#❓ask-a-question
1 messages · Page 69 of 1
Hey! No I haven't tried anything really... I'm not sure where to being, I'm not familiar with photoshop in the slightest so I didn't know what the best method would be
Please use #💬chat-general for requesting help with projects. Also, given what you're asking about, please don't request help using artwork that you do not already have permission to use.
Using a search engine is a good start, or Ctrl+F and doing the beginner tutorials would help you understand the basics necessary to perform such tasks as https://helpx.adobe.com/photoshop/using/combine-images-auto-blend-layers.html or https://youtu.be/kxEof8ecl78?si=gUuoV0XwoHYDeR8o. I like to recommend the photoshopessentials website too.
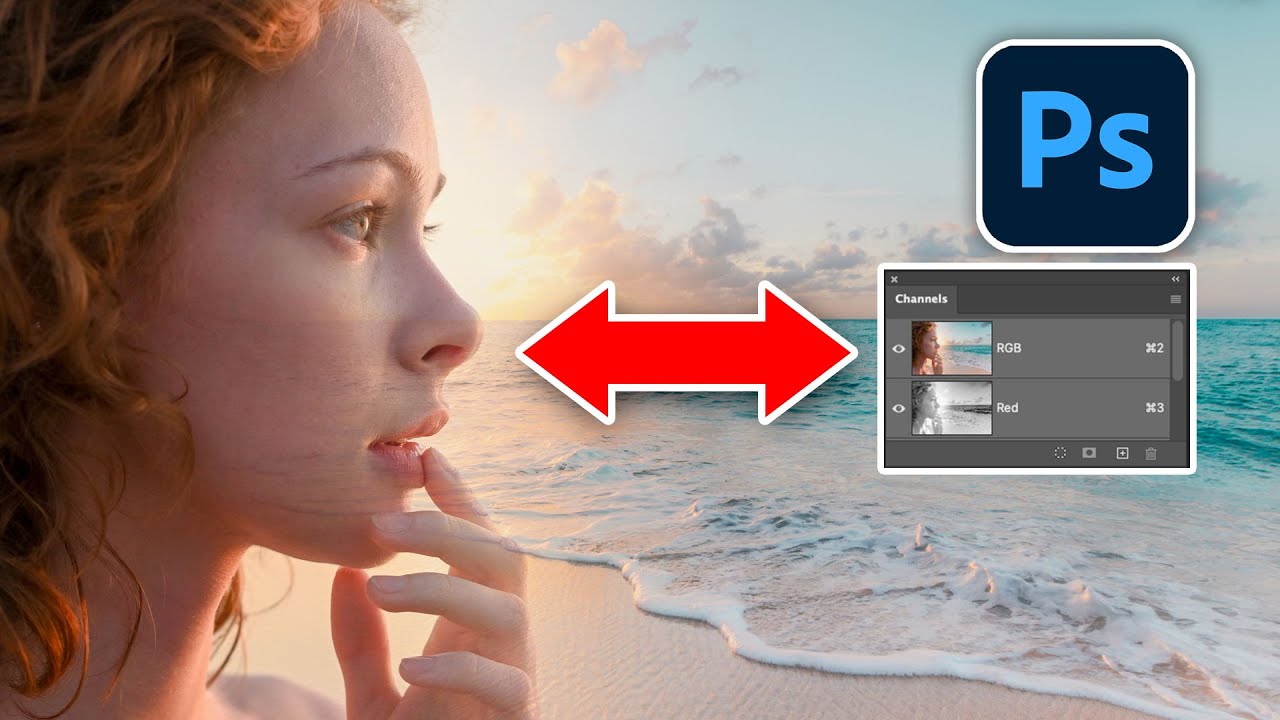
How to combine 2 images in photoshop and blend them together. Colin Smith shows how to use Color channels to make selection to be used in compositing images in Photoshop
► Free Photoshop add ons: https://photoshopcafe.com/vault
► THE GEAR I USE: https://www.amazon.com/shop/photoshopcafe
► THE MUSIC I USE: http://share.epidemicsound.com/photos...
Nice, I feel like that's pretty dang good. The only way I know how to make the transition better is to alter it using the clone/healing tools and also blur tool for the edges. The burn tool darkening spots can help
I like the content of that video but what's with the breathe sounds that almost sound as if they where added in with a soundboard??
2:01-2:05 have my favorite ones as he included a double
Hey guys, quick question. Im a little bored so im recreating the "a quiet place: day one" movie poster; two questions, any way I can make the meteor in the back look a little more distant? and is there a way I can make it to where the bright women doesnt seem clipped in?

hold on ill explain
Id like to get rid of this little mistake right here

Good first try.
The assets are all very different to one another, so it's extremely difficult to merge them together to a consistent image.
Start with trying to get the **lighting **correct.
Try skipping through some of the sections here perhaps:
https://www.youtube.com/watch?v=i2fngCW4JIU

LEARN TO COMPOSITE ANY PERSON IN PHOTOSHOP | Take a deep dive into dragging someone from one image into another in this tutorial | We will cover selection tools, correcting color, creating colorful effects, sharpening, lens flare, dodging and burning, and much more!
🔥 ↓ VIDEO GUIDE ↓ 🔥
00:54 Getting started
03:38 Cleaning up the background
08:...
Clutch, thank you
How can I create a star like this?

I have this AI image I prompted of the statue of liberty and I want the face to look a little more accurate, what is a good whay for me to swap the face with a better one?


A stupid question but I haven't used Photoshop for a few months and now completely forgotten how to convert a raster into path/shape thingy?
the Hue/Saturation adjustment layer's eyedropper tools are greyed out... any fixes
Also, is there anyway to get photoshop to use the 0 to 255 rgb thing and not the -180 to +180
Hello there can someone help me with automate adding an image to another image
if anyone could help me through vc i would be thankful :)
This only demonstrates how to open two PSD files at the same time. It has nothing to do with adding one image to another. Also, its seems like you've also inadvertently pinged someone while posting this. They might be wondering why. heh
we are in vc :)
This may be a very dumb question, but I'm working on making a custom snowboard, and I have the dimensions of that set up in a photoshop template, I massively upscaled a photo to import in, but it doesn't import at that size (photo is about 15,000 by 15,000 pixels), is it possible to do that OR take the image I have currently scaled and "brighten"(?) it up to be more clear?

Is there any reason my photoshop acts very slow and nearly crashes after trying to make a gradient and then says the scratch disks are full in Photoshop 2024? I have cleared Media Cache.

What is the size (dimensions) and resolution (ppi) of the document? Main menu: Image > Image Size... Have you accidentally created the canvas at some ridiculous size, e.g. 2000 centimeters (instead of pixels)?
I can't even see what this is. Sorry.
Looks like a cartoon.

Yeah. 2560 inches is like 214 feet wide. That'd be why you're getting a scratch disk error.
How would i layer mask if theres already a layer mask? Im trying to remove that grey colour it generated

You have a Layer Mask and a Vector Mask applied to that layer. I'm assuming you don't need the Vector Mask so you can delete that.
Ive removed it now but how do i remove the grey background colour?
Paint on those areas with black. Black hides pixels. White reveals pixels. Didn't we go over this the other day? Still have problems grasping this concept?
Yes but it removes the flower aswell
It looks like perhaps you have the flower selected. Perhaps you want to invert your selection.
Thats was for the vector mask.
Main menu: Select > Inverse...
Would anyone know the best way to do this?
This is what happens when it gets inversed

Can you please stop cropping the screen and share the entire Photoshop interface with the Layers Panel open?
Its incredibly difficult to understand what's going on when you only share tiny portions of the screen.
Sorry boss is this better?


OK. So that is a Generative Fill Layer. You probably want to Rasterize that first. If you want the Gen Fill layer to remain intact, perhaps make a copy of it first.
Ive made a copy of it now
Right-click on it that Layer in the Layers Panel and choose "Rasterize Layer"
Now it should just be pixels.
yup
You can also "apply" the Layer Mask. (Right-click on the Mask and choose "Apply Layer Mask")
Now you can make a new Layer Mask and just work on that. Hopefully, that should be easier for you now.
Ok thanks boss it worked
Gave +1 Creative Carma to @ripe quest (current: #3 - 2217)
Start with a real image of Layer Liberty and apply the flames and burn marks to it.
You're not going to have much luck going the other way (trying to match that image to the real Lady LIberty) unless you have some serious manipulation skill.
Alright, whats the best way to apply flames? The generative filling didnt work great
Get images of flames and composite them.
Alright, another thing also, Adobe stocks, is that a whole different subscription you need to purchase?
Yes. Its not included with Creative Cloud unless you've purchased some package deal or you have an Enterprise or Teams license that includes it.
Alright, because I study at college where they provide the whole thing for us free of charge so like Photoshop, Illustrator, Premier, etc but stocks was the only one I couldn't get access to
They probably don't have an Adobe Stock license then. You can ask your plan administrator at the school (to find out what is included with your plan).
As an aside, the Statue of Liberty, the outer skin is make of copper so I'm not sure how that would be on fire...
Doesn't make a lot of sense but I guess you can take artistic license with it. :)
Lol, Im trynna make a kind of logo inspired from the civil war movie  . Just symbolic, like the bald eagle even tho it doesn't make the sound everyone thinks it does
Oh alrighty then, thanks
Gave +1 Creative Carma to @ripe quest (current: #3 - 2219)
I'm using a tablet and rotated the picture I'm working on. I don't know how to get it back to 0 degrees rotation, it's always a little bit off
Tap the Esc key
👍 thank you
How do you make this from scratch? using hair brushes doesnt give the same result

I frequently get into situations where PS won't change the font unless it is selected, hindering me from seeing it in real time as I sift through the fonts unless it is highlighted which does the same thing. Anyone know how to fix this?
One moment...
Do you mean having the letters selected on the layer?
Or are you referring to something else?
OOF! I wasn't selecting the layer. You've actually helped me with this same exact thing before, thanks for doing it again!
Gave +1 Creative Carma to @ripe quest (current: #3 - 2220)
Hello everyone, is anyone of u know a website that can give me a high quality pictures of cargo ships in different angle?
You know what you can just activate the layer, highlight the Font field and then use the Up/Down Arrows on the keyboard to cycle through the fonts....
I don't know of anything specifically for that. You'd have to try searching the stock photo websites and see if they have assets that meet your expectations.
Or you can try to generate them with an AI model.
How do i get it to match the otherside? Lets say black is the front and pink is the back

Its cut in half and I want the otherhalf to be on the otherside
ohh yeah yeah
thanks @ripe quest
Gave +1 Creative Carma to @ripe quest (current: #3 - 2221)
Yeah, thanks that's actually my preference and not being able to do it was tripping me up. I kept having the text tool selected with the text box open with blinking cursor expecting to be able to change fonts like that
Gave +1 Creative Carma to @ripe quest (current: #3 - 2222)
When you say "cargo ships" do you mean like this?

What do you mean "match the other side"? Like when its printed?
So ive got this image and I want it split in half.
Picture a card for example, on the front would be one half and on the other side it would be the other half of the flower

SO yeah like when its printed
I don't do a lot of printing or any designs where folded layouts have elements that have to align with each other. Sorry. I'm not going to be much help to you. There are probably templates for that.
no problem boss thanks anyways
Gave +1 Creative Carma to @ripe quest (current: #3 - 2223)
yeah, btw where did get that? @ripe quest
i was looking for high quality photo so i can make a good poster
I generated it. Its not high quality.
Ohh, it looks good but i will still look for more but thank u so much!
These wouldn't be suitable for high-quality printing. They are flawed in the details. (Or too small for anything other than screen use.)

What's the poster actually for? - Seems like a strange choice to include them on a poster.
e.g. - People advertising trainers, show the end result. - Someone wearing them on a path, or the a nice zoomed in shot.
not, the lady in the factory making them.
I'd have thought the same would apply for 'shipping'. 🙂
Obviously I don't know the context, so feel free to ignore!
try making two images with each half, and printing the images into different sides
It doesn't sound like it needs any alignment does it? - Are you literally asking for half the flower to appear on the front, then it wrap around the spine and the rest of the flower on the back?
e.g....


i need some help in trying to achieve this effect the image on the right is the effect i want, I tried posturize,threshold,bunch of filter combinations in the filter gallery but haven't been able to get close tried color overlaying the threshold still didnt manage, all i need is just the base since its overlayed with a grunge which is easy to do and some crf adjustments and ill manage to reach it but generally the drawing kind of effect is what im trying, does anyone have an idea


Probably a pretty dumb question but how do i change the size of the text box without changing the size of the letters?

does anyone know how to get like that smooth round looking finishing on the characters?

Yes something similar to this but wrapping around the spine and through to the back
I would use the brush tool to “airbrush” in shadows and highlights to get a rounded, three dimensional look.
wait what do you mean exactly with airbrush
An airbrush is a mechanical painting tool. It uses an air compressor to deliver a soft spray of paint onto a canvas or paper. They were used by illustrators and artist before the digital era. You can use the brush tool in Photoshop at a very soft setting to emulate an airbrush in a digital file. Lightly spray in darker colors to create shadows and light colors (or white) to create hi-lights. Typically you would create a selection of the area you are airbrushing. After brushing in a stroke, you can use the eraser tool to clean it up. There are lots of Youtube tutorials to get you started.
Make sure to have the T (text tool selected) and then drag the corners around
That's not 'similar', it's exactly the same. - The image I shared was a book cover that wraps all the around the front, spine and back. - Just whack your flower image in the middle of the page and fold in half. You're good to go! 🙂
Thats what i think I did but its on a curved surface I cut it in half but it doesnt line up. I feel like im missing somethign very obvious..


Hello,
I'd like to disable Spacebar from triggering Timeline playback. Everything I've tried is in the pic.
Aside from asking adobe for a feature request, are there any external plugins or scripts that would disable spacebar for playback?
TY!

Hi everyone I’m on holiday and tried to take a nice photo of the sunset but the sun seems really small I was wondering if anyone could maybe enlarge it slightly so that it looks better yet still realistic, thanks.

trying to scale up simple stuff like this:

but when i confirm

its like this
nvm
I have an image for my book coming out soon and I noticed when I uploaded into an indie authors FB forum that it distorted the colors. When I googled why, it said reds tend to be distorted when compressed from uploading and downloading, my image is mostly blue.
How do I keep it from distorting? Is there something I can do in photoshop?
I have it set to CMYK for printing and 8bit, hopefully this helps to understand why compression is distorting the image
How do I make the Vignette Effect focus on this specific Object?


Presume you found the interpolation settings?
nope i saw that online
i just image scaled it
Add the glow around the object in the effects panel.
and Changed the settings a bit
How big? 🙂

Honestly I’m not too sure how big I’d like, could you experiment with some sizes around 1.5xish and dm me them please?
Image above is at least 3 times the original size 🙂
Just wondering if anyone can help me with this question. Thank you 😊
outer glow?..
i have a question about exporting images. so i have this image here that i just got done editing and i was wondering if there was a way so that when i saved it, it JUST SAVES THE EDITED PICTURE and not the rest of the canvas

is that possible?
or is it just always going to save the background no matter what
in retrospect i def should've just opened the image and edited it on its own instead of just throwing the image onto a canvas
that's my fault
but just wondering if that's possible to do
That's what she said
Can you not simply crop it back down before saving?
I might be wrong but you need another background layer, then save the layer as a png and it should remove the rest of the canvas
Oh wow ha I didn’t even realise sorry I forgot how small the original is, do you think it’s possible to make it a tiny bit bigger? Thanks very much
Gave +1 Creative Carma to @sly hawk (current: #5 - 953)
oh crud lol thanks
Gave +1 Creative Carma to @sly hawk (current: #5 - 954)
hello!
Can someone help me figure out how to fill out the inside of the hood?

Like how I can select the inside of it?
Object selection or magic want should do the trick as there looks like enough contrast. Check out how to use the various options here
https://helpx.adobe.com/photoshop/using/making-quick-selections.html
You can then fill or mask the area. Best to do that on a new layer obove so you can edit
I am getting this error,

Hi guys, do you know a tutorial video that can explain me the basic things (but also some complex stuff) that i need to be able to do for making posters (of movies, for example) ? Thanks.
Make sure layer isn’t locked and you have it selected
@river otter There should be but you could duplicate the layer and increase contrast to make selection on that layer then hide it or delete it once you have your selection and fill on a new layer
There are good getting started videos in the app and on the Adobe product pages
How do i increase the contrast if theres not a layer that already selects that part of the hood?
I am a rookie lol
Duplicate the layer that the image is on and use layer adjustments from layer menu
I take it there is only that single layer in the file
If you check in layers panel
There are a ton of layers, I am just a bit confused on which one to duplicate

The "design" One looks like this

if I deselect
Click on eye icon to hide layers to see which one you should be working on
Inside hoodie I’d guess?
Any luck?

I think you need a bit of shadow on the inside of the hood....
Thats great advise thank you bro🙏🙏🙏🙏
You could also do with adding a bit of 'texture/creases' to the hood so it's not so 'flat'
Thank you!
Hello! I have a question if anyone can help.
I'm trying to figure out how to type in japanese in photoshop but it won't work, it's just producing english letters.
I have japanese fonts but I can't figure out how to use them.
You will need to change keyboard settings to match the language, are they correct?
guys how can i get rid of this box

i cant move the graphic
graphics disappears when i move the them out of the box
can someone please remove the transparent grid lines

Is that the only way?
In View menu you can switch off the grid
I have pasted foreign language text into documents when it comes to Japanese and Chinese, you could try in a text doc then copy/paste if it only doesn’t work in photoshop. Is the text language set to Japanese in Photoshop when you select type tool?
Dang I wish there was just a font that had japanese letters so you didn't have to do all that conversion
If you have a Japanese font and paste the text it will work… do you have the translated Japanese?
Yeah, I see what you're saying.
So I just need to copy and paste and then set it to that font.
Yes
Line breaks can be critical
I rely on a translator to check
how can i stop my brush from mixing like this?

nvm im dumb
i turned on mixer brush somehow
I want to be able to zoom the image in without losing the original dimensions of the photo, so I'd like to be able to go from image 1 to image 2 (im using an online tool for this, but I significantly lose quality when I do this. What's the easiest way to go about doing this?


Trying to remove the white smug on the right side please help me

I just need to brighten up the colors too!
You can't arbitrarily change the scale of a pixel-based image without losing quality. There are some AI-upscaler apps that might help but mileage may vary.
You've got some significant streaks across this image that might require careful painting/brush work to fix. Also, there are some spots in the dark areas where the clothing is blobbed together and it just looks like a large dark mass. Or there is no detail there to reclaim. So you'd either have to paint that in or use some sort of AI to "invent" details that weren't there before.
Also, what colors? This is a greyscale photograph. Unless you're referring to the slight "sepia tone" effect that it has. This is likely from being an old photo that was scanned and saved as RGB color.
Yeah I feared that and I mean to get rid of the smudges to fix the color as it’s a bit too bright in places
Thanks for the help! @ripe quest
Gave +1 Creative Carma to @ripe quest (current: #3 - 2225)
You could start with some simple Highlight/Shadow, Brightness/Contrast Adjustments...

Some of these areas, I think would require artistry and hand painting...

To be honest, it would probably require selective adjustments. Given the range in the image, I don't think there is a one-size fits all approach for this image.
When scanning different blend modes is there an easy way to compare 2 different ones, without duplicating and pressing the eyeball? Or even comparing the blend mode to normal would be cool
Is it possible to have the swatch on the right appear in the library on the left? Edit: I'm understanding I need an .acb from the .ase on the right.. but I don't have one. :/ So hopefully there's a way to create one.

I'm having a weird issue with trying to make a tapered brush. What I want to do is have my brush leave tapered ends (consistent thickness with the ends of the lines being thinner) and no matter WHAT I do, the "control" dropdown on shape dynamics keeps reverting to "pen pressure" - I am indeed using a tablet with pressure sensitivity, but my hands are not steady enough to control thickness reliably. How do I force it to stop reverting my setting? This feels like a glitch
is there a a way i can upscale this without transparent lines showing up

without converting it to a smart object
smaller its fine

they're all tiny shapes
Hey Guys! Does adobe has any tools for mindmaps and flowcharts?
When you're scaling, try changing the Interpolation Method to "Nearest Neighbor"

Ctrl + Alt + i, then make sure "Resample" is checked with the method "Nearest Neighbor," make sure you're scaling by a mulitple of 100%
Okay tysm
how do i do multiple of 100%?
so if im at 1024, i should do 2048

it worked
tysm

just had to double it
Take a look at Adobe Express. There might be some useful templates in there. https://www.adobe.com/express/learn/blog/mind-map-ideas
or idk
ty
Gave +1 Creative Carma to @proud skiff (current: #915 - 1)
+rep @proud skiff
I forgot the default is pixels instead of percent lol
https://youtu.be/hxOH2GfsVao?si=pGQN1_FUxL3l7r_M&t=64 hi im trying to follow this tut would any1 be able to tell me what he does here ? i have linked the video with the time already set

like how does he make it disappear does he just delete it ?
Yep
The yellow part in that video:

A little after that though I see him paste it in. So I take it he ctrl + c and then deleted it.
thanks!
Gave +1 Creative Carma to @honest thicket (current: #587 - 2)
i want to add like electricity over the text how would i go about doing something like that

I would look around online for a png of electricity and use it on top of the text. you can also use layer mask to make it appear in front or behind the text
Can anyone still try and help me?
you have to use radial gradient and set its points the way you want so the center is on the object you want to 'focus'
the tutorial above is one of the options
if you wanted something like


you would have to import the png from wherever you found it AND change the blending modes
and preferably add a mask to the text layer and decrease the density of the mask so theres a bit of lightning coming through to the text but not enough so that it lowers visibility like in the pictures above
and the blend modes you would like to use are in the first category preferably because you are adding light not taking it from the image so preferably find a lightning image that has a DARK BACKGROUND or NO BACKGROUND
Did someone know how to have ABR file for the Summer 2024 Brush for Ps please ?
Let me check the link for you
https://www.adobe.com/uk/products/photoshop/brushes.html
It should work, the link is at the top
Sorry, it's the spring brushes
I am not sure the summer ones are there yet
Kyle Webster has left Adobe, but I think he will continue to supply brushes on an on-demand basis. At least, that's what I heard
Since we don’t have Fresco on Mac we need to draw on Ps and I draw on Fresco iPad with the Summer 2024 Pack but when I work on Ps Mac it’s not compatible since the pack is not install on my Mac 😕
I just checked on Fresco, and I can see they are available there. Let me see if I can turn that into a link
I have Fresco on the PC
Thanks so much 🙏
No luck, the link from Fresco desktop only have the spring brushes. Let me find a way
Might need to do through a library or something
Does anyone have an idea how could i make my own logo similar to these?


You need to provide more info. What's the logo supposed to be/represent/say etc?
@narrow venture I need to wait for the syncing to complete, I cannot see those in the libraries yet (I can see the spring brushes I just downloaded)
In the meantime I will ask around
its a clothing brand its supposed to be like similar to those shapes above so i guess a shape
If you don't really care, and it means nothing to you, just pick something from shuttrstock perhaps?

Most brand marks at least represent SOMETHING. - A letter, a book, a relevant shape, shield, cog etc.

thanks will do
my photoshop and illustrator just randomly stopped working upon launch. It just freezes when it loads and get stuck at certain points for each app. For photoshop it freezes once it reaches "preferences" and for Illustrator it freezes once it reaches " Plug ins" I am unsure if this is an issue that is causing it. I tried multiple ways to fix this, Uninstalling the programs and downloading again. I tried to run it as administrators. all apps are updated to the max, I dont know why this randomly happened. I did everything i can do to resolve this and it wont work. All my other apps work, prermiere and after effects so i am unsure why this is happening. anyone know how to fix this?
All was working perfectly for me today, but I heard about people having isues with the latest Beta version.
Are they Beta versions?
yes and no. The ones i am running is illustrator 28.6, tried 27.9.5 and still no luck. and with Photoshop i ran 25.11 and the newest beta and no success
they all keep freezing upon load

where it freezes

Did the preferences delete as they may not when you uninstalled, try deleting them and restart then try the apps
Is your C drive or OS drive near full? It could be that or you have some sort of problem with the hard drive, e.g. bad sectors, file corruption, ect.
Gave +1 Creative Carma to @sly hawk (current: #5 - 956)
Here my full logo I’m not sure how to explain it but I’m trying to add something subtle like the aqua text but for electricity I think both options are a bit aggressive and don’t fit the theme

no my drives are still good
refer to the video above my image
i have about 40+ gigs in both
SSD or spinning disk?
ssd
its weird cause premiere and after effects work
just not illustrator or photoshop
What about holding down SHIFT CRTL ALT while Photoshop is starting up.
If it asks to delete the settings, say yes.

have you tried uhh the baby gronk method
It seems like you have a hard disk issue. Some sort of file corruption but its difficult to know.
skibidi rizz ohioed all over my keyboard im at my last edge sesh
so random it just happened today so gayy
uhh have you tried installing another version
yes
have you tried installing another version of cc
i even adobe cleaner tool and it still no luck
Yeah still to aggressive I’m unsure how to explain what I want. I have a vision in my head but don’t know how to put it into words
look up tutorials on layer masks
You can try the CC Cleaner app and start over with a clean install. I'd check the hard disk first for problems. The manufacturer probably makes a utility for that.
Best way I can put it into words or a image I want something that surrounds the text more than going inside of it or behind it

ahhh you want a stroke of some sorts
Yeah I think ?
ohh no i get it
hmmm
have you tried pasting an image in changing the blend modes
and playing with fill if available or opacity
?
have you tried looking up yt tutorials on something about lightning stroke
https://www.freeject.net/2022/06/free-download-15-electricity-photoshop.html?m=1 I think I might have just found it

FREEJECT
free download photoshop template, mockup, brush, illustration, background etc, free graphic design source
see
Ty for ur help
Gave +1 Creative Carma to @faint garden (current: #916 - 1)
bro what the leveling up system is this

lol
Please stop posting GIFs here. This is a help channel.
not even the png images work

oh come on
someone hasnt tried being jolly
I'm asking you nicely not to do that here. We appreciate your cooperation.
I love you man
._Electricity by freeject.abr - try chaning the file name.
Or is there a MacOS folder in there? These could be Mac file pointers.
Hence the reason they would not work on Windows.
Screenshot the contents of the zip file you downloaded.
Give me a couple minutes


Use the one without the dot underscore... Notice the difference in file size?
The other is probably some MacOS file pointer or thumbnail or preview... whatever they do on MacOS.
bruh thanks
Gave +1 Creative Carma to @ripe quest (current: #3 - 2228)
hello everyone, I have a problem with photoshop that I don't understand, when I skew a shape it also changes the properties

Have you tried booting up in Safe Mode?
This should be a thread!!

When you manipulate the points on the Primitive Shape (i.e. Rect, Ellipse, etc), it is converted to a Shape Path. Thus, all those "special options" like corner rounding on the Rectangle are no longer available.
there is a way to avoid that, because I saw people who also skew the shape had the same properties??
If you're trying to retain that Primitive Shape and its options, you can convert it to a Smart Object BEFORE you transform it. Then you can always, enter the Smart Object, make changes, save it and go back to the main layout and it would be updated.
thank you so much
Gave +1 Creative Carma to @ripe quest (current: #3 - 2229)
you helped me a lot
Glad you got it sorted out!
#✅community-guidelines how to edit image in photoshop
Do you want to hire someone to edit or you are starting to learn Photoshop !!
For people new to Photoshop and not sure where to start...
Hit Ctrl F to open the Discover Window. - "Hands-on Tutorials" - Set the filter to: Beginner. Work your way through those materials. Those will get you familiar the basic tools and techniques.

I got it fixed!! Adobe agent helped me!
They uninstalled all my apps through cc cleaner and redownloaded it! Everything works now
I suggested that above and you said you had already tried that.
I didn’t do it the right way
I had to clean all
I only uninstalled one app
But Adobe agent uninstalled and cleaned everything
Well, its great that you got it figured out!
Thanks my bro, if anyone has the same problem Adobe is really helpful they’ll guide you through it
Well, generally, we send people to the CC Cleaner page which links to the app and describes that process in detail. However, Adobe Customer Care is there when people need a bit of additional support. If you can do it yourself, you don't have to give anyone admin access to your computer, which some people aren't very keen on doing. :)
i followed through with the cc cleaner page but it was asking to do only one program
i was unaware that i needed to clean all apps cause indesign wasnt working as well
only my premiere and after effects were working so i guess it was just design apps
adobe customer care suggested a full clean, i didnt know that was possible at the time based on the steps given :/
its random that it affected all my programs that were design, some dumb bug
Or something was corrupted during download, or there is an issue with your hard disk, etc. Its difficult to know why.
Regardless, you've apparently got it worked out. Now its time to start creating.
yea thats true, im unsure why it happened but i am sure glad it is fixed whew
yess its cool i found this community excited to share my work with fellow creative individuals
Normally Cleaner works with single app, you don't normally have to remove everything!
In regards to problems with multiple apps not starting up, we would likely recommend that they do a complete uninstall/reinstall of everything. It's a safer option.
@narrow venture I asked around and here is the answer. The summer 2024 brushes have never been fully released, because of Kyle's departure, they were never fully implemented. As of now, the latest fully released brushes are the spring ones.
I don't know if there is a viable solution to transfer them into shareable libraries, but I haven't been able to do it.
Hi, I have a question, I've cutout some layers and when I add them all together I have those blank outlines, how do I get rid of them?

It would be better to make copies of the layer/objects and use Layer Masks to hide pixels. This as opposed to chopping/pasting parts. Then you can refine the edges after-the-fact. Once you've cut and pasted, the pixels are changed permanently.
Also, it might help to understand the goal of this process. Are you hoping to put new objects behind some of these items in the scene?

humann
save me
Window > Layers... or F7 on the keyboard
tyyyyy
also
the generative fill
says "currently not available"

Are you signed in to your Adobe Account?
nope
You can't use cloud-based features without being signed in to an Adobe Account.
so i dont have to be signed in to use it
?
oh
do i just go on google and sign in orrrr
Help > Sign in... ?
Or open the Creative Cloud app and sign in there
You can recover it regardless.
yeah but i be lazy sometimes
That's unfortunate.
i signed in
and then the sign in thing that showed i\up inside of photoshop disappeared, and i still cant use the feature
i think it crashed or didnt work
no it says im signed in
i just cant use it
Close Photoshop. Open the Creative Cloud app and sign in to your Adobe Account. Make sure you're signed in to your account. Then open Photohsop.
okii
do i leave it open when i open photoshop
No. You can close it. You just want to make sure that you've signed in and that CC apps are registered on that PC.
I do my best. Glad you got it sorted out!
❤️
do you know where i could find a logo somewhere else? i didnt really find anything there
Could someone help me out 🙏 it would be very highly and kindly appreciated
You want to learn how to make something or you want someone to make something for you?
Hi everyone I need a favour, I took a picture of this cool church in greece but the background isn’t really matching the aesthetic I want for it, if possible could anyone add a nice sunset in the background and maybe add something to the foreground I’m not sure so completely fine if not. Thanks very much


Gave +1 Creative Carma to @sly hawk (current: #5 - 957)
Yeah it is lol I come here most years it’s a beautiful place
I need help. I'm trying to make a photorealistic globe map for an alien planet I'm making, but I can't figure out a method or find tutorials to make the realistic sea. Can anyone help out with this?
I mean something like in this image.

So as shown in this screenshot, whenever I hover over a layer it highlights it in blue. How can I disable this feature?

Select the Move Tool (V) and check the Options Bar > Gear Icon... Remove the hover options.

Perhaps you could use DEMs or top-down views of topographic maps. Colorize them. That might be one way.
DEMs?
Digital Elevation Models.

You could maybe start with something like that and manipulate them.

but there are still a few thin green pixels around the model
is there a way to trim like the outer 2 pixels of the image?
You can add a Layer Mask and use Refine Mask. Then you can shift the edge by a few pixels. That's one way.

do i change something here?
Yes. Its going to depend on the mask you made
I'm assuming that there is nothing on your Layer Mask.
Ctrl click on the Layer to select the pixels. (Not the Layer Mask). Then you'll need to invert the selection. Select the mask and fill those areas with black. Do you understand how Layer Masks work or nah?
Now Refine Mask and try to shif the edge slightly.
i still don't see a change for some reason

it is the one at the bottom right?
wait
i thikn i got it working
hold on
Yeah. You can try to expand the selection, fill the mask again and then try this again. Its really difficult to describe this.
i see a change when i move the radius value
but not the shift edges
the radius value creates this

adding feather to the mask kinda solved my problem
You would use all of those controls. Sparingly. Small changes.
I have a nice mask that I would like to copy to another layer, can I do this? I actually frequently want to do this
Hold ALT. Click and drag the mask to the desired layer.
Ohhh snapp, thanks! I'll not even exaggeratingly probably end up using this hourly
Gave +1 Creative Carma to @ripe quest (current: #3 - 2230)
Use photoshop filter > render options
Hidey Ho All - I have some retangles that I want to make exactly 11 pt. When I type in 11 pt Photoshop will make it 11.04 pt. Why does it do that?
I have an image with many layers that I want to essentially make all the edges fade into transparancy. Kind of like a finishing "frame." How would I do this?
thanks!
Gave +1 Creative Carma to @ripe quest (current: #3 - 2231)
any tips on creating custom posters similar to these? i'm a beginner at photoshop and would love to make posters for my apartment


Hello! I am new to this world of Photoshop, and I am interested in making my own t-shirt designs, but I don't know where to start, could someone help me know where I should start, please, thanks.
#📕server-guide how can i delete the flowers on the lakeside
im having this issue where the object is snapping like this. is there a way to disable this?

View > Snap...
And View > SnapTo... if you want to toggle certain snapping
So I’m having trouble trying to save as copy a tga it’s not saving to my pc any help?
Works for me. Version 25.11
who does t-shirt graphic design ?
I fixed it now
👍 ty
Gave +1 Creative Carma to @ripe quest (current: #3 - 2233)
trying to download photoshop and im outta options bro, its installing creative cloud as a DMG file??? and whenever i try to download it straight from the source its skewed, am i doing something wrong?
thought maybe i clicked something wrong
ive had ps before
just never used and deleted it
says its incompatible but I run a 4090, have 2 tb free
is there a way to make highlighted text using the layer style option?
like its been highlighted with a highlighter how it is on google docs
How would one replace the shades of purple, into a series of red shades, whilst keeping the drawn look and basically not scuffing it all up?

Hi, I would recommend to do Ctrl+F and start with the basics tutorials to know how things work in Photoshop. I like the Photoshopessentials website as well.
Hi, I’d try another browser, see: https://community.adobe.com/t5/photoshop-ecosystem-discussions/i-cant-install-any-adobe-app-after-factory-reset-for-my-pc-dmg/m-p/14654729

https://community.adobe.com
i try to install adobe prodcuts but im hit with the message... "update required If you would like to install Photoshop, you must update your system." however, my system is up to date. I have a pc with a 3080 ti, Ryzen 9 cpu,32 Gb of ram, windows 11 ect. This wasnt a problem till i did a facto...
Hello, it maybe keeps the proportions of the rectangle. Or if the resolution is too low, maybe is it trying to snap to pixels/units?
Howdy! To tally on, I’d look into tutorials to create lighting using render>clouds and difference clouds: https://photoshopcafe.com/tutorials/lightning/lightning.htm but do not use levels so strongly. It could be the basis for a random elevation map.

Here is a nice little tutorial to show you how to electrify your images with lightning in Photoshop. This spooky graveyard will have lightning added in Photoshop, we will make our own lightning, no cheating by adding a photo.
Are these free hand pencil strokes?


I'm just guessing them. can someone help me recreate these pencil drawings.
These are just drawings made with the brush tool (hardness 100%, colour white, flow 100%)
It's easier to do with a graphic tablet as it's not easy drawing with a mouse, but if you only have a mouse, know that you can control the "smoothness" of the drawing as well (the stroke conteracts the jagginess of the line automatically)
Alternatively you can use vector strokes which can be tweaked after the fact with nodes. This is the method of choice for people like me who can't draw to save their lives 🙂
Cool. Thanks
Gave +1 Creative Carma to @vapid flume (current: #8 - 690)
is there a way to turn all these guides into strokes in photoshop?

AS far as I know, not in Photoshop (you can do the opposite thouigh, turn lines into guides)

I know it doesn't help 🙂
no plugins or anything? dang
But since you can have the snapping magnetism on, it will be relatively easy to draw a vector line over them, two clicks each time. Unless you have 100 of those obviously
The world of plugins is infinite, you can have a search on the marketplace (In your CC app)

but some plugins are not necessarily distributed through the Adobe Marketplace (that's the dev choice), and can be found on GitHub or some commercial platforms like Envato
I believe this option exist in Illustrator, so while it doesn't help as of now, that can be a good option for next time
https://community.adobe.com/t5/illustrator-discussions/how-to-convert-guides-to-lines-that-can-have-strokes-fills/m-p/2481099
https://community.adobe.com
I am trying to work with a document in Illustrtor CS3 that has complex lines that are in the same color as guides. They are a complex dieline of a box. I need to add strokes to them for the printer to create a dieline from them. I am not able to apply any stroke or fill to them, but in every other ...
Apparently someone made a script
https://www.youtube.com/watch?v=6vEEeHXLwT0
I haven't tested it though, exercise caution! @cunning bobcat

Quick tip on how to convert Photoshop guides to vector shapes thanks to custom script created by Photoshop guru Chuck Uebele.
Download script from here https://community.adobe.com/t5/photoshop-ecosystem-discussions/hey-guys-how-to-convert-ps-guides-into-paths-or-strokes/m-p/13303186#M681390
@vapid flume Thank you. I found a solution but it requires some type of script?

Gave +1 Creative Carma to @vapid flume (current: #8 - 691)
I cannot help you there, I thought the guy in the video made one ready to use, but I didn't check further.
Photoshop uses Javascript if that helps (I am unashamedly outsourcing any scripting needs to my beloved husband 🙂 )
https://www.creativebloq.com/photoshop/scripts-4132441
Apparently it just requires you to copy the script from the forum, paste it in a text editor, and then running it as you would normally from the script menu (File>script)

Creative Bloq
Bored of doing the same repetitive tasks in Photoshop? Then create a script to automate it. We show you how, so you can free up your time for creativity...
Thank you @vapid flume
Gave +1 Creative Carma to @vapid flume (current: #8 - 692)
It worked
Glad I was able to find it's not hard to do as well! Win win for both of us
hello. I have this design (1 text layer, 1 rectangle, 1 text layer) and I need to make one for 1/100 to 100/100 but when I change the 50 to 1 I want it to be always the same spacing on the left side so the orange and 100 text should also go to the left. if you get what I mean,, sorry my english is not good and i dont know how to explain

like when I change the 50 to 1 it is like this but it's not possible to enable something to make it always have same spacing between 1 and orange rectangle and the text? it will take me long time always moving manually and not precise

I am looking for a recommendation, I want to create a sticker sheet for my phone case but I would rather not do it all manually. Are there any ways of easily doing this. I picked images out from online and I put them in photoshop and got the desired stroke on them to make them look like stickers, I want to have them randomly placed around the canvas except for the camera area and I want them to be randomly rotated but not upside-down
@carmine briar If I understand well, you need to have a fixed spacing between letters
I don't think it's possible with a text like that because spacing/kerning is built-in the font. You can tweak it, but you'll have to tweak it with the kerning option of the character panel for every number.
so two solutions, either you choose a mono-spaced font (like courrier), or you turn your text into shape, and it will react as shapes that you can align with the alignment tools
It may sound tedious but there is only 10 numbers and with the help of guides where your letters will snap onto, it can be a breeze.
To convert to shape right click on the text layer and choose "convert to shape"

Found a script online that does it
Is anyone here available to assist me with a Adobe CRAW issue im having please?
Just ask your question and if anyone knows the answer they will answer!
hello everyone! I have a question to ask. How can I make text like this?

I cant paint with brushes like oil in fresco…why??
Which bit specifically?
1 Gradient stroke
2 color inside the text
3 lens flare like effect
Here's one way... 🙂
thanks alot
Gave +1 Creative Carma to @sly hawk (current: #5 - 958)
It sounds like this would be a lot easier if you used TWO text boxes?
Left one could be RIGHT aligned, and right one would be LEFT aligned.
you were such a huge help for me ❤️
If you need ALL the numbers, I'd suggest you try a photoshop data merge to speed things up.
Please help with this question im very irritated!! #❓ask-a-question message
Are you using the mixer brush?
I don’t know i just downloaded the program yesterday
Is this what you're hoping to do/use?
https://www.youtube.com/watch?v=ndYFFbCh0QE
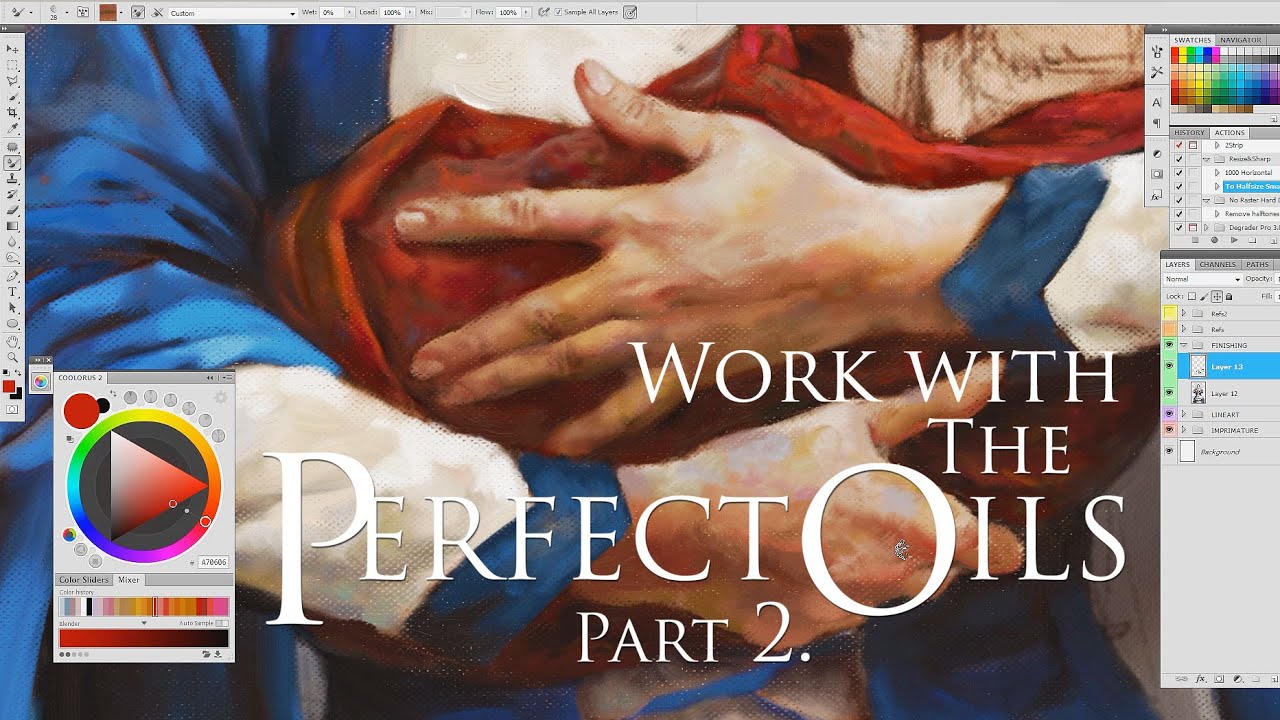
#Painting with #Mixer Brush tool in #Photoshop versions CS5 and above, or how to make your #digital #art looking like an #oil painting.
This video shows some episodes of working on a number of the art pieces I painted using my mixer brush #presets kit.
• 'The Perfect Oils. Part2', 46 Mixer Brush Presets for Photoshop CS5+ and Bonus:
https://bit...
(Sorry, I don't use fresco)
@sly hawk im just trying to use these brushes but they wont paint

oh, you're actually using fresco! - I thought you wanted photoshop to be like fresco.
Have you watched this guide?
https://www.youtube.com/watch?v=0EZlQAwH664

🍊Please take time to answer this poll:
https://ko-fi.com/polls/What-kind-of-Fresco-tutorials-would-you-like-to-se-C0C7YVMWO
🍊Buy Me a Coffee:
Support my work: https://ko-fi.com/printmesomecolor
🍊Get the texture here:https://bit.ly/4cmMKhJ
🍊 Private lessons: https://www.printmesomecolor.com/private-lessons/
🍊Try out Creative Fabrica for free!...
Giving a try thanks. If someone else knows what the problem is, just type #❓ask-a-question message
Gave +1 Creative Carma to @sly hawk (current: #5 - 959)
Ok I know why
@carmine briar The left hand text layer must be aligned right, and the right hand layer aligned left. That should be all you need.
Left layer aligned right:

Could someone please explain me how can i replicate the green color on the white?

I want to make a banner for my discord server but i cant figure out how to set it to 16:9 aspect ratio?

Please help me fast
Please share!
The crop tool is a way, or image size. But you did not explain the results that you expected: remove part of the flag? Expand it? If you want fast help you need to give accurate expectations
I handled it somehow
thanks tho!
Could you tell me a font that looks like this tho? maybe you know?

im trying to make my server a bit better
Generally, you create a document at the proper aspect ratio first and then put the design elements into it. Thus, if you want 16:9, then you probably want 1920x1080 or something like that. Then create your layout inside that canvas. If you try to scale these things afterwards, you could have problems scaling objects to fit.
It was the pencil pro that refused to draw with different brushes in different programs. I could paint with my finger tho and in non painting apps pencil pro worked in a polite way. I removed the tip of the pen, changed the settings, unpaired pen few times etc.. nothing worked until i decided to restart the ipad. After that it worked as usual and I painted masterpieces
No idea why, the pencil terrified me
Thanks, it might help others, and it is good to know for the helpers, so that we have other recommendations to make
Gave +1 Creative Carma to @lost hamlet (current: #918 - 1)
Im immensely happy that I could help. :hattip:
chat uhh
can i add text on a video. Since i wanna make my discord server's icon animated :P
i plan for it to be this:

but it just gave me a image

can someone help me?
im trying to replace this image in an embedded smart object
but whenever i edit contents and close, nothing changes
Are you trying to save it as a GIF or as a Video?
Gif
And how are you exporting the file?
Well, back up. You have the video on one layer and the text on another. Have you opened the timeline panel
No..
You're in Photoshop
Go to Window > Timeline
a box will appear
with a button

click Create Video Timeline
You'll see something like this

@micah could you maybe help me out with smth?
sure
ik its extremely simple, but do u know how to add like cool effects like this to text?

You with me so far?
So you want a fading bar behind the text?
yeah
couldnt rlly find much on google but tbh i didnt try those words, lemme google it
So you have your image on one layer, create your text on another layer
yeah
this right? i think this could work

what did you do to the white layer?
then add a layer mask and paint black on the edges of the rectangle
that's a layer mask
thats perfect lemme try real quick

Jesus has a video: https://www.youtube.com/watch?v=ThtGXyzbiQY

Struggling to learn how to use layer masks in Photoshop? This Photoshop tutorial will guide you through the easiest ways to think about and use layer masks like a PRO in no time.
📝 GET MY FREE PHOTOSHOP GUIDE here 👉 https://bwillcreative.ck.page/7ae57b5bc4
👨🏫 JOIN MY ONLINE PHOTOSHOP COURSE: https://learn.bwillcreative.com/21-day-photoshop-e...

gonna watch the vid to see how to make the edges black
So you click the little box with a circle in it on the tool bar, and paint black (to hide, white to reveal) the layer.
do i have to have the white layer on the layer menu selected?
cause when i try to use the brush it just changes the color of the background a bit instead of the rectangle
Yes. So select the layer you want to mask. Add the layer mask, click on the layer mask (white rectangle next to layer) and paint on it.
Always mask instead of copy/pasting, when possible
gonna watch the video you sent cause i think im missing a step but thanks a lot for pushing me in the right direction.
Let me know if you need more help.
one last question, this image is 2 mixed into one, like the buildings and the hallway are one image and the one on the right with the girl is another. my question is what tools exist to blend images together?
I learned how to use the gradient tool in like layers to blend images together but is there any other way? any other tool that I can learn to use that will also give these results?

gradient tool is cool but was wondering if there are any other better options that i can learn
This is all masking too.
ok ill master masking then, any youtubers you recommend?
Jesus Ramirez (Photoshop Training Channel), Colin Smith (PhotoshopCAFE)
Lisa Carney
alright, again thanks so much for helping us noobs out lmao
Gave +1 Creative Carma to @still verge (current: #435 - 3)
Yes, all masking
great thx!!!!

omg yeah that is much better then the gradient tool
You can use the Gradient Tool on the Layer Mask...
thats what ive been doing yeah
thanks for this
Gave +1 Creative Carma to @ripe quest (current: #3 - 2236)
The point is: you can use the Gradient Tool, the Brush, any number of tools on the Layer Mask to affect it.
Happy Masking
ok yeah i need to learn how to use the brush tool on layer masks now then
:)
Yah, you can use the gradient tool on the mask box to fade
dithering

Create the object, blur it a bit, set layer to Dissolve
Gave +1 Creative Carma to @still verge (current: #345 - 4)
how to use 2 gradients on a layer mask? for some reason i cant find anything on google
like if i want to put a gradient on the layer mask on one side of the rectangle, how do i add another for the other side without deleting the first grardient
So you can either switch to classic gradient and use lighten/darken mode.

OR
And easier/better
Put your Layer and Mask into a Folder, and then add a layer mask to the folder

folder worked great
isnt this gradient fading to almost like a white?

hows that possible
Not sure, would need to see the full image/layers
insteaed of going to transperent its got like white highlights

those appear to be on the photo imo
full image but i havent got the psd file

yah that's some object
u think? above the word HOPE it looks like part of the rectangle
not seeing it

The fade continues beyond the H
cause if white is transparent, is there a way to make the gradient 2 colors? like from green to actual white?
white is clear i mean
Sure. you could make a gradient any set of colors
ill try it in a bit thanks again
yeah i wouldve thought cause the letters are a separate object then the rectangle, its just like put on top


So you can paint any color you want over top the graident
gradient
but the mask is strictly greyscale
hey bros, how can i export this image with transparent background? watched YT videos but my artboard isn't letting me do that

so is the white area actually transparent, or is it white?
it's not transparent
But you want the white areas around the photo transparent?
exactly
yeah right, the white thing is the artboard
Select the Artboard tool then go to the context menu at the top and make your artboard transparent

Then export as a png/gif
thanks bro

Gave +1 Creative Carma to @ebon trail (current: #918 - 1)
Looks good
Hi! I have a question about making a 'long-shadow' but instead of having it go 45 degrees, i want it to be vertical, and have the shadow reduce size as it goes down.

How can I center-align text vertically within a container without aligning it to the bottom?


so then it would fill up that empty spot there
is there a way i can make this type of shadow without having to manually draw the lines and fill up the inside of it?
@still verge
So there's a few ways to do this, none of them will create a true 3d look without using Illustrator or other app.
may i kindly ask what those three ways are?
im trying using a triangle shape and flipping it upside down at the moment
Duplicate the text layer.
Make it Grey/dark grey.
Record an Action to do the following:
Duplicate the current layer
Transform the layer 99% h 99%v and move it down a few pixels
You could even make the action reduce the opacity a bit to fade it out

i do want to make it go vertical, is there a way to do that as well?
Another way is to similarly do it with Dropshadows in the layers panel, but that is a bit more difficult
Just increase the vertical change

so translate 0 h and 5 pixels
but it wont look as good
Would that make it look as similar as this one?
Okay thank you!
I'll try and let you know
thank you for ur kind answer 🙂
also
may I ask another question?
I commissioned this to one of the designers i know
and i want to make the similar text box myself as well.
but im not sure if i can recall that box without using illustrator
i want to make one so that the edges of the text boxes are like that to make it look somewhat 3d
that's an inside-shadow

okay thank you!! ill try that
Not sure what you're saying can you rephrase?
hi
I know its weird question but
how can I make the curves affect only the layer I wanted

You want to Alt/Option click between the curves and the layer you want it to apply to
Alt click on the line between them
like anchor text box?
im still not really getting these well-organized pixel edges. are these drawable with the inner shadows?
No that's going to be Bevel option
like the anchor text goes to the bottom
like i want int in the middle but not bottom or top
Oh thank you!!!
Gave +1 Creative Carma to @still verge (current: #281 - 5)

LOL never seen it before
OH LOL
no thats isnt in photoshop
its just a example on like what i meant


bye.. does this help-
I think that's just a diagonal line across the box that's been beveled...
or draw it and bevel it
Sorry, I'm not sure what you're asking. Is there something you can show me that explains what you want?
hey micah I did that and it worked but not like how I expected it to be it was wery sharp before I assign it to the layer but when I asign it to the layer it just goes to the old sharpness
this is the before assigning

this is after
Screen shot your interface and layers
do you mean this ?

yeah
Try a levels instead?
You're using curves to sharpen the blurred image/
?
yeah

here
( this isnt photoshop )
the example is from a different program , i just want to like do the same thing in like in photoshop
where the anchor text is like in the middl
middle
do you want the text start from middle ?

yeah like that but like
no i know its like in the middle but like when i hit enter doesnt go entirely down but like
omg idk how to explain HELP
I am realy confused XD
What is the best way to paint the whole sweater green? Tried most youtube tutorials and doesn't work well

yeah it starts from middle
do you just want to shift the baseline?
first example w/ the pink X i showed
is like when the second word it goes down
but with the second example w/ the check mark
its like it still goes down but just small bit and the top word goes up a bit
sorry im so dum wdym 
ohhh
you mean
it should be in the middle of the page
I get what you meant now but its realy hard to explain :D
oof
yeah cause like
i tried liek doing everything like what YT said
but when seeing them doing it its wrong anyway
like its not the thing that i need to liek figure out
it be great if yall can help me out on this 😭
this is a very html centric thing
I never seen how to do it photoshop like that you want it to get centered automatically like in word program but I am actually very confused about how even did you find that gif
hi im really sorry to bother again, but where can i find this option?
i dont think ps does this.
which one
lol
thank you both anyway
@still verge @cursive night
is there like a some other way to do it?
like moving the text
idk
yeah you can just moove the text yourself after writing it
just press control + t
ohhh
what does that do again?
it lets you freely moove any layer you selected :D
in photoshop everything is a layer so you can move the text too
then do i have to make this change for every single duplicated layers that i make??
or is there a way to make it auto-shrink as i duplicate the layers?
ohh omh thank you so much 😭
Gave +1 Creative Carma to @cursive night (current: #918 - 1)
what do you mean by that :D
like centering the page
like a guide that like u put it in the center
like those guide lines looking thingy
idk help
isnt that automatically done by photoshop??
im not sure.
yeah there is little purple dots and string that helps you
and it automatically puts them there
but if it does? how?
??
thanks <3
just try it LOL
np happy to help
ur not dumb lol
lol thanks , yeah im just really new w/ photoshop
and one last tip if you dont want it automatically putting somewhere you can hold ctrl while moving the layer
I mean you can just duplicate the one you shrinked
but wouldnt that still not shrink the size?

like this is what im getting rn
i want the size to shrink more and more
as im duplicating the layers
oh I get it now
maybe i understood this in like the wrongest way ever
you want the text yo get smaller every time right
YES
make the second layer solid color to match.
It does seem to be moving or shrinking
there is realy not a way I know other than doing it by hand sorry
i want the shadow color to match the stroke color(white)
yeah
this is sort of what im trying to make
you might rasterize the second text layer
that part under the text
make it completely white
ok
I dont think this is shadow rather than shadow it looks like its made by hand
i think it does too but idk
it probably is, but can be done other ways
i made it completely white, but i think the size is still not auto-shrinking
does the 'free transform' option make it auto shrink everytime i duplicate the layer??

so this is currently what i have

and ive made it so that the w and h is 99 %
and it doesnt auto shrink 😦

this is what im getting right now btw
Show the action
Did you record an action?
Open the Actions Panel
Click the [+]
Type in a name "vertical shadow"
Hit the round record button •
Duplicate the layer
Control-T to transform, move it down a few pixels and then in the top bar set it to 99.5% x 99.5%
ill make a video
how about just making one of them than stretching it down to the lenght you wanted than making the bottom narrower so it looks like its going smaller ?
Hey guys I was wondering what the best way to replicate these gel camera filters in Photoshop is? I've tried to search about it but the searches are dominated by gel lights instead
I've also tried RGB (it's the colours I need) color layers with varying fill and normal, soft light and overlay blending modes

me or micah :D
both actually LOL
XD
SO the actions panel is a way to automate tasks
right
We're using the actions panel to do something over and over

So click the [+] to create a new action
type in name for action
that will start the recording

duplicate your outline text layer
then Edit > Free Transform
Set to 99.5% x 99.5% and then move the text down a bit (use arrow keys to move it down a few pixels)
we'll have to play with that part

So, not as fast as doing it by drawing, but you can make it work
Also if you wanted the shadow to fade out, you could lower opacity
thank you!!
i really appreciate all your help, thanks a lot :)))
Gave +1 Creative Carma to @still verge (current: #250 - 6)
Please help! I need to change the jacket in the photo to another one, but it is very particular. I cannot use random color or pattern. How to do it? I've watched 10 different tutorials but none of it worked
like this?


Best to give us screen shots of what you have and what you want
where do i find this? swatches thing
is this swatches thhing like a inv of like colors that i saved
or.
Can you help me on the problem that i have rn ! Thank you <3
Gave +1 Creative Carma to @still verge (current: #211 - 7)
o-
Thank you! I have this girl, and I have to dress her in this jacket. Is there a way?

