#❓ask-a-question
1 messages · Page 51 of 1
i go to another chrome acc yet i was able to access behance even though im not logged in
very weird
but my main one doesnt work
and the main one has my adobe acc in it as well
does photoshop has variables for math? for example you can do math in some input box like image resolution, brush size, blur amount etc. but do you have resolution variables for canvas, image, and layer or a way to create some variables? it would be really good for automation (macros), because you could do percent based edits for example, so you don't have to resize the image/layer and the result would look the same but not limited to resolution
You should contact customer service for this, I don't think anyone here can offer any assistance on personal accounts (at the very least you can check on the Behance discord server)
Would it help?
https://www.youtube.com/watch?v=6W9C61U5jgU

Welcome to this complete tutorial on how to import and save variable data in Adobe Photoshop CC 2020. We start of with a blank document and a spreadsheet and end up with 20 different data sets which can be saved as .psd .jpeg and .pdf! Make sure to subscribe if it helped you!
(00:00) Start
(00:16) Set up Photoshop document
(01:25) Define the va...
I recently came across this thumbnail from a youtube video
why do y'all think the girl doesnt fit in with the background

the lighting on her doesn’t fit with the background
so she needs to be really dark innit
btw for some reason I really dislike this
something doesnt feel right even after removing the girl
well we are to believe the lighting is coming from the chest centre of the picture and mainly from the top then her legs would certainly be darker
Mostly because the direction of light is completely off (main light coming from behind her on the right, the chest emit a light from her middle to her face, but light only appear on the face))
That's the thing with those composites I keep seeing as thumbnails, it seem people don't have a proper understanding of how light and shadow work
In this tutorial, we break down the compositing process with techniques for choosing images, making selections, and enhancing light and color. Learn to analyze light, perspective, and camera settings to predict how well photos will blend together.
There are tons of - very good - tutorials on the subject
hmm alright yes I get what you'all mean
what about the lighting on the car?
is it accurate?
you have to ask yourself the question: where does this light on the hood of the car comes from. It can't be the moon, the moon is not a flash-light type of light
maybe the light is bouncing off from the sunset?
Well the person have never seen a real sunset then 🙂
I mean the bare minimum would be to observe nature.
I also strongly believe that understanding of photography really helps. The best compositers I've known where always photographers at heart
hmm true true
references, at the very least, are everywhere. You go to Unspalsh or whatever free stock website around and you start looking at references images "car in the sunset", and you work from there. I mean it can take months to master, you can't really fire up Photoshop and decide you'll be good at it without putting in some elbow grease first
okay I get your point.
a lot of photoshop is just understanding shadows lol
thanks for explaining
That's if you want things to be realistic, that's not necessarily everyone's aim. But if that' what you want, then you need to know how "real" things work. Since your task is to make things real.
Also, basic 3D skills come in handy. Sometimes, when I need to composite something and don't get the shadows right, I open a very simple 3D software (Adobe Dimension) and try to reproduce camera and lights on a set of basic shapes that mimic the object I have trouble with.
That way I get the real shadows and I can understand how they fall on the ground, on other objects, how they bounce off surfaces etc...
btw one thing that I really struggle with the light on the face from below
I always manage to make it look really wierd
how do you deal with lighting on the face in general
Faces are 3 dimensional objects, with lots of "cavities" and protruding elements (eye sockets, nose etc)
It's notoriously hard.
If you're good at drawing or willing to lear, learning how to draw shadows definitely helps. It's notoriously difficult
figures
There are great courses on YouTube an LinkedIn learning to draw figures (or you can join your local community art school if there is one)
what do you mean by figures?
bodies
like sketches?
yes, sketches
oh okay. so that helps?
Photoshop doesn't exist in a vaccum. it draws on the usual arts that were there before: Photography, drawing, painting... If you have a basic understanding of this, it helps a lot.
ah i see
Also, not everything is possible. If someone is being photographed with the wrong lighting, it sometimes worth redoing the photo, instead of trying to salvage things. Commercial compositing done well always start with great photography.
okay
See what the pros do
https://www.the-retouchers.com/

yes wrong lighting on people or models(cars etc) really takes time to fix
Sometimes it's just impossible to fix...
You need to draw on a new blank layer
AI generated layers are locked for drawing. You can still unlock them, but if you make a mistake you're toasted. Better drawing over a new layer so you can delete what you've done
and a quick question how to make parts of an image transparent?
oh nvm i found the eraser tool
I know this and already explored/used them a couple of times, but what I need is the properties of the layers/images/documents etc. returned by photoshop as variables so I can do math with them.
For example the size of the image could be returned as a variable like imgSize("px") which would be the value in pixels of the image's width times height.
With it I could resize text with a macro based on the resolution of the image so the text would be always the same scale, and I don't have to scale the image to the text so I don't possibly lose details.
So when I record the macro instead of putting a fixed value for the text size, I would do math in the input box for the text size like: imgSize("px")*0.07
Think about this like you want to sew a jacket to the button (current method) instead of sew the button to the jacket (the method I want to achieve), where the jacket is the image and the button is the text :)

Would duplicate and rasterize the copy be a good alternative?
id like to crop out perfect circle from this pizza and make everything around png so if id upload it anywhere there would be only round pizza without a background

Hi, if the unit is set to percentage, then brushing steps would be replayed proportionally: https://helpx.adobe.com/photoshop/using/recording-tools-actions-cs6.html
Does Photoshop 2024 work on macOS Big Sur?

hey i was making something
and pressed some shortcut
and it went kinda black
how to undo

its not all black
or white
its weird
Anyone know something like this? https://www.youtube.com/watch?v=Yzmd9KWSDFg I understand this but I would like for it to follow the pen tools path, is there a way or do i need to do it manually
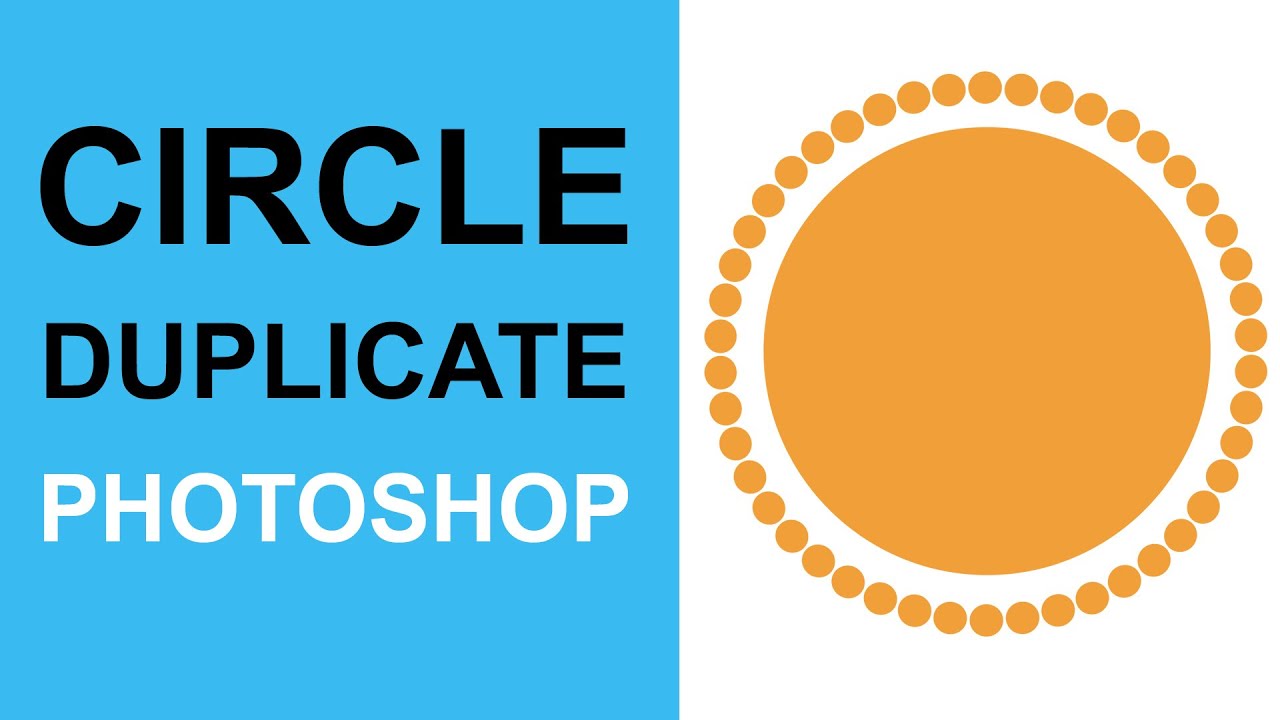
How to duplicate a shape around a circle in Adobe Photoshop CC 2024 2023 2022 2021 2020 CS6 etc
00:00 - Start of video tutorial and guides added
00:30 - Transform origin
01:00 - Show transform controls
01:11 - Rotate
01:28 - Duplication via keyboard shortcut
Online Education tutorials
#AdobePhotoshop
ok nvm ive found out
guys is it just me or does the photoshops pen tool very different to the illustrators one
its like the pen tool for adobe illustrator is more accurate, efficient and flexible
like you can double tap an anchor point to convert a curved line to a straight one where in photoshop u can’t 💀
this, I can't do the same as in the video as it's not a perfect circle, so wha am I supposed to do without manually adding n rotating?

Does Photoshop 2024 work on macOS Big Sur?
is there a shortcut for turning Auto-Select on/off?
There Is No Shortcut For It
But You Can Turn It On/Off Manually By Unchecking The Box Near Auto Select On The Top Options Bar
When You Are Using The Move Tool (Shortcut : V)
They have similarities and differences, so much that Deke McClelland did a 6 hours class on the topic: https://www.linkedin.com/learning/adobe-pen-tool-mastery

LinkedIn
Explore the intricacies of the Pen tool. Learn advanced techniques and how you can use the tool across Adobe Photoshop, Illustrator, and InDesign.
anybody has experience with ps plug ins? spcifically coolorus? i don't get why it's prompting an error when i try installing it

accedentally merged these 2 pîctures toghether
is there anyway to like seperate these 2 pics?
ctrl z?
how do i recreate this? i need all other planets in the solar system for a school project.

don't you have the original photo? if you don't have. The photo on the front can be easily separate by using crop tool.
1st one:
open photoshop select crop tool ( shortcut: c )
then just crop can save it as JPEG or PNG
2nd one:
for the 2nd photo you have to use gen fill. to do that.
select the front photo using rectangle tool
Click to generate.
how do I get the surface area of a irregular shape / magic wand selection? I've already set the measurement scale in the Analysis menu
Hello! Did you follow all the instructions? https://helpx.adobe.com/photoshop/using/measurement.html
Hi, did you check the FAQ or ask in their email support channels? https://coolorus.com
Color picker plugin for Adobe Photoshop. Simple and clean interface, fast, responsive, scalable, with color schemes and RGB/RYB modes - all digital painter needs.

Probably a GPU issue. Main menu: Help > GPU Compatibility... run that. Any errors or issues reported there?
Hi, sent them an email, i have low expectations they could help. Hope i m wrong
Hi, that is one thing, what I need is properties stored in variables so I could do math on them with any tool or function where the input box accepts calculations, I did not find anything in this regard, probably with plugins it is possible to create these variables 🤔 but I have never tried to create one so, no idea about that 😅
@frank terrace DM i can help you with thisc
I still need help with this :'v
What is a good Photoshop 2024 tutorial?
Photoshop. Main menu: Help > Hands-on Tutorials...
hey everyone, im currently editing a panorama of the aurora (18 pictures) using auto-blend layers. now for some reason no matter what i do there is always a visible seam between these 2 pictures and i have no idea why. The colors on both sides of the seam match up


even when the line between the images is somewhere else a visible seam is created in that new place
all the other pictures work flawlessly btw
Yes, I assume you can't adjust one layer without it impacting on the next in the chain.
Can you use a little bit of content aware fill to fix the seem?
or gen fill?
what do you mean?


Where's the seem?

I can barely see it. - but either way, if you draw a big patch over the area and then try generative fill, it may smooth it out better for you
yeah its not that visible in the screenshots but you can definetely see it with the full pic
is there any other way, i really want to avoid any ai if possible
dont like the idea of some of the picture not being real
nvmd i think i solved it by pushing the images out of alignment a bit
check if theres enough overlap between those two layers then try to feather the masks (or blur the masks at that part)
Im a small musician and was wondering if anyone would like to make some Album Art for me?
Then, I would inquire with script writers. You could ask for help in the Adobe Community Forums.
can someone help me?

im trying to make a cut like this at the top

on my triangle shape
Henlo. How do I remove these blue boxes everywhere?
I tried this: "To disable the blue box that appears when you select or hover over an object in Photoshop, you can try the following steps:
Go to View > Show > Slices and uncheck the box next to Bounding Box. This should remove the blue box from your workspace."
But it didnt work
Can you show a screenshot of your Photoshop so we can see which blue boxes you are referring to?
When i hover over stuff. It's since the new version I think, but it's useless for me^^

Try this, deselect Show Layer Bounds on Hover

May also need to deselect Show hover bounds from Layers depending on what you're particularly after, feature-wise
quickest way to select everything within the out shell of my selection? and remove the negative in the interior?

What does Yearly billed monthly mean?
you pay the annual fee in 12 monthly installments
How much would it be after 6 months? for £10/m
Annual Plan, Paid Monthly — This option requires a 12-month commitment but is billed on a monthly basis, offering a lower price compared to the month-to-month plan. You can't cancel until the 12 months are up, with a potential cancellation fee if the subscription is terminated early.
Monthly Plan — The month-to-month plan allows users to subscribe and cancel at any time without a minimum commitment, but at a higher monthly cost.
so it would be £60 at the 6th month
- the fee if you terminate the subscription
hi, wanted to ask like where do you guys find vector assets? for example, these dividers:
I can't really afford those paid websites so was wondering if there is something available which offers these free of cost, i'm just learning so won't be using this stuff for commercial usage anywyas.

You can try things like
https://www.vecteezy.com/
or even the free section of popular Stock platforms, including Adobe stock
https://stock.adobe.com/uk/free?
another popular place but mostly for icons is the noun project
https://thenounproject.com/
Adobe Stock
Stunning, diverse collection of free Adobe Stock photos, vectors and videos. Free to download, cleared for commercial-use, royalty-free, no credit card required.
Noun Project has the most diverse collection of free icons and stock photos. Download SVG and PNG. Over 5 million art-quality icons and free photos.
tysm, you're really nice
You can ask for feedback in #📝project-feedback
ah yes my bad forgot
No worries!
how do you get the oval shape of brush to create shadows on the ground?
When you open the brush settings (F5) there is an angle slider (next to hardness and size)
In that angle slider, you can also change the shape of of the brush by moving the dots on the circle

see how I made mine very oblong (you can also change it numerically with angle and roundness)
Not sure it's helpful for shadows though, I never used angles strokes for these
okay thanks
sandrine is there a chance you could help me with this? I asked yd no one replied, I just wanna know if there's a way for this can be copied, pasted and rotated automatically without me needing to do it 1 by 1

what can be copied?
the star
like a lot of stars right
yeah for it to go in the direction of the arrow
pasted once without doing it 1 by 1
there is a way, i forgot but the question is understood, the mods might help
there was a same issue for a guy with leaves which was ans
yeah i thought too thats why I'm askin
ah
wish i could check the history u know the guys name?
so i search

Discover this HIDDEN Photoshop Script that will allow you to generate a random fill from a pattern!
🎯 SUBSCRIBE to get more amazing Photoshop tutorials!
► https://www.youtube.com/user/photoshoptrainingch?sub_confirmation=1
📘 INDEX - Photoshop Random Pattern Fill
00:00 - Introduction
00:28 - Remove Background Using Adobe Sensei
00:59 - Fixing ...
check this out
i think that's only for random
But This Will Create A Random Fill Pattern
One Min
The only way to automate this would be to recod an action (check the action section of the help files)
there is a command that allows you to repeat a transformation (Ctrl+Alt+T on a PC)
You need to transform manually once, and the Ctrl+Alt+T will repeat that transformation
Of course you can add that to any action you will make
okay thx a lot i'll try
If you need to copy and pate a lot of stuff, and if you need them at random, consider the fill > pattern (edit fill)
https://medialoot.com/blog/how-to-make-a-random-pattern-fill-in-photoshop/

Medialoot
Patterns are one of the most important resources a designer can use. Of course there are tons of different ways to make them, either in Illustrator or in Photoshop. Although they're a bit more time consuming to make in Photoshop rather than in Illust
There is in Illustrator (that's called Symbols). There is maybe a external plug in for that in Photoshop? That seems plausible... You can do a quick search in the CC app
thx tho sadly I don't have the newest photoshop, mine's torrented as I live in a poorer country and in education they just tell you to torrent it, there's no education lisence
so can't do that I guess
I Think You Can Use The Reference Point For This
Well, all I can say is that you're on the official Photoshop discord. so you won't get any real sympathy for cracked software (particularly when students discounts are so low)
any idea how to make this PNG crown look like it belongs?

But you do you!

Add a shadows that sits on the text?
wow, i feel like an idiot lol
Just Duplicate The Shape And Add The Reference Point In The Middle Of The Other Shape That You Want To Rotate Around
i thought that's just for a circle, you can do it on any shape?
helps it a lot thank you

Gave +1 Creative Carma to @vapid flume (current: #8 - 606)
Waaayyyyy better!
No It Will Work On Any Shape I Think
Lemme Try
What Else Shape Do You Want To Try That On ?
Cuz If It's Like A Rectangle You Don't Need To Do That
what would I need to say to this though, my teachers told me to torrent it, that's how it goes where I live, If I had a job I would ofc get the newest version cuz I'd need it, but I understand, it's not like I'm looking for any sympathy, I came here for help and I get it, and I thank everyone that helped me till now
Gave +1 Creative Carma to @vapid flume (current: #8 - 607)
hey does anyone think they could change the back ground to black and the black bit to green?

can remove the text aswell
if it works on a circle that's not perfect then it would be fine, but I don't think it does, I mean i didn't try but I saw videos always do it on a perfect circle only
Maybe It Was Illustrator
Cuz It's More Vector Specified
I've managed to construct this portrait of myself with the help of AI... but I am struggling to add my arms in... anyone have any advice please?

@native shard
idk i'll try both what you and sandrine said, I really thought there's a way easier way to do it as it looks like it's something a lot of people would do regularly in designs
thx a lot guys
You Are Welcome
Stay on the AI route?
Do you have a little bigger size btw? i can record doing in photoshop and show you
The AI wasn't PS AI
I don't have a PS license 🤣
I'm using PS though, I can't use PSAI
that is the only image i have sorry
alright
Well its not clear quality but yeah here you go
its fine thank you
its loading
no problem
It does not show in recording for some reason, but after selecting i right clicked and clicked on "similar" that is very important @proud holly
ctrl+j to duplicate
or just hover your mouse over the lock symbole and click it
that doesnt work?
uh
okay then right click on the layer, do you see duplicate layer option?
or maybe because yours is in smart object or not smart object
thats very strange idk why you cant duplicate
i dont see that no
could you show me ss of the lock symbol

right so when you hover your mouse on top of the lock symbol
and click it, it does not unlock?
no
alright thank you

thanksyou
wc
hey, does anyone know if there's a way to do this in photoshop and have it be editable? I've found a tutorial that involves rotating the text and copying it a hundred times but that's not gonna work as i have to create a lot of logos with this style


this is the style that i am trying to achieve
this is the only tutorial i found and it takes way too long for how many of these i am planning to make

If You Want To Do It Manually Then Yeah You'll Need To Create A Lot Of Layers
Or You Can Search On Freepik Or Any Other Sites About An Editable Text Effect
Hi, if the shape was a part from a perfect circle, you could increase the size of the image, draw an overlapping circle to find its center, place the transformation point there, and do like in the tutorial you shared.
Hah! There is the pattern fill along a path option, see: https://youtu.be/PtTFfH41N84?si=lGO-tDzyoKuFL01S

Create patterns placed on a path in Photoshop using the edit menu fill script 'place along path' command. You can use it with the shape layer (and path) in Photoshop. Software tutorial Photoshop 2020 CC 2019 2018 2017 2015 etc
Another tutorial on the subject
https://youtu.be/xfN7R_rCv3M
Line place along path tutorial
https://youtu.be/78Te4XTIfIc
Hi, use smart objects for editability, and record an action of the step and repeat. https://www.photoshopessentials.com/basics/photoshop-actions/record-action/

In this sixth tutorial in our Photoshop Actions series, learn how to record and play your very own custom actions in Photoshop!
Hi, you are in index mode, go to image>mode and switch to RGB, you’ll be able to add layers, etc.
yeah, you mean increase the size of the canvas tho?
Everytime I try adding a photo to edit it keeps saying "Could not complete your request because the disk is not available" Anyway to fix?
Hi, could you explain what you mean by adding a photo? Are you trying to place an image in an existing design, are you using menus, drag and drop? Are the permissions on all the discs setup normally?
Exactly, but it seems that it is not part of a perfect circle.
I am trying to drag and drop to start a new one, and I just keep getting that message

blending this

can anybody here share a tutorial for darkening an image and adding text over it like those on a website. I want to do it on photoshop. I tried searching on YouTube but it's giving me irrelevant search results
does anyone know how to fix generative fill altering edges outside the selection area?
@fading cliff send a screen shot of the issue

i cant crop the image out
whatever i try
no ratio, any ratio
it doesnt react

only like that
Save the project and restart Photoshop.
the blue border is familiar
Also, this is the beta version. There might be issues/bugs in that release. Try the General Release. @fading cliff
Well, if the Crop Tool is not working in the beta and you want to crop, you'll have to do it a different way, eh? Crop it in the general release. Crop to transparent. Save it. Then bring it back into the beta if you want to use Generative Fill in the beta.
i dont think the issue lies there
Or you could create a new larger canvas and paste the image into it. Then use Gen Fill.
Sorry. I can't test this as I'm not on MacOS. Perhaps if someone else who is on the Mac and is tracking this, they could try it out.
i fixed it by reseting the crop tool with right click
didnt knew this was possible, chat gpt pointed it out to me
Any ideas on how this type of retouching can be achieved? No it is NOT just a soft blur filter, lol. I've tried this. Any ideas would be greatly appreciated! x


can anybody here guide me
What about file>open?
Tried that
this worked amazingly, thank you, I just want to ask though, I can't use combine shapes option now I think cuz of that, what can I do to make it available cuz i wanted to cut off these white ones away from the shape
Gave +1 Creative Carma to @hushed niche (current: #23 - 85)

i think thats beyond the scope of photoshop 🤣
hello!! im very new to photoshop and i was wondering if there was a way to remove the metal bars?? i think they get in the way but i cant find a pic without them :(

hey can someone help me? im downloading ae from adobe creative cloud, it said it works on my device, but whenever i install it it just goes as "failed, retry" without any error code

ive tried to download other versions of it as well
it said If you would like to install After Effects, you must update your system.
Have You Tried Generative Fill ?
oh! not really, i dont really know how to use it haha but ill try checking it out 
Just Make A Selection On The Metal Bars And Hit Generate Without Writing A Prompt
thank you sm!! ill give it a try >:)c
Gave +1 Creative Carma to @vocal shale (current: #132 - 11)
You're Welcome

Adobe Stock
Download Water text style effect editable Stock Vector and explore similar vectors at Adobe Stock.
i downloaded this and dont know how to use it can anyone help
Hello there. I'm trying to create a line of flour, and having trouble getting it to the proper thinness
how would i use the refine edge tool on this mask so that the areas around the tree dont look so bad like this

Can you provide more detail? Do you have a starting image?
What operating system and version number are you running? Perhaps this or your hardware is too old to run it.
all i had to do was to change download location
thats literally all
on the web it said that but on adobe cloud it popped up the error code 133
Excellent. Nicely done.
my system is all up to date to 2022
where is the refine edge tool?
all the hardware beside the cpu is made after 2022
Could you elaborate on how you solved this problem as it could help others who read this?
idk i forgot how to
cause i didnt resolve it myself
i just youtubed error code 133
and its pretty self explanatory
Is this what you are looking for?
Select > Select and Mask
yes i believe its that
Cool
but once im in there
how can i use it to make the edges not pixely
on my palm trees
bcuz i cant see any preview of whats going on

Try increasing the Feather amount a little and then play with Contrast and Shift Edge
Have you played with the View option at the very top? The drop down menu gives you lots of preview options.
Also review those Show checkbox options at the top
ugh yeah no matter what im getting those pixel edges
Hello, I know this isnt a lightroom server but I just need help to resolve this message, it says that my storage limit is almost reached and I do not know how to clear space, get a bigger plan or such 😕

Hello! What would be the easiest way to change the "RED" text of this gif nto something of my own liking?
Thank you.

wdym?
Hi, you might want to post Ae questions in the video discord: https://discord.gg/adobepremiere also you posted at 5am in Europe, which is 8pm in the east coast, maybe people were not in front of discord on that time slot. Do not always expect immediate answers. Users graciously share their experiences here in their free time…
Okay, uhm I’m trying to change the text in that gif, I know I’ll have to edit each frame and replace the text, I’m just not sure how to approach this though
like customise the text
I mean it’s not text in that sense but ya, the actual letters.
like something that’s not ‘RED’
OH like change the colour?
Hi, it is a gif, so you need to open it via file>scripts>load files into stack : https://www.adobe.com/creativecloud/file-types/image/raster/gif-file.html#how-to-open-a-gif-file the text won’t be text anymore you’ll have to erase and type anew one with a pixel font.
no….i’m bad at explaining >.>
so just change the text
easy way just find a font that looks like it then get the same colour or the hard way u could take a ss of each letter of the alphabet and form words like that
ya no i have the font :) i just wanna know how i would edit each frame
do u have premier pro?
ya launches premier pro
well I think u can do it by
putting the text u want in the timeline above the previous text but also get a black block to block the text already on there and line it there I think that would work but im not sure its worth trying
I havent worked much with gif's
tell me if it works
oka uhmm
hmm
i think im onto something here
i need to remove the previous text first
Is there a way to paste an image on a selected layers?
I'm trying to make a layer without the text and then trying to somehow put that on top of each layer that has RED in it

I would get a video of a black block then posistion it on the text then cut so it doesnt interupt the intro
how do i resize this in premier pro >.> the black block i mean
O i got it
oka now for the text
o i did it
@south stirrup LOOK!

i know the font isn't the same
but like
i love TNR Italic
Looks great
But I think U should extend the end bit a little more so it's not just a flash
Extend it to like 1.5 or 2 seconds
but like
how
add a frame hold?
Just copy past it then cut it to Just the end and repeats a couple times
Prolly easier way but that's my way of doing it
hello guys, anyone got an idea why when i try to change the layer size its like stretching?
- normal text(layer)
- when i try to change the size


I'm creating my brand's logo, how could I remove the dot from the "i"? I did it using the text tool

I prefer designing logos on adobe illustrator but if you want to do it on photoshop you can either mask it or change delete the dot from the path
Feel free to design a logo in photoshop all you want, but if you're serious about needing it as a 'proper' logo meant for large format print (like billboards, display stands etc) - it will need to be a vector image, most likely built in Adobe Illustrator.
If the logo is just meant for the odd website and social media posts and web banners, photoshop is fine.
@robust viper
Your best best is to simply apply a layer MASK over the text.
Is there a way to enable the ability to drag objects out of the artboard an still keep them visible?

wait
could you elaborate?


i think he means to make a infinite space , more like the puzzle games where the pieces will be all over the screen even outside (the box we work in photoshop) he wants to see the pieces even tho they are not on the poster
it is indeed possible
@deep geyser Create an artboard
and drag the layer above the artboard
this will allow you to see the images outside of the box
oh wow never knew

how do you get that faded effect i circled. is it just an eraser with the opacity lowered or something else.
also how would yall approach recreating this graphic poster

really simple
you start off by making your own brush
i can link a video for ya
@woeful python
yes
and give u a time stamp
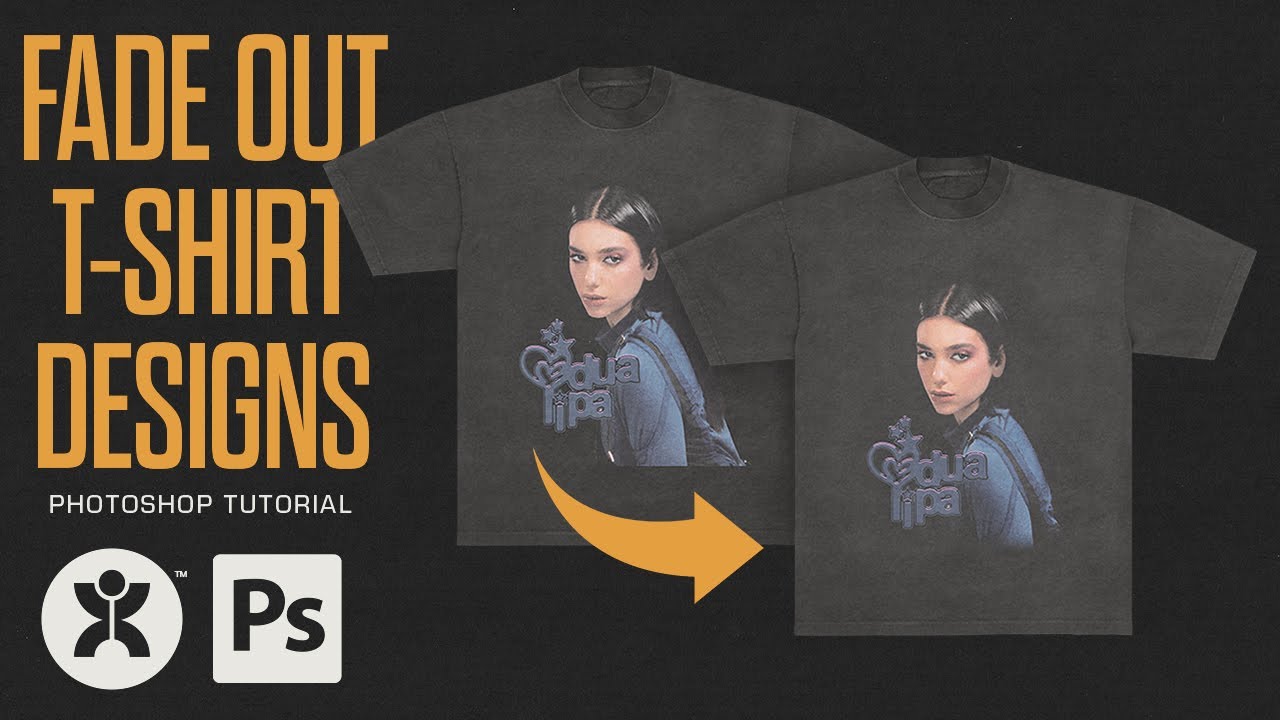
Fading out an image in your design can make or break the composition. In this video I go over the best ways to do so, including a soft fade with a touch of contrast, and a grungy fade. I teach you how to make a grunge brush from scratch as well, and demo it on multiple designs. Hope you learn something!
Looking for high quality textures to use?...
time stamp : 5:05
@woeful python
thank you
what about the whole black and white theme as a whole
it doesnt look like a simple threshold layer ontop
because it isnt
just black and white gmap
with good texturing
most likely patterns
ohh
for that noise effect you wanna use filter gallery at the very end
np!
you have a good eye
yeah haha i mean im better at this then most other creative creations since the stuff you showed is mostly what i do
can i see your work
sure, would rather post in dms since it would be flooding here
i really like this type of poster style
same haha
imma add you
HI You could also look in the glyphs panel (windows>Glyphs) if the font has an [i dotless] that is used in Turkish, IIRC
Hi, check if the move tool has a lock between w and h then transforms will be proportional by default. Otherwise you need to hold shift.
Sup.. Can anyone help me with my problem.. I created a thumbnail, and the resolution is low as it has to be but the image size is 160mb.. How can I reduce it ?
thx
Gave +1 Creative Carma to @hushed niche (current: #23 - 86)
How many pixels does it have? Check also for document ancestors: https://prepression.blogspot.com/2017/06/metadata-bloat-photoshopdocumentancestors.html?m=1

A small but growing number of Photoshop users have been noticing and complaining of excessive, bloated file sizes with certain files saved f...
Yeah, check the image dimensions- bottom left.
If it's a thumbnail, I assume it should be about 1080 x 1920 pixels.
Its 1280 x 720
Ohh. Its 36283 x 20409 :DDDD I found my problem..
How can I reduce it ?
Is there an easy way to remove the centre of this image so I have two separate parts of the coin, the middle and edges

I think the Magnetic Lasso Tool can help?
You can mark the middle part and copy and paste it and then delete the marked part. Then you can have both the parts separately. I hope that made sense ?
One way would be to duplicate the image to another layer. Then use the circular selection to select the joint between the middle and the outer edge. Use that to delete the middle. Move to the other layer invert the selection and use it to delete the outer.
You then have one layer with the centre and one layer with the outer 🙂
hey,yes i fixed it now,tysm❤️
Thanks, it worked up until it says could not complete your request before the smart object is not directly editable
Gave +1 Creative Carma to @unique mason (current: #877 - 1)
Even after converting the image to a smart object
Did you Rasterize the Layer?
Image > size 🙂
Can anyone help me achieve this bevel & emboss + stroke effect? I've tried everything but i am fairly new.
- Whenever i add a bevel & emboss layer style, sure the lighting is correct but you also get this muted effect all around the text as well. For example, at the bottom of the A, mine continues past the corners for a tiny bit. I want it to abruptly stop as it reaches the corner.
- Then in the first image the stroke is sharp. If i apply stroke through a layer style i can't get pointy corners but if i convert the text to shape first, i can get the pointy corners but if then the bevel and emboss gets applies to the stroke as well.


Inner Shadow kinda half works. It does the first step perfectly, but then after i add it. How can i add a pointy stroke that ignores the inner shadow and applies it to the outside of the text?
Converting the text to shape and then adding strke to it doesn't seem to do the trick....

Why don't you duplicate the text and add the inner shadow to the upper layer and the stroke to the other one ?
Good question, cause i am dumb probably. That should work, let me try.
still it would be nice to do it with one layer
You can select both layers and convert them to a one smart object layer
that's a thing?

but yeah this seems to work Ahmed.
Is there any way to apply a stroke with pointy corners on editable text?
You can still edit them separately if you convert them to smart object

I know that but you can't apply the stroke to the unified smart object layer though can you?
it won't have pointy corners
you will only be able to apply the stroke with layer styles then, and that doesn't give you an option for pointy corners
Why would you need that when you can just add it inside a separated layer inside the smart object itself
You are welcome
Hey I’m having a problem with photoshop. Im trying to use the brush and erase but I get these white squares randomly. Btw Im using a computer with integrated gpu (intel graphics in my case) idk what to do.

Main menu: Help > GPU Compatibility... any errors or issues reported there?
The only thing that says is that my gpu drivers need to update
I checked and they are updated
Sorry it’s in Spanish. I’ll translate the errors. “It’s recommended to update the gpu drivers.” “The gpu drivers are not updated, (14 months, it should be less than 6)”

Well, it says they're out-dated. What version of Photoshop is this? Help > About Photoshop...
You can try setting the "Older GPU" in the Preferences. Edit > Preferences > Technology Previews.... choose "Older GPU" option. Then restart Photoshop.
Lemme check
Seems to work I think
It’s not doing it
Like the white square things
Soo maybe that was it
Try it out for a while and see if that problem comes back.
Fo shure
Thanks humann
💙💙
You're welcome, pal.
Does anyone know if theres a way to do shape packing in Photoshop? Maybe a plugin?

E.g. finding the optimal layout to fit as many items as possible on a page
There is a Pattern Fill feature and scripts that will change the behavior of the fill but nothing that works exactly like that. Photoshop does have a scripting API and if you're familiar with JavaScript, you might look into that. Perhaps someone has already created something like that. If not, you'd have to create it...

i am familiar with javascript but ive sort of written off photoshop scripting as soon as i realized its impossible to do the simple task of alterating a particular pixel which is like the most fundamental image manipulation task. anyway, thanks
Gave +1 Creative Carma to @ripe quest (current: #3 - 1986)
Well, then try GDI, ImageMagick or something like that. Probably more suitable for this task.
yeah, thanks i already misuse a 3d modeling software for doing this its just nice to keep things in one program
Someone knows why this happens?

Only happens when I borrow something in the clipping mask

Why "what" happens exactly?
Use a Layer Mask and paint on it with a custom textured brush.
that trasnparent thing
as if I had erased it with opacity
I still don't understand what I'm supposed to see here.
wait
this part in red

only happens when I borrow something in the clipping mask
and I didn't borrow the image with opacity
"Borrow"? I don't understand what you're talking about.
the image originaly looked like this:

I tried to quit that part with clipping mask and this happens
delete*
Paint on a Layer Mask to remove it.
Yes, I already tried but it won't let me :,v
and happens with all the images :,v
I try to delete it and the piece stays there as if I had deleted it with little opacity when I didn't
Yeah. Sorry. I don't understand what you're talking about.
wait i'll send a video
With Layer Masks, black is completely transparent. White is completely opaque. Perhaps you were painting with some shade of grey.
look:
stays there :,v
You're using the "Eraser" Tool. And its in Brush mode. Are you using a Drawing Tablet? Perhaps, there is Pressure Sensitivity turned on?
It would happen with any tool that has a pressure sensitivity setting on. Many Brushes will also behave that way.
Either turn off the Pressure Sensitivity for the Brush or choose a different brush.
Do you see the cyan stroke of the image? How can I achive that grunge effect on the stroke?


It is present in here too
I already answered above. Use a Custom Brush.
Is there another way to get an outline of a number that’s not turning the number into a shape and going from there
Place the text (number) on a Layer. CTRL and click on the Layer Thumbnail. (This creates a selection around the object.) Create a new Layer. Edit > Stroke.
You could also do this so there is a little more control over it...

I had another way
I have a perchament brush that is very large, and used it as an eraser
on a 1 pixel stroke rectangle
What do you think about the result?
I wouldn't "erase" anything. I use Layer Masks so I don't permanently destroy the image. The non-destructive workflow is the professional way to approach this.
Yeah, but the rectanngle stroke is easy to paste in case I need it
So if you're already set on doing it that way, why are you asking?
Anyways, I would use a Layer Mask. That's the recommended method but you're free to do whatever works best for you.
thank you 🙏
i have a client that wants me to enlarge their image, but im dealing with a blurry image and not sure how to make the quality better, any tips?

Trace the shapes with the Pen Tool and make them vector objects. Then you can scale them up to whatever size you want without losing any quality.
gotcha i tried taking an easier by just quick selecting the object and then coloring over it but that didnt help
how do i make them into vector objects once ive traced them?
When you trace them with the pen tool (just make sure they're shape layers and not paths) the shape layers is already a vector object
Tracing them with the Pen Tool automatically makes them vector objects.
is there any way to make the object straighter without pressing shift
Alternatively, you could use Adobe Illustrator and the Trace Bitmap feature. If you have that app.
the lines seem pretty adjacent
would that be easier?
Probably. Unless you're a master of the Pen Tool. heh
the pen tool is making me upset LMAO
i cant get the sizing right at all
I would probably prep that thing a bit first though... before tracing in Illustrator.

This is what an auto-trace might look like...

I would actually delete those rectangular shapes and just recreate those with new rectangles.
I would focus on cleaning up the "B" shape.
Here is my example. You're free to play with that. Use it. Whatever.
oh sick!
thank you man
if i wanted to refine the edges would i just be able to do that in photoshop
I would do it with Illustrator. I would keep a pristine vector version of it so that you could always go back to it. You never know what size you'll need with a logo.
Vector graphics have no resolution. They can be scaled to nearly any size without quality loss.
how do I polish this and make it look high res?

Same advice as above. Create pristine vector graphics.
so just redraw it in illustrator?
Or Photoshop. Photoshop has some vector tools. However, Illustrator has more tools and was specifically designed for that task.
dam I was hoping there was another way but I thought photoshop only supported rasterized images
If I were making a logo/icon/shapes like this, I would make this with vector graphics. Its cleaner for one thing. And resolution independent.
do you know how to center crop an image by aspect ratio by chance?
Get the Crop Tool. Set the Aspect Ratio in the Options. You should be able to drag the thing into place and then complete the crop.
Aspect ratio 1:1 Center crop of 2.5:1 (for display in Maps) 1.5:1 (for display in Apple Wallet)
would that be in pixels?
1:1 are ratios. Not dimensions.
Dimensions are physical size, in pixels, inches, centimeters, etc.
Not sure what you're going for here. It's kind of a rough drawing but something a bit more symmetrical...

so 1:1 would just be a square then
Yeah. 1:1 is square. :)
kk thx
Gave +1 Creative Carma to @ripe quest (current: #3 - 1987)
and then how would i do the center crop? same process?
Here is my Adobe Illustrator file... look at it, play with it, use it if you like.
Get the Crop Tool. Set the aspect ratio. Move the artwork into place and crop. If you're trying to get a specific size of artwork, you could always make a canvas at that size and aspect ratio and paste the artwork into it. Then position it [the artwork] inside the Canvas. That's another way. Might be easier if there is a specific size you're trying to hit.
not sure if theres a specific size, thats all the info he gave me for sizing
^
OK.

does anyone know if this is an actual shape and if so what is it called?

A shield?
I think its a crest
Oh. Yes. Well, perhaps a crest. Also, an emblem or an insignia. @unique bronze
Sometimes a "seal."
true
Do you see what I mean? With this artwork: #❓ask-a-question message
If you create it as vector art, it's cleaner, you can rescale it to whatever size and you can always import to Photoshop and do other things with it.
howd u recreate it so fast?
This ain't my first rodeo. :)
Hi. For feedback and suggestions on work. Please post in #📝project-feedback . :)
oh sry
cheers
Quick question, does anyone know how to turn like a detailed image

to a blob of paint
like this image
are there any tutorials for such
What’s it called when you make your image quality more pronounced like he does in his thumbnails, everything is more toned and saturated is there a certain setting

ym the glow around him?
or do u mean how he is brighter then his surroundings
u can try tracing it by hand
https://www.youtube.com/watch?v=CGdGqcAQdMU - this is a good start.
A few things inclusing masking, over saturation and contrast adjustments
plus the outer glow.
how to change color of brush ?


If something is saved as a svg eps etc can u view it without adobe photoshop or illustrator?
SVG or EPS?
aren't they two different file formats?
SVG's can ususally be viewed by opening them in a web browser like chrome or firefox.
--
for EPS, probably not. - you may need a tool to help you:
https://jumpshare.com/viewer/eps
one question why didnt u use straight black and instead used a lighter shade?
Maybe use bridge?

Bridge also accepts .eps and opens up in your app of choice (same with .svg, pdf etc)
the pleasure of knowing what's inside a PDF, or a video by just looking at a thumbnail can never be topped 🙂
how can I put it into a server pfp for a discord server cause it doesn't show up
what is a pfp? what are you trying to do?
We are the ones dealing with Bridge here
you have bridge when you get your Photoshop sub. They come together

If you want to learn how to use it
https://helpx.adobe.com/uk/bridge/user-guide.html
my photoshop is loading and loading
it stuck
i even relaunched it
Is it the first time you are opening the software? Do you have an active internet connection? (you need it)
nah
not first time
yes i have enthernet
pfp-profile
I still don't know what is it 🙂
this thing
educate me!

OK, thanks. I still don't know what it has to do with Bridge
yay i cant even close photoshop
Did you update recently? What is the version you have?
go to Help> about photoshop

i opened it last time like year ago
Maybe you need an update?
phew
OPen your CC app and check if there are any updates waiting for you
its working
what is that

Yes you have it. When you bought and downloaded your subscription at Adobe, Photoshop came with the CC app (and bridge)
sorry I meant the picture of the sever on the severlist for example this is the picture for this server

There is no specific server for Bridge, but you can ask your questions here
There is a specific forum in the Adobe Community forum though
https://community.adobe.com/t5/bridge/ct-p/ct-bridge?page=1&sort=latest_replies&lang=all&tabid=all
Settings Game Activity
Photoshop
If you use Photoshop (or any other Adobe app) and don't use Bridge, you miss at least 30% of all the automation possibilities
You're talking about Rich Presence
no like discord server
It looks like your discussing Discord features here, not Photoshop features... So I really cannot answer that
Are you asking how to get a server logo?
no like the file cannot be seen by alot of software like discord for example
Which file?
no .eps are vector files and are incompatible with browser based apps
dam
you need Illustrator or the like to see them
thanks anyways
svg should work, if svg don't work with discord, it's an issue with Discord. You should contact them
svg are visible in any browser (FF, Edge, Safari, Chrome)
nah I think svg shows it self as code to discord so it doesn't recognise it
well, it's a discord issue then

SVG is code anyway, they just don't have a proper reader to display it
I am a basic Discord user (as you probably guessed already) so ...
I have to split apartment by apartment.
Is pen tool way to go, or there is another way?

split as in?
like in the middle? vertical? horizontal?
Please specify in details
Yeah, what's the end goal?
I feel like pen tool is the best option since it's not like each apartment is exactly rectangle,
Something like this?

I don't know. I guess maybe my color palatte was set to CMYK instead of RGB.
how can I export the file with different dimensions - everytime I change the width etc it changed the below but I want to choose my own - it's quite frustrating

What do you mean "different dimension" exactly? If you arbitrarily change the aspect ratio of the image, it might be squashed or stretched. If you want to crop or frame the artwork differently for a different AR, then you should do that BEFORE you get here.
Are all the dimensions in proportion with one another?
e.g. 100 x 100 AND then also 200 x 200?
Hm probs not - I did 1920 x 1080 as custom which is fine - but I wanted to export the same project/picture to 1080 x 1920 - just wanted to test if it would work
so landscape... then you also want it portrait?
See what I said above... They're completely different aspect ratios. You'd have to creatively crop the image to fit the new aspect ratio.
I'm trying to find the best export for an instagram video reel - so I have the image in 1920x1080 but I am editing the picture or adding it onto my adobe premiere pro to export a video - maybe I can do it on premiere instead?
This would be the normal landscape version I guess....

if you tried to change the canvas size inside the export settings, it would then do this...

So to clarify, do you want to make a video in PORTRAIT, using a LANDSCAPE image?
If so, I'd suggest you just export out the image correctly as landscape, in photoshop and then import the landscape image into premier pro, and then you can pick the crop and export it in portrait using Premier pro
im gonna keep both landscape - just dont know the best way to size it down a little so it fits into the reel - my latest video looks good on thumbnail but when you click on it, the left and right edge is a bit hidden into the reel
instagram reel videos are portait aren't they?

yeah can I just change that in premiere pro directly for example?
you can't stick a whole landscape image into it and expect to see the whole thing.... unless you're willing to have a huge empty area above and below the image.
guess i need to make some changes

regardless of "which settings" or "which program" to use - you'll need to decide which option you want to go with
i might go with option 1
Instagram stories are 9:16. Not 16:9. Thus, you'll have to "crop" or "re-frame" the artwork to fit within that canvas size and aspect ratio.
Hey, is there a way I can disable the feature that every time I want to open a new document, PS scans my copied files and automatically inputs these particular pixel dimensions? On my version (21.0.0) this always takes ages. (Like 5-10 seconds, but it gets annyoing)
You mean that you copy something to the clipboard and when you go to: File > New, it automatically chooses the same dimensions as the clipboard?
No. I don't think there is any way to disable that other than clearing the clipboard.
To do what faster?
Well when I click on file>new, it always takes 5-10 seconds for it to read (i guess?) my clipboard. In that time I can't do anything and have to wait
If i click on something it only opens after these few seconds, and then also the wrong file becuase the new document moves everything by one
Sounds like something is up with either Photoshop or your computer. Try updating Photoshop.
Or clear the clipboard.
Yeah probably, thank you!
In Windows... Settings > Clipboard... "Clear clipboard data" and hit the "Clear" button. Try that and see if this "waiting period" persists when you do File > New...
It didn't change anything, I still need to wait but it just doesn't input anything new
weird
Then there is [probably] some other issue.
Yep seems like it

The 3D features in Photoshop have been discontinued. See: https://helpx.adobe.com/photoshop/kb/3d-faq.html
ah oki
so from where can i open 3d files?
In an app that supports whatever file format you have. Adobe has moved most of the 3D functionality to other apps, like Adobe Substance...
ok.....
Reels are the same?
Or use an older version of Photoshop. Although, I'm not sure how far you can roll back to in the CC app. Read the page I posted above for suggestions from Adobe.
I don't know. I'm sure you could Google that.
i want the ai feature + 3d ig that wont be possible so i have to get some other software
Hi, in help>system info you can see what takes time to load, there is a milliseconds (ms) reading. Do you have lots of fonts, presets, files on a network in the recent files?
Does anyone know the name of this effect?

Halftone
Thanks for the hint! I'll check that later once I get home
Gave +1 Creative Carma to @hushed niche (current: #22 - 87)
thanks
Gave +1 Creative Carma to @ripe quest (current: #3 - 1988)
Hey y’all, I did a model photoshoot in the suburbs and am trying to edit it for the concept “being bored in the suburbs”, sort of with the vibe that the model is going insane or that she’s trapped in the suburbs matrix lol
But I’m having trouble starting. Part of me wants to edit it to be kinda Inception style, where the landscape is bending around her and stuff, but overall I just don’t really know where I wanna take it. So if anyone wants to talk ideas, it’s a pretty creative+open ended concept
Here’s the photos I picked out from the shoot for anyone interested in talking ideas


Maybe a photo where it's taken behind a chain link fence, to give a sort of prison/trapped vibe?
I was gonna suggest an idea but im not sure if theres actually a way to do it
is there anyway to lower the opacity of a layer mask?
if not that would be very useful id say
Damn yea that would’ve been cool, I already had the photoshoot tho ☹️
For what effect?
If I update the beta version of PS now, is it possible to downgrade after?
Unfortunately this is one of the problems with being a creative 😅 Getting ideas after completing shoots. What kind of editing did you have in mind before and during shooting?
nothing in particular
just asking if its a feature or not
Yea, after you make the mask you can use a shade of grey instead of black and it’ll partially mask it
Just somehow making the landscape swallow the model, and then using a dull gradient map to make her surroundings less stimulating
I could do something where I replace the sky with more suburbs but I feel like that’s kinda unoriginal lol
Hey guys, i have a basic height map in .obj format with no texture i want to create a texture UV for my heightmaps
how do i do this?
Sounds like you should create an image reference board if you don't have that yet. If you can point to that we can definitely help you out with the technical stuff
hello do someone know how to change the view of making document in photoshop?
it used to look like that

now its like that

i understand that yeah, just saying youll have to then go over the shades of black no?
when it could end up being more convinent if there was a feature where you could double click on the mask and allows you to also adjust opacity of either the whites or blacks
Ctrl+K to enter settings, then toggle the "Use legacy 'File New' interface"
How can I use Photoshop for Computer Science?
hello
i want to recolor a .ai file.
but there are only two options in swatches:

what to do
Bet, I’ll go grab some inspo pics 👍
That's a bit of a generic question. Computer Science touches myriad technologies and fields of study. Photoshop is for creating and editing raster graphics. What in particular are you wanting to do in regards to "Computer Science?"
Does anyone know how I could figure out if my Photoshop file is permanentaly corrupted? When I try to open some of my old-ish files I get this error. "Could not complete your request because the disk is not available"
Where are these files located?
I guess in my downloads folder
Try this!

It sounds like there might be an issue with the path. Are you opening the file by clicking on the file in your folder or inside of Photoshop?
Clicking on the file on downloads folder
I would try moving the file to another folder and seeing if that fixes the issue
Like the desktop?
Yes, for example
Nah same thing. After I moved it from the downloads to desktop
It’s just this one file too

Im not sure why vector masking is doing this now
Basically im trying to mask like the top image (So that it keeps it)
The bottom is just deleting it, not sure why it switched to this mode
When i press ctrl+i it Inverts the color but usually there is a menu with extra options about it. How do i bring it back?
All my PS stuff is like this; any way to automatically have thumbnails?

There might be some plugin for Windows that will build a preview of Photoshop files. You can also use Adobe Bridge. It can preview a bunch of imagery types, most importantly, the the Adobe formats, .psd, .ai, and others.
I see. Is there any recommended batch converter to turn them all into PNGs?
Again. Look into Adobe Bridge. It can do batching operations as well. :)
It's a very powerful file management app, that can preview files and do many other useful things.
Can anyone answer please im waiting to continue and can't without it
You have to make the layer a Smart Object first. Then when you apply an Invert it will be stored as a Smart Filter. If that's what you mean.
When you invert it gives a menu with color adjustments often and it's gone
I do the same procedure as normally but it doesn't appear
Invert? No. Maybe you're thinking about Hue/Saturation Adjustment Layer?
I don't know what this means. Sorry.
Oh wait it was control U for that tf..
I must be tripping holy i did it earlier today i hope i don't have dementia
Happens to everybody. Trying to keep 20 apps and their shortcuts in your head... its a challenge. :)
#📝project-feedback - for feedback and suggestions. #1110544577850511401 to make a post with various images, go into details about its design or construction.
hey! sorry if this is a redundant question, but how can i set the alpha value of a pixel? the 1-100% slider is insufficent for this as i need the full 0-255 range
Hey guys, what image style is this? How can I achieve this if I started of with a clear image of a car?

(I have asked on Adobe Illustrator this, but I believe in this server is appropriate...)
Can anyone help me providing advices/tips on how I can produce these type of game icon sets (anything similar you have heard) on Adobe Photoshop? I have seen this type of cartoon-ish and stylized style, however, never able to understand where to start. Any help is appreciated!

How much would u pay someone to create an easy Business flyer?
Could I use it to make mockups of apps I am trying to develop?
can someone help me find stabilizer in phototshop?
hey all
Hi, none of the main apps lets you get 256 opacity values in sliders, but it seems that figma (!) can get 10k numerical opacity values: https://bjango.com/articles/opacityprecision/
Bjango
Opacity is usually measured as a percentage in design tools, with zero percent being fully transparent, and one hundred percent being fully opaque.
Hello, There is a warp stabilizer in After Effects and Premiere pro, not in Photoshop : https://helpx.adobe.com/premiere-pro/using/stabilize-motion-warp-stabilizer-effect.html is it what you are after?
Hi, what is your issue? Are you able to sketch them on paper? Is it their angle/lighting you cannot achieve ?
Hello, I think this particular design is an airbrushed painting that’s been color separated then printed on fabric. Which aspect are you trying to replicate? please elaborate …
Hi, IIRC you need to click on the color well and use another color picker. But the AI discord is here: https://discord.gg/adobeillustrator
a stabilizer for the brushes since my hand is shaky and makes shaky lines
Hello, Check the settings of the tool in the option bar, is it set to intersect (edit: mistyped to exclude)
Hi, see the stroke smoothing section : https://helpx.adobe.com/photoshop/using/creating-modifying-brushes.html .
Or see: https://youtu.be/eUPAidoqS-c?si=dBI132jX58H5IC18 there are third party tools with more options : hejstylus on Mac: https://hejstylus.com or lazynezumi on Pc: https://lazynezumi.com

Discover how to create beautiful brush strokes using the new smoothing option and quickly make symmetrical paintings using Paint Symmetry tech preview in Photoshop CC.
Subscribe to Adobe Photoshop: https://adobe.ly/3vWtAiy
Learn More About Adobe Photoshop: https://adobe.ly/4bUzQbh
Try Adobe Photoshop: https://adobe.ly/3womKm8
About ...

Hej Stylus!
Hej Stylus! is the best global pen stabilizer application for macOS. Use it universally in any software on mac. As a productivity enhancer for digital illustration software, It’s capable of smoothing out position, pressure, tilt, and rotational values. It also maps pressure and stabilizes line draw
Lazy Nezumi Pro is a Windows app that helps you draw smooth, beautiful lines with your mouse or pen tablet. It works with Photoshop and many other art programs!
Not every image has a style (or maybe the style naming might be too niche and nobody uses it!). I would say retro realistic hand drawn, but that's just how I would name it
2 things I like to do when I need to fins similar images. I upload a sample on Google lens, and find related images. It will come up with a name at some point.
Also, upload in the visual search of any stock image platform (say Adobe stock), and see what other similar images it will come up with, inspect the keywods the creators used to describe it. You now got a name
This image replicates the printing defaults of old low quality magazines, so anything that adds thextures like halftones, grain etc will be good to experiment with.
Also this image is clearly a drawing and if you start from a photo, you may not achive the same result. However there are some filters/plug-ins actions around that you can use in Photoshop to make it look like a drawing (I always had mixed results with such things). You can find them searching on Behance and similar (art station, Dribble), on specialistic platforms (envato, Graphic River, Spoon graphics)
You'll have to do a bit of digging because most actions will try to create an artistic look (like this one)
https://www.behance.net/gallery/136916521/Free-Color-Pencil-Sketch-Photoshop-Action
but since it's not the style you're looking for, there may be some searching.
The other obvious solution will be to draw a "clean" car using the photo as a reference and add the texture after.

Free Color Pencil Sketch Photoshop Action
You can find all those textures in the Filter>Filter gallery
Since they have a 3D look and 3D features have been more or less terminated in Photoshop, you'll find that most people would try that in illustrator instead (I've done a quick search in Google since I'm not entirely familiar with this, and I see people using either illustrator, or a 3D program (Dimesnion, Blender, substance) and Photoshop to add some texture.
Keep in mind that Photoshop is not entirely well equiped for vector graphics and you likely want vector shapes for your icons, so keep that limitation in mind. Illustrator is capable of generating vectors (obviously) AND had some basic, but very cool 3D capabilities
see if that helps!
https://www.youtube.com/watch?v=D_NVhzUKMXM&list=PLnfeH--vEllrQSvIbxaOki2g4212MO5KG&index=1

This video shows you how to create a 3D icon using only Photoshop and Dimension. Fast & easy 3D tutorial. Follow along and learn my method. Make sure you like and subscribe if you want to see more video like this ;) Thanks.
Just keep in mind one thing. Most older tutorials, like this one, will use 3D features that were there in Photoshop at that time, but no longer are.
Particularly the ability to create 3D models to be exported in a 3D software. This now can be done in Illustrator
You can, however, decide not to take the 3D route and draw the icons by hand. That means you'll have to manually draw the 3D effects, in the same way a pen and paper (or painter) artist can create "fake" 3D simply by knowing where to put lights and shadows.
@vapid flume Thank you for the reply!
Well, they are not that 3D from what I’ve seen so far while searching for ideas at ArtStation… It is likely that the artist drew a sketch and then painted while using light and color theory + doing a bit of a “fake 3D” for the icon
Game UI icon sets are something that I have been really fascinated to try out to learn, but the only problem is just where to start

ArtStation
ArtStation is the leading showcase platform for games, film, media & entertainment artists.
Gave +1 Creative Carma to @vapid flume (current: #8 - 608)
Yes, I can see you can also do that as "fake 3D" I touched upon that in the later part of my answer. When people come here, I alwyas (mostly wrongly) assume that they'd want something simple to start with, depending on how they put together their question of course. That's the flow of Discord interactions in my experience, a bit a shoot and respond type of communication 🙂
Any ways.
How would you start drawing something?
Firts you search for ideas, stylistic references, etc
then you sketch those icons, pen and paper, Fresco, Photoshop, whatever
Then you build the colours and highlights shadows by adding layers, the same way a painter will do
Observation (what others did, how, why you like or dislike an element…) is a good starting point. The theme/era/style of the game will give you a design path to explore.
It's not different than any drawing/painting exercise.
You can start with this (⚠️ the guy's voice is VERY irritating)
https://www.youtube.com/watch?v=1Qo0KJi0fsg

This video is your perfect companion for starting digital art in Photoshop. In this beginner guide to Photoshop, you'll learn everything about all of the key functions, tools, and properties so that you can start digital painting right after you're done watching! I've also included some really important tricks and t for how to troubleshoot the b...
It's for beginners so skip it if it's not your case...
But like in any artistic endeavour, you'll first have to research, thumbnail/sketch and then start by drawing clean lines from your sketch, and build your colours, highlights and shadows on top.
One good start that is not linked to any software in particular would try to take a course on commercial illustration. They will explain the research and thumbnail/sketch process. Drawing iterations, culling bad ideas and concepts and keeping the good bits to integrate them into the good ideas.
It may look completely far off what you try to do, but believe me the concepts are the same. They are the same when I do a complex photo composite in Photoshop. I research references and I sketch my ideas. The same when I draw a font, there are plenty of sketches, most of them fill my bin.
people that offer those courses
https://www.skillshare.com/en/classes/composition-for-illustrators-expressing-ideas-with-story-structure-and-style/994903044?via=user-profile
https://www.kadenze.com/courses/introduction-to-graphic-illustration/info
https://www.domestika.org/en/courses/4922-commercial-illustration-for-beginners
In this online graphic arts course, students will use digital illustration tools to apply design principles and their own visual ideas into marketing/advertising media. This course is taught by Junichi Tsuneoka of Cornish College of the Arts.

Domestika
Learn commercial illustration from scratch and create effective key visuals for your clients
Did you get this sorted?
Hi, target a layer mask, then use the density slider in your properties panel.
I'm really struggling, I have two very different colours I'm trying to change but the rasterization is messing me up.


I hate how color range has a fuzziness slider. I prefer 100% automation. x_x
🤔

how would i achieve this paint splatter effect

eWhat are your target colours ?
Black and yellow
Not the neon green colour but CMYK yellow
Convert to CMYK and use the Y channel as a mask ?
That might be too advanced for me but I'll do some research.
Yes I found a video tut on that actually. That's what I ended up using. The master slider or w/e

😮
Stay in school kids! 😉
Apply Image has to be one of the most powerful and underused tools in PS.
I mean it's nothing you can't do manually with layers, it's just hella convenient.
It works here because your source colours are so distinct.

's how I learned it too.
xD
(Formally I did engineering 🙂 )
Nice!
Mmeh.
Never went into it due to lack of confidence, so now I'm a photographer.
#BigMistake
I'm in the same boat brother, it's never too late.
I just never wanted to specialize.
It is now, I'm old.
hey man after looking at the tutorial, the outcome i would want is something like this

would you think photoshop has a filter for it
or would you think it's a tracing done by hand
apparently this one is more towards
just 1 side


Where is the location for this option?
Hi, ive run into a problem, so currently im working on a litte boardgame, so im putting cards into photoshop on a 10x15 cm sheet rn cuz thats the only test photopaper i have atm. but when i do the image im pasting in gets extremly pixilated, when in reality the iamge iteself is not pixilated its only pixiltaed when pasted in, whilst the size is the same


Yes, you could.
Hi, you would have the same issue with a piece of paper that you put at an angle on a table : it would be more difficult to read. But it seems that the resolution is too low?
Hi the option bar is the one at the top of the interface, if it is not showing, go to the windows menu.
For the new shape/add /remove/intersect options, they are located after the width and height options, before the alignment : https://helpx.adobe.com/photoshop/using/drawing-shapes.html
With Photoshop 2024 can i start with an imported Bust portrait and text ai to prepare it for CNC--like change all blacks to medium dark gray beard to almost white. nose to white-ish, etc? No other changes except what's texted. No Creative alterations.
Hello, what is the resolution of the document, how many pixels ?
This is a general "can I..." question for all my mm sizes.
Hello, yes, if you create proper selections, you can alter tones and hues locally in Photoshop.
Ahh, i was hoping ai could make the selections i indicate. Not so?
Can ai make selections that i test that i want to be isolated, or grouped--like all black colors--or just the top of the nose?
Should there be a reply to the 2 questions just asked now, or will the replies perhaps come later? ... Today's my first experience here.
You mean this?
When I want to save a PSD file to the cloud, the button is gray and I can't click it. Does anyone know why that is?
Ah, I misunderstood your question, for the moment, you can do AI pixels generation, not yet what you describe with text.
Yes, that is the options bar. The path operations are towards the center.
No, not yet.
i have a crop duster pic from the internet
how can i change the color of the spray

i have it isolated but i cannot get a realistic color tint

it's hard to change the color of white
Hello, using a clipped color layer with multiply might do what you are after: https://youtu.be/1GiWmuJ4vdo?si=cvdjoFNCDtvh-HES

Using the Basic Concepts of Blend Modes, Easily Change White into Any Color Including Black in Photoshop! Create realistic colors by combining the power of Blend-If coupled with Adjustment Layers and Blend Modes!
In this tutorial, we will be using Solid Color Fill Layers along with Multiply Blend Mode to project color on the white object. Then,...
I have a design that is letter size. I would like to print it so that the design goes all the way to the edges. Everytime I print theres like this margin border around the paper. Is it possible to achieve this or is the issue with my printer
Hey. I'm not at my machine at the moment and have been asked a question by a client....
Can you save a layered PSD file into a LAYERED PDF file?
is there a good, fast, way to import an image, and scale it such that it fits within 5mm of the canvas edges?
preserving the aspect ratio
basically, for this print-shop I need the PDF to be exactly for example A2 sized, and the content to not go within 5mm of the edges
I have done this manually, but now I want to do this to a whole bunch of images
You know that when they say 'content' they're just talking about important stuff like headings or text?
If you're asking a print shop to print an A2 poster you would typically add at least 3mm BLEED and keep copy and bits like that at least 5mm away from the trim marks (Aka canvas edge)
nah, here I get as the finished size, the image is somewhere within that
and I then cut it
this is a plotting place for architectural plans, not a regular print shop
but they are cheap as F
I have this issue with adobe tools and macOS. Whenever I have any app opened, new desktop icons that I add to it like screenshots, files or folders are all placed one over other like a pile of overlapping icons. I can’t move none of the desktop icons new or older ones unless I close the apps. Does any one knows how to fix this?
A print screen?
Yes, in Mac it becomes a file automatically.
Hello, it is up to your printer, if it supports borderless printing.
I meant : could you share a print screen of the situation ? I see something like that only when I click and hold on an app icon .
How to make 2000 like 1000 in color and effects?

Not all printers support borderless printing. Check your printer manufacturer's site and see if it supports borderless printing. If it does, it's usually a settting that needs to be selected in printing preferences dialog box. If your printer does not support borderless printing, then I'm afraid, you are out of luck.
Got it thanks much,
question about this stamp filter- you can control the light and dark balance and the smoothness, but is there any way to change the scale of the dots themselves? Currently the only solution I have found is to scale the image really high(?)

does anyone know how to recreate something like this in photoshop whenever i use a gradiant map it ends up looking really bad and not like this at al

i need help with a really simple task any1 to show me how to do it
Image
this is what im getting when im trying to change the color of this balaclava which is kinda okay but i want it more realistic
Image
something like this
is anyone gonna be able to help out really quick or tell me how to do it if its simple because i need like a bunch of different colors

