1 messages · Page 49 of 1
I tried to make lamp glow did I do good job at it?
Feedback and tips would be greatly appreciated
I took a look just now and, WOW! I will try replicating this using Adobe Photoshop 2023
Should be pretty much the same.
This is the photo in question, as you can see under the light and next to the person, there's a blurry figure (me 🤣) it's quite a dark background so was hoping there'd be a way of relatively simply blending it to at least make it less noticeable

Can anyone make the photo night scene and the lamp turned on

how can i make it look like theres ligh coming from the lighthouse shining to the left and expanding but instead of it being light its text? that gets wider as it goes

using layer styles and layer masks can help achieve this effect. First, create a text layer with the text you want to appear as the light. Then, apply a gradient overlay layer style to the text layer, setting the gradient to start from the lighthouse and expand to the left. Finally, use a layer mask to hide the text outside of the light beam area. You can adjust the opacity and color of the text layer if you wan’t.
can you show yourself doing this im really bad at reading instructions sorry
Does anyone know how I can best remove shadows from an image? I pictures from a Wonka photoshoot back but some of them have a shadow from my hat covering my eyes.
This is the pic for reference

You Can Do It Manually Or Use Generative Fill
If You Don't Have The Photoshop Version You Can Try The Web Version
What prompt would I use to do it with Gen fill? Just "remove shadow"?
Yeah
Select The Shadow Part And Use Prompt " Remove Shadow "
Hello. What is the name of this effect? (undistorted letters of different heights) If you also have a video how to do it, please share it.

You can easily achieve this look by altering the Baseline Shift

Gen fill isn't looking so great...any suggestions on how to do it manually?
Thanks!
Gave +1 Creative Carma to @nocturne cairn (current: #18 - 111)
No worries. Thank you.
Gave +1 Creative Carma to @modern bane (current: #875 - 1)
A big benefit of this method is that the text is still one piece of text. In other words, you don’t have to have a whole bunch of individual words that are only one character long.
Even after zooming out the canvas remains in zoomed in position. Even the zoom out is showing in the navigator but the canvas is the same. I have to restart to fix this. Need help.
can anyone help me
What is it that you need help with? If you have a specific question about how to do something with Photoshop, please post it here.
i dont need help anymore
Hi, I suspect a problem with your GPU, make sure your drivers are up to date.
https://helpx.adobe.com/photoshop/kb/photoshop-cc-gpu-card-faq.html
I recommend to post in the community forum: https://community.adobe.com/t5/photoshop-ecosystem/ct-p/ct-photoshop?page=1&sort=latest_replies&lang=all&tabid=all .
Try to set the status bar, on bottom left of the document window, to GPU info, and report what says when Ps misbehaves there.
Also go to help>GPU information and screen capture it.
Master Photoshop with the help of our global community.
Hi, how can I remove this blue auto layer detection/selection it's broken
its not a photoshop but lightroom
does anybody know why is this happening?
Hi, in the Move tool Option Bar, click on the gear, and uncheck « Show layer bounds on hover » it gives you the limits of the layer when you hover in the layers panel.
Hi! When you adjust the curve, the tones of the image change, and the histogram of their distribution reflects it.
Thank you so much 
Gave +1 Creative Carma to @hushed niche (current: #24 - 82)
Heya folks, I have a question regarding canvas removal. The canvas I chose was to big basically and I want to cut off some parts of it on left and right side.
Any idea what I need to do to achieve this :p

hi guys! im trying to make this circle into more of a translucent orb, currently have a lowered opacity fill layer (soft light blend) and a masked lens flare (color dodge blend). anyone has tips or suggestions it would be appreciated!!

use the cRop tool
ty ill give it a try!
you can add some light inner glow to it
Is there any special method to make it just stretch out to left and right? seeing that when I drag the frame it grows in all corners

hold ctrl while u stretch
ty! clearing the ratio did the trick!
inner glow has potential ty
Gave +1 Creative Carma to @grave cloud (current: #875 - 1)
@blissful hemlock what yall think is this more orb-y

I would make the bottom part a lil bit more blurry, like you could add a mask and use the light black gradient for it
(or you could try the other sides ofc)
il give it a shot ty
Gave +1 Creative Carma to @elfin dawn (current: #415 - 3)
Same. For project feedback/suggestions, please post in #📝project-feedback
ok ty bossman
please provide the image so i can see the example
There's no InDesign discord, so maybe someone here knows - how can I see the sequential page number, IE, I have "68 pages in 35 spreads" but the number shown is the page number I assigned (below, C2, C3, C4 etc). It's because InDesign is telling me it inserted a blank page into my printing template ("see page 65") I need to find out which page is "page 65"

obviously I'm just going to count backwards from 68 for this one but if it happens in the future with page 400 out of 1000 im gonna be out of luck
They are not
As you can see, those are pages C2, C3, and C4, where pages C2 and C3 are based on Parent B (indicated in the corner).

oh hm. kind of gross but that's a doable workaround (undo all of my numbering sections)
thank you!
(I'm not in front of my computer at the moment - so I'm just stabbing in the dark)
You SHOULD be able to see each page number in the pages panel
I do see them, but it's the ones I've assigned (section C, page 2)
indesign still insists on referring to it as "page 65" in the error
🙄
I am completly redoing this logo I made for a podcast (Middle pic). I am going with a neon kind of theme since it standsout compared to what's being streamed in Sweden.


The issue is I can't really find a mic like that that I could use for my project, do I recreate the mic or what do I do.
If you have other Ideas on how I could do it, lemme know
Mate, you could draw it or just create a simple microphone symbol or take it from a free "custom" emoji websites
or...if you have an AI subscription ask them to create a microphone logo and just Object select and take it away and use it.
Are you saying that you previously made the Debaaura one, but want to instead make one like the Neon Tube?
what does it means after a shot is done and the camera is tilted upwards or downwards its surely a non verbal signal to something
What on earth are you talking about? 🙂
after a few shot the camera guy tilts the camera up why does he do that ?
Here's how you can get started if you're new 🙂
Exactly
What the hell, that's mad. I appreciate it. Yea I am new I have aw course in High School called Media Production so we make all kinds of Meda forms
Like Logos, Articles, Podcats or whatever. But thanks again man
Cool. Good Luck with it.
Wiat another thing, I dont have Adobe Stock could you send me the image you downloaded
Nvm, but is there anyway to add another text?
Hello all

Anybody know how to get rid of the white lines around the guns?
Selected the guns with Select Subject and it did a pretty good job, but sadly, there are still white lines around them
hello my stamp tool is not working i set the stamp on a patern and its not doing anything when i try, if i go on my face it does copy it
A few options. - Did you do it using a mask?
Hey, did you get my DM earlier?
Probably 'cloning' the wrong layer?

Nope just the selection tool
Can you please share the original assets here? - I'll have a quick try 🙂 - or at least the image with the guns
you mean the whole photoshop file?
No, not specifically. -
Just image that you 'cut' the guns out from
(Unless it's multiple images?)
@civic egret
Oh wait... - it's from the Jonn Wick poster
How to get this shadow?

@civic egret take a use of minimum effect.
Or you can shift selection by 1px.
And make new mask.
Does anyone know what kind of AI service is required to get the images like we have in this insta account? https://www.instagram.com/portraitxai?igsh=czdpMmoyc3pvNmFl
Hey, Is there a way to create ribbon brushes out of images like you can in Clip Studio Paint? (Not just regular greyscale brushes, but brushes with color and everything from an image that is converted to a material with correction and what not, if anyone is unfamiliar I can show you what I mean). And if not, where can I suggest this feature to Adobe?
To go a little further in deatail, with the brush style I am talking about: I mean a brush like this screenshot. There's a lot of settings , but under the stroke menu there is a checkbox for "Ribbon" that basically turns your image into an ongoing line you can draw (so long as your original image is seamless at the edges) and it has an autocorrection to stabalize the line while you curve it around things. The material is added in the brush tip menu (the menu I am showing) but yeah. Essentially I find myself importing my images into CSP just to add a few things I use this feature for and I just wish that PS had it (if it doesn't) so I can just keep all of my workflow in one app.
(Asking again because last time I asked my question got buried and noone responded)

Hello, I'm looking for some help with AI based up scaling and enhancing photos. I understand Photoshop has an AI based editor, I'm wondering if anyone has experience with any other AI based programs or tools. Here's a photo for example of how much it needs to be upscaled by.

If you're trying to get a crappy photo to look good, it really won't ever happen.
A good one to try out is "Upscayl"
Your image though looks like a photo from the 70's, so I don't think anything you do will make it look amazing...
(Note that the dimensions on the upscaled image is dramatically larger)
guys is it possible to put a layout for text like in in design?
Thank you for your suggestion!
Gave +1 Creative Carma to @sly hawk (current: #5 - 890)
Hi, could you elaborate on what exactly you are after? One can set up files as psdt template files, one can have styles sheets in a document. See: https://youtu.be/jXLp7MPX5lE?si=NtBUVQFbuTB6eLYx
Adobe CC:http://bit.ly/1ggeBAr
Adobe Digital Imaging Evangelist Julieanne Kost explores the new type features in Photoshop CS6.
Get Photoshop CC: http://bit.ly/1hz1ZES
Follow Photoshop:
http://bit.ly/1hz1ZES
http://bit.ly/1hz1ZES
http://bit.ly/1hz1ZES
A gradient doesn't really work because it's a complex-shaped mask, this was just a zoomed in portion where it appears flat. For some reasons, a very feathered brush still produces these hard edges, and blurring them doesn't smooth the edges out, it just kinda blurs the colors of the edge into each other a little bit.
Hi, with the cropped screenshot, we can’t see what is the blending mode that you use? Can you show the brush used? Did you try a standard rounded one? It looks like there’s a pattern in yours, on top left.
Was it present on the original file? iIRC, in the neural filters, there is a jpg artefact removal tool: https://helpx.adobe.com/photoshop/using/quick-actions/jpeg-artifacts-removal.html
The blending mode is normal and the weird pattern seems to be an artifact from the recording, it's not there on my screen. The Brush is a normal round one. The default one.
Did you try to reset the brush? Does it do in in another document ? Without seeing the layer stack, it is difficult to understand what’s going on.
hey y'all im using photoshop beta and i was wondering wether i can import a 3d asset GLB format onto photoshop beta, im doing an alternative poster for lord of the rings so its a 3d ring
cuz i tried and it file isnt readble by photoshop
?
hii i have an specific question
so i used to use clip studio paint and there was a "erase alond the edge" eraser you could get
is there a way to do that in photoshop?
this is what i mean

i want to be able to use a sort of a clipping mask so i dont have to erase it manually yk
nope it works on the same layer on a different spot
hey can someone help me pick a background music for a video i have no music sense i am struggling with it
OK, fair enough I didn't have the whole picture... Would a large amount of feather work?
Probably best to ask in the Premier pro discord
Even at max feather on the brush, it adds to the existing hard-edged blob to make it bigger. There's no way to blend the opacity better. It's so weird. It happens even with a normal brush alone on a new document, no masks or anything.
ik i asked everywhere copy pasting that in every server
Not on the brush, on the mask
do you guys know any good designers atleast 3 that uses photos to create an artwork?
like photo manipulation, collages, posters etc?
As a start, you’ll probably want to post a link to the video. Also best stick to PP discord and not flood all the servers.
A photomontage illustrator working in editorial, design & publishing settings to create dynamic, powerful & unique images
ty your a life saver, hey sandrine do you know any designers that uses photos for design? It can be anything
Gave +1 Creative Carma to @vapid flume (current: #8 - 602)
I try to remember their names. Do you look for digital artists, or also artists from past decades and /or people who use non-digital techniques?
like designers who create artworks using images
ill show some examples
I know what you mean I think
it can be anything
I have lot sof name of people who use non-digital techniques, less so for digital artists
yea
Also do you search for people who are well-known in the art world, or just good people (we all know that it isn't necssarily the same)
but i prefer if its mostly made using digital techniques


i look for underrated artists who do good art as well as well known people
im doing a project something to do with architecture

Collage artist for hire. Editorial, blog posts, newspaper, magazine, etc.
I would suggest you put one of the images into google lens and see what comes up
oh alr
btw how do u find artists in pinterest or what sites do u usually use to find other designers/artists
most of the time when you click the profile of the design created
it shows that they have no work made
that's what I do. Pinterest is only right for 2 things: When you know what you are looking for (upload an image as a pin, into one of your board and see what the "suggestions" come up with, or when you just want to see things and don't mind the unexpected
oh i see
i use behance and pinterest
i wonder if instagram is useful and if there are other more good sites to gatekeep
Otherwise look for that website
https://theinspirationgrid.com/

Inspiration Grid celebrates creative talent from around the world. Your daily fix of design, art, illustration, typography, photography, architecture, fashion and more.
it's a repository of digital (mostly) creators. You''ll always find their credits there
As a creative professional, you'll naturally need a daily dose of inspiration to succeed at work. The Internet is a great place to start your day with a wealth of blogs and online magazines sharing...
i really need to start gatekeeping though it will help alot
i'm still training to be a graphic designer
Don't be tempted to always look for something in particular, read anything. Old books, new books, websites from art galleries, museums (inmcluding Google art & Culture)
https://artsandculture.google.com/
aldo I just bought that book. It's the kind of books you may want to buy (or rent if your local library is good enough)
https://books.google.co.uk/books/about/Asian_Graphics_Now.html?id=jgOWSQAACAAJ&redir_esc=y
Google Arts & Culture features content from over 2000 leading museums and archives who have partnered with the Google Cultural Institute to bring the world's treasures online.

tyyy alot
Read also about the history of graphic design, history of illustration, typography etc.
What worked then, usually works now
https://letterformarchive.org/

A nonprofit center for inspiration, education, and community in graphic design and the letter arts.
btw just a quick question but when did u get serious about graphic designing in your highschool years?
I have 1 year left and i'm off to university
Forgive me for I am not a native English speaker, but for me gatekeeping is not something to be proud of 🙂

its okay
weird
i thought gatekeeping was about saving information
that can be useful to you
i didn't know it meant that way
The reason all these resources are available (and the reason why a Photoshop Discord server is a thing) is that we thrive not to gatekeep 🙂
true
The industry is always accused of gatekeeping imformation: Not on my watch!
xd
thats so real though
good think we are in the modern years which means less gatekeep
Can anyone find an image of the ring from lord of the rings in full frontal view
goooogle
Their all in quarter view
and more ig
or get a 3d mmodel of the ring
Yeah but I can’t import it onto photoshop
3D stuff on photoshop is being discontinued aparantly
I am already answering in the Question channels 🙂
It's been slowly discontinued for MANY years
I would say at least 3 years and maybe more. They keep removing features
Yeah I know u said it’s basically no possible but th thing is I’m making a poster on photoshop
Not a 3D model
It’s a poster for lord of the rings movie
See what I answered on the questions thread, no need to answer twice
If you just need to visualise it . as in front face, send me the 3D file (publicly) and I'll export it for you.
I'll do only one view so choose wisely (including the lighting 🙂 )
what if you find an image of a ring
and photoshop it to look like the ring fromm the movie
Oh wow thanks so much u mean for me chose wich side of the ring I want on substance
Gave +1 Creative Carma to @vapid flume (current: #8 - 603)
there u go
Any particular lighting?
U see the ring like a circle

Like that kinda a bit tilted to the front so h can see the letering

WE have a wide angle, with a ring that is quite close to the camera
the lighting is soft and multi directional
Oh yeah perfect maybe a bit brighter so the lettering pops out more ?
That's the issue with 3D (and one that you would have to deal with in Photoshop when it worked as well)
Oh yeah ok
Can u send me the file then
Thnks so much

Hold on, little horse!
I need to render it first. It may take a few minutes! 😂
Oh yeah right my bad
Before we commit, which size (in pixels)
Don't be too greedy because it will take longer to render
Ofc as long as it’s like a bit higher than 1080p
It should be fine cuz I’m be using it in big

see tthe dimensions on the right and let me know if it's enough for you
300 dpi since it's a poster, I assume it's for printing
Yeah it is
so don't forget to set your photoshop file to 300 dpi as well 😉
Ima print it in 61/92cm
Sorry, Sandrine. Didn't realize you were actually making one.
Yep I have it preset
Let me know the size you need in pixels, I don't want to do the maths now, it's sunday
No worries, it's my 3D practice! It's Sunday 🙂
1200px 1800px pehaps
in the psd file, you'll get the shadow as well. If you want to remove it let me know now
Well if that not too much trouble yeah

Perfect
please confirm and if OK, I'll fire up the engine
Yep confirmed thanks so much
Let's fly! Might be a few minutes
Yeah don’t overload ur gpu for me tho
Too late 😂
2000 dead in Antarctica
is it a 747 that just landed in my flat? Nope 🙂
One is the PSD file, the other is the Dimension file
So can’t realy render on my windows laptop
Ok Thnks
in the PSD file you'll see weird layers, they will serve you to make easy selections.
So feel free to use whatever you need to use and discard what you don't need
I’ll send some picture of my poster so u guys can give some feedback
Absolutely!
You're welcome
Ight will do
Thnks again
Is anyone free 2 dm?
Why there is separate blending modes of brush in the option bar at top in psd, if there is already layer blending modes?
Why? There are also Blend Modes on the Layer Styles themselves. They're just giving you different options, I suppose.
Why someone will use brush' blending modes if they can use layer' blending modes. Any benefits to use it? Infact if we use brush' blending modes we cant alter it later if we work with multiple blending modes in one layer
They can be used together to create certain effects.
i tried to draw letters but they not straight any way to make them look straight?

For the cleanest, most editable shapes, you should draw them as vector objects using the Pen Tool.
alright ima try
I wouldn't overthink it at first. Just trace the shapes with simple lines. You can add effects and things later...
I would be thankful to you if you share the link of any art/ videos/ resources that show the benefits of using brush' blending modes. I'm searching this from three days but can't found any
People use them to paint highlight and shadow using Screen or Multiply modes respectively. This can also be done on a layer above a primary layer that might be set to Overlay Blend Mode. This is just one example. If I think of more, I'll be sure to let you know.
That's what I'm asking. If someone can do highlights and shadows using layer's blending modes. Then why people someone try to use brush' blending mode. Also we all know that this will be destructive process and we can't alter it if we need.
i have to remove the background, but also, have to keep the blured edges, any ideas?

U said that it can be use to achieve certain effects. But I can't found any
Just because you don't find utility in a certain feature doesn't mean its utterly useless. If you don't require that feature or prefer to do things a different way, then by all means do that.
See above.
Use a Layer Mask with a soft edge.
Where...pls tag it
I was referring to this statement: #❓ask-a-question message
If you don't need it, don't use it. Its as easy as that. Do you understand what I'm saying or not?
In Photoshop, there are often many different ways to arrive at the same result. People find the method that works for them.
I totally agree with your statement and what u r trying to say....but you said that it can be use to achieve different effects. That's why I'm wondering how?
I just provided an example... #❓ask-a-question message
I feel like this conversation is going in circles.
I saw it but how highlights by using brush' blending modes and highlights by using layers blending modes will give different effects?
Because paint strokes can be "built up" with successive passes. The Blend Mode on the Layer can only be applied once and then only adjusted using the Opacity and Fill settings.
Pls refer this
no different effects, different ways of achieving the same effect.
I don't have anything else to say about this. Sorry.
why? that's the question you must ask urself
while making projects eventually you'll see the reason this function exist
Ahh opacity and fill will be the reason of different effects
I'm confused sir
You can paint on a layer. And each paint stroke could cause an effect of darkening or lighting (depending on the Blend Mode being used.) When you apply a Blend Mode to the Layer, it affects THE ENTIER LAYER. When you use it on the Brush, it is being applied to ONLY THAT PAINT STROKE.
I will be grateful if you share some video recording by acheive certain effects you were talked about. (Not now but when you have free time). Btw thanks in advance
you don't have to use it because it's "righter" or "seems to be professional way of achieving something", if you want, just do it the way you're used to
thanks!
yeah bot never gives credits when i'm being grateful, what a shame
You have to reply with "thanks" directly to me or to my comment...
Gave +1 Creative Carma to @ripe quest (current: #3 - 1956)
Maybe the bot croaked. heh
okay then
Thanks!
Gave +1 Creative Carma to @lunar hollow (current: #101 - 15)
Whoa
Thanks!
Gave +1 Creative Carma to @ripe quest (current: #3 - 1957)
There's this image of the burj khalifa with a sky background, in front of the building there's a palm tree, how to remove only the tree as effectively as possible!? I'm unable to select the tree perfectly and thus having problems
also it's usually better (in 99%) to use layer effects instead of brush effects simply because you always can edit them later if you screw something up on the way @plucky zinc
This is one person's opinion. People use the methods that work for their particular project, workflow or task. Generally, it is preferred to work non-destructively. However, I've seen great digital artists only paint on ONE layer. Without any effects or Blend Modes.
ah blending modes, that's how they're called lol
We experiment with the features and audit them via this experimentation. Then we either keep or dump tools and techniques that either work or do not work for the particular task. That's the beautify of creative software. You're free to use the app(s) any way you like. :)
Luckily Photoshop offers many different ways to work and arrive at the same or similar results. Thus, you can craft your own workflows and in ways that work for you.
I think that brushes had blending modes before layers existed. It can be useful when working on masks. The behind blending mode lets you paint where there is transparency, and not affect opaque pixels. You can shade a painting with blending modes, if you work on an indexed mode image, you can’t have layers, thus need brushes to have B.M. There’s countless uses of blending modes, for different tools, like the clone tool.
Rushes vs layer blend modes: https://youtu.be/idinN3CNYpY?si=_SAKUIReH0i-xCOl .
Here you can see whether cumulative brush strokes do when brushing. You do not want to have as many layers as you have brush strokes: https://youtu.be/6PtDON05znw?si=pfboJMHCyRfb-FcG

Brush Blending Modes VS. Layer Blending Modes EXPLAINED!
Scroll Through Blending Layer Modes (SHORT CUT!)
Find me on Patreon
http://www.patreon.com/kaisatoshiart
Redbubble
http://www.redbubble.com/people/kaisatoshi?ref=account-nav-dropdown&asc=u
Support me by visiting me below
shop at my store!
http://society6.com/product/show-and...
or fol...
How can I make only the car blue?

How do i select just the tree? Should i go with the lasso and refine it manually or the object selection stuff

Try Generative Fill.
You can use a Hue/Saturation Adjustment Layer with Colorize and then paint on the mask to only apply the effect to the desired area.
I have the 2019 version
Then you'll have to either try to Clone Stamp it, paint it or find a different image.
This basic principal... Obviously paint in the blue in a much more delicate way than I did.
ty!
Honest question:
There are so, so many images of this building online. - Why try and remove the tree when there are 1,000's of alternatives?
Gotta do this for an assignment
oh, so the homework is literally 'remove the tree from this image'?
Yup, and any potential shadows of the tree on the building as well
Oh if only you didn't have a pirated copy from 2019. 🙂
Hi! And you are supposed to use such an old version for school when there are education licenses ?
This is the version that my current system supports plus most of us have been issued the same
(It's a strange one here, I'm not knocking the OP, but as a teacher, should you encourage your students to do things 'the old way'?. I mean it teaches fundamentals I guess?)
Tho the traditional work that goes in this. Is it doing all the selection manually?
I just need to know, since in my head when I imagined what it'd look like ofc it looked better, is this the most you can do with this idea? I don't really understand what to do to make it look more clean, I wanted it to have a feel like the smoke curves around the text but it looks like it's impossible from my knowledge at least

maybe play around with shadows till i get it right?
am I able to change the font of a text without having to have it selected? I would just like to see the font change without having a large contrasting selection box over it

nvm i figured out a way: goto windows > properties and you don't need to select the text to change the font
is there a way to symmetrically free transform the top left and top right corners of this rectangle?

i tried holding ctrl + alt but it moves the top left and bottom right corner for some odd reason
Can you quickly 'draw out' the sort of shape you wanted it to look like?
There are transform/warp tools that may do the job
like a trapezoid where the longer line is at the bottom
sorry for the late response, that was exactly what i was looking for thanks so much for the help 🙏
Gave +1 Creative Carma to @sly hawk (current: #5 - 891)
how do i acutally see my artwork while setting up a camer aposition

When I play it , it's just a black screen
I have another question, to make this into a typewriter animation does it need to be text from after effects, or can it be from photoshop aswell? because I do not know how to animate texts from photoshop if so how?

It Depends On The Animation That You Want
If It's A Simple Animation Then You Can Animate The Text As A One Layer
If You Need More Professional Animation You'll Need To Separate The Text Into Layers , Each Layer Has A Letter Of The Text
Late response? It was like 9 minutes! - That's all good. Sometimes due to timezone differences and availabilities, conversations take days!
How do I even animate it, When i put typewriter effect on the photoshop file it does nothing.
Ahh thanks
Gave +1 Creative Carma to @ripe quest (current: #3 - 1958)
Thanks. I will see it
how can i change a shortcut to the SPACE key? Im doing a course for Photoshop and the teacher says we need to change the hand for H to SPACE key but in Photoshop says you can put only the letters keys (he use MAC idk if this is the reason)
space bar is one of the unchangeable shortcuts. If you hold it it will act like holding the H key for the hand tool  . There is nothing to change for it to work as your teacher wants to
can you specify the effect you want to achieve?
I'm still trying to get rid of the shadow on the eyes, can anyone help tell me how to do it easily?

is there a way in general to smooth such edges automatically?

Hi! Which tutorial did you already try so far, there are plenty, like: https://youtu.be/sRMFYKiXB6U?si=_6G7kOLDAbPipkz3 .
Or: https://youtu.be/P-IWQPkEDPw?si=YCB-pvkv6QdfHoyO

Completely Remove Hard Shadows Seamlessly in Photoshop! With a simple selection and a common masking technique, easily fix distracting shadows using the power of the Curves adjustment.
In this tutorial, we will also learn a quick and dirty technique to hide imperfections and mistakes easily. I hope this tutorial helps you. Thank you so much for...

Learn how to remove shadows from a face. In this Photoshop tutorial, Colin Smith shows you how to remove difficult shadows from a face in Photoshop. This is a retouching technique everyone needs to know.
► THE GEAR I USE: https://www.amazon.com/shop/photoshopcafe
► THE MUSIC I USE: http://share.epidemicsound.com/photoshopcafe
► SUBSCRIBE FOR...
Hi, I think they meant that you should rather use the spacebar: it easier to reach; combined with Ctrl, you zoom in, with Alt, zoom out; if you add Shift, you can do it on all opened documents.
Hi, remember to be more descriptive : « why are pixels removed outside my selection » will get faster answers than « this » .
The marching ants indicate the pixels that are at least 50% selected. The selection method you used select grey pixels as well. Lower the tolerance setting if you used the magic wand. You can switch to quick mask: hit Q to visualize the selection in red (you can change the color in a right-click, IIRC. Then you can use levels to tighten the mask. (Bring the black and white levels sliders together.) see: https://www.photoshopessentials.com/basics/selections/feather-quick-mask/

In this tutorial, learn a great way to feather, or soften, selection edges in Photoshop, complete with a live preview of the results, using Quick Mask mode!
how to do the "bend" on the piano object..?

i have some ideas for a skate shop(im in school and its a project were working on) which design looks better and fits a skate shop more. The name of the shop is "just skate" just wanted some feedback because im stuck between the two


left, but looks soooo weird
wdym?
the way the legs are being cut is weird, but if implemented correctly (preferably in vector graphics) it will be just fine
hey i have this texture and i would like to change it so all the cobblestone "squares" would be the same color. Basically make all the darker stones lighter, as if they were all the lighter shade?

whats the best way to do this, im not sure how to mask it correctly because of all the detail, how would you guys do this?

You are pasting a 16 bits photo to an 8 bits document ? If there is a long tone graduation, like a sky, you might see some stair stepping.
your main goal can be easily achieved by using curves and adjusting the color with your preferred method. however, there is a tricky part here - the edges of your selections have to be precise + there is some grass sticking out that will need additional masking

i tried doing that, slecting with color range but i never could get the shade to match right

a trick to overcome this could be applying a solid fill layer and setting the blending mode to color. then you can either pick a specific color or make it black&white. This should help equalizing the differences
content aware fill it
or just use a clone tool
or heal brush
or generative expand
or just manually edit them with masks
sorry for not giving a precise answer you're looking for but it's all up to you on what workflow or app you'll pick. nothing of what you said is wrong!
if your good at photo editing
Does anyone have any idea how this has been achieved. Had someone retore a photo for me and provide the PS file. Halfway through the layers they go from cleaning up the original to a greatly enhanced version. Its very precise to the original and I cannot replicate it in any AI I know?

Hi, I’d use the program you are more confortable with to start. That said, InDesign is made for multi age long documents, especially if you want to reuse paragraph styles, etc. Illustrator is tailored for vectors, Ps for Easter images, but their functionality increased with time, towards each other’s specialties.
I recommend to use a physical A4 page, and fold it, to see which part will be up, down, etc. I’ve seen an instagram with someone doing exactly that: https://www.instagram.com/wuthipol.designs?igsh=MXg5dnFscWZlNmc5Zg== happy creation!

79K Followers, 1,876 Following, 966 Posts - See Instagram photos and videos from Tum Wuthipol Uj. (ตั้ม) (@wuthipol.designs)
It could easily be done with Stable Diffusion using the original in image-to-image with a low denoise value. The problem that I see is that it's changing her face and introducing details that were not there in the original. It looks good but its not "real." If you're ok with that then it works.
I'll give those a look thanks
Gave +1 Creative Carma to @hushed niche (current: #23 - 83)
I'd suggest you get as close as you can, then apply a gradient map to the whole thing. 🙂
You are welcome ! Which ones did you try before, and what were your struggles ?
thansk for the tip. It was used as a base and the original brought through more. So the hair details and clothing etc.
The face was changed. Its not the same after denoising it.
Again, if you're ok with that then it is what it is. Its just not accurate as the A.I. has imposed its own details.
yes the face was not used. Only the AI details like the hair and the clothing. Here's the final result

It looks good.
Postscript: People also use Krea and Magnific to enhance images. That is another way those details could've been generated.
Yes it pretty good. Still has the painted look to it but a great improvement. I'll check out Krea and Magnific, thanks 🙂
Gave +1 Creative Carma to @ripe quest (current: #3 - 1959)
Hey!
I've this shirt mock, and when I try to change the color of the shirt, it opens a new psd


I don't have any idea what to do, plz help me out 🙂
Dbl-click on the "Effects" line in the layer and edit the "Color Overlay" values.
When you're done, save and close it.
Hi, I need some help with a photo im tryna edit. Can someone who's good at it shoot me a DM?
You can ask questions here and if someone knows the answer, they will probably reply.
I don't really wanna send the photo here, so I'd appreciate talking to someone in dms
you're the man. It must have been Krea. Just reproduced the exact same result!

Language is handled by Creative Cloud app. Open the CC Desktop and go to File > Preferences > Apps... Default Install Language
Once you’ve added another language (it is very fast) go to preferences>Interface and there is a field for the language. Hit ok, then restart Ps.
how can i have this effect on the background where it becomes transparent with a different

i want to have the background effect on mine heres my image i want to apply it on

pretty sure it's a simple gradient map but you'll have to play around with the settings


I'm not trying to change the color, I'm trying to have the edges of the background to fade properly, like it turns transparent.
then blending options
rmb on the layer you wanna edit-blending options-then play around with those

to separate these two you hold alt then hold and move one of the points

Use a Layer Mask. You can use a Gradient on the Mask to softly transition from opaque to transparent.
(or just paint on it with a soft round brush)
Don't bother with Advanced Blending. That will not do anything about the edges of that layer.
I had to crudely separate this to demo it. Hopefully, you still have all the Layers intact and can use a Mask directly on the image in the background.
The first method you used is exactly what I'm looking for, and would it make the image transparenet?
A mask will potentially "hide" pixels. Black is transparent. White is opaque. Values of grey are respective levels of transparency in-between.
Please learn how to use Layer Masks. Working 'non-destructively' is one of the most important concepts to grasp and Layer Masks are a key part of that mindset.
@ripe quest is there a chance you could tell me or give me an example of what would you do to make smoke feel like it's curving around something, I did ask before but no one replied, if u cant np, it's just I'm lost, I was trying a lot of things, it didn't work out so I'm stuck since yd, this the best I could do even tho it's bad af, I'm thinking I just did it bad from the start maybe

I would probably paint it with a custom brush that will create a cloud texture.
You could also try using Generative Fill.
generative fill for what? But nevermind I can't do that anyways I have an older version of ps, I live in a poor country and they don't give education licenses here they just say torrent it
but it don't make sense tho, for what would I use generative fill? The goal is to make the smoke feel like it's curving around the text
like does it feel to u that it's curving around? It feels too simple
I tried making the shadows on the left and right side bigger so they feel like they're more in front meanwhile the darker part in the middle has less shadows
but that just ends up feeling like it's too much
I'm starting to think it's impossible there are not even pictures of smoke curving around a person on the web, let alone text so I don't have any examples
this what i meant, how would you curve smoke instead of that line?

It's not impossible. Some people might paint it. Some might use A.I. Some might use both. It just depends on the desired effect.
This is just quick but, if I were trying to do this, I would paint it...

yeah that's good thx but I did the exact same thing with it, but why doesn't mine look good, that's wha i'm tryin to ask 🤣 like you'd rate mine a 1/10 ofc but if you were to put more time in to it wha would you do my exact design to make it look more dynamic
It takes time and practice to develop artistic skills. I've probably been doing this a lot longer than you.
k thx, I thought it would be more about blending modes, layer adjustments etc, i didn't think you could make it look that good with just a brush and an eraser
I did it with a Brush and layer masks. Masking instead of permanently erasing.
Hey guys! how can i create a scanned soccument like effect, like the one seen in the image?

You can try making a Color Fill Layer. Choose White. Then do Filter > Mezzotint... Use "Fine Dots"

Appricate it man! tysm <3
No prob. Certian parts appear "darker" so you might have to pile a couple other layers on top to build it up in certain places.
Try Ctrl+H, it hides the selection
hi hi, can anyone please remind me - what is the keyboard control to switch the brush colours from front to back?
I mean, I have black and white set as my colours, and I used to switch between them with a keypress, I just don't remember what key it was anymore. Thanks in advance
X is the default shortcut
I have a 2D image with some great colour gradients in it, I would like to make the colours swirl just a little for a bit of movement. What might be the easiest way to accomplish this please? I don't have access to After Effects or anything, I only have PS access.
I mean, an AI tool would be great, but I've no idea where to start looking if I wanted to learn to do this manually either. Any tips or leads would be great! Thanks much
So let me see if I understand properly... you want to animate this using Photoshop?
this is my project im new with photoshop

Cool. If you want feedback and suggestions from the community, please post it in the #📝project-feedback channel.
On king David yall lame asf for not answering
Hmm. By "mobile version" do you mean Photoshop for iPad? If so, yes. You can do something similar. It has layer masks just like the desktop app.
Hey there, im again having these render issues with latest Ps ver25.7.
My settings are the same and i didnt had these problems lately

its when transforming a layer. Doesnt matter if text, shape or image :(
Main menu: Help > GPU Compatibility... any errors or issues reported there?
no errors
Nvidia GPU?
4070S
Drivers up to date?
yep
i also did use DDU, as i had this problem back with win 10
it was fine the last weeks tho, so im very confused how this could occur
Hmm. Seems like it should be fine. You could try deactivating the native canvas rendering and see if that changes anything.
in Tech preview?
Aye
Will try!
hm i turned on multithreaded (was off)
But when i turn of native canvas rendering, it shows me the white blocks again
That's weird. Do you have the Ps Beta installed?
yea i have, act installed it today
Does it behave the same way?
Dang.
i have a 5800X3D ... i dont think thats the problem xD
im very confused haha.
Im planning on getting an editing setup anyway with intel. Seems the better option i guess
Would you mind reporting the issue on the Ps Web Forum? See:
#🪲report-a-bug message
sure!
Then the Ps Team can investigate.
Thanks!
Gave +1 Creative Carma to @elfin dawn (current: #268 - 5)
The link inside that post here doesn't work?
it works but it puts me on the main page after some secs
any browser, edge, opera, chrome
Adobe and me have a love hate relationship

Dang. I'm really sorry you're having all these issues.
Np
Not ur fault :D
Hm thats so weird. Do you also have that bug?
Or can you just click on "post to community" ?
The rendering bug when transforming?
no the community.adobe bug
No. It takes me to the bugs page. But I'm on mobile at the moment.
this is whats happening.
Watch out for audio, it captured my music :D
What the heck? lol
and its in edge, opera, chrome. :D
and in edge (in video) i dont have any browser addons installed except dark mode
So i would love to send a bugreport xD but cant
I appreciate the attempt. Again. Sorry about the problems.
Is fine. Love adobe any way lol
even with its hiccups
I wonder if any of our other German language users are experiencing that.
Good question
@grand stump Sorry for the ping. Are you having any issues loading the bug page(s) on the Helpx Site?
He might not be around.
hm one thing or idea, i use the google dns instead of the default
could this be a thing? 
Not sure about that

Any help? Tryna colorsplash the orange only but it does his skintone when doing it and other things
With the player
Use a Layer Mask to target specific areas of image.
Can I have more than 1 layer mask with a image
So how are you doing this? Adjustment Layer?
Camera Raw Filter is going to work differently. The masking would need to be done inside ACR and its probably going to be more complicated.
Add the Adjustment Layer (with a Layer Mask). Hue/Saturation + Colorize, I presume? Fill the Layer Mask with black. Then paint with white on the areas you want the adjustment to appear.
How do I fill layer mask
Nvm got it ty
ACtually nvm the lasso tool just isnt working
Can you just paint on the mask?
It wont let me
Quick overview of masking an Adjustment Layer...
What would u guys call this style of art work. I’m wanting to create similar designs with other vehicles and stuff and want to see if there’s any tutorials of similar but don’t really know what you’d call it

Got it now
Nah it's the photoshop app for android
I had to change how I was viewing it and the different tool
There is a lot going on in here. "Vintage illustration" comes to mind.
Photoshop Express doesn't have the same tools.
So whatever I was asking abt it can't be done on google play store version?
Correct. It doesn't have layers and masks like the desktop version.
L
I think they could add that no?
Phones generally don't have the same power and resources that a desktop PC has.
Photoshop Express is mostly for quick edits.
I made this on pics art. Pretty sure photoshop express can do this simple edit

What "simple edit" are you referring to?
In the original post, you were asking about a tutorial that demo'd removing the background from something.
Well its the fact it didn't let me set a picture as a background nor did it have background options like this and then it didn't let me put pic on pics and it didn't give me that extra space for top and bottom to add the text
Ps Express doesn't do that. There aren't layers and custom masks. It does not work the same way as the desktop or iPad versions.
Yeah and the fact another mobile app like picsart CAN makes photoshop express LAME cuz aren't they bigger and better?
Its a lightweight app for quick edits, e.g. level adjustments, cropping, exporting to different sizes, etc.
Nah it shouldn't be tho
Literally should let us do the background images and text edits
OK. Well, regardless, it doesn't have that functionality.
I mean it should tho cuz other mobile apps have it
And photoshop is bigger and better right
What's stopping them from having it
OK. Feel free to send your feedback about Ps Express on the Web Forum. Perhaps they will change how the app works.
You'll never have the editing power on a phone. It just doesn't have the memory resources to do serious editing.
Yea but for the things we discussed like background images and text edits it should be fine cuz we can do it on picsart n other apps so it is possible

Is this where I should leave feedback?
Even tho my lightroom on my Ipad Pro is faster than the lightroom cloud desktop application 
but agree!
one day maybe :D
Question:
How do i de-select the layer highlighting in the beta?
so i get a clean view?
ctrl-d ?
Not there. On the web forum: https://community.adobe.com/t5/photoshop-express/ct-p/ct-photoshop-express?page=1&sort=latest_replies&filter=all&lang=all&tabid=bugs
Connect with the official Photoshop Express community.
Do you mean this?

Ah yes!
but is there a shortcut to just disable it real quick? For an overview?
or just use preview fullscreen?
I don't think there is a shortcut at this point. Its a new feautre.
I see! :D
Its getting pretty good. Each version it gets a bit better.
I was a early tester and from that version to this its like a difference by day n night
Text is getting better too
Yeah. You're playing with Firefly Web Service as well?
Structure Reference is very cool feature in the Firefly web app.
Its a style reference.
im looking forward when we can generate 2k or 4k px images
Firefly web service gens 2048.
Photoshop is adding more of those features all the time.

Experiments in generative imaging, style references and pixel manipulation.
like de-noise is holy hell overkill
Wow
Looks like a damn photograph :D
I can only difference bc you see the left fabric beeing to much of a drawing imo
Its supposed to be a hybrid style. Painting and photo. heh
Left a follow!
Anyways, the point of the post is demonstrating how you can use Structure and Style References.
yeah i saw that now xD
in discord in small preview it looked like the hyper realistic version you also posted
looks hella clean, like it too!
Go, Longhorns. :)
Thanks
Check out some of the community gens: https://firefly.adobe.com/inspire/images
This was inspo

CHanged it to like a college commitment edit
Couldnt figure out the player thing but its fine
man i love the blurry effect. Seperating the text from the image is so important, nicely done! :D
@ripe quest tested out v3 of firefly ... bro the eyes generation is unreal

Crazy good.
Right?
even tho, skin is still very hard
thats the only thing i can difference that stuff. Bc it usually looks sanded down or somethin xD
im so impressed.
Even the Beta had power... https://www.behance.net/gallery/194331181/Virtual-Destinations

Now i only need an ai, that translates my ideas into code
mad
AdobeGPT?
look like straight outta pixabay or something haha
For futures ones I do instead of just guessing on camera raw imma do vibrance and other things with the layer mask
haha yeah
Like i have an idea, but cant find a specific plugin or tool for it to realise it for my client
Yo got a question for peoples shadows on their feet how do you guys do that
I just draw and change opacity but its hard to get
Adjustment Layers are really powerful. I usually save the Camera Raw filter for the very last step in the workflow.
Also sorry for all the questions but do you know how to get the words like this in 3d

I would use Adobe Illustrator.
Ight thanks
Or Adobe Substance Stager but that is a different suite of apps.
Ye i would have to request
One thing i still cant get is like shots from far away. like i wanted to create a black and white image with a silhoutte in firefly, but sadly its always very close
Try using a structure reference to drive the composition.
im fascinated how fast it is
lol
eh, almost

im overwhelmed, its so crazy good :D
i act did samish shot and this one almost looks better than the real one xD haha
oh
Its a lot of fun to generate and remix images
Yeah
Small text is tough in almost every Gen AI model.
yeaa
It can be fun to combine tools and models to remix, regen and retouch...

Is it fine if I ask u questions tmmrw

I tired to make this and failed
Badly
Of course.
Probably not a lot of training data for German kebobs. :)
not my kebobs ;_;
eh will do. But its hard to find reference images any way bc of most of them look like an accident
If there is no easier AI alternative, and if using PS is possible, that would be ideal! I don't see it as a difficult project, the amount of movement I would like is pretty small..
I just don't know how to learn how to do it, and was hoping someone might have a link or something to point me in the right direction.
Unless there is a different program that can also do it? I mean, it's just one little graphic, I don't really want to pay $33 to do just this, so I was looking for something that is free.
Hi, are the gradients on their own layers, or is it a flat image? Photoshop has some animations abilities: https://helpx.adobe.com/photoshop/using/video-animation-overview.html
thank you! I will go and study that for a bit.
I have taken a flat image, and separated the gradient to its own layer. Maybe I can AI expand the gradiented area and then move the image around a bit to fake it..
Gave +1 Creative Carma to @hushed niche (current: #23 - 84)
There are plenty! But try this one
https://www.youtube.com/watch?v=kyxth0yQMMU&vl=en

In this tutorial, Jonathan Lam will show you how to create a metallic medieval fantasy text effects, using a pattern and layer styles. ► Download Photoshop text effects and layer styles on Envato Elements: https://elements.envato.com/add-ons/text+effect/compatible-with-adobe-photoshop?utm_campaign=yt_tutsplus_kyxth0yQMMU&utm_medium=referral&utm_...
The 3D effect is probably done using a 3D software (although you can do that in Illustrator as well, it's more tricky in Photoshop)
what happened to "Merge visible to a new layer"? All I can see now is merge visible.
I don't know the exact answer - but this may help:
https://www.reddit.com/r/photoshop/comments/viuobf/guys_how_do_you_merge_a_bunch_of_layers_into_1/
Explore this post and more from the photoshop community
wow, that's weird. "control shift alt E" instead of a menu selection. Seems more difficult to try to remember.
Thank you
Gave +1 Creative Carma to @sly hawk (current: #5 - 892)
I know it doesn't answer your question but what I routinely do is: group my selected layers and then merge the group (all of them available through the menu). You can even assign those two steps to an action and set this action to a shortcut (Mine is F11)
So, my workflow is "select a bunch of layers" and then hit F11.
I have some weird stuff going on rn, was going to merge and start over, but like to keep the old layers for easier selection purposes, can delete the extra later.
I used to right click the layer in the layers menu and merge to a new layer all the time. Hotkeys are harder for me to remember, but - it is what it is.
At least it's still possible
Beats copying them all individually
Layer>Merge visible. Alt just makes it a separate layer
Alt makes it a new layer. That's interesting, better understanding of the hotkeys. Maybe that will help. Thanks

I really miss that function....
in Photoshop, alt key is generally used to duplicate stuff. I agree this should be a separate menu item
It used to be, last year. idk why they would remove it
while waiting for Ps to unfreeze 😂 [broke it with 100% responsibility] to ask; Is it possible to make and preform upscaling action using neural filters upscale?
Yes you can do some upscaling with superzoom

Like neural filter as part of your action? yes, you can use it but count in the calculating freeze 😛
if it's about upscaling only, I would recomment Upscayl that can do batches
You need to click on the magnifying glass and set up your % . It zooms in on your image so you will have to extend your canvas when done to see the bigger image (image>reveal all)
Thank you both @vapid flume @serene coral yes, that is the one I tried to make into an action and lost it 😅. The point comes through perhaps its a tad much for my PC to handle. Thanks for a tip, I'll give a go to Upscayl.
Have a 100ish images (not RAW) and trying to pull out the best out of them 😵
Gave +1 Creative Carma to @vapid flume (current: #8 - 604)
Yes, neural filters are sometimes a bit much for anyone 🙂
Does Photoshop Beta already generate at 2048px ?
I did remember that for a while, Neural filters did not work in actions. I guess it was fixed?
I wasn't sure and checked it before answering. It worked fine and I was able to run the action with specific settings. Of course, it took the time to calculate everything just like it would when doing it manually.
Thank you for going the extra mile!
Gave +1 Creative Carma to @serene coral (current: #7 - 857)
i have alot of backlight how do i get some more color in this photo

Hi, I'd like to hatched an area on a photo, to hide it
I'd prefer to not blur or pixelize the area, because we'll see some disagreable dtails
So, to me, hatched area will be fine, to delimit the visible parts of the photo
Would you have any method/trick to succeed in realizing this task, please?
Hello guys! How would I remove the lighting on his arms? It is from the original download.


You could try the 'burn' tool - plus a bit of cloning?
Change the background?

...or just a simple hue/saturation adjustment
but i want the bird to have more color in the other photo its good but for that one its to dark
Is there a way to convert RGB black to CMYK black? I'm working in CMYK color environment and i've just imported SVG file that only contains black and white colors but i need the SVG black (It's RGB black actually so it's R0 G0 B0) to be C0 M0 Y0 K100
As photoshop imports the SVG file R0 G0 B0 color as C75 M68 Y67 K90
Anyone know a prompt to make the headset piece of a stethoscope? I am trying to use adobe photoshops generative tool and it just keeps coming out so bad so its got to be my prompt, PLZ HELP IF YOU CAN

Figured it out myself. (make sure your layer is a smart object) select the Layer, go to Image-Adjustments-Channel Mixer. On Output Channel - select respective CMY channel and set the value of each channel to 0%, on Black (K) channel set the value to 200%
it will now be 100% CMYK black
C0 M0 Y0 K100
and it being a smart filter, it can be changed any time
how do i sign out on the windows version its signed into wrong account


hopefully not a stupid question but does anybody know how i can fix this exporting as this?
How are you exporting? Using File > Export as? Save for Web? Make sure you choose PNG-24 with transparency.
What's the whole image? - Can you not instead just source an image of a man/woman with a stethoscope?
found it, was in the help section
Can someone please help? I must of clicked the wrong button, but now when I want to select something on the canvas, it doesn't allow me to unless I select it through the layers tab. Also, whenever I hover over something, it highlights it in blue on the layers tab. I'm unsure how to turn this off, but it's been annoying as I have a lot of layers, and it's difficult to find the right one through scrolling in the layers tab.

Random question - do you know why some layers are highlighted blue when I hover over them? This never occured before. 😟

If I uninstalled Photoshop from my computer, does it affect the PSD files I have on my PC at all?
I just uninstalled Photoshop to hopefully re-install it soon, but now all the PSD files are just blank with the blank thumbnail.
Layers always do that
No. The PSD's will be fine.
I've only experienced it being blue when it's actually selected, not when I hover over it.
However, your computer won't be able to 'understand' them whilst you have no photoshop. Hence the lack of thumbnail.
It's blue if the layer is visible.
Okay I understand, again, thanks for your time. 😄
Well, I just tried to open a PSD file in that online Photopea editor since I know that can open PSD files, but none of the PSD files are opening.
Maybe I accidentally deleted the files while cleaning my PC a bit? 🤔
If you're stressing, you can send me a PSD if you want, and I'll check it opens ok on my side?
Hold on, does deleting the image files that's in the PSD files affect the files?
Because I did clean up my PC a bit a few days ago, and I think some files from multiple PSD files were possibly deleted from within that clean up.
If it doesn't affect it, then I can send you one of my PSD files to check it.
It depends. Normally if you use an image in a PSD, it will EMBED the image within.
However you can use a 'linked image', meaning if you delete or edit the linked image, it will impact on the PSD.

However, I doubt you would have done this in your images! since it's an extra step you'd have had to go through!
I never use "linked" images.
The weird thing is, I tested another psd file in that online Photopea editor, and it opened up just fine after a bit. The PSD file I wanted to open tho just doesn't open at all.
photopea isn't as good as photoshop. Maybe there are some features in the PSD that won't render in in photopea
Oh my goodness, I cannot even send you the PSD file. I has the DM open, ready for a file, and the PSD file I want to send doesn't even allow it to upload in the slightest, no pp-up or anything. I think that one PSD file is corrupted or something?
I tested another PSD file that opened up just perfectly in Photopea, and it can be uploaded to discord to send just fine.
It's 3.41 MB
ok. That's decent. - strange you can't attach it to discord!
Any decently good AI Image Generators that anyone know of?
i need a good shrift
Define "good" because there are so many to choose from. What do you want to generate?
You're in the Photoshop server, so... Adobe Photoshop would be the obvious one. Adobe Firefly (https://firefly.adobe.com) is the web-based service.
Well tbh I will need it for different imagaes, but atm I am trying to generate Vector Images
How much does it cost?
Adobe Illustrator can generate direct to vector. Otherwise, you generate something with flat colors and use Trace Bitmap inside Illustrator to convert pixels to vector shapes.
You'll have to investigate the plans and features that fit your needs/budget. https://www.adobe.com/creativecloud/plans.html
Discover Adobe Creative Cloud membership plans and monthly prices for our
full suite of applications including Photoshop, Premiere Pro, Illustrator, and more.
Would you say Firely good?
Its pretty good. But again, it really depends on what you want to generate. Some tools are better than others at certain subjects.
how would I decrease noise that came about from an adjustment layer?
like I masked out the sky and applied it to a Hue/sat layer and upon increasing the saturation I obviously get noise but is there any way to decrease noise without referring to the original layer?
IS there a way to make layer mask opposite
Like switch the black and white
Nvm just found it
Hello guys, i have this image that i want to highlight the fingerprints, and tool that would help me ?


Humann look at this
I messed with some things with the player and it look so much better
hey yall , im trying to figure out how to cut out the shape of the colored boxes in the black background

anyone kno how to do it ? its been a while since i used photoshop so im tryna get adjusted again
I’m on iPhone and got no sort of computer or pc. What’s the best ways to photoshop images. I make things such as movie posters n stuff, So what would be the best way to do that on iPhone for free cause the photoshop app doesn’t really do much
Just search up a blank template for this or use the select thing
What tool can i use to highlight the fingerprints in a zoomed in finger?
High pass filter?
yeah but like the fingerprints are inked (in red) , so there is some inconsistencies that don't capture all of the fingerprints
is this good?

hey, does anyone know how to get that grid/big pixels like effect? its not low resolution its like a weird thing over the picture


try going image then image size and increase the resolution that way
no i mean like, how do u get to that effect
prolly do the same thing but put the resolution down
if u look closer u can kinda see that its not just lowering the res but sum else
which one
which one did u make?
none i jus wanted to know how to get a picture to that
Hi, those defects/artifacts are repeated JPEG compression that damages the image. Save repeatedly a copy of your image at very low size, using different heavy compression levels, or methods
Hi, peaceful image The tones and colors are nice, I’d like to see a point of interest/subject, the front light patch of plats attract the attention. There is a channel for critiques… #📝project-feedback
Is there a way to draw a primitive in photoshop then tell the AI to generate something in that shape?
I've tried being as descriptive as I could with how I want my generated object to conform to the privative I drew but still no luck, so wondering if anyone here knows
Hi, you can Ctrl+shift+click on each box to create a selection, then add a layer mask on the black layer, invert if needed.
Hi, a structure reference, that works in firefly, not sure if the latest Ps beta has it: https://youtu.be/2C_7UykQ8ic?si=pfxMkbWqImIaKXbk or https://www.photoshopessentials.com/photo-effects/using-structure-reference-and-style-reference-in-adobe-firefly/
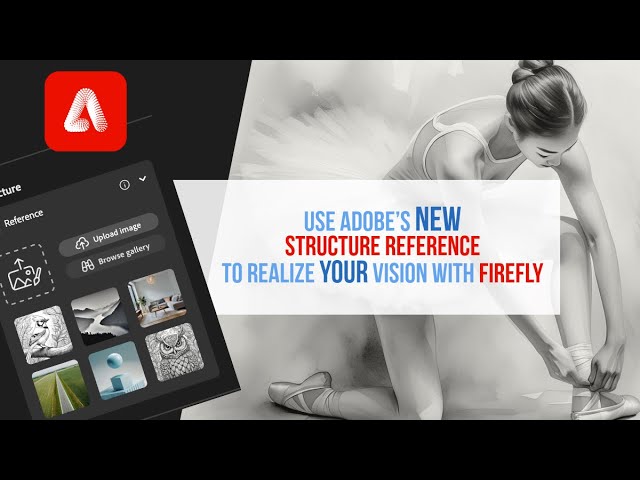
In this video, I will show you how to use Adobe's new Structure Reference in Adobe Photoshop. Don't forget to use my reference sketch:
https://www.patreon.com/posts/adobes-new-101508709?utm_medium=clipboard_copy&utm_source=copyLink&utm_campaign=postshare_creator&utm_content=join_link

Learn how to use Structure Reference and Style Reference in Adobe Firefly to control the composition and visual style of your AI-generated images.
so I have to do it within firefly?
thats a dumb question, I didnt read your message, only clicky. oops
not quite what I want to use it for tho so unfortunate

anyone can point me into the right direction?
i know how to use the bucket tool, but that's about it lol
and it doesn't look very good using the bucket 😅

bucket doesn't affect transparent pixels as far as i know
it only affects the pixels with similar / same color
there's many ways of doing this, the laziest and longest would be to use adjustment layer - Hue/Saturation - Colorize- Pick the right color, switch to the mask of the adjustment layer and hide the areas of white pixel contour that you want to stay white
but seeing you're new, would be better to find a video on how to do that, the problem is i have no idea where to look for exact scenario, this is close enough
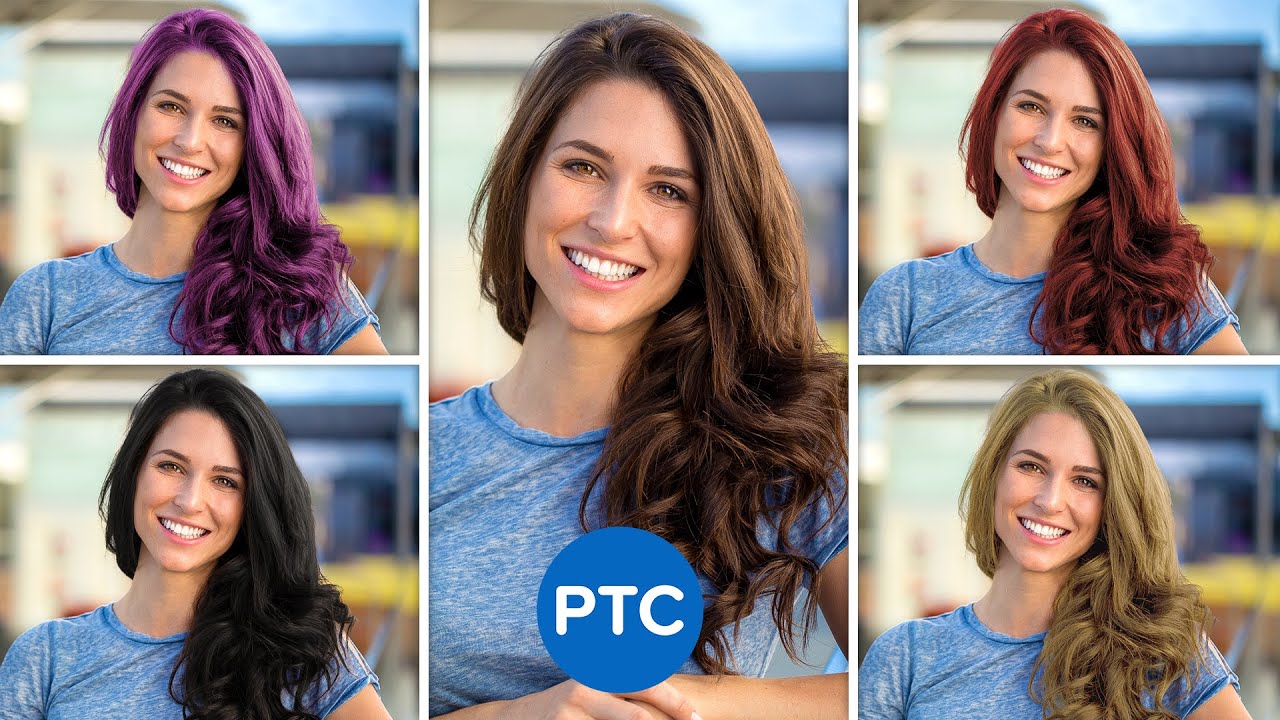
Learn this powerful technique to change hair color in Photoshop!
Keep in mind that when doing hair color changes in Photoshop it is a lot easier to go from light hair colors to dark. The biggest reason is that lighter hair tends to have more detail and therefore you can make those areas darker and keep the detail.
Going from dark hair to light...
use a clipping mask  . simply add a new layer, clip it and paint it red on the ship
clipping will obey all the transparency data
if you want to keep the outline white, use a proper bleinding mode on your clipped layer
actually just go to Image-Adjustment-Replace Color, pick a color (black) select a color range
this easier but likely will paint letters as well, sooo you'd need to use the clipping mask or just, mask.
unless you can just move the letters to another layer
don't forget to use Colorize function, without it blacks&whites don't change
i appreciate all the help this is all a bit much for me 😅
i tried using a adjustment layer, but it only changed the while outline and the black stays the same
where can i enable the colorize function, i don't see it...


How to match this blender better with background

I think mostly getting the right shadows: 1/ those that touches the "ground" eg contact shadows, and those that are the projected shadows from the light source onto the blender. Now, talking about the light source. Your blender's photo light source and the background's don't match.
There is not much you can do about it, because you cannot really control the light source of the blender (frontal, quite harsh) neither the one of the background (soft, from the right, probably coming from a window)
I would try to find a background where the light matches the one of the blender (or change the bvlender image to one that matches the background)

imagine that cylinder is your blender, see how the light is stopped in its track by the blender, making the shadow appear exactly in the same path. You can clearly see that in your backgound with the tall cream vase.
I'm trying to remove the background for this image, the remove background quick action removes some of the image and quick select struggles. Any tips? Thought it would be rather easy with the black on white

How can I remove this MM between the words so it stays just yellow?

Ik but this channel is way more active for some reason it's really annoying
do you guys know any graphic designers or artists who use blend modes alot with photos to create some sort of artwork e.g collages , manipulations and more?
You'll probably have better luck with the select>colour range (and choose Blacks in the dropdon menu) than with the subject select (as you have sharp angles and it doen't always deal with it very well

or maybe the magic wand?

since there is only two colours there, you can choose the lowest settings for both tolerance and and point sample to get the best results

Yeah. - Definately use colour range!
Remove tool?
Oh wow thanks man, you made that look easy!
Gave +1 Creative Carma to @sly hawk (current: #5 - 894)
It IS easy 🙂 - Good luck!
I can't use any of the filter in the filter galery. Each time i try to apply it, it says "the operation could not be completed. P"... Yes, there is even a random "P" at the end of the sentence. I've tried with different images, different filters, but nothing seem to work.
It can sometimes happen when you don't have enough memory. Other than that difficult to say (I never stumbled upon it)
If you suspect it's a bug, you need to make a bug report on the community forum
https://community.adobe.com/t5/photoshop-ecosystem/ct-p/ct-photoshop?page=1&sort=latest_replies&lang=all&tabid=all
Master Photoshop with the help of our global community.
What is the discord rpc plugin?
If it happens only with this plugin, have you tried contacting the developper?
how do I get a bigger brighter red without effecting the blue too much?

it basically shows in your discord activity that ur on photoshop and shows the the layer name and everything about ur psd if that makes sense
You can try with a hue stauration adjustment layer, and choose "reds" in the drop down menu, meaning that will only affects the reds, and not the other colours

ok ty lemme try
Gave +1 Creative Carma to @vapid flume (current: #8 - 605)
You got all these colours to choose from in the dropdown menu. You can also click on the image after having chosen the little finger icon at the top so you can directly choose the colour from the image

is there something i should change in the "performance" part of the setting ?

I would say a bit too much, but not by far!
ok
The system couldn't detect your Graphic card apparently, maybe that's the issue
Do you know if your graphic card is compatible?
You can check here

its an NVIDIA GeForce GTX 1660 Ti
but even if i disable the use of gpu in the settings it still don't work
hello, does anyone know how to apply threshold layer, when i want to convert to smart object, the blending mode is deleted and blended image fully exposed?
Maybe it NEEDS the GPU to work. Is it compatible or not?
yo guys i got a question, this is a general one but do graphic designers use more than one graphic design softwares not only adobe softwares?
idk the gpu compatibility thing doesn't show up in the menue
only the system info button
Have you tried applying the blending mode AFTER converting to a smart object?
Like is this a good thing or bad
cause some softwares have things that are unique to them
Which version do you have? Do you have a current subscription?
and you kinda wanna combine it with the other program as wel
What does the system info say after GPU sniffer?
It depends on the kind of things you do, If you do 3D for example, you might use 4 or 5 software, only half of them would be Adobe's. In certain industries (say book layout, or photo retouching) Adobe is the default, but it might depends on industries. You will never be wrong with an Adobe Software though
not sure if this is what you are asking but here is what it says in the gpu part of the system info
------- GPU
Native API stable: True
OpenGL API stable: True
OpenCL API stable: True
GPUDeny: 0
GPUForce: 0
useGPU: 0
useOpenCL: 0
isGPUCapable: 1
GPUName: NVIDIA GeForce GTX 1660 Ti
GPUVendor: NVIDIA
IsNativeGPUCapable: 1
IsOpenGLGPUCapable: 1
IsOpenCLGPUCapable: 1
HasSufficientRAM: 1
VRAM: 6,282 MB
Required VRAM: 1,500 MB
UseGraphicsProcessorChecked: 0
UseOpenCLChecked: 1
Windows remote desktop: 0
GPU Allow Normal Mode: False
GPU Allow Advanced Mode: False
GPU Drawing Mode: Advanced
Display: 1
Display Bounds: top=0, left=0, bottom=1080, right=1920
Start sniffer 2024-05-08 11:19:54
Hi, the amount of RAM you have is really low.
but it worked well like a few month ago
i had no problems
and my drivers are up to date
With an older version of Photoshop… the code and requirements change…
Did the sniffer crash?
no i don't think so
Did you check this document: https://helpx.adobe.com/photoshop/kb/troubleshoot-gpu-graphics-card.html#Troubleshoot .”
Also, try the old GPU mode in preferences/technology preview , see: https://community.adobe.com/t5/photoshop-beta-discussions/graphics-card-not-recognized/td-p/14533448
Issue: Photoshop version: 25.7.0 20240331.m.2568 97f8f4c x64 Graphics Card: NVIDIA GeForce GTX 1050 Ti - Driver Version 31.0.15.2756 OS: Win 10 --- 10.0.19045.4170 Steps to reproduce: Open Photoshop Beta Expected result: Photoshop using Graphics Card for performance enhancing. Actual result: Grap...
Can i ask, can i somehow remove the "white parts" cuz im going for like "pencil effect"?


so it would be like a little transparent
Can you not get 300 DPI when exporting to jpeg or png? I seem to only be able to keep the original DPI and dimensions when printing to pdf
Hi I’m trying to do something similar

I want to create a mix media piece like this where I draw lipstick on a paper scan it and turn it into a drawing that I can edit with photoshop
Bit harder because its not actually white
So I am trying to make a qr code in indesign and i need to add a tab between two sequences. I dont remember how to enable the tilde process thing so i can use ~d009
i would ask in the indesign discord... but there isnt one
Did some other way, but its not like in the original, but figured it out by some photoshop tut
Hi, double-click on the layer in the layers panel, and alt-click and drag the white slider in the blend if section: https://phlearn.com/tutorial/30-days-photoshop-blend-if/#:~:text=Blend If can be found,looking at the second slider.

Blend If is Photoshop's best kept secret. Learn how to use it to blend color and exposure effects into the highlights, midtones, and shadows of any Layer.
Put the layer onto a **multiply **blend mode - The white bits will then 'dissapear' when a darker colour placed behing them (like that dark green)

well i dont know how to apply blending mode either, i have it set up but i dont know how to apply
It's all good.
Can you share a full screengrab of what you're trying to do?
How to select an interval of color , i know the >select > color range, but how do i isolate for example all shades of white?
vrstva is layer and práh is threshold, i have it in my lang, and i want the three top layers( práh 3, mask41 and práh 2) flattened to one layer

Have you tried these?

You just use the slider in the colour range selector.
You say "all shades of white" but that's subjective.
i did and it exposes the picture its blending with

i know, but like i have this , to get the selection and isolate the fingerprints, taking "all the shades of white" would do it

Something like this?
Hi guys. can anyone give some tips to generate shadows to products with Ai photoshop? I tried diferent prompt text but it doesn't add any shadow
yeah, but it doesn't look precise enough, should i just complete it with brush tool ?
thanks a lot btw
Feel free to change the "fuzzyness" accordingly.
i have a dumb question: the eyedropper is my favorite photoshop tool because when i click on an empty layer, photoshop sensibly assumes i simply want the topmost visible layer and samples from there. is there any way to get the other tools to behave like this, instead of hassling me about my ADD
Hi!
It does not assume that you want the uppermost layer. It samples the color that is directly underneath it. Then it becomes the foreground color. See the video. The layers are transparent. Thus, the color that is selected is a mixture of all the colors underneath the Eyedropper.
how do i create an image containing only the red area?

i used the rectangle tool and then rounded it, but im interested only in the red area
if i clear the green area with the magic want it lose quality

trying to create an image like this, but with the borders anti aliased
Can you show me your Layer Stack? I'm assuming they are on different layer...
i have one leaf image, and i want to fill the entire canvas with that one leaves with different scales
and also with shadow effect, how can i do that?
maybe suggest a tutorial?
Use a leaf to define a pattern. Then fill a selection with that pattern.
copy paste the leaf multiple times and resize them and maybe flip some of them
for the shadow double click the layer in the layers panel and select drop shadow
i am totally new, so it would be difficult for me to understand all. can you tell me what shall i search exactly? i cant find tut on yt