#❓ask-a-question
1 messages · Page 31 of 1
even when you use edit -> content-aware fill?
how do I get the same color as the first image to the other project the second image


Eyedropper tool
Shortcut : I
how do i put it to the other project
copy the code
code?

how do i get that window
double click here

it's not the same colors the green

merge how do I do that

it just added another layer

it's still not showing the green color

use eyedropper and take screenshot pls
wheres the eye dropper tool


how do I do that
now u wanna tell me, what u wanna do 😅
sure
can you photoshop?
yeap
alr so what i need is like a body with 20 organs and i have to switch them to 10 fruits and 10 vegetables
but idk how
and i got like 10 hours left
so could you help me? @warm grove
explain more 😂 😂
mask out fruits, use transform tool to move/scale
you can use gimp
yes
but it's not as powerful as PS
but still you can mask fruits
and transform

directly
but you can help me right like guid me through it?
I haven't use gimp for a while
We're here to discuss Photoshop. If you have questions about Gimp, you should join their Discord.
k
that's a really tight deadline 
does anyone know how i can make a image look like this with the colorful pixels

you can download trial photoshop or photoshop light
If you're asking for someone to create something for you, please read the following: https://discord.com/channels/547473772727238676/1042833042378592329
even if he will use trial version of PS it will take at least few hours to learn how to basics
ok i will
Otherwise, this channel is for questions about creating with Photoshop.
Not sure what you mean, "with the colorful pixels" - What is it that you're trying to do?
you see how is chain is like distored or like colorful

and it carries with the whole image other then hsi body
i want to recreat it for someone
Yeah. We would call that a "poor quality image." :)
It looks like a tiny image that has been rescaled / upsampled and it has gotten blurry.
so i would just need to make it into a tiny image and just rescale it
cause it looks bad but good yk

I suppose that's one way to handle it. Create it really small and then drastically upscale it so that the interpolation causes it to look blurry/pixelated.
isn't there a filter to pixelate images, maybe that worth giving a shot 
This just looks like some old poor quality, heavily compresseed JPEG that has been upsampled.
so throw it few times on websites with memes and it will get worse 😏
you could try to export as jpeg with lowest quality, few times
Do you have an image that you're working with?
ya
usually it's the other way peoples try to get as much information from old pics
nah im just tryna make a pic look like that
Image > Image Size... Reduce the size by a lot. 300% maybe. Then File > Export > Save for Web... Turn the quality way down. Save it. Then open it back up and Image > Image Size and scale it back up to the original size.
See what that creates. heh
guys nobody can help me 😭
howe i reduce the size lol

You've posted your question in chat. You'll just have to wait to see if someone is interested in working on it.
change to pixels and just type new size
you can use math like 300/3
Change from inches to pixels. Then you can divide in the input field.
ok
You probably shouldn't count on anyone doing this for you. You should probably find another way to get it done.
you lost me at the end ngl
i some what understand my bad lol
The fields say "inches" .... change them to "pixels"
i did
Then in the width field, you have 4032... you could type /3 and hit the tab key and it will do the math (division) for you.
oh damn word thank u
Hit OK. Now it should be much smaller.
I think you should do some basic tutorials and learn how to use the basic tools and techniques. You're going to find this to be difficult if can't make simple edits on your own.
ya nah ik im not really the best at photoshop but ik like basic things for the most part but thanks
Also, there is no guarantee that any of this is going to work out the way you want. A lot of this generally requires experimentation to get to a desired result.
ya ik but it still helped me to learn something new
@crisp saffron - Use the Remove Tool...
Or since you deleted your question, I guess you figured it out or changed your mind. lol

The file size is probably too large.
When files get too large, Photoshop will present you with the option to save in PSB format.
TL;DR PSB (Photoshop Big) is the Adobe Photoshop Large Document Format. It's used for images that are too large to be saved as regular Photoshop document (.PSD) files. PSB files are nearly identical to PSD files, but they can be much larger. PSB files can support documents up to 300,000 pixels in either dimension and file sizes up to 4 exabytes. The PSD file format has a maximum height and width of 30,000 pixels and a file size limit of 2GB.
32000 x 32000 @ 6000 ppi, I would say that 6000 ppi might be a bit... excessive. heh

how to fast select 1 color on picture and delete it?
Select > Color Range... Apply Layer Mask. Adjust Layer Mask.
Gave +1 Creative Carma to @ripe quest (current: #3 - 1695)

Redraw the boxes with vector shapes. Delete the old image. Then rotate the new sharp vector objects.
The Rectangle Tool...

Choose Shape mode. Use the same color for the Fill as the original shapes...

still get the fuzzy edges when I rotate it
How small is the image? There might not be enough pixels to represent the angle.
1024*1024 72 ppi
it is for a ets2 skin but no sure if I scale up the image if that will end up wierd in the game
Did you draw the rectangles in "Shape" mode or "Pixels"? Are you viewing this at 100%? Because if you're zoomed in, of course, you're going to see the 'stair-step pixel edges'. View it at 100%
I am at 100% and did the same as you shown in the pictures above yes
Then I don't know what to tell you because the edges of my objects are not "fuzzy" at 100% zoom.
You're in RGB Mode or Indexed Color?
rgb
Also, I have no idea what an "ets2" skin is or what the requirements are for whatever that is. Sorry.
Ets2 is Euro truck simulator 2
I tried to scale it up to 4k and works fine now., thx for helping anyways!

Yeah, looks like someone used Cabazon and then messed with the *tittle * to make it a triangle.

Hi, can I ask a followup to this? Is there a way to shift a grayscale image values downwards by a certain offset? Specifically, if sea level rises then the mountains aren't as high above sea level as they used to be so they need to get darker.
In other words when I just mask with a threshold, then I have mountains that fall sharply off into sea when I want them to be turning into islandss if that makes sense
It feels like you'd be better off trying to find out if there is a way to render/generate the mountains in something like Blender. - Then you could literally draw in a literal 'sea level' and raise on lower it accordingly.
Basically the operation I am trying to achieve is shift every grayscale pixel down by a certain value and every pixel who was already below that value should disappear. I know how to achieve the second with the layer mask, but the ones who remain keep their values.
I am a photoshop noob so there might be an obvious way to shift pixels like that, brightness doesnt seem to do exactly that
What do you consider 'greyscale'? Literally every pixel between BLACK AND WHITE?
(So all of them?)
Yes all of them, I am working with 16bit grayscale images
so every pixel is a 16bit unsigned integer the way i understand
I want to deduct a specific value from all those numbers
You'll have to excuse me for asking, but can't you do this by just changing the Threshold layer once at a time?

can I ask a question about a bug?
Have you updated photoshop first?
Could you get the effect you're after by putting a white background in, and then slowly changing the 'greyscale' opacity?
from 100% down to 0%?

i am confused how is brightness different from opacity
like maathematically
i can tell it's different but I dont get why it is
its more of the login process
like I cant get the organisational login
anyone got the adobe illustrator server link?
This might be gibberish but:

ty
Gave +1 Creative Carma to @sly hawk (current: #7 - 777)
(check the bottom) - or simply google it
⬆️
What? Like this?

That happens after you've put in your username and password.
It asks you only AFTER it knows who you are
I did however make a personal account with my uni email
Yes, login with it. It will likely ask you then. - If you even have an 'organisational account'. If it doesn't ask, I'm going to assume you don't have a team/organisational account.
I dont have uni account if thats what u mean
it doesnt, thats the thing (I deleted the personal account btw)
Maybe have a quick scan over this perhaps?
https://helpx.adobe.com/enterprise/using/manage-adobe-profiles.linkfree.html
hmm opacity wasn't quite the operation i was looking for,
I wanted: A to become A-X and B to become B-X, for two unsigned integer pixel values A and B
Opacity does (for 50% for example): A into A/2 and B into B/2
Opacity is like dividing everything by a number instead of deducting a number from everything
Ok. That makes sense.
ty, will read this
This any good?
It kinda 'swallows up' white pixels and then the further your slide, the darker and darker it will consume
so typically what should happen is when I type my uni email it will redirect to my organisational login page
This here explains now why that slider runs from 0-255.

I don't know too much about it, but yeah - that logic makes sense.
no wait.
prob something on their end (the uni I mean)
this doesnt happen
Maybe scroll to the bottom and check the FAQ's, or speak to your uni about it. - Sorry I can't be any more help
hey guys i have an assignment for my image processing class, i’ve created a movie about a drunk santa claus and the movie is starring the real santa claus. here is the dvd cover i made! i’m not allowed to use any composite images , and i have to create merchandise for this project , and i really only started using photoshop at the end of January . due to circumstances in my household i got an extension and i’m still trying to wrap my head around the tools and how to use them. i’m really not happy with the way my work looks so far and i was wondering if you guys have any advice on what i could improve on? for example i got stressed and burned the little boys face! 😦

this looks cursed and something I'd watch at the same time
Playing around with the blending options, it seems substract does exactly what I was describing
What do you mean by "i’m not allowed to use any composite images"?
@pulsar ferry
i’m gonna to proudly take this as a compliment
for example i had to add the clouds in the background, and the sky separate. Everything is separate, even the wreath in the second preview on the back of the cover is separate from the image.
So you mean everything has to built separately. - Which ironically is what composite means. - but yeah, cool. I get what you mean.
To be fair, I'm really impressed what you've done.
I tried something using AI....

Your DVD cover legitimately looks like something I'd have seen in blockbusters back in the 90's. - Which means I guess you're on the right track!
this is actually amazing 😂😂thank you for the feedback, i haven’t gotten any so far, i’m a little stressed on time but i think i’m happy with my dvd cover, i also have a movie poster made, but i’m struggling a lot with implementing graphics onto a t shirt, i know about displacement but it really doesn’t seem to be working out for me. 😦 and the warp tool is my mortal enemy, lol
is there a tutorial to understand what blending does? substract isnt working the way I expected it and I need heelp understanding some basic stuff.

thats a white and black box on layer 2 and a gray box (70%) on layer 1
i am confused on what is being blended when I click the small fx button for layer 2
Hi.
is there a way to make like a center so when the red pice is placed where I want it the black pice will snapp to that place when draged ower it, on its own side as a mirror kinda?

oh i figured it out, blending options on a layers affects how that layer blends into the rest of the painting
also blending modes have a lot of weird math behind them it seems
Seems like a silly question but what's the best way to blend the bottom black border into the BG color? Seems like the blur feature even at highest hardness doesn't work

how do you give some parts of a image less opacity than other parts
anyone know how to have 2 separate layer styles so when i move the angle of one drop shadow it dont effect both layers and just the one?
never mind figured it out was (Global Light)
Apply a 'gradient' to it.
The imagd will need to be split into multiple layers. - so draw a selection box around it, then cut and paste it back in. - then change the opacity of the new layer bits
is there any guides to make this skeuomorphism style interface in adobe? I'm curious about how this was made


What version of Photoshop do you have?
2022
If you choose OK, does it open fine?
Does your Layers panel look OK? Are all of your layers and groups as they should be?
If you click on the “Don’t show again” checkbox in the lower left corner hopefully you shouldn’t see it again
well except one cos when i was 'cleaning up' my layers because i had a mess there i named one group ... and idk it disappeard and after that everytime i save this happens
Does it only happen with this one file or every file?
only this document
That's good. Weird. But good.
yeah i mean its not that important because in that group was nothing too necessary
but i just dont know why it disapperad when i named it ...
As a double check you could do a Save As to create a new file. Or copy all of the layers to a new file and save that.
Sorry what disappeared when you named what?
my group
OK
after i named it ... (like actually three dots)
Does your name have any weird characters in it?
? what do u mean... like where
Like is your layer/group name something like "*&^%^%$^&#%$#%" instead of something like "some simple text"?
every group that i named had 'normal name' except one cos i didnt know how to name it so i named it ... (i named it three dots like ...) and after that it just despawned and every time i try to save this pops up but it saves normally after i click OK
And if you change the name from "..."?
Oh wow! You sure you didn't accidentally move or delete it?
98% im sure
So 2% not sure? 😉
😅
I'm signing off buddy. Have yourself a great day 🙂
but anyways if i'd deleted it why it would be poping up this attention thing
why? 🥲
yeah u too
.
anyone else here to help me figure this out? 😁 😅
You can safely ignore it and check 'don't show again' unless you are going to open this file in a version of Ps that is over 10 years old
Could someone help me with a prob with after effects?
I think Adobe Video is better place to ask - https://discord.gg/adobepremiere
isnt there a way i can change the checkered background on a png from white to black?
does anyone know what this guy means in this particular section of the video? for context i’m trying to create a promotional phone case for my fictional movie, and i think im trying to make this camera layer completely invisible. i’m confused he says i should press backspace or delete and it never works for me
like only in photoshop
can anyone tell me how the pictures fade into eachother so smoothly?

top layer has low opcity and it's been placed moved with transform tool
like this? interface-level?

they are changing the layer mask of 'Design' layer by ctrl-clicking on other layers' thumbnails to select their pixels. Then, with the mask still selected, they are deleting those pixels from the mask
Is this a good laptop spec wise for creative cloud. (Its $800)


for some reason my photoshop only lets me undo a certain amount of times before not undoing any more
Photoshop only lets you undo up to 50 times.

is there a way to increase it ?
Yes, by default its set to 50 undos for performance optimization. It can be changed by going to your preferences (Ctrl + K / Cmd + K) then go to the Performance tab and change the History States value to up to 1000 (this refers to the maximum amount of allowed undos. More may cause a fluctuation in performance, dependent on your computers specs.
yes, looks pretty solid. in general, any recent hardware will run Photoshop just fine, just make sure you're not running low on disk space and you have at least 16GB of ram
each history step is kept in cache so setting it to more than 100 is risky if you work on larger files (speaking from experience)
does anybody know the exact effect to make this bus stop advert glow?i understand what they did with the lens flare but i still don’t know how they make the advert glow, make the floor have a light reflection and how the made the back of the bus stop glow.

this is the best quality i could get :/

tysm
can anyone help with change any color with color code with hue saturation
what do you mean by color code? do you want to use hue/sat adjustment to change some color to a specific hex value? can you show the image you want to change?
with the hue sat adjustments with the excat color code as the pink.

how do i select the color and change it
use the eyedropper 
hello photoshopists!!
does anyone know why this happens or how i can fix it
i want to keep the pixels when I export it
or is this because of my image viewer

another example

You're previewing at 2120% so image viewer antialiases the preview
What is the purpose of these images?
art
With the current state of how web and social media work, your art is going to be viewed at 100% zoom or less
This looks like a heavily compressed JPEG...

They are at 600% zoom here :p
That's part of it...
does the image viewer compress my png?
Are you designing in a printable resolution? Or are those pixel arts and you want to upscale them?
The source file is 8000 pixels and you've exported it out to what size?
Not 8000 pixels x 6000 pixels. Looks like its reduced. Then you're zooming in 600%. heh
it looks like the same size as my ps document

is that bad?
That's one of the standards. But imagine you print your design and a single pixel of your design takes 1/72 of an inch when printed. Is that what you want?
sorry i dont understand
do you have a printer? press ctrl+P, make sure the scale is set to 100% and look at the preview
go ahead and print what you see (at 100%). This is the file you're working on right now
I have typography and or reproduction question: is it a font or an effect on Adobe PS for the bottom text?

that's a gradient overlay layer style
Hi.
is there a way to make like a center so when the red pice is placed where I want it the black pice will snapp to that place when draged ower it, on its own side as a mirror kinda?

Thanks. Also is the rough edge part of the font or an effect?
Gave +1 Creative Carma to @serene coral (current: #6 - 813)
use align buttons (at the top when move tool is selected)
aha okay I will try
looks like it's a specific of the font used
Thank you 👍
hey, could i get in trouble for taking images of a google/pintrest, edit them, put it on a t-shirt and sell it?
you'd eventually get the bill with the amount to pay to the owner of the image
how do i know if certain image belong to someone
hoiii, need help with making a gif, i found a web page that has a cool gif, i wanted to know how i could make something like that
don't think i can post links here tho
EPILEPSY WARNING

it the background for this
i wanna make a gif like that, without all the flashing lights
ive created a ui design using graphic shapes in photoshop
how would i crop the canvas to perfectly fit the ui?

Image>Trim
awesome thanks!
Gave +1 Creative Carma to @serene coral (current: #6 - 814)
save for web offers a lot in terms of limiting colors and dithering

eh, nyo how would i make the text do that?
hey everyone
where can I submit a collective request from a bunch of creatives to adobe team directly ?
...what kind of requests?
move? you can animate position change but you'll have to use video timeline
Regional Pricing Adjustments for a selective set of countries
https://community.adobe.com
Master Photoshop with the help of our global community.
Thank you @serene coral but I think that I need to reach out to the sales team or someone closer to that
Gave +1 Creative Carma to @serene coral (current: #6 - 815)
how can i make lights in a image glow a bit brighter ?
How would one bend it like this? and not change the spacing between the 3 black lines?


i am trying to recreate this artstyle, what is it called?

nvm google bard answered my question
Use curves or levels adjustments
Sorry but I'm unable to guess what I am looking at?
sorry, the black line that bends
is there a way to change all of a specific one color in a selected area?
create mask for selection and then use hue/saturation with clipping mask above

how do i know if certain image belongs to someone
whats a good place to find brushes ?
you could do a reverse image search to see if you can find somewhere that says it's protected by someone
right, how about editing the image to the point where its hard to tell its originality, would that work?
hey can u help me please:
first picture the file is perfect but if i place it (second picture) the file is like low resulution


okay, interesting. TY. Will look into it
Are you resizing when/after you place it?
the normal picture is bigge after i place it in 32x32 pixel
i want a big picture for mc item
what type of effect can i use to make a regular rose turn into this?


Threshold + grain effects
What exactly is the problem?
won't let me save to cloud
Change Interpolation settings as shown in my old video here:
#❓ask-a-question message
I cant crop this image... I select the part i want to keep and go to image>crop but it doesn't work

Could this be the issue?
Discontinuation of Creative Cloud Synced files
https://helpx.adobe.com/au/creative-cloud/kb/eol-creative-cloud-synced-files.html
Hi guys I have an exercise to do which is to remove people from a particular image but when I do it it's not qualitative if anyone could help me I would be grateful. Thanks in advance
tbh I use the marque tool to crop images
Can you post the image and guidelines so we can offer you suggestions?
Yeah thanks Michael
I have to remove the two girls while keeping the boy. But the brunette's shadow hides the boy and I know that this will be detrimental to the final score. The fact that the boy is dark-skinned is done on purpose. I'm French so I hope I'll be clear enough
Look at my first work
I wanted to use color contrast but it looks like a cartoon
and as I'm just starting out I don't understand all the subtleties
tbh I'd do the opposite and get rid of the guy XD
Also I'd like to note that in this one the wave gets cut off, the white part of the wave just abruptly stops, then starts again
Anyone can edit for me the picture
270 X 349 pixels
300 resulation
Size 13-14 kb
souravsdtapash2000@gmail.com

no
XDD
@river otter well seen I hadn't even noticed. you think you could help me ?? 😂😂
a bit XD
but seriously, since I made water appear, the teacher took me for Moses?
interesting
aint no way
Nice pic on BMW m4cs btw
I have banners from which there is light and reflection in the sea. Now I have changed the content of the banner and its color. How can I change the color of the reflection so that no difference is visible?

thanks
ty ty
Gave +1 Creative Carma to @oblique dagger (current: #847 - 1)
how do i extend this pattern its like 4 sqaures of this connected to each other but hte lines on the end connect

@fallow peak Please read this post: https://discord.com/channels/547473772727238676/1042833042378592329
If you have a current version of Photoshop, you can try to use Generative Fill / Generative Expand...
i tried but it just make some random weird background that had nothing to do with it
and put random text and stuff
this has got me going crazy. My brushes never did this before. for some reason, it does not remember the size i change it to, and keeps reverting back to size 22. the shape dynamic gets reverted when ever i switch brushes too, same with opacity.
It normally would stay to what ever setting i changed it to without having to make a new brush. if i changed hard round to size 4 and added shape dynamic pressure, it would stay that way when i went to a different brush and come back. Can anyone help?
the only way i can change it is by making a whole new brush
so you have 2 brushes. Hard round does not have size specified. Edge brush has a preset size of 22. Blue brush outline means you are using the settings the preset was saved in. Orange outline means the preset has been applied and modified

use any online converter. Photoshop is not the tool for this
yk why I cant do the challenge

what is the link?

works fine for me
I am on a school account
does it work if you open it in an incognito window?
You can make this pattern seamless with offset filter and clone tool, bit old school way of making game textures

Or if you have substance sampler you can do this within few clicks
Any tips on how to remove the white under the colours so that the colours are more transparent rather than looking like colours over a white bsckground?

I don’t think you can remove white from under colours
Probably you would have to redo this with gradients set to to transparent
color range masking or blend-ifs. or if you want to use it as an overlay on another image, use blending modes
?

I have banners from which there is light and reflection in the sea. Now I have changed the content of the banner and its color. How can I change the color of the reflection so that no difference is visible? I tried to highlight these highlights, but it turned out a little wrong. Is there some other option?

Thanks, I'll do some research on colour range masking and blend ifs
Gave +1 Creative Carma to @serene coral (current: #6 - 816)
Is this color range masking or blend-ifs?
color range mask - you can see the layer mask next to the layer's thumbnail
was this made with Generative Fill? you could try selecting the reflection and regenerating it while being specific about the color you want to get and selection
Thanks mate
Gave +1 Creative Carma to @serene coral (current: #6 - 817)
No, the image was taken in midjourney. I've already tried using generative fill, but it only makes things worse
just to make sure - we're talking about the water reflection of the screen at the top in the middle, right? blue and pink?

want a second opinion on colours in this image. any recs?

like this?

Well, rather yes than no
I have removed the existing reflection with Generative Fill (empty prompt) and added the reflection using 'classic' methods. I copied the screens visible at the top, mirrored and placed at the bottom, where the reflection should be. Then I blurred them a bit, changed the blending mode to linar light (or you can use screen) and used blend if to hide the layer where the background layer (water) is dark. Then I adjusted it a bit with curves and hue/sat
Of course it sounds difficult to me, but I'll try. Thank you.
Gave +1 Creative Carma to @serene coral (current: #6 - 818)
Don't worry, update on the process and ask for help here if you need to!
does anyone have any ideas on how to add a gradient to this using the elliptical marquee tool? i need to use this tool for my assignment

the elliptical marquee tool  is used when you want to make elliptical selection. You can't directly add gradients or any pixels only with this tool
sorry, my mistake! i meant the rectangular marquee tool
my tutor has a video up where he uses this tool to blend a woman to a background, and i am lost on how to do it in my image, because i used the distort and perspective transform tools and the gradient doesn’t look right
still, this is only a selection tool. Or is it that your process has to include it? can you link the video you're talking about?


I need a slight bit of help. Basically I have a lot of images and I want to make them all exactly the same size
Ok so first they make a selection of area they want to affect and then use the gradient tool to place a gradient within the selected area

Got a lot of photos to resize? Don't spend ages at the computer. Read our article on how to batch resize images in Photoshop for faster results!
thank you
thank you so much 😄
Gave +1 Creative Carma to @serene coral (current: #6 - 819)
is there any way to alter the gradient of an image to approximately 2.2
can you clarify?
hi! i am designing a project for uni, the brand name is “mundane memories” they are a restaurant that sells foods which remind you of those really regular things you did as a kid, i need to design a logo and would appreciate any ideas as im a little stuck :))


you have a selection active while the tutorial doesn't use any? they create a radial gradient
thanks for the advice, i thought it was the elliptical marque tool 🙂 do you have any advice on my bus stop advert, do you think it looks similar to the one in the tutorial?
yes, I like the glare!
hey i want to blend this eye with this character but i dont know which is the best way to do this

if i use auto blend it messes up the edges of the character a lot
Add a Layer Mask and paint on the mask... See: https://discord.com/channels/547473772727238676/1045711257178738760
thanks does it matter that the eye that i want to use is lighter in terms of colors to the one that the character has which is darker?
Gave +1 Creative Carma to @ripe quest (current: #3 - 1696)
First, you'd paint the mask to start the composite. You can adjust the colors, brightness, contrast later.
okayyy
Whats teh best way to remove transparent pixels like this?

also whats the best way to make an image pop/the colors look more alive
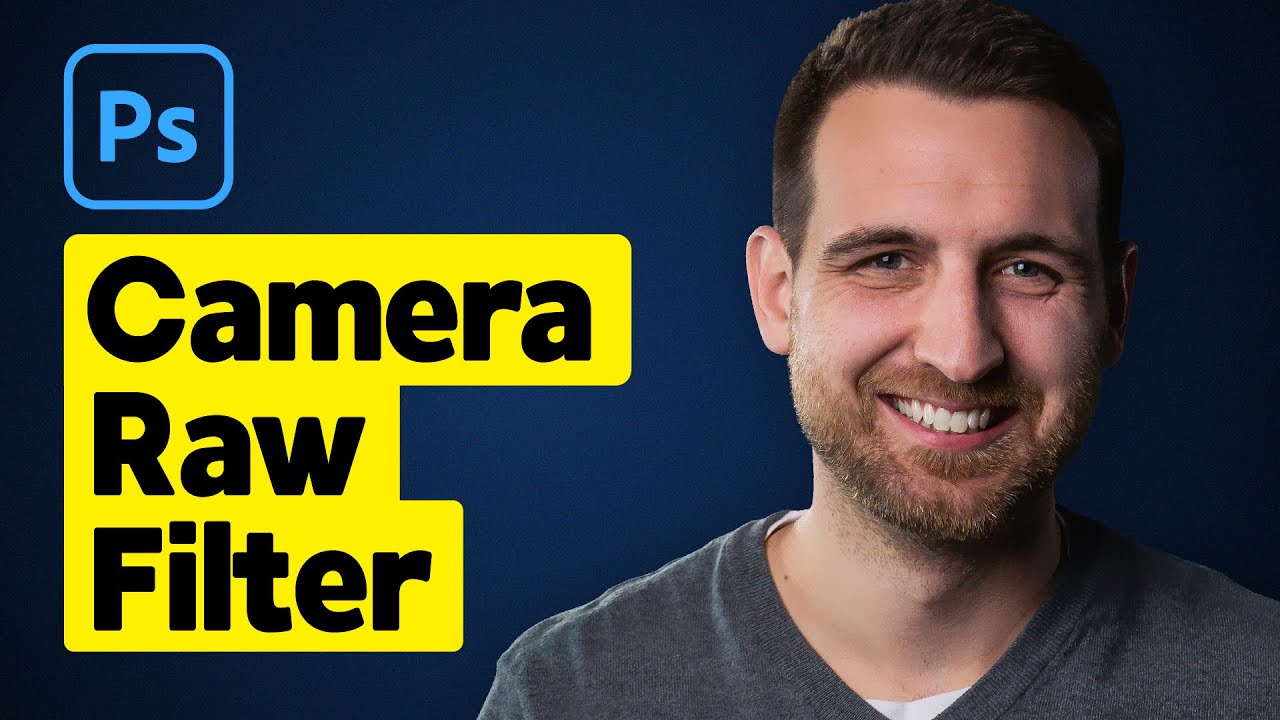
how to download or add Camera Raw Filter to photoshop CS6 Extended?
save an image as an PNG or JPEG
then u have to open it as camera raw
Camera Raw filter
thank you thank you
Gave +1 Creative Carma to @thick tangle (current: #847 - 1)
no problem
Really weird question, but does anyone know why the right side looks brighter than the left side? The files are untouched and I haven't added anything to them, but for whatever reason anything that goes to the right side suddenly looks more bright no matter the position, size or rotation

bro, it looks normal
Are you sure? I've checked on both monitors, on my cellphone, even asked a friend which he noticed the difference as well
Here, maybe you'll notice the brightness difference in this zoomed screenshot

Ah yes now, I only the background, but it must be something you did...
then i guess just make that one side a little bit darker 😅 🤷
Like, I really haven't done nothing but add images, resize them and place them together, I don't know if my .psd files are permanently screwed up at this point
I was thinking about that.. Got any suggestions?
Without seeing the project and the layers it is difficult to give you a solution
well u can only select that 'background' and make it a little bit darker with Curves/Levels
or the opposite make that one lighter ... what will be easier
or maybe u can use Match coclor in Photoshop but not sure if that will will do it...
Guys, I believe I have found the problem
I think.. It's an optical illusion
🤯
The design pattern is in a way where there's a subtle gradient. Where the left end meets the right is where the darkest and brightest parts of the gradient meet

Why don't you just duplicate one of the gradients?
I mean, these cards are already images, not layers upon layers
ok, but photoshop gives you all the freedom to cut and copy....
nah
i figured it out
i understand now
if u look ate 'the left side' it goes from a slightly lighter to darker and at the right side its literlly the same thing
but theres this darker bottom right next to the lighter top
thats why it look like that
Yeah, an optical illusion
I can't describe how confusing this is to process, on my mind at very least
Yep, for me it's simple, I remove the saturation of the layer, add a solid background color and use the texture as an overlay mode, if any side is darker I would correct it using levels
Now if you don't understand anything, it's better to take a basic course on YouTube
No, yeah, it's clear as crystal
But I'll take a bit of a break for now, I may let you know how the thing turns out
I really appreciate your help, you two

https://www.youtube.com/watch?v=EnKJdAv7agE&t=152s
anyone can tell me on this video what he used to make that black and white bad quality look ?
#1hour #1час #music #phonk #vibe #tiktok #tiktokphonk #slowed #slowedandreverb #slowedsongs #slowedsong
like fully black and white

They're all exactly the same?
The gradient just changes at the top of the card. That's why it doesn't match.
"threshold"
ty\
What are they for anyway? I'd have assumed they were due to be printed, but there's no tickmarks or bleed, then I thought you were making them for TTS, but you're not in the TTS server either 🙂
I see, I see
Yeah, it seems to be like that
Hey! Coffee Rush!
Also, good observation! I'm currently gonna print this game for myself, making a smaller version
And yeah, those assets are from the TTS workshop too, a guy I know translated it


Well TTS probably has some slightly yellow lighting on it.,
The images themselves are alright, for the most part
You can check them individually, too

Also I think you can change the lighting in a TTS session as well
The whole game looks like it doesn't need translation anyway?

Only saw this one counter?
Which I'm going to assume says "Open"
Yeah, you can - and interestingly enough....

(Ok, this is probably veering off topic a little ) - Glad that you seemingly got it sorted.
Well, its either print this one or the russian version 
does falling lava have shadws?
its dark ish...
The glow of the sun in the daylight is typically lighter than some lava.


theres no sun in the image and the lava sholud be my lightsource...
What's the end goal? Are you going to be printing it?
yes
In that case, no. the flame from a lit match doesn't cast its own shadow.
how big?
im not sure the exact dimensions

Gimmie a moment 🙂
i can give ue psd
Yeah cool. Cheers
check dms in a sec
okay but then how can i actually make it more 'realistic' cos now it looks like just smashed on to the image ...
CAN SOMEONE TELL ME WHY IS THIS HAPPENING

i just need the photo to be imported normally zommed in and not zoomed out
I'd have likely done it in Adobe Illustrator, and I could have picked an 'offset stroke' type setting but in photoshop, which is raster... I'd do it like this..
wow thank you so much
NO I
made new
and just placed an image
How big is the canvas?
i reinstalled photoshop
1280 720
pixels
and img is 1920p
why does that matter
it was perfect 2 months a go
could u send the pf in dms
dpi? and the size of the file you are trying to insert?

pls
I need to ask, so sorry if this is insulting, but are you sure it's 1280 PIXELS? and not inches or anything?
doubtful
It's kinda hard to help when I can't see your image
What was it?
that
i suposseee
dude i had photoshop 2023 downloaded
and i wenmt back to 2021
.-.
lol
Hey guys I REALLY need help with something
I don't understand what this means. You can just drag and drop an image into the interface...
Under the white image IT wrote import image, but IT dissapeared

hey know anyone really good at photoshop?
some douchebag crashed into my friend and brandished a gun on him and his gf
we need help unblurring the liscence plate number
I don’t know if this is against the rules
But the reason I joined is simply that
You're probably not going to be able to "unblur" it.
@ripe quest can You solve my problem?
I don't even know what you're referring to.
Below the white image was a rectangle with the import image function
Can I dm it to you just in case?
Are you talking about the "Contextual Task Bar"? Main menu: Window > Contextual Task Bar...
No. If this was a crime, call the authorities.
That’s why I want to unblur it
We took pics but the numbers are too blurry
But if you can’t it’s fine
You're probably not going to be able to "deblur" the image. You take the image and the description to the cops and let them deal with it.
Something like that
Sorry. I don't know what you're talking about.
ok so I'm a artist and I've been trying to draw in photo shop and I'm some areas of my art whit boxes appear when I use my brush, now I know it has something to do with my gpu and ik theres a setting in my preferences that can fix my issue but it makes photoshop laggy anyone experienced user know how to fix it??

Sounds like some sort of realtime rendering issue. Check, main menu: Help > GPU Compatibility... any errors or issues reported there?
this is what pops up,

That's how you turn it back on. Clicking the menu item toggles it on/off. If its toggled on, maybe its on a second screen. Do you have two displays? Otherwise, save your work and restart Photoshop. Try that.
i haven t two screens
Says right there. "Update drivers." The driver is out of date. Try updating your GPU drivers. Reboot. And then try again.
Then read the rest of what I said... Perhaps its a glitch. Restart Photoshop.
it appeared again
It was automatically disabled
Idk why IT was automatically disabled
I don't know either. Its either on or off based on the setting in that menu.
That menu bar is "contextual" meaning that it will change based what tool is selected or if an area of the canvas is selected, etc.
I keep getting told that I already have the best drivers installed
Well, Photoshop is telling you that its two [2] years old. This is the first thing to try when you have rendering issues.
how do i improve my creativity? some days i have a really foggy brain and just stare at my computer like i don’t know what im doing (i don’t know), but my creativity isn’t the best and i have some issues with that, so my question is: how can i improve my creativity?
could someone photoshop me something? ill pay for it
Finding inspiration can be tough. People deal with creative block many different ways. Sometimes, it happens when you step away from the computer and going to look elsewhere... music, movies, books, taking a walk outside, shooting photos, etc etc.
thank you
Gave +1 Creative Carma to @ripe quest (current: #3 - 1697)
Anyone knows why i cant add stroke to the text?
The Opacity is set to "0" - turn it up so its visible.
Im so dumb, i thought 0% was max. Thanks bro
Gave +1 Creative Carma to @ripe quest (current: #3 - 1698)
You may want to "reset" your Layer Styles. Only a few of them are showing up in the menu.
Gotcha ty

Ok so I updated it and now theres no errors that come up with the gpu but its still showing white boxes
you're
How do you find good fonts
There’s Dafont but I can’t find any I like
But when I look beyond that
All the fonts I like are for money on like
Freepik or Vectezzy (I think)
Adobe Fonts
Adobe Fonts partners with the world’s leading type foundries to bring thousands of beautiful fonts to designers every day. No need to worry about licensing, and you can use fonts from Adobe Fonts on the web or in desktop applications.
Search. Activate. Automatically available in Adobe apps.
@glacial vortex have you found someone? I can help. Send a request.
How do you make the font 3D in a sense
Hi, the "Import image" will pop up on the contextual toolbar then you open a new blank color Background document and then new document have focus. and disappears then the new document is out of focus or that you add something on the blank document like a new layer.
if you choose transparent background as new document will you not see "Import Image" because it's not a "background" in layer panel.
With other words as soon you do something on the document you will see the normal contextual toolbar. So what I know that how that's toolbar work.
You canvas be empty for you shall see "Import Image" in the contextual toolbar. Hope this answer why Import Image disappear.
thank you
Gave +1 Creative Carma to @thick tangle (current: #545 - 2)
No problem
Guys, I need a bit of help.
Watch the intro of this video - https://youtu.be/-Hwlvkfp698?si=YOFQdDb5TdiZIjDC
How is he randomly adding the subtitles on the screen wherever he wants, but it still looks like they are aligned? How can I do that as well?
I know this channel is for Photoshop, but you guys should have an idea of how to do it.

If you enjoy hearing about the transformative power of sleep, I recommend you check out my conversation with Dr Matthew Walker, which you can find here: https://www.youtube.com/watch?v=Us8n8VBQn_c
00:00 Intro
02:13 Why do you do the work you do?
02:48 What your work is and involves
05:03 The Importance Of Sleep Wake Timing - circadian rhythm
10...
I would imagine they are using guides? I mean that's how I would do that. However this is likely done in After effects.
Yeah I was thinking the same, they're probably using the guides, we can add guides in after effects, so no big deal.
If you need more info, their discord server is here
discord.gg/adobepremiere
Thanks!
You can easily create 3D shapes from a font (or any shape for that matter) in Adobe Illustrator. You could in PS, but they removed the 3D capabilities a while ago. You could make fake 3D though, real 3D will be either Illustrator or a proper 3D software (Blender, Substance etc)
good morning Sandrine! You can still do font 3D in Photoshop with help off Layer style but it's better to do it in the other apps you said, because they have 3D tools.
Welll, you can create the 3D shape still, but lighting and texturing have almost all but disapeared. I mean I would expect top have some lighting and cameras fully functionnal if I wanted to do 3D 🙂
It's also insanely complicated compared to how you'd do it in Illustrator
Also since the phasing out have been going on for years now, I would say, if you haven't migrated to a proper 3D workflow yet, start it now 🙂
https://community.adobe.com/t5/photoshop-ecosystem-discussions/photoshop-3d-features-are-being-removed/td-p/12322748
https://community.adobe.com
As of Photoshop 22.5, released in August 2021, Photoshop’s 3D features will be discontinued. 3D features have enjoyed long success within Photoshop over the course of 10+ years, however the personal computing industry has recently been transitioning away from use of OpenGL (having to do specific...


It's not often I use 3D and it's only for fun. I have a 3D cad program then I work with 3D
Yes, I used to use 3D in Photoshop as well. I started in earnest just a bit before I started being interested in 3D agin (My luck! 😂) and I used it to model things and then I would use Dimension to stage them. It was pretty laggy and a bit bug prone though (In my opinion)
Maybe it was a very good alternative when nothing else existed. I think the combo Illustrator for modelling and Dimension for staging (lights, camaras, texturing) is a way simpler workflow for those who don't want to bother with very technical stuff. Of course it's limited compared to what you can do with a "proper" 3D software, but it's still good fun, and you learn about working around limitations!
Also Illustrator and Dimension are both in the standard CC subscription, so it's a good alternative on a budget (bar going to Blender which is free) and even if Dimension is marked "end-of-life" (but still fully working, it's just that's it's not updated beyond bug fixing nowadays) it's still a very good entry point if people want to work in the Substance environement (same UI, same logic etc)
But I digress 😂
hey so im trying to color correct this image, how do i take out the red overcast?

I have Blender but I have not have I nearly don't use it.
I have seen some tests of 3D apps and Adobe's 3D sweet stands up well in the competition. But have a complex workflow if I can say so.
One simple way is to add a Hue/Saturation adjustment layer on top, select "reds" in the dropdown menu and lower the saturation slider in there
sometimes darken it as well works
There are other ways (Curves which is more precise) but Hue / Sat is the more strightforward
it turns it into a very desaturated grey

Maybe lower it just a little, obviously not to 0
also you can try tweaking the Hue towards the right so the red becomes more yellow and blends better
you need to test things, move all 3 sliders untill you get something that fits

red removed, to be in line with the rest
Now the red cast wasn't the real issue (But you did ask about the red 🙂 )
oh sorry about that
No worries, I am just being cheeky
Selective colors can do wonders sometime also.
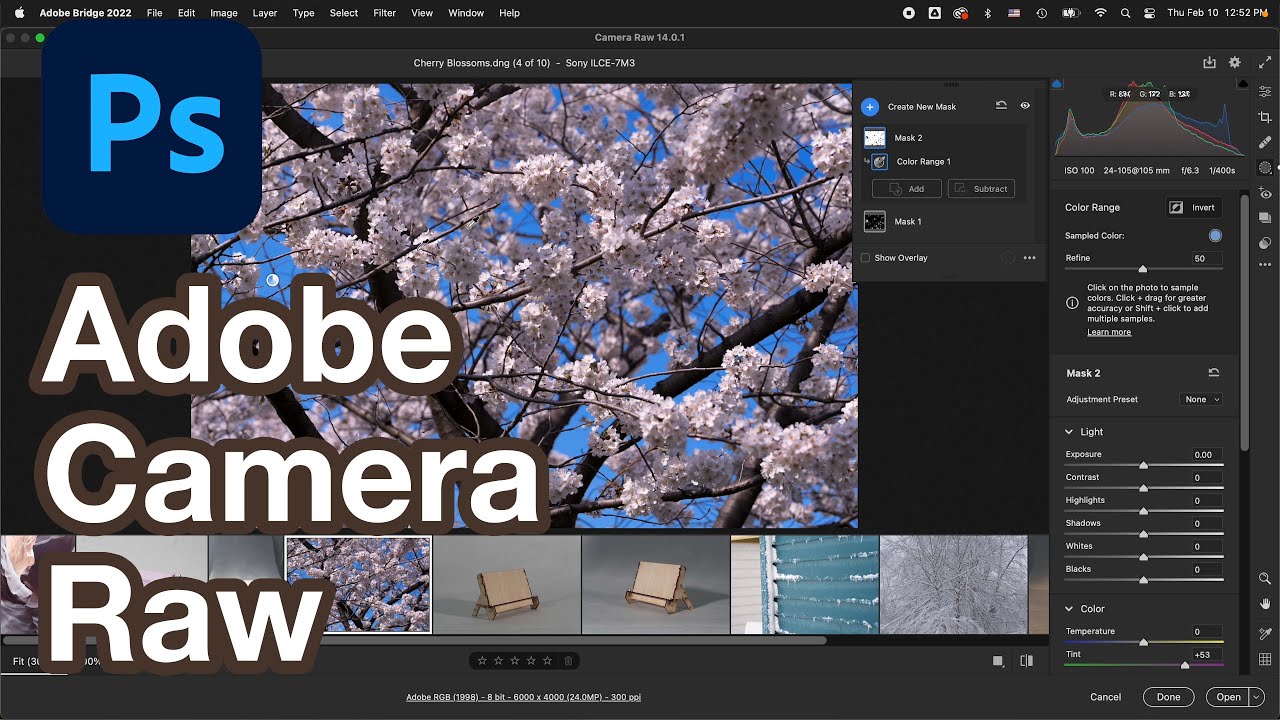
Is it a jpeg or or a RAW image?
raw
because with a RAW image it's easier
ya
Using Camera raw filter

When there, you get into a module that ressembles Lightroom, which is more intuitive to retouch images.
First off, you need to search for a neutral grey into your image. It will be your refernece point

the hoodie worn by the character in the background seems a good contender
in the "colour" panel, check this eye dropper and click on the hoodie

That way, you get only the colour cast set by the sun
yea
Then I would go towards the colour mixer there and tweak the colours further

click on this icon and then click in the image to select exactly the colours you want to change

place yourself in either hue, saturation or Luminance, and move the mouse right or left, directly within the image to check the results
thanks , it will surely help me ahead tho
i doubt theres much that can be done further tho coz the image was so overexposed?


Of course, I am working from the screenshot and I can't extract any details from the face, but it would be within those settings
oh lemme try that
Let me send over the different settings, in case that helps


I didn't go into much details but you get the thing
Is there a way to implement the sprites from a sprite sheet into photoshop easily? Or am I asking a question that would be better fit for a different software? I'm trying to take a single sprite and put it onto a map.

Do you mean extract each element from the whole sheet and insert them into a photoshop document? It depends how the sheet is made (Is it a flat file? layered? which file format?)
this is what we get

I think eventually you will have to work on selections by masking. Keeping the face lighter while keeping the background lighter

there are very cooll selection methods in Lightroom (in some respects even better than in PS proper)
oh i see
for now i just know basic color correction just fixing exposure and matching the whites blacks and greys with curves eyedropper
Correct. I'm trying to extract a singular sprite from the sheet to implement onto a different image. I'm not sure what you're asking in the 2nd question, but what you see is pretty much what you get. The format is a png but it still has that green background. The way I currently see a workaround is to screenshot the individual sprite I need, remove the background, then place that sprite into the map but it sounds dreadful doing it that many times, even if it's as needed.
would be great to delve deeper into more advanced techniques for sure
if you could recommend some resources
Selective colors and camera raw filter

I was asking as more often than not those sheets are either .ai files, a .svg, or an .eps (or an affinity designer file) that's what I have been given every time I had to work from those
If it's a flat png, the only way would be to carefully select the sprite you want to extract, and go CTRL/CMD+J (copy from selection)
Yeah I see what you mean. Unfortunately, I'm just using this for a recreational project to try and learn PS a bit better, so this isn't an official sheet such as .svg.

In this video, I will show you how to edit ANY PHOTO in Photoshop. It doesn't matter how low quality, or how bad the photo was taken, you can always do some kind of edit. This step-by-step tutorial will walk you through how to use the built-in Camera Raw Filter in Photoshop.
🟢 Get 70% OFF Envato Elements: https://bit.ly/LSPV-Envato-70-OFF
📌 Env...
In this Photoshop tutorial, learn how to use camera raw filter in Photoshop. You can use the camera raw filter on smart objects in Photoshop to edit the camera raw settings.
Check out my Photoshop classes on Skillshare 👉 https://pxlbr.link/PhotoshopEssentials
I use Screen Studio to record tutorials 👉 https://pxlbr.link/screenstudio
MY TUTORIA...
I'm still a little new to PS, would I use the Object Selection Tool to initially select the sprite I want before copying it?
Depending the size of each prite, you can extract roughtly the area using the shortcut I shared earlier (select first using the rectangular marquee tool - shortcut M -and use the magic wand -shortcut W - to remove the remaining background colour from the new layer
The workflow for my test
this tutorial is cool too!
https://www.youtube.com/watch?v=11jwSwUu2WI
📸 Discover the Secrets of Adobe Camera Raw in This Comprehensive Tutorial!
Join us in this in-depth Adobe Photoshop tutorial where we delve into the world of Adobe Camera Raw. Perfect for both beginners and seasoned photographers, this video is your ultimate guide to mastering raw images and taking your photo editing skills to the next level.
...
Object selection tool would work, unless the sprites are very small, which I suspect they are.
Try it, and see if it manages
Alright, progress. Now doesn't PS have a built in "remove background" type of feature?

Or is there an easier way of removing the green
I mean most often than not, the success of using one feature over an other depend on the kind of colour, contrast and size of the element concerned (since those tools work according to edge and colour detection) so it will be a question of trial and error
Try the magic wand as I told you earlier?
it's a single colour so you should have some success with those settings

select the magic wand tool, and then click on the colour you want to remove. It will select it. Once selected, click CTRL/CMD+X to delete or mask it using the masking icon in the layer panel
Oh apologies, I missed that earlier/ forgot that step. So I've never used the magic wand before

What do I do after it's highlighted? (I know I can probably look it up, but I assume it's faster if you tell me and I really appreciate your help btw)
click on the green with the magic wand on the new layer. It should select only the green. then cut or mask as explained above
thanks for your tutorials ill check them out !
you should see the "marching ants" (the blinking line) indicating the area selected
Oops lol almost there, I just CTRL+J'd but it removed the sprite rather than the green

Selecting areas, people etc in ACR is really a breeze. I would suggest doing a global colour correction and when it's done concentrating on the face to lighten it and bring details. Don't blow up the whole thing. Keep the background quite dark and then work on the face separately
I tried copying and pasting it, but it doesn't seem I can copy the sprite
before cutting, you will need to invert the selection (CTRL/CMD+I). It shouldn't be like that if you clicked on the green background though
so select, invert and cut... In that order
see how it selected the green only there

after cutting, note than some parts are semi transparent

I was having trouble with CTRL+I, but found out that it's SHIFT+CTRL+I for me (not sure why, but just wanted to let you know).
Yeah it seems I'm at that part but it's clipping into the actual sprite itself

It doesn't matter where I select the image with the magic wand, it always selects the same outline
Even if I click on the corner of the green
you can clean the residual stuff with the eraser

can you show me the whole PS screen? (with all the panels etc)
Yeah no problem. Like this?

hi! im working on a project thats meant to be a restaurant that sells memories via foods, ive started working on a menu and would like some feedback, its very rough rn but im stuck on what sort of direction to take it

Yes that's OK. What settings do you have for the magic wand? Nothing seems off in the screenshot you shared
Umm I'm not sure what settings could be changed. This is literally the first time I ever selected the magic wand, so it should be default everything
Yeah I just tried again and it's highlighting more than just the green. Is there a way I'd be able to tell it to only remove the green?

Sandrin have you used history log anytime.
I wish there was like a paint bucket/ fill but for creating a PNG background
I just need to remove one static color
Yes, lowering the tolerance in the magic wand settings. See those I shared earlier
as you're trying to select a single plain color, tolerance at 0 should do the job without spilling the selection anywhere
Yes, I used to, but not anymore, it just adds to the file size, and none of my client care about how I do my things 🙂 (not that I will share anything mind)
Once again, progress lol. What tolerance worked for you? It's now only removing the background.. but then leaves me with faded pixels. I'm not sure if tolerance even impacts this, but I tried 10

can you send the source image?
You can save automatic as a text file and your fil size on the image will not increase. only the logfile I started my logfile 11 January and to day is the text file only 2.6 MB
@serene coral this?
yes, the image you sent gives me weird results

It's more than I have no use for it 🙂
Agree, the only use I can see is you will do Actions or Tutorial to transcribe your settings for different tools
I generally work exclusively with smart objects and I can always see what I have done by clicking on the filters settings there. I used log files a lot when I was learning and I agree they are useful to reverse engineer things. Unfortunately nowadays I will thrive mostly for efficiency and trying to keep files relatively straightforward and light!
Efficiency is no trouble for me if it take 10 min or 1 week no matter I'm retired
My retirement (if any) is still a long way away unfortunately! 😂
Good start! - But it's always easier if you're not forced to start completely from scratch.
Something coming in from the edges could look nice:

hi um can anyone sugest and good drawing pad with styles i can not find one that is what i want the the one i am using is getting a little bit old and is starting not to work
I think it helps if you can find a nice colour pallette that you can pull from, it's always tough if you just randomly pick colours as you're designing:


I see you've already picked the crayon drawing style, but I also think 'stickers' could work quite well... So it looks like a child made the menu by putting wonky stickers around it.


can someone straighten this mat?

I'm a bit confused. The image you posted is an awfully low resolution. - It's all just blurry when you zoom in.
If you literally have nothing better, I'd suggest you follow the first 1/2 of this video here:
It's still going to still look jagged and pixelated.
here we go.
ok thanks. can you please send me the picture?

thanks👍
that would actually be fine but only if pixels weren't aliased somehow in the image they sent
I've been having an issue with Photoshop, where sometimes I'll Quick Export as PNG, wait for it to finish, then, in Photoshop, change the image size without saving new copy.. but the image that I saved before has now been replaced with a saved version of the new size- example:
Quick Save guardians.png at 1024x1024 onto Desktop > Press Enter > Change image size of guardians.png to 512x512 > Press Enter > guardians.png, which is on the Desktop, now reads as 512x512,
-even though all I did was change the size of the still-being-edited document in photoshop, and did not save again.
If there is only one copy of guardians.png and its on the desktop and you save over it (use the same name) of course its replaced. Thats how files work. :)
Save the PSD first. Then do Quick Export.
If the file itself is still open in Photoshop, you might be able to use the History panel to go back to a certain state. Window > History...
Out of interest, what is the layer called? I'm sure I saw a video where the guy was auto-saving files by simply adding .png to the layer name!
I actually do this a lot but using the right-click option, Quick Export PNG.
I'm aware, as I said twice, I'm not saving it again after editing it, it seems to automatically replace it sometimes at random
I do this a lot because I'm making icons and I need about 5 different sizes of each, so this is a constant process, but sometimes, when I change the size without saving, it will somehow save it anyway, replacing the file I just saved
If I catch it in time, I can save it, just Ctrl Z to before the resize then resave it as the full size image, then try resizing it again, but that's an annoying process and requires that I double check that each icon hasn't mysteriously been saved over without actively trying to do so
Why not use File > Export > Export as... ? You can Export multiple files/sizes at once.
Can this batch process also execute a specific naming convention?
or is it just filename(1), (2), (3), etc..
For my purposes, the filenames need to be
FilenameΩ
Filename8x8
Filename4x4
Filename2x2
Filename1x1
Then you should probably use the Image Processor script. @sly hawk can probably show you a method. I think he uses this a lot.
Or tediously export them out one by one... it's up to you. Heh
Ok. Then carry on as before. Just save the PSD first if this odd behavior is occurring.
Then delete the PSD later if you don't need it.
It has a GUI. You're not writing Javascript.
Well, I suppose I'll see if James replies
Probably a few options.
You could probably create an 'action' that saves, resize, save, resize, save etc.
You could maybe use a duplicated smart object and a load of artboards? - then batch save all artboards
Or you could save all the images in the same psd together as separate layers and then 'export layers as files'
Then you could save all the 8x8 in one single hit.
The names of the files could be [Layer Name] - 8x8.png
@wary rivet
All that does sound very appealing-
I was actually thinking "Image Processor Pro" add-on but perhaps its overkill.
I sense a "but"
I suck at script- majorly
So do I. None of that uses custom scripting
Then how do I achieve this?
Can you please DM me a zip file with a bunch of your example files?
Oooh, free scam?
I'm out getting lunch but due home in 10 mins
Okay, thank you
Gave +1 Creative Carma to @sly hawk (current: #7 - 779)
@ripe quest - would you please do the honours with zryn... I'm just jumping in the car
Wait, no, I want my free fake 50 dolla!
You'll have to go out back, in the dumpster. That's where I put the spam. heh
I've done worse for absolutely no benefit!
@wary rivet I've had to post here since it's over 50MB
(Hope you don't mind) -
I'm happy delete the video once you've downloaded it
I'll explain the rest in a DM
I do not mind :)
hii does anyone have some advice on how i can make something like this? i've been racking my brain over it all day lol

Like, specifically the foreground colours flipping when overlapping the background?
nah like the outline of the people
Is someone willing to help me find a certain font? Please pm
If you're able to get cutouts of the people, you can make them a flat colour and match that colour to the background while giving them a 'stroke' effect the layer fx
(Just one more video - very faffy, but you'll hopefully catch the gist of what I was doing)
Adding a stroke around a person is easy?
ty!
I'm sure I can decipher your instructions :>
Is there someone who could help me with fixing a blurry photo? The focus is not on the subject, I tried a few things but no progress. I can also share the image if that would help 🙂
yo quick question, what's the best way of centering the text next to the image?

This is if you don't want the people inverting when they touch each other
Yes. Please share the pic. Either openly or privately if you prefer.
thank you so much! i really appreciate it :))
Gave +1 Creative Carma to @sly hawk (current: #7 - 780)
Does anyone have a prompt for making ember/fire particles? like this

thanks quick question how do u get like the pink lines to appear when u dragged 123? they dont seem to appear for me
Gave +1 Creative Carma to @sly hawk (current: #7 - 781)
Pink lines I think are smart guides.
View > Show > Smart Guides
Best I could do was:

"a black screen with fire in red particles on it, in the style of light gold and dark brown, scattered composition, atmospheric and dreamy, glittery and shiny, dark brown and orange, tumblewave, shot on 70mm --ar 16:9"
been getting the exact same results :/ cant get them to spread out more
As you can probably guess,, this was based on me asking midjourney to describe it
"small campfire particle texture on black background" this is the best ive found so far


can you try gen fill on a larger area?


Then take a different crop?

Should I add or remove the trophy and what other adjustments shouts I add
Good idea 🙂
Hello, does anybody knows what the posters or designs made with this style of brushes/strokes are called?

Paul did a demonstration of that future in a live stream, I don't rember then it was
I can’t remove back round from subject to make it white any thoughts ???
I want to take a simple image and put it on a white background plate

trying to copy paste something from one psd to another but when i paste it just creates an empty layer. why is this happening?
has it always been like this that Opacity is not actually saving when exporting it as PNG?
it seems that the Opacity is not preserved when exporting. i tried the quick PNG export, save as (and web), ticked on Transparency but it will remain as-is. this is what I want to achieve but the result is:


Hello all! Could someone teach me how to thicken the neck in images? I'm trying and failing miserably right now 😄
looks like it saved hence the green is darker because its blending with the gray. youd probably notice it more if you put it on something
I’m just gonna put this in #📝project-feedback I think I picked the wrong channel 😂 any advice still appreciated here tho
ofc though the gray of file explorer and whatever else does not have a pattern to let you know its opaque. i could be wrong ofc but it really does look like you got what was intended
it is indeed opaque 
-20 minutes wasted and im like.. ok
appreciate the point-out haha
You should be able to drag and drop a layer to another PSD file. Also, you can right-click on it (in the Layers Panel) and choose, "Duplicate" and then choose the destination document.
The #📝project-feedback is the appropriate place for this.


You'll have to share more because its impossible to understand based on these fragments of screenshots.


initially i thought maybe the original file types of both images was the problem but ive done this many times and its never been a problem until now
Drag Layer 1 to the other tab, hold there until Ps puts the document in focus, then drop it. It should be that simple.
hm
the logo was insanely oversized. its possible the shirt wouldve fit right between the gaps of it
but why wouldnt it show on the layers view?
bottom is what just worked, top is me trying to copy paste it again

Its probably there but its "insanely large" - try to transform one of the so-called "empty" layers... Ctrl T.
Hello, would anyone know how to create this lighting effect? It is the one that appears drawn in blue


Its a "rim light" or "edge light" effect. There are various tutorials on YouTube for that.
thanks haha I didn't know how to look for it on YouTube😅
Gave +1 Creative Carma to @ripe quest (current: #3 - 1700)
Here's a good starter 🙂
Thanks :^]
Gave +1 Creative Carma to @sly hawk (current: #7 - 782)
@serene coral @ripe quest @vapid flume - You might get a message from @ripe burrow about unblurring an image. For once it's nothing to do with unblurring license plates, telephone numbers or the exam answers on a teachers desk! - AI is allowed to help fill in the gaps on this one.
The Photoshop 3D capabilities have/are been removed by Adobe
really?
thank you! all help is much appreciated 🙏
Gave +1 Creative Carma to @sly hawk (current: #7 - 783)
@spare pier Yes, see https://helpx.adobe.com/photoshop/kb/3d-faq.html
hey guys is there a way to fix the blurry edges when im making a 32x32 pixel circle?
looks like youre zoomed in 740%, wouldn't the edges always be that blurry? unless you want no anti aliasing at all?
figured it out, actually it was more of a work around
Hey guys, does anyone here by chance looking for commission? I’m looking for someone who’s pretty experienced in photoshop and I have a request, interest please dm me
if i make a lazzo this happens

Hi does anyone have some advice on how I can make this frame? I assume the easiest way would to be make a square frame then use perspective warp.

hi does anyone know what photoshop i use to reshape images like changes someon's facial features
no one?