#❓ask-a-question
1 messages · Page 27 of 1
I don't understand the problem. I don't know your project, how your document is arranged or the context of conversation you had with Sandrine. Sorry.
You can Export Layer Comps to image files. But why you cannot, I really don't knw.
I have simple background layer, and next layer is smart object.
Inside smart object i placed 10 images.
I saved layer comps for each image (only one image layer is visible per layer comp).
If I understand well, Sandrine said that these saved comps will appear in main project, but they do not in my case.
If they are just layers, you probably don't need Layer Comps. You can use: File > Export > Layers to Files...
Guy asked for like thousand images that should be placed in some frame.
I tried it only to check if it works so I may need use that method sometime.
If you're trying to put a "frame" above each layer and export each one as an flattened image, then perhaps Layer Comps are appropriate. Its extremely difficult to understand from just these text descriptions of the problem.
May I send simple project?
No. I'm in the middle of something else right now. Sorry.
Ok
Hi, i am trying to generate an image but i dont know whats the right approach or how to do it most efficiently
Anyone who may help me and have spare time? 🙂
i have prepared a snippet on how i want the image to look like but i want "ai" to take over and "modernize" it
what would be recomended for converting PSD to JPG
It's okay, I think I understand, thank you very much.
Gave +1 Creative Carma to @vernal ember (current: #89 - 17)
Its not really going to work that way with Generative Fill. Its not going to replace the entire image in one pass. You'll probably have to work on portions of the image.
File > Export > Export As... JPG, choose the options that work for your project.
o shi, ty bro
i see, i want to create an image with a nice background, and a men riding a horse backwards. whats the best approach here? I have the background but letting ai draw a men riding a horse backwards is almost impossible
it's a donkey 😄

i want to integrate this image "modernize" it and apply it to a disney like environment
It will probably be difficult. Try to render the horse. Then make a selection and try to render the guy.
😄
gotcha, so first gen fill the horse/donkey then save, then import and gen fill the rest?
This is going to be complicated. Probably not going to be able to "gen fill" your way to desirable results.
No. You can Gen Fill on different layers. They will become different layers in the file.
ahh nice, thank you, gonna try this out now 🙂
Any tips on how to use gen fill? any q's that are important? 🙂
Probably watch some tutorials about it because this is a big topic with many things to keep in mind.
uff 😄
Sorry, I did miss your question. It's rather long to explian, hence why I provided the stream link that goes into extreme details on how to achieve this, in real time, plus the link to the help files and an extra tutorial
Have you watched them?
I did not. Can you send the link, please.
https://www.youtube.com/watch?v=hA_SFUcZTpg
https://www.youtube.com/watch?v=hA_SFUcZTpg
https://www.youtube.com/watch?v=b0Ch-ShfFW0&t=6s
https://www.behance.net/videos/05e50e6e-616d-4edb-877d-208fda7d8ad6/Mock-Ups
It's here #❓ask-a-question message
and in the following conversation
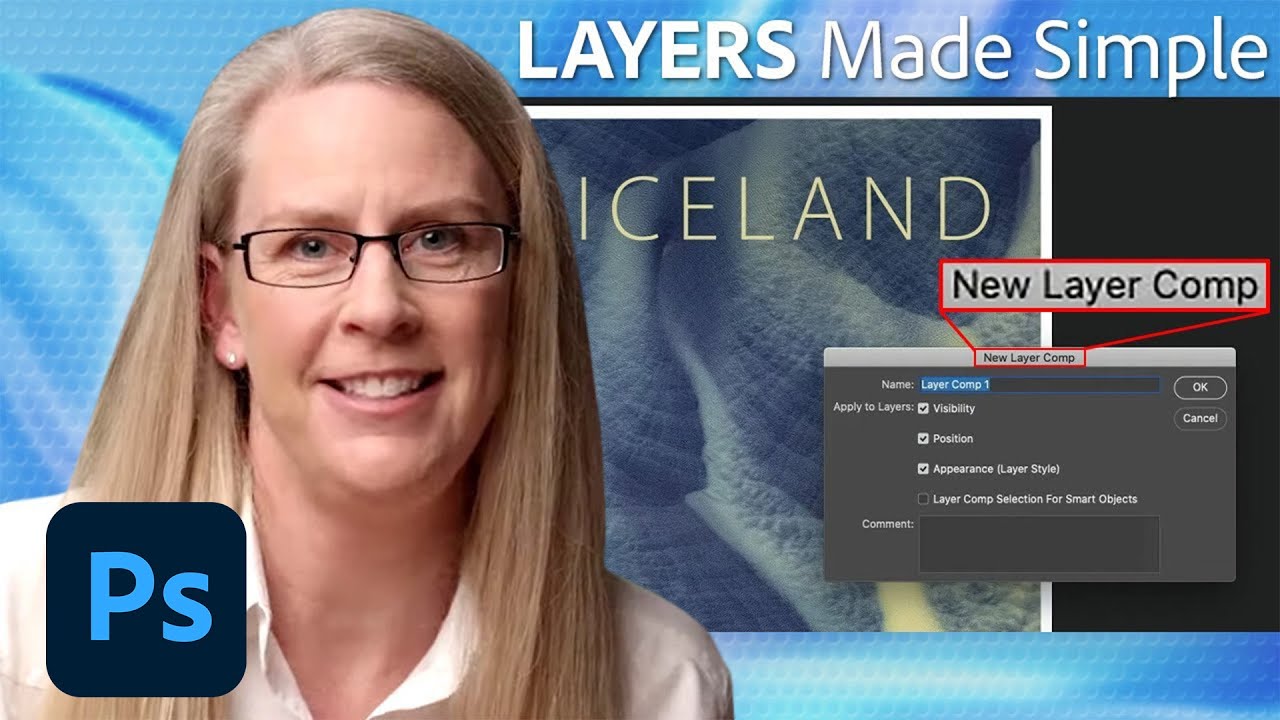
3, 2, 1… Photoshop! In this tutorial, Adobe Evangelist, Julieanne Kost shares important tips for using and managing Layer Comps.
Subscribe to Adobe Photoshop: https://www.youtube.com/adobephotosho...
Try Adobe Photoshop: https://adobe.ly/46TB5o1
Get Photoshop CC: http://adobe.ly/10ekpOA
Adobe Customer Care: https://helpx.adobe.com/contact
...
Photoshop tutorial showing you how to use Layer Comps alongside Smart Objects.
► Subscribe to My Channel Here: http://www.youtube.com/channel/UCdQ_ZkYaMe6qPoueUyPQgpQ?sub_confirmation=1
If you have any questions, please leave them below
or head over to this tutorial's page on our website:
➜ https://photoshoptrainingchannel.com/
👍 Subscribe +...

Shawn will be hosting Sandrine Bascouert making mock ups in Adobe Photoshop. https://www.behance.net/ImaginerieJoin Shawn's Discord: https://bit.ly/shawndiscordShawn is an Adobe Express Ambassador.Check outAdobe Express: https://express.adobe.com/
... hey I recognise that last last troublemaker/guest. - I'll have to have a watch later @vapid flume
I have a question on something I'm trying to achieve. Essentially I have a photo of me that I've used PS to erase the background of so now the photo is just of me but its being saved in the same resolution as the original with a transparent background. Is there anyway to save the photo as a png and have it only be of me? No transparent background at all. Essentially just crop it down to the exact size and shape of the subject (me)?
Image>Trim
Thank you.
I watched stream.
Nice to know for vector masking tip.
I think the thing in 4th. step you wanted to say in layer properties panel, as you are switching particular smart object layer comps in main project there.
However step 5 wont work.
This is just a way to switch smart object layer comp without openning it.
Gave +1 Creative Carma to @vapid flume (current: #8 - 509)
Main project doesnt have own layer comps, so exporting as layer comps is greyed out (not possible).
this is the color tool but how can i make it look like that in my workspace?

hey if i had a transparent curved object, how would i, im thinking "rig" the image to be able to drag those points and warp it as if it were a bezier curve instead of warping to a grid?
something like this, but when i drag the curve, the image warps behind

WIndow > Color... From the 'hamburger menu' in upper the left corner, choose "Color Wheel"

There really isn't any rigging like that in Photoshop where you can add a bones system and make it warp an object. The closest/most similar thing would be to use Puppet Warp. However, its not really meant to do what you're asking about.
thanks a lot!
Gave +1 Creative Carma to @ripe quest (current: #3 - 1650)
it kinkled a little bit but that was the most fun ive had on photoshop in ages lmao thanks
Hi, Im trying to make this background effect with the lines and the explosion type thing. What is it called and how can I make it? Or do I have to manually place every brush stroke?

You could probably 'generate' it with Firefly / Gen Fill.
I guess Im just looking for a square that looks the same as that (but with different colors)
What would I even say to generate it tho lol
Idk what it is called
that looks like bleach actually, the prompt could be something along the lines of
As in they phsyically bleached the hoodie?
bleach explosion on a tshirt or sth
yes
Why would it surround the characters hand then?
im not sure tho but it looks similar
orange and yellow burst explosion, painterly or some such thing...

Hmm could I manually do it somehow? I think Id prefer that level of control
you can achieve different depths depending on how much bleach you put
Then get out the paint brushes.
Which brush would I use tho
Or do both. Generate it and then paint on it.
there are brushes that change the color for every stroke you make
kyle has some really good ones for free, check his gumroad as well
No need for Gumroad. Sign in to your Adobe Account and go here: https://www.adobe.com/products/photoshop/brushes.html
Probably every brush you could ever need.
yeah but he has some other things i didnt find on there
There are enough free brushes provided by Adobe that will keep anyone busy for a long time.
And anyways, its not the brushes. Most artists I know do everything with one or two simple brushes.
yeah i have all of his brushes for photoshop lol, those are just things i added for fun
true
Forget about using "bleached" or keywords like that. You generate, create and composite in pieces in full color first. You can "bleach" it (adjust brightness, contrast, levels, etc) later on.
I would concern myself with the getting the shapes, placement, colors first. Worry about how to present it after you have all of the pieces together.
I dont think I have the skills for this lol
You can learn. Its not that difficult. It just takes time, practice, devotion.
Idek where I would start tho
I have the colors I think -- tho Ill probably want to change them after I see it
this is what I got so far

Its alright... idk whats wrong with it tho. It just doesnt have the same explosion look
another question, when i press alt + click with the color picker, the color im positioned on doesnt show up on the color wheel as i'm doing that
Just a snip of one of the sand parts of my illustration,
never done sand before, im trying to get a sand dune look but not really sure where to start, if anyone has some tips,
Im not trying to make it realisitc, just that concept art style blotchy painting aesthetic,

I'm having a pixelated brush issue

how do i mimic this photo's color?

I would try Harmonization... Convert to a Smart Object. Add a Layer Mask. (It won't work without it.) Then, Neural Filters > Harmonization... and tweak to the desired amount.
thanks!
Gave +1 Creative Carma to @ripe quest (current: #3 - 1651)
how to make 2 lasso tool instances?

so there are 2 lasso tool at the same time without overwriting the other (pls ion get it)
Hold Shift to add to the selection. Hold Alt to subtract from the selection.
I'm having pixelated brush issues but I didn't change my canvas's resolution, is there a fix?
No idea. I don’t know anything about your project or the document that you’re working on.
Hi guys, I need help !
I created a file on Photoshop (size for a YouTube video thumbnail) I put the project so that it is transparent but I do not understand I can choose the white color (as you see) but not to see the small squares, (which is normally transparency it seems to me) someone can help me solve this problem ? Thank you very much
I have that, I don't understand

is your ardboard's background set to be transparent? select the artboard and open the properties panel 
Is there a way to completely match text in an image to copy and add more of that same text, for example the text I'm trying to copy is a little pixelated.
How to make the color not go out of the selection. cause when I draw it feathers out of the selection.
how do i change the lens flare color
you mean the filter ones or do you have an image asset?
hpld on lemme send an image
you have to manipulate the edited text to degrade it to match the original, that's the way

this one

modify/refine your selection so it doesn't have semi-selected pixels in it
these are predefined, you can only change the general look of it. everything else has to be done with regular methods
???
ok
nothing... 
just try to match the text you added to the original. blur, sharpen, add noise...
Okay I'll try
i made the selection from polyon
idk how to refin emy selection
you can enter the quick mask mode by pressing Q and increase the contrast with levels (ctrl+L) to the point where no pixel is semi-selected
how to make engraved text and engraved little picture
not sure engraved on what so I'll just drop the link https://www.youtube.com/results?search_query=photoshop+engraved+effect
i have this image which i would like to put on a mobile phone cover.. the only problem its size is not upto that.. to make this i need the background in this image to be bigger.... i have seen in some yt videos that photoshop has an ai which can make the background bigger based on the image through ai... can someone help me with this...

engraved on just white
no texture or stuff
select the crop tool  and set the mode to generative fill
yeah so i dont have photoshop... thats the main problem... i was hoping if someone could do it for me quick
or the free trial would have this feature? if yes i could download it
@serene coral @night plinth - As an FYI, any of your LASSO TOOLs can be set to have anti-alias turned off...
Doing this will give you that ugly hard edge you wanted.
I believe so. you can follow this guide https://helpx.adobe.com/photoshop/using/generative-expand.html
ok so by 'polyon' they meant polygonal lasso... haha
(I assume so... The polygonal lasso, normal lasso, Magnetic lasso, - all allow anti-alias to be toggled on and off)

Also @night plinth - I noticed is looked REALLY laggy for you. Try turning off SMOOTHING for the pencil tool if you don't need it anyway:

It's a bright day. I doubt there would really be any, - especially with that crop that I can see.
I usually don't like the way characters look when I integrate them into an image because they are not realistic. Any advice on how to make people look more realistic?
can u help me with this @sly hawk
yep i already claimed free trial already so theres no way I can do this
Well the first obvious one is making sure the art style matches.
For example, trying to photoshop Bart Simpson into the Movie Avatar will never look believable.
That is not something about Photoshop, but understanding colors and real life.
I had same question before.
I took some uDemy courses, I recommend them, some are great.
We all can advice you to balance colors, contrast, exposure, and basically we told you to use all tools in Photoshop, but the real answer is "Practice", watch real environment with new eyes, seek that highlights, shadows, colors wherever you walk, take image and look at it, study it, etc.
Getting as close as possible perspective, getting good colors balance, saturation, getting shadows and highlights as close as you can, getting haze ready.
Most important part of this process is picking images.
If you pick two wrong ones, you will never match them well.
As far as I remember, you need the layer comps in both instances, not just one. That's how it works. You'll find about gazillions of tutorials exploring how to create mock-ups with layer comps and I think all of them showcase more or less the same stuff.
I can't tell you much more as of now, I am not a home, so I haven't got my PS open, but last time I checked one of my file to point you to the right direction. I had layer comps created in the "embedded file" (the content of the frame) as well as the mock up itself. I think it's well explained in the stream video as well.
Hello There! I couldn't find an Adobe Fresco channel so i thought this is probably the next best thing and maybe somebody can help me 🙂 I am a Creative Cloud Subscriber and wanted to try out Fresco on MacOS. However i don't see it in my CC App and the link i found online only gives me an error...
Has it been discontinued or does anybody have any info?
Thanks!
The Link to the Desktop Version in question
it's there for me (on Windows), can you see it if you go to Apps and then Illustration section of the Creative Cloud app?
(Just to check @serene coral - You on a mac?)
Nope but I believe I saw it on my Mac laptop the other day?... or did I?

geez i was certain i read somewhere it's available for macos but i guess not :S
that might be the reason yea
uhhhh
yea you're right it's because i'm on mac, silly me
thanks for clearing that up 😄 i was under the impression if there's an ipad version and a desktop version that macos would be kinda natural but guess not

https://community.adobe.com
Am I able to download and run Adobe Fresco on my Apple Desktop computer? I see options for I-Phone, I-Pad and Windows Desktop, but not Apple Desktop. Thank you! [Renamed by Mod]
Yeah, feels a bit strange it's not to be fair.
Someone said "Well, it's made for touch screens, what's the point of desktop?" - but someone was quick to point out that it's on PC.
(How frequently do macs have touchscreens?)
well, honestly, the ux could be a lot better on windows...
I mean you open it and immediately see it was designed for touchscreens
how would you guys compare fresco to procreate? unfortunately i don't have my ipad with me atm but i would really like to make comics on my ipad and feel like fresco could be a nice middle ground between procreate that misses some stuff and clip studio that feels a bit bloated on the platform...
Hey @serene coral
Random question... - first gut response:
Would you think of photoshop, indesign, chrome, baldurs gate 3 etc as PROGRAMS or APPS?
can i have multiple perspective grids in a document for starters 😄
We both struggled to even identify is Fresco is even available on our machines. We probably can't give a very helpful answer to that personally.
#TeamProgram
Fair enough 😄
I don't know too much since I don't do much in that area, but I was very impressed by clip studio paint. Some of its brush has features that photoshop and indesign still doesn't do.
I'm not an iPad user but I heard a lot of good about Procreate. Fresco feels a little... unfinished? Clip Studio Paint is amazing for painting but its learning curve is quite steep
I would call a program anything that is used for work like Ps, Word, Excel. Apps for me are for... less serious tasks 😅
hey guys, is someone here who can maybe help me with a logo creation? i have a specific idea how it should look but dont have the skills to do it on my own 😄
I can't bring myself to call anything I install on a PC an 'app' - but I think that's more a Millennial thing.
Maybe. Write up a proper brief/description in #💬chat-general and if someone wants to help, they can get in touch.
if i'm making a vector shape, should i use illustrator or photoshop? like this WiP of mine but i need to make it more curvey

making it in Illustrator will make it easier to work with and export when it's finished
can illustrator open my psd file? maybe thats a bit off topic
to some extend, yes. what is your goal?
(im newbie) just to rebuild this line (the line is the map of an ancient city's walls) also to be in my copyright while as similar to this picture im following, but ill probably make it thicker. inside the line wont really be anything. so far i was using the pen tool which made the yellow thing

Can anyone guide me on how create this kind of artwork ?

you're doing great!
what kind of answer are you looking for? this is a bunch of text, some images and graphic elements
I'm talking about background. How create such kind of effect on pictures ?
the blur? or the paintery style?
Paintery style
Easy: https://youtu.be/MWJJvuMByPA
Medium: https://youtu.be/fFQI7P7W9yk
Hard: https://youtu.be/U7SnfuIM778
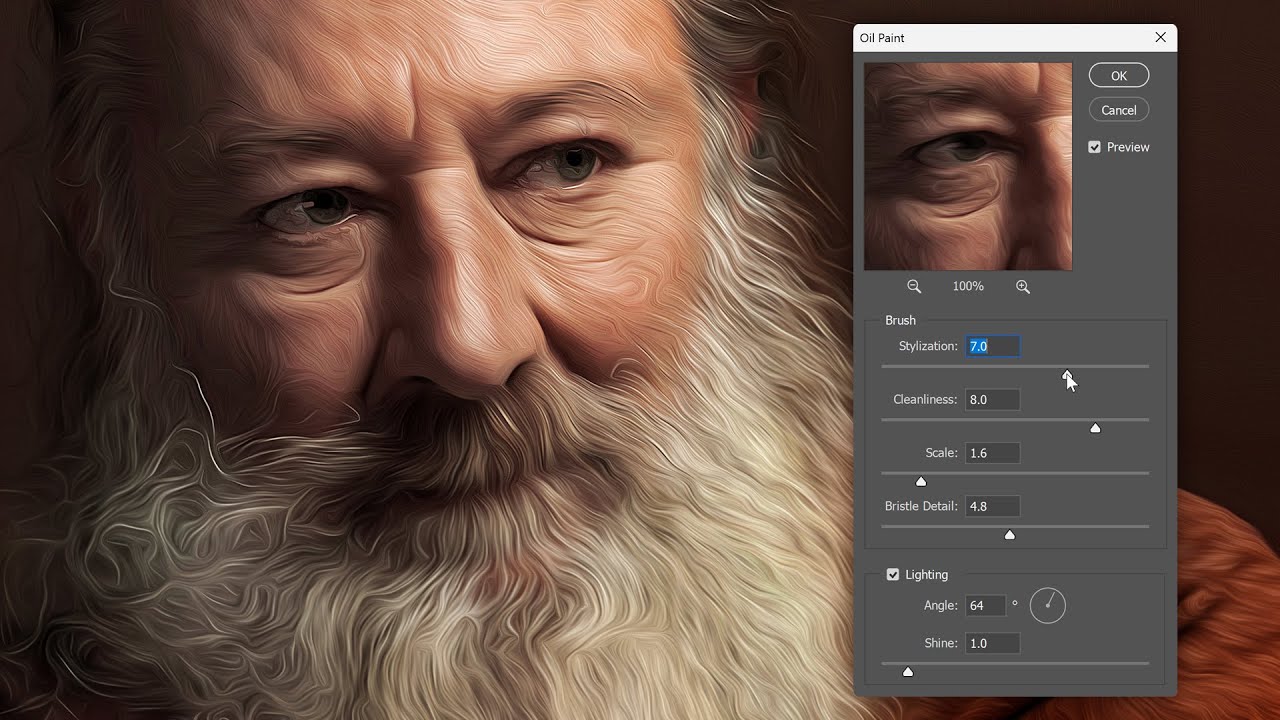
Transform your photos into stunning oil paintings with Photoshop's Oil Paint filter. Discover how the brush and lighting options affect different aspects of the oil painting effect, and how to adjust the effect in different areas by combining two Oil Paint filters on the same image! Even if you're a beginner with Photoshop, this video will have ...
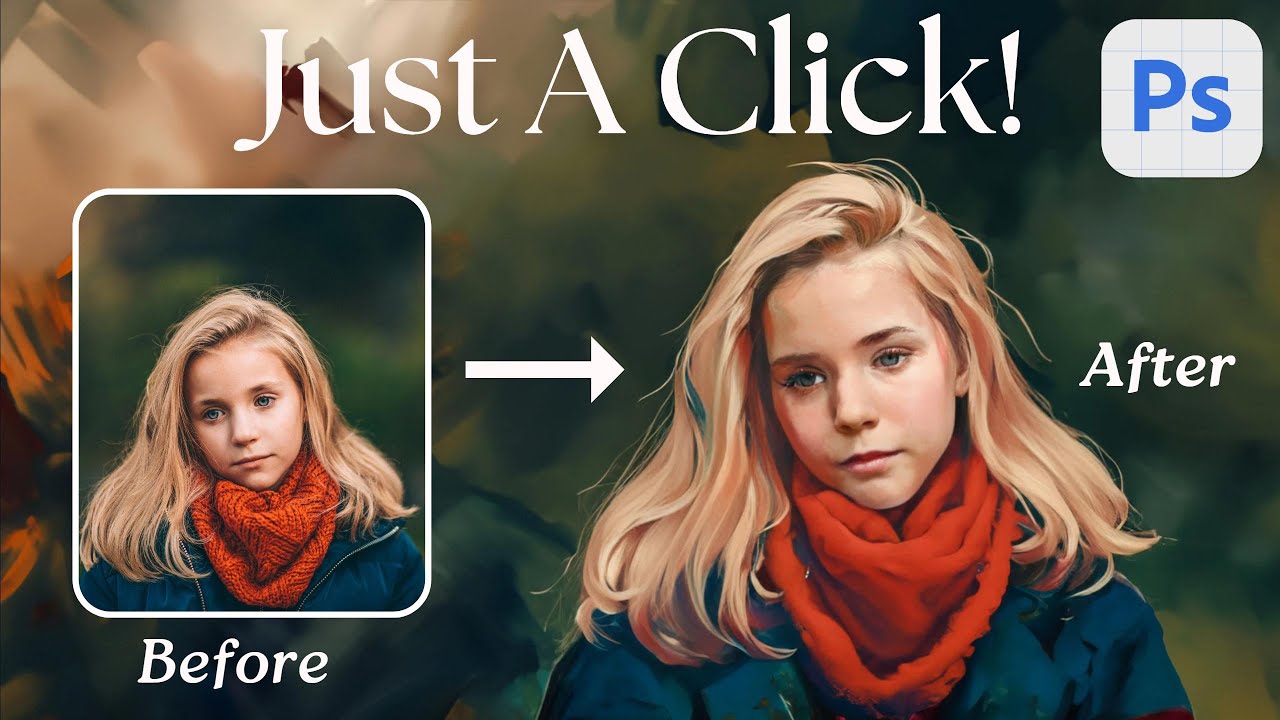
Download Actions and PSD files free: https://photoshopdesire.com/ In this quick guide, I'll show you how to turn any photo into a lifelike painting using Photoshop Beta.
First, ensure you have Photoshop Beta installed on your computer. If not, visit Adobe Creative Cloud to get it. Once installed, let's get started!
Inside Photoshop Beta, focus...

In this photoshop tutorial, we’ll check out a fast, fun, and easy way to create digital oil paintings! We’ll focus on one specific tool - the art history brush. Once you’re up and running, this tool unlocks all kind of awesome possibilities.... but first, it does help to get a basic sense of how the art history brush works and a few headaches yo...
are there any good places to ask after effect quesitons
i’m at argos and had enough for only a 124 gb i think?
i’m not sure that would be enough but i’m getting it anyway to test out photoshop later today
128gb***
@shut fulcrum Well, technically you need 20GB, but of course that was just for the scratch disks (don't forget to set them up in the preferences panel!) all the rest will have to cater for saving the actual files. So only you can tell!
Hey, I'm not sure of your goal, and how much you've done yourself, but is this of any interest?
Hello,
I am creating a texture sheet for a video game project. I was wondering if you know a way to "soften" the edges of the object so I don't have this blackborder all around the texture


I put the background Transparent when I created the project, but I have that
soften

Photopea . com , open, save , download
Hi all. I just tried opening Photoshop and it popped up with a message, "Your graphics processor is incompatible" but I was using it yesterday just fine.
does anyone know what font is this ?

https://www.myfonts.com/pages/whatthefont , seach for "creppy font" "mettal font"
Identify any font with our font finder tool. Upload an image, and we’ll search our collection of over 133,000 fonts for the best match.
what it says now with the usb stick in

Is there anyone here that has a macbook?
me :) although im not a moderator or anything
I would like to know is it worth paying the extra buck if you want to use it for editing/businnes?
ahahh,,, uh
well
i have the macbook air that came out in 2023 M2 chip
ive spent £20 to buy an adapter for it to use usb sticks / other things
I am think about buying that exact macbook
ive just spent another £15 buying a usb stick with 128 gb of storage just to use photoshop because i only have 256gb of storage on my macbook
@vapid flume having the same problem still aghhh

convinced i cant use photoshop on this stupid macbook
might go back to my 16 yr old hp laptop just for photoshop then use my macbook for literally everything esle
else*
I have the same plan as you said.
Why dont u use a external ssd
For storage
currently dont have the money for an external drive
im a 16 year old highschool student in the UK lol, i havent asked mum and dad though
Oh, I was just suggesting
they said they'd go about buying one for me if this usb stick did nothing
oh no no you are absolutely fine love!!!
i was suggested that yesterday on here
it looks like im gonna have to do it
if you do go ahead and buy this model macbook, do make sure to choose a good amount of storage. not 256 gb 🥲
Do you have the option to expand your cloud? I dont know if that is a thing or not, but if you can you can save all on cloud and it’s connected on all apple devices
So, first, I believe you need to have significant amount of free space on the OS drive for virtual memory (20GB or more). This is for general machine performance. You should never let the OS disk fill up right to the ceiling. Second, if you're going to use a USB drive for scratch disk purposes, it needs to be fast enough, SSD or USB 3.0 speeds, e.g. USB3 = 400MB/sec
You cannot use thumb drives or any USB2 devices as they are simply not fast enough to use as swap/scratch disks.
where is the mirror tool
Select the layer or object. Ctrl T, then right-click and choose "Flip" horizontal or vertical.
What do you suggest, getting a mac or a windows computer?
dam is there no like the line thing where it instantly copies to left to right
I would get a Windows PC but that's my preference. More bang for the buck. Less money and fewer limitations. More upgrade possibilities.
I don't know what this means.
Can you give me an example of a good pc if the budget is around 1.2k€
There are so many different configurations...
What do you want to do with this PC? Laptop or desktop?
Laptop
Ugh. I don't know. The best specs you can get for 1200 bucks. heh
I would look at the following spes: Intel i7 (or even better i9), at least 32GB RAM and the best GPU you can afford.
What about if I bought a desktop?
What do you want to do with this PC?
I want to use it for editing/business/work
"editing" what?
I would look at the following spes: Intel i7 (or even better i9), at least 32GB RAM and the best GPU you can afford.
I'm not suggesting this PC but similar to this: https://www.amazon.com/CyberPowerPC-i7-13700F-GeForce-Windows-GXiVR8040A14/dp/B0CBL8N3FC/ref=sr_1_5?crid=1HWCTHBD989AY&keywords=computer+for+%241200&qid=1707154653&rnid=172282&s=pc&sprefix=computer+for+1200+%2Caps%2C114&sr=1-5&ufe=app_do%3Aamzn1.fos.765d4786-5719-48b9-b588-eab9385652d5

Destroy the competition with the CYBERPOWERPC Gamer Xtreme VR series of gaming desktops. The Gamer Xtreme VR series features the latest generation of high performance Intel Core processors and ultra-quick DDR RAM to easily handle system-intensive tasks, such as high definition video playback and ...
16GB RAM so you'd want to upgrade (to at least 32GB) when you could afford it.
Someone help me please
Please ask a specific question. :)
my photoshop got bugged and i didn't save the project and if i force close photoshop i'll lose everything
im not even able to save the project because of program error
wait nvm
thanks god
my heart was about to stop actually
Save, save, save. Ctrl S once in a while if you're saving locally. :)

you can see how it's bugged
i was trying to apply an image and it said couldn't complete because of program error
Could be a GPU issue. Help > GPU Compatibility... any errors or issues reported there?
i was spamming save and it said it's saved but it's not
until it solved itself alone
and saved
i love you bro @ripe quest
let me check

Great! Maybe it was just a temporary Photoshop/Windows Virtual Memory issue.
Perhaps just refresh the system. Save your work. Reboot Windows and see how it goes after that. :)
If it persists, it could be something with the Photoshop version you have installed or the Photoshop document. Maybe Scratch Disks. Its difficult to diagnose.
not a big deal tho
happens time to time
hi hi , so when i creat a ai image it replaces a object in my original pic and it replaces it , how can i stopt that ?
Generative Fill should create pixels on a new layer (above the one that was selected when you generated it).
Unless you're speaking about some other "AI" tool that you're using.
no i meant the photshop ai
Generative Fill creates pixels on a new layer.
so yu see the ball its the origanal . after i use the ai the ball und the person disapears


Open the Layers Panel and look at the Layer Stack.
A Genertive Fill Layer is created with a Layer Mask on it. You can paint on the mask to remove portions that you don't want to see.
alright , let us say i want to create lightling bolt on the ball, how should i do it with ai without removing the ball?
Well, I would probably do that a different way... But if you're going to use Gen Fill, you'd probably want to make smaller selections and do it in pieces. As opposed to selecting over the entire ball and just entering "lightning bolts" for the prompt. But that might work. You never know. This isn't an exact science.
Its likely going to require some re-rolls and even some subsequent tweaking using traditional Photoshop techniques to get a desirable effect.


You do it in a different way to start with...
how
@hollow trout can you share your two original images and I'll show you

or.... another option:
@hollow trout
You didn't share the background image, so I can't see how it compares when you try it on your specific background @hollow trout
no need i just want the cloud transparent
ok, good luck then. - I've shown you two methods above
big THANKS man that looks so awesome
Gave +1 Creative Carma to @sly hawk (current: #7 - 753)
how do u make those overlays that slides in
I'm not sure what you mean. I showed everything I did within the video itself.
Did you hold ALT and click on the layer mask?
It won't look like anything changed, but it DID! 🙂
oh yeah thanks
Gave +1 Creative Carma to @sly hawk (current: #7 - 754)
Asking again
Alt+Click with Eyedropper tool => assigns picked color to the background color.
Color wheel shows you the foreground color.
(if you press X to switch between foreground/background color your color wheel should change show you the color you picked with the alt+click)

@cedar kestrel If you take the Brush tool and alt+click the color picked should appear in foreground and on your color wheel.
When I want to change the hue and saturation of a layer, the preview changes it for all layers... How do I change that?
can u tell me how i get full pixel, not transparent pixels

oh now i get it better, thx! although the color wheel is still not picking it up

Can you provide more detail?Are you creating this? If so, how? Are you resizing someone elses graphic? etc...
If you were to do this, the result would likely look awful.
see for yourself, by just duplicating (cntrl+J) the same layer 50 times....
Check if your sample mode is on "All Layers" position...
Other modes may give you weird results depending wich layers are active or not...
For color sampling "All layers" mode is the more often used.

Thank you!! saved a day worth of work
Gave +1 Creative Carma to @mental kiln (current: #316 - 4)
it is
how can i make this rough edge smoother?

How do I mimic this cover's colors?
Also, how do I add that grainy texture?

You asked a similar question last night and I demonstrated to you how to do this. See: #❓ask-a-question message
alright, thanks. didn't realize the technique was similar here.
The first part is matching the color using Harmonization (as before). After that, you could use Filter > Noise > Add Noise to add a bit of grain to the image.
Hey how do i resize a image from 64 pixels to 16 pixels without loosing any quality
im trying to make more detailed 16 pixel sprite art
but when i resize in most of the other programs it gives me a deformed sprite when scaling down
You can't. You're removing most of the pixels from the image and with them most of the detail.
ahh i see thankyou
Hey, so I wanted to post a survey here for my academic study. Didn't know where to ask, so I'm here
What's the survey about?
About photographers and how they interact with image alt-text, and how it could be made better
How is the survey administered? Google Form or something similar?
You can post in #💬chat-general but please don't repeatedly SPAM the server with it.
Gotcha, thanks for the information!
Can anyone give me some advice on this fake passport I edited
Can you tell its fake?
Yes. Plenty of signs that it's fake. - for one, the background colour changes between the 'head' and the text.
There's no good guides on faking passports
Just an FYI:

yes, but first you have to ask your question!
how to paste on png to other pic
like on this pic

i want this to paste on it

open the first image and then drag and drop the second image over the first one
ok
got it?
yup
great, have fun!
Hey ya'll, I need to make an Inner outline like this but making sure all the spacings are equal, how do I do that?


use Illustrator
Yeah I'm sort of within the bounds of photoshop, anything I could do?
duplicate the shape and eyeball transform it with warping. Ps simply does not have a tool or option to do this. In Illustrator you could select both shapes and create 1 blend that would be perfectly in between the two shapes.
Just saying the outline doesn't neccessarily have to be another shape, It could be like a stroke or something.
yes but the stroke will only work with a single shape. It will be within a fixed distance from the shape 'over' it.
if it's just for the looks and you're not going to use it somewhere where high precision is needed, you can duplicate the shape, adjust the scale and use warp transform it to make it fit between the other shapes
Precision Is somewhat needed, quality not so much.
So If there's any workaround any of ya'll know of, I'd appreciate It 👍
I want this to fade into the background but I couldn't find any examples
Add blur with 2-3 pixels
What type?
guys, whats the best canvas size for graphic design? want to put my graphic design in my tee
I'm trying to align a line but the options to align are greyed out.How do I fix that?
Not specialist but for prints uou want to go for as big as possible to have as much details you can have
Do uou have active layer you want to align?
ok. whats the dpi that i needed tho?
Minimum 300 i would say
Yea. It's a line layer.
You probably need to wait for someone with bit more knoll than me because I have no clue
I should know this, I'm certified but I haven't used PS in years. 💀
Is it smart object?
Yea, but even after rasterizing it, it still doesn't allow me to align. Which is weird because I aligned a line earlier in the project.
I figured it out.
It was set to align to selection instead of canvas
Also does anybody know how to add this gradient to a line
Use line as mask on gradient? 
Gradient as separate layer
And use line as mask
I think this way it will be easier to make changes if you need
At least that’s how I would do
Next to the alignment options should be three dots or something
Click that and change the text box to canvas
I don't have ps open so I don't remember much lol
It's not going to be a straight line though, the gradient will need go in different directions like the logo I sent and the gradient needs to seemless ly connect.
Yea, thats what I did and it workd.
In that logo gradient is going up to down
Yeah I just read it mb
When I set the gradient layer to screen its doing it for the whole file in stead of the line layer.
you can just clip  the gradient or use gradient overlay layer style
How do you clip the gradient?
place the gradient layer above the layer you want to clip it to and press ctrl+alt+G or alt-click between the two layers in the layers panel
Honestly, easiest way is wertos' other suggestion:
gradient overlay layer style
haha I prefer clipping! 😄
ok, ok, fair enough. I thought you were trying to recreate the simple ps2 logo
clipping it is!
yes, you can move the gradient around and change its size and direction with both methods
The way clipping works, is that you tell the layer ABOVE to shape itself to the layer below.

like.... pouring jelly into a mold.
When I click create clipping mask, the line dissappears
can you share a screenshot?

whats the difference between create a separate gradient layer than add fx gradient effect to text layer ?
I sent the screenshot.
you can't apply multiple gradients at once using a layer effect (I don't think) - whereas you can with a clipping mask
@serene coral - any idea on @fair fiber screenshot?
Nvm. Once I rasterized it, it worked.
you can click on the  icon in the layer styles window so it goes up to 10
Thank you all for the help!
Hi all, i hope this is the correct area for a newbie question, in the below image im trying to remove/blend away the irritating sleepyman caught in my cats eye , what would be the best method to achieve this?

the easiest way would be to use the remove tool, have you tried it?
i did not even know there was one, i have little to no experience of photo manip and was a tad overwhelmed looking at the option

got it now, thank you so much for the quick help!
Is it possible to have text in rectangle, and once text is going to leave the rectangle are rectangle should automatically resize?
Or, even vice versa.
Rectangle is the same but text auto resizes so it does not leave rectangle area.
Do you mean, use a text box and you want to keep a colored rectangle around/behind the text? If so, there is a convoluted way to do that in Photoshop using a text box and layer styles. Side note: that is much easier in Adobe Illustrator.
Yes, that.
I am doing product advertisements, and I am more experienced in PS.
Trying to have template, where I would change products, background image, prize etc.

Also I was looking for option to have Superscript and Subscript one under another.
85/KM
No. That's something else
Oh! OK
Right click on the icon to see the other similar tools
Honestly, I would do layouts like this with Adobe Illustrator. However, you can create a text box with Layer Styles to render a background color behind it. The method is pretty convoluted and difficult to control but its possible.
I see.
I tried with glow, as you said hard to control.
I guess I will leave and resize rectangle per need.
need help ASAP, so I'm tryna edit a GIF in photoshop where I add just one photo for the entire 50 timeline. Thing is whenever I drag a photo it's only 1 timeline and I have to manually edit and stretch it for each timline, is there like a way where I can just instantly put it in all 50 timeline?
I noticed that when Smart Object is created, and if it is transormed in original project, once openned it still keeps prior size.
How do I update Smart Object per its transformation, do I need to again click this layer and convert to smart object?
So for some reason, when I draw using the brush, not only is the brush color completely different from what I selected in the color picker (top right), but it also has a decrease in opacity. Although both flow & opacity are 100%, no pressure-based opacity is enabled etc.
It is probably me being stupid having enabled some setting that is causing the issue, though I can't pinpoint what exactly is causing the issue.

So the Blend Mode for that Layer is to 'Difference' - set it to 'Normal'
As a professional digital marketer and graphic designer, I possess a unique blend of creative and analytical skills that enable me to craft compelling visual experiences and drive impactful marketing campaigns.
That's awesome. However, this is a channel for asking questions about Photoshp; not for self-promotion.
That is actually intentional, following a guide in a video for shading stuff and I doubt that's been the issue as it worked splendidly before.
Difference Blend Mode makes a... [considerable] difference in how its displayed.

ah I see.
I am assuming "Layer 0" which I wanted to use for the background is the issue then
as its all white and manipulates the brush color I am using
It's weird though because I remember using it without any issues, including that layer
something changed
Blend Modes work because there are layers below them to "blend with." Each mode is a mathematical algorithm which changes its attributes (and how it appears) on top of other elements.
Is there a way to make it disregard a layer?
I use the difference blend mode so it blends with the flat colors as you can see here:

Personally, I would put the sketch/line art on top and set its Blend Mode to "Multiply" mode. Then I would color 'underneath' it. Attempting to control colors using Difference mode seems a bit impractical to me. But whatever floats your boat. :)

What does multiply do exactly?
It drops the white out of my sketch, leaving only the grey pencil lines.
You shaded within your sketch/lines layer, correct?
Shaded? I put the colors on a separate layer under the sketch. This way, I can quickly start trying out colors without messing with the sketch at all...

Or I can still manipulate the sketch separately if I have to change something.
Generally, I would put "fills" on one layer. Then I might do highlight and shadows on another layer. Or separate those as well into their own layers.
I find that its best to work "fast and loose." This is because the design and content change a lot. Like if you have a better idea. Especially, if you're creating something for a client.
However, "fast and loose" takes a lot of practice. Most notably, not getting too attached to any particular thing in the image.
It's hard for me to put into words so I am just going to try and show what exactly I mean. Let's say I want my eevee here to have strong eye bags

When I put my fill/flat color over it, it would look like this:

The base fill colors should go underneath. On a Layer below the highlight/shadow layer.
Whereas I want it to (somewhat) look like this:

Although I wasn't showing it, actually it is like that. The flat color is within a layer beneath the layer with the shading in it
Some people prefer to paint all of the color fills, highlight and shadow on one layer. Or will get it started on separate layers and then merge them later to blend things together. It just depends on how you like to work.
While there might be strategies that work better than others, it really just comes down to personal perference.
How exactly would it be possible to merge it, or do they also shade in the respective color?
Because I planned on shading in grey, thinking it would blend with the color fills
There are various methods... You can select layers and Merge them together. You can also make merged copies of layers.
when I merge, I would get the same result as in the image I replied to for example
(with blend mode on normal ofc)
Generally, yes. But I can't answer that definitively. It really depends how the layers are set up.
I am a PS first-timer, so pretty clueless. I just created the layers in the without any settings really changed yet: (fills, shading, sketch, lighting, highlights, sketch blur (duplication of sketch with less opacity).
so when editing text

photoshop sometimes pops up this menu
and prevents me from typing over my letter
for example here i want to put a capital A instead of the lower case a
what causes this menu to pop up?

how do i make it go away and edit my text like regular?
Its in Prefs. Edit > Preferences > Type... "Enable Type layer glyph alternates" checkbox.

 thanks
How can I add a gradient along a path using the pen tool?
that's a tough cookie
Something like this...
You'd probably have to recreate it. There isn't some automatic tool to do it, other than Generative Fill. However, even Gen Fill probably won't do it cleanly.
That works, thanks!
Is there a shortcut/keybind to increase brush size, instead of having to do it manually?
Square brackets [ ]
When will they come out with the refection removal in camra raw filter? or is this going to be a LrC only option?
They [Adobe] don't really offer ETAs for feature releases so there is no way to know if/when that will happen.
I have the qwertz keyboard layout, do you maybe know the shortcut for that?
damn rip then, thanks anyways
Gave +1 Creative Carma to @ripe quest (current: #3 - 1655)
You select the Brush Tool. Then you use the square brackets [ to decrease the size. ] to increase the size.
I really hope so, My dad took a bunch of picture with his cellphone of pictures in a photo album the the problem is he captured the reflection of his cellphone in every single one of them...expects me to work my magic but I can only do so much. lol
You can also select the Brush tool, hold the ALT key, right-click and drag right-left to change the size of the Brush.
That works, thanks!
Gave +1 Creative Carma to @ripe quest (current: #3 - 1656)
I feel your pain. :)
Glad you got it sorted out!
Hello, i got a big problem with text outline. it shows that i placed orange color, but the preview shows gray color, how do i fix?
Can you show a screenshot of your whole Photoshop window? It easier to spot things that way, particularly when we can see the layers panel
here, or dm?
Here!
sorry for russian, got no time to change

Sometimes we can also see colour profles etc..
No that's not the full screen.

that's a full screen 🙂
No worries

The problem is the language 🙂 sorry.
What does it says here?
let me change it to english right quick.
the tab where the name of the document is
it could be the colour profile, it could be the blending mode, it could be the layer styles
"gray./8#)"
That's why... You're not in a colour mode
how to change to it?

ohhh, thank you very much :3
No problem

Because you're in gray mode, most filters only work with a colour mode
how to change the language
Thanks, @vapid flume :)
Gave +1 Creative Carma to @vapid flume (current: #8 - 510)
when you want to change the language for some help files people share here and elsewhere, you can locate the language tag in the URL
like here /ru/ and change it to the one of your language
I say that for all the other people for whom English isn't their first language
.
how photoshop is far better than canva? ( I'm a Beginner just need clarity, canve have plenty of templates which you can edit easily and get the job done quickly? isn't it?
Clip it to a specific layer (or group of layers) using a Clipping Mask.
Thank you
Gave +1 Creative Carma to @ripe quest (current: #3 - 1657)
clip the hue saturation layer to the layer which needs to be affected
Photoshop has different use cases.
Canva is more of an "general graphic design tool."
You can do simpler things quickly, but most Photoshop users tend to use it for more complex things (like Photo editing and compositing, painting, drawing etc)
While you can do graphic design layouts in Photoshop, its not specifically for that purpose. Its a bitmap editor, first and foremost. For the creation and editing of raster/pixel-based imagery.
does anyone have time to help me out with this project im trying to do, im struggling to use ps and jus need someone to get in call with
@ripe quest@vapid flume Thank you for the answers
Gave +1 Creative Carma to @ripe quest (current: #3 - 1658)
I need help! I’m trying to focus stack and send the photos from Lightroom to photoshop however after selecting the photos the edit in photoshop option is greyed out
It quite bizarre, I never had it... but I found that in the Community Forum, and maybe that will help?
https://community.adobe.com/t5/lightroom-classic-discussions/edit-in-photoshop-greyed-out-in-lightroom-classic/td-p/14204232
But let's see if someone has a better idea.
https://community.adobe.com
I just updated both Lightroom Classic and Photoshop to the latest versions. After the update, the ‘edit in Photoshop’ option is greyed out. It worked before the update, as I used the feature just before updating, and found out that I hadn’t updated Photoshop and henceforth couldn’t use Generative fi...
It seems both are up to date
first picture is very good, if i playe my picture its like the second pixture how can i fix it


Whats "playe"?
Click on layer with right mouse and use "Convert to Smart Object", resize afterwards.
place
Whats best advertisement ratio for each screen.
I find 4:3 working very well, but I wonder what you think about it?
It can be fixed by changing the interpolation settings in the transform settings.
16:9 seems small on phones, and if igo 1:1 it is perfect, but does not fit well on social media for desktop.
my english ist terrible, i dont understand
Presumably this was originally smaller and you stretched it to this size?
There's not a "best" per se cause every screen type is different. Do you mean a web advertisement? Social media advertisment? Google ad?
yes but before i place it, i love it
Social media.
But that would be useful in google ads.
I fond it bad to resize finished works.
I would say most social is headed toward that full screen ad experience (9:16)
ok. One moment.
Hmm, yea, thats best option to target mobile users.
I usually open it in new project and turn it to smart object, rather then place embeded or linked.
Anyway, wait James.

i love u
I assume it worked then 🙂
thank u so much :D
No Problem.
James, why you did not use transform instead selection, is there particular reason?
At the start? - The first 20 seconds was me just trying to show that the image was only about 16 pixels high
After faffing about with the selection tool I did then switch to use 'transform' for the sizing.
Aham.
any idea why on my tablet (huion) this is happening to my brush? It doesnt happen in diagnose tool.
I've tried smoothing which helps a bit but its laggy. I've also tried with the "use pen pressure instead of brush settings" toggle. Neither works.

"It doesn't happen..." in the diagnose tool. What doesn't happen? Also, "Smoothing" in the Brush Options is to make the strokes more smooth as you draw them. It has nothing to do with the taper/falloff of the strokes (if that's what you're referring to).
The weird tail that it gets. It also does not happen in krita
You can see that it tapers off until right before i take the pen off the tablet. Then the size stays a consistent value for a bit
It isnt tapering off naturally
Also sorry by diagnose tool i mean in Huions diagnose tool
I don't have my Huion out to test this with you. (Its my back up device.) I'm using a Wacom Cintiq Pro. However, when I want to work with perfectly tapered lines, I often have to adjust the Tip Feel in the Tablet Properties. The default/factory setting doesn't perform well.

Yeah but regardless of those settings it doesnt get fixed
I have a feeling its related to lag from photoshop
Sorry. I don't know what to tell you.
Especially since its not happening elsewhere
I’ve got a pretty beefy system too. So i cant imagine thats the issue either
What lag? If you turn "Smoothing" all the way up to 100%, everyone experiences a lag, regardless of system as its trying to work against you to draw a "more smooth" line. And that has nothing to do with the tapering ends of the brush. That is pressure control.
Idk. I’ll just hope someone comes along later who maybe knows. Thank you for your time though
Yeah but regardless of smooth %. Not visible lag, just some weird software input thing im guessing
What version of Photoshop is this?
Latest. I’ve shut down computer so not sure which exactly but it’s been updated very very recently
OK. Good luck with it.
Thanks. Maybe i’ll wake up to it being magically fixed
How do merge all these styled stuff into the image itself so that if i do Select > All and then Edit > copy, it will pick all of it up as if it existed on the image before i made the styles

You want to create a merged copy of everything that's visible?
or just a group of layers?
yeah pretty much
im trying to copy this layer and paste it into a layer mask
when i do it currently, it doesnt copy and paste all the effects i added
Sorry too that i dont know the technical terms!
To create a merged copy of everything, you would select the upper most layer in the stack and then do: Shift Ctrl Alt E
That should be everything that is currently visible merged into one layer.
oh i mean like the effects specifically i can show you what i mean
so this picture shows the effects i have on the image that i will be pasting into the layermask

edit then copy

holding down option on my mac and pressing the mask

it doesnt have the effects

ill show you the difference
what the layermask puts

what i want it to look like

(with the effects)
sorry for all the photos hopefully this shows what im trying to do
When you merge the layers, there are shapes in the background. The Drop Shaodw layer style is casting a shadow on those shapes. You'd probably have to hide those shapes -- turn those off in the layers panel.... If I'm understanding your issue properly.
but why does the color change so drastically
this is what the image looks like when pasted into the layer mask and its way lighter with none of the effects
this is what it loojks like before i paste it into the layermask
just like the base image layer that im pulling from
maybe im approaching this issue wrong

do you know the best way to paste these images that i styled into where the rectangles i placed down are. bassically the images get cropped to the shape of the rectangle
when i click ctrl+alt+shift+T nothing happens can someone help me
(in other project it worked)
Maybe a Clipping Mask... Not sure I understand. Check this out: https://discord.com/channels/547473772727238676/1081318392750940290
but this one it didn't for some reason
Shift Ctrl T is "Transform Again" which repeats the previous transform.
yeah
ik
im trying to do this
In this tutorial, we will showing you how to create an editable graffiti text effect by using basic techniques in Photoshop.
Addon Files Download ► https://bit.ly/3vgjQKH
Font Download ► https://bit.ly/3fHXR8T
▽ FOLLOW
Instagram ► https://www.instagram.com/photuts/
Twitter ► https://twitter.com/photuts1
Facebook ► https://www.facebook.com/ph...
check 4:46
You have to do it once. Then you can use "Transform Again" to repeat the previous transform n times.
it didn't work
i tried it in another layer from another file and it worked
OMG THIS IS WHAT I WAS TRYING TO DO! Thank you so much thats awesome!
Gave +1 Creative Carma to @ripe quest (current: #3 - 1659)
so @ripe quest
I don't know why its not working. Impossible for me to diagnose based on these descriptions.
@ripe quest is there a good way to feather the edges so they blend into each other a little bit more

To which edges are you referring?
You're trying to make the edges of the clipping mask "softer"?
yeah i think so
like each image in the background is a rectangle
thats what the clipping mask is applied to
and id like to make the transition between each one a little smoother if possible
One moment...
isn't there another option for it
instead of the buttons
take your time! i appreciate your help!
If I'm understanding the goal, you could add a Layer Mask onto the Shape Layer that you're using to "clip" the image. Then adjust the edges of the Layer Mask to feather it.
sweet thank you man you are seriously great
Gave +1 Creative Carma to @ripe quest (current: #3 - 1660)
Another option for what? That's how you do it. You transform it once. Then you repeat the transform. Not sure how else to explain it.
I'm glad you got it sorted out!
Hello, ive got my own brush here, with works great for me at 4% flow. Thats how i saved this one. However, when i switch to other brushes, like the lower one that i downloaded from an artist, it also places them at 4%

Why does photoshop do that? it would seem alot simpler to me if, by selecting a different brush, its own flow setting goes active
Those are tool options. They're not necessarily related to the brush. However, they can be. If you go to save a Tool Preset, Photoshop should ask you if you want to create a new Brush with the Tool Settings included. Choose "Yes", give it a name and check the box for "Include Tool Settings." Boom. Now you have a Brush with your desired Tool Settings defined. :)

Pro Tip: If you create a lot of custom brushes, be sure to back up your Brush Set regularly.
I like when brush does not change my opacity and flow settings.
I deleted every single brush that does this.
thank you very much, i hope that will help me figure it out
Gave +1 Creative Carma to @ripe quest (current: #3 - 1661)
Can someone explain how to create something like this. Something with perspective.

There's a perspective tool.
i know that much. any tips on how to actually create it? this is done really well with perspective, shadowing, etc.
please help!! how do i cut the white custom shape at the line of the ellipse?

i figured it might have to do with layer masks but thats so confusing
why cant i make a marquee selection of the shape so easily and then just select inverse and delete from the white shape
hi could anyone help me upscale an image? i cant see any of the texts in it 😭
You answered your own question, it is perspective, and a bit looking like 3D on edges.
Copied in black, transform, distort and lay it over crowd, use gradient mask.
For 3D like effect, you could use bevel and emboss or use transform on text and move once by arrow, keep pasting with ctrl and j, until you feel it is enough, afterwards join all text layers except main.
This thing is easier in Illustrator, you use blend between two of the same text, but that trick does similar in Photoshop.
It also has gradient over main text layer, from vlack to white, and this is the part that makes it like arena lights falling over it.
Also, crowd in front is cropped or it is just separated image.
I believe it is selected, as it seems to be same arena.
That layer is above main text layer and bellow shadow text layer.
Or, you could use masks.
Ehh, many options for that one.
hey, so my schools history department is aware of some art i have done in the past using some AI software and photoshop, and now want me to make a banner for school with all of them in it as like a histrical event. like all of them at last supper, or washington crossing the delware etc. wondering what you guys think is the best course of action or know of any services. im fairly new to generative AI on photoshop, could it potentially help me in this way?
Use simple selection tool, it will select only that white part.
hello anyone can tell me
how to match the font
i download a pic from internet ai
genrate the image
i dont know which font is this how to match it

this text is AI generated? what did you use?
You can try feeding this image to fonts.adobe.com and see what is says it looks like and give you a similar font as I kind of doubt you'll find the exact same font since it's AI generated

hey! you saved me, thanks!
Gave +1 Creative Carma to @vernal ember (current: #86 - 19)
A sans serif typeface with 32 styles, available from Adobe Fonts for sync and web use. Adobe Fonts is the easiest way to bring great type into your workflow, wherever you are.

idk how to use it
can you pls me that font
or name of font
and tell me how to use it
literally press the button
scroll up
can you help me pls
I sent the screenshot of the output and link to the font I found similar
A sans serif typeface with 32 styles, available from Adobe Fonts for sync and web use. Adobe Fonts is the easiest way to bring great type into your workflow, wherever you are.
how to download it
(make sure you're logged in)

looking for a very skilled photo shopper, i have a picture that glass has broken on there. and if i try to remove the glass the picture will rip. i also have another picture of the same one but it is very faded. if anyone here thinks they can do it please dm me it will mean a lot.
theres a subreddit called (i think) photoshop request, and if youre lucky many people will reply with an imgur link of your image photoshopped
what do you mean? where can i find it?
That's the one
https://www.reddit.com/r/PhotoshopRequest/

Reddit
A friendly place for free and paid photoshop requests. ⚠️ Read the rules before posting a request or a comment. Any violations will result in a ban without warning. If you're not sure if your post is allowed, contact the moderators.
Also depending how much you may want to offer, you can try on one of the many freelancing platforms (Upwork, PPH, etc) where you can find expert freelancers that come with reviews and recommendations about their work. Also these platforms use an escrow systrem, meaning your money is protected
No idea, I have never used reddit, but there is always a wikihow when you need it!
https://www.wikihow.com/Use-Reddit

wikiHow
Reddit is an American social news aggregation, web content rating, and discussion website. Registered members submit content to the site such as links, text posts, and images, which are then voted up or down by other members. You might've...
oh okay are you a good photo shopper by any chance?
That's my job, and no, I don't offer my skills here, I am here to help with Photoshop problems🙂
could i send you photos and see what you think? if it worth doing and stuff
You can post them here, that's not a problem. Very few images are impossible to restore. That said, sometimes You need more of an illustrator than a retoucher, because you need to recontruct something that have disapeared, and "invent it" If that makes sense
But since you have a complete faded image, that's the bit that will help the restorer with this task
okay ill send them and let me know what you think and thank you
Also you will need to get a proper scan of that photo, so the restorer will either ask you to send the image for scan, or guide you to do it yourself with a scanner for you to get proper results. Don't even think about taking a photo BTW, it will look crap
Unless you have a nice repro stand and the proper lights (or willing to build one and have DIY skills)


there are the photos
OK, it's not THAT bad!
I thought it would be completely faded
Definitely can be done
what's the point of removing the glass here? just scan the photo?
The glass is stuck on the photo. It happens when the gelatine is burnt into the glass
the glass is stuck to the photo
When the photo has been left too long in direct light with a glass that wasn't designed to hold photos (I'm looking at you Ikea!)
ah ok that makes sense now
yeah
Actually you could try removing the glass. But you'll need nerves of steel. You need to immerge the whole thing is tepid water and let the gelatine melt a bit again.
i tried doing a bit and you could hear it ripping thats why im here to see if anyone can do anything ahah.
There is a fine line between the gelatine not melted enough to let the glass go and you rip the photo, and too hot and the whole thing leave stains because the gelatine has gone in the water with the dyes
its been like it for a good year now
haha that sounds quite risky to someone with no experience with warming chemicals to a very specific point 😅
If the gelatine has stuck in the photo and unless you live in a very hot and humid country, I would thin it's been into that glass frame more than 1 year!
I would say a decade. Gelatine doesn't melt that easily. Particularly if I judge by the style of the motorcycle, it doesn't seem that old, and the gelatine is probably the later style type (not make from bones, which were more fragile)
back to the question - scanning the photo will give you the highest quality possible. if not, a proper photo taken in controlled enviroment would be a good point to start removing the glass in Photoshop
i dont have photo shop
To scan, you could put another glass pane on top of it, and return the photo and pane onto the scanner (the glass pane will be on top of the glass of the scanner
that why i’m here if anyone is skill enough to do it
If your glass pane is very clean (Clean it with alcool, touch it with cotton gloves) then it will scan properly
Once you get a nice scan, someone will be able to restore it, however it's still quite a lot of work, so I would bank on 2 hours of work.
theres to many cracks and gaps i dont really want to risk it its the only photo i have and that fadded one like i said im willing to pay
Well the issue is unless you bring it to be scanned, the end result will depend on the quality of the scan. Obviously the restorer could work from the faded photo, and that would be my first port of call so not to touch the original.
hello, I have a question, when using generative fill, it also effects things outside of my selection... how do I fix this?
Depending on your country, there are places where you can have the whole thing scanned and restorered. Obviously not as much as there was in the olden days (That was my first job as an apprentice 🙂 )


but they could still be there, waiting for your custom
I would paint the mask that is generated with the image to remove the bits I don't want. Just paint over the mistakes with black on the mask with a small brush
Where's the pic anyway? I didn't see it posted above
so theres nothing you can really do
I was gonna, but I know there's an easier way to and I don't remember how
and I can't find it ANYWHERE
Me no, but feel free to ask on the reddit link
also I can give you the links to the platform I mentionned earlier
Easier than paint over with a brush?
How easy do you want it to be?
Bc it affects something outside of the mask, Ik there's a way to make it not do that
and only affect what's inside of the selection
I just don't remember how 😭
i did and it keeps getting take down
the post

the mask is based on your selection (more or less) by modifying the mask, you're modifying the area concerned
Because it's artificial intelligence, it tries to detect what you want, sometimes it doesn't succeed. Maybe try another generation? It gives you three choices when you generate, so maybe try if one was better than the others and work from this one
I wouldn't expect a generated image to be 100% ready, I always had to retouch a bit to blend it in the rest
no ik, but I saw a vid on how to remove the feather it creates, I just forget the method and can't find the video
But in that case it's easy enough to correct the mask and remove the featheres bit
you could sharpen the mask, apply a maximum filter or remove the feather -if there is one - in the mask properties (you need to have the properties panel open)


Sometimes, the good old pen tool and a proper work with the stamp tool gives you less headaches, particularly for such a small area with no significant detailed object
At least that's how I would do
I'm a bit confused why you'd use gen fill for that anyway?
Are you just trying to change the background?
@vapid flume
ye
everytime i try to post it, it keeps on saying, Sorry, this post has been removed by the moderators of r/PhotoshopRequest.
Moderators remove posts from feeds for a variety of reasons, including keeping communities safe, civil, and true to their purpose.
If you could share the whole image, and explain loosely what you're trying to do, I'll send a video of how I'd do it....
I think I got it to look decent
Try that
https://www.behance.net/hire
or
https://www.upwork.com
or
https://www.peopleperhour.com
Your request should be along the lines of "Photo restoration needed"
Discover, connect with, and hire the world’s best design talent on Behance

PeoplePerHour.com
Get any project done on PeoplePerHour with our fantastic freelancing community. Post a project for free to find professional freelancers and find freelance jobs in minutes!.

I answered above. Your username doesn't make it easy tagging you 🙂
Hopefully you can follow the process here...
Stick in my new background,
then remove the car from the new background,
then put the original car back in the new scene
Obviously it's a LOT better if you spend more than 2 minutes on it, and if you start with a decent res image in the first place
Does anyone know how to fix thiss error?
I downloaded a action and when I try to play it this comes up

Basically says "The Select Command is not Available"
open the action and see what it is trying to select. maybe because your layer is a smart object? you have to debug it yourself (or send screenshot of the action opened)
It worked now, but I manually need to click Ok every time.

Is there any way to get it to auto play by itself?

For some reason I can't save to cloud documents, I just did on another project like an hour ago but I can't now with this one
when I press save to cloud documents it just reopens my files again
I keep pressing it but nothing happens
nvm solved it. Thanks man your a legend
Hello i tried importing my HIF photos in photoshop or in lightroom and it doesnt seem to support the file type is there anyway i can import HIF/HEIF files on these applications?
mac or windows?
windows
Actually i have an issue I was using the wrong action. When I try to use this one it won't allow me to press Play
@serene coral

you're trying to play a group. Select an action and you'll be able to press play
i already seem to download the heif extention and i still cant open them for some reason

still says the same thing
i dont know what to do anymore
i shot my photos on HDR PQ using my canon camera and it gives me HIF files
can you send the file here?
Just a thought, in the software you surely got when you purchased the camera, there should be a converter.
or we can try to convert it here
I used to have a canon, mine didn't come with anything like that

I have a bog standard cheap Panasonic, and when you register your camera they give you a link to download the software. Mine also have a special website to update the firmware for the camera, and also the lenses
my cam is canon r50 it doesnt really have "raw" but instead it has HDR PQ for it to shoot at high dynamic photos
When downloaded, it says it's an .avif file, and also that the file is corrupted
so it's a sequence of images?
hmmm not so sure how it works but i saw a reddit post that it takes multiple exposures and i think i need to combine them later on not so sure


wow so how could i now open that to lightroom
I gave you a tiff, so you can import it into a catalogue and play with it as you please
got it too by using an online converter but had to change the extension to HEIF
It just doesn't show as a stack, just a single image
so i need to convert every hif photo into tif?
The thing is, I am 100% certain that Canon should have a proper converter for this
kinda dumb that they dont have
It would be completely idiotic if there weren't any available
there is something called sending an email, that helps a lot in many situations
I would shoot them one!
the worst thing is Microsoft charging $1 for the system extension to open the file 💀
how do i convert it into tif for me to import the hif into lightroom?
In DPP, I experimented with HDR PQ. Since most web browsers will not display HIF, I then attempted to convert the HIF to JPEG. I am attaching examples of the results. I like the result produced by macOS Photos and the result produced by GraphicsMagick better than the result produced by DPP. The HIF ...


first google search
Canon forums will help
do lightroom support tif?
I opened the file in Lightroom directly, and then I exported that file from Lightroom to a tiff. Lightroom handled that file format
Did you try? I had no issue with LrC reading the AVIF file
it all just shows jpeg photos

is there a setting i need to change for me to see other file formats?
Not that I know of, is that Lightroom? or Lightroom classic?
You need to keep it updated as they add file formats all the time
lightroom classic

Hi, is it possible to convert an image from RGB to CMYK, but with filters already used, such as a filter gallery, etc., so that the image does not change much?
weird i should be able to import it normally just like how you did it
exactly, But I don't think you can restrict to a singular file format. Just make sure you got an updated version
nope, filter gallery and some other filter are simly disabled in modes other than rgb and will be disabled when changing the mode
Oh okey, thanks
sandrine you rekon you could edit the pants of something?
That's the latest version, with also Camera raw updated (Camera raw is the important bit)

it will take a few seconds if your very fim wit ps
you can sort of work around this by nesting your image with filters inside a smart object
I already told you, I am not taking requests, I am just here to help
oh sorry
That's the best line if you want to alienate a retoucher (me included)
this is the version im running
So update it!
Go to your CC app and check for updates

see, I have some updates myself 🙂
just to be sure how did you do this specifically
did you just drag and drop the file?
i still cant figure it out ughhh
I opened LrC, I chose import photos

I located the photo
it showed, and then I clicked on it to highlight it, then right clicked, chose export

and then exported as a TIFF
As you would do with any photos you'd want to work on
hello im still trying to find ways i i already bought this extension to open the file and i cant still figure out how to open it
Guys, is there a shortcut to toggle these options?

is it the hevc video file extension?
if you open the image with windows photos app, is it displayed properly?
nope still says the same thing

its this right?

what if you change the extension of the file to .heif?
bro, just open it with paint, it always worked for me, so simple
how do i specifcally do that?
i dont see the point of doing that im trying to import it into lightroom as well
right click file > properties > change the name from .HIF to .HEIF
up

i will change the name to .HEIF?
or the name in the "type of file"
short answer: no
long answer: https://graphicdesign.stackexchange.com/questions/104901/how-to-switch-between-group-and-layers-using-a-keyboard-shortcut

Graphic Design Stack Exchange
How do I switch, using a keyboard shortcut, from selecting a grouped layer to selecting the layers grouped individually?
Show file name extensions in Windows 10 by following these three easy steps.
im starting to lose hope here

have you restarted your pc after installing the extension?
hold up
what are you opening? this is a hidden file
wdym
this is the way MacOS generates thumbnails or some other internal stuff, this is not the file you're looking for. find the one without ._ at the beginning

did you restart the pc after getting the extension? I have no other ideas...
Since Adobe doesn't think of a function that we need to change all the time, I installed the script to select the parent folder, but it didn't appear in my list of scripts,
i have restarted so much times already damn this sucks
although i can open them easily on mac
everytime i open the hevc video extention movies and tv application just open is it suppose to be like that?
you don't install scripts into Ps, just run them from a selected location. There are plugins that move scripts to gui
ok progress somehow but this shows in lightroom


Does anyone know how to make this effect layer properly?

I've tried all blending modes, but it doesn't look the same
trying to find a working solution too...
white text, linear light blending mode, lowered fill?
thank youu for trying to help me though really do appreciate it hahahahahaha
Gave +1 Creative Carma to @serene coral (current: #6 - 799)
still cant find a solution
damn this helped a lot
It was exactly that, just the color was more of a gold
can't get it to work on my end either. looks like you'll have to convert the photos first
to jpeg?
or png or tiff
how do you suggest to convert iit into tiff?
I got it to work by using an online converter before. you can try any or find a program that can do it locally in bulk
Hey there. I'm new to the digital painting and a complete beginner in a adobe photoshop in wacom one tablet. If anyone can guide me regarding, if I can get the link to download, the alternative of jingsketch brushes for adobe photoshop, as I can't afford the paid brushes. It would be a great help. Dear admins. Would you please also like to help me out, I don't even remember,if I can tag those admins here. Can't remember,if it's allowed to tag admins. Because I'm new to discord as well. So don't know about it much. So yeah. Any help from anyone would be welcome.
I’ve already told you where you can download 1000s of brushes. How many times are you going to ask?
No you haven't told me. Maybe I might have missed out that particular msg. Would you please like to reshare that link? Apologies for repeatedly asking. I thought maybe someone else will also come up with a solution of mine.
Yes. I have. Regardless, here is the link again: https://www.adobe.com/products/photoshop/brushes.html
Yeah but these aren't the substitute of the jingsketch brushes ig? 🤔
You must be joking...
There is literally every brush you could ever need (realistically), unless you create your own custom brushes.
Nop I'm not joking. See as I've told you I'm completely new to this digital painting thingy n to the adobe photoshop. So I've no idea about these things I got stuck while following a tutorial n there was no 1 2 guide me that's why I came here for the guidance.
See the tutorial which I was following, was having every paint brush but then when I was doing the adobe photoshop I've very few of those brushes which doesn't match with the jingsketch brushes. Wait I'll share the pic with you.
If you don't have money to purchase "jingsketch" brushes, then you'll have to do something else. There are THOUSANDS of brushes on that page and I'm certain that you could find any number of replacements. Perhaps you could try them out.
Sure tysm for your guidance.
Also, if you need to follow a jingsketch tutorial specifically and you need jingsketch brushes to complete the tutorial, then you'll have to purchase the jingsketch brushes. You can't ask people to provide paid products to you for free.
OK sure.
I wanted to share the pic to you to explain why am I not able to download the brushes for free with the link which you've provided. But unable to do it on discord. As I'm new to discord. So would you please like to guide me that?
I wasn't following a jingsketch tutorial. I was following some other tutorial in which that mentor recommended me to use jingsketch brushes.
I wanted you to explain via a picture on this discord. So how do I do that?
I do have but that's of my cousin brothers one. He has purchased it for me.
i have an update i downloaded lightroom on my mac which can open hif files but im not seing the hif files on lightroom itself
still shows the same error even if i change it into png

Hello everyone.
Can anyone help me create this effect? I'm a beginner and I've been trying for 3 hours without success.

Hey i need to erase this template around a gif
how do i do it to match every frame of the gif instead of doing one frame at a time?

crop tool
is it the fastest way, or will you have to do batch processes
If your images are in a folder, open an image, recreate the rectangle using the shape tool, use this layer as a clip mask in your image, remove the white background layer, ctrl+shit+e, it will merge everything, save, create a batch action for this process

You'd have to convert to a video timeline. Then group all the frames and use a Layer Mask on the Group to remove it.

It just seems like some abstract shapes with the opacity turned down.
Hi, anyone knows how to edit only part of a text (one word) with the layer style function, I can only edit the whole sentence with the same style. Should I just create a new text ?
Layer Styles are specific to each Layer. If you need an object to have different Layer Styles, the objects would need to go on a different layer.
I need help.
I am just wondering how to pain the background into a picture
e.g. the hair doesnt look perfectly cut out and I want to brush the background over it
anyone know how i can achieve this glowing text effect

i followed a tutorial and got this i dont like how it weridly distorts the text

makes the glow in a separate layer, duplicates