
#❓ask-a-question
1 messages · Page 17 of 1
how do i make text come out
nvm got it

now i can compare

i need to make the white smaller
Go to blending option
Drop shadow
the white one
and play with the size


unlike this
also how do i make the text green from like the inside
i told u before, in the color overlay


also how do i make the text in the middle like this
uh sure
Hey guys I need your help, because my girl took a picture of herself, but it didn't go as planned. She wanted to be in the center but the person who took the shot did a very bad job, is there a way to put her in the center i kinda dont have any experience with photoshop and I need your help
okay @warm grove where do we chat
in dms? or is there a chat for this
oh yeah the voice channe chat
let’s go there
Could anyone remove the star rail logo from the top left of this image?

I want to use this as a wallpaper but the logo is right where the clock is
So it makes it hard to see the clock
I believe this can be done with photoshops generative fill
@warm grove
Possibly, but it will be dependant on the image. Send it over either publicly or privately and we'll try and get centred for you.

ty
Sure
can u keep the bottom the same tho

Hey guys so I have both creative cloud and adobe photoshop, but can’t seem to figure out generative AI, the beta option isn’t showing up on my creative cloud at all, does anyone have an idea why? says it’s up to date
You don't need the beta version of Photoshop to get the generative fill. It's right here in version 25.00 and over
It's right here in the contextual bar

You can't
it's the official Photoshop server, maintained by Adobe, here
Here is the link for a 7 days free trial
https://www.adobe.com/uk/products/photoshop/free-trial-download.html
and a link for discounted price if you happen to be a student
https://www.adobe.com/uk/creativecloud/buy/students.html
Thank you but it’s not showing up on my photoshop at all. It says my photoshop is up to date on my creative cloud but I don’t see anything for generative fill.
Gave +1 Creative Carma to @vapid flume
Which version does it says when you click here

Actual version is 25.3.1
You can also check here

Also, just to make sure, for the option to appear you need to have something selected, of course...
does anyone know how to make this text?

Is there any way to enhance the starburst effect of the lamp post light?

any tip to make that color different go away and smooth the sky?

How do you mirror an image?
click on the image you want, go to images>rotation>flip canvas horizantal
i need the person to be infront of the words, why isn't it doing it?

my guess would be the blending mode "vivid light" of that layer
thanks
I would maybe try to use a very soft brush, wide feathering, make one big "blob" of light and play a little with the overlay modes.
Hmmm
Thanks!
I'll give that a try!
you could also grab a free lens flare image from Adobe Stock and add it to the image (usually with the blending mode screen) https://stock.adobe.com/search/free?k=lens+flare
That's an interesting idea too!
Thanks!!!
Why would the options for flares be vector or jpg only? Why not png or gif so that the background is transparent?
Does anyone know how to measure on a picture, like I have a picture and I want to know how tall it is in correlation to it’s width
You can. It can be PNG, JPG, not gif though, it would look all banded with a gif.
Grab one from online or render one automatically in photoshop filters - two routes below
Oh, that's so awesome James!! Thank you so much!
I had thought I'd seen something done in photoshop once but googling was not giving me any answers.
🥰
Something like this I assume...
One option would be to BLUR that part of the image only with a mask. - See example here...
Thanks a lot
Gave +1 Creative Carma to @vapid flume

are you sure you want a 18k x 8k image? @marsh citrus
well i dont want it that big but i want it to be that aspect ratio
im trying to expand the image
then I'd highly recommend scaling the overall canvas size down. this might also solve the source of the error message. with 18000x8000, you could fill 4 8k TVs completely with room to spare

I can't see a selection. have you selected the area you'd like to fill?
no i did not it is saying that for some reason
right. if you are using generative expand (via the crop tool), you don't need a selection. but if you already have expanded the image, you have to tell photoshop where you want to fill in content. so using any selection tool (marquee, magic wand, quick select...), select the white area with a bit of overlap.
then you can try generative fill again
i did not expand the image because everytime i hit ok on the error it does this

it just undoes it for some reason
i also was not using generative fill
i was just expanding it
i never typed anything in either
i just hit done
and generative fill was not selected
hold on let me make a gif so it can be explained better and more thorughly

you are trying to fill a non-existing selection
when you first expand the image, you are cancelling out of the generative expansion. then you are trying to fill the image using generative fill but without having anything selected. Generative fill and Generative Expand are related, but not the same thing.
then how would i expand the image to make it have more stuff in it?


i googled it apparently maybe its the version?

https://community.adobe.com
Hi Team Long time learner, first time poster for help. I was having a play with generative fill in photoshop (which was working), but when I tried generative expand with the crop tool like the tutorial, it came up with an error message saying "the parameters for command "Generative Fill" are not c...
you most likely are on an older version
and im on the newest
25.2
it doesnt happen on 25.0
according to that
are you using the Beta version or the stable release version?
okay, I still had 25.1 installed. I'll double check and update
hm. working fine on the latest version both on windows and mac 🤔...
you have both windows and mac?
think it was a bug
for that version
so im updating
ill check give me a few

worst case: you can try generative fill instead. expand the image as usual, select the white area and use the normal generative fill. if that also doesn't work, you can try resetting the preferences of Photoshop: As you restart Photoshop, press and hold Alt+Control+Shift (Windows) or Option+Command+Shift (Mac OS). You will be prompted to delete the current settings. The new preferences file is created when you re-launch Photoshop.
ok let me try it
or like this


i remember having an error before where when i exported photos it would not let me
i dont rememeber the error exactly as i have not used photoshop in a little
but that is what happened

let me check now
that is premiere
woops
it says photo shop update failed
what

try reconnecting your internet maybe?
but I have intenet
might be related to your issue, @marsh citrus ?
no
I tried disabling the firewall
i mean disconnect and reconnect
or reinstall completely
didn't you just say your update failed?
and...deleting antivirus
yes but that was photoshop not creative cloud
well

oh that is different
mine was not in that it was creative cloud already
I tried reconnecting

it just wont let me in
reinstall creative cloud completely
might be a courrupted install
i dont know much about mac
but i can try to help to my best
I did. It stopped working back in 2022 and I ignore it. I reinstall it and wont work
I restarted my mac too
https://status.adobe.com/ doesn't show any outages. either it will show up there or the issue is likely to be on your network
Adobe Status provides service availability and performance impact information for all Adobe products and services. It includes incidents and maintenances that are ongoing or in the past that affect Adobe products.
how old is your mac?
that or software issue, or even hardware
might not even be the network
from 2017
might still be good im not sure
depends on if it is slow or not
Yes it worked in 2022 and one day the error decides to show up
ive never had a mac but i understand tech very well
try googling it
I did I followed all the steps from the Adbobe website and it still wont work
the thing is I dont know where the error comes from. I have it go through firewall and uninstall all anti-virus software but the error still persists.
Ah finally I found the problem. Something to do with keychain.
I deleted the info keychain and its now installing.
Only took 2 nights because it is not in the instructions

how could I create an image like the one on the shirt from an original black and white picture

yo i updated still wont work
how could i recreate this design in photoshop?

how could i make the black parts white but keep the texture on them


It depends what is your picture: A vector shape? A raster image? does it have a background? (and in that case you would need to get rid of the background in order for it to be colorised easily)
There are probably at least 50 ways to recolour something black, but each method will depend on the original, and also the degree of precision you need.
It can be a one click affair if you got the right original
I would cut the whole thing with the pen tool, copy it on a new layer, onnce separated from the background, I would cut it in 3 parts (again with the pen tool, ideally with guides)
and separate all these in 3 layers as above
Then I would duplicate the middle part a couple of times, and realign all the sections neatly so it looks bigger
It will be a bit finicky as you'll need to make sure you cut between the brick layers (and respect the perspective)

the step by step would be :
1-take the pen tool, trace around the block,
2-Once done, right click and convert that path into a selection
cut that selection into a new layer (layer>new layer via cut)
3- Pen tool again, cut the bottom and step 2 once more
4- Repeat steps 1 & 2 for the top
5- Name your layers 🙂
6- take the "middle part" and duplicate (layer>duplicate layer)
7- hide everything but your two middle parts (eye icon next to the layer)
8- Position your middle bits one on top of the other, retouch tiles if needed
9- Repeat if you need one more storey, and group the whole thing (CTRL+G)
10- reveal everything (same eye icon) and position each part where it belongs.
11- Group all the bits together without the background (same as step 9)
12- position the group within the scene
ASee if that one helps!
https://www.youtube.com/watch?v=3Ce8f6rlkP0
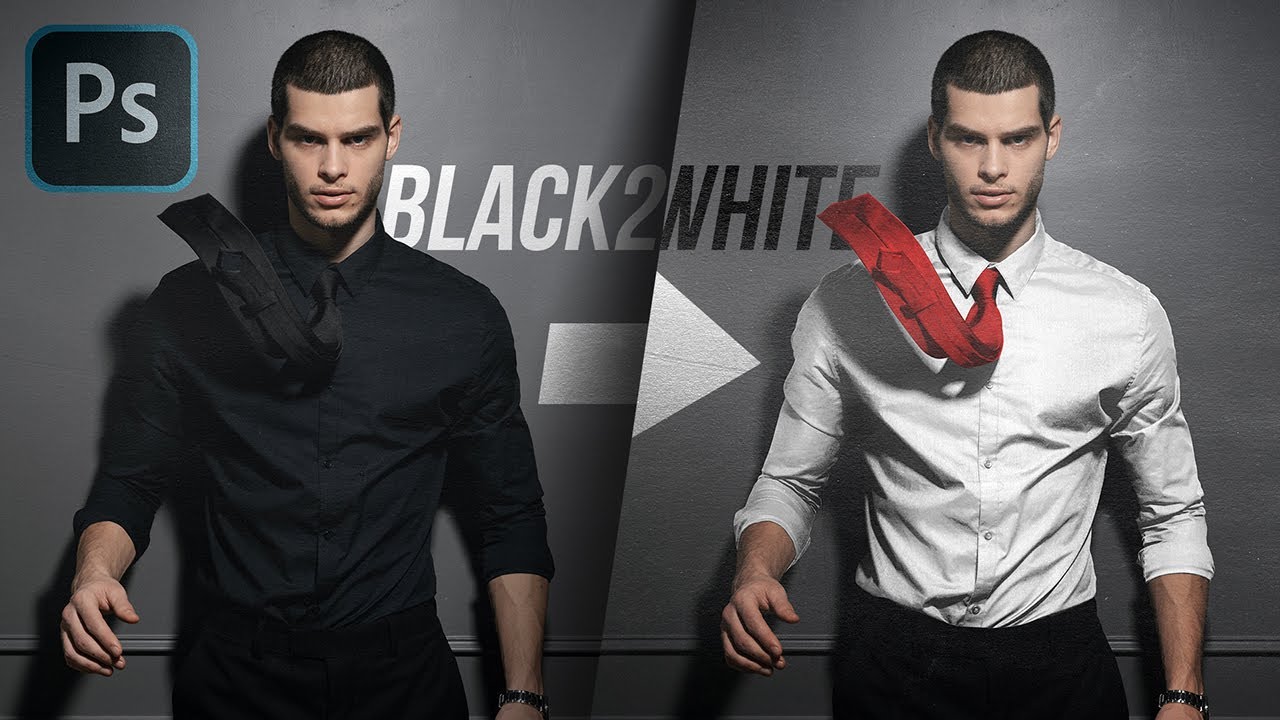
Learn How to Change Extreme Black Color with Very Little Detail to White with Photoshop! In this tutorial, we will use precise masking, Hue/Saturation, a ton of Curves, and most importantly; techniques to hide pixel breaking.
Whenever we are changing black to white, since black has very little details, making it brighter might learn to loss of ...
What are some good DDS plugins for Photoshop on Apple Silicon?
Which part of the design?
The logos or the background? The background seem to be illustrations cut and placed together so you'll need the illustrations.
If you ask how to make the illustrations, I would say, unless you want to start from photos, I'd say, you need to know how to draw first!
what is DDS?
The Data Distribution Service (DDS) for real-time systems is an Object Management Group (OMG) machine-to-machine (sometimes called middleware or connectivity framework) standard that aims to enable dependable, high-performance, interoperable, real-time, scalable data exchanges using a publish–subscribe pattern.
DDS addresses the real-time data e...
Mipmaps and that stuff
Cubemaps too... For 3D engines
No idea what it is even after the explanation 😅

NVIDIA Developer
Allows users to create highly compressed texture files from image sources.
Plugins are found generally in the marketplace section of the CC app
maybe that helps
Not really 🙂 but ...
yeah not even on Windows I find DDS exporter there, all are 3rd Party, on Apple Silicon even less...
Well anyway 🙂 thanks i may have to look way deeper into the internet lmao
I would suggest trying your luck in the community forums, there is a plugin section
https://community.adobe.com
Come for help, be inspired. The Adobe Community is the place to ask questions, find answers, learn from experts and share your knowledge. We have everything to help you get started, learn how to's, tips and tricks, and unlock your creativity.

you can ask within the "photoshop ecosystem" or in the "coding corner" as well
alrighty thanks
But wait: No idea if it's related. Substance suite has a software called Substance painter. That, among other things allow to create textures that can then be exported to Photoshop.
No idea if they allow DDS (But I can find out)
Maybe the reverse is possible
and it's not a plug-in, it's a proper software
that would be awesome 🙂 but i mainly need from psd/psb to dds 🙂
In that case, maybe you can also try your luck in the Substance server
discord.gg/substance3d
3D being what it is, they know about the interoperatibility of different software (you'll find lots of crossover Substance X Blender, or Substance X Unity there)
Substance is an Adobe software suite, but that doesn't mean only Adobe can do PSD to DDS
Also, found that. No idea if it fits:
https://www.youtube.com/watch?v=FG17FyyW_gY

Photoshop 2021 CC - Installing DDS Plugin to view game texture files in photoshop.
PC Gaming, DDS texture files, photoshop, windows 10
Link to DDS plugin - http://fnordware.blogspot.com/2014/09/dds-plug-in-for-after-effects-and.html
Intel DDS plugin tutorial for Photoshop - https://youtu.be/nMWOFocc5t0
My Twitter: https://twitter.com/tgsogood
...
Still having this issue, idk if anyone who animates in photoshop knows a fix
I'm not a video expert but from what I'm reading, this is not possible
You can lock layers but not clips
That said, if you put your layers in the same line (no idea how it's called), you'll have issue, but if you split your clips among multiple lines, one doesn't affect the others
Not sure if that's solving the issue
Like that

eg: multiple clips within the same video group, but not the same line
Sorry if I haven't been more helpful though
Dang i guess thats the only way to circumvent the issue, thanks
No worries, if that helps, here is a good recap of most features in video/frame animation
https://jkost.com/blog/2015/03/masking-videos-for-special-effects-in-photoshop.html

Here is a collections of posts to help make working with video, the Timeline panel, and animations in Photoshop easier.
how can i make this type of gradient overlay in photoshop

i didn't find any tutorials online
the image I wanna make like that is this; basically wanna take the outline of the nuke and people and then change the outline color

Coming back to photoshop after a couple of years. Not sure if i can explain this well, but how to i make my brush/pointer manipulate shapes, like skew them (had a shortcut, but its gone ofc, but i don't remember the name for that function)
In that case it's best you create the outline yourself by tracing over with the pen tool. (there is no easy way to create the outline in an automatic way, since p[eople are wearing white shirts, black trousers and it may not be easy for the select>subject function to recognise shapes) Before starting with the pen tool, make sure you're in "shape" mode and not in path mode, and when you're finished, you only have to choose the colour in the "stroke" section to colour it


Might be transform (CTRL+T) that you can summon by going to Edit>trasform. But if you want to do it with a "brush" then it might be the "liquify" filter (filter>liquify)

Yes! Thanks, liquify was exactly what i was looking for 🙂
Gave +1 Creative Carma to @vapid flume
Cool 🙂
Describe "it." Why doesn't what work? What exactly are you trying to do? Erase?
Perhaps because you're just slapping the stylus against the tablet?
Try creating a Layer Mask, choosing the Brush Tool and painting with solid black on the mask to hide the pixels that you don't want to see.
normally the things work when I tap them now its not
Check your tablet drivers. Restart the tablet service and/or Photoshop.
ok
after coming back after getting a drink the file had corrupted
Does anyone know how to solve this problem, I've already rotated the image at several angles and it doesn't fit in the car.


Has that file worked for you before? Because it seems that the dds texture is simply not aligned to the 3D model of the car.
It says my version is 23.4, and it says it’s been updated. Would I have to reinstall to get it at 25.3?
Open the Creative Cloud app and click the "Check for Updates" button; see if it refreshes the list and shows new available updates.
how can I create a reflective effect on clothing?


Kinda weird question, but how do i recreate that background, where is just says ufc everywhere on a hitlted angle?

i want the logos and the bg in it, ik how to draw but i want it to come out sort of airbrushed
download a png UFC ( same style) from internet. add it to the Photoshop.
resize and place the png one after another ...one behind another. do it into the full canvas.
select them all < tilt them. done 👍
dont forget to do the same color. to get the same result
ty, any tips so i can line them up perfectly tho?
you can press ctrl+ shift at the same time to move to the up, down or side straightly.
also you can add lines by pressing ctrl+r then drag them from the scale writen side.
@fierce hornet how to i seletc all, and how do i tilt?

select the first text layer( just click) then hold shift and click to the last text layer
with selected all layers click to the group icon. so it will be easier for you
tysm @fierce hornet
hey guys, i am new to photoshop and i am making a roblox milsim, any ideas on how i can make this picture look a bit more like the ones i have posted below?
My picture:

Reference picture:


No, just go to help>update and then let the CC app show you the "update available"
(where the up to date is in my screenshot)

Alternatively, you can go directly to your CC app and check the updates section
you might find all the things that needs updating here

Says that there aren’t any updates available, even when I click “check for updates”. Still says that my photoshop is up to date but is still version 23.4
u need to make the whole photo darker, then select what u want to glow it, copy in new layer, then blending option, then Glow effect, that's it
So im trynna make rectangle around my photo, but they're just full black and i cant change colour, and if i use the bucket whole imagie changes
Pls give us screenshot
want it to be gray


ah shoot i acidently clicked sum and now i cant see my layers
How do i fix it


cause ur rectangle layer not a rectangle layer 😂
ooo how do i change that
Step 1 : press U in ur keyborad then draw in a whole screen
Step 2 : drag the rectangle bottom in layers
Step 3 : do what i share to u above ☝️
Step 3 :
ah, it worked now but problem, now whole screen rectangle not just the ssides

yeah but if i put in botton, it dont do anything

aha, i think ur design not isolated
u need to cut the black edges
alright how i do that
Hey wanna get into a call instead lol?
show me ur layers pls

well, we need it now xd
can anyone photoshop something for me, very last second (can pay)
Sure, dm me if u want
@warm grove tysm
Welcome mate ♥️
Why do transparent holes remain when I cut out an image in PS, although there are none in the original?


I can’t update my photoshop and it’s stuck on version 23.4. It says it all up to date on creative cloud and there’s no update for it.
anyone have an idea why? I’m using a MacBook
Have you tried deleting and installing it again?
does anyone know how to fix this? I'm on a macbook pro M1.
I just uninstalled it and now it’s saying “photoshop is not yet available for devices using Apple silicon.” And won’t let me install again
Then try to delete Creative Cloud and download it again from Adobe's site https://helpx.adobe.com/download-install/kb/creative-cloud-desktop-app-download.html
Make sure the text font is installed on both your MacBook and Photoshop. It can also be a performance issue, if not fixed try disabling hardware acceleration
Just did. Photoshop is nowhere to be found. How do I install it again without purchasing it?
You simply log in to the Adobe account in which you purchased it and install it.
Still says that photoshop is not yet available for devices using apple silicon” I’ve had adobe for a year now what can be the issue
Idk then
Can anyone here help me with After Effects? I'm trying to import a custom image for the shatter effect but whenever I do it looks like it isn't rendering the actual image for some reason:

I have scoured the internet end to end and cannot find any answers
how to go from first image to second? How come second one seems more natural, has sharper face and the cut around the hair looks better?


Could not complete the quick export as png command because of a program error
Hello! Merry Christmas for those out there!
I was wondering how I can achieve at making a pose image with outlines based on a Roblox character like the following image

I am not sure if I need to make screenshot the character in a greenscreen background and then use magic eraser to delete and etc cuz I believe this won't come to a accurate result
https://github.com/antipalindrome/Photoshop-Export-Layers-to-Files-Fast
While trying to use this script I'm getting an error about printer 😅
GitHub
This script allows you to export your layers as individual files at a speed much faster than the built-in script from Adobe. - GitHub - antipalindrome/Photoshop-Export-Layers-to-Files-Fast: This sc...

I've used this script in the past so haha and never had a printer before, so not sure what's up now.
I think you would have to manually draw this
Kind of hard to describe, but whats the best way to conform an image to a shape? Like for example, if I wanted to stretch the details of the left image to a square without any spaces, what tool would be best? Image on right for comparison.


It happens with installed fonts as well. I tried disabling hardware accelaration but it doesn't help saldy.
Why is this so hard to articulate? Essentially I want to flatten/stretch it to fit into the square, but keep its details. Would I use the distort/warp for it? Or are there more efficient methods?
So guys i have no experience in PS however i am really into technology and my uncle asked me to teach him to use AI to remove background etc inside of PS. I dont want to let him down. Can anyone help me please?
Is there a particular reason why sometimes my photoshop doesn't save properly all the time? It's as if the save was interrupted and a black bar will appear on the photo.
I'd have to re-save again but this is a tad annoying

Hello, I am working on something with home alone poster and it has a kind of retro look, and I want to change part of the text, I removed the text and put a new one, but how can I fit it into the rest of the picture so that it looks like it was there before?
Reinstall photoshop
did already
Do u have all drivers in ur pc ?
Like dx12, graphic card updates
Where is ur Roblex character ?
it keep showing me this whenever i try to right click smart object

Do you have legal photoshop? If you have crack maybe it is bug because it is crack
maybe you have a virus on computer
did you try to reinstall applications?
well my father always told me I'm spacial maybe he's right
Hi! Ive been using photoshop for illustration for some time but today i wanted to try and edit some photos for my social networks but i dont really know how to proceed, what do you guys suggest me to do to this image to make it look better?

Ty
Gave +1 Creative Carma to @sly hawk
does anyone know how to make all of this like chaos

Lower the yellows, since your subject is darker than the background, it's not popping as much.
Or darken the background by some other means
Question for y'all. I have this source image which has some kind of pixelation artifact as you can see in these corners. What is a good way to make it more rounded?

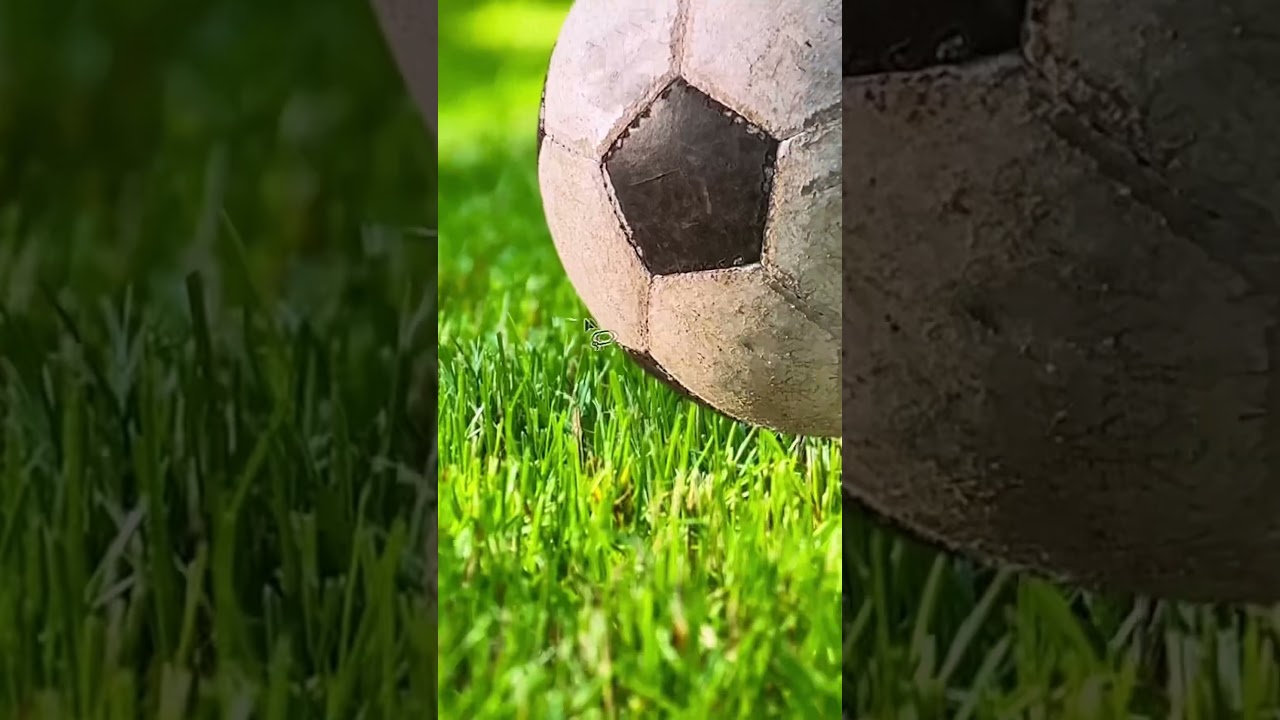
how do you manage to achieve something like this 'small' effect?

the effect is called tilt shift. you can do it in camera or fake it in Photoshop via the Filter -> Blur -> Tilt-shift blur
I'm trying to make the man be in a movie premiere. The counter should be replaced by a promotional wall and there should be a red carpet on the floor

current:

now I'm trying to add shadows of the man to the wall and the carpet
can someone help me or point me to some resources?
i dont know where to place the shadows
I suppose you could "cheat" with generative fill https://www.youtube.com/shorts/_HLoUX4ZvC4
yeah, but it's gonna change parts of the man and i dont really want that
How do i make these corners less bumpy?

brush the edges with the blur tool set on low

ah, I see. yeah I thought you meant less sharp
looks like you could do what you just did. then resterize and delete the black. would get the job done.
of to be nondestructive, select the black, mask, and then remove the stroke. that'd probably be the more proper approach.
does anyone know how these various lights added to these images?


ambient occlusion by the feet (think int terms of contact points. there's aways dark shadows near where two objects make contact. no big at all, but dark and hard. then work your way out. think about how light hits objects. you can google for reference images or just play with light and objects in your room. learning lighting is gonna be helfult on soo so many levels if you get further and further into post production and production. it's useful for photoshop compositing, it's useful for 3d modeling. it's useful for directing lighting on a film set. So you really can't go wrong to sit down and really study light and shadows.
just some basic stock flares. you could find 'em on google images or anywhere. doesn't have to be transparent. find flares on black. then change mode to screen or linear dodge.
oh gotcha, ty
bada bing bada boom. place, switch to screen, if you get any hard edges on the sides, hit 'em with a little soft eraser.

also google "light leak" or "film burn" for the other ones on the side
@plush stirrup is on the money. tilt shift. neat effect.
looks like some creative layering and radial blurs. could also be some brush packs.
Thanks both!
Gave +1 Creative Carma to @gusty drum
this is what I have rn, i added shadows to the floor and the wall

no idea btw if the shadow on the wall is good
@river otter someone just told me there should be no shadows because of the bright suit
instead it should be something like

nahh i prefer the first one
but move the shadow more to the right
warp it
because it doesnt make sense
shadows dont work like that haha
first one looks pretty dang good! it needs tweaking, but it's not a "back to the drawing board", you got something there to work with.
something like this?

really depends on the angle of the light. which is hard to determine in this image. I'd give you some artistic liberty on the angle if ya wanted. there's just one main rule you need to execute here.
here's the original image. Isn't there a shadow of the man on the counter on the left?

shadow dissapation. shadows become softer and lighter the further they get away. so where the shadow is by his leg is good, by the part up by his head should have become a lot softer and more faded in a smooth gradient like transition.
indeed there appears to be. perhaps our friend here is looking more at the lights in the new scenes as opposed to the old scene. so you have the lights right for him, but maybe not for that red room?
again, so hard to tell in this shot, I would give you some liberty to do what feels right.
and that extra loud outfit of his lol, makes it extra hard to tell where the light is hitting form.
use the blur tool on full strength because it's kind of a weak tool to be honest. and paint the shadow so the closer it is to him the more it remains sharp and the further away it gets, the more blurred out the shadow gets. then take a soft eraser on a low opeacity. like low low opacity, and brush it to have the same effect. darker the closer. more invisible the further away.

before you do, because those are destructive edits, create a duplicate of the shadow and just turn it off. so if you mess it up, you have a backup. real easy to brush with the soft eraser, stand back and go "ah, too much". so makea backup. then when you are happy with the blurring, make even another backup before erasing.
What do you call this photo effect, thorn image, cut image?
Brushes have weird names, what will I google for?

Color splatter?
just go too google images and draw that image itself into the search. reverse image search. you'll find what you're looking for
I did it and found this https://pixels.com/featured/night-city-06-am-fineartprints.html


I have tried it, I need something like this, like brush stroke or something.

is it possible still buy all adobe cs6 apps?
Is it possible to still use Adobe Cs6 apps?
so i want to make the photo on the left match the colors of the person on the right. what tools do i use to do that?


Can you be more specific?
Are you trying to match skin or clothes or background or everything?
Adobe retired CS6 years ago. Even if you could get your hands on a copy the activation servers have been shut down.
Now that I think about it, there's a small green outline in the left photo that I want to remove. How?
... and the other questions?
Wdym
In my first response I was trying to get more information about what you are trying to do.
oh.
then i guess i wanna fade the edges of the image.
oh oka
ty
any resources on how I can make a mock up similar to this one?

I will find you some tutorials (they abund!) but just in case they generally concern how to create a mock up from an existing image (that of the wall, and maybe a "blanck" canvas like the one you have now, and the tutorials will teach you how to craete smart objects to easily place the artwork of your choice into that canvas (respecting existing light and shadows, or possibly enhancing those if the image is a bit flat)
so the premise will be - almost - always that you have a photo to work from

Need to make a billboard mockup in a hurry? Then look no further! In this tutorial video, you'll learn how to make a billboard mockup PSD in Photoshop. ► Download unlimited premium creative assets with Envato Elements. Find fonts, photos, templates and more: https://elements.envato.com/?utm_campaign=yt_tutsplus_AYUzk1RdTOY&utm_medium=referral&ut...
Learn how to create your own mockups by adding text, logos, and graphics to any photographed sign in Photoshop! Photoshop CC 2021
Regarding finding suitable photos, again, they abund. See for example the free section of the Adobe Stock website. If I type "billboard blank" this is what I find

Adobe Stock
Search Adobe Stock for millions of royalty-free stock images, photos, graphics, vectors, video footage, illustrations, templates, 3d assets and high-quality premium content. Try risk-free today.
Not necesarily what you want, but you can tweak your search parameters according to your needs
Now if you need to create the canvas from a wall photo, or create the wall thing altogether, then it's another story.
does anyone know how to like blend all of these?

That's called compositing. Basically you need to correct all the disparate elements so they realistically fit together.
It would be difficult to explain in a post (and a bit long) so hope it helps
https://phlearn.com/tutorial/beginners-guide-compositing/
In this tutorial, we break down the compositing process with techniques for choosing images, making selections, and enhancing light and color. Learn to analyze light, perspective, and camera settings to predict how well photos will blend together.

Learn how to create composite images and explore photo manipulation in Photoshop by using these 10 steps that will get you on track creating great composites of your own! We will cover lighting, color, shadows, perspective, and much, much more in this Photoshop tutorial.
Get a free 7-day trial for Envato Elements here: https://1.envato.market/...
oh ty
Gave +1 Creative Carma to @vapid flume
thank you. what I'm primarily looking for is the "glassy effect" of the white boxes which create a reflection
Gave +1 Creative Carma to @vapid flume
That would be mostly an overlay (say you are drawing a fake window which is really just a set of white squares traced with the pen tool, in shape mode, fill colour being white, and then take that new layer, set it on top of your canvas layer - clip it or mask it so it only affects the glossy elements, as it wouldn't register in the rough, non reflecting brick wall.
Once on top of the rest, change the blending mode (overlay or softlight seems a good option) and reduce the opacity...

In this Photoshop Tutorial, Learn how to create light and shadow overlay windows in Photoshop. You make a quick and easy way, how to add a window light effect in photoshop. This is the best light rays and shadows of photoshop effects within 1 minute.
It's one of those quick and simple create shadow lights effect tutorials you'll learn how to us...
does it look like i've drawn the horizon line correctly here?


also if I have this astronaut, the horizon line is at the waist, would it not be possible to add the astronaut to the subway image, given how the horizon line is in the subway image?

hey guys, I just want to make my picture make eye contact with the camera sorry for the very noobie question
does anyone have a very simple tutorial by any chance
there is a new filtter in photoshop call Smart portrait, this gonna help u
In Neural Filter
Just a quick one my friends, I'm making a logo for a game that is 200x275px, Everything I do on the canvas is blurry, how do I avoid this without having to make it bigger?
I'm playing around with the AI tools. I am trying to find if there is any way to create HDRi/equectangular images. I am imagining I could create some larger image, then apply a filter to spherefy it. Then move the seam over and regenerate a section to remove it. What I can't figure out is how to use a filter or build a prompt to get the correct distoriton in my image
when did they shut down cs6?
im making a shirt but how do i know if the logo (gap daniels) is centered at the bottom

I added the astronaut into the image, but it's much better quality than the background image so it still looks unrealistic.
How can I make the astronaut look like the car? (ie that bad and blurry quality)

I uninstalled my Adobe photoshop because it was stuck on version 23.4, when I try to install it again on creative cloud it says “photoshop unavailable for devices using apple silicon” does anyone know How I can fix this
how can i change this shirt color to a natural shade of pink?

hey can someone help me with something thats probably really easy?
having a difficult time with editing something specific that should take probably 1 minute but cant figure out how to do it
im already 99% finished with the editing aswell, it's just that one thing idk how to do
how do i fix this error
[11:02 PM]
when exporting images in photoshop
Could not complete the quick export as png command because of a program error


you can make a color range selection to select the skin and add a new curves adjustment layer. with the selection active, it will be used as a mask for the curves. then you can brighten the skin areas. you might need to refine the mask
what is your Ps version? does other export options work as intended? have you tried saving as png?
im trying to photoshop a helmet onto a cat, how can i get his ears to pop out of the helmet?

(he has ears in the original photo)
uhhhhhhhhhhhhhhhhhhhhhhhh
is there a video guide on that?
im quite still learning
use hue/saturation adjustment 
latest version and no other exportt works
i got 2 backgrounds only

you have to mask the helmet to hide the parts where the ear should be visible
with which tool to make it smoother
no other export options work? so you can't export your image in any way?
nope
youtube is a great source for learning Ps, if you search for color range selection you'll find a lot of good tutorials
what solutions have you already tried? have you restarted Ps or your pc? do you have free space on your disk?
you can use soft brush
yes i have done those
and i have free spoace
@serene coral
ooh oki thanks
Gave +1 Creative Carma to @serene coral
thanks, i might just drop it because it seems really difficult for me because i tried and it looked absurd, probably because it just looks stupid for ears to pop off helmets lol
Gave +1 Creative Carma to @serene coral
not sure what is on the image you sent but if you're looking for the same effect you might want to use a ready asset

Hey I just got in Photography and I have this camera canon eos 250d and this lens - Canon EF-S 18-55mm f/3.5-5.6 IS II Lens
Is that zoom level enough I noticed that it's really bad lol and also my lowest aperture is f4 so it doesn't even blur the background anyways just wanted to know if its a good camera and a lens for street photography and for some nature photos.

Hey guys I am modding an old game and I need to modify a texture. The texture is kind of strange though. it is for a Boar with yellow paint on its back. I want to change the paint from yellow to grey:

What would be the most efficient and good looking method to do this?
You don't necessarily have to walk me through it here. Whatever technique is best i can look for a tutorial on youtube. I learn better from watching anyways, but I just don't even know where to begin here
Use HUE/Saturation
I don't want to change the whole things colour just the yellow paint.
U can select one color
How?
Ok let me look up a video on hue layers.
Is there possibility to bulk rename brushes?
I did it, but I have a slight problem. I used the eyedrop- tool to exclude the background but it still changes. Why?

It seems as though it won't let me exclude certain colour ranges from the palette
Now click in HUE LAYER MASK, then draw the things u wanna exclude
Make ur brush Black
hello all, i'm trying to transfer a color palette from my project INTO my shared library...i've done it before (as you can see in the image) but i can't remember how to do it now

Ok it's working. It's just gonna take some a lot of masking cuz the texture is so strange and low rez to begin with. Thank you very much.
Gave +1 Creative Carma to @warm grove

Select what u want to add then press on the Plus icon
It probably doesn't matter anyway does it? the grey/brown flat colour aren't shown on the model anyway
Assuming this is your own artwork (or AI)....
Maybe with a hue shift....?
One thing you could try is to simply reduce the size of the layer and then stretch it back out again. - Just make sure it's NOT a smart object. 🙂
I also then brightened it and tried some kinda high-pass filter, but it was just trial and error at that point.
when i use the hue saturation to change the color of the texture i want to add to the shape it changes the color of everything and not what i want


i only want to change the square color not the other things
Make HUE layer, then select the mask, then with brush tool draw the other things
Make ur brush Black
@steady bloom
the shade won't be affecterd right?
Thanks james 😅
It's ai
Gave +1 Creative Carma to @sly hawk
I assume they're different layers?
if so, click the adjustment layer and then.....

yep
Might someone be able to help me?
I have a file that I am looking to make the background disappear on and keep all the white parts

I'm having a hard time and have an older version of PS so I don't have a lot of great magic select options or background knockout stuff
I just want the white boxes, icons, and txt with none of the background or logo at the bottom
want it to be transparent
Is that your file, or do you have a photoshop file with layers? It's not going to look the best if you take that flattened image and try to remove the background. It honestly looks simple enough that you could draw those shapes and recreate it.
yeah it was a template I bought of etsy for 4 bucks
I was thinking it would be layered
but it's just a flat image sadly
wow
it's for AIDA64 which monitors pc stats
it came with more than just the image but it was a bummer to find it a flat image.

when the program is running it looks like that
which is great but I want it to show my Window background not weed leaves lol
If there is an option in your version to Select Color range, and use the eyedropper one the white parts to create a selection, you may be able to create a layer mask and make it work that way, but it probably won't look great
maybe I just need to make a new layer and start making new boxes with radius'd corners
honestly recreating it would look way better
If I recall there wasn't an easy way to just draw boxes
you have to make a square with a radius'd edge, then stroke it or something
yeah but that just draws a solid rectangle
then I think I had to stroke, flatten and delete the color out of the middle
it's been a long time lol

if you look at the top bar there is a stroke option and even radius option up there as well as in the properties panel I showed you
you don't have to delete the color out of the middle, just choose none for the fill
Maybe I need to take some ibuprofen and knock this headache
at the moment it seems a bit overwhelming
Thank you, Luna!
You're welcome
how can i make an where i can swap between images without having to redo shapes and everything? the image would only show in the shapes form, but i cant seem to switch the images in an efficient way like those mockup templates

clipping mask
put the image above the shape layer, then point in between both layers and press alt or opt to create the clipping mask
you could clip a bunch of images onto that shape and turn the layers on or off, or just duplicate the shape layer and clip another image into the dupe.
I tried it, using a combination of masks, colour selection a threshold adjustment, and then redrawing a few boxes, and got it working pretty well...


hey, can anybody make this realistic,i make this in blender

Wow thanks!!
can yiu?
I'd try finding a car with a similar headlight style... copy the headlight on a new layer and play with transparency to blend the two together
no,uhhh i never use photoshop i need someone to help me
I'm not home atm
For me the most unrealistic thing is the brick texture and the wall elements not matching. Do you know Blender well enough to remap the textures? Do you know how to UV Unwrap?
im too lazy to do that

So you want someone else to make it look better for you?
no just add dust
is it hard?
Is it possible to guide photoshop with AI fill to make it generate something similar to an image?
let's say I want a table in a scene that looks a certain way and I have a low-res image of that
could you tell photoshop to generate some variations of it in high-res?
has anyone here tried to play with multiple art boards with video timeline, I'm trying to export just a specific artboard on export to video, but there's no option to select a given artboard.
After last update there is something different in my layer panel right click menu. Anyone having this issue?


Can you be more specific about what the problem is?
it's not an issue, it's just a new panel
isnt it pointless? Same menu options but different panels
Well, to be honest i liked the new panel
is there any way to select one of this menu? Cuz it changes depends on layer type. Creating constant confusion
No
Hi y'all i'm really confused, I have a clipping mask on the adjustment layer so that it will only apply to the black of the abstract shape but it doesn't work:


All the blending modes are normal
the black of the abstract shape, not isolated, it's one layer with the background, u need to make it isolated
like this?

Yes
But it doesn't work
Cause it's tottaly black
Ok I think I'm not clear for what I want
I want the black to be a mask for the adjustment layer onto the bottomost layer
i want to be able to control the brightness in the area that is black, but on the background landscape
I get why it isn't working now, it's because the brightness was applying to the black layer
Make the Black shape, bottom, then mask the photo
then use ur adjustment to control it

that is helpful thank you
I'm going to cut out a copy of the black shape's area for the bottom, paste it above the original bottom, and then apply adjustment layer to it
Alternatively (rather the intended way) use the layer mask in your adjustment layer for better layer management
Select the area you want adj layer to effect, in you case ctrl + left click on Layer 2 thumbnail, select mask of your adjustment layer, invert your selection and fill with black
ah yeah i was trying to think of how to do that all along that makes more sense
i was trying to paste my layer nto the adjustment layer mask but that option was grayed out but the invert and fill works
you can alternatively delete the default layer mask and recreate it using the layer icon at the bottom while the selection is active, it will fill automatically
if you want to copy something into the mask directly, you can alt + left click on the mask to make the mask visible and edit it
😄 anytime
Getting this issue where I can't rotate an image as it creates this faint line anyone know a fix?

not with this amount of information, which layer are you transforming exactly?
and are you sure there are no active selections before you hit transform?
transforming layer 3, I can move it around okay its just when I transform

no active selections fixed it thank you
such a stupid feature
umm glad you fixed it, may i ask what was the problem
no idea
Probably something esoteric and awkward - my current experience with PS
Like "oh you didn't turn off bongledinger in Layer > options > fill > bongle > wibble > wobble > turn off lines > turn off bongledinger"
I know photoshop can be frustrating to use in the learning phase, sometimes even after years of using it. That s because it is a general purpose app and favors customized workflows for the unique users rather than a one way fits all system. What i would recommend is to use its customization features in the long run and get rid of stuff you don t use, create an ideal workflow if you want to use it professionally
Whenever I open a photoshop document and it opens photoshop (like if I click on it and the program was not already open) It opens a weird version of photoshop with a tiger icon instead pf the flamingoes and no pen pressure. What is going on?
Ah it's just the new version. Where are all my custom brushes then? Can I port them over?
they should be transferred automatically when updating
They didn't. Damn it now I can't even see them anymore =(
Damn it photoshop! I guess I'll painstakingly remake them. Cool
maybe you should check the brush preset folder manually
it was in appdata i suppose
see the old version presets they could be there
Ok I'll look thank you
C:.Users>username>AppData>Roaming>Adobe>AdobePhotoshop "version">Adobe Photoshop "version" Settings> Brushes.psp
also i highly recommend exporting your presets such as brushes and store them in an external location, just in case
along with other settings such as tools or menus if you want to take an extra step of security
Did you just copy and paste the path?
I was worried for a second 🙂
Let me double check but on the top of my head it's the right path
Looks like I can at least backtrack and get back the shape I initially used to define my favorite brush preset from the 2021 version of photoshop I have
It's weird that in the new update there's just no pen pressure settings by default on any brushes
Did you save them as .abr somewhere after creating them?
What tablet do you have? Mine is an XPPen and it happens, I just need to check the drivers (it's been a while they haven't been updated though)
Wacom intuos Pro

check that for a path
You're most likely would have the presets for the older versions as well

So if there's nothing in 2024, then you can check elsewhere
Oh! I have the brushes again
In any case, you can try to install your old version of Photoshop alongside the new one abnd migrate the presets
https://helpx.adobe.com/ca/photoshop/using/preset-migration.html
I restarted and opened the 2021 version of photoshop and they are back
The option to export the brushes is greyed out for some reason but the gear is allowing me to do it anyway
Really strang
One thing I do, but it's just me. I never allow any Adobe product to update automatically (I never had any issue when I did, just to be clear) But I just like to be here and physically press that button that say that I want to keep the presets
So now migrate them to the new version
I'll be taking this to heart. Thank you so much
Gave +1 Creative Carma to @vapid flume
And save all you important presets 🙂 Been there, got the tee-shirt! 😉
You too. Thank you and I'm sorry I was a bit rude at first, I didn't mean to direct any of that onto you.
Wooo I appreciate you <3
For the sake of clarity for any other person who might stumble upon this (I'm not sure anyone would use the search function though) you need to allow Windows to display hidden files, otherwise you'll never see the "appdata" element.

Win + R = %appdata%
don t worry about it, glad you found them
And that too. Perfect!
Huh. wait a sec.
I got my brushes but shape dynamics is not working in the new version at all
Shape dynamics should work (except "off" and random" again on the top of my head) if it recognise a pen pressure and tilt
The transfer didn't solve your pen pressure isue
holy wacom
No, but I thought I was good because the pen pressure was fine in the old version when I reopened it
Do you have to reassign your wacom to Photoshop of do you leave it as is?
Ok hold up, this is the weirdest part - the actual brush stroke shown isn't acknowledging that it should have variation

I don't have a wacom so I can't drive you through the thing, but on my XPpen I chose to assign different software to different sets of express touch and pen pressures

it's also possible that you have your "windows ink" setting disabled with the update.

It needs to be on to accept the pressure
Huh. Damn. But the pressure does work in other versions of photoshop
With windows ink off, I mean. I might have entered some code or something to make it work like that now that I think about it. That's probably what's going on! I just need to figure out how to apply it to this new version
A while ago, there was an issue with that windows ink thingy, if I remember well. But I'm pretty sure it was in Win10
I'm in Windows 10 currently
Oh, maybe that's why! But I would also search in the Wacom forums/help files
Ah! I found out how I did it and replicated it, now it works
Cool, excellent!
I'll share my solution:
- Create a text file in a text editor such as Notepad.
Type in the following lines:
`# Use WinTab
UseSystemStylus 0`
-
Save the file as a plain text file named PSUserConfig.txt
-
Put (copy) the file into the Photoshop settings folder: C:\Users[User Name]\AppData\Roaming\Adobe\Adobe Photoshop CC 2015\Adobe Photoshop CC 2015 Settings\
-
Restart Photoshop and check the pen pressure and overall performance.
(Found on the adobe forums)
I might have had to use it, I found it in my Photoshop 2020 settings 🙂

Proof that everything got transfered over, even if it needn't to!
Hah! Brilliant. I honestly don't know why they made windows ink the way they did. I'm sure they had reasons to do it, but it's the worst user experience I've ever encountered personally. Best guess is that it's somehow better for the tablets?
Anyway problem solved, you've been a big help. Good night !
I've just woken up 🙂 (sitting on GMT time!) Good night to you!
When printing large format, it will make the color gradations look more obvious and it won't look good anymore
Hình ảnh
Doesn't look smooth 😭
Because the image quality is low, I converted the file to vector format
Unless you actively digitise the file (transform the raster elements into vector paths - which is not likely in Photoshop) hen you are just embedded a raster file into a vector format
Your image is likely still raster
Can you screenshor the WHOLE of your Photoshop window? I need to see the whole thing to let you know what's wrong
Like that

You can cover it with a square if it's NSFW or that kind of things
But that's OK
What size do you want to print it?
what size is it? : go to image>image size and screenshot the result

What is it that you want to print (a drawing, a photo?, made using which tools?)
How do I post pictures to this group?

click on the little + and choose upload a file
other wise you are doing screenshot just CTRL+V in the text line you are writing into
On my site there is no plus sign like yours
I want to send a picture of the problem I'm having and ask for your help
Can you screenshot your window? You don't need that + button to paste it into Discord, you just paste with CTRL+V
What do you use to create screenshots?
I saw you managed to post on the #💬chat-general section
Your file isn't vector as it is
No matter if you saved it as a vector format, it's saved as an image inside a vector format but it's consistuent parths aren't vector. And I doubt you'll be able to vectorise such an intricate design if it haven't been designed using vectors (say, with Adobe illustrator) in the first place
These artifacts you see (banding etc) are there because your size is too small and therefore the resolution is too low
@snow tulip You can see it's there on the original as well
https://www.junodownload.com/products/danny-at-askin/6081223-02/

Juno Download
Download Askin by Danny (AT) at Juno Download. Listen to this and millions more tracks online.
or there


does anyone know how to make like this aura all over him?


How to place a baby inside the cot/bed?
please help I have a client to whom I have to give this to
this is my first work
please help
https://www.youtube.com/watch?v=rJShznYTwt0&pp=ygUkYmFieSBzbGVlcGluZyBtYW5pcHVsYXRpb24gcGhvdG9zaG9w @pearl gust
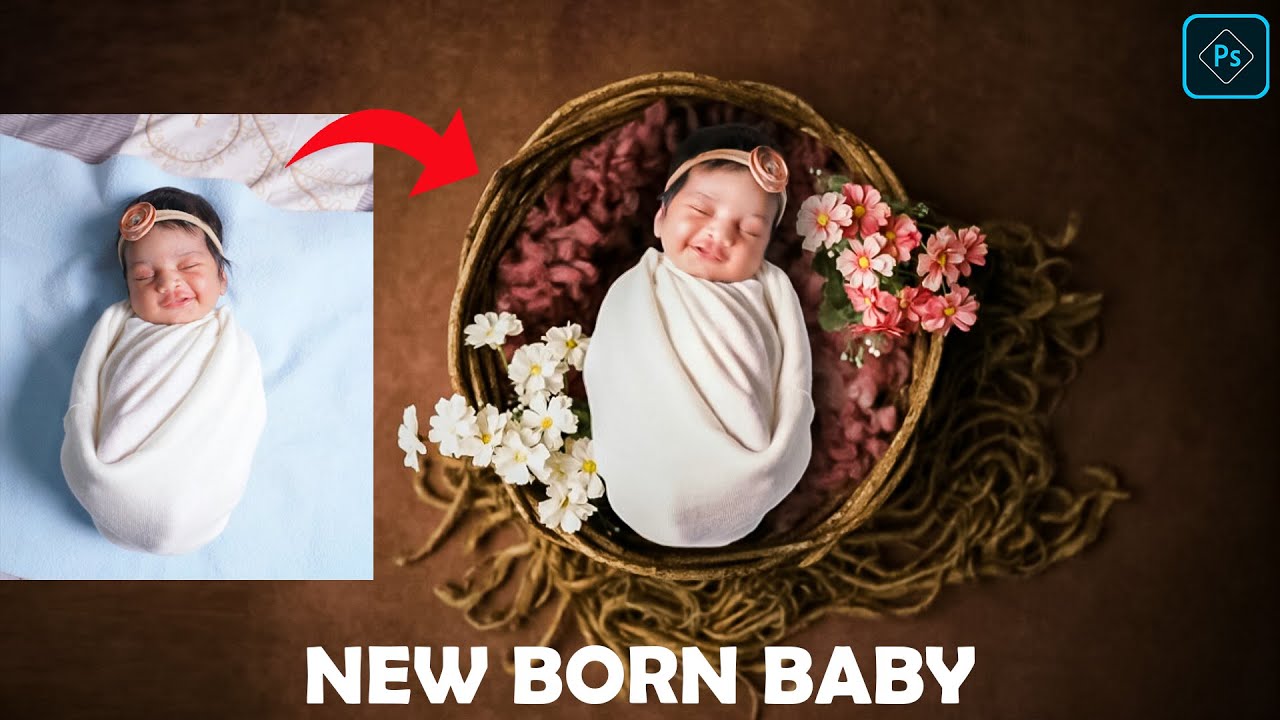
Baby Photo Editing | New Born Baby Photo Manipulation Photoshop Tutorial | Prasad VFX Studios
Nuke Tutorials :
Copycat nuke 13 : https://youtu.be/3vEJIztDRtY
Face marker removal : https://youtu.be/szDor-mOup4
Basic stereo : https://youtu.be/gs8GmWMcOkM
F_Rig removal : ...
Um, I watched but it's different
I have a different doubt broski
I want the baby INSIDE IT, like behind the net
well sir this is a whole Task, not just a small or simple thing to do 😅
At this moment i can't, cause am at work right now
why i cant edit this layer?

it's locked


uhh i use photopea but its the same i need help with something, how do i individually resize these and get them the same size?

Your image colour mode is on INDEX. Change it to RGB.

(i know photopea has a subreddit it just isnt active)
You'll need to find a baby in the right angle to start with.
yes, u should change the color mode and if the issue was still not fixed, then unlock or duplicate the layer
You need to learn about masking and blending modes
First you take the picture you have of the baby assuming it’s at the proper perspective and then mask out the background, place it over the bed and then you’ll have to mask some of the netting over the baby’s head. You may need to use a blending mode like screen maybe on a duplicate layer of either the net or the baby’s head and mask some more
It wouldn’t hurt to add shadows or lighting and color correction if the photo doesn’t match the bed image
If they are shapes on separate layers you can transform each of them individually by changing the dimensions in the property panel, or change the size of one by ctrl/cmd + T and then duplicate it three times so you have four of them.
they are on the same layer
Transform the whole layer and then make a selection to move the individual pieces where you want them.
I've grabbed 2 points, and want them both to move inward towards each other, rather than both moving to the side, is there a way to translate them like that?

Why are these points connecting?

font?
How can I achieve this watermark effect? I've created the text so far and got the angle right.

Hi guys, if I use the Path tool and draw Text along that path, is it then possible to edit the path and have the Text automatically update position
does anyone know how to make like these blue spots on his face

Move one point at a time with the white direct selection pointer not the black one
I was already using the white selection tool, my problem is I don't want to move the points one at a time because I want the shape to be symmetrical.
Just count the increments or use guides
How can i do shadow here?

Make a shape and then apply Gaussian blur to it or paint the shadow with a soft brush.
im beginner in photoshop can u guys give me a good tutorial vid to watch?
ty man
Gave +1 Creative Carma to @ripe quest
lf person who can photoshop something for me, its so easy it only takes 3 minutes max no payment
how would i do that word thing on the image, i know its most likely simple but i cant think what to search on youtube for a tutorial

Create your text and define it as a pattern, you can search “how to create a repeating watermark pattern in photoshop.”
ah okay thank you
I am modifying textures for an old game. Is it possible for me to get the smudge tool to keep some pixelation, rather than smoothing the texture over so much
?
how do people make this kind of abstract art?

some of it could be done with the liquify tool
100% but the amount of colors and detail is immense. wouldnt you need a well-prepared layer?
Sorry for the delay, but here it is @warm grove

@warm grove There is also this one

How do I create a mockup template from scratch? I have a tumbler that is not on the market yet and need to learn how to make the mockup from scratch.
im trying to create this type effect any ideas?

looks to me like a halftone effect and possibly a custom pattern overlay
& hue and saturation adjustment layer with saturation turned all the way down
possibly some slight torn edges effect as well
can someone tell me how do i do the like blue spots on face

if u have a blue patterned image you can drop that on top of your image, create a mask while on the blue patterned image, invert the mask, then goto the brush tool then select an appropriate brush size with hardness at 0, ideally the soft brush, set the blending to multiply, set the flow to a low number and brush over the spots you want the blue effect to come in
@astral dove
i made it like dat

but ty
Gave +1 Creative Carma to @pure lava
looks great!
I have downloaded a heart vector from a website, However when I try to apply gradient to the heart it only applies to the outlines and inside the heart.. any ideas?

how should I go about blending the graphic to the shirt because I dont like it being a box

I saw you clipped the gradients to the heart shape. That's how clipping works there. Also I don't see the gradients applied inside. But it's normal, the inside is transparent. If you clip something to something else, the clipped layer will only apply to the pixel content of the base layer, not the transparency.
oh..
how would apply the gradient to the inside then?
The best way would be to mask the graphic layer and brush with black the edges with a soft brush so the edges blend better with the background.
You need to fill the inside. Either with a shape (draw it with a pen tool) or just create a new layer and paint inside with the same colour as the original heart, group both the heart and the new fill colour and apply the gradient to the group
oh alright thank you!
Gave +1 Creative Carma to @vapid flume
@exotic berry https://discord.com/channels/547473772727238676/1042476087642423369/threads/1103001841190576258
Discord
Discord is the easiest way to communicate over voice, video, and text. Chat, hang out, and stay close with your friends and communities.
I tried the brush tool but it does nothing and I already have a blending mode on
Can you share your Photoshop view (the whole view?). You having a blending mode already doesn't stop you from masking the layer. YTou can have both

I see you created a mask with the outline of your design, but actually you don't seem to have blended it any further. You need to do that by hand, with a brush - a soft, low opacity brush - to blend the edges

this is a crude version of what I mean
yeah I dont know why but mines gone like this instead like yours

Because you're not drawing on the mask, you're drawing on the layer. Look carefully at what is highjlighted in my screenshot (white square around)

I did it but it didnt make it less square just changed the graphic colour

You probably done it on the wrong layer (I can see you have two layers for some reason)
I was thinking more the bottom one since it's where you got the outline shaped mask
you want to brush the outline to make it less square
Like I did in my screenshot
thank u 🤟
Gave +1 Creative Carma to @pure lava
hey anyone free to help?
Ask your question here. If anyone knows the answer they will answer!
Okay it’s hard to describe and I’ll see if I can find a photo example but how do I create a zoom effect but keep the edges the same (so basically a 3d image) it’s supposed to look dumb


OK< sorry, I
I feel like it’s really simple I am just a complete beginner
No no I really appreciate it so much for the help!
That's the term zoom that lost me 🙂
There is a glow around the middle guy, is that what you want to mimic?
No no
You see how his face is like stretched out
How do you do that?
I think that’s a better way to put it LOL
OK, so it's a lend deformation
Like applying a wide angle effect from a lens
yes exactly
You can go to filter> adaptative wide angle

have a good look at the settings I have in my screenshot, see that the default should be "fisheye" but you need to switch to perspective
Because, surprisingly "fish-eye" means you want to CORRECT a fish eye effect. But fisheye is what you want
You can also try filter>camera raw and choose this: "optics" tab then a negative distortion
You're welcome!

WAIT THATS EVEN BETTER
So the key word here is "wide-lens" effect or fish-eye. Fish eye is the kind of lens you see used to film those skate videos
hahaha! Thank you 🙂 That's learning on the job really. Also some of us have been at it for quite a long time (many, many, many years!)
Gave +1 Creative Carma to @boreal abyss
Everyone is here to help here! So feel free to ask!
can someone tell me what to fix?


Which one of the two? Both?
uh the one with the real player is the example of what i was trying to make
and i want to fix the left one
The issue is that the blue tint is supposed to mimic a gel like lighting effect on the player. It reacts to the shape of the face like this

that means in the case of yours, it's just a glow, it doesn't follow the shape of any feature like you see in the example
I must admit that the real player effect is not good IMHO
it's not realistic is what I mean
so in your case, you should have a recess where the eye sockets are (You need to follow the skeleton if you're doing some anatomy)
- cheeks, sides of nose etc. Everything that is not flat
Also in the case of the guy who raises its arms, it doesn't really take into account the direction of light and how it bounces from the face to the other side of the arm. But again the reference is not good either in that regard
If you have access to a 3D software and know a bit your way around it, I would import a character from mixamo (it's free, and you can log in with your CC credentials)
https://www.mixamo.com/#/?page=1&type=Character
and study light on a character so you can mimic it realistically in Photoshop
In the same way that pen and paper artists use wooden manekins to study lights and shadows
oh okay ty
In the same vein, you could use either the generative fill or firefly directly, describe what you want to see (harsh gel lighting in one direction) or import a photo that shows what you want to do and see what the AI comes up with with a cartoon character. That way you'll have a good reference to draw inspiration from
That's my google search query if that helps
https://www.google.com/search?client=firefox-b-d&sca_esv=594218892&sxsrf=AM9HkKmHGJ7RqfXZIHgElQM4Z8SYD3bbxg:1703765731415&q=gel+lighting+photography&tbm=isch&source=lnms&sa=X&ved=2ahUKEwjF8c35jbKDAxUmTkEAHd8fBFQQ0pQJegQICRAB&biw=2560&bih=1279&dpr=1#imgrc=XYfjS1Ug68oBJM&imgdii=frgwOc11Wk7YuM
thx
Gave +1 Creative Carma to @vapid flume
also, never neglect the power of Pinterest!
https://www.pinterest.co.uk/pin/333407178664029758/

Mar 9, 2019 - Using color gel is a great way to add bold color and emotion into your images. So here are 20 Inspiring Color Gel Photography Examples for inspiration to create dramatic gradients.
If this is the right place to be, any tips on how to make these types of headlight effects?

download some flare brush packs or you can just get some flare image off google or something, then brush/paint or place image over lights, and change mode to screen or linear dodge (to your taste)
Cheers mate, will try out. Im a newbie so. :)
we all were at some point. you're on the right path.
I try do go through menu's when I do these vids as not to confuse anyone with my shortcuts. but at the end there I helt down alt/option when draging the layer to duplicate the layers. that first time I duplicated with the menu and it was so clumsy lol
Thank you so much for the video aswell man!
@river otter @dire swift I am contractually obliged point you out to this, because at least, one person, in the whole history of the world will get to use it, and have a good laugh! 😂


That's cool man!
lol, well I appreciate you fulfilling your contractual obligation. I forgot it existed.
Me too, my friend, me too!
I've got a classic for you though! are you ready for a blast from the past? still functional and working in 2023. gimme one sec
Not willing to be pedantic one jot (ahahahhhhhhhh) but just have a look at my profile 🙂
I think this will help me :)
BOOM. A vintage classic. I stole it from a museum and installed it on my 2024 photoshop
Ah the knoll factory. Those were the days
https://en.wikipedia.org/wiki/Thomas_Knoll
Thomas Knoll is an American software engineer who created Adobe Photoshop. He initiated the development of image processing routines in 1988. After Knoll created the first core routines, he showed them to his brother, John Knoll, who worked at Industrial Light and Magic. John liked what he saw, suggested new features, and encouraged Tom to bund...
he's still alive, I didn't know!
I'll tell ya one thing that caught my eye on your profile. "No help through DM" good call. I am going to be joining the class of Adobe Experts next month. and my application would look that much sweeter if not for the hours and days of teaching that happened in the DM's. 😭
I got d*ck picted and insulted in DMs so I'd rather not
been there, got the tee-shirt
lol, I guess that one didn't cross my mind. moreso all my extra credit work was going unseen
How do you know you'll be joining? Applications are on hold for the moment, unless you're talking about something else?
on hold until mid January after holiday. Let's just say if my track record didn't speak for itself, I have some incredibly strong references. two of my recommendations have been featured on Premiere's home page lol.
I have so many people whispering in Sil's ear about me the application is a formality at this point. I was born for this moment.
Also something, and I do that when I ask for help on Discord servers too. If you know the answer to a question, even if you found that answer by accident, thus answering your own question, that's always good to share the answer to everyone. That way, others can learn in the process.
For example for the moment, I am learning blender. I'm a total noob, but that doesn't stop me trying to find answers myself for issues I got (generally through the help files), when others do the same, I learn too
And I was able to pass on that info to someone else having the same issue this very morning. Despite them probably have much more knowledge than I have in the subject
I mean, it's supposed to be community learning so unless the images aren't safe for work etc, then I don't see why that knowledge should be kept private. But that's just me I suppose
closesent thing I've gotten to a D pic from someone. student says "can I dm you a question. I said of course you can. open up my inbox....

😂😂😂😂😂😂
we had a good laugh that day.
the question was about the anchor points being misaligned by the way. he needed to nest the clip before adding a transform. but hilarious nonetheless.
You'll never be sure until it gets validated. We've seen people get rejected (not saying that it will happen to you, but it's absolutely not a given!)
I was very nervous. and going way overboard. I was trying to get a reference from Jason Levine, both my friends who admin on the Adobe video discord, Valentina, Kelsey. and it was just like, overkill. because it means a lot to me and I didn't want to take any risks.
Then Phillip pretty much sat me down and was like "dude, you've done so much great work teaching people. you'd get in with zero references. and premiere gal arleady wrote you a glowing reference. stop overthinking. you'll have no problem getting accepted.
sorry, I'm a bit dyslexic when I type too fast.
is it possible to manually paint on the effects of an adjustment layer without just applying it to the whole layer?
yup, just use a layer mask.
sorry im new - wdym?
white is visible, black is invisible. I'll send you a video in a moment.
ohhh i see! thank you!
Gave +1 Creative Carma to @gusty drum
extra tip. if you want to apply a layer mask to a layer that doesn't have one, this button right here (with layer selected of course) can even bee applied to groups and more.

oh awesome, will do 👌
just make sure you have the mask selected when you start painting, not the layer itself. I been doing this 13 years and still make that mistake regularly.
todays mantra. select the mask, not the layer.
well, I do believe I have put in a good morning. fairwell discord
Protip: the way I was making the mask invert was by hitting ctrl+i
(command+i on mac) that will invert anything selected, IE turn black to white and white to black.
and I guess last last tip before I leave. it operates on greyscale. so for example, if you paint 50% grey instead of black or white, it will make it 50% visible, and so on.
How would I make this logo a single soid color like in the second image?


(would send full but its nsfw)
does anyone know why the text stops appearing after I type a message long enough

mhmm select using color range and fill is the way i would go

most likely you made a text box (click and drag with the text tool)
oh i found out what it was i had a grunge filter and it became black where the texture stopped
thanks for the help though :)
Does anyone know how to do this InDesign? Basically, I'm trying make image zoom in the middle.

can I pay someone to help me with a VERY simple tutorial
would you buy me a course instead?
Can anyone help me make a logo 3d? I want it to look somewhat clean
Hey can anayone help me, I think its a "newbie" problem but I dont have a solution for it.
When I move a layer, the image is either cut off or more pixels are added

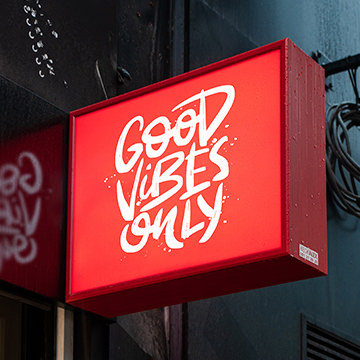
sup there, how to do photos like this?

Thresholding is the big one there to get that photo effect. Also some noise / dirtiness layered on. Also obviously this is hand written font.
Is there a Lightroom specific FAQ?
Gradient Map and Posterize too @unreal kestrel
thx
I recently aquired a Wacom Cintiq 24 Pro. I like to draw with the pencil in photoshop at 4px or 2px for pixel art, and i dont like the pen pressure feature for pixel art. how can i turn it off in photoshop?
Print them out, cut them up, photo copy, and scan.
nice idea
^
if I deleted an object, how can I get it back?

how do i get the smoke

can someone help with making something disappear from a picture with the photoshop ai thing pls contact
Select it and don't enter anything and generate. Try a few times. Sometimes it doesn't work and you have to do it manually
Command Z bro
Does anyone know if there is a Lightroom Specific forum?
There isn't a dedicated Discord server operated by Adobe. You could post on the Community Fourm on the web.
i dont have photoshop, i need help to do that. can you help me?
Is there a way to use nvidia mx150 in adobe ps and illustrator 2024?
Hey guys just realized i didnt really center the light bulbs with the bulding and it doesnt look good with theese lens flares or without them is there a way i could fix them? or it looks fine

How do I fix a pen tool shape path that decided to set everything outside of it as the fill instead of everything inside of it? Is there a way to invert a path?

Hey community!
I need some help trying to get these black boxes to look like they are "set into" the wood

Kind of like this ^ (except for the pebbles)
Anyone know how to speed up PS?? I'm running a older version, but the machine is fairly new with more than enough memory and seems like PS is running slow.
Not enough info to answer this. What are the specs of your PC? What do you consider slow?
inner glow/satin only on the edges, let it fade into the middle
look at your reference image
Thanks I’ll give that a try
Hi @tawny pecan Can you share a screen shot that includes the shape layer active in the Layers panel, and the Control panel so that we can see what you have going on?
Hi @unkempt urchin What version of Photoshop and what OS?

You can see the system requirements for older versions here: https://helpx.adobe.com/photoshop/system-requirements/earlier-versions.html but keep in mind that issues can occur when running an older version that was not designed for a modern operating system. Photoshop seems to do better than most Adobe apps with this, but still...
Hi @stoic ore If you draw that path as a shape layer and not a path (it's a drop down menu at the top, left of the Options bar) you will be able to control the stoke color and width.
@willow gale If I draw it as a shape I found that it wanted to connect the first and last points ... is there a way to stop this?
Nvm
Thanks
Ok!
Hello!
I was wondering how I can achieve at making a pose image with outlines based on a Roblox character like the following image with a space key
I am not sure if I need to draw it manually or anything similar because I want to have a accurate result
(This is a repost from my previous reply that never was answered, but here it is again)


Edit > Undo or check the history panel. When it comes to removing content, you want to work non-destructively so that you can change your mind later (beyond the undo/history panel), and in your example, this means masking pixels and not deleting them. https://www.adobe.com/products/photoshop/masking.html
Hi @radiant sparrow If it were me, I would draw the character in Illustrator, and then adjust the poses using Illustrator's puppet warp. You might also look at Adobe's character animator, depending on where you want to go. https://www.adobe.com/products/character-animator.html.
If you need to work in Photoshop, draw the character on its own layer and play with Photoshop's (similar) puppet warp feature