
#❓ask-a-question
1 messages · Page 14 of 1
reject this from...?
There is a woman sending me this idk how to reject her
here on discord?
Snapchat
Tell me a line to reject her plz
This is ask a question how do i reject this woamn?🙏
Oh nvm she blocked me
This is the Photoshop discord channel. We are here to help with Photoshop questions.

Hi, suddenly started having a bit of a problem with photoshop, it doesn't respond to most things, I can only open images directly from the image itself. I can't flatten layers, change image size or anything else.
I have uninstalled and re-installed photoshop and it's still the same.
Does anyone have a solution? Ty
School😝

Is anyone here?
Hi there sorry for the ping, but I desperately need to do some things and I cannot seem to fix my problem with photoshop
Hi, my patch tool suddenly have trouble

and evrytime I drag it, the patch that I make become a mess and wont work
hello 
anyone here online 
I need Some help 
Anyone can tell which software is used to change vocals of songs into my own voice
any tell
btw tag me while telling
Hi @lapis mulch Not sure what is happening. Have you restarted the computer lately?
Uninstalling from the CC desktop app leaves behind Preferences that may be corrupt. The next thing I would do is back up, custom brushes, custom, presets, etc. and then try Settings > General > Reset Preferences on Quit. Then close and relauch Photoshop.
Ty hey, the problem has been fixed now
The last thing I'd try is completely removing Photoshop with the CC ... OK! Sorry. I was out.
Unfortunately that involved completely removing all adobe products and the cc app, as well as deleting everything in the appdata folder
Reinstalling after that fixed it
No worries hey, thanks for responding tho 🙂
Gave +1 Creative Carma to @willow gale
That's where I was going. Did you use the CC Cleaner tool?
No idea what that is
I just uninstalled everything, went into appdata local local roaming and the other and deleted the adobe folder
Then reinstalled
It would have fully removed Photoshop. As I said a few minutes earlier, when you uninstall Photoshop from the desktop app and leaves remnants behind. The CC Cleaner tool removes everything from everywhere.
so i wanted to have this cross m16's beneath the trinity logo but it doesnt seem to go below even when i have my layers properly arranged


Yes, file it away for future issues.
Hi @warm sequoia: all objects are black. I can't tell from the image what is on top or underneath.
those guna are above
so this is beneath

but i want the guns to be beneath and this logo to be above the cross guns
Hi @river otter did you get this worked out?
yes, ty.
OK great!
but I still have one more question if possible
of course
@Ken, make sure the white interiors are filled with white and not transparent.
how can I remove the shadow around the lines to complement it's surrounding? I tried brushes but I don't think i find the right one.

they are not transparent , apparently i had to blend it in and then use filter to turn it black its original color was gold
It just suddenly turn out like that after I clone the lines
I tried using the eyedrop as well but the brush I can't figure out what brush
Cloning copies the pixels you brush over. Easiest path is to back up, and clone with a smaller brush so that you don't pick up the extra pixels.
A blend mode could make the white interiors drop off.
I see. but backing up and redoing it again would take even more time I guess I have no choice
Well, you could still clone the medium browns out now. The trick is to really watch closely what's getting cloned and stop and adjust before you complete cloning the whole area when you realize it's not right.
in the clip above, there are two triangles with a line on top. The triangle to the left has a white fill, and the triangle to the right has no fill. Those pixels are transparent, so when I pull the line underneath the two triangles you can see through the transparent triangle, and the line shows through.
then, if I change the blend mode for the triangle with the white fill to multiply for example, the white drops out and they're behaving the same way. You can't tell by looking which what is on top and what is underneath.
oh i will try messing with the blend mode , thanks
Gave +1 Creative Carma to @willow gale
Happy to help. Need to run but will try to check back in later.
Can anyone preform a fairly simple photoshop task for me? Please message me if interested!
the handle of pen tool covers the curve of pen, could it be hidden temporarily?
Is there a way to see the saved image canvas in the folder in ps? In another software i have it shows the picture before you select it, but in ps all of them are this image

I have the same question
hello can someone fix please this mess for me , i want to keep the chess with the background color and take off the lines
Since I still got this open, this would be a wonderful thing to add Adobe

please design a logo for our youtube channel ? its name is "Knowledge Kernels".
Hey currently I´m trying to face swap this picture. Does somebody know how I can make it more realistic? And I cant really explain where the red boarders are coming from.

I'm sure this is probably a simple answer, but I've never worked with some of these tools before. Whenever I try to use blur, it creates this solid black edge around the object. How do I prevent that?

OH WAIT DONT ANSWER THAT
Oh wait, do answer that. Thought I figured it out, did not.
Did your try the Blur tool in the toolbox? It's grouped with Sharpen and Smudge.
oh yeah, I forgot it thx :))
Face swap tutoria: https://www.youtube.com/watch?v=gOQ25Kp6jPY
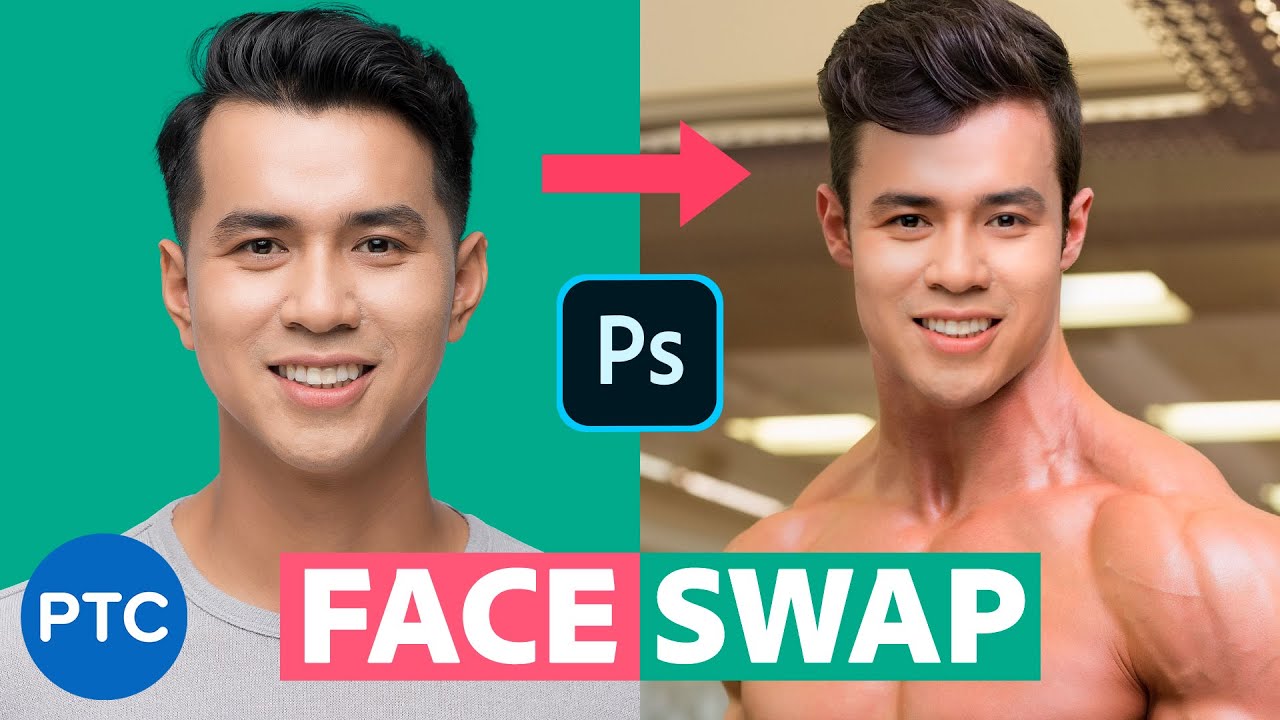
FAST and EASY method for Swapping Faces in Photoshop! Automatically match brightness and skin tones.
In this tutorial, you will learn to Swap faces In Photoshop. Swapping faces or swapping heads is perhaps what Photoshop is most commonly used for. Almost every magazine cover or movie poster that you see has had a head or face replaced.
There a...
I have a 600dpi scan of a print I would like to get to a level ready for print on t-shirts and other merchandise. However, there are a few pieces of pastel in red/brown/black that have migrated onto the image when the photographer took the high res. image. I understand there is a bit of detail for printing. What would be the best way to go about removing these in PS while maintaining the high resolution image quality?

Not in this PS discord !
im trying to recreate the 1st image, 2nd image is my progress so far


how do I make the person and the trophy look like as in the 1st image? You can see they're clearly modified
Hey guys, how could I make something look like it is embedded into something? Like a rune on a piece of wood or something

I want to create like this picture. Can you help me please!
How i can mirror anchor points?
Draw it, change blending modes and opacity.
Sharpen, lower saturation...
You can watch that one, it will help!
https://www.youtube.com/watch?v=g3qe4rDw1XU

Learn how to create composite images and explore photo manipulation in Photoshop by using these 10 steps that will get you on track creating great composites of your own! We will cover lighting, color, shadows, perspective, and much, much more in this Photoshop tutorial.
Get a free 7-day trial for Envato Elements here: https://1.envato.market/...
What do you mean by create? Do you already have photos? Or do you need to create them with Generative Ai?
Will this help?
https://www.youtube.com/watch?v=zxK6ZfMBmiE
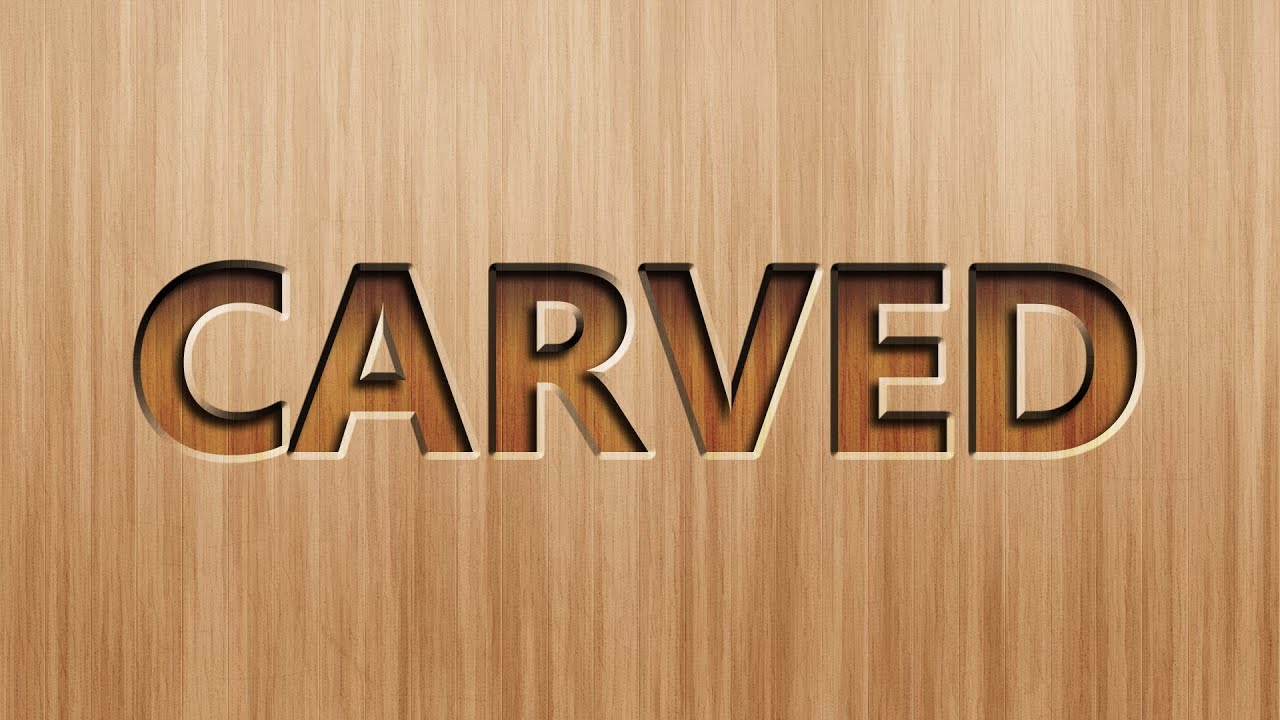
In this Adobe Photoshop tutorial I'll show you how to create a great looking quick and easy text effect that allows you to CARVE text into any object. You can use this for text, logos and other objects. I really hope you enjoy this text effect tutorial and if you have any questions ask me in the comments below and don’t forget to Subscribe for m...
Once you'll know the menus you can change your embossing type, depth of effect etc...
I don't think there is a specific menu in Photoshop for that there is in illustrator)
so I would copy the path, paste it, and then use CTRL+T to summon the transform contextual menu, and then from there right-click to choose "flip" (horizontal or vertical)

There are so many ways to do that, but my favourite would be to use the "healing brush tool"
which has the ability to keep the overall texture if applied in small, delicate touches
That means you will have to sample (Alt+click) a clean area, and then apply that sample to your defective area. If it's the first time I suggest you just try it on a new layer first (that would be my suggestion anyway, as to always keep your corrections on a separate layer)

If you look closely in the top contextual menu for the tool, you will see a drop-down that says "current and below". That's the option that lets you sample the layer below to apply the corrections on a new layer

I use overlay, opacity and inner shadow for such things.
Then just choosing if Embedding should be darker or lighter then object its embedded into and choosing black or white color.

Bevel works too, yea, who have nervs for it. I don't usually. 😆
@river otter Sorry I realised I answered to the wrong person! 😨 It was meant for @river otter
It's fine, I'm sure he read it.
I did all like in that tutorial, bevel and emboss still looks like a protrusion not an inset.
That's why I hate it.

Without it, and with Shadow looks just right.

The quality for this is very low. Is there any easy way that I can make it less pixelated?

Depends what method you are using

You can, bit trying to smooth the lines (but it can go very wrong, very quickly)
Try filter> noise> median
I think I got how to avoid protrusion.
Countering highlights with inner shadow gives nice result.

If you happen to have illustrator, I would try to image trace it and tweak the settings to avoid the jagging (for example the "noise" option)
Or try it in the image trace module from Photoshop, but That is a little more crude
In PS, go to your library panel, click on the + icon at the bottom and choose extract from image

When there, choose the "shape" tab and play with the sliders

You prbably would want more details, and smooth on save to keep the brush strokes. This can only be saved to a library, so once it's saved just drag and drop it on your canvas from the library it's saved in. This is not a standard shape, it cannot be editable unless you rasterise it. It's a last resort digitisation, so I would really do that in illustrator instead, but if you don't have illustrator then it will be better than nothing
I have illustrator downloaded but I haven't used it yet so I would have no idea how to do it in that
Thanks, I just tried this but it didn't really do much
Gave +1 Creative Carma to @vapid flume
https://helpx.adobe.com/uk/illustrator/using/image-trace.html
That might help
The help files are the unsung heroes of all this. Sometimes just way simpler to get than random videos 🙂
Ok thank you
You get a button here

that should get you directly to the menu when you click on it, with a test file to explain step-by-step how to do it. It's super easy to learn that way. You try it by yourself, but guided
Once it's digitised (or vectorised) you can enlarge it as big as you want, and it will stay the same quality all the way through
When tracing it, it still loses a lot of detail


you need to play with the sliders

threshold, paths, noise etc
you have an explanation of all the advanced controls in the help link I gave you
Ok I'll try that
How do I merge two layers and create a new layer of it?
Select both, right click, then "merge layers"

Yeah but I want it to create a new layer instead of replacing both of the original
Then you should duplicate them first and merge the dups
You have the "duplicate layers" higher up in the same menu
Ah alright, I thought there was some shortcut to do it but I'll try that, thanks
Another way is to only make those two layers visible, and then CTRL+SHIFT+ALT+ E that will create a new merged layer of all the visible ones
But the latter sometimes doesn't work properly if you have layer styles
Perfect, that's what I was looking for
Ok I see
why did the History Eraser erase the brush the same way the regular eraser just did in this second layer? also i did use the history eraser on this first layer and it worked properly by reapplying the erased parts of the brush
and how do i make it work the same with the first layer i shown?
After a while this was the best I could get it to. I'm guessing you're not able to make it 1:1? @vapid flume

how do I make these blend together better?

this is what I got in the end, how can I improve it?

You have to adjust saturation and brightness locally, you can use the hue/sat adjustment layer and a layer mask
wow looks realistic like someone carved it out
What do you mean by that? If the original is really small and a bit crappy, there is a limit of what either PS or illustrator can do. It will never be 100% exact, because they have to work with partial info, and they can't extrapolate from that. Digitizing is the best way to go about it, but I never said it would be perfect. Perfect would be you recreating those brushes in illustrator or Photoshop and redrawing it the exact same way.
hello, i want to remove the shade spots on a table, i need like a brush tool with low hardness type of stuff and increase the brightness of these dark spots. are there anything like that at all? if not, how can i remove them?

Hi, I have a question about Lightroom Classic. Sorry if this isn't the right place, I couldn't find a LrC server and I just learned that the Adobe Express one closed.
Question: I want to change my Photography (1TB) plan to the Lightroom (1TB) plan, which doesn't include LrC. How can I preserve all my edits and work I made in-app for when I return to LrC in the future?
Some say:
(a) Everything will remain intact and I only lose access to the develop module, mobile sync and something else.
(b) But others say I still need to export my catalogs.
Are any of these true?
Probably a relatively simple adjustment that I'm looking to make - just want to change the color of the red steel roof grey without losing the texture. Have tried a couple different fill options but wasn't quite successful

you'd be better using Gen fill or content aware fill...
Use a colour gradient.
Generative Fill did the job.
Gave +1 Creative Carma to @sly hawk
Some random minecraft castle background?

Gave +1 Creative Carma to @sly hawk
ty but I alr made 1
Gave +1 Creative Carma to @sly hawk
Cool. whatever works I guess 🙂
👍
tho what's ur opinion on it?
and what could be improved
Is there a sensitivity adjustment that you made to the quick selection tool? I'm using shift/click to try to get all of the red but doesn't seem quite as accurate as yours. Just curious!
Nevermind...enhanced edge
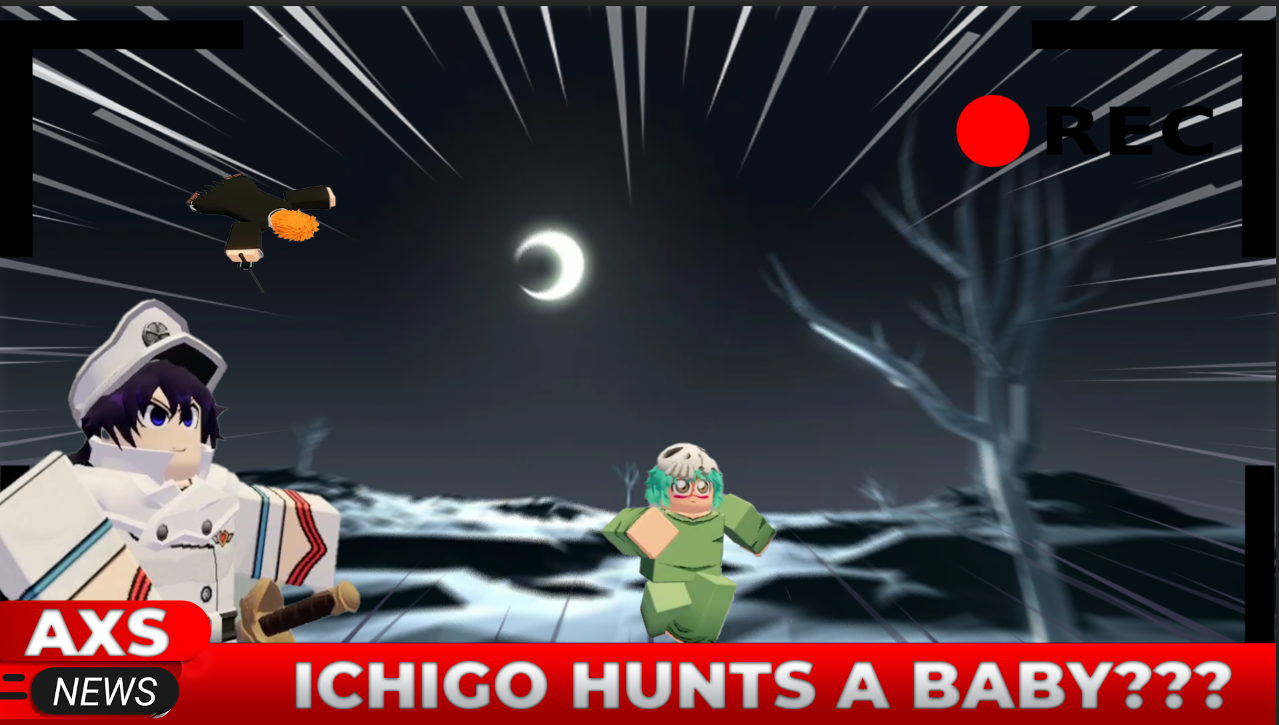
I have no idea what it's supposed to be. - If it's a thumbnail, the text is too small. I can barely see the person top left and the REC is hard to see too.
Hello, I wanna know if its ok to ask people her to make a job for us ? with payement ofc 🙂
It's a thumbnail yes
it's for a roblox game
Yeah, try your luck in #💬chat-general - but this discord is not a 'job board', so post at your own risk
ty
If you're going to post, make sure to provide a clear brief, and avoid just saying "I want someone to photoshop something", since it's such a broad request 🙂

.... or be entirely vague with no explanation at all. 🙂
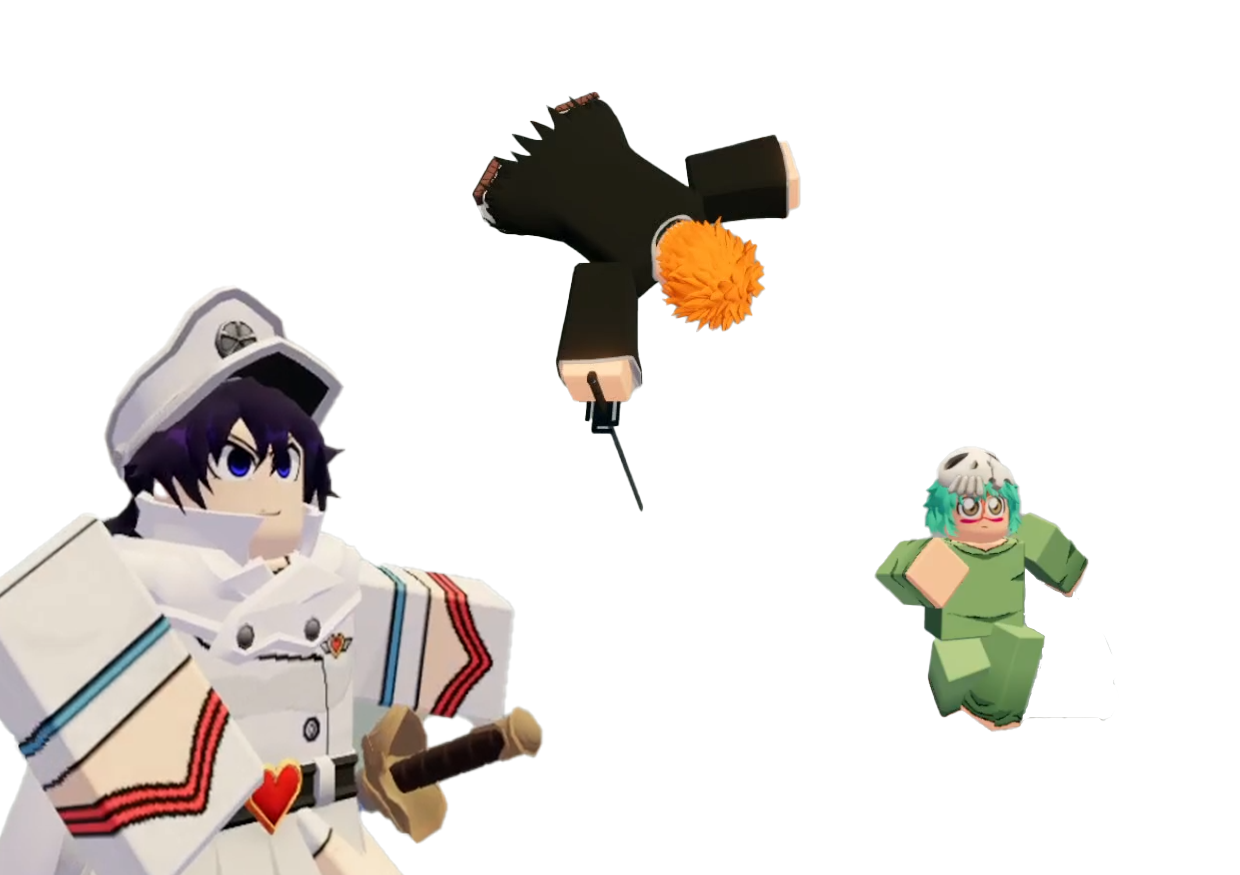
y'all got opinions?
also
@sly hawk do y'know how I can change the rec color? it's an image and idk how
Try this...
Still a little hard to see, I'd add a stroke....
You can also try 'outer glow' for the same effect: - It's in the same place the stroke settings are found.

ok
It's all in the video. Admittedly a little fast (sorry). - Maybe play it in slow motion to see the buttons I'm using 🙂

I decided to use the outer glow to make it glow a bit
i think this looks good too

Looks good too
also
@sly hawk do u know how to change the color of an image really good

like, I want to change the color of this picture
to blue and green
do I just use hue and saturation?
or is there a better way
Are you combining "hue and saturation" with a mask, or selective colours?
what's selective colours 🤔
(e.g. the first part of this video)
idk abt it

shoot
ohh
I would just use
the lasso
to then split
and use different colors
for both of em
but this is beter
*hue
If you want specific colours, try this:
jesus that's crazy
I got this too

with just hue and saturation
and I added a stroke
Yeah, you were lucky that the colours you wanted could be generated via the simple hue slider. - You'd have been screwed if you wanted something like yellow and purple.
ye
I would have to do the method u did
this is the result
but I don't feel like the placing of the AXS logo is rlly good 🤔
or is it
You're learning - which is the main goal anyway
yea
I got photoshop rlly recently
like 2-1 weeks ago
I don't think I'm the target audience for your art, and this is really subjective.
fair
Like....I pretty much hate every one of these 'apparently amazing' thumbnails:

the thumbnail idea was random and I thought that making something like this would've been interessting
Yeah, of course. It's coming together L(
good luck.
Gave +1 Creative Carma to @sly hawk
u made me learn some things + made me get a good thumbnail
Hi @vocal anchor This should be helpful: https://helpx.adobe.com/lightroom-cc/using/migrate-to-lightroom-cc.html
And hopefully you won't need to reference this, but just in case: https://helpx.adobe.com/lightroom-cc/kb/migration-errors.html
WOW- You didn't only answer my question about catalogs. But introduced digestible instructions for migrating them to Lr and error help, too. Thank you so much, this is a great solution! I wish you all the best  ✨
✨
Gave +1 Creative Carma to @willow gale
Hey I was looking for a guide how to blend a distanced character in a photo but couldn't find anything specific in YouTube, someone have recommendations?
Do you mean "How do you place an image on your canvas?"
If so, you can drag and drop it from your desktop or folder.
Follow the 5 simple steps in this Photoshop tutorial to learn how to add an image layer to an existing image.
Youtube has plenty of tutorials on how to start using Photoshop!
File-import

―
Download the Free Frequency Separation Action Here:
https://phlearn.com/tutorial/the-amazing-power-of-frequency-separation-retouching-in-photoshop/
What is Frequency Separation?
Frequency separation helps make retouching a portrait easier in Photoshop. Frequency separation works because it allows you to separate the texture of an image fr...
i use this method step by step for frequency seperation
however whenever i change my blending mode to linear light
i notice that theres a slight change in luminosty with my over all photo
Does anyone know why this could be happening especially since im following this tut exactly??
Hey guys I really need help with some PS is there anyone I could message?
I’m willing to pay
sure dm me ill try to help
I think some basic beginner guides on youtube might help you.
Thank you so much

I have a PC hardware question - trying to set up a system for a new employee for some PS/AE usage for web and marketing work. No 4K/big images or videos. The base system is Ryzen 1700 + Radeon RX 470 (32GB RAM, SSD). Will this work fine? and what would be the difference with an Nvidia GPU like GTX 1660 Ti/Super or RTX 3050/3060? Old Polaris GPU doesn't support the latest OpenCL that Adobe wants...
And I wish you the best on the migration, @vocal anchor !
Yeah, kinda. The only issue is I was going for more of a carved in rune like you would see on viking swords and stuff. Would you know how I can do that? If not then I can make this work ahahahah
for reference, this is what I need the runes on.

How do you make this bent thing straight? Is there any tutorial recommendations??

That looks like a curved brush stroke. To draw a straight line, select the Brush tool, color and hardness. Click where you want to start the line and Shift+click here you want to end it.
If you are determined to change that curve to a straight line you can try puppet warp but it won't be very accurate. I'd just erase and redraw following the steps above.
I just did a curved brush stroke to simplify the problem I’m having, I have a bent texture that I want to straighten out and I have no idea
I tried puppet warp, it’s not too perfect
How can I make it perfectly straight?
How do I make a line like this?

How do I cut this out perfectly and turn the black into white ? Pl0x

Click the layer, press selection then color range and click the black, then press the cube with a circle that's on the bottom right
This is for cutting it out
THANK YOU, SIR! 🫡
As you may know, Photoshop is pixel based—whatever curved object you have is built on a square pixel grid—it's not a easy task to straighten a bitmapped image. You could play with Edit > Transform > Warp to see if you can get closer.
I used generative fill on a image with a solid-color background, and it introduced some artifacts into the otherwise single-color background. How should I go about removing these slight discolorations? is there a way to select all "similar" colors in an image and change them into a single color?
the "replace color" just appears to be a hue/saturation change, and doesn't get rid of the actual artifact itself
better image of the artifacts i'm talking abt (contrast turned up)

Oki ty!
anybody knows why under 3DLUT i cant seem to use that feature for the image i am editing?

Need a good Editor, where can I find ?
What kind of editor are you in search of?
Why does puppet warp keeps cutting my photo?
3d modeller
I create designs in 2d, i need someone to turn them into 3d
check out Behance
If Puppet Wrap is cutting your photo, it might be due to the boundaries set by the tool or the specific area you're selecting. Ensure that you're adjusting the puppet wrap points carefully to include the entire photo without cutting off edges. Additionally, check if there are any restrictions on the puppet wrap tool that limit the transformation within certain bounds. Experiment with the tool settings and points to achieve the desired result without cutting off your photo.
Ok
Can you explain it in a much simple context I'm sorry I'm not really good in english so It's kinda hard for me to understand
Put your screenshot here, I need to see what your problem is ?
Try to select the image layer first, and then try to add lut
Is it possible to screen share instead? or nah I gave up on it I'll just ask a different question insted. so I was trying to cut off an image using calculations so I wonder since the video that i watched didn't mentioned it. the black is for keeping the image and the white is to remove the ones that you dont want to include right? also is there a specific brush for it or any brush could do? and do I need to make it really black or really white or kust the touch of the brush is good?
you're working in cmyk, switch to rgb to use 3d luts
does it cut only the parts that are outside of the canvas? it would help a lot if you could screenshot it. win+shift+s
so I pin just the leg partand moved it and when I applied it, it gaves me a cutt of image.
can you please screenshot it? are you on a mac or windows?
I'm on windows. I actually no longer have the image as I back out from editing it.
what about this one?
next time you can easily take a screenshot by using win+shift+s and selecting the area to screenshot. then simply paste the image here
I know how to screenshot I just intentionally leave it out since the photo is personal as well
I'm not sure why are you using calculations? it's a very specific operation and there is absolutely no need to use it unless you have a specific use case for it. are your next questions related to calculations as well?
I use it because it a pesons photo and I wanna make sure that the hair will be cut with accuracy tho I know that's not a 100% I still think that calculation is way better than pentool or patch tool for that case
actually it is related
use regular masking methods then https://discord.com/channels/547473772727238676/1045711257178738760
Oh what are the regular masking methods?
I will check that out thank you
Btw can you list me the ways to cut ou an image what I know so far is
• Pentool
• Patchool
• Calculations
• Blending
If you want to cut out a person you can use select subject
Only if you have the latest version of Photoshop
not sure how do you mask with the patch tool but good luck!
I think I did that but it didn't cut as the way I expected it.
Then you can use lasso tools, like magnetic lasso tool
To do it
No I use patch tool if the image I'm cutting is not that complicated or big, but thanks I appreciated it.
Gave +1 Creative Carma to @serene coral
ow thank you I didn't know that one will keep that on mind next time
Welcome
Btw is there a time that people here use the voice channel?
If any other queries feel free to dm
Not many people use it
Sure, thank you. Can I add you then?
I see.
Sure
There, thank you again
Welcome
does someone now why my photoshop keeps crashing on startup? it never did this before. i re-installed the app, updated my drivers and restarted my pc multiple times. keeps giving me this

While opening your photoshop press the shortcut key ctrl+alt+b and a menu opens as scratch disk preferences, in that menu add your other disk partions in 2 3 and 4

A menu like this appears
Add your disks in there

Select the second disk also and click ok
If doesn't work
Deselect c and select d and click ok
If that also doesn't work, go to your system's graphic settings and add photoshop in performance mode
Did you try this one ?
For my friend that thing worked out...
are you on the latest version? have you tried resetting the preferences? https://discord.com/channels/547473772727238676/1042970894911410277
If that doesn't work try changing compatibility and run photoshop as administrator
i cant do it, it gives me like 3 sec max and crashes then...
Did you update recently?
I would uninstall this version and install an older version just to test (don't worry, as long as you tells it to keep your presets and transfer them, you won't loose anything). Once there, you can check if the graphic card is fully compatible, if the scratch disks work as intended, etc.
Sometimes you can also clear the preferences (so you may loose some things like tools presets etc) when you do SHIFT+CTRL+ALT just as the launch page appears, So basically open Photoshop, then hit the 3 keys immediately after (might beat your 3 seconds), that's what @wertos said.
If your preferences aren't crucial, you can start with this one, before going to the uninstall/ downgrade route
thanks for the info, ill check it out later today

You can try changing compatibility by right clicking \ properties \ in Photoshop
Use a mask with a stroke like this....
The quality is awful, and it's been designed by someone who nicked two other designs and placed them over the top of each other. THe cross seems to have an outer glow with noise applied , which makes it even worse. - You'd be better off finding the original assets and remaking it:
https://www.deviantart.com/aj-kidman/art/Cross-with-Angel-Wings-48917716

Yes, you can use the colour selection tool for this. See video for a few ways in can be utilised:
hello!
where do i ask for adobe lightroom and stuff ? because i cant seem to find the discord server for LR
hi, feel free to ask any Lightroom related questions here!
im on the photography plans, trying out the free trial before buying
i was trying out the denoise feature
so the denoise says it would take 2 minutes to denoise but after waiting until the progress finishes
it applies nothing and didnt say denoise applied, the button is not greyed out (its normal on my windows pc)
device is macbook air m1 2021
thanks before.
Guys, my photoshop won't open a cloud document and i have a meeting with my client in 20 min.
Im freaking out, can someone help me out asap?
Is it possible to download my cloud saves through webbrowser to my machine?
make sure you follow the steps described here: https://community.adobe.com/t5/lightroom-classic-discussions/how-to-use-the-denoise-filter-in-lightroom-classic-quick-tip/td-p/13900452
when done correctly, you should see a denoised copy of your image

https://community.adobe.com
Using the new AI Denoise filter Did you know you can easily remove noise from high-ISO or underexposed images using Lightroom's new AI Denoise filter? Follow the steps below or watch the video at the end of the article to see how this amazing filter can rescue images you thought were destin...
you can access all of your files here https://assets.adobe.com/cloud-documents and download them as well
im at step 7, after clicking Enhance
nothing happened :(
thank you wertos, i figured it out and i think the poster went corrupt.
Gave +1 Creative Carma to @serene coral
damn
try opening it online with Photoshop web
nothing happened and? the app hung? window disappeared? something else happened?
it didnt hung, it shows the loading, but after minutes it just dissapears and went back to step 2
have you tried restarting the app or your computer? also make sure you're on the latest version of the app
i just downloaded it, tried restarting
still the same sadly
not sure what's wrong with it, because its normal on windows
is there any way i could see error log ?
https://community.adobe.com/t5/lightroom-classic-discussions/ai-denoise-amp-mac-mini-m1/td-p/14256559
https://www.reddit.com/r/Lightroom/comments/187z3fd/denoise_not_working_since_i_updated_to_1301/
https://community.adobe.com
Hello. I'm getting mixed messages in various places about denoise times for those with a Mac Mini M1 16GB RAM (2020 build). The GPU is 8 cores Metal 3 according to my system information and I'm using ios Sonoma 14.1.1. It's taking 2-3 minutes to process each picture. Is the consensus that this is ...
Reddit
Explore this post and more from the Lightroom community
please try restarting the app and rebooting your mac first. try denoising on a different photo
the window disappearing would suggest the process was successful. make sure the denoised photo is not stacked under the original one
still the same, tried on different photo
it isnt, it changes nothing to the photo
please contact Adobe Support https://discord.com/channels/547473772727238676/1044348438512418907
hi guys does anyone want a logo im quite new to photoshop
?

So i made a poster in photoshop, saved it as a .pdf. opened it in acrobat pro.
When convertng the .pdf

this is in photoshop
this is in word/powerpoint

any reason why this happens and how i can prevent it?
did you convert from pdf to word?
yeah
I think that is the problem
word doesn't really know what anything is and its formatting whatever is not good
so when reformatting the file, I think some data or something got lost in translation and caused that case
in my recomendation, I would save that part as a image itself
and just drag it into word or powerpoint
no conversion from acrobat pro?
I don't recommend it
it can work from time to time, but it makes words into picture and so and so
space grain = "knowledge Kernel" 🙂
@sly hawk the client liked your style alot btw, thank you again!
Gave +1 Creative Carma to @sly hawk
woo!
i updated the poster to a infographic type. kept your header
and then added my own stuff
yeah. - As per my previous video, you can't really trust the conversion to do the job.
i will show you later when the client agrees to the new version
since there's a heavy NDA on it rn
You'll need to manually recreate it by saving out the assets as seperate bits, and then recreating in word/powerpoint.
I see you went for a https://www.vecteezy.com/free-vector/topographic-map style too.
yeah, i love those contours
topographic countour graphics
whatever it is called
It looks like you just need the background a little brighter...
Hey, want me to delete my vid? - if you've learned what you wanted?
(I noticed you'd removed the photo above)
Yes please, thank you for your help!!
Gave +1 Creative Carma to @sly hawk
done!
😄
Hello, does someone know why my pencil does paint inconsistent as if antialiasing is enabled but? Modus is set to normal, opacity 100% and smoothing to 0%. In the past I never experienced painting a solid colour with the pencil

Does pencil even have antialiasing?
I'm surprised too, didn't think so
but something seems to be weird in my settings apparently, just can't figure it out
did you have some pixels SELECTED when painting?
(like in your screenshot?)
a clean reinstall fixed it,
A pixel can be 'partially selected' it's the dotted line you see isn't a definative SELECTED OR NOT.
Every time I save an illustration on photoshop, it becomes a bit blurry. It doesn't matter whether I save in PNG or leave it as PSD. How do I stop this?
A good rule of thumb is to use Photoshop for photo editing, and Illustrator for illustrations. Photoshop uses a square pixel grid and therefore needs to blend curves so that they don't look pixelated.
Oh I had no idea. In the meantime, is there any way to prevent this? Or that's just the nature of Photoshop
It's really the nature of Photoshop. You can see the blending (aka anti-aliasing) on the curve visible in James' video poster right above your question.
This may be helpful: https://www.adobe.com/creativecloud/file-types/image/comparison/raster-vs-vector.html or perhaps can help you locate an explanation that is. Keep in mind the bitmap/raster/pixel grid are synonyms. PSDs and PNG files are both pixel-based.
Thanks!
Gave +1 Creative Carma to @willow gale

Increase the yellow satuation
this worked, thanks!
Gave +1 Creative Carma to @vapid flume
where
Ryans teeth are so nice and clean, that there is no yellow in them to 'saturate'! - So instead you'll need to add some via a gradient map.
If you want to take it further... - See here...
Don't use this skill for evil though!
Yeah exactly
Okay very interesting, but in older versions of photoshop it did work with selection.
I am working on a satmap for a game engine, the workflow so far was always to select specific areas of the satmap inside another layer and then use this selection inside the layer of the mask for the game engine.
It always gave me sharp borders
try this...
- Make your original selection:
- Enter Quickmask mode by pressing 'Q'
- Use menu Image > Adjustments > "Threshold" and set your selection
- Exit Quickmask,
- Now you have your solid SELECTION. You can now mask, or paint it with either the pen or brush tool.
Okay I will try tomorrow and give feedback! Thank you very much 🙂

Oh excellent 🙂 Glad I could help
I have an image I plan on using on a graphic tee and would like to preserve the most detail I can. What resample option do I select that'll be keep the detail of the image?
thank you so much!
Gave +1 Creative Carma to @sly hawk
How would I cut a picture into sections ?
https://i.imgur.com/G0QgrR1.png
Hi, I was wondering if someone could guide me on how to achieve that kind of oil on canvas effect on an image?

New update for How to Split an Image in Photoshop - The Easiest Way 👉https://youtu.be/VOmGMcHjTv0
If you found this tutorial useful and want to support this channel, you can buy me a coffee 👉 https://www.buymeacoffee.com/ioni.grdesigner
00:00 Intro
00:22 Import an image
00:32 Split the image
02:27 Export the image
Don't forget to subscribe to...
And you can give it that effect as a round using a brush, I guess.
How do I resize text boxes
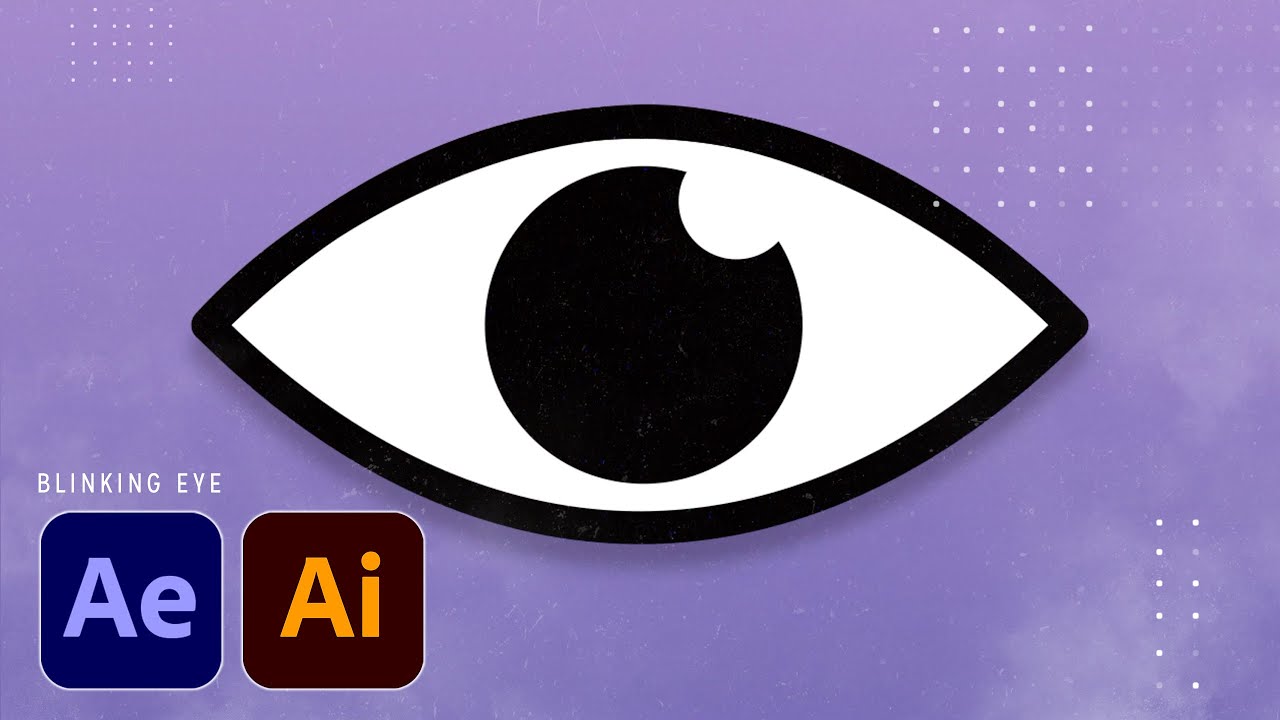
Hello! Have a question regarding a logo we have and use. So, we are making a end of the year completion and in the beginning of the video we want our logo to be an animated blinking eye. I'll attach the logo at the bottom for reference. Is there any way we can do that? I am kind of new to PS and was wondering. Thank you.

Click the text tool first, then click the word and the handles will appear.
Well. "Technically"' it can be done, but not through any automatic method. - you'd likely need to do it in Adobe Aftereffects which has a very steep learning curve...
If it's a company project, it would be more cost effective to hire someone than dedicate the time you'd need to learn and do it yourself.
■ ∞ VIDEO INFORMATION ∞ ■
So in this AE tutorial, we will create this blinking eye. We will use Illustrator to create the eye first and then do the animating in After Effects. You'll never believe how easy it is to do, so let's jump in!
■ ∞ DOWNLOADS ∞ ■
ColourHunt
■ ∞ MUSIC ∞ ■
→ Your support means alot.
🎧 Music by Ëndaii @learnspacerecords ...
I have been learned a bit about illustrator in contrast with Photoshop and though I hear it creates very crisp lines, the style of art of Photoshop appeals to me more. Is there any way to stop my drawing from blurring after I save them on Photoshop? It's not vector art but more like digital paintings.
For example, stop compression upon saving, etc.
Maybe increase canvas size
Hi guys why do my photoshop has propose to me to resize and now nothing :
look

hey guys, got a question, how do I merge multiple gifs into one. Got some gifs that are split up, I kinda want to next to eachother :?
https://www.deviantart.com/aks1d/art/Demon-slayer-Workshop-Showcase-906580300 want to merge these gifs into one big gif.
Is there a reason why there is a gap between the image size and the canvas size even though they have the same dimensions?


Hi @livid otter The image size and canvas size both indicate the dimensions of the file. The canvas size is the full editable area of an image. The image size dialog box allows you to modify the pixel dimensions and resolution of the entire file—it doesn't differentiate between the transparent and colored pixels. If you want the dimensions of the art in the center, select it and look at Window > Info.
Is resolution the same as DPI? Or is PPI?
This image is an extension of the katy perry album cover made by me.
Looking at it, what do you notice could be improved easily? (im a complete beginner)

For example, would 300 here be the DPI or PPI?

No. Resolution and PPI and DPI are all different things.
Is DPI for printing? I only see where I can change the PPI when setting a canvas size. I don't see anything for DPI
DPI means 'dots per inch' and it's literally talking about the number of 'dots' a printer generates.
to be honest. Think of DPI and PPI as the same thing for the sake of your current needs
The most important thing is resolution.
When it comes to PPI, it pretty much just means "if this were to be printed, how many pixels per inch?"
E.G. If you had an image that was 10px by 10px, but a PPI of '1'..... - This would mean 1 pixel = 1 inch.... making your image 10 inches x 10 inches.
Now, keep your image at 10px, but change the PPI to 10.
- This would mean that your image is now '1 inch'

99designs
PPI and DPI are two important terms describing image resolution. But what's the difference between DPI and PPI? There is much confusion on the subject, but not to fear. Here's what you need to know.
You changed the CANVAS size, not the IMAGE size.
In photoshop, 'Image size' includes the empty wasted canvas too.
In your example,

Thanks, I only see where I can change the PPI when setting a canvas size. I don't see anything for DPI
Gave +1 Creative Carma to @sly hawk
Here you go. - I assume this is what you were asking for...
Yeah, you won't see much reference to DPI in photoshop.
when do I choose the DPI? Because I was reading about ideal DPI setting (is that something you choose when you print?)
Read the link above if you want, but to be honest, just set your PPI to 300 if you're planning to print, - and use a decent resolution (which will be dependant on how large you plan to print something), and you should be golden.
how i do fix this?

@dapper zephyr If it's an A3 poster for example, aim for maybe at least 3000px high. - Don't go too crazy because......
your computer will not be able to handle the size of the file, as @raw plover has just shown!
ok
How big is your Canvas?

If you liked this video, buy me a coffee here: https://ko-fi.com/2minutedesign
Problem: a message keeps appearing in Photoshop. It says that the Scratch Disks are full.
Solution: watch this video :)
For more videos, check out https://2-minutedesign.com
if it's over 10,000px... try reducing your image size for a moment and see if it fixes it,
Thanks
Gave +1 Creative Carma to @sly hawk
How can I straighten the "wavy" pattern that is inside the selection?

You can use warping or liquifying
Thank you. I tried Liquify and it seems I can modify it closer to being straight. However, is there a brushless method? I would like to be able to get it straighter than I am able to get it with a brush and I will likely have many more sections like this to work on.
I don't really know how it will work but if you don't mind loosing a little bit of detail in the lines you could use motion blur and set it in the direction of the lines
Make sure you convert it to a smart object firs si that you cand remove the blur from the areas you don't want it in using the smart filters mask. Lasi liquify would be good to use afterwards
Thank you. I can try that too. I just found out that generative fill and then some clean up works decent.

Alt+ Left click on the point you want to move handles independently
and watch this https://www.youtube.com/watch?v=5kAQUNFZJXY

► SUPPORT THE CHANNEL & GAIN PREMIUM ACCESS: https://www.patreon.com/piximperfect
► RECOMMENDED SOFTWARE & GEAR:
✅ My Graphic Tablet: https://pix.live/wacom
✅ Recommended Budget Tablet: https://pix.live/wacomlite
✅ Try Photoshop for Free: https://pix.live/photoshop
✅ Artificial Intelligence Photo Editor: https://pix.live/luminarai
✅ Unlimited Ph...
Can't u just say it tho?
i just said it tho
is the pen tool selected?
holding alt will basically select this tool

you can also pick it manually
Actually it works now thank you it turns out to be the command key
ctrl key sorry
how can i change the image size ?

I had a feature that allowed me to modify the image through a bar that appeared at the bottom of the image I selected.
yes is it missing now?
you are probably talking about this but i don t know if it has image sizing command

oh you are looking for free transform, its ctrl + t
Recreate it then, using shapes and gradients
hey can someone change the 1 at the end to 9 i have no experience in photoshop what so ever

hello
how can I fix these blue around the buildings?

I use the selection tool to cut out the background and apply the layer and invert it
Select that particular building, which you have added and then go to select option in Photoshop and modify and then contract

Set accordingly
Thankyou
Gave +1 Creative Carma to @sly hawk
Can someone pls help me? I have a big project on PS, and i wanted to edit it today and i saw it in my recents. sec later it was gone and i can't find it anymore
Probably means the file has either been deleted or simply MOVED
i can't find it anywhere
How to reset brush settings on iPad not the default brush reset?
are there actually no other way to draw straight lines without a double click process? if you use low hardness brush you get an overlap at where the line start... how do i draw a straight line with a low hardness brush?

there must be a way to prevent overlap since that would also be useful when painting an area in couple clicks
you can either do it the other way around - by painting with a full opacity brush and decreasing the layer's opacity, or by making a path and adding a stroke to it
im doing it in a similar way to the first option i use full opacity then use field blur but are there actually no way to prevent overlap? in general
i saw graphic artists use brush multiple times on the same area and they dont get overlap
it goes down to how drawing straight lines by holding shift works - you have to specify the starting point. My first suggestion was not to use a hard brush but a 100% opacity/fill brush and decrease the layer's opacity/fill
okay i got it thanks. how about the last part? i see anime artists for example paint the same area over and over again to get it perfect but they dont get overlap. their color doesnt change when they paint the same area
can you link what you're referring to?
https://youtu.be/NN3Ujie54wg?si=j4p02yS1djf6dCLc&t=2206
this is what i mean. goes over the orange part twice but no color change

In this video I teach how to draw emotes for Twitch. This is an updated video from my previous one that goes more in depth and is a full tutorial guide where all steps are included and nothing is left out. This is of a heart emote specifically as heart emotes are the most popular type. You can draw along and create your own heart emote using thi...
but its full opacity maybe thats why
so the moment we go low hardness we get overlap....
i get the problem is the way how i approach the same conclusion, i could go with low opacity later on or field blur
but maybe i want to draw with low hardness in the first place
ok first of all - this is not Photoshop
and what i mean by "low hardness" are these brush types
yes, this is simply a well placed full opacity layer and well chosen color
if you want the same brush falloff everywhere then blurring the hard-brushed layer is the way. alternatively, you can do it the smart way by using a drop shadow layer style
ill look into that thanks
Gave +1 Creative Carma to @serene coral
Since yesterday I get this error for all files. I followed the steps it gave me but still have the issue. I just did a reinstall but it didn't change anything.
Edit: It's solved now after deleting the preferences again

Creating a new file just does nothing
how do I save this psd as an eps file with a transparent background? Whenever I do it now I just get a white background...

and all the objects are made with pen tool

yo srry for not answering yesterday but I kind of got off my pc
also I got this as result
tho it's kinda bad ;-;
HI @primal vault EPS is a really old format—is there a reason you need an EPS?
If yes, you need to make a clipping path in Ps first, before Saving a copy to Photoshop EPS, 8-bit TIF.
Thanks for answering, he said he wanted the logo printed and needed the eps file for it
Gave +1 Creative Carma to @willow gale
Can't a normal png be used for printing it into a sticker?
Mybe it could. Several Print-Services uses different Image Formats. But you said your Printer uses eps. So you can ask if they use PNG or try another Printer.
Thanks!
on a layer if i use the rectangular marquee tool to make a selection and the use the move tool to move only that selection, it moves the entire layer. why?

Hello, I'm trying to create a red monocromatic sky with black dots as stars, I've managed to get the opposite: https://share.ldflabs.com/XuYA5/xAFuYEca62.png
this is done by adding noise to a red background and adjusting levels so there are not too many dots. Do you know how can I get what I want?

Date: 2023-12-12 15:28:13
If you're being asked to supply an EPS it may be that they're hoping for a VECTOR file. Google "save photoshop as vector" to get the info you need.
Is the layer a smart object or 'raster'? Try making your selection and then hit copy then paste... then you can move your selection around independently.
You can always 'merge layers' later if you want
Is it possible to convert something in PS to a vector? Something along the lines of Live Trace in Illustrator. I have in mind, line type drawings, images. Nothing like photos unless ive extracted specific elements.
There is no automatic way
Hello I'm using Gimp cause I'm a cheapo and I haven't had any expierience since high school a decade ago so there's my backstory. I'm trying to make a simple logo for my friend and I've entered hell. All I want to do is trace this damn thing I drew and make the line have a horizontal gradient so it doesn't look so solid. I need a teacher that's all. Someone to take me under their wing for this onnnnnnnne god damn thing. Please. I'm pulling my hair out.
I traced an image in illustrator and now I want to transfer the file to PS...is that possible
Have no idea buddy, good luck
Got to ask one of these gods who are wired to the mainframe

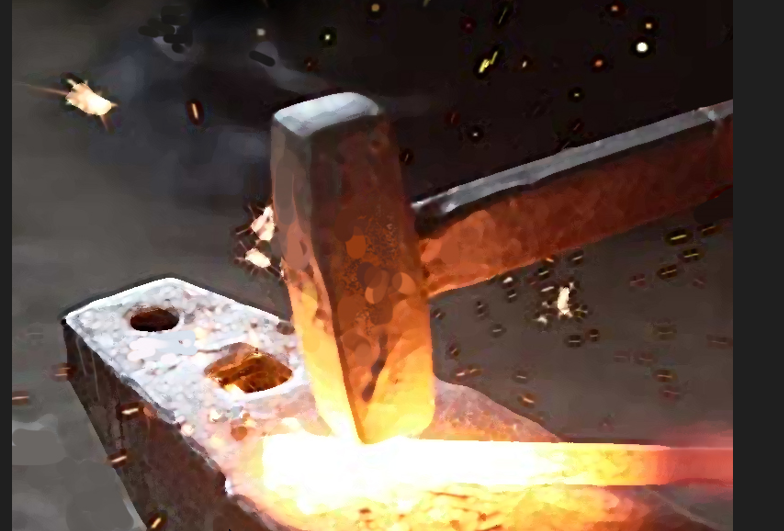
I want this effect for my logo
But I don't know how 😐
It looks really complicated
That's easy, you apply the lava gradient
Oh...thankss
any times
Can I get different colour?
edit the hue lol
Ok
I'm the one asking for help so sorry if you follow anything I say
It's ok
@wide rivet check dm
Hi, I'm trying to automate changes I need to do to 100s of files using scripting, but I need to draw a gradient to a layer mask as part of the script and I can't figure out how to do that (nor can ChatGPT), is there anyone who knows how I can do it? Thanks
Might not get a real answer! It keeps hallucinating parts of the API which don't exist.

Someone help me with this please
Does anyone know how can I get this exact effect in PS
is there a way to make 3d text from 3d extrusion as a custom shape?

guys so i just restarted my pc
and installed windows 10
so i am downloading the adobe apps all over again
every app is working
but adobe photoshop keeps saying this after i launch the app and then it closes
someone knows the solution to this problem?
i try to open the "click here" but its just the generic solutions, nothing really helpful
Happiness
?


where do i type in calculations and thanks for you help
Gave +1 Creative Carma to @gusty drum
yo I am in contact with this manufacturer I am using their tech pack which is a pdf. They are asking to put my label design as an svg. How do I import a vectorized image in adobe acrobat because that's where im filling all the information on their tech pack. Anyone know?
does anyone know how to make the right character look at the left character properly? It doesn't look realistic enough

Hello, how do you make this brush effect over the paper? I got the paper background, but I want to make it blue and with that pink brush?

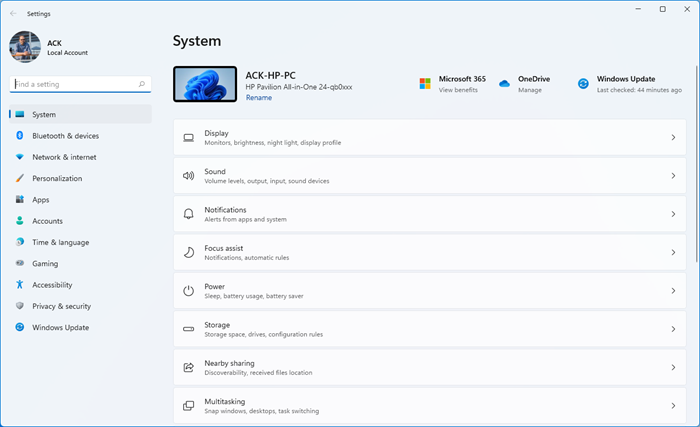
Hey guys, I appreciate this is more of a technical question. I'm on WIN 11, and whenever I click on a file and I want it to Open With > Photoshop, it doesn't do anything. Either doesn't open photoshop at all, or the same window with apps keeps reopening asking me to select an app. Any ideas?

Hi @potent jetty That's what blend modes (and opacity values) are for.
Hi @sturdy python Check your file association for .PSD files.

PCMAG
Microsoft has made it harder to choose which apps handle standard file types. Follow these steps to set default apps for all your documents, images, music files, and more.
I'm trying to open a jpeg though, sorry if I wasn't clear. Normally I could choose any photoshop-compatible image and choose which editing software I'd want it to open with. But now photoshop just doesn't seem to want to open them
So I'd still want an image viewer to be my default jpeg app for opening it, but on Windows you normally could select which app you'd want to use for that particular time
But you can use File > Open in photoshop on the same JPG?
Question: The character on the right is looking in the direction of the other character. Does it look realistic though?

This is what I'm trying to do, but it's just not opening it in photoshop.
do the eyes look correct? That she's looking at the other character
in my opinion it doesn't look correct, but I photoshopped it so I'm looking for other people's opinion
@sturdy python I though you said you were trying to open it from the folder using Right click > Open With? I'm asking if you can open in from within Photoshop.
I'm on Macs, but here's something that may be helpful, or may lead to something helpful to troubleshoot this? https://www.thewindowsclub.com/change-pc-settings-does-not-open-windows
The Windows Club
If you find that your Windows 11/10 Settings app does not open, work or launch in, you may reinstall it, reset it, or try these other suggestions to fix the issue.
Oh sorry, completely misread your question!
I can still drag and drop it in PS, and it opens fine within Photoshop, but normally if I don't have it open, I would just right-click the file and do Open With, it just saves me opening PS separately.. Which I know only saves me a few seconds, but it's just a matter of habit now, since the function worked for a long time before.
Thank you for the advice and the links you've shared though, I will have a look into them, and it may be something I'd need to ask Microsoft rather than Adobe to be honest.
It looks like she is looking in the general direction, but also down towards the left character's elbow.
I was trying to find an answer on the Microsoft site, but couldn't find one quickly enough so yes I agree, ask over there. The article I posted to does give the indication that it can stop working at sounds like that's where you are. Microsoft has a forum and you can certainly find the answer there.
do you know of any way to improve it?
ie make it look like she's looking at the red hair's eyes


is there a way to make 3d text from 3d extrusion as a custom shape?
hi chat, does anyone know a free brush set where i can find markers close to this? like really cheap children's markers texture, i know it's an odd request but im really struggling to find something similar to replicate kid's drawings


is someone able to reduce this gif size to under 5mb? I can´t reduce the size, well cant find a way to do so... anways

nevermind got it working 😄
There are some similar looking brushes in photoshop, if you have not imported photoshops legacy brushes I recomend it
and how do i do that?
wait it was a quick googling away
thank you ^^
ill see what i can manage
you can also go into brush settings and click on "get more brushes" adobe offers lots of free brushes
help! When i create new file. After clicking the template and hitting the create button, nothing happens.

When is the last time your restarted your computer? Sometimes that can help with this specific issue.
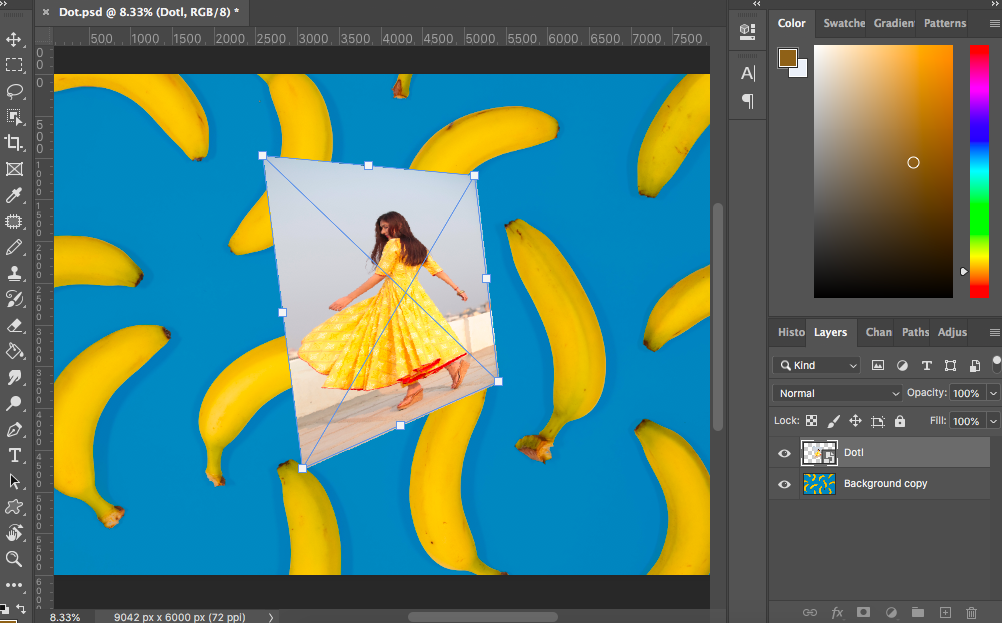
Hi @dapper yarrow I think you are asking how to skew the square? Edit > Transform > Skew and drag the top middle handle to the right.
i did it already but thanks for actually answering i almost never get an answer
@sweet nacelle If she is on her own layer, an easy option would be to lift up her chin with Puppet Warp,
I'm sorry. It's all volunteers who stop by to help when they have time.
Hi. I know it's not about AI, but Photoshop. I paid for this Photoshop action script, but it doesn't work
I need one up-to-date. To obtain same result. I already asked for a refund, for the one I bought.
https://www.youtube.com/watch?v=3N1kzWSHTy0

!!!IMPORTANT!!!
Starting from Photoshop CC 2020 please use File / Open for loading the brushes and the patterns files.
Download location: https://1.envato.market/nzgL7
Other great effects here: http://1.envato.market/93y40
How to change language: https://www.youtube.com/watch?v=GJAiu5W2gLE
My profile page: https://1.envato.market/PZmJX
What happens when you try to use it then?
It simply doesn't work at all? - Or just that it looks rubbish?
They look lovely!
i appreciate it but thats not my question at all and not my art, i just want the brushes 😭
or similar brushes recocomended
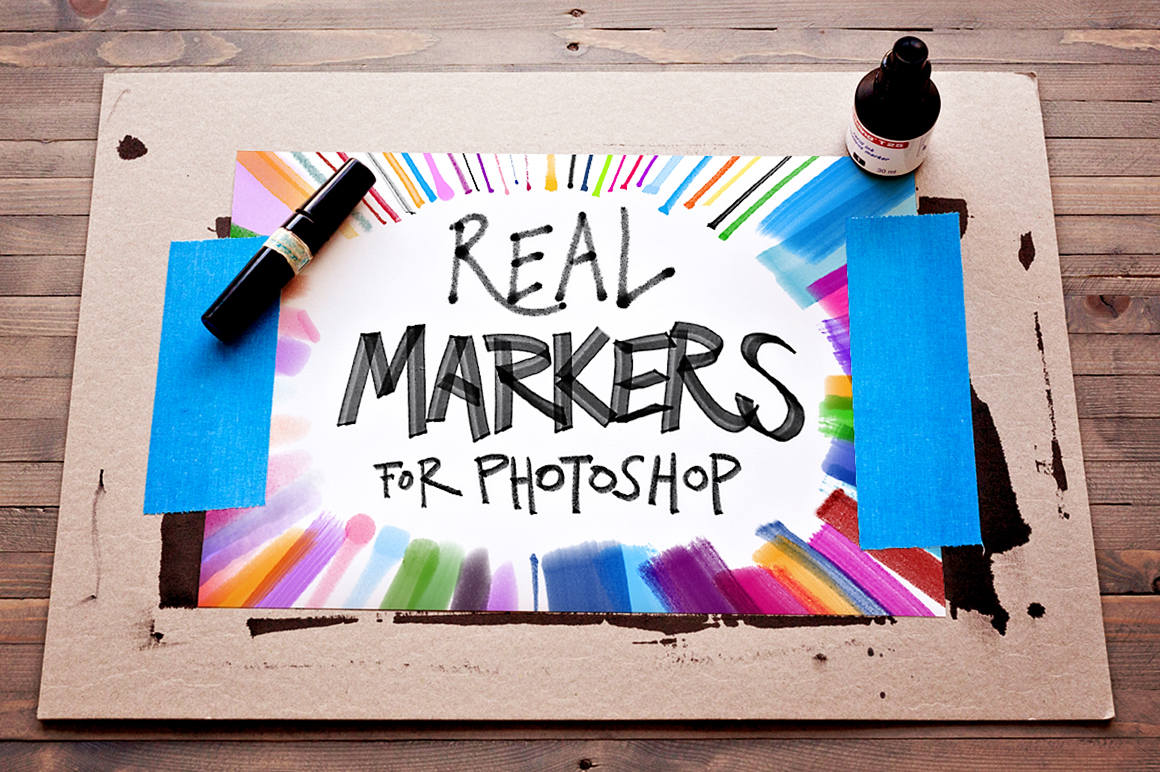
HEJ! Give your illustrations some JAZZ with REAL MARKERS FOR PHOTOSHOP!
Yes. I know. I was just busy googling "kids pen marker brush set photoshop"
i had seen thta one before but i didnt know there was a free version
thank you so much 😭
idk how i missed that

Today we have a freebie for you - a set of 26 high qualit...
As in, make some text, extrude it and therefore make it 3d, and then make a SHAPE from the extrduded resut?

Can someone please tell me how can I get this effect in PS
The texture which is inside the bird
@devout pasture
It's just a mask by the looks of it.
What is a mask? 😅
Also, maybe watch this:
https://www.youtube.com/watch?v=Ni4dJs3kthA
Learn all about masking and why it is such an awesome feature of Photoshop (and basically every creative app out there!) and how to create masks from scratch and from selections in Photoshop.
💰 Support the Channel and use WP Engine to host your website! → http://bit.ly/3Yoqgpu
📸INSTAGRAM → http://instagram.com/theNathanielDodson
Adobe Stock u...
(note the key shortcuts used) - This is called 'skewing' if you want to google it.
Doesn't work at all
bro i LOVE YOUA
You want the DESERT part to fill the entire image/stamp section? - that can be done with masking and scaling easily enough
NEEDED THAT SO BAD
Yes I want to do that
How
Can you share your PSD file here? - I'll show you exactly with a recording if you want.
Are you following the specific instructions? - Like... import the action and get it to appear in the panel etc?
If you can PM me with the action I'll be happy to try it out and see if we can figure out where it's not working, or what you're perhaps doing wrong?
(If the "STAMP" shape is already a layer with a transparent pixels around the edge, you can probably just hold CNTRL and CLICK on the layer in the thumbnails panel to select the pixels instead?)
(like this)
OMG
that work ok for you? 🙂
I’ll try tommorow I’m from Paris it’s night for me ahaha
If you can explain what you're trying to do, there may be a betterwork flow to follow?
Can I mask 2 different images into the symbol?
I've discovered the scripting listener plugin, so I can just use that to capture what I want to do then get ChatGPT to prettify it.
Yeah, just open the AI file in photoshop, and it will render a raster version of your image for you to modify/play with. - Or literally copy and paste your assets out of illustator into photoshop.
Yes.
You see in my video where I put a MASK over a FOLDER, then whatever you chuck into the folder, will have the same mask.
@bleak idol 👇
Hey, drop a PM or respond below and I'll try and help you out when we're both free/available.
Maybe start by posting your image that you want to trace.
Thank you so much
Gave +1 Creative Carma to @sly hawk
i need help

I don't have a clue what font that is
well like what font is good for that
and the fact it's arching, means that a font identifier site would struggle
like what kinda font is similar i could use
Are you literally using the same image behind it?
yea i am making a another logo using same image yes
so i am woundering whats a good font that woul stick out better tht is kinda curved n stuff
feel me
Dunno. - Just check out dafont.com and find some that you like the look of.
personally I think that could be improved massively anyway
yea
@sly hawk I thought I was nearly there, but then I got:
"General photoshop error occurred. This functionality may not be available in this version of photoshop"
no clue what the actual issue is... real helpful.
EDIT: Added a try {} catch {} and got a bit more info, but still had to scour my code to find the issue, which I now have and it's working.
Does anyone know how to manage the scripts within the scripts menu in Photoshop?
but then it would look very jagged and not smooth at all

thats whats adobe illistrator is for
smooth at all sizes
what exactly do you mean?
You could do that with layer styles but that level of details is probably more likely to be the result of lights and materials done directly in the 3D software used to model the letters.
With photoshop you will be able to add reflections and various effects but you will have some trouble having the effects work accounding to the diffent planes (you'll have to do it manually)
Photoshop have phased out all but the very basic 3D features so it's no longer really an Option.
How was the "TUCQ" work created?
you can try that, but it would work on a text layer, not a 3D lettering effect

In this tutorial, Jonathan Lam will show you how to create a metallic medieval fantasy text effects, using a pattern and layer styles. ► Download Photoshop text effects and layer styles on Envato Elements: https://elements.envato.com/add-ons/text+effect/compatible-with-adobe-photoshop?utm_campaign=yt_tutsplus_kyxth0yQMMU&utm_medium=referral&utm_...
What do you mean by "manage". Do you want to add some?
Anyone know the best way to put the effect of  on a picture of someone
The effect of what?
Do you have a more meaningful example, I have no idea what you are talking about 🙂?
 this to this
If you want to transform someone in a completely different person, consumed by rage with the eyes bulging, like this drawing, but on a photo

this is not done with a "filter", just done with skills and hours of retouching 🙂
Just so you know
You need to know either how to draw the different elements yourslef or to "composite" elements taken from another photo into the first person
so assembling multiple photos into one, in a realistic way is called compositing. There isn't a single filter to achieve this, this is done with carefully putting elements together and then maybe apply a lot of filters to make them fit, and then colour correct and light correct the different elements together to they look like they belong to the original image
You could try the generative AI module in Photoshop and see if you can make something out of it, but you'll likely to spend time with trial and errors
You're welcome!
is it possible to export a png with transparent (no background) hue & saturation? like for example could i just make a png with nothing but a hue & saturation layer?
Not really, if you want a .png, you need some pixel content, and a hue and sat layer doesn't contain any pixel so it will be seen as completely transparent. If you want to be able to apply a H/S layer to another image (like a prset) you can use other means
Like creating a preset for example... Either an ACR preset or a standard PS reset
unforunately this is used for an overlay so having a steady png is not really an option
Can you explain the scenario a bit more in depth? Maybe there are ways
erm i can share screenshots but it contains art that isn't mine so
maybe with a white PNG and a multiply blending mode, that kind of things
No, just explain with words!
Where would you want to be able to apply that overlay? (which software/platform)
in the game there are a few elements i don't wish to change (like a mana bar which fills up and goes down constantly, it has a dark grey background and fills up blue) in the photo i was using as reference for placement. i want to change it to pink instead of blue but maintaining that dark grey background when it's empty
and OBS
here would be an example of that
Let me think. I've used overlays in OBS but obviously they didn't interact with the existing graphics (a frame that kind of stuff)
Why not uploading a green bar in your case?
a green bar with the rest as transparent
oh like make a fake green bar? would that not remove the grey bit?
Forget it, I understand what you are trying to do
My mistake
The issue is that I am pretty sure you could do that directly in OBS, but I am not technical enough in OBS (I haven't used it in a long time), without resorting to overlay
I'm thinking in the lines of applying a colour effect in a portion of the image
i will be honest i have no idea, it's not for me but my friend 🤣
With a specific blening mode so it doesn't affect the whites
I won't be able to answer really, but let me fire up OBS, try to find the right terms and then your friend will be able to go to the OBS help (do they have a discord?) with the right idea
But the definitive answer is that you cannot embed a H/S layer into nothing and save it as a PNG. That point is clear
ahh alright, thank you, it's okay you don't have to do all that haha
i wonder if i could create a 1% layer and paint it black behind the hue 🤔

so it would be colour corrections in the OBS effects
you could even do that with a LUT
the issue id to apply that colour correction only to a portion of the image
So basically you need to open or create a new source and apply that colour correction effect and then resize it. Easier said than done I guess
You could, but my guess is that it will be too faint to register
because the H/S is applied to the pixel content
hmmm, i see, thank you. i will have to try both ways and see what i can come up with 🙂 appreciate you!
Glad I could help about something I know barely anything about 😂
that would make 2 of us lol
I know what you mean, but no. You can't export an 'adjustment layer' as a single PNG in the hopes of having it work when you overlay it in a game or web browser.
Obviously you could make a lime green image and set it to 50 opacity before export out as a PNG and then this would 'colour' the the thing behind it in green. - but this this the digital equivalent of taking a sweet wrapper and placing it front of the lens before you take a photo...

How dare you nicking my photography tricks? 😅
@serene coral So i had a bunch of scripts installed which populated the Scripts menu in Photoshop. Gets too cluttered to navigate them up so I was wondering if PS allowed putting the scripts in subfolders
In the menu itself. Like submenus
Not that I am aware of. I know what you mean, I have a bunch too. I just leave those I need most, and load the off-one when I need to.
though, I know there is a script panel as a plug in somewhere

I haven't tried it so I can't vouch

Worth a try still would have been cool if it did allow us.
I have another question
I use actions with batch processing images. With the Batch option and using an action in it I can do that easily but there's a hurdle I've often came across. Opening of files.
Yeah the batch process has an option to override the opening of file in the action. But I use exr images in Photoshop with a plugin which opens the file with a bunch of options. (Exr.io plugin)
When I create an action, it sure preserves all what happens. And in the action i can see the file is being opened as exr io with the options I selected. But this is applicable if the file is opened from the action.
Not sure as I never worked with exr files. Would it do the the same if instaed of working from a batch you create a droplet and batch the files from there? (basically applying the droplet to a specific folder)
If I override it with the Batch processing's override open option it neglects all of those. I was wondering if it was possible to either
a) use wildcards in the path of action's document opening of
b) somehow feed the path of the file being opened from batch processing to the action
That would, maybe, bypass the opening of files from a folder
A what?
Have a ton of files to resize or do the same repetitive actions to? You need a Photoshop droplet! Learn how to create one in this video!
Join our FREE Illustrator Facebook Group: https://www.facebook.com/groups/adobeillustratorusershelp
Get your first month of Skillshare FREE: https://bit.ly/3LSFlvz
Get a great deal on Adobe Creative Cloud: htt...
I am throwing things there, not sure it will work
Maybe it's something that would be taken care of better in a script than in an action though
Sadly it won't. Also even with a droplet it doesn't particularly seem anything different you couldn't do with batch processing. Bottom line still is processing a bunch of files 😅
The action has a recorded entry for Opening a file. Basically it needed to open a file as a certain extension which would trigger opening of exr io's panel and use the selected option I used while opening the file.
The action records the file being opened and its absolute path. Which means that the action works for that particular file only. Oh it'll do the rest of the stuff just fine.
I had some issues in the past processing batches that required an action on a 3rd party software so I know what you are saying, but unfortunately I cannot help here, as it may be completely specific to that 3rd party. I would put it to the good technical people in the Adobe Community forum
https://community.adobe.com/t5/photoshop-ecosystem/ct-p/ct-photoshop?page=1&sort=latest_replies&lang=all&tabid=all
and tag your post with scripting/action so it get seen by relevant people there.
https://community.adobe.com
Master Photoshop with the help of our global community.
I haven't had this specific issue of path in Photoshop, but I did had this issue in illustrator and I seriously think that the assets exports options lacks in those two Adobe products compared to one of their competitor. Particularly the bit about opening specific folders with exceptions and saving to specific folders with exceptions (Which is something I would use a lot when batch working on games assets)
But I don't do that kind of stuff anymore and I am pretty sure things have improved since then, which is why I think the Adobe Forum will best suited as there are Adobe devs intervening there, and more niche questions are more likley to be answered than here
Gotcha
hi guys! I am new to using photoshop CC and I am trying to put a logo on a polka dot shirt. What happens is that when I try to distort > displace > then open my displacement mapping, it distorts the logo so much. Here's the actual pic after doing distort > displace. Thanks a lot!

Have you tried tweaking the displacement map setting? (basically the number of pixels) as in both scale elements
in my experience, you gotta keep them low to make it work
Although the exact number depends on your image size so if you image is very small (less than 1000 pixels) then it can be tricky to find a scale low enough

also don't forget to blur your distort map enough for it to look realistic in the end
Thanks for the tip! I will try those 🙂
Are all the charIDToTypeID codes documented somewhere? I've found some of them in the Appendix of the scripting guide, but it's far from complete and doesn't give much context. Some are properties of descriptors, some are enumerations, but many of them it's not even obvious what they mean from context.
How can i extract the selected 3 object into an individual object as a smart object so the background is eliminated?

@heady nova With the three layers selected as in your screen shot, Layer > Smart Objects > Convert to Smart Object. All three layers will moved to one smart object.
Idk what this is, is it a bug, what is it. How do I fix it
Hi @uneven sable See if this works: Preferences/Technology Preview and check “Disable Native Canvas”. Quit and relaunch PS.
Still doing it
What version of Photoshop?

Yes. But I'm still looking for more info...
Okay, I’ll wait. Sorry
You couldn't know!! It sounds like it relates to your GPU or Graphics driver. See https://helpx.adobe.com/photoshop/kb/troubleshoot-gpu-graphics-card.html

Is the driver up to date?
No clue, I’ll ask my professor
Sounds good.
thank u
Gave +1 Creative Carma to @willow gale
Everything it up to date now. It’s still happening
Gave +1 Creative Carma to @vapid flume
I accidentally enabled I think some symmetry option while using the eraser tool. How do I stop it?
whats this minimalistic font or lookalikes?

I think so, but I suspect it would be way more work than doing it in Cinema 4D (or blender, or Substance painter/stager) directly. Illsutrator has some 3D capabilities, but it does not offer a way to quickly make reflections like you have in your example.
Does Photoshop support exporting DDS images with BC7 SRGB?..
Hello, I would like to reproduce this effect, how could I do it?

"What's the font" tells me "acre Regular"
https://www.myfonts.com/pages/whatthefont
For more info see this instagram post
https://www.instagram.com/p/CqughxJstif/?img_index=1

Identify any font with our font finder tool. Upload an image, and we’ll search our collection of over 133,000 fonts for the best match.
What do you do when you find a font you like, but then have no idea what it is: You use a font identifier!
Whether it's in an app like Photoshop or Adobe Capture, or using online resources online: I got you covered!
See the links below:
https://fonts.adobe.com/
https://www.whatfontis.com/
http://www.identifont.com/
https://new.myfonts.com/WhatT...

when i try to creaste new and open exisitng .psd files

Wow! I didn't even know I needed to see this until I DID! I could've used this information just on Monday. It would've shaved almost 2hrs off my work that day. Thanks for posting this for the OP and for the rest of us who benefit.
Gave +1 Creative Carma to @sly hawk
can some 1 fix the mouth ?

Cheers Nia 🙂
It's always worth posting up what you're doing because these days, there's often a quicker, easier approach to completing what you're trying to achieve!
Also.... what do you think is better? Figma or XD?
I've used XD plenty but figured that since it's now just on life-support, I'd better move to Figma, but I didn't like the keyboard shortcuts!
Thanks James! Great advice. I will have to recall that when I am going nuts 😆
I was using Figma first. Just doodling. But XD was being used by a contractor and I had gotten used to it. There were some frustrations since you can do somethings in Figma you can't do in XD and vice versa.
Now that XD is in its final days, I have moved back to Figma. It is a lot more convenient, but now I am missing some of the XD features. They have their merits, but if you have a mac, I would totally extol the virtues of Sketch over all... well.. the last time i used it at least.
So which is better? I think after using both for some time, my opinion is Figma is better overall. It gives you more control over a lot more things.
Gave +1 Creative Carma to @sly hawk
Good to know. I've got a few websites to build in the new year (not me literally doing the coding, I suck at that) - but I'll be designing/visualising/wireframing etc... basically all the XD/Figma bits!
I was looking at Adobe Portfolio and would like to know how to copy images from my Adobe stock collection into Portfolio or is this not allowed?
I have a problem, for 2 weeks I can no longer save as TGA in Photoshop, 3 weeks ago this was also the case, then I pressed "save a copy as", then it worked, but now it's gone there too, my friend still has it under “save a copy as” but it doesn’t for me, does anyone know why that is?


Hey, with creative cloud synced files being discontinued, will that effect my 600gb of photos on lightroom on the cloud that im paying for?
Simplest solution, use the paint bucket
Select them with the colour picker and then INVERT - see video
....1st result.

has the crop tool been removed? i can't find it on my toolbar

it did not work but i found it by right clicking the three dots at the bottom
thanks tho
send finished vers pls
wait leme se
I didn't even save it. - If you have photoshop, I'm sure you can handle those 3 steps 🙂
also... I edited some screenshot of it anyway
💀


gotcha
leme try
small issue @sly hawk im using the free vers of photoshop which is photopea so im losttt
got it @sly hawk thank you handsome young fellow

Gave +1 Creative Carma to @sly hawk


Which red? Same as outfit?
Yes
hey everyone, I just wanted to ask if anyone knew how to make these boxes from this thumbnail!

Those are nice
Is there a similar discord for Lightroom Classic?
how can i draw a similar red arrow to this in photoshop?

Need help, I dont know what happened but this suddenly appear. How do i remove it?

You can get the brush tool and draw it or you can look for free & royalty free arrows that are similar online and drag and drop onto your canvas. Easy to change the color by setting the FX color overlay to the desired color.
I’m good at document editing and creating documents what line of work can I step into
How can i create that chin?


Hi! Any advice how I can crop the extra layer of the logo that goes beyond the arm? (I tried the background eraser tool but Im not sure if there are any other workaround) Thanks!

I also tried to reduce underlying layer but the polka dots started appearing

Hello, I am trying to use my swatches that I saved on adobe color to my stuff in photoshop, but my swatches don't appear in the swatches menu. How can I get them to appear?
I think you've already got photoshop - so instead of me just doing it for you, let me show you two methods instead....
Just with a brush tool?
Yes, this is what you can do with simple masking...
for this, are you able to input specific hex numbers for the color?
how can i make an image look like this, distorted and low quality

if you want, you can just make it bigger, save it, make it smaller, save it, repeat
you could also probably find some website that will decrease the quality for you
Make sure it's a raster image (not smart object) and just shrink it, approve new size, and then stretch it again?
finally figured it out 👍
Yes. The 2nd method.
So basically make it like the canvas size really small?
I'm not positive about that, I'd say place it as embedded and do it to the image
Thanks james
I was away from my computer at that time but now i can do
Also your way is easier than how i used to do it so thanks for the knowledge ☺️
Gave +1 Creative Carma to @sly hawk
I have never done that, how do i do it?
File - place embedded
why if i simply save i only have 5option of format, but if i save as a copy i have more option? is there a way to custome the option? cos i mostly work with jpeg,tif,png,pdf & psd


Save as is to save an original copy so all of its options are editable
Export and saving as a copy has more flexible options
For the most part
I’m not sure if you customize it
But if anything export will be your friend
I think it's because Photoshop changed its saving policy a little while ago, and treat "save as copy" as the default
It's in the preferences to change it

true, but looking for convenient as if im not mistaken older version most format are listed when saving, my work line dont really need original as we discard daily the submitted, and we find exporting kinda lagging as rather just saving it faster
"Enable legacy save as" should be enabled if I remember well
okey, another legacy option ima gonna turn on like i do most of the setting on adobe 😆 thx will try
test both to see the one that gives you more info
I generally export through Bridge as default, or export as JPEG via quick export so I don't see much of a lag
I wasn’t aware how useful the preferences were
I may start experimenting with it more
The true clues of the universe are laid before your feet in the preferences menu 🙂
Lmaoo photoshop is huge always something new to use
Well discover would be a better word
This is a never ending quest, my lord
Hey guys, I have a picture of a painting made with my phone. Now i wanted to replace the frame with photoshop. Do you have any ideas what the best way of doing so is with minimal effort?
The frame?
yes
Use the crop tool
so yeah that was my idea.. taking a picture of another frame and just exchange them