#❓ask-a-question
1 messages · Page 3 of 1

can somebody name me a good free stock website?
I have part of an image and the background is transparent, I'd like to fill everything that ISNT transparent with a flat color, how do I do that?

Pixabay, Pexels, Unsplash. Search Google for "free stock photos."
Make a new Color Fill layer (Layer > New Fill Layer > Solid Color... then choose the desired color). Position it below the other layer in the Layers Panel. Then you can merge the two layers into one.
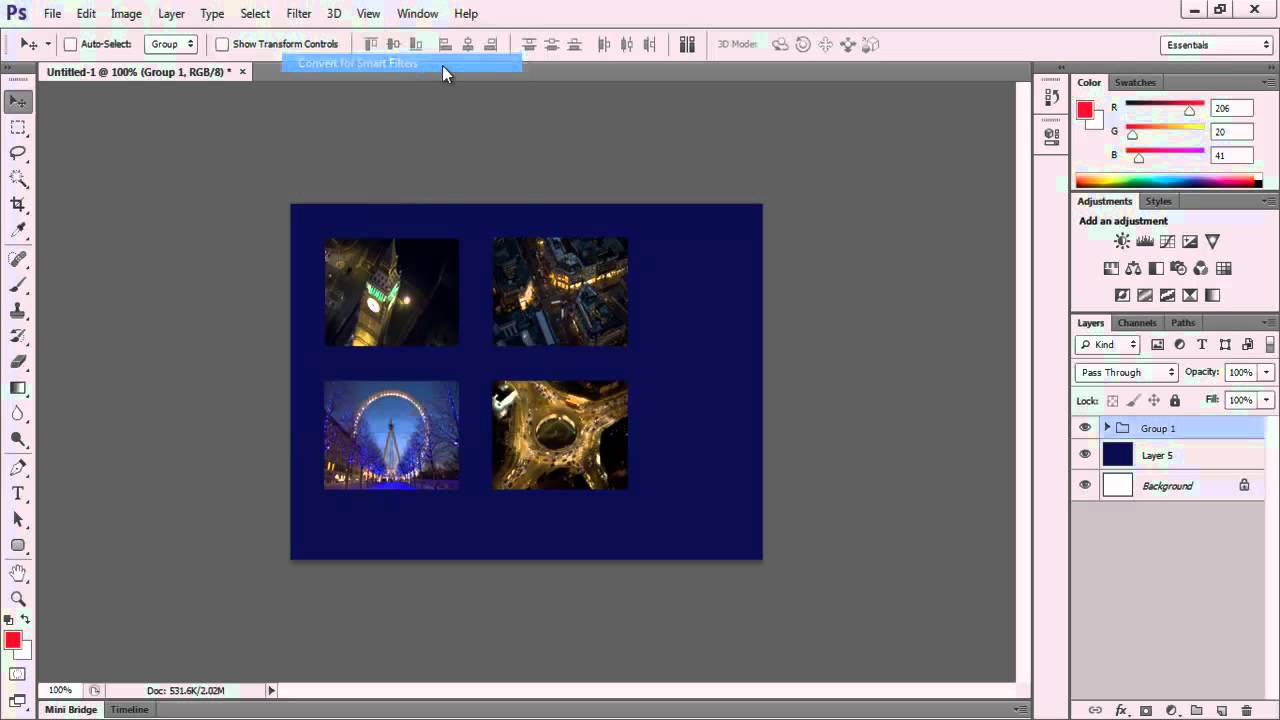
However, that would be a destructive workflow. I would probably consider converting the two layers into a Smart Object. Then they could be easily be edited later if necessary.
merging it into one just gives me the background with the lines on top, instead of only the lines becoming the background color
Sorry. I misunderstood the goal. Undo the merge action.
You want to create a fill color that fills all of the pixels on the canvas EXCEPT for where the lines are? In other words, those areas would be transparent?
nope, the image is a drawing I scanned and I'm trying to remove everything BUT the lines I drew on the paper, I cut out the areas I dont need but now where the lines are I'd like to make it dark gray as I'm going to print it out again
I tried to use the layer with the lines as a mask for a solid color layer, but I cant seem to use a layer as a mask
So you just want to make the lines "thicker/darker" ?
Yup
What about just trying a Layer Style > Stroke on the layer? Choose a center alignment and then a stroke weight that makes sense for your design...
You could also couple this with a Color Overlay, choosing the same color to fill in any areas.
awesome thanks! Is there any way to make the stroke even thinner? size is at 1px but its still pretty thick
I guess I could use a gradient as the fill color but not sure if thats the best way to go about it
Thinner than one pixel? heh
hey sorry i know problem with my language reason my American Sign Language but not have Translation to english sorry
Good is relative. D.Humann already told some Free-Stock Websites, but depending on your workflow maybe look exactly on the Terms of those. Some of these sites let everybody upload content, but not check any of the legal side ofthe photos. That can be if you will use them commercially be someday a little bit problematic. In most cases if using privatly it can be Ok. But again, if somebody uses a picture that another one has no rights given to use it that will be a problem. Always be aware of that.
No problem. seem to work fine.
Sorry. I don't understand your question(s) above. Thus, I don't know how to help.
how do i fix this?

whenever i select a color with the eye dropper, the sliders do not change
i tried resetting preferences and that didn't do it
i don't know what to do here
What version of Photoshop is this?
I use Windows so I can't test or try to reproduce this. Hopefully, one of my colleagues on a Mac will chime in.
going back to previous version worked
Must be a bug in v25.1
yeah, with all the reports from other users, seems to be a 25.1 bug
Sorry about that!
's fine, not your fault
Hi! I come with a question that bothers me tremendously. Is it possible to automatically draw contours based on a photo in PS? I would like to make a photo wallpaper with the outlines of a car, and doing it step by step, by hand, is time-consuming and not very even. Is there any way to detect contours in a photo and extract them as lines? I have tried filters but the effect is poor... I'm doing it first time 😅
When you say "extract them as lines," do you mean as vector lines?
yup
i'll try to show you what i mean
I want to receive something like this

from photo/image
Probably easier using Adobe Illustrator and the Trace Bitmap feature.
ok then! thanks! I don't know why I didn't think about AI
You might have to "prep" the image a bit in Photoshop first.
Then trace it in Illustrator.
Yeah! Thanks!
hi guys! im kinda banging my head against a wall cause i select a color and it doesn't show the correct color that i selected on the color wheel tab, i would super love some help on how to fix this, ty!

oop just saw this, sobbing atm lol this makes my job so hard
Hi, need help. I'm looking for a tool that I'm almost sure exists, where I can paint to change to a specific color that I need
yeah, it's a new bug in 25.1, reverting to 25.0 fixed it for me
could you tell me how to revert please?
i would super appreciate it
do you have the creative cloud app?
yep!
open that, go to apps, click the three dots, then uninstall photoshop
make sure to click "keep"
then, when you go to reinstall, click the three dots again, this time select other versions, then choose 25.0
seems like it !!!!! thank you !!!
practice, practice, practice.
why are there 5 colours in the triadic scheme selection in colors.adobe.com?

I hope this counts as a photoshop question since although its not on photoshop it's where these are used the most
This seems to be an issue a lot of people are having at the moment. @stuck iron - Have you seen anything about this? (I can't replicate it).
That's a fair point and one I agree with you wholeheartedlly
It's because Adobe colour always display 5 swatches, what ever you choose as a system
So: in this case, they display the 3 colours from a triad + 2 tints (the ones you see alongside the same axis as the blue and red on your example.
They are not part in the triadic system, they are just there so 5 colours could be displayed
basically only those touching the edges of the circle (and the yellow) should count
I don't know i did this wrong because of stress/time limit.
I want the silver railing to have the same color as the hard cover of the glass panel.
( Anthracite Hexcode: #336666)
Here's what i did to try to change the color.
I put the color layer on overlay becaue that seemed the most natural for me.


Does anyone have an anwer to how i can fix this?
Feel free to ping me, so i can respond quicker to your opinions 👍
color fill layer with color blending mode is a good approach but instead of hue/sat below it I would use curves to control the brightness and contrast of the selected area
That's a good idea.
I played around, idk if it matches

try playing around with the color too
it needs this blueish tint
you mean with the blending optios of the fill layer?
options*
no, the color itself. try making it more saturated or brighter, see what works for you
Understood!
The issue is that it's not as simple as putting an overlay of the exact same colour, because the overlay takes into account the colour of the base. I would try "luminosity", or even more realistically, match it visually. There is also the issue of the highlights and shadows which will not be exactly the same hex colour obviously
So what I usually do is created a swatch (a square) with the exact colour, and position it very next to the object I need to match. I like it when it overlaps a little so the colour is easily identifiable
And then I use whatever I want, mostly curves, to match the colour
What does the luminosity blendmode do? I have never used it.
Also thank you both for your time and help!!
it strips the layer that is blended of any colour, only taking the luminosity into account. It still keeps the colour from the layer underneath. It preserves highlights and shadows really realistically. When done you can then try to match the colour by other means (sometimes with a similar layer, but with a hue or colour blend mode)
It's still more straightforward with curves for me
Luminosity blendmode on the color fill layer?
Yes, if that works of course. test things out
sometimes you discover things with blending modes, they're full of surprises 🙂
particularly if you use them with blend if etc
Will i need to use a Hue/saturation correction layer with this?
Yes, to put the colour back (in colorise mode), but then, as I say, I would rather match it with a swatch and a curves layer as @serene coral pointed out.
Sometimes in colour corrections, the less you stack, the better it is, less headache when you need to modify a tiny thing
Also, in what I do usually I use colour samplers

so I position my swatch, I position my samplers strategically around the area I want to match, keep an eye on the one I consider to be the middle point in the area (no obvious highlights, no obvious shadows, just the middle colour)
And I match with numbers and also visually
Nothing replaces your eyes there
Something like this?
Yes, I generally position it very next to the area so my eyes aren't "contaminated" by surrounding colours
for my daily product retouching tasks, photo<curves<color fill in color mode works like 90% of the time. It gives consistent and predictable results, is easy and fast, and looks realistic, especially on plain objects. When needed, you can swap the color fill layer with a regular layer and simply paint the colors you need including gradations or small changes to make it look even better
if you overlap the swatch with the object, any deviation is really obvious. Position it next to a neutral zone

for example I would put the swatch directly over the railing here
I see a tiny tint of purple/blue in your railings, compared to the rest here. So I don't know if you rather match it to the rest of the window or the numbers
Don't forget it's photography, if they give you numbers but the photo is an ungraded, compressed jpeg, then there are chances it's not absolutely exact
Yeah, that's my next goal to fix.
It was that i got confused and now i know how to continue
thank you @vapid flume !
Gave +1 Creative Carma to @vapid flume
Thank you Wertos!
This was a team effort 🙂
Ultimately, as with everything in PS, there is no right or wrong, there is what works and what doesn't
If you find your own way, then that's what counts 🙂
Imo, it's amazing how powerful adobe tools have become
If you do it often enough, you'll find something that works for you and may be VASTLY different than what each of us use. That's OK!
(obviously not mine) did they have to go over it by hand or did they put some kind of filter over each of them since its clearly not real

Just have a look at the directly above conversation. The OP was trying to match an object to another by changing the colours. It's the same here, however it's a very crude job. So not technically a filter but most likely a hue/saturation adjustement layer with an overlay blending mode or something of the kind
ohhh that makes a lot more sense, thank you
Gave +1 Creative Carma to @vapid flume
If you have to reproduce it, make sure you do better 😉
lol
Specifically see how the highlights (the very bright parts) are preserved in the light pink one, and that they are completely muddled in the two other ones. This bright part should be the same in all the images. Right now it looks like someone have put a coloured glass pane in front of the hair
looks like a gradient map to me
youre right, that is what it looks liek
The absolute best option would be to use a gradient map like Wertos suggested. Not a hue/saturation adjustment.
Same logic works for your attempt above @grand siren
how do i make it so that the above layer is also visible?

You need to extend your background: image > canvas size
how do i do th
You can only see what's inside the canvas in photoshop
another quick way is to go image > reveal all
It will automatically extend the canvas to include all layer contents

hello, is there any way to do this kind of shadow in ps? the guy im seeing is doing it in illustrator

oh alr ty
Gave +1 Creative Carma to @vapid flume
It's because it's dead simple in illustrator but photoshop doesn't have the same tools so you'll have to do it "manually"
not the exact same thing you want but might worth a watch https://www.youtube.com/watch?v=NpEJEJ2hjTI
This tutorial will demonstrate how to create a custom long shadow effect in minutes using Adobe Photoshop. This method uses a custom 'action' that will enable you to instantly use this effect again in future, saving you a lot of time. Typically, creating a long shadow effect often involves rasterising the shadow. However, this technique uses Sma...
okay thank you
Caity is out on leave. It seems like the issue has been reported. And I think it only affects MacOS.
Heyo, where exactly?
(A clip of me using a 'gradient map' to recolour the rails) - no faffing around with curves, hue etc
Thank you so much!
Gave +1 Creative Carma to @sly hawk
how do i make it so my font layer gets merged with all the individual layers of characters?

like i want half of that j on that girls layer
What do you mean by 'merged'? literally just 'flattened' in the PSD?
@warm hill ?
Just select all the layers in the layers panel, right click and click "merge Layers"
personally I wouldn't recommend it though.
but i want the other layers i only wanna merge the font


Perfect.
So... Are you wanting the TEXT to be sort of sliced up so for example the top half of 'KAISEN" is MERGED in with the polar bear image?
yes
no reason to be sorry lol
(if that is what soz stands for, im still not sure)
I can only think of doing it this way...
Not a particulary 'graceful' method. - It would have been something easier if it was chopping up shapes but everything on your canvas is a raster graphic.
alr ty
Gave +1 Creative Carma to @sly hawk
Every so often I encounter this issue, which seems to happen randomly. I have an image of a screen placed as a smart object in a PSB (a png). I am trying to update this screen with a quick edit, so I hop into the smart object and make my corrections. I try to save my smart object out and I get this message: "Can't save this document back to its original file format. Flatten layers and discard extra data as necessary then choose File > Save again."
Ok, fair, so I flatten my smart object. Now, when I hit save, instead of updating the smart object, it prompts me to save a jpeg elsewhere. I have no way of updating my inner smart object. I could be a total idiot and missing something, but this is driving me crazy. What's the solution here?


I think I know your issue.
It's because your original smart object was not layered.
Ah, so ensure the png is not flattened and maintains transparency when I originally bring it in then?
Try this:
- Open you smart object of the screen, and then do a SAVE A COPY of that smart object to your desktop as a PSD.
- Just close the smart object and ignore any error messages like the one you showed above
- Delete the smart object from your screen
- DRAG IN your NEW PSD from your desktop and place it back into position.
Ok, will try that now! Thank you so much for the help btw!
- Now you should be able to work without the annoying message about flattening layers
- Let me know if it works @grave tulip !
Alternatively, just make sure to literally FLATTEN the smart object before saving.
(But I prefer the non-disctructive route I mentioned above)

@sly hawk it worked!! TYSM!!
With a disgustingly smug grin on my face..... "yeah of course it did" 🙂

Hello! I got a problem. My indesign pages fail to correctly show up on PDF so I want to export them to Photoshop but I don't know how ._. can someone please help?
or eventually how do I fix my indesign PDF export if anyone knows ._. since there is no indesign discord
i don't use mac!
I'm not experiencing it on Windows. Not sure what version of Photoshop you're running but perhaps open the CC app and "check for updates."
hi, does anyone know how to get those leafs around a text?

Is there a way to copy a layer from file A to B?
Yes, Right-click on it in the Layers Panel and choose "Duplicate" and in the pop-up, choose the destination document.
Alternatively, you could just select the Layer in the Layers Panel and drag it over to another open Tab in Photoshop. Keep the mouse button down and hover over the tab and when it switches focus. Then drop the Layer into the document.
this is homework and i can't really find anything online it's kind of urgent to me right now if anyone could help😅
You might be able to make a custom brush that is a leaf shape and then have the Brush strokes follow a path.
it was on the most updated one!
but after yesterday, i had to revert it back to 25.0
I'm using v25.1.0 and it seems to work.
thats the one i had
i was using it for the whole day without issues
then it just bugged and wouldnt go back
yeah i freaked out for like an hour cause i have stuff i needed to give to clients
glad i found this discord cx
I think there might be a bug in there. If it happens again, try double-clicking inside the triangle and see if that will force it to update.
did that, did a bunch of random stuff trying to get it to work, messed with the hex codes, with anything that i thought could maybe get it back
but nothing worked

just reverting versions
I don't know. It works for me. Windows 10 Pro. Photoshop v25.1.0
i used the same stuff,
but this was after an entire day of working
like, it was fine for 90% of my day
until it wasnt
I was trying to make a displacement map. Is there any way you can create a directional gradient?
What do you mean? How are they showing up then? Any screenshots?
Hey, sorry I think we discussed this before, but does photoshop (or illustrator) allow for 'full colour' brushes yet?
e.g. a brush which is a little car icon with black wheels and a red roof
Or a 'bush' which maybe looks like one of these?

How can I just have the shell?

I would post the full picture but I don’t know if it falls under the rule since one of her breasts are exposed.
Birth of Venus painting made in the 1400s
Photoshop has the Mixer Brush. Illustrator has the Sprayer or whatever. Can't recall the name of it atm.

Does anyone know if PS can be installed on a non OS drive?
Why are these values different and how do i fix it

Yes. It can. However, some Creative Cloud assets will still be put on the OS drive.
Hi everyone. any tips for getting rid of the green screen glow on people? specifically hair.
Yes, use a hue/saturation adjustment, with a mask, and targeting the green.
I started looking for an old video of mine where I show it, but found a link to a different one instead:
https://www.youtube.com/watch?v=x8rK1aWaMj8

This is minute mask Tip 7 of 10. It shows how fix color spill an issue that happens when your selection's edge color is off due to reflecting the original background.
To beta test when I have a new cl...
I have a question. And it's probably a super simple one, but I am not at all savvy with PS.
I want to create a 64x64 black square set to 75% opacity (see-through) and I want to save it as a .TGA. How would I go about doing that?
Can I get some help, I wanna place a product image onto this empty product, wanna create a template where I can just auto fit images here and for it to look semi realistic

any help?
Do this and then the final step would be: File > Save a Copy... Choose Targa file type from the list. Give the file a name. Click Save.
Thanks for the prompt answer! I thought you had to save it as an alpha mask or something?
Gave +1 Creative Carma to @ripe quest
Because this just makes a light grey square. Not a black square you can see through.
Ah. Yeah. I wasn't thinking. Targa doesn't support per-pixel alpha; it needs a discreet alpha channel.
Can you guide me in the right direction to do it like that?
Does this look correct in whatever app you're using it with?

I may have had the values flipped...
What a pain in the neck this is. You can't use a PNG file?
It's not going to be black because its transparent.
This requires making a Layer Mask. Layer Masks show or hide pixels based on greyscale values. Thus, you'd mask this off and (according to the post in the Ps Forum) save this mask as a separate channel. This just ends up being a "grey" block and the value of grey represents a level of transparency. Then you'd save as Targa with "Alpha Channel" checked.
Getting this to a specific value, I suppose would require some trial and error. I don't know.
Who uses Targa anymore? And why don't they support PNG? heh
use the pen tool, make a selection of the white board. put whatever image you want above it, create a clipping mask. add shadows and highlights, play around with the blend mode and curves etc.
Not exactly sure I understand what is being placed on this object. Is it a placemat? If so, you're wanting to do something like this?
This is just a rough idea using a textured box that is converted to a Smart Object.
Oh yeah I have a 1920x1080 image I'd like to place onto there via cliping mask and for it to show on the right angle and everything, still possible with this method?
I used a Layer Mask but you could certainly use a Clipping Mask.
let me try this out
Clipping Mask is going to require you trace that shape with the Pen Tool or make a Rectangle Shape and edit the anchor points to match up with the bitmap.
oof, I'm not sure on how to do that, are you maybe able to send me the PSD on which I can just place any image onto and it would do that? I'm kinda messing things up on my own, sorry if it's a big request
this would be the image I'm trying to work on

and just place a wallpaper or whatever onto it so it curves with the placemat itself
uh sorry was I pinged? I can't seem to find it anymore
One moment. I made the embedded object the wrong size. You said your images are 1920x1080px, correct?
That aspect ratio yes
You should just be able to edit the Smart Object and insert a different image. You'll probably want to add some adjustment layers on top to match the light/shadow/contrast of the base layer.

The Smart Object is made at 1920x1080 so if its a different size than that, you'll have to rescale it. If you change the Image Size of the Smart Object you'd need to edit the template layout.
Okay, doing it now, yeah unfortunately it's not the same aspect, I messed up
OK. Well, I can't work on this project for you. I have my own work to do so hopefully you can figure it out.
I was going to say.... that card doesn't look 16:9
3675
2175
Strange but ok 🙂
You may prefer to create the playing card portrait, and then rotate it when it comes into your photo as a smart object.
i believe you're looking for vanishing point
there are tutorials on youtube
Yeah I tried following one but it's super hard for a rounded edge
maybe duplicating the background, selecting the background, masking it and putting it to the front
with the vanishing point in between
Don't bother using Vanishing Point for this. If you're not familiar with how it works, you'll probably end up getting frustrated. Regardless, Transform > Distort is enough to put this in place.
Yup, got everything set up boss!
Thank you!
It's not perfect perfect, a bit too bright but I'll take it

Try using Neural Filters > Harmonization on that layer as a Smart Filter. Choose the "background" layer to match it up to. Tweak the knobs and switches slightly to match the base.
How could I use this image to create a Minecraft style enchantment glint effect for a gif?


How would I create a four point star on PHOTOSHOP.

can anyone help? keep getting this error but i have room?


I get that quite a lot, it may be ram or something it's talking about
I don't exactly know tho
Restarting and clearing some tasks on taskamanger seems to always help
how can i take a something out of a layer with have a background
You'll have to select the object and extract it to create another layer from it
Once the object is selected, go to layer>layer via cut (shortcut CTRL+ALT+J)
and it will create one layer with just your object. The original one will just contain the background which you can delete
now to select your object, the method used will depend on said object. It's complexity, how weel it is standing out from its background etc.
There is about 1000s of methods for that.
If you want to show your layer, we can advise the most straightforward way based on the actual subject
These are the scratch disks, they are used to offload the computing from the RAM when you're using some features intensively. Imagine you are saving that .psb (which is either a smart object or a file that is more than 2GB) on another disk, like an external one, then it's possible you don't have enough space there, and that have nothing to do with the scratch disks...
have a quick look also at your performances (not related with your issue, but it always help)

alr ty
Gave +1 Creative Carma to @vapid flume
and some good help here
https://helpx.adobe.com/uk/photoshop/kb/optimize-photoshop-cc-performance.html
I'm new in ps and im searching for someone who can help me to make a customized sneaker
Try your luck in #💬chat-general unless you want to learn how to do it (and in that case you're at the right place! 🙂 )
Literally pick any of the first 50 results on google:

Scope is correct, but also check your canvas size in case you're accidentally trying to save a file which is stupidly oversized.

None of them tell 4 point star
Gave +1 Creative Carma to @sly hawk
You need to draw a selection and select the layer where the face appears
So the generation is made within the constrain of the selection
I assume that there is some really bid hat on the head. so first I would erase all thats around to clean up the background and then use GenFill only on the head (without prompting maybe). I assume that if using GenFill First and clean up the background after will not produce good results.
hello i have a strange problem with photoshop that i never encountered before, everytime i close my photoshop all my brush groups collapse, so i have to reopen them every single time, can this be disabled somewhere? it usually never does this but now its closing all groups on the new update

The hat was a " bicorne" (the same one as Napoleon's but wore sideways instead)
It's because the guy sporting it joined the french resistance during the second world war and probably earned that piece of costume with a distinction of some sort (Legion d'honneur? if that so, not the petty rank, but probably the highest rank)
Personnally, I wouldn't ven delete the hat from the original photo, just neatly select from the base of the head and then loosely on the top, and start generating from there. The main thing is there need to be a selection somehow. With a selection, the contextual bar will change from "select subject" to "generative fill" which will make it more obvious what to do next
Maybe I could be wrong but I think I never had the folder behaviour stick when I closed the program and opening it again... But now, you are making me doubt myself 😁
the folders would always be open everytime i start up photoshop, after this update it doesnt happen anymore
hello everyone, someone know how I can link all my shapes between themselves?


Sorry, i Think I never noticed I supposed. In my defense I put all my favourite brush into a spacial forder meaning that I don't really have to wade through them so often. I tried to do a quick search in the community forums
https://community.adobe.com/t5/photoshop-ecosystem/ct-p/ct-photoshop?page=1&sort=latest_replies&lang=all&tabid=all
and found nothing that could help, let's hope someone comes up with something!
https://community.adobe.com
Master Photoshop with the help of our global community.
yOU CAN SELECT ALL THE LAYERS YOU WANT TO LINK (SHIFT + SELECT) AND RIGHT CLICK TO CHOOSE "LINK LAYERS"

ANY TRANSFORMATION, POSTIONNING, ETC WILL AFFECT ALL THE LINKED LAYERS
Sorry, caps lock!
Hello guys! I have a questions about editing.
Idk if this is the right chat, but I have a photo which is not that great of a quality with really important text to me, and I was wondering maybe someone from here might help me? If you don't have time at least tell me if it's possible to make it readable because I've wasted like 2hrs trying to find a solution but can't find any 😄
And idk if i should continute searching or it's impossible.
Can you post it here? At least we could see if it's realistic to hope to make it legible. It also obviously depend on the size of the image (the bigger the better!)

Thats the best i got :/
I tried playing with the white and black levels but it only made it worse. 😄
If it's possible to atleast make it a little better that would kinda work
I don't think you'll get anything simply because the image is too small and the pixels of the screen interfere with the text.
I tried with a superzoom filter but obviously it enlarges the pixels as well as the text
Atleast I know i shoulnd't waste my time more haha, thank you Sandrine!
That said it looks suscipiously like an exam sheet so I am not even trying more than that 🙂
i'm not sure i have it but I want to erase the white part between the shapes
It's a completely different matter than trying to link the layers. Sorry I don't understand want you want then. Maybe it's best you explain more in lengh, maybe adding a full screenshot as well?
Maybe try that... I am trying to figure out what you want to do there (select all the layers first)

I want to connect my shapes together so that I no longer see the gray space. Am I clear sorry I don't speak English very well


I don't think you can in Photoshop. Maybe try that. You need to select all the shapes with the vector selection tool (the black arrow)
and choose that

You will need to merge the shapes first
however, it will not fill the greay area unless you create a shape that encompasses everything first, marge that will all the other shapes, and run the "merge shape component"
because Photoshop cannot "invent" the missing bits
So maybe the best bet is to draw a new complete shape from the outine of this one, put it below all the others and do the "merge shape" first, and then "merge shape composnent"
You need to test things out
You can't do anything 'automatic' but you could quite easily paint in the 'gaps'.
You obviously can't sort of just push the shapes together, since they won't fit properly.
Any idea how I can tilt this popsickle and it's packet on the surface of the plate on photoshop?

You can fake it, but it would be obviously wrong since it 'should' show the edge more, which of course isn't in the image

can i change the color of the rectangle now ?

due to my lack of skill i had the idea to add an outline on the inside from the inside and full opacity
i request this to all the suckers like me :)


Hi, looking for advice with saving JPG files. This week, when I save PNG as JPG, it adds strange lines across the JPG. (Photoshop and PS Express) It never happened before that. How can i fix it?

Are you sure they were not on your PSD file too?
yes, absolutely
clean png image in photoshop mobile on ipad pro and then saves JPG with strange artifacts


What jpeg settings are you using when exporting? Looks like it's lower resolution than the original, which would explain some of the artifacting.
hey I have a small issue with the color wheel. When I'm picking the color, the wheel/hue cube isn't reflecting that change. is there a way to fix this?
screen shot for example, the color picked is orange but the square is still stuck on green

Is there any practical way to do embroidery effect? (All embroidery plugins are so expensive)
I made it like this, does this look realistic even the slightest?

Try installing an earlier photoshop version. if you have 2 versions Installed delete one and do the same
okk I'll try it thanks
Gave +1 Creative Carma to @steady girder
how does that cause this though?
what happened for me was i updated photoshop and suddenly i had this porblem, im assuming that its a bug that formed after the version update. I helped another guy with the same issue, he installed an earlier version and it disappeared. so did I
How to remove the noise from the paper bags?

you can use patch tool
or healing brush
Yo can someone edit the bacground of a pic for me
I’m using the highest settings that are available to save JPEG file. JPEG files end up 5-7 MB (I worked with Adobe tools for 30+ years as 3D environment artist with BFA , but on PC, I got an iPad just this spring )


@ripe questas you said, i updated to the new version, now this is showing, a pop-up prompts me to either start a free trial or purchase it

anyone here know how to make a realistic lava brush
due in 4 hours and im freakin out, why does it do this? everytime I open a layer it does this

also i had a certain wash layer that ended up appearing like this...

Is there still any 3D support for photoshop?
I need to retexture some models and i am inexperienced with using blender
The 3D features are removed little by little. So personnaly I stoped using it
Nothing more frustrating that trying to do something that worked last month, and don't work anymore 🙂
Aren't we all! 😱
If you got the texture ready, you can try Dimension (you may need a full CC, but you can still try)
This is an End of Life product (replaced by the substance suite) but it's stable, and works. You'll have to install from your CC app
https://www.adobe.com/uk/products/dimension.html

I have the full cc
So basically they got the 3d features out of photoshop so they can force you to work in Dimension if u want to stay in the adobe ecosystem? ( just my assumption)
I don't really know right now.
I would say likely a graphic card issue so the best bet would be to close PS, check the graphic drivers are up to date.
potentially check if the GC is enough to run in Photoshop first
and also potentially disabling a few stuff in your preferences in case you need the project finished over having more features.


I think it was just to streamline things better. Dimension is included in the full CC, I don't think - but I may be wrong - you can buy it as a standalone. So no gain/loss for Adobe. Substance Suite proper (without Dimension) is a different sub entirely, as it's a completely new type of software coming from Adobe - well after they bought the thing from another company and developped it on their own terms)
interesting
@late reef Close PS, restart your graphic card drivers, open PS

To be honest, even if I used a bit of 3D in Photoshop (mainly modeling) the texturing and environment aspect was always really confusing (at least for me)
3d modelling isn't cut out for me
but retexturing is actually easy
I have full Substance 3D and I like it 300% better than Blender. Blender is a wonderful software, but pitiful interface and not user friendly. Unfortunately, my computer doesn't agree with Substance (maybe Stager is OK-ish). So when I change my computer eventually, I'll stop trying to learn Blender for good 🙂
Substance HANDS DOWN
is quite expensive to be honest, but Susbatnce can do things that Blender cannot (as I understood, don't take my word for that, I'm a beginner)
I will give Adobe Dimension a try first
it looks fun
using the #✍how-to-discord where can i ask questions regarding Dimension? ( Which server? )
If you try Dimension, you'll have a small taster of the interface. It's pretty basic, but it's aimed at beginner. So not sure you will be able to do what you want to do with your retexturing.
But you can certainly do things if you push it sideways (which I always do with software in general anyway). There is no modeling in Dimension (apart from primitives and some ready made objects) but you can import your own .obj (these have been created in Illustrator, the rest is done in Dimension


That'll be the Substance server
discord.gg/substance3d
Oh thank you
Gave +1 Creative Carma to @vapid flume
it's not listed in the server list
Yes, because it's an off-shoot. I think it's more or less maintained by the people who were brought up from the original software company (Allegorithmic) to Adobe
Substance uses procedural everything (nodes in Blender) so if you got that bit right in Blender, you'll get that bit right in Substance. Dimension doesn't use that, it's just a stager, but you can apply texture, set lights and cameras...
AnimDessin2 (plugin for Timeline) don't appear in Photoshop on MacBook 👇
https://github.com/sbaril/Photoshop-Animation/issues/18
has this problem not been fixed in 2 years, or
is the information not relevant on Github? Idk, may have already found solutions. Thanks in advance!

GitHub
Hi, I'm a Graphic Design student and I'm having trouble viewing plug-ins in Photoshop (CC 2021 22.3.0) I am using a Macbook pro with m1 (OS: Big Sure) I tried to install the files with Anas...
Oh I understand: like this, and I put the prompt to "(guy with) bald head"?

If I select the head too it changes the face and orientation of course , which is not the goal ^^ but kinda cool

(original image) with that big hat

excuse me for not generating a thread here, could be more readable
I don't like threads so that's OK
I would say only select the top of the head and the hat to keep his face (Poor Paul 🙂 )
As always you need to trial and error. The generative AI learns from the attempts
Don't forget you got versions displayed on the right, so you can choose between 3
anyone can help me with this? i tried to change the greyscale into RGB but still on greyscale after

Hello, I have assigment to make a storyboard in illustrator and then animate it in powerpoint. Someone know how to do it? Because i habve no idea i have used the animate effects but its not ok
Can we have a look at your original image? Maybe it was originally in Black and white? Also, do you need 16 bits? (You may need it, but we don't see that very often)
I would have no idea how to do it, but since it's the Photoshop server here, you'd probably be better off asking in the Illustrator server
@vapid flume i updated to the new version, now this is showing, a pop-up prompts me to either start a free trial or purchase it

i just ticked the 16 bit thinking it might fix but still the same
Can you go to your account and see if you have the right payment in place? (don't post screenshots 🙂 )
this is the original image

if nothing seems wrong, you'll have to ask Adobe directly (Customer support) as only them have access to your account. There aren't Adobe employees here...
🙂
What is the file format of the artwork, and do you have a warning message when you import it?
No it will just give the artwork for colours to work with, but most screens won't display it anyway
to go to your account the best bet is to go to your CCapp and go right to the top right of the screen

where your profile picture is
That's your CC app, (have you tried to sign out and sign in again? in case your payments options are up to date)
no there's no warning when i imported the image
But what is the original file format and how is it displayed when you open it in Photoshop? (open, not place)
If you have an active subscription and you can't access the application, you'll probably have to contact Adobe Customer Care. We can't help with issues related to your Adobe Account.
Question about Adobe Premiere Pro, dunno if theres a server for it but how does one import a ton of screenshots (100+) and make them all appear for the same length in this case 1.5 seconds, like not at the same time but Screenshot 1 (1.5sec) - Screenshot 2 (1.5sec) etc
You'd better go there
discord.gg/adobepremiere
(I never used premiere in my life, maybe someone else can help here, but it's better to go to the proper server)
Oh not bad! thank you a lot


Gave +1 Creative Carma to @vapid flume
without prompt, it's quite good (yet not really bald )
but with a prompt like (bald head) I always get a hat xD
I don't understand why, there is no negative prompt? ^^
Also, little question, is there an alternative to Topaz Gigapixel AI to increase the resolution in any Adobe software now?
Sorry if you're already sorted - but if not.... just make sure your workspace is RGB and THEN drag your image back in again
i dont
Then you'll have to subscribe if you want to keep using Photoshop.
why did i listened to you and updated, now i cant use 2022 or 2023 🥲
not just Ps, most Adobe applications
When you have problems with old versions of the app, updating to the latest version is the easiest fix. If you're using pirated software, you've got bigger problems.
I don't think you'll get much sympathy or help here *if * you're not paying for Adobe, and as a result, not able to use it.
Its amazing that people turn up here and seek support for their hacked apps.
I'm trying to crop, I have the layer selected so crop is no longer greyed out but clicking it does nothing
You're cropping the canvas? What do you mean by layer selected?
Cropping is when you're making the canvas smaller/bigger. Are you trying to add a mask to the layer?
nope just cropping like you'd do in paint, my image is too large
Okay, what do you mean by it doing nothing? You have to use the crop tool to resize your canvas and then press the ✅ icon up at the top.
I mean it just does nothing, nothing happens, I click on the tool and nothing changes, no things to drag in order to crop, my tool stays the same
Could you post a screenshot of how your screen looks with the crop tool selected?

Looks like you just have a selection there. You don't need to have a selection to crop. If the crop marks aren't showing up, try changing tools to move tool and back to crop. The bounding box you can drag should show up.
without a selection the crop option is greyed out
What crop option? Use the crop tool (hotkey C)
oh, thanks!
And if you use the image-crop option, you can make your selection and it will crop the image to what your selection is.
I see, ty
png
Did you flatten the layers when you changed from greyscale to rgb? That will make the images remain black and white. Why do you not import the image after having changed to rgb?
how do I make my eraser make my layer transparent? Like, I have an image and where I erase I want the layer underneath to become visible
no i didn't
The best way to do this is to create a mask, so you're working non-destructively.
Here's a quick tutorial on how to use masks! https://www.youtube.com/watch?v=ddbMxDT7J9Y
Okay. You can still import the image when the color mode is in RGB. It'll have all its colors then.
I successfully use the integrated neural filter "super zoom". It's not ideal and neither solution is since it's un-resolvable issue but works well nonetheless
https://phlearn.com/tutorial/ai-super-scaling-graphic-integration-in-portraits/

In this Photoshop tutorial, we learn to seamlessly blend graphics with portraiture by using the Super Zoom feature to upscale graphics without losing resolution, applying Gradient Maps for color matching, and employing the Select Subject and Select and Mask tools for precise subject isolation. The result is a harmonious and visually appealing co...
Forget the effects, it's the super zoom that is important here
thanks I'll do that, what a strange bug!
Gave +1 Creative Carma to @steady girder
does 25.0 work or do I go further back?
why does this keep popping up

It's because you are trying to paint (or something similar) on a smart object... You either need to rasterise your smart object, or do your modification on the embedded file (double click on the smart object to open it on a new tab and work on it there, save and then close)
It's an embedded object/image inside the Photoshop document. Dbl-click on the Layer Thumbnail to open that Smart Object into in a new tab. You can edit it there. Save it and go back to the main document.

If you don't want it to be a Smart Object, you can do like Sandrine suggested and rasterize that layer. Then is just becomes pixels.
How to do what?
ok so im trying to make a airline livery
and i want the grey to be on the plane
but its also outside
im terrible at explaining things
I would use an Adjustment Layer. Probably Hue/Saturation with a Layer Mask to only affect certain portions of the plane image.
oke tq


ignore the Green Boxes
Is there a way to reduce or get rid of the blue ghosted light pieces all over my photos in some cases it looks super good and cool but I would love to try some versions without it

How about a quick and dirty selection of the elephants and then dehaze and reduce clarity in camera raw?

Ah yes I can play around with filters and blurs right
The ones I mentioned will give the effect of being in the distance which is I think what you want?
Yes atmosphere perspective I'll try thag
is there any way to scale something to make it longer without making it wider
If you don't scale in correct proportions to the original, things will look squashed or stretched.
yea thats the point of what im trying to do
control or command T gives you the transform controls
oke tq
What is "tq" supposed to mean? Thank-Q? heh
ah it bascially just means thank you
my therapist says it so much im just used to saying it too
is there a way to make something just longer tho instead of both ways
Pull the control on the middle of the line, not the corner
yes 🙂
Take a little look : https://youtu.be/nBtUpxoVONQ?feature=shared

In this photoshop tutorial you will learn how to master the transform tool in Photoshop CC. Ed Gregory walks you through each part of this extremely powerful tool while walking you through a full project. Learn how to change the shapee of an object in Photoshop C, how to Photoshop Skew, Photoshop Distort and how to change perspective in Photosho...
oke thank you!
What’s UI/UX
it’s short for user interface and user experience
Are there maybe PS plugins for upscaling?
thanks for the PS help overall
There are some. One of the popular ones is Topaz Gigapixel. It runs in standalone mode or launched from inside Photoshop.

did you see my last message by any chance? I use the highest settings that are available to save jpegs. please help me with this, since I can’t really work anymore
I couldn't find the Lightroom Discord so I'm asking this here:
For some reason when I "scale" the image in order to create the white border, my image appears to be rounded. How do I make it so that the image isn't rounded and displays as a rectangle? For reference, another shot I took is perfectly straight.

I also have PS, so if it's easier to fix on PS then I'm willing to do so
Is it included on the PS or Adobe membership?
No. It's not from Adobe. Its a third-party app.
There are probably dozens of upscaler apps out there. Some are free; some are paid.
I assume your stroke is set to 'outside' or 'centre'? - If you can make it 'inside' it will be fine...

Alternatively, you may need to draw a 'shape' and then apply a stroke, since you can have more controls on that...
Congrats by the looks of it 🙂
Hi would anyone know why when I click the gradient changer the editor wont open? anyone know how to open it?
so im kind of confused im trying to use the brush (white) so i can remove the dark spots from the threshold but for some reason when i click the layer mask of the cross png i can only brush things that are black in the cross png box why is that cuz im trying to paint off the black spots

i also want to know how to do that because that seems cool to only paint a specific color i think that would be helpful
Can you post a screenshot and circle what you're trying to click on...
Because your layer mask is ONLY effecting the cross.
Whack a layer mask over your GROUP below and try again 🙂
@sly hawk the green to white. when I click on it, it doesnt open editor


It works differently now. - Try drawing a gradient on your canvas first, even with the wrong colour
... you'll then be able to edit it afterwards. Simples.
(you'll be able to later edit the colours, angle, gradient, opacity etc)
....
Sorted?
yes but no. now i cant change the white to black

....or double click the DOTS on te gradient line on the canvas
when I add a text box I get this, the letters are also insanely big

Gave +1 Creative Carma to @sly hawk
make it a smart object if you want. It will then select the rectangle only and not the outer (transparent) pixels.
Can you share your whole screen please?
I just want to see the size of the canvas vs the size of the text

Sorry - Whole screen, I just wasnted to see the canvas size.
if you have 48pt but the canvas is 60,000 pixels wide... we'll know the issue! 🙂


now its better

I mean the pt size not the problem
no clue how it got to 14.88 lmao
It looks like there is a clipping mask applied, which is probably confusing things a little.

deleted the weird text masks and still the same problem
I'm not sure. - What happens if you create a new document and try it?
If it's fine, then try dragging in your (working) text layer into this existing PSD file
works in a new one, I'll do that
so my teacher in her vid whenever she uses her pen tool can see her path how can i do that
strange. - Sorry I couldn't ID the issue.
yup works thanks a lot, this is a template file I got from my college so probably something going on with that, the layer drag is a great workaround
What? This path?

like when making a line she can see it before she clicks to make it. a linear path

Tick RUBBER BAND
thank yoi
how can i open a dds file one photoshop ? i have to work with them a lot
You could have googled that one:
https://www.youtube.com/watch?v=6yimyuWzgkg

How To Edit Open A DDS File in Photoshop 2022 - Assetto Corsa Car Skin
🔔 Subscribe for more Sim Drifting videos! 🔔
🔥 Drop a LIKE! 🔥
Link To DDS Plugin:
http://fnordware.blogspot.com/2014/09/dds-plug-in-for-after-effects-and.html
Twitch: https://www.twitch.tv/crilla18
TikTok: https://www.tiktok.com/@crilla18
Instagram: https://www.instagram.c...
having an issue when i change the threshold of this image my texts are affected and disappear but i want the texts to not disappear
its only a certain text layer because im trying to move the text to be infront of the image then it disappears
how to make this white or black without using the brightness slider because it will make everything white or black?

yes thank you, i usually google stuff i dont know but i completely forgot now...
Gave +1 Creative Carma to @sly hawk
Try using a levels adjustment
it still doesn't look good
actually this is nice thanks
thank you!!
I cant paste my texture into my vanishing point screen. I 100% have it copied but when I ctrl+v nothing happens in the VP screen.

this is what happens when I ctrl v
so it works with other things not the texture itself. I did rasterize it

ok i found the issue but dont know how to fix
when my prof pastes her texture is a single panel in layers as when I do mine its still a mask

hum, now that i can open dds files, how can i edit the mipmaps ? i have to for my game (these smaller and smaller textures)


Thank you so much and it is my friend in the photo he asked me to take pictures of the suprise purposal
Gave +1 Creative Carma to @sly hawk
bump
yooo how do i redo a filter and also!,
How do I use filters without having to have it directly on my layer and just give me a filtered layer on top?
Video is a decade old, but still works....
https://www.youtube.com/watch?v=7twUMeP_VOI
Follow this tutorial to learn how to apply different filters on more than one image in Adobe Photoshop CS6.
Don't forget to check out our site http://howtech.tv/ for more free how-to videos!
http://youtube.com/ithowtovids - our feed
http://www.facebook.com/howtechtv - join us on facebook
https://plus.google.com/103440382717658277879 - our group...
Maybe someone on here can help me with this:
The first one Is photoshop, the second Is gimp.


I want It to hard edged like that.
Same doc size/resolution)
what's the original image?
This is usually to do with antialiasing and interpolation when resizing

I opened It directly from the file to photoshop.
Turning on nearest neighbour sort of works,
But I loose some pixels.

Thanks for the answer. - I'm AFK now but will take a look tomorrow
hey any idea why drawing deletes random blocks?
am stressed
literally cant draw anything it keeps happening when i redownload i legit look like the image


am i allowed to pay someone to do something to a picture
i have $4.50 i can mail a gift card to you
Noise.
i figured out if i remove the bg it works but thats insanely stupid, is there a way i can have a bg????
You can describe your project in the #💬chat-general channel. If someone is interested in working on it, they might reach out to you.
Without knowing more about the project, Layers, brushes you're using, it would be difficult to suggest something.
Just looking at this video, I don't know.
can you please? do you have a price
No, thanks.
if i get another quarter or 2 on my card im sure i can change a mind of 2
I told you above about a possible course of action. Good luck.
No thank you
this happens with every project and every brush
every layer, as long as theres a bg
Sorry. No idea what that could be.
no worries homie appreiciate the try
Main menu: Help > GPU Compatibility... any issues reported there?
bump
Have you followed the workflow(s) described in the User Guide? https://helpx.adobe.com/photoshop/using/vanishing-point.html
Hi guys
I desperately need help
I cannot export this Photoshop file and I don’t know why
I think the file exceeds 2G but I already tried grouping the layers and I still can’t get it to load
Export it to what file type?
If the file exceeds 2GB, you'll have to save the file in PSB file format.
how do I put text in this marquee selection I've made?

im trying to put a gif onto an image and when i try to match l;ayers across frames it sstill shows the checkered background
how to make text swirl
I want the winter 2023 to swirl around the center text and lower its opacity as if it were behind the text

so i just convert filters into smart filters basically?
it has to be a shape first. then you can use the type tool to type inside
yes, working on your layers as smart objects will allow you to change a filter values anytime
can you elaborate? maybe add some screenshots?
I learned I can make it into a work path then use text tool to input text
its called color noise, and i think you can emulate with a camera by increasing the ISO to a crazy amount. I believe you can make noise in photoshop and lightroom too. probably easier in lightroom
i fixed it thanks anyway
Gave +1 Creative Carma to @serene coral
is there any practical way to do embroidery effect without using plugin? these plugins are way too expensive
I'm trying to import RAW that was taken from an Iphone to Photoshop but when importing it to Photoshop it's auto correcting the image?
Can someone help me?


Learn/watch how to 'write along a path'. - also 10 characters isn't much, so it won't look very good.

I will show you how to fill a shape with text in Photoshop. This is a fast and easy Photoshop tutorial. You can create word text in any shape such as a heart, circle, etc.
After you have your text into the custom shape, play with the different alignment and font size to get the best results. Use smaller font size for better results.
I used Pho...
It's applying the AppleProRaw profile. You could select none or have a go at making your own that you liked. 🙂
https://www.youtube.com/watch?v=6Pvjkz0QV_Q
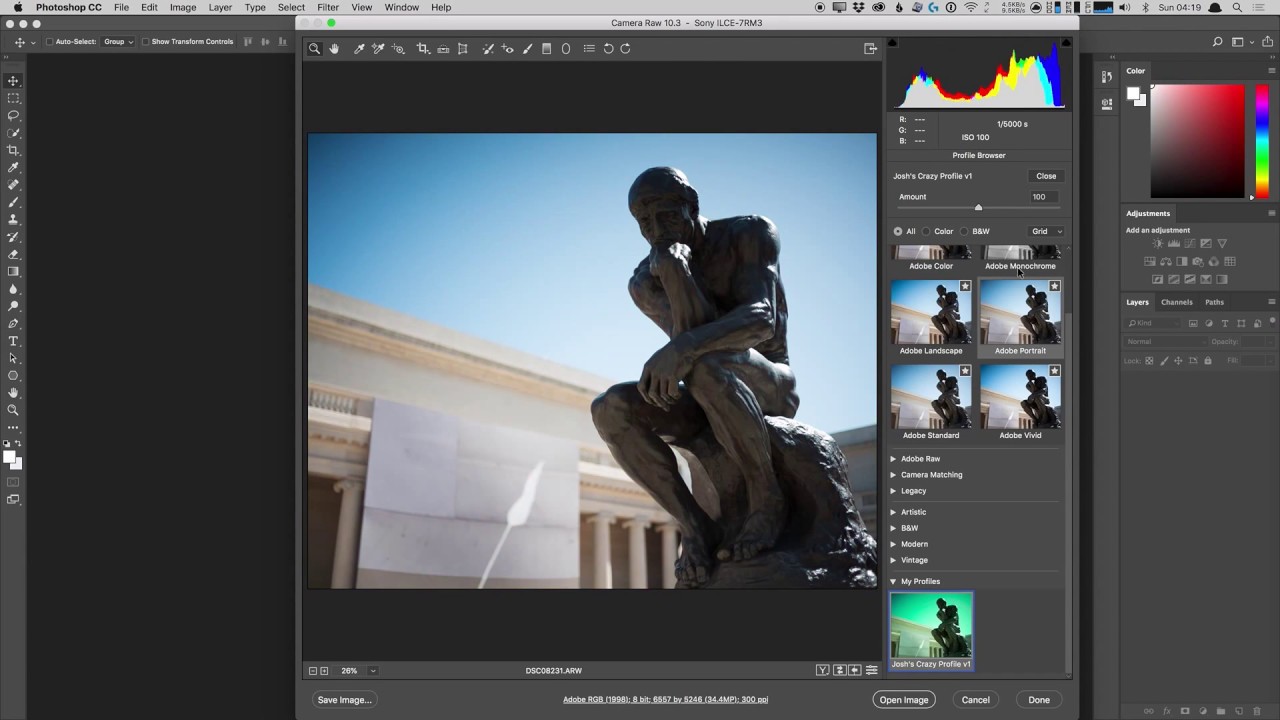
An advanced, step-by-step guide to creating Creative Profiles in Adobe Camera Raw for use in Adobe Camera Raw (ACR) 10.3 and later, Lightroom Classic 7.3 and later, and Lightroom CC 1.3 and later.
Please keep in mind that profiles are very different from presets, and as such, there's lots of stuff that can go wrong while making them. Experimen...
I see no one replied to your original question so how about this:
https://www.youtube.com/watch?v=wVtDPgAGSUA
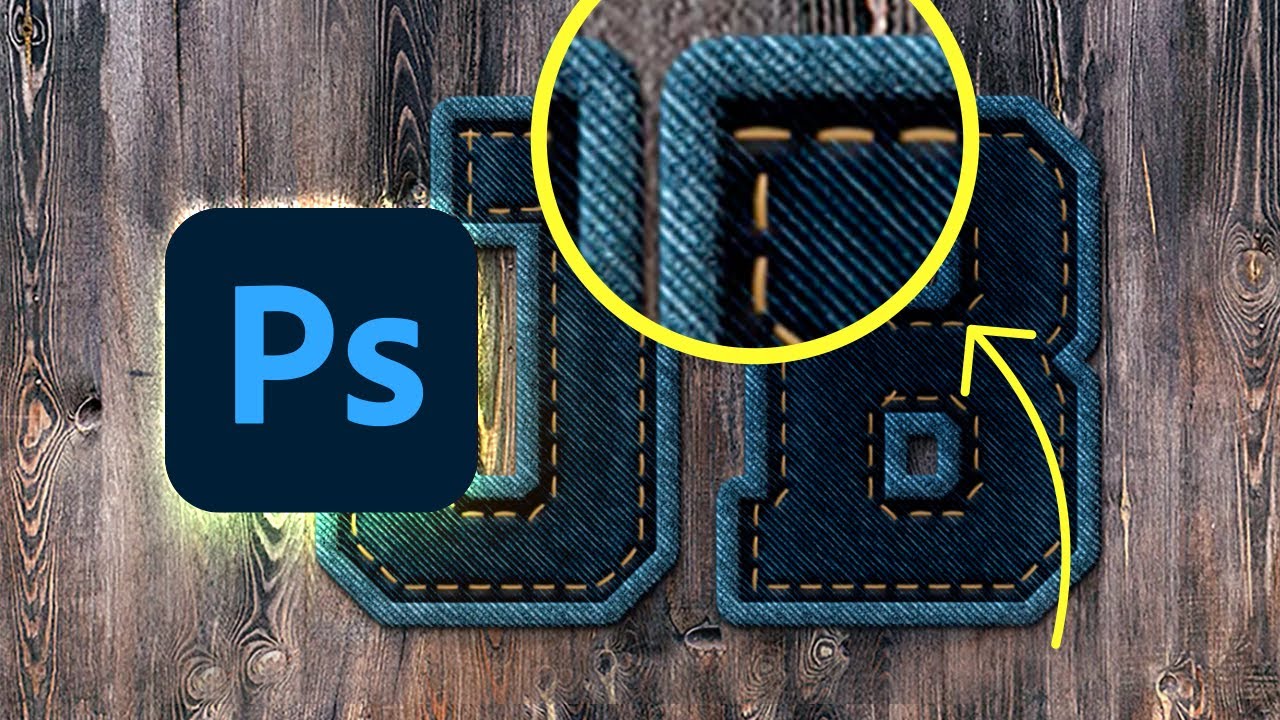
Learn how to create your own denim texture using filters in Adobe Photoshop, and how to create an action for the stitched jeans text effect. ► Download Unlimited Stock Photos, Fonts & Templates with Envato Elements: https://elements.envato.com/?utm_campaign=yt_tutsplus_wVtDPgAGSUA&utm_medium=referral&utm_source=youtube.com&utm_content=descriptio...
will take a look, thank you!
Gave +1 Creative Carma to @lucid crane
for some reason since yesterday the colours on the Hue Cube dont change anymore when I colour pick something. Does anybody know how to change that?
i don't know its just that its all in the image. i tested other images but no problems at all
Try double-clicking inside the color block. Then try a single click to select the color.
when I save PNG as JEPG, it adds strange jagged lines across the JEPG. (Photoshop and PS Express) It never happened before that. How can i fix it? PNG is clean and I’m saving JEPG with highest settings


Seems like a bug. You should post on the Photoshop Community Forum. Include all the relevant information. Platform and version. Photoshop version, etc. Include the symptoms and the screen shots.
yeah, someone posted a similar issue 24/48 hours ago
is this a correct place to post: https://community.adobe.com/t5/photoshop-ecosystem-bugs/saving-jpg-adds-jagged-lines-artifacts/idi-p/14195732#M94641
https://community.adobe.com
when I save PNG as JPG, it adds strange jagged lines across the JPG. (Photoshop and PS Express on iPad ) It never happened before that. How can I fix it? PNG is clean and I’m saving JPG with the highest settings. I'm using iPad Pro mobile photoshop and photoshop express
Yes. That is the correct place. However, you should include information that will be helpful to troubleshot the issue. iOS version. Photoshop version and anything else that might be relevant to the issue. Then the dev team can take a look at it.
where on ipad i can check the version info?
Hello can someone have already this problem ?

iOS information will be in Settings > General > About... Photoshop information will be under the App Settings > About...
I assume that says something along the lines of "Impossibe to save this file due to a programme error"?
Yes but not save just open
A random stab in the dark, but maybe this would help?
https://community.adobe.com/t5/photoshop-ecosystem-discussions/error-could-not-save-the-file-because-of-a-disk-error-in-photoshop/m-p/11663169#:~:text=You need to grant full,Photoshop to give it access!
https://community.adobe.com
I have been getting error while saving and merging the layers after updating to v22.1. My photoshop files are saved on creative cloud and I am importing the files to edit through external drive. PS It's working when I am hiding that specific layer. Macbook Pro early 2015 running BigSur.
I know it talks about saving, but it could apply to opening too
Thanks
Gave +1 Creative Carma to @sly hawk
thank you. I found ios info, but not photoshop info Attaching screenshot
Gave +1 Creative Carma to @ripe quest
In Photoshop for iOS, you tap your profile pic in the upper right hand corner of the GUI. That should open the App Settings. Then see: "About" and you should see the Photoshop version there.
thank you. Is this a current version?

Gave +1 Creative Carma to @ripe quest
Yes. I believe it is.
what is the difference between those two Adobe express apps that i have on my ipad?


Photoshop Express is for quick edits: e.g. highlight, shadow, contrast, level adjustments, applying preset filters to images and exporting the results. Adobe Express does many different things like creating layouts from template designs and more.
thank you. Which one is better at removing background to create transparent png with smooth high quality edges?
Gave +1 Creative Carma to @ripe quest
Probably "Photoshop" for iOS. Not Ps Express or Adobe Express.
what about creative cloud? How does it compare to ps, ps express or Adobe express?
what do I do in the meantime while waiting this bug to be fixed? I can’t save any jpg files now?
Creative Cloud is the product suite under which all the products exist as well as Adobe's cloud service where objects, libraries and projects can be stored.
I don't know. I suppose you'll have to find a workaround.
hi all - my color hue cube is not updating to reflect the color i have recently selected. I've tried everything from resetting my workspace, turning off and on the color window, to reinstalling photoshop. can someone please help me fix this problem??

I see that there are also an option to remove background on Creative Cloud - PS is still better? (Gosh, so many options 😂)
It seems there is a bug in the current version. Try double-clicking inside the color box. Then try single clicking to select a color. See if that works.
It will likely depend on the image and image quality. Why don't you experiment with it and see.
I tried working with smaller file and it saves a good quality jpg. but now I’ll have to resize my rendered files
anyone know how i can fix the eyes on this so they dont look as alien im a novice here

I think mobile PS can’t save jpg with good quality that is larger than 6000 in width…
Then use the Photoshop on the Desktop.
True, but I already spend too much time in my dark small office, it’s nice to sit outside and work. Also, it’s easier to use mobile for painting with ipen.
OK. Well, good luck with it!
She kind of has no pupil, or it's very washed out... - See an alternative eye below 🙂

You would also see a slight reflection from the scenes lightsource too.
thank youfor all of your help. Have a nice day
Gave +1 Creative Carma to @ripe quest
Save it as a png and convert to jpg with some other tool 🙂
If you are on a Mac, preview can do that.
Hello, being a beginner, I am a little lost in the middle of all the techniques. It would be to know if there would be a good way to match the colors between the different elements of the composite because I see a lot of different ones.
Go onto google and search for photoshop Harmonisation
Im on ipad pro . What can i use on it?
So i have been messing with this for a while now and can not figure out how to get rid of the shadow or whatever it is in the image below. The image is on a smart layer. I have tried several different images all do the same can someone help me figure out how to make it stop doing this???

well what the heck it does not show up in the screenshot...lol
Never mind apparently i can only see it in photoshop once i save it and look at image it is not there. That is annoying i have fought with that for like 2 hours...lol
Thanks !
Gave +1 Creative Carma to @sly hawk
I’m sorry, I don‘t have such a device so I can’t advise.
I’m making a mock-up and using distort to apply the image onto the template is there a fast way I can get the image to be symmetrical and make it snap to the points

Hello Guys, i have a question that´s driving me insane. When i draw something and press alt to copy a color why isn´t it moving to the new color on the hue cube? it only changes the color on the foreground color square. I had a brake and i am so so sure that it changed on the hue cube as well.
It seems there is a bug in the current version. Try double-clicking inside the color box. Then try single clicking to select a color. See if that works.
I am a little new to photoshop, why is auto blend colors not working for me. When I do it the other image disapears and puts a copy of the background. I am trying to make my other image match my background colors/tone.
yes that works. But isnt it possible to have that directly in the cube? without double clicking? It takes much more time like this
You should only have to do that dbl-click the first time, no? It shouldn't happen at all. It's a bug that they will have to address.
no it stays the same. I also restarted and its still like this
What platform and version of Photoshop?
Do you mean having that image fit to the corners I marked? If so, the aspect ratio will likely be wrong or the image will be cropped.

any idea why when masking with pen tool get these kinda vestiges left over? they don't really affect the image unless shrunken or a glow/stroke is applied but still

it's pretty easy to just erase it but is there a way to exclude this ?
how would you replicate this background effect?

How to exclude the table section color, when changing color using hue/saturation?

Use a Layer Mask on the Adjustment Layer and paint out the parts that you don't want to be affected.
Is there something like best take feature, which is available on pixel 8, in photoshop with a small selection, using 2 or more images?
im trying to get the outline shape of this flag, so that i can put the outline on a blank canvas and put another flag inside of it. how can i obtain the shape of this flag?

play around with blur effects and some noise i guess idk tho
That seem to be a Motion blur effect.
i dont know much bout ps , how do i get this effect ? :v

Its typically known as word art. No automated method in PS that I know. Manually: https://youtu.be/27eJ5yhUYPM?si=NhVRWZWZQhuhWQIZ

In this Photoshop tutorial video I will show you how to create a cat word art shape design or word cloud based on a cat's characteristics. Some of the words I used were curious, clever, independent, etc. I have included a chart in the tutorial listing many additional words you might use for a cat. The list is sorted by word length.
This tutoria...
Ah , thanks , imma look into it
@lone hollow
Select the blue border using magic mask or similar, Add layer mask, hide selection. You can now put your flag image underneath that layer and play with the wave filter to get the undulating effect.
Im using the latest version of PS on windows
25.1.0
Can you try to go back one version?
It's available on your CC app.
can any help me with what effects were used on this text just list them?

I'll start by saying that the text is extruded. However although it's still hanging on in PS, 3D is being removed. You may or may not have it available to you.
https://helpx.adobe.com/photoshop/kb/3d-faq.html
alr I've figured out how to make the 3D text but 1 question
how was that black part made

was it done by gradient?
or something?

or something ;- )
The extruded text has had lighting added. The end nearer the light is bright on the edges, the end further away ends up dark.
See this: https://youtu.be/Jk_fEn4lE8Q?si=M_9wQzRgtWwGXawV

Download Photoshop: https://prf.hn/l/VlpdEA9
If you liked this video, buy me a coffee here: https://ko-fi.com/2minutedesign
In this 2-minute video, we're going to learn how to create an awesome 3D text. We will be using Photoshop's 3D features to achieve this effect.
Along the way, we will use a variety of tools...
Possibly adding a texture on a 3D text.or more likely a reflection of something else on that text with would be done in a 3D software and that text having a metallic material. Do you know if it was made in Photoshop? Seems unlikely, unless it was done when the 3D functionnality were complete, or drawn by hand, which is also very possible
Thanks both I'll try both of your tips later today @vapid flume @lucid crane
Gave +1 Creative Carma to @vapid flume
hii, can someone help me please with my photo? my arm looks really weird
and i dont know how to change it
If you want to post your photo, we can tell you what you can do to correct it!
yea but i dont know anything about photoshop so i wanted to ask if someone can help me in the dms
Well, you either have to ask in #💬chat-general if someone wants to help you, but we don't really have a job/request board here, so sometimes we direct people to https://www.reddit.com/r/PhotoshopRequest/

reddit
what's the best choice from these for printing high quality photos?

I'm lost in the difference between baseline, optimized, and progressive 😭
can someone explain me?
this article explains this modal pretty well https://tricky-photoshop.com/photoshop/learn-photoshop/jpeg-format-options-photoshop-16051/

TrickyPhotoshop | Read the ultimage guide on JPEG save options in Photoshop
omg tysm for this!!!
Another viewpoint might be to use a non compressed file format like png if storage space is not an issue 🙂
As Euan said, I'm not sure why you would want to so drastically stretch that poster, but if you insist.... try adding some simple guidelines to the corners by dragging from the edge/ruler onto the canvas. - Then you can later SNAP to the guidelines.
guys is there any way i can make an exact replica of this? (soft copy)

please help as soon as possible
I've provided a few options here, watch the video carefully...
What do you mean? What did you do? Ruin the paper and realise you need to remake it and print it?
i do not know i just need it
i know its weird but yeah
I still don't know what you're asking. You can make an EXACT COPY of the image itself with copy and paste.
yess how
However, I'm sure that's not what you actually mean
i mean like
i need it on an A4
with the exact margins text style etc
im actually a beginner i got no PS experience
Is that th only photo you have?
unfortunately yes
I feel like you can do that using Microsoft Word. - The font looks like Calibri
okay let me try
Seems like a pointless exersize you trying to do it in photoshop @visual falcon when it's clear to me that it was made using the default settings/fonts in Microsoft Word. - Good luck!

what would be the easiest way to add shadows like this on every pole?
they're based on shapes I made myself.

what I am trying to create is that I want to crop out all of these images individually and create new documents with each. how do I crop them out please help ctrl + x doesnt work
You could try File>Automate>Crop and Straighten Photos
ctrl + x is not a default PS shortcut
other than that, I'd make a selection, ctrl+j to copy selection to a new layer and with everything done File>Export>Layers to files

yeah it gave an error :D
this app is driving me nuts
while...?
when I tried "crop and straigthen photos" option

and now it is giving another error when I try to just select images individually
duh
does the same happen on the stable build? I can see you're using beta
anyone? I have no clue myself..
@lucid crane @sly hawk Thank you both so much, and that video helped me a lot James, I really appreciate it
Gave +1 Creative Carma to @lucid crane
@sly hawk give james creative carma too, thanks james
oh sorry, i guess it doesnt work 😦
thanks @sly hawk!
Gave +1 Creative Carma to @sly hawk
you're using the beta - problems are to be expected. Try the stable version and let me know if it works for you
Depends on how the poles are added to the file. One layer or each on its own layer? how did you make the shadows on those two?
I just decided to draw them, right now I merged them all into 1 layer but I could remake them into seperate poles.
using drop shadow doesn't seem like an option because I'm not able to rotate the shadow.

I want to apply a gradient to this image, but not all of it, just the bottom 1/3 of the image. If I apply a gradient using a FX layer (the best way I know how) it only applies it to the entire image. Anyone have any work around or specifics on this?

Ok, here's a method to make realistic shadows: https://www.youtube.com/watch?app=desktop&v=67W0Xo1sIFE
I'd do it like this: Make one large pole and sort the shadow. Duplicate and shift shadow in the other direction.
(if you want it to appear they are lit from the center)
The copy and paste them where needed and the poles can be sized and the shadows will be sized also.

In this tutorial, I demonstrate how to add a realistic drop-shadow to a person using Photoshop.
🔗 MORE FROM NICOLE:
Free presets, textures, and training:
► https://nicolesy.com/free
Subscribe to the Nicolesy Newsletter:
► https://nicolesy.com/newsletter
Join my FREE photography community:
► https://nicolesy.me/circle
I think the gradient tool would do the trick! It appears when you right click your paint bucket tool :)
Thank you! I'll check it out!
Gave +1 Creative Carma to @lucid crane
I tried the gradient tool, but the issue is that does not effect my rat drawing. It just makes a new layer it seems. I am not sure how to get the gradient tool to apply to my image

with the gradient fill as a layer style, you'd have to reposition the gradient and probably change the gradient points too. I would make a new gradient layer and use clipping mask to apply it to the image you have
ctrl+alt+G
I am on mac (sorry I do not know the conversions for shortcuts), so I need to make a new gradient layer and then use a clipping mask to apply it, let me try that 👍
ooo that seems to have worked! Thank you very much for your time and help 

just replace ctrl with cmd
Hi
just tried it and it doesn't fit in this design, so I decided not to add it.
still thanks for your advice :)
@everyone When using Adobe express app on the android I add an image and it says upload failed try again. This is only happening with images from mid journey. Why? Actually it's happening with all the pictures from my phone.
uh i downloaded a texture pack but when i unzip it all the effects and all the overlays basiclly everything in the pack is seperated and i need it to fir all in one
Please don't try to ping "everyone" - Just ask your question.
Hi, can you please ask in the Adobe Express community? https://discord.gg/adobeexpress
can you maybe help me?
I will thanks
Gave +1 Creative Carma to @serene coral
is it a texture pack for a game?
no
for editing
effects overlays etc
there all seperated
this is what i mean

someone pls help me
Hey guys, I am currently looking for someone who could help me convert my 12 slices in photoshop over to another format in illustrator. If you can help please dm
Is there a way to automatically spread 2 or more layers so they are next to each other
example: I want this to become this


distributing doesnt seem to work
is there anyone that can help me with putting a rectangle over some parts of an image in DM's
@cosmic kestrel @frail sluice - Please make these types of requests in the #💬chat-general channel. Briefly describe the project. If someone is interested in working on it, someone will probably reach out to you.
Okay! Thanks
Gave +1 Creative Carma to @ripe quest
Can I send a personal message?
@ripe quest
Are you using distribute objects or distribute spacing? With distribute spacing, you can press one of the objects, set the spacing to 0, and press the right button there.

I never knew that was a thing 🙂
hey all. I've been utilizing generative fill for product images and it's been great but I've ran into some problems. One in particular is when I go to expand an image, the results look fine but if you look closely theres a very faint line where the original and expanded pixels meet. When I use GF, I normally only go in tiles of 1024x1024px to avoid losing resolution. Not sure if theres a work around but if anyone has any advice I would greatly appreciate it!
here's what I'm talking about

I've tried feathering the selection before expanding but I keep getting the same results
this is what is happening when I expand even if i expand in small increments

I downloaded a new 2023 version of photoshop and now the resolution of the same photo on the same scale is different
any idea to fix this?
whats the canvas size?
6 cm x 9 cm
dpi?
okay perfect. I was gonan say it was the dpi

so I cropped out all of the single images and now what I want to do is that I want this image to become the whole document with rounded corners
how do I do that anybody know
ctrl t for free transform (note image quality could be lowered)
is there a way to do rescaling without playing with images res
and I should ask how can I save all of these files into 1 PSD file
so uh
my layers are hidden
i think i hit a wrong keybind or smthing
but i dont see the right side of my screen anymore while in ps
i only see two tabs, "Libraries" and "adjustments"
if you are working from the same project it will all be saved into one psd file
using plugins is the best way

where can I find the plugins I need for this
on1 or topaz
It's super useful! I use it a lot when working with a lot of objects

so I downloaded topaz gigapixel and this is the error I am facing with
I downloaded impbase.dll again on my computer and put in inside of sysWoW64 because my computer is 64 bits
it still didn't work
will putting impbase.dll file into the system32 file will fix this
I dont want to burn my pc so please answer
That isn't an Adobe product. You should contact Topaz support.
is it because I cracked the photoshop?
I have no idea.
is there a way for me upscale an image without actually breaking its resolution.
like thats the only reason why I need gigapixel
So first off, you don't need Photoshop to use Topaz Gigapixel. It runs in standalone mode. Also, this is the official Photoshop server run by Adobe so talking about your illegal apps here is a bad idea.
Probably if you cracked that too.
I just clicked on the first site I saw
We can't help you. Sorry.
just circling back to my question from earlier!
or if there's a dedicated server for generative fill I would greatly appreciate some direction
There isn't a separate server for GenFill. This is it.
Have you tried making sure the selection extends over the existing areas? I wouldn't put the "tiles" directly next to each other. There should be a slight overlap.
No, you can download plugins :)
You can download them "legally" if want support. heh
topaz isint illegal lol but if you cracked it off some sketch site and are using cracked ps idk how to help
you guys know anything about this?
I don't seem to have these buttons
I'm not sure why these things even need to be said but whatever.
Hey, I’m trying to take a video, crop the size of it, and export it as animated gif, can I do that in photoshop?
Maybe. That depends on the file size and length. There are limits to what Photoshop can do with video. Also, there are limitations with the GIFa format.
yeah that's what I normally do but I'm still getting that line. Like it's not blending very well
I get that occasionally as well. Most of the time, I just create a merged copy of all my layers and paint over the seams with the Remove Tool. It usually works. :)
How well it works really depends on what's going on in the image.
yeah I ended up doing that for the first photo. I was just wondering if anyone had the same problem or a fix. Thank you!
Gave +1 Creative Carma to @ripe quest
I was confused because the background I was trying to expand is a fairly simple 2 color gradient
They are in the align menu. Try opening it in Window-Align
What does “cracked” mean?
Generating pixels using a diffusion model isn't an exact science. It does a good job [matching the existing pixels] most of the time. Then you run into instances when its less than cooperative.
It means pirated and we're not going to talk about that here. :)
Ahh, I see. 🏴☠️
that is all i got

no window-allign
photoshop beta
Change "Align To" dropdown to "Canvas"
Unless you're trying to align to an active selection.
yeah active selection
either way
nothing in the menu changed really
whatever is shown in my screenshot just gets greyed out if not available and that is it
Sorry. I wasn't tracking your question. It sounds like @sweet field knows what you're trying to do. :)
Apologies, I thought this was posted in the Illustrator server! I don't believe there is a way to do this in Photoshop. For work like this, Illustrator is recommended. There may be a script that could do this for PS, though. Let me take a quick look
is there an easy way to transfer all my layers into illustrator
Since Photoshop is raster and Illustrator is vector, normally you would want to work the other way around. You can of course save the psd and open that in Illustrator—however I'm not super familiar with that type of workflow and won't be able to advise for efficiency
ill check it right away
goal is:
I have images of identical size and I want them to align in rows and columns
so I have a collage of all the images which I can then cut
is there a better way for this other than doing what I'm gonna do now: use illutrator to distribute them equally
Sure, you can try File-Automate-Contact Sheet with Photoshop. I believe I did this a while back, let me see if I can find it
Here it is! Does this look like something you're trying to achieve? With contact sheet you can also have multiple rows and columns. #❓ask-a-question message
is that photoshop
i bet that is what I want maybe
I have X images
could be 20, could be 50
all identical in size
is that doable with that?
Yup, try it out!
have a big sheet of all of them in rows and columns
will try
thanks, big help
it seems to take forever
so I can't seem to get it right

the space between the left and right part shouldn't be more than a few 100 pixels at best
~300 pixel between the actual edge, but here I get 1000+

gonna try auto spacing this time
1500*2100 are the images that I want to merge into 1 sheet