#✂challenges-feedback
1 messages · Page 49 of 1
Day 4 Colors & Blend Modes...

Colors and blend modes
@gaunt swan That’s great! Good job!!
@bleak fossil Thanks for th the comment. The top of my head has "peach fuzz" but your are right the side needs work. I don't know what I was thinking when I submitted it.
Gave +1 Creative Carma to SamPetersonArt
thanks @stiff jungle ! 😄
Gave +1 Creative Carma to capturesbykyle
@bold valley I don’t think it’s bad at all! These challenges are all just for learning and practice so they definitely don’t need to be perfect. The refine edge brush tool is fantastic for those types of edges, anything with a soft edge, hair, or a little fuzz. I posted a video in the pro tips section about it, but for a head I think it should be pretty accurate out of the box so to speak.
Gave +1 Creative Carma to SamPetersonArt
@bleak fossil Thanks again. I'll watch it.
Colors. Put a little rain pattern from an earlier DCC in the background.
Day 2: Used the guassian blur for the planet. Playing catch up. Any suggestions?
Images used:

Day 3 challenge
Hi there, I didn't understand how Paul resize the layer where he painted a shadow. Does anyone have an idea?
Would love some feedback on this one I did for the day 2 challenge!
Photoshop Day 3
Just playing - don't like skulls so left it out. Enjoyed your tutorial - thank you.
Challenge no 3 along with images used from Pixabay.
Image by stuarthampton
Image by fabcsaby
Image by Prawny
Challenge 3
Here's Day 2. I know I'm a little behind. I want to blur the legs but not the face but I can't seem to find a way to do that. I tried path blur but that blurred everything. Any suggestions?
Challenge 3! Love the DCC so far! Thanks @brittle slate
Gave +1 Creative Carma to Paul Trani
Day 3 Challenge - Feedback is welcomed and needed honestly 😅
Day 1
#ps_challenge_color @brittle slate love your tutorials 🙃
Day 2
Hey guys! I little bit late but I try my best to create the challenge. Day #1 Design. I hope you like it!
Gave +1 Creative Carma to Paul Trani
Day #3 Design. The work on this image was very experiemental. I learned a lot about color, shapes and images. Thanks @brittle slate your stream yesterday was awesome!
Day 3
Challenge 3
Day 3 Challenge: Colours and Blend Modes + Before and After.
Maiden Hair Fern in lieu of skull
I gave a more "Cleopatra" look with blend modes.
@young karma first click on the layer, then cmd + T that'll let you resize it.
Day 3
Day 3
Once again, I really struggled with this one, but here it is. I couldn't get the sky in the background to be unaffected by the blend mode on the flower+face. I think I finally merged them and changed the blend mode to normal. I forgot how to fill the flower vector with a color, so I saved it to my Library and worked on it in Illustrator. Lo and behold, there are blend modes in Ai too. I should have "roughened" the green circle. I'll try to post the original iPhone pics
challenge 4 while trying to attempt these challenges i am learning the things i really do not know how to do which is great so i do not know how to mask and several others like layers i ruin the text with warp and i cannot make it smooth eventually i will get it but as right now i played with this for a few hours so i am posting anyway have a great day to much fun though!
happy friday everyone - here is my version2 with darker flowers ...
Enjoyed learning some new things
Challenge 3
Day 3_v2 I went a different direction with this one. Left or right which do you like?
Day 3_v2 original
Day 3 challenge
Day 3! Enjoyed doing this one a lot!
Day 3 - What a great challenge!
love the left one @keen granite
🙂 @hearty wharf
@honest gorge Congrats with your emoji! Just noticed it between the others 💯
this is my version sorry if it is a landscape but the image that Paul Trani supplied so sorry
tried again challenge 4
hello all - here is today's challenge ... will do more text modifying over the weekend, this is what i followed along with.
@keen granite I really like the blend between the skull and the face on this! I think perhaps the text could stand out a bit more, it’s a bit hard to read in the thumbnail view which is usually a good indicator of if something is reading well enough. Either making it bigger or giving it more value contrast could possibly do the trick. I like what you did with the repeated elements of purple in this image, looks good!
@stiff jungle Really nice color and texture to this whole image, it really ties all the elements together. I really like the element of texture and how it kind of balances with the skull’s texture vs the smooth skin. I think this image reads well, but I feel like a masked levels adjustment to boost the brightness in the face a bit might strengthen it as a focal point. Nice work!
@left sand Really loving the swirly focus of color in this eye! Really great focal point and effect. It could be interesting to see just a subtle tint of tis color expanding out into the white of the eye as it fades out, might tie everything together a bit. very nicely done!
@hybrid yacht Nice job with the shapes in this design, the variety of sizes gives it a lot of interest! The color is a really strong effect too, and the blending with the skull works nicely!
@fossil kettle Very cool look to this design! I like the bold color and the way the skin tone and green eye make for a nice contrast. I love the texture transition between the skull and face. I really like how gradual it is in the forehead and chin, it might help to soften some of black transition in the nose area to make the fade a bit more gradual as well. Nice work 👍
@static coral Looking good! I like the way you arranged the background shapes, the spacing and size variety looks really nice. The skull effect is really interesting too, it almost looks like a white mask but the hints of the skull shape give it a really interesting feel. Well done!
@young karma Ooh, really cool effect! I really love the balance of the graphic shapes with the photograph, the color works extremely well in this image. Really great job on the masking of the hair as well, excellent work!
@honest gorge Very cool, really liking the graphic shapes on this Day 1 challenge! Really nice job color correcting Paul to fit in the with rest of the image as well. I feel like perhaps attention could be drawn to his face a bit more, perhaps by brightening it up a bit, or even vignetting the rest of the image slightly, or even a little of both. Nice work and congrats on the emote!
@bleak fossil thank you so much for the feedback! I'll go into the nose transition thing and try to improve it.
Gave +1 Creative Carma to SamPetersonArt
@kindred kernel Oh wow, super creepy, hah. The distortions on the skull's proportion make it look like a creature design or something. Very cool 👍
@cold cedar Really great work on this design! I love what you did with the pattern overlays, it really gives the portrait a unique and inhuman look. Really interesting and bold color palette as well, it works nicely. My only suggestion (nitpick really) would be to maybe tone down the contrast/opacity of the pattern on the neck ever so slightly so it doesn't draw attention away from the face, but that's really just personal preference. Really nice job!
@shrewd rivet Very nicely done, I really love the strong contrast of the green eyes. I really like the way you fit the skull to her face shape as well, including how you handled the hairline. Though if you wanted to push that even further you could mask out the skull jaw on the right side. I really like the version with the background, kind of adds a mysterious feel to the whole thing. Looks good!
@nova swan I really like how you blended these images together, and the purple flower as the edges of her shirt is a really cool effect! The skull looks good, thought it could be interesting to increase the contrast/opacity of the antlers a bit more, might make it feel a little more solid and in line with the skull. Nice work!
@bleak fossil Thanks , I will ajust 😊 😉
Gave +1 Creative Carma to SamPetersonArt
@plain sable Ooh, really cool concept and colors on this Day 4 design! It might be nice to boost the contrast up in the face a bit and lower it on the dark flowers to make the face a stronger focal point. It could also be interesting to overlap the flowers a bit with each other and vary the size to get a more natural look and add some depth. Just some thoughts, really great mood on this image!
@compact pecan Really nice color contrast between the portrait and the background! The gradient and texture look really nice as well. The overlapping foreground and background shapes add some nice depth as well, nice work!
@fallow bough Ooh, really nice job on this Ken. The grainy texture around the edges really adds to the creepiness of it. I really like how you blended the images together, around the bottom of the jaw where it meets the neck for example. Looks really nicely integrated. I’d be curious to see what it would look like if you applied a little blur to the background to get a depth of field effect. The edges of the portrait seem out of focus, so it might make sense that the flowers would be too, and it might draw a lot of focus to the portrait that way. Just a thought. Looks great!
Challenge #3 of the Photoshop Daily Creative Challenge.
day 1 2 3?
Day 3 - running late - on to Day 4
with skull
@bleak fossil Thanks for the feedback. Blurred background as suggested. Also added grain to background and skull layers. Original photo had ISO set high (my bad) so quite grainy.
Gave +1 Creative Carma to SamPetersonArt
**Day 4 Challenge: **What do yo guys think? I didn't found a High quality picture for the sphere... Because Caracas is where do i live, and i couldn't find a good image 😦 thats why looks pixelated... Thanks for the feedback!
wow! I looooved! @bold plume
@gaunt swan thank you my friend!
Gave +1 Creative Carma to VictorBS
Thanks! @bleak fossil
Gave +1 Creative Carma to SamPetersonArt
Day 3 Challenge
Gave +1 Creative Carma to SamPetersonArt
Thanks @bleak fossil for the input... I tried to lighten the roses but I kept loosing the detail 😦 so I moved them off a bit and clumped as you suggested and darkened the face/scull. Does it work better?
Previous version
Day 4
Lighted the skull a bit not sure which I like better darker or this just a bit lighter
Day 3 -
My work from the second day challenge.
Thanks @bleak fossil. I was also looking at how the pattern seemed a little much there. I'll give it another go.
Gave +1 Creative Carma to SamPetersonArt
Another great Daily Challenge
Day 4 - a polluted combination!
Challenge 1 I've been busy. now to catch up lol
Here is my challenge for day 3 comments are always welcome thank-you
PS DCC #3 Colors & Blend Modes
day4 TYPOGRAPHY
First attempt, playing with all the things that can be done to text
Challenge 2
Day 4 Challenge
thoughts would be welcome. I went black and white as a contrast?
a graphic winner @hot thicket
@willow nebula...love your style
@bold plume just gotta say, that's deliciously cool
@vague shuttle Gracias my friend! You're deliciously cool too 😉
@bleak fossil thanks for the feedback, I really like your suggestion too, I might go back and try that. Thanks again, I’m glad you liked it.
Gave +1 Creative Carma to SamPetersonArt
The Nickname for my hometown, Worcester, Massachusetts, This is the clocktower of the old Insane Asylum.
hello! I'm still catching up, here's my entry for the challenge of day 3. I had too much fun with all the flowers, adding gradients and blend modes to them, and arranging it all . I hope it's not too much flowers now... 😂 Would love to get feedback on this
okay, couldn't help myself ya'll. but here's another version. does it work?
@bleak fossil Thanks Sam I originally had it less opaque but was on the fence. Appreciate the feedback
Gave +1 Creative Carma to SamPetersonArt
Thanks @willow nebula 😊
Gave +1 Creative Carma to Hilde
Is anyone else having problems importing fonts from Adobe Creative Cloud to Photoshop? I’ve activated new fonts that I want to use, but they aren’t showing up in the font list... 😤
Disregard, I got them working 😃
DCC3-PT3-240120 I did a bit of further editing on my composition, which I had uploaded earlier. The longer I looked at the composition, the more I saw the need for editing... on editing I had to restrain myself to not edit the earlier good I had done...such enthusiasm would, I think impoverish the composition... What I was aiming for really, ia a seamless merging of my two photos... 😀
With the text both blended and distorted...
With the text blended but not distorted\
I actually live 15 min from Hershey, but Harrisburg is boring. 😝
Hey guys! I finished the day 2 design. Feedback are welcome!
And my project on Behance.
https://www.behance.net/gallery/91181315/Daily-Creative-Challenge-January-21-January-31

Behance
Daily Creative Challenge - January 21 - January 31
My submission for challenge #4, featuring my own photo. Gathered a new font from Adobe Creative Cloud, put in some drop shadow, messed with spacing, and then worked a little magic to make it look like a worn out postcard. Hope ya like it.
Type Distortion. The coloring on one of these was accidental and it took me a minute to decide between the original and the "accident." Which one do you like? And, do you know what Dirty Coast means?
@stiff jungle I like it. Would you mind sharing the original alongside this one? I would enjoy seeing the comparison.
@fringe thicket I like it. My only thought is that the fore flowers seem a little too bright for the composition. Maybe you could lower their exposure a little?
Day 4 challenge. Colorado Springs, CO
@cold cedar Here’s the original.
@cold cedar I'm torn I love purple but the green makes the text pop
@stiff jungle Cool!
@nova swan I know what you mean. The purple was original. As I was duplicating the green for my "images used" the green came through so nicely I had to use it.
Gave +1 Creative Carma to ValentinePierce
@cold cedar Thanks! 🍻
@cold cedar love both of those, but the green looks so cool! @stiff jungle love what you've done with that photo!!
Thanks, @tardy hedge. Yes, the green stole it.
Getting this set of challenges up on Behance. Check it out if you get a minute. https://www.behance.net/gallery/91218143/PsDCC-21-31ja20-with-Paul-Trani

Challenge 4 completed. Not a lot of distortion in text for this one. Am going to try a couple more just generic to Sunshine Coast, and try some of the other distortions shown.
Mockup
Challenge 4
Day 4
Thanks @cold cedar ! Will take another look at that!
Gave +1 Creative Carma to ValentinePierce
post card challenge done 😀
DCC4-PT4-250120 - Photos I used (See Below)
DCC4-PT4-250120
DCC4-PT4-250120 - Edited
Why is it, as soon as you've uploaded your composition, you immediaely begin to see mistakes?
@vague shuttle Thank you! 😊
Gave +1 Creative Carma to Abraham (aka Wordsmith Hero)
Had fun making a postcard for my area in Germany.
Is the text a bit tough to read? Maybe the color scheme is off on the background?
Having a ton of fun with this text challenge!
I changed the background. I think this is better?
@young karma I think maybe make the image a bit more evident in the word as well as place Historic above Bathurst rather than over it.
More generic for Sunshine Coast with a bit more distortion and playing than the 1st one.
Mockup
Retry of Challenge 4 2nd design, the first JPEG did not save correctly and I noticed after posting
@ruby panther I really like the Rheingau Wein card. The text might be a bit tough to read because the foreground of the picture is in focus and busy. Maybe try a slight blur on just the foreground and maybe a very slight gradient to darken it? I think it looks quite professional though!
@solid linden Your Sydney postcard is awesome!
@tardy hedge Thank you so much!
Gave +1 Creative Carma to Valerie
diverting from the challenge....
@young karma Bathurst is legible to me but Historic is hard to read
@pure herald your cover is nicely creepy and your skull overlay is well done. The only thing I would change is the white text, it's pulling my attention away from the skull caper island text. I'd maybe put skull Caper Island in the middle and maybe float the five star destination underneath it in a different color.
@forest gulch I like your Day two especially the skateboard one. What struck me on the woman picture was she does not seem to be jumping very high so it looked a little off proportionately to me.
@oak mist really love your typography challenge
@pure herald I know just what you mean.🤪
@young karma Very nice. Historic is difficult to read. Perhaps use lowercase?
@ruby panther I agree with you. The background colors aren't working as well as they could but the that text is cool.
@nova swan thank you! Glad you like it!
Gave +1 Creative Carma to Patti McCoven
A postcard n'at from Pittsburgh, Pennsylvania.
did a compilation postcard of Motown. Sorry to say it's not like it used to be. We were on a roof of an abandoned building and that guy came up wearing a vampire mask....
Has gotten much better but have had SWAT in my neighborhood more than once.
@fallow bough 😳
one more Day#4 LEMON
Day 4 - Distorting Text
Day 3. Slowly catching up...
Today was the first time I've had to sit down and actually complete any challenges, so you'll see 'em all, one after another. Day 1 - Retouching to start. Various techniques for were used for retouching, starting with camera raw. I thought the coffee rings in the background were especially appropriate for Paul after watch several broadcasts. You can see before/after on my Behance Page.
Day 2: Select & Mask. The skateboarder is stock from Pixabay. I've recolored the mountains to match the given gradients. The shadow is a combination of a drop shadow on a new layer squashed thin and several lobs at varying sizes and opacities. Outer glows on moon and mountains, while model has inner glow where the moon shine bends around her. You can see before/after on my Behance page
Day 3: Color and blending. I added the flowers from the Enchanted Watercolor Kit and the background shapes are from Watercolor Textures, both template in the Art & Illustration tab when you choose New Image. I did a lot of recoloring on the model and skull. Before/after on Behance.
Day 4: Type. All the Chris Craft images are photos I've taken; some have been masked. The wood grain on the background is a Bittbox subtle wood texture. Before/after on Behance.
@forest aspen Nicely done! I think you should just remove some of the redness to make his skin look more natural 🙂
I really like the glow effects of the skateboard composition 😄 But you should make sure to make some adjustments to the mask around the fingers 😉
I believe you could also take out some of the green to blend the colors more with the purple/magenta background 🙂
@forest aspen wow! your submission for day three looks wild! The flowers around her head in combination with the paper background, ink stains and pink "lips" are such a bizarre but great combination 😄
I wouldn't even change any major aspects! Perhaps you can touch up the dark spot above the eyebrow and brighten the eyes to bring out the color 🙂
@forest ivy A+ for the symmetry and floral elements 🙂 The skull also is nicely incorporated into the design. I think you should use one consistent color system though. You have red, orange, yellow, green, blue, purple and pink all in one design. Try to limit the colors to about two or three major hue variations.
@wispy compass oh nice, great use of the weathered text look! The resolution of the map in the background seems to be a bit low. This is fine but you can clearly see the pixels and they look rather soft.
This becomes especially problematic when scaling up layers with clearly visible pixels (like pixel art)
sometimes it's more important to have clean and crisp pixels. So when scaling up layers it can be helpful to set the scaling mode to nearest neighbor. Granted this is a very rare case but IMO it can be helpful to know about this option 🙂
Thanks @glacial path ...I see what you mean...I will see if I can find a different map!
Gave +1 Creative Carma to evil
@wispy compass haha, I guess that would also work 😄
@wispy compass the text itself (which was the main point of the challenge) looks fantastic though!
lol...thanks @glacial path
@oak mist I wonder, is this one of your shots? If it is, that would make it even better 😄 - if not, that would also be fine. Nothing wrong with using great stock images. The text itself looks very natural and warped letters adhere beautifully to the contours of the water splashes. I would perhaps make some changes using Camera Raw. You could virtually shine some light on the lemon slice and the text. Also remove a bit of the cyan color of the water 🙂
@glacial path ...found a cool new map lol
@wispy compass yeeeees! Much better 😄 ! I think the warped text in the background actually complements the similarly warped text in the foreground. So this map works even better, not just because of the resolution. Thank you for updating your submission 🙂
Gave +1 Creative Carma to babsams
😀
Thanks @glacial path! I recolored the image and I see what you mean. I think it works better as a composition now.
Gave +1 Creative Carma to evil
Hi - had another attempt at Challenge 3 - Colors. My last effort was a bit one colored. Find it hard to know when I have finished my work or whether I need to add more complex stuff. Thanks
Gave +1 Creative Carma to Patti McCoven
@nova swan Thank you for sharing your insights. 😄
Day #4
DCC4.2-PT4-250120 I've had another go at Day 4 😃
@glacial path the image is from unsplash, thank you for your kind feedback 😊
Gave +1 Creative Carma to evil
DCC4.3-PT4-250120 I've yet another go at Day 4
@vague shuttle
Day 4
Syracuse—otherwise know as ’CUSE mostly for its Syracuse University athletics—hosts a big car show every summer—the Syracuse Nationals. It's the "Salt City" because salt from a nearby lake was harvested, shipped and used to preserve meat during the civil war.
Day 4 challenge
Day 4 I use several different layers using puppet warp to get this effect. Quite a challenge but fun to create
Day 4
@tiny bridge Very nice reflecting the words!👏🏽
@left sand I really like that image! The only difficulty is the text. I almost didn't see it.
@wispy compass Love how you have all the nicknames of the cities.
Thanks @cold cedar ...but it’s not my design...I love it too!
Gave +1 Creative Carma to ValentinePierce
@wispy compass I know but it still cool. I lived in that area many years ago and was fascinated by the nicknames people used for different neighborhoods.
I’ve lived here my entire life...seen many changes...I think it’s really cool too! @cold cedar ...did you ever listen to Tower of Power? I used their album from 1970...East Bay Grease
@wispy compass Don't know that one but in 1977 I bet against my brother on the Raiders to win the Super Bowl. To this day I know nothing about football but I won. Good thing we didn't bet money.
my re-attempt at the Selections Challenge...changed her clothes, saturated and played...what do you think of the updated version?
Challenge #3 - Colors
I reworked this because the dark blue at the top seemed top heavy.
Day 4 - Text
First time participating in the creative challenges! I'm excited to continue learning new things!
I'm still trying to find this place. It sounds nice, but the politics among the residents is vicious.
@stiff jungle That looks so good, really nice job! The texture and color filter really works well for that aged look. I think it might help to apply a little of that texture to the text too, it almost looks too clean to fit with the rest of the postcard. Really love the whole look of this one, well done!
@plucky turret Nice work with the text masking, the skyline looks good! This is a really good photo for this challenge too.
@cold cedar This photo makes for a really interesting texture on the text, seems very fitting for New Orleans. Both colorations work pretty well, just slightly different moods to each. Looks good!
@dire glacier Very nice, I like the vintage look of this image! The warped text is interesting, I like how it kind of follows the perspective of the road a bit. Nicely done!
@young karma Ooh, really awesome image. I love what you did with the background, the lighting and colors between the background and portrait work really well, they really feel like they’re in the same scene. I really like the soft transitions you have between the skull and face as well as the shoulder area of the portrait. Very nice work!
@pure herald This looks great Tawn! You really got a solid postcard feel with this design. Really nice work with the perspective on the text, though I almost feel like you could push the perspective transform even further to make the text at the bottom expand even more so it looks bigger and like it’s coming towards us a bit more. Could be nice to scale it up a little bit overall too and even have a little bit of “is” masked out by the tree overlapping it. Nicely done!
@compact pecan The design for the post card looks nice! I like the simple color scheme, the clipping mask design pops out nicely from the background. The mock up looks great too, I like the sort of aged look and texture to the whole image. Looks good!
@sterile jackal Very cool, welcome in, glad you’re joining us! There’s definitely a lot of things you can pick up after doing enough of these challenges. I really like the the look of the overlaid design on the face, and how similar the skull and pale skin are to each other. Gives it a more natural blend. I think perhaps it might help to use the refine edge tool within the quick selection tool for edges on things like hair to avoid any jagged edges and get a more soft transition. I actually posted a video about that in the #🔨resources section but this video might be a bit more straight towards the point. Nice work! https://youtu.be/c2I7X92IVGk

Isolate a detailed subject from its background and create a new composition. Featured artist: Temi Coker. Check out more of his work here: https://www.temicoker.co/
Start from scratch, or download practice files [https://learndownload.adobe.com/pub/learn/photoshop/complex-se...
@unkempt field Really cool effect on the Day 4 challenge! The color of the background image reflects nicely in the text to give them a cohesive feel. There’s a lot of texture going on in both elements, so it might help to separate them from each other. Perhaps by brightening up the text to make it pop out from the background a bit more? Nice job!
@oblique anvil Very cool! The diagonals of the car give the image a dynamic feel which is really fitting for the subject matter, and I really like how you used gradients with the salt texture and made the text on the car follow its form, though I think you could probably push the perspective a bit more with an Edit-Transform-perspective adjustment to really sell the effect. Love the boldness of this image!
Gave +1 Creative Carma to SamPetersonArt
@bleak fossil Hey, thanks a lot for the feedback! I’ll give that a try for sure. I’m just trying to navigate the learning curve and these challenges are definitely helping 🤘
@bleak fossil Thank you.
Gave +1 Creative Carma to SamPetersonArt
@bleak fossil thanks for the feedback! Can't wait to check that video out!
Gave +1 Creative Carma to SamPetersonArt
Day 4. Kind of simple but I did use a color lookup to change the colors a bit.
Thanks
#challenge4_distorting_type
Flensburg is known for its pure rums imported from the Caribbean and experienced a real economic boom in the 18th and 19th centuries with the production of real rums and rum blends. Flensburg thus became the rum city of Germany. From once more than 200 rum houses there are still two manufactures in the historical streets and backyards of the old town of Flensburg.
@kindred kernel - I like your font. What is it?
Gave +1 Creative Carma to Patti McCoven
@nova swan , @cold cedar , & @hidden pendant - thanks for your valuable feedback. I have updated the work, changed the font for 'Historic' and watched @brittle slate 's 'Type Masterclass' to get a better idea of fx.
Gave +1 Creative Carma to SamPetersonArt
@bleak fossil Thank you!
Challenge #4 - Distorting Type! Detroit has some pretty amazing graffiti so I wanted to bring that aspect in. 🙂 The background is pretty crazy so I wanted to keep the Detroit font more simple - like a relief in the graffiti
Challenge #3
@forest ivy Beautiful & minimalistic. I like the simplicity and atmosphere
hello all - i live in the middle of nowhere, so atlantis had to do ...
hi all! Spent way to much time on this because I couldn't decide on the fonts and image. Still not very sure if I like the result, but ran out of time. Feedback is most welcome! 😅
@fringe thicket That looks really cool, nice job 🙂 . I think it does help to loosely match the perspective of the text to the background (including the water ripples). I would perhaps go for a different gradient in the background. Perhaps you can pick some colors from the image?
Thanks @glacial path , I'm working on it! But ran into something weird with my color panel... Don't know what happened, how can I fix this and bring it back to default? 🧐
Gave +1 Creative Carma to evil
@fringe thicket you are sorting the color by the red channel. Set it back to "H" (hue) to use the default selection method 🙂
while you're at it, you should try out the other options too! Maybe you like one of them even more 😉
I'm personally a big fan of the "a" sorting method
Photoshop Daily Challenge day #4 Distort Type
@hearty wharf Often this kind of distortion looks off. It usually takes away from the image and is unnecessarily hard to read, but this is one of the use cases where it actually works in favor of the overall design, especially when combining it with the water swirl in the background. This looks like a great underwater scene and the water ripples on the text provide texture and add to the look 🙂
@wet thistle fantastic job! I love the new direction you took with the colors of the skull. It looks like metal or paint... or metallic paint! The transition between the skull and the skin could be more refined. You can go with a hard transition (possibly even adding a bevel effect to make it look like the skull has some depth to it) or a more gradual dissolve into the real skin to mask the transition point.
@gentle tundra great use of texture and lighting! The noisy drop shadow looks off though. I think you could reduce the noise effect to a limit of 1-2% 🙂
the edge of the smaller font seems to be very pixelated.
please check the aliasing (select the type tool and then select the text)
it shouldn't be set to "None"
in this example I have disabled anti-aliasing so you can compare it to the aliased version
Challenge #4: Type - Not loving it, but my previous 3D one never rendered properly. Looking forward to today's challenge.
Thanks so much @glacial path ! I did have the aliasing set to strong so I took that down to none, and also took down the noise significantly in the Drop Shadow! I appreciate the helpful tips 😍
Gave +1 Creative Carma to evil
@gentle tundra nice! it still looks pretty pixelated. are you using the dissolve blend mode?
Yes I am! Good eye
thank you so much for feedback @glacial path 😃 totally agree about distorted type, it's a fine line.
Gave +1 Creative Carma to evil
Ok last time I'll post this... haha... Normal helped a bit, but then I went back to aliasing and took that to smooth and that seemed to help with the pixilation

I really do appreciate the help @glacial path !!
Day 4 challenge Not sure which one to go with. What do you all think?
Or version 2 Had to add VCU colors lol
Thanks! @glacial path ! 👍
Gave +1 Creative Carma to evil
Making Paul Joker as he jokes with the chat all the time 🙂
Double exposure I did a few weeks ago for last challenge. Will work on another.
@gentle tundra Thanks!
Gave +1 Creative Carma to Robbieaaron
Challenge #5: Double Exposure
Playing arround with @brittle slate 's Daily Photoshop Challenge Day #5. Just discovered that with timeline when you change some layers caracteristics they apply only to the frame eddited even if they are visible in may frames. The blending option creates an awesome effect. I still need to work more on this. Any suggestions for improvement??
@fossil kettle NEAT! Could watch this all day.😀 Pouring rain here forever.
Thank you @frigid barn !! I must admit it was quite accidental most of the animation part. I'm most experimented with Illustrator but I'm so glad I'm doing the Photoshop Challenges.
Gave +1 Creative Carma to JeffrieAnn
this has nothing to do with the challenge today but I want you to see this piece I love doing fan art I have my strugles with anatomy but now Im feeling the strugle in background I feel that they are not the interest I did this piece for new years (chinese)
Day 5 - Only used the face and the tree 🙃
second version of the challenge. Too many thing going on in this one?
@fossil kettle @dim brook @tacit condor We have reviewed your design on stream! Check out the replay with Anthony Jones aka Robot Pencil (day 1)
ohohohoh @glacial path gonna watch it right now!!!
@fossil kettle the 2 piece looks much better and clear!
thank u @wicked nexus ! Yes I liked it better too
Gave +1 Creative Carma to DamaChan
After Anthony Jones Feedback from Adobe Live
Photoshop DCC Challenge #5 Double Exposure. I have made a few changes and saved multiple image files.
version #3. What do you think?
Day 5 challenge
@dim brook ayyyy Nevada City?? That's where I graduated highschool!
my attempt at typographical play play...I feel the text should somehow fade in from the back? thoughts?
Challenge #5
Thank you @glacial path for your input, I will try to do some alterations to the skull 😀 . I hope I'm able to do it.
Gave +1 Creative Carma to evil
Day 5 - Double Exposure
Made some adjustments after feedback and now I can't choose which one I like best 🙂
Also made another one for day 4. Maybe I went a bit too wild with the filters/distortions? 😎
Challenge 5
that's very nice sno.e.
Gave +1 Creative Carma to Diamondblade
Thanks @dusty pond
Man. So many cool ones today! Good job @wet thistle @plain sable @dusty pond @coral cloak and everyone! Very cool! 😍
Can it be spring yet? 😉
Didn't get to see the live stream today but got to see the replay. Here's my offering. Share your thoughts. Do you think the double sun is too much? What do you think of the way the mountain echoes her head?
Here we go for challenge #5. This is a portrait of me, taken by my cousin yesterday. It probably wasn’t a good pick, because I’m not a fan of the composition with the camera, but this was pretty fun to make. More grunge to hide all of my happy little mistakes.
@blissful wolf Wow! Both are amazing!! I can’t pick a favourite haha 👍
And Day 5 with minimal gradient background ...since I didn't realize how much the no background transparency would blend into DarkMode Discord. Oops.
@wet thistle That is unreal! Great work!!
Challenge 5: duplicate offset portrait layer, 2 flower and 1 leaf layers, multiple blending modes, edited masks
Catching up from Houston, TX
Made a few modifications.
Challenge 5
More double exposure with a bit of warping and some new lipstick and eye color. Let me know what you think.
Challenge #5 I couldn't find anything I like on the skin, and so I left it, but I did a double exposure on the rug he was laying on and the background.
Before
Double exposure challenge
which one do you like better?
Thank you @stiff jungle 😀
Gave +1 Creative Carma to capturesbykyle
Day 5 #doubleexposure
Challenge 5.
DCC5-PT5-280120 - Reworked.
@cold cedar The double sun looks good. So do the mountains framing the model's head.
The zebra is free in Adobe Stock. I licensed mine. Is there an expiry date on these freebies?
Hey guys, here's my #4 challenge design. I have chosen a poster design for the text distort. I hope you like the design!
Behance
Daily Creative Challenge - January 21 - January 31
Found this a struggle today to get images that I felt worked together. Still not happy with matching the skin tone on the two woman, so I probably need to find a filter. I tried levels but could not get to work.
Image from Pixabay (Pexels)
From Pixabay (LeoderLiebe)
Image from Pixabay
Def. need to work on this a bit more but figure I’d post a progress image!
Gave +1 Creative Carma to nungulu
Thanks @young karma.
Day 5 I'm working through what to do less of and more of with this one.
Day 5 originals
Day 4 Challenge With this version should I have the "RVA" pattern (left) or without (right)?
@keen granite beautiful work! The waterfall blends nicely with the background. I assume you have used some of the Kyle Webster brushes to create the foliage? I think you don't have to paint with the brush using a low opacity because you will lose the texture. I'm certainly not a master painter but here is a suggestion how it could look. I have also made the shadows a bit cleaner by darkening them. The exposure is slightly increased for the highlights.
this is how it would look without the original leaves
if you take a bit more time (and skill) than I have, you can almost paint a cloud of leaves 😄
@gentle tundra this already is a really good submission. I like the high-key photography style and the white on almost-white color theme is a very soft and gentle way to define shapes. I would only recommend working on the transition here
this is one of the classic examples where they blended the background with the foreground
you obviously don't have to do the same 😉
@glacial path I really love that example with the subject to background transition! Thanks so much- I think something like that will work better 🌿
Gave +1 Creative Carma to evil
@hallow tiger I love the idea with the water and the fog to create some depth to the composition. But since this is probably a lake and not an ocean I would suggest creating the water reflection from scratch instead of using the water ripples from another image
Luckily it isn't that difficult 🙂
First I created a copy of the entire layer
then I removed the water
By using the free transform tool (CMD/CTRL + T) and right-clicking the layer you can flip it
Now we just have to darken it slightly, color correct it and add some ripples
To darken and color correct it, I have used the curves adjustment layer
now it looks darker
@hallow tiger now we have to apply the ripples. move the flipped image so it's completely visible
then apply the ripple effect
you can also use the ripple filter
find a distortion amount that looks natural
then apply the filter
Using the free transform tool (and the shift key), squish the image
@hallow tiger now you can add some fog to the foreground and you're done 😄
after that I would reduce the effect around her face a bit to make the image more clear 😉
hello all - here is my double-triple multiple exposure ...!
@hearty wharf haha, sorry about the tutorial spam 😛
ha ha @glacial path - this is very interesting, i didn't want to interrupt the lesson!!
@hidden pendant I think I know why this was so difficult for you. The source image of the person in front of the dark background is already very low-light but the forest image is exposed normally. Mixing those two lighting schemes is very difficult because you have to essentially match a day to a night scene. You can make your life much easier by picking an already matching background image
this makes masking the image almost effortless
@hidden pendant If you like the original image you will have to do some color correction to match both images 🙂
with and without color lookup
Either I uploaded the wrong one or there's not much difference.
Had fun with this. Need more practice.
@young karma Like your colors and the wave effect on Sea is sharp looking 🙂
Thank you @nova swan 😋
Gave +1 Creative Carma to Patti McCoven
Updated work with text and clipping masks
Here's my final from this morning. Basically add gradients, convert to Smart Object, Liquify. Then get fancy with patterns, blend modes, and the Filter Gallery (glass).
The wavy shapes in the background here is done by liquifying a pattern of horizontal lines.
@hearty wharf Your multiple exposure looks really nice.
thank you very much @oblique anvil 😃
Gave +1 Creative Carma to KieferCreative
Challenge #6
hello hello - what fun with rainbows! my eyes have gone a bit funny now.
here are the starter files ...
thank you @brittle slate - such an inspiring challenge!
Gave +1 Creative Carma to Paul Trani
Photoshop Daily Creative Challenge Challenge #6 Prismatic Design Challenge. I took my own assets and design. Used a lot of Gradient.
Day 6 - Gradients & Filters
thanks for feedback - here is an update!
Day 6 updated after feedback. Still working on it. Thanks so much!
I love it! @hearty wharf
oooh @keen granite cool orb!! thanks, such detailed feedback!
Gave +1 Creative Carma to LeahMichelle
@keen granite @hearty wharf @dim brook @warped saddle @brittle slate @young karma @static coral we have reviewed your work on stream 🙂 please check the replay to catch the review.
and here is an update on my update!!!
Challenge #6
Hi everyone! Here's my entry for today (day 6). Had fun playing around with liquifying patterns 😄 and probably went a bit overboard with it. Would love to hear what you think of it
Day 5 : Double exposure
my attempt at a double exposure challenge. I wanted it to be warm. is it? does it work?
@hearty wharf thanks!
Gave +1 Creative Carma to Tan_2019
@wet sentinel that's beautiful
alternative to share...thoughts? is it indisdinct or does the style work?
@plain sable that's awesome!
@forest aspen so cool
Day 6 - Prismatic?
dig the style @willow nebula
I made updates. Thanks for the always awesome feedback! @glacial path
Gave +1 Creative Carma to evil
Changed globe size and reflections. Cleaned up subject mask
Day 5 Double exposure. Do all the elements blend well together?
Day 6: Let there be color lol 😜
prismatics
@glacial path Thank you for your imput, I love the double exposure look but it appears it may be something I struggle with. Will be going back again and reworking, I did love the combo but knew the colour match wasn't quite there and being really late at night wasn't helping.
Gave +1 Creative Carma to evil
@keen granite Very cool! Really love the color contrast in this. Great graphic read on these shapes! I think it could look nice to give the sphere up top a little more brightness or even a bit of a glow to really make it pop. Nice work!
@kindred kernel Great background effect! I like how you repeated the colors from the background in her glasses, it ties the image together nicely. Nice work on the masking as well!
@hearty wharf I really like how this image is so colorful but at the same time kind of has a subdued feel. Very cool, really nice balance of colors. The grain texture also adds nicely to that feel, looks good!
@pulsar walrus Nice, work, the masking looks good in this, nice graphic read too! It might help to scale up the rock/person a bit to have a bit stronger of a focal point, but that's really just personal preference. Good job 👍
@wispy compass Really cool colors and effects on the Day 6 piece! Really interesting mix between abstract design and images. The colors work nicely together two and give some good contrast between the figure and background!
@fallow bough Looking good Ken! I like what you did with the colors in the scene. The bubble and whale are a really interesting surreal element. She almost appears as if she’s in front of a green screen, I wonder if using a color layer, photo filter, or something like that could be an interesting way to get a little tint of coloration from the scene onto her. Just a thought, nice work on this!
@haughty gale Very nicely styled! I really like the more graphic design elements of the background and how they balance out the more graphic look of her shawl. It also really helps the face contrast against the background and pop out!
@velvet hearth Really cool rainbow effect with the music waves! The colors really make him pop. I think it could be nice to mask his face and hands and bump up the brightness with a levels adjustment and maybe even add a little boost to the saturation. It might help him fit in with the rest of his colorful body and bring a bit more attention to his face. Nicely done!
@willow nebula Really interesting how the triangles with that gradation look so sharp and the shawl almost looks like a melted form, very cool. Really interesting feel to the whole image. It might be nice to bump up the contrast around her eyes for a nice focal point, nice work!
@plucky turret Haha, very nice! I like the sense of perspective on the lights beams. The way you split the color of the image with them in a nice touch!
@dire glacier Really cool effect! I like how the arms almost become wing-like. The version with the background looks really cool! I like how much the stars appear in the ice. I think the version without the background could have an even lighter color to really make it pop!
@forest ivy Looking good!I think the transition from the face into the mountains looks really nice! It could be cool to see some color or texture in the white space between the mountains and leaves, something to ease that transition maybe? But that’s just a small suggestion. I like the addition of the birds, makes for some nice movement!
@slim raft I really like the way you blended the skull with the face, the skull nose with the lips over the skull’s mouth work really well together and have a nice balance. The illustrated looking flowers in the background are a nice element too, it gives the image a really interesting feel. Very cool!
@mighty linden Really cool combination of layer effects and blend moves here! I like the rainbow effect from the eyes along with the more transparent modes. Some really cool effects going on :D
@nova swan Very cool background on this challenge! I really like how the texture of the background contrasts with the softer texture of her jacket. There’s a nice contrast between the figure and the background over all. Really nice warm/cool color contrast as well, nice work!
@plain sable Hah, very cool design on the Day 6 challenge! Really love those land scape colors and the soft transition between them. I wonder if the rainbow beam could be a bit brighter to give off more of a glow effect? Maybe another blending mode might do that better, sometimes I even overlay more than one blending mode at different opacities to get the right look. Really nice design!
@vague shuttle Really cool to see the variation in your two double exposure images! I like them both, but I really love the second one. Something about the colors and contrast seems more unified and works really well. I really like the gradation in contrast as the elements move back away from the face, but there’s still some nice contrast in the face itself to give it more focus. Really great image!
Laser cat attacks! Day 6 Prismatic. The text says "9 lives" (Hopefully. I used google translate). I had to Export > Save for Web (Legacy) instead of just Export as or else the gradient is messed up. Does that happen to anyone else?
Day 6 challenge
@fast moth Awesome image! Did you draw it yourself? Did you use Illustrator or Photoshop?
@young karma Beautiful Double Exposure you created 😍
Thank you @wet thistle !
Gave +1 Creative Carma to Carry
Challenge 6, this was my first time working with filters in photoshop so learned a lot of new interesting things today, also worked with camera raw on this one
thanks so much for feedback @bleak fossil - you are such a great motivator!!
Gave +1 Creative Carma to SamPetersonArt
Challenge 6. #1 Still playing with all the info Paul gave us.
this looks terrible! JPEG screwed up my PSD.
First I used Export As. Did not work well. This time I used Save As. That is weird.
hi @ruby panther - same happened to me, i had to flatten the smart object first. looking good!
@forest ivy - yes, this seems to happen!
@hearty wharf Some strange things are happening with PS 2020 when saving to external hard drives. I've started to save everything to my desktop then move it to my hard drive.
@ruby panther yes, i haven't noticed this before ... but then i don't work with rainbows that often! sounds like a faff, not saving directly!
@hearty wharf First off any PSD's with Smart Objects would only save to 99% and never finish. I had to force shutdown PS and restart my computer to open PS again. @glacial path said PS is working on it and gave the idea of saving to desktop first. Seems to work.
@ruby panther oh no, that sounds like a right pain - good thing that tim's tip works. i'm slightly vary of smart objects, as they can get so big. i had a crash once where i completely corrupted one and had to try and retrieve what was left of it via illustrator!
Thanks @bleak fossil !
Gave +1 Creative Carma to SamPetersonArt
Enjoyed doing this but wish I had a bit more time for the tweaking
@bleak fossil Thank you Sam!
Gave +1 Creative Carma to SamPetersonArt
Day 6: Prismatic Shapes. I used the full moon to provide lighting behind the model's head. Do you think it's effective?
Double exposure challenge - I think I went a little crazy here with a picture i took. i found a new love in Photoshop 😍 Thank you @brittle slate for showing me how to do this. I have never done this before and I am learning loads this week.
Gave +1 Creative Carma to Paul Trani
The original
DCC6-PT6-290120 - Photos I used
DCC6-PT6-290120
DCC6-PT6-290120 - Photos I used
DCC6-PT6-290120
Challenge no 6. Think perhaps I should have left the ground black and white, any thoughts.
@vague shuttle I like the orange one 👌
Yesterday's Challenge. I did my own thing and used the numbers in the back. I am loving these challenges since I have never done this effects before or even attempted to try - Thank you guys!
day#6 Prismatic Shapes
Day 5
@hearty wharf Saving files to exFAT formatted drives can freeze before the file is saved. As a workaround, you can save the file to a drive formatted with a different file system than exFAT. We are working with Apple to address this issue.
aaah - thanks for explaining @glacial path 😃
Gave +1 Creative Carma to evil
Gave +1 Creative Carma to SamPetersonArt
Thank you @bleak fossil ...I wanted to do more but felt less was more in this case 😁
Who doesn't love laser cat eyes & rainbows 🐈 🌈
hi all! Here's my entry for day 5. Was still cathcing up 😅 Would love to get feedback
@gentle tundra I love this 😀
@oblique anvil Thanks so much it gave me a good giggle
Gave +1 Creative Carma to KieferCreative
My Day 6 Prismatic Thingy
@oblique anvil I love these spacey dogs! and that pipe! 😁 Very cool smoke effect happening
Thanks @gentle tundra The dog with the pipe is from an old photo I found at a flea market. I've been wanting to do something with him for a while. 🙂
Gave +1 Creative Carma to Robbieaaron
Prismatic Shapes
Love the detail of playing with the blur on the gradient shape! Thanks for the pro tip.
Catching up on sharing my projects... before & after for Day 1
@bleak fossil Thanks for the feedback 😀
Gave +1 Creative Carma to SamPetersonArt
Day3
Trying to make colors work...🤔
@bleak fossil Thanks for the feedback. Fought getting rid of the green screen look but am still not happy. Problem was harsh lighting with subject too close to backdrop.
Gave +1 Creative Carma to SamPetersonArt
Day 7 challenge
The truth about the world spinning Photoshop Daily Challenge #7
Cool @static coral! Looking good!
@Paul Trani#5521 I really appreI truly want to thank you from the bottom of my heart .
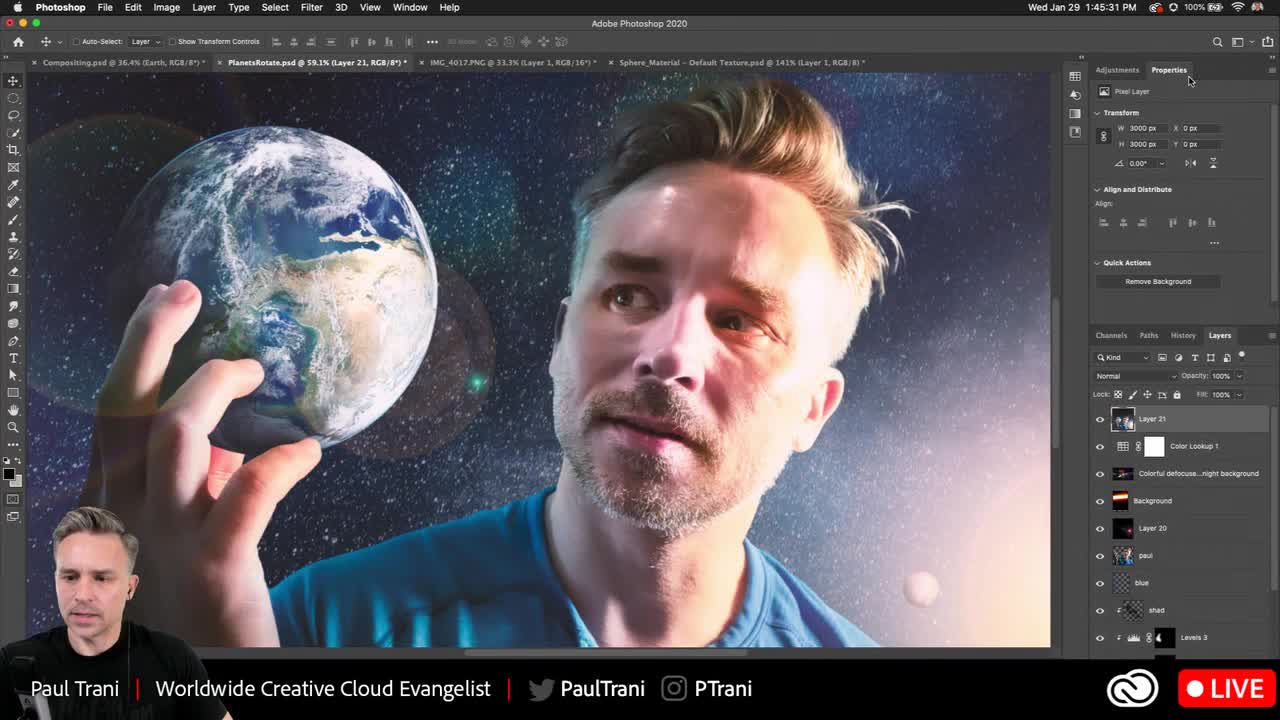
Day 7 - Paul Trani in space!
today's work in progress
I thought the pensive look needed a quote from Carl Sagan. I went for a moving moon also
DCC - Day 7
Day 6 - Prisma
Day 7 - With the fingers on the earth...
@hearty wharf @young karma @kindred kernel @willow nebula @dim brook @pulsar walrus @placid trout @static coral @fossil kettle @fast moth @fallow bough @coral cloak @proper cave @stark goblet @keen granite @umbral lichen @oblique anvil @fringe thicket @gentle tundra @honest gorge @pure herald @ruby panther we have reviewed your work on stream! Please check out the replay 🙂 (Making Lightroom Presets with Arielle Vey - 1 of 2)
V 2 with color filter
Thanks, Tim👍
@glacial path thanks man
Gave +1 Creative Carma to evil
@glacial path Thank you Tim!
Gave +1 Creative Carma to evil
Thank you @glacial path !!! Is review and feedback always at the same time? I LOOOOVE this.
Gave +1 Creative Carma to evil
@fossil kettle yes, usually 90 minutes into the stream 🙂
@glacial path do you happen to know what's the hashtag for the Behance Project to showcase the challenges??
Thanks @glacial path ! 👍
Gave +1 Creative Carma to evil
prismic play...couldn't quite find the right pattern for the BG. thoughts on better backgrounds?
Prismatic
Today's Challenge
today's challenge (just did this super quickly since i just heard about the challenge!)
Another version
And another
This is my second version after the awesome feedback I had in the Adobe Live with Arielle Vey. I think is much better now.
I couldn' finish well... Steak needs a lot to edit left xD @brittle slate
I have some more work to do on this—clean up the boat and grass masks and decide if the background is too dark and/or foreground too bright. Let me know what you think. Thanks.
Day 7 - Compositing
Day 6 adjusted 🙈
Alternate prismatic ... feedback always welcome. I thought this one pop pop popped more?
PsDCC 29ja20 compositing. How is the lighting?
Composite
Day 7
Day 7
Day 7 - Representing the world we live in....so many scary things that are happening. After a while you just get used to it.
And another try. Did some content-aware cropping, lens flare, lighting. Does it feel unearthly or does it need a LOT more work?
I thought this needed a little "moonbeam" light
Take 2 (the PNG lost the shape details) for belated Day 6 challenge
My Day 6 not-so-prismatic image revised slightly, based on comments in today's review. I added some shadows to the dog and the ball.
@dire glacier I like your concept. Nice job.
Thank you @oblique anvil
Gave +1 Creative Carma to KieferCreative
This is my upload to the Compositing DCC
I used Paul's photo and made him into a Thanos-like god creature. He's about to toy with a couple of astronauts. The original Enterprise is coming to the rescue, the Silver Surfer is curious about the whole affair, and ET is in his hair.
Finally got to my prismatic. What do you think? How can it be improved?
@nova swan Very nice composite!
@oblique anvil thank you, I liked yours better than mine 🙂 I feel like mine got overworked , I just kept fiddling.
Gave +1 Creative Carma to KieferCreative
PS DCC #6 Prismatic Shapes
@gentle tundra Hah, great image with the colorful cat design. I really like the bold gradients in this image. They're extremely saturated but still have a good harmony together. It could even be cool to bounce a little of the pink and yellow colors into the edges of the cat with the right blending mode to look like reflected light and fit the cat in the scene even more. Nice work!
@velvet hearth Very nice job with matching the lighting direction on the planet with the lighting of the scene! I think you might be able to get a cleaner edge on the hand with the quick selection tool, especially the refine edge brush within it. Though the masking is looking great everywhere else, nice work!
@wet thistle Very cool image! I really like how the background compliments the surrealness of the rest of the image and adds some nice color contrast. The skull/globe is a great focal point with how bright it is, but I think you could probably fade off the darkness on the girl a little as if the globe is casting a bit of light on her upper half. It will also strengthen her as a nice secondary read. Really nice design!
@unkempt field Day 7 is looking good! I like the really bold colors and graphic shapes! The gradients are looking solid, it could even be nice to see the background landscape get a subtle gradient tint to it. That might really pop the face out even more as a focal point and the only element not affected. Nicely done!
@mighty linden Really nice job on matching the lighting to the scene on the Day 7 challenge here! I really like the contrast of the cool and warm lighting on the head. I feel like perhaps the whole image could use a slight levels adjustment layer to boost up the lights a bit, might make the face pop a bit more. The masking is looking good too!
@prisma raven Very cool Jeff, really interesting image! I really like the lighting effect on the statue figure. The masking with the text is a nice touch as well! The statue and big blue sphere on the left side seem to be competing size wise a bit, so it could be nice to shrink the sphere slightly and enlarge the statue a bit to give them a more clear visual hierarchy, but that might mess with your text masking too much. Good stuff!
@vague shuttle This is really cool! very bold look. My only suggestion is that there’s a lot of really extreme contrast, and it might be best to reserve the most for the face to keep it as a dominant focal point. So perhaps toning down the brightness of the “5” just a bit, and even making that fade between the red and black to the right of the eyes a bit more gradual could help. Nice work 😄
@honest gorge Day 6 is looking good! I like the overlapping of shapes in this image. There’s also a nice balance of colors going for desaturated to extremely saturated with steps in between. It gives the whole image a nice balance over all! I wonder if the 9 and 5 were slightly smaller if it might do the same thing to the size contrast in this image, and really allow the portrait to be the dominant element. Nice job on this!
@wispy compass Hah, very nice work on the Day 7 challenge! Nice work compositing these together. Though you might have lost the edge of the earth on the dark side, it seems like it’s cut in a way that’s not quite perfectly round. I think the ellipse tool could help you match the right side and give you nice guide for where the dark edge might be. It might also look good to have the earth a bit bigger so the car overlaps it slightly. Since right now it’s almost creating a bit of a tangent and them overlapping might add some nice depth. Just some ideas, nice work!
@bold plume Hah, very nice. I like how the lighting on Paul seems to match the warm interior lighting quite well. Really the only thing I think it’s missing is a bit more shadow on the underside and left of the steak, you already got a pretty nice shadow where his hand is holding. Nice work XD
Thank you so much Sam! You're amazing... Thanks for the review bro! ❤️
@cold cedar Hah, very nice! I like the lighting effect you added on the face, that’s a nice touch. I think you could probably do a levels adjustment to boost up the brights a bit, and increase the contrast a bit more overall. It could be nice to add a bit of a shadow on the underside of the earth to sell that lighting effect a bit more. Maybe something like this?
@oblique anvil Very cool! This image has a great feel to it. I think it might help to make the water more clear by changing the value, and maybe blurring the grass that’s being reflected. I think maybe the water could be brighter with a reflection of the full moon. A vignette might help the image too, to focus the brightness more in the center. Maybe something like this? Really nicely done!
@fossil kettle Really nice job on this! Glad you were able to get some feedback during the live stream. I really love the intensity of the lighting on the cat, it really matches nicely with the light source. It could be cool to do a levels adjustment just on the earth to boost up the brights, and mask it so it’s only hitting the side closest to the light source. Might help the two elements fit together even more. Well done!
@molten axle Really interesting how different the blend modes/colors can make these look. The first one is very retro/dream like in its colors. I think perhaps a levels adjustment to increase the contrast could keep that look while still giving it a bit more pop. Cool effects!
@proper cave Nice work! How many different images did you use for this challenge? It all fits together very nicely.
@sturdy vault That background texture really gives some great contrast to the face. I like the cohesive colors in this design too, it works well!
@fallow bough The Kodak function does a nice job of unifying the color and contrast in this image! It might help to apply a little shadow to the under side of the globe and her hand to sell the lighting a bit more. Nice work Ken 😄
@bleak fossil. Thanks for compliments and encouragement.
Gave +1 Creative Carma to SamPetersonArt
Thanks @bleak fossil. Exactly what I needed. I'll post a revised one later.
Gave +1 Creative Carma to SamPetersonArt
Thanks @bleak fossil ... I did use the ellipsis tool but obviously not good enough. I will work on it again in the morning and resubmit it...I like the idea of a larger earth too!
Gave +1 Creative Carma to SamPetersonArt
Day 7
Challenge 7, I also done version with usual moon, but this one looks more interesting to me
Added shadows and levels, re: @bleak fossil. Couldn't quite get the levels right.
Compositing Challenge 😄
Challenge No 7. This one came together a bit quicker than the last 2. So much so I could not decide between 3 backgrounds.
I warped the earth image to look like a bubble and used different blend modes on the different backgrounds help keep the illusion. Also used different Colour filters.
This is the 1st
This is 2nd
Challenge 7. I used @brittle slate assets and added my photo of the moon with the plane.
DCC6-PT6-290120 - Photos I used
DCC7-PT7-300120
DCC7-PT7-300120 - Photos I used
DCC7-PT7-300120
I am obsessed with this class. I cannot stop adding things to it now that I know how to. I just couldn't make the satellite paths to glow properly
Images used
Gave +1 Creative Carma to SamPetersonArt
what's the difference between opacity and flow in the brush tool options?
@bleak fossil Thank you for the feedback, I'll try to make the adjustments and repost.
Gave +1 Creative Carma to SamPetersonArt
@tacit jay I really like your composite—the colors, the the globe ball, the lighting all work well. Nice job.
@oblique anvil Thanks
Gave +1 Creative Carma to KieferCreative
Day 7 - Compositing
Compositing #light #color #masking
Thanks for all the great tips and tricks 🤟 groovin'
@bleak fossil Thanks so much for the great and helpful feedback!
Gave +1 Creative Carma to SamPetersonArt
Thank you @bleak fossil for your always attention to giving us feedback. I used your suggestions to improve the earth and match the cheetah. I'm posting the images I used.
Gave +1 Creative Carma to SamPetersonArt
here is the resulting piece.
hello all - here is an update on my space-sealion ... couldn't resist to add some lens flare and play with the colours!
Some very subtle differences. @bleak fossil I added the vignette, but couldn't navigate my layers well enough to add that bit of moonlight to the foreground.
Here are the assets.
Thank you @bleak fossil, do you think I improved it?
Gave +1 Creative Carma to SamPetersonArt
Hi! Here's my attempt at the challenge of day 7. I'm not really happy with it but I don't know what to do about it. Seems too much details? 🤷♀️ Would it be better if the earth was really big in the image? Light & shadows are off too I guess... 🤨
@fossil kettle adding more highlights will make leopard pop.😼
Day 7 I'm not sure if I over darkened all aspects. What do you think?
Day 7 originals
Day 7 I tried to dabble with PS animation. 😃 Thanks for such great tutorials @brittle slate
Gave +1 Creative Carma to Paul Trani
That's so beautiful @keen granite ! I love how you made the sphere glow, and I love the animation! Did it take a while?
@bleak fossil Thanks for tips. Added shadow to globe left side of subject. Dodged right side of face to balance.
Gave +1 Creative Carma to SamPetersonArt
@fathom moon I love this very other worldly composite.
hi!! I couldn´t see where you posted the link to the brushes @brittle slate . Everything went blank in a sec!
how do you grab those photoshop preset brushes?
Here you go Vivi.: https://www.dropbox.com/s/sdltk10yrgoyuu2/LensFlares.zip?dl=0
But only because you watched the livestream and know how to make them. #teachamantofish
... thank you @oblique anvil
Gave +1 Creative Carma to KieferCreative
Thank you @brittle slate
Gave +1 Creative Carma to Paul Trani
Glad I could hep!!!
thank u @brittle slate u and your challenges rock!!
Gave +1 Creative Carma to Paul Trani
Thank you @brittle slate !
Gave +1 Creative Carma to Paul Trani
Here's my final.
@sturdy flare thanks!! No it didn't take long at all. The thing that took the longest was rendering lol. I watched @brittle slate 's master class for the 3D and animation how to: https://www.behance.net/videos/e2f56da2-9bc1-4d96-b545-ae0378c61d7d/Creating-Worlds-Using-Creative-Cloud
Photoshop - Creating Worlds Using Creative Cloud
Gave +1 Creative Carma to Aria_Kitten
Oh nice @keen granite , that's really cool! I'll have to try that sometime
#paintwithlight_challenge8
Inspired to try Arielle Vey LR workflow and Holiday Preset Pack on a photo of mine.
@bleak fossil ... how does this look?
here is my first stab at day 8 - made my own globe!
@fast moth This looks great, really wonderful job on the masking of her hair! The lighting of this whole image works really nicely. It might help to feather/soften the edge of her eye “beams” so it’s not such a hard cut off. Or if it’s supposed to be a light scanning type effect it might help to warp the edge of the beam to curve with the surface of the globe. Looks good!
@kindred kernel Looking good Gerard, I really like the perspective on this piece! The whole image has a nice cohesive color palette too, nice work!
@dire glacier Really nice work on the Day 6 Take 2 challenge. I like the cool colors of this whole image! I feel like maybe you could pull a bit more focus on the ice skater by making him a bit bigger in the scene, putting a bit more light around him (maybe a masked levels adjustment for that area or a little color dodge), and maybe even a bit of a vignette around the whole image. Nice work and cool effects with the light beams!
@twin flume Hah, very cool, I like all the elements you added. The lighting fits the image nicely as well. I think the masking on the hair could be refined a bit. The quick selection tool with the refine edge brush tool can really help with those more complex edges. I made a video about it I posted in the #🔨resources section in case that helps. Nice work!
@nova swan This is great! Very well composited together. The texture and colors of the background work really well together, and the color shift in the heart makes for a great focal point. Always cool to see the source images too. Very nicely done!
@bleak fossil Thanks for the feedback. I was actually aiming to have the "prism"/light beams bits be more of the focus, which is why the skater is darker. I'll check out the protip!
Gave +1 Creative Carma to SamPetersonArt
@hearty wharf very cool. How did you make your planet?
thanks @oblique anvil - i started watching paul's stream that leah michelle posted further up, and realised i can't do a quick one in 3d, so i layered some colours and liquified them, added a highlight and shadow ... the glowing bits are brushes! 😃
Gave +1 Creative Carma to KieferCreative
something's coming!! Thanks for the Brushes @brittle slate I played with the presets soooo many ways I can use this in my creative process.
Gave +1 Creative Carma to Paul Trani
still working on this one
@nova swan Very cool! I think moving forward you could darken down/increase the contrast of that foreground rock bridge, and even lighten the background just a touch to separate those two elements. Really like what you have going on with the lights!
here is my version 2 - proper meteor shower this time!
@bleak fossil Thank you for the suggestion is this what you meant?
Gave +1 Creative Carma to SamPetersonArt
@nova swan Maybe something more like this? Typically you see the most contrast (specifically the deep darks) in closer objects and atmospheric perspective causes that contrast to lessen as it gets further away. Of course a night scene will affect this a bit, but same idea. Here's an example of environment thumbnails that focus on this principle too, focusing on values in the foreground being the most dark/contrasted. Hopefully that makes sense.
#challenge6_prismatic
@bleak fossil I see what you mean that is better. Is that a brightness contrast layer you used?
@nova swan I used a masked levels adjustment layer, then touch ups with a multiply layer for any extra shadow and a color dodge layer for any extra lighting
Definitely my 3 go-to layers XD
I'm very inspired by everyone's work on these challenges ! Also the painting with light and all the galactic images are really making me happy. Great work all!
Day 8 - Light
#✂challenges-feedback Paint and Light Photoshop. any suggestions?
Day 8 - Too many possibilities ... Fun!
attempt at compositing...does it jive? do the color lookups work? 'tis a privilege to be among you ! 😎
Day 7: Compositing with planets. Mother Nature? Moon Goddess? A friend took this picture of me yesterday with an iPhone. Yes, it has been retouched -- I call it the "spa treatment"
Day 8: Result of global warming???
Here's another fun one.
@prisma raven nicely done! The tower itself already looks very magical, so the added galaxy is a beautiful extension of that design 🙂 for those dim light flares I would go for a more colorful version though. the gray light looks a bit off. You could also make the halo smaller to indicate the reduced light amount emitted from the source 😄
@forest aspen Wow, I am really impressed with the transformation of the 8th challenge! You can really feel the glow of the fire 😄 I believe you can improve this look even more by adding some heat distortion to some parts of the image.
Fixed shadow
@forest aspen but you have to use this effect sparingly or it will look wrong. Some added smoke could also help to build a convincing fire effect
Substituted fire background on yesterday's challenge. Zoomed in on other and realized it was an oil painting so didn't blend as well as it could.
@forest aspen I wish your submission for day 7 also had some glow around the moon. It really looks like the hand should be lit by the moon 😄
@fallow bough As always, great work! I think this could be improved by adding some light which wraps around the subject. The main light source is behind the person, so you would expect some light wrap especially on the brighter pullover 🙂
when painting a shadow, try to use the blend modes multiply or color burn. this looks a bit like the normal blend mode which will remove the texture of the pullover
if you look at the real shadow, you can still see the fabric texture
@vague shuttle Woah, this is awesome! You don't see a lot of striped lemurs in space 😄 - the mask of the lemur looks great and the idea of the added planets helps to fill the composition.
I think you can improve some things to tie the composition together. The planets look very small; if that's your goal, then you don't have to change anything. But if they are supposed to be regular sized planets, I would recommend moving them behind the lemur layer. You could also distribute them more in the composition.
The colors of the lemur seem to be very busy. I can see a lot of high-contrast colors (red, orange, yellow, white and black). The overexposed parts don't really work too well with the low-contrast highlights of the earth and the other planets. Saturn for example has really smooth colors and is reasonably exposed. the moon however looks super dark even though the log right next to it is overexposed.
I would suggest dialing back the color correction of the lemur and matching the colors of the planets to that layer.
Then you can start adjusting the colors overall to match the space theme. Usually that means removing some red or green to create a magenta or cyan color cast
@kindred kernel Well done! I like the added lens flares and the nice portrait shot. I would slightly reduce the contrast of the space background to bring back some of the details in the darker areas 🙂
@dim brook What a great shot and really creative idea 😄 - I would suggest tweaking the warm colors of the two players to match the overall cool background.
To select skin tones, you can use the color range tool
adjust the fuzziness
click ok
open camera RAW
and decrease the white balance
click ok to close Camera RAW
@willow nebula Ha, this looks strangely eerie. you can make out human shapes but you can't quite tell if they're really there. I bet you have used one of these blend modes, right?
@glacial path Right! I used linear dodge, dissolve, a normal layer and divide on top of each other. Copied them and flipped them horizontally, usw, usw!
@civic goblet yeeees! moooore glow 😄
@civic goblet the glow of your portal already looks great but I believe it could be even stronger. the sky could probably be also darker (this is your chance to add some stars!). I have also added some highlights to the person in front of your portal plus some particles
@wispy compass just a tiny trick: it looks like there still is an edge here. you can use the levels adjustment layer and drag the blacks slider to the right until the edge disappears 🙂 this will get rid of the border
Day 7 Challenge - Compositing.
@glacial path Thanks for the feedback. When I replaced the background, I forgot to redo Match Color. The new fire has much more red than the previous so I've redone it here. Also redid the shadow on the sweater using Multiply as suggested.
Gave +1 Creative Carma to evil
@bleak fossil I used three images. The stars. The Earth. The astronaut and moon in the foreground. I was going to add some asteroids, but I got sidetracked and forgot.
@forest aspen #1 fun #2 sad
A little overdone with the light blobs, but time to call it a night.
Challenge 8, first time working with brushes, didnt make much, but been trying to create effect of glowworms flying around
Day 8. Haven't used brushes like this before. Super fun!
Paint with Light ... on a blood moon. Not getting my ideas to gel so many you can offer some advice.
DCC8-PT8-310120 - Reworked
Challenge 8 Paint with Light. Had so much fun creating brushes with this one. I think the cats are discussing which light/s they need to chase.
Images used
Day 8 - Paint with light.
2nd go at challenge 5, I have darked the forest with colour match (to woman on right) and also attempted to change the lighting on the face on the left side of the road, so it matches the lighting of the face on the right. Not sure if the matching of lighting really worked that well. I tried to dodge and burn, but not that successful either.
@glacial path Thank you so much for the feedback, from which I learned a couple of new things-YAY! I adjusted the skin tone of the player on the right, and adjusted the white balance, but wasn't quite sure what to do with the one on the left. I'm tempted to change his shirt color all together.
Gave +1 Creative Carma to evil
Hi! I made a new one for Day 7. I think it's much better than my first attempt, but feedback is always welcome!
Now on to yesterday's challenge and today's of course! 😀
Sorry so late. Beauty is only skin deep.
Contest 7
A little late to the game. Let me know what you think!
hello all - happy friday!! have a lovely weekend, here are my butterflies ...
and here is the still, in case the gif stops working ... thanks for a fab challenge!
@oblique anvilReally like the little glows in flowers.
@pulsar walrus Nice work, I really like the focus the color of the sky and text brings. I think the right side of the text gets lost a bit due to it being a darker purple. Perhaps choosing a lighter purple for that side of the gradient might help. Nice design!
@hearty wharf The globe looks good! Nice texture and contrast. I really like how subdued your background is contrast wise, really helps the foreground read well and gives everything a nice focus. Nice work!
@fallow bough Very cool Ken, the spotlight effect looks really good. I like the dramatic look and feel of the image too 👍
@wispy compass Ooh, I really like that change. It feels more natural to me. Nice job with the adjustments!
@oblique anvil Really nice, the colors and lighting of the flowers look really good. The perspective adds a lot of interest too.
@fossil kettle Ooh, really interesting. Very festive Christmas feel with those lights. I really like the lighting on the foreground rock in this one, really nice under lighting then cool blues in the shapes. Makes for some great contrast, looks good!
@rigid wolf Really nice shapes and colors in this design! I like the feeling of the overhanging arch. I think the masking of the foreground stone bridge could be a bit cleaned up, especially around the bush, I think the refine edge brush within the quick selection tool could do the trick for that. If you still get a bit of the white halo around the edges you can always go to Select at the top and condense the selection 1-2 pixels which usually fixes that issue. The spot light on the path looks good!
@plain sable Really nice, really solid compositing on this design! Great work with the shadow on the hand. I think you could maybe even push this shadow effect a little further. Maybe on the right/top of the globe if the light source is down the the left, and maybe even use it further into the wrist and on the right side of the thumb. Space always seems to have pretty stark lighting and it might help push that feel more. But what you currently have looks great!
@left sand I really like how well she fits in with the color of the scene in your Day 7 challenge! The flowyness of the hair kind of works with that water effect too. I think it might help if you lightened up her topside a bit, and/or add a little more shadow to her underside to sell that effect of the light coming through the water like we see on the floor. Looks good 👍
Thank you @bleak fossil I'm soo glad you liked it!!
Gave +1 Creative Carma to SamPetersonArt
Yesterday's Challenge
@young karma That masking is looking really solid, especially the hair! The colors seems to have a nice cohesiveness to them too. Well done!
@velvet hearth I love the way you handled the light in this! The light going in a big loop under the bridge and getting masked out on the other side adds some really nice depth. The warm cool color contrast also looks really good and you did an excellent job of lighting the girl to make her the focal point. Looks great!
@prisma raven Very cool to see how much you transformed this image! I really love the color shift and the warmer temperature of the light really helps this pop. Really nicely done 😄
@forest aspen Really nice job getting that hot lighting from the fire onto the rock in the Day 8 challenge! Thought the giant flames might look more realistic if they didn’t have such long smooth forms, since it seems like that’s how fire reacts when in a very small form like a candle, but it kind of has a cool surreal look this way too. I also agree with what Tim said about having the moon cast a glow on the hands. Would really help fit it in with that image even more. Nice work Marie, these are looking great!
@vague shuttle Nice work! I think the colors look like they fit together, but I feel like there’s a texture all clash in this image. The lemur and branch has so much intense texture (from the background I assume?) but that planet is really smooth and feels out of place. I’d either add texture to the planet (and maybe mask it behind the branch?) or remove the texture from the lemur. That might make the whole image fit together a bit more. Looks good!
@bleak fossil Thanks for the feedback. I will implement the proposed changes.
Gave +1 Creative Carma to SamPetersonArt
@kindred kernel Looking good Gerard, I like the style of those light orbs! The masking is looking good too. I wonder if doing a pass to cool down the lighting on the people might help. They seem to have a really warm lighting on them like indoor lighting compared to the environment they’re in. Maybe even a simple cool photo filter could tone it down just a little bit. Nice work!
@dim brook Really cool image! Interesting mix between the grass and lights that imply a stadium and the Rocky Mountain terrain. The color and shine on the ball give it a really interesting metallic look, like this is a promo for some championship, hah. It might help to use the light stars/flairs on key points (like the lighted portion of the ball) to really create more of a focused point where you want the viewer’s eye to go. Nice job on the lighting in this scene!
@willow nebula Ooh, spooky, makes me think of the X-Files instantly for some reason. Like it’s from the view of a creature or something, hah. Cool effect!
@wispy compass Very cool, that blue light is really interesting! Nice job with the light sources! I think the refine edge brush within the quick selection tool might help to clean up the rough edges on the rock/bush area. There’s also a bit of a hard edge on the image blue planet with the blending mode you’re using. It might help to mask it and clean it up with a soft round brush so those seams aren’t so apparent. Nice work!
@dire glacier Ooh, very cool! Really nice warm/cool contrast in the lighting here for the Day 8 challenge! Also a really great effect with those particles. I feel like this could be a great opportunity to use a color dodge layer to add a bit more glow around the top area of the particles, and even cast a little light down onto the faces of each skater. Might gives the whole image a bit more pop and stronger focal point. Just a thought, nicely done!
@bleak fossil Thank you! I'll look into that when I start playing later, if I have time to hit it again, I'll repost.
Gave +1 Creative Carma to SamPetersonArt
thank you very much @bleak fossil - your feedback means a lot!
Gave +1 Creative Carma to SamPetersonArt
Cheers yet again for hugely constructive feedback. I played with matching planet colors, updating LUDs, etc. whatcha think? @glacial path
oooh, very nice @vague shuttle
Also, I practiced a gradient blend and blend if sliders to create this based on a PS tutorial found here: https://helpx.adobe.com/photoshop/how-to/compositing.html

super thanks @hearty wharf
Gave +1 Creative Carma to Tan_2019
yay - it's all done! would be lovely if you have time to look at my behance ... thanks so much! https://www.behance.net/gallery/91133657/Photoshop-DCC-with-Paul-Trani
wow nice work @hearty wharf ..whoo woo love the creativity in here
thanks so much @vague shuttle - fun stuff ... great collection of your challenges as well!
Gave +1 Creative Carma to Abraham (aka Wordsmith Hero)
@bleak fossil thank you for the feedback. I will take another look and try to clean it up 😀
Gave +1 Creative Carma to SamPetersonArt
@glacial path thank you for the feedback, i will fix that area 😀
Gave +1 Creative Carma to evil
Day 9 - A wee animation - thank you @brittle slate for the challenges - they were all super interesting and fun!
Gave +1 Creative Carma to Paul Trani
@bleak fossil Thank you for the feedback on my work from day#7. Quick question: could you please give me a hint which tool to use to create the effect of the light coming through the water? Is it helpful to create custom brush (as we saw on day#8)? It would mean a lot to me as I'm a beginner. Thank you again!
Gave +1 Creative Carma to SamPetersonArt
@bleak fossil Thank you for the feedback. Yes, I went a little overboard with the flairs. I'll look at those again.
Gave +1 Creative Carma to SamPetersonArt
messin about cuz I just can't help myself...
on another world looking at another world. I used the night time LUT. is it to dark?
@hidden pendant great perspective on this challenge. great creativity.
Day 8 "Follow the Light" lol. Is the gradient behind the rings to "strong"?
Day 8 - Modified
hi! Still catching up, here's my work for the challenge of yesterday (day 8). I couldn't decide which one I like better. What do you think, night scene or day scene?
paul trani tips and tricks
@hearty wharf I'm so impressed with your butterflies. I haven't tried it yet. So cool.
Better with (above) or without (below) light move?
Thankyou @supple canopy
@fallow bough Love them both, but I like the light move better.
@dim dagger Great work. I can't stop looking in her eyes.
@supple canopy I'm thinking there needs to be more contrast between the woman and the sphere.
@fringe thicket I feel the night scene has a more "magical" quality
This is my first PS animation and it was super fun! Question though: in the timeline I had added a mask to the cupid's arm so that the arrow would fly behind it not in front. and then to the target so the tip would look like it was "sinking in" to the target. When I rendered it that mask effect isn't showing anymore. Can someone tell me why? What am i missing? Thanks!!!
Attempt at animation. This was a lot harder than it looked watching the video. And birds are a crazy pain, so have butterfly-post since my owl-post attempt failed. 🙂
And the static image, just because.
I just want to say to you all are doing Beautiful work of Art in all forms and Thank s for Adobe Live episodes on Behance this has all been to wonderful and fun. Glad to be here lost track on the second week but still trying to grasp all the tools. 😃
Challenge 9, first time working with frame animation and also my first GIF
Thanks for the feedback @bleak fossil.
Gave +1 Creative Carma to SamPetersonArt
PS DCC #7 Compositing
Day 7 Compositing