

1 messages · Page 1 of 1 (latest)
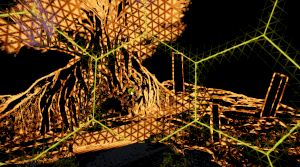
hey guys can some one help me out firuge the cause of this error?
these trees are doing this is build mode
in another scene this does not happen
Random question, tempted to report it as a bug but I'd like a confirmation first:
Reprojection denoising in volumetric fog increases performance cost by 2.5x-3x
Is that expected or should I report it as a bug?
I'm not so much surprised that reprojection denoising increases the cost.
I think it increases by a more or less fixed value depending on there voxel resolution
Ty for the tip: do not enable reprojection denoising in volumetric fog.
It's just surprising how big of an increase it is. At medium quality it's about 1.5x to 2.5x
your probably right increase is based on voxel, sometimes it's 1.5x increase, but can go up to 2.5 depending on the settings
The bummer is that reprojection denoising really helps static lights/quality, even at low quality it can make volumetric fog look good.
I guess it's not reportable than 😄
There's another issue: When the post process "fog" is enabled, but inside it you disable the fog like this pictue:

The volumetric fog cost will actually still happen as long as volumetric fog is ticked, as if volumetric fog is enabled, even though there's no fog/volumetric fog on screen. Even if this is working as intended, it doesn't make sense (unless there's a point to it I don't know about), volumetric fog should rely on fog being enabled
Yeah reprojection is very expensive (1.5x/2.5x), but.. it really pushes visuals for your volumetric light.
edit: then again, you can push volumetric fog quality quite a bit if you use gaussian denoising until you reach the cost it would be on lower settings with reprojection, so I guess it really depends on your particular project
reprojection is also better when you're moving next to punctual sources of volumetric light
i'm not sure if this is the place to ask it but
me and my friend are trying to make a see-through texture, like a fence with the see-through holes in it
we have literally no idea how to do that and whatever we try doesn't work
it's transparent in blender but not in unity
could anyone please help us with this?
i'm not sure if it's even using all the texture maps that i imported it with
i don't think it is
is there a way to know that?
we have literally no idea how to make the model use all the texture maps
Your texture should have an alpha channel unity will the use to cut holes in it. It can be done without an alpha channel too but the results aren’t generally as good.
If you select your texture in unity you should see the texture properties window. In there check the alpha settings to see if they been enabled.
Materials define how textures are displayed on meshes, alpha clipping and transparency included
Just a warning that HDRP and the resources for it will assume that you have a solid grasp on rendering fundamentals like these, so it's a really rough choice to start out with
It looks like your bloom level is too high.
In the your GameObject Hierarchy, select your Global Volume and then in the inspector find the Bloom override and disable it to see if that makes it any better:

If you can temporaily disable it just to see if that is what's causing the blow-out of your materials, that would be good.
it's exposure
go to exposure, set it to fixed, and change value until it looks right
look up exposure in HDRP doc to learn more about it and how to use it correctly
also check global settings, HDRP has a bunch of post processing by default enabled. so when you disable ur stuff in the global volume, it might fallback to bloom from global settings
Yes, HDRP tries to render scenes based on the real world properties of light and materials etc. So the expose might be too high for your camera and you get an 'over exposed' picture.
It'll be one of things that you'll need fiddle with and try to understand what all the different properties do.
Change the fixed expose value until it looks better.
If you have a day/night cycle then you can't use a fixed exposure. You'll need to use dynamic, so change the mode.
reflection probe
All of those are dynamic, it just depends what the best one to use is. Automatic is the easiest, but not always the best results.
Again, best to just play with the different settings
What's the recommended way of having per render parameters for a HDRP shader graph material? Like if i have fish swimming around with various velocity and want to control speed of my vertex shader waving?
Hi, my game is super blurry in the middle of the screen. Any idea why? Is this some HDRP setting?

There is no bluriness in the editor
is there a way to ensure a screen space - overlay canvas appears in an hdrp camera render to render texture?
i think you probably have motion blur or depth of field turned on. try turning it off
control speed of my vertex shader waving
expose a property in your graph, and modify the material
I'm having a really strange issue. I've booted up a brand new, totally fresh project with the 2022 Unity Build, in HDRP, and there's these weird black artifacts on my model that I imported, (That are being cased by something in the shadows, I've almost certainly narrowed it down to)
I don't know what EXACTLY is causing this though, or how to fix it. Can anyone help here? I'm sorry if this is an inept question.
I have not done ANYTHING to this fresh project other than add a model and a floor to it, and there are no special materials or shaders active.
https://cdn.discordapp.com/attachments/497872424281440267/1001307723134152724/unknown.png

Turning off shadows fixes it, but well, it turns off shadows.
No I don't think so. Hundreds of fish with different materials is completely unoptimizable for the renderer. Is must be something like material property blocks or something.
Looks like contact shadows
The particle system has custom vertex streams feature which can do that very efficiently
You might be able to implement something like that yourself, though it might be smart to use the particle system for flocks of fish
I would expect VFX graph has something similar
Material property blocks are probably the next option but it won't work with SRP batching
Ooh, this is very interesting! Tried out the vfx graph yesterday, will look into it for fish!
I'm not totally sure what the artifacts are in this picture, but if you mean the grainy shadows that looks like shadow filtering
How much half-shadow there is that needs to be filtered depends on the light source diameter; smaller diameter means sharper shadows
I've heard that lowering the filtering quality to medium makes them less grainy
Just a heads up if you have any form of flocking behaviour (boids) you will have to do that sim in a seperate compute shader and pass that data into the graph via the rather new compute buffer access.
change your shadow filtering quality to Low. then yes, turn off contact shadows
you might also have to adjust the cascades. it's hard to tell from the scale of your model

im using hdrp and have emmissive lighting
basically my problem is you see the bars next to the light are really absorbing the light and i dont want that
but i still want to maintain the base color
I’m not sure what you mean by ‘bars’. I can light coming out between the gaps in your tiles though, is that what your talking about?
oh no those arent gaps
ill change the lighting so you can see it better
i just made it green

Ok, I see what you mean. Are you using a point or area light, or just baking with emissive light?
im using emissive
And baking?
yeah
So the colours on the bars are correct because of bounce lighting, you just don’t want them to receive any light.
You could untick the static checkbox for the bars so they aren’t included in the baking process. That’s one way.
i dont want them to recieve no light just significantly less
Hmm. I’m not on my pc at the moment. I can’t check to see what other options are available.
Thanks man, it was motion blur, but was hidden deep down in an HDRP file
can someone remind me what is this thing called? i totally forgot the name

The rendering debugger ?
oh that what is it called, also why is the default tab are on decals though? not display stats?
It reflects the tabs order from the editor version (window/analysis/rendering debugger), I guess they are ordered by name
oh i see
But indeed, having display stats as the first one would make sense
last question, the mini render stats (right side), if i want to close it i have to tab the shift button 3 time, is this intended?
Ah when not in play mode the display stats are not available (which kinda make sense)

I don't think so 🤔
Feel free to report a bug for this one 🙂
Oh wait i think it's intended, each time i press shift it toggle the mode from avg,min,max and close the window
so yeah, nvm then 😄
wait wait are the hair samples out ?
cause I checket the beta yesterday
and did not find the samples
unless they are in the material samples
does anyone know what version reflection probe time slicing was added? I'm on 2022.1 and I can modify the value in script, but it doesn't seem to affect anything
i think it's inside the material samples
is there a way to modify custom pass properties from other script?
hmm i have to work it backward it seems if i want to modify custom pass properties from other script, by making the custom pass to copy other script properties instead
kinda weird but it works
I have contact shadows turned off, and messing with cascades doesn't seem to affect it. I also can't seem to find any options for Shadow Filtering, it's not under the Shadows tab in project settings, and it isn't in the shadows tab for the light source I'm using either.

And here's another pic of the problem in question. It seems to only happen in places where the model I have is in its own shadow? The normal cast shadows by things aren't affected?

Oh, nevermind, I found it. It wasn't under the HDRP settings, it was under the Quality Settings. Sorry for the trouble.
@upbeat hill Did you change the light's diameter yet
The only light in my scene is a Sun, I can see if that has a diameter, but I didn't think it did?
Hello guys
I would like to know, if there is a way to render transparent particle (like a smoke particle flipbook) inside a mesh with a hdrp transparent refractive material? Any clue ?
If you render it in the "before refraction" render pass it should work
@scarlet hull i've tried, but i get nothi,g :/
Oh ...
I remember there was a bug about this, but I was sure that it has been fixed 🤔
😢
i'm on hdrp 12.1.6 btw.
i've 2 refractives materials for the tank + liquid, then the smoke flipbook.
screen for the flipbook.material.
Hdrp is new to me :/
A lot of parameters to tweak.

Wait, are you using the legacy particle system or VFX graph ?
legacy particle system
I'd recommand switching to vfx graph, the legacy particle system is not really made for HDRP
Ok, i'll give it a try 🙂
anyone ever had HDRP drawn nothing no girds no cubes nothing

no errors
wizard is green

i dont know what to do here
This should not happen, but sometimes can be fixed by:
This is ... unexpected.
Does it also happened for a newly created project with HDRP template ?
no it does not
So it does only happen to you on existing projects after importing HDRP ??
it looks like from a custom template
i will have to dig some more
but let me ask a qustion
will HDRP break if you create a new proj w a different name and copy in the ProjectSetting, manifes.json and asset ?
from a working project
isnt that essentially what a template is?
It might, for example the HDRP assets assigned to the quality level will probably not have the same GUID and will be lost
Ah no, if you copy the assets with it, it should work
ill do a small test, i have a feeling this is what happed here
thats Remy for the help
thanks*
it's in the quality > hdrp section. it's your shadow filter. try turning it to low.
why does the color in the swatch look nothing like the color i've chosen

this is ridiculous
why is it saving the wrong color
does anyone use unity for anything anymore?!
how am i supposed to use
a color in two places
this is so ridiculous
whatever
HDR colors do not appear like their previews because they're emissive and subject to exposure, but I can confirm that they are saving and loading correctly from swatches
Trying to save a HDR color as a swatch and then using it as non-HDR will cause a bit of mismatch as well
To be fair it'd be kind of complicated and ultimately pointless for the UI to try to adapt to different color field types
Because colors aren't one to one convertible between HDR and LDR anyway
Hi guys! Is possibile to connect mobile controller (like iPhone or iPad) for a pc game with HDRP? Thanks you 🙏🏼
Sounds more like a coding question
Input devices don't care what render pipeline is in use
thank you! would you have some guide to follow?
because what I found make me switch to mobile game
Networking
question:
does anyone have any experience with textmesh Pro and HDRP?
Its not working with the materials, and its just blurry.
I'm in version 2022.2, and I'm having trouble getting a camera to render out alpha into a render texture, I've tried setting the Color Format to different things like suggested, but I don't think it's working at all.

(It should only be rendering the character in the middle, but for some reason, it's writing weird stuff underneath them)
i'm basically just trying to set up a pixel perfect outline around entities in my scene.
OK, nevermind, now I have a different problem. I'm having trouble figuring out how to get Scene Depth into my Custom Pass to work. I'm pretty sure it's not working, right now, I'm trying to pass the scene depth to the screen so I can visualize it, but it's only outputting pure white.
I read that this node setup is supposed to do that, but it's not working.

I seriously can't figure out how to get my custom pass to actually generate the depth I need
Ok, so, I've written a script that I read would make the camera go into depth mode, but it STILL only outputs full color to the buffer render texture I have assigned to it.

Ok, so, it was working before, but now when I plug HD Scene Depth directly into my fullscreen shader, it just renders this black triangle over half of the screen, and I'm not sure why.

Does anyone know some possible reasons why this might be happening?
Nevermind. I've managed to figure out all of this stuff myself after some trial and error.
What happened to this Fog parameter ?

or how do one have sunshafts with volumetric fog & clouds?
I'm reading that i'ts only two options but nothing works when I do it.
I always end-up downloading a package from a forum that do work and I can't find the differences in parameters.

ehhhr okay that's here, but it does nothing either.
Hm

how to use DrawProcedural in custom pass?
hello, can my GTX 1080 support ray tracing in Unity for HDRP?
I have researched and it seems that "yes"
because it uses something called "ray tracing fallback"

Yes it should, if you have the correct windows version + nvidia driver. Keep in mind it will be pretty slow.
ok thanks! yes probably it will run pretty slow..
Is there any way for me to cast shadows with a area light without the object being static? I want it so when a door opens the light from the other side leaks into the room your in

I just tried an area light on Unity 2022 HDRP and area light shadows work with non-static objects.
Did you enable shadows on the area light?
yes
The light looks very soft, so have you light baked the area light? Is the light set to realtime or baked?
Also, my test is on 2022, I'm not sure what you're using and if area lights can cast realtime shadows

the light is set to real time and neither of them are set to static so Im really confused on why it does it
Check out the glass custom pass here https://github.com/alelievr/HDRP-Custom-Passes
A bunch of custom passes made for HDRP. Contribute to alelievr/HDRP-Custom-Passes development by creating an account on GitHub.
thanks king
but how would i apply after i download it
Well I havent tested the glass myself but it looks like its two shadegraphs so you will be able to figure it out 🥳
There is a glass scene in the project where it is set up
wait is there a project in there?
yes the git repo is a project
@rugged kernellooks real
Thanks
Hey guys. I haven't used HDRP a lot before, and I would like to know if someone has found a workaround to the lack of camera stacking. I'm coming from URP, where it's very easy to render the viewmodel of a first person character over the environment. Is such a thing achievable in HDRP too and to what extent? Thanks :)
@noble sparrow There is a fps custom render pass in this repo https://github.com/alelievr/HDRP-Custom-Passes
A bunch of custom passes made for HDRP. Contribute to alelievr/HDRP-Custom-Passes development by creating an account on GitHub.
is hdrp water system released?
Available in the alpha releases.
thanks
Hey, is there away to mask lights? like set certain lights to only affect certain objects.
have a look at "light layers"
Hey, I have a project I made in HDRP and I want to move it to normal built in pipeline.
is this possible?
I can Simply delete the package from the package manager and convert all Materials myself.
will this work? is there anything else I need to do?
Things like lighting and cameras and any other HDRP components would have to switch. And of course updating any code referencing them.
But yes, it's possible to switch with some work.
Awesome, Thanks!
I want to switch from HDRP to URP.
I know it's not recomended but urp seems to be much more popular today so it will be worth it
Hello all, I'm using HDRP in my project and all of a sudden i can't see any shadows? I've tried adding new lights/removing old ones and removing my volume post processing but nothing seems to work, anyone know a solution?
how can i convert uv to position on the mesh
I need to change texture on mesh based on some things from scene
@pallid monolith There's no need to crosspost to unrelated channels
i posted here first then realized its the wrong channel
Made a thread in lighting asking for help with light leak. Probably should've made it here as I'm guessing it's to do with HDRP.
Hello guys some questions about decals

i have 3 decals inside my scene (only 2 on the screen). When i switch on the third , i go this :

Any idea, this random (sometimes, the first one turn white) sometine the second...
and when i launch the player, i've got this

Random guess : you are overflowing the decal atlas. Defaut atlas size is 2048x2048.
Look into the HDRP settings, under Rendering/Decals
Any idea (its for merch/visual production) and i'm gonna need a lot of decals
Hello @scarlet hull
its 2048x2048 by atlas or for the integrality of all atlas inside one scene ?
I don't get the question.
The atlas size is a rendering settings, and decal texture are pushed in / pulled out of the atlas dynamically depending on what is displayed
Unless you have very big textures, I guess you shouldn't fill the atlas then 🤔
it for 4k screen with large close up
i thought that it was 2048x2048 per Atlas
it seems that you're right, the limit size is for the ALL atlas - at the same time
I don't get what you mean by "per atlas"
i thought the limitation wason 2048 -4096 per decals
and it seems that is for All the decals inside a scene
i crop texture size inside unity and by now, all the decals inside my scene are visibles (but blurry ^^)
thank you again
The decal atlas is a texture that contains all the decal textures, for decals applied on transparent objects.
And not for the whole scene but "for all the decals visible by the camera"
8k by 8k should be quite enough, that's 16 2k x 2k textures.
With 3 decals that use basecolor/normal/mask map, it should fit in the atlas
@granite marsh
But of course, the larger the decal texture, less you can store in the atlas
You can use the Rendering Debugger window (in Windows/analysis menu) to view the decal atlas in the editor
ok ;:)
why is this happening
Also, what's happening here? Why switching to deferred make the scene dark ?
Hmm, trying to repo it in fresh project didn't happen...
Fixed by disable Probe Volume check box in HDRP Global Setting
How do I paint on my hdrp skybox in runtime
I want to be able to change the .png it uses.
Without precompiling one
Since I make the .png with code in runtime
The USE CASE IS THIS: I have a MMO starfield, some different colors and nebula. When a ship enters warp, the actual stars/nebula are rendered, the skybox derenders, and you see them whip past you like StarTrek:TNG. Then when you exit warp, the skybox is drawn behind the scenes to resemble the stars and nebula where they settle, and the gameobjects of stars and nebula are derendered (still see em because they're now skybox).
Here's the full rundown https://forum.unity.com/threads/its-trivial-to-change-the-png-of-a-skybox-right-it-should-be-look-what-i-want-to-do-warp-drive.1319313/

MY QUESTION IS: How do I swap a hdrp skybox graphic texture? It should be easy right? No one can help me. I've been asking for months and even had an...
Hey everyone ! I made a png texture and I would like to know how to make it so the transparent part is, well, transparent in the shadergraph
https://forum.unity.com/threads/multi-render-pipeline-asset.1319580/
Would love some help with this if people have experience with it!
I am making a visual asset using shader graph and I need to use different shaders depending on the Render Pipeline (URP/HDRP).
What would be the best...
If your texture, check that 'Alpha is transparency' is true. On your material, check that Surface Type is set to Transparent instead of Opaque.

It seems that the HDRP package is crashing my user's even when on decent hardware, is there anything known to cause consistent crashes?
Additionally if it helps it seems that a common issue is that the unity crash reporter never opens in any of these cases
actually forget this
said they were running decent hardware
when I looked into it more, they didn't have a gpu
how do I shift the horizon in HDRP physically based sky? I want the sun to go below horizon above sea level.
to achieve this type of effect
? Below horizon + above sea level seems impossible to me, logically speaking
@scarlet hull sorry probably I wasn't clear. I want the horizon level where the sun goes down, to be above visible sea level.

like in this image, there a dark gap between the sea level and sun
this is what I am getting, I want it to be little above the sea level

What about cheating with the sea level of the PBSky ?
that's what I thought but increasing sea level isn't doing anything
Could somebody confirm me if my understanding of surface inputs and details inputs is correct?
If I understand the documentation correctly, they both do the same thing, the only difference is that the detail and mask map will contain information of several layers at once? So if I fill the base map + normal map, it would be the same as using a detail map having albedo desaturated in R channel and the normal map X/Y in the required channels and smoothness channel at 128, is that correct ?

Meaning if we only use albedo and normal maps, we don't really need detail and mask map
But if we need them, it's better to pack albedo and normal map in the detail channel and leave the base map and normal map fields from the surface inputs empty?
Basically, either one or the other, filling everything is redundant for some layers then?
If you don't need the detail inputs, don't use them.
The detail map only has albedo & smoothness variations (no color) and normal, when the basemap has color information.
Usually you would use the surface inputs with non tiling textures for the overall look of the asset, and add detail with higher tiling value and a tiling texture to add close up informations
So you still need to fill the base map texture even if the detail map contains the albedo data? You can't just leave it empty and change the color of the base map if the detail map is filled?
I'm trying to import some Daz3D clothing which offers some specular map which should be the smoothness map for Unity if I understand well? But to use this map, I'd need to create the detail map then since there is no smoothness map in the surface inputs? Not sure if it's worth the efforts though
The smoothness is in the Alpha channel of the mask map
Oh indeed, I mixed it up
No, you don't need to fill the surface inputs to use detail map, what I'm trying to say is that you mesh aknowledge that the detail albedo is only to add variation to the existing base color ( it is working like an overlay blend in photoshop), it won't be able to drastically change the color value
base color blue can get lighter/darker until white/black, but won't change to red with detail map
Ok got it
For the mask map, if we want a neutral metallic and occlusion, it should be RGB 128 on average right ?
And if we don't use detail mask, then the blue channel of the mask map can be ignored ? Which only leaves the alpha channel for the smoothness? Did I get that right ?
If you want to keed controll of the metallic value with the slider, set it to 255.
Occlusion should be also 255 : white = full brightness.
So if you don't use detail mask, the mask map value is :
R = 255
G = 255
B = whatever
A = smoothness
Got it, thanks a lot for your time and explanations
This might lead to a material that look dark due to metallic beeing maxed out, you'll have to reduce it with the metallic slider value, but this way you have control over it, whereas if you use R = 0, the slider will have no effect as it's multiplyed with the value
Ah got it, thanks
Is there a way for HDRP lit layered to handle semi transparency for the additional layers ?
My texture has one spot with some semi transparency

But the hdrp/litlayered doesn't care?

Nobody?
How I can fix these reflections just being not visible sometimes?
You can't
This is a fundamental limitation of screen space reflections
The other option is to use something like box projected cubemaps, a planar reflection probe or fully ray traced reflections
planar reflection probe mhm
Hi, recently I have bumped into this kind of block artifacts problem on the multiple projects. it seems there's too many volumetric lights intersecting but how can I increase the limit? Or any workarounds?
I have searched about this problem but I can't find any info of this problem...

Still nobody here to let me know how to have the HDRP lit layered shader handle 50% opacity on the extra layers? At the moment, it displays all pixel with opacity > 0% as if it was 100% opacity. Is it a wrong set up on my side or can't the HDRP lit layered shader handle semi opacity on the additional textures?
I'm using the latest 2022 version, and for some reason, my Post Processing Effect is showing up in game, but it isn't showing up in the scene view OR the camera preview.

I have post processing turned on in the scene settings, as well.

Does anyone know what might be going wrong here?
Is it the same in game view?
I often see things that I don’t in game view, maybe not the issue here lol
Nice SCP SL though, I like that game
it's due to the light tiling optimization, you can disable deferred tiled in the camera settings custom frame settings rollout under light loop debug
but your scene will render too slowly if you disable this
i think you will have to fake this effect for it to perform well
what do you mean megascan? do you mean like an unreal engine style environmental scan? you can use the ones from hdr studio in the asset store
other than a camera orbit you can't do much in those scenes because they don't react to anything 🙂
what is the objective? you should probably not be using layered lit for this
you can use an hdri for the sky
Does anyone know how to apply volume/post processing to UI?
Hello all. When using urp its been easy to upgrade the materials, but in HDRP I cant seem to find an option to upgrade materials in project to HDRP.
Is it not possible, or am I missing something ?

I want to create customizable clothes. One texture is the background of the cloth, like a wool texture. Then I want to apply a logo on the cloth. But the transparency doesn't seem to work.
I don't think there is an upgrade feature. IF you moved from standard RP, the materials of your objects won't change and they'll still be using the standard RP shader which doesn't work in HDRP and displays as purple like you showed. You need to go to your gameobject and change the shader from standard to HDRP/Lit
I dont think the layered lit shader is appropriate for that. Either make a shader grapg shader that samples both textures and mixes them how you want or use something like a decal for the logo
Isn't the lit layered shader exactly for layering textures together?
Why wouldn't it be adequate for my use case?
I'm getting good results so far actually, it's only the semi transparency which is a bit strange.
I did write a custom shader to merge texture by I'd prefer to use built in shader since my shader graph knowledge is close to zero...
Here is another use case for my project:
I'm using the lit layered as a skin shader (using the subscatter option). The first texture is the face texture without the eyebrows. Second texture is the eyebrows. It's working quite well, I'm not looking for AAA quality so I don't mind if it's not realistic looking.

Transparency seems ok here, but I've been trying to add a heightmap to give the eyebrows some more height however it's working weirdly.
From my understanding, a heightmap is a greyscale texture with white being pixel forward and black being pixel backwards. But when I apply, I can't get the eyebrows pixel to stretch out, moreover the whole face texture gets backwards too while only the eyebrows layer should be affected.
Here is the same with amplitude set to 5, I was expecting the hair on the eyebrows to move forward, but instead, the rest of the face seems to move backwards while the eyebrows don't move at all.

I thought maybe using grey 127,127,127 instead of full black background could fix the problem but it only reduce the strangeness
When I increase the amplitude, the eyebrows still won't stick out, only inwards.

Using pixel displacement mode

If I use the vertex displacement mode, the correct result appear, only the eyebrows vertices are stretching out as expected.

But I need the pixel displacement instead. Why don't they work the same?
if the clothes are customized in a systemic way, at least as far as i can be familiar with any system in any other game, you have two approaches:
(1) use shadergraph and create texture slots for the decal positions
(2) composite in canvas, and use a snapshot of the canvas as the main texture
it is unusual to use layeredlit to achieve your goals
i'm going through this video enabling raytracing for the demo scene. when i enable screen space reflections, i'm getting these cube artifacts around the edges of objects. anyone have any idea what the issue is?

those boxes seems to appear only on bright areas. I think you are hitting the limit of per tile light sources (I dont really know much about lighting in hdrp, if I remember correctly, the screen is divided into those tiles which are somehow used in the lighting calculations). take a look at this https://forum.unity.com/threads/hdrp-tile-cluster-lights-rendering-bug.667234/
Thank you so much for the advice! I have looked into it and disabling big tile prepass in Light loop debug solved the problem!
This document also help me understanding tile/cluster light rendering
https://advances.realtimerendering.com/s2018/Siggraph 2018 HDRP talk_with notes.pdf
yes but the game will run too slow
what is your objective?
At this time, I use it as prerender content. But now I understand what causing the problem so I can tweak settings like ranges and numbers of the lights in the scene
is there a way to use the physical sky with a skybox? i want to have a sky at night instead of a black void but i can't find a way to use the physical sky at the same time
how can i get rid of this automatic shadowing/darkening of this mesh? it seems to change automatically in occurrence to a directional light

Literally where the hell is shadow distance in HDRP
With min and max
It's not in the volume override
Shadow cascade should be in the volume override https://docs.unity3d.com/Packages/com.unity.render-pipelines.high-definition@12.1/manual/Override-Shadows.html
Could anybody give me the name of the HDRP/Lit properties for Tiling and Offset? I'm checking the Shader code but I can't find any vector or float related to it
I can see this :
[HideInInspector] _InvTilingScale0("Inverse tiling scale = 2 / (abs(_BaseColorMap_ST.x) + abs(_BaseColorMap_ST.y))", Float) = 1
But there is no _BaseColorMap_ST property in the file? Where does this come from?
Plus it's a hidden property so it shouldn't be the one I'm looking for.
The goal is to be able to change the tiling and offset at runtime. But can't find those 2 properties in their code. Quite strange.
In HDRP how do I apply texture to the moon? I added a surface texture but it is not working, what am I missing here?


increase the angular diameter
Nobody knows this?
@eternal laurel thanks, that worked
I have another problem, I am controlling the day-night cycle using a C# script. I have 10-12 reflection probes in my level, I need to update them every hour or so in game time. I know "on demand" mode does that, but how I do it?
I need some examples or documentations for the coding process.
"• On Demand: Updates the Probe's capture data when you request it. To do this, access the Probe's HDAdditionalReflectionData and call the RequestRenderNextUpdate() function.
This property only appears when you select Realtime from the Type drop-down." documentation exists
I would suggest you pre bake 4 sets of probes and blend them according to the time of day
rather than rebaking
should be faster but more memory intensive
so 4 reflection probes per location?
how do I access the probe's HDadditionalreflectiondata script? I mean what exactly I have to do in my Daynight cycle script? sorry I am beginner.
its a Component on the reflection probe you get it like any other component. If you dont know that, stop doing a day/nigh cycle and go do a basic course on learn.unity.com
okay thanks
Is there any way to exclude VFX particles from DLSS? they are causing bad ghosting effects.
no
HDProbe is the name of the component
How can I change the tiling of the main layer in HDRP/Lit at runtime? I can't find the property code for tiling or offset.
Is there another place to get this information if nobody knows here?
Also, is it possible to change the layering list of the HDRP/Lit Layered at runtime ?
I am facing a weird issue. I have some reflection probes set to realtime on demand mode, when I hit play in editor I am getting complete black screen until I move my camera , then it flickers and no problem after that. If I set the reflection probes to bake mode it doesnt happen. Getting no error or anything. any idea?
aren't you trying to use LayeredLit for a clothing system?
I think I figured out the cause of this issue but still no idea how to solve it. My reflection probes are on demand, so they are blank and probably causing the issue. I update them at certain time of day but also I called the update function in void start() . But still getting this issue.
Yep, still on it ahah 😉 For tiling and offset, I found out they are linked to the texture directly and they have unique methods SetTextureOffset and SetTextureTiling to change them. It was a bit confusing because other shader have exposed properties to change those values. Moreover, in the editor in the lit shader, we can only change the offset and tiling of the albedo, but it seems that using this code, we can also change the tiling and offset of the normal map independently which is nice, though I'll need more testing to confirm it's really working.
The only remaining issue is semi transparency not being handled properly in both opaque and transparent mode. I think it's a bug. I've opened a ticket but no news so far.
for some reason when i obscure some of my glass texture infront of a light it does this
If it's any consolation, that's exactly how the ceiling lights in my office behave! If they have rectangular grid on the plastic sheet under the light you get that holograph effect. Call it a feature 😉
Probably a screen space reflection (or refraction) artifact
this actually helped lol thank u
Hey everyone, i'm facing a strange issue in HDRP with Ray Tracing. Essentially I have a capsule for my player, I obviously don't want to see a capsule and just want to use the collider, sure I could probably use an empty with a collider, but is that really necessary or is there some option in the settings to fix this issue.

I've broke it down to what part of the mesh renderer is causing this and that's the Ray Tracing tab where it says Dynamic Transform. If I turn it to off it does same black artifacting
Okay it's something else, even if I delete the capsule the black artifacting still happens
Broken it down even further that the ultimate culprit is Screen Space GI Ray Tracing, apparently it loves and needs the capsule lol
How do I stop a HDRP decal from drawing on objects after being spawned? I'm dropping objects on a explosion scorch and new objects on top look scorched
I'd take a guess and think maybe decal layers? You can find the option here

that didn't do it
That will do it. Create a scorched layer. Wheb you do your explosion move neardy objects to that layer and set the decal to only affect it. Simply ticking the box wont do much
That's a bit of a pain. I can see how it would work though. But I'm going to try a third party asset instead
since already have it. Not looking to do anything fancy with the decals anyway
Also you can - the material on objects such as a player turn off "Receive Decals" on the material udner surface options
Pretty sure any third party asset wont have a exclude new objects option by default
Buuuut gl hf
https://assetstore.unity.com/packages/templates/packs/snaps-art-hd-warehouse-155229 this says dude to changes in 2019 and up it's not supported. Does anyone know off the top of their head what changed?

Use Snaps Art HD | Warehouse from Asset Store Originals to elevate your next project. Find this & more Packs and templates on the Unity Asset Store.
Can somebody tell my why this texture is shown as being 85.3MB in size while it's only 135KB in windows explorer?

OK, nevermind, it's the size in RAM which is shown here which is the decoded version of the one windows explorer shows.
Textures in Unity are also imported to formats that are ready for runtime graphics. The format you use to author the asset has no effect on the size once imported
If your texture is just a black and white mask you might want to choose to import it only as one channel.
Indeed, I was not aware a PNG could be greyscale and keep its alpha layer. For the matter of easy use, I want to be able to use only 1 texture for both a diffuse texture which will be colored AND a mask texture to know the opacity to show.
I was saving my PNG as RGBA thinking it couldn't handle greyscale due to my ignorance lol. After understanding a bit more about shader and images, I'm starting to get the hang of how those things work, at least a little bit better 😉
Thanks again!
Hm, it's a bit strange, I did change to greyscale which reduced the size in windows explorer from ~182KB to 129KB, but Unity still shows the same size unpacked.
64MB in both RGB or greyscale. Is it normal?
As I said,
the format you use to author the asset has no effect on the size once imported
If it's still imported as RGBA8 without compression (or whatever) then that's 8 bits of R G B A
Oh got it
Indeed, enabling high compression reduced to 16MB, quite a difference
And using crunch crompression even lowered that to 308Kb in low quality. But I still don't see a difference in the shader graph preview. Does compression not affect the preview?
I have no idea. I was saying that if you just have a black and white texture without alpha then you could also switch the format to R8 or 16, as all the channels are the same
Ah, got it. I do have alpha though, so won't be able to use this way.
Anyway, you enlightened me once more, thanks a lot for this! 😄

why this guy implement Nanite in unity?
do you think any project will use this kind of art asset?
small teams have no budget to use this art style
how do I set the brightness of a gameobject in HDRP? I want to change an item to absorb more light aka be brighter
Id imagine thats mostly useful with 3d scans which are quite easy to make
Higher end graphics are pretty easy to make, despite the popular belief that they aren't. But getting them to run in a performant way is the actual hard part 😆
The reason why most indie games are low-poly or some mix art style is because most indie devs instantly assume that it's super hard to reach realistic looking games. I'm saying this from personal experience. Three years ago I was sure that I could never get my games to look realistic, but nowadays it's super easy and pretty fun actually. It requires a little bit more learning, but it's worth it. If you want examples of Unity indie games with pretty damn good graphics, check out Road To Vostok and Project Z for example.
but if a project is going to realistic style, especially 3d scans, why not choose UE5?
The Nano Tech has no value😂
I'm not talking about nanotech. You don't need Nanite nor it to have a realistic game. We've been making pretty damn realistic games for almost ten years, after all.
I personally think that making models should not just be as easy as just importing them into an engine and enabling a tool. But I like the challenge of optimization so it's just my own stupid opinion lmfao.
HDRP and UE5 are very close in visual fidelity, but beyond that the engines and their workflows are quite different
A tool like this would probably have have value for a studio that's looking for more feature parity with UE while having chosen Unity out of necessity or convenience
At this point the only difference between unity and UE is that Unity doesn't have a system like Nanite, or actual realtime GI and they don't make every tool they buy free for everyone.
For me, those don't really matter since the base engine is good enough for my every need.
How much price do you think the nanotech plugin should be?
Let's be real here, Unity is going to make something similar at some point. They know that they're losing customers if they don't. Same goes for actual GI.
unity is far from here, they just finished adaptive volume GI, that's very old school tech😄
That may be a small base of customers that need things like that, but since unity is aiming for also cinematic and movie creators so they'd just benefit from such tech.
I really don't have an opinion on that
They'll price their assets according to what they think they'll target demographic is willing to pay
Usually a studio that has the resources to produce HD graphics has investor backing behind it as well
lol, HDRP has a trend to make small cinematics, the digital human and lion king
but cinematics don't really need Nanite, it needs realtime GI like Lumen
HDRP has real time GI using hardware ray tracing. If you're targeting photorealistic graphics / cinematics, you're already targeting GPU's that can do hardware ray tracing.
Valid logic, actually.
Also, the reason why people usually choose unity over unreal is the general requirements for the engine. I literally got hdrp and volumetrics to run on a seven years old PC on 30 fps. No wonder unity is the most used engine, you barely even need a good PC lmfao
I'm not a huge fan of Lumen because of the delay/blobs/etc, maybe the scheduled updates will make it better.
Lumen also takes a fuck ton, and I mean a fuck ton, of performance, which is a total minus in my books. Like yeah, obviously. You get amazing lighting, but it takes so much performance that you either need a beast of a PC or just don't use it.
I view UE5's graphical jump as a total minus in general, tbh. I personally still use the Xbox One to play games, but when studios aim to use this advanced graphical stuff they most likely only aim to release on next gen.
Hey guys is there any way of using tree compoment for hdrp?
because im getting pink error textures
The tree generator ?
We don't "officially" support it in HDRP, but at the end it's just generating a mesh with materials and textures, if you change the shader to HDRP/Lit with the same textures it should work.
Yeah but unfortunately when I change a bit of the mesh to fit what I want like extending the size if it's a bit too short than it swaps the mesh with the pink one and it gets really annoying quickly. I just want to know how to make it not swap the mesh when I do slight changes.
I don't think you can avoid that sadly :/
Maybe if you create copies of the materials in your assets, and force assign them in the tree generator fields (not into the mesh renderer) it will keep them 🤔
I'll try that one out. I don't know where the options for the tree gen is though.
also yeah that didnt work it just continued forcing them to the pink color
Why is it changing HDRP Volume layers makes local volumes stop working
Is this a me issue, or a HDRP thing.. Because I can't find anything that would rule out either.
@dawn sorrel The camera has a volume layer mask, making it that only the volumes in the listed layers will affect the rendering of specific cameras.
If you change a volume to a layer that is not in this mask, it will no more affect the rendering.
And its always anoyed me that adding a new layer does not check it by default in the camera masks
Where do you find the camera volume layer mask? I can only see culling
"Environment" section, "Volume Mask"
@lone river Please post only to one relevant channel
Is there a way I can do this for the editor camera
The editor camera should reflect the value defined in the main camera of the scene
Ahh
I've got no camera in the scene as it's loaded in an additive do not destroy scene
I'll just put one in for whilst i work
@barren gobletyou are a troll, clearly
@steep verge Sorry what ?
Something about a real-time shader
Most likely asked "why hdrp can't render a realtime shader in the viewport"
Ah yeah, they havent enabled Always Refresh from Scene view View Options toolbar https://docs.unity3d.com/Manual/ViewModes.html, thats most likely what they mean, by "realtime" they mean shader that animates over time
@steep verge
can anyone help with procedural world generation in hdrp
thanks
Thats not necessarily hdrp related, procedural generation should be the same on all pipelines. Try to ask on the coding channels instead
guys how do i check if im using hdrp or urp
I think im using hdrp but there's an "Exposure" node that I can't find here
I'm getting a lot of this on building:
Graphics.CopyTexture source and destination have different master texture limits
on my build.. but its not telling me what texture?
can anyone advise me on how to find the problem texture or where i can fix this issue? cheers
ok i am a big dumb nevermind. - did not realise Hdrp quality settings panel defaults to building in 'low quality' mode
what?
You can specify a default quality level by platform, but I don't think there is a "low quality" build mode?
ok

That's what im referring to. that's where the 'problem' was
Not sure if this is the right channel so please correct me if it is not.
Any tips on how to make my hdri sky cubemap less boxy? Like what effects to add in photoshop or on Unity?
Mine feels a little bit too much that I'm on a cube (which I know I am 😆 but still)
https://youtu.be/XZmr-XYRw3w
Cubemaps must be authored with very specific perspective distortion
Anything that's not drawn in 3D projection mode won't have the correct perspective
what is the skybox material for HDRP?
I was using the Legacy one, which has 6 sides
oh cube textures work, got it thanks !
I just switched to HDRP and Im getting this really weird shadow that moves with me.

And Im getting an error
Seems like shadow cascade border. You are clearly having some shadow acne close to camera
Hi any tips on how to set up lightning for a space scene? My current problem is that I have a tight coupling between the skybox and the lightning on the scene. If I change the skybox, I need to change the entire light settings for the scene. It's also hard to manage making the scene look well lit enough and the skybox not looking too bright
I'm using the Exposure Compensation in the HDRI Sky and Directional light intensity to manage this
Exposure is set to automatic
If anyone has some preset values for space scenes it would be great 😛
Should I use fixed exposure?
hi , im trying to make stylised "wiggling" shadow effect, plan is to offset shadow map with slight noise, but i cant figure out how to hook up shadow map (single directional light) in hdrp
there is great talk about light in hdrp: https://www.youtube.com/watch?v=yqCHiZrgKzs , imo clamping exposure min/max values might help you

In this video, you'll learn how to create AAA-quality visuals for current and next-gen games. We’ll also show you HDRP’s key rendering features and how to tune settings for anti-aliasing, lights, shadows, exposure, and more.
Speaker:
Pierre Yves Donzallaz (Senior Rendering & Lighting Artist)
Did you find this video useful? Room for improvement...
Thanks, but could you please dumb that sentence down for me. I'm really new to unity. How would I go about fixing this?
yes, that eally worked, thanks! I ended up clamping min and max close together. I was checking other space game and it also seems they have fixed exposures as well
Hey.. im trying out hdrp for the first time. My point and spot lights doesn't seem to emit any light when the directional light is set even if i put it in full intensity.. it will show up when directional light is disabled or if it's intensity is brought down to almost zero. And i should mention the spot and point lights are inside a structure which is decently dark.
You must change the bias values in order to get rid of shadow acne
I know HDRP isn’t for low power devices but if I am targeting desktops that go from low power to high power can I stay with HDRP or should I just bite the volumetric fog and return to URP? I don’t believe I’ll ever go on mobile.
I figured out there is light from skybox even inside fully closed off places.. how do i fix that?
Place a reflection probe inside the space
So i have to manually do it every enclosed space?
Thanks. Where would I find that setting?
Thanks!
do baked reflection probes affect reflections of static objects?
for example, if I have two metal walls marked as static and bake the lighting with no light probes, will the metal walls reflect each other during the baking process?
if I then add a baked light probe and rebake lighting+bake the light probe, does the lightprobe affect what is reflected on the already-baked walls?
Anyone know how to access "Shadows" VolumeComponent via script?
Look into the coreRP package API doc on how to retrieve volume components
How can I make it so for the skybox not to affect enviormental lighting in HDRP? (example from legacy: https://answers.unity.com/questions/1743675/skybox-affects-lighting.html)
I wanted to give it a fixed color
Thanks
Damn this is a game changer lol
I set my shadow resolution and filtering to max, but I still see a lot of aliasing on my direct light, what gives?

I did, I can retrieve almost all of the other components fine, but shadows don't seem to be there like the others
I want to recreate the damage system from l4d2 https://www.google.com/url?sa=t&source=web&cd=&ved=2ahUKEwiB2rvVqvD5AhUjXvEDHc0-B6UQFnoECAUQAQ&url=https%3A%2F%2Falex.vlachos.com%2Fgraphics%2FVlachos-GDC10-Left4Dead2Wounds.pdf&usg=AOvVaw2ZQRYP1EsIcKbmCrzrQkJv but I feel this pdf is not enough to go on or Im being stupid and not understanding it. Anyone got any pointers, ideas or resources ?
looks like this: instead of trying to model 1000000 different variations of zombies in varying damaged states, they said, lets just create a few internal wound models that we can slap into the zombies.
but you want to be able to see the wounds. for example, if you place some guts inside the zombie model, but the zombie's tummy hasn't been destroyed, then you wont see the guts behind the tummy.
so they said: ok, let's place a white splatter texture on the tummy. this will tell the renderer to make the tummy pixels transparent where-ever the white texture is on. then you can "see through" the tummy and see the guts. then they use the ellipsoid to better scale the tummy texture and guts so it fills up the transparent hole better. idk the exact implementation. but that seems to be the gist of it.
rather than actually deleting parts of the model, or creating a million different zombies in different damages states, just make the damaged part of the zombie transparent, then you can stick in some gore models in the zombie. so they aren't dynamically destroying zombie meshes, just turning part of the zombie mesh transparent
Well sure I understood this much from the pdf too🤣. Is the splatter texture rendered in UV space ? How exaxtly is the alpha of the splatter and the clip from the elipsoid combined ? Stuff like that.
The actuall gdc talk would be nice but I cant find it in the vault or anywhere
hey i really need some help i made a character in blender that look like this

but when i upload it to unity in hdrp its just look like this

and its becouse i have no idea how to setup the materials

And I cant find any youtube video explaining it
Can someone explain why changing the ground tint or turning the cloud layer on affects the lighting of the scene (quite dramatically)? I would think these are background elements that shouldn't impact anything
This is not at all uncommon. Blender and Unity use different renderers. You are encouraged to define materials inside unity and spend more time on them there than in blender. They will never look the same.
it's hard to tell from a screenshot with no movement, is that z-fighting or are the normals just weird?
Unsure but for a sec I thought this was a real picture
The lighting of the scene could be weird as well, hard to tell
It may be smart to do tests in the sample scene where you can be sure the lighting is okay
@red needle
Thanks but I think I found out
Yo Remy, were there any big changes to HDRP in general in the more recent versions? I could run a hdrp game at around 30fps with older versions, but now I always go below 22. Had to switch to urp because of this.
Even on the lowest quality settings my performance doesn't change at all.
Ahhh how did I miss that, thanks for replying
anyone know why I"m not seeing my command buffer in the frame debugger in 2022.2 ?
when rendering in batchmode, why might my custom pass blitting the color buffer only draw a picture when debug build is checked?
this is a real puzzle
the backbuffer is the render texture so it shouldn't really matter if there is or is not a screen. waiting until the end of the frame, and then blitting using Graphics.Blit works
its any easy way to make like switch between baked lights and realtime?
You could just switch your scene with realtime lights to a scene with baked lights on the go
Well you just clear the baked data if and set all lights to real-time you want to go to real-time
is there an event when the gpu has finished rendering?
for example, if i have a camera targettexture sent, and i render to the camera
i would like to know the exact time, possibly even from not the main thread, that hdrp has blitted the final pass's output to the render texture?
OnPostRender() is what I'm using for after all rendering is completed.
Note: These callbacks only work with the Built-in Render Pipeline
anyway the hdrp equivalent for them occur after the main thread work for the camera is done
They work for URP in my case.
I know the coroutine wait until end of frame will work for HDRP as well.
hey people! We have a project in Unity 2020 LTS with build-in pipeline, and we want to remake it in HDRP and we are considering using a newer Unity version for this, do you think it is recommended? Does 2022 has stable enough HDRP or should we stick to something like 2021 LTS ?
It depend on where you are in the development.
If you are still in a quite early stage, you could even go for the current 2022.2 betas (current beta is 7, the final version should be far away), and later upgrade to 2022.3 LTS.
Else, if you want to ship soon-ish with a stable version, stick to the 2021LTS, but you will miss some of the most recent features.
makes sense. We're going with 2021LTS eventually, thanks!
how do I bake all dynamic objects in the reflection probe, including obejcts which don't have the "reflection probe static flag turned on" ?
I expect you would enable the reflection static flag, or use a realtime/on-demand reflection probe
how do i do something similar to camera stacking (urp) in hdrp? i need it for my weapon viewmodels
Custom render pass
A bunch of custom passes made for HDRP. Contribute to alelievr/HDRP-Custom-Passes development by creating an account on GitHub.
im using unity 2021.1 with hdrp 12.1 tho
the only version this has are 2021.2/3, 2020.2/3 and 2022.1
Concept is the same🤣
that's cool, I didn't know there was an implicit exceptions made when switching render mode.
how do you guys like HDRP?
Very much
love
@eternal laurel @pulsar skiff what do you render in it - can you show?
oh
i render weapons
its a fps game
you still there?
@signal osprey
show us your stuff, dude
What do you want me to show
The weapons are several gameobjects on a layer named. Viewmodel
I also have a second camera that only renders that layer from before i upgraded from urp to hdrp
In urp there was a thing called camera stacking that rendered that second cameras view onto the main camera
You are asking me to show you stuff without telling me what you want to see
the game
Here is a pic from before upgrading to hdrp with the camera stacking and the weapon being rendered on top
https://media.discordapp.net/attachments/998645849317969974/999037173741396059/ApplicationFrameHost_AeYuSJfGOQ.png


Here i sent some more
Do you want to see the hierarchy?
I cant send you a pic but this is how it looks like:
MainCamera:
-viewModelCam
-flashlight
-weaponHolder:
--pistol
--shotgun
--grenade
--ar2
--physcannon
Main cam renders every layer except viewmodel layer
viewModelCam only renders the viewmodel layer
no i know how to use stacking, i was only curious to see what benefit of HDRP over built in
What do you mean? Hdrp looks so much better
Im doing it for the graphics
Vfx graph, shader graph and decals
Volumetric lighting ,ray tracing, hair shaders
You came here to ask me why im using hdrp?
Seriously?
Acting like you are goig to help me just to say what is the benefit of using hdrp in the #archived-hdrp channel
What did i do to deserve this
Are you guys seeing this?
Ig im gonna have to do something about it myself
what a drama queen 🤣
You were literally acting like im waisting your time when it was the opposite
a custom pass blit appears to fail only in release builds. when built with development mode checked, everything works 😦
hey guys, i made this shader named water which should look something like this and actually did look like this in urp and hdrp deffered renderer but as soon as i changed my lit shader mode to forward every material using this shader became invis, how do i fix it?


guys please help. So i added hdrp to my project. And after adding it everything turned pink. Then i foun how to fix it on internet and now every texture is blue

im desperate with the grass in hdrp, what am i supposed to replace the details with?
uhh... does anyone know why i got this visual glitch? is it a shadow bias problem or something?
(edit: you can barely see it)

increasing the shadowmap res made it even worse

ok so i did a bit of playing and it seems to be coming from the directional light angular diameter
Yes, setting to angular diameter to 0 will fix the issue, but then you have sharp shadow edges which you might not want.
To get around this, you can use the Graphics > HDRP Global Graphics > Shadows settings to change the defaults shadow cascade effects. Playing with the Cascade count, Border and Split settings can help.
Or, it might be better to add a 'Shadows' override to your global volume, set the cascade count to 4 then play with the settings in there.
yea i did tweak the cutoff and blend of the cascades and it fixed the issue
thanks anyways

in my scene i have this issue
i think its a little too dark up in the corner
all light comes from the emissive lights on the ceiling
https://www.youtube.com/watch?v=Ww3lLYQqg_w maybe is this helping you, sound familiar
hey guys. ive come across a problem with recently on hdrp 12.1 and camera stacking
_first off, here is the scene set up:
1-a main camera that renders every layer except "viewmodel" with the depth value of 0
2-a second camera "weapon cam" that only renders the viewmodel layer witth a depth calue of 1 and the background type of "none" to achive
the depth value and backgrounds are set like this to achieve a effect similar to urp's camera stacking to avoid weapon clipping
3-and at last, a planar reflection prone
_the problem:
as you can see in the gif a portion of the "weapon camera" goes white when the planar reflection probe comes near its field of view?
it doesn't happen with the normal reflection probes
_things ive tried:
ive tried excluding the probe layer that the planar probe is on(basicly making it so the camera dosnt render reflections from that probe) yet that did not achieve anything
this problem is really bothering me and any help with this issue would be appreciated .thanks for reading

also please ping me if you respond, thanks :)
You got a few ways to go around this, one is switching to medium quality shadow filtering. Less nice/smooth looking shadows, but the issue will be gone.
Another is turning on cascade blending, increasing it on every cascade, and lowering angular to 0.4 or thereabouts.
I reported this bug a long time ago.. but HDRP doesn't care much about high quality shadow filtering except for demo purposes, so fixes are slow unless they need it. So many issues and bugs I've reported related to high quality shadow filtering (even though it's a massive quality increase compared to medium..)
You shouldn't use camera stacking in HDRP, extremely high CPU cost and there's nothing you can do about it. It's not like URP/built-in.
what should i do?
i want my weapons to be seen in a different fov then my normal view
i tried the compositor, everything went white. i tried custom passes, nothing happened
following official unity tutorials
I remember many people do the trick in a custom shader for the weapon itself, what to do exactly is more complicated, (google around there's many threads about camera stacking alternatives/what to do in HDRP)
i spent like 2 days looking for solutions
i did not see any shader related things?
But for UI you can use this: https://github.com/alelievr/HDRP-UI-Camera-Stacking
only usable for UI though
Optimized implementation of camera stacking for UI only in HDRP. - GitHub - alelievr/HDRP-UI-Camera-Stacking: Optimized implementation of camera stacking for UI only in HDRP.
I'm not sure about this myself but I do remember reading a few solutions when I was googling for camera stacking alternatives, wasn't for FOV though but there's probably something out there
or post in HDRP forum section
don't remember exactly but it's pretty bad, you can check it out in the profiler
=|
there's also a GPU cost, not just CPU
ik
so urp does it in a diffrent way resulting in more performance?
im really tired of searching online and not finding any solutions
what im doing rn was recommended to me by a friend
https://forum.unity.com/threads/fps-gun-rendering-fov-corrections-and-no-clipping.893875/
https://forum.unity.com/threads/fps-sample-shader-graph-for-weapon-fov-not-working.576796/
I've been searching for a few days to find the best way to make the guns in my FPS render with a different fov and not clip into walls. Every resource...

Hi,
As we can't use the version of HDRP in the FPS sample it would be great to have the FOV adjustment as a shader graph. I tried and failed horribly...
alright!
ill look into it
so both of these change weapon fov too?!
great!
thank you so much!
the shader is broken af with lighting
it just looks black
except the emissive parts given to it with emissive map
oh nvm
the maskmap was broken, just had to remove it from the graph
how do i fix the clipping? this only distorts the model to look like a different fov
@summer glacier

render the gravity gun on another layer
above the main scene
thats how games usually do it
but how
thats the thing
im trying to avoid using two cams and depth
because it costs like 50fps
maybe custom passes?
i tried them before but i couldn't get them to work
im not sure exactly how but no not by using 2 cameras
you need to tell unity to first draw everything else and then draw the gravity gun
Ah nice. How to fix weapon clipping urp
as if thats not what im trying to do xD
https://www.intetic.com/blogs/unity-hdrp-render-object-on-top-of-everything/
(it does it without a second camera)
Alright ill check it out
hey man, i did as the tutorial said on both the deferred renderer and forward renderer and my weapons are not rendering at all. i remember following this same tutorial before and got the same results as now. here is my custom pass

works in scene view but not ingame?


okay got it to work but things clip through eachother and are seethrough and... idk what is going on

the hand can bee seen through the handle. the tip looks weird , mesh is messed up
visual effect graph is uhhh

this shit is broken man
@lament mango


this is it "after opaque and depth normal" which breaks the rendering. and "before postfx" like the tutorial said which does not render anything. and none of these work when removing the weapon layer from the cameras culling mask like the tutorial said


weird.. they dont render in the correct order
hey chat, is there a way to make a light look the same in every scenario? i have this point light that i use as a flashlight but in some scenes it looks dark in dark areas, dark in bright areas and some scenes it looks very bright everywhere


maybe a script to change the light intensity in different exposures?
To make the light look "the same" you'd have to disable automatic exposure
Hello! In this image, the top version is from Blender (eevee), and the bottom version is Unity 2021 LTE HDRP. Despite the obvious differences, the only one I take issue with **is the shading on the left+down wall/shelf. **It's much smoother on Blender. Is there a way to approach this level of smoothness in HDRP? Maybe a shader or lighting parameter hidden in some pipeline settings?
Some details:
Both lights are sun/directional, hitting directly from the front, rotated 10 degress downwards. The light angular diameter has no effect on this shade.

The shadow on the Blender image looks like ambient occlusion to me. You can add SSAO (Screen space ambient occlusion) as an override to your post-processing volume and play with the settings in there.
If the light is coming directly from the front then you can also add a Shadow override to your volume, but first try adjusting the Angular diameter of the directional light to give your shadows diffuse edges.
If the back wood plane is seperated from the vertices of the rest of it you may want to connect them, thats the sort of thing that causes light leaking in engine, so i'm guessing the same may apply for shadows too
Are you aware if there's a way to render UI via custom pass after post process, as to avoid needing multiple cameras?
I tried to set it up, but it looks like my UI is still getting caught up in the motion blur.
Oh wow, I got it to work... nevermind! Custom Pass ftw!
i dont know if this is like global illumination but i think it might be
nvm fixed :D
Enlighten us
Hey everyone. Is there a way to have a sky like this :

But
with an exposure like that ?

Im trying to have really dark shadows/areas, but by doing so, the sky is not realistic
anybody know a tip for making the ray tracing less laggy
and also how to use emissive lighting with ray tracing
It would be very unrealistic if the sky was this bright and the building were as dark as in the second picture. I think the sky looks good on the second picture as well
Oh? Alright then I'll think I'll keep the sky dark as well, thanks for your feedback ^^
Oh sorry nvm
Yes, create a new post process volume with visual environment set to static, and your HDRI, assign it in lighting environment tab
and have another post process volume but set to dynamic, with sky set, and added to hierarchy. That way you can control the lighting and sky visuals separately.
I know you can use the local volumetric fog component to create additional fog that gets added to the global fog, however is there any way to subtract fog from a region instead of adding? My situation requires that the global fog is quite intense but certain areas need no fog. As far as I can tell, this doesn't seem possible for some reason.
I would rather not create my own volumetric fog, but I'm starting to lean in that direction
Nesting local volumes inside of each other is also additive, so I can't override a region of local fog either.
Suddenly, there are multiple GI solution that is about to hit asset store at the same time
H-trace, Erabus, Lumina and another one in URP forum
Idk what to choose 😂
What about having a not dense fog in the volume settings, but use local volumes to raise the density around the "hole" ?
But in the future it will be possible to subtract density
What is the difference between a "sky and fog global" volume and a "global" volume?
Sadly this wouldn't realistically work for my case as the area that requires no density is dynamically moving and rotating, and there are multiple different areas that will be like this. I am happy to hear that it's a plan for the future though.
Only name and the volume scritableobject inside. Just to separate the sky volume and other things shadow, exposure, post effect etc so they are easier to manage
does anyone have best quality settings for shadows (for a pre-recorded cinematic movie so idc about performance)
with me trying to find the best settings they either appear too blurry, glitchy, flicker, etc
also i have a problem with volumetric fog sometimes i can see those square/rectangle shaped holes

Maybe shadow distance is too large. Try reducing those.
Hi guys, why there is strange problem with lights?
Weird, still looks beautiful though
Does anyone know how I fix this? i recently activated Virtual Texturing, I set my shader graphs up to use them, but get spammed with this at runtime

guys, is it possible to extend hdrp with custom volume overrides? I would like to change some of my custom system parameters (for example camera parameters) and interpolate it the same way as the volumes are interpolated.
I think you can make your own volume components
https://docs.unity3d.com/Packages/com.unity.render-pipelines.core@12.1/api/UnityEngine.Rendering.Volume.html
oh nice! thanks!
hm, it seems that it should be possible to create new VolumeComponent with VolumeParameters. Sadly creating one with just test float volume parameter breaks the rendering
It should totally be possible.
I did play with custom volume components myself and didn't have issue. What did you do ?
I haven't played with it too much, i've just created component wit VolumeParameter<float> but I think I've noticed in the source code that it shouldnt be used directly, instead we should extend it so it doesnt have a generic type. I'll fiddle with this a bit more first
iirc, you just have to use 'FloatParameter'
https://docs.unity3d.com/Packages/com.unity.render-pipelines.core@14.0/api/UnityEngine.Rendering.FloatParameter.html
There's a lot of other types
thanks! I am starting to get it going. One thing that I cannot wrap my head around for now is to detect entering/exiting from the volume. Is it something that is prepared?
You need to update and get the current volume stack result using the volume manager : https://docs.unity3d.com/Packages/com.unity.render-pipelines.core@14.0/api/UnityEngine.Rendering.VolumeManager.html
Hi guys, im using the wind zone but not working with this plants model. Trees is working well, but plants or also grass not working. why?

Hey everyone! Im having a problem with HDRP, here is the situation.
The arrow represents the light source. As you can see, in the red circle, the light goes through the wall for some reason, and lights up the corner.
Another problem, in the orange circle, you can see some weird horizontal lines.
Anyone ever had this problem? Thanks.

hey guys, if i have 2 custom passes, how do i make it so that they dont overwrite eachother?
right now only one is working at a time
How do I publish HDRP project. It throws me an error when I try to publish it with OpenGL.
Not possible
OpenGL doesn't support many of the features required by HDRP
Even with URP and BiRP it struggles in some situations
How do I publish HRDP projects?
as a desktop executable
What kind of package do I need for it?
No package
A build support module which matches your OS

Bump ^^
Thanks to whoever finds any solution
Did you make a volume? If you did, try increasing or decreasing the exposure
I published Linux, Mac, PC standalone build, but it required unity for others. If I want to create a file for people who play on windows then do I have to take Universal Windows Platform build instead of the first one?
i solved it bro
sorry
No problem
If you want to make a windows build you'd choose the windows build support module
Last time I made bullet hole decals I used the HDRP decal projector, but I'm wondering if it's cheaper and smarter to just use a plane with a texture on it (for walls and other static objects)
With a bit of height to it to avoid z-fighting
I imagine it would be, given the limitations
But to know exactly if the savings are worth it you'd have to profile their performance
Does anyone know if there is an equivalent of camera.Render() in HDRP? I am setting my render texture and i want to force the camera to render, but i can't find the method that manually renders camera. For instance, URP has UniversalRenderPipeline.RenderSingleCamera(). Anyone know?
I'm currently having an issue where in the editor, the lighting from my directional light works just fine. However, when I build the game, it's like the scene has a giant shadow casted over it. Here's an image of what I'm talking about (top picture is in the editor, bottom is in the build). I've tried making sure the rotation of the directional light is correct in the build, using deferred rendering instead of forward, changing the light layer of the light, changing all the light parameters, and increasing the max distance for shadows in the shadow post process component. Only changing the max distance for shadows has had any effect, though it's still quite broken. I'm kind of stuck now, so any help is greatly appreciated!

i went from 2022.1.2f to 2022.1.17f and now none of the skinned meshes are rendering
only when I enable ray tracing, they appear when I turn it off
and its only the skinned mesh renderers
putting the materials on standard mesh renderers works fine so I assume the materials arent the problem

unrelated issue with the janky blur but its only in the scene view and im basically done with what I made this project for
looks like i gotta try my luck with a beta version or seomthign
restarting editor changed nothing
2022.2.0b8 fixed it
though weirdly the ray tracing is behaving differently now
oh they added denoising??? 
Ray tracing denoising has always been there, for path tracing it is relatively new yes
anyone knows what can be causing the shadow being like that ? I've check shadow resolutions lights and didn't work 😕 https://i.gyazo.com/306404bb8ec7886747090978bda0ca30.mp4
Looks more like light issue : Do you have a lot of lights in the scene ?
Can you show the inspector of one of those spotlights please ?

Hum, nothing suspicious here either ... But what you show definitively looks like a tiled lighting issue
looks like it was because of the shader i was using for a plane to create elevation

That really seems like a problem with per tile light limit or something like that
No, solution is found a bit higher 🙂
What special thing is the shader doing for elevation ?
vertex offset from a bumpmap
This is something very straightforward and should work 🤔
Might be interesting to see if it does the same in shadergraph
I saw but I still think it has to do with lighting tiles. Those tiles seems to follow brighter areas very clearly
yeah, the problem im the worst in shaders 😅 it will be pretty hard but lets see if i get somewhere
Where can i find the lighting tiles limit ?
By disabling this option on the shader gameobject completely solved the problem

@scarlet hull

????
This would mean that the issue is related to motion vectors, but it really doesn't look like it would have something to do with it :/
Im really confused with all of this, being honest 😅
I dont use hdrp myself but this seems very similiar problem https://forum.unity.com/threads/hdrp-tile-cluster-lights-rendering-bug.667234/
Hi , i have a Problem, the Hands of the Player in my fps shooter are getting multi rendered , can someone help me

Im using mfps 2.0 and hdrp
On a material using the HDRP/Lit shader... Why does modifying the emission not actually change anything during runtime? If I look at the material in the inspector, nothing changes. However, if I go into the inspector and change the values manually, it changes.
Code snippet.
m.SetColor("_EmissiveColor", Utilities.GetColorFromTeamColor(owner.teamColor));```help me decide between urp or hdrp please... my game is going to be on a computer but i dont know which to choose.. i know that hdrp is stronger... but I am not sure which to pick
(i am a beginner)
If you don't know, and your a beginner, probably better off with URP. Even better, built-in
most videos are built-in.
yes but i want to create shader graphs now.. i did work with materials in the normal shader... but now i want to add stuff.. i just dont know which to pick
I will listen to your advice... ill URP
thank you 😄
You can move into HDRP later, now is just learning
one last question though... just asking for your opinion, if you work on a game, which would you rather finish first the mechanics or the effects
sure thing !
effects? do you mean visuals
yes
You don't have to finish one before the other, they usually go together but it's good to focus on mechanics, visuals can be done later based on what you have
I understand what you mean, thank you
and that's what i did.. i finished most of the mechanics part... so time to do some visual stuff
When emission is set to not black on the material, the material inspector will toggle a keyword.
Since you are changing the emission color value from code without the inspector open, the keyword is not set, and the emission code is stripped out.
We now have a public API to automagically set all keyword and passes depending on the material property values : https://docs.unity3d.com/Packages/com.unity.render-pipelines.high-definition@15.0/api/UnityEngine.Rendering.HighDefinition.HDMaterial.html#UnityEngine_Rendering_HighDefinition_HDMaterial_SetUseEmissiveIntensity_UnityEngine_Material_System_Boolean_
Only available since unity 2022.1 sadly :/
If you're on LTS, you need to set the keywords manually, but to make it work in a build you need to be sure that the needed shader variant is included, using ShaderVariantCollection.
Or, here's an easy "hack" : set the emission color to something very close to black but not black, to have the material emission keyword/pass enabled, but not visible ^^
Got it. Thanks!
How to bake lightmaps?


Why do I get this message in the console?
I made sure to turn water on in the hdrp asset. I just want exp[eriment with the new water system bat it doesn't render.

how would i achieve this sort of lighting? it feels uncanny but is also well lit up


Change resolution method is”Scale in lighmap”
but,how to change realtime lightmap resolution?
why generate multiple textures?
how to decision resolution?


does anyone have any examples of modifying the normal buffer in AFterOpaqueDepthAndNormal?
whenever i try to do it, it just returns a solid white texture
https://cdn.discordapp.com/attachments/647891574755164187/1026339808173367367/unknown.png Just wondering if anyone knows a fix for this, upon building and running the screen is grey, only in developer build things render propperly. Yes i have a camera and is set to main and all that

Difficult to tell what could be happening from a screenshot of a blank screen. In your build settings are you including any additional scenes that could be causing this? That’s the only thing I can think off.
Have you enabled Clouds in the HDRP project settings? I haven't used it myself though.

Yes, I enabled all the Cloud things
does anyone know what setting i have to change to add a brightness setting to my game? does unity provide some kind of setting
Exposure maybe?
It’s a post processing thing
yeah that’s kinda what i’m going for now, thanks for the reply.
how do i increase render distance?
i have plenty of trees, but they arent visable and the shadow map aint showing unless im close to the ground

My bakes are saying they are going to take 8 hours plus, even when done on the gpu regardless of quality settings
Is there anything i can do about this
In case any help, I wrote a blog post of what I have learnt about lighting so far (still learning!) - e.g. there is the Exposure Post Processing effect, but you can also fiddle with ISO etc on the main camera or Cinemachine Virtual Cameras instead (which is easier to animate). https://extra-ordinary.tv/2022/09/25/lighting-tricks-in-unity-hdrp-for-cinematic-effect/
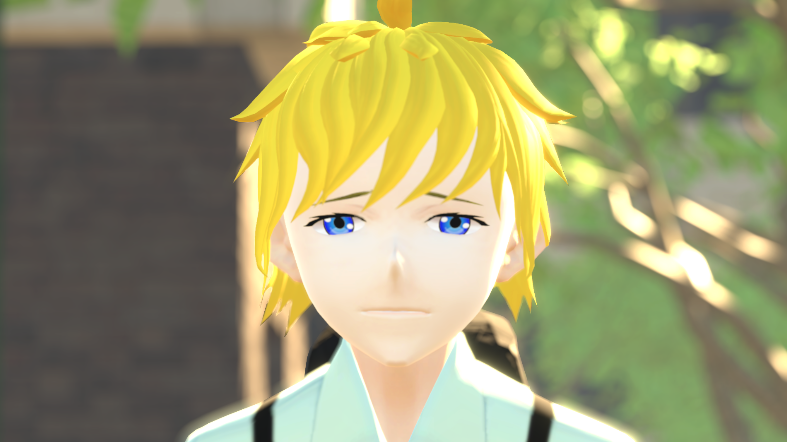
I am creating a simple animated cartoon using Unity and the High Definition Render Pipeline (HDRP). One challenge that comes up is how to control the lighting levels of shots – how to make it…
Do they appear in the Game window but not the Scene window? There are the camera settings for the scene camera for example. But there is also LOD (Level of Detail) if used by your trees, and main camera also has "Clipping Planes" for near and far you may want to check.

???

what are the shadow resolution settings on your lights? Also, you could turn down the shadow distance if your scene doesn’t need a 6km view
oh bruh they left the server, can’t even ping them now
Do you have a lot of high-poly static meshes in your scene?
i did not, cleared cache and that fixed i't
hey guys so i just made new project and installed Hdrp
but i get like 40 errors instantly and ive triwed to fix them but i am unable to
ok well when restarting not so many anymore but
Most of these are warnings unrelated to HDRP, not errors, and the messages seem pretty clear
If the red error about invalid dependencies persists, you'll need to check it for clearer details about what packages you may be missing
Yeah thats what i did it just says either reimport or check the version of the package is the same as the hdrp and it is did all those things ..
I'm having a terrible time understanding how these HDRP skyboxes work. The global settings seem to take over every scene in the project, no matter what skybox I place in each individual scene. Each scene needs it's own skybox. If I take out the *global * skybox, I get no sky's at all from any scene , even though each scene has their own skybox assigned.
At this point I'd be willing to pay for some help on my project from an HDRP pro who knows how this works, and can make the game more performant. (That's the other thing)
Selecting very low, low, medium, high and very high graphics profiles makes the scene look better, or worse, but has 0 impact on framerate. <shrug>
Any HDRP pro's need a side gig for a couple of days? 🤔
My best guess, each "volume" has a priority. So if you add a global volume, are you giving it a higher priority value? You can check volume priorities in the "Light Explorer" window (the second tab is a "Volumes" tab which shows which volumes are in effect and their priorities). (And no, I am not a HDRP expert - just learning myself at the moment!)
Under Quality / HDRP in the project settings I got some improvements by cranking up the Punctual and Directional Light Shadow resolutions. I then set the directional light game object shadow resolution to the max as well. It might not be your problem, but it helped a lot on my project.
Well that got to the end of my knowledge pretty quickly! Lol!
lol its ok
It's because you're using high quality filtering for shadows. And by default, the directional light angular paramater (basically shadow smoothness) is set to 1 which is too high.
Reduce it to 0.5 or so. You can find it in your directional light inspector.
Also high filter quality shadow depend on TAA to clear out noise, so in scene view make sure camera is set to TAA and refresh is on. Or you can just ignore the noise in scene view and try it out in game view with camera set to TAA.
Another option is to just switch to the medium shadow filtering quality option, then it'll just work as usual and less complicated. High offers better smooth shadows and a parameter to control smoothness.
Got it, thanks
Hi guys! Is it possible to use visual effect graph effects in HDRP + DXR mode?
Post only to one relevant channel please
Raytracing support of VFX Graph is currently undrer In Progress category in the official roadmap
Just a note that I have given up on TAA as frequently the artifacts it introduces are worse than the problem it solves - I often get a shadow trail behind the character for high contrast shots (e.g. dark character on light background). (I am using 2022.1.)
Im using HDRP for VR and I guess Forward is the way to go. People are also saying that MSAA is the best to use. Do I change that under the HDRP High Fidelity > List Shader Mode: Forward > Multisample: MSAA 4x? I also see it under the HDRenderPipelineGLobalSettings (every rendering tab). Or if someone else had a reccomendation please let me know! Thanks.
I set the anti-aliasing on the main camera (and the scene camera). (Actually, I tell a lie - I turned off the anti-aliasing as it was giving me more problems than it was solving, but that might just be for my project!)
Yeah, HDRP's TAA was very bad until recently. It should be usable now with the ghosting improvement, and the addition of a jitter parameter. Reduce jitter to 0.5, 0.6, should help reduce issues
In 2023.1 alpha, there's some new sharpening quality options that are much better than the current (and only) option
Any ideas why lightmapper doesnt seem to do much if anything at all in HDRP

It does make a slight difference but generally the room looks too bright, especially noticable where the desk is there is no shadow at all
Path traced it looks like this, a bit too dark but thats the look i want to achieve just a bit brighter in the end

Does anyone have suggestions that might help get me started on a good way to get color variance for things like clothing or metal? Most of what I found involves using MaterialPropertyBlock but I read that is not the way to go in HDRP? I'm not very knowledgeable about this area, but would like to create color variants of clothing and swords and stuff. What should I look into to get me started on the right way to do this?
Ambient light and reflections from the visual environment?
It took me weeks to discover “ground tint” in the hdrp profile. I could not work out why my characters had a light shining on their faces from below!
how do i fix? im kind of new to lighting and hdrp
Bake lighting and reflection probes.
I recomand to watch some lighting tutorials.
In this video, you'll learn how to create AAA-quality visuals for current and next-gen games. We’ll also show you HDRP’s key rendering features and how to tune settings for anti-aliasing, lights, shadows, exposure, and more.
Speaker:
Pierre Yves Donzallaz (Senior Rendering & Lighting Artist)
Did you find this video useful? Room for improvement...
Why not create materials or material variants ?
ok, im trying to make everything dark and only a flashlight as light but cant seem to find something that specific
but ill check out the video
Try to start with the "indoor scene" instead of outdoor then
I'm using new materials for each color variant at the moment but wasn't sure what is the usual way of doing this. I thought I'd see what other people are doing and learn something. Does the SRP Batcher make having these extra materials not really an issue when there are quite a few variants on screen? I'm really just trying to see what I need to start looking into to make sure I'll be able to implement a good way of doing this. If just using extra materials isn't going to create an issue down the road that works fine.
Indeed SRP batcher is here for that.
Ok, that seems like it will be much simpler than I was imagining. I appreciate you taking the time to answer my question!
Is there a reason why there have been no HDRP changes for 7+ weeks?
If you are refering to this repository : https://github.com/Unity-Technologies/Graphics/tree/master/Packages/com.unity.render-pipelines.high-definition
This is no more our working repository, we work on an internal repo and changed are mirrored in this public one "regularly".
The process takes time and is tricky, and over this, sadly not automated yet iirc.
Yep I know, but it was supposed to sync every 2 weeks, and I noticed it completely stopped, so I was wondering why.
Has the inconsistent folder structure and messed up workflow really made things easier?
I can see this helping someone internally who has never heard of symlinks, but for the most of us, this is just terrible.
Not to mention all of the previous PR's and paths that have broken due to this.
Not trying to bash you personally here, by the way.
Erm, it did made some things easier indeed:
It would have been better to prepare the automated synchronization with the public repository before such a massive change that affects all of us working with the HDRP codebase. This change has not only been executed in the wrong order (execute and then get ready), it has been 8 months and is still not ready. We're all left in the dark trying to ensure compatibility with the next release and it's almost scary waiting for massive dumps of squashed together PRs/commits without any of their original structure and messages, especially if we're getting 8 weeks instead of the original 2 weeks worth of data.
I think it's not the first time I see this feedback here ...
We are working to have an automated process and more frequent updates.
Indeed, and not even from me. I decided to not speak up until now, trusting things would improve without the need to raise concern. Apparently we didn't deliver enough feedback last time such a workflow disrupting change was delivered to the SRP community (december 2020) since we were greeted with current broken circumstances due to bad preparation only a year later.
In case useful, I have been keeping notes in a blog. Turning ground tint off for example helped a lot for dark scenes for me. https://extra-ordinary.tv/2022/09/25/lighting-tricks-in-unity-hdrp-for-cinematic-effect/
I am creating a simple animated cartoon using Unity and the High Definition Render Pipeline (HDRP). One challenge that comes up is how to control the lighting levels of shots – how to make it…
@loud leafglad to see you back mate 🙂
its internal now 😦
guys, I am really bad at shaders and got stuck with the rendering outline of occluded objects based on https://github.com/alelievr/HDRP-Custom-Passes. I can't figure the way to render outline only when it is occluded. The objects are being rendered to the custom buffer but the place where outline is being drawn doesn't exist yet in the depth buffer so I cannot compare it to anything. Does anyone have an idea or stumbled upon such thing?
I did this sample originally 😄
Haven't touched or even looked at it for a while, but iirc in the "selection fullscreen" shader, there are a lot of samples for drawing the outline.
You'll also see a depth comparison for the "fill" effect.
To draw only the outline of culled parts of the object, you can add a depth comparison for each of the samples, and it should be good.
yeah for fill effect it is pretty understandable for me as those pixesls exists in the custom & camera buffers
apart from that - I really appreciate your work, thanks ❤️
so the problem is that I can't compare depths at given position because in the custom color buffer where objects are being rendered to there is no depth information (as the outline is rendered "outside" of original object), right?
actually, I have achieved what I've wanted, but I doubt that it is a correct way:
        float4 outline = float4(0,0,0,0);

        float2 uvOffsetPerPixel = 1.0/_ScreenSize .xy;
        float customDepthSample = 0;

        for (uint i=0 ; i<sampleCount ; ++i )
        {
            customDepthSample = max(SampleCustomDepth(posInput.positionNDC + uvOffsetPerPixel * _OutlineWidth * offsets[i]), customDepthSample );
            if (customDepthSample <= db)
            {
                outline =  max( SampleCustomColor( posInput.positionNDC + uvOffsetPerPixel * _OutlineWidth * offsets[i] ), outline );
            }
        }
where
float db = LoadCameraDepth(posInput.positionSS);
Well, if it works 🙂
yeah, it works as it should. I mean that I've made something that works but my modifications probably arent the wisest ones 🙂 I don't like to fiddle with stuff that I don't understand decently at least ^^
hi, could someone jump in a call with me quick? i need some help setting up some basic lighting
nah bruh that aint gon help
sucker
Keep it appropriate and on-topic, please
ok 🥸
It was actually 2.5 by Default which is definitely WAY TOO much, 0.05 or lower is good
How do I get rid of this effect (Light becomes dimmer and lighter)
Have you tried using a "local volume"? You can define a volume that kicks in when you enter a region, where that volume could say change the camera exposure so everything looks darker.
oh, sorry, you said "get rid of" - I just read "get". Are you using automatic exposure? There are a few modes to it. I would try adding an exposure global volume where you set exposure to "fixed" just to see if it stops happening.
I am not using exposure in my volume
I am suggesting to try adding one, as the default may be automatic exposure which does a histogram of the screen. When you pan out, you see all the dark around the area, so it may be overcorrecting. To see if this is the problem, add a Exposure post processing effect but set it to "Fixed" (not automatic) just to check that is not the problem. (It was a frequently problem for me, so I set a global Exposure with mode set to "Physical Camera" so the ISO etc of the camera controlled exposure.)
Automatic exposure attempts to adjust to the void outside, making lights appear brighter
This does not happen in game assuming there player doesn't also go out into the void
i suggest switching to medium filtering. High filtering for point light shadows has a very large cost.
@summer glacier @shrewd moon @keen jay Thanks guys, I understand now
just wondering what causes unity to have models break when i import them

hello

im investigating volumetric clouds
but for some reason, it didt work in game, but work on scene
how can i solve this?
Random thought - could you have two volumes with same priority? It might randomize which one wins then. (Solution would be to adjust priorities of the volumes to different values.)
but i only have 1 volume in this scene ;/

Looking at image, is it something like the amount of light on the clouds, rather than the clouds themselves at fault?
sorry but I dont quite get what u mean
Its okay - it did not make sense when I thought about it either! 😉 Its just the brightness of the two windows is different and I was trying to think of why that might occur
The point of viewing the clouds is different, at a different angle I think.
i set the camera to the scene's camera position by ctrl + shift + f
A suggested thing is to select the camera, then "Align View to Selected" so the scene camera exactly lines up with the main camera.... (but bottom line is I am not sure. They are close, but not the same)
Great minds think alike!
lemme try..
i had aligned the view to the camera

but seems the same
any possible way to make 2 window's brightness the same?
I was just experimenting with one of my projects, and the scene and game view window clouds are not identical either...
🤔

I had to adjust the field of view of the scene camera, but yes - its in both.
ooh, i just fixed that.
i turned on local clouds
thats why it didt show up in game view
i shouldnt turn on something that i dont even know
Cool! Glad you worked it out. I had no idea otherwise. Local Clouds I think let you fly through them (like a plane).
ooh
thanks for helping me btw 👍
i appreciate it
No problem - I am trying to learn it all too. I often find debugging problems helps me learn more too!
Local clouds definition: "Indicates whether the clouds are part of the scene or rendered into the skybox. When enabled, clouds are part of the scene and you can interact with them. This means for example, you can move around the clouds, clouds can appear between the Camera and other GameObjects, and the Camera's clipping planes affects the clouds. When disabled, the clouds are part of the skybox. This mean the clouds and their shadows appear relative to the Camera and always appear behind geometry."
O.O
graphics rendering are just getting better and better these days
...and more and more complex!!!
ye
trees. how.
holy shit does speedtree not work
it's OK till the bark, then when the leaves come in it gets so, so, fucked
HDRP "the current render pipeline does not support grass details". Can't paint on my grass. Is there any way around this or should I do with hdrp? Ty
You can use the tree details, if you're talking about the default terrain system, it still works.
terrain detail for HDRP supported 2021.2 and after
use tree details (not good for performance), or use an asset that handles terrain object rendering (GPU instanced, nature renderer)
Are there good assets for trees and grass with hdrp? A lot of my assets did not upgrade to hdrp, meaning all my terrains now look rather bleak and empty.
Hey guys dumb question but is there anything similar like unreal's lumen in hdrp?If not is there any 3rd party asset that can work with hdrp that provides this feature
No.
You can find some real time GI plugins compatible with HDRP in the asset store, like this one : https://assetstore.unity.com/packages/vfx/shaders/fullscreen-camera-effects/lumina-gi-hdrp-real-time-voxel-global-illumination-231711

Add depth to your project with LUMINA GI HDRP: Real-Time Voxel Global Illumination asset from ARTnGAME. Find this & more VFX options on the Unity Asset Store.
Do u know if the performance hit will be bad?


