#💥┃post-processing
1 messages · Page 7 of 1
Mine does too
same
Now to move everything over and then try and get some sleep XD
@junior canyon The first thing you should do with the other project though is to remove the PP Stack package which you don't need. Then remove everything PP related and start over with that. It should really be as easy as creating volume, adding effects to it and making sure camera and the asset have PP enabled
I will give it a shot
I think you are misunderstanding what the local volumes do. They don't apply effects to a local area on the screen. What they do instead is apply the effects to the whole camera when the camera is inside the volume. In your case the best way to get Bloom to only one object would be to apply material to the object that has high color intensity. What render pipeline and unity version are you using? depends a lot on those how you would do that
Thats how I has it set up but I think I broke everyhting when I actively tried to convert a file from something els to urp
Ooooh, you're right, I did think that
Appreciate ur help tho
My unity version is 6000.0.34f1 LTS, and the render pipeline is on the screenshot (I hope thats the correct thing)

Alright. First you may enable HDR if it isn't enabled yet https://docs.unity3d.com/Packages/com.unity.render-pipelines.universal@15.0/manual/post-processing/hdr-output.html. The next step would be to create a shader that you can apply to the material (that allows you to set bright HDR colors). It should be really easy since your unity version supports shader graph UI shaders
I found some tutorial where the guy creates a shader graph, and he did enable HDR there somewhere
You think Im on the right track?😂

This is in the shader graph
That's the property for the color. That has to use the HDR mode
alr thank you, I'll look into that in like 10-20 mins and let u know
We can create a thread for our discussion in case you need further assitance
how can I apply the depth of field in a third person camera that follow the player?
By the way, why do I need HDR? My monitor doesnt even support HDR😂
Ye we might.
So I followed the tutorial I mentioned, created a shader graph, a material, set the HDR color to white, and in scene view my object IS white. However in game view its for some reason black and therefore it doesnt glow, obviously
And I did enable HDR like shown here
Your monitor doesn't but it doesn't matter. Without HDR, you can only use values between 0 and 1 for each color channel. Without tonemapping and HDR support on your monitor, you wouldn't see huge difference in the brightness on the screen but what it would do is make it possible for you to raise the threshold for the Bloom effect high enough that only these HDR colors would get the glow effect
This is how the object looks in scene view with the material on VS how it looks in game view
I set both the sprite color and the glow color (on the material) to white... Its so confusing lol


Excuse me, guys, I want to ask if anyone has experienced rendering a texture with post processing enabled but it's not transparent in Unity URP? If you know the solution, how can I make it transparent?
I'm currently using Unity 6
Solved Thankyou
Hi guys. I just updated from Unity 2022 to Unity 6 and my post-processing is not working at all, I’m using the volume component, then tried downloading the post-processing package and using the post-process volume component, but none work. Does anybody know what’s happening?
Do not download the post processing package, unless you're on the built in render pipeline
Try making a new post processing volume and a profile, and I'd recommend making a new URP asset as well, guessing you are on URP
Post processing is supposed to work as-is when upgrading, but 2022 to 6 can in my experience break anything
I was using URP yes
I tried making new volumes as well but nothing showed up
How do I create a new URP asset?
It's simply an asset you can create, but you'll need the instructions pinned in #archived-urp to know what to do with it
Okay, so now I’m in the place where it is indeed showing in some scenes but not others 😅 Same project, same settings in cameras, same volumes. Any suggestions?
Is it ok to have more than one camera with a post processing layer? Eg shmup kind of game and camera view- im loading a background terrain scene which only shows terrain layer, and then additively loading the “play zone” scene but because the terrain camera is not showing the player it would need its own PP layer on the play area scene. Is that fine?
Post-process Layer is for making your Camera interact with Post Processing Volumes on a specific layer, and usually to ignore ones on other layers
It's necessary to have different layers if you want different cameras to choose between different global volumes
But it may also be an option to have one layer but separate local volumes
Yeah the terrain camera is only showing skybox and terrain layer, but the rest is on depth only and various other layers. So would I just put the same PP volume on both cameras?
Since they aren’t sharing layers at all
iirc in BiRP only the final camera that's rendered needs to have post processing
If you want the same post processing to apply equally to the whole stack
Can it do pp on layers it’s not drawing? Like it’s set up for depth only, everything but the terrain layer, but can I still have the pp volume affect a layer the camera is not rendering?
Confusing
Volumes affect cameras
Cameras pick volumes by layer
Cameras can cull objects from rendering by layer
Post processing layers/volumes don't interact with non-camera objects at all
I guess what I’m thinking is
If camera A is set to clear skybox, only rendering Terrain layer
Camera B is loaded additively and clears depth only, targeting all but the terrain layer
If camera B has post processing that affects all layers”, will it affect the terrain entities that only camera A is drawing
I believe it does, but not because of layers
Ok thanks that’s what I was trying to say
In case you think that post processing is applied to objects by layer, that's not what's happening
It's per camera only
But a camera's rendered image includes what was rendered before by anyther camera
Yeah, I just wanted to know if a camera that is culling a layer could still apply post processing to that layer
You can definitely specify to exclude layers on the post processing component
But those layers only exclude/include volumes*
A camera renders all objects it hasn't set to cull, and it also includes in its render the image from cameras that rendered before it
Post Processing Layer component determines which Volumes affect the Camera
The layer mask in Post Processing Layer component does not exclude/include rendered objects on those layers
It is only used to pick and choose which volumes that camera gets its post processing from
I think I follow, thanks
So am I right to assume I should put the post processing on the camera getting loaded in latest?
If I understand your setup right, yes
And not "loaded", but rendering the last
There is someway to exclude the alpha channel from the post processing??
City map have a post processing, but the dialogue images have another
When I start the dialogue, the Post Processing are above the city. I want only that be in the character and dialogue text
For example: Maintain the city colored, but the dialogue gray
Alpha processing
I don't know if there's really documentation for it though
I'm trying to affect the Dialogue, but without affect the entire game :/
Let me know if you can get it working
I'm trying
But are affecting the alpha channel, and getting the game behind the dialogue :/
please avoid cross-posting
Anybody know why my crt filter's film grain is only working in the editor and not in the build? 😭


Build may be using a different quality level than the editor, and so missing some prerequisite
The CRT shader may be getting removed by shader stripping, if the system assumes that nothing is using it since it's not used on any specific object
so it's the quality settings I have to change?
Check that first
Quality tab of project settings should have multiple quality levels
Each of them is specificed to a build target, and the one that's selected/highlighted is the one the editor uses
ok, these are the settings, never been in here so I'm unsure


this looks like smt as well

Does anyone know how to fix this issue with the Lens distortian effect? For context the lines are just sprites with animations so I put them under an empty gameobject and the collider is supposed to go over/on the lines.

I'm using URP
What is the issue precisely?
If you mean that they don't line up with lens distortion enabled, that's not an issue because they do line up
The game camera won't ever see the colliders
Okay but I need to be able to click the collider to activate a certain script and that messes things up since it doesnt line up
I think instead of using a Raycast I'll instead use either a RaycastSphere or a Raycastbox
URP my screen is pixelated

it only becomes pixelated when I turn on post processing in the camera
that screenshot is with no effects on
how can I modify those depth parameters in a script?

I've been working at this problem for a couple of days and I can't seem to get it working. I am trying to build a CommandBuffer which renders selected Renderers into a RenderTexture, respecting the depth buffer of the main camera. Here's some of the code I have so far that doesn't quite work:
// Inverse Bloom effect darkening space around certain objects
public class Deepblack : Singleton<Deepblack> {
    private readonly HashSet<DeepblackObject> deepblackObjects = new HashSet<DeepblackObject>();

    private CommandBuffer commandBuffer;

    private readonly int deepblackTextureId = Shader.PropertyToID("_DeepblackTex");
    private RenderTexture deepblackTexture;

    private new Camera camera;

    void Awake() {
...
        commandBuffer = new CommandBuffer { name = "Deepblack Buffer" };
...
    }

    private void RecreateRenderTexture(int width, int height) {
        if (deepblackTexture != null) {
            deepblackTexture.Release();
        }
        deepblackTexture = new RenderTexture(width, height, 0, RenderTextureFormat.ARGBHalf);
    }

    void OnPostRender() {
        int numDeepblackObjectsRendered = RebuildCommandBuffer();
        Debug.Log(numDeepblackObjectsRendered);

        Graphics.ExecuteCommandBuffer(commandBuffer);
    }

    private int RebuildCommandBuffer() {
        commandBuffer.Clear();
        commandBuffer.GetTemporaryRT(deepblackTextureId, SuperspectiveScreen.currentWidth, SuperspectiveScreen.currentHeight, 0);
        commandBuffer.SetRenderTarget(deepblackTextureId, BuiltinRenderTextureType.Depth);
        commandBuffer.ClearRenderTarget(false, true, Color.clear);

        int rendererCount = 0;
        foreach (var deepblackObj in deepblackObjects) {
            if (deepblackObj != null) {
                foreach (var deepblackRenderer in deepblackObj.renderers) {
                    if (deepblackRenderer.IsVisibleFrom(camera)) {
                        commandBuffer.DrawRenderer(deepblackRenderer, deepblackRenderer.sharedMaterial);
                        rendererCount++;
                    }
                }
            }
        }

        // Blit into a stored RenderTexture for debugging purposes:
        commandBuffer.Blit(deepblackTextureId, deepblackTexture);

        return rendererCount;
    }

    void OnEnable() {
        camera.AddCommandBuffer(CameraEvent.AfterDepthTexture, commandBuffer);
    }

    void OnDisable() {
        camera.RemoveCommandBuffer(CameraEvent.AfterDepthTexture, commandBuffer);
    }
...
}
However, this has the result of always drawing the deepblackObjects without respecting the depth buffer. For example, when I move the player's camera so that a piece of geometry is partially occluding vision of one of the objects, I want the resulting RenderTexture to only show the unoccluded part of that object, but it instead always renders the entire object.
I'm guessing that I'm doing something wrong with this:
commandBuffer.SetRenderTarget(deepblackTextureId, BuiltinRenderTextureType.Depth);
trying to pass the depth buffer information to the CommandBuffer, but I can't seem to figure out what the right thing is. Would really appreciate some help on this!
I've also tried explicitly executing the CommandBuffer in OnPostRender, instead of hooking into CameraEvent.AfterDepthTexture, but that also had the same result.
_CustomPostProcessInput <- Anyone who's writing postpro in HDRP, why does this Unity-generated texture not get resized properly whenever you resize the gameview?

It seems to never decrease in size, only increases if you increase resolution. If you decrease resolution, it keeps the same res :/
I'm trying to add a render texture to a quad and make the background transparent with solid color, but when the camera using it has post processing enabled, the background turns opaque instead even when I set the color values, including alpha to all zero

Anyone know what seems to be causing the problem?
I'm trying to adjust the weight of my post processing in code but I also use Assembly Definitions for the first time. So my question is what assembly definition reference do I need to add for me to be able to mess with post processing in code?
Since there are non called post processing and a boat loud with rendering?


Found it by just going through the list, it's the Unity.RenderPipelines.Core.Runtime if anyone wants to know.
I got sorta a 3-channel question about Shaders, Post-Proccessing, and URP.
Im trying to convert a Kuwahara oil paint shader to a full screen effect. Should I be trying to write a global volume Post Proccessing pass, or a URP renderer feature pass? How do the two things differ?

As far as I know, only if it's controlled by and associated to a volume override
But I may be wrong
hi, i am trying to create a post process hlsl shader, and i have the script with that blit function, i have the Image Effect Shader, i put the script on my camera and its not really working, i also tried adding fullscreen render feature to urp renderer and it also didnt work, anyone know why?
this is the code for that script with blit

okay nevermind, chatpgt made me a custom render feature script and it is working now
thanks anyway
From the documentation:
OnRenderImage is not supported in the Scriptable Render Pipeline. To create custom fullscreen effects in the Universal Render Pipeline (URP), use the ScriptableRenderPass API. To create custom fullscreen effects in the High Definition Render Pipeline (HDRP), use a Fullscreen Custom Pass.
OnRenderImage only works on the built in render pipeline
Ah okay then, thanks for info
I'm making a 2D pixel game with Unity 6 and I wanted to blur the background behind the UI, so I tried using "Depth of Field" for 4 hours and it failed. How do I do it?
perhaps telling us what steps you taken as there's really no tricks needed to apply blur independent to an overlay
also no posting on multiple channels please
hey, is it possible to make it so the entire game is in black & white except for e.g. red color, only using the post processing? I want to make some kind of "bullet time" where everything will go into grayscale except for blood effects
I'm on HDRP for now, if it is important
i managed to do it using color curves
I've done that by calculating the hue, then adjusting the saturation based on how close that hue is to a target
I have a screen-space distortion that is sampling a blit of the screen and distorting that so that this effect works in conjunction with transparent render pass elements, however I hit a snag with it and post processing 
If I render my object displaying the color blitted distortion at any point before 'AfterRendering', it shows up black even though the layer its on is set to be filtered out, but if I do 'AfterRendering' then I dont get any of the post proccessing and it looks out of place.
How can I get it to render after Transparent but before Post Proccessing but not be all black?

Pictured: Black if I render my object after Trasnparents before Post Proccessing, how do I make it not black but still before Post Proccessing?

Hey i'm new and I wonder if someone knows how to do a Sobel effect in Bult-in with amplify shader?
Use the sobel node?
no node in amplify shader
I would then expect you can’t make any effects that requires a kernel/loop in ase or shader graph without a custom shader code snippet (assuming you mean a sobel filter for edge detection)
anyone here familiar with the workings of the post processing stack? I have a custom forked version of the Post Process Stack V2 (for built-in render pipeline) that I'm extending to work for single-pass instancing rendering
while I have the shader portion figured out (i.e when in single pass instancing mode, the camera render targets actually render to a Tex2DArray rather than a normal Tex2D), the C# portion is where I'm stuck because when blitting to the screen it looks like it's still stuck to only one eye
and I'm not exactly sure how to go about blitting it so it appears on both eyes

context.command.BlitFullscreenTriangle(context.source, context.destination, sheet, 0);
//context.command.BlitFullscreenTriangle(context.source, context.destination, sheet, 0, false, new Rect(0, 500, 1900, 300));
//context.command.BlitFullscreenTriangleToDoubleWide(context.source, context.destination, sheet, 0, (int)activeEye);
//context.command.BlitFullscreenTriangleToTexArray(context.source, context.destination, sheet, 0);
//context.command.BlitFullscreenTriangleToTexArray(context.source, context.destination, sheet, 0, false, (int)activeEye);
//context.command.BlitFullscreenTriangleToTexArray(context.source, context.destination, sheet, 0, false, 1);
these are the different commands I've also tried, which are all native, and none work
the 2nd one yes is wierd/iffy, but I wanted to see if it also could have been a viewport issue and it isn't
Hi friends! I'm attempting to make lights in the sky, the esiest way seemed to use a object with bloom amd emission, but it seemingly doesnt work as intended; is there any way for a transparent oject to recieve bloom?
Or is there a better way to attempt this?
HDRP - 2021.2.61f
It does work
Technically there is no simple way to exclude an object from receiving bloom since it affects the whole rendered image
Bloom is based on brightness, so you can boost it with a high emissive intensity of a material
It may fail or flicker with extremely small emissive surfaces if they don't cover enough screen pixels, in which case particles around the camera are a more reliable method for a similar result
Thank you!
I'm still figuring out, but i eventually managed to make soem parts work
the other pards will be built in in a shader by other members of the team (mostly a smooth gradient from transparent to color)
but i was baging my head agaisnt the table for soem three hours before i noticed it.
,,,,im a bit sutpid, realized now that this level has heavy fog, therefore i could just use actual,,,lights.
¯_(ツ)_/¯
(im going to cry a bit)
Sometimes we all are a bit sutpid aren't we
double nevermind there, fog is only at ground level while im trying to get it to work on the sky, so the method i was working with does make sense for the stability of the project & scene
¯_(ツ)_/¯
i mean im less angry but now i think i might be going coocoo, alas, nothing not seen before.
You should consider emissive materials, emissive details in skybox or emissive particles
All work with bloom, and you know the details of your scene so it's up to you to decide which seems the best
they are all emissive!
i was having issues with the bloom & emissive, but worst ase i would just have removed the bloom, emissive was always a factor here.
but thank you
What issue? I don't think you mentioned exactly
It was transparency and bloom not working correctly, which was mainly solved by fucking around with the setitng up until then, this issue became 'how do i do this' and 'why common fix isnt working' to 'complete insanity overworking'
That's not very specific, but in any case bloom does not care at all what the material or shader are
It's only concerned with what's the brightness of that pixel after rendering
For a bit before transparency was discovered as causing some issues without the tweaking, it was that bloom wasnt affecting my object but the entire scnee, which was solved in a similar matter. Overall this all started when added a custom model and it decided to not act the same as it had with a unity 3d one (that notabily was opaque and not tested in teh right scene, which is a error by me)
learned that. Sorry for the mess of mesages, but thank you for helping me either way.
I'm glad you made progress
We can be more helpful the more accurately you present the issues and the solutions you've tried
True, true i should have done so (having my own server with a similar rule,,,) I was on a rush, will try to be clearer in the future! :)
hello, anyone here familiar with using LUTs for colour grading?
I learnt about it recently and wanted to try it out, but I'm getting some weird results
it makes the image a lot darker and I don't see why
this is using a neutral LUT


I'm very confused
okay I found it, it was the colour format in the import settings
wait, it's a lot better but it does still make it a tad darker
it's still doing very weird things
it's added a purple outline to the explosions, I'm not dreaming, right?
I disabled every other post processing effect to make sure it wasn't caused by them
unity 2021.3.11 BiRP btw
You probably shouldn't have compression on. Also if you didn't disable sRGB (I presume that's what you mean by colour format), that too
Yeah I disabled sRGB and compression, switched the colour format to RGB 24
It's a lot better, but I still get the weird things I showed in the last video I sent
Hi! I'm having a issue with the bloom aspect in post processing, when turned on it starts makign my entire screen flicker. (hrdp)
Hey guys, why my post processing dont work in the android build? Using the Built-In pipeline, it only works in the pc editor, but when builded it stopps
By default your build targets may use different quality levels, such as one that disables post processing
That's the first thing you want to check
If anyone else has this problem; stop nan's on the camera should fix it
Actually, nevermind.
It wasnt. Somehow.
any ideas?
(ps it started workign when the programmer got here to help me, sob)
I'm looking at the Volume system in URP for the first time. If I change the layer of my volume from Default to IgnoreRaycast, it stops working when I enter into it (with some post processing). Anyone know where I can change layer settings for volumes?
Cameras look for volumes using their Volume Mask, by volume component's gameobject's layer
I don't know if Ignore Raycast is a special layer in some way that may affect that
Hello Guys,
i am trying to update my Global Volume lens distortion via a script.
The slider changes during runtime, but not the effect - but if i change the slider manually, it works
anyone got an idea?
https://paste.mod.gg/meydebaczjyi/0
i am using URP pipeline
A tool for sharing your source code with the world!
i got it working.. i didnt have the right volume mask selected in main camer->Environment

first shot at postprocessing for my horror game, let me know how i did !!!
That’s good, especially for Built-In.
Make sure to get a skybox too
i could be wrong but I think im using URP, with a default skybox
but i totally will find a skybox
Oh right the volume icon is indeed from UPR.
but that rainbow circle on the bottom is from Built-In, did you convert or something?
Ohh, yeah I did. I have that because I was under the impression I’d still be using it with urp.
Yeah that’s a common mistake.
Either way, I hope you don’t go back to Built-In after using UPR lol
URP is better in every way.
And if you want really cool visuals, try HDRP, though it is quite difficult
I spent like maybe nearly an hour trying to figure out how to convert to URP, but if its worth it I might
Conversion is indeed bad, but when you just create the project as URP from the hub then there are no problems
yeah, this was my first project. I didnt know there was really a difference so i stuck with the deafult pfft
Yeah, all good
I have an issue where setting the dof focus distance in hdrp doesn't work how I'd want it to
I only get a real dof effect if I disable tier and just keep focus distance
I set it to volume and set it via svript
But it's too aggressive and leaves no tolerance for depths even slightly off
When I tinker with radius and step count, there is barely any effect so I turned it off
What should I do?
Cool!!
This was totally the solution to my problem, thanks for the screenshot!
is there a way to disable the fullscreen effect on splash screen ?
What's "the" fullscreen effect?
the render feature thingy
its okay tho , i ended up disabling in unity it and re-enabling it the first frame in game
so what does the max radius on dof do? It doesn't seem to do anything to me, only setting it to 0 disables DOF and any other value acts the same
It’s supposed to define how maximally blurry the far distance appears, if your other settings don’t max it out, you won’t see a difference.
You mean basically blur intensity?
no
So what do you mean by how maximally blurry the far distance appears?
It means only objects past that distance will be effected pretty much
But that doesn't make sense as I have the near and far blur ranges. I set those via code and they work as intended
Why would max radius override those values?
it means that an object that is far enough away to be super blurry, will only be as blurry as that value (max blur radius) allows, closer objects that should be less blurry than max-blurry will be unaffected. its basically actualBlurRadius = Min(desiredBlurRadius, maxBlurRadius)
Ah ok that makes sense
Might modify that via code too and see how it looks
im noticing some small artifacts or something in the background of my game that only seem to show up or become noticeable when i have depth of field enabled in post processing. might anyone know what's going on here and how to get rid of this?
they show up in this clip in the first second or two, down in the bottom right near the ship and the "Towers" button
seems to have something to do with the light reflecting as the camera moves, but not sure how to stop/reduce it


Hi, I am new to shaders and post-processing. I used a full screen shader graph to create outline. I wonder how I could apply those outline to only some objects
Not straightforward!
What I do is use an additional buffer to mask out or select objects that the edge detection shader then takes into account.
You could mask objects using vertex colors and have the edge detection shader check for that.
URP Color Adjustments -> Saturation at 0 creates very red screen. Whereas other modules, when the value is 0, dont modify the screen at all. Is this a bug?
Saturation -50 is more close to default look
confused why my post process volume isn't working when its set to blend mode, only when its global? the volume and the camera are like 10 units apart. Do I need a collider or something?


as you can see it works when I set it to global but not when its local, even if the radius is stupid high
nvmd
i cant read
I need a collider
can someone help me pls? i have a post processing for some cameras in my map to create CCTV cameras. However, when i try to output the cctv camera output it doesnt work.
1st screenshot is what i want to see (and is the actual post proccessing effect) vs 2nd screenshot (what i see on the render texture)


Is there a way to change the depth buffer format requested by Unity in BiRP? I have a post processing shader that needs a high accuracy depth buffer to create world position from, but one of the platforms being targeted defaults to a depth24/stencil8 format. My understanding is that format is what Unity requests by default and that many platforms will return a 32bit depth format. The effect in question functions on most platforms but has errors caused by depth accuracy on one platform that I have confirmed is using a 24bit depth buffer.
For performance reasons, I'd like to use the _CameraDepthTexture generated by the depth prepass rather than needing to render out a second depth texture of higher accuracy for the effect itself.
can anyone help me set up post processing? i have been following tutorials and cant get it working at all
if you are following tutorials and its still not working, I would suggest just asking about what you are having trouble with
like i think i have implemented everything correctly but when i change settings like intensity nothing happens, its probrbly just something small that im overlooking but no clue what it is
youll have to give us more info than that
show us inspector views of relevant objects and hierarchys and stuff
any chance i could jump in a vc and screen share?
Has anyone managed to get past processing volumes to work properly with the quest 3 in passthrough?
you mean you want them to apply to the passthrough? or is there some kind of bug with PP and passthrough
i dont think its possible to add PP to the passthrough, assuming it works the same as the quest 2, its just the same image the cameras on it see, its not something you can change
I’m having an issue where when I bake my lighting it gets stuck on 99% any idea?
Hi, is there any way for two gameobjects to have 2 seperate bloom properties
For context, My camera is fixed so I cant use local volume and I am using URP
No, but their materials can have different emission intensities which can be used to influence bloom
Bloom is a full screen effect so it can't be per object
ok
can you also please tell me that why my materials with emission disabled are also being affected by bloom?
It's a full screen effect based on brightness of each pixel, bloom doesn't know if something's "emissive", intensely lit or just otherwise bright
so i just need to increase the threshold?
Likely yes that is what you want
Increasing the threshold moves the brightness cutoff value, so less bright areas will not bloom
ok thanks
In my scriptable render pass I have passData.outputTex = resourceData.activeColorTexture;
This maps to RWTexture2D<float4> _OutputTexture : register(u6);
This leads to the wonderful error Attempting to bind texture as UAV but the texture wasn't created with the UAV usage flag set!
I have absolutely no clue how to get around this, I have spent hours trying every solution I can find online. Genuinly stumped.
I can't check atm but gut feel tells me you're trying to output to a tex that is by default, only an input/readonly texture, I'm pretty sure that's what resourceData.activeColorTexture is.
I'm trying to blit to a render texture from within a scriptable render pass. It's correctly visible in the frame debugger, but the render texture (and the material that uses it) both show up fully black. If my rendergraph looks like this, does that mean it's getting pruned?
In my RecordRenderGraph function, I'm importing the RenderTexture as follows:
            if(hasScreenViewer)
            {
                RenderTextureDescriptor screenViewerProperties = new RenderTextureDescriptor(screenViewerTexture.width, screenViewerTexture.height, screenViewerTexture.format, 0);
                RenderingUtils.ReAllocateHandleIfNeeded(ref screenViewerRTHandle, screenViewerProperties, FilterMode.Bilinear, TextureWrapMode.Clamp, name: "ScreenViewer");

                TextureHandle screenViewerHandle = renderGraph.ImportTexture(screenViewerRTHandle);

                RenderGraphUtils.BlitMaterialParameters screenViewerPara = new(source, screenViewerHandle, screenViewerMaterial, 1);
                renderGraph.AddBlitPass(screenViewerPara, passName: "ScreenViewer");
            }
Edit: I've come to the conclusion it's not getting culled. So I'm still confused, why does it draw to the frame debugger, but not the RT?


hi
My problem is this
this looks like this without Ambient Oclussion

and then looks with ambient oclussion

The problem is that the blood is does not affected by ambient oclussion
the blood is a texture put into a 3d Plane
So, how can blood by affected by that?
-
It does though. Look at your screenshots. The parts that are close to the pipes darker when AO is enabled.
-
I'd recommend upgrading to unity 6 as now you're working with a beta version and there are likely to be many engine bugs.
Its like...
There is a way that blood just draw below of the object?
(sorry by my english, im spanish)
Nope, the blood is doesnot affected by the AO, see the edges of that
the blood is just renderer up to the AO effect
AAAAH i see the problem
AO dont affect when the texture is transparent
only when it is opaque
I tried a different approach, similar to how one of the built in examples modifies a render texture, creating a new raster pass. This has the exact same symptoms: the pass draws in the frame debugger, but not to the actual render texture, and not visible in the scene.
            if(hasScreenViewer)
            {
                using(var builder = renderGraph.AddRasterRenderPass<PassData>("ScreenViewerPass", out var passData))
                {
                    RenderTextureDescriptor screenViewerProperties = new RenderTextureDescriptor(
                        screenViewerTexture.width,
                        screenViewerTexture.height,
                        screenViewerTexture.format,
                        0
                    );

                    RenderingUtils.ReAllocateHandleIfNeeded(
                        ref screenViewerRTHandle,
                        screenViewerProperties,
                        FilterMode.Bilinear,
                        TextureWrapMode.Clamp,
                        name: "ScreenViewer"
                    );

                    passData.source = source;
                    passData.destination = renderGraph.ImportTexture(screenViewerRTHandle);
                    passData.material = screenViewerMaterial;

                    builder.UseTexture(passData.source);
                    builder.SetRenderAttachment(passData.destination, 0);
                    builder.SetRenderFunc((PassData passData, RasterGraphContext rgContext) =>
                    {
                        ExecutePass(passData, rgContext);
                    });
                }
            }
Is anyone familiar with using the RenderGraph API for blitting into a renderer texture? This method works fine for blitting to the screen, but not blitting to a render texture.
Is it okay to access the volume stack inside RecordRenderGraph ? For example, to change the material of an effect ? Or do I really need a separate render feature for that
it looks like it updates the stack, then records the render graph, then executes that render graph, all before moving on to the next camera, so I think it is okay 🤔
update: nvm the default post process calls AddRenderPasses before the render graph is recorded anyway and i can modify its params, missed it somehow ^^'
I'm currently relatively new to unity and while searching for how to implement custom post-processing in built-in pipeline. I stumbled upon two approaches: "The Post Processing package" and "Use PreRender with blit or use CommandBuffers" and I don't really know what is the most convenient between the two , what if I need the depth buffer for my effect?
I've been trying to set the color of a TextMeshPro object to a HDR color. It looks like someone asked the same question a year ago (in the reply) and back (or whatever version was in use then) it seemed like the shaders for TextMeshPro materials supported setting HDR face colors directly from the inspector
I'm on Unity 6000.0.41f1 (with whatever version of TMP that gets built in) and it seems like this is not the case here (I've tried a bunch of the various distance field shaders)? I'm a bit confused
I can set HDR face colors through code though, that works

is there no longer a way to do this through the inspector?
I seem to recall the option disappeared from 2022 to 6 for some reason
damn alright thanks!
Could even report it as a bug to get some clarification at very least
But it's good to know that it's at least possible to still use HDR color
yeah, just a bit more inconvenient
ah you're right
was previously discussed here but no response yet
thanks!
i was making changes to my defaultvolumeprofile, saved the project and scene, opened the project and it didnt save my changes? why?
why doesnt saving just save everything, so annoying
this is what it looked like before it didnt save


now it looks like this

got it working, dont know how but i did
deleted a global volume i had and for some reason that fixed it
Hello there ! I'm looking for a way to do a blurry vignette. Any ideas how could I achieve that effect ? (Kinda like the ref). I'm using HDRP tho !

You could probably adapt the blur effect in here. https://github.com/alelievr/HDRP-Custom-Passes
GitHub
A bunch of custom passes made for HDRP. Contribute to alelievr/HDRP-Custom-Passes development by creating an account on GitHub.
You could also achieve this with a UI overlay. I adapted a partial blur for a photography system in my game from these samples. https://www.youtube.com/watch?v=LuS-TDTI8mU
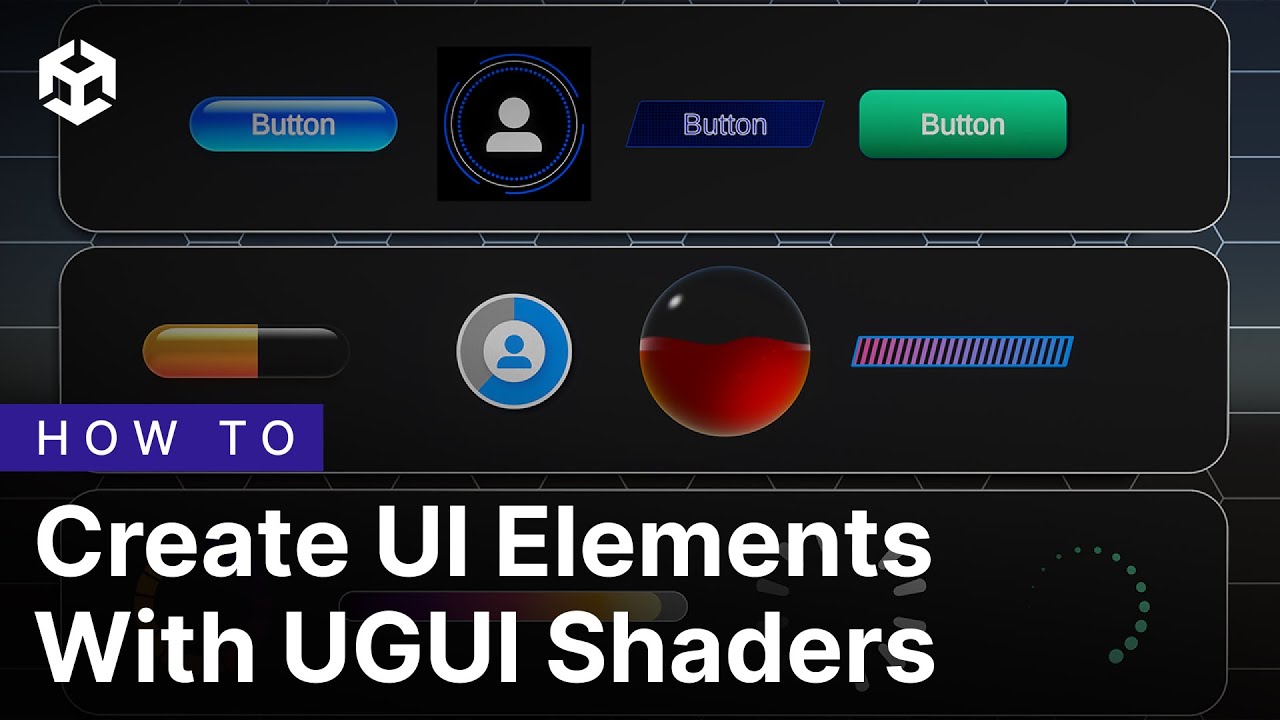
The Shader Graph team is excited to announce the release of our newest set of samples - UGUI Shaders - available to import now in Unity 6. This set of samples contains over a dozen user interface widgets, buttons, and backgrounds - all generated procedurally using Shader Graph. It also contains a library of more than 50 UI-specific subgraphs t...
It was easy and I have next to no shader experience
If the scene you're blurring is also shaped like the ref with lower areas closer and upper areas further away, then DoF would also work
That actually could be something interesting (and easier) to test, tysm !!
Hi everyone !
I've got an issue regarding FSR and DLSS (basically dynamic resolution).
I'm using a custom pass in after post process and the buffer's size seems to be incorect

Does anyone knows how I could fix it ?
Just found this https://docs.unity3d.com/Packages/com.unity.render-pipelines.high-definition@17.0/manual/custom-post-processing-dynamic-resolution-dlss.html
Gonna give it a try
I have a game volume and a ui volume, each on their own layers.
A main camera that is set to render normally, and have the ui volume layer disabled.
A overlay camera that is set to render as overlay and have only the ui volume layer enabled.
And for some reason the game volume does not affect the ui (expected) but the ui volume on the overlay ends up affecting everything. Why?


Use version control
(TLDR, trying to apply post processing to my game. And ui. Separately without affecting one another.)
I need to apply a post-processing effect to my render texture. I have four separate cameras outputting render textures for 3D UI elements and in-game monitors. The problem is that if I enable post-processing on these four cameras, VRAM usage spikes to 14–15 GB and the FPS drops to the 30s or even 20s. How can I apply the post-processing effect to these render textures without tanking my VRAM usage? Also, why does this happen in the first place? Isn’t post-processing a basic operation that is applied to the final image output?
further digging down i found the real spikes happens bcs of the bloom but have no idea why? it only spikes when 4th camera is opened setting it to 2 iterations helped much but still i have no idea why it behaves like this
What Render Pipeline are you using? SRP has a bad habit of trying to auto-apply postprocessing to every camera which will destroy VRAM bandwidth with 4 cameras when using a full stack on each
I am using URP 17.0.3 1 camera is players fps camera which renders at 2k and other 3 cameras are like cctv cameras that are reflected to a plane and each of them have around 1000x1000 res but mostly renders fancy 3d world UI so doesn't have complex geometry that vram spikes happens when I enable the bloom the other effects does decrease the fps but does not spike and freeze like that decreasing iteration to 2 did managed to prevent that spike but i really wonder what went wrong under the hood
also its not camera specific which is weird too
I'm not gonna lie.. so in URP Unity 6 - honestly starting to feel kinda frustrated about post processing.
So I want to have Depth of Field.. awesome. Add it to a volume, and boom, done. But wait, now all my particles have DOF applied, even if they're 2 inches from the camera.
No problem, I'll just use a camera stack, I guess... even though that seems unreasonably redundant. -Now particles appear behind everything, great.
So, basically, in 2025 using Unity URP there's no way to render Depth of Field AND particles? Is that what's going on?
I've tried everything.
Transparent particles are transparent. Transparent stuff doesn't write to the depth buffer. Depth of Field relies on info in the Depth buffer.
Alternates:
-Use alpha clip opaque particles instead of additive
-Write a custom particle shader that writes what you want to the depth buffer (then deal with other problems that creates)
-Don't place particles in spots where they can look weird like that

Guys, how to disable post processing for Canvas World Space?


Camera UI

Player Camera


anybody knows why most post processing work fine, but bloom does absolutely nothing?
Threshold is too high
oh wow it had to be a value between 0 and 1 !
even scrolling slowly it zoomed straight to 100 so I never saw the result with a tiny value like 0.5
well thank you kind sir!! :D@buoyant galleon
Help guys
!ask the question so someone can
:thinking: Asking Questions
:mag: Search the internet for your question!
:book: Use the API Scripting Reference and User Manual and this troubleshooting site for commonly posted issues.
:wrench: Attempt to debug your issue.
:thought_balloon: Find an appropriate channel by reading the name and description in #🔎┃find-a-channel
:grey_question: And don't ask to ask, ask a full question illustrating with screenshots if needed.
-# For more posting guidelines, go to #854851968446365696
check UP!
bump
Does your event camera have post processing enabled on it?
A canvas just renders UI elements, post processing rendering happens through the camera
yes
yes
I know, but I want to disable that Canvas World space with the desired layer is not triggered in post processing.
I use a cinemachine and two trackers to switch.
I’m assuming you’d want two cameras then and toggle between both of them depending when you should view the world space canvas. The event camera being the one with post processing disabled
I'm already using two cinemas.


Yes but i’m talking about your main camera. Cinemachine controls your main camera. I meant have one main camera for the world canvas and another for whatever else
how do I hook up the other camera?

how do I connect the second Cinemascope to the second camera?
At that point i’m not sure. I haven’t worked with cinemachine enough to know, but at this point it’s best to ask in #🎥┃cinemachine . Your issue originally was the post processing being enabled on your main camera. You can also have a script that toggles between the two different main cameras
Cinemachine cameras are not Cameras, they control Cameras
You have to understand what Cinemachine does to use it
It's likely not relevant to this issue though, post processing volumes affect Cameras by layer
But that brings the questions of do you actually have more than one Camera, and if so how are you combining their outputs
i dont know why my post proccesing dont work i enabled it on camera install it etc any help please im stuck (tried everything my lack on knowledge is the problem im new) urp
what did you install, it is actually already available in urp.
is this urp right

yes
yeah i did created it with this one
still had t install post processing
idk if i had
but i did it


this
what i did
install
its called post processing
any help if possible ?
that is not necessarily required for the version and pipeline you are running.
https://docs.unity3d.com/Packages/com.unity.postprocessing@3.4/manual/requirements.html
What tutorial told you to install that, or what tutorial are you following that is not working?

This tutorial will show you how to add post processing to Unity.
Music:
"Limit 70" Kevin MacLeod (incompetech.com)
Licensed under Creative Commons: By Attribution 4.0 License
http://creativecommons.org/licenses/by/4.0/
#unity #unitytutorial

Want To Add Post-Processing to your Unity project? Then this is the tutorial for you. Doesn't matter if your using Unity 2D or 3D, you can easily make you're game look much better.
Play My Games - https://jumbo-jump.itch.io/
About Me:
Hey, I'm Jumbo Jump, an indie game developer who uses the Unity Engine. I make videos of the games I make for ...
no one worked
i think its something in settings or idk cuz nothign works
https://www.youtube.com/watch?v=YYNMGq50d5g&t=221s this didnt work too and its only drag and drop

Recently the indie game industry has been flooding with Retro PS1 and VHS style horror games, Its become a Iconic Look to the Indie game Market and Today we'll be taking a Look at how u can set up a Scene in Unity to Look like A Old Retro VHS Style Horror game
The Assets that are used are fully Open Source and the Entire tutorial is Very Begi...
my knoweldge is so 0 cuz im new to this
but i have been stuck for 3 hours now
please do this official tutorial instead. Skip to the Post Processing section if needed.
https://learn.unity.com/pathway/creative-core
Start a new URP project, and do not install that post processing package
Unity Learn
Free tutorials, courses, and guided pathways for mastering real-time 3D development skills to make video games, VR, AR, and more.
ok il try thank you very much , can i comeback to you if it didnt work ?
You can ask the room, in general. my knowledge of Post-Processing uses the already installed stack in URP. others will know more than i do
the short of it is, the post processing stack you are trying to install is not compatible with URP or HDRP, they have their own. it is for BiRP, AFAIK. it makes things a bit confusing at first, because things can be in different places. once you get through that tutorial though, you will understand more
Hello all, I am trying to set up 2 post processing layers, where each one affects different layers. I have 2 volumes, one is on the MainPostProcessingLayer, the other is on a different one, then I have 2 cameras. One is an overlay with its Volume Mask set to the 2nd layer, and the main camera has the volume mask of the layer with the first volume on it. This works fine, however i have the overlay set to cull only the objects I want the post processing to affect. When it changes, it affects the whole screen and not just those objects. Why is this? and how can I fix it? I appreciate the help. I can also send some inspector photos if I wasn't clear enough. (URP)
Well I have been reading and since the post processing affects the entire camera and not just the objects it renders I might have to just resort to dynamically applying shaders :/
Heya folks!
New to Unity here! I am on Unity 2022.3.58, using the URP pipeline. I have several .CUBE 3D LUTs I'd love to use in my project, but URP only seems to support 2D LUT images
Is there any addon, script or otherwise that allows me to use a 3D .CUBE LUT or atleast let me convert from 3D to 2D
Can't find much at all in the interwebs :(
guys, can someone help me with this? yesterday this was supposed to be working fine

this light randomly started showin today
and idk its glowing like a particle thing , my mesh dosent have any particle system or anytg
and currently its happening with any mesh i try to import
hi, for my post process effect, I'm using OnRenderImage in the MainCamera using Built in Pipeline and I need both depth buffer and color buffer of a second camera, Currently I used two render textures updated using camera.SetTargetBuffers. But I have performance problems, is there a faster approach
Hey thought id join in and ask for help ive been having an issue , created my own problem, i use post processing after realizing after over a year i had my canvases set up incorrectly, i switched them to overlay which stopped all issues i was having , in regards to sprites updating flickering etc. The problem post processing does not apply to overlays. The issue with that is now all the ui looks dull, any ideas on quick fix? 🙂
What type of overlay
Set incorrectly how? I don't think sprite flickering is a typical UI issue
Ooo sorry my canvas used to be set on screen space camera , it causes flickering when the player moved , but post processing works on this , I set to overlay no issues , but I can't use a post processing volume 😦
The idea of screen space camera canvas is that it's rendered at a specific depth from the camera, which you can change
If the depth overlaps exactly with the Z depth of your sprites, Z-fighting would occur
If I recall mine is set to - 10 as I'm a top down perspective
So, are your sprites also at depth 10?
You'd want to bring the canvas as close as you can for it to be on top of the sprites
Or sufficiently close anyway
On the canvas it's set to 0 , well the sprite renders are
But the canvas matches the camera
You can swap the viewport from 2D to 3D mode to see where and how the overlap occurs
So you have everything at depth 0?
Oooo that's a really good idea , I believe all my ui alignments are at 0 yes
It only happens when my player moves
Sprites and UI both at 0 means they are overlapping, obviously
So their depth sorting is ambiguous
Because you can't have the UI any closer than depth 0, you'd instead move all your sprites away from the camera, or your camera away from the sprites in depth axis
Even 1 unit backwards should fix the issue
Hmmm and that's why it doesn't happen on a overlay canvas
Thank you this is interesting I'm still new to game development just over a year now self taught and others teaching me:)
Screen space overlay canvas is rendered later in the render loop, even after post processing which is why it's unaffected by it and why depth sorting ambiguity cannot occur
Screen space camera canvas physically exists in the scene as transparent geometry, at specified depth relative to camera
You have probably solved all my issues
So if i have a panel set to panel to z -9 and everything else at 0 would fix the issue or.am still not getting it
Not exactly, UI component depths don't matter for 2d sorting, only the Canvas Plane Distance
I forgot Sceen Space Camera canvas supports Sorting Layers
So it may be simpler for you to give its own sorting layer that's always in front of your sprites
I'd prefer to use Z position whenever possible, and let objects have ample space between them for flexibility, but ultimately it doesn't matter which you use
But it helps to understand them
https://docs.unity3d.com/Manual/2DSorting.html

I wish I could use post processing on a overlay , still to need learn and also thank you
You can achieve the same result with screen space camera
I would also instinctively avoid having everything at 0 depth, overlapping with a camera with a 0 near clipping plane

0 (or negative) near clipping plane on a camera can cause rendering issues
Currently it does use post processing on the screen space camera canvas yes
And having everything at 0 means you can't bring anything to the top depthwise because you have no room to work with, it'd instantly go behind the camera
Thanks again 🙂
The biggest improvement is performance when switching to a overlay canvas
But I lose all post processing and ui looks dull
This is my example

Off the top of my head there should not be a difference in performance
So, maybe something to keep in mind to profile performance later
Yes but definitely need to learn how to arrange my ui depths correctly
You have put me in the right path I appreciate it
The overdraw which is the biggest cost would be the same
Post processing is calculated on just one rendered image in both cases regardless of what's on it
If anything screen space camera seems like it should be cheaper
Maybe I'll switch to cinemachine
It could be my camera script
Cinemachine is good but it has nothing to do with any of this
As it's not involved in rendering
Not sure if you meant that but CM doesn't have any impact on performance either
Just making sure there's no confusion
Ooo I thought with me handling following the player etc that cinemachinr might be more efficient than my code 😳
Possibly, if your code is inefficient
But scripts that move some transforms are hard to make very costly
The advantage is that it has most if not all the features you'll likely need without having to code them
The relevance here is that it can also move it in the Z axis, which is easy to overlook in 2D
Maybe it's a star pathfinding, I just notice I significan drop in fps while moving
Good call writing in my notes
Thank you back to work 🙂
Guessing what the performance problem is won't get you anywhere fast
You should be analytical about it and profile exactly what's doing it
https://docs.unity3d.com/Manual/profiler-profiling-applications.html
The profiler is amazing I used to get my fps from average off 30 to 50 to 70 to 100fps still alot to do.

Profiling the editor is fine for a quick look, but as the linked article instructs if you want precise data you should profile a build
or how do I turn off post-processing when I'm at my computer? because I can't see the UI because of it.
Just disable the volume?
Or disable PP in scene window
Or in Camera's properties
How impossible is it to have a list in the inspector for a post processing effect?
Using unity 2021.3.11, built-in render pipeline
Bonus points if I can put a custom class in that list
I have a problem with post processing on a render texture
In the inspector

when applied to a raw image

if i add a black backround to the ui camera


When using post processing layer, out of my (VR)'s left eye i see white, but on the right one i see perfectly fine


is it normal that in brp the ssao post process stack does not work with an orthographic camera? is it because it uses a linear depth buffer?
oh not even in urp? I guess I can at least enable ambient occlusion in light baking
Hey, so I want to create a sort of a pixel art post process effect for my game I created the shader and the material I created does feel pixelated. The problem is when I effected it to the camera, when I play the game, the camera the effect is not applied. Do you have any idea why?
HI all I am using built in render pipeline and I have a global volume, but it affecting certain sprite I dont want it too. How can I exclude those sprite please. I set up a No - Post layer but its still putting post on it. Do i need 2 cameras??..

YDis?
https://gyazo.com/ed7bdcca5bd9ac9dab8e07d59b3c2139
https://gyazo.com/b6bd3780cfa9fad7af49b92adf0a950f
(Playing with post processing screen space reflection, Knowledge level: No, IDK maybe. I followed a few youtube tutorials but IDK what is going on...)


Also this
Actually I guess the arm in the cube is because that part of the cube is not in the cameras frame. But I don't know what to do about it.
im having a bit of an issue with the render/layering in my game
the fox is supposed to generate ABOVE the dialogue box, but behind the dialogue box background for the portrait (as you can see it does this already) the issue is the fox is supposed to retain post processing meanwhile the portrait box background is not. I haven't been able to find a better solution than this. I have 3 overlay cameras on top of my main camera, one renders the dialogue box, one renders the portrait box background, and one renders the fox itself, my post processing is on the fox's layer, but for some reason post processing affects anything that has rendered before it aka the portrait box background but for this to work it has to go in the order of portrait box background > fox > dialogue box.
any solutions i couldnt see?

If you're working with camera stacks, post processing is always applied to the whole rendered image as seen by that camera at that point in the stack, so it includes all the ones below
So if what you want is to 1. render the game with post processing 2. render the UI without post processing and 3. render the portrait with post processing on top of the UI, that's kind of a problem
Because the third render would apply its post processing to 1. and 2. again
I think you could render the portrait on 1. but use some method to always have a hole in its shape on 2. UI
Unity 6 URP supports Alpha Processing that does let you write alpha transparency on overlay cameras' rendered images, so it could carve the UI out of the third layer
hi everybody i would be interested how people here work with HDR monitors. My stuff looks good and visible on such hardware. When playing on a normal monitor (sRGB) the dark parts of the level are quite hard to make out.
I just realized that there is in the setting --> player: Use display in HDR toggle. I am using the build in renderpipeline. It seems to affect this as well (scenes look a little bit closer to sRGB) with the same post processing.
I think i will do all my visual stuff in sRGB in order to guarantee that the stuff is visible here as well.
Another option could be to have a toggle in the game to ask for HDR monitor and then use different Post processing profiles).
Any ideas how people here do that? thank you very much
Which render pipeline?
Well, I guess the general idea is the same regardless of that
Generally you'd configure your visuals, tonemapping and post processing for HDR input to look good (without a HDR monitor)
Then you'd additionally allow the user to enable HDR output for use with a HDR monitor, and do the extra configurations necessary for the wider gamut and brightness range
I don't think it's required to have different post processing profiles for the two modes, but you can have them if you want
Thank you very much! The build in renderpipeline. What do you means by extra config if not changing the post processimg provide. What to change then? Thanks
HDR output has settings that are only relevant to it, specifically tonemapping minimum/maximum brightnesses and paper white brightness, since you have to map image brightness values to monitor backlight brightness values
I'm least familiar with birp so I don't know if those are set the same way as in URP or HDRP
thank you very much!
Why is there a glow when i shine
A light on a white surface
Hoping someone might have some insight into a problem I'm running into. I'm trying to 'blit' to a render texture with another texture as a starting point for batch drawing multiple layered textures and materials together in UI. However, I'm not sure I'm approaching this correctly. I'm essentially using GL and the Graphics interface to draw into the active render texture.
The end goal would be to 'dirty' the render texture, draw a bunch of graphics related stuff inside it, and then draw that single render texture with IMGUI.
RenderTexture.active = renderTexture;
GL.PushMatrix();
try
{
  GL.LoadPixelMatrix(0, renderTexture.width, renderTexture.height, 0);
  GL.Clear(true, true, Color.clear);
  Graphics.DrawTexture(rect, mainTex, material);
}
finally
{
  GL.PopMatrix();
  RenderTexture.active = null;
}
But it's offset a bit. rect is the white area.

GL.PushMatrix();
try
{
  Rect normalizedRect = NormalizeRect(renderData.rect, rect);
  Vector3 center = new(normalizedRect.center.x, normalizedRect.center.y, 0);
  Vector3 size = new(normalizedRect.width, normalizedRect.height, 1);
  Quaternion quat = Quaternion.Euler(0, 0, renderData.angle);
  Matrix4x4 matrix = default;
  matrix.SetTRS(center, quat, size);
  GL.MultMatrix(matrix);

  Graphics.DrawTexture(new Rect(-0.5, -0.5, 1, 1), renderData.mainTex, renderData.material);
}
finally
{
  GL.PopMatrix();
}
Sorry for the spam, just trying to provide all the relevant context
nvm, managed to figure it out. I needed to translate the matrix but still draw in the render texture at normal coords (0, 0, 1, 1)
Matrix4x4 matrix = Matrix4x4.TRS(normalizedRect.center, rotation, size)
  * Matrix4x4.Translate(new Vector3(-0.5f, -0.5f, 0f));
GL.MultMatrix(matrix);
Graphics.DrawTexture(new Rect(0, 0, 1, 1), renderData.mainTex,
  renderData.material);
Hello, I can't get LUTS to work at all for my URP project. My current setup;
- I have a post process (global), other effects are working correctly. The camera has post enabled.
- I have edited the assigned LUT (originally neutral) with an obvious color adjustment in photoshop


Do other post processing overrides work?
@mighty stump Yep, I am able to enable bloom and dial it in/out and see it in scene view just fine.
Hmm LUT size in your URP asset matches the size of your LUT texture?
@mighty stump Yeah, I think so. Lut image is 256x16. Lut size in URP is set to 16,
How do I turn off Low Resolution Aspect Ratios pleasee, I have done everything and still can't. I am in the Game scene, Display 1, Free Aspect and Scale 1x

I'm not even sure what it does
What is achieved by disabling it?
From what I saw the Low Resolution Aspect Ratio literally makes ur game low resolution
It does not
The Game window resolution settings only affect how you see your game in the editor
Oh ok then the problem I am having is somewhere else
Unity games by default use whatever the user's native display resolution and aspect ratio are
The dropdown is so you can preview how they would look so you can ensure UI and other things still look right even when the resolution changes
what problem are you having?
I sent in the #📲┃ui-ux message
Post processing wont work
I did put post processing layer in the cam
And post p volume in cam
Didnt work at all
Which render pipeline is your project using
HDRP
HDRP has no "post process layer", that component belong to the post processing stack v2 package which is only for the built-in render pipeline
If you have that package installed, uninstall it and then follow the post processing setup instructions for HDRP that can be found in this channel's pinned messages
What is?

In that case you follow the pinned instructions for post processing for BiRP
LUTS. Anyone able to confirm if this warning message should appear? My pipeline asset should be set to LDR shouldn't it? Is it saying I need tonemapping enabled to make this work?

How do you guys handle color grading & tonemapping?
I’ve just been using Unitys ACES so far, but the colors, especially in textures, VFX, etc.—end up looking way off from the original.
Tried messing around a bit with AGX (via the Beautify 3 asset), but I just can’t seem to get the saturation and contrast to feel right.
use neutral tonemaping, find/make a LUT you like, stick it on there, done. Alternatively spend a whole bunch of time learning proper color grading (yt has lots of tutorials, though not unity/game specific) and the question answers itself.
This one in photoshop is a pretty nice default one (if you want analog film look, this is the one you want)

@idle swan Ah great, yeah i am deep in that rabbit hole, although I actually just need something I can stick to and move on.
Oh I'll definetly try this! I acutally searched for some LUTs, most I found were really artistic and changed way too much. (like a night scene LUT)
First thought was to recreate the agx-punchy or medium-high contrast look from blender but that did not work so well...
I just need something that does not look like Its raw log footage and handles emmisive materials more niceley than using no tonemapper.
The game is pretty stylized & rather colorful (like Zelda BotW, Tunic, Genshin, ...) so i want to solve most of it with my basic light setup and textures.
Its so weird that there is so little game-specific information about this topic.
Hi! I'm having an issue with bloom. When I move any object close to a light source, the bloom becomes overly intense and causes heavy overbright. Is there a way to fix this? Or is it better to just keep the player away from the light source?

Your light could be too bright, try decreasing its intensity or increasing the bloom threshold
if I make the light intensity lower it will be too dark, and if I make the Treashold higher the bloom will not be what I need
Try increasing the range of your light and decreasing the intensity.
doesn't work, maybe it's just that when creating a map, forbid the player to come close to the light source?
It's happens when I come right into the dense to the source of light
For the most part it’s not a game specific subject. There are just some game specific concerns that you need to be aware of, like readability of play relevant objects must be upheld. Slapping ACES on usually makes everything way too dark, though it looks nice… but regarding color balance, what looks good in film also looks good in game. Totally agree with you that most LUTs seem too extreme. But consider them in a context where you don’t compare them with each other. For example, In a game that very desaturated overall, you don’t notice that it actually is, until you view something colorful in it, or next to it. Anyhow, the pure film stock LUTs just add a layer of ‘nice’ and prevent oversaturation.
nvm
@idle swan Kinda, I see a little difference from film in that nothing is fixed. If I have a photo, then the colors and lighting conditions are just the way they are. But if the colors in games don’t look right, it might not be because of the tone mapping, but rather because our lighting setup is off or the textures don't fit.
Which makes it really hard for me to choose something as a starting point. I actually now realized I made a lot of my textures too bright to counter the ACES look, which is super annoying...
Buuut after trying some more stuff, I may go with the GT Tonemapper (which acutally looks pretty nice and neutral) or the LUT you suggested (although the Lut feels a bit warmer)
Like in film it’s a good idea to light a scene towards a flat exposure that maximizes the available dynamic range and pick textures/colors based on a neutral response. This makes your game workflow compatible with intuition and techniques from film.
Don't forget other material properties besides textures
PP, lighting and materials all affect each other and it's easy to accidentally try to compensate for issues with one by tweaking the others instead
I recommend finding solid references for one or more of the three categories
Like template scenes that have verifiably accurate lighting and exposure settings, and PBR materials from reputable sources
I have a Full Screen Pass Renderer Feature on one of my URP Renderers. Now I would like to apply a copy of the Pass Material assigned to that at runtime so I can change variables on it. But does not seem straightforward!! In fact ScriptableRenderer does not give access to renderFeatures
Hey! Im using unity 2022.3.30 URP. I want to make a basic image effect shader. I did this a while ago with no issues but cant seem to get it workig now, how can i implement it? Dragging it in to the full screenpass renderer feature doesnt do anything... onrenderimage doesnt do anything... do i need my custom scriptable renderer feature to blit the screen or what? My shader is in CG
Figured it out!
Nevermind no havent, _MainTex isnt being picked up here, any reason why? its just returning _Color

Figured it out, did not know i have to manually set the main tex.

I'm having an issue with Gaphics.Blit(src, rt, mat) where those artifacts are on the final render (green part), I've tested the shader and it works. It is a Gaussian blur shader I made myself.

Here is the code that makes the Blit() call
    void SetMaterialOnce()
    {
        Texture2D tex = img.sprite.texture;

        //tex.Apply();

        material.SetColor("_Color", color);
        material.SetFloat("_Radius", radius);
        material.SetFloat("_Blur", blur / 10f);
        material.SetFloat("_Alpha", opacity / 100f);
        material.SetTexture("_MainTex", tex);

        RenderTexture rendtex = RenderTexture.GetTemporary(tex.width, tex.height, 0);
        Graphics.Blit(tex, rendtex, material, 0);

        _shadow_img.texture = rendtex;
    }
I do not know why those artifacts are displayed. Can someone help?
Does anyone know how to apply post processing on a base camera AND overlay camera without the effects layering on top of each other? Im using URP btw
Why does my post processing look so different in maximized playmode compared to the editor game preview even if I scale the game window to be juist as big as the maximized playmode ?


nvm, im loading the scene again when entering playmode so that explains why its suddenly twice as bright
Hi all. I'm using URP, and I'm newish to Unity. Can anyone provide some insight as to how I can improve performance on my splitscreen multiplayer mode?
In my singleplayer and my singlescreen multiplayer mode, I get a cool 60 fps. I'm lucky to get 15 fps in my split screen mode. 4 cameras will do that I guess.
I'm totally new to game dev, so I'm just looking for some tips on how I can improve this to maybe 30 fps? Thank you!
Post only to one channel please
damn i shouldve known that was a bad idea i posted to three not knowing which one was best. sorry about that.
I followed this tutorial to enable Glow on an object (in my case, a 3D object) https://www.youtube.com/watch?v=I1C_es6wuDg
And I feel like I have everything setup right, but my object isn't glowing. I have the Post Processing package installed, the object has a Post-process Volume attached, it's in the layer "Glow" which is the same layer set on my camera's "Post-process Layer" component. What am I not understanding?

How to Make 2D Objects Glow: Unity Beginner Tutorial
My camera:

The object that should be glowing:

The object in scene view (at the tip of the wand):

Edit: I think this is due to following a tutorial for the Built-in Renderer. But there's another method for applying glow in URP.
The method is the same but it is the post processing part that is different. In BiRP you need to download the package and in URP, post processing is already there by default
how do I fix my ambient occlusion? im using urp and setting it up in the renderer itself

It isn't pretty but I cannot see anything necessarily wrong with it either. It is supposed to darken creases and holes which it seems to do here
its going through the wall dude
thats not how shadows work
Where? I can barely see stuff in the picture

you can tell theres a room behind better with the shadow than the mask itself 😭
these are my settings

I thought there was no wall in front but you saying it's a flat wall that hightlights the geometry behind? The ambient occlusion is based on the depth texture and potentially the normal texture as well so if the wall in front does not write into those, only the wall behind will be affected by the ambient occlusion. What type of shader/material are you using for the wall in front?
If it was a transparent material for example, that would explain it since transparent geometry cannot write to the depth buffer
on the inspector here is the material I am using

its not, in the editor for some reason its transparent but not in runtime
the screenshot I sent you was from runtime
I don't know what causes it but there's definitely something going on with the mesh/material, you can even see the grid running through it

Oh, why do you render both faces? I could see this potentially happening if the faces were flipped and you just enabled both faces to fix the issue. If that is the case, you should just flip the faces in your modelling software (and render only front faces). Don't know why exactly that would mess up the depth texture though
I did convert it to a probuilder mesh at some point for my wall cutout script but it didnt work and I didnt bother to patch it up I suppose, but that issue didnt happen after only recently
nah it works fine with front, i just made it render both because it was a bit more convinient
Also what is going on here?

like I said, its prolly because I probuildurized a plane object
since its so thin
Can i arrange the post processing effect order so that i firs desaturate the image and the apply chromatic aberration so in the end i have a mostly grey image with colorfull chromatic aberration ?
oh right, usually you would make the whole building be a single mesh though I don't see why that would mess up things so bad either
idk either, I guess its the downside of not knowing blender and having to use probuilder lol
I don't really know why that would be but there definitely seems something wrong with the mesh or the material
now its a normal plane object (no probuilder) and same issue with the occlusion

I'm really out of clues
If you're rendering the wall with RenderObjects feature instead of the default Opaque Layer Mask, it'll be removed from the camera depth/normal textures that URP generates for you.
Afaik there's not really a solution for that. You might be able to find some features (or maybe write your own based on / using the DepthNormalsOnlyPass.cs) to render those layers into the camera depth/normal textures or generate your own
Does anyone know how I can use AddRasterRenderPass to modify the activeColorTexture (I want to add outlines) in Unity urp rendergraph? The issue is that I can't use it as both input and output, do I really need to declare a intermediate texture and then have 1 pass to blit to the intermediate and then another to blit back to the activeColorTexture?
Nevermind, its not possible eith addRasterRenderPass, id have to use an Unsafe render pass
hey, so in my project my enemies flash white when they take damage. I do this by changing the emission intensity via a script. the problem is, the emission effect works as expected in the editor (scene view and game view) but in the build it is WAY brighter than expected, flashbanging the entire screen.
the thing is, I had to do some weird scripting stuff to get the actual emission value I want (a number from -10 to 10). this is my code:
IEnumerator DoOvertimeFlash(float duration, Material material)
    {
        float time = 0f;

        while (time < duration)
        {
            time += Time.deltaTime;

            //-0.4169 and mathf.pow(2) are required to get this to work. credit jdeangoldstein on unity forums
            float adjustedIntensity = IntensityCurve.Evaluate(time) - 0.4169f;

            Color colour = EmissiveColour *= Mathf.Pow(2f, adjustedIntensity);
            material.SetColor("_EmissionColor", colour);

            yield return null;
        }

        EmissiveColour = _cachedColour;
        material.SetColor("_EmissionColor", EmissiveColour);
    }
that method is from this forum post: https://discussions.unity.com/t/setting-material-emission-intensity-in-script-to-match-ui-value/739533/2. without doing the weird maths stuff it doesn't produce the correct emission result.
it works perfectly in the editor, but is extremely bright in the built game.
strangely, other emissive materials in my game work fine in both the inspector and build, it's only when I modify the emission value of a material via scripting that it breaks.
(I've tried not using the equation and instead using the absolute value given by the AnimationCurve (i.e. the 'raw' emission number) but that doesn't produce any emissive effects in the inspector or the build.)
well, I 'fixed' it by doing this before doing Mathf.Pow:
#if !UNITY_EDITOR
            adjustedIntensity /= 2.75f;
#endif
would love to know why this actually happens but that fixes it for now I guess
👋 Is there a free alternative to Beautify 3? I obviously don't expect the same quality, just looking for something similar that does the job
Hi, so im having a problem with implementing my own post process HLSL shader. Im using urp and unity 6 and i dont know how do i make my unlit shader work like post process. In previous unity versions chatgpt was able to generate some code to add a new Render Feature to URP renderer, so i just used to drag my shader in that script and all worked fine. Now the functions are obsolete and most of the stuff doesnt work anymore. I tried looking for some help on the internet on this topic, but it seems no one covered it yet (or im bad at googling lol). I hope some of you could guide me into right direction or show me some sources on this topic, thanks to anyone who helps :D
URP provides a Fullscreen Pass Renderer Feature now. Can use material using a Fullscreen Graph with that, or write a shader using the vertex shader from the Blit.hlsl include file. See https://www.cyanilux.com/faq/#fullscreen-shader for more info/example.
well, after testing my game on other pcs, some people have super bright emission/bloom even with this code...
not sure if it's from the #if directive failing or if its more wackiness with whatever's going on with emissive materials under the hood
Why do I get bloom when I enable the emission of the material but I do not get any bloom if I shine a really bright light at the object from slightly behind it to get a rim-light using some normal textures ?


Most likely explanation seems to be that the shader is clamping the maximum incoming light
Depends what shader is being used though
Unitis urp simple lit shader without modifications
and i get this really ugly flickering if the camera moves
Flickering is likely due to bloom's resolution
Usually it's half
If you're reducing the RT resolution then bloom will be proportionally more pixelated
I don't think Simple Lit clamps light intensity but you could confirm that by swapping to Lit
Its rendering to a render texture that is 480x270px, how can I fix the flickering. shoudl I add a second camera that renders the whole scene at a higher resolution and write my own boom shader that calculates the bloom with the high res rt and copies the result onto the low res texture ?
That could work
but is there a simpler solution ?
lit shader didnt change anything
where can i change that i dont see that option

It's not an option per se
found it, but theres no option to disable downscaling

I think it was only possible to get full resolution bloom by modifying the effect itself manually
But if you render the RT again at native resolution, half resolution bloom should be plenty enough
but I want the bloom only on this one rt and not for example on my pause menu that is rendered with a nother rt

Ill give that a try if I can find a guide online
thank you
Post processing is applied per-camera, and would include the images of all cameras that have rendered prior to that camera, so they're not per RT exactly
Probably most convenient to toggle Volumes on and off as needed
i have local volumes
That shouldn't be an issue
If you want to disable gameplay overrides for the pause menu, enable a global volume that overrides bloom and other post process multipliers to 0
I think theres a miscomunication, the pasue menu is rendered on another render texture and then I have a high res camera that renders these stacks of images that all have their according render texture so if I wanna do the bloom with the high res camera that produces the filan image it will be applied to every layer. Pls dont judge all my render textures, I made my own ui system becuase unitys ui has some really weird sprite sorting and i needed something with actuall depth sorting for my pinboard


I don't necessarily understand what the issue is
You presumably want to apply your post processing only to your final camera
And when you display the menu that you don't want post processed, you turn off the post processing at that time?
Or you can render your UI in the stack on top of your "final" camera if you need the UI to partially cover the post processed gameplay
(If you've tried to use Canvas with sprite sorting no wonder it's been weird, since Canvas uses its own sorting, not sprite sorting)
no I still want bloom on the game in the bg i just dont want any bloom on the ui
I didnt even try it cause cnvases have this weird thing where its rendered based on the order in the hierarhacachy
sorry
why do I need to render my game at 2x just to get 1x bloom, this fixes the jitter but everything is slightly blurry now TT


If your UI is rendered by a camera in your stack above your gameplay, the gameplay camera's post processing will not affect your UI
Or anything else rendered by the above camerae
That's not what you need to do but what incidentally also accomplishes it
all I need is full scale bloom that doesnt utilize any downscaling, why isnt this a thing TT
this is getting to confusing for me
What's confusing about it?
cause idk if we mean the same thing
I don't know either but you're not giving many clues about that part specifically
I assume you have a camera stack that has your gameplay and UI?
i have, somewhere in my world the ui that is rendered onto a low res rt. somewhere else i have the gameplay being rendered onto a different low res texture. then I have a camera that actually ouputs to the screen, infront of this camera there are planes displaying the render textures
You need the gameplay and UI planes to be rendered by different cameras and composited by the camera stack
Then the gameplay camera can have post processing which the UI overlay camera will not have
now I get it
isnt this gonna hurt my performance if i render the game 2x at 1080p and 2-3x at 270p ?
that also means my bloom is no longer pixelated, so i would need to render the 1080p rt at 270p once again and pray that all the pixels are still perfectly alligned
It would
I don't suggest you use render scale
I think you should either render the game first at low res, then that image onto the 1080p/native res camera that applies bloom at half res
Or modify URP to allow for 1:1 bloom directly on the low res image
thats the way I wanna do it, but i dont know how to do it
Basically you can copy files from package sources into your assets and you can modify them as long as you don't install an update to the package so it gets reset
For this effect you'd look at how the resolution selector works and what it's selecting
I expect set up a new RT for the 1:1 resolution and add it to the list
Don't know if there's some technical reason why that couldn't be done
Do we have this or not?
https://dev.epicgames.com/documentation/en-us/unreal-engine/using-radial-motion-blur-in-unreal-engine

Epic Games Developer
This page describes how to set up Radial Motion Blur in an Unreal Engine Material.
No, though HDRP's object motion blur may still work for spinning objects as the blurring with motion vectors is per pixel
Sadly I'm stuck in urp.
Urp's motion blur is similar, at least
So see how it works in your case
URP has object motion blur
Thank you so much, It was literally just 4 lines of code to add full res bloom. Im gonna put you in the credits, youv saved my dice game when it got all purple and your basically the only person that helps with post processing and rendering in this entire server.


look at this magnificent glow


how can I make certain objects not be post processed?

im running on URP
my current settings

There's not directly such option, because PP is per whole rendered image
If your material is emissive, a workaround is to increase Bloom Threshold and decrease emission intensity so that it does not bloom but looks right otherwise
it isnt though
its just using lit shaders
Then there's some other reason why it's bright enough to push past the bloom threshold
couldnt I make a layer and just tell the object to not render the post on said layer?
No, post processing layers are for excluding/including cameras from using specific volumes in their post process pass
Your bloom intensity is very high
So even just a tiny bit of brightness above the Threshold will quickly explode
While it's technically possible to implement per-object layer bloom, your first option should be to make sure your bloom is configured correctly
how can I fix my ambient occlusion?

its being rendered behind the wall
so you can tell theres a room, when you shouldn't
turns out its because of the way I handle my glass cutout shader
anyone knows a workaround?
Hi, I want to create a VHS effect for my main camera, but nothing is being displayed. I am really new to creating games with unity so I'm not that good. Even when I create a post-processing layer and volume, nothing changes. I have also downloaded and inserted various scripts into my camera, but they don't work either. Post-processing is installed in my project. Its a first Person Game and I have a first person controller for that (however, I don't believe that has anything to do with it). Please help!
Typical mistake is to install the wrong post processing
By default Unity projects use URP which does not use the post processing package
Instructions in pinned
Ok, I'm gonna check that out. Thank you very much!
I'm messing with scriptable render features for the first time. although, the link to the documentation in the code doesn't work
// This is the script template for creating a ScriptableRendererFeature meant for a post-processing effect
//
// To see how this feature is made to work with on a custom VolumeComponent observe the "AddRenderPasses" and "ExecuteMainPass" methods
//
// For a general guide on how to create custom ScriptableRendererFeatures see the following URP documentation page:
// https://docs.unity3d.com/Packages/com.unity.render-pipelines.universal@latest/index.html?subfolder=/manual/renderer-features/create-custom-renderer-feature.html
is there another documentation link i should look for?
nvm. found it 
I had a look at it and I don't really understand this so nothing I did really works. I cant even use scripts on my camera like vhs effects or something. When I put a script on my cam, nothing changes.
You have to specify what you don't understand or it's difficult to help
Post processing compatibility is per-render pipeline so if you're using an effect for the wrong one there's nothing you can practically do to to make that particular effect work
@barren gazelle Did you try setting your overlay camera's Clear Flags to "Don't Clear"?
Overlay camera's depth should not be less than the base camera's
can i use a blur effect with an orthographic camera? is that even possible with post processing?
because a orthographic camera doesn't have persp- oh okay i think i just did what i was looking for lmao
i think u can but not with the usual post processing blur
A big post explaining everything about Depth : Depth Buffer, Depth Texture / Scene Depth node, SV_Depth, Reconstructing World Position from Depth, etc.
Don't think unity's blur respects ortho so you need to fix it up yourself and apply your own
Hi all, is there any way to use post processing's blur effect and make it ONLY show on the edges?
In other words - can you take the way it looks without post processing (image 1), add the blur version as a lower layer (image 2), and then draw some sort of mask that gradually reveals the blurred layer underneath on the edges (image 3)?


Basically a vignette effect, but with blur
how do i pixelate a 3d object (including the edge not just the surface) but only specific object not the whole screen
im trying the same thing and im having issues
i dont know jack about post processign and every single tutorial is only doing blur effects for the entire screen
im thinkign of just ditching the blur idea and changing it for like a color gradient or something, this shit is hard...
👋
Is it worth buying post processing profiles from Asset Store or should I just make my own?
You're not alone in the struggle. I found one that did a blur effect a totally different way and it was putting the blur effect on a UI rectangle, so you could have it be a piece of the screen, but I couldn't find any way to gradually fade it out
i guess itll do for now, can you share what you found?
Think it was this https://youtu.be/yQzWt5FT930?si=CrHAFO7p7pM1hV24

In this Shader Tutorial, I will show you how to create a simple blur and pixilation filter using Unity 6 and Godot 4.3!
👉 Learn to write Unity shaders https://www.youtube.com/playlist?list=PLaE0_uENxXqsd-Ys_Hl2A83axiyTBVsRc
👉 Do you want to support my work? The best way to support this channel is to buy my game on Steam. https://store.st...
Hey follks, My bloom isnt playing nicely with my characters 'sway'
It kinda flickers and looks pretty odd, any ideas?
Adjust/lowering the 'scatter' seems to have helped alot
Is your bloom set to downscale?
I'm pretty new to post processing with unity but for is there a more effective way to blur the background of a side scroller. It could be my lack of knowledge but sometimes the effects are inconsistent


Since this is a 2d repeating background, couldn't you just blur the image itself via any image editing tool?
Would be the most efficient way
I create my level design using tile maps! So it would be difficult to do that way
I still wouldn't do a blur as any part of a rendering pass personally, since that would be an ongoing expense every frame. I would personally blur them at development time as well. If the depth is variable so the blur can vary, I would render a blurred texture at runtime as needed.
Doing it with shaders might be fine as well, considering this is a very low poly count thing you are doing here.
Blur overlay or post processing shaders can be just fine
You can't beat their flexibility and performance concerns always depend on performance targets
@fringe patrol But out of the box Unity doesn't really have tools for it
There's the DoF post process override but it only works for opaque materials, and somewhat relies on camera perspective so it's rarely a good fit for 2D games
So you'll probably want to be looking for some custom implementation or asset that fits your criteria
The topic comes up often for 2D, usually using Hollow Knight as the game people are trying to use as a reference
I think not pre-blurring your images will also give you a benefit of any HDR lighting effects. If you pre-blur you won't get the same kind of bloom interactions as a more "in camera" approach
It looks like you intend to do some 2D light stuff there, so you will probably want to try to go that route. Rather than drawing in your volume light - letting it happen naturally
I don't think we ever asked which pipeline he is using?
I don't personally do 2D, but if I did I suspect I would end up using a more 3D approach to it
Pre-blurring would be trading performance for a lot of technical and workflow limitations and comes with a lot of caveats and pitfalls so I'm not eager to recommend it
Yeah, I only originally said that looking at the style he was showing - it looked very old school and not using any URP features
But it would definitely look better to take advantage of the pipeline tools and let some of what he is hand drawing occur with more natural light/camera effects
They look like URP 2D lights to me
Oh, nm
Then out of the box URP looks pretty freaking flat 🙂
I really shouldn't be giving advice on 2D LOL
But I don't think it makes a difference, as long as the blur effect is compatible with the render pipeline and materials used
Those 2D lights have the volume cones, but seem to be having no gradient effect on the objects around them
2D lights have a "volumetric" option that creates thick cones like that separate from the illumination of materials
If the ambient light is also rather bright, the lamps' illumination would not stand out much, and there are different varieties of blend modes that affect that
The light can be filtered by sorting layer so it can ignore the background, and if there isn't much more than empty space under the lamps the illumination would not be that visible
That said they could just as well be some other type of lighting
Many ways to customize the appearance
As mentioned Unity's DoF isn't intended to work with sprites because it works purely off the depth buffer
2D blurs usually have to be injected at a specific render order instead
yeah camera DOF would definitely be something to avoid - the lost information of the obscured layers makes edges a complete mess
Great opportunity for the 2D renderer to implement that because it's already masking lights by render order depth using the same method
But instead that has to be custom
UI and post process blurs meant for 3D rarely can mask by specific transparency depth either, so it has to be specifically for that case
Camera DOF is one of my most loathed effects, and too many games use it
Certainly easy to misuse, and rarely helpful even when not misused
Most places where I see it used, I wonder why not just render multiple layers instead. Its usually for a dramatic effect where the depth layers are very clear... rendering two camera layers and blurring each separately would give a much better result. But I guess for simplicity of workflow... slapping DoF on works. Just sooo ugly
Personally, I would just rather not see it
I find depth buffer DoF can really work in a bird's eye environment like that of Tiny Glade
Or when some object is brought into a really close focus
No matter how much a dev likes any effect they should implement an optional toggle or slider for it, in any case
For sure 🙂
I'm new to this, but does anyone have an idea on why this depth of field has weird interactions with the water plane? The always looks blurred, and if my character sprite overlaps water, it becomes unfocused/blurred


And depth of field off

As mentioned right in the above discussion DoF only works on opaque materials
Transparent materials get the blur amount of whatever opaque object behind them
Also, that water looks opaque so maybe you can just make it opaque if you don't need the transparency
Not sure if this is the right place to ask,
But I'm having trouble making a quad always face the camera!
I'm really new to Unity, so I've been looking through forums, but the answers are pretty over my head with all the scripting
-# I know how to add a script in the asset folder, but I've no idea how to use it!
Anyone know what I can do?
this isn't post processing, this is more #💻┃code-beginner 🙂 have you got a script? What have you tried doing?
I'd suggest doing a unity introductory tutorial so you can get to grips with the engine. The GMTK flappy bird tutorial is great for this!
hi everyone, so I was trying to create a pixel perfect effect via downsampling game render texture but the result still yields some unwanted blurry pixels even if I set the temporary downsampled texture filter mode to point and turned off MSSA in project settings can anyone explain to me why is this happening?

and pls ignore the typo I've made 🫠
If both camera and graphics quality AA methods are turned off, it could be texture mip maps
thanks for the help but I've found another way
turns out camera pixel perfect component already gave me the downsampled non blurry texture
does anyone know why my plants here look so terrible? I took some prefabs from kenney or something, but in my scene they just look very triste

Too much bloom
I don't think I have bloom activated
it was the ambient lighting
it was to white I think
making that lower makes it look much ncier
hey guys, in HDRP is the global volumetric fog or local fog more performance intensive? Im currently using global volumetric fog on my post processing volume, the goal is to create sort of a "smooth" way to prevent the player from looking too far into the distance
global is what you're looking for, local is just for a limited space encapsulated with fog, I doubt it would be more performant if you stretched it accross the whole scene
Volumetric fog, whether local of global is significantly more expensive than simple distance fog
yikes ok thanks
ig for distance for ill use non volumetric fog and for lets say map-area specific fog ill keep them volumetric
Hi there! Im working on a project for me where I have a volcano scene. I found interesting trying to make ashes fall with a shader + post process is that even possible>?
I'd be looking into particles first, but I guess it depends on the game and perspective
If it's 2D or top down then you can do that kind of stuff with shaders more easily
I ended up doing other stuff and planning to adding some Bloom as the Postprocess, but I have not found a guide to do it, only people using the Package of PostProccess --> Bloom
Pinned messages has links to documentation for each render pipeline's post processing
Great thanks for the tip, I still do not know how to make that sahder, but Im working on it ❤️
You don't need to make a shader to have bloom
If you mean the ash effect, you have to provide more details
Earlier when I said shaders are "easier" I meant to say easier in a 2D or a top down environment than in a 3D perspective environment, but particles are still typically the easiest method
Hey guys, in a custom render feature in Unity 6 (using Render Graph) I can get the global volume stack like this:
public override void RecordRenderGraph(RenderGraph renderGraph, ContextContainer frameData)
{
  var stack = VolumeManager.instance.stack;
  var customEffect = stack.GetComponent<MyCustomEffectVolumeComponent>();
}
However, this doesn't work when handling overlay cameras and multiple volumes per camera. How can I get the volumeStack for the specific camera?
how do I get HDR on my render texture in unity 2022?

i found this but the formats they have dont show up for me, idk if they mean color format or something else but im not sure what to look for
is there a different format field other than color/stenicl?
so theres this
but what property does this even refer to
is it just Texture2D.format?
doesn't inherit from Texture2D...
this is majorly confusing
no idea how RenderTextureFormat is used nor how I can use the correct hdr format
wait... I might not even need it
@mighty stump Is there even a place now to general freeform discussion about lighting/urp?
Does anyone know how I can achieve pixelation like in this screenshot without using a pixel perfect camera? Maybe a shader, I'm clueless here


This short video tutorial covers how to get a pixelated look (also called "low resolution look" or "retro look") in Unity. This is a great effect for 2D and 3D games.
In this tutorial we learn:
- How to create a Render Texture
- How to create a Raw Image
- How to tweak some settings (game scale, camera warning, crisp pixels, resolution)
You ca...
This guy shows how to do it in 3D but it works for 2D too
Forgot to mention. I need it to not be forced into a resolution. So if you launch it on 1920x1080 or 2000x800 or 1500x1000 or anything else it won't look weird
in this game the game itself has pixelated art and over it is a chromatic abbrevation post process effect
are you trying to explicitly get the pixelation or the red/green/blue effect
pixelation. I need it very slight (Like in the screenshot) and adaptive to any screen dimensions
Also in case this is any help the screenshot is a geometry dash level, they have a pixelate shader there
Also the tutorial might be a bit outdated

in that case i think you could do the pixelation via tutorial, make it higher resolution and then add custom code for adapting it to your resolution
i dont think you can achieve a pixelation effect easily
So following the tutorial it's not working. The texture is just yellow

what version of unity?
okay, im opening up one of my older projects (also unity 6) to see if it still works there
It's gotta be this, it's the only thing you can plug a render texture into in the camera components

these are the settings i used for my rendertexture
you have r8g8, mby try the SFLOAT r32g32

What does your scene look like, i genuinenly dont know why its yellow for you
Unity 6 with its paranormal activity again

show me the display gameobjects inspector window
im using urp and my bloom just keeps popping out and idk why

its another scene but the same problem


only when i set the threshold to 217 it disappears
you mean tyhis?

for now I'll forget the pixelation
the object under canvas
also it could be yellow because there are no objects in the scene, maybe if you put smt like a box it would appear normal
there are
wait you mean renderable things
Those topics should now be threads in the #1390346776804069396 forum channel
It's a new change so time will tell if it works for the purpose


I never touch threads personally, they are just forums which is a totally different kind of interaction. Oh well.
How do I make it just pixelate instead of doing whatever it's doing here
People use Discord instead of Forums because they want realtime conversation, and to see what other people are talking about.
I haven't had to use them before either, but it's better to try than to prejudge
I'm here to solve issues, the format is not that relevant
Ultimately their goal is to try to improve things, not to alienate helpful users so our feedback is valuable as long as it's not just an impulse opinion
We added them along side of general chat at Photon when I worked there and ran the Discord. The conversations in Threads are very very different, and really just ended up being redundant with Photon's forums. People primarily used the general chat channels for questions, and only posted to the threads as crossposts (which got annoying).
The threads were good for very specific questions that typically would go on a Forum. But... it was still just a second forum.
And now... I am having this conversationn in Post Processing... because where else I would be having it? LOL
Anyway, not my server not my problem. Just a shame that another chat channel bites the dust
- I will add one more issue with this -
By making it into a forum - you now have forum answers in a location that are not findable on the web.
change it back to r8g8b8, could be that
It was a thing of the color range
yeah it was the color range
I hope it was
And now... I am having this
Now it works quite well

Hi, I have been recently learning Unity & shaders and things have been going well, but I got stuck on a particular issue that doesn't seem to have a googleable fix.
My URP HLSL shader works in the unity player, but not when I properly build and run the linux binary.
What I've tried:
- Including it in both the 'always included' and 'preloaded' shader lists (under project settings)
- Debug logging whether my renderer feature & pass code are actually being run; they are
- Creating a separate material, attaching a shader to it, and passing it in via SerializableField in my renderer feature's settings (which I've also confirmed exists on build via logs)
Does anyone have any guidance on what else I should look for?
Did you try different graphics API? I don't know which one are supported on Linux though.
Good idea.
I was using Vulkan, but OpenGL is the default and wayyy slower
I'll try it in a bit out of curiosity
No luck with opengl either.
Make sure your quality settings in the build are the same as in the editor.
got only 1 :/

Hmmm...
Try using the frame debugger with a build.
Starting with confirming that the draw call is there.
ah, that's a thing
ight found some time to check that stuff
the only post-processing effect I'm seeing is UberPostProcess, which is Unity's shader that combines all of its default stuff (like vignette, which I used for testing)

meanwhile in play mode, you can clearly see my FlowRendererFeature:

just to note, I tried changing the RenderPassEvent to various stages to see if it'd fix things
Sheesh, I finally found a way to get at least a basic magenta shader working.
the documentation for urp render pipeline stuff has been super sparse, and it seems I may have found something that become outdated in 2023...
Yeah, so there’s a bug that causes Unity ⪅2022.3 to ignore the RenderPipeline tag, and an error in the manual that instructs you to use the wrong RenderPipeline tags.
from said forum...
thanks, unity 👀
I appreciate the help @hushed grove
I can rest peacefully now
my first game starting to look pretty neat already, though the shader definitely needs more work once i'm done with a MVP


hi
I have no idea anymore where to post this

do you know what can be these things?
these are constantly visible
no matter how I move the camera
and only through this material

Make a thread in #1390346776804069396 with more details, such as which render pipeline, which shaders are involved, and which renderer features are involved if relevant
What effects i can add in the volume/shaders to make old camera look (besides crt and vhs)
Whats the simple way to do a vertex shader over the whole camera? Custom pass maybe
I'd like to use a vert shader to artificially shift the camera pos to view around the mesh
Vertex shaders are not running per camera. They're running per mesh. You can't rotate a camera in vertex shader, but you can rotate a the mesh vertices.
That being said, vertex shader in post processing is rendering a full screen quad and is unrelated to whatever object you want to rotate(or rotate around), so this is not even the correct channel.
Okay makes sense, I was looking at this custom pass method and it seemed like it could be done there https://docs.unity3d.com/Packages/com.unity.render-pipelines.high-definition@15.0/manual/Custom-Pass-Creating.html
How would I be able to put a vertex shader on all meshs, that would work, I'd just have to pass through the main camera pos, determain how the mesh can be warped to be rendered around the camera to seem shifted
Im not well verse with unity and its shader environment clearly, but my heart tells me its possible.
Honestly it sounds like a wrong approach, though I'm not sure why you're trying to do it this way.
Why not just rotate a camera?
the idea was to have the verticies warped to make the camera appear shifted. the original idea is to make a coop game where you can only see the visible mesh from the partner's view
also i just have been thinking its possible for a while and want to prove it
Its gonna be difficult, as you'll need a custom shader for all your scene objects(that you want to be affected).
but for now i just want to get a vertex shader working on everything
Everything already has a vertex shader. You'll need to replace or modify it.
Also film grain, easy pp effect
so two film grains, one to make the CRT, and second to make that noise?
You don't necessarily use film grain to make vhs/cry effects, but you can use it in addition to those
I made only crt with it
Just added to it the lines texture
VHS with shaders
Hey, quick question. In the new URP RenderGraph API, what'd be the proper way to combine the result of two cameras while using Stencil Buffer for masking?
My current set-up is:
- MainCamera - Base type
- Second Camera - Overlay type, inside MainCamera's stack, uses custom Renderer with a custom RenderPass (this is what I need to figure out)
- A shader that only writes the Stencil Buffer value of given surface to desired value
- A shader that renders only if Stencil Buffer is equal to desired value.
Essentially, I want to take the output of the Overlay camera and apply it to the masked out section of the screen (where Stencil buffer is >0).
Hi everyone I have an issue with URP Rendering Features, where I add the shaders as FullScreenPass, but even when I turn it off it works in some camera angles (Y rotation of the player) what is this and how to solve it?
https://youtu.be/oMHUamFKMSA

Hey, I'm using URP, Post processing and an android build profile. The anti aliasing doesn't work...I set it on the camera, but it doesn't apply on my shadow. Does somebody knows why? For the camera I use the Meta VR Building blocks für hand tracking

Would be controlled by adjusting Shadow Distance, Shadow Cascades & Soft Shadows option on the URP Asset, not using Anti-Aliasing
yeah that helped thank you!
looks like unity had some internal bug even after removing features one of them was displayed - needed to recreate one of the materials from shaders
I ported Unity PP Stack v2 Motion Blur to URP. It's leakless, but the NaNs problems still persist. The URP object motion blur is an unusable, simple shader (it samples the motion vector instead of the velocity calculated with the previous projection) and has color leaks. PPv2 Motionblur (AKA Keijiro KinoMotion) doesn't have this problem. It's written as a tile-based leakless version.


Shader Graphs keeps crashing my unity projects no matter how simple they are. I've tried some suggestions i read online. I've updated my drivers, restarted my computer, tried making new projects, tried making different shaders, but no matter what it will crash every few minutes whenever i start doing anything with the shader graphs. Any clues to what might fix the issue? I'm using 6000.1.10f1 and trying to make a 2d shader
New projects using a different Unity version, like 6000.0. or .2. ?
Does not seem related to post processing
#💻┃unity-talk or #1390346776804069396
My bad I was not sure where to ask. didn't notice a shader chat or thecnical help chat. Should i ask somewhere else instead?
Could, though there's very little anyone here likely can do about random crashes, unless you can narrow it down to something specific and/or post logs
You could file a !bug

🪲 To make bug reporting as quickly as possible, we made a bug reporting application for you. When running Unity choose Help->Report a Bug in the menu, or you can access it directly through the executable in the directory where Unity is installed. It will also launch automatically if you experience a crash.
📝 If your bug report is to do with Documentation, either an error, typo, or omission, you can report it by scrolling to the bottom of the page where you found the issue and click ‘Report a problem on this page’!
💡If your report is to do with a new feature idea, you can check the Unity Product Roadmaps page to see if your idea has already been planned.
For more complete instructions on how to report bugs, access: https://unity3d.com/unity/qa/bug-reporting
I'm trying to add bloom effect to make the candle fire glow, I set the main camera that has post processing layer component and post processing volume component to post processing layer but then all the 2d sprites glow. the layer for all 2d sprite game object is default and is not in the post processing layer, why is it glowing..?

I experienced a very strange bug last year that persisted across projects and caused numerous issues. It was related to editor layouts. These are global. It’s a long shot but you could try resetting your default layout. If not, I would install a different version of the editor to test.
Layers don't determine which objects are affected by post processing, all of them are
Layers determine which cameras are affected by which post processing volumes
Post processing is applied to the camera's rendered image
If the camera can see it, it's affected by all the same post processing
Hey guys
For a graphics manager in my game I want to add toggling of bloom and lens distortion off and on
Should I disable the volumes or reduce weight to zero
(PS) each pp effect is in its own volume not all on one
Pls @ me if you have an answer
Why not have everything in one volume and just toggle the effects on and off, reducing the intesities to 0, etc?
Any one of those ways works, I'd jist imagine disabling and enabling volumes would be slightly less performant
I’m looking for performance yea
But the effects are separated
Some are for only the bg
Some are for the rest of the game
They’re grouped
I would just create volumes for the parts of my game where I want the additional effects.
Global Volume: base post processing.
Layer on top local volumes for different effects localized to part of my game.
Yh I used layers
Anyone familiar with the hdrp vert shaders?
I posted on the main thread to no response, should I make a full thread?
I think the reason for no replys might have to do with the lack of concrete details from what I can see. It would be easier to help if you provided a simple example (e.g. image of the shader graph) which did not work, told what you expected it to do and what it does. You could make a thread of your own yes. Most likely the reason for the issues is in the HDRPs camera relative rendering which requires an extra step in the coordinate handling, I don't use HDRP myself, so I don't really remember how it was done
im using HDRP and i just discovered that disabling all PP boosts my fps by about 30. is PP supposed to be this intensive?
The HDRP settings on windows can get rather intense. You actually do need to be constantly evaluating your perf/fidelity distribution.
Like one full trip through graphic settings in a scene can result in high-res contact shadows, micro shadows, and then the base shadow map itself. That's before you start talking one of the 5-6 ray tracing features
30 relative to what? If it's 90 -> 120, that's a difference of just 3.1ms, which is totally possible for PP. It also depends on the settings and the kind of effects that were active as trent mentioned. It's totally possible to make one shader take 16/33/10000+ms if you're dedicated enough.
Point is, it's not impossible, but to get a better answer, you'll need to profile and investigate how much time each effect is taking.
Also avoid using fps as a measure of performance. Talk milliseconds.
What's the current proper way to apply a LUT to a scene comp? Back when I was using unity we always just used Amplify Color
I've given more details before in several messages, but the main idea is to offset and rotate the rendered positions of all triangles while maintaining how they look. This would allow the camera to virtually look as if it has shifted. I can't find any resources online talking about using hdrp and very shaders together
I've posted more info in #1391720450752516147
hey guys does anybody know how to make the volumetric for spotlights be visible at a very far range
Increase the intensity and range of the spotlight and/or decrease the density of volumetric fog
i tried that and it didnt work


the right picture is after i move back my camera just a bit
Well, increase it more lol. Do you understand how much light you actually need to penetrate that far into deep fog?
Hdrp lighting tries to emulate realistic light dropoff and such
Btw the lights get weaker the more range you set as their max. Maybe you cranked up the range by something ridiculous, so you need absurd intebsity.
Try setting the range at something you'd actually want to range to be and crank up the intensity
Hi guys, I'm making a semi-realistic survival game in unity3d and I just need some input on the graphics. Can you look at this screenshot of the game and give me some tips to add or change?

Hi all, I’m developing a PCVR project with Unity 6 and HDRP. My understanding is that generally for VR it isn’t advised to use screen space effects because they wouldn’t take into account the different perspective of the left and right eye and therefore they would create strange artifacts, not giving the correct stereo effect. Is this the case also for Unity 6? The effects I’m after are screen space reflections and screen space ambient occlusion
how to stop bloom from effecting everything


Raise the bloom threshhold

I don't know what setting material to max means
But you can increase bloom threshold all you want
the intensity of emmission
It just means that intebsity values over that value (threshold) will bloom, and values below will
So for example, if you set bloom threshold to 2, you need to decrease intensity below 2 if you don't want the material to bloom
Whichever settings you end up using, your intensity value needs to be lower than the bloom threshold if you don't want it to bloom
Will also need to enable HDR on the URP asset for values above 1 to not be clamped
any idea how i can remove emission for a custom shader the die i am using glows by deafult

You don't exactly "remove" it, because bloom is applied on final brightness of the screen pixels
Which means you have to ensure the emission value + any received light together (+any transparent materials on top of that) don't exceed your bloom threshold whatever it is
anyone know why this happens? i dont have any post processing stuff on that would do this manually

nvm fixed it
just set grading mode to ldr
Hello! I am new to Unity and I an trying to make a horror game whilst watching a tutorial, I can't get my post processing effects to work, nothing I do works and I can't find a solution...
- Post Processing Layer is on the camera
- Post Porcessing Volume is an empty object
Can anyone help me fix this problem?

Wrong post processing system for your render pipeline
Check pinned messages for the right instructions
why is bloom doing this whenever i clamp bloom it stops going all white


Intensity of 10 is pretty high. The higher the hdr color intensity, the closer the resolved color would be to white. Though it depends on some other factors too.
half of URP settings is not here anymore(6000.045f1) like stencil overides and what not .....where did they go?

Your inspector is in debug mode, perhaps that's why it looks different to you?
thanks....fixed
What can I do about this?
For starters, avoid crossposting.
hello, I am trying to obtain an anamorphic like effect in my HDRP scene and it seems there is something about it but i cant seem to make it work
the bloom settings show something related to it and that it's related to the camera anamorphism

but there is no "anamorphism" setting in the camera, am i missing something?

To use this property, enable UsePhysicalProperties.
-# https://docs.unity3d.com/6000.1/Documentation/ScriptReference/Camera-anamorphism.html
yes that was it
thank you
hey guys i am not sure if this is the channel for this topic, it's mostly about color blindness but the script i use just modify the color mixer overide in URP Volume, so i guess that count as post processing?
but anyways my question is this, for anyone who have color blindness of the three types, is one of the following images is accurate for your eyes? Because i am adding color blind support to my games.
1st image is Deuteranopia,
2nd image is Protanopia,
3rd image is Tritanopia.
the 4th image is just is how the game supposed to look like with no color blind filters on.
I'm open to any feedbacks.


[EXPOSURE PP SPEED ISSUE with ADAPTATION]
Returning from unreal to Unity for a small job I've got quite a big issue in the project I'm working on, I want the EV to change slowly but doesn't matter if I make the speed 0.001 or 50000, the speed won't change in either play mode or Scene view and it will be way too fast, if you move around you will have flashes of light sometimes for how fast it is.
Currently on Unity 6 (6000.0.4f1)
Anyone encountere this issue before?
@mighty stump Apologies for the tag, I saw that you are actually a very reactive member when it comes to Post Processing, in case you're willing to give me your two cents

I have to ask in here because frankly the forums are dead, but is anyone here familiar with the URP Render Graph API? Please reply/ping me if you do
I've been stuck on an issue that has been riding me for a few days now. Trying to render the scene using a custom camera, and in the frame debugger draw comamnds and the scene is being rendered and drawn alright. but the resulting color render target is completely black. if you know anything or are intrested in helping please let me know
Pinging is not needed, if I'm in a position to reply I will also see new messages
The settings do work, so the issue is elsewhere
Typically another volume component overriding the one you're modifying
Specifically you'll want to test the camera / game window in play mode, scene view is not precise how it uses automatic exposure values
hello I'm trying to make a custom pass to have some post effects only on certain objects and preferrably also masked based on the emissive map of an object
(well i'm trying to use a custom pass thinking that is the correct way but i dont know for sure)
but once enabled it my model start flickering and I have a warning saying
"your HDRP settings do notsupport ForwardOnly some objects might not render"
Im not sure if these problems are related nor if they are the solution I need but i have been looking for how to fix either for a while now....
if you have any suggestions feel free to leave a comment, I really appreciate it
It seems that the volume i'm using it's affecting 100% of the scene, I tried looking it up with the rendering debugger in the volume section, and yes basically nothing seems wrong but anything I try the exposure speed will always remain the same. I even changed the settings in the HDRP default profile and no it doesn't fix it
At that point I'd 1. make a new test scene and try changing that override as well as other overrides to confirm they have an effect
2. make a test project with the same version and the test scene there
Sounds about right, thanks!
Hello, We are working on hybrid casual mobile game genre. Can anyone help me with the lightsetup like make it look clean and clear. and assets seems distorted on edges. how to make them smooth on unity. in blender they are good and eyecatching but in game they seem distorted or say edges are distorted.
Post the question in #1390346776804069396 with appropriate tags and illustrate the problem with screenshots and detailed information.
why can't I edit the shader?

You need to make a new material and place it on it
oh thankss, it worked
Hey! This is probably been asked a lot but reconstructing worldPos from a pixel (Scene Depth). Is there a predefined helper node or do I have to fully do it by hand in custom HLSL function?
If it's in a Fullscreen Graph, using the Position node handles that for you
I am so stupid for not realizing that beforehand, also glad to see you answer 😄 learned a lot from your blog i randomly found a year or 2 ago.
hello, I asked something similar before but I'm still stuck
does anybody knows if it's possible to make a post processing effect apply only on certain objects, maybe with a custom pass volume?
If so can I ask for help to set it up?
I have been stuck for multiple days no trying to make it work wasn't able to set it up
thanks everyone either way
Assuming urp/hdrp, you can do it via the render objects render feature. It allows you to only render on top of objects on certain layers.
https://docs.unity3d.com/6000.3/Documentation/Manual/urp/renderer-features/how-to-custom-effect-render-objects.html
I was watching this tutorial to try and dip my toes into learning how to make unity effects but the tutorial went into the post processing volume object to add a bloom effect and I could not find information or the tool anywhere. If anyone knows what the modern method of doing it is itd help a ton thanks! https://www.youtube.com/watch?v=iCEHarLRCzI

Let's get this year started with some awesome fireworks in Unity!
Explore your creativity and get 2 free months of Premium Membership: https://skl.sh/brackeys18
● Post Processing: https://youtu.be/a0OQvWAPeuo
● This effect was inspired by: https://youtu.be/rBU7XNxQs84
···································...
The way post processing works is dependent on the render pipeline and may have changed over the years. Try to find an up to date tutorial for the render pipeline you are using specifically for post processing to follow
I don't know what you mean by mod vent, but more than likely it has nothing to do with the kind of post processing this channel is about. This channel is about post processing the rendered image
Hi everyone, im sorry if this isnt the right place, why is the skybox reflecting off the Marble coutner ?

Hey guys! Can I make a fullscreen renderer only render on a specified layer?
Tbh the new channel system is shitty and people are gonna keep doing this forever
Agreed. They should bring the dedicated channels back.
With some kind of mask or stencil buffer, yes.
Hey guys, I saw that URP is getting some interesting new bloom settings (https://github.com/Unity-Technologies/Graphics/commit/a34fca5e867e85dca8cec3bc14d2403666e421ff) and was wondering how or where I can find out in which Unity version this will be included in.
This is currently in the master branch but I'm not sure about the mapping to Unity version numbers. Thanks!

This is likely gonna be in an update to the urp package. As for when, that's hard to say. Maybe in the next version.
hello, whenever I move the cards in my card game the sprites and text appear and disappear, it's related to the position of the objects compared to the camera I think because it happens in the editor as well as in game. up close the artwork appears while far away only text is shown
anyone know what I can do to fix this?

Might be ambient occlusion set too high?
good morning guys. I have a small isuee. I work on a Avatar and after i put the Material. i saw a strange error. I try to find this missing black part in my texture or level but dont fint anything on it. Do u have a idea what i can dooo

any idea how to fix my forcefield shader to be rendered even in front of the 2D map? the force field is a sphere which is why it probably doesnt want to render my 3D object. Also my camera is set to Orthographic, any help would be much appreciated since this is a problem I was trying to figure out for 2 days already and had given up today


