#🔀┃art-asset-workflow
1 messages · Page 68 of 1


3D papercraft?, has a lowpoly feel to it! 😃
AK 2nd attempt

pog
Anyone aware if this UV mess of the LineRenderer corners is fixable in some way? Or should I consider using a 3rd party asset instead? 😅

how can i do so that i can add an image with transparent background on a object with a colour(material) on it
If it's an image with an alpha channel then i usually make sure I've set it's Texture Type to Sprite in the inspector window and make sure Alpha is Transparency ticked, and the alpha source is set to Input Texture Alpha
If you're using the HDRP you can tick the Alpha clipping box in the material options
Oh, if you're using standard pipeline then make sure you set the material rendering mode to cutout!
is it for blender?
Unity. For blender you can just add an image texture node and hook up the alpha output to the alpha on a principled shader. Or you can activate the add image as plane add on and use that
ok done tnx
https://streamable.com/zo8eki do u guys have any idea why cell fracture is broken

Any Zbrush users online?
delete the original cube
its not broken its just the original cube overlapping
It looks like there are two objects after the process has finished. Does one of those contain all of your cell fracture objects and the other one is your original object?
@quaint raft
nope i just remodel that object its worked
I've had to do that before, think cell fracture just glitches every now and again 😂
I really don't know where to ask this but does anyone know why my cube tiles border lines are not straight anymore? I was messing around with the ortographic isometric camera in Unity (so you can move it with WASD and rotate it with Q or E in a script) and for some reason the cube tile lines suddenly started having this wobbly look.

(Have to zoom in to see the cube lines not straight)
Oh never mind, I'm dumb
my view scale was at 1.1x, probably changed it accidentally while messing around with the camera
Yeah I am trying to explain him that
Made a new sword design for theme Reptilian (Swordtember)
https://twitter.com/FarrukhAbdur/status/1441287224360796160?s=20

Made this for theme Reptilian 🦎 #swordtember
#b3d #gamedev #indiedev https://t.co/j193SILPgg
You're on fire with the swords. Very cool.
might be a dumb question but when i make a new game object, how do i make it have the 0,0,0 position???
Type, 0,0,0 in the transform? Or right click the transform component and select 'Reset'.
i know that ... i mean i dont want that to happen in the first place is there such a way
Yes, you can go to Preferences > Scene View > Create Objects at Origin.
thanks!

Pretty rad!
late reply damn
but thanks
Nice! 👍

hello guys
stupid question here....
i am making an industrial scene... and i want to make some metal floors with holes, you know what i mean?
my question is, if it is best to do this using a mesh with all the holes etc, or using a material with a transparent shader 🤔 make sense?

like this

or this
what performs best? ahhh also, i need to tile this.
less polygons means better performance, so the latter
And in this particular case, way less polygons. Seriously, the amount of polygons those grates would have is off the charts!
Use an alpha masked texture
Set the material as opaque and enable "alpha clipping"
Hey guys i am new to game dev and i would like to learn 3d modelling to make ym assets so does anyone know where can i learn to do so
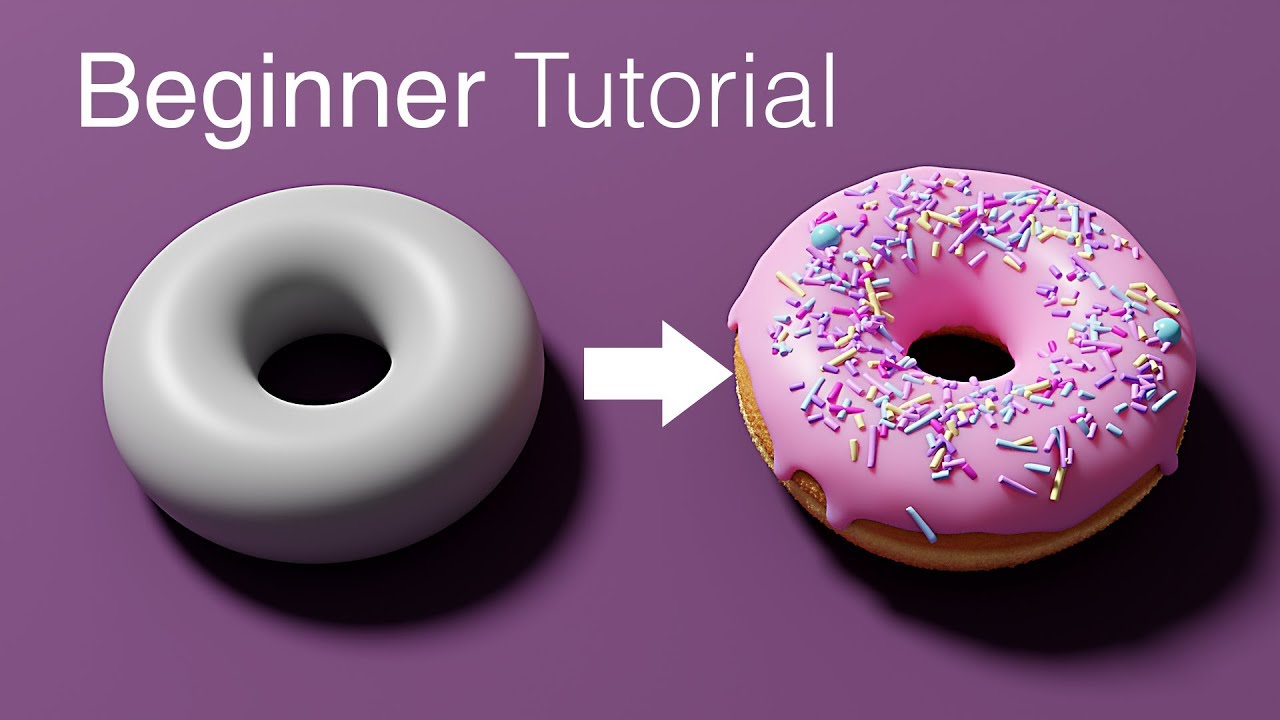
I started learning Blender using Andrew Price's donut modeling series
It's long but goes over a myriad of techniques important for any kind of different modeling work
K thnx
transparent shader, ALOT less polygons and its alot easier on the player's system not to mention alot faster rendering
ohhhh thanks makes sense
Thanks, just making sure 🙂
how can I get my 3d model from blender with the textures to unity?
I created the texture itself with the shading tab
oh wow i like that
google it
yea tried that already
alright
found nothing useful...
Well, model can be just
save it as obj or something, then you can just drag the file into project tab
ok thank you
my best on so far
that screen shake is too intense
yea iknow its just a personal preference

I have a doubt. Very new to blender. So imagine I have a crate built in Blender. I want to import it into unity and make it explode. YouTube tutorials including brackeys suggests that I have two objects. One the normal model and the other one fractured, where you have RBs attached and add force. Is this the general workflow?
Pretty much
Once the crate explodes, you replace it with the crate that is fragmented (but still put together to look like the original one) and then blast the fragments away
Ooh...can I bake the animation? Say I fracture it in Blender, add some modifier and make it explode, record that animation and import to Unity? I know the animation would look same all the time and that the object will be fractured from start. Apart from that is there any other flaw in this workflow?
Yes, you can. Nope, that's pretty standard procedure, don't worry about it.
the object will be fractured from start.
Well, the issue with this is that if you have many boxes or breakable objects in the view you would be increasing the polycount in the scene. Specially if there are lots of fragments, an object not being broken apart sitting in the scene will give you more performance.
But this is something you have to test, maybe you want to decrease the size of imported assets (which shouldn't be by that much).
You should test both methods and see how they impact your game.
Got it.
Or maybe have a Unity particle system with generic polygons as individual elements? Maybe I can try all these and see. Thanks a lot
why does blender give you a sphere to start with but a lot of tutorials start with cubes?
i don't get it, do you usually move vertices and such instead of sculpting? i guess modeling vs sculpting?
https://www.youtube.com/watch?v=zROBuhBAehk
like i opened up blender for the 1st time and it just painted on bumps and such, but this guide adds vertices/polygons and moves them
Perhaps you should reset your blender to default settings
I got this pig from the assets store, but it has no shadows, how can I fix it?

I changed the material, I found something that casted a shadow, but it's only on the ground and not on him
meaning that at night this happens

can you not use the default shader?
the default and only material it came with is Unlit
ok but you can change the shader to use the default shader


i think its called the standard shader
sith Sprites/Default

sprites is for sprites...

you need to find the texture and drag it on the material
you probably should look up how materials work while you're at it
I'm kinda lost, I know hot to code, I've never worked with materials
can you help me?
theres a section labeled texture in the material, find the pigs texture and drag it there
Im having an issue replacing a model with a new version, it has the same name and the same rig (but with a new bone added)
The new bone is just for a item, If i delete the old version and import the new version it hooks up to the old version like it should ( the model in scene now uses the new version )
But its not being rendered. If i add a new instance of it to the scene it renders fine.
But the original that was already setup before importing the updated version of the model dosent, the animations play but the mesh isnt rendered.
the skinned mesh renderer is referencing the updated mesh but yeah not sure whats going on, Normally if i replace a model with a new version with the same name everything just works fine. Any thoughts?
there is no texture, only materials
that is the main part I don't understand
for example, when I select the pig that has a texture but no shadows, it tells me Textures None

almost like the material was already the texture
also I can't find it in the foulders
ooooh the color is a shader

this seems dumb
oh yeah it uses vertex color directly, you're out of luck then unfortunately
unless you want to write your own shader
do you know how to do that?
i think it might be difficult for someone who doesn't know how materials work 😅
you can look in the #archived-shaders pins for a guide if you want to take a swing at it
although it might be easier for you to simply use a different model
ok, I'll look in to it for a bit... then I'll change model
If you're on URP, it's simple to make a vertex color lit shader using Shader Graph
If you're on built-in RP, you'll have to figure out how to code it, or find such a shader from somewhere

Basically what you need is a basic lit shader that multiplies its base color with vertex color
yep
Hopefully simple question but do 'hand painted' textures still react to real-time lighting? TBH, I have heard a lot of places say no but I don't see why they wouldn't
Default layout in blender will start with the cube but if you select sculpting as the layout then it will start with a sphere.
If its not that then I am sure - could be as @toxic steeple mentioned and be in a startup file that was modified
What do you guys use for Tris Reference?
im Making a gun and i cant find any good reference for how many tris it should have
@tribal ravine I guess it varies, and there are a lot of factors that can govern the amount of tris someone would aim to have their model using. Type of game, art style, etc.
You'll probably get different answers from people as there's not really a "uniform amount". You just want to keep it as low poly count as you can without sacrificing the look you want to achieve.
If you have a gun model that's 20k worth of tris but looks like 5-6k worth, then obviously that's not great!.
I've read that some games in the Call of Duty series use anything ranging between 15k right up to 60k tris but then games such as Overwatch use between 10-16k tris per weapon.
I don't really make many guns but the last one i did was a hand gun (a HK USP.45), that was around 20k tris but after some tinkering i got it down to 10k and left it at that, but that was a for a fairly realistic looking model.
Hope that's of some help!
Well that clears up the context I was gonna give as well. Let me just share this link then. It's a few years old now but gives you a good idea how to think about this https://docs.google.com/spreadsheets/d/1xJmSuBZbdMOlIcdXmO9hu46GJ7-wIiWCclJwimIOJa4/edit#gid=0
does anyone use ProBuilder 5? It seems buggy to me

yoo this is cool
i would ask in #⛰️┃terrain-3d i think
i used it for like 3 objects in my first project, didn't notice any problems
Hi! I recently imported an fbx file from tilt brush into my unity 2020.3.9 project and got the error: ‘Assetimporter is referencing an object from the previous import. This should not happen’ - no shit. I was unable to correctly assign the materials and some odd things were happening. Should I delete that asset from the project and try to re-import or is there another fix? Thanks 😊
Sharing some of the environments from the game I am making. Thanks for viewing!
.
https://twitter.com/FarrukhAbdur/status/1443054755039825922?s=20

Sharing some of my art for #LovelyLandscapes
From my game that I hope to finish someday! 🌿
#madewithunity #gamedev #indiedev #b3d https://t.co/4tJvkZmcbE
spending hours painting for blender to crash and have no way of recovering textures 🥰
ye i came across ur twitter post earlier today and its AMAZING
Looks super good!
Hi guys, Why should the size of the model be 1,1,1 once imported into Unity? Is It it related to performance or something?
The size does not really matter, it has to do with scales.
1,1,1 means that is the original size of the object in the world.
Thank you
I'm having a problem with my stylized tree model. The light is passing through it asif it were translucent


↑this is from top down
I made the tree in blender and did the data transfer
Any way I could solve this problem?
Had you used uv mapping in your texture?
no i havent
by uv mapping u mean unwrapping right?
Yeah
You might wanna try that
In 3 hours I'll get off work, if you'll still need help with that I can check it out
unwrapping wont work in this

Buy me a coffee if this video could give you a little bit help, your support will give me more power to make more good videos! Thanks!
https://paypal.me/lobeyjon
Also welcome to join my Patrons with some other benefits:
https://www.patreon.com/gamedevlobeyjon
My other videos about how to make stylized tree by using Blender and Unity: https://y...
^ive done omething like this

Hello everyone,
I am not sure that should I ask it here but...
this is the first thing that I made in blender and I can you all criticize the heck out of this?
because apparently that is helping me learn

You're following the donut tutorial right? I'd say it's too early to criticise right now
Not much to say except good start

I'm a 3D artist for a team working on a fan project in Unity and have a few questions that I'd like to ask. We want to use the original game's assets for our title, and have figured out how to rip them from the disc. Unfortunately, everything is extracted as one object, meaning that the map is filled with duplicate assets and messy geometry. Our biggest concern right now is with the terrain itself, which uses a special type of texture-blending in-game, where intersecting geometry creates blending.

Should we convert this to Unity terrain? How would we replicate the texture blending?
The blending should occur at the areas marked in red

Beautiful
hey i recommend https://www.youtube.com/watch?v=1jHUY3qoBu8&start=24

Expand description for timestamp shortcuts! This is a long video but it goes through all the techniques that I've learned about low poly modeling in my 5 years of using Blender. I use Blender 2.83 with default keys:
TIMESTAMPS:
00:00 Intro
00:55 Basics (navigation, viewport)
02:12 UV Coloring Technique
04:46 Shiny Edges - Cavity in Viewport
06:...
its way better tutorial and only blender tutorial u want to learn blender
Thank you very much @misty lantern and @gilded lake for your comments. Happy to hear your like this work!
Thank you very much! @lapis sedge
There is an another good similar tutorial, it shows the UV wrap steps also. Maybe you can check.

Here's a tutorial describing the process of using a quadmesh-to-billboards approach for making foliage, and how you set up the content for it to work in your own projects.
This approach offers a streamlined way to make fluffy trees without too much of a complex setup. Once the shader is working, it can easily be applied to any mesh that is unwra...
Oh that's great
I thought that some random guy would just make a 20 points list stating every possible mistake
But that's awesome 😀
I will look into that
There is a particular game in which I like the shaders. I would like to learn how they was made. How can I inspect it in more detail and see what texture maps go where and how they are processed?
When games are built you can't really access the files anymore as if they were still part of the project. I think there are some programs that could turn them back to a Unity project but I'm unaware of the legality of it all.
Your best bet is to check if the developers of that game posted any development blogs or talked about these shaders in general. The alternative is to see if someone out there didn't already try to replicate the effect on a tutorial. There are lots of tutorials on YouTube and written articles about shaders and visual fx.
Out of curiosity but what game / effect are you looking to replicate? Maybe you will have better luck asking this on #archived-shaders .
A couple games actually. I just need some solid reference. Unity have a lot of games made on it, most of them don't have any kind of content made featuring them, especially as niche as shader recreation. Maybe I would try unpacking the assets with the tools you mentioned and try to make sense of the files. Which is probably unlikely, doubt any tool would give me access to the source code without manually reverse engineering it.
hi can someone give me some advice on terraining?

Unity Learn
This project covers the basics of Unity’s Terrain tool, the project demonstrates sculpting terrains, painting textures, adding trees and models, as well as details such as grass. In addition to the terrain tool, the project takes advantage of Unity’s standard assets to add water and speed tree assets to the scene.
Can you import heightmaps to unity?
Yeah of course, In the standard shader there's a height slot.
Then I'd suggest to use an external terrain generator if you don't need it to be very precise in shape
Not for me buddy, Lord Joel was asking.
I guess I should've replayed to him, but that was my aim
need to give examples
like screenshots or something
if its 2D type of look have fun dealing with normals
For me personally I found the Unity Terrain great if you want a large, random, realistic terrain. Otherwise, I would use some other tool to create the map, create a height map and then generate your terrain that way, however, for some reason when I do that the terrain isn't very.. smooth - random jagged almost like step like structure but that could be from me not understanding the terrain tool completely.
@rapid echo great tutorial, thanks for sharing!
It might be that the green planes are using a decal shader so they are projected onto the base rock mesh. Pretty easy to do in HDRP, just need to put a Decal shader on a mesh. This approach is called mesh decals.
Asset Studio and uTinyRipper in combination with ILSpy can get you as far as extracting textures, models, scripts, animations, animator controllers. Shaders are no go.
One of my final designs made for swordtember. Theme Galactic.
.
https://twitter.com/FarrukhAbdur/status/1443806310261305364?s=20

Final one made for theme Galactic✨ #swordtember
#b3d #gamedev #indiedev https://t.co/zIaAqnkpDc
Hi not sure if this pure #🔀┃art-asset-workflow question
I'm just wondering about the complete batching/optimization unity does
My game's style is body parts. I'm just working on systems that enables to make variations
They're all colored in vertex color. Not using textures at all
Does unity batch meshes? If i want a variation of the same mesh shape but different VC, it would skip that mesh' batching?
What if i assign a variation of the mesh at runtime? I guess the same bcoz it'd not use .sharedMesh anymore?

Static batching will batch together any mesh sharing the same material (BIRP) or the same shader (URP/HDRP). Vertex colour does not break batching.
non-static geometry can be batched if you have less than 300 vertices/900 vertex attributes in a mesh and you have dynamic batching enabled. Vertex Colour might count towards the vertex attribute limit, I'm not certain of that. The best way to check this out is getting familiar with the Frame Debugger, as it lets you step through draw calls and tells you explicitly why something was not batched
Vertex colour does not break batching.
This is true for material batching, right? Where shaders get ordered to be drawn in a row, and amount of textures loaded to gpu
But doesn't mesh get batched too, at least in the cpu side (yea i read that page but yea dont understand it 100% yet)
Like if i have 10000 cubes, they get "batched" bcoz they're the same mesh?
And if half of them have a tiny difference in the vert attribute (yea i'm not sure about VC being part of attribute too.. i'm guessing it is as it's part of what can be extracted by the shader?)
Meshes don't have to be same shape nor have same vertex data to be batched afaik
Get i have a few questions with exporting models from blender to Unity
Namely, do i need to remove rigid bodies and rigidbody constrains before exporting?
And what do i with empty axes


wow
If you have 10000 meshes, they all have different meshes, but they all share the same material, they will all be batched together
Have u recorded video of any of them ? I just wanted to see how u made them like what tools :)
Ok so ultimately this is what i wanna confirm
So 10k mesh renderer, all same material but each have whack different mesh shape and VC
There is no perf difference if they were all also the same mesh?
You can go ahead and confirm that
My understanding is that batching combines meshes into one, so their shape is irrelevant
Instancing is used if you want to draw lots of identical meshes economically
Alright i mean instancing maybe
Yeah i'll have to test eventually for sure
thanks @lime pollen
Hey so I'm making the interior of a house in Blender then exporting it to Unity, and I'm a bit new to both so ofc I've run into a problem,
I really just don't know how to get the textures working...
Is the best way to split the house into different meshes depending on what texture they have
Or is it to have multiple textures on the same mesh, which I've been trying to do but can't seem to get anywhere :)fhdafdhasvb
Or is it something else that's probably a lot better than anything I just mentioned
Here's an image of the house I currently have (Yes some of the textures are placeholders and I only did the floor)

This could be a single mesh or this could be multiple meshes, it depends how you wanna implement it in your project. Look into UV mapping, you could use a single texture for the entire house if you want to have as few materials in your scene as possible. All you have to do is properly UV map your house.
Now, if you want to keep multiple meshes for different sections or rooms to achieve a special effect with the camera or something, you could do that too. It's hard to give advice without knowing what the end result is supposed to look like.
I wonder why the skybox is back 🤔 Is it because I had the sunlight set to bake? Looks like I'm in space apparently 😅

Hello there! Does anyone has found a way to smooth meshes in runtime?
I tried with what is explained on the following page, but the only result I get is a subdivision of the geometry and not a smooth :/
https://medium.com/@italohdc/smooth-meshes-on-unity3d-mesh-subdivide-b55a469bb518

Medium
Graphical interfaces on computers work by discretizing an environment. For example, when you see a circle on your screen, it’s shaped by…
It is required to use 2 scripts. One is showed on the page (MeshSmoother.cs), the other one is on a offline site (wiki.unity3d.com), but it can be found on this repository linked on the page: https://github.com/lucascoelhof/VoronoiUnityTeleoperation/blob/prefab-scene/Assets/Scripts/MeshHandler/MeshHelper.cs

GitHub
An example of VR application to teleoperate robotic swarms - VoronoiUnityTeleoperation/MeshHelper.cs at prefab-scene · lucascoelhof/VoronoiUnityTeleoperation
Where are the tiny speckles, this need some speckles.
Can someone recommend any youtubers for making 3d objects?
Imphenzia?
okay thank you!
Thanks for the help!
Its just supposed to be a smallish house that you can walk around in...
I kinda wanna use just one texture atlas (I'd guess its just a single image with multiple textures for like wood flooring or concrete, am I correct?) and one mesh, but if I did that how easy would it be to make specific textures on the atlas (like wooden flooring) tile?


Edit a plane to make that shape, then extrude
It wouldn't be difficult, you just put the wooden flooring somewhere in it.

can anyone tell where can i start to learn blender?
you mean youtube tutorials?
any source is fine
yes
im also learning blender. are you a begginer? do you have modeling skills in other software?
Blender tutorial for beginners! The long awaited reboot of the popular donut tutorial, completely remade for Blender 2.8x. New videos will be uploaded every other day to this channel.
Get the shortcut pdf: https://mailchi.mp/ef5b15a32043/subscribe-to-the-newsletter
Follow me:
Twitter: https://...
i am complete beginner i have modeled in tinkercad and probuilder
not in any popular 3d design software

YouTube
This channel is about games design and game art. I use Blender, Photoshop, Krita and a few other programmes. My tutorials are mainly about How to use Blender. I also Vlog now and again about freelancing, being creative, and the creative industries.
Live streams every Friday at 4pm GMT
Visit my website http://www.gabbitt.co.uk for complete cour...
thanks
thanks a ton
there are so many youtube tutorials, just gotta wade through the bad ones to find the good ones
🙃
Using Package Manager from within Unity might work better
You should see packages you've got from the asset store when switching to My Assets category

Tasty
https://www.youtube.com/watch?v=1jHUY3qoBu8&start=24 is a much better tutorial than how to make doughnut
Expand description for timestamp shortcuts! This is a long video but it goes through all the techniques that I've learned about low poly modeling in my 5 years of using Blender. I use Blender 2.83 with default keys:
TIMESTAMPS:
00:00 Intro
00:55 Basics (navigation, viewport)
02:12 UV Coloring Technique
04:46 Shiny Edges - Cavity in Viewport
06:...
I mean how do I make specific parts of the atlas tile over and over again...
Like, I need to make the area outlined in blue use only the wood part

I could add a lot more vertices to the mesh to make a bunch of squares and UV map it that way but that seems really hacky
Made two more low poly characters.
#lowpoly #gamedev #indiedev #blender #Mondayvibes #gameart #October


Hey guise
I got a working magicavoxel importer that runs with the latest spec
if anybody wants, I can share
The normals it generates are kinda wonky but otherwise it's pretty clean

That's pretty much the way to do it.
o okay thanks


do you think its gonna look good in unity?
Usually importing meshes break the materials for me
blender materials don't transfer over to unity, you'll have to remake them yourself
You will need to learn UV mapping.
You can't make specific parts of a texture repeat without extra vertices at every repetition, as far as I know
At least not without fancy shaders
does anyone know of a blender assetpostprocessor that properly flips the axis so Y is up (without using transform rotation)
I've searched for a while and can't find one, I'm having a hard time believing no one's done it

GitHub
FBX exporter addon for Blender compatible with Unity's coordinate and scaling system. - GitHub - EdyJ/blender-to-unity-fbx-exporter: FBX exporter addon for Blender compatible with Unity&...
Apologies
I dont want to manage multiple copies of the model 😦
Sorry i dont follow. What is it youre trying to do?
I want to keep my .blend file inside my unity Assets folder
and when I drag it into the scene, I want it to have Y = up, Z = front
as opposed to the unity's default .blend file asset importer, which leaves Z = up, but just gives the model a default -90 degree rotation when you put it into the scene
Oh I see, sorry cant help you, I always use FBX in Unity, not blend files.
yea, it seems that most people do
maybe for that reason?
but it'd be so handy being able to just double click my model from unity, have it open in blender
hit save
then back to unity and it's all updated
and you keep just 1 copy of the model
yeah that would be awesome
it's gotta be possible to do, unity's asset importer is pretty extendable...

GitHub
A tool to fix orientation issues from Blender to Unity - GitHub - ogxd/blender-importer-unity: A tool to fix orientation issues from Blender to Unity
hmm looks like this actually works...
Could be very useful! I keep getting the FBX orientations wrong and edit the files often also
I would not recommend storing blend files in your unity project, this creates more performance hit during development and then also requires you to have blender installed at all time on every computer that works with the project.
When you store and use a blend file in unity, it actually has blender open in the background to allow the model to work, you can't see this or control it, It's something unity does. The same with Maya files too.
The best practice is to export to FBX or Obj.
^ from what I understand fbx/obj vs blend file is a size/performance difference that makes it not ideal to use
Nothing exciting, but a brick wall that I spent forever sculpting trying to replicate a zbrush brush in blender. Materials on it are just a default color in blender, planning on moving to substance painter next and eventually making it a modular asset. Any feetback?

hamburger
burgir
You might want to learn Houdini.
@neat field Possibly next task, learning substance now and Blender is free. Thanks for the recommendation
im having a weird issue with fbx exporting on blender. When i export my model as a fbx despite it having a subdivision modifier applied this happens:

however the same doesnt happen when exporting as glb

or as obj
however afaik i can only import weighed models as fbx into unity
even just dropping the blend file doesnt seem to do the trick
btw i wanted to thank those guys here back here who long ago told me to learn blender better since now im fairly skilled at it....err... somewhat
well er
seeing this is a fbx exporting issue
cant i import glb/gltf or some similar format to unity
Would anyone know how to properly unwrap my UVs for this pretzel? I marked seams to split it in half but is there a way to wrap it better?

thats... weird, what unwrap method are you using? smart unwrap?


Did I mark seams incorrectly? 


light map

ok switching to conformal method gave me a bit of a better result @eager mist
oh okay that works
How do you recommend fixing the wrapped curves from this? Still learning UV unwrapping and not sure what to even google
oh yeah sorry im dumb, lightmap is for like level modeling
tbh zero idea i would just paint stuff directly on blender and save that
even lightmap works for that sort of stuff

KK, was trying to figure out how to unwrap it into nice rectangles so that I can just export the grids into photoshop and paint em

Soo..
First I used proportial editing just to sort of get everything on Y axis but very messy, lots of just rotating uv verts until it was up and down and not curled around.
Then alt > click each loop of verts
s > x > 0 to align to zero for each local loop of verts
then after everything was sort of aligned i made one uv box the proper square i wanted, and right click > follow active quad > even
and it made them all same size / width etc.
just the donut's bread-y texture is left(and more details? I guess..)
I hope this is fine for a beginner...

@eager mist ty for the help ❤️

TexTools addon has an operation for unwrapping a pipe/cylinder, as well as operations to straighten and rectangulate unwraps
Don't sub Div a model. 🙃
Sure it makes the model smoother, but it actually increases the polygon count of it by 4. If you use sub div 2, it's (base mesh x 4 x 4) and so on. It also does it to the whole model. So even if you only want so smooth a small part it will do it to everything. It's only useful in very few cases.
This is not good for games, when you want to keep a lower polygon count. Right click and marking as smooth will make it appear smooth and you can manually add more geometry to the model.
Have you retopologised it? Or is is still the sculpt?
I know you've already fixed it, but just to let you know it's a base cylinder.
You only needed to have 1 seam that ran down it's Length, then when it unwraps you could just line up the UV. :)
@stray stone No, not yet. That is next before I go into adding materials
Hello,
I have a problem exporting animations
In blender the gun looks like this
https://gyazo.com/96740fb5d14ce6e1d2c1069a6141ca9d
But in unity it does this
https://gyazo.com/9c195641a447c579393a018df3aaa04f
Any solutions?


that happened to me once
do you have an armature and objects parented to that armature through bone relative parenting?
@hollow shoal
yeah thats your issue
reparent as simply bone
not bone relative just bone
and that should fix it
So i parent my main gun bone to my main arms armature bone as simply bone? @eager mist
And if so, does that mess up all my anims again?^^ just so i can mentally prepareXD
no, you parent the meshes to the armature's bones
not if you dont mess with the armature
select bone -> get out of pose mode -> click on mesh -> select armature too again -> ctrl p -> bone
So you say have 1 armature that handles both meshes?
i mean isnt that what youre doing
No
I have too spererate armatures for the gun and the arms
And i animate them toghether
oh thats fine
Yes

Yes
show me your gun armature

Allright, thank you!
Appreciate it man, I figured that out afterward and re-unwrapped it with one seam just to see and it was way better.
hi im looking to make a planet -> simple sphere would suffice to demo some code on, is there a higher poly version to use other than just the sphere scaled up to size in unity or do i need to go into blender and make it there?
go to blender make it there
just add cube
select it
and press CNRLT+6
goodluck
cheers
idk it didnt do anything
ctrl + 1 through 5 in object mode is the hotkey for adding a subdivision surface modifier
I assume 5 was the intended number
Worth noting though that the result is not entirely spherical
You can remedy this by applying the subd modifier, selecting all verts and using shift + alt + S aka "to sphere" operation to make it properly round
ok thanks
Hello a question about 3D Modeling, i can place a house exterior and it will work if its already been made from 3ds max correct?
Depends. The only thing is try it and see what it looks like.
If there are any special materials needed, you'll need to remake them in Unity, for example.
Oh i understand okay, but when saying special materials, like props? Walls, etc?
Might need to add manually?
@outer halo
If you want to adjust the smoothness, or add transparency and stuff. The materials that come in aren't always matching. So you'll likely need to make new materials inside of unity.
using blender and i just entered sculpt mode to see all me faces oddly colored, what did i do??

does anyone have a tutorial on how to make a human model and how to rig a skeleton with it?
whenever I find one it either just shows u how to make a model on blender or it expects you to download a model online which appears to come with a skeleton?
@tacit marlin Low Poly character or detailed ones?
@gloomy stump Usually the materials are packed within the fbx files and you can extract the materials in unity 3d with click of a button. For other materials like glass etc it's better to make them in unity itself.
low poly will be fine
its just that I found one, followed it and then the tutorial stopped without anything about the skeleton
@tacit marlin Even though it's a bit old and not on free software, this is the best rigging tutorial out there by a long shot: https://www.youtube.com/playlist?list=PL8hZ6hQCGHMXKqaX9Og4Ow52jsU_Y5veH

YouTube
In this tutorial series, we show you how to create an animation-ready character proxy rig with features such as stretch/squash, space switching, knee/elbow s...
They are "face sets" created automatically by some operations for your convenience if you need them
If you don't, you can look up how to hide or remove them

@tacit marlin Are you looking for blender tutorials?
yes I am
I suggest Imphenzia
Hes got two videos back to back about modelling a character and then rigging and animating it
Very spoopy.
is it still working the 3DSMax <-> Unity 2019.4 sync?
I remember that were a Unity asset to do it.... I guess 😅
ok I guess the answer sit inside this video 😛
https://www.youtube.com/watch?v=AVTr-wEOTaE

In this video, Work with a Unity Certified Instructor through a series of mini-challenges to learn how to retopologize a simple high poly mesh.
Speakers:
Stephen Studyvin 3D Artist & Educator
Sandeep Kulkarni Education Global Program Manager
Did you find this video useful? Room for improvement? Let us know: https://on.unity.com/38Sw8Pl
Chec...
storing blend files
is anyone familiar with both VRM and VRCHAT?
so when I go the vrchat SDK project, and load the included project, it shows this but, when I go to convert the blendshapes to vrm, it only allows me to click on one blendshape group, is there a fix to this, I'll provide another screenshot in a second

another thing, in the text file I see

something about lipsync blendshapes
how do I convert that file into aeiou blendshapes for vrm
I found the name of the blendshape actually nvm but
now

what do here, when I change the slider she goes to smile, I don't think thats lipsync
do I just use the available blendshapes to form what looks like lipsync?
So I make a skeleton, and when I try to rig it this error pops up, anyone knows whats up?
Hi, I'm artist low poly, Nice to meet you, I am new to the server and in the unity community I leave you my sketchfab profile so that you know me uwu

Sketchfab
View the profile and 3D models by sergio_vasquez (@sergio_vasquez). I love pepsi
tbh you shouldnt ask for this here since this place is for game devs, i doubt any of us has any idea what an "aeiou" blendshape is
nice shader tho pls share


A collection of my latest 3D stuff ^_^


Let me know what you think if you can, I'm always learning and wanted to share, I'm beginning to make livestreams too cuz I really want to engage with people more within my art
shader is univrm and unigltfvm_Shaders add-ons
install the latter mentioned add-on first
also its for a specific version of unity, and maybe the latest version has them prebuilt in but not used for the importing, could be under a diffferent name
also, the models textures are just like that, its not the shader :3c
it's a baked cellshaded model
for vrchat, but converted to vtuber.
ALSO, this is the only unity server other than ones specific to vrchat(which turned me down, cause "the question is for converting") and nobody in the vtuber server knows what the hell I'm talking about because they all paid for their models, there is no vtuber creators portal
you can google those two cause I don't wanna spam with links but here's one that's just the shaders https://openupm.com/packages/com.vrmc.vrmshaders/

made today using synty assets

AEIOU blendshapes, are blendshapes for facial animation. The vowel sounds.
This is part of what is called a FACS system which is paired with ficial rigging. Absoloutly used in game dev.
A smile is teh shape of the A sound, so that makes sense.

Different blend shapes would activate to make the lip motions of words.
So if you were to make a word like Sweet.
You would use the different blend shapes that match teh corresponding letter for each word/phrase.
If you say things slowly, you can see that these shapes will mostly line up with your lip motions.
hey guys, i was wondering if anyone could help me out with learning the basics of making 3d renders in blender? I want to make thumbnails and just artwork in general but have no clue how to start as there isn't alot of videos on making renders for RUST
Blender tutorial for beginners! The long awaited reboot of the popular donut tutorial, completely remade for Blender 2.8x. New videos will be uploaded every other day to this channel.
Get the shortcut pdf: https://mailchi.mp/ef5b15a32043/subscribe-to-the-newsletter
Follow me:
Twitter: https://...
cheers, also does anyone know how to make make 3d scences for the game RUST?
how'd you get the godrays?
have a question about importing meshes into unity. I am working on a custom star/sun shader and for some reason when I use a sphere I import from blender the mat is all wrong, I think its scaled way up or something. on the default sphere in unity it looks like it should but on any sphere I import its messed up. they are unwrapped before export. https://cdn.discordapp.com/attachments/804225222769246218/896281558833586176/unknown.png

the middle one is the unity sphere and more or less how it should look, the one on the left is a UV sphere I imported and the right is an icosphere
anyone know what I am doing wrong here?
from an asset pack somewhere, its just a stretched out translucent material pretty much though
I have a model with one atlassed texture and I have grouped parts of the model that are translucent so I can apply separate materials. How do I have unity apply the opacity in my png texture to the model? I'm trying different shader options but they make everything completely opaque and ignore alpha in the image or just completely transparent
Ah nice

I have an 8k grayscale emission texture and I am a bit unsure what format would be best to use for it, give me the best compression for quality and all that. anyone know? I saved it as an BC7 as that is what I was currently setup to export as and its 84MB, seems a bit high for a grayscale image even if it is 8k

Maybe just makre sure that your object normals are facing the right way as well as the scale of the object being applied before exporting
BC7 is RGB + optional alpha channel
You should use a different format
BC4 is single channel
I noticed when I just threw the PNG file in unity that it seems to have some kind of auto conversion, is that true?
Importing usually includes compressing the textures into a default vram compression format
it sure looked like it converted it to something like BC4 and generated mipmaps
not seeing any option for that

ah, ok. hm... it turns it red
since it's single channel :D
sure, but why is it reading it as red instead of grayscale?
I suppose that might be because the texture inspector always renders textures in RGB mode
and if you have a texture with one R channel and nothing else, it will turn up red
You have to use shaders that use the red channel only as grayscale, though
its not just in the inspector, its red in game
what are you trying to achieve?
grayscale color textures?
because you will need a custom shader for that, or waste memory and use 3 channels
its just a gray scale emission map, I mean I could go convert it to gray again in the shader but that seems like an odd way to do it
shaders don't really know how many channels a texture has
so if they expect rgb data, and you only give them r, they will interpret it as r 0 0
this is how it all works, you would do the same in Unreal or any other engine
so backwards... still not saving me as much space as I had hoped. 43MBs seems like allot even for an 8k texture, but I guess its better then 80
8k textures are absolutely huge
It's like having 64 1k textures
Are you sure you need that much resolution?
no, I am fairly sure I need 16k, but I am not willing to go that high
its for a star in a space game, star is thousands of km across and you can get fairly close to it.
you might be better off using some procedural method then
its not a big deal, a full set of 2k pbr textures for a normal game object is around the same size, I dont see any problem with having a handful of 8k noise textures for stellar bodies like stars and planets, esspeically if I dont need a full set of them, just a simple grayscale noise
cant really use procedural noise in shader graph for it, I tried, the noise textures it creates are not seamless
If it's just noise then you can make a smaller noise texture repeating
You're going about this the wrong way. 8K is bare used at all in commercial games, even 4K is saved for high priority assets like player characters. You should think about how you can do this in a smarter, more efficient way
Since a star is spherical you're already getting the benefit that tiling won't be that noticeable
And if you have lower res unique texture you can add detail to it with detail texture that layer on top of it
I want as little distortion as I can, these objects are huge, I dont know of a good way to make a tiling texture for a sphere that dosnt look fairly bad. when it comes to the gas giants its going to be an even bigger problem you cant tile a texture for something like that... at least not that I know of
actually as far as I know you cant make a texture tile vertically on a sphere at all
Can somebody help me with render texture? I iam trying to do the retro look render texture and now it's rendering only black/No camera thing!
(Not sure where to post this)
I don't see why couldn't you tile a texture more in one direction
regardless, you can try using a single non-tiling texture, performance/storage may not be an issue after all
you can combine multiple techniques as well, like a lower resolution non-tiling map with a a tiling detail map
and you can use triplanar mapping for the details, that way you don't have to deal with sphere UVs
So I had a quick question for you level builders here. What do you think a good approach would be to make a simple spooky cloudy sky for my level? I'm going for something PS2/Dream cast era, and was thinking of applying a scrolling texture to some kind of dome or cone
hello guys. i have this summoners rift(sr) model on .obj but when i import to unity the model looks like that. i also tried .fbx and nothing changed but when i import the sr to blender the model is fine. someone knows how to help me? this project is just for learning about unity and blender


is it perhaps flipped normals? in Unity, do you see it if you look from the bottom of the mesh?
that looks like flipped normals to me
Hello everyone, Don't know if this is the right place but I have an issue with Unity, Materials can't be shown anymore, wich is.... pretty annoying, I'm using Unity 2019.4.8f1 and Shader Graph 7.5.1, I don't know where this can come from:


The issue shows to every material, even the one using the URP
like this one

Does clicking that little grey arrow do anything?
doesn't do anything
I showed it in the position where it should show something
I'm doing a copy of my project so I can try it with other unity versions and see if the issue is still there
Does this mean you've upgraded or downgraded the project recently?
yes I had other issues with unity and had to change version
Upgrading editor to another feature set is very likely to cause issues
Downgrading even more so, if it's even possible? I hope you kept back ups from before the process
yes.

this was from the bottom
how can i fix this from happening when i import it from blender?

Alright, that's an easy fix then, just flip the normals in Blender. Or instead, set it to be double-sided rendered in Unity, but it's a lot less performant than the first fix
You have flipped normals as well
select and invert the problematic faces, or try "recalculate outside"
no i have not flipped the nornmals i just did that that fixed it tysm!
thank you so much bro
So after countless youtube tutorials and errors I have finally got a skelton rigged, so with the skeleton do I just export it to unity for animations or are animations simpler on blender?
also theres a problem for causing the hair to move with the arm any one know what's wrong?
hi
im not sure where to put this
but i would like to convert 6 different rectangular textures to one to then use it as a texture for a sphere
which program could I use?
The hair vertices are partially weight mapped to the arm bone
Is it a specific kind of sphere?
sphere is the relative word, make a skybox to a spherical texture
but no just the shape of sphere
Separate rectangular textures can be used as skybox textures
I don't know what program would be needed to project the six sides onto just one panoramic texture
well yes
but i do some weird compute shader to skybox texture
when putting a normal texture it streches
well is there a place online to find textures?
It has to be a texture specifically made to be a skybox
You can't use any old texture, or even convert it easily
well i haven't tested more textures
but is not a unity skybox
it displays a texture part depending on the rotation
That's generally how skyboxes work, but if it's not a standard type I wouldn't know
ok thanks any way, i think i will use an existing one from a store
and then modify the colors
spent about 6 hours so far on this guy, still finishing him up

Chocolate bar monster?
the man

Any idea why my graphics look like this ? I am using URP but damn thats like 3D Animated Graphics
Lighting
Post processing
Details in environment, textures, etc...
Unity is hard to make look good from the get go

This is how it looks now @glacial elm
Yeah it seems like you have to play around lighting
Yeah i baked it, looks more realistic now
i am trying to find furniture asset package but damn, cant find any good because i want to place meterials for walls and rooms general but i dont have any
It looks great man, good job. But yes, if you wanna get a much more realistic result, then you want to work hard on detail
meaning a lot more models
a bit of dirt and dust. more story telling. other whise its great man. keep going
Thank you appreciate it! Never messed with this, no idea how to make it dusty and dirty yet but ill figure it out
good luck


How do I place a positive scale on an object?
I've been trying to do an Unwrap, but gives this message:

hello! i posted a question related to meshes, textures and transparency over on #archived-shaders but maybe it would have been better to ask here? i don't know if it's ok for me to copy it or if i should wait for someone else to answer on the other channel, hehe
I am using the transparent surface type for a fade animation I am making but with that on, one side of my walls (top image) looks fine but I can see through part of the other side (last image). How would I fix this?


A good way to picture what I mean is this. The model has render face set to both and works on one side but this side can see through to the inside/back faces.

It works fine with opaque but not with transparent.
It looks like a common issue where (because it draws the faces in order) when double sided it will draw the far face in front of the near one.
Because transparent objects don't sort well.
Usually the solution is to make a double sided mesh instead of turning off culling
Well, I just want a front render face and drop the alpha for a fade effect.
Is there a way to achieve this without messing with the actual mesh?
Or use dithered alpha clipping instead of fading I guess
I am looking a shader graph tutorial on dithering to make 'fake' transparency. It looks like a lot of stuff and way more complex compared to just changing the alpha of my material. This is fairly annoying but I guess I will try that.
What shader are you using?
The default shaders generally have an option for which faces to cull
Universal Render Pipeline/Lit

When I have it set to front, you can see part of the other side of the mesh through it.
Both does the last image I sent, you can see through into the inside of the mesh.
And back only renders the back/inside faces which is useless for me.
That sounds like a problem with your mesh. Try putting the same material on a cube and see what happens
Yeah, it seems perfectly fine on a cube. Do you know what could cause this issue by any chance? My mesh should just be front facing but it happens on 3 out of 4 sides of the mesh. Will just check that out in maya I guess.
Might have fucked up normals, might have overlapping faces.
At least my mesh is not too complex, will have a look.
Actually, I put the material on another mesh I have and it has the same issue. hmm.
When I set any of my objects textures to transparent I can see through them, even when the alpha is 255.
Transparent objects are handled differently from opaque ones; they aren't depth sorted the way opaque ones are.
So, is there just no way to do what I want with transparent? The mesh can't be the issue cause I checked it and because it works on any of my meshes. The texture can't be the problem because it works on any of my textures.
So it is literally just an issue because unity decided to be a pain with it's transparent surface type I guess. That is annoying.
Yes, using something called "zwrite" I believe
It has its own limitations though
Or just use dithered cutout fading as Pinballkitty suggested
If you can see through your mesh with double-sided off, you have faces with inverted normals
Yeah, I can see through with double sided off but only on opaque mode. Will check it out.
Heya folks, I got tasked to port a small 3D project and have an annoying problem: when I make a platform change from PC to Nintendo Switch (or any other console) the platform change apparently breaks all 3D level modells, the import settings get overwritten which leads to faulty and nonplayable behaviour ingame. Any pointers what I can or should do since I'm just a programmer and have no clue where even to start fixing that

I know this is over a month old but I was scrollin' and just recently discovered a quick way to do this and am happy to share the time savings with you too! lol. @void orchid too!
In your UV Editor view in Blender you may select a part of an island that is already properly aligned (one square or almost square face of the UV island image you posted. for example) and use the "Follow Active Quads" option. If the selected face/section when this is performed is perfectly square, it will try to align the rest of the island to also be square.
I didn't attempt this on a donut so it may be slightly more difficult and involved in that case, but it's certainly something to try before committing to manually rotating hundreds of verts when simple seams just don't cut it.
To test while writing, I did this on a long bent cylinder with a tapered tip. and after a normal UV Unwrap (U,U) I also wrecked a portion of the UV island way out of image bounds on purpose to demonstrate the follow quads function.
- Find **one ** face of your UV island and straighten the edges with Sx0 or Sy0 as needed. You may also check the Stretching of the UV
- Select the entire UV island with L, ensure the previously straightened segment is the 'active element'. (the lighter colored selection)
- Unwrap again with Follow Active Quads . Click OK once, then change the "edge length mode" in the tool window to check which result may be best
- Perhaps check the Stretching overlay (top left) to ensure your textures won't be too distorted, then resize/move the island as needed.
- jobs done!
there is an addon called UV Squares for blender, it does this but even better. a must have addon IMO
Mesh taking hours to import! PLEASE HELP!!
Sometimes a file will just randomly become corrupted and take about 1-2 hours to import. This FBX is only 2.6kb in size. I've reexported it with a new name and that doesn't work. Only fix has been making a whole new scene and starting the level from scratch.

I've redone this whole level three times now and I'm still encountering this issue and I'm so sick and tired of it. It's happened with different meshes over multiple Unity versions.
Thank you so much for the info! :)
Hi, when my friend opens my bushes in unity and applies a transparency map to the foliage only one face of the foliage is shown. I thought that when you are using a transparency map you don't need to worry about face orientation

They're using the standard pipeline
Anyway it's solved now, they used some leaves shader
There are assets like this one https://gist.github.com/unitycoder/469118783af9d2fd0e2b36becc7dd347

Gist
Standard Shader - 2 Sided (cull off) - Also, 2 Sided Standard Surface Shader with Fixed Normals - Standard-2Sided-FixNormals.shader
Just finished my environment blockout :)

Beautiful!
This sound like a serious damaged fbx, we never experiences something like this.
It might be you have a corrupt mesh, hard drive or your OS blocks the import runner task of unity.
we import millions of polygons in few minutes. I can't speak for unity version below 2017 but since then we never had slow mesh import.
i can recommend you search the problem within your OS and computer not unity, because this is really something that is rare
Dang, already looks great!
unity is crunching my texture down into 16 squares, where do I need to start looking to fix this?

in case it doesn't make sense this angle looks better. nothing in texture, material or project texture settings seems to help

https://discordapp.com/channels/489222168727519232/763495187787677697/898969102834602045
that but I put it in the wrong channel my bad
hi i was wondering if anyone can help me i have made a racetrack in blender however when i import it in to unity and put the mesh on the race track it goes very small and a weird shape however when i put it on a cube it goes normal shape and size. the only way i could think of fixing this was re importing however i have tried this but it doesnt work.

you are exporting the file wrong
in your screenshot, the highlighted object's scale is 100,100,100
I believe that you should be exporting your models as fbx, and you need to check "Apply Transform" and set the scalings to "FBX all"

otherwise the scale of the objects in unity gets completely messed up
Can you SHOW your import settings?
That is looking great- is it all just primitives, or are you using something like probuilder?
just cubes, greenery is spheres
I refined the scene a little bit last night.. gonna start on modeling set pieces in blender now

...so is the shaded edges on the water a shader or just more cubes?
just cubes  smoke & mirrors hehe
I only noticed when zooming in
goal is to eventually build my own water shader
and particle system for waterfalls
lots to do 😄
super new to unity, sometimes i click on a material or object and it will show up in the inspector on the right - other times it won't. I'm sure it's user error but I've been listening to the most basic tutorials and can't figure it out :C

i found opening a new scene didn't help but a new project did - but I don't think opening a new project several times a session is a good idea
Yep! I don't know if this is exactly what you want to see but here's the material settings and the texture settings.
In case it helps figure out what's going on at all - this persists whether i try a obj or an fbx. Only the fbx doesn't give me control of what type of material i want.

How do I change wardrobe of a 3d character in unity ? Can someone help me?
Materials and Textures are two different things.
Ok, I see two obvious problems. You're using point filtering, which is meant for low resolution pixel art and removes any benefit from mipmaps. And you have max size set to 256.
You're also using normal compression, which is based on Jpg so it will always be based on 16x16 squares.
im having an issue with my model in unity
when imported to unity it makes these
random faces


bottom image is blender
Recalculate your normals
did that, didnt work
however there was an odd face in this area
deleting it fixed it
it was like as thick as a toothpick
Yeah exactly! I need to make sure it's point filtering because it's pixel art :)
So how it looks in blender is correct but how it looks in unity, divided up into 16 sections, is what I'm struggling to fix

That is the compression.
You probably had a quad that was not flat; any quad can be triangulated in different ways, and if the quad isn't flat('planar') the different triangulations will look VERY different.
I hope so, that sounds easy to fix! 
I thought it was the max size (because of google results) that i needed to change but it seems I'm wrong again
If anyone knows which field I need to change it would be greatly appreciated ;n;

Are you doubly sure the texture in the viewport is the same as the one in the import settings? That still looks like compression to me
You could show advanced settings also
excellent exceelent call patchi: the problem that i've been dealing with for the last 50 hours was in advanced x'D ngl I started singing once I had found it
the non-power of 2 dropdown was set to "ToNearest" when setting it to "None" fixes it

@teal hearth Just curious, what is the resolution of said texture?
Can anyone recommend best practices for setting object origins (I'm using blender)? If I put origins in the center of an object they rotate and center nicely when using them in unity but when dragging objects in they also spawn halfway through the floor and each object needs to be corrected for size offset. If I put the origin at the bottom of an object they spawn in on the floor perfectly but then if I need to rotate things can get a bit weird and not everything has a 'bottom'. Anyone have insights?
hey when i import obj models from zbrush to unity there is alot of details missing. anyone know how to preserve your zbrush models details when importing to unity? thanks
bake them in
when I import my fbx model in unity it gives me this error any idea how to fix?
@harsh dagger the whole .png was 240x240 and each 6th was 60x60 :)
(I've scaled back the max size to 256 now that it's fixed)
Ah, if it's what I think then you'll have to take the question to the program where you made the model and lookup how to fix overlapping or intersecting geometry.
If it's Blender then i remember the dirty way was to go ham with booleans.
https://blender.stackexchange.com/questions/7910/what-is-non-manifold-geometry here's an article that demonstrates what kind of geometry can cause problems when imported
Not all of these are relevant to every engine, but most cause at least some kind of issue
This issue is one of the reasons why you should always use power of two size textures
Yes I am using blender only
Or whenever possible
I saw some tutorial which said to convert the mesh to quads followed it but it still didnt work
didnt work
there is nothing non manifold in my object
well there seems to be something self-intersecting according to the error
which also is non-manifold
Anyway it's not any kind of serious error
well when I do select non manifold it selects nothing
The importer just deletes the weird part and gives you a heads up about it
If you can't click to select the mesh, you have bigger problems with it


i can select the mesh but when i do select everything that is non manifold it doesnt select anything
i hv no idea how deleting a part of a 3d object can cause this to happen 😂
@pliant patio Did you apply the objects' transforms before exporting?
how do u do that
no
ctrl + A in object mode with the objects selected
Or apply transforms option if you're exporting as fbx
i export as fbx
u mean this?
Yes
I'm 99% sure you've flattened and rotated the monitor in object mode, and that transform is unapplied so it's ignored at export
well yes
Also, the operation "select all non-manifold" isn't guaranteed to catch self-intersecting geometry from my experience
OMG THANKS A LOT IT WORKS

Self-intersecting error is probably a canceled extrusion
i applied transform
The warning will most likely go away if you select all vertices in object mode and merge by distance
its gone
love the way it looks!! looking forward to the more defined scene

Hey guys, my cloth sim is getting all wrinkled up no matter how I play with the settings.
I use tris at the ends of the plane, could this be a problem for the unity default cloth simulation? (Ill post a screenshot 1 sec)

Do I have to model it differently? (tag me please)
where can find super realistic race car models for unity for free?
First hit on Google 🤷♂️
https://www.cgtrader.com/free-3d-models/racing
I want to make a character that has ears and a tail that can be revealed and hidden at will. Should I export the ears, tail and body all together or separately even though they have the same armature
So if I were doing it in blender or something I'd keep the ears and tails and stuff seperate from the main model but I'd export everything as one fbx or obj or whatever. I don't do modelling much though so maybe someone might say something different
Is it better to create each model separately? I want to make a room and I don't know if I should create all the assets individually, or create a scene with all the objects that can't be interacted with?
Individually
You can export the room as is with everything in place, but they would still be separate objects themselves.
Objects are just meshes. And still, seperate ones.
Thanks, that still helps!
Yes, better option is to create models separately. It will be a more flexible approach to make changes as needed. Even for non-interactive objects keep them separate. You can tag or mark them in the game engine if you plan to take it there. Enable and disable as needed.
Working on a flower with geometry nodes in blender.
https://twitter.com/FarrukhAbdur/status/1450673986296336386?s=20

New flower progress using geometry nodes. Updated transform control and more colors. 🌸
#b3d #gamedev #indiedev https://t.co/iVx2dSW3af
once on pablo's laboratory server i heard of gamemodels.ru but i dont know how is that site
hey guys, is there any1 good at poly brush here?

Is there a way to take a model from Blender and import into unity without extra verts being added?
I was exporting to an FBX format so maybe that's where the verts are being added I'm not really sure, but even when I change all the import settings for the unity object so that it's not doing anything on import, there are still extra verts being added.
My model has 0 hard edges so there should only be as many verts as are visible
Also if you have an answer please @ me, thanks
UV seams also add new vertices I believe @untold edge
ah that could be it, thanks
Hey, I need some help with adding texture to 3D models. I have a 3D model without a texture and an external texture image with just colors on it. My question is how can I add that texture image to my model, should I need any 3D modeling software or is it possible to do it in just Unity?
Here are the steps I followed:
Placed the model prefab into my scene.

Inspector Panels

Dragged & dropped the texture into a child prefab named boy_2

As you can see the colors of clothes are just fine but the skin color is wrong and there is the texture image itself in the hands, the model should look like this:
You need to change the UV map, which is done in your 3D app @versed jolt
Thanks a lot
So I decided to make a low poly character and basically I have that done (Im following a tutorial by Imphenzia) and so basically this happens which doesn't appear to occur in the tutorial, any thoughts?
#💻┃unity-talk message @wind field wat about it
Anyone here experienced with making large maps for mobile? Looking for a few pointers on workflow.
How come I need "Convert Units" checked on my import settings? The mesh is made in blender with default settings which is 1m units so Unity should be able to take it in without scaling it down 10x but if I uncheck convert units the mesh is 10x larger than it should be.
@tacit marlin Well I'm not sure what your tutorial is going for but...
That's not how you pose things. You should never be moving non-ik bones like that except if you're squashing/stretching for cartoony animations and then only very little. (or fixing distortions caused by IK such as knee popping but that's advanced animation stuff)
You should have an IK foot that you can move around. Otherwise you use the fk and rotate (use IK almost always for legs though)
If you're referring to the distortion, you are probably using automatic weights and you need to go in and do some touch p on your weight painting
Probably need more vertices around the joints, as well.
Having issues with beveling in blender

This is the shape I want to bevel

This is the result
I've already checked for extra edges and vertices, there's no extras
These are the tool settings

I made a random background element, tried to limit myself to two colors, not sure how I feel lol

Have you tried applying transforms to it in object mode?
It got fixed, thanks though!
it kinda lacks color i think?or i dont think its the color...it might be the shading
Hello everyone! I'm trying to create a tree like this one (from Pokemon omega ruby/alpha sapphire).

This is my 3d model and my issue is that when I apply the texture with cutout in unity

It looks like this. Does this have something to do with my UV Mapping or with my material settings?

I couldn't figure it out. Would be great if someone could help me with that 😄
Looks like a uv map problem.
That was my guess as well but I wasn't sure. Alright I will see what I can do about the UV Maps then. Thank you 🙂
So this is my result with smart UV projecting. I don't understand what I would need to change to make it not look like the way it does in my current version. Could someone please help me go in the right direction?

What does your texture look like @true yoke?
In your reference I would assume the tree is just unwrapped with a planar projection from the top
it's a ripped texture from the pokemon games to see if the uv map applied correctly. Will do my own texture then of course. Here it is:

Right then it's a cylindrical unwrap
So I need to look up Cylindrical unwrap then. Alright thank you very much 😄 I'm pretty new to modelling and uv unwrapping etc. so there is a lot I need to learn
what would be your tip to unwrap it? From a video I saw that using "cylinder projection" with View on Equator could work. In the video he changed to an ortographic view with 7 on the numpad and for him the projection looked fine. but for me it looks veery chaotic 😅

even if I make them smaller it still doesn't work properly. It is closer to what I want though

Can you share the tree model?
Your geometry looks a bit messy but you should still be able to unwrap
here you go
I couldn't find where I messed it up
I also tried cleaning with merge by distance by didn't change anything
Hey all, beginner question and might not belong here, direct me to correct channel if it's a problem please. I got the Gridbox Prototype Materials packet, that blueprint like materials/textures thing. I place the material on the cube and increased the scale, which required me to change the material tiling matching to the scale of the box. Is it possible to make this automatically? Do I need to change the tiling options any time I increase the scale for more space in game world or is it a bad practice to scale the cube for creating grounds/walls?
Made some procedural flowers in blender with geo nodes.
.
https://twitter.com/FarrukhAbdur/status/1452627782010277900?s=20

Made some new flowers using geometry nodes. 🌸
#b3d #gamedev #indiedev https://t.co/g1Q6mdW3mO

oh great 😄 thank you very much I will try it out with these settings
@foggy dew the usual solution to that sort of thing is to use world coordinates for the texture, so it is always the same size regardless of the object scale.
Though you CV ould also make a script that adjusts the scale or the UVs based on size if you really wanted to. Or use Probuilder.
@true yoke you can't just use a random projection for vs and hope it lines up with your existing texture. The computer has no idea what it is 'supposed to ' look like
Yeah I see. I will keep that in mind 😄 I know that there is a lot I still need to learn about UVs but since I'm focusing more on just doing the 3d models I haven't dived into UVs that much. I will keep training that as well though 👍

You should change it to something thats not .blend, as .blend files are very bulky and drop framrate
I thought the .blend import internally converted it to an fbx now? (not a blender user but that is how it was explained to me)
Next week, you just write a shader that raytraces the shape with an SDF? 😄
Yeah I don't see how the file format could affect frame rate.
@true yoke There's probably no problem with your mesh, you just need to study and understand how UV unwrapping works
in the game I'm using .fbx
Got it! 😄 Thank you very much, I will try to learn UVs und unwrapping them 👍
reset your scale transforms before applying bevels, actually before applying any modifier otherwise you will get some odd results
can someone tell me why when i build a vrc avatar i press build and publish it just makes another prefab?
Good
has anyone had any experience opening a unity .mesh ??
I want to fix ONE of the LOD models in this tree asset package
but when I select that tree all that comes up is a '.mesh' with two submeshes


I found a .mesh importer for blender but that seems to want the .mesh from XNALara and that's not working with this
Why did you select each face separately? Why not just hit A for all.
meh, sometimes i do sometimes i dont 😄
Anyone have recommendations on sprite texture size? I know Unity defaults to 100 pixels per unit (which I have 1u=1m). Is 100px per meter a reasonable resolution for high quality sprites, or can anyone offer any guidance there?
You seem to have a NON-seamless texture. This can be a problem
-
You can keep the unwrapped UV, export it's layout then open it in image editor, then draw your texture in imageEditor OR you can just draw it via TexturePainting in Blender
-
Another way, is to convert those triangles back to quads, then unwrapped once again, then do the same process as number 1. Reason for this, your UVs won't be significantly stretched or missaligned when texture tilling is happening due to the nature with the low poly model you're working on
Thank you very much for the tips! Will keep those in mind for the next time 😄 But I already finished the tree and it's looking good now. One thing I needed to do is add some seams in the edges and then I basically adjusted the UV's to the texture (I opened the leaf texture as the image in the UV Editor)
This is what they look like in game now for example

(I have a low res render texture applied to the camera that's why it looks pixelated)
That is one sexy looking Pine tree, sir 😃 ...I'd marry her if I were a pine tree myself 🙂
good luck!
Hahaha thank you very much! 😄
Made a spooky theme cat scene in Blender 🙂
.
https://twitter.com/FarrukhAbdur/status/1454341314733084685?s=20

Made a new spooky theme cat scene! ✨🎃
#b3d #gamedev #indiedev #blender3d https://t.co/7AFMsGJwOh
Hello everyone! I am total newbie to blender so I have tried to do my first low poly character (looks like crap). My problem is, that when I import my model to unity via FBX, it have some sort of greenish washed out colours. I have used colour palette from Imphenzia. Does anyone knows, what the problem is? Thank you very much.
This is view from blender:

And this is how it looks like in Unity:

These are my material settings:

If I should provide some more information, just let me know...
I just found this video, and I understand what it's saying and can even use it in my own projects. But, as a total beginner (~1 month now) I don't quite understand the why..
I mean, I know its bad to have all those extra edge loops, and I would have gotten rid of them myself anyways (or not even made them to begin with), but why did this have to become to complex that fast? Why couldn't he have just added 3 extra cubes to the end and merged them?
It seems like all this technique does is add a bunch of extra vertices for nothing, but I am 99% sure I'm just not understanding something..
https://www.youtube.com/watch?v=HGL6QpVRyXk

A good understanding of topology is a vital skill that every VFX artist should have in their arsenal. In this video, I'll break down a quick and simple method to change the edge count of any topology. Once you know how to connect an odd and an even number of faces, you can create clean topology for any mesh.
My Gear -
(Camera) Canon M50
US li...
Hi, it's quite simple actually and it's a common practice IF you want to animate your character...
Also, the guy mentioned the reason why he did that in the video
I still think I'm missing something..
Like, here I have a cube, I put 4 edge loops around it, then deleted all the edges except for the ones on the face I want to extrude. I then extrude them (showing only 1 here) and they're all perfectly attached, so they'll move with the cube if animated..
I don't understand why adding all those extra vertices are needed.

thats not a comparison by any means... not comparable
the dude was modelling a hand and it's fingers...
What he was trying to tell you(in the context of human hands topology and it's fingers) was to avoid what shown in box no.2 and no.3 in this video @strange pike
i cannot find the model import help channel so here i am. trying to import my model from blender into unity. everything works right except for like 2 parts. the spheres that act as joints and the plates underneath them. for some reason unity keeps inverting the normals even though its perfect in blender


its only when i go alt +n -> recalculate inside that the two objects look good in unity
but i dont wanna do that because these are normals, inverted normals are not good at all and tend to break everything
nvm apparently these two objects had negative scale which inverted the normals, its all good now
your video still has all those edge loops. the whole point of the video was to get rid of the edge loops to reduce vertices (right?)
let me show you what I mean. i remove all the edge loops here, leaving behind only the edges and vertices I need for extruding "fingers" so why would I add a bunch more vertices back in when this works?
https://www.youtube.com/watch?v=Fz_GO0dZN5Y (sorry for me fumbling around in the video a little. I'm still very new to all this, and muscle memory isn't quite there for all the hotkeys, yet)

I didn't bother to remove those loops, the point of the video is to explain why the dude did it like that
you may still confused now, but once you're animating, you'll understand what he meant in the tutorial
maybe. because right now, it just doesn't make sense to me to do all that extra work, especially since I showed you "fingers" moving just fine :3
what you shown was just a box, not fingers or anything close to finger anatomy,, I shown mine with the box no.1 to prove my point... apparently you still don't get it... but.. oh well
???

Sir, you're drunk... you posted this like 5 minutes ago
sure, I my response was to your original post
now... make a hand,, and animate it.. $10 you won't get anything close to fingers with just that...
also, keep what you got,, see if it works.. $10
not sure what to tell you, man.. i drew the same thing in the tutorial video, which is the same thing in your "box #1".. its a cube with a finger and 2 joints.. i even moved the joints up at 2:13-2:32 just like you showed me in your video with box #1
hizzah! I found someone that was actually able to explain it to me ^_^ it was something stupid simple I was overlooking.
turns out, what I was viewing as quads was in fact not quads. because I deleted the edges on the top/bottom and replaced them with a face i was actually creating an 8 sided "ngon" but my mind was interpreting it as a quad :3

Heya! so I'm using Piskel to try and make some light retro style assets for a prototype where I have my own character I made and some grassy earth I made for him to move around on. Trouble is, when I import the sprite into Unity, it gets stupid blurry...
Do I perhaps need to resize the image?

on the sprite, change filter mode to point (no filter)
I'm looking, where is this found?
or is this in my Piskel app?
click on the image in your project and it'll show up in the inspector

ohh, down in the assets itself. Thanks, I was looking at the object in the game window in the inspector, if that makes sense
Thanks! now the only thing to figure out here is why Unity screwed up my player character's colors

A few of his pixels didn't carry over somehow
how do I fix the awful scaling blur?

@strange pike this technique is about a lot more complex geometry than the test you set up. In your case, it doesn't really matter since blender will take care of triangulating things for you. But with more organic shapes, like hands that was mentioned, you will quickly get shading errors if the topology is messy. Then there's hard surface modelling which relies a lot on subdivision. In those cases too, poor geometry will create artefacts on your model
what is the best way to put a collider on this imported model (since i cant add a component to it)

i tried the inbuild generate colliders but it's geometry too complex
i just want a box collider
do I just have to create a prefab?
Yes
The moment you put it in a scene you can add a component to it
Ok thanks!
This is not okay 🤣
?

?
Is anyone familiar with substance painter?
Apologies, not sure if I'm missing something here, it's my first time importing a blender model into unity and am having trouble turning it into a prefab and setting up the colliders/rigidbody components.
So far I've:
- Imported the .blend file into the assets folder
- created a new prefab
- added each part of the model into the prefab with mesh filter, mesh renderer and mesh collider components, and added a rigidbody component to the prefab
- added the relevant script components for collision to the prefab
- no collisions occur
Could someone point me in the right direction please? Scratching my head here!
@mystic matrix Is it dynamic physics object and if it is did you set colliders to be convex?
Yes it is dynamic...no I did not set it to convex! Will try that now and see if it works
still no joy 😦 maybe it's something to do with the way I've added components to the children possibly?
This is what the hierarchy looks like for the prefab so far:

Dynamic objects need to use physics forces methods to react to collisions when moved.
It's a good idea to through physics tutorial first. You can find one on Unity Learn
yes I have a DetectCollision script that handles all that, and it works on the primitives
where I'm getting stuck is in swapping out the primitives for actual assets
Just swapping primitive with an object with convex collider should do just fine.
If everything else using physics correctly.
And if you are having problems detecting collision events, make sure rigidbody is configured properly, details are in the manual for the events.
thanks, I'm still struggling but will do some reading and find if i can figure it out
If still struggling after, for physics specific questions, illustrate what's happening and post in #⚛️┃physics . There is also pinned troubleshooting link for physics messages in that channel. (pins are top right in channels)
i'm using blender, and i have a 3d model ive exported into unity and it works fine.
similarly, ive exported an animation from a separate fbx / blend file that applies to the same rig that the model has, so they should work. in blender, when i use "link" to pair the two .blend files, they work as expected. however, im not sure what its doing - because whjen i try the same inside unity, it makes my model really large, lay down, and doesnt actaully animate him at all.
any ideas?

ok i think i have the root of the problem
exporting the animation as a .fbx also brings over the entire rig's bones as you can see in the assets
the same rig in blernder was used to make Stalactite as you can see in the hierarchy
but .. i dont know how to get Rig|Die to understand it should affect the bones in the hierarchy rather than the bones it exported with
because presumably replacing those bones with the ones that were exported will remove all the weight paints
You need to create/copy an avatar from the rig. Then you'll be able to use animations on any rig that uses the same avatar.
that sounds AWESOME and makes a lot of sense
if you wouldnt mind, could you walk me through it a tad more?
Or if it's a humanoid avatar, any animation from a humanoid avatar.
i used rigify's default humanoid, but i have creatures to make too, so walking through the process sounds good
in your fbx(blend/obj) file import settings there are several tabs. One is for a rig.
Yes. It's whatever you see in the inspector when you select an asset in the project tab.
oh ok so ill go to my model import settings
rig
where it says No Avatar
Create From This Model
root node should be the skeleton?
just "rig"
Yes. If your models use the same rig in blender, you can create 1 avatar and use "copy from" for the other models/animations.
okie
take a screenshot...

I'm not sure about these options. I barely ever used the generic rig. If your rig is humanoid, you should select it in the Animation type.
fair enough
For root node it's usually whatever comes before hips.
and what should i do for skin weights? it says standard (4 bones) or custom
standard is good enough
Where does it say that?
I'm not sure I understand. Take some screenshots.

here.
there is improvmeent though, now the model of the guy just stands in place when animated instead of going at a weird angle., still doesnt move though
Umm... I'm not sure why you'd look at the animation tab...🤔
coz im new >:P
figured if he wasnt moving the first place to cherck is to see if theres kyeframes in there corresponding to the right animation
well, why isnt he movin then
Take a screenshot of the rig and animation tabs of your fbx file
uh, like this.>?
In the import settings.


what are the warnings?


Seems like your avatar is broken
oh ... but i just made it
havent done anything with it
just clicked create from this object
i have a snreaking suspicion which ill go check
Take a screenshot of the import settings of the rig that he avatar is created from.
ok, i sorted it i think
nothing to do with that
i think in the animator component i didnt set his avatar, which ws probably the issue
but i also deleted a bumnch of keyframes i dont think were necessary to be performant on Die, so i tried it with Idle and it works ... mostly
he does it all properly but his head is a lil' bit weird. probably just a weight paint thing, though
and nowwww its all modular thats easier to fix than ever!
this fake user save deletion hell ive been trapped in since yesterday is over. this is gonna be so much easier to develop in!
thank you so much for all your help, dlich, modern day heroi
Is there any built in way (like a shader) to blend textures on a model on a per-vertex basis, or would I need a custom shader for that? For context, I'm trying to port an older source-engine map, and the displacements with blend textures are giving me trouble. Here is how Blender interpreted it, but I'm fully open to different methods:

Managed to make a basic shader doing what I need, but seems like I'll need to properly teach myself how to write shaders if I want features like normal maps.
Anyone have any guidelines for picking a good pixels per unit for a sprite pipeline? Assuming 1u=1m in game.
That would depend on each of the sprites...🤷♂️