#🔀┃art-asset-workflow
1 messages · Page 62 of 1
i'm not very good at coming up with things myself
and I think it would be easier if I got told what I needed to make
The asset store != a portfolio.
You can use art station for a portfolio.
And if you just want to focus on modelling, then you don't have to think of your own stuff.
Look around for a concept you like, Then contact the artist and ask if you can use their concept to make a 3D version or similar.
And then if they say yes, have at thee!
also should I be using only one shape to make the model or...
It depends on the workflow you use.
I tend to model most of my stuff as a single mesh, but that can't be done for everything.
One of my larger models, still a work in progress.
it's the chomper thing
heck
i just blanked on the name
Audry 2.
No, Mines is a 3D version of a character from an old musical film.
i get that, I'm just telling you that it reminded me immediately of the chomper from PvZ
Little Shop of Horrors?
Aye my man!

That's a different one, Usually I get Mario Piranha plant.
VROID is software specialized in generating anime characters
it's fre to use IIRC
if you want to model it yourself, this japanese tutorial bar none will get you a similar look pat down
https://www.youtube.com/playlist?list=PLaZf7EtPohEzBJ85nJu12hTEgynwp1Se7

YouTube
書籍『Blender標準テクニック ローポリキャラクター制作で学ぶ3DCG』で制作した3DCGキャラクターの制作過程を動画として記録したものです。書籍と合わせてご利用ください。 CHAPTER 1 制作計画(※動画はありません) CHAPTER 2 頭のモデリング CHAPTER 3 体のモデリング CHAPTE...
can it do those low-mid quality characters? because im not trying to make a genshin impact anime game, also probably easier to make more outfits with the low-mid quality characters
the second tutorial is fairly low poly, plus blender can decimate meshes if they are too high poly
if not too much to ask, does a base character models like the ones in the pictures ive provided exist?
https://sketchfab.com/search?features=downloadable&licenses=322a749bcfa841b29dff1e8a1bb74b0b&licenses=b9ddc40b93e34cdca1fc152f39b9f375&licenses=7c23a1ba438d4306920229c12afcb5f9&q=chibi&sort_by=-relevance&type=models
have fun browsing 🙂, they're also filtered by OK free to use licenses
Sketchfab
Use Sketchfab to publish, share and embed interactive 3D files. Discover and download thousands of 3D models from games, cultural heritage, architecture, design and more.
And if you have little experience with blender and need some help getting started https://artisticrender.com/beginners-start-here/
Hey guys, I feel a bit homeless since Adobe to kill Fuse 😅 Do you know if there's still a way to create a character with it, including his blendshapes ? 😬 Or another free software for making 3D models ? :/
Blender
Hum, I got Maya, but to be honest I can't model something more complex than a cube... Unless there's a tool in there which automatically rig the faces of an imported characters? x)
they killed Fuse?! Damn you adobe!
on that note, maybe try getting into the metahumans early access https://www.unrealengine.com/en-US/digital-humans idk if thats too high fidelity for what you want though

Unreal Engine
MetaHuman Creator is a tool for creating photorealistic digital humans that are rigged and ready to animate in Unreal Engine.
@lime pollen Thanks for the link, it's super high quality indeed, haha, but it's an alternative I didn't know, I will look at it 😁
And yeah, actually they gave up support I think. So you still can create your character in Fuse and all, but there's a link missing with the export, and I can't generate blendshapes anymore... :/
usually people use that for making anime models?
it's definitely used by people (there's even a reddit community), now whether it has the blessing of some big corporation like Disney, no idea.
big corps probably have enough artists to spare that they have no need for a tool to speed up the generation of an anime base mesh specifically
Let's also note. This isn't making a base mesh. The base mesh is already there. It gives you options to make a character.
A base mesh is a basic model with no details and no texture usually too, so artists don't have to start from scratch.
Base mesh != Basic model.
I've had a couple hours with this, It's still lacking a lot, and actually downloading the models to make animations in maya is actually such a pain I don't think we'll see too much wide adoption out of people just making quick characters.
Unless they fix their pipeline issues.
its early access for a reason 😄
The funny thing about epic, It's not gonna change much, what we see is what we're gonna get.
They still have massive fundimental things broken, but instead of fixing they pack in more features that also make things more broke. :D
Epic is flashy, but not actually stable. :D
Heyos! it's been a long, loooong time since I last made any art, but here is something that I had been working on for a while now, and I just finally finished it today. lemme know if you people like it! This isn't entirely what I wanted. I wanted to do a lot more with this, but I couldn't do it because of some problems. But hopefully i'll do those for the next landscape ♥️

holy moly
does anyone know how to export a submeshes in blender?
@wanton hound what do you mean submeshes?
uh like
Mesh.subMeshCount
parts of a mesh that you can apply different materials to
You can just assign different materials in blender. Then when you export it as FBX youll get those material slots in unity.
thank you
Hey, my brushes say read only. How can I change/fix this?
Any help would be appreciated
You'll have to reconstruct the materials.
But I will tell you that ripping assets from another game to use in your own is breaking copryright. And with Dark souls, also trademark.
Hello. I need to stick Missile Silo in Ground, Witch is a Cube from WorldBuilder so basic cube. But it will cover missile silo hole.

i see its use for making some random things
not sure if its for making game ready models
It makes models game ready, but more towards the higher end poly counts we see. Around 60k.
You can try to boolean the silo or cyclinder to match in size so that it has the cut out of shape.
I need Boolean in Unity3D so silo will cut in cube taht iam using for floor /terrain
Fuse 1.3 is still available from Steam for now.
making a character and thinking where should I add the orange point in blender for best animations for an arm and a head
The orange dot just means the origin for the mesh or object.
If you are aniamting you should use bones to rig the mesh, and the origin to that should be world center.
I'm following a tutorial on how to animate using pixel art 3d and he doesn't have arms and he's putting the dots in certain places so I'm asking where I should make the dot for arms
and head
Hmm. What's the video?

im trying to figure out a workflow for making platforms for a side scroller and I have the dimensions figured out in Unity but I want to be able to know how big the platforms are so when i model up the platforms in Blender, they are pretty much scaled with what I have in Unity. is there a general principal for knowing how these scale? That colored model I have actually had to be sized down to match the platform below it.
@wooden grove Jut use these for your export settings and it will export 1-1 in unity. :)

The above like is another solution but makes you rotate and do other stuff that you can already do in the export settings.
how about if I for example know I have a block that's 8x4x2
does it just scale then with those dimensions?
because with the above the scale will be 1-1 which is what I want
but if I make an 8x4x2 model in blender that will be about the size of a cube i made in unity thats 8x4x2 despite the scale being 1-1-1?
or when im in blender, don't reset the scale to 1-1-1 and use the settings above
i just did a test with not resetting the scale (alt+a) and it seems to be doing the expected thing with the settings above. Thank you
I just did a test and an 8x4x2 cube i made in unity vs what i exported with the settings above aren't the same. Blender's FBX was bigger than what unity made. Should the scale factor just be decreased?
setting the scale factor to .5 worked to get the same size as the cube in unity


Your scene is very front-lit, you're killing the shadows. I would try angling the light so it's coming in from the left side, or in from the back, spilling in through the window. I would also add walls to the front and side and set them to contribute GI but make them invisible to the camera, so that way you get bounce lighting from them.


first pair looks alot like warframe

Hey does anyone have a good pipeline reference for making unity HDRP materials?

anyone knows how i export a blender material to unity? not a texture
Can't be done, Unity and blender have different shader systems.
You need to reconstruct your materials in unity.
J U I C Y
Is adobe fuse a good tool for character creation?
It's free on steam
No
Great materials :) The on the lasts ones is particularly nice
Is thier a specific reason why?
I looked at it and you have no control. It's juste a preset characters with sliders like ingame character creator.
Okay

some practise, obviously not the best
cw for small unrealistic blood

Question: How does one transfer mesh from one armature collection to another in blender? I need to transfer the mesh data into the Armature of another. (Basically move hm.001 to inside Armature.001)

How do I flip the uvs on one face for this cube(generate 3d object > cube). One of the sides has my text upside down(texture on material)

Should be able to change the armature option in the modifier on the mesh.
i like that style
ty
My model faces are beckwards, when they were in blender they looked just fine, how would i fix this, is there a backface culling option as there is in blender?

ping me
Flip your normals in blender.
yea, i just did that, works
idk why they were upside down or flipped i nthe first place
Anyone have any dice on my question from earlier?
Because you extruded the face downwards and through the bottom, essentially flipping it inside out.


If you scale by -1 or any negative number, your normals will be flipped.
It could be the reason behind it.

That controller looks like it has it's own nutsack.
Does anyone know how to eliminate floating point flickering when working with Probuilder meshes?
Oh great grandmasters of 3D art, could you share your wisdom to help out a poor pleb in seek of blender knowledge? :)

I am wondering what a simple/fast way to extrude all these selected faces (that exists on all sides of my object) towards the inner point of the model? (or cursor if thats easier)
I am aware of the orientation and pivot feature ( "," and "." ) but rarely use it and cant say I get the differences or when to use them yet. The only thing I ever used so far is extrude from normals.
Quite often this question came up for me when learning, instead of using automirror all the time sometimes I just want to position/scale/rotate something, in sync on all sides but towards for ex its "inner" orientation".
would prefer to learn of more ways (for different situations), rather any alternative to selecting individual mirrored faces and using scale on an axis with pivot point to median.
Guys, i'm getting my blender models to unity thru blender files but this one material just does not render the right way... can someone help me with this?


are you using a custom blender material? those don't import into unity, you'll have to recreate it again
noo, the material only has a color and roughness
I remade the material but it still does not render the right way...
unity doesn't import that, you need to remake it in unity
the roughness specifically
Alt e and then choose extrude along normals


i have a lot work but here is the head of my satyr character

he will have beard, hair, realistic horns and eyes
what do you think?
... it looks like the horns are just like pushed into his skin, not like its a part of his head...
yes that's how it's suppose to look like
Maybe make it more red around the horns?
Did you sculpt the character yourself?
because it looks really nice
yes im 16 btw
rpg
hi, how can i get the maximorig:Hips outside the inner Armature (i want to move it up the Hierarchy) i am new to blender can anyone help me out here

General question, but I have a bunch of objects (some animated, some not) in a single Blender file.
I then export each individually to their own FBX file.
Is it recommended that I separate out each object into its own Blender file? When I'm exporting objects with animations, it exports ALL the animations
does only one know how to import only animations from blender to unity ?
If you tick export only selected in Blender export settings and only select the rig, that will be it.
Its probably easier to have each object separated. However, I'm assuming your objects are interacting in some way together with animations. Keep each separate object and give it its own animation actions and only keep the ones you need in Unity
ya i tried selected Objects Options during export but for some reason the size scales up 100 times for the animations but when i import both the model with animations they are correct
@earnest pagoda that sounds like your actual mesh doesn't have a 1 scale.
oh will check
is it possible to export particles from blender to unity?
nope
Kinda wondering, how would I make a model look like it's melting in or out of a surface
maybe by using a deformation and baking that to a vertex animation, or a simulation with shaders thrown on
Ty
#archived-works-in-progress is probably more apt

Blender or Cinema 4D when it comes to 3D art in general?
blender has a lot more resources online, and free
Cool, thanks for the feedback!
im working on a simple flag model but the flag itself wont show up on the UV map, is there a fix to this?

it is there
press A at the UV Mapping workspace
and u will see a yellow dot somewhere
the reason its not showing up is because all the vertices are small that it became a dot
this is the whole map, i have no clue what this highlighted bit it but i doubt its the flag given the amount of faces

@slow prism in object mode, is the scale 1?
anyone knows how i can write on a normal map texture?
@raven verge Generally you never want to do that, Normal maps are mathematically created. So then editing with a brush or something could cause more errors.
But if you really really want to do it, you can load it up in any paint program and then then match the colours.
Does anyone know how to make a see through/ transparent Game Object?
Trying to make a wall I can see through with the camera but still want that wall to reflect light like it normally would.
change the rendering mode of your material to Transparent
thats a super basic way to do it, if you want something closer to a window then google "window material unity", plenty of different setups out there

Would it be something like this material? It's transparent but the title of the material is default terrain.
I don't have any transparent assets from what I can see.
you shouldn't be changing the default terrain material, you can make a new material by Assets > Create > Material
It kind of worked, kind of not, it's transparent but not fully.

You can somewhat see through but not all the way, maybe I am missing 100% opacity...
lower the alpha in the albedo color
Worked perfectly, you're the best, sorry for the rookie questions, I am really new to this whole Unity development stuff.
Learn something new everyday, thank you so much.
np, try tweaking the metallic and smoothness values too for fun
I have been dipping my toe into programming in c#, doing VFX in High Definition RP, and now trying to mess around with lighting and figured a room with a few game objects bouncing light off of them would be a good place to start but the walls were in my way lol


Using the new line art modifier added in blender 2.93. It can produce interesting results for line effect.
.
https://twitter.com/FarrukhAbdur/status/1401728516534702080?s=20
Using the new line art modifier added in 2.93, works in viewport real time on objects, collections. Baked lines give fast performance and are editable.✨
#b3d #blender3d #gamedev #indiedev #polycount https://t.co/TPdbWXx1mV
@slow prism The face is brighter because it can be selected already in the mesh. One face is usually brighter in sync selection mode. Try selecting all faces, see if all faces are shown. You can mark seams around the edges and try unwrap. The problem can be due overlap uvs or faces not unwrap.
hey! does anyone know how to make a proper torus now the probuilder shape editor has been updated?

the above should have a horizontal circumference of 45 degrees, but because you now have to set the height/width/depth, you can no longer get a perfectly circular torus unless it is 360 degrees all round

ArtStation
I made this lock to study about udims and improve my knowledge about stylized, I took advantage of it and also made the scenario, I hope you like it!
do yall think gravity sketch is good for modeling?
I would say it's a good tool to concept, but I feel you would have to have an optimisation pass to use anything you export from it.
Has anyone made realistic animal assets? I'm assuming someon has but I dont want to download a virus from a sketchy free assest site. I am looking for african animals specifically, thank you 😄 (u can dm me btw)
Sketchfab is a good place to pick up models(Some for free some paid). Despite the name it's not sketchy. Turbo squid is also a good place for models.

Elephant 3D Model - Elephant - Download Free 3D model by freddy1231 (@freddy1231) [71e67ef]
Just be sure to check the creditations needed. Most assets will most likely be CC-By. Which means you have to credit them. And If nothing mentions what copyright it is, then assume CC-By
Thanks a ton, I will check out those sites 🙂
Working on my next scene

Hi I am working on a game and I am trying to add color to my player in blender I have everything done but I can't figure out how to save them please help
@solar estuary Yea getting the materials to transfer can be tricky since materials don't transfer between renderers very well.
Might be simpler to just assign your own materials in Unity to the appropriate slots
Though the proper way to color your object is to UV map it to a texture, then use the texture in a single material that is used across the object
looks epic
i have a question
i just put my blender files in unity
but some walls are invisible
and i already turned on backface collider
You shouldn’t be using blend files in Unity. They only work if other team members have the exact same version of blender as you. And by default blender shows back faces (unity does not)
i used fbx files
It isn’t a collider issue - it’s a rendering issue
The shader / materials in Unity only draw the forward face. The way a face is drawn is clockwise triangle verts
so how can i fix it?
Go into blender, and check Hide Backfaces. That will show you what you see in Unity and any game engine.
Then add the inverted face. A wall in the real world has depth, it is two sided.

Blender Artists Community
I have a UV sphere that I’ve flipped the normals on. I would to turn on backface culling so that I can see the inside of the sphere rather than the outside. I can’t find where to turn on backface culling in 2.8. Anyone know where it is? Thanks.
Hi all! I am new to Unity (I hope that it's not a problem) and just got my first map. Can anyone help me with tips so I can make it as nice as possible ? I had just one question myself: To place grass and dirt for the player to walk on, do I first need to place a underground so it will be equal high or can I just place it in the air?
@marsh summit Face Orientation is another great one, it colours the mesh blue and red so you can see which way the normals face. :D
I am not sure if I should post it here, but I thought this is the best place for it..
@eager mist I reccomend first making a block out, Just use cubes and other basic shapes to design your level. Get it worked out on a functional level before you start adding art to it. :)
Definitely! My fav not talked about feature - showing edge lengths. Super helpful for checking models quickly
I think that I understand it, thanks for your help. :)
Thank you very much!
you're welcome


i can not equip my material
can anyone explain
it is for a terrain
oh i see
can i give a phisic material a color?
Importing a railroad track model into z brush and I keep getting this weird rendering issue where parts of the wooden sleepers don't show


this is what the bottom is supposed to look like

oh wait I got it
how can i add an image
i created an canvas and an image
but if i try to put my image in the source image
it doesnt go in there
please help me
you're asking in the wrong channel, but you likely need to change your image import settings to a sprite

@wooden oak Set your export settings to these and it should be good.

Also make sure your objects are set to scale 1 in object mode.
What version of blender is this?
Fixed with FBX all thanks @stray stone
the other options like x forward messed with a lot of stuff
Ah right, yeah, Gotta export as FBX.
Yeah, teh forward can basically be what you want, I just use that one.
Sorry for being late thanks I got it to work
After exporting rig to blender, and I notice there is lot of files with Tex at ending, and it kept appearing why does that happen?
.tex files are just the files blender generates when you import a texture/image file
any 3dsmax expert here? I just want to know the correct / best way to convert fbx.
i have a huge scene with all 3d object in 1 scene files, those will be processed and export to unity
i have successfully able to export fbx & obj for 3dsmax, however i still have some issues.
- What would be way to keep model look "upright" in project window? (I used only pivot rotation atm, but there is also a setting for Y-up in exporter). I assume this because 3dsmax is z-up while unity is y-up
- How to make the object facing correct way forward (this one i had issue), example : 0,0,0 would facing negative world unity Z axis
- Same goes for when dragging object in the scene, sometimes even i set the pivot correct, it rotate to certain direction (i assume i have to bring the object to origin with default rotation in 3dsmax itself before exporting
I think i solved my size issue (using meter or milimeter unit in 3dsmax), but i just want to know a proper way to export it nicely.
There are a lot of 3d objects atm that have to be export individually atm.
hmm, now even more puzzling
have a furniture with multiple part, i assume 1 of the pillow is mirror of another
i already reset transform / pivot / rotation
but when i export to unity
only 1 of then are flipped normal
weird part it, on windows 3d browser (win10), it showed correctly.
and in 3dsmax the normal are correct.
hey guys, im looking at https://www.prometheanai.com/ which seems really cool to set up a room or environment quickly. but i'm wondering, do people really have this big of an asset library already? it seems that they assume that you already have 1000s of models ready to be dropped in to the scene
many big studios would have a huge asset library that this would be useful for, they probably also provide some sample assets
right.. trying to see how many assets they provide but cant find anything
why don't you download it and check?
im on mac 😦 😦
get someone else to download it for you and check 😛
alternatively you can go to their discord and ask
oh yeah good idea with the discord 🙂
This might be a more noobish/general question but I noticed that when I import my 3d models into unity from blender the model looks more like it is in Eevee than it looks like it is in Cycles. What is there I can do to improve the look of my models?
Are there any popular shading/rendering options out there?
I just dropped my .blend file into my project just like that
But are you actually supposed to do that? 😅
I think they have no maps, like normal maps

No
You should export as an fbx or other formats
That's because you need to bake the maps and export them

In this video I will show you how to properly bake textures from Blender to use in Unity. I will show you how to bake a texture for a single object, and I will also show you how to merge multiple objects into one to bake a single texture file for those objects and how to apply the texture in Unity.
25 minutes to explain baking textures. 
All you need is a decent UV map, have selected the object in the 3D viewport & an image texture in the shader editor (Shading tab) & press "Bake".
My object uses multiple materials, do i need an image texture for each one in the shading editor?
I believe so
When i bake the texture image it also bakes in the lighting
my scene has blue lighting

but for unity i would want a "lighting neutral" texture

Doesn't work either
Maybe because I changed the world lighting value

I do not see the red carpet in the baked texture, is that normal?

You have to bake each material so yes
so each material needs a new map?
Never mind you can bake each material into one map

In this episode I take all the textures from the house model we did in the previous episode https://youtu.be/4c64OqXQj3Y and apply them all/bake them to one single texture map. It's a tricky process in some ways but I break it down into simple steps as much as i can.
My website www.gabbitt.co.uk
discord server https://discord.gg/Y5QaDnT
rec...
i have a material that is almost just white, is this what it is supposed to look like?

i did this

Choose "Emit" instead of Diffuse
and plug the color directly to the output of the shader, so skip the BSDF.


Delete the bsdf,
either use a color ramp or just an RGB node, and plug it into "Surface" of the material output
🤔

Press SHIFT + A to search for the nodes I mentioned
That looks like it's supposed to
But now the other textures are all dark
You can either do the same for all other materials on the same object but first uncheck the setting "Clear Image"
or, you can copy/paste the image texture node to the other materials and press bake.
So I guess bake all the other maps with diffuse first then deselect them in the node editor and then only bake the white texture with emit?
No, bake all of them with emit.
So first diffuse and then emit but without clear image?
Diffuse is the same as emit in this case.
The emit option is just less unpredictable.
it still goes dark

Uncheck "Clear image"
I did for emit
1.Diffuse on all with the clear image checked
2.Emit on all with clear image unchecked
You don't need to use Diffuse to bake the textures...
It won't make a difference.
Just do step 2.
Make sure they're all using the same image texture when baking.

What do you want to do?
What does your object look like in Blender?

So you've plugged in the color directly into the material output for the white material.
Now do it for the other materials as well.
The other textures are a little bit more complex though
Show an image.
For example the ground has this musgrave and everything

for the roughness
and this is the floor (non red part)

I personally don't care for roughness & normal maps. (When making games) I usually try to incorporate all the details in the base color.
If you don't want to do it that way though. You'll need to do what I just told you, but for the different maps.
I see, so back to the color map:
I think it does everything properly when using the diffuse except the white walls
But when I use the emit the walls are good but everything else isn't
So what do i do
First of all how do I clear this?

You use "Clear Image" when baking, to clear it.

What does it look like in the 3D viewport?


Well, then continue using diffuse & include the bsdf.
Alternatively, you can use the Diffuse bake -> uncheck "Clear image" -> bake ONLY the white material.
How do i only bake the white material?
Remove the image texture node from the other materials
The problem I have with that is that Blender tries to overwrite the other image texture in the material
Then uncheck "Clear image"

You are only supposed to select the image texture node that you want to bake to. (in the shader node editor)
This cannot be the same as an already existing image texture that's used to create the texture/base color
How does selection work in Blender?
Alright, I did the diffuse baking
So now how do I deselect the image texture nodes of all materials except the white one?
you just delete them in the other materials.
But that did not work last time I tried it
If I delete the right one, Blender takes the one on the left to bake

You shouldn't need the left one anyways...
Why is that?
Because once you have the baked image texture, you'll be able to replace the left image texture node with the baked one...
But if you want to bake the normal map & roughness map, you can just re import the original texture.
So how can I tell Blender to only bake for the white material and leave the rest alone?
I mean, there must be a way
or should be
If you have done the following 4 things
- Deleted the image texture node containing the bake texture for the other materials.
- Selected the image texture node containing the bake texture in the white material.
- Selected the object in the viewport.
- Uncheck clear image. (to make sure it doesn't override any previous texture on the image with a blank canvas)
Then it will only bake for the white material. Or you've done something wrong.
So how do I know I did step 2?
When the node has this white border around it?
Go to the white material in the shader editor
Yes, it should have a "highlight"-border around it.
like this?

yes

I have no idea what you're doing (wrong)
Why has my emit map turned all dark?

Even though the thumbnail still has the correct image?

Can't tell ya without knowing what exactly you are doing
you aren't giving us any information about your process
I think restarting Blender should help if the image does not match the thumbnail.
I thought maybe it's a common problem
I had to rebake it
Is it fine for roughness maps of materials to overlap?


it looks like the two would be overlapping
it's p much the same texture, so it won't be much of an issue ig.
When would it become a problem?
What's the equivalent to roughness in Unity materials?

Apparently it is smoothness, but how do i link that to a roughness map?
smoothness uses either the alpha from the metallic map or the albedo map
So does anyone know what I can do to make it receive the right smoothness information?
When I check the alpha when baking a diffuse map in blender, will it also include the roughness information?
It still does not look like the material in Blender though


I am fairly new to this so I would need some help.
Is there anything else I should do other than exporting and using these maps?
This is what it looks like in game right now

You either need to set up the maps to be what unity expects or write a shader that uses the maps you have.
You material doesn't have any maps for smootheness/metallic.
So you'll just have a blanket smooth factor. The only thing you can do it adjust it by eye get what you want, or get the maps set up for the material. .
@stray stone So export a metalness map?
Yeah, but unity can support also number of materials in that one map.
If you hover over teh text it'll tell you which channel you can assign as what cause it can support multiple maps because they are only black and white ones.
When I export from blender how do I make the metalness map contain the roughness data or is it added automatically?
You would have to pack the map into the channels, so photoshop or another tool can do this.
So image files come in RGBA, Red, Blue, Green and Alpha.
Because textures like, roughness, metalness, glossyness are all black and white images.
We can get away with putting each of those types onto one channel in an image.
So Green can be the roughness, Red can be the metalness, ect ect.
This is what is called a mask map in HDRP, but they are used in all of unity's materail system.
I am currently using URP
If you hover over the text for a map it will tell you what channels each map is assigned to.
Could you take a screenshot maybe?

If you hover your mouse over this text, it will tell you what map goes on each channel.

That's the base map, you want the one under that.


Thanks
So if you put the metallic into the red channel, and the smoothness/roughness in the alpha channel you'll be able to use 2 maps in 1 texture!
So in an image manipulation program I can do that when I have both maps?
Yeah, Photoshop can do it, I think GIMP as well. I'm not upto date with anythign other than photoshop. 😅
But as long as it allows channel editing, it should allow it.
I see, thank you
And that will make it very close to what I see in Blender?
I guess I'll have to try out and ask then
What kind of rendering does Unity use by default when using URP, something that's closer to Eevee or closer to Cycles?
It's more eevee looking.
So how do I make it look more like Cycles?
What shading/rendering options do I have and how do I change them?
Cycles is a whole different rendering system, to get anywhere close to that you would need to use a more advanced rendering system like HDRP.
You could bake all the data for lighting and such into your images, from cycles, but that's a lot of work, but possible.
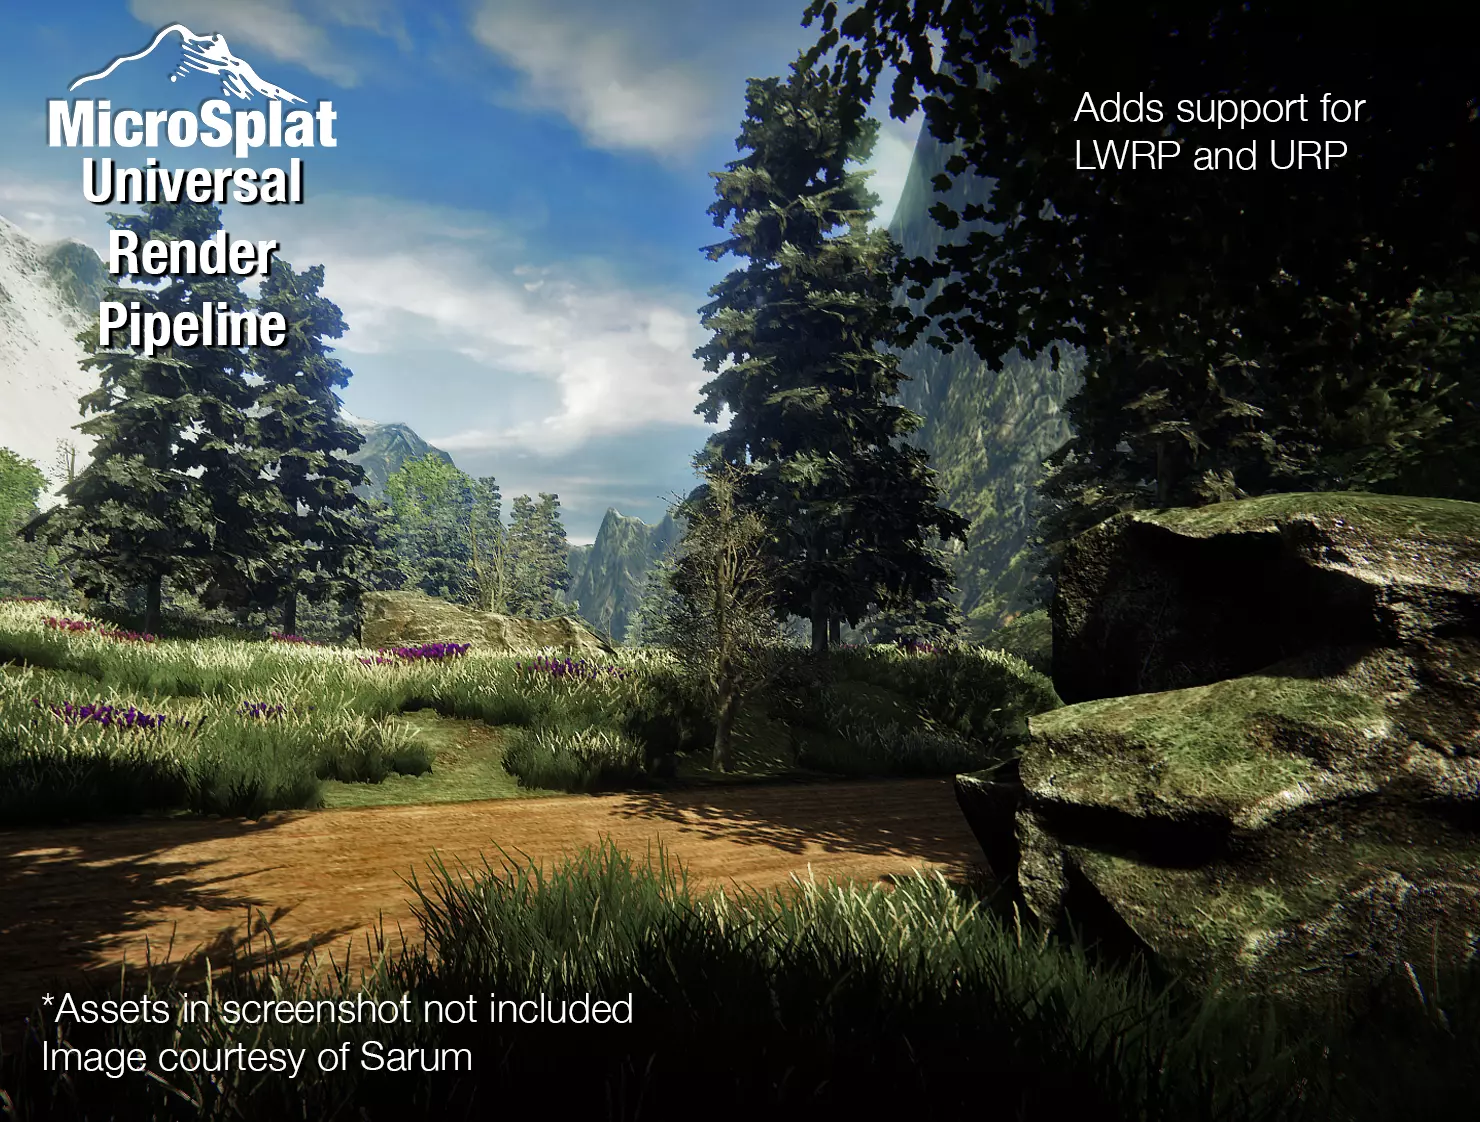
I am not too knowledgable on the topic but I have seen pretty great landscapes in Unity with the usage of something like Microsplat with other rendering systems
You can get better results with practice.
Practice is always the thing to do to get better.
That's a good answer
But i also need to know what I need to practice

Like how do they do this?
Lighting and materials are the top two things.
Also baking lighting which helps optimise.
Baking lighting into the textures?
So I need to take a look at materials, lighting and other things like post-processing?
Anything else?
Unity light baking.
Okay
Good luck!
Thanks!
hi guys, hope I'm in the correct channel 🤞
so I'm struggling with that for quite a bit and I guess I need to ask some guys now to help me get answers...
I made this button that requires different colors.
when the colors are completely random I would prefer having 2 materials, but what when it's only 4 colors for example? should I bake the texture for every version or also just use 2 materials and color it in Unity? 🤔 cause I learned avoiding multiple materials on 1 object should always be the way to go in terms of performance


you could just color it with the vertex colors and then have different models > colors, but all using the same material?
I would probably use a mask texture
could someone help me..
i got some bad topology and i too dumb to fix it lol

looks all good but the neck area..

not sure how exactly i should go about this.. my brain tells me i need the overhanging faces like in the front and back.. but everything i think of ends me up with a triangle

this is all i got.. and then i end up with these 5 vert faces 😐
Who has a blender low poly model for human
You can select the loos vert and then the corner and Merge them. @tawdry valley
Free
wouldnt that make triangle

How do I model a low poly human

YouTube
I make music, sound effects, game development assets, games, and all sorts of different stuff. Thanks for visiting me on YouTube where I share videos of the things I do.
check out this guy @native bane
Ones that aren't an hour or 30 MINUTES LONG IM ON A LIMIT HERE
you're not going to model a low poly human in less than an hour lmao
Is there one for Low Poly Humans
Charg1n prove you wrong
Learn how to easily model a low poly character in Blender 2.9x. This is the first in a series of three videos. In the second video, we create an armature and rig this character and in the third video, we key frame animate an idle and a running animation.
You can download the tutorial files as a Tutorial Tier Patreon at:
https://patreon.com/imph...
just because the video is 10 minutes doesn't mean that you will do it in 10 minutes...
this ^ and ull probably pause 1,000 times

Can you?
Can I what?
Free low poly model (r i g g e d)
Second, given the "urgency", I suspect you are just about starting your game.
Which them means you aren't ready to put art in, You should build your game out with cubes for a bit till you work out the mechanics.
This is the basics of prototyping.
If you do stuff yourself it's much more rewarding in the long run
If your new to blender I would recommend you do Blender Gurus donut tutorial and then for the low poly character you can find a bunch of tutorials on youtube
Blender gurus is quite amazing. There are also some good tutorials on Udemy for ten bucks
The game dev tv one is good
Sorry if this is the wrong channel.
I have this object in a file. I would like to import it into another file, preserving the parent/child relationships, in such a way that any changes made to the original file will automatically propagate to all copies.
What is the term for this? I am trying to look it up, but without knowing the Blender term, search results are a mess of not-really-related topics and questions.
Edit: found it. The processes are called "Link" and "Append" in Blender, and Collections which have been linked can be parented to other Collections.
Second edit: However, it turns out that this does not preserve the parent/child relationships within the Collections.
Third edit: I ended up just copying the collection directly into the main file and making linked copies from there, rather than try to keep the objects in separate files.

is anyone interested in helping me make my game? its a 3d unity engine xr crossplatform choose your own adventure emotional drama. Let me know if you can use blender or maya or any compatible 3d asset creation for unity
we have 3 unity devs but need a new artist/s
job/collab posts go in the forums, sorry
how can I apply textures to 3d models?
I drag and drop my texture on my model but it just keeps the color, it doesn't transfer the texture
Create a material, assign texture, put material into object.
How do I assign a texture to a material
Drag it into the slot of the property you want it assigned to. Albedo for example.
yes but it still displays just one color
Then your texture is incorrect, or the UVs on your model are not mapped to work with that texture.
and where can I find good textures for 3d models?
The internet. 🤷♂️

What are the step we should take while exporting model from blender to unity(like normal map)?
drag blender and drop into unity, then it becomes blenity. thats all

@eager mist but like high poly, will it affect performance of game , can it make normal map and bake texture it's own
nvm dude i was joking 
no
High poly models should be reduced with retopology to make it more performant and also easier to rig/animate.
You can bake normals from high to low.
okay
are there any more thing I need to take care of
@stray stone Thank u very much for ans
hey, where the heck is the mesh menu? can't find it, I'm using 2.93
What do you mean? To add a mesh, To edit hte mesh in edit mode?

In edit mode, it's here at the top.
Hey guys! I recently exported textures from blender, and when I import them into unity I notice that my material is getting this Line affect going through it. I'm thinking that it may be something to do with how close my islands are in the UV's, but I thought I'd ask before I export another set of 8192x8192 textures (took me many hours haha)

I don't think that its an issue with the material itself, but here's some more information if you need it

Anyone happen to know what is causing these dark rings that follow the camera?

It has these sharp edges in regular intervals
This is in HDRP
Something to do with the normal on this texture 
Okay solved. Through events unclear to me the filter mode got set to none for the normal 

hi, i'm creating a skybox, unfortunately substance gradient mask won't work, any solution to this?

ehm
so im making an game and we have someone who makes the props etc with blender... but his blender crashes everytime so can any1 make props etc for us? dm me
So i have imported a hair piece i did into unity. I made the model, bones, and did the weight painting myself in blender and everything works fine in blender. When i import it into unity though, all weight painting is lost


Is your model subdivided?
Bones need names. And if you are parenting it to another rig it won't work due to confilcs.
Also just gonna point it out, that's way too many bones.
Should run 4/5 chains and do the hair in bunches.
Yeah but Im pretty sure I applied all the modifers and re-ran Smart UV wrap
her name is Teo. Any suggestions? (except for the skirt ill change that later)

Twist the legs so the knees and feet are forwards instead of tilted inwards. That's gonna make leg rigging painful. @errant dome
right, thanks for the suggestion <3
If it's a female mesh, you also want to make sure the shoulders are thinner than the hips.
Anyone familiar with CGAxis, know if their Complete collections are any good for game development?
@winter gazelle Having a look at some of their models on the site, They are not suitable for games development.
Can you be more precise please? Like why you think so?
They are too high in poly count.
Simple things that you can model with a few hundred are several thousands here.
Good point
This appears to be a site for people who make arch vis, or animations with offline rendering.
Just a question from someone a bit green with some 3D modeling software, namely Blender. If I was to merge some of the poly, would that affect the UV?
It will.
So i would have to remap.
Yes.
OKay.
Don't buy from this site, please.
You can model most of this with very little effort.
Modeling yes, texture much less.
Depends on what you are texturing but you don't need to hand paint every texture.
If you are just using a wood material, Just gott make sure the UV's all going in the right direction, doesn't matter how it's looking.
Can i have your opinion on KitBash?
Kit bash I know was made with more games in mind, but they are still pretty high poly for most.
They are aimed more to the AAA market rather than indies.
Especially when you are paying $200 for 20 models or so in some of them.
nods
So... Speaking of bash kits. Am I doing this right in a low poly sense? It's a kit for a tank.
Either it's hovered or not would still be decided though. 🤷♂️

still a WIP too.
can anyone tell me how to use ProBuilder nicely. Any external website link will also help
@gaunt minnow I would seek out videos made by the creator of Probuilder. Some of them are on his personal channel, and some of them are on the Unity channel.
I am trying to make a grass material but when I add my image tha transparency is lost gets lost and a lot of weird lines pop up

(on the right is the image that I add and on the left the outcome)
What do you mean more lightweight? It's the most ligtweight 3D modelling program out.
You need to set your material to allow transparency.
how do I do that?

This setting here, Alpha cutout should do it for you.
It will also then give you an option to tweak the boarder of the alpha to be in or out more, so you can tweak it.
it just disapears
Lemme see the material settings?

Adjust your alpha cutoff.
so when I adjusted the alpha cutoff it just disappeard
thanks
how can I make a mesh visible from both sides?
Oh
@stray stone So about what I asked a few days ago. I have now exported a metalness as well as a roughness map, but I do not know how to
1.Invert the roughness map to make it a smoothness map.
2.Copy that into the alpha channel of my metalness map
Could you maybe explain how you would go about doing this in software like photoshop?
Photoshop has a channel editing system that's on another tab where you see the layers.
You would load up teh image you want to use as a mask map, Then the images you need to add to the specific channels.
Copy one image from the file you need, and paste into the channel of the mask map texture.
If there is no alpha channel, you can add one.
Inverting in photoshop is just a filter can be found in the menu.
Unfortunately I do not have photoshop, so I have to try to recreate this in other software
First of all, what is the inversion called you would use for this?
Invert colors?
@stray stone What kind of inversion would I need to apply?
So inverting colors will do?
any zbrush users?
I'm trying to insert a mesh that is mirrored, I already have symmetry active wondering what else I need to do
imagine a mirrored shoulder pad
@maiden tangle What do you mean?
You want to duplicate a mesh across the middle to mirror it on the other side?
Yeah man, that's all it'll need.
Alright
Someone on the blender forum told me I should use a program called fusion and use channel booleans

I guess this will do what I want to achieve?
exactly
https://media.discordapp.net/attachments/853744653123059723/853751204524982282/unknown.png
The resulting images look a little weird though

@ionic blade This is because you are stacking different channels, don't worry about how this looks.
Unity will read those channels on there own, not as a whole.
Okay
@stray stone Copy tool wouldn't be what I want would it?
@maiden tangle
Here's the way to mirror across the middle. :)
It's in Geometry > Modifiy Topology > mirror and weld.
If it's not on the right side, you will need to flip your mesh to the other side first.
So that can be done in Deformation > Mirror.
@stray stone tysm!! works like a charm 🙂
@maiden tangle Last thing I sculpted in Zbrush. ;)

that's pretty dang cool
yeah it's exciting, just learning dynamesh fun to mess with
Sculptris pro is also a great feature to check out, No need to deal with dynmesh. It'll automatically retopologize as you sculpt based on brush size. ;)
I'm used to blender where if you mirror something, the position of the mirrored object is sort of independent with the real object- whereas here I move the real object, it moves the mirrored exactly the same.. hmm
I originally tried that when it came out, thought it was meant for like zbrush mobile or something not so serious... I guess that's changed? Will have to check it out!
Mirror in blender is where the object origin is.
Zbrush is done across the world centre.
any way to switch it up? I'll keep messing with it this way I guess
There's a way to change the location of the mirror, but I recommend just practicing more.
When you start zbrush and add the first mesh, it's always gonna be in the world center.
I think what I'll do, remove the mirror and properly place the mesh- that way when I mirror it'll be at the correct spot on the other side
instead of mirroring > moving around like I would in blender
Zbrush is one of the more diffcult programs to learn within the 3D scopes. Becauseit's just so weird.
Yeah, you don't want to be moving the mesh around unless you need to, or know what you're doing.
Last question I swear! 😅 @stray stone
removing said mirror-
I've unselected all the little dots on the mirror and weld button
Haha, Right okay, This is gonna be interesting.
oh boy here we go
Mask the side you want to get rig off, hide it, then delete hidden.
understood, interesting approach that's the "go-to" huh?
I'm starting to see like when you do something in zbrush, you gotta know what you've done before you do it lol
Zbrush doesn't conform to traditional.
blender is so much more forgiving.. but I hate the sculpting
You also have a history bar right at the top of the viewport that you can drag up and down.
ohhh forget the forgiving bit.. blender needs that! lol
So you can always go back so many steps, but if you go back and start doing stuff, it will remove the stuff infront of it.
awesome, I'll just do that then
gotcha, fair enough
thanks for the help man!
makes this journey a lot easier asking for help
cheers
No worries, I use to teach Zbrush at my uni. 😅
lucky I caught you online then! 😆
I have a bad ass introduction lesson, that's 30 minutes and teaches all you need to know to get started.
this is what I'm working with since last night, hoping to go full human soon 😄

really my first sculpt having kinda learned this remesher, very satisfying to work with
long way to go obviously
ahh I don't think I could keep up 1 to 1 haha
No, I mean I do my lessons 1 on 1. So it's me and a person sitting down and doing it like that.
Cause then I tweak and tailor based on the knowledge of the other person. ;)
If you can, I recommend finding and getting involved in a life drawing course/class/group. Those are massive help for modelling pople.
yeah I'll have to do that, I'm really winging it I know I need a lot more resources
anatomy needs to be a focus etc.. have a course or two on that I need to get back into
any sculpting related discords you know of?
I don't. I only really live in this Unity server and one that's been around longer haha, Doing the same stuff I do here.
Helping. :)
I work in a high end animation studio, but have a masters in games development. 😅
that's a nice mix, thanks for sticking around here helping the noobs on your free time!
best get back to it, have a great rest of your weekend sir!
Good luck!
Not exactly sure about wheather this is for 3d art but say I have a texture sheet animation, can I put this texture sheet and have it play on a 3d plane.
very nice
I wanted to import an empty metalness map with the roughness data in the alpha but Unity does not seem to accept it
This is without the map

This is with the map

There seems to be no difference
Also why is the smoothness slider still active?
It shouldn't be active at all if there is smoothness data in the metallic map(?)
I've been trying to find out for days how to get the material properly imported from Blender to Unity without it looking horrible
No luck so far
Yeah, the slider should disappear after loading in the metalness map so why is it still there?
Wow, it works when using a custom shader!

But I don't know if using a custom shader for almost every material is a good workflow?
Does someone have experiences with that?
I'm using URP
the smoothness slider reads from the metallic map, so no it doesn't disappear
@lime pollen Ehm, what do you mean?
Is it supposed to ever disappear in case it found usable smoothness data?
For me it didn't read the data until I used the custom shader
And set the smoothness manually

its not supposed to disappear
it just reads from whatever map you tell it to read
then you can adjust the intensity using the slider
actually I might be wrong on that nvm
Not sure if this is the correct channel but i have imported a model from blender however in unity my model has no colour but in blender it has colour?
How did you import the model?
.fbx
oh what do i need to import it as?
how do i export just the textures?
got a video i could watch on how to do it or a website that tells you how as i am very new to this
iirc fbx should also export textures if you don't use material nodes
the pins has an export setting image you can refer to
It doesn't always work though

Export 3d models from Blender 2.83 to Unity with textures and Materials.
✅Asset Used: House Model
https://bit.ly/2DssWPb
▬▬▬▬▬▬▬▬▬▬▬▬▬▬▬▬▬▬▬▬
💎 Watch advanced tutorial on Patreon 💎
http://patreon.com/uguruz/
▬▬▬▬▬▬▬▬▬▬▬▬▬▬▬▬▬▬▬▬
📱Social Links:📱
🔸 Discord https://discord.gg/BmYJC34
🔸 Twitter: https://twitter.com/U_Guruz
🔸 Facebook: ht...
also say i made something in blender and i wanted the doors to open would i make them open on unity or would i have to do that on blender ?
for a simple door opening you can do it either way
I have exported the base color and roughness map but my material still does not look right
In blender

in Unity

I guess I need a higher res roughness texture?
But I think I am also missing something else?
maybe its your texture import settings
This is roughness

aka smoothness but I am inverting the map in the shader
Is this correct?

This goes into smoothness
try importing it as a single channel texture
I do not really see any difference

I don't think I have overlooked anything in the Blender node

I have the base color as well as the roughness
anything else shouldn't be needed for this example, right?

Maybe it's just the lack of good lighting in my unity scene?
Maybe because I have no normal map?
possibly. Unity isn't going to output exactly the same image as blender
even when the same maps
you also have a reflection map in blender
How do I export and import that reflection?
you can't really, you'll have to set it up in unity
Oof
any good advice or resources on that?
look up unity reflection probes
👍
I noticed the default project for the Lightweight RP has very decent lighting

I wonder how this is done
Is this related to reflection probes?
yeah those sphere things are reflection probes
https://www.youtube.com/watch?v=lhELeLnynI8 brackeys has a decent video on it (for once)

Let’s learn how to create reflections by using Reflection Probes and Screen Space Reflection (SSR).
♥ Support Brackeys on Patreon: http://patreon.com/brackeys/
····················································································
♥ Donate: http://brackeys.com/donate/
♥ Subscribe: http://bit.ly/1kMekJV
● Website: http://brackey...
You don't like Brackeys? 😅
Brackeys is fine for the basics. But if you are doing serious stuff. It's useless.
he's not a great reference for complete beginners imo
I learned that just copying code is useless since I want to go back and customize it later anyway and I don't understand anything I copied so I just end up starting from scratch and recoding everything myself anyway
Followed the video everything still white
@ionic blade how are you making these textures. 🤔
you don't have anything to reflect in your scene
I have exported the base color, roughness and normal map from blender and put them into my shader graph. That shader I used on my material.
So why are you inverting your roughness map?
You don't need to. 🤔
Oh. Your using specular glossy workflow.
I recommend moving over to the metallic roughness. Just removes the need to invert things.
I've been told that what smoothness in unity is the inverse of roughness blender uses
And without inverting it does not look good
You can change the shader type to use metal roughness instead of specular smooth.
Where can I do that?
Wait. No. You are on URP.
Also, true
I might need to import a few sample trees or something
yes
Ooft. Unity needs to fix this switch quicker.
just import any HDRI from HDRhaven as a skybox
Ok, will do
Don't get a 16k one. 4k is more than enough.
What do you mean exactly
They are working on building a system that allows you to switch between HDRP and URP on the fly. So are making things more consistent between the two pipelines.
This I hope will bring metallic/roughness to URP.
I heard HDRP is harder than URP
It is.
but I also do not want to miss out on the advantages of using these
that's why i chose URP as a middle ground
Standard does not let me use shader graph
That is true.
Anyway, if you make a vector node and make it public.
And then plug the wire from invert into multiply top slot, and then plug the vector into the other a multiply slot and plug the multiply into the smoothness slot. You'll have a tweak control to adjust things.
If I was still on my pc I could show you this in a minute. But alas I'm in bed.
If you are still working on it tomorrow. Send me a ping
Post processing if you are using URP.
Just out of curiosity, same for HDRP?
Which post processing effect is it?
I can't remember.
Well, fudge
URP skyboxes are the same as built in

set the skybox material in the lighting settings


I don't see a skybox
The skybox does not appear in the scene view?
it should
This is in game view

Looks better than before
But something is still not right
How can I desaturate the red?
Actually, other than the missing reflection probes and the color it looks pretty similar now
The original is just shinier and has more reflection
I guess that can also be done with reflection probes?
What you are seeing in blender is a look Dev view. This is a very specific view that isn't actually accurate lighting. It's just to test material properties.
That's what those two little balls in the bottom right are helping with as well.
cycles still has more reflection though

oh it's an interior...
place some lights in there, check "static" on floor wall ceiling,
add a Reflection Probe, bouding box as corridor/room size, check "Box Projection" and bake it.
you may also be interested in ScreenSpace Reflections @ionic blade
I see, many things to look forward to the next days
check "static" on floor wall ceiling
@neat field where exactly?

What does that do?
makes the gameobjects rendereable by the reflection probe among other stuff
It also tells unity that these things aren't suppose to move.
It then batches things in chunks to make it faster on loading.
Hey, I dont know if it fits here, but, should I build my scene by "blocks" of 5x5 meters for example, or should I import all the scene done in one model
I would have more than 500 blocks for the floor if I build it like that
One model takes less performance.
Its better? For example in this image they clearly use the other approach

It depends in what kind of a scene you're trying to make and how much performance you'd like to milk out of it.
Its for android so I guess all I can haha
is your play area 2,5x2,5 km?
I havent defined the total size but around that yeah
If you look closely it looks like that floor is tileable, so you can import only one of each type and build your scenes with them for example
Trees are repeated as well (with variance in scale), basically if you want to build for android you need to build entire scenes inside of Unity using as fewer unique assets as possible.
And testing performance from the get go
Also mark everything that isn't supposed to move as static.
This helps performance A LOT.
Okay, I will try that. Thanks!
@stray stone Can I also check the static option for objects that do not move but change their position when not active?
If they move, they are not static. So no you can't.
Static allows unity to know what isn't moving so then it can batch things together to improve asset loading times.
But when the gameobject is not active / not visible it should not matter(?)
They do not move but have a different position when set to active again
Changing if it becomes active or not, means it's not static.
Static means, these do nothing.
how can i add a blender project to my unity project?
@eager mist I recommend not using blends in unity, But exporting them as FBX .
You mean i save my blender project as an FBX file?
Then how do i put it in unity?
Can click and drag the file into unity's asset browser.
Or you can import new asset in the right click menu.
Yes
Can we give them names so we can play them in the script?
Yes, they're assets with names. The intended use is to use them with an animator controller.
Either using parameters to transition between them, or calling them directly via their names.
You can also save the FBX directly under your Unity project's Assets directory (or a subdirectory thereof) - Unity will detect it and import it
Done, Thanks :)
👋 I have a shader graph that is a progress bar mostly following this: https://devsplorer.wordpress.com/2020/05/18/creating-a-3d-progress-bar-with-shader-graph-devlog-tutorial/
I modified it to have an enum keyword to describe the XYZ axis for different fill types. In the editor it works fine, I can enable & disable keywords to make the bar fill correctly, but in the build it does not. It always fills along the default axis. Anyone have ideas on why this might be? Happy to share code/graph screenshots if helpful!
We have a #archived-shaders channel. I suspect this has to do with how shaders are compiled with keywords
Ty! I was just about to update that it was the multicompile option I was looking for 🙂 tyty.
Hi team - I hope this is the best place to ask this?
I am looking to make a health bar be integrated into the character, much like the backpack in Dead Space. I will have a couple of thing represented: Health, shields, maybe ammo or team % remaining. This will be on a 3d model, on the back, on a third person view.
I'm wondering, what's the best way to do this? Have ten lights on the backpack be their own object so I can turn them off and on or change colour as needed? I can do a 2d sprite thing like a usual health bar and parent it to the backpack, but I can't make it emissive, right? I'm new to the animation/modeling portion of this so I'm not sure what the best practice would be here. Any advice?
You can do what you suggested with 10 little things/lights.
You could also do a shader that has a variable that allows you to adjust things on the fly. This is what I believe was done in deadspace.
Oh interesting, a shader
Those magical things that do magic
Yeah, It shouldn't be to to hard, you can make the bar fully solid with colour, then adjust another colour moving up and down based on object position or UV.
And this can also then have emmission and all the other goodness you want to add.
That's really cool
Thank you for the tip
I'll start looking at shader tutorials and learn what they're about

A shader for things appearing, Using a hologram effect for the transition for a digital feel.
it really seems exactly what I'm looking for
This is one I did a while back.
This is more basic than what you would need, but can show you the effect.
Oh awesome
Hey - thank you for taking the time, I'm going to look at it now
This sounds exactly what I need!
This is a more advanced solution, but offers way more flexibility when it comes to other models and such.
Also entirely possible to use Shadergraph if you are on HDRP, or URP.
That's perfect. I have to learn shaders anyway, and this will be a core experience so it's got to be done right
I'll google shaders vs shadergraph, haha
this is all brand new to me. I can code very well, just... artistically got nada lol
Shadergraph is just a way to authour shaders.
You can program them yourself, but require you to know HLSL.
shadergraph it is! It's just a visual scripting tool I assume
Yeah.
Then you've got something like what I do. 🪃

Thank you everyone and @stray stone
Big shaders.
This is a shader I've made to allow dynamic normal map blending, so I can get more impressive character work.
Having the characters normal maps change in different places so that they can look more dynamic without having to simulate anytihng.
(googling normal maps)
Normal maps allow you to have more additional detail in your mesh, without it taking up polygons.
It's essentially a way to get free details.
(for hilarity, this is the top answer lol. )

ohhh interesting
Normal map 3D might have been a better search. :P
haha probably
you seem to know your stuff very well
are you familiar with animation instancing

I'm trying to reduce physics load (physics.movebodies, etc) since I have a ton of mesh renderers. One solution I heard about is animation instancing - I guess it's baking the animations into a texture

oh DAMN. Yeah that looks WAY better
you should make an asset and sell it
Aint got time, I'm busy at work. 😅
(y)
High end animation studio.
oh congrats man
I'll let you go work haha. Thanks again for the advice, really excited to learn
I appreciate it
hope you have a great rest of the day!
Will do!!
Ok I have a pretty weird question
I barely know how to 3d model but I do know how to get my Minecraft builds into Blender
Is it at all possible to just build my maps in MC and then change textures and make it not cubes in blender to make my levels?
the levels dont have to be High Poly or anything
Learn how to 3d model, it will be faster and less janky than doing that
That is my plan in the long run
my charecters Im doing from scratch they are low poly jankey but its a start
Unless you want to specifically have maps that look like it came from minecraft, which you could use a voxel program for that
im going for more of a TABS look
but the only reason Im using MC is because before I knew how to code games I just made them in Minecraft so I already have the levels
this is the head from my chrecter
its all ive modeled so far

It's a start, keep it up 👍
Thanks!
Yeah I have no idea how to make arms look good

this is like my 10th attempt at an arm
@wheat sinew first shape the cross section of the arm into the shape you want (usually circle) and then extrude the circle
ok