
#🔀┃art-asset-workflow
1 messages · Page 10 of 1
Second
?
My first was a Star G430 if I remember correctly
It was my first so I didn’t really have any complaints or things to compare it to. However, the pen “died” or something
This one seems larger, has buttons, and seems to have nice reviews though so that would be a plus
does the subject of importing 3d models belong to this channel?
is there an up-to-date source of information and instructions on how to best import 3d models made in blender, maya or basically any other software whose coordinate system is different to unity without resulting in model rotations or any other type of ad hoc transformation?
i mean i know in the end the model file needs to be "transformed" to fit in the different coordinate system, but i'm talking about importing in such a way that i will get zero rotation (and/or scaling) and also to make the model continue to "face forward" in the asset preview, instead of facing up or whatever.
i'm going back to a personal project, but i remember maya gave me less problems than blender in regards to that
https://polynook.com/learn/how-to-export-models-from-blender-to-unity This is the most detailed explanation that I know
There are also scripts out there for it
thank you!
yeah i have one script that works really, really well, unless there's a lot of child objects in a multi-level hierarchy.
even saved it to my drives in case it goes away at some point.
where do you go for learning pixel art?
see a youtube beginner guide and then just start drawing and practising
start simple, with 8x8 canvas
then you can go to 16x16 when you feel confident and further
if you're looking for a free program to draw it, I recommend pixelorama, paint net or aseprite
aseprite is worth every cent btw
hi! Working on my new package. this is Resent level Showcase with baked lights and postproccess.


I imported my fbx from blender to unity, but my textures are not showing.Any idea what the issue could be?
Import them separely, make materials for them and assign the materials to the mesh
What do you guys do when you're making sprites for a game, but some characters are larger than others?


Do you just increase the canvas size by X+1 and call it a day? So make each of these for the soldier into 18x18 instead?
You make them all the same size
Otherwise, when you splice the sheet, their pivots will not be the same and you'll have to manually fix that which is more headache than just having them evenly spaced on a grid.
alternatively, you do several sheets
but then you do have get the pivots right
i'd only do that if i could automate the entire process
Brigador does that; its sprite sheets are tightly packed. every sprite is tagged with its bounds and pivot.
Perhaps.
But it might take some extra legwork.
As I mentioned in #💻┃unity-talk, a lot of what Blender can do doesn't make into the FBX file
FBX is what we'd call an "interchange" format. It gets data from one application to another.
So, for example, FBX has no clue what "modifiers" are
When the model is exported from Blender, it applies all of the modifiers and exports the resulting mesh
No.
Unity doesn't speak the same language that Blender does. How would it know what the heck a Boolean is?
but I don't think that is one of the problems you're having
go into unity and deactivate the cubes
they're going to be separate objects.
Yes. In Unity.
Drag the prefab into your scene. Deactivate the cubes.
....no, click on the cubes and turn them off in the inspector
Yes. Turn the cubes off.
Then they will not be visible.
Is something unclear?
okay, there are several ways to make this easier, then
did you export an .fbx from Blender, or did you just put the .blend file in your assets directory?
Blend files are automatically converted to FBX, so you get no control over the process
If you switch to exporting an FBX, then you can tell Blender to only export selected objects.
that way, you can simply select the house and export
If you don't mind taking a few minutes to install an add-on, I have a great suggestion..
this lets you define an export package
you select collections or specific objects to export
then you just click the button
yes, so you will select just the house mesh(es)
or, with Quick Exporter, only list the house mesh(es)
Here is an example.

Note how the "Objects" list only contains one object: "Mesh"
the two bool meshes are not included
You could also put the actual meshes in one collection, and the boolean meshes in another collection
and the only select the first collection
either way works.
what is "it" here? the house model?
i don't understand your question
it's shown in my screenshot
you probably didn't activate the add-on
you have to turn them on after installing them
edit -> preferences -> add-ons
search by name
enable the checkbox
then you didn't install the add-on
install the add-on.
it would be in the list of add-ons if you installed it
do it again, then
hit Install, pick the zip file
don't unzip it
ah, my bad: you probably downloaded the repository and tried to install that
grab the zip from here.
i'm pretty sure i tried to do that at least once, lol
anyway, install it, enable it, and then set up an export package like I did above
set the output folder to where you want it to go (probably the Assets directory of your project)
and then name it "House" or something
i mean, you're basically at the finish line now
you just need to tell blender to only export the house
you don't need to do anything "special" to keep the holes made by the boolean modifiers
that will make it more challenging, for sure..
but i would start with just getting the model exported correctly from blender
Unity isn't much a tool to leap in blind face first into
Helps to study beginner resources first
Not sure if this is the right place to ask but i'm new to unity and trying to get a character I rigged to stay in T pose.
When I go to the character, go to rig, and hit Configure the character is in a T pose. and, I also go to pose and click "Enforce T pose".
But when I hit done the character goes back to there default A pose which Is not what I want for Export.
Not sure what i'm doing wrong?
Enforce t pose is only for setting up the avatar. If you want them in a t pose, make an animation clip of them in t pose and play it.
is there anything close to nanite for unity or even better? please @ me
No
sheesh nice you work in blender?
show me something
not sure if this is the right channel (apologies if it's the wrong one!) but i have an issue!
when i add a root bone to a skinned mesh renderer, the position of the fbx changes. does anyone know how to fix this?


hii guys i was wondering if there are any alternatives to blender
an alternative to which part of blender? I.e sculpting/rigging/VFX ect.?
well i mean im just starting out with 3d modelling and i hope to use 3d modelling for roblox soon enough
but blender is becoming increasingly confusing as i watch more and more tutorials
so im considering moving but im faced with 2 things
- to where
- would there even be any easier alternatives without it sacrificing the quality work i make on there for ease of use
The only one I am somewhat familiar with is Cinema 4D which is generally said to be a bit easier to grasp than blender while still having a ton of functionality. Though if you just want the basic modeling features I'm sure you could find something much simpler than that, though they may limit some functionality (such as rigging characters for example) that blender may have.
"Add a bone" how exactly and using what tool?
If you need to make changes to a mesh, especially a skinned mesh a or a rig you'd prefer to do it on the source file in a modeling program
I think its because you have edges that connect two faces into one face which makes buggy triangles

Yeah
All it takes is 1 vertex per face to fix

Also you have 4 wide faces on top of two wide faces

And some random vertices along edges.

But now you know that a face must always have 4 vertices (two triangles of 3 vertices) and some of yours have around 50 vertices. So while blender shows all the floating faces and vertices, unity tries to physically construct the objects, flaws and gaps included.


Well you can either meticulously fix your model, buy something free (or paid if you want something higher quality) from the asset store, or search YouTube and Google for a downloadable user made model.

Really?
In the window you have the asset store and the package manager for downloaded assets


You should be able to change the albedo of the material
In the inspector
On the right usually
The renderer has a material attached so you click that to modify it.
Open the Materials tab in the mesh renderer.
Did you double click the material so you can see the options for it?
Go back to the original scene (clicking the scene icon in the bottom or the current scene in the top left)
And try some different materials
So choose the gray one
Double click or right click or search or whatever to get the menu for that material
Then change the colour by choosing a color in the albedo

The left box is for a texture but for the time being the color is all that is needed which is the white box with a dropper beside it.
Watch a tutorial
You will need to do some beginner tutorials to be able to use Unity at all !learn
🧑🏫 Unity Learn can offer you over 750 hours of free live and on-demand learning content for all levels of experience! Make sure to check it out at https://learn.unity.com/
You double click the Lit to go straight to the material asset instead of clicking the popup on the right to change materials.
i have an armature(humanized) and also a vest model, inparent the vest to the bones with automatic weights, the problem i encounter is that even if the vest moves the mag pounches dont the radio doesnt..., this mag pouches for example are part of the model but not attached with any verticals to the main part of the model which is affected by weight, how do i fix it
Assuming you're using Blender, its automatic weighting doesn't reliably get disconnected parts
You'd have to connect them first, or use manual weight mapping, or envelope weighting, weight transfer or any such method to fix it
yes im using blender, well ig ill look into that
thanks
wait, whats the difference beetwen automatic weights an envelope ones?
Sorry if this is the wrong place to ask this, but how do I stop unity from deleting vertices in my model? I messed up somewhere and now I keeps on deleting useful vertices because they overlap
Triangulate the mesh before exporting it and solve the self-intersection issues of those polygons at that point
I've been trying to get into game development and the thing that has been holding me back is having the right game assets 😭
I'm currently trying to make a simple FPS. Are there any free assets that I could get or a website that provides free assets (besides Unity asset store)
just googling "free game assets" should get you plenty of results
Automatic weights tends to be best for manifold geometry that surrounds a bone while envelopes are based on proximity, from what I understand.
i mean like assigning a bone to this

i have to assign a specific bone from the armature but when i do i get the issue
What 'issue?' The position of the object is based on which bone is set as the root.
ok i think i thought of another solution, is there a way to copy blendshapes from one skinned mesh renderer and paste them to another one? just the blendshapes though
What are possible reasons why Unity would completely re-arrange which vertexes are weighted to which bones on import?


are there any obvious mistakes in the import settings?

Other meshes with skins from the same exact scene don't have this issue
but I can't seem to debug a reason why this specific one does, or how to fix it
i think i solved my issues another way so i'm good
Both 'weld vertices' and 'optimize mesh data' could potentially cause that sort of error. Having the bones per vertex set too low might also cause problems but probably not quite those ones.
well it looks like this..


hello, hope this is a correct place to ask. I got a small problem in a project Im working on. I got a wooden crate object, created material, assigned textures to it, and when I try to drag and drop it on to the object it appears as just similar looking flat color instead of the texture. heres how it looks:

ofc it should be wood textures instead of flat colors. what do I miss, maybe the object I got is bad or smth?
Do you have UVs on your object?
how can I check that? I only begun to learn so quite loosing my way around still
if it's just 1 material and you got it from some low poly pack that didn't show textures, most likely UV is made only for color palette @unreal gazelle

UV is on 3d model

yea but it's not the crate
UV gives instructions on how texture wraps around the model, and most low poly modelers cut corners by using a color palette
how can I check what is going on with it ? 😦
open in blender or probuilder's uv editor
probably easier to make your own models from scratch than trying to fix these though
dont have neither of them 😦
both are free bro 
yeah but never used them. all I wanted is to edit some game mod textures which were saved in unity3d format.
as both looked as low poly colored
There is no way to apply textures to that model without editing it and giving it UVs
will check uv editor then
hmm how do I even install uv editor
It's a part of probuilder
yeeeah, finally found it 🙂 trying to launch uv editor now and see what it shows
got object selected but uv editor wont show it hmmm

select faces

probuilderize
eeeem, let me find it first never used it

ooh got it working onem oment
its aliveee! 😄

@unreal gazelle probuilder is better for quick single-use stuff like level geometry and blockouts, download blender for the rest
will just stick to probuilder to switch those I dont need anything beside this crate (and another version when it fileldup) so its not that much
my mind will blow up, some of the sides works some not 😄
then I do another side and it messes up elsewhere 😄
lightmap is just messing around one moment its there another it disapears says please generate new one and texture ofcourse disappears too
guess either Im so bad or probuidler is really not so great with details. guess time to check out blender for the first time
its far from perfection but heres what I got back into unity after blender

If you rotate the shells so the wood grain follows the shape that will help a lot
I marked all of the parts and use smart uv feature
now the question is how do I export it as unity3d file
as I tried exporting as package and naming it .unity3d but in game it does not recognize it
You don't want that, you want to export it as fbx
buuuut, the files from the game mod are in .unity3d format
if I export it in fbx it wont recognize it, so would need to potentially go browser xml files in search how to change that
Oh... Yeah there's nothing on this server about modding
So I couldn't tell you how
I just need them to be unity3d for the mod, I have fbx saved for myself
wonder how to save them that format though
how do I get a blender model with all its textures and materials into unity'
hey guys, I'm using 2d tilemaps and I have 3 types of layers for a single tile (background, slope, connectors). Each of those types have multiple options.
I want to combine them so a single world-tile will have 3 of those sprites, and use that for rendering and colliding.
How can I do that?
how to make the background transparent ? i wanna use it as an asset

Go to photoshop or any other image editing software, select the white part, delete it and save as a png
dont have any rip
alright
Does anyone know why are the tiles so small? They were connected and filled the entire square and than I placed in the tree and it changed it to look like this

It looked like this before

Do all the tiles, including the tree have a correct PPU value?
Is their scale wrong only in the palette, or also when painted onto a grid in scene?
When painted on the grid they look fine and sized as they should be. And I don't know what a PPU value is
Pixels Per Unit, in texture import settings
oh than yeah, They are all 16x16
I figured it out, thanks for your help!
how to fix misplaced tiles pls help

what misplaced? everything looks fine

If I had to guess I'd say that this is how it's supposed to look like, have you tried placing it?
it should be like the white border, it fits exactly within the pallet unit borders

Yeah I know but did you try to place it in the tileMap?
I'm hoping this is the place to ask about my Blender to Unity import workflow...
i suggest joining a server for blender
lol
why is there gaps between each part if i am painting stuff horizontally but if it is verticlaly then they conenct

nvm its the asset
i figured out why
Ok, that was not helpful, thank you… and then you come and ask your own question. This is NOT a Blender related question if you had bothered to ask a follow up question for two.
@solid jay Is this a better place to try and figure this out? Not sure how to create separate thread though.
To review.. I have a Sketchfab model that I imported and cleaned up in Blender, for use in Unity with the Spatial SDK. I joined several objects to make texturing/shade ring easier… I exported the entire thing as a single prefab for use in Unity. Everything worked out great… but then I found I had to edit a hanging light object…. So I had to go back into the model via Blender, make the change… and export again… worked great. But then I noticed it kiboshed all my textures…
I figured the best practice might be then is the export each mesh from Blender and assemble them in Unity so it makes later edits easier…. But when placing the objects in the Unity environment… there doesn’t seem to be a way to place them in a consistent and aligned position…. It would take hours to properly move and align things to where they should be.
I’m wondering if there is a way to place a model from the assets folder into the scene that doesn’t include dragging it in and letting the UI position it via your cursor… is there not a way to say, right click and say, place in scene… hoping it just consistently places stuff where it’s supposed to be.
The only cheating method I can think of is joining each and every object I have with a “universal key object”… where then in Unity I align everything with that key object.
Just hoping there is an easier way… for instance in most 3D software packages, when you go to the menu and import a new model, it aligns it according to it’s world position where it was created… not just aligning it to world centre.
Hoping someone has some insight… more then “joking a Blender server”… whic =h I’m on a few.. thanks.
@unkempt leaf you mean grid snapping? prefabs?
creating at world center is an option in preferences that i think is off by default
Not sure…. So I originally imported the object from Blender as a prefab.. but then found when I made changes to the prefab in blender, it got rid of all the texture work I did…. Hence why I have to find a new approach
And I did try putting the models into the space, then setting it position to 0 all around… though it didn’t put everything dead centre, it was far from aligned.
I could have my terminology wrong. Sorry.
This started a s a model from Sketchfab…
I cleaned it up and joined objects in Blender so it was easier to texture in Unity.
check the alignment of original, maybe it has something to do with units conversion
I exported teh entire thing as a single file, and it imported into Unity fine, as a prefab.. each object was seperate as it needed to be….
Naw, for instance one of the objects was a couch, comprised of 3 seperate meshes… the cushions, separators and back support…
When place as separate models in Unity and position set to zero.. they are completely misaligned.
check export options in blender
Humm.. ok… will have to tomorrow
normally the position is preserved, and after that you can just make a prefab out of all 3
That is what I was hoping!
i think it was "apply transform" option
i just have a preset so i don't even remember what i have ticked 😛
So you don’t know a way of placing a model that doesn’t involve dragging it from teh asset folder into the scene eh?
you can just select it in mesh component, but prefabs are better. no need to think about layers/materials/other components applied after initial setup.
you could probably also make a script for spawning prefab from menu
Sorry, can you explain that deeper? I am beginning honestly… only way I’ve seen of placing a model from your assets folder into your scene is by dragging it from the asserts folder.
unity has the default create object menu so i'm guessing it's possible to make it for custom ones, i just never tried it
i just have a 2nd asset window locked and it works fine for me, easier to search too
I’m afraid the is light years ahead of my current skills.. I would most likely meld my cpu
oh and about texture being screwed up, saving model in blender doesn't save the texture you edited @unkempt leaf
could also be auto-UV. not sure what else could do that.
Oh yes, I know that. The issue was that because it was a prefab, when I changed the model in Blender, Unity saved position and scale, but removed all the textures I had set before.
Hence why instead of an entire room prefab… I have to break it up into individual models…
prefabs are made specifically to prevent that, so i have no idea what happened there.
hey, the Youtuber Fancy showed this scene where he added some grunge textures / puddles to his scene in Unreal Engine. Is this also possible in Unity like the way he did it? How can I do that in Unity?
oh it's called "Decals" so i know what to do know
Perhaps I did it wrong then? I am just learning! Would you happen to have a moment sometime today perhaps to jump into a vc channel?
So I'm creating tiles for a unity project and so far I have the grass/dirt tiles done as you can see, but I'm not sure if I should make more tiles with different materials on the same sheet such as stone or wood. Also if I make tiles intended for the background should I put them on the same sprite sheet with middle ground tiles like this one?

In most cases, it doesn't really matter- especially if you are using unity's atlasing tools which combine sprites into atlases for you.
Of course, generally it is giod to combine where practical but for such relatively small amounts of data the work might outweigh the reward.
ok thanks
I'm trying to move my project from editing in windows to linux. I have Unity 2022.2. When I opened the unity editor to the project in ubuntu I got a huge number of errors all saying that GraphicsFormat.R8_UInt (I'm trying to set a RenderTexture.stencilFormat) is unsupported. However when I look online I see this suggested as the most commonly supported format (https://docs.unity3d.com/2022.2/Documentation/ScriptReference/RenderTexture-stencilFormat.html).
How can I figure out what formats I can support / is there anything I can do to make this format supported?
Each graphics card may not support all usages across formats. Use SystemInfo.IsFormatSupported to check which usages the graphics card supports.
https://docs.unity3d.com/2022.2/Documentation/ScriptReference/Experimental.Rendering.GraphicsFormat.html

I saw that line but 1) I'm not sure what format to chose, and 2) I chose a few pairings and they all came back false. Exhaustively going through that list would be thousands of combos, and I don't know a way to do that non-manually
its an enum so you could technically just iterate through the values to find out which ones are compatible. Otherwise you can cross reference compatible formats here https://docs.unity3d.com/Manual/class-TextureImporterOverride.html
So I can just give (a,b) as inputs for ints a,b in the range of the enum (presumably 0 to n)?
yes
Do I need to type cast this somehow? Trying to use int for the enum?
cannot convert from 'int' to 'UnityEngine.Experimental.Rendering.GraphicsFormat'
OK thanks I was able to find some formats that work. Hopefully one will suffice for what I am trying to do
Oh if you're still here, by chance do you know how to build & run a project on linux? I'm used to my window's build where it just executes, but on linux it opens a folder and asks for x86_64 file. Do you know what I am supposed to point to here? Maybe I did long ago on windows and forgot.
never built for linux so can't help you there
2019.4, I'm trying to export an asset package, when I re-import, every material loses its texture, every prefab loses its meshes, except for references to objects not included in the package; What am I doing wrong?
Are you actually including the dependencies?
I know this is likely unrelated to the channel but don't know where best to ask. As a programmer I'm no good at drawing, I'm wondering if anyone can share some resources that teach basic sketching / drawing for untalented individuals, maybe for use with an iPad air (with apple pencil). I really have no idea where to start, so any help is appreciated
i made these cool tools for my game

Drawabox.com
Before we get into actual exercises and drawing concepts, let's discuss what drawabox is about and how it should be used.
Heya guys! I exported my mesh as an fbx to unity and added all of my textures to a material. Now I have this issue where the uv's are showing wrong colors in some places where they aren't supposed to show.
I'll attach a video to show the issue I'm experiencing.
Also I don't experience this issue in Substance painter, Blender nor Unreal Engine

to show the same issue in screenshots:

Does the material use Height?
I think it's because different programs render height aka parallax mapping in different ways
Some with more accuracy than others
I thought I'll take off everything but forgot the height map lololol
ahh is there any way for me to use the height map without this happening?
I did export it specifically for unity XD
Shouldn't happen if it's used only on totally flat geometry
There may be shaders with a different kind of parallax mapping that can handle curved surfaces but the default one isn't one like that
Yeah, it is shader dependent.
You might also just be able to turn tge height strength down if it is set too high.
The way the default parallax mapping works is to shift the uvs based on view direction so if there isn't enough padding you can easily get artifacts.
Whereas actual displacement will displace the surface
yeh that makes sense
I tried that as well but there are still tiny little spots of color in unneeded places
I just took them off :D

is there a way to make 3d shader work in 2d im new to shaders and this is suprisingly hard to google, i cant find the answer
No, they're completely different things. The concepts may carry between depending on what you're doing, but implementation is different.
If you can generate a edge and crease masks in substance, taking difference of those should map mostly flat parts of the model, multiply height map with it to get height only in safe areas. Similarly able to map the UV islands, softening it from the the edges could also be used if UVs are not all at creases and edges.
This is the sprite sheet for a game I'm going to make. I just finished the grass/dirt tiles and the stone brick tiles. Before I move on to other tiles is there any more variants of these tiles that you think I should make?
not sure if this is the right chanell , but how can i fix this. im very new to unity . ive only just started to learn how to use it

You can probably just convert the materials in question to urp materials.
ah thanks
Hello everyone, I'm new to 2D game art. Me and my mate are working on a fun game. I came up with this fun little daruma looking character, and made these kind of platforms.
It would be great for kind suggestions related to the looking of character, the platforms and mainly I'm stuck on how the background should look like, i wanted to make some vertical parallax layers for background.
Here's a snippet attached 🙂
Has anyone encountered this error recently trying to import .blend files?
Blender could not be found.
Make sure that Blender is installed and the .blend file has Blender as its 'Open with' application!```
I have Blender 3.5.1 installed and double clicking these files opens them just fine in Blender. It's just Unity that seems to have an issue.
Unity 2022.3.3f1
Does blender open if you try to run it from a terminal
You might just need to add it to environment variables
does it need to be in my command line path for Unity to find it?
I figured:
Make sure that Blender is installed and the .blend file has Blender as its 'Open with' application!
Was enough 🤔
I'll try I guess
Adding it to the PATH didn't work
(it opens in cmd now but not in Unity)
I'm going to try an earlier version of Blender I guess
Why not convert it into .fbx or some other supported format?
That's what I'm going to do now but this was an old project I was upgrading to a new computer and Unity version and a lot of prefabs are now broken. It's kind of a mess.
question about shadows. Pictured:
- Mesh with only one smoothing group.
- same mesh and smoothing group, with the pictured shader on its normals.
- same mesh but without smoothing groups (causes seams in the shadows)
Is there a known workflow to have -some- smooth edges but not all edges smoothed? For example a cylinder (smooth sides, flat tops)


use duplicate vertices with discrete normals on the flat-shaded edges and shared vertices with averaged normals on the smooth-shaded edges
I know the hard normal shader effect could be lerped out with a vertex color or texture mask
But it might end up looking a bit different
Oh thats a good point, double it and have one v. for shadowcasting and the other for visuals
What is the difference between Sprite Atlas and Sprite Mode Multiple?
Multiple mode sprites can define multiple individual sprites per sprite sheet
A sprite atlas compiles all individual sprites together, even from different sprite sheets, to be used internally to optimize draw calls
So sprite Atlas is better? From Multiple mode sprites
They're not alternatives to each other
Multiple mode sprites are for importing multiple sprites in one file
Atlases are for compiling imported sprites for optimization
So it depends on the file and whichever one we use, there is no difference, right?
They're different tools for different tasks
Unity can compile sprites to an atlas regardless of whether they reside in multiple or single type sprite sheets
Can you give an example of using her tools?
An example of what exactly?
An atlas is not used for importing sprite textures in Unity
You need imported sprite textures to make an atlas
Hi I assigned a quest for the NPC but it is not visible as a child GameObject as shown in the official unity tutorial.

Is it better to do the atlas with Photoshop or with atlas Unity, which is better to take pieces and make it atlas in Unity or put it in a Sprite with Photoshop and set Multiple Mode
In unity context you're talking about a sprite sheet, not a sprite atlas
Which means you cannot make a sprite atlas outside of unity
You make it from sprites after importing sprites into unity
It's a totally optional step on top of any sprite creation and importing
@winged zenith https://learn.unity.com/tutorial/introduction-to-the-sprite-atlas
If you're just talking about sprite sheets, it doesn't practically matter whether you import them as single or multiple
Unity Learn
A Sprite Atlas organizes your Sprites onto a sheet to optimize your game's performance. In this tutorial, you'll create and configure a Sprite Atlas.
Pretty broad question but I am hoping to get an average or something close. I want to start making modular pieces for rooms, buildings, alleyways, gates, fences floors , trims etc, however I would like to try and get standard metrics for the pieces I will be building. How heigh would a door way piece be, walls , trims etc.
2m by 2m feels like I am not giving a enough walkway to the character. The character is set to an average height and bought from unity asset store.

Hello!
I'm building a simulation tool in Unity for a university project and we need some very low poly humans that are at least rigged, ideally free or very cheap. (I'm sure I can find a free walking animation somewhere and we don't mind using the same for all the models)
I found these and they are ok: https://www.cgtrader.com/free-3d-models/character/other/low-poly-people-free-sample-pack
but I was wondering if you know another pack that's similar (it doesn't have to be colored) with maybe a few more models and a lower poly count.

CGTrader
Model available for download in Autodesk FBX format. Visit CGTrader and browse more than 1 million 3D models, including 3D print and real-time assets
Hi all! Here's my updated art for this fun game that im making, added some vertical parallax background.
I would be grateful for your kind suggestions related to the character visuals, platforms and background!
Here's the attached snippet. Thankyou! 🙂
Im trying to create a rig for a 3d model that is being mirrored, the rig works good but i think because of the mirroring, when a leg moves on the original side it messed up the other side's leg

will this happen if i import it to unity or is there a way to fix this
If the generally suggested way to make something like an HP bar is to make it of type "fill" then increase or reduce the amount, does that mean we also have to make our assets precisely the size that they need to be, since they cannot using tiling properties?
Hello, I am currently taking my high poly and making the low poly (coloured areas), however I am at an impasse with the gas tube.
I want to make it low poly (ideally using a cylinder) but I am not certain how I would maintain the details of the ridges whilst also making the inward corrugated bits invisible/opaque.
Tools I am using; Blender, Substance painter, Photoshop, and Unity.
High poly tri count of tube: 18,000.
Youtube is not particularly helpful on this.

Just texture on the ridges instead of having them be phyiscal features of the model.
I thought thats what would happen when I bake it in substance painter, the details would carry over on the high poly bake onto the low poly model, but the thing I dont know is how to make those inny bits opaque.
What do you mean by inny bits opaque?
Would be useful if you can show what you want
Essentially, there's no way to maintain the silhouette of those ridges without the geometry for it
I dont know what you would call them

It depends on your target platform of course but I would say that in most games this wouldn't be geometry in game, only normal mapped
I thought, so the intent is to bake it into a low poly cylinder, which should preserve most if not all of the details here, but I also know im going to have some shading issues since it will try to fill the gaps, so the question is how can I make it look see through even if there is a cylinder running through the whole tube- can I photoshop it and just clear/transparent that part of the map?
No, that won't push it in, just makes parts invisible. If you need the silhouette my workaround would be to have two cylinders with one being a bit bigger than the other, and then have a stiped opacity map and a normal map on it
hi I'm having turbels with a model vrchat model idk if any one can help with it so basically i need to edit some of its mesh so i pop it in to blender and wen I import it back in it brakes the model it seems to implode and spaghetti so all i am doing is importing the fbx from unity in to blender and then re importing it in to unity over the fbx file i have dun test wear i dont change any thing and export the model with leaf bones off witch should be the exact same model
i have never had this happan b4
why does this tilemap try to print the shapes outside the square when i put a tile of it in the scene, its a shape I rotated and shifted I want it to only put the shape inside the single square, not sure how to do that.

what would you guys call this type of wall, its kinda tricky to get right. thats what the above post was about

Can anyone tell me which design pattern should I choose for isometric pixel tiles in unity?

This is because of the sprite's pivot point I believe
This would be a fake perspective wall or kind of isometric wall
Old games used to have to split them into multiple smaller square tiles to form the whole structure
I doubt we can tell you that
It's up to your artistic and design preferences
Hi, I would like to ask if someone has an experience with painting 2uv texture map. If so, then how do you do that? substance painter can't open two uvs and paint into the second uv, so if you have any alternative, another software for that, or you somehow solved the problem in substance painter, or do you have any addon in blender for that, or you're doing that in unity or unreal engine. I would appreciate any advice.
For painter you have to export two versions of the same mesh, with the channels swapped around
then I would paint on black model and paint the texture in RGB colors and I couldn't see how it is and how it's blending or am I wrong?
yes, you would have to paint in the projects and export it out to see what it looks like in engine
I see
my friend is doing that like that, although it takes a lot of time, so I hoped I will find a faster way to do that
although thank you for your time, you are the only one that answered me so far, I asked in more servers and places, but it seems it will be kind of complicated to find a faster solution for it, I can't find anything not even on net 🥲
There are workarounds but nothing easy
A guy I know has a custom shader, where you give it 4 materials, and then you paint in user channel 1/2/3 to create masks, and in the viewport you can see the result with the blended materials instead of the mask RGB
But custom shaders in Painter is its own thing
As long as you have automated texture reload wherever you're rendering, I don't think it's too much work to export out and tab over, but it's not ideal
so I would have to code it to create a shader for that 🤔
Is there some all encompassing guide on pixel art scaling and the effects resolution has on it? There seems to be a magical balance between resolution support and fidelity without the sprites distorting (especially when rotating). I want to learn more about that.
For pixel perfectness there's no magic, only rules as follows:
- They must be rendered at native scale
- If scaled, only scale up, by integer multipliers
- Don't rotate
The pixel perfect component will enforce rendering at native scale
But is pixel perfectness your goal?
Not exactly, since I am rotating
and upscaling by 2x seems a bit rough, but that might be because of my draw settings
There isn't any way to fundamentally preserve the integrity of pixel art when rotating, but the closest you can get is by implementing some texture antialiasing like this one
https://assetstore.unity.com/packages/2d/smooth-pixel-209066
oooooooooooooooooooohhhhh
So if my sprites look good at 1920x1080, upscaling to 2560x1440 would be a 33% increase, so I might get a good result by reworking my sprites at half their resolution, then just double it for 1920 and then the rest of the resolutions after it might also look decent?
I'm confused
Anyway, you will always lose detail when you render a sprite below its native resolution, and either get stretching or fuzziness when rendering it at a higher non-integer scale resolution
@misty lantern I thought to avoid distortion at x resolution, the lower resolution the sprite the better
so if I take a sprite that's 128x128 and then scale it down to 64x64, I would get less distortion when using different resolutions
You always lose detail when downscaling
If you have to downscale, downscaling by a power of two is the least destructive
Right, so there is a balance between detail loss and distortion due to resolution differences and rotation.
Anyone familiar with what Unity does under the hood when importing meshes? Specifically I'm importing very low poly convex collider meshes, but I'm concerned that the assets may not always be perfectly convex, if the convex box is checked in the mesh collider, will Unity automatically fix any concave areas? Or, what if the model contains quads rather than tris, and some quads are non-planar... if convex is set, is Unity smart enough to always split the tris the convex way?
awesome, thanks. impossible to see that in the meshes im using
im hoping that the mesh collider wont create extra faces at all where the model is defined as quads or more sides, some of my colliders have 6 sided polys, would be silly to check the same plane 4 or 6 times
but it all gets a bit hinky when im not 100% sure those faces are planar
Here's a character model from the game Albion Online:
It's seems pretty low poly, but how do they manage to give the models that "smooth" look? In my attempts, all faces have their own light relection, so the model looks more like a checkerboard

Is it completely done via shaders, or is it the model itself?
The option is called "shade smooth" in the modeling program
It's all to do with where the vertex normals are pointing to, and if they are merged or split
The beard appears to have some sharp edges / split normals which you can get with "shade auto smooth" in blender for example
I thought so too, but it looks completely different in blender and in unity:
Gets more of a plastic look I think


The sharp edges appear to do the trick! I'll play around with that, thanks a lot
@tepid anchor You must've missed some step of the baking process, there isn't just one cause for that error
Only two nodes are not supported by Cycles: Shader to RGB and Specular BSDF
Do note that any material that changes based on view direction or in response to its surroundings cannot be baked to a static texture while retaining these effects
I'd just retrace my steps through the baking instructions and do simpler test bakes to practice
There are many steps that can go wrong
<Repost from other channel>
I'm not sure where to ask this, but I think this channel is the best way to go. I have a blender 3D model with an pretty advanced material. However I want to import the material to unity. To do so I watched a couple of tutorials and I tried to bake the texture into an image. My issue is, that whenever I try the baking (in blender) it will just return a black image. I think I used some nodes in the material that are not supported in cycles render engine. My question is, how could I get to import that texture / material into unity? Is there an alternate way? How can I bake the texture in blender correct?
okay, I didn't use any of them. However, when I configure the "Material Output" node as "Cycles" instead of "all" the texture is just purple. Thats why I thought this is the cause of the issue
There is no other way besides baking to textures to get a material from Blender to Unity
It may be possible to recreate the same kind of procedural texture within Unity, such as with Shader Graph, but it's not 100% the same and you rarely want realtime shaders to be as expensive as you can afford within Blender
There should be no need to touch that setting
If you're previewing it using Eevee and set it to Cycles only it would naturally break
okay thank you. Do you know by any chance a tutorial about the baking process, that covers every important point?
Not off the top of my head
I think most tutorials neglect to mention some part of it so for me it took quite a bit of trying to learn it fully
You could show a screenshot of the nodes and the mesh with the material so I might be able to give less general advice about how it could be moved to Unity


Nothing weird here since you're effectively just trying to bake the color to a color texture, I presume
I prefer to use Emission nodes and Bake Type: Emit so there's no chance to accidentally include lighting
when creating a new image, do I need to adjust the size of it?
At that point you'll have to define the resolution you want the image texture to be
Hi, anyone knows how to filter out all the assets from Packages/ in the Select Sprite window ? It's filled with useless placeholder icons that I will never need to select.
I've tried typing something like Assets/* to filter them out but I don't think that works, only search strings do. The switch button on the top right seems to imply there is a black list somewhere but I have no idea where it is or how to add directories to it.

Also Google searches didn't lead into any good solution
Hey everyone. I have a gameobject with a sprite and rigidbody, with some additional child objects with sprites (no rigidbody). I have the rigidbody set to interpolate and it moves cleanly but all the attached sprites do not, they tend to jitter a bit. I'm not entirely sure what the fix is for this, do I need to put rigidbody's with interpolate on all child sprites too? That seems like an inefficient solution...
yo guys what is causing this

issue solved give bro a like: https://www.youtube.com/watch?v=jSo0DeSPqHc
I got some answers to my question in the physics channel, so additional context is there. Still not fixed though.
I'm currently working on constructing levels for my game. Probuilder is almost everything I need, but I want to have some greenery texture hanging over the edge of cliffs and another texture to represent dirt piling up on the side of the cliff so it looks less like a block on top of a dirt plane, and more like part of the ground. It isn't obvious how I would do this efficiently. Any suggestions?


I've added a tree model to my unity project and it has these weird squares around the model. The squares get finer when you move the camera closer and larger when moved away

so i did some testing, and read some docs... I'm using a "permutohedron" as mesh collider, the shape has 6 quads and 8 hexagonal faces. unity IS smart enough to create a single 6 sided face when cooking the collider mesh... and if I distort the mesh so that a hex face is no longer planar, it will automatically build the convex hull correctly. Docs unfortunately strongly advise against doing this at run time, for performance reasons, which is a shame because proc. gen. collider meshes was the next thing I wanted to do.
I figured it out.
It was to do with changing the shadow filter from "High" to "Medium". Probably just my intergrated gpu that is the problem.
What is a typical workflow for 2D sprite-based animation in Unity? I'm a software engineer at my day job, but I've been practicing drawing characters in Procreate for my game project. Once I have a character design I like, would it be typical to draw the rest of the animation frames in Procreate or move to another software?
Guess this counts as art integration. Beginner here. What is the importance or the reason to nest prefabs? Is it the same as nesting game objects? I just learned about variant prefabs and how it all works, though confused on this bit
Prefabs within prefabs has the same function as prefabs in general, to create reusable gameobjects/hierarchies that can be modified from one place
You may have multiple different prefabs for patches of forest, each using a prefab of a tree
Modifying the tree updates all forests
Variant prefabs copy components and properties from another prefab, minus the ones you override for that variant
You might have a prefab variant of the tree that's otherwise the same but adds snow on the tree's branches
Thank you!
is it normal for my model to look like this once imported into unity?


See the inverted normals resource pinned to this channel
Yes, its very normal you can see thru certain parts in unity, you just have to live with that 
It's very _inverted normal _
Hi! I have a question about these artifacts. He's currently building modular modern architecture to be viewed from far and near - and I noticed these white artifacts. I read on the unity forum and there a similar problem is repeated almost from the beginning of the engine's existence. Is there a cure for this in 2023? (I will add that turning on TAA - significantly improves the picture, but with TAA there is flicker in the image, I also tried to add "Geo Aliasing Correction" to the shader for smoothness - it helped a bit, but is it supposed to work in unity? - I also threw these assets to the ue4 for the test, or maybe I'm doing something wrong, but everything from the default looks good there)

If I'm storing data in a scriptable object, does it make more sense to store the name of a sprite (and sort out how to load it based on name) or just use a direct reference?
direct reference
its not easy to load something just via name at runtime unless its in a asset bundle or addressable. also is fragile to stuff like path and name changes where a direct reference is not
@violet walrus Is a sprite reference serializable though?
as a asset yes
SO's work just like monobehaviours in what they will andiwll not serilaize
As they say, beggars can't be choosers. Start learning how to make your own assets and hopefully that ends up being cheaper than buying something.
Use textures with transitions on them and apply them to a strip between the two other textures, if you want to do it the way old games like you reference did. You can also blend between textures or overlay them for more modern approaches, or use decals over the seams.
There's no right answer there. Really whatever software that works for you.
Cheap, good, or quick, pick two.
Apologies if this is the wrong place to ask, but I've got an idea for a mechanic where a character can shoot an item and the item permanently changes the appearance of the surrounding area, kind of like a color splash. But I'm still fairly new to unity and am not entirely sure where to start, can someone point me in a direction on where to begin, like with a youtube video that explains a similar mechanic?
Use projectors
Hi. One question, does anyone know why is it that the same model in Blender it says it has 1832 vertices but when I import it to unity it says it has 24160 please??


🗃️ Documentation
FBX Exporter
glTF
Alembic
USD
MeshSync
De-Lighting Tool
ProTools
📚 Resources
Blogs and videos
- Advanced Editor scripting hacks to save you time
- Probuilder Tips & Tricks
🤔 Troubleshooting
🗺️ Roadmap
but like the difference is huge 😦
I been playing genshin since the beginning and honestly idk what you talking about 
Is it possible to kind of do the reverse, like rather than place a static image, it reveals the real color of the area?
But thanks, I'll def look into projectors more 
Did you try to triangulate it directly in blender before exporting?
how exactly do I do that please?
Triangulate Modifier
It's recommended to triangulate in Blender, before exporting to Unity / Texture Programm.
Because every programm can triangulate the mesh differently, which may cause problems.
is it the same as selecting everything and pressing F3->triangulate faces?
yeah, nearly.. but the modifier can be turned on and off 😄 So you dont destroy your Mesh ^^
because I don't really want to add that modifier to every single object😅
oh okay
okay did that but nothing changed, the vert count is the same as before inside unity :/
Thats weird. Whats happening if you just export a simple cube? ^^
24 verts
So a cube has 6 Quads .. triangulated 12
Hm.. i will have a look how that behaves on my unity 😄
maybe it's because of the lights?
Is it shaded flat?
idk but it was just some topology problem and shadows stuff
No changes to my renderer asset change anything in my scene, how can I force this to work? I set it as the renderer but nothing changes, hell I deleted it and the scene just keeps looking exactly the same

its set

it exists

but nothing I do to it affects the scene in any way
whats the magic missing step im missing? some esoteric setting buried somewhere?
is there a trick to it?
found the problem, quality level was overriding the render pipeline asset

why is the transparency in my texture appearing black?

when i toggle that it just makes it look like this (everything around the center and spikes is meant to be transparent

all the black is supposed to be transparent

The alpha in those black pixels probably isn't actually 0
You also need to enable transparency in the material/shader
Alpha is Transparency setting in the texture import settings doesn't touch the alpha channel but makes it preview with transparency in the inspector, which seemed to be what you were asking about
Hi Guys -- anyone familiar with putting different materials on opposite sides of the same object in unity?-- like inside and outside a wall? The object in quesiton has 2 materials on it when imported, but I can only get one material to apply in Unity
Importing from where?
Blender
I don't think blender allows you to have two different materials per one polygon face, but it does render them as double sided by default
I found the answer -- should have noted it -- Im assigning diff colors to UV islands in blender
in some cases splitting islands for different colors -- sorta like a UV map
Errrrrr. color map
You normally want to have two different faces for outside and inside of a wall

yup -- the walls in my mesh actually have 2 sides and a thickness - -they are cubes --
Right, I misunderstood the description
thanks for the help!
Weird question, how do I increase vertex count of an imported mesh? My mesh's shader relies on vertex colors and those colors need to be unique per vertex, but the imported mesh is optimizing out the vertexes that share a flat surface

I tried various settings in the import but none of them would restore those vertexes that are getting optimized out

Have you tried "keep quads"?
Unity normally turns quads (faces with 4 vertices) into tris (faces with 3 vertices) on import.
Hey that worked!

I am not sure what is different occuring but that made it work as intended 
weird that disabling weld vertexes didnt fix it but setting keep quads did
Yeah it slices squares in half to turn them into triangles.
Must have interfered with your system somehow.
hrmgh actually I spoke too soon
it worked on that ONE specific mesh, and I have no idea why, its not working on any other mesh

the middle mesh also has keep quads set, but its killing all my quads
trying to debug what is different about this mesh vs the other mesh

do you see a difference? because I dont, yet the one on the left doesnt work but for some reason the one on the right does work and there is no difference bewteen them
theyre both FBXes with the same export values 🤔
The only difference I see is the shape, one being a cube and other having both a cube and a round shape.
Weird. If there are any ngons maybe they'd affect it. But I'm really not sure...
hm it looks like it works if I first split every single edge so that no polygons are attached to any other in my modeling software

but if I split them but dont hit keep quads, it fuxes up again 🤔
at least I know the answer is to split it manually I guess??
Kind of annoying since this means I need to pre-proccess every mesh to have split faces
but better than nothing I guess??
Are there any ways of getting UDIMs to work with unity? Has anyone ever done this before?
Not practically
Unity's shaders must sample a predetermined number of texture maps, which doesn't work well with how UDIMs work
I think it's possible to import UDIM meshes but the texture tiles will each get their material slot / submesh, which may defeat the point of using that workflow in the first place
UDIMs are not commonly used for game assets
Sparse Textures / Streaming Virtual Textures are similar and supported in some versions of Unity, but you'd only need those if you're specifically using the megatexture workflow
This is my first time trying to add an asset to unity how do I do it?
Thanks spazi! Well that sucks, I actually used UDIMs on my character for the head and the body. But now I guess I'm going to have to bake that into 1 tile for it work then. Not a big problem. Thanks either way 
You could see if importing the mesh works
If it creates material slots for the tiles, that isn't terribly bad
It means more draw calls but SRPs are pretty fine with that
Sadly that didn't work.
I could however just assign the textures to seperate materials I guess
It's just extra draw call right?
Yes
I feel like I don't mind that performance drop as I don't want to redo the UV's again 😩 . But I'll keep in mind when I'm making another character
sup yall, im making a game with a 16x16 character. if i want them "equipping items" is my best bet to just make new sprite sheets for each item? i'm looking at alternatives but i think at 16x16 it would be hard to just put the item in their hand

If you don't have many items and making new sprite sheets for each doesn't require a lot of sprites, or time otherwise then it may be the best option
A technique you used to see a lot in the 16-bit era was that characters had animations without items, and items each had matching sprite sheets without the character, so you could overlay any item with the character and animate them in sync
The character being a low resolution pixel art sprite doesn't mean you can't attach items by position to them either
You'd use empties as attachment points and keyframe their transform to move along with the changing sprite, snapped to pixels
Then have the item parented to that empty
Each method has tradeoffs
Hello Guys, i exported a .fbx file that i made in a Motion Capture room, i exported it with skeleton. If i drag it into Unity it shows nothing. can someone help me out there?

in blender if i import this file it shows me this, if i press play the animation runs. but the model is missing

Can someone help me sort whatever the hell is happening to my textures?
Model is fine, UV is fine, texture looks fine in substance painter but as soon as import it into Unity and apply it onto the asset, the base material goes nuts


I exported from substance painter using the Unity HDRP metallic standard template because that's the workflow I'm going with.
I only have one other texture that I'm currently using in the scene and that works completely fine with no hassle.
I have no idea where it went wrong and how to even begin troubleshooting this
Is there supposed to be a model attached to this or is it just a skeleton
in the motion capture program i imported it with the model..
Looks like a uv problem to me
Well you'll probably have to troubleshoot with the mocap program since the issue is with its output
okay thank you, i will look for the problem
It's possible that you're just exporting the animation only which you can apply to the model
do you know anything about it? i would have to go to the university and check again. i don't have the programme myself. it's at the university.
Not in blender, sorry. But you can try searching how to apply animation to model in blender on google
i don't really need blender, i wanted to import it directly into unity. when that didn't work i just tried blender.
replace blender with unity then
Hi, I've dropped a floor tile from SciFi Warehouse Kit into the scene. Why is it purple? I might presume that the material or texture is missing. But Materials Element 0 is not null and I tried dropping a texture on the object and nothing happens. The object looks like it also has a Component called 'Floor Tile Mat (Material) and everyhting in there looks OK to me, it has an abledo (diffuse?) map, a normal map.
I've read that pink/purple can indicate that something is broken. How can I determine what is broken?
Pink Material can have several reasons:
- Material had a Texture which is deleted.
- Shader is broken
- Shader is not compatible with Unity Version (URP, HDRP etc.)
That outline shader is nice! Curious to hear more about how it works.
Are you changing the texture offset?
Its currently got a bunch of minor bugs to it but poke me again and Ill explain it after work, in like 2hrs
Awesome 😄
I can use ibis paint x
Hey guys idk if this is the right place to ask but what are the best/reccomended import settings for 2D assets that arent pixel art. This is my first time trying to make a game thats not pixel art. Here is one of my tilemaps. Pls @ me, thanks!

Im used to putting no compression and doing bilinear with point no filter from making pixel art games
You'd use settings that look the best
Which likely means bilinear filtering and mip map generation enabled
You may be able to have some compression, but eyeball it
alr thx man
For most uses, I enable trilinear filtering and, if using a single layer psd, the psd fix checkbox. You might also need to increase max texture size since that is based on the sheet, not the individual sprites on it.
thx to u as well sir :)
Psd fix? What's it for
Unity devs don't understand the point of premultiplied textures.
Hah, who does anyway
back now. The wireframe shader you see there is cobbled together in two parts:
this file for baking barycentric values into the vertex color, and this tutorial for then using those coordinates to create a wireframe shader
https://medium.com/codex/creating-a-cross-platform-wireframe-shader-in-unity-64045828d4e2
https://www.youtube.com/watch?v=fu5HYNu-lw4
Medium
Wanna create some cyber-like effects for your games? :)

Improving our existing wireframe shader, to only render quads. This removes many of the diagonal lines from the mesh you may not want.
We use the technique of longest edge removal from the triangles. This removes the majority of cross diagonals in a mesh that is predominantly made of quads. It isn't perfect, but if this is the effect you requir...
the file 'MeshWireframeComputor.cs' has the code for baking barycentric coordinates into vertex colors; but it doesnt natively support the extra data shown in that youtube video which renders quads instead of tris
I have a version of their code that I re-wrote, and its buggy and fails in various use cases, I can tell you exactly where, when, and why its failing but I don't have an answer on how to actually fix it to not fux up
here's my code. You can compare it with 'MeshWireframeComputor.cs' to see its like 95% the same.
The exact place where the bug occurs is lines 124 to 137. Per those if statements, the wrong colors are being assigned to the wrong vertexes sometimes for reasons I wasn't able to debug why it didn't just work.
Originally the 3 if statements returned Color.red, .green, and .blue, however non possible combination returnred the correct colors on the correct vertexes, instead sampling the color of the vertexes itself worked as a shitty hack for like 80% of the time, but its not actually solved or working right, it just looks right for some use cases
and the shader to make use of the barycentric coordinates to create a wireframe

if you solve the bug I want to see the sollution 👀
Very cool stuff!
I've tried using Unity ProBuilder, and I've found it to be completely unusable. Firstly, it vomits errors, after 30 seconds of trying to create a block, I have 999+ errors in the output window. And I can't complete the geometry, I tried left-click, right-click, middle-click, space, enter, escape - nothing works, I'm stuck in geometry creation mode. What's the deal with it?
hello, i want to ask about this, i have sink asset and i add to this table, but material from table still still visible. how do you make the material disappear when there is a sink in it? sorry if my english is bad, thanks

You'd have to use stencil shaders which are pretty complicated
Much easier to modify the mesh in a modeling program and carve a hole into it
Usually the table top is made swappable with one that includes the sink and the hole for it
do you have some video tutorial? or link about that? thanks
i mean download the 3D software and simply open the model and carve in the hole, since you also have a 3D artist tag im guessing you have at least minimum knowladge of modeling?
thanks for the advice, I re-edited my assets to make holes in and then position the sink
btw do you know how to make perfect mesh to bowl? i making vr project and mesh collier non convex didnt support in unity so i have to convex, but the problem is when i convex, that mesh close that bowl so i can't put object in that bowl

dont know, sorry mate
unless you make a lower detailed model and put the lower detail model on the mesh renderer and the higher detail just for the view
Dont use mesh collider, if you can avoid it. Better take your time and add a bunch of box colliders there to fit the form of the bowl
Most of the time its not neccessary to have a 100% accurate collider
i mean, i using 10 box collider
Just make it look, like it is 😄
is that enough?
Not sure whats the purpose of the collider there
or more?
just to avoid things falling through the bowl?
yeah, because i using grab interactable unity vr, if i grab that bowl and there a gameobjet in there. if i move my grab, something that gameobject is falling or through that bowl
that 5 box collider, 1 in buttom and 4 in side of bowl
well, if you want to do it easy, place one on the ground and 1 on each side 😄
what do you mean? can you explain please?
yeah, i mean is 5 box collider right

what, box collider can rotate?
lol
omg where is bro?
so 1 box collider, 1 empty gameobject?
Yeah.. just create an empty Gameobject as Parent called "Colliders" and there you add all of your colliders as empty gameobjects and rotate and scale them as you wish 😄
then you have it nice and clean
Yeah.
Gamedev is mostly improvising 😄

Yeahm works too, if you dont need precission
not too precesission bro
Just play around with some colliders and find the best amount of colliders ^^
as long as this egg doesn't come out of this bowl

yeah, vr development is masterclass 😄 Doing it since 5 years.. its annoying. You cant imagine what people are doing in VR.. 😄
wow, so you have a lot experience mate?
i hope so, im not a programmer, more like technical art
i am newbie in unity, and i jump right into vr
i learning blender just for unity bro, find asset is realy hard
I learned Unity and VR right after University.. at a time where you had no dicord servers that help 😄 sad times
But its fun
wow, thats tough
believe or not, i learning english because find solution in english
well is still broken english
but i can understand now a lot of word
everyone can understand you ^^ thats fine
yeah, learning grammer is realy hard
i think i have learned it while using discord too 😄
i even dont know how to use is coretly
So if you have some question, just DM me. We shouldnt spam this channel so much ^^
may i ask about vr and unity in dm? because it looks like this is not a channel for conversation
ok bro, thanks
I have this .fbx export from Blender. As you can see the Materials are embedded. However the Materials are not assigned properly.
When I access the Material List at the bottom and try to select the i.e. Base material manually nothing happens. I can select any other material the search dialog can find but the one that is embedded?
What I am not understanding here?

How do I copy the pause menu reference from the left by using the sprite sheet asset from the right? I'm confused on why the bar is half created

It's likely just mirrored to save memory
I don't know if I'm doing it right, creating a UI panel with attached with a horizontal layout group and paste the UI in the image component. Is this inefficient or is there a better way?

or can do it in a tileMap and convert the tilemap to Image?
GitHub
The V-HACD library decomposes a 3D surface into a set of "near" convex parts. - GitHub - Unity-Technologies/VHACD: The V-HACD library decomposes a 3D surface into a set of &qu...
something like that maybe?
thats correct.
Why horizontal layout group? Thats only needed if you want to automatically lign your buttons up horizontally
what arethe ai toolset for 3d for someone like me as gamedesigner
Hello!
Any reason the asset in Aseprite does not match the Unity result?

I don't get why the Unity one has different colors
EDIT: I was using the Wrong Color Format
There's one called the human brain which has evolved over a 530 million years or so.
Always had this question in my mind, is there any specific workflow for creating levels or assets for levels such as rooms, hallways, staircases? (3D)
I tried some ways and it seems like too much steps and that I'm overcomplicating the process, thanks in advance 😄
why is the 3d object not expanding right like the sprite object. its getting stretched
So, i have this 3d model here, and i want to texturize it, but look at the amount of meshes! And if i join them, it will mess up everything. Including the rig. Pleasse help

The 3D object stretches and the sprite expands as it should, what is causing this issue? Is it possible to make the 3d work like the sprite object
You can assign a single material to the whole model and UV unwrap it all together
idk how to do tht

How's this for someone with almost 0 modelling experience
It was meant to represent a hospital door, although it looks more like a school one
I think changing the door knob to a door handle or a pull handle would look more like a hospital door
but tbh this looks good regardless
Thanks
Will look into this


New versions of Blender allow you to unwrap and edit the UVs of multiple separate selected objects at the same time
Looks like you could be using an ancient Blender that wouldn't have this feature
even in shade flat it happens

oh
i think theres another mesh overlaying it?
what

I would guess you're using a mirror modifier with Bisect off on a mesh that has two halves to begin with, so the mirror-side half would overlap with the one generated by the modifier
Then it seems likely you have overlapping geometry from some other source, perhaps a duplicated mesh
i dont see how

theres only one visible object
by the looks of it, there IS a duplicated object

these are the only modifiers

on the end of the foot its clear theres something else

the weird poart is, deleting a vert there removes it on the second thing
That's puzzling
I can take a look at the blend file if you want to send it
It's the armature modifier
It deforms the leg forward a bit, and if display mode is not "on cage" then edit cage and the deformed mesh will be displayed separately, causing the appearance of overlap

Happens because the left leg of your armature has a slight pose rotation, and the armature isn't in Rest Position
This is basically what's going on

ah ok
When the 3d object expands its losing his shape/edges and stretches, I want only his body to expand and his edges to stay the same. Any solution?
for example on 'image > sprite' edit you can edit the grid and set the borders, so the edges do not expand with the body.

If I understand the problem correctly, the box expands below the keys because the point of expansion is the origin point

To preserve bevels or other details when stretching a mesh, you cannot simply scale the whole object, but instead will have to move specific vertices such as like this using bones

Yes, the box expands only from one side and the edges should remain same without stretching and messing up. So I have to add bones?
On this image it looks correct, good example. Now will this work when I scale y position?
Bones are maybe the simplest way to make this kind of effect yes
You wouldn't scale it, just move the bones instead
You added a bone in the middle too, that makes them expand right?
Only one in each end, as there is no vertices in the middle to attach to a bone
i've set two bones and the pivot point to the bottom, but can't figure out how to connect them like you did

do I have to make them child of the mesh first
You need to look up how to make an armature and parent and weight a mesh to it
You wouldn't use two armatures for it, but one with two bones, one parented to the root bone with an offset
ok, on my research thanks
@misty lantern as far of my understanding about bones/armature i've done everything as described, i can't spot the mistake I make
I have also set parenting to bone instead weight, same result
Looks right (the process I mean)
Don't scale the bone, move it
Or rather move the child bone
Since it's parented to the root bone it moves (and scales) with it
Automatic weights might not give the precisely correct weights you need
Each vertex on one end should be fully weighted only to first bone, and each on the other end only to the other bone
"Each vertex on one end should be fully weighted only to first bone" can't follow here
you mean this here @misty lantern ?

That can be used for assigning weights yes, but there's also the weight paint mode for that purpose
First select the armature, then the mesh, then swap to this mode
ctrl + click to select bones after that
(your color theme will look different)


When selecting a bone, all vertices on its side should be weight painted red / full weight, and all the verts on the other end should be dark blue / zero weight
Do the same for both bones


Yes it should
@misty lantern okay gona try it rn, can I buy you coffee or smth
No need 
checkin apply transform and uncheck add leaf bones is right, to be able to expand when played right?

uncheck Apply Transform preferably
Mesh or Armature should not have unapplied scale transforms so apply them manually if there are any
okay, now only left to animate them I guess and attach them to the script
Hi, i've got a little problem. I have an image, and a border. Border outlines the image, and it looks good on the scene, but on the Game it looks like this. (will send border and the image too)

Scene view:


It's too small relative to Game window's resolution / camera size
Also the texture might not have "alpha is transparency" set in import settings
Oh, and i use a mask to cut this image
Game window simulates a screen of a specific resolution through the camera's viewpoint, whereas the Scene window always displays everything in full native resolution regardless of zoom levels
Also, after i make masked image smaller, black pixels outside dissapear. So I guess its problem with blurring the masked image outside of border
Are there any guidelines about stuff like this? I feel like I do too much tinkering, and it could be done simpler
Can you clarify what the problem is exactly? When you said "looks like this" I assumed you meant the low resolution
Sure, resolution is okay - it's small on the screen, the problems are black pixels outside of border
Sorry, I should tell it from the start
Do you have a third mask texture? That could be used to hide the mask edge behind the grey border
I would guess that if the grey border is also the mask, the antialiased pixels near its outer edge are ambiguous for masking purposes
I use this

I have it 9-sliced in the sprite editor
Okay, i think it's okay now. I tried to a turn off mipmaps for mask image. I sit on this for a few days, and just talking to someone helped
Make sure your game view window scale slider is all the way to the left.
So basically issue was, mipmaps blurred out mask a bit when zoomed out, so the "true image" pixels were out of border
I'd give the mask's edge and the border's edge some margin so the blurring won't cause issues
Mip maps are necessary for downscaling images
Yeah sure, i have some margins. Also, i use the mask image also as a button, so that's why i used mipmaps
The Mesh/Bar when expanding (the bone) it slows down. Any solution?

The Script is not the issue, I have checked that, works normal with a regular sprite object
You have to move them in different ways from the sprite, considering the bones are separate transforms
So I believe the script is the issue
Remember that with the mesh you only move the bones and the mesh itself, with sprites you would move and scale instead
The bones are also hierarchically connected which means the child bone's position is relative to parent bone (though I don't recall if setting position through script defaulted to local space or global space)
Got this problem when i import from blender as fbx to unity my models changes colors. I painted then using uv mapping


Disable texture compression in Unity texture import settings
I think I did it correclty but still it dosent have the same colors

Hello everyone, when trying to import a model from blender, position, rotation and scale are not correct (compared to blender). Can someone give me some advice please? 1 - Unity, 2 - Blender.


Looks pretty much the same
Blender has different environmental lighting and uses a different view transform (or tonemapping) so you can't expect it to look 100% the same unless you match those conditions as well
Is the white ring thing a part of the mesh or a separate object?
They are 2 separate objects but one parent of the other
Is there an armature rig involved?
The solution could be as simple as applying necessary transforms before exporting and disabling "apply transforms" from fbx export
But if there is a rig and you're using bone parenting you'll also need to make sure the pose matches when you parent it in unity
because bone parent relationships are not importable iirc
Rig not involved.
Apply transform doesn't help. I have several of these models and the original model (I copied it to create subsequent ones) has the correct position, rotation and scale.
1 - Unity 2 - Blender


Turn off mip maps. Also you did not disable compression at all
cant get it to work still

Set filter mode to point
Made it, thank you
How do i make my blender asset transform match to unity? I made a model on a 4x4x0.5 platform, then imported it to unity and it seems wayy bigger
and also its rotated for some reason??


At first i decided to fix the rotation, but i cant. No matter which option do i choose for Up here sc, it looks the same.

Also, scale factor does not work for me, because my game is going to have some precise things, like this pipe output being connected to grid's edge.

when you export from blender there are all these settings in the mid panel

you can specify the forwards and ups and stuff
look at my other messages
the Apply Transform is also made for unity i htink
The output was the same no matter if i had Y up or Z up
ahh ok
And scale factor is not the case here
did u apply the transforms in blender?
its hit or miss when i export
sometimes its perfect and other times its on its side even tho i set it up to export correctly
oh
as for the size of things.. i usually use the scale factor to compensate

havent figured out why sometimes my models are big and sometimes they are small
2 big ass corporations cannot handle exporting and saving
It says Blender could not be found??
i'll keep lookin for some solution
🤔 weird
ohh it seems it depends on what version of blender ur using
lmao
@ivory widget Try these settings but with apply scalings: fbx all
There should be no need to touch Scale in export or in Unity
and make sure that ur version of blender is set to open *blend files as the Default program
that may have something to do with it


this option here.. thats what some of the unity threads ive read said the solution was to the blender not found error thing
ohhhh
The rotation cannot be fixed unless you rotate the mesh 90 degrees, apply transforms and then export with specific settings, or have a script do it
I never bother with that
With Z* Forward and Y Up the mesh should be turned around 180 degrees on Y axis which is inconsequential in my opinion
the only difference is steam has auto updates lol
But what about scale factors?
Spazi?
Do you know anything about that?
 guy knows what hes talkin about
If you're curious why the rotation (and scale) errors happen and how to fix them in detail you can read more about it here
https://polynook.com/learn/how-to-export-models-from-blender-to-unity
I get by with these settings just fine though

About scaling, look. Platform is 3 , 3, 0.5

These platforms are 4, 4, 4

and even that the generator is bigger somehow
lmao

I tend to get my sizing correct in blender and apply all the transforms scales.. so the pad would be 1x1x1 and the generator would be 1x1x1... in unity doesnt matter how big they get or shrink.. they should stay relative to each other..
Hmm at least the scale is right now
Is this with Z forward or -Z forward? I meant to type positive Z the first time
No the scale is not right

It is 1, 1, 1 is what I mean
Size is another problem
its Z forward
Try measuring the generator's precise size in Blender and Unity
how do i do that
in blender you should have the pad and the generator be the sizes they need to be and both of them scaled to 1x1x1
Blender gives you "dimensions" but in Unity the quickest way to measure would be to stack 1m boxes

stacked boxes approach
2D view helps with it too
I dont use the literal same objects, they only share the same scale
i cant use the blenders platform in unity and otherwise

these are the dimensions
That suggest to me this size comparison can't be correct
i didn't even know Blender had Dimensions until just now 👀

This is what it should look like compared to 3, 3, .5 platform

@misty lantern quick question. how do u get those sharp edges?
the color i mean, not the actual geo
"Cavity" in solid view settings

is it "Cavity"?
ohhh nice! omg this makes it soo much better to see my edges
anyways scales were hard for me to get used to..
but scale is not the same as the dimensions
you can have an object scaled 1,1,1 with dimensions of .5, .5, .5 and it would be the exact same size as
if you had an object scaled to 2,2,2 with dimensions of .25, .25, .25
i try to zero out my scales.. so in unity im working with 1,1,1
in my mind it goes like this
its scale * dimensions * import scale settings...
commonly i want everything 1x1x1 if it needs rescaling i do that in blender and then reset my scales as always..
i think with some testing, some math, and a few iterations you can get ur objects to appear exactly how u need
It is kind of like that
How do i make use of that
I'm not totally sure what's going on but this indicates that your generator was way too small in Blender before you exported it
In game i use 4,4,1 platform, sorry for the misinformation
oh
i know
the dimensions are twice as big as the scale
so i just need to set scale factor to 0.5
and it will be good
I'd scale the mesh down and then apply transforms rather than relying on scale factor on export
Cuts out one unnecessary moving part of the equation
ur right
As Spawncampgames said remember that "scale" is just a multiplier onto the mesh's real size
You'll want to change it only when you have multiple instances of the same mesh that need to have a different size from each other
true.. and also physics work best at 1,1,1
if u go all crazy with ur scales and end up needing to manipulate its physics you can get some pretty random lookin results
moreso Spazi. but np 👍

aye! ❤️
so you saying its on the script? I loaded a normal sprite cube and it exapnds without slowing down
I tried changing the speed in the script and more but no matther how fast I make the bars move, the expanded one always slow down
Like I mentioned you cannot or shouldn't expand the scale of the rigged mesh like you would with other gameobjects, because its size should be determined by the position of its bones
Not their scale
yes, that is right, Instead I edited the script so it moves the position Y of the bone that is attached to the main one
before it was expanding the scale now its modified to change the position

so it does not stretch as you tought me to do
idk where to look for this issue right now
if it has not to do with weights and the script hm
maybe I should use animation instead? I was really trying to avoid animating it
I'd debug the positions of the mesh, the "armature" and both bones, either by debug.logging or by giving them Icons, or preferably both
Remember that every gameobject will inherit the transforms of the gameobjects above them in hierarchy
My hunch is that you're moving multiple bones without accounting for this inheritance that then results in an offset
Or the math to move them might simply not be correct
You could describe the problem and post your code in code-beginner or code-general for them to investigate
Ok I will look it up and ask for support on the code channel if I cant find a solution. Thanks

i have this slime animation for a platformer
does it look ok?\

our would this verison be better
Well, the faster version certainly has better timing.

I like it more, yes.
Why can i not use any assets from the asset strore? They are always pink. I expect to be able to import an asset package and drop a prefab into the scene. And that just doesn't work. Even when I double click the Example.unity file in a package, it loads up an example scene and it's pink. What am I not understanding about this process?

Pink material means the shader cannot be displayed
Most commonly because it's not compatible with your project's render pipeline
If you can tell what RP your project is using and show what materials those assets are using, that may tell us if it's possible to convert them
I'm using HDRP and the package is compatble with HDRP https://assetstore.unity.com/packages/3d/environments/roadways/modular-lowpoly-track-roads-free-205188
When I look at the materials, they are using the Standard shader
I used the tool 'Convert All Built-in Materials to HDRP - some improvement but everything is gray
@misty lantern the problem was actaully with the script, there was a code that multiplied the bars to x2 speed when they get released. that fixed the problem
Standard shader indeed is for the built-in RP, and it doesn't look like the asset contains any materials for other pipelines though the Standard shader is should convert okay
Make sure the material references the texture after conversion
@misty lantern So HDRP/Lit is the default material that I should use?
Dragging the provided texture onto base-map slot, gave me what I was expecting!
So, is this what they mean by HDRP compatible? Do I have to do this all the time with pacakages? Or have these packages been labelled incorrectly?
Usually URP/HDRP compatible implies they include materials for those pipelines or don't rely on them at all
In this case I'm not sure
I guess it's technically not "incompatible" since it uses the convertible default shaders
Ok, thanks for helping. This will help with other packages I'm sure, that I've had trouble with.
So I recently managed to export a model from Blender into Unity for the first time but not without issues. For some reason some of the faces (only in unity) seem to render the inside-facing edges/faces. This doesn't happen to the entire model and I would like to know a workaround or at least why this happened.

Some inverted normals and maybe overlapping geometry
I don't think I generated normal maps yet if that's what you mean
though I think I might know why now

I guess you can't have completely flat faces in Unity?
at least not when there's also sides with 'thickness'
Sprite looks different in-game compared to scene? Especially when rotated.
https://i.gyazo.com/bac587406f5317d3703f669fe34eeeea.png
https://gyazo.com/bc73402e48cdfa85551aa7f412ce0064


@warm sable Regarding the difference in the 2 images you provided, what it looks like to me, is that you are rendering half-res images (2 texture pixels / screen pixel) and you are suffering from aliasing issues. Look into pixel-perfect camera positioning. You may also suffer this if you are scaling your sprites. Try observing the black border of your sprites as you move your camera around. The border thickness or any feature for that matter will jiggle thin to thick and back again. You need to position your camera at a fixed sub-pixel offset in each dimension so that the pixels are sampled consistently as the camera pans. Unity probably has a camera setting to handle this for you.
hey so I have an issue with a grass texture being rendered as a detail using the terrain tool. As you can see, some visual bugs appear

however the texture is fine

and the texture config is exactly the same as some grass that I've downloaded that works fine

Idk what to do
You can try enabling border mipmaps.
kind of basic question
can someone help me add these assets to my project? They are already in my account from asset store

Just add them from the package manager
I’m trying
So where does the issue seem to occur precisely
Or where do you get stuck?
@tawdry valley @ivory widget Discovered a weird quirk that was throwing me off yesterday
Whether you enable "apply transform" in FBX export it does not do at all the same as "apply transforms" as in the operation
Most notably it changes what kind of rotation the mesh will have in Unity
Without it I get
with it I get
Both of them start by facing the same way regardless of this and have their origin unchanged (which apply transforms normally could change)
-180 Y is much more convenient since you can reset the transform and it'll still be upright, albeit not facing in "forward" direction
In any case you can (and usually will want to anyway) place mesh renderer gameobjects under a container gameobject to separate visuals and their transform component from the object itself
any idea why the Blank Shader Graph on URP 2D is not rendering?

also tried rendering it to UPR from Edit


The Graph Settings

Cool, very useful thank you
Guys how do i remove the blur on unity? Everything seems low hd when its 1000x1000 pixels
Hey, I want to get the Roughness from Blender and tried following this tutorial: 15s all in all
https://youtu.be/ogz-3r0EHKM?t=686
I dont understand the mask part... I am using photoshop and gimp but cant apply a mask?
Used the Diffuse and Roughness picture but it just dont work like he explained
I am a noob when working with picture manipulating programms and would appreciate any help!

Learn to create a 3D character from sketch to game.
I go over all the steps and give some tips and trick along the way.
in This tutorial, I use the following programs:
Procreate (Ipad)
Blender
Affinity Photo
Unity3D
If you liked this video, be sure to subscribe so you won't miss the next video!
You can use this for all kinds of applications:
-Y...
What kind of blur and what context?
I made an icon for a gui im working on
and i have ised raw image component
but it makes my image look so muxh low res
so what you gna do?
wdym?
There may be many reasons for it, such as zoomed in game window or problems with texture import settings
Could use more details about the issue


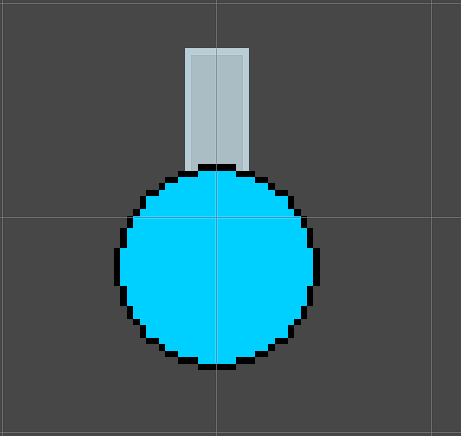