
#Galileo general information and discussion
4717 messages · Page 5 of 5 (latest)
What bowden tube should I use from the G2 to my hotend? And if I get clicking, and skipping on the extruder, should I up the current or is there something else? I can turn the gears good by hand, and it doesnt always happen.
Here when assembling the g2e we put this screw
Later when I am installing sb2209 rp2040 can I take it out and use this one again or should I use a longer one?

That one is long enough for most purposes
Okay thanks
Anyone know where I can get a reasonable Gear set for the G2SA , I have more pancakes than I can eat sat in boxes... So just a full gear set Thanks.
Unless you happen to sit on a stock of 9 tooth motors, they won't do you any good for G2
If the motor shaft is 2mm then you can swap the gears easily enough to 9t ones.
But I think most (all?) 10t motors have 2.5mm shafts.
Hey folks 🙂 I'm having a little trouble with my new wwg2 extruder.
How hard should it be to turn the knob? I figured it should have resistance but not so much that I can hardly move it.
If I tighten the main two m3 bolts, the knob is very hard to move. I have backed them off a bit so I can move the knob with resistance.
Is this correct?
Hi, I'm having extrusion issues but only when at high accels. I've run flow speed test where it increases flow every layer and it managed 20mm3 comfortably (basically vase mode print so extruder doesn't have any large accel changes). But if I print with 2000mm/s/s accels on a normal print then it will cease extrusion after a layer or two.
I have a G2 with a rapido. Recently regreased so issues might have started from then. Does this suggest my tension is too high/too low or is something likely off in the assembly?
Is there any upgrade path for a Galileo 1 gearset, to convert it to G2? Or is there any extruder that works with the G1 gearset and is not the Afterburner specific one?
Apparently there were some efforts to make a G1 extruder compatible with Stealthburner: https://github.com/JaredC01/Galileo/issues/14
No activity since 2023 though.

GitHub
Good evening, First of all, thank you very much for the current design, I'm building it currently and are quite impressed. The Voron Team did just release a new toolhead assembly, do you have a...
Hello! Are there any holders for g2e and BTT SB boards made? Can't find one :/
you shouldn't need anything special for that
Gosh I wasn't clear, what I meant was holders for CAN wire going for board - things from cw2 doesn't work
Anyone have a problem with a rattle sound?
You dont need the extruder knob?
no, it is only needed if you want to manually turn the knob
Anyone have any tips to get my Galileo 2 extruder (standalone) to stop skipping? I've taken it apart a handful of times, seems to run smooth by hand, I ran in the housing piece with the teeth like the instructions said with a drill, the knob is pretty easy to turn if need be, but at 10 mm/s, it'll extrude fine for like 10-15 mm of filament then start skipping. If I go slow it seems to be fine. I thought I was hitting up against the flow rate of the revo hotend but I don't believe I am at that speed (normal revo brass 0.4mm nozzle). apart from taking it apart again and looking things over, any other tips or tricks to get this thing running smoothly and consistently?
Oh, 10mm/s is 24mm³/s, way above what you can do on a normal flow Revo nozzle
okay, see that's one thing I was unsure of. Google said it was far less then 24mm³/s but that was my initial hunch
what's the correct way to calculate flow rate? just for my future reference.
the wonderful takuya has a number of useful tools
they're one of the purple people here
ah sick! much appreciated! that's most probably what i'm experiencing. Time to get a HF nozzle or slow down my prints. cool, thanks for the quick responses 🙏
Also this; many of us have found it to be fairly accurate:
https://e3d-online.com/pages/revo-nozzle-maximum-flow-rates
If you’re using Orcaslicer, you can set a maximum flow in the filament profile. It will automatically keep speeds in check to not exceed that value.
Im thinking about going bowden on my awd trident build to lighten up my toolhead, is there a a G2 bowden mod out there anywhere?

GitHub
Contribute to JaredC01/Galileo2 development by creating an account on GitHub.
Not sure if you got a reply to your message - I’ve recently built a wwg2 and the knob moves with little effort. Make sure you’ve set the hobbed gear “backwards” with the grub screw facing the front cover instead of the extruder motor.
Thanks for your reply. I think I have things under control now - I've been using the wwg2 with a xol toolhead for a few weeks now and I haven't had any major issues 🙂
For future reference, if someone has the same problem: the upgrade path seems to be getting an additional F688ZZ bearing and building an Orbiter 1.5. There's a Stealthburner mod for that, or it can be used standalone with other toolheads.
when assembly the G2E what great and where should i be applying?
Grease?
a pea sized blob of ep2 or similar inside the large ring gear
how about the metal on metal parts
shim agaisnt bearing , spingle in bearing
oh. i guess a tiny dab would be ok, but not really required
sorry if this is the wrong place for this: I'm getting a terrible creaking noise from one (or more) of my G2ZXL motor mounts, but only when moving slowly at certain heights. I am able to complete prints (if i can get them started), but the noise is messing with my beacon scanner, causing issues. Any general advice to what might be causing this, and possible remedies?
Some background: I realized that I had the toothed pulleys on backwards for a few months, but i fixed that, still had creaking, but it was miles better than before. I then replaced all the Z belts, since i figured the irregular wear might have been causing an issue as well, still present. I then changed the z joints, and still present.
EDIT: I rebuilt the shaft assembly where i thought the noise was coming from, and swapped in an older printed part (the part that holds the three countersunk screws). I found that when applying a side ways force to the shaft assembly would cause the bearing to pop out of alignment (but the shaft was not in the frame mount) I've reprinted the project before with what i thought were better tolerances. Turns out the older printed part would hold the bearing in alignment better under side force.
Long story short: This has helped a lot, but not entirely eliminated the issue. However it no longer happens close to the bed which was causing the beacon issues
I'm using a WWG2, wondering if it's worth trying to push the accel/jerk/limit values for the extruder motor? Anyone tried and found improvements in print time?
Currently running max velocity of 100mm/s, accel of 1,000mm/s^2, and jerk of 5mm/s, retractions are set to 0.4mm at 40mm/s. Not sure how conservative these are...
Do any of you actually use a drill to apply the grease?
I did, it was fun
I'm taking apart my Galileo 2 SA to turn it into a dual sensor version for a tool head cutter. When opening up the gearbox it looks like this. I used mobulix EP2. Is it supposed to look like this after a while?

Hmmm, wonder if mine will look like that, good thing I did not use EP2 
What did you use? I also have super lube here
I think I used white lithium last time
you might want the little shim in there😂
And no, mine looked nothing like that after a couple hundred hours. My green grease was brown, but still recognizable as grease. And not newly PTFE PA fortified.
Hello. Is there a way to remove filament detritus from the extruder without taking apart the whole toolhead?
What shim?
There’s a shim that goes between the spider gear and the planetary housing. If one wasn’t supplied in your kit (or lost and forgotten), you can print one. There’s an STL in the G2 github.
Intersting. Do you know if the G2WW with dual sensors use a shim?
Clean out that plastic laden grease best you can, and add more fresh grease. If you need to print the shim on that printer, install it next time you take it apart. The sooner you do that, the less will be mixed in with the grease. And you’ll want to clean it out again, unless you’re comfortable with a little bit. It’s just nylon…shouldn’t harm the POM gears, but you don’t really want a bunch of plastic dust in there.
The planetary end of the G2 should be the same between all variants.
I cleaned it, soaked stuff in some isopropyl, and reassembled....with out a shim hah.
all new printed parts in a g2ww for anthead
If you find a way, let me know. Tedious enough cleaning plastic from the hob gear without having to disassemble.
Im looking at the build manual and I do not see where it has the shim install
Printed shim is here https://github.com/JaredC01/Galileo2/tree/main/galileo2_extruder/stl

GitHub
Contribute to JaredC01/Galileo2 development by creating an account on GitHub.
my manual is over a year old

Yep, its not in the G2SA or G2WW manuals but I see it there
Page 35 of the regular manual
okay well, I have a LDO kit and I am fairly certain my kit came with one
Must’ve been an oversight to leave it out of the other manuals
extruder worked find without it 🙂 I will add it in
Some consider it optional
But I’d argue the grease sucking plastic dust in the housing is optional too!
is that what you think probably happened?
Yeah, I figure without the shim, the back of the spider gear was eating into the housing. Quite a bit of plastic dust though, I would think it would eat a little bit of the housing and then have the clearance it needs🤔
But what other explanations are there?
The nylon housing got eaten away to the infill.
Funny thing is it was printing just fine. I tore it apart to build the dual sensor wristwatch version for the ant head toolhead
That doesn’t surprise me too much. You had grease in there, it was a slow grind. Not too much resistance for the motor to overcome, especially with the planetary gear reduction.
I have problem i get bad input shaper result with Galileo 2 on SB. Any one know how to fxit it? maybe reprint all the parts?
I'd ask in #1308016330326413393
I have a g2ww fitted with a piece of capricorn tubing. I preheat the extruder before loading the filament through the 3mm ID bowden tube that is attached to the outer fitting.
I make sure the motors are disabled before feeding the filament.
Sometimes I cannot manually turn the extruder with the knob to feed the filament without first disconnecting the 3mm ID bowden tube and feeding the filament in manually.
Could this be due to:
- curling of the filament
- no "tapered cone" on the entrance to the capricorn tubing
- something else
I'm not sure where to look first. I don't think the filament is that curled up all of the time. Would slightly boring out the capricorn tubing with the end of a razor blade help things?
Does anyone else have this issue?
Thanks!
i have something lose in my toolhead i can hear it
Does somebode knows or has experience if this is original from phaetus or a fake one.It has very good price

Geekbuying
China-1 Stock | Buy Phaetus Dragon Hotend High Flow Edition, for Prusa/Creality CR-10/Ender 3, 500 Celsius degrees Temperature Resistance, Compatible with All Filaments, PLA, ABS, PETG, TPU, PP, PC, Nylon, PEEK, PEI and Composite Materials, Black online at unbeatable prices. ✓Free Shipping ✓Limited Time Sale ✓Local Warehouses.
what do i do if my extruder isnt extruding
ive taken it apart several times and its easy to turn by hand but when i send a command to extrude it just makes a buzzing sound
it works perfectly fine by itself when not connected to the hot end but its not a nozzle clog because ive tried swapping nozzles and it shouldnt be a heater issue because i can spin the knob to extrude plastic
this sounds like a mis-wired extruder motor. you'll need to check the coil pairs with a multimeter and move some connectors around in the plug
i wouldnt think so because when its just the extruder by itself it the motor works fine
then we need to have a look at your extruder settings in your config
suggest you upload a klippy.log
which part
all of it. download it from the machine tab on mainsail, in the bottom right
run current 1.2 is extremely high for a galileo- recommended is around 0.6
you also don't need stealthchop for extruder (set it to 0)
everything else looks ok

(disclaimer, I didn't read your klippy.log)
Typical is that you are including a secondary file that then overrides they settings you are looking at. Klipper doesn't warn you if you set a value and then reset it, or if you do that 1000x. We ask for klippy.log usually because that contains the digested final configuration.
where would the secondary file usually be
it would be the result of any [include xxx.cfg] statement
ok
Just finished with my WWG2. When I turn the knob by hand I feel a sudden increase in resistance at a certain part in every rotation, is this normal?
It should have consistent resistance through multiple rotations. Sounds like you might have one of the gears off by a tooth. I’d take it apart and try to remesh them.
I took it apart and remeshed the gears. Runs smoothly now, thanks.
Whatsup erryone. Was in gchat and was told to go away and come here. Just did some massive upgrades and one of them being g2e. Got this funny noise after about 6 hours of prints. Lemme know what you guys think
ill be re-printing everything, but some speculate its this front bearing holder , just pre-emptively getting some info before it gets re-printed etc

That is an Ok price, pretty much the same price as Triangle Labs (who are partnered with phaetus and co-develop products)
ok im going to ssee if anyone can help me out lol. I run the g2e and a rapido ace uhf ( .4 cht on all my printers) on my 2.4 and my trident 300, as well as a g2e and rapido 2 plus hf on my trident 250. the 2.4 and 250 both want a PA around .4 at 210c .98 flow with pla+. Now the 300 even at 200c .98 flow ( which is the best flow rate for all of them by my eye and feel) wants pressure advance of .09-.10 I cant get it lower but its making my retractions and edges look like crap if I run it that high im stumped. printer config matches all my other g2e .04 for PA and .04 smooth time. Anyone have any ideas? Similar results with abs/asa obviously with different temps and flow is usually about .96 on abs
What do i need to be careful for printing TPU with G2E? I had 0 problems with CW2 and I heard that G2E is better than CW2 on soft filaments but somehow I got 3-4 failed prints - it printed first few layers fine and then it can't extrude anymore - and later it caused clog on my hotend and I had to swap my heatbreak on Dragon HF. Any advices?
G2 has the possibility for alot of tension. Like, a lot of tension. You might be squishing the filament too hard
Thank you, i am also assuming that was the problem but i wanted to ask it before i try TPU again as i am afraid from another clog to happen
Has anyone gotten good TPU prints with the G2? I've seen a bunch of fails where the filament bunches up going into the final tube, so i haven't even tried.
I feel you, same results for me on Orbiter2. I haven't gone back and tried again on O2 or G2 yet
People did advise that the TPU can't push through leftover filament that may be down by the nozzle. WHich makes me think maybe heat it up and let it ooze a bit before trying to load the TPU
Hmmm, so if I do a nylon pull before each print with TPU, G2-TPU might be within the realm of possibility? 🤔
Because doing all that on my voron would be less hassle than making a dedicated TPU ender, or swapping my voron’s G2 or ender’s orbiter 1.5 for a more TPU friendly extruder whenever I want to print TPU. As it stands, whenever I think I might want to print TPU, I reconsider my life’s decisions and say, “not today”.
I don't know any more useful info. I do wonder if a dual-drive BMG might perform better
Keep trying though, I know people have TPU working on Orbiter2
i've sent quite a lot of TPU through my g2e. admittedly not the softest of soft but it went ok
Thoughts on the WristWatch packaging of G2 for TPU compared to the standalone?
I had the least trouble getting TPU to print with my Orbiter 2
It never twisted or got stuck, even if the settings were bad
I had a lot more trouble with CW2 but was able to get it to print eventually. I haven't tried with G2E yet, but generally what I found was the problem was mostly with the hotend side, not the extruder.
I see. Could you please elaborate further? I'm just finally getting into combat robotics where TPU is a must and it's my first time using the material, so I'd love to nail it
Sure, basically the general idea with TPU I found (and got some advice in the print help channel here) is that you need to reduce the back-pressure from the hotend. TPU can't really be pushed harder by the extruder like other filaments -- and you have to use lighter pressure with the extruder gears or it'll tend to get squished.
So like, enough extruder clamping so it will get a grip, but not extra. To reduce back-pressure from the hotend, you need to print slower in terms of flow rate (I used a volumetric flow limit of around 12 or so) and use a larger nozzle. I couldn't get my Trident CW2 to print reliably without a 0.6 nozzle -- 0.4 could print small objects, but longer prints would always jam in some way.
Also I've seen some bad advice now and then, like "remove the reverse bowden" -- definitely don't do that, yanking on it will just cause pain. But you should make sure the tube and spool mounting spins nicely, and the TPU absolutely needs to be dried fully and ideally you print from a dry box. If you're getting a lot of stringing it's probably wet.
Someone in the print help channel suggested that to reduce friction and restrain the filament even more, one of those $10 V6 hotends where the ptfe tube goes all the way to the nozzle ender style actually works well for TPU (and for no other purpose), but I never tried that.
Thank you so much, that's really helpful!
Oh lastly an SFS is really nice for TPU since a lot of prints can just be resumed if they get stuck.
Hmm just found my TPU settings, it was actually at a flow rate of 10 (but regular speed otherwise). retraction set to 1 mm / 30/30. On the plus side TPU (or at least the inland stuff) has great layer bonding and perfect bed adhesion
hmmm, I guess you mean SFS 2.0 with the encoder?
When I did print TPU successfully, it was with a stock ender3 style hotend, bowden, and $10 BMG clone extruder…one of those clear Winsinn jobs lol
Has anyone made a G2SA nighthawk 36 mount for a v0?
https://www.printables.com/model/1172727-g2sa-ebb36nh36-pug-mount
might fit on a v0 if you use the short or medium PUG

Printables.com
A mount for any "36" style toolhead board (EBB36, NH36, SHT36, etc.) to go on the back of a G2SA Extruder | Download free 3D printable STL models
awesome there's a step file thank you! Ill work out a v0 remix and post it via that page
simple quick remix ill see if it works jsut using a ziptie mount for securing the cable

I still recommend the PUG if you can fit it.
the "ziptie just above the connector" is never great.
though on a v0 the cable doesn't move much anyway so it might be fine
geee do i Feel dumb lol https://github.com/chirpy2605/voron/blob/main/general/PCB_Mounts/STLs/G2SA_Carrier_DB_36.stl

GitHub
Voron mods. Contribute to chirpy2605/voron development by creating an account on GitHub.
random question..I ordered 4x LDO Galileo kits. 3 of them are fine. 1 has a smaller gear for the 3x planetary gears. I sent LDO an email. What I am curious to know is in which kit/device is this smaller gear used in?


You might reach out to the distributor where you bought it. Most LDO warranty items are done through that avenue. No idea about what the different size gear is used for tho
No idea where it can be used... maybe Orbiter gear fall into the bin by mistake?
Orbiter/positron
Ahhh. Thank you!
Contacted LDO, they shipped out a replacement gear.
Hi everyone, for the wristwatch G2 or even the G2SA, is there a recommended extrude/retract speed/acceleration for the extruder anywhere?
For instance orbiter 2 docs have 120mms and 12k.accel or something similar.
30-60mm/sec retraction speed is adequate. You can run faster if you want but there is no real reason to. Personally I've seen it starting to struggle above the 80-100mm/sec mark in my setup.
Thanks! Can rule that out as an issue
Hi everyone, my G2 (ldo) motor died, is there anywhere in Europe where I can buy a replacement

MyRigs
Spare Parts for Galileo 2 Extruder kit, Z drive kit and Z XL drive kit. POM Planetary Gears and Housing (1 x gear housing + 3 planetary gears) in injected plastic mold G2 Extruder Gear G2 Carrier Shaft G2 Z XL Replacement Motor LDO-42STH40-1684AC(RSS9T) 1.68 Amp, 4.5Kgf cm Holding Torque, 40mm Body and 9 tooth G2 Extru
Awesome thanks!
hello people, i have bought a secondhand Trident 350 with a galileo 2 extruder, but i am having a hard time tracking down what type of hotend assembly this is, anyone recognize this?

Looks like wrist watch G2 on Xol2
I can’t see the actual hotend from the photo though.
the hotend is a trianglelab Dragon-V hotend, its performing well i just wanted to figure out that the fan stuff around it was to do some slight modifications
A4T could be a update to the design if you are planning on keeping the fans.
might take a look at the AT4, but plan is replacing it with a bondtech Indx when that comes out, so for now it will stay xol. just trying to rig up a nozzle wiper and the airguide for the fan keeps hitting the wiper. but i wil find a way
id just retract vs a wiper. one less thing to deal with
You can get air in a car, which looks a bit like a wd40 can but without liquid, however if your filament is ground in to the teeth, it's probably better to strip it and have a good clean
I'm going to print g2 parts in asa. would like to know if I need to add shrinkage to the galileo 2 parts that I print in polylite asa
you do not
What he said.
Shout out to whoever did the G2E manual. I just built it and it was a breeze. My cw2 died (cause yet unknown pending autopsy) and I was finally forced to put it together (was waiting for a full toolhead rebuild). Process was super simple.
Turned out looking really good. WWG2 Annealed pet cf


Is there a better version of G2E filematrix dual filement sensors?
Like CW2 version is very reliable, but G2E I can't get the bottom sensor to work at all and top sensor trigger a false positive in every 20-30 hr(My printer currently running 24/7 printing in ASA). I have to disabled it to prevent failed print jobs and likely have to switch back to CW2 when I installed the BoxTurtle.
Could try this.
https://www.printables.com/model/643093-galileo-2-g2e-filament-runout-sensor-updated-filam
second sensor is not needed.

Printables.com
Download 3D printable STL models
You also could just run a ram sensor using the turtleneck buffer and ignore the toolhead switches.
I run this variant that is also setup for Fliametrix and used the macro to make changing filament super easy before I made my ERCF. Been working great since I built it as well.
https://github.com/juliusjj25/G2E-Filametrix-Lever-Switch-Mod/pull/1 https://github.com/juliusjj25/G2E-Filametrix-Lever-Switch-Mod/pull/1

GitHub
I've noticed that the baseline G2E extruder design has a sharp lip where the ECAS connector leads to the extruder filament path. This results in the filament on occasion catching on it when...
I'm assembling G2E right now and the manual mentions binding in the planetary gearbox. What does this binding feel like?
Right now when I spin the shaft it feels like one portion of the rotation spins slightly more freely than the rest of the turn, is that the binding?
@dense island I’m a little confused on how these limit switches should be mounted. Based on the cad they go under these angled fins, but I don’t see an opening on the other side to install a switch or ball bearing. Is there support material I’m supposed to remove?


Ah ok that explains it
Is the lower down one also support? In my second photo, the little rectangular part inside the wiring cavity
It is.
Any fix for this probkem?
My G2E failed because thumb screw’s heat insert came lose.
Is there a square nut version?
Strange, what filament was that printed out of?
Polymaker asa
Well, unless you're running your chamber over the temp we're supposed to talk about here, I would say you just has an improperly set heatset. It's not like that part is heated.
My heat insert is flushed with the surface
I use a M4 hex head to make sure the insert is seated properly
I’ll see if bigger heat insert help with my problem.

Welp... I think I drilled out the filament hole in my G2E main body too much, the pre-extruder filament runout sensor doesn't work bc the filament can just go around it. Any ideas for un-fucking this up besides reprinting the part lmao?
Fill it in with 3D pen and redrill the hole. It’s my method of repainting broken screw holes of retro electronics.
Are we trying to rescue a 12g part here?
I'm fine with reprinting it, just an annoying mistake lol
Just be glad we are our own manufactures, very little consequence to such mistakes
Ok wtf
I just did my first print with FilamAtrix G2E and its doing some weird stuff

I heard grinding/crackling noises coming from the extruder during this
Is this perhaps the binding they mentioned in the build manual if your planetary gears weren’t meshed properly? Or some weird interference from the cutting blade not being pushed out far enough?
@dense island any advice?
you lubed the planetary gears right?
the solution is the same though, you're going to need to take it apart probably and find out what isn't assembled correctly
Yes
😔 i figured. I'm curious as to why the print looks fine (flow wise) for the first bit but later starts grinding/slipping/idk
And I didn't notice any issue like this when just loading filament in
I guess the issue revealed itself on those longer lines
wait what if my thumb screw is just too tight? I had to loosen it a lot just to get filament to slide into the extruder, I realize now that I forgot to loosen it extra per the manual's instructions
Maybe. It could be squishing it quite flat and causing flow issues that way
I sure hope so lol. What does binding in a planetary gear train sound like/cause? I am somewhat sure I assembled everything correctly, so I’ll test the thumb screw theory first and if that doesn’t fix it I’ll take the extruder apart to check for mistakes/binding
Don't use G2E 🤷♂️
I am the wrong person to ask about it
I had similar infuriating issues with the release G2E parts ... but had successfully run the beta parts for months using the same hardware.
I gave up after many reprint and reassembly attempts and went back to CW2.
I did not have such problems with WWG2 on my tri-zero.
damn is this a common problem?
I would not say it's common
I'd say no because there are zillions of people running G2E in both SB and SA configurations
there's many, many happy G2E users
I'm just not commenting because I am running SA
I'm just saying I am the wrong person to ask for advice because I gave up trying to solve it
Ok update on my situation: loosening the thumb screw didn't fix anything, now I'm actually having a different problem where I go to load filament in, it extrudes for 50mm, and then pressing extrude again has some weird delay on mainsail and I can see the extruder motor turning but the filament isn't getting moved down
tightening the thumb screw more doesn't change that, its like the filament is getting stuck after 50mm
Mine stops working correctly if the thumbscrew is too tight
in the same way mine did?
I don't recall, it was just erratic. But didn't make terrible noises, except maybe clicking
I’ve been super happy with G2E and WWG2. Only issue I’ve had was getting the tension just right. It takes fewer turns of the thumb screw than you would think. It’s surprisingly easy to crush filament
I'm not a fan of the manual's instruction to turn it 2 full turns from loose because its very easy to drop the screw, do you know the corresponding amount of turns from full tightness?
No, I adjusted it completely by feel. Unfortunately I can't give any precise instruction. Just that I played with it until it "felt right"
I’m taking apart my extruder to assess. This looks like too much tension right? There shouldn’t be bits of filament in the drive gear

Ok I think I figured it out
My extruder might be fine, I think there's just a clog in my hotend
or @dense island is it possible/common for the filamatrix version of this setup to get the filament stuck between the extruder module and hotend? Since there's no PTFE tube guiding the filament between the two anymore
if you are retracting molten filament back up yes it could get jammed into the heatsets ...
you would probably get more help on filamatrix specifically on the armored turtle discord in a help thread, being there's others there who have run it...
I don’t think the filament is getting far enough to melt, I thought it’s getting stuck at the heat set on the way down through the extruder
That would be helpful, is the server link posted somewhere?
github.com/armoredturtle/boxturtle
has the discord link
i will work to update it on my github too

Looks like you might just be extruding too fast. What material/temp/feedrate are you pushing there?
it was 10mm/s it didnt extrude at all at 5 but i could try again
10mm/s linear speed is 24mm3/s volume. Extruding PLA? Sounds to me like it's just outrunning your hotend. Don't know that anything is actually wrong. What hotend are you running?
i'm using a revo hf
So that's probably near absolute max (24 cubic, I didn't check the math btw) for a Revo HF. Do you have your heat high enough?
Anyways, not sure what you are doing, why not slow down if you are just trying to get it to work.
That is right around the rated limit for a 0.4 HF
On ABS, that is
PLA, you're looking at more like 18
In case anybody needs it...
https://e3d-online.com/pages/revo-nozzle-maximum-flow-rates
It's currently down
It loaded for me - people need it so often that I just go to my browser history to grab it
Probably cached then, 404s here
since switching to a Nitehawk 36, My G2SA/Drragonburner cannot print Matte PLA at all anymore. First layers start out great, and then ... slip/clog/jam city. Any ideas on how to troubleshoot?
Ugh, i take that back it is doing it with ABS as well.
it's unlikely that it is related to the extruder or filament, probably it's your hotend. So this thread if probably not bed. I'd ask in #1182811180566331432 perhaps. Maybe indicate which hotend fan you are using
BTT SB2040 will fit ok with g2e?
In a SB you mean? Just to clarify
Well, imo your extruder choice is important, let that guide you, not logistics around it. I'm sure you can make the toolhead board situation work
Isnt G2 a bit better then CW2?
Reduced artifacts
?
Is G2Z a replacement for the actual belt and pulley Z stepper motor gearing system? And if so what is the benefit to that?
No, only the drive motor assembly that is integrated into the foot, doesn't affect the belt setup otherwise.
It helps you brag that you have G2Z. With the new more compact feet (esp on Micron+), there's really no need
Only thing I could see is that if you are self-sourcing, you might choose G2ZXL instead of sourcing all the things to build stock feet. I priced it earlier, the cost approaches the same, close enough at least
Anyone know a mount I can print for G2 and my CANBUS cable? It's the BTT cable and BTT SB 2040
Oh looks I just use the PG7 version and the cable will fit
Do you still need this printed shim with the newer plastic-injected G2 parts from LDO?

Latest kits come with a metal shim
How is the G2E and TPU?
Can I install up to 3 shims here?

Kit came with 3, and with 1 or 2 the planets still touch the abs slightly
@severe acorn id say you need to push the bearing inside housing up to the screw heads and it will be fine.
another msg, not a part of a previous msg. idk why discord connects them :/
is it possible to get just the 9t gear to replace it manually on the stepper? from what i see on the cad it should be 0.5 modulus ( i dont even know what it means), but i can't fint anything with the right ID ( cad is 2.25, motor shaft should be ~2.5)
The stock motor is 2mm shaft.
You can replace the gear with one of these

Common 10t gear motors seem to have 2.5mm shafts and I haven't found a 9t gear for that size, which sucks.
@manic gazelle well this one is the best i found too. from ldo datasheet it seems like the shaft really is 2.5mm and spur gear for g2 in cad is 2.25mm ID...
but i guess i can try to get these ones and drill the hole a bit.
kinda sux i cant get 9t ldo/moons motor in Czech republic, like everything i found is ~$20 for motor and ~$40-60 shipping 😄

MyRigs
Spare Parts for Galileo 2 Extruder kit, Z drive kit and Z XL drive kit. POM Planetary Gears and Housing (1 x gear housing + 3 planetary gears) in injected plastic mold G2 Extruder Gear G2 Carrier Shaft G2 Z XL Replacement Motor LDO-42STH40-1684AC(RSS9T) 1.68 Amp, 4.5Kgf cm Holding Torque, 40mm Body and 9 tooth G2 Extru
@calm radish this one is best so far, but still €20 part, €17 shipping.
Hi All, I'm about to build a G2E and want to add a filament sensor. I have a standard StealthBurner, with Chaoticlab TAP, Voron Revo and Nitehawk-SB board.
I saw julius mod (https://github.com/juliusjj25/G2E-Filametrix-Lever-Switch-Mod), apart from the switch housing it has a protruded part on the bottom.
Does anyone knows if that protrusion will work with standard SB?

If you can do a bit of CAD, I'd steal the top half of the G2E in the Filamatrix files, and merge with the stock bottom half
That's what I was thinking, but I don't know if it is required though...
Most of the filament sensor versions will be made for toolheads with cutters, and thus have a heatset and a gap at the bottom. If you won't be using a cutter, I'd recommend modding the files to retain the PTFE tubing
That makes sense! will be doing that. Thanks
I did overlap it in the model and seams that there is no clash, so it would work, but it does makes sense to only use the top section of the mod.
I believe it is just clearing the gap that normal exists there. I use that version myself.
I do recommend adding sensors and the cutter option to a build as it makes loading and unloading the filament super easy even when done manually.
Do you think it's possible I'm getting print failures with the extruder losing grip then grinding the filament as the gear is getting too hot? I just touched the gear shaft and it's pretty dam hot, the stepper was at least 100c when measuring
I'm running 0.7A at 48v in a 60-70c chamber, I was only pushing 30mm3\s out of the lancer long so it should be within it's capabilities
I run my Galileo 2s at 0.6A and they always stall out before stripping the filament which I consider a feature so I don’t need to clean out the gear.
Hi,
Was not able to find anything similar, so will ask.
Could someone suggest why the Galileo2 tension screw touches the Z-belt on the Voron 2.4 250, and how to fix this issue? Thanks.
Which toolhead? Stealthburner?
Yes.
got any photos of what's happening? this isn't an issue on my v2.4 with g2


Of course, I can tighten it almost all the way. But as far as I know, you don't need to do this on G2.
Well no, you want it to be adjustable, that's its purpose
Sure, that's why I'm asking around. 3mm are unusable.
how often do you really venture out that far on the build plate though
I had been using this configuration for a year approx. However, a few times I failed the build because I didn’t mark the unusable area in the slicer and kept forgetting about it until the problem reappeared. Finally, I decided to ask folks for advice on this issue.
The easiest: to use a smaller screw + spring. But still, I wonder why I have this issue, whereas others don't...
If my g2e is skipping when loading filament at 25mms where should I start looking? If I use klipper screen to load it, I select 25 mm at 25 mms and the first time it works fine, the second it skips, the 3rd is fine, 4th it skips. It's like something isn't correct as it is repeatable based on the rotation... I've cleaned/changed me nozzle and ensured there's no filament dust in the gears but past that I am not sure where to start looking. Tension on the spring seems fine as it pulls the filament without issue, but I've cranked it down and loosend it and it happens either way
25mm/s is too fast. The first ones are working because the filament as not reached the hotend yet.
You can go fast then slow down if you are in a hurry
From memory 5mm/s is like 25mm^3/s
Around double, so closer to 10 -12 mm3/s iirc
Before I teardown my SB to see if somethings up internally, can anyone clarify these directions? Maybe I'm interpreting wrong, when it says 2 full turns in from fully loose does that mean from when it has engaged the threads of the heatset insert or 2 turns in from when I'm first feeling tension against the inserted filament?

Ok, thats what I had been doing. Hmmm, Idk whats giving me the grief I mentioned in gchat. Wonder if I have some shaved filament in there binding up the works or something
The assembly is so solid and robust I can't imagine that I've broken anything inside
relatively tricky to clean out a g2e without lots of disassembly
let me try to take a pic of a section on filament I saved, mine seems to have stripped some. Drive current is set per galileo spec, .6A iirc


Okay good it shows up, you can see where it stripped away at the bottom right in the zoomed out
That does look like very low pressure as well
maybe I need to ditch the capricorn xs for the filament path too? Doesn't seem like that is the issue though as I can push it through by hand, and it feeds successfully until the top side PTFE seats into the SB as described.
I was thinking the same, I'll heat it back up for now and try more tension again. I had turned it up some, but I was afraid to go too far and hurt something. Should I be less cautious and expect all that'll happen is it will start skipping if I go too tight?
If you go too tight you can flatten the filament (at least I have seen that on my WWG2). Capricon should be fine between the extruder and hotend.
Like I said, I'd tried more tension earlier and was still getting issues. I feel like theres no way I'm breaking this assembly easily, certainly not by running enough tension to start feeling some resistance, but 2 turns from just threaded in doesn't seem to be getting it.

wait a minute....
Ok, no nm, that doesn't make sense anyway. I was noticing the instructional for the thumb screw and this image do not show the captured nylon washer below the spring that exists on the actual tension screw assy. That's a necessary piece though since it's responsible for transferring the tension force to the printed part.

Hmmmmmm, that might have been my issue, I don't think I had done initial assembly and count of turns with a bit of filament in there. I notice if I lift up that manual tension release tab to take all the slop out between the drive gear, filament, and idler bearing surface, there is still a decent amount of thread to take up on the tension knob before the nylon washer makes initial contact with the printed body. I had been doing 2 turns from when initial thread engagement of the tension screw into the heatset with the body just hanging full open under its own weight, a relatively arbitrary zero point. I think this may be a good revised procedure for the instruction manual, seem more sensible to me anyway. I seem to be reliably feeding now with the PTFE fully seated in the SB, with about 2.5 rotations from the zero point I described.
Spaghetti for lunch, so far so good. Seems odd this issue just reared it's head swapping to larger ID PTFE, I don't think I ever had this happen with the Capricorn, I swapped it on the advice there's concern for too much drag and it was interfering with feed/retract.

picture of the actual tension screw for clarity

Hi, I have a G2E in the SB... and have already installed a new stepper and a new SB2209 without any success or improvement
If I extrude filament on the display, e.g. 25mm at 1mm speed I can hold the filament with 2 fingers and the stepper skips
When printing, of course, there is almost no flow without skipping
On my other printer I installed a Sherpa mini with the same hotend on the skin and the PLA at 220 degrees with a flow of up to 25mm³/s. The G2E skips at 12 with the same roll of filament
Already checked several times:
Stepper current 0.6A fits Config generally OK
The main shaft is not jammed and can be moved in both directions with a stepper without jamming
Spring tension on the lever tested various
Screws holding the bearing are flush
TMC Autotune for Extruder Disabled
Gears look good


Did you install the extruder gear the right way?
I've seen more than one, including myself, put it the wrong way. And the grub screw hole is not enough knurling to grab the filament lol
yes the gear points away from the motor so riffle towards extruder front
You can see here where the gear was already loose because I had just dismantled it for the 9th time

where was the kit sourced from?
there is a knockoff kit on aliexpress with really bad tolerances, is why i ask
I bought the printer from someone where the G2 also served me well
I then changed the SB board and made small modifications to the printer myself and at some point I had the problem from one day to the next
I have now freshly printed all the parts that have to do with the extruder.. everything is clean and freshly assembled.. unfortunately I can still hold the filament with two fingers with a little force and the stepper skips
TPU jamming up right after extruder gears on G2SA

looking through history I'm not the first to encounter this
has anyone redesigned the tensioner arm to take up some of the void where TPU gets jammed up?

Talking about the space circled in blue
I redesigned the tensioner arm and fixed it:

If you are having trouble printing TPU and it keeps jamming, print this updated tensioner arm and try again. You will have to press the bearing into place to get it to fit in the void with this new design, but it does fit.
I just finished a 12 hour TPU print with retractions and no jams
Well, I just spent weeks chasing down various possible issues on my printer only to find that the tension screw was way too loose. Somewhere in the 2.5-3 turns from thread engagement with filament loaded seems to be doing the trick for me. Hopefully this note useful to someone (or future me) at some point. At least it's a bit cathartic to mention here...
Hi I have some issue, which i can't resolve for a while. I had original CW2, which "skipped steps" or so at some point. Now I replaced it to Galileo2 and problem is still there

SB head with revo nozzle, 250 on petG, 215 on PLA. Still the same.
I have to push filament manualy for it to catch again. No matter manufacturer or type
I asked in elecronics forum if this would be a Power Supply issue, but they declined
?
Just joking with reactions
Under what circumstances - are we talking about loading or during a print?

Well, since you replaced the extruder, it may not be the problem, less likely now at least.
Ideas:
- too much drag from the filament supply - wrong size bowden tube, damaged, sharp turns, spool is hung up
- Nozzle could be partially clogged, wrong temp, feeding too fast
PTFE was out for last test and still same result. 0.6 nozzle has the same issue (brand new)
could it somehow be Pwer supply issue still?
If it canot deliver power on more load?
Please upload your klippy.log
No, if overloaded, probably the power supply will shut down, or brownout. I don't know the behavior of that PSU
We ask for klippy.log to see the configuration because looking at printer.cfg is not always accurate
Toolhead is on CANbus
i know that 🙂
I wonder why it happened after 450 hours of print time, and still happens on different filament feed (cw2 vs. Galileo2)
now I think it is something outside toolhead because almost everything was replaced on it
I've not built G2E, only G2SA - I assume the SB locking lever assembly gets fully replaces when you change over, yeah?
it only replaces feeding
so whole feeding mechanism of SB is replaced when Galileo is put on

this whole unit on top
i ready the manual, never mind then
Once you do a filament load, you should not be able to pull the filament out manually, can you?
nope
So the drive teeth are probably engaged
you can try increasing run current to 0.65A, or even 0.7A. That's pretty much the upper part of the range
I notice my rotation distance is 47.088, yours is 46.188 which incorrect
https://github.com/JaredC01/Galileo2
some people suggest to change run_current to 0.8 and hold_current to 0.5
We recommend no hold current set for any of the motors
mine is at 46.188 right now. tested
0.8A is pretty hot for that motor, I'd say that's not normal
thats what one of my friend say. Not me


0.65 was on CW2
Galileo suggeted to step down it to 0.6
yes, it's basically the same motor, the LDO ones pretty much always run what we need in the 0.6-0.7A range
LDO-36STH20-1004AHG(9T), so pretty much the same as everyone 😛
Toolhead board was replaced earlier withe same (negative) result
SB2209 from Biqu
I caught it happening again think this is because there's not enough pressure from the idler?
It's likely this was a result of the toothed hob not been aligned with the filament path. I was also getting losses with it rubbing on the bearings too.
I'll hopefully improve this further with a U groove idler

Anyone knows why my Galileo 2 does some squeeking sounds from time to time, like it has some friction somewhere, but when disassembled no friction to be found and no wear on printed parts, bite sign (?) on filament looks good as well, it's not a bearing or a gear in planetary, ruled that out by using Mobil grease
I just had this, fully rebuilt it after a good clean and applied new grease the squeaking is gone
Hasn't solved my issue but that damn sound is gone at least 
I've rebuilt it a few times, but not any better :/
My Galileo 2 is binding and I’ve tried shimming it and adjusting the scews that hold the bearing in but nothing has worked
It’s not letting me upload a video either, there’s no binding until I bolt the pieces together and if I attach my drill to the post and spin it slowly the two halves shift and the whole thing wobbles
Sounds to me like one of your gears is “off” by a tooth. It should spin with consistent freedom over multiple rotations.
I kinda find it hard to believe, I’ve separated and placed the pieces back together an ungodly amount of times now and let the pieces drop into place smoothly every time
To think that after every attempt not once so far has been correct is strange to me
I’m just full on reprinting the two halves to see if that changes anything, I can’t find any info anywhere as to why my kit isn’t functioning
any problems with these prints that would cause misalignment? These are the freshly reprinted ones, look about the same as my first ones


Used Voron settings on orca slicer in a p1s
Nothing jumping out at me here, when you get it all apart, take some pics of the guts and tag me. There might be witness marks that'll help tell us the story.
PSA: If you are using the Stealthburner G2E and are having issues like intermittent extrusion, failures to extrude, seemingly not enough tension on the hobbed gear, vague feeling from the tension knob (like the tension isn't changing when turned in), etc, inspect the heatset insert for the tensioner knob. I blame myself for the failure here, I don't think I ran it in hot enough the first time.
It's difficult to get a look at the heatset with the G2E assembled, to catch it in the act of yielding it's way out of the printed plastic as it's hidden by the rest of the body, the problem only revealed itself to me when it pulled out completely. After the repair everything seems to be working as expected, amazing what tension being applied to the filament instead of pulling out the heatset will do for consistency, oops 😅.


No visible wear


Maybe a tiny bit on the bottom of one part of the tri piece thing

I think I’m just going to have to sand one part of the printed parts, this face because with just one stock shim the 3 small gears rub on the bottom against that face, not sure that that’s enough to cause the wobbling though

Does this motor shaft look slightly bent or am I tweaking

Can't really tell from this angle, pop of the ring gear and look from the sides for perpendicularity to the stepper body. Nothing is jumping out on the parts to me tho, yeah, no witness marks
I couldn’t find a real obvious tilt from the side but something just looks off and this would completely explain my issue, I think I’m gonna buy another motor and test from there, if it’s not the issue then I just have another stepper motor to play with
I have realized this essentially means just buying a whole new kit, idk what to do
Wish you luck, and I thought I'd been having a hard time of it. Not that I see it helping the interference with the printed part, but maybe on the binding.
Are the planetary gears/bearings seating fully on the carrier pins? Mine were tight going together, it took a little gentle persuasion to seat them fully; I set the assembly, planetaries down on the bench, then gave a few LIGHT, small hammer taps through a brass (anything softer than the aluminum) rod at the center of each ear of the carrier to fully seat it down into the bearing. If you listen carefully, you'll notice the tone change to being more "solid" sounding when the bearings are fully seated. This is a great telltale to listen for any time you're seating a bearing to an assembly/housing btw.
Idk if you saw my messages in general but I bought a new motor incase that really was the issue 🌞
all of mine slide on and off pretty smoothly
Well, so much for that idea. Yeah, hopefully the new motor solves it for you, I can't see what would be giving your grief at this point.
Thanks though 🙏
I also re printed the part with the bearing held by the three screws so I’m going to try and re place that to see if it was the screw alignment
It looked like you had it flat as it should be in there, but yeah, now with a backup printed body on hand, maybe try running the screws down even a bit tighter on the old one, then recheck fitment. Bit of a hail-marry play, but worth crossing off the list I guess.
I honestly kinda wrenched it at the second attempt on my old part and never stripped the threads
New one I was just careful to align it the first time
Looks more centered this time


I’m imagining things lmao the old pic looks the same
About the only thing that jumps out as slightly suspect to me here is that witness mark circle at the center of your planetary carrier (on the planetary gears side face), like it was shimmed out too far from the bearing and making contact with the sun gear on the stepper shaft. Seems that could definitely bind or lock up the assembly altogether.
Yeah that was from when I over shimmed it by using both of the two stock shims
1 shim wasn’t enough to keep the gears from rubbing on the bottoms (in the pic) and two was too much and caused rubbing on the top so I bought more shims in .1mm rather than .5 to shim it properly

This is with one included shim, makes contact and rubs if the gears are slightly applied pressure to (when in motion any movement would cause the same rubbing so another shim is needed)
I think .7mm of shims was just enough to keep that rubbing away
I can’t post videos for some reason
@severe storm Wish I had taken more photos of my assembly, I don't see why those should be rubbing. Something does occur to me though, booting up the rig to double-check the manual, iirc it calls for pinching the carrier and hobbed gear inward against the carrier bearing/plastic body before tightening the grub screw. I wonder if you've been testing without doing that and the lack of support is allowing slop for the gearbox to bind. In that Pic it looks like the assembly is leaning off perpendicular ever so slightly by looking at the light gap shining beneath 2 gears and none under the closest in frame.
I didn’t have it on in that pic but all of my previous testing was with the collar on 🥲

Do you have the assembly manual open on your PC? The second half of page 36 is what I'm thinking of.
Yup
It is strange though, 2/3 planetary gears rub but one doesn’t
I’m sure it’s because of QC and how much the bearings are allowed to seat but I can’t imagine the designer didn’t account for that
(Also I rechecked and re seated the bearings in the planetary gears
I swapped the gears on the posts and now they all rub lmfao
Also the binding is mostly at one point, it rotates and then gets really locked up (you can force it through it just hurts the hands)
That bit sounds like youre off a tooth on the engagement.
😭
I pray to god that’s the issue
Also it never happens until I bolt the halves together
Nvm I can feel it lightly without the bolts
Follow the instructions on that; if it binds, pull apart, rotate a bit, re-stab, re-test.
I’m about to make a wrench for this thing my fingers
I designed a wrench lmao I’m tired of this shit

does anyone build wwg2 and find front shaft bearing lose ? mount space is 0.25mm bigger than bearing but it has movement on the motor shaft.
New motor came in and the problem is still not fixed
Still binding up
New one does have less binding though
Can you explain to me what the binding is like when the gears are off a tooth like is it an instant bind or does it have to rotate a bit to start binding
Like any details revolving around that would help because MAYBE I’m just super unlucky and haven’t gotten things aligned properly yet
This is probably exactly my issue, I did notice my planetary gears sat at slightly different heights

Guess it’s time to just really smash the bearings in
I’m gonna be very pg because I know how this discord expects you to be so I will say this: I’m genuinely disappointed in how difficult this extruder is to get assembled properly, fine details completely ruining overall function with very little foolproofing. The product appears quality but could use some work for future designs
Nothing has changed, I got two to 5.07-8 and the other will not compress anymore than 5.15, the post the planetary gears sit on has different heights on each gear post too so I managed to get all the gears to the same height but no improvement overall
You should feel the binding pretty quick if there's misalignment, I never had mine go together misaligned so I can't tell you exactly what to expect with this assembly, but as small as the sungear is, it shouldn't take much rotation before a gear being a tooth off wants to lock out the assembly. I'd recommend doing what I said about fully seating the gears to the carrier, set the carrier assembly gears side down, give the center of the back of the carrier ears some gentle percussive persuasion through a drift that's softer than the aluminum, ideally, I only had steel but just a few light taps was all it took to fully seat the bearings to the carrier without leaving a mark on the Al.


Thank you I will try the hammer method
I used my Nalgene bottle with water in it as a hammer
Didn’t get any improvement unfortunately, I’m gonna order new plastic pieces for the bearings and a new aluminum shaft
I’m gonna be able to build a second g2e eventually
On the bright side, you'll have parts for G2SA or WWG2 on standby for another toolhead. I'm not sure I'd qualify that as a proper hammer and drift, doesnt really focus the force/impulse the same, you dont have a hammer and punches?
I don’t think I’ve got punches at my moms place and we’ve only got rubber mallets and standard steel hammers
8lb maul too
What’s wwg2?
Also how much force do I really need to apply? Some people in general said it sounded more like a factory defect with the shaft heights being different
(Also for seating the bearings into the planetary gears I used my screw driver with no bit in and pressed HARD onto both the bearing end and the gear cover end, there’s no more movement for those two parts to make)
You want to do it on a solid surface too, if your hammer has give to it like rubber, or said nalgene, and youre working on a flimsy surface that flexes, the energy you put in goes to flexing all that instead of being delivered to the target. Bench block like this makes a good solid anvil to work on. A steel hammer would work fine, just dont go ham with it, light but sharp taps are what seat bearings, dowels, and pins best in my experience.

That's a good tool to use as a drift/punch, even better if you can pull the steel shank out of the handle and tap on the back of that with the hammer. It sounds like you've done enough to have them fully seated, more sharing experience and theory.
I think the design of the extruder isn’t supposed to include this level of compression ☹️
I’ve got new ones ordered anyways we shall see if there’s any difference
If not I shall attempt to harness the pressure of ocean depths to sink these bearings
Thanks for all the help btw and continuously attempting to help
Its not about compressing anything here, its more about the light/sharp taps overcoming the static friction so the bearings could seat on the carrier pins. The tolerance was tighter on mine than what I could overcome with my thumb once they stopped at most of the way seated, I didn't snap the first couple together hard and fast enough by hand to keep them under kinetic friction and fully seat. Friction is weird like that, it takes more energy to get something moving than it does to keep it moving.
Do your bearings easily slide on and off the shaft
Mine can like straight up fall off the shaft
@severe storm Measure things with calipers when the new parts arrive, production mistakes do happen, its looking like you may have just gotten "lucky" at this point. We've done pretty comprehensive troubleshooting on the entire assembly, I think its safe to entertain the possibility.
TMK, you dont need to do the run-in with a drill step anymore with the injection molded gears and ring gear. I wonder if maybe you were a tooth off initially, did the run-in step, and the drill just muscled through it without you noticing, blew something out in the process.
No, they're ON there, I'd have to drive them off the carrier with a hammer and punch probably.
Dang yeah very different from mine
I didn’t run the drill until quite a bit after messing around with the pieces by hand, I’ve been using my fingers and printed wrench since
I am determined to get this thing running because it still appears to me as the best extruder for stealthburner currently available I’m just running out of options
Hoping that the new shaft is the resolution
I liked everything about it for stealthburner, WWG2 looks even better and has a nice aesthetic to boot. @glad jungle does good work, no surprise he had a hand in it.

GitHub
This is WristWatch, a standalone extruder designed by @bythorsthunder WWG2 is built as an alternative to WristWatch BMG etruder - but it uses Galileo 2 insides for pushing filament. Development sta...
Pretty cool that it uses the same internals so you have a choice between the two
It says same mounting pattern as orbiter 2, does that mean it’s compatible with stealthburner or is it more focused towards the xol toolhead
Yeah, it's for other toolheads that arent built into a standardized package like stealthburner. Can't quite call them aftermarket toolheads when we're making em at night
I'm having the same issue @severe storm . Purchased LDO kit from OneTwo3D, reprinted all parts 3 times now thinking I was having tolerance issues, but no luck. All runs smooth until I tighten down the two bolts, and the shaft starts locking up. I've left the bolts loose to the point where the shaft spins freely and continued with assembly, but there's very minimal extrusion force. Frustrated to say the least. CW2 was a doddle compared to this
Ill let you know when my new shaft comes in to see if that fixes anything
Cheers! I'm gonna disassemble in the meantime and try as @untold thistle suggested with hammering the planetary gears down. They seemed fine at first, smooth on and off
I've measured my planetary gears and they measure 5.05, 5.09, and 5.15. I also checked the planetary side face of the shaft, and you can clearly see the ring of dark grease, so something isn't lined up properly. After hammering they're at 5.05, 5.09, and 5.09 - really did require a solid hammer, bench, and a good whack to get it down. I tried doing it on my desk at first and measurements didn't change much. Torqued the bolts on either side as equal as I could and now its soo much smoother! Hopefully the thing actually extrudes more than 8mm^3/s now.


Hmmm, sounds promising. In @severe storm's case, even if that alone doesnt get it, bringing the bearing down a bit further on the planetary carrier may move the tolerances around such that shimming the carrier further out will put the carrier in the goldilocks zone.
I had hope, started off at 15mm^3/s, and after 10 minutes of printing it gave up extruding at all. Tried a flow test, and it'll extrude okay upto 10mm, then it turns inconsistant. I've tightened the idler so it grips the filament only just enough to skip if I hold it by hand, so I don't think its a slippage issue, but also no sign of skipping?
Did you see my woes with not sinking the tensioner heatset* at a high enough temp? Sounds like yours could be yielding out of the printed body too, worth crossing off the list.
That’s literally almost exactly the sizes of my planetary gears too that’s crazy
@dusty wadi
My only issue is that even if I get the planetary gears equal there is a clear issue with my planetary gear shaft
I can move the gears around and they’ll all sit at different heights, if I set them on the right posts -even with the one gear being .1mm larger- I can get them all about equal in height but the binding is still there which tells me my shaft might be botched as others have noted too
I’m gonna wait and try the new one and if that doesn’t fix the issue I’ll try the hammer method and see if that works, if not I’ll get new bearings too because I have a new set of planetary gear caps coming in too
I’m essentially just replacing every part at this point until I find the issue out of spite
I’ve just had a look, and it looks seated in there, but I guess I’m gonna have to disassemble it again to properly check. This is driving me mad.

I don’t think I’d have the patience, kudos to you!
I opened it up and the heat insert was solid. Had some dust in the extruder teeth, cleaned it out and extrudes fine again. I get 13mm^3 on flowrate calibration, which is still less than my cw2 :/
New shaft came in and there’s already a large improvement in the binding, still has binding though for some reason
The bearings once again slid on easily, slightly tighter than the last shaft but the heights of the posts are the same this time which is already two large improvements
I’m not sure how much of a difference it’ll make but I’m going to try the tap method
Somehow the binding got worse (I don’t think that was the actual cause of the binding increase)
@untold thistle is the shaft supposed to be able to spin completely freely when the two halves are split?
NOTHING I DO WORKS
I’m essentially just getting slight improvements with each part I replace but nothing completely solves the issue
I’ve noticed two things
All of my planetary gear caps except two put the sizing to over 5.1 with the bearings installed, all of my bearings are exactly the same measurements.
IM LOSING MY MIND
Ok the bearings measure the same down to .01 mm but one of them very clearly fits differently into the caps
I got all the gears to a range of 5.07-5.11, that’s .04mm of difference and I still have binding so I’m officially ruling that out
Dude I just don’t know what to say or attempt anymore
I’ve replaced every single functioning part in this section except for the back collar and the bearings themselves, the bearings are all equal in size so there should be zero issue there and I heavily doubt the collar is causing it
Is there supposed to be a small amount of play between these two halves? Am I just over tightening???

I have no binding if I give a little gap I pray to god I’ve just been an absolute idiot this whole time

Galileo2 was just released! Let's hang out with the creator, Jared, as we assemble and install the public beta LDO kits for both the Extruder and Z Drive version of the setup!
Project Github: https://github.com/JaredC01/Galileo2
-------------------------------------------------------------------------------------------------------------------...
So it's up a running now? Fruastrating you've had to replace every part before figuring it out. By leaving a small gap do you mean between the motor ring gear housing and the printed rear half, or between the drive gear and printed part?
It's confusing because it seems different versions of the assembly guide have contradicting instructions. The guide I have says to press the shaft in from behind (on the planetary gears), and then tighten the drive gear down onto the printed surface. The guide in the video says to press down on the center of the shaft (towards the motor?).


My extruder has 0 play, I wonder if that's causing me to have misalignment between the gear and filament. The extruder keeps slipping and grinding filament
First one, but no apparently it’s not supposed to have any gap as of some of the people in this discord so I just bought a different brands extruder
I’m going to be honest with you, I’ve seen several different manuals and assembly methods and all sorts of different contradicting information and not a single person has been able to identify my problem despite supposedly a lot of people using these
My experience is that the design is super finicky and even though there’s some improvement if everything happens to work out properly other people have had problems with the device being finicky too. I personally believe after all the effort I put into mine that if it isn’t a quick fix just grab a different brands extruder, there isn’t enough people around that really know the ins and outs of the possible problems to make it worth your while trying to troubleshoot
Also I either every single time misaligned a single tooth or never had that issue (and I seriously mean I installed the two half’s well over 30 times and let them smoothly drop into place), I’ve also not seen an actual example of that binding happening so I have no clue what I’m supposed to be comparing to
Well while first assembling my extruder i did force it to misalign and you can feel the difference, but i don't know how that shows in the prints. While assembling I really felt like this was the only "tricky" thing, but also not that complicated to get right.
I build 2 and didn't have any problems with the design (except for the shaft getting really hot from the motor and melting my pla -> wish meant a rebuild / disassembly of the extruder).
I even tightened the first one so much the abs plastic part "split", but it still worked fine like that.
But yes it's also true, at least on my trident I didn't really see a big improvement in quality, so either my cw2 was really good build, or the rest of my printer is bad enough for it to not make a difference.
If you still want to find the cause, i would recommend to try and build the WristWatch-G2, I found it to be simpler to build and it might also be easier to find the problem with it, as you have better access to the shaft and can spin it by hand
I’ve honestly also debated asking if someone just wants to pay shipping for my parts to see if they can get it working that way it’s not going to waste, I’m sure it performs well when assembled properly and I feel like (mostly just heavily hoping) that I’m doing something wrong
I may try the wristwatch first though
For sure, not bolting down the two halves together reduces the friction inside dramatically for me as well, but I'm sure there are some consequences to this. I rebuilt it, again, this time pushing down on the shaft and then just securing the extruder gear in place - probably gave me 0.1mm of play in the shaft, but the extruder seems to be performing much better this time. Layers are much more consistent now, maybe even better than my CW2, and no filament grinding problems.
I really shouldn't have spent the money on the G2E kit, the performance boost over CW2 is nowhere near what I was expecting, and the issues with assembly are nothing compared to CW2 either. The reason I purchased the G2E was because people are raving about how much easier the assembly is. I didn't have any problems at all with CW2 assembly, but thought I was too stupid to understand which issues I had missed - so if G2E is so much easier to assemble, then maybe I could expect a dramatic improvement in performance vs CW2
I played around with the collar height a little bit but couldn’t really get much difference, my main thing that I’ve noticed with the binding is that it’s typically near one point and makes one entire half shift horizontally to get past the bind
Very unfortunate, I’ve heard it performs better too and in theory it makes sense but I just could never get mine assembled. Mine was supposed to be a full extruder replacement because my original kit gave me a mix of parts for two different extruders
I'm going to try reprinting G2E one more time, and see if I can get anymore performace out of it. But Im not holding my breath. I think I'll probably move from SB and switch to the wristwatch
Best of luck but I second on you not holding your breath lol, I reprinted parts and saw zero difference-all of my small improvements came from swapping the non printed parts
Strange that some aren't having any issues at all. I guess its down to variations in print quality and kits, but if this extruder is so sensitive to tolerances, then ther'd be alot more complaints
Honestly, I've printed the parts 3 times already, so this'd be the fourth, but I really don't want to go back to CW2 after this amount of effort. Sunken cost fallacy, and insanity at its finest.
Honestly I really do feel like it has 3 main issues, 1. Not enough data on problems that were ran through and solved 2. Assembly could be more fool proofed 3. Oddly tight tolerances required to function
Yup I getchu, I almost have a second g2e lol all I need are bearings a collar and the pin
The WWG2 clicks when I emulate extraction <->retraction. The clicking occurs at certain positions, but if I rotate the knob slightly, the clicking stops. I have assembled and disassembled it hundreds of times and have even reprinted the parts, nothing helps. I have no idea why this happens, what is causing it, or how to fix it. Maybe someone can help? 🤞
So random thought when I was pondering filament sensors on my WWG2….
Could I use a tiny encoder like a mouse encoder, on the bearing side of the extruder, as a filament encoder?? One like this:
Since the bearing side isn’t powered, it would only trigger if filament is actually moving…

The encoder can be commonly used as long as the encoder of your mouse have the same height with it (Distance from board surface to center hole) So far known for: for Razer Deathadder 2013, for Razer Krait 2013, G Pro Wireless, M170, etc., Specifications: Height dimension: 8mm Customized high life...
does anyone know how much the G2E weighs?
also what is the benefit of the WWG2 if its the same insides as the G2E
g2e is for stealth burner
wwg2 is for not SB
Do you mean the G2SA?
I don’t have an assembled weight, but I happen to have the printed parts for both here
G2SA is 23.62g with heat set inserts
WWG2 is 22.83
I am trying switching to the WWG2, because I was having filament jamming issues with TPU that I wasn’t seeing with my G2E stealth burner. Not 100% what’s causing what, but the exit path looked like it has a little less space for it to squish out of the way
I've made some progress with this. It turned out that (for me anyway) the 3 screws holding the bearing in the planetary gear assembly are too proud no matter how they're screwed in, and once I start tightening the assembly together, they are pressing on the planetary gear shaft and lock it in place. After running the extruder for about 50 hours with the assembly loose, some very slight marring has started to show up, but it is very slight, so no chance of seeing this when just assembling. In every printed version I have done thus far, these screws have never held the bearing in place anyway, and they just sit next to the bearing, so I just removed them (I can't imagine any real issue with removing these, and expect the shaft just holds the bearing in place just fine? After removing the screws, there is normal resistance in the gears, I can tighten the assembly as much as I like without any binding, and now there is about 1.5mm of play in the shaft allowing the drive gear to self centre on the filament. I've not done a max flow test yet, but it's just completed a PLA print with no issues at 15mm^3/s, and the grinding issue has completely resolved.
My screws looks exactly like this, not really clamping the bearing down, and no matter how much I try the screw them in (down as tight before stripping, and stripped), they always caused high resistance, or just lock up completely.
That’s awesome, yeah I figured they didn’t do much of anything considering the edges of some of them didn’t even make contact with the bearing but I didn’t want to stray from the intended design because I don’t know that much
@viscid basin this is probably the solution you’ll have to do
🫡
Yeah I kinda put excessive force into driving mine in at the end too
Also I never had any movement/play like they describe for assemblies so that would make sense that the screws were taking up that room
The recess for the screw heads to sit in always seemed slightly too shallow I’m happy a solution has been found, good work!
no, the G2E. i think its like 150G but i cant find a definite weight on it.
sorry for the late response i waS really busy eysterday and couldnt do anythijng
My g2e just started making this noise today 🙄 any ideas? Changing tension doesn't have any effect. Sounds squeaky. Not skipping or affecting print. Probably only a couple hundred hours on it
I want to publicly admit I was an idiot and somehow misaligned the gears every single time
I think it was the main issue. The bearing wasn't fully recessed, causing excessive friction on the gears. They were catching on a crack, causing slight binding and a slight misalignment. When the misalignment was corrected, the gears made a slight clicking sound as they released from that area.
Crazy.

Crazy detective work there!
Finally putting together my LDO G2 extruder kit and having trouble with the gearbox assembly.
The ring gear housing will fit onto the stepper but won’t “snap” as instructed on page 30.
I’ve tried pressing with my fingers, using 2 pencils and applying downward force with full grip too. No luck.
Am I missing something obvious perhaps?
It does sit down flush though. No rocking. It just isn’t locking into the stepper.
It can be easily removed though.
I don’t remember mine really snapping so maybe it just a looser fit now.
Thanks. I’ll proceed and see how it goes
So long as it’s flush to the base of the motor and not hovering above you’re good
One of mine was too tight and wouldn’t fully sit into place so I had to take a tiny bit of the edge off with a razor blade
Is it possible to change the gear of the motor? What's the kit recommended LDO?
#afterburner_and_stealthburner_questions message
it's really difficult. much better to get an "official" 9t motor
I have a CW2 on a voron 2.4 should I upgrade to G2 and why ? is it better ?
@tender hearth I replaced my CW2 with G2 a month back, and it is performing well, eliminated some of the extrusion artifacts I was getting. I had tried to tweak and tune the CW2, but didn't trust that it was working well. I also have a SV08, and have had a lot of success with it (the stock extruder is planetary as well). I used the parts from the CW2 to build a WWBMG for the Dragonburner going into my Stealthchanger build but haven't had a chance to test it yet. If it doesn't work well I will probably put another Galileo in it - for the price, I think it's a good extruder.
Mine definitely snapped, and it held fast. I'm sure I could pull it apart if I tried, but I think something in your kit is out of spec.
I’ll say so far it seems to be holding and I to disassembled it the other day and it held on correctly.
Fingers crossed it’ll be good
So I've been on a bit of a mission to "have it all" in a Stealthburner. I'm switching from CW2 to G2E, I've got a custom-designed XY limit switch on-board the Stealthburner carriage, a beacon probe installed, a 3DO nozzle camera, and I'm working on a custom 3x USB umbilical via a CNLINKO connector. The only thing I'm missing at this point is a filament run-out/tangle sensor.
Right more, I'm looking at whether I might be able to cram the Orbiter 2 smart sensor into the G2E. Before I go down this path (or look into doing something entirely custom), does anyone know of any other filament sensor mods for G2E?
I already looked at some of the ERCF mods for their filament sensors, and unfortunately they all seem to put their sensors right where I put the PCB for the nozzle camera. I could potentially move this PCB to exterior of the Stealthburner, to the rear, as an add-on to the CNLINKO mount, but I'd prefer not to.
Hi, did anyone here assemble the galileo 2 standalone extruder?
In the ldo kit they give you 2 labeled washers that i assume go on the shaft before the main body.
They also give you 3 unnamed washers that i assume go between the bearings and the drive gear.
Am i correct and can anyone tell me the order of them, also my drive gear if pushed to the bearing is below the filament path and wouldnt grip the filament.
Thanks!
Nope, nobody uses SA. jk
Did you follow the instructions are you just winging it? I suggest reading the manual
the washers are not specified in the manual and are not used in g2sa
i guess if one wants to know, you might compare to G2E which is why they might be in the kit
I like G2SA quite a bit, not sure I can convince myself to switch to WWG2
i do like it, it's a nice little unit
I did read the manual but im confused because in my case the drive gear does not align with the case, also it doesnt show that they put the washers on but they show some type of ring on the shaft
Also, if you slam the gear on the bearing it will touch both the inner and the outer ring of the bearing and that defats the purpose of the bearing
I also built the regularz stealthburner version of the orbiter and i dont remember using the 3 washers
You can post pics and we can give suggestions. It's been a long time since I assembled mine, but I don't remember any problems with the way the manual said to do it
What you used for other extruders isn't relevant
LDO normally includes a spare of everything and I only remember one washer in G2E so I’d assume the same with g2sa.
They are in 2 different bags, 2 in one and 3 in the other
And i still dont know how do you get 1-2mm of play in the shaft
For anyone printing their G2E parts, I recommend printing spares of the Front Bearing Holder as it tends to break. I put like 100-200 hours on my extruder until last week when my prints started turning out very weird and my extruder was groaning intermittently. I found this to be the cause


Oh that sucks
When reassembling mine I broke that piece myself. Looked like the seams were around that part from my slicer so I took extra care to orient it away and may be worth keeping in mind when/if you reprint them too
Yeah the seam should be in the little V channel on that part
My seam was oriented correctly and the part broke anyway
Hey guys, noob questions:
1- how is the blue part inserted?
2- How is the bowden cable going in? Any chance I could see a video of pulling out the PTFE tube?
3- should I press down more the collet? I saw other builds looked more flush. I am not sure if I can push mine more.


What umbilical mount is best with PG7?
Blue part should snap in. Requires some force to get it in there. Should be clicky and springy when installed right. As far as bowden, just push it into the blue part. To remove, push down on the blue part and pull the tube out.
This is the umbilical I use. Using an SB2209 RP2040 CANBUS toolhead board. This is my remix, since I'm using the stock BTT CANBUS cable and needed a slot for it: https://www.printables.com/model/1173861-pg7-mount-for-galileo-2-extruder-with-wire-slot-fo

I took mine apart for some Filamatrix upgrades, and this part was broken as well. However, the filament drive gear had become loose on the shaft, so it was moving up and down (relied on the pre-applied LDO threadlocker and shouldn't have). I'm pretty sure this is why the bearing holder broke. Reprinted a few of them on another printer and applied plenty of fresh threadlocker to that drive grub!
And yes, it's pretty thin and easy to break, so I'd second the recommendation to print a few of them up front.
Oh that's a good point, I should double check my drive gear tightness too
do you know where to find that slotted toolhead cover?
Exactly what I was looking for! Thank you
It is for a fan to keep the RP2040 cool: https://www.printables.com/model/984617-galileo-2-cable-cover-with-3010-blower-fan

Glad it helped. I tried several of them and this one worked the best for my setup.
Another one https://www.thingiverse.com/thing:7284335
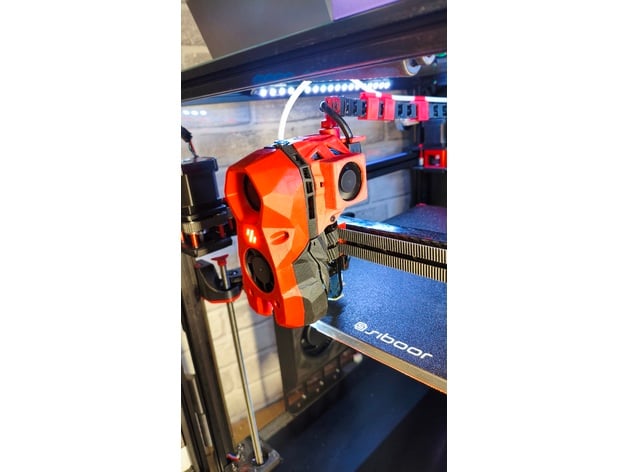
Thingiverse
This is a modification of the original cover included with the Galileo2 extruder kit, aimed at upgrading the cooling for the StealthBurner PCB. It utilizes a 3010 24v cooling fan.
Hey guys, I'm interested in making the WW-G2 for my machine. There were a couple people saying that the WW-BMG would be a better option. What would you guys say? I'm gonna be switching the entire toolhead to an A4T and a dragon ace volcano
"better" depends on your goals. WWG2 is a great extruder with very consistent extrusion quality. WWBMG can suffer if you have non-concentric (cheap) gears. RIDGA BMG gears can help mitigate that, and can give very good results. In the end, there's a bunch of really good extruder options out there these days. I wouldn't get hung up on "best", just go with what checks enough boxes for you.
Thanks man. I really would like more consistency with my stuff. I also was gravitating towards the ww-g2 because I see a complete(minis the prints) kit including the right motor for it. I feel like I'm venturing enough learning the whole toolhead, learning how to consistently make stuff with ASA, and starting a V0.2 build. Any complete kit or already assembled product that just works™️ is a welcome sight for the time being
Hi, I am wondering, How do I know, if the G2SA has good grip on filament, because it tends to slip in the extruder when doing first layer squish, leading to tearing of some patches. I might have high friction in PTFE and bad angle/folding of ptfe doring print causing it to be too hard to pull? I dont know where to look, when hotend is not there it is almost alright, extrusion calibrated, but during print it tears still... Any suggestions?
Have you tried to tighten this. Disclaimer: I have not yet installed the G2.

I feel G2 has decent grip, that's not been my limitation yet. It doesn't drive from both sides, so it's not gonna be a superstar but it's not a problem with typical filaments (not TPU for example) and reasonable speeds
hey guys, im looking to switch my stealthburner extruder from orbiter 2 over to the G2, i have a couple questions, how is it with flexibles (95a tpu), and can it have filament sensors so it can be used with an mmu, such as box turtle. and whats your opinion on the reliability
I have both but have not tried TPU on them. Orbiter 2 is theoretically better because of the drive gearing
As far as use with a filament changer, it can work but most consider it "hard mode". It's not as reliable for changes as CW2. The WWG2 or G2SA fare a little better in that regard. If you're up for an adventure, you can find the FilamATrix mod with filament sensors and a cutter for use with a filament changer. Note: with a BoxTurtle and AFC, the toolhead sensors aren't actually required.

GitHub
This is a mod of the Voron Stealthburner which adds a filament cutting possibility! - thunderkeys/FilamATrix
Don’t know how TPU would fare with ramming though
TPU in a filament changer is a recipe for insanity IMO
tool changer ftw
ah good to know thanks
There is some "free" volume in the extruder, near the filament path, where people have modded it to have microswitches to detect filament presence. But I have not personally done this. At least not for microswitches. I did carve out some of that volume to make room for 3DO's PCB for their nozzle camera, so I can confirm that while there is enough room for a microswitch, there really isn't much and you'll be cutting the walls pretty thin in some places if you aren't careful.
G2E is the extruder for when you want a "true" Stealthburner toward tool head, but want an extruder that's better than CW2. If you want filament changing and/or flexible filament, you're probably looking at a complete redesign of your tool head, imo.
Running a Boxturtle with G2E. I converted over to this one that uses D2HW-C201H microswitch and an MR63ZZ bearing. This one has been flawless after hundreds of filament changes. I originally ran the FilamATrix one with the 5.5mm ball bearing and a different switch, and found it unreliable. However, the Box Turtle team is now recommending ramming vs filament sensor now. https://www.printables.com/model/1243724-galileo2-d2hw-for-filamatrix-filametrix

Has anyone had much luck with the pushing force of the G2 with high flow hotends such as the goliath or Chube?
I find that even at 48v and 0.7a it struggles quite a bit
@final shadow was testing with Chube some time ago
Have two Chubes on two printers... G2 on both. Depends on the filament though. 30+ cubic with PLA? Not gonna happen even with Chube.
Yeah, I'm struggling to get more than 30 with ABS on a lance rlong
I'm tempted to switch to a LGX gear with a u-groove idler
I can get 60+ with proper ABS on Chube and G2, no issues.
Sparta3D ABS+ doesn't flow as well... usually get around 45-50 tops with it.
This is my own ignorance here, but you can get higher maximum flow rates out of ABS than PLA? Am I understanding this discussion correctly?
Just surprising to me, since I would have expected PLA to flow much easier given its lower melting point than ABS.
Oh fluids....
Yes, I've not experimented myself, but charts show that ABS/ASA vastly outperform PLA for flow rate
(not a subject for this channel)
But I wonder if you want to print PLA at 40 cubic, can you start blowing pre-chilled air at it?
This is a wild guess, but I'm guessing that, when molten at their ideal temps, ABS/ASA has a lower viscosity than PLA. But this is a wild ass hypothesis. But then nozzle cross sectional area(s) and internal geometry would begin to play a big role, too (i.e. how small could you make a fluid channel, so you could make more total channels, for each polymer before resistances outweigh the thermal benefits?)
But, yeah, veering far off topic
I am trying to insert the filament but it is not getting gripped? I can hear the gear turning. Is there something that needs to be pulled out to pass the filament in?
Nvm seems like polarity is reversed lol
The default arm for the chain is too high up for the space I have on my wiring. I've seen this question asked before but I could not find and answer; Is there a arm that it a bit lower that someone made?
Not that I've ever seen. Seems like most custom strain relief designs for the electrical connection G2E are umbilical ones. I suspect that most people, by the time they're swapping extruders from CW2 they have already ditched the XY chains for an umbilical.
I was thinking about that too... but I think I will just hold off until INDX happens at some point
I've got 2 identical Anthead WWG2 extruders, but one is skipping, and only works intermittently. What are the usual causes for this, and what could I do to improve the performance?
Assuming you've checked the tension is correct? I would begin to suspect the coupling between extruder gear and something was off. Either the grub screw has come loose, or the bearing supporting the other side of the drive shaft the extruder gear is on has shifted, or the bearing that the extruder gear presses against has bound up. Something along those lines.
Your extruder is either gripping the filament too well or not well enough, or something is causing the filament to bind up in its path.
I think the actual issue is the hotend. It's a Rapido 1.0, and I've had to clear many clogs in the heatbreak section. I've got a Delta 2510 which West3D carries. I'm probably gonna switch to some non-UHF nozzles in near future, Dragon ACE Standard when they are back in stock.
Yeah. I'm in a similar boat right now. I'm 100% going multi-material at some point - I want to be able to do supports in alternate materials from the prints - but right now I'm waiting to see what the real performance of INDX is before I decide between IDEX, Stealthchanger, Box Turtle, and INDX. And I want to see what the real mods end up looking like in Voron, first, too.
So for now, I'm just going to finish up my umbilical mods, and wait to see how INDX does before making other tool head changes
Yeah. Back when I was spending more time tinkering with my Prusa Mini, I also found most filament skips and grinding having a root cause in heat creep. A titanium heat break solved the issue so thoroughly that I haven't had to tinker with that printer in a long while.
If they make a titanium heat break for your hot end, it might be worth it to give that a shot before you do a major surgery like changing the whole tool head for a new hot end
That's fair. I'll look around.
Wait, heatbreak, not heat sink. It just reduces the heat creeping better than typical materials? Not sure if they'd sell just that heatbreak cause it seems to be a complete components, heatblock + heatbreak.

Yeah, heat break, not heat sink. Titanium has a very low thermal conductivity, so it makes an excellent heat break (it's also very abrasion resistant, making it good for GF/CF/WF/sparkle materials). In enclosed printers, heat breaks are more important because the higher ambient temperature reduces the effectiveness and efficiency of heat sinks.
A better heat sink might still help, but a better heat break will help more. Keeping the heat in the nozzle in the first place is better than trying to pull the heat out after the fact.
Seems like there are replacements, though that seems to be for broken heatbreaks as it seems like a somewhat common issue. Not seeing them claim it is made from any different metals.
Does the other G2E use the same hot end? If it does, maybe there is something wrong with your hot end/ heat break?
The other is a Rapido 2.0, so not exactly, but similar.
Do they typically run at the same chance temps? If not, does the one that skips have the hotter chamber?
Apparently they each report over/under, but w/o inserting a separate temp sensor I can't verify, and w/o the nozzle idk if it would be reliable.
But that sorta runs counter to the heatcreep I've seen.
I'm building a A4T with XOL carriage and EBB36 v2 board. Want to add the crossbow cutter and G2 extruder with gates sensor.
I'm between WWG2 and G2SA. But couldn't find much information on what's the difference between them.
Any suggestions on:
- Which version of extruder to use
- Mod for the sensors
- Controller mount; I saw that steve had modified one to use with cable chain, don't know if I can use that one as well
- Any thing in particular I should pay attention for the integration between toolhead, extruder, cutter and carriage?
I am building that right now, I went the WWG2 (model with 2 Filament Sensors) route with NH36.
Don't have yet any feedback as I need to finish installation on the printer and use it
Which model for the WWG2 have you used. I found this one here that seams reasonable https://www.printables.com/model/1186399-optimized-wristwatch-g2-dual-filament-sensor ... but still building as well

I used this one made by bythorsthunder :
https://github.com/bythorsthunder/Voron_Mods/tree/main/Wristwatch_G2_Dual_Filament_Sensor

GitHub
Contribute to bythorsthunder/Voron_Mods development by creating an account on GitHub.
But you can also find this one on the discord
I need to modify the Electronics Bay now to install everything, though I am debating on getting a Leviathan Board to free some space (using Octopus v1.1 rn)
Mine came with Leviathan, it's a nice packed board. I was using Nitehawk SB and am switching to EBB32, I will replace the USB adaptor, but don't know if it's required.
I have an old Galileo 1 that I disassembled and a motor for the new Galileo 2 (so with 9 teeth). Can I use the gears of G1 for G2? Or do I need to buy the gears etc for G2? Sadly the LDO G2 kit seems to be sold out at most shops (in my area). So I can't just order it.
Sadly, no, they are not interchangeable.
Thanks for the info
Does anyone sell a hardware only kit for the g2e? I know filastruder has a listing for it, but they are out of stock. OR better yet just the 16mm drive gear?
nvm i found that fabreeko and others sell just the extruder gear
Don't forget it needs a 9 tooth gear on the motor.
hi, I've got a bit of a problem with my g2e: when trying to extrude it's kind of stuttering. already looked inside, grub screw is fine and there's no debris. this is a new build, printed a Voron cube fine and started stuttering after that print. I tried changing the tension while it was extruding and it started to stutter as soon as it was tight enough to actually move filament
are you able to see if the motor is turning at all when unloaded?
if it's still stuttering/making weird noises then, it could be that the stepper motor is miswired
yes, it turns. I put a line on it and I can see it jumps back and forth when trying to extrude
played around a bit more with the tension though and it seems to work again. is it safe to say I fixed it or should I look at anything else?
would still be cautious. did you do anything like shorten the stepper cables?
I did shorten them, yes
what method did you use to do that?
also, have you made the recommended changes to your config (esp run_current: 0.6)
i cut the wire in two places (to remove a piece between the motor and connector without having to redo the connector), then stripped a bit of the cables, held them together (not tip to tip, overlapping), soldered them together and put shrinkwrap around them
and i did make the config changes, yes
Is the G2E considered more stable/reliable than the CW2?
I'm working on pure reliability, maintenance for my 2.4 and CW2 has been one of my more annoying upgrades so looking at what alts are out there and G2E is the best drop-in for existing compatibiliy with SB and my CAN setup.
what particular issues did you have with the cw2? that might help inform a specific answer regarding g2e
Primarily quality drop from CW1 but this week I had to idler gear just pop out, no idea why as it went back into the arm fine so no cracks or anything.
Would I be right in saying that with all the videos on dual vs single gear that single came out better for quality?
Not sure if this is related to extruder to be fair but this is what I'm seeing for first layer currently which is not what it used to be (attached).

That just looks like you're too close to the bed imo
I would normally agree but when I take the parts off I can clearly see the perimeters as if its not close enough and the bottom is also rough but not like the PEI finish I have on older parts rough like the above picture.
Parts are fine, the top finish is coming out great, same parts (attached) after tuning some widths on infill.

any sidewall issues on taller prints? that can be indicative of extrusion system issues
Mmmm, none of your pictures are in focus, try to pay attention to that while composing the photos please
Not too many, I was using Virtual Gantry Backers for a while, I've disabled and moved to the z_thermal_adjust and did the testing required to calculate the inputs for it yesterday but this was happening before today and now again so both options didnt change that.
Pics taken from cheap c270 webcam, not ideal apologies.
I dont think these are extruder related any way so I'll take it to another channel if this isn't the right place.
CW1->CW2 however did introduce more side-wall artifacting and quality issues which is why I was thinking about the G2E move.
well to answer your original question, G2E is not known to have many print artefact issues at all. this channel, and the one in VOC might give some more insight into pros and cons
Many less issues with backlash and gear concentricity in g2e
If you want to keep working on the cw2 issues I’d suggest #slicers_and_print_help
FUUUUUUUUUUUU.... how do I diagnose why my extruder is skipping? I've changed about everything except the extruder parts, or motor... I'm going crazy.
Well, it's not always the extruder. Can you push filament throught the hotend by hand?
I can.
I can't recall about G2, but found that Orbiter is super sensitive about the tension that's on the arm. Maybe tell us exactly what extruder we're talking about here....
G2WW from DoomCube, Ant Head.
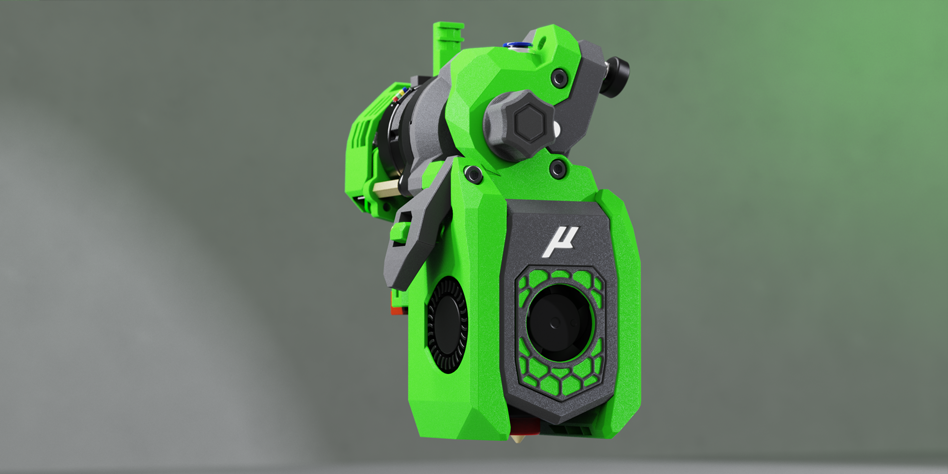
GitHub
Toolhead for Micron and other PFA printers . Contribute to PrintersForAnts/AntHead development by creating an account on GitHub.
But I have another from a likely identical kit which does work.
Seems I over tightened a screw🤦♂️