#building-tips
1 messages · Page 3 of 1
 fresh jackal
well since these lines are very thin and go in very specific directions, you can have very open areas that give you shelter or very closed areas that don't give you shelter depending on where those solid objects are relative to your character.
i could swear the wiki once had an image example of the former but i can't find it now
oh nevermind, here it is.

objects here are placed in just the right spots to count as fully covered, so if objects are placed everywhere but in those specific points, the opposite can be true even though you may look thoroughly sheltered
 young anvil
Hmm interesting. as for this "these lines are very thin", I mean it's 1 floor wide within yellow lines. So not thin
fresh jackal
no i meant the rays, bad choice of words on my part
 fallow leaf
young anvil
okay, thanks for the info. I wlil somehow make it shelter
fallow leaf
young anvil
okay, thanks for the info. I wlil somehow make it shelter
Just put walls up around you, see that you’re sheltered. Then removed bits one at a time to see when you don’t have shelter.
 lime agate
fresh jackal
oh nevermind, here it is.
lime agate
fresh jackal
oh nevermind, here it is.
Thanks for finding and sharing that one! 🙂
 restive cloud
how do y'all manage to use wood/iron for fencing outside without roofing and not lose your minds every time it rains
 elder phoenix
By using the actual fence pieces?
restive cloud
yeah but roundpole fences are kinda boring sometimes
elder phoenix
🙄
restive cloud
fences like these
 elder phoenix
If you choose to build water-damageable stuff outside, that's your choice.
restive cloud
I was just wondering if there was some sort of technique to prevent them from decaying that I was missing out on
elder phoenix
You do know there are more actual fence pieces than just "roundpole" right?
Dverger have a good one.
"Prevent from decay" comes down to 3 options:
- Roofing
- Using pieces that don't care about rain.
- Mod.
 fiery musk
elder phoenix
"Prevent from decay" comes down to 3 options:
1. Roofing
2. Using pieces that d...
fiery musk
elder phoenix
"Prevent from decay" comes down to 3 options:
1. Roofing
2. Using pieces that d...
- shield generators
elder phoenix
Interesting.
 balmy stream
restive cloud
I was just wondering if there was some sort of technique to prevent them from de...
balmy stream
restive cloud
I was just wondering if there was some sort of technique to prevent them from de...
i think if you put stone blocks and the wood on top rain wont damage it
 lapis basin
fiery musk
4. shield generators
lapis basin
fiery musk
4. shield generators
- Snowy area.
 feral storm
snow doesn't damage exposed stuff the same as rain?
 feral lintel
no - but snow covers the normally exposed stuff, so all looks the same xD
 shrewd crag
Has anyone had success with Lox in their bases? I want to tame some but I'm worried they may trample or damage buildings
 hasty patrol
shrewd crag
Has anyone had success with Lox in their bases? I want to tame some but I'm worr...
hasty patrol
shrewd crag
Has anyone had success with Lox in their bases? I want to tame some but I'm worr...
i believe a lot of people opt to keep loxes in holes so that their buildings stay safe
 gilded pond
anyone else struggle hard with mixing the heavy build pieces? I feel like they all snap just different enough.. to make it difficult to mix and match them fluidly
hasty patrol
gilded pond
anyone else struggle hard with mixing the heavy build pieces? I feel like they a...
i've found that letting go of perfect snapping to be pretty helpful for mixing stone and wood. Putting wooden walls in the middle of a low stone wall looks a lot more natural than the snapping along an edge
elder phoenix
There are roof pieces that have "roof" in the name.
 orchid gust
Hi, Im looking for an automatic chicken/egg breeder thats still working, every build I found so far has either the issue of clogging eggs on 45° roofs or my chickens are not eating. Are there any good builds out there?
fiery musk
You can do it with black marble plinths instead of roofs. Need to freehand place the eating surface (trial and error pretty much, but it wasn't too difficult for me) but it works fine after that.
The beam is the eating surface, it needs to be just above the hens heads for them to consistently eat.
 orchid gust
fiery musk
You can do it with black marble plinths instead of roofs. Need to freehand place...
orchid gust
fiery musk
You can do it with black marble plinths instead of roofs. Need to freehand place...
Thanks, I’ll try that once we unlock black marble 🙂
orchid gust
Has anyone a good automatic Lox breeding design? Mine is always getting damage from the Loxes moving arround. Also my current one is not save from Bat Raids.
 zealous void
Any way i could get roof here? i cant figure it out with corners nor normal pieces

 drowsy frigate
that looks a bit off from the default sizes for roof tiles so an inside corner is probably not gonna cut it
maybe you can get creative with beams and deck that with 1-2 normal roof tiles?
 novel quarry
so im trying to build a world tree lookalike in my base using core wood for branches, any ideas how to make a leaf looking texture without any mods
shrewd crag
novel quarry
so im trying to build a world tree lookalike in my base using core wood for bran...
Maybe the new vine piece? Or some sort of item on a display stand?
 drowsy patrol
How can I fill this gap? I tried using a beam to find a new snap point but I'm not sure if it's the best way

 hasty patrol
zealous void
Any way i could get roof here? i cant figure it out with corners nor normal piec...
hasty patrol
zealous void
Any way i could get roof here? i cant figure it out with corners nor normal piec...
i'd just have useinner corner roof pieces and have them overlap/clip a little. You really won't notice it 🙂
novel quarry
if you really need it to be all stone, use shift, to have it not snap, and you should get somewhat smooth looking
 warped quiver
drowsy patrol
How can I fill this gap? I tried using a beam to find a new snap point but I'm n...
warped quiver
drowsy patrol
How can I fill this gap? I tried using a beam to find a new snap point but I'm n...
Use the stone block be guided on the stone block, not on the wooden pole. This way you can snap the left stone 2x2 into the right one, placing it partially inside. forget the wood outline.
drowsy patrol
warped quiver
Use the stone block be guided on the stone block, not on the wooden pole. This w...
This is what I got

 thick turret
Hello, me and a friend have started playing Valheim for a couple weeks now and are working on a basic but large 2 story base. We are having issues getting the roof to stay up so any tips or if it is not possible would be great to know. Appreciate any assistance!
 hasty patrol
thick turret
Hello, me and a friend have started playing Valheim for a couple weeks now and a...
hasty patrol
thick turret
Hello, me and a friend have started playing Valheim for a couple weeks now and a...
you'll need a few pillars to support the roof 🙂
elder phoenix
Ironwood Beams.
thick turret
We have tried the Corewood pillars but they dont seem to be holding up, I thought the iron pillars may help but was unsure and we have to do another Iron run 😅.
elder phoenix
Ironwood Beams have the highest structural points in the game.
thick turret
We will definitely try with the iron ones, thanks for the assistance!
elder phoenix
thick turret
We will definitely try with the iron ones, thanks for the assistance!
This is also the source of "You never stop needing iron."
hasty patrol
thick turret
We have tried the Corewood pillars but they dont seem to be holding up, I though...
Were they properly connected to the ground? They'll be coloured blue if that's the case when looking at them with the hammer, which means they're providing the most support that they can
thick turret
They were not, we connected them to the 2nd floor that we tried to keep as supported as we could while still leaving room for building and such. The floor is mostly solid green with a couple yellowing spots.
fiery musk
You can't get more stability than whatever thing you're attached to, so log beams on normal wood flooring doesn't do much.
If you want to take advantage of log poles higher stability they need to be attached either to the terrain or something even more stable (like stone, iron or black marble).
 lethal ferry
idk if this is the correct channel but would it be possible to build a bridge from point a to point b?


 carmine badger
lethal ferry
idk if this is the correct channel but would it be possible to build a bridge fr...
carmine badger
lethal ferry
idk if this is the correct channel but would it be possible to build a bridge fr...
I think this is possible I may be wrong, BUT you would definitely have to use corewood to help stabilize it more, but if it doesn’t work, wait until iron age
shrewd crag
lethal ferry
idk if this is the correct channel but would it be possible to build a bridge fr...
Very possible - but tricky. You'll need to carefully plan the supports.
fiery musk
normal wood and corewood only go 10m horizontally without extra supports iirc, which is nowhere near enough for that gap even if you build from either side and meet in the middle.
And from looking at the picture the ground seems too far down to use corewood pillars as support.
Iron goes 40m so it's definitely possible with that.
warped quiver
lethal ferry
idk if this is the correct channel but would it be possible to build a bridge fr...
I'll say differently. Why a bridge in this place? don't get me wrong, you do your game, but unless you are planning to build something on both sides the bridge alone become pointless.
I'm saying that because I "wasted" my time building something far from base to be my portal hub, but I realized I could've done that in/near my base.
lethal ferry
warped quiver
I'll say differently. Why a bridge in this place? don't get me wrong, you do you...
I built a temporary longhouse over in point A and planning to build a temple to odin over in point B. I'm planning to make it a bit further from the village and that cliff side looked to be a good spot
warped quiver
Well in that case I think only iron would hold it. And go for it. lotta work to do hehe. o/
lethal ferry
thanks for the feedback. gonna take a long while but eh, doable
 honest rampart
hey, im trying to do these kind of entwined shapes , is there a specific name for them or building technique to do them both vertically and horizontally?

 thorny musk
thick turret
They were not, we connected them to the 2nd floor that we tried to keep as suppo...
thorny musk
thick turret
They were not, we connected them to the 2nd floor that we tried to keep as suppo...
It can be done without using ironwood though you may need to get a structural engineering degree.
I recommend building the 2nd floor first and using that as a basis for the supports, stone pillars may serve you well if only to serve as a starting point for more pillars.
Build the roof with rafters and support the rafters instead of the roof directly, and run angled beams along the roof for more support.
thorny musk
lethal ferry
idk if this is the correct channel but would it be possible to build a bridge fr...
It shall be a glorious bridge.
 zealous oar
can anyone help here cant seem to build higher have tried like everything and im pretty stuck 😮
 honest rampart
zealous oar
can anyone help here cant seem to build higher have tried like everything and im...
honest rampart
zealous oar
can anyone help here cant seem to build higher have tried like everything and im...
how tall is the entire building?
maybe you reached max stone height
if thats the case switching to wood will allow you to combine both their heights
(but only wood over stone)
 icy canopy
This is a re-share


 charred rapids
So I'm working on building a keep around a stone circle without using the stone circle as support. So far, I'm happy with what I've got. I've gotten my wood iron beams across the top of the stone walling finished, which is gonna be used to support the flooring. It's, mostly, going pretty well so far.
However, I'm running into a new issue: The roofing. I've never been very good at making my roofs look elegant, espescially for larger projects such as this. I thought I'd come here and ask if anyone could help me with this process, because I've tried a few different things, and am getting frustrated with the build.


 proven dawn
@fringe heron these are 3 of the must-watch building videos. Hope these help you out, friend!
https://www.youtube.com/watch?v=7JRsxqKrlL8
https://www.youtube.com/watch?v=QQlPWJw5CFg
https://www.youtube.com/watch?v=lES8KjXMbaI

Description: Strategies for Filling in Roof Gaps - Valheim. In this one I show my favorite strategies for filling in the gaps in your roofs in Valheim and I also share how to create a multitude of different types of roofs! This is the 2nd part to a 6 part series that is everything you need to know about making a roof in Valheim. More coming soon...

In this video I will show you how to dig a perfect basement in Valheim! This tutorial can be for beginners or advanced builders, and will help digging basements become an easy and normal task!
Thanks for watching my video! Be sure to 💥SUBSCRIBE, LIKE and SHARE with your friends if you enjoyed :) And don't forget to hit the bell icon to be notif...

In this video I will show you how to build a steep and pointy roof in Valheim! This method works in vanilla with no mods, and is a perfect way to make a steep roof for your house, fishing hut, or whatever build you desire! Comment below for any questions or tutorial requests!
Thanks for watching my video! Be sure to 💥SUBSCRIBE, LIKE and SHARE ...
 austere obsidian
anyone else plan out their future builds with beams?

 fringe heron
proven dawn
<@333332665610665984> these are 3 of the must-watch building videos. Hope these ...
fringe heron
proven dawn
<@333332665610665984> these are 3 of the must-watch building videos. Hope these ...
OMG THANK YOU! I can build only with basic wood, Once I get more materials I will check these again !
proven dawn
fringe heron
OMG THANK YOU! I can build only with basic wood, Once I get more materials I wil...
everything that's in those videos can be done with basic wood
fringe heron
proven dawn
everything that's in those videos can be done with basic wood
Hell yeah!
 lime skiff
Hello! How high up should I build a treehouse in the swamp? Hopefully something that isn't reached by abominations or big enemies
elder phoenix
As high as you feel like?
fiery musk
Trolls are 8m high iirc and the biggest normal enemies, so anything 8+ meters off the ground should be fine.
 warm stirrup
Posting this here to guide some players that insist we should be able to plant berry bushes.
 thorny musk
this is the way.
 sly summit
dear valheim builders, here’s a thought: instead of sticking with flat boring brick walls, try walls like this 👇

minecraft builders manage depth and detail even without all the rotation and snap points we have
we need to step up our game and make it interesting!

tried googling valheim wall designs and man.. was disappointing! a few are decent but mostly just flat, bland, no texture

 weak mauve

Any ideas on what I could put here for decorations? I had eikthyrs (butchered his name) trophy there but he's now above my kitchen area. His trophy didn't really stand out being there
 edgy fiber
weak mauve
edgy fiber
weak mauve
sea serpent trophy is my go to
weak mauve
edgy fiber
sea serpent trophy is my go to
Oooo that would look good. Gonna go find some serpents
edgy fiber
I figured you were right on the coast, so adding in a "fishing" vibe could work
 rose saddle
Or maybe a nice set of shields
shrewd crag
weak mauve
Perhaps a large fish? A lighting option? Or a window?
 vernal talon
sly summit
tried googling valheim wall designs and man.. was disappointing! a few are decen...
vernal talon
sly summit
tried googling valheim wall designs and man.. was disappointing! a few are decen...
Look up Timo Redbeard on YouTube.
 jaunty zodiac
Anyone have a good example of what a farm looks like? I have the roundpole fences but i hate things that dont snap together like legos
elder phoenix
So use stone?
jaunty zodiac
Dont have it yet 😦
elder phoenix
Then my advice would be "don't worry about how anything looks in an possible way right now as you lack the materials to make what you truly want."
sly summit
roundpole fences are nothing, try this
 jaunty zodiac
Looks sick
elder phoenix
That is either very patient planting or modded.
jaunty zodiac
I was talking about the aesthetic mostly i didnt even pay attention to the actual plants lol


 solar void
Hey guys, are there any tips to building curves into my walkways? im just struggling getting the floors to not clip/look ugly
 split stratus
sly summit
or these
split stratus
sly summit
or these
That's pretty cool idea.
proven dawn
sly summit
tried googling valheim wall designs and man.. was disappointing! a few are decen...
doors and log pieces are your friend when adding texture and depth. Doors, of course, for the .5m snap point on the x and z axes, logs for the .5m snap point on the y axis. Many people don't like working with walls, especially larger ones, where any decorating and texture would have to be repeated 100x over. It takes a lot of time, but it's worth the effort. Just one (bad) example I was working on in a past build; this whole project ended up being abandoned in favor of the current one, but this wall was going to span roughly 1km, with these pillars spaced out about every 20m or so. Even in this pic, the pillar wasn't fully done and decorated, but it took 10 minutes just to get this one pillar perfect the way I liked it. I later added more stuff to it, as well as log pieces and darkwood and all sorts of stuff and layers just to give it some character.
That's what we gotta do. 🙂
 sly summit
proven dawn
doors and log pieces are your friend when adding texture and depth. Doors, of co...
sly summit
proven dawn
doors and log pieces are your friend when adding texture and depth. Doors, of co...
i stopped depending on snap points, i just use walls or beams as quick temp backers and shift place things how i like
i actually plan it all out on my 2nd monitor while doing it 👇😬
 proven dawn
sly summit
i stopped depending on snap points, i just use walls or beams as quick temp back...
proven dawn
sly summit
i stopped depending on snap points, i just use walls or beams as quick temp back...
That's all well and good, until you go to line something up just right, and find out that one pixel you were off 3 hours ago just royally fucked your whole design hahaha. I've had it happen. Trust me, you don't really want to depend on shift-clicking, friendo. 😉
proven dawn
If anyone wants to see some methods to my madness, I'll be streaming in Odin's Greathall 🙂
 gritty mulch
anyone got any tips for a good roof design here? built the tower out of black marble, the spikes around the rim are bright red structurally, and im wanting to make a roof over the whole top area so that i can have it as my crafting area, but im having trouble figuring out what to use/how to use it. threw up some corewood beams just to see how it would look and it doesnt fit it at all lol. i have access to mistlands building materials and under. going to be making the rest of the build later on, just trying to get this tower functional so i dont have to keep teleporting back to my original base for mats.


 shrewd crag
Stone/Grausten always matches the mountain biome best from what I’ve seen. If it’s just a watchtower, maybe a circle roof matching the shape of the tower that leaves open air sides?
gritty mulch
shrewd crag
Stone/Grausten always matches the mountain biome best from what I’ve seen. If it...
i unfortunately dont have access to grausten atm, and i wouldnt be able to use it anyway since its stone and the structural integrity of the top of the tower is already red
shrewd crag
gritty mulch
i unfortunately dont have access to grausten atm, and i wouldnt be able to use i...
Have you reinforced it with iron beams? It could be used as a watchtower/FOB until you get access to further options? Either way the longer I look at it the more I see some beauty in its simplicity
proven dawn
gritty mulch
anyone got any tips for a good roof design here? built the tower out of black ma...
Description: Strategies for Filling in Roof Gaps - Valheim. In this one I show my favorite strategies for filling in the gaps in your roofs in Valheim and I also share how to create a multitude of different types of roofs! This is the 2nd part to a 6 part series that is everything you need to know about making a roof in Valheim. More coming soon...
gritty mulch
shrewd crag
Have you reinforced it with iron beams? It could be used as a watchtower/FOB unt...
thanks. my original plan for the tower was to have the base floor be my smelting area, the second floor be a portal room and then have the top floor be a crafting area but im realizing that despite how big i made it, its still cramped on the inside. so im probably going to just turn it into storage and maybe put my obliterator and eitr refinery up top. and if i still dont like it i may have to scrap it and start over, making it bigger.

 solar void
is there any advice for making a circle not be super uneven?
 proven dawn
solar void
is there any advice for making a circle not be super uneven?
proven dawn
solar void
is there any advice for making a circle not be super uneven?
There's a trick to it. This guy made this video before the snap point update, I think, and with snap points, what he's doing is a LOT easier. The basic concept is the same. It's about where you connect the wall sections. Hope this helps! 
https://www.youtube.com/watch?v=n68c30jiszg
I stream on Twitch Tuesday to Saturday, 12pm-6pm GMT @ https://bit.ly/Timo_RedbeardTV
Support me on Patreon! https://Patreon.com/TimoRedbeard
Get yourself a Timo Redbeard Snapback @ https://korfmerch.com
Getting that perfect stone foundation circle can be a pain! Here's a super easy method to get it done.
0:00 Intro
0:51 Building th...
I need to start making guide videos
solar void
doope thanks
ive been struggling real hard with the build system tryna make cool stuff and im always somehow off
proven dawn
solar void
ive been struggling real hard with the build system tryna make cool stuff and im...
and unfortunately, most of the guide / tutorial videos were made before the snap point update, so the processes they describe are a lot easier to do with snap points (though extremely different), and also very difficult to describe via text lol
shrewd crag
proven dawn
I need to start making guide videos
Any experience with roof peaks?
shrewd crag
proven dawn
https://discord.com/channels/391142601740517377/1202303747053846608/130892621340...
I’ve watched that before. I wanted to know your experience in case you had more up to date methods with the new snaping points or pieces; I have a project being planned and I need a building with at least 5 different peaks. Peaks like the ones in this video: https://youtu.be/vShsry0r-SY?si=CgSq5siaVoaljlTw

Description: How-to make a Viking Roof in Valheim! This is part 4 out of 6 of my Valheim Roofing tutorial series! Hope it helped! Part 5 coming soon...
Support the channel with a membership: https://www.youtube.com/@9byte/membership
Timestamps:
0:00-0:16 Intro
0:16-4:36 Step 1
4:36-10:41 Step 2
Mods Used:
Infinity Hammer
World Edit
Server D...
proven dawn
shrewd crag
I’ve watched that before. I wanted to know your experience in case you had more ...
ah I see. I do not like to do peaks like that, because I know as soon as it rains it'll look like dookie, and we really have no mechanics for closing them off. I wish we did, they look cool as hell 🙂
gritty mulch
solar void
is there any advice for making a circle not be super uneven?
Make sure that every block you put down is angled evenly. If you place a block and then the next one you put is angled one “click”, the rest of them all need to be angled one more click than the previous. If you angle it two clicks, then they all need to be angled two clicks more than the previous. Trying to eyeball it will only result in messed up angles.
sly summit
sly summit
minecraft builders manage depth and detail even without all the rotation and sna...
came across this on reddit
i’m pretty precise with building but this guy’s on another level.


 shrewd crag
sly summit
came across this on reddit
i’m pretty precise with building but this guy’s on an...
shrewd crag
sly summit
came across this on reddit
i’m pretty precise with building but this guy’s on an...
HOLY - never seen someone stagger those so incrementally
 limpid nest
proven dawn
ah I see. I do not like to do peaks like that, because I know as soon as it rain...
limpid nest
proven dawn
ah I see. I do not like to do peaks like that, because I know as soon as it rain...
Angled beams don't take rain damage.
proven dawn
limpid nest
Angled beams don't take rain damage.
wait what? Since when? 😮
warm stirrup
proven dawn
wait *what*? Since when? 😮
iirc since they came out 😛
proven dawn
warm stirrup
iirc since they came out 😛
Certainly not. I've seen it happen.
shrewd crag
Can we get a fact check?
warm stirrup
proven dawn
Certainly not. I've seen it happen.
Well I bought it when Early Access dropped, and I remember using them as alternate roof designs then 😛
sly summit
here’s something else to blow your mind any wood piece directly on stone blocks won’t take rain damage

 fresh jackal
warm stirrup
Well I bought it when Early Access dropped, and I remember using them as alterna...
fresh jackal
warm stirrup
Well I bought it when Early Access dropped, and I remember using them as alterna...
yepp, since their intended purpose is to be part of a roof, they count as roofing, protecting things below them and not taking rain damage themselves. (that said, they aren't immune to water damage as a whole like stone and darkwood for example, if submerged in water they do take damage)
this also applies to cross beams, just not straight ones, and it has indeed been like this since before early access release
oh also wood iron angled beams iirc still take rain damage, but i could be wrong on that
sly summit
just exploit the bug up there, if it's touching a ston piece it won't take water damage no matter what
fresh jackal
i don't think that'll help with that roof design 😅
sly summit
by the way Smiffe once told me why floor pieces get water damage but angled beams don’t it’s because the rain just slides right off the beams 😝
elder phoenix
Precisely.
shrewd crag
Mind blown
sly summit
shocker!
elder phoenix
Iolite.
 lusty gyro
Someone please explain to me why does black marble completely ignore iron beam stability
elder phoenix
It doesn't.
You can stack Marble higher with beams vs. without.
-# Unless you started the beam on the marble instead of in the ground.
shrewd crag
What if I start a beam or even an iron fence on stone attached to the ground?
limpid nest
It must be attached to the ground to increase stability.
Kinda surprised how many people didn't know about angled beam waterproofing. Then again, I didn't know about stone-attached waterproofing.
solar void
does anyone know of any tips to make a spiral ceiling/roof?
 dusk flume
Hi
 hot rover
I use the short X wall to make fences. If you top the Xs with 4m corewood beams, the whole thing doesn't weather. Using the 2m corewood beam results in weathering. Couldn't tell ya why lol shrug
sly summit
because it clips into it which is what makes it weatherproof
 versed osprey
@cosmic pivot Responding to you post in #building-screenshots: The most important thing to keep in mind when building on a coast is tides. Tides will put out your fires, making it impossible to sleep and cook sometimes, and they'll also interfere with crop growth.
For the sake of ease, I recommend sticking to a smaller structure that has farms away from the coast. Find one corner of your intended structure and place a vertical support there. Make it tall enough that tides rarely surpass it (2m above sea level will work most of the time but not in violent storms). Then built the frame of your floor out from the top of that support, adding more supports as necessary. Then build the rest of the structure on top.
Keep in mind that your fire will need a stone foundation. You will need to raise the ground or build a stone structure somewhere to bring it to the level of your structure.
Coastal builds require foresight because you can't easily raise/move a completed structure, and expanding one isn't always straight forward like it is on plain flat ground. Make sure to think hard about how large your structure needs to be and where/how it will fit before you commit to building at such a site.
 sly summit
i measured 26° beams but they’re actually 27° rounded we've been lied to

 feral swift
how do we protect a coastal base? Enemies just keep walking out to sea, swimming around the walls, and then coming back to land on the inside of my defenses ;-;
 obsidian marsh
sly summit
i measured 26° beams but they’re actually 27° rounded we've been lied to
obsidian marsh
sly summit
i measured 26° beams but they’re actually 27° rounded we've been lied to
it's just the inverse tangent of 1/2... opposite over adjacent, basic trig
 naive scarab
obsidian marsh
it's just the inverse tangent of 1/2... opposite over adjacent, basic trig
naive scarab
obsidian marsh
it's just the inverse tangent of 1/2... opposite over adjacent, basic trig
🤓
naive scarab
feral swift
how do we protect a coastal base? Enemies just keep walking out to sea, swimming...
build a wall along the waterline
sly summit
naive scarab
🤓
🤓
 sly summit
feral swift
how do we protect a coastal base? Enemies just keep walking out to sea, swimming...
sly summit
feral swift
how do we protect a coastal base? Enemies just keep walking out to sea, swimming...
raise the ground as far as possible and extend your walls way into the ocean 👇
 fiery musk
feral swift
how do we protect a coastal base? Enemies just keep walking out to sea, swimming...
fiery musk
feral swift
how do we protect a coastal base? Enemies just keep walking out to sea, swimming...
spikes and ballista
 feral swift
sly summit
raise the ground as far as possible and extend your walls way into the ocean 👇
feral swift
sly summit
raise the ground as far as possible and extend your walls way into the ocean 👇
but enemies dont drown, this doesnt seem to stop them
proven dawn
I hate to say it but I actually suck at geometry. How the heck do I drop this from 8m/side to 4m/side? The perpendicular sides go down to 4m, but the 45deg. sections are 5m. 😧

sorry old pic this is the adjustment from the oops up there. Still same question.
 fiery musk
proven dawn
I hate to say it but I actually suck at geometry. How the heck do I drop this fr...
fiery musk
proven dawn
I hate to say it but I actually suck at geometry. How the heck do I drop this fr...
use right angles only to measure distances if you want accurate results, then fill in the diagonals you want from those.
if you use diagonals you get inaccurate measurements. Because geometry.
proven dawn
fiery musk
use right angles only to measure distances if you want accurate results, then fi...
Yeah I ended up figuring out that if I built out from where I needed the center, I could get it to exactly 7m/side on the diagonals, and the right angle sides are all 8m, so it's symmetrical on both levels 🙂
#building-screenshots message
fiery musk
proven dawn
Yeah I ended up figuring out that if I built out from where I needed the center,...
ah nice, good job 👍 looking forward to the results
sly summit
feral swift
but enemies dont drown, this doesnt seem to stop them
spam player base items by the shore to control their spawn area. they won't try to get around the wall
campfires work best
feral swift
sly summit
spam player base items by the shore to control their spawn area. they won't try ...
this reads like forgotten arcane lore. I can affect their spawning? I wish to know more
do these campfires have to remain lit ?
sly summit
no
feral swift
Most player base structures are attacked on sight by hostile enemies that can path to them. The only exceptions are campfires, bonfires, and both kinds of brazier. i found this in the wiki
What if i build a complete wall around such a structure, will enemies try to break that wall to attack the thing ?
 inland burrow
If you Build a House with Wood Pillars as like just a model to look if its working yk and than you decide to build it do you put the stone walls on the outside or the inside?
and do you make a 1 meter overhang on the sides or a 2 meter
fiery musk
feral swift
```Most player base structures are attacked on sight by hostile enemies that can...
they won't. Enemies only attack player base items if they get line of sight on them, they only attack walls and other structures when they're already aggroed and can't get to you.
feral swift
fiery musk
they won't. Enemies only attack player base items if they get line of sight on t...
So does this mean that if enemies never see a human player, they won't ever attack structures?
Can they be aggroed by tame animals, or by any other cause?
Also, is it possible to do something silly, like building a wall alongside yourself as you travel past enemies, to make cover so they dont get direct LOS on you ?
fiery musk
Tame animals make noise which draws nearby enemies to investigate, but if they can't see the animals they won't aggro on them. The exception is raid enemies which spawn already aggroed, so they go after your pets either way.
As for building to break LOS building also makes noise which draws nearby enemies to investigate, so you'll just pull every enemy along your path to you. If you want to avoid enemies just walk, aggro ranges are generally pretty short if you don't alert enemies by sprinting.
feral swift
fiery musk
Tame animals make noise which draws nearby enemies to investigate, but if they c...
understood thank you, i am trying to understand the system to help build things better
i know we are kind of getting outside the realm of construction now, i apologise, but two more questions:
-
Will enemies become aggroed from taking damage or dying from the environment? Like if they randomly stumble into spike walls
-
Are stealth kills a thing? Can i oneshot an enemy without aggroing their nearby friends under the right circumstances
fiery musk
-
usually no, but they can become alerted (which mostly matters in case of lox because they'll trample your base just by moving). They won't start attacking your walls though.
-
yes, but most attacks make noise. Your best bet for ranged attacks is the huntsman bow since it makes the least noise, so sniping targets from the edge of a group can work quite well with it.
 cosmic pivot
how can i decorate this wall in the back?
 shrewd crag
cosmic pivot
how can i decorate this wall in the back?
shrewd crag
cosmic pivot
how can i decorate this wall in the back?
A chimney, window, or trim
 heady shell
cosmic pivot
how can i decorate this wall in the back?
heady shell
cosmic pivot
how can i decorate this wall in the back?
Three troll head trophies
 modest kindle
Is there a text version of this type of list for more recent updates? The Wiki didn't seem to have Firepit Iron on it until recently and I'm looking for some way to check this. Also, thanks for this in either case. It's very handy information
fresh jackal
modest kindle
Is there a text version of this type of list for more recent updates? The Wiki d...
actually yes!~ https://docs.google.com/spreadsheets/d/1lGv_8efnTaAjYSLKGaquMbulrbalgBB3_69CaQ_54L4/
not too long ago scarlet and i collaborated to split her sheet into one for food and one for building, the latter of which i'm maintaining, should be less tedious to update than the image
been meaning to update the image as well but at least this exists now 😅
 modest kindle
fresh jackal
actually yes!~ https://docs.google.com/spreadsheets/d/1lGv_8efnTaAjYSLKGaquMbulr...
modest kindle
fresh jackal
actually yes!~ https://docs.google.com/spreadsheets/d/1lGv_8efnTaAjYSLKGaquMbulr...
Awesome! Thanks so much!
modest kindle
For some reason, I thought the Cauldron and Iron Cooking station were Base Structures. Glad to be wrong about that
and the Stone Cutter
fresh jackal
modest kindle
and the Stone Cutter
wait the stone cutter is player base, i must've accidentally toggled that one while editing, thanks for calling it out 😅
(cauldron and cooking station aren't player base though yea)
modest kindle
fresh jackal
wait the stone cutter is player base, i must've accidentally toggled that one wh...
No problem, thanks for the heads up
 void mural
any recommendations for a good guide or tutorial on how to get nice, level ground? I keep ending up with a lot of ugly peaks and divots when I'm raising ground to try and level a large area.
shrewd crag
void mural
any recommendations for a good guide or tutorial on how to get nice, level groun...
This is still relevant today: https://youtu.be/GzshydsyIJg?si=ZQkM7JtriZP9I9Mu

Terraforming in Valheim can both be satisfying and frustrating, especially if you are new to it. In this Beginners Guide Beeblebum shares his best tips for flat terrain, easy slopes, even perfecting those tricky edges in no time. With these handy tricks at your disposal, you'll be ready to transform the world of Valheim effortlessly! So grab you...
modest kindle
I know people use doors for finding snapping points that are less than 1 meter apart horizontally, but is there a similar tool for small, precise, snapping-point shifts vertically
fresh jackal
the smallest vertical offset i know of is still bigger than the door one sadly.
the easiest way to get it is through horizontal core logs, it's 50 centimeters.
very possible the ashlands update added something smaller i just haven't noticed yet though
modest kindle
fresh jackal
the smallest vertical offset i know of is still bigger than the door one sadly.
...
Right! Core logs! Thanks again! I will keep an eye out for anything introduced by the new pieces, but I haven't played much since Ashlands and I'm waiting on a friend to have a bit more time before we advance
honest rampart
yo, why does this happen?

specifically meaning the stone getting out of the wood frame
like, in the right where the stone stairs is aligned with the wooden frame but when i continue the thing it gets out
i checked the frame and its properly built
fresh jackal
because of math, 2 meters diagonally don't cover the same distance on the x and z axis as a straight 2 meters
drowsy frigate
yes math continues to ruin our plans even after school
honest rampart
honestly its the first time i do a building that isnt a rectange and i just autopiloted through
drowsy frigate
yea, non rectangular builing is a lot toughe when everying is rectangular
elder phoenix
fresh jackal
because of math, 2 meters diagonally don't cover the same distance on the x and ...
X and Z axis? 🤔
fresh jackal
probably not what i was looking for but you get the point
honest rampart
i am in profound pain

i really cannot seem to figure out how to make it workb(besides i've never worked with stone so im confused about the 8 snap points but thats aside)
 pallid shadow
Hello, Valheim community! 🎮
I’ve just uploaded a new video on my YouTube channel where I recreated The Bannered Mare tavern from Skyrim in Valheim. The video shows the full building process and interior design, so you can easily recreate it if you’d like. I’d love to hear your feedback or ideas for future builds!

In this video, I recreate The Bannered Mare tavern from Whiterun, known from Skyrim, in Valheim. I tried to stay as close as possible to the original design of the structure and interior within the limits of the game’s tools, while also adding a few personal touches.
Throughout the video, calming Skyrim music plays in the background, creating a...
warm stirrup
honest rampart
i am in profound pain
I'm not sure I understand, also what in the world is going on in the bottom right? 😅
honest rampart
dw about it XD
warm stirrup
honest rampart
dw about it XD
I'm very worried but okay 😄
honest rampart
XD
nah my doubt was that since i never made a non square build , pieces wouldnt "perfectly fit"
so i was kinda worried it would all be a mess, i was able to figure out tho and do little tricks here and there to solve the most part
honest rampart
warm stirrup
I'm very worried but okay 😄
thats bro gaming hard on the "stairs"
warm stirrup
honest rampart
thats bro gaming hard on the "stairs"
Genius is 1% talent and 99% hard work.
-Albert Einstein
honest rampart
he is a damn god


 mint chasm
 toxic torrent
new to building why still red
toxic torrent
new to building why still red
The more unsupported a piece is, the more red it becomes, so a solid piece in contact with the ground will be blue, then as it gets further away from the ground and thus less supported, it'll turn green, then yellow, then orange, then red, and it will get to the point where nothing will connect to it
toxic torrent
so i just need more on the ground does it need to connect all the way up
warm stirrup
Friendly reminder that you can waterproof stairs with Darkwood beams snapped to the middle 👍

 vital forum
toxic torrent
so i just need more on the ground does it need to connect all the way up
vital forum
toxic torrent
so i just need more on the ground does it need to connect all the way up
Structural support is determined by how many pieces between the piece you're placing and the ground. It's not that you need more on the ground as much as you need pieces connected to the pieces on the ground. W/o stone or ironwood, there's only so high you can build. You can use the hoe to raise ground around/into the walls to kinda cheat the system, but said ground might/will clip into the interior, so depends on you aesthetics preferences.
toxic torrent
dang so i do need more pillars to the roof then
unless im reading that wrong
idk im tired ill look at it 2mrrw ty for the tips
fiery musk
You can use trees as support too if you don't mind having one grow out of your base. I'd suggest pines since they're narrow and grow pretty high.
 pure oyster
hello, not sure if post here or valheim help would be better but, i have this question.
that 2x2 tile that have the torch in it doesnt count as sheltered and i ant figure out why. every other tile arround it does count. Its not important to "fix" this ugly starting box i made but i would like to understand the mechanics to avoid things like that.
i have destroyed roof and rebuilt it but it seems "correct" so idk what could be happening
Rain doesnt filter aka i dont get wet in that tile, but sheltered doesnt shows and i cant get the buff in that tile in particular


 fiery musk
pure oyster
hello, not sure if post here or valheim help would be better but, i have this qu...
fiery musk
pure oyster
hello, not sure if post here or valheim help would be better but, i have this qu...
https://valheim.fandom.com/wiki/Cover
Basically your windows mean that one or more of the cover rays go through them from that position, so the spot has less than 80% cover.
Try framing your windows with wood beams, that usually helps.

Valheim Wiki
Cover determines when players are sheltered and affects behavior of some structures. Cover is calculated by checking how many of the 17 cover rays are blocked by obstacles. Each ray starts 0.5...
pure oyster
oo seems complex but ill try the beam fix, ty!
pure oyster
Beams worked thanks!
 heady hare
I'm having trouble keeping greylings and greydwarves at night from pissing off my two star boars and causing them to shred the fence I have set up. I'm aware of stakes, stake walls, moats, earth walls, indoor pens etc. But those are some pretty ugly options and I'm a big fan of simple cozy homesteads and farms. Simple fences. So I'm in a weird spot, I'm not sure how I can make their pen more defensible without compromising the aesthetic. Any tricks I can employ?
mint chasm
heady hare
I'm having trouble keeping greylings and greydwarves at night from pissing off m...
Try putting fencing around your homestead and scatter some standing torches around inside it, to stop creatures spawning in within the fence's perimeter. That should help.
elder phoenix
heady hare
I'm having trouble keeping greylings and greydwarves at night from pissing off m...
Sleep through the night and they won't spawn. 👍
heady hare
elder phoenix
Sleep through the night and they won't spawn. 👍
I could also not play. Then they definitely won't spawn.
👍
elder phoenix
🤔
fiery musk
heady hare
I'm having trouble keeping greylings and greydwarves at night from pissing off m...
greylings and greydwarfes are afraid of fire, so some fires scattered around will scare them off. Doesn't work on brutes and shamans though.
Alternatively just make a wider fence around your boar pen to avoid enemies getting into the boars aggro range.
Keep in mind though that as you kill more bosses nastier enemies will spawn at night, even in the meadows. And fulings or seekers aren't all that impressed by fencing.
vital forum
Night seekers will see your walls, stop just long enough to laugh at them, and fly over them to ruin you day
warm stirrup
heady hare
I'm having trouble keeping greylings and greydwarves at night from pissing off m...
How to effectively stop all spawns from detecting you inside your walls at any time, even extends to Fulings/Seekers/Trolls.

This will cause enemies to spawn a full 1.5 workbench radius' away from the edge of your walls, which massively lowers the chance that they will detect anything inside.
 ebon rampart
So what is the method for supporting a bridge WITHOUT poles to the ground. I wanna have a suspension bridge between 2 tree houses, but they're too far apart to reach each other. Would an a frame like the golden gate bridge work? Or supports on either side of the planks?
elder phoenix
Supporting without touching the ground -> there is no method.
ebon rampart
Sadge. I thought maybe there was a physics trick to avoid hitting the ground. Kinda breaks the tree look to have a post between them
vernal talon
Maybe with wood iron beams if the distance isn't too far. Or plant a tree somewhere between them, and use that as a pathed support off to one side to not block direct view.
fiery musk
ebon rampart
Sadge. I thought maybe there was a physics trick to avoid hitting the ground. Ki...
Just plant another tree in the middle and use that as support
mint chasm
It depends on how far away they are from one another. The game follows some physics principles, such as squeeze mechanics for stone slabs, but building horizontally is definitely more of a challenge than building vertically. Try iron beams for reinforcement, and use diagonal beams in addition to horizontal. You may need a temporary support pole to hold things up while you only have it attached to one tree.
 winter briar
do those pillars in the wall even help? how should i stabilize these walls?

here you can see what im trying to do. tips on how to make the walls/roof non-red is welcome
 fiery musk
winter briar
do those pillars in the wall even help? how should i stabilize these walls?
fiery musk
winter briar
do those pillars in the wall even help? how should i stabilize these walls?
grausten has the same stability no matter if it's a pillar or a wall, so no, they don't help. What would help is hiding wood iron poles inside them since they have higher stability.
https://valheim.fandom.com/wiki/Building_stability

Valheim Wiki
The construction system in Valheim implements a stability mechanic to encourage more realistic buildings and drive gameplay. If the player places a building piece that is not sufficiently stable...
Alternatively grow a tree in the middle since they count as ground. Downside is there'll be a tree sticking out of your base, but it works for some builds at least.
winter briar
fiery musk
grausten has the same stability no matter if it's a pillar or a wall, so no, the...
what would you do? if u look at the full image and imagine completing the roof there. use wood iron poles?
fiery musk
winter briar
what would you do? if u look at the full image and imagine completing the roof t...
if you can spare the iron they're the easiest answer. As i said you can just hide them inside the grausten pillars and things should work (you may need a wood iron beam along the peak to hold up the roof too).
Alternatively you can also hide dvergr walls inside the grausten walls since they have the same stability but use copper instead.
You could also use the hoe to raise terrain walls as supports and hide those inside grausten or stone pillars.
winter briar
alright, wood iron poles it is. ty
gilded pond
what's the best way to roof an octagon style wall setup
can't figure out a good way to handle the corners
mint chasm
gilded pond
can't figure out a good way to handle the corners
I just go around, matching roof parts to the straight edges, and leave any overlap of roof parts as a kind of decorative effect. Sort out the straight bits and let the corners happen naturally
I've roofed all of these by following that same principle


 gilded pond
mint chasm
I just go around, matching roof parts to the straight edges, and leave any overl...
gilded pond
mint chasm
I just go around, matching roof parts to the straight edges, and leave any overl...
woah!
mint chasm
I have a bit of an obsession with core wood hubs, LOL
gilded pond
I'm looking to add grausten roof at a 135° angled wall. following the lines straight doesn't blend as well with the sloped grausten. think I'm gonna have to get creative
mint chasm
You'd be surprised. This is grausten (not my build, but a friend's
 gilded pond
that's definitely creative and using gizmo 
mint chasm
gilded pond
that's definitely *creative* and using gizmo <:Valheim:809345344260407296>
Undoubtedly using it, in order to get that roof pitch, but it still shows that grausten can look better than expected even when overlap occurs. I've used it on an unmodded lighthouse roof, and that looks similar, but I don't yet have pics of it.
winter briar
mint chasm
You'd be surprised. This is grausten (not my build, but a friend's
holy fuck
any pics of interior?
mint chasm
winter briar
any pics of interior?
These are all I've got. The builder used lights to line the inside. And it's built over spawn.

 winter briar
damn very creative builder
mint chasm
We've got some great builders on our build server!
 south bone
How would one fill in this part i cant seem to figure it out

 tight thicket
mint chasm
You'd be surprised. This is grausten (not my build, but a friend's
tight thicket
mint chasm
You'd be surprised. This is grausten (not my build, but a friend's
What is that roof
elder phoenix
tight thicket
What is that roof
Plains-tier materials.
 frozen sleet
south bone
How would one fill in this part i cant seem to figure it out
frozen sleet
south bone
How would one fill in this part i cant seem to figure it out
I’d just try using the same angle of sloped roof and clipping them in, might work, might not
tight thicket
elder phoenix
Plains-tier materials.
Yea i was asking which roof piece
elder phoenix
It's darkwood.
mint chasm
26° shingle roof piece, I think it's called
tight thicket
Okay
mint chasm
south bone
How would one fill in this part i cant seem to figure it out
I would use the standard 26 degree pieces like this....
 fiery musk
south bone
How would one fill in this part i cant seem to figure it out
fiery musk
south bone
How would one fill in this part i cant seem to figure it out
with octagonal roofs like that i generally start from the corners with the 26° corner pieces and fill in the rest with the standard ones.

 mint chasm
That's a good option
 sage plover
ebon rampart
So what is the method for supporting a bridge WITHOUT poles to the ground. I wan...
sage plover
ebon rampart
So what is the method for supporting a bridge WITHOUT poles to the ground. I wan...
iron i believe
ebon rampart
Usually, iron still has a point of not reaching each other. It needs something between. I didn't know if an a frame like the golden gate would work, but they said no
cosmic pivot
how do i make this perfectly even?

 tiny glade
south bone
How would one fill in this part i cant seem to figure it out
tiny glade
south bone
How would one fill in this part i cant seem to figure it out
Use wood beams for snap points, you can delet them later if you like. The spots that you have the 1m beam, place a 1m beam next to that one and use it to snap your roof tile in. That will offset the next row of roof tile for less of an overlap. Use wood beam for snap points for the next row as well. all the way up.
 tawdry haven
ebon rampart
So what is the method for supporting a bridge WITHOUT poles to the ground. I wan...
tawdry haven
ebon rampart
So what is the method for supporting a bridge WITHOUT poles to the ground. I wan...
iron pole + iron cage floor is your friend. even supports stone floors.
 earnest plover
how do you connect something like this

 dire sleet
there should be roof inner corner pieces that would fit there?
You may have to redo that. I'd remove the leftmost roof pieces and try to fit corner pieces if you can
earnest plover
i got inner corners to work, but only up to that T part. then i couldnt figure it out
 harsh roost
sooo you can make golden pavement cobblestones with honey 😮

 eternal geyser
harsh roost
sooo you can make golden pavement cobblestones with honey 😮
eternal geyser
harsh roost
sooo you can make golden pavement cobblestones with honey 😮
Looks nice. So with new food decorations we must be careful to not eat it randomly 😄
proven dawn
earnest plover
i got inner corners to work, but only up to that T part. then i couldnt figure i...
When the corner pieces meet up top, they'll form the peak of the roof that sticks out to the right there.
 winged breach
Anyone know a trick to stop these middle angled beams to stop getting water damage in this spot?
 elder phoenix
Don't put them underwater?
warped quiver
Find those big boulders and try to go under while maintaining the upper part of the rock intact when going thru. If you are using creative mode, spawn the same rock/bolder, those that are on BF or Plains, then you just dig under them.
 thick kelp
If you're open to mods, there are some that allow you to place the rocks in the game like any other piece. You can spawn them in with devcommands, but it's very cumbersome. I've built a pretty natural looking tunnel doing this, and others have built entire bases "underground" in the same way.

 dusty yacht
(reposted from another channel since I'm illiterate)
yo I was gonna make a base here and dig into the ground area the area to make like a pit. I was wondering how wide I have to make it in order for trolls to fall in + there being a height difference between the edge of the workbench area will make it difficult like raising the ground and stuff like that. Or if there's anything else I need to be concerned about

so far I've only really built a base like this
 tawdry haven
Anyone have tutorials on how to put surtlings in Yagluth's eye sockets?
tawdry haven
nevermind found a way
 modest kindle
So, I have been working on a Lox Breeder and I got one technically operating. Looking for some ideas about making an extremely high build because making them unable to see enemies seems like the only reliable way to prevent them from becoming furry wrecking balls
I'm assuming find a natural peaked area about as wide as the build, raise some ground and plant some trees, I have also considered building one off one of the indestructible Swamp trees
 placid trench
modest kindle
So, I have been working on a Lox Breeder and I got one technically operating. Lo...
placid trench
modest kindle
So, I have been working on a Lox Breeder and I got one technically operating. Lo...
I'd build it very high and enclose it near my base so they breed while I'm doing other things.
 frosty karma
thought Fir trees don't grow as big
any way to force them to grow into their small versions? Or atleast make them half their size
 vernal talon
frosty karma
thought Fir trees don't grow as big
any way to force them to grow into their s...
vernal talon
frosty karma
thought Fir trees don't grow as big
any way to force them to grow into their s...
Either trial and error, and hope you get lucky (cutting it down if too big, replant, wait for it to grow, repeat as necessary), or use a mode that lets you manipulate the size when placing non-build pieces (there are a few but I don't know what they are), or if you want the immature fir tree, Plant Everything (mod) will let you place them.
frosty karma
either I was continuously unlucky or there's an invisible grid that determines the size of a Fir tree since the other times that I tried planting in the same spot they all grew the same size
fresh jackal
the biome-dependent size range only affects naturally generated trees, ones planted by players always use a unique size range specific to player-planted trees of that type.
fir trees found in the black forest have a size range of 200-250%, mountains have a size range of 150-300% and player-planted ones get 100-250%
 distant dove
any way of venting smoke (in small builds) without the use of ugly chinmeys? (#building-screenshots message)
elder phoenix
Make pretty chimneys.
distant dove
i'd like to avoid chimneys altogether (if possible)
elder phoenix
There has to be a hole somewhere for the smoke to exit.
Where you put the hole is up to you.
distant dove
side holes arent venting fast enough
elder phoenix
Do you have something slanted to force/encourage the smoke to travel sideways?
It wants to go up, but if you put a slant directly above the smoke it will divert sideways.
mint chasm
distant dove
any way of venting smoke (in small builds) without the use of ugly chinmeys? (ht...

Hello everybody! In this video I'm going to show you how you can manage the smoke from your fires by using crawlspaces instead of unsightly chimneys!
distant dove
@elder phoenix , @mint chasm thanks for the help
Result: (#building-screenshots message)- works perfectly
elder phoenix
Nice. Glad you found a solution.
mint chasm
distant dove
<@927600394434129970> , <@628503434836049921> thanks for the help
Result: (https...
Awesome!
 eternal topaz
I'm working on a high-level build in Valheim and struggling to keep my structure stable as I go higher. I know the building system relies on the stability of the core and proper support, but I’m wondering if there are specific tips or tricks to maximize support for taller constructions.
For example, should I focus more on stone as a base? Are there certain materials or techniques I can use to reinforce the structure or distribute weight better? Any advice on making sure the build doesn’t collapse as I go higher?
 fiery musk
eternal topaz
I'm working on a high-level build in Valheim and struggling to keep my structure...
fiery musk
eternal topaz
I'm working on a high-level build in Valheim and struggling to keep my structure...
Valheim Wiki
The construction system in Valheim implements a stability mechanic to encourage more realistic buildings and drive gameplay. If the player places a building piece that is not sufficiently stable...
short answer? use iron beams hidden inside.
 mental dove
I'm not very creative lol but I'm looking for some ideas to spruce this side of the home up. I can't put any windows in on the second floor, but I could put some in on the bottom. I was debating on making the length ways side the smelting area but I'm not sure.

 deft hedge
eternal topaz
I'm working on a high-level build in Valheim and struggling to keep my structure...
deft hedge
eternal topaz
I'm working on a high-level build in Valheim and struggling to keep my structure...
use “wood iron poles and beams” as load-bearing elements and then cover them with “Core Wood”, as the “iron wood” is not waterproof.
In addition, the first support should always be connected to the ground (blue indicator).
If possible, you can use the Hoe to raise the ground so that you can build higher.
The raised elements can then also be covered/hidden with walls, for example.
warm stirrup
mental dove
I'm not very creative lol but I'm looking for some ideas to spruce this side of ...
Some good options are a nice little fenced in area for tames or a tiny garden. You could extend the roof by 1 more core wood beam & cover in a nice crafting area or outdoor cooking area with stone foundations. 1 last idea, a small staircase allowing access to the back balcony, with a row of planted trees for some coverage. 👍
proven dawn
tawdry haven
nevermind found a way
Well, I mean, I didn't want to sleep tonight anyway, so thanks for the fresh nightmare fuel 🤣
 fringe ibex
mint chasm
These are all I've got. The builder used lights to line the inside. And it's bui...
fringe ibex
mint chasm
These are all I've got. The builder used lights to line the inside. And it's bui...
👏👏👏👏👏👏👏👏👏👏👏👏👏👏👏👏
 lavish sierra
Should I build defenses around my meadows base?
Since I'll go into the dark forest soon and won't use this meadows base as much
fringe ibex
my friend thinks no, but I'm thinking yes but don't very big defenses
 restive vortex
modest kindle
So, I have been working on a Lox Breeder and I got one technically operating. Lo...
restive vortex
modest kindle
So, I have been working on a Lox Breeder and I got one technically operating. Lo...
this is what I built for lox

 restive vortex
mint chasm
https://youtu.be/CuLj-XaB8es?si=wgF59m6Nuv_2PRNP
restive vortex
mint chasm
https://youtu.be/CuLj-XaB8es?si=wgF59m6Nuv_2PRNP
the "chimney" is in the left corner covered with X


 mint chasm
restive vortex
the "chimney" is in the left corner covered with X
mint chasm
restive vortex
the "chimney" is in the left corner covered with X
Looks great!
 oblique oak
What's the best way to expand on a build? I made a viking longhouse that's also build height limit, but I don't know what to do now, and the back yard is too cluttered already
Do I make a viking longerhouse?
split stratus
oblique oak
Do I make a viking longerhouse?
Or viking longesthouse
 dusky dirge
oblique oak
What's the best way to expand on a build? I made a viking longhouse that's also ...
dusky dirge
oblique oak
What's the best way to expand on a build? I made a viking longhouse that's also ...
Are you looking to expand the indoors or outdoors? If the former, then maybe add a stone tower on one side or a second building. If the latter, then expand your base's wall and add more space for whatever is cluttering up your backyard.
oblique oak
OoooOoO.... I'll definitely try out the stone towers in the corner
split stratus
oblique oak
OoooOoO.... I'll definitely try out the stone towers in the corner
Basement under the main building could also work. I have a basement under my Grausten Hall which has walls and floor made of black marble and upper floor supported with iron cage and Eitr refineries there, the projectiles won't hurt my upper base.
modest kindle
Looking for a tip about terrain walls. I am generally pro terrain walls (I know some people do not like the appearance even if effective defense), but I am curious if others have come up with a solution they really like for getting in and out of them? I have built Stone Stairs into the sides of them to jump onto and things like that, and I was thinking about trying the spaced out Core Wood bridges that Creatures can't cross, but I am wondering if there are other things to try. Anybody have a tip?
 coarse spear
Helo dose som one has a idea or a video on a decoration including the cartography tabel?
restive vortex
split stratus
Or viking longesthouse
longhousest, no?
dusky dirge
modest kindle
Looking for a tip about terrain walls. I am generally pro terrain walls (I know ...
The spaced out wood/core wood bridges over moats are perfect imo. I use them a lot and they’re a nice combination of practicality and aesthetics
You can potentially also take advantage of high terrain to glide into your base from above with the feather cape, but this only works for specific locations
modest kindle
dusky dirge
You can potentially also take advantage of high terrain to glide into your base ...
Still a pretty great call out
fiery musk
modest kindle
Looking for a tip about terrain walls. I am generally pro terrain walls (I know ...
I like using the steep grausten stairs because mobs can't use those while you can, even while encumbered.
And when you're unencumbered you can just jump up.
 shut dew
I am new to the game, any ideas of making stilt house foundation? when i do myself it turns green, i heard for foundation blue is recommended for it
 sand bloom
Depending at how far you are in the game, use the Core wood Log Poles. they're stronger as the common wood ones.
Place one of the poles, then connect the horizontal ones on that in the size you want and snap the other poles to them. If you run out of space, use a shorter version with the snap changed to top instead of auto to connect to that one, so it would actually get into the ground.
Later you may want to replace the Log poles for stone pillars as they are stronger as the log poles.
Wood beams are the weakest items, so better not use those for large heights.
coarse spear
Helo dose som one has a idea or a video on a decoration including the cartography tabel?
lavish sierra
Somebody pls tell me how to build this overhanging bit above the window

This is my horrendous attempt of making one

 crude basin
lavish sierra
Somebody pls tell me how to build this overhanging bit above the window
crude basin
lavish sierra
Somebody pls tell me how to build this overhanging bit above the window
Using a roof corner piece should do the trick, check out this vid. what i mean is at 14 mins in the video
https://www.youtube.com/watch?v=-WRzv-Furmg

This is a full How to build Tutorial for a Viking Longhouse using the Darkwood structures introduced with the Valheim Hearth and Home update.
I have used the new Darkwood shingle roofs on this build, the roofs reminded me of crows wings so I built the large overhanging sections on the roofs to mimic wings.
I have explained every part of the bu...
 earnest heath
lavish sierra
Somebody pls tell me how to build this overhanging bit above the window
earnest heath
lavish sierra
Somebody pls tell me how to build this overhanging bit above the window
A few things going on in the top image:
- The building is 6 meters wide & the roof overhangs that...it is 8 meters wide. This fact is hidden by the extra wide octagonal pole assemblies at each building corner.
- Using an 8 meter roof, I was able to get the same peak with x2 45 degree beams each rotated 1 click outward from the house, topped with x1 26 degree beam rotated the same way.
- For a similar look on a smaller roof, use the X beams. They have an extra snap point in the middle. So once you have your arch with tighter snap points, you destroy the X beams and back fill with regular beams.
lavish sierra
Ty for your input ill try it out again
lavish sierra
crude basin
Using a roof corner piece should do the trick, check out this vid. what i mean i...
This is exactly what I was looking for ty
Didn't know the right term for it
earnest heath
I love the octagonal poles. Using them in my own build. They have trick to them also.
harsh roost
you can make cobblestone path with Corewood 🙂

 crimson shale
proven dawn
crimson shale
proven dawn
In case anyone's wondering how to take a multi-floor spiral staircase and transition between floors while still maintaining the staircase...there ya go 😉
Seamless when walking (no hitches or snags), and still allows you to either stay on the floor you just arrived at, or keep going up (or down). Works aesthetically as well as functionally!


You can even squeeze one of these in and no hitches or hangups!
 proven dawn
This also works! Just skip a step (no pun intended) with the spiral staircase 🙂

 bright citrus
Hello, I am trying to make a roof for this house but I'm struggling a lot first with the type of roof and second with realization and feasibility due to physics, any tips would be greatly apreciated


 digital temple
#valheim-help message @bright citrus Tbh i do only very basic roofs usually so probably something along of these lines. 😅 It seems you would like something fancier.
 bright citrus
digital temple
https://discord.com/channels/391142601740517377/1202320491377856512/132542459077...
bright citrus
digital temple
https://discord.com/channels/391142601740517377/1202320491377856512/132542459077...
I would really love some long overhangs but im experiencing some limits to building so no matter whats the other solution i feel like it wont ever be perfect to me so in the end i will probably go with a simple roof like you are suggesting
bright citrus
digital temple
https://discord.com/channels/391142601740517377/1202320491377856512/132542459077...
do you personally like this roof design?
 digital temple
Sure 😄 I might try it without these beams, just to see how it looks but yeah this style will work nicely imo 🙂
 bright citrus
digital temple
Sure 😄 I might try it without these beams, just to see how it looks but yeah th...
bright citrus
digital temple
Sure 😄 I might try it without these beams, just to see how it looks but yeah th...
 digital temple
Looks nice either way, depends on you 😄
bright citrus
I think il keep it as original we can call the spiked that sticvk out a feature lol
bright citrus
digital temple
Looks nice either way, depends on you 😄
look at the progress

there will be space in second floor even
digital temple
Ooooh, you went for BIG overhang 😄
bright citrus
yeah
 vague kindle
any tips how to perfectly flat an area? strugling to actually flat an area with my hoe
 boreal coyote
vague kindle
any tips how to perfectly flat an area? strugling to actually flat an area with ...
boreal coyote
vague kindle
any tips how to perfectly flat an area? strugling to actually flat an area with ...
Stand in one place, dont move around spamming it. Also be aware that the terrain has a max/min height that you cannot change.
earnest heath
vague kindle
any tips how to perfectly flat an area? strugling to actually flat an area with ...
Level terrain will attempt to match the height of ground you stand on. So stand on one spot & level as much as you can from there. For big areas, extend out from your flat spot with floor. Then raise the earth through the floor & remove anything that pops through with a pick. You should then have another spot of the same height from which to hoe more. Level terrain only adjusts the ground up/down a bit. So if the ground aint fairly flat to start, you will need to do coarse adjustments with a pick and/or 'raise earth'.
fiery musk
vague kindle
any tips how to perfectly flat an area? strugling to actually flat an area with ...
https://www.youtube.com/watch?v=GzshydsyIJg explains it pretty well.
Terraforming in Valheim can both be satisfying and frustrating, especially if you are new to it. In this Beginners Guide Beeblebum shares his best tips for flat terrain, easy slopes, even perfecting those tricky edges in no time. With these handy tricks at your disposal, you'll be ready to transform the world of Valheim effortlessly! So grab you...
 edgy mirage
Anything I should add to the walls for it to stand out a bit more?

 midnight quail
edgy mirage
Anything I should add to the walls for it to stand out a bit more?
midnight quail
edgy mirage
Anything I should add to the walls for it to stand out a bit more?
Banners, sconces, wood trim, ... test out what you want and find what you like.
elder phoenix
Dragon Eggs.
bright citrus
What walls should I add on top?

 toxic quest
harsh roost
you can make cobblestone path with Corewood 🙂
toxic quest
harsh roost
you can make cobblestone path with Corewood 🙂
Is this the stack?
harsh roost
toxic quest
Is this the stack?
Nope simple collumn of corewood. Just use a different snapping point.
proven dawn
edgy mirage
Anything I should add to the walls for it to stand out a bit more?
Here's some help for your roof, bud. For the walls, I'd suggest layering. I'mma try to describe the process...
Build the Roof first. If you layer the walls before you do the roof, it'll make it 10x harder to get the proper snap points once you go to do the roof.
Take a wooden door (standard 2x2 wood door) cycle till you have Bottom Corner 4 or Bottom Corner 2.
Snap that to the corner of one of your wall pieces.
Get another wall piece, cycle to any corner snap point.
Snap the corner of new wall piece to the middle snap point on the bottom of the door, and place it smooth-side-out on top of the wall pieces with exposed ribs.
Decorate those edges however you want.
Some will tell you just to hold shift and place the wooden walls to cover. Shift-clicking is imprecise, and a good way to fuck up your build. Use the door, use snap points.
https://www.youtube.com/watch?v=7JRsxqKrlL8
Description: Strategies for Filling in Roof Gaps - Valheim. In this one I show my favorite strategies for filling in the gaps in your roofs in Valheim and I also share how to create a multitude of different types of roofs! This is the 2nd part to a 6 part series that is everything you need to know about making a roof in Valheim. More coming soon...
 oblique sluice
Something I found useful for building:


 dapper shadow
digital temple
<@201979309278101504> Try to dig a bit where the stairs go to make step like thi...
dapper shadow
digital temple
<@201979309278101504> Try to dig a bit where the stairs go to make step like thi...
Thanks, gonna try!
digital temple
Also, when leveling the ground it levels mostly in the centre of the circle but it still levels on the edges of it, just slower, so when you need to be precise just line it so the edge of circle lines up with there you want to level and just click multiple times instead of just once 🙂
dapper shadow
Aaah, got it. Thanks 😄 !
proven dawn
Think outside the box


 last tiger
ive been trying to decide for so long. which wall materials for these two gazebo like rooms?
1: dvegr metal wall
2: glass
3: ashwood decorative wall (also could do ashwood dividers)


 maiden anchor
2: glass
last tiger
maiden anchor
2: glass
thank you!!
 last tiger
dusty yacht
wait so this doesn't decay or wat?
last tiger
dusty yacht
wait so this doesn't decay or wat?
it will still decay from rain or monster damage. the color of the tile just indicates how structurally sound it is. roof tiles prevent the tiles directly below them from decaying from rain. if a build keeps breaking it just means it needs more support to be able to place.
that support could either be added straight to that respective tile (which will give the most direct support) or to any other tile supporting it
dusty yacht
last tiger
it will still decay from rain or monster damage. the color of the tile just indi...
Is it structurally sound (excluding from bad weather) as long as it doesn't instantly break?
I'm experimenting rn and on the left corewood pillar I can build out two floors from the floor on top of it but on the one I'm standing on I can only do 1 on each direction. I wonder if it's because I started by attaching the corewood pillar on top of the wood floor that it treats it as being on the side or something and giving it less integrity

ayo my theory seems to be correct
dusty yacht
idk if separate supports have like a value that can be combined with each other but that also seem to be a thing since these two red thingies can't be supported and will break instantly unless I build both of them at the same time

If I break one of them the other one breaks
it looks like supports also work diagonally even if worse. Noticed I couldn't place walls that exclusively 2 platforms away but the diagonal ones are also technically 2 platforms away but I could place it on it

 mental dove
So I'm trying to build something large for once and do something new but how do you guys hide the iron beams ? The wood walls expose it on both sides.
 trail topaz
mental dove
So I'm trying to build something large for once and do something new but how do ...
trail topaz
mental dove
So I'm trying to build something large for once and do something new but how do ...
you can snap corewood beams over them to hide them.
elder phoenix
mental dove
So I'm trying to build something large for once and do something new but how do ...
Why hide the beauty of ironwood?
mental dove
elder phoenix
Why hide the beauty of ironwood?
Haha I'm not a big fan of the look
last tiger
dusty yacht
it looks like supports also work diagonally even if worse. Noticed I couldn't pl...
yes it is almost a team effort in a way. sometimes I also build two pieces at the same time knowing that they will also support each other. its a total summary of support. so if you add a strong support pillar to the center of say a square, it will increase the support of each piece in the square with the corner pieces having the least increase in support due to distance from the original addition
elder phoenix
mental dove
Haha I'm not a big fan of the look
YOU TAKE THAT BACK!! 😭😭😭😭
warped quiver
last tiger
ive been trying to decide for so long. which wall materials for these two gazebo...
They are different parts of the building. I like them this way. xD
 supple girder
its been a while, but a shape like this cant smoothly be filled with roof pieces, correct?


 crude basin
nope
crude basin
supple girder
its been a while, but a shape like this cant smoothly be filled with roof pieces...
supple girder
noted, its impossible, neat vid, but not the goal i was looking for. thank you
dusty yacht
how do I make this plank blue while also attaching properly to the rest of the planks?

The only way I was able to make it blue is by placing it while aiming on top of the log, but then it'd be on a different level from the rest of the planks. I thought the log would have the exact same placement if I made it level with the other planks and then placed the log while looking at the plank either underneath and above but that didn't seem to do the trick either
warped quiver
dusty yacht
how do I make this plank blue while also attaching properly to the rest of the p...
There are three conditions for wooden structures to be Blue: Placed on direct ground, placed on stone/grausten building pieces or iron-wood/metal pole (up to a certain high), and connected directly to trees.
 tidal vault
Anyone have any recommendations for how to bring my build to the next level?
 warm stirrup
tidal vault
Anyone have any recommendations for how to bring my build to the next level?
warm stirrup
tidal vault
Anyone have any recommendations for how to bring my build to the next level?
I would add banners, as well as a little prisoner encampment on the bottom left with cages skewed around. It's not difficult to trap Fulings 👍
 slow crow
Hello! I've recently (or not so recently depending on how much work I've put into this...) got into the Mistlands biome! With that I decided to dedicate a large tower made of black marble filled with all the latest gizmos I can find (I found out about the side effects of having an Eitr Refinery near stone structures...).
With that I wanted some peoples opinions on how I'm designing it:
The exterior will look like this.

One moment it got to night...
And the interior will mimic the outside. However due to how I am placing the floor I'm running into a choice that I don't know how to solve:

My question is, do I adjust the floor height and stay consistent with the exterior of my tower
or do I adjust the interior corner pieces to look more pleasing internally, leaving the outside pieces alone
Or should I move this to building ideas 😄
dusty yacht
warped quiver
There are three conditions for wooden structures to be Blue: Placed on direct gr...
but this piece is blue even though it's just attached to a log pole
 warped quiver
dusty yacht
but this piece is blue even though it's just attached to a log pole
warped quiver
dusty yacht
but this piece is blue even though it's just attached to a log pole
When you first place a piece, regardless of where it is attached to, it becomes blue for a few seconds. However for it to stay blue, it needs a stronger material, and Core wood, iirc is not as strong to continue to make the piece blue.
 young hemlock
hi guys, how can i turn off mob dmg into my structures?
elder phoenix
#mods-discussion would be your only option.
young hemlock
okay
 lethal verge
elder phoenix
<#1202934289898151966> would be your only option.
lethal verge
elder phoenix
<#1202934289898151966> would be your only option.
Perimeter defense comes to mind. Moats and earth walls through most of the game works a charm. If they can't touch it they can't damage it
placid trench
young hemlock
hi guys, how can i turn off mob dmg into my structures?
You can't turn it off but you can mitigate it really well with proper defensive techniques. There are ways to eliminate 99% of any damage your structures could get.
young hemlock
It's a pity I can't do this command :( I'll watch yt videos about defensive techniques
thanks plenti
placid trench
young hemlock
It's a pity I can't do this command :( I'll watch yt videos about defensive tech...
Nutty mentioned the two major ones, moats and earth walls, but there are a few others out there too. Depends largely on personal preference.
I always elevate my buildings to make it too steep for anything to climb up to them.
young hemlock
I'll have to make a tiny moat
placid trench
young hemlock
I'll have to make a tiny moat
Big enough that a troll with a tree can't reach across
lethal verge
Airborne raids are another consideration
 frank citrus
lethal verge
Airborne raids are another consideration
frank citrus
lethal verge
Airborne raids are another consideration
I got 2 airborn raids recently, lost all but 1 2 star boar. In the second one while building the fortifications OVER the boars, lost the last of them
frank citrus
frank citrus
I got 2 airborn raids recently, lost all but 1 2 star boar. In the second one wh...
So since i'm built on a nice hill on the coast, I'm going to bunker the pen by digging it down and leaving the natural ground as a wall around it and then build a new structure over the top
 earnest axle
Would it be able to give the floor a misty effect by placing item stands with frostners under the floor boards? I'm trying to build a walk in freezer
Wait, should I ask this in building discussion?
 crisp inlet
earnest axle
Would it be able to give the floor a misty effect by placing item stands with fr...
crisp inlet
earnest axle
Would it be able to give the floor a misty effect by placing item stands with fr...
Yes, that's the way you will get that effect.
You can also use stone golem trophies. Whisp lights will also give you a blue glowing effect with some more partical effects.
Have fun combining those items!
 real viper
Ive heard about some folks using trees to get stability in tall builds - how exactly does this work? Wouldn't the branches and leaves just clip through everything?
trail topaz
Yes they do, that’s the trade off for blue stability at 20m
inland burrow
This a good window design for my build in mistlands?
 lethal verge
real viper
Ive heard about some folks using trees to get stability in tall builds - how exa...
lethal verge
real viper
Ive heard about some folks using trees to get stability in tall builds - how exa...
Most space efficient would be a pine tree. Makes for a nice column
real viper
lethal verge
Most space efficient would be a pine tree. Makes for a nice column
I didn't consider this!
Thank you!
lethal verge
You're welcome.
trail topaz
Problem with the pine tree is that it sways a lot in the wind so you have to be careful how you build around it. That's why most people use Oaks, because they're more stable.
elder phoenix
Ancient trees though 💪
inland burrow
can i get black forge to lvl 3 before queen?
elder phoenix
Did you make a Spring?
inland burrow
elder phoenix
Did you make a Spring?
whats a spring
elder phoenix
A spring is a device consisting of an elastic but largely rigid material (typically metal) bent or molded into a form (especially a coil) that can return into shape after being compressed or extended.
dusky dirge
Valheim Wiki
Mechanical spring is an item and can be crafted at an Artisan table. It is used to construct base defenses. Crafting: Trap Ballista Vice
frank citrus
How would be the best practice for making rounded edges
lethal verge
frank citrus
How would be the best practice for making rounded edges
1m beams is what I use to make round shapes. Core wood for edging.
inland burrow
anyone got tips for greystone roofing
frank citrus
Do the wicker candles do anything?
 cyan owl
Provide light and when they burn all the way down you can get your wax back
 sour turtle
Any good building tips out there
lethal verge
sour turtle
Any good building tips out there
Terraforming according to cardinal direction makes better looking lines. Walls, trenches, and paths.
sour turtle
Oh cool ! Is there a building tip for scaling cause I either make somthing way to big or way too small
lethal verge
Perhaps beds and crafting benches are good frame of reference
 shell sandal
Hey guys, looking for some help with some modded building. I got a mod to allow some more rotation (PerfectPlacement), since I wanted 64 degree roof pieces (kind of an inverted 26 roof piece, for a steeper roof then the 45). All was going fine until I needed to do an inner piece. I can't just seem to do rotations on two different axis' to get the desired effect, and while I could eyeball it, it still doesn't properly line up. It either ends up being TOO steep or TOO tall. Does anyone have any advice on how to do this?
trail topaz
try asking in #mods-discussion
shell sandal
Will do! I know it is modded building, but the game does natively support the rotation placements, jsut need the mod toa llow the custom rotations from the hammer. I guess it is more of a maths question, so maybe I should find a 3D graphics discord lol.
winged breach
sour turtle
Any good building tips out there
hide work benches and/or furniture you dont want under the floor
same with workbench/cooking pot upgrades, for a less cluttered look. Stone walls or floors work really well for that. I usually hide the cooking upgrades in the fireplace+chimney and then add them later for cosmetics since they're usually out of range
elder phoenix
Hide nothing. Expand size of room and place appropriately.
frank citrus
Don't build, only fight
lethal verge
No shot. Years in and still get a kick out of building.
sour turtle
Building is the best part of the game
elder phoenix
*Sailing
frank citrus
these guys are a pain in the butt, how do you guys keep them from stacking?
 lethal verge
frank citrus
these guys are a pain in the butt, how do you guys keep them from stacking?
lethal verge
frank citrus
these guys are a pain in the butt, how do you guys keep them from stacking?
Individual pens
frank citrus
Layouts for the furnaces?
lethal verge
frank citrus
Layouts for the furnaces?
What are you asking. Sorry
frank citrus
how people lay out there furnaces for smelting
lethal verge
frank citrus
how people lay out there furnaces for smelting
I like to put my furnaces with a full tile space between each. Placing each furnace on a respective tile. Makes lining up exhaust hoods easy. Where as the coal kiln needs a little finesse to line up with an open tile above it. Either way I like them to be close to one another for efficiency.
elder phoenix
Exhaust hoods?
lethal verge
elder phoenix
Exhaust hoods?
Yea. Using walls and roofing to direct the smoke out of a wall.
elder phoenix
lethal verge
Yea. Using walls and roofing to direct the smoke out of a wall.
That implies you have smelters... inside??
lethal verge
elder phoenix
That implies you have smelters... **inside**??
Yep. Furnaces and kilns indoors. It's a beautiful thing. "Clean" dry smithy shop.
elder phoenix
Heresy.
lethal verge
I'll try to take some shots of my most recent iteration tonight. Stone and ash wood aesthetic. Still working on ideas for grausten trim
 graceful knot
earnest axle
Would it be able to give the floor a misty effect by placing item stands with fr...
graceful knot
earnest axle
Would it be able to give the floor a misty effect by placing item stands with fr...
I saw Vers video where they use Frostner to have a chill look. I "think" it was on ceiling and walls. Try that or just experiment with it.
frank citrus
graceful knot
I saw Vers video where they use Frostner to have a chill look. I "think" it was ...
I hope that in the upcoming update, they give us the ability to rotate items X and Y insdead of just Y. Left and right is fine, but the ability to rotate up and down could allow for some signifigant changes. I have a mod that lets me do it, but not everyone does. I'm trying to cut my overall mod list down
frank citrus
So, when it comes to building with Wood, I know that exposure lowers its health and changes the appearance. Asside from putting a roof over the top, any reccomendations on how I can slow down or prevent the break down?
earnest axle
frank citrus
So, when it comes to building with Wood, I know that exposure lowers its health ...
Lay down stone then snap wood to it. Any wood laying flat against the stone won't decay
frank citrus
How do you mean?
earnest axle
If you're making a wood floor outside and you don't want a roof make a stone floor first, then lay wood directly on top of the stone
frank citrus
What about stairs? We just remodelled our Workshop space and up on the second floor is the Workbench+upgrades. It's an open air area in the front where the Charcoal Kilns and the furnaces are, with the Artisan table and the forge under the upper floor. But the stairs and guard rail are exposed.
graceful knot
frank citrus
I hope that in the upcoming update, they give us the ability to rotate items X a...
be surpised if they add that becouse theres a mod for it. Guess we'll find out
graceful knot
earnest axle
If you're making a wood floor outside and you don't want a roof make a stone flo...
you can also add roof tiles onto stairs and still be able to clime the stairs.
 gusty turret
graceful knot
be surpised if they add that becouse theres a mod for it. Guess we'll find out
gusty turret
graceful knot
be surpised if they add that becouse theres a mod for it. Guess we'll find out
Way better to have it in vanilla than to rely on a mod though and it really just makes sense with the building system they created.
feral swift
How can i get the snapping system to do what i want here?
I'm trying to do stone, then a layer of darkwood (either on or half inside the stone),
and then planks on top of it, not interpenetrating the darkwood at all
i basically want the darkwood as a spacer between wood and stone, it refuses to behave. Thoughts?

the plank on top of the darkwood here is just slapped down, it isnt snapping anywhere
I think what i need is quarter metre vertical spacing
tried experimenting with a corewood log, its still not right, lower one is half buried in stone, the upper one has too much spacing from the stone
 feral swift
i guess what i need is to make a 1/8th of a metre vertical offset
lethal verge
feral swift
i guess what i need is to make a 1/8th of a metre vertical offset
Have you tried stacking the small wood floor pieces? 2-3 may give you what you're looking for
trail topaz
can I ask why you want to use darkwood as your spacer? You should be able to use a corewood log as a spacer and can snap the wood flooring on top of it.
feral swift
lethal verge
Have you tried stacking the small wood floor pieces? 2-3 may give you what you'r...
they don't snap to each other vertically, had that idea and it wouldnt work
feral swift
trail topaz
can I ask why you want to use darkwood as your spacer? You should be able to use...
aesthetics primarily, but also the size
corewood is somewhat thicker, and i think it just looks kinda bad up close
darkwood has that sweet polycount
for now ive ended up doing it by hand, both the spacer and the floorboard on top, i guess its probably close enough, only off by a few millimetres
but if theres a way to get snapping working for my needs i'd still prefer that
does paint exist? We'd like to have walls with a white exterior
elder phoenix
No paint.
Just different wood colors.
feral swift
what colours? all ive seen are three shades of brown
elder phoenix
Wood is brown.
Ashwood is grey.
Darkwood has some black accent pieces.
Then you have stone vs. black marble for some other contrasts.
You can also purposefully let wood get rain damage for a green hue to it.
feral swift
aww, not much i didnt know about
lethal verge
feral swift
they don't snap to each other vertically, had that idea and it wouldnt work
The intention is to use a snapping point on the lil floors as, a way to change the position of your horizontal spacers. Two to three stacked should give you half the thickness of a core log
feral swift
lethal verge
The intention is to use a snapping point on the lil floors as, a way to change t...
but since they don't snap with each other, that's 2-3 manual placements, and 2-3 chances to compound mistakes, this doesnt seem better than just placing the darkwood beam by hand
lethal verge
We learn the most from failures? Good luck
 uneven charm
this is the best i could think of to make polished sloped levelling, still quite messy though, anyone got better strategies?


 crude locust
I usually use the pathing tool to smooth stuff, normal or stone pathing doesnt matter.
uneven charm
crude locust
I usually use the pathing tool to smooth stuff, normal or stone pathing doesnt m...
mm, i got many problems with stone pathing, feels it messes up the height of the soil more than anything else
crude locust
when you look directly in front of you and run while hitting the pathing tool with the hoe it should create a somewhat smooth incline
uneven charm
yes i tried that, and also the holding shift thing, guess i'll just have to practice more
crude locust
I try to avoid Terraforming and keep it to a minimum 🙂 it always takes ages to get anything done with terraforming 😄
uneven charm
yup, me too, screenshots are from my Hammermode-LegoSandbox-practice-world, i usually keep terraforming to a minimum
lethal verge
uneven charm
this is the best i could think of to make polished sloped levelling, still quite...
Making a hill face is a pita to perfect. Facing downhill and trying to keep consistent movements and corrections. Then of course there will be high spots to fix. Being in line with the high spot and sometimes go with the pick. Patience and time ftw. Good luck
 storm ridge
hey how do people get these super flat terrains they build on? i feel mine look like an undercooked cake when i flatten terrain
 split stratus
storm ridge
hey how do people get these super flat terrains they build on? i feel mine look ...
split stratus
storm ridge
hey how do people get these super flat terrains they build on? i feel mine look ...
You have to use both pickaxe and hoe.
 nocturne sierra
Hey all, i would be happy if anybody have some tips on organising the small piece of land i've found for my second base that i want to use until i reach plains.
I know its somewhat tiny (i like it because i can place two small docks on the two sides, and set sail into the sea at both sides of the island withouth the need to run far from my home)
I think to build a two floor building 7x4 or 8x4, and leave place for two docks, boar pan, farm, space for portals, smelter and chraocal kiln.
So i'm having troubles with understanding how much space i need to clear for all this actually..
I'm also wondering if raising the ground and digging trenches around filled with water might help during raids?
p.s. i don't want to make a huge village, just space enough to fit the needed workbenches etc.


 storm ridge
how large should a crafting room be to fit upgrades and such?
warped quiver
uneven charm
mm, i got many problems with stone pathing, feels it messes up the height of the...
It does messes up. Therefore I use a mod that removes it. I just hate it trembles the ground while also "painting" it.
 zealous talon
storm ridge
zealous talon
storm ridge
The "trick" is to raise the terrain once, each time that you cant get it flat.
after raising it, you tap it flat again with the hoe.
if you cant tap it flat and it stays risen, you use the pickaxe and mine it down once or twice --> hoe again.
so its basically a ping-pong game of raising ground or mine it down, followed by flattening it with a hoe.
Once you get the hang of it, it goes pretty fast.
storm ridge
currently build a box with the minimum size of what i need. now i have no idea how to advance. its going to be the back end of a walled in fortress/town. but i have no idea how to go forward now

 acoustic widget
How do I build with the shingled roof, first time getting them and they place differently than the regular roofs.
elder phoenix
They have the exact same snapping points, so idk how they would place differently?
warm stirrup
acoustic widget
How do I build with the shingled roof, first time getting them and they place di...
They're more limited to building gable & cross gable rooftops, even more specifically a rooftop style called gambrel. Looking into this style should reveal many rooftop style that grausten allows you to make. 👍
 slow spindle
I wanna place floor ontop of this...how could i support it well without it taking up toooo much space? ^^


 supple girder
slow spindle
becouse thats gonna be eh..difficult 😄
supple girder
slow spindle
becouse thats gonna be eh..difficult 😄
wood provides nothing to support stone, best bet is to spam arches on the edge and use strategic spacing of pillars. them floor tiles you place the less pillars you would need minimally because there is a slight support from the surrounding tiles but really only when you have ALL of them placed
or wait till you get iron to do that
slow spindle
supple girder
wood provides nothing to support stone, best bet is to spam arches on the edge a...
i am already at dark iron x3
supple girder
black metal?.... then making a stone floor is rather trivial with cage wall supports in the walls, and wood iron poles, greatest support make sure they are purely vertical
slow spindle
or however the plains metal was called agin
supple girder
trivial in concept, but the work to do it wont be with the size of the space you are covering
slow spindle
ah so doing it that way is pretty crazy in simple speak? xd
supple girder
its a matter of keeping them supported during the process, it ill take up space doing the supports
supple girder
slow spindle
well thats helpfull tips
this is one of the things you can do to help have support for the hight you are building at, and in this particular case it would help you get rid of the 1 meter layer of stone you have on top of your current walls


and using the wooden door you can align metal bars to be places hidden in your walls for better support from the edges since iron is stronger

 slow spindle
thats some nice building tricks x3
slow spindle
i need so much metal now xd
supple girder
nerver enough
 marsh depot
storm ridge
hey how do people get these super flat terrains they build on? i feel mine look ...
marsh depot
storm ridge
hey how do people get these super flat terrains they build on? i feel mine look ...
My method is a little tedious but I will build floor pieces in a sortof grid pattern and use the hoe/pick to get a really accurate ground level. Trying to go off what LOOKS to be flat usually ends up in lopsided/lumpy platforms.
storm ridge
marsh depot
My method is a little tedious but I will build floor pieces in a sortof grid pat...
thats a good way to do it i feel
 lean scaffold
slow spindle
lean scaffold
slow spindle
Wood iron beams - you can align them in the middle of the first row of floors using shift key, make grid of them and than place your stone floors
it would look something like this
 marsh depot
storm ridge
thats a good way to do it i feel
marsh depot
storm ridge
thats a good way to do it i feel
It is! Hopefully you can use it for the next time you need a super flat area to build on!
storm ridge
now the only problem is  building
slow spindle
lean scaffold
Wood iron beams - you can align them in the middle of the first row of floors us...
thanks, but i already dis that yesterday (rip 50 iron-)
i made beams to support the stone spaced apart at certain spots
 austere zinc
When I try to use workbench, it says workbench needs a roof. Hammer equipped, I right-click, click on a thatch roof, try to place it on workbench, and it says either blocked or invalid placement.
What gives?
slow spindle
quick n dirty?
slow spindle
austere zinc
When I try to use workbench, it says workbench needs a roof. Hammer equipped, I ...
place two floors, wall 3 sides off (Back ans sides) place roof on back walls

 stoic terrace
u dont even need those 2 walls on sides, just 2 roof or 1 is enough
marsh depot
storm ridge
now the only problem is <:TrophyFrostTroll:489509728070795264> building
Dirt walls! You can find the right angle with just a couple hits with a pick to make super straight lines and none of the mobs can run up them! You just have to know how far out the troll with the tree trunk can reach and they can't touch your base!
stoic terrace
I always struggle with the doors/window design any ideas? also pretty new to this game this is what I only have atm

 supple girder
stoic terrace
I always struggle with the doors/window design any ideas? also pretty new to thi...
supple girder
stoic terrace
I always struggle with the doors/window design any ideas? also pretty new to thi...
thats a broad question (atleast for me) what restrictions are in place to help narrow down to some examples?
stoic terrace
supple girder
thats a broad question (atleast for me) what restrictions are in place to help n...
basically just to make this look good
 supple girder
stoic terrace
basically just to make this look good
supple girder
stoic terrace
basically just to make this look good
with just wood, the options are limited, but you can extend it outwards with Shift Placements and in this case ive used the 45 cross as an extra, or use 1x1 floor (snapped to the wall not the beams) to give it a ledge... personally im not a big fan of angled wood especially for a 2x2 window cause they are so thicc.
there are a few other things but they require more to account for with the rest of the build. i could maybe give more examples but im really only good with hands on situations to explore ideas


 stoic terrace
ohhhh, thanks man
been trying todo that haha, I see now
it's only for the door, cause it's too plain
I also think it would look bad on window
Unless it's a huge frame
vernal talon
@stoic terrace If you don't mind thick walls (three walls thick to hide things on both sides) there's this design. Originally done for stone, but works in wood as well.
 austere zinc
marsh depot
Dirt walls! You can find the right angle with just a couple hits with a pick to ...
austere zinc
marsh depot
Dirt walls! You can find the right angle with just a couple hits with a pick to ...
Wait, is it possible to remodel the landscape as in Wurm Online/Unlimited?
supple girder
austere zinc
Wait, is it possible to remodel the landscape as in Wurm Online/Unlimited?
yes, the hoe
and pickaxe for removal, kind of a core aspect for the game since you have to dig for silver, and copper deposits are bigger than you think, deeper than 8 meters most of the time
you just cant make caves with terrain alone, a boulder or placed stone is the only way to roof for a cave.... aside from the silly Elder platform
stoic terrace
vernal talon
<@319503156369293312> If you don't mind thick walls (three walls thick to hide t...
this is useful thanks man
 marsh depot
austere zinc
Wait, is it possible to remodel the landscape as in Wurm Online/Unlimited?
marsh depot
austere zinc
Wait, is it possible to remodel the landscape as in Wurm Online/Unlimited?
I have no idea what that is 😅
austere zinc
Video games, duh.
Wurm Online = MMORPG
Wurm Unlimited = for single player and player hosted servers
stoic terrace
any suggestions what to add? I think it's too plain need more details


 keen apex
Maybe a change to the land or area around it! But I think the build looks wonderful!
stoic terrace
lacks details tho
keen apex
I think a focus on the surrounding environment or the base of the build would drastically improve the appeal!
crude locust
Ivy veins from the Traders would look nice i guess.
stoic terrace
keen apex
I think a focus on the surrounding environment or the base of the build would dr...
added some details, and yeah I would try to add something about the surrounding area, I need to build walls


the front lacks details gonna add something for that as well
lethal verge
stoic terrace
the front lacks details gonna add something for that as well
Rather tall build on stilts. Use a fair amount of iron beams for stability?
stoic terrace
lethal verge
Rather tall build on stilts. Use a fair amount of iron beams for stability?
ahh so it depends on beams as well, I can't do that sadly. I just played this game 2 days ago, I just got into swamps
lethal verge
Looking good either way
 pine wing
hey, i want to make an off set with a beam
but if i go snapless, it's no longer sunken into the other beams, making it uneven
how can I sink structures in other structures without snap points?
 lethal verge
pine wing
hey, i want to make an off set with a beam
but if i go snapless, it's no longer ...
lethal verge
pine wing
hey, i want to make an off set with a beam
but if i go snapless, it's no longer ...
The wooden door may work for what you want
It has 3 snapping points
supple girder
pine wing
hey, i want to make an off set with a beam
but if i go snapless, it's no longer ...
Nutty is right, but only horizontally.... it looks like you want it vertically tho, in that case, do hold shift but look at that beam on top on the bottom of it
lethal verge
Good call Monkey
split stratus
pine wing
hey, i want to make an off set with a beam
but if i go snapless, it's no longer ...
Maybe Grausten floor piece could create a snap point vertically where you want it.
 random stone
Or corewood
uneven charm
supple girder
Nutty is right, but only horizontally.... it looks like you want it vertically t...
also alternating corewood horizontal beams with wood ones, then destroyng the corewood one will align them along th vertical pole with a fixed small gap

(the right pole seems uneven, but it's perspective, all auto snapped, no manual)
supple girder
that do be neato
lethal verge
uneven charm
also alternating corewood horizontal beams with wood ones, then destroyng the co...
Nice tech. The core wood has top and bottom snapping.
uneven charm
lethal verge
Nice tech. The core wood has top and bottom snapping.
yup, that's basically the wooden door vertical equivalent, creates precise half-meter snapping points wich then can be used for all sort of things
lethal verge
Indeed. I noticed Grausten floors works similar
uneven charm
lethal verge
Indeed. I noticed Grausten floors works similar
nice, i still have to get there, playing since beginning, but very slowly
lethal verge
Tons of fun
gilded pond
struggling to build a proper passageway for askvin pen. they always lump up and block the passage - anyone have any elegant functional builds for this?
feral swift
can smoke float up through iron cage floors, or any other floor?
how do we get smoke from these braziers to go up and out of the chimney structure

its kinda pooling here
 grand sigil
Ashlands structure im thinking about remaking in survival with friends
 supple girder
feral swift
can smoke float up through iron cage floors, or any other floor?
supple girder
feral swift
can smoke float up through iron cage floors, or any other floor?
smoke does not do through cage floors, and the smoke goes straight up, so thats where you should put holes for smoke to go... you can change the path of smoke with roof like structures though, but up is the direction it will always go.
pallid shadow
Hello, Valheim community! 🎮
I’ve just uploaded a new video on my YouTube channel where I recreated Warmaiden's smithy and shop from Skyrim's in Valheim. The video shows the full building process and interior design, so you can easily recreate it if you’d like. I’d love to hear your feedback or ideas for future builds!

In this video, I recreate the Warmaiden’s forge and shop from Whiterun, well-known from Skyrim, in Valheim. I tried to stay as true as possible to the original design of the building and its interior within the limitations of the game’s tools, while also adding a few personal touches. Since the in-game tools don’t allow for precise detailing, so...
lavish sierra
feral swift
how do we get smoke from these braziers to go up and out of the chimney structur...
I think your best option is to divert the direction of the smoke with the help of a roof tile angle outwards into a vent on the wall
Those braziers are placed right next to a wall so it should be easier than building a whole network of chimneys
slow spindle
is that high enough for the furnaces to still work?
 supple girder
slow spindle
is that high enough for the furnaces to still work?
supple girder
slow spindle
is that high enough for the furnaces to still work?
maybe, but i don't think its likely
just gottaa test it
 hollow gale
i want to bulid a tree base but i dont know how
lethal verge
hollow gale
i want to bulid a tree base but i dont know how
I square a floor piece up with the tree. Attach it at the height I like. Then start snapping floors all the way around. May take some clipping and overlapping. You'll have a platform to work with once satisfied.
Or if you're working with multiple pine trees. I start with core or iron beams. Lay out a frame that connects with three to four trees. Then snap the floor pieces inside the frame to make the platform.
There's a few yt vids that can give you visual perspective
 plush yarrow
Can anyone help me out in building and establishing a base?
I'm pretty new to the game and i just want something cool
supple girder
plush yarrow
Can anyone help me out in building and establishing a base?
i'de be happy to help guide you
plush yarrow
supple girder
i'de be happy to help guide you
I’ll be on in a bit if you wanna join my world
supple girder
plush yarrow
I’ll be on in a bit if you wanna join my world
ye, just dm me
plush yarrow
supple girder
ye, just dm me
alr
 shrewd badger
feral swift
how do we get smoke from these braziers to go up and out of the chimney structur...
shrewd badger
feral swift
how do we get smoke from these braziers to go up and out of the chimney structur...
why braziers? could do other hanging lights or just use torches on item stands on walls
 bright raven
any ways to make a gate or door that players can walk through both ways but tamed animals can only go through one way or not at all
supple girder
bright raven
any ways to make a gate or door that players can walk through both ways but tame...
you can jump, they cannot

 tulip maple
gilded pond
struggling to build a proper passageway for askvin pen. they always lump up and ...
tulip maple
gilded pond
struggling to build a proper passageway for askvin pen. they always lump up and ...
Depends on your definition of elegant... https://youtu.be/HQbdrmAveXY?si=zjI15uC-YV0OIi90

My breeding base for free range Asksvin. Unmodded. Gathered materials. Spawned Surtlings.
gilded pond
woah sick! looks like there is no way to have a good askvin entrance that's elegant other than a floating stair 😅
tulip maple
gilded pond
woah sick! looks like there is no way to have a good askvin entrance that's eleg...
If climbing is the problem, make it the solution
gilded pond
yes!
tulip maple
gilded pond
yes!
In reality that stair was more for me than them. They'll stack up trying to reach the Surtlings and reach the platform as soon as there are enough of them.
 low scarab
Good evening, Hope this is on the correct channel - Just curious.
If I want to build a work shop with ALL the workbenches and their "add-on's" with it, how big of a space would I need so I can still be able to move around without problems.
placid trench
low scarab
Good evening, Hope this is on the correct channel - Just curious.
If I want to b...
It really depends on how you want it to look. Some people place all of the add-ons so they're in the appropriate location as if they were actually being used. That takes considerably more space than if you try to cram things together as tightly as you can and you don't care about the aesthetic of it. I prefer a clean look so I almost always have a basement that hides as many add-ons as possible so I have more floor space inside my actual living area.
bright raven
tulip maple
Depends on your definition of elegant... https://youtu.be/HQbdrmAveXY?si=zjI15uC...
what is the point of this instead of an open pen? are wild asksvin being brought in regularly? does this allow for more asksvin total?
gilded pond
tulip maple
In reality that stair was more for me than them. They'll stack up trying to reac...
my issue is trying to grab the eggs and getting stuck in the pit 😅
tulip maple
bright raven
what is the point of this instead of an open pen? are wild asksvin being brought...
The point was to respond to a question about how Asksvin/ppl get out. I have open pens further out. This is my landing base, centered on a breeding pen. It was an open pen (see https://youtu.be/9WiuOjZgEzI?si=2BcCg_NTeKz2VXm7) but now it has defensive ring walls where I grow berries. I spend a time above in the base so breeding is frequent. Asksvin are free range but there are always some around the base. Not sure why I would bring wild ones in now. I captured the original breeders and they're well protected. Tame Asksvin roam the lands so there are no wild ones spawning for quite some distance.

Showing progress from Grausten mining throught to completed breeding base on the same site. Once the grausten was all mined I made an opening in the surrounding raised earth wall and enticed a 1 star Asksvin and no start Asksvin in. Closed it up, tamed them in the pit and build the rest of the base to support free range breeding around them.
For...
gilded pond
I'm trying to amass a chest of askvin eggs to mass hatch them (if that's even possible)
bright raven
tulip maple
The point was to respond to a question about how Asksvin/ppl get out. I have ope...
i see. i saw a maze of asksvin and was confused, thinking there was some underlying mechanic i was unaware of
tulip maple
gilded pond
I'm trying to amass a chest of askvin eggs to mass hatch them (if that's even po...
Definitely. If your pit is large enough you'll amass quite a few anyway before they stop breeding.
gilded pond
when I made a pit with ramps + doors they just clog up near the door haha
bright raven
gilded pond
when I made a pit with ramps + doors they just clog up near the door haha
i made a smallish pen in ashlands to get my initial eggs and they kept escaping either by breaking the doors when something got too close, or stacking on top of one another
tulip maple
bright raven
i see. i saw a maze of asksvin and was confused, thinking there was some underly...
It was built based on their behaviour, I wanted some in/some out. Spawning in other biome mobs helps if you're in to that
gilded pond
I wonder... if I planted trees as a sort of cage around the door if I could slip between the trees but it'd block the asKVn HMM 🤔
tulip maple
Free range is the answer
bright raven
gilded pond
I wonder... if I planted trees as a sort of cage around the door if I could slip...
i dont think they can fit through a 1.5m opening, but you can
gilded pond
can askvin break trees?
bright raven
not sure, but you cant repair trees and planting in the same spot would require some deconstruction
gilded pond
I used birch trees to pen lox and it worked like a charm!! they can't damage the trees
bright raven
im surprised lox cant damage trees
tulip maple
gilded pond
can askvin break trees?
I'm sure, if attacking. They do less motion damage than Loxes
gilded pond
I must test this! lol
tulip maple
gilded pond
I used birch trees to pen lox and it worked like a charm!! they can't damage the...
What about stomping
gilded pond
yeah lox can't do chop damage or w/e
gilded pond
tulip maple
What about stomping
it says 'too hard' anytime they hit the trees
tulip maple
I don't force enclose Loxes for breeding
gilded pond
they kept trampling my farm in plains so I caged around my farm with trees and they mostly free roam
literally could not believe it worked (read it on some random online post)
tulip maple
gilded pond
they kept trampling my farm in plains so I caged around my farm with trees and t...
I just live above them, for example https://youtu.be/NPQS8AI7Gjs?si=yiae6nf2edOQfZ2u

My method for breeding all tame-ables involves capturing a Greyling or similar. See why this is the most efficient breeding method with this basic example. I walk you through a simple stone and wood build. No mods or devcommands necessary.
The breeders won't leave but the offspring flee
hollow gale
i need help buliding a tree house
like how do i make it more round and how do i find bigger trees
tulip maple
tulip maple
I just live above them, for example https://youtu.be/NPQS8AI7Gjs?si=yiae6nf2edOQ...
Nice of the Trolls to visit as a base test 😄
vernal talon
hollow gale
like how do i make it more round and how do i find bigger trees
Either an oak in the meadows if you want something relatively safe, or one of the indestructible trees in the swamp. Both are good sized.
 ember folio
Builders of Valheim. i am stuck trying to build a good looking stone/wood bridge that a longship can sail under. keep in mind we are playing in survival vanlilla settings so we cant build extream stuff
i have been going at this with a friend for 2 days now and we cant figure out how to build a good looking bridge that we can sail under would also be great to be able to pull a fully loaded cart up it without getting stuck like we get on the 26 angle wood roof

plan is to build a town around the river
warm stirrup
ember folio
plan is to build a town around the river
I remember seeing a youtube short of someone utilizing many Darkwood gates all together to form a flat top that aligned with a bridge's width
Perhaps something like that could be possible for what you need?
supple girder
that sounds pretty excessive... might be cool looking... but you still need to build high enough anyways to let the boat through, and a longboat its fairly high
hmmm... i suppose if the doors are only for the hull of the boat, and the bridge has a gap for the mast (making the bridge actually 2 halves of a bridge)
then it doesnt need to be high
supple girder
ember folio
i have been going at this with a friend for 2 days now and we cant figure out ho...
its a concept with the idea (maybe not the same) from what Omni was referencing.... you do need to be slow and steady to go through.. and realistically dmg to the bridge will happen but it can go through without touching


 ember folio
supple girder
its a concept with the idea (maybe not the same) from what Omni was referencing....
ember folio
supple girder
its a concept with the idea (maybe not the same) from what Omni was referencing....
thank you. we will try this out. had not thought about it. much appriciated i will send you an update when bridge is built. atm we are building our houses. so will take a bit
supple girder
ember folio
thank you. we will try this out. had not thought about it. much appriciated i wi...
to be clear, that gap is 1 meter wide
and then another meter on each side of that before the doors are placed
supple girder
the more i think about it, its still a goofy design, the same can be achieved without the doors, realistically you would keep them open. might as well not have them, the meter gap for the mast and a 3 more meter gap till a post for stability on each side is the only thing needed
 torpid barn
How do I put a firepit in a wooden house without catching it on fire?
elder phoenix
torpid barn
How do I put a firepit in a wooden house without catching it on fire?
Leave a non-wood space in the floor and put it on the dirt.
Once you acquire Iron and can build the Stonecutter. You can have a wood building but with a stone floor and place it directly on that with no holes.
 winged kernel
need some recommendations for stuff to put on top of this gate house
 lethal verge
Archer nests and more detail to the wall
 burnt seal
are there any other things i should have in my plains house besides forge, furnace, and food (they are elsewhere)?

 wise condor
Can anyone tell me what these pillars are? I want to make this house but no clue how to start it

 modest berry
wise condor
Can anyone tell me what these pillars are? I want to make this house but no clue...
modest berry
wise condor
Can anyone tell me what these pillars are? I want to make this house but no clue...
forge coolers i think?
wise condor
modest berry
forge coolers i think?
Oh they do look similar! Can they even be used for foundations like this or is it likely the person who built it had mods?
modest berry
Im not sure can you even stack em like that
if its that is built without mods there is probably something between em
I think the real foundation is under the house because those coolers may not hold very much
better ask someone wiser
wise condor
Well thankyou for your help
 wicked wolf
Really struggling with covering this entire ceiling with stone floor rn

Ends up leaving a massive hole in the middle, tryna figure out the best way to use the least iron beams possible
lethal verge
wicked wolf
Ends up leaving a massive hole in the middle, tryna figure out the best way to u...
Run up columns from the ground to support until the whole thing is tied together. Then you can see which columns can be removed. Overlapping floor pieces also gets things to lock in. Albeit more expensive and creates a lot of those clipping graphic collision (z something).
winged kernel
how did they make those windows? are they even real
 wicked wolf
lethal verge
Run up columns from the ground to support until the whole thing is tied together...
wicked wolf
lethal verge
Run up columns from the ground to support until the whole thing is tied together...
DONE DID IT

aw man Im not looking forward to making the roof of this build
lethal verge
Work in all your straightforward symmetric areas then work in the rest.
lethal verge
winged kernel
how did they make those windows? are they even real
Glass block with normal wood trim. Not sure if that's also wood(?) trim in the seams of the block
Hmm perhaps that's the iron cage pieces
wicked wolf
Looks more like iron cage pieces tbh
lethal verge
Yea
stoic terrace
burnt seal
are there any other things i should have in my plains house besides forge, furna...
that crafting room is way too small trust me
if that's just for the looks then I think it's fine, but if u want a fully functional house then u need to expand ur house way more
burnt seal
Ok thanks I will do that
 rain lodge
anyone have any tips?
im tryna build a second floor with stone walls but they keep breaking i have tried all sorts of supports
split stratus
rain lodge
anyone have any tips?
im tryna build a second floor with stone walls but they ...
What kind of supports? Iron beams/cages?
wicked wolf
rain lodge
anyone have any tips?
im tryna build a second floor with stone walls but they ...
Higher stone walls can be built by using iron beams or cages inside going up from the terrain, I recommend experimenting on a separate world with build mode and dev commands to get a feel for it and find a solution that works for you and uses as little iron beams as possible
ember folio
quick question does anyone know if they ivy will grow up on my tower here? as it is connected to the wall with just a slight angle? would love for it do to. hench why i have temporarily removed some of the details to let it grow

 brittle zenith
burnt seal
Ok thanks I will do that
brittle zenith
burnt seal
Ok thanks I will do that
Just as an idea for crafting right now (killed half the bosses) I have 3 main workstations for crafting, plus almost a dozen upgrade pieces next to them
 arctic osprey
What y'all think of my lighthouse

Also, you can place (no snap mode) an iron cage floor piece on any floor, like wood or whatnot, and place a bonfire on it, and you won't see any gap between it and the floor
But I can attest that using iron cages, which stack like 2x higher than anything else, can somehow support stone.
I figured this out by trying to demolish a prebuilt structure that looks like a broken bridge but it's ridiculously tall, only to find iron cages inside acting like a rebar frame. I assume they clip THROUGH the bars to make it buildable on the bottom, and continue clipping and meshing with stones and cages until the SI is so low the stones just break.
I'm experimenting with different shapes now, as you can tell from my castle
 boreal coyote
arctic osprey
What y'all think of my lighthouse
boreal coyote
arctic osprey
What y'all think of my lighthouse
the Iron gate door i think is best for rebar as its the tallest Iron piece straight out of the box so can be stacked higher
 still basin
brittle zenith
Just as an idea for crafting right now (killed half the bosses) I have 3 main wo...
still basin
brittle zenith
Just as an idea for crafting right now (killed half the bosses) I have 3 main wo...
I build a subfloor under my crafting area so that everything is hidden other than the items I need to interact with. Much cleaner look, and a smaller footprint.
brittle zenith
still basin
I build a subfloor under my crafting area so that everything is hidden other tha...
I'm very much an aesthetics person, I try to incorporate them into the build
A good trick is putting them outside the wall the workbench is against, especially the two woodcutting based ones, they look great next to a stack of wood
 soft geyser
wise condor
Can anyone tell me what these pillars are? I want to make this house but no clue...
soft geyser
wise condor
Can anyone tell me what these pillars are? I want to make this house but no clue...
you could also shift-place a couple corewood logs in a tight circle to make it appear like a thicker post
wise condor
soft geyser
you could also shift-place a couple corewood logs in a tight circle to make it a...
thats what i ended up doing, thanks 😁
vernal talon
ember folio
quick question does anyone know if they ivy will grow up on my tower here? as i...
Ivy will not turn a corner. If you want it in that spot, you'll have to plant it below the area, or plant some in the correct facing, and use some temporary support to get it to that area.
 tame pulsar
Anyone have any tips on how to make a good chimney for the stone fireplace?
 dense edge
tame pulsar
Anyone have any tips on how to make a good chimney for the stone fireplace?
dense edge
tame pulsar
Anyone have any tips on how to make a good chimney for the stone fireplace?
Depends a bit on constrains of your build, but what's essential is that the top is covered from sky but there's also plenty of ventilation
Adding details will make it look nicer
 magic sluice
I have a question. So I’m not very good at building. Could someone come help me with my fence? I could give you the materials
 hallow tide
Hello builders 🙂
I need your help. I'm playing survival with some friends and I wanted to build a church on a hill in plains (where I stand on the screenshot).
I want to make it defendable against mobs (trolls and gobelins mainly) and make it look good at the same time.
What would you suggest to make that beautifull hill a safe place ?
Please share any advice or defense prototypes I can take inspiration of ❤️
 lethal verge
Defense idea. Just below the edge of the hill. Following cardinal direction. Axe pick straight walls so mobs can't climb up. Shouldn't take away from the aesthetics while on top of the hill.
hallow tide
lethal verge
Defense idea. Just below the edge of the hill. Following cardinal direction. Axe...
I will try that 🙂
Thanks!
I should also think to the road climbing up that hill but that shouldn't be a problem.
If anyone has a screenshot of similar builds, I would be curious to see it.
 tight wedge
Hello, i am fairly new to the game, and i want to build my rooftop here, but when i place the wooden planks they fall down, can i get some help please?

i know that i need reinforcements for it to stay up, but i don't want to place a pillar on under each square.
split stratus
tight wedge
Hello, i am fairly new to the game, and i want to build my rooftop here, but whe...
Corewood beams offer better support for roof that high.
tight wedge
or is it too weak because of the giant windows i made?
tight wedge
split stratus
Corewood beams offer better support for roof that high.
oh ok, so i need corewood
split stratus
tight wedge
oh ok, so i need corewood
In your current state of progress they are available for supporting your buildings, once you enter further you will get other options.
tight wedge
ok, thanks a lot, didn't know corewood beams hold structures better
split stratus
tight wedge
ok, thanks a lot, didn't know corewood beams hold structures better
Also note that wooden floor pieces don't count as roof, so you need to use proper roof pieces in their place.
split stratus
Okay, mentioned just in case.
tight wedge
ty
split stratus
You can check the stability of each building piece by howering your hammer on them, blue means it is the most stable (connected on ground), green is good, then if it goes red it is not any well supported and might collapse.
 jolly zephyr
a central chimney made of corewood beams will give the roof something stable to attach to as well, might help for the tricky middle which will be the furthest away from any support
tight wedge
so i build in the middle corewood beams and then around that
jolly zephyr
ye it should be easier to get the roof to join up to that
tight wedge
also, i made the second floor one layer downwards, is there anyway to connect that gap with the things i have now?

i mean if rain doesn't come in to destroy my house, i'm fine with leaving it like that
split stratus
tight wedge
i mean if rain doesn't come in to destroy my house, i'm fine with leaving it lik...
Rain doesn't destroy any pieces, it just degrades them to 50% HP.
tight wedge
oh ok, but can rain get through those gaps?
split stratus
Those small gaps in roof? Yes.
tight wedge
oh damn
split stratus
Just in case if you weren't aware: using Q and E for changing snap points for building pieces can make building easier, like when you place those supporting corewood pillars.
jolly zephyr
something like this, will provide good support for the middle roof
 tight wedge
oh ok, i'll aim for something like that
jolly zephyr
i'm using iron but just use whatever the strongest materials you have available are
split stratus
jolly zephyr
i'm using iron but just use whatever the strongest materials you have available ...
Corewood seems to be the best supporting material for them currently (bronze age).
jolly zephyr
also important is that you can trace the corewood supports all the way down to ground and they must be contacting to gain full support
tight wedge
yeah i traced them through the floor
split stratus
tight wedge
yeah i traced them through the floor
Incase you missed this: #building-tips message
split stratus
tight wedge
oh, it's just your message, i thoght it was another channel
Yeah, it kinda seemed to be overshadowed by that screenshot Meow showed so I wasn't sure if you saw it.
tight wedge
@jolly zephyr @split stratus i made it like this, i didn't have space in the middle to do a central chimney

what do you think? could i have maximised my space more by placing less beams?
jolly zephyr
looks sufficient, and hopefully enough to keep the roof up 👍
jolly zephyr
the horizontal beams are less important as horizontal support degrades faster than vertical so you may decide to remove some of those but they are quite fine as is
jolly zephyr
it can take a few minutes for the stability checker to catch up to the top of a build, hovering with the hammer will tell you more than i can
tight wedge
the reddest one looks like this
 jolly zephyr
from experience that should be fine
tight wedge
nice
split stratus
tight wedge
the reddest one looks like this
You're fine with that.


 mossy vessel
hmm
 mossy vessel
hmm
mossy vessel
mossy vessel
hmm
this one i think the best, but idk
brittle zenith
Is there a video somewhere that explains how to do semi circular cone roofs?
I had guess at doing it but mine looked a little chunky in areas compared to some I've seen
lethal verge
brittle zenith
I had guess at doing it but mine looked a little chunky in areas compared to som...
A nice 10x10 building makes for easier round roofs.
lethal verge
brittle zenith
Is there a video somewhere that explains how to do semi circular cone roofs?
Probably best vid on the subject
Description: Strategies for Filling in Roof Gaps - Valheim. In this one I show my favorite strategies for filling in the gaps in your roofs in Valheim and I also share how to create a multitude of different types of roofs! This is the 2nd part to a 6 part series that is everything you need to know about making a roof in Valheim. More coming soon...
brittle zenith
lethal verge
A nice 10x10 building makes for easier round roofs.
I'm constrained by the size of the building that's already there sadly but I think this should work, thanks :)
lethal verge
26° & 45° triangles would make circular roofing so much easier. Hope it comes together for you
wicked wolf
for some reason only one of my braziers stays lit when its raining, any idea what the issue could be here?
 fresh jackal
it looks like it's sufficiently covered from above, so it's probably strong wind blowing most of them out due to insufficient horizontal cover
wicked wolf
fresh jackal
it looks like it's sufficiently covered from above, so it's probably strong wind...
ah thats good to know, I didnt realise wind played a factor and that makes sense with the one being lit as its at a spot where the bridge turns so the supporting logs are closer together
lethal verge
Aren't these brazier's suffocating from being so close to the roof? Although I would assume iGod hung them at the same position. The horizontal cover is interesting. Didn't know it was a thing
fresh jackal
i don't think they emit those white particles when suffocating but i could be misremembering
worth mentioning that the wiki doesn't mention braziers on the cover page so i'm not 100% certain they need horizontal cover during strong winds, but it'd be odd if they didn't.
i'll test later
 lethal verge
Neat
wicked wolf
lethal verge
Aren't these brazier's suffocating from being so close to the roof? Although I w...
I’m gonna do some more testing tomorrow but upon closer inspection the one that stayed lit was slightly offset from the centre of the roofs compared to the other ones I checked that had gone out
lethal verge
Hmm perhaps allowing a bit more room for the smoke to move away
fresh jackal
i remembered right, they don't produce steam particles when suffocating from their own smoke, it's gotta be wind.
(here's also an example of wind blowing out fires with insufficient cover, and a screenshot of a brazier being blown out by wind in clear weather, the wiki page is incomplete)

(wind direction doesn't matter, you just need 70% of the invisible rays cast by a fire source to hit a solid object for it to count as sufficiently covered.)
and due to how few rays are actually cast by objects, cover can feel pretty inconsistent with rays sometimes incidentally dodging objects depending on what Y angle the structure is built at


 lethal verge
Now that's cool. Learned another something. Thanks Winter
wicked wolf
cant figure out a way to do this any better, on the plus side its functional, but it does look kinda ugly


bridge connecting two plains together through a black forest is coming along pretty nicely tho

 balmy monolith
how do people get stone stuff to float on top of water or build structures on top of water or sround in the trees cus i cant figure it out whatever i try
lethal verge
balmy monolith
how do people get stone stuff to float on top of water or build structures on to...
No build will float on water. Either raise earth or put the structure on stilts
balmy monolith
lethal verge
No build will float on water. Either raise earth or put the structure on stilts
but how do people make such long bridges over the ocean then with big builds? i dont underestand it and raising ground takes so much time and i cant always teach deep enough to raise it and also somehow it all just looks like its on water
 hasty cliff
hello, i'm looking to build a treehouse for the swamp, i would like to rely on fallen trees to get the path starting, but i can't find the console command to spawn them, is there even a way to do so, or should i just try to make it on the spot when i generate the map?
looks like its a terrain generation thing, and i'm not even sure you can rely on console commands to spawn them, just figured i'd ask before giving up.
 sinful isle
Anyone have any design ideas to add more texture on these front and back ends? Have only materials up to swamp, but can get more later


Tips to clean up the roof would also help

 raven nova
i have issues trying to snap a wide grausten arch on to a wide grausten column that already has another arch coming from it as well as more grausten columns going up
if i use snap points in other edges, they won't snap onto other adjacent pieces to force snap it onto the edge i want it to snap to
lethal verge
raven nova
i have issues trying to snap a wide grausten arch on to a wide grausten column t...
It seems as of right now. Pieces run out of snap points. Free fitting is required. I still use an optimal snapping point and line it up with similar seams
raven nova
I desisted
lapis basin
lethal verge
It seems as of right now. Pieces run out of snap points. Free fitting is require...
@raven nova
This is untrue. Other pieces would still snap to that same piece.
Basically, the game partially prevents pieces from being snap placed inside each other. This is mostly used for pieces that would overlap almost entirely, such as straight beams, or walls at a 180 angle. However, for some unknown reason, be it accidental or intentional, the grausten arch was made to exhibit this property.
It recently got fixed in the test branch, so it's probably gonna be fixed in the normal build relatively soon.
raven nova
ah well, I hope so
lethal verge
lapis basin
<@585269601592410146>
This is untrue. Other pieces would still snap to that sam...
Relative to the arches I was correct. They stop snapping if three other things are snapped to the point of interest
lapis basin
Since I'm on ptb, I can't actually test this, but I think you are incorrect.
The left should be possible, the right should not.
In fact the right positioning should refuse to snap, even when snapping to something at the upper ends of the arches.

And the floor doesn't matter, since it doesn't have snap points there.
raven nova
lethal verge
Relative to the arches I was correct. They stop snapping if three other things a...
heh, a nice interesting point, maybe too interesting for its own taste. They need to fix this.
 limpid horizon
anyone have examples of builds around a maypole? I wanna put my "comfort room" in there, but building around it on the floor is odd for a noob like myself
raven nova
leave a small 2x2 green area in the center to place it and then build a room above it with the bed right on top of it to get the Comfort level bonus
lapis basin
Has anyone found a way to keep a Drakar locked in place with build pieces?
 north fulcrum
lapis basin
Since I'm on ptb, I can't actually test this, but I think you are incorrect.
The...
north fulcrum
lapis basin
Since I'm on ptb, I can't actually test this, but I think you are incorrect.
The...
they actually just changed this, you should be able to do the thing on the right now
boreal coyote
best part of the new patch imo
north fulcrum
right????
lethal verge
It will be convenient not to finagle with these pieces anymore. But if you ever built before snapping points. Lol we got used to making it work
 patent umbra
what can i do with this roof situation ?

 humble root
Try using other snap points. Pieces can overlap
boreal coyote
patent umbra
what can i do with this roof situation ?
Use the 45degree inverted corner pieces? Start with finding the middle using a 1m beam.
or use it as a chimney stack?
dense edge
patent umbra
what can i do with this roof situation ?
You could make a hat. 1m up and 1m out and then four corner roof pieces. Still gives cover, also provides ventilation, and looks right if the ratios with the roof are balanced.
uneven charm
patent umbra
what can i do with this roof situation ?
goodday! assuming that you want a crossed ridge with no openings and consistant with the crossed roof design i can propose two solutions, first you connect two of the ridges snapping another 45° roof ridge to one of the angles, then for the other one crossing the first you either:
a. you use 100% snap points, but you'll have a little overlap with shingles, placing a 1m beam at the farthest end of the buildpiece and snap a ovelapping ridge piece to the beam#building-screenshots message
b. you freehand the second build piece, but shingles will look exactly like the rest of the roof #building-screenshots message
uneven charm
boreal coyote
Use the 45degree inverted corner pieces? Start with finding the middle using a 1...
this one is a nice solution also, i would prefer 26° corners as the °45 will fall down very steep and disappear below the roof, this will give a nice cross decoration at the center of your roof, full weather cover even if has small gaps and overlaps #building-screenshots message
uneven charm
dense edge
You could make a hat. 1m up and 1m out and then four corner roof pieces. Still g...
"hat" also very good, if 1m up still better with 26° #building-screenshots message
eheh sorry for the poem, i actually used my "solution b" in builds, but other options are very good, i think i'll start make some @dense edge 's "hats"
split stratus
uneven charm
goodday! assuming that you want a crossed ridge with no openings and consistant ...
From those options I'd go with option a.
uneven charm
split stratus
From those options I'd go with option a.
yeh i use it a lot with thatch, but that narrowed double-up shingle pattern... mmm
split stratus
I wouldn't care if they overlapped, I just want them to align perfectly. I'm not spending time sitting/standing on roofs.
uneven charm
right, also the problem doesn't stand for the inside, anyway, in general, that's my big problem with tarred pieces, both roofs and beams, i rely a lot on half-piece-overlays and those patterns clutter up that way
boreal coyote
uneven charm
right, also the problem doesn't stand for the inside, anyway, in general, that's...
my solution? Build in the mountains, the tile pattern is not so noticeable when covered in snow 😆
or just build so ridiculously tall in whatever biome you like that you still get snowy rooftops
uneven charm
boreal coyote
my solution? Build in the mountains, the tile pattern is not so noticeable when ...
eheheh, right so, yeh the snow is the new "carpet for hiding dust", still somewhat prefer thatch, also look more "vikingish" for my taste, but beautiful build pieces the tarred ones no doubt
boreal coyote
uneven charm
eheheh, right so, yeh the snow is the new "carpet for hiding dust", still somewh...
Agreed on using thatch, i usually build "rustic" in my playthroughs so its all A frames and thatch everywhere, however i like to mix up the styles once in a while (as well as building the odd stupidly large castle now and again) and the tar is great for a more medieval/tudor vibe. Also I find that thatch looks really out of place in mistlands/ashlands
uneven charm
agree 100% on black marble and grausten, also shingled is better for plain stone imo, i mean thatch is not bad for that, but i find tar more fitting for a full-stone building
boreal coyote
I really dig the ashwood + tar roof look too. Looks much classier and love the colour variations. After a while the unrelenting brown-ness of using normal wood + thatch gets too much
uneven charm
uuh right, as a wooden builds fan, cant' wait for ashwood, it will ad a lot for sure (i'm still in mistlands and procrastinating queen fight, i play since the beginning of e.a., but verrrrry slowly)..
-# i already seen ashland's gear and structures a lot tho, no spoiler possible for me
boreal coyote
uneven charm
uuh right, as a wooden builds fan, cant' wait for ashwood, it will ad a lot for ...
To battle, Viking! Odin's eye is upon you and Valhalla awaits! (along with a whole bunch of sweet new build pieces)
uneven charm
boreal coyote
To battle, Viking! Odin's eye is upon you and Valhalla awaits! (along with a who...
right on!  (as i learned from AoE 2 soundfiles) "til bardaga!"
lapis basin
What are your fun methods of vertical travel?
I would like to build one of those silly tall towers, but I'm not sure how to change floors. Stairs get dull and use a lot of space, with portals, you loose your sense of location.
The remaining options I can think of are clipping and falling, with especially feather cape falling being quite appealing. Not sure though. I'm hoping one of you have something else.
If not, top and bottom portals, + falling might be my goto, with stairs between levels that need a direct connection.
lethal verge
Catapults at different floors of the build would be a fun way to travel. Giving some control over distance flown. With feather cape obviously being mandatory.
patent umbra
uneven charm
goodday! assuming that you want a crossed ridge with no openings and consistant ...
i did it :D it was exactly what i wanted thanks a lot !!
 still basin
dense edge
Lol, what is this... A screenshot for bats?
still basin
dense edge
Lol, what is this... A screenshot for bats?
better than a school for ants
uneven charm
patent umbra
eheh, seems a hard construction working day, sunset didn't stop you! (jk, roof looks well aligned/polished) glad it worked out
patent umbra
dense edge
Lol, what is this... A screenshot for bats?
i was so focused on making the roof right i did not noticed it was this dark lol
patent umbra
uneven charm
eheh, seems a hard construction working day, sunset didn't stop you! (jk, roof l...
ye did not notice it was dark, too focused on making the build right, thanks a lot <3
uneven charm
patent umbra
ye did not notice it was dark, too focused on making the build right, thanks a l...
perfect, that's how "passionate activity" works eheh, glad to help, have a good one!
 orchid bison
Cheap Hearth railings idea. Works great but it takes multiple tries to get the railing placed at the right height


(The railings are also still functional for cooking meat ;))
raven nova
lapis basin
Since I'm on ptb, I can't actually test this, but I think you are incorrect.
The...
well, they fixed it, now i am hating it how there isn't a way to do outward corner grausten roof, they have the wedges to do inwards only
 viral shadow
PTB was moved to live, so now PTB is the same as live again.
 hard moss
Machicolationnnnsss
With the wooden beams, the gaps are tight enough to safely walk over without falling through, still leaving enough space to fire an arrow through.
Using machicolations, it becomes possible to fire at enemies that hog your precious walls.
https://en.wikipedia.org/wiki/Machicolation


In architecture, a machicolation (French: mâchicoulis) is an opening between the supporting corbels of a battlement through which defenders could target attackers who had reached the base of the defensive wall. A smaller related structure that only protects key points of a fortification are referred to as Bretèche. Machicolation, hoarding, bretè...
patent umbra
hi why these two ones, it says it need more open space ?
 still basin
stone wall prolly
 halcyon tendon
hard moss
Machicolationnnnsss
With the wooden beams, the gaps are tight enough to safely w...
halcyon tendon
hard moss
Machicolationnnnsss
With the wooden beams, the gaps are tight enough to safely w...
So fabulous!! Well done, stealing this idea for my own castle wisdom 🏰
hard moss
halcyon tendon
So fabulous!! Well done, stealing this idea for my own castle wisdom 🏰
Thank you! Please, steal away, valheim castles need more machicolations 😄
patent umbra
still basin
stone wall prolly
then why the bees are happy in with the one at the corner T_T
still basin
Because that one wall is shorter and the corner of bees is closer to the edge of stone, would be my guess
Easy enough to test
magic sluice
Anyone available to help?
hard moss
patent umbra
hi why these two ones, it says it need more open space ?
Could be too close to the other hive
hard moss
magic sluice
Anyone available to help?
Not unless you post a question 🤷
magic sluice
Oh I just need help with a pathway
lethal verge
magic sluice
Oh I just need help with a pathway
What kind of path? Can you post pictures
magic sluice
 lethal verge
magic sluice
lethal verge
magic sluice
I figured it was a hill path. Work from the top down. Move and hoe little steps at a time. Truly is an art to do hill path. Practice is everything
pallid shadow
Hello, Valheim community! 🎮
I’ve just uploaded a new video on my YouTube channel where I built the Ultimate Cozy House in Valheim, Inspired by Skyrim’s Proudspire Manor. The video features a full overview of the result and the building process of the main structure, so you can easily recreate it if you'd like. I’d love to hear your feedback and ideas for future builds!

Hello everyone! In this video, I built a cozy and practical house in Valheim, inspired by Proudspire Manor from Skyrim! Its exterior is partially based on the original, while I designed the interior and exterior details myself, adding my own style. I also equipped this manor with all possible crafting stations available in the game, making it pe...
feral swift
how can i dredge out a harbour? Need to make the water deeper for a dock
i'm open to using console commands or special modes, maybe even mods?
lethal verge
feral swift
i'm open to using console commands or special modes, maybe even mods?
wind [angle] [intensity]
This could potentially do what you want. Wind would blow in one direction ofc.
There isn't a vanilla (with cheat commands) way to raise water.
#mods-discussion for mods
feral swift
ohh i found the debugmode
that helped a lot, i just flew underwater and picked the seafloor
 bright heron
hello, does anyone know of a video guide for a rather low fantasy stone/marble tower? 🙂
supple girder
bright heron
hello, does anyone know of a video guide for a rather low fantasy stone/marble t...
https://www.valheimians.com/builds/
maybe you can find one there
Valheim builds are constructed for a variety of purposes from humble homesteads to elaborate villages. Find inspiration from others and share your creations.
north fulcrum
hard moss
Machicolationnnnsss
With the wooden beams, the gaps are tight enough to safely w...
OMG SOMONE ELSE KNOW WHAT THESE ARE
lapis basin
Throne looks complete, with back and and all, but the player gets slightly clipped intp the portal hidden inside the wall.
If you sit down normally, you will get the portal screen, but will still be sitting on the throne after.
If you sit down and immediately stand up, you will get teleported.
The exit portal can also be inside a wall, causing the player to be transported to a room that doesn't contain a portal.
 limpid horizon
does anyone have a recommendation to making this straight both horizontal/vertical? I want basically want a straight wall that leads down to the next level of my base

 lethal path
limpid horizon
does anyone have a recommendation to making this straight both horizontal/vertic...
lethal path
limpid horizon
does anyone have a recommendation to making this straight both horizontal/vertic...
try putting wood walls and floors around it and fill it in then remove the wood
 obsidian stump
limpid horizon
does anyone have a recommendation to making this straight both horizontal/vertic...
obsidian stump
limpid horizon
does anyone have a recommendation to making this straight both horizontal/vertic...
Before trenching / digging, turn towards a cardinal point - you are currently pointing towards East. But your character is facing NE and your digging was also done along that direction. Try digging down in one spot. You will see what I'm talking about. Valheim builds it's terrain using squares. The STRAIGHT sides of the squares are along each cardinal point. The POINTY edges are along NE, NW, SE, SW.
Get it?

Once you have dug out a hole with straighter edges, you can use stone walls to make them fill the gaps.
limpid horizon
obsidian stump
Before trenching / digging, turn towards a cardinal point - you are currently po...
This is super helpful, thank you for that!
trail topaz
And so easy to forget. I recently found a gorgeous spot for a Black Forest base. Brought in my mats,, cleared trees and rocks, started terraforming and only then realized it was facing NE
 dapper nacelle
I was working on a lighthouse and I came up with a system to use iron-wood like rebar to get the stone to build a lot higher with support, but now I'm 18 rows up and I think I'm nearing as high as this technique will get me.
What other tactics have you used to get super tall stone structures?

 lethal verge
Raise earth to max. Plant a pine tree. Build wide enough to encase the canopy.
dapper nacelle
Yea, I actually raised the earth as high as I could to start and then built this on top of that
I've used a pine tree before but they really mess with immersion during windy storms
split stratus
Maybe if you shared a screenshot of what kind of bridge you're going to build we might be able to give some advices.
My advice at first: use snap points (Q or E) for easier placement of longer poles underwater.
 tranquil trail
Need some help finishing off my wrap around porch. Cant find something to "fence it off" that isnt too tall.

 still rapids
tranquil trail
Need some help finishing off my wrap around porch. Cant find something to "fence...
still rapids
tranquil trail
Need some help finishing off my wrap around porch. Cant find something to "fence...
2m poles with 26 degree x beams in between?
Reddit
Explore this post and more from the ValheimBuilds community
Like these?
supple girder
limpid horizon
This is super helpful, thank you for that!
what Deni said is good tips indeed, but you CAN have flat sides parallel to the NW-SE directions, it just sicks since the perpendicular line do make pointy edges.... you cannot make a perfect rectangular raised or lowered section on all 4 side in that orientation.
and similar to what Ricky said using build pieces can make good guidelines, walls for planning where the edge of a dirt wall should end, and standing on floors to provide consistent flattening ability or to just mark how high you want the dirt to be
tranquil trail
How are yall covering this little triangle spot?
 humble root
tranquil trail
How are yall covering this little triangle spot?
humble root
tranquil trail
How are yall covering this little triangle spot?
With a unsnapped 2x2
tranquil trail
Also wish there was a better way to do this kind of thing without all the overlapping and clipping
 tranquil trail
Feel like the actual house bit needs to be bigger
 obsidian stump
dapper nacelle
I was working on a lighthouse and I came up with a system to use iron-wood like ...
obsidian stump
dapper nacelle
I was working on a lighthouse and I came up with a system to use iron-wood like ...
Trees. Specifically Pine cuz it's long and narrow. 😏
obsidian stump
dapper nacelle
Yea, I actually raised the earth as high as I could to start and then built this...
Or build on top of a Mistland rock formation. Don't worry... the mist doesn't go in the sky.
obsidian stump
tranquil trail
Need some help finishing off my wrap around porch. Cant find something to "fence...
Make a custom one. You can use wood cross 26° as well if you like it more zig-zaggy.

 robust elk
I haven't spent much time building with black marble yet. Does anyone have or know of a little visual guide that shows what to use the different parts for? I can visualize some of it, but a few of the pointy pieces or other shapes are hard for me to imagine using. I'd like to make fancy looking stuff.
boreal coyote
I find black marble lends itself well for a Fantasy vibe, with lots of spiky bits and diameter transitional pieces allowing for more interesting depth and shapes. Here's what i mean about using the pieces to adust to different diameters:

I also like to use the small spiky piece as a decorative finisher to make my fantasy castles look a little evil.

The arch piece is also really great for making foundation pieces look good imo
 robust elk
Thanks! Those look great. I'm going to have to play around with it. It'd be fun to build castles like that.
soft geyser
boreal coyote
The arch piece is also really great for making foundation pieces look good imo
can you post a couple examples of circular roofs you do?
tranquil trail
Peak or rounded?

 soft geyser
tranquil trail
Peak or rounded?
soft geyser
tranquil trail
Peak or rounded?
round looks better to me
tranquil trail
Eended up with something like this

 fiery wharf
The Twisted Gaming's community builds 🙂 Some amazing builds here ❤️ https://www.youtube.com/watch?v=U-rlApwLTXo

Showcasing builds by all of our outstanding community members!
boreal coyote
soft geyser
can you post a couple examples of circular roofs you do?
Sure np.


Flat roofed version


sorry for spam... you asked for circular rooves, i give you circular rooves 🙂
my main hints for circular rooves: 1. Snow covers a lot of ugliness :), 2. the internal ceiling doesn't need to be the external roof, 3. when filling in gaps, be consistent. Pick a snap point and use the same one all the way round. 4. Remember, in game, it usually wont be seen from above so focus on coverage and how it looks from the ground. 5. Straw roof is the easiest to get looking decent as you don't have all the ugly overlapping tiles. 6. Having a hole in the middle isnt a problem, its a chimney!
 wind garnet
Speaking of chimneys, does anyone have chimney solutions for towers that don’t involve it being in the middle but still need n the base floor?
lethal verge
wind garnet
Speaking of chimneys, does anyone have chimney solutions for towers that don’t i...
 wind garnet
lethal verge
https://youtube.com/shorts/9cq57iN_xt8?si=FoRdVc4rSvHexKs7
wind garnet
lethal verge
https://youtube.com/shorts/9cq57iN_xt8?si=FoRdVc4rSvHexKs7
Will definitely keep that in mind, but I’m trying to get something for a functional stone hearth that has all of the cooking stations.
lethal verge
You can accomplish that too
soft geyser
boreal coyote
sorry for spam... you asked for circular rooves, i give you circular rooves 🙂
thank you for all of those. i am a bit of a perfectionist which is a leading cause for me hesitating to try anything more than a box. lately i've been messing with circular designs and figuring out how to integrate roofs, floors, and stairs into them while minimizing the amount of overlap needed in pieces (at least with floors)
 spiral needle
any tips on how i can make the upper part of my house less empty looking? also i think overall it looks too clean


 granite plume
spiral needle
any tips on how i can make the upper part of my house less empty looking? also i...
granite plume
spiral needle
any tips on how i can make the upper part of my house less empty looking? also i...
You could add a overhang to the roof, or some roof windows?
spiral needle
good idea
soft geyser
how would you do a roof for a layout like this?
 soft geyser
spiral needle
any tips on how i can make the upper part of my house less empty looking? also i...
soft geyser
spiral needle
any tips on how i can make the upper part of my house less empty looking? also i...
A 1m overhang does wonders. You could also flip the upper wall pieces (the 1x2m) around to put the other side facing out. Also there are many videos out there about layering the facade to give it a little more interest
spiral needle
Yeah thank you i added an overhang and a little roof above the door and it looks much nicer
How tall do you guys usually make your walls tho?
soft geyser
I try to do 4m because 3m is a bit cramped
spiral needle
I just do 1 full wall + 1 half wall
soft geyser
so 3m?
pallid shadow
Hello, Valheim community! 🎮
I’ve just uploaded a new video on my YouTube channel where I built a cozy and functional mansion in Valheim, inspired by the "Breezehome" from Skyrim. The exterior and interior design are my own improvisation, with a focus on combining practicality and comfort. The video offers a full tour of the mansion, showcasing all the details inside and out. I’d love to hear your feedback or any ideas for future builds!
Check it out and let me know what you think! 😊
Link: https://youtu.be/_dL-64l7IN8

Hello everyone!
In this video, I built a cozy and functional mansion in Valheim, inspired by the "Breezehome" from Skyrim! The basic structure is based on the original, but I designed the exterior and interior myself, adding my own style and creative touch. The mansion is equipped with all possible crafting stations in the game, making it perfec...
spiral needle
soft geyser
so 3m?
Idk
boreal coyote
soft geyser
how would you do a roof for a layout like this?
I have just started work on a meadows/plains farm and was in need of a storehouse when i saw your post so i used the design, this is the basic undecorated form I'm at at the moment:
 spiral needle
Put some logs on the roof
limpid horizon
please tell me to not give up on the pyramid

 random geode
Not to give up on the pyramid
limpid horizon
random geode
Not to give up on the pyramid
I gave up, screw that lol
maybe if I was not in survival mode and I could fly around/spawn mats
random geode
I feel you. I also build in survival and especially the roofs can be a pain.
lethal verge
Black marble farming in survival can be rough.
spiral needle
F5 + devcommands
 chrome hatch
Is there an admin command or something you can do to make a prefab not able to be destroyed using the build hammer? Trying to use a modded building that is all one piece as a base, but one misclick while building inside and the whole thing disappears
icy canopy
limpid horizon
please tell me to not give up on the pyramid
On my server we made a black marble pyramid for our chicken coop (the Cluckery), it is possible, will post picks later.
 pseudo mortar
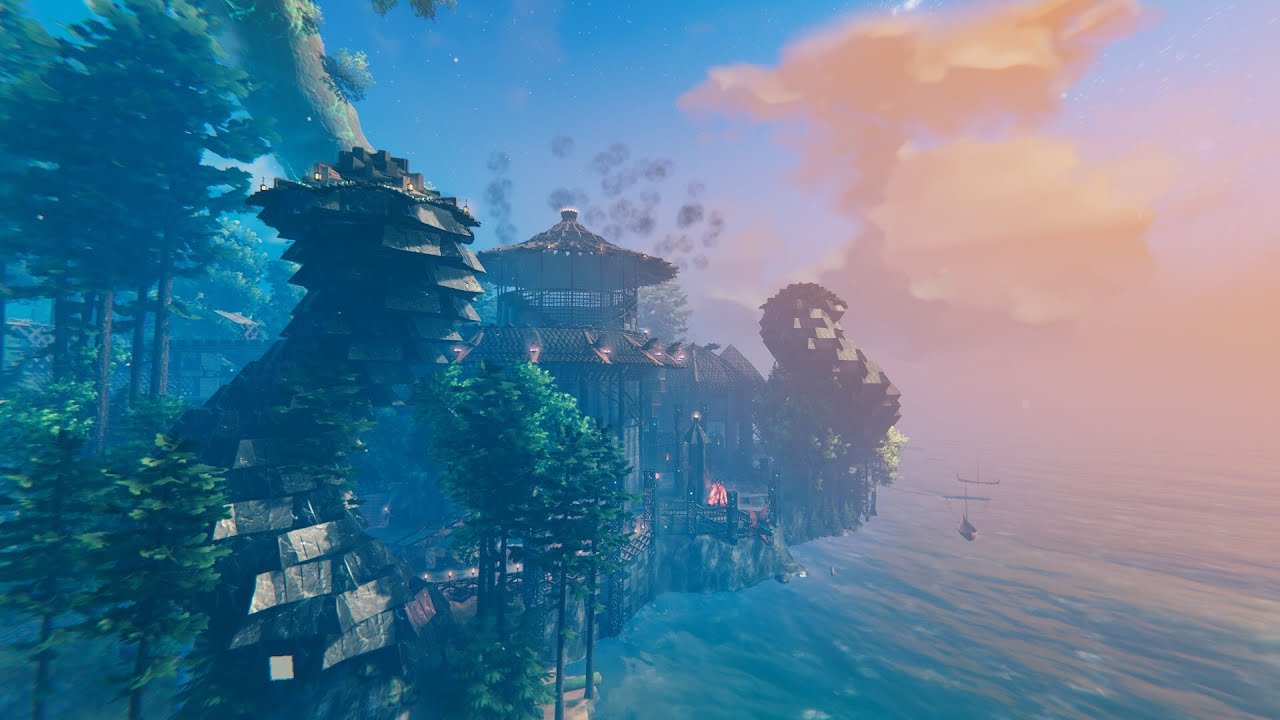
A tour around some builds in my most recent Valheim world. #ValheimBotM
soft geyser
boreal coyote
I have just started work on a meadows/plains farm and was in need of a storehous...
I like the detail you added in the upper circular roof. I do need to practice more with roofs like that
lethal verge
Another brilliant smokeless fire idea by emmatpotato ❤️🔥
#shorts #valheimscience #valheim2025 #valheimtip #valheimtips #valheimtricks #valheimguide #valheimcoop
spiral needle
janky tower with lots of clipping but it still looks off. any tips?
 patent umbra
is there any ways to arrange the improvement better bc they need to much space ;-;
i dont want them hidden though
 placid trench
patent umbra
is there any ways to arrange the improvement better bc they need to much space ;...
placid trench
patent umbra
is there any ways to arrange the improvement better bc they need to much space ;...
You can put some of them behind the crafting benches if you don't mind that. If you want them to look functional I'd just out come youtube videos that make blacksmith buildings and whatnot (or some images in the screenshot channel).