#help-with-hw-design
1 messages · Page 50 of 1
 worldly schooner
If your application is draining a coin cell to 2.5V after 10 mins, you probably need a different power supply.
Coin cells are typically used for very low-power applications, like RTC. If you're powering an LED with a coin cell, my guess is you're drawing way too much current to be relying on a coin cell for power.
 gaunt cedar
dang. i probably should have done more power draw math.
It's a 2032 running a samd21e18 and a single neopixel
could the while true loop in python that listens for the gpio buttons add to the draw significantly?
 unreal flax
It just means that the processor is fully active, the same as running any other code.
gaunt cedar
right, I suppose I should have made that question sound smarter. sleeping and looping to check if a pin is low shouldn't add a ton to the load you think or cycles are cycle and it would drive power down.
just experimented. removed the loop altogether and the ~10 minutes still occurs
worldly schooner
If you have a pulsed current draw without sufficient capacitors to smooth it, you could derate the battery capacity significantly.
On that note, are you using PWM dimming to control your LED?
gaunt cedar
worldly schooner
If you have a pulsed current draw without sufficient capacitors to smooth it, yo...
no just the circuitpython implementation to control. setting brightness to .3
the pulsed current draw might be it? I have 2 test pads 3.3 and gnd. watching the voltmeter right now I can watch the voltage drop by .001 every 2 seconds
it seems to have stabalized now.
.001 every ~30 to 45 seconds
 supple pollen
CircuitPython or no, that LED is likely being controlled by PWM, so is presenting a varying current draw
worldly schooner
I thought as much, but wanted to see the library source before confirming.
gaunt cedar
yeah its a neopixel 6812
worldly schooner
Yeah, 0.3 brightness is just the high-level simplification. The python libs are doing work behind the scenes to convert that brightness to a duty cycle for the chip to follow. If you have the traces and spare batteries to experiment with, I would put a nice big discharge capacitor across the neopixel V+/GND as close to the LED as possible, and see if your battery life improves at all.
It's an LED capable of 50mA drive current, and assuming your SAMD21 is drawing an average of 4mA, you LED running a single channel at max brightness should be able to get close to 4 hours of battery life. If the discharge capacitor is doing its job, you should be able to get at least close to that range.
gaunt cedar
thank you for this. I'll add a cap to the circuit and see how that goes
 tough matrix
worldly schooner
Yeah, 0.3 brightness is just the high-level simplification. The python libs are ...
tough matrix
worldly schooner
Yeah, 0.3 brightness is just the high-level simplification. The python libs are ...
That's not quite accurate. For a neopixel, python libs (or C code in bootloader) produce a data signal which is sent to the pixel; the IC inside the NeoPixel reads the data and converts it to PWM duty cycle for each of the three color LEDs.
Of course, the end result is much the same: LED is powered using PWM signal, and yes, a capacitor is highly recommended to maintain voltage.
worldly schooner
Ah, I should have explained more clearly. Yes, a duty cycle VALUE to the Neopixel IC "chip". Thank you for the clarification.
 supple pollen
It's not critical: anywhere from 10µF - 1000µF is fine (you don't need a lot for a single LED). I might try 47µF or 100µF. Closer to the LED is best.
 distant raven
supple pollen
It's not critical: anywhere from 10µF - 1000µF is fine (you don't need a lot fo...
distant raven
supple pollen
It's not critical: anywhere from 10µF - 1000µF is fine (you don't need a lot fo...
100uF is pretty suitable for up to 50 Neopixel I’ve found. More than 50, you should at least add an additional 100uF+
gaunt cedar
if I wanted to get some more life out of this battery by lowering the clock to say ~8mhz. would I be making that change in the .bin that I flash or in the circuitpython uf2 build or both?
supple pollen
Depending on the clock source, you may also need a hardware modification to swap out the crystal.
gaunt cedar
clock source on this samd21 is internal. from what I gather there are a couple sources to choose from.
https://microchipdeveloper.com/32arm:samd21-clock-system-configuration
I know enough to be in the right area(ish) and I'll mess with the code to see if I can get the clock down. the reason I asked about where to make the change is because I thought I did it correct in the init_samd21.c file where it selected which clock source to use but when I'm in code I printed the microcontroller.cpu.frequency and its still 48mhz. I'll keep hacking away at it
I often find myself not knowing for sure if I'm going about it the right way and get a bit anxious I'm wasting my time 🙂
supple pollen
The microcontroller.cpu.frequency is probably just set in the code, not derived from the processor registers.
supple pollen
You could send the clock signal to a GPIO pin, or write a timing loop (either toggling a pin or blinking an LED after a certain number of cycles).
 polar lantern
Do you need hot air/a hot plate to use those SMD to breadboard things effectively?
And a stencil or whatever?
supple pollen
Not necessarily. I've soldered fine pitch SMD with thin wire solder and a (very) fine tipped iron. There are also "dragging" techniques. You can use solder paste without a stencil, you can apply it with a toothpick or something like an iExtruder. You can melt solder paste with an iron, but it's kind of awkward.
polar lantern
awesome, thanks!
I guess none of these questions are quite pcb design related, so apologies if there's a better place to ask, but I got some airtags and have been meaning to try and dump the firmware/get SWD access

does someone know what the right name for this kind of wire is?
and likewise, do you think this fellow used a fine tipped soldering iron? or something else?
 long wraith
Looks like magnet wire/enable coated wire
Personally I'd use a fine tipped iron for that
Actually, it looks like the wires are going to the legs of ICs? so maybe a hot air station...
polar lantern
I think there are test pads for all the connections I need to make
In the video, the guy says he burnt a test pad off because he was impatient, and had to solder to the cap because of that
but I am also probably gonna get myself a hot air station as a birthday-gift-to-self
gaunt cedar
follow-up from earlier. I still haven't been able to verify if the clock speed is at 8mhz but that's what I set it to in the compile. I also changed the brown out fuse to a lot lower. it was tripping at anything under 3v. and lastly lowered the led power a bit more to .01 for this test and its been hanging out for over an hour now. still at ~2.6v
worldly schooner
Is 2.6V enough for SAMD21? Last I checked, it expects 2.7-3.6V...
gaunt cedar
worldly schooner
Is 2.6V enough for SAMD21? Last I checked, it expects 2.7-3.6V...
datasheet says its happy down to 1.62v. My test board is currently at 2.56 and its cycling neopixel colors and a couple button inputs are still responding
supple pollen
For that kind of work, I prefer a fine tipped iron to hot air, as I just want to heat a specific small area at a time. For a Hakko iron, I use the T18-I tip.
tough matrix
you need a really steady hand for using the iron, though
 rustic linden
Bleh why do 2 versions of this chip come up as Basic and 2 as Extended when they're all pin compatible gah
supple pollen
Presumably the "basic" ones are fixed voltage and in stock, and the "extended" ones either need a voltage specified, or they're not stocked?
rustic linden
Nope, the basic ones are 5V and ADJ, and the extended are 12V and 3.3V
supple pollen
Presumably the "extended" ones are not in stock then, which is what I said.
rustic linden
the 12V one has 3500 in stock, while the 3.3V has 385
worldly schooner
If we're talking about JLCPCB, it's just a matter of how frequently each component is used. If it's common enough, they sit on their setup with the reel preassembled to their setup. The 12V is definitely not common, but idk about the 3v3...
 hollow swift
Greetings. I am a beginner in IC design using Cadence Virtuoso. Are there any tutorial videos that you can recommend me?
I am actually trying to build the basic 6T SRAM and wish to know how to find properties like Average Area, Read/Write delay, SNM, WTV etc
 thick willow
reinstalled circuitmaker... and still getting the bug about vias not connecting to planes :S. Oddly enough it works fine on my notebook...
 pearl tapir

Instructables
Build Your Own DIY 3D-Printed Soldering Fume Extractor: If you are an electronics hobbyist, soldering is essential in almost all of your project, but the smoke/fumes from burnt solder and flux isn’t something you want to breathe. It smells bad and can be very dangerous to your health but you can reduce …
distant raven
Oh sweet
That’s pretty nifty @pearl tapir
The color scheme and shape of the enclosure is pretty retro feeling too
pearl tapir
@distant ravenThe only downside is the enclosure design requires that the pot be removed from the pcb and remotely located using 5 wires.
That needs to be redesigned.
long wraith
Looks like a TF2 prop, I love it!
 toxic patrol
Well, I accidentally asked my question in general (#general-tech message)
But I guess the conversation should continue here
unreal flax
Unfortunately the consensus is usually that autorouters completely suck, if they converge at all, until you get into very high-end, very expensive specialized tools. Most people just suck it up and route boards manually.
supple pollen
You'll generally get better and more æsthetically appealing routing that way
toxic patrol
Do any of you have experience making PCBs in fusion 360?
supple pollen
I've made PCBs in Eagle, which is related...
toxic patrol
From what I can tell they're pretty close
Anyway
I have this part here:

The OLD part I was originally using looks like this instead:

When all 15 pins were on 1 side, it made the schematics easy to map out
But since the new piece splits them on 2 sides, I'd have to redo a bunch of my wiring
In the schematics editor (not in the layout designer or part itself) can I change the pins so they're on one side?
supple pollen
I don't think so, I think you have to do that in the part editor.
But then you can replace the part in the schematic and keep the connections if you like
 supple pollen
Use the "replace part" function
 toxic patrol
Wow
I'm amazed that worked so well and everything connected to the right spot despite being different parts
I guess it helps both were numbered 1-15
supple pollen
It does a decent job lining things up if the pins have compatible names
toxic patrol
Last thing and I should be done with questions
Should I replace something like this with 10 buses?
 supple pollen
You can do that, or go to the trouble to line everything up
 toxic patrol
I was nicely lined up lol. The auto replace kinda killed that
supple pollen
Or just use named signals. They're all valid, it's a matter of personal preference

 supple pollen
That reminds me a little of a board I'm working on.
toxic patrol
Huh. Cool
This one is (supposed) to switch between RPi cameras w/ the 3 signal pins there
Also, I'm pulling my power and ground from the camera connector of the pi, is that alright?
Actually nvm
It's only getting ground from the cameras
supple pollen
Mine involves cameras and relays, but in a completely different context: it triggers the camera focus signal, waits half a second for the camera to focus, triggers a flashbulb, waits 20-35ms for the flashbulb to come up to full brightness, then triggers the shutter. There's also an on-board charge pump to charge a capacitor to 27V so the flashbulb will trigger in a fast and reliable fashion.
toxic patrol
What do you use to make your PCBs? The one I've heard of is PCBway
supple pollen
I use several vendors, depending on my mood: OSHPark for the pretty purple and clear ones, PcbGoGo when I want a bunch of copies cheap, or JLCPCB for small quantities of inexpensive boards.
I've heard good things about PCBway and Seeedstudio, but I haven't tried their services (yet)
toxic patrol
Is JLCPCB what you'd do for a single board you're not even sure works?
supple pollen
Probably so. I've only just started using them, but they did a nice job knocking out these boards from an open source project for me

Generally the shipping costs more than the boards, but that's kinda what happens with really inexpensive stuff.
toxic patrol
Ok. I think I'm gonna order it, but do you mind checking it over in case I messed anything up?
supple pollen
I can have a look, but I could miss stuff too (I often do)
toxic patrol
The only thing I'm worried about is some vias under some components
supple pollen
Those vias should be fine, if they're "tented" (have soldermask)
If you like to make your vias double as test points, then have them untented and out where you can get at them.
Trying to figure out the relay connections, they seem odd.
toxic patrol
What seems off about them?
supple pollen
They appear to be wired in series?
Also those traces seem really narrow (but maybe none of them are carrying anything high frequency or high current)
toxic patrol
It's all running at 3.3v at 250mA roughly
Unless the camera data lines are high frequency, I think nothing is
The idea behind the wiring of the relays is that you enter a 3bit binary signal on the 3 pins (at 3.3v) which allows power to get to only 1 of the cameras

It all works in my head and from what I can think of, but I may be wrong here
supple pollen
Okay, they are in series, as a 1 of 8 decoder, got it
Those MIPI signals can range from 80MHz to much higher, you might want to think about at least a ground plane
toxic patrol
How would I add that?
supple pollen
Scroll down to "Finishing Touches", "Adding Copper Pours" https://learn.sparkfun.com/tutorials/using-eagle-board-layout
supple pollen
Make backups first! I usually do the pour first then route, but you can try it the other way too (which sometimes ends up being multiple pours you have to stitch together somehow).
toxic patrol
Ok, V2 here we go
supple pollen
That seems more likely to work nicely to me. Make sure you run ERC and DRC too.
toxic patrol
The ERC warnings I'm getting are all "wires close but not connected" because of this mess from the auto replace

DRC is giving me actual errors tho... Apparently it left some airwires
supple pollen
You'll want to address those before getting a board fabbed. I got burned by that once with a short between a 3.3V power supply and ground, in an internal board layer (the board had multiple power domains and I goofed)
toxic patrol
I'm stupid... The airwires are between all the grounds that are connected with the polygon...
I spent the past while trying to find why they didn't connect
Wait, nvm
There is an actual issue
Can I just stick vias in random places?
I think I may have it fixed?
Gimme a sec
supple pollen
Yes, that's what I was getting at when I mentioned you could get multiple pours and you'd have to stitch them together. Doing so with a lot of vias is known as "via stitching".
You can see some via stitching here at the bottom around the WiFi antenna, at the top, under the WiFi module, and to the right, at a voltage regulator. It's popular when you need good high frequency or high current performance.
 toxic patrol
Alright, all airwires have been connected
I did have to move some wires around tho, and now parts of it look stupid

There wouldn't happen to be any sort of way to "optimize" the lines, would there?
 short zodiac
it's been a while since i did PCB stuff, but i seem to remember that certain angles are sub optimal
acute angles may be high on that list
supple pollen
I usually limit the angles, enable "snap to grid" and drag them individually. It's slow, but I have full control on how they end up.
toxic patrol
It was really weird about legging me drag stuff for some reason though
supple pollen
Yeah, acute angles can act as "acid traps", have some inductance, and are rarely the optimal routing. With modern PCB manufacturing techniques, acid traps are less of a bugaboo than they used to be.
toxic patrol
I know the pic is a mess, and not what it should look like, but it doesn't wanna let me put traces where they should go
supple pollen
Eagle (and every other PCB design program in existence) is quirky and you may need to tweak some settings to drag things the way you want to.
supple pollen
@rustic linden You were looking for some surface mount diodes? https://www.adafruit.com/product/5099

You have some electrons over here, and you want them over there but you don't want the electrons from over there to be able to come over here? That's what a diode is for, these are ...
 elder peak
No more SOD stories about not being able to find one
long wraith
Lol
 tender cedar
Is there any guidance for footprint cutout geometry for surface mounting a QTPy RP2040? I made a janky guesstimate footprint in KiCad by measuring the QTPy fab print but am wondering if there is a published reference footprint for the cutout anywhere? 🙂
 twilit mango
@tender cedar Like the PCB file for the actual board? They're EagleCAD, so I don't know how KiCad handles those, but would that help? They're on GitHub. Not sure if that's what you already used.
tender cedar
More specifically the cut out I would need to make to accommodate the bottom-side components if I want to use the castellated pads to solder the QT Py onto a custom pcb design. I am not sure whether there’s a recommended size for it or if I need to ensure some specific minimum clearance from the under side components. I am pretty new to pcb design so maybe I’m just overthinking it!
twilit mango
Oh! I don't think I fully registered what you were asking. I was thinking QT Py standard, forgot about the RP2040's underside. I'm new to it as well, so I'm not much help (ergo the pretty useless answer 😄 ). Someone else might have a better idea.
tender cedar
I literally received and soldered my first ever custom pcb design today, so.. very new!
twilit mango
Congrats!
 untold seal
tender cedar
I literally received and soldered my first ever custom pcb design today, so.. ve...
untold seal
tender cedar
I literally received and soldered my first ever custom pcb design today, so.. ve...
Nice. This is very special. Basically Adafruit that taught me how to do it. The people from here.
tender cedar
😊 the design is a digital potentiometer breakout which is very obviously inspired by the Adafruit stemma qt breakout format. Adafruit is for sure the reason I was able to even get this far!
 tough matrix
tender cedar
More specifically the cut out I would need to make to accommodate the bottom-sid...
tough matrix
tender cedar
More specifically the cut out I would need to make to accommodate the bottom-sid...
there are actually quite a few components on the bottom - not only RP2040 but also smaller comppnents, capacitors, etc, so you would need a large cutout
an easier option might be using regular male headers which you solder to both boards so that the plastic spacer is between them
providing 2.5mm clearance, which should be enough for all components. This way, no cutouts are needed
tender cedar
That’s probably the better solution. Not as cute though!
 tender cedar
I will probably just do that
 floral karma
designed this stm32g491 feather form factor pcb the other day. ordered with the wrong thickness for the pcb usb c tho 🤦♂️
 distant raven
😅
 silk lark
@floral karma in my experience both 0.6 and 0.8mm work
@floral karma you can still test it by whittling down one side
floral karma
yeah i’ve reordered with 0.8mm. that was the plan always, i’m just a moron who can’t fill out forms
speaking of actually 😅

 silk lark
good!
but if you reordered it already, it doesn't save you a prototype
at least you will know earlier
floral karma
i had to cut thru a bunch of important vias so this ain’t working. idm tho
love how well it works mechanically. a handy tip for saving bom cost, especially in these shortage times
i'm actually proper proud of this design. the feather shoould be able to be a dual role port- so it can sink up to 20v to power stuff (the freebie pin is vbus) or source 5v like a power bank
tough matrix
floral karma
yeah i’ve reordered with 0.8mm. that was the plan always, i’m just a moron who c...
I am pretty sure that everyone here made equally stupid mistakes more than once.
On my most recent PCB, I forgot to connect negative terminal of the battery which is supposed to power the whole thing to the ground pour...
floral karma
woof. at least that's bodge wireable
tough matrix
yeah.. using a 22awg bodge wire 🙂
rustic linden
I actually really like how you're using the PCB as the connector for the USB-C port!
 languid light
Hello, this is my first time designing a PCB, and I have a few questions about my current design. First of all, if I have a 170v line (2.5mA). Is it ok to have my GND copper pour on this layer of the board? I cannot really set the amount of margin to give the power line in the software. Also, (not entirely related to the pcb specifically) what would be recommended for the Ohms of the pull-up resistor for the Feather Huzzah32 (the learn guide recommended one.) I currently have a 4.7k marked there, but it can be changed easily.

(Feel free to @ me)
tough matrix
pullup resistors for I2C lines?
any value between 2-10K should work
choose larger value (10K) if you are trying to conserve energy and get as much time as possible from a battery, choose lower values for better performance over long distances.
4,7K should work just fine.
but what is confusing me are resistors R1 and R2. They seem to be placed in series between SCL/SDA pins of the MCU and SCL/SDA pins of a connector... why?
@languid light
 lime thunder
you seem to short SCL and SDA together as well
distant raven
Hurray! I got more boards in 🙂
24x PixelLeaf Matrix to stock more on my tindie shop
long wraith
Yeet!
distant raven
I think I have enough to build 10 to stock
Need to order another reel
1500 didn’t last as long as I though 😅
long wraith
XD
I assume you're talking about the NeoPixels... Yeah, goes fast when you do 24 at a time, lol
That's only like 62.5 boards per reel for 1500
lime thunder
amazing how fast parts go
long wraith
Stocks be like... nyoom!
distant raven
Well, 24 boards would use 1200 Neopixel
You’d get 30 boards total using 50x per boards
lime thunder
I am not sure if that many parts would drive me crazy or be super zen
lime thunder
(I did actually find it super zen placing the 224 (dumb) LEDs per panel on one of my products)
distant raven
It’s super repetitive so it’s kind of zen placing 50 neopixel at a time
long wraith
lime thunder
I am not sure if that many parts would drive me crazy or be super zen
Both XD
lime thunder
except when I flicked tiny little grains of light-up rice all over the place because bad tape holder
distant raven
I can see why Ladyada loves making boards that use neopixel and all the other neopixel projects she makes and sells
long wraith
I find zen in repetition -- one time I had to sort about 20k pieces of colored paper
That was calming and satisfying
distant raven
Super relaxing and satisfying to place tons of neopixel and then they just work
long wraith
lime thunder
except when I flicked tiny little grains of light-up rice all over the place bec...
light-up rice XD
distant raven
Lol
I kind of want to make the PixelWing on a flex PCB to see how it works
Seems like it would be really fun to do
It might not be as flexible as I would hope since it has huge power pours on it
lime thunder
really want to play with flex one of these days too
distant raven
PixelLeaf would also be fun to do flex. It’s be easier than the PixelWing since it doesn’t have USB connector or a ESP32-S2 or other things on it
One day I need to trademark my product names
Or the ones I can anyway
lime thunder
I really should trademark the logo I'm using
esp before I start putting out Open source hardware
distant raven
I need to clean up some schematics and start submitting to OSHW
lime thunder
but I also need people to actually buy up some of my stock first >_>
distant raven
Yeah same
lime thunder
buy my stuff so I can get money so I can make more stuff
distant raven
My RGB boards and LiPo power pack sell pretty well
But I’m not selling many CP Saplings
long wraith
lime thunder
but I also need people to actually buy up some of my stock first >_>
What has?
distant raven
And I can’t ship to the EU right now because CE certification being more enforced right now
And the UK also has its own certification process now after leaving the EU so i have to figure all that out
Also VAT stuff for the EU but couriers can deal with that but
Bit *
lime thunder
long wraith
What has?
https://affsnake.us/s (mostly that absolutely tiny and slim breadboard indicator)

[I like snakes, and I picked an arbitrary adjective >_>]
 lime thunder
[ I'm also trying to offload some components I got and didn't use through Tindie's Flea Market to no success but shrug ]
long wraith
How many of those indicator boards do you have?
lime thunder
120 ready
long wraith
Hmmmmm
lime thunder
a bunch more if I sit down with some wire strippers
long wraith
So I see there's a kit and fully assembled options, is that just adding pins?
For the kit?
lime thunder
you've gotta solder in the pins and a single wire (both are included)
long wraith
Ahh, I see what I'm guessing is the ground wire on the back
lime thunder
I'm trying to not assume where you are picking up the ground from
and yeah I have it running along the back
long wraith
How come when you have all 8 lit, half are brighter than the others?
lime thunder
that's in the description which might not be clear enough
long wraith
Or is that PWM flicker?
lime thunder
I'm showing the brightness from both 3.3V and 5V power
languid light
tough matrix
but what is confusing me are resistors R1 and R2. They seem to be placed in seri...
Oh, perhaps I do not understand how the pull up resistor works. Would you mind explaining the proper way to connect the resistors? I will head to my computer later on and try.
languid light
lime thunder
you seem to short SCL and SDA together as well
Where do you see this?
lime thunder
languid light
Where do you see this?
looking again I believe I was mistaken
languid light
lime thunder
looking again I believe I was mistaken
Ok!
long wraith
@lime thunder Oh,something I noticed -- the 3D printed version of your NeoKey plate seems to pull the switches together and cause the whole thing to bed. Not a lot, but some
lime thunder
\o
long wraith
o/
languid light
tough matrix
but what is confusing me are resistors R1 and R2. They seem to be placed in seri...
Oop, just realized I forgot to connect 3.3v to the line 😉
Thanks for the help!
long wraith
@lime thunder have you considered different colors for that baby indicator board?
Also, does USPS really not consider that a "tiny item"? XD
lime thunder
I wish I could hide those names
and Tindie's shipping rate system is... annoying
tiny item basically means "I can shove 1000 of these in an envelope and it will still weigh .001 gram"
long wraith
Ahh... Yeah, that's a dumb name. Those boards are tiny
lime thunder
oh actually no it should be a "tiny item"?
rustic linden
I assume one of the pins would be a common?
long wraith
I think they're trying to rip me off XD
lime thunder
@long wraith I can check the rates when I get home to make sure it's not doing something silly
long wraith
lime thunder
<@!381566293368897537> I can check the rates when I get home to make sure it's n...
Ohh, wait, I realized there's Priority Mail tiny and First Class tiny, it must be using First Class... but First Class costs less to start, and it might upgrade to Priority Mail... so basically I'm dumb and can't read XD
lime thunder
ah yeah
basically if someone actually buys 100 of them
it will cost more than $3.whatever to ship
so I had to do a bunch of math and try to make the rate match as best as possible to my actual cost (because Tindie)
long wraith
Maths!
tough matrix
@languid lightit woudl be easier to discuss if you also provided schematics
rustic linden
I'm unsurprised I can't get these shipped to me
tough matrix
@rustic linden you are in Australia, right?
lime thunder
@rustic linden I can check international rates, but it'll be ow
tough matrix
@lime thunder I am using PirateShip to ship my items from Tindie; they have a very convenient rate called "Simple Export Rate"
lime thunder
and I probably need to verify the international shipping rules
tough matrix

Get exclusive access to the cheapest international shipping rates available to instantly raise your international conversion rates and get more sales worldwide.
rustic linden
Yeah, Australia
long wraith
Pirates :O
tough matrix
Yarrr
long wraith
lol
tough matrix
basically any country in the world - same rate
$10 for small package
lime thunder
actually for some reason I have a rate set up, but that board was deselected
check now?
lime thunder
tough matrix
basically any country in the world - same rate
$10 for small package
mine said $12 when I calculated it but same idea
rustic linden
For a board where I don't want to introduce much more draw on data lines for LEDs, should I use transistors to power them?
tough matrix
you are talking about usual - "dumb" - LEDs, not neopixels?
lime thunder
yeah, "dumb" LEDs
tough matrix
then yes, transistor or MOSFET is the way to do it
rustic linden
Even at only 3.3V or so?
With a MOSFET
(usually only see them in higher power stuff)
tough matrix
yes
rustic linden
Australia shipping shows up for $12
tough matrix
in fact most adafruit boards use a MOSFET to automatically swithc power between USB and LiPo battery connector
lime thunder
yes alas 😦
rustic linden
Oh, I know, I've used one for that purpose on a board i used
tough matrix
so there are plenty of MOSFETs which are fully on with V_gs = 3.3V
rustic linden
Any recommendations for transistors/mosfets that trigger at about 3.3V?
supple pollen
I looked one up about a year ago, it's lost in the scroll now
tough matrix
I recently used this one:
https://lcsc.com/product-detail/MOSFETs_Vishay-Intertech-SI2301CDS-T1-GE3_C10487.html
just because it is on "basic parts" list of JLCPCB
Vishay Intertech Vishay Intertech SI2301CDS-T1-GE3 US$0.1314
LCSC electronic components online Transistors MOSFETs
- leaded datasheet+inventory and pricing
lime thunder
if I do a second version of that I should really try to experiment with the very low current LEDs that are still reasonably bright
supple pollen
Ah, found it: STP160N3LL
tough matrix
@supple pollenwow... 3.2mOhm RDS_on !!
and 120A
might be an overkill for most of my purposes
elder peak
Either way, you should be FETed for your discovery.
lime thunder
A N-FET would not really work for my board. I only have a common cathode version right now. Alas.
languid light
tough matrix
<@!690196776136736889>it woudl be easier to discuss if you also provided schemat...
Ok, you would like a screenshot of the schematic or is there a way to send the file…
 lime thunder
so I do see the pullups ( R7 and R8 ) but I also see R1 and R2 inline in the SDA and SCL lines -- what are you trying to do with those?
languid light
lime thunder
so I do see the pullups ( R7 and R8 ) but I also see R1 and R2 inline in the SDA...
Those are the ones which I forgot to add 3.3 v to
lime thunder
you should only need 1 set of pullups on the bus
languid light
because on the PCB, the cable runs the whole board, I figured I might as well have one on each end
I suppose that there is no harm in having it just in case
Unless there is?
lime thunder
the resistors will be effectively in parallel
so you have 2.4kOhm of pullup
instead of 4.7k
distant raven
I don’t see a need for them. I have this board here that has I2c and I’m only including 4.7k pull ups. Adding additional resistance might have negative affects as you add additional devices
 distant raven
Usually you put them close to the MCU or the connector for your i2c device
A lot of breakouts have pull ups on them too
distant raven
Yeah that would be a good place
distant raven
Best of luck in your design endeavors 🙂
It’s a lot of fun to get a board designed and working
languid light
🙂 I will probably post it in #show-and-tell when I get it working! Good luck to you too!
rustic linden
tough matrix
I recently used this one:
https://lcsc.com/product-detail/MOSFETs_Vishay-Intert...
THANK YOU basic parts are always helpful for me!!
lime thunder
also oo yay there's my email from OSHpark saying they got the panel my board is on
 lyric nymph
Can anyone tell me what package of ATSAMD21 is used by the Adafruit QT-Py?
unreal flax
It looks like a QFN-32, but there are two variants of that, with and without wettable flanks, and I'm not sure which is used. I'd assume without, as that seems to be the more common version.
lyric nymph
Thank you! 🙂
lyric nymph
I was thinking it might be QFP-32, but that package is much larger.. I measured the chip on the board and it's only 5mm across, which matches QFN32, so I think you're right there, @unreal flax !
silk lark
ATSAMD21E18
lyric nymph
Ok, looks like I get to keep the board moving here! 😄 I bought some APA102's in 2020 size (http://adafru.it/3341) ... I'm trying to build the pattern for these in DipTrace, but the PDF Documentation does not show a clear mechanical drawing... Anyone have a better lead on that?

These incredibly small surface-mount LEDs are an easy way to add a lot of very tiny (but bright!) colorful dots to your project. They're mini versions of the ones in our digital ...
Here's a screen-grab of the mechanical drawing. It's pretty unreadable at least to my eyes..
 worldly schooner
lyric nymph
Here's a screen-grab of the mechanical drawing. It's pretty unreadable at least ...
worldly schooner
lyric nymph
Here's a screen-grab of the mechanical drawing. It's pretty unreadable at least ...
Well, looking at similar LEDs from the original manufacturer, this should be more than close enough for your purposes.
 lyric nymph
Beautiful! Thank you!
tough matrix
@lyric nymph@worldly schoonerare you guys related?
lyric nymph
Heheheh. Not as far as I know, but as big as the internet is these days, it wouldn't surprise me too much either!
worldly schooner
I would assume no, Hem is taken from my first name haha
 keen jungle
Is there a simulation software? Or something that would allow me to swap components and make sure the system still runs? Or is this a built in thing in most software now?
 heavy jasper
That's. a very broad question, and it really depends on what you're trying to do, and what you mean by "runs."
e.g. ltspice is very good at simulating analog circuits (though it takes some work to get used to it) and I'd trust it if I'm e.g. swapping out op-amps in a filter circuit and want to verify that my filter performance is still what I want.
For a digital circuit (e.g. I want to swap out a flash chip and see if the MCU can still read it properly) there isn't so much a simulation tool that will work, and you'll need to do it by comparing datasheets.
worldly schooner
Background: I have a schematic for a Pi Pico - Capacitive touch display interface, but I'm struggling on the backlight power supply circuitry. I was initially planning to use an MC33063 (because JLCPCB) to boost the 5v input to a ~20V output, but I have little clue what I'm doing when it comes to selection of inductors or zener diodes.
Question: how do I determine Vsat or Vf? I have no idea what my output switch or output rectifier is.
Also, does anyone have any advice regarding boost converter circuit design and component selection? I considered copying one of Adafruit's circuits, but I was hoping to use JLCPCB/EasyEDA to accelerate the design process...
Datasheet: https://datasheet.lcsc.com/lcsc/1809171620_ON-Semiconductor-MC34063ADR2G_C32078.pdf
distant raven
Has anyone worked with 8051 based microcontrollers at all?
Particularly the ones like SiLabs makes
unreal flax
I did a small project with one years ago. I found them surprisingly easy to program, compared to, say, more complex STM32 peripherals.
distant raven
Any recommendations for programming them? I’m seeing the have a 2 wire type interface.
I want to make a small board to fiddle around with one both hardware wise and learning assembly for them
I found some good assembly references for them
unreal flax
I just bought whatever the little USB programming dongle was that SiLabs suggested, but I'm not sure what other options are available.
unreal flax
I think I started with an eval board to test things out, but I did make my own too.
distant raven
Ah okay cool. I’ve got a bunch of 150mA 3.3V LDO, that should be enough to evaluate them at least I think.
unreal flax
Yep, they're pretty low-power.
Although I'm not sure that I would be designing with one today. At the time I was driven to them because of the capacitive-touch sensors that weren't readily available on other chip families, but today it would probably be a hard sell versus an M0.
distant raven
It’s mostly for fun
Plus $0.98 or less depending on the one you use, there isn’t much to lose to learn at least
unreal flax
Gotcha. Yep, should be fun. I was pleasantly surprised at the learning curve, anyway.
heavy jasper
For the boost: MC33063 is a very, very old part, and probably more flexible than you need. I'd probably go with a more modern FET-based one (and it looks like the cheapest one on LCSC, https://lcsc.com/product-detail/DC-DC-Converters_SHOUDING-SDB628_C77805.html, is actually a decent choice)
SHOUDING SHOUDING SDB628 US$0.1875
LCSC electronic components online Power Management ICs DC-DC Converters
- leaded datasheet+inventory and pricing
This set of calculations from TI is a good choice: https://www.ti.com/lit/an/slva372c/slva372c.pdf?ts=1627486566148&ref_url=https%253A%252F%252Fwww.google.com%252F
worldly schooner
heavy jasper
For the boost: MC33063 is a very, very old part, and probably more flexible tha...
Thank you very much for this! I actually found and started reading through the ti literature earlier, and it definitely helped a lot!
heavy jasper
(but also just for your info, Vsat is the "Saturation Voltage" on that datasheet, and then for Vf it's somewhat a matter of just picking a diode with enough current limit (your output current) and going with it; 0.5-0.8V is a reasonable first estimate
worldly schooner
Oh, I missed that Vsat. Thank you!
heavy jasper
for what it's worth, specifically for LT (now Analog) products, this is actually the sort of thing where ltspice can help tremendously.
They have fully modeled components for many of their switching regulators, and a bunch of other components (Diodes, MOSFETs) modeled as well, so you can draw up a schematic and then simulate it. But that's going to be somewhat more annoying / impossible to do completely for a non-LT/Analog part (it requires the other company to have an unencrypted SPICE model, which is fairly rare).
and LT/Analog parts (while very very nice) tend to be quite expensive as well.
supple pollen
I've become quite fond of their LT107x and LT117x switchers.
Even this nutty bodge to (ab)use a CCFL inverter to make a kilovolt regulated power supply using an LT1172 worked nicely.

 distant raven
I’m a little surprised that the ESP32-C3 mini module requires so many external bits to function compared to the WROOM
distant raven
The ESP32-C3-WROOM peripheral schematic is also interesting
It lists an external 32.768kHz crystal but labels the connections as NC (no component). I can’t tell if that’s because it’s optional or they don’t want you to use it. It’s kind of unclear.
Actually both the mini and the WROOM modules have the same NC on the external crystal

 tough matrix
isn't the crystal on IO0 and IO1? they seem to be connected, no NC there
distant raven
Look closely
Both crystals and components for the crystals have NC and they are grayed out
This is true on both peripheral schematics

 distant raven
That’s all the I can gather. I wonder what cases they would suggest where you might use it rather than leave it off
worldly schooner
As far as I know, 32.768kHz oscillators are usually only used as a tuning fork for RTC or other precise-time applications. System clocks usually use MHz-range oscillators instead.
distant raven
I imagine if you used the it in a situation where you were not connected to the internet consistently it would be better for timing as you suggest
worldly schooner
Even if you were assuming a constant connection, having a precise frequency that can be easily divided into exact seconds can significantly reduce drift between time queries, so you can stay in sync with other services with far less power.
Alternatively, you could also use that as a way to query time far less frequently.
Wait, that's kinda the same point.
Anyways, it's better for precisely-synchronized operation in every metric except cost. Power consumption comes down with less wireless transmission, processor load comes down with simpler clock dividers, and accuracy is improved with drift-free seconds counting.
Relatively, anyways.
Even simple data-logging applications benefit from it being there. Cost-wise, it's not a huge impact, but function-wise, it's pretty much a net positive.
distant raven
Does this seem like a suitable replacement to the DMG3415U-7? I’m not familiar with the brand but the specs seem similar enough.
UMW(Youtai Semiconductor Co., Ltd.) UMW(Youtai Semiconductor Co., Ltd.) AO3415A US$0.08
LCSC electronic components online Transistors MOSFETs
- leaded datasheet+inventory and pricing
Footprints match
supple pollen
A fair number of modern MCUs use a 32kHz crystal and PLL to get very high clock frequencies.
distant raven
supple pollen
A fair number of modern MCUs use a 32kHz crystal and PLL to get very high clock ...
Right, it’s a great crystal for that. I was just intrigued by the fact it was on the peripheral schematic but listed as no component.
elder peak
Maybe it's just there.... vibing.
lyric nymph
I bought some WS2812 LEDs in 3535 size.. The spec sheet is here: https://cdn-shop.adafruit.com/product-files/2686/SK6812MINI_REV.01-1-2.pdf ... but it doesn't mention a recommended pad layout, and the pads are unusually shaped. Any recommendations on how to create a pattern for this part?
distant raven
Those are the SK6812mini which are different from the WS2812B
The pins are rotated 90° counter clockwise
lyric nymph
Agreed that the pin layout is different -- but the Adafruit Neopixel driver will run them the same as WS2812B's.. Anyrate, my question is about what pad pattern I should use. 🙂
supple pollen
I guess you could look at the files for an AdaFruit board that uses it
lyric nymph
But the pads on the 3535 look drastically different than the 5050. Here's the 3535..

So I don't have a clue how I would set up a pattern like that in the EDA software I'm using. Plus, there's really not much mechanical data on that drawing..
 lyric nymph
Any chance you've got that in DipTrace? 🙂
unreal flax
Ouch. On the EDA side, sometimes people make a polygon for the pad and overlap a small SMD rectangular pad on top of it for the signal connection.
distant raven
I’m not familiar with DipTrace 😅
lyric nymph
It's not quite as popular as say, Eagle, but I definitely prefer it over Eagle. Eagle just hasn't felt natural to me somehow.
distant raven
Yeah, I run in eagle. But overall it wouldn’t be too hard
Do you know how to make footprints in diptrace?
lyric nymph
Absolutely.
Just don't have the mechanical drawing enough to convert the mfr's "Back Pad Size" to a layout.
distant raven
Draw a 3.5mm square and place four 1mm square pads on two parallel sides
Set the center spacing between the two at 2mm
lyric nymph
Cool, I'll give that a whirl.
distant raven
So the distance from the center of one pad to the center of the next pad on the same size is 2mm
Then center those pads on the edge of each side
lyric nymph
And each pad is 1x1mm?
distant raven
Yeah
And the center to center spacing is 1.75mm not 2mm
Had to open my footprint to double check
 lyric nymph
Disregard pin numbers; haven't set those yet.. But are these measurements what you're describing?
(I'm OK with them being off by a thousandath of a millimeter. 😆 )
 distant raven
So you only need 1.75mm between 1&2 and 3&4
The distance between centers for 1&4 and 2&3 should be 3.5mm
lyric nymph
If it's a "3535" package, shouldn't the distance between 1&2 be the same as between 1&4?
Ah, disregard. I see what's up there.
 distant raven
Yeah, it leaves enough under and some on the outside for soldering
lyric nymph
Sweet. Many thanks for the help!
distant raven
🙂
silk lark
I wonder, does anybody have experience with soldering double-row pin headers on the edge of a PCB to pads on both sides? Something like this:

it seems reasonably solid, but I wonder if I'm missing something
distant raven
Seems reasonable
worldly schooner
silk lark
I wonder, does anybody have experience with soldering double-row pin headers on ...
That's an interesting idea. I imagine this would only work with 1.27mm on 1.2mm pcb, or 2mm on 2mm pcb, though.
I don't think you could get a 2.5mm pcb from most places?
silk lark
it's close enough on a 1.6mm PCB to work
worldly schooner
Pins are usually something like 0.4x0.6mm?
silk lark
on the female header, the pins are bendy enough, and on the male one you just use more solder
supple pollen
"the bigger the glob, the better the job!"
worldly schooner
I mean, you'll probably have to solder it by hand, which affects scalability, but otherwise the only other issue I foresee is potential flexing of the board-header connection
The geometry should be okay, but I worry about the durability of the pins and potential stress on a right angle connection, unless you have other ideas for mechanical support.
 worldly schooner
Oh wow, is that a plastic piece on the back side extra support?
 onyx kernel
I've made a little macro keyboard with an display, nRF24L01 module and a integrated Arduino Leonardo. but since its my first PCB project want to make sure, that it works. Thx to everyone who looks at it 😄 and sorry for the messy wiring
heavy jasper
Okay, so, step 1: Let's clear up this ratsnest of wiring, it makes it essentially impossible to review. A note: you already have GND and +5V power symbols on your project. Instead of having all the GND be physically wired out from there, you can just put a GND/power symbol wherever you need it, and they'll connect to each other.
even as I'm going through to try to remap some stuff as an example, it looks like you e.g. have the same net named both +5V and VCC, which hopefully is generating an error somewhere.
If you can get the drawing cleaned up a bit (w/ power nets used locally for voltages instead of having everything drawn across the screen) I can take a deeper look.
onyx kernel
heavy jasper
If you can get the drawing cleaned up a bit (w/ power nets used locally for volt...
ty ill clean it up tomorrow
 broken zenith
supple pollen
"the bigger the glob, the better the job!"
broken zenith
supple pollen
"the bigger the glob, the better the job!"
Truer words have never been spoken
onyx kernel
heavy jasper
If you can get the drawing cleaned up a bit (w/ power nets used locally for volt...
That should be better 🙂
broken zenith
Just a question: I know the basic workflow of KiCad, but is EasyEDA better for simple PCBs? I've heard mixed opinions and I can't really afford a paid option
onyx kernel
broken zenith
Just a question: I know the basic workflow of KiCad, but is EasyEDA better for s...
ice never heard of KiCad but i like EasyEda its pretty simple
heavy jasper
IMO if you've already started using KiCad and understand it, you might as well keep using it.
broken zenith
heavy jasper
IMO if you've already started using KiCad and understand it, you might as well k...
I have plenty of time on my hands to learn new software so if you think it's worth it, I might give it a shot.
broken zenith
onyx kernel
ice never heard of KiCad but i like EasyEda its pretty simple
KiCad is this pretty cool(imo) open-source pcb design software that runs locally, not in the web
heavy jasper
Okay, this is much easier to read! Some notes:
The upper-right switch has a GND port that's not connected
I don't see that you have a way to flash the bootloader onto the atmega32u4, are you getting them pre-programmed?
I'm super happy to see the type-C connector, but you'll need 2x 5.1K resistors from CC1 to GND and CC2 to GND to indicate to the upstream device that there's actually something plugged in (a true type-C port, if you have a C-C cable, doesn't supply VBUS until it sees something on the CC1/CC2 lines).
onyx kernel
heavy jasper
I don't see that you have a way to flash the bootloader onto the atmega32u4, are...
Jeah that's a thing I haven't implemented jet I think I'll just take the pinns of the nRF24L01
onyx kernel
heavy jasper
I'm super happy to see the type-C connector, but you'll need 2x 5.1K resistors f...
Oh that's good to knew
heavy jasper
I would recommend adding some additional decoupling at the AVCC/VCC pins (probably 0.1uF - 1uF per pin, since they're spaced fairly far apart on the chip).
And probably some local decoupling capacitors near the keyswitch LEDs and the OLED connector.
onyx kernel
Well thank you very much. I'll have to go off now but I'll read your messages tomorrow (if you have any more)
heavy jasper
It looks like the OLED display needs I2C; and at the moment the pins you have wired to it are just normal GPIOs so you'd need to use a GPIO-implemented I2C library, which is a bit annoying. It looks like the actual I2C pins (PD0/PD1) are just being used for button-press sensing right now, so it should be pretty easy to swap those around and have a true I2C hardware peripheral driving the display
I also don't know if that OLED has its own pull-ups on the I2C lines, but it'd be good to add in a pair of ~4.7K pull-up resistors to the I2C lines.
As a more general style point, I generally like any net that actually runs somewhere important to be named ; it makes the purpose a lot easier to understand.
long wraith
Usually I2C peripherals don't have pull-ups built in, but it should warn you if you're trying to use I2C without them
heavy jasper
Sure, but at that point the only options for adding pull-ups becomes either A) rework the board to hack them in or B) rely on the very weak internal GPIO pullups on the atmega, which could limit bus speed pretty severely.
vs. just adding them to the PCB design to start with, and you can always depop later.
- D1 is an RF PIN diode, which means it's probably more expensive than it needs to be, and its abs-max max forward current is 50mA, which seems low for all the LEDs you have running here. I'd recommend replacing it with either a low-voltage-drop standard diode, or even more so, a schottky.
long wraith
Ahh, you're talking about designing a board for the OLED? I popped in during and thought you were talking about doing the MCU side
heavy jasper
This is the MCU side, and the OLED is on some unknown carrier board
so I'm not going to necessarily trust they put pull-up resistors on.
long wraith
Ohh... I'd expect the OLED not to, and would put them on the MCU
heavy jasper
Yeah it can be a mix. And resistors are cheap, so may as well add them to the MCU board for safety.
long wraith
Mhmm
heavy jasper
(it's a lot better than having to hack them on later)
long wraith
Or having to go external [or have your customer use external if it's a product]
heavy jasper
- A small reset switch would also be a nice addition so you don't have to keep unplugging/replugging to reset your board when programming.
- I did check the nRF24L01 and the atmega32u4; initially I was concerned about overdriving the 3.3V-powered 24L01 inputs, or the 24L01 not having enough voltage to drive the 32u4 inputs sufficiently 'high'. In this case (somewhat rarely!) it's actually OK: the nRF24L01 has 5V-tolerant inputs, and the ViH of the atmega32u4 is 0.2*VCC+0.9V, or 1.9V which is easily satisfied by the 3.3V out from the 24L01.
- Unless otherwise specified, I'm assuming you're going to be using the internal pull-up resistors on the GPIOs to drive all your switches. A lot of what I do tends to be in a fairly wide operational environment and with a lot of noise nearby, so I tend to prefer having at least pads for discrete pull-up resistors so I can make the line a bit more noise-immune by increasing the pull-up strength, but you'll probably be OK here.
- In general, the USB-C will only be giving you 5V, so trying to LDO to 5V isn't going to go super well. I'd probably just entirely remove U4 and let the bulk of the board be supplied by the USB raw voltage.
- C5 appears to currently be specified as a tantalum cap (though with no specific BOM callout yet so it may just be a placeholder. In general, it's best to avoid tantalums wherever humanly possible; for small high-capacitance applications ceramics have gotten quite good, for larger SMT bulk capacitances polymer caps are also pretty decent. Pure-tantalum has a nasty habit of catching fire if you mistreat it. It's also a conflict mineral so especially if you're not getting a name-brand capacitor from a known-trusted source, the odds of the supply chain incurring some strong negative externalities goes way up. For your application here, any electrolytic cap would likely serve you perfectly well.
distant raven
Wow didn’t know tantalum capacitors were potentially conflict mineral dependent
heavy jasper
Tantalum itself is a conflict mineral (and so are many other things we use, but this one is a lot easier for most folks to design out)
distant raven
I usually buy tantalum caps from DigiKey so I think they probably try to avoid conflict sourced tantalum capacitors?
I should say I always buy them from Digi-Key
heavy jasper
Hopefully yes, though it's worth checking with the brands you're actually buying to see what guarantees they make.
Digikey gives you a pretty good guarantee that you're actually buying the brand you think you're buying.
distant raven
I use them on my led boards since they are low profile
heavy jasper
For what value/size?
distant raven
100uF 1206
6.3V 20% variance
It’s hard to find high value ceramic caps
And they can be prohibitive cost wise
heavy jasper
Yeah, that's generally where I'm going to be branching into polymer
heavy jasper
or aluminum-polymer
heavy jasper
But I believe tantalum-polymer is better than pure tantalum, at least from a safety perspective.
Generally the aluminum-polymer tends to be more of the can type, unfortunately
distant raven
Yeah
100uF is just to provide some bulk capacitance to the sk6812mini
It’s not perfect because the surge current on the ones I’m using is small compared to the max you would expect for 50 sk6812mini
But the thought was they are pretty bright at even 10% brightness so one one should ideally be turning them on at full brightness with all three colors on
heavy jasper
TBH in your situation I'd probably just parallel a couple smaller ceramics
22uF or so becomes a lot more available
if you primarily care about height, not x/y
distant raven
Probably better
I can buy 1000 for 4-5¢ a piece
And 5 of 22uF in parallel is more than 100uF of a single and only $0.25 compared to $0.40+ at volume
Plus tantalum caps are starting to get hand to come by
 vapid grove
onyx kernel
ice never heard of KiCad but i like EasyEda its pretty simple
vapid grove
onyx kernel
ice never heard of KiCad but i like EasyEda its pretty simple
Simple, but powerful, I managed to route a 4 layer board there
onyx kernel
Here is version 2.0 🙂 i've added all recommendations (i understood). And thanks again for all the hints yesterday
 gleaming thistle
Came across this today, Honeywell Hall Effect Sensor, I suspect the one on the right as counterfeit. Contacting the vendor now (I won't name until I can confirm).

 bright thistle
Uhmmm... Is it feasible to solder 1210 and 1206 SMD by hand?🤔
 marsh nest
bright thistle
Uhmmm... Is it feasible to solder 1210 and 1206 SMD by hand?🤔
marsh nest
bright thistle
Uhmmm... Is it feasible to solder 1210 and 1206 SMD by hand?🤔
Absolutely! When I use SMD resistors/capacitors, I typically do 0805 and they're easy enough to do by hand. The 1210 and 1206 are both a little bigger. You'll need a nice set of tweezers (I love some angled ones for this), but it's not too tricky
I have soldered smaller, but I really don't want to solder smaller.
bright thistle
@marsh nest thank you!
I've sent my first PCB to fab, remembered I've put 3 SMD (2 caps, 1 regulator) and went "Wait. Do I know how to solder those with a pencil iron?!" 😬😅
As for tweezers, would "reverse" ones be ok? :)
marsh nest
bright thistle
<@85813260359565312> thank you!
I've sent my first PCB to fab, remembered I've p...
Reverse ones should be fine.
The way I've done them in the past (To be fair, it has been a while) was to put solder on one pad, then get the SMD item right next to it, heat up the solder, and move the one pad into it. Remove the iron, let it cool, then solder the other pad.
Also I'm just going to put a reminder out there to double check all your measurements when making a new footprint.
Because a 1.25mm peg does not fit into a 0.75mm hole...
bright thistle
I'm using the ones provided with kicad 😅
marsh nest
bright thistle
I'm using the ones provided with kicad 😅
There's quite a lot, and I'm really liking how they have things set up
Having independent symbols and footprints really gives a lot of flexibility
bright thistle
The only footprint I've ever made is a silkscreen to put as a thank you to fab :)
marsh nest
The program I used previously was footprint AND symbol as one "item"
Which has some perks but, flexibility wise? KiCad's method wins.
bright thistle
Yep, I see many people being turned down by "too much flexibility", even in other fields, but at the end it boils down to mental flexibility, not the tools
marsh nest
Too much flexibility can be a thing, especially if it's flexibility that's not needed or is forced - IE, you have to click through a menu that most people never need
But I haven't seen that in KiCad.
bright thistle
Sounds more like a UI problem.
I don't think there's ever gonna be an "overload" if you stash less common options and keep stuff well separated (again, kicad is brilliant in this)
As long one knows that something is doable and knows how to reach it, you just need not to clutter
Ok, the biggest one here is a 0603, I'm going to be fine 😅😂

Smallest is a 008004 😱
marsh nest
bright thistle
Smallest is a 008004 😱
I don't ever want to solder those.
lime thunder
I'm pretty sure that 008004 is just a grain of salt
 lime thunder
how are those made?
bright thistle
By casting a hex at the magic smoke, I guess
worldly schooner
lime thunder
how are those _made_?
Same way they make any ic, plant little silicon wafers and watch them grow
 marble scaffold

just finished my first schematic
i'm aware this is pretty messy, can clean it up later
this is for a hardware password manager that you can plug in like a usb thumb drive
(think: yubikey but password decryption instead of 2fa)
for the experts out there: is there anything i'm missing, or ways i could improve?
edkeyes mentioned adding decoupling capacitors
 glass fox
Question: I got a senor based project in mind: an environmental sensor suite: temperature, humidity, air quality, water level, ekg, etc. I want to make my own pcb instead of using a prefab board. How do I best determine what I use for the MCU and every other components that accompany it, and is that part typically in the datasheet? I already have all the sensors I want to use planned out, thinking about using i2c or spi for communication between them. Please @ me Ill forget to check otherwise.
I got Eagle and Fusion360, and have been going through the tutorials lately too.
supple pollen
@marble scaffold You'll need to use the AdaFruit bootloader if you're going to omit the crystal. I'm still a little boggled at USB support without a crystal.
@glass fox MCU choice is, in my opinion, determined somewhat by circuit requirements and largely by personal preference. Factors I usually consider are software support (are there libraries available for the sensors I want to use), USB support, 3V vs 5V signalling, number of I/O pins and interfaces (UART, I2C, SPI, etc.), packaging (DIP vs surface mount), programming support (ISP), performance (8/16/32 bit, clock speed), support requirements (power supply, crystal, filtering, etc.), and built-in peripherals (PWM, ADC, DAC, EEPROM, etc.).
distant raven
supple pollen
<@!740679995269054546> You'll need to use the AdaFruit bootloader if you're goin...
It sets an internal oscillator which I found out by looking at the SAM-BA bootloader in atmel studio that there are a number of internal oscillator options. It then uses the timing signal from USB to tune the internal oscillator
It’s interesting
If I remember correctly there are two or three internal oscillators on the samd21
Internal 32.768kHz, 1MHz, and an 8MHz
The internal 32.768kHz is for low power timing
supple pollen
I can understand all that, but I'm still a little surprised it works well, given the tight timing requirements of modern USB implementations.
distant raven
Yeah, internal oscillators are notoriously unstable
But they appear to compensate for drift pretty well
Crystals are also ridiculously cheap anymore so unless you’re just going for a super compact design, it makes no sense to leave it off
supple pollen
I keep seeing clever ways to basically replace hardware with software, and am repeatedly impressed with the kinds of things that can be done with sophisticated enough algorithms.
distant raven
Lattice semi has one of the best internal oscillators on their ICE40 fpga
They clock 48MHz and up without external components
supple pollen
That chip comes close to "replace arbitrary circuitry with this"
distant raven
And they just tune the PLL with a SPI clk signal when flash is programmed
Since the SPI clk should always be active due to the parallel usb to serial, you always have a tuning source
supple pollen
It's the same kind of thinking that let inkjet manufacturers replace expensive stepper motors with cheap DC motors, optical encoders, and carefully designed firmware to build ever-cheaper printers and maintain 4800dpi resolution.
distant raven
Yeah
It’s amazing what you can do these days with even just an Arduino
Like an atmega328p
I see the 328p/pb used a lot in smaller industrial controllers
supple pollen
I've designed those into a bunch of projects.
 distant raven
Which is kind of funny considering it’s clout as a hobbyist chip
Are you using optocouplers for power switching?
supple pollen
I started in the PIC world, but ended up deciding it was worth paying a few cents more per chip for the more convenient architecture and better documented programming interfaces of the AVR line.
The board runs a pair of the 4-tube nixie boards: the optocouplers serve to switch the 180V anode supply, they do the level shifting and soft switching intrinsically, making a simple, low component count design.
Here's the breadboard version
 distant raven
Nice, that’s a pretty cool application of the octocoupler
supple pollen
It's a somewhat odd use case, but works nicely
distant raven
Nice
I’ve always wanted to do stuff with tubes to make a present or something for my dad
He used to scavenge through junk yards for good tubes when he was a kid to fix radios and whatnot
supple pollen
People tend to think of tubes as fragile and short-lived, but they're surprisingly reliable. I still repair tube gear, and the tubes are rarely the problem.
distant raven
Yeah, I just think it’s be cool to make him a custom tube radio or something
supple pollen
That would rock. There are some nice designs out there, from simple 1-tube regenerative sets to fancy multiple conversion superheterodynes.
While you probably don't want a kit, there are a few good ones available, and they can be a great source of design ideas.
marble scaffold
just finished routing my PCB

ik it's really messy
but this is the first time i've done something like this
and there's a lot going on
kicad screenshot with all layers
 supple pollen
Not bad, it's æsthetically appealing, which isn't technically required, but something I aim for
marble scaffold
3d model

probably messed up somewhere
i can almost guarantee that i'm going to fry my first board
supple pollen
It looks like several JTAG pins aren't connected. I do like having the switch out where it's easy to get to.
marble scaffold
forgot to connect ground to jtag
there we go

it's fine to leave vref unconnected, right?
supple pollen
I'd have to crack a manual, I don't remember. You can connect the USB connector mounting pins to ground via a high resistance to give some static protection. Speaking of which, I don't see the traces to the USB protection chip.
marble scaffold
i ended up removing the usb protection chip
could probably re-add it though
have more than enough room
supple pollen
It reduces the chance of zapping your MPU, especially if your board is going to be riding around in your pocket without an enclosure or things like that
 supple pollen
That's shaping up nicely!
marble scaffold
yeah
surprised how much i was able to get done in just 3 days
is there anything else i should add here?
supple pollen
I'm not sure enough of myself to say you "should" do anything, but I'll give you a few thoughts: a couple of test points might come in handy, I'd probably add a static electricity drain to the USB shield connection, you might consider adding antireflection resistors to the USB leads, maybe nudge your components a little farther apart if you're considering hand-soldering them, a mounting hole or two?
marble scaffold
thank you for the advice
im asking because this is my first time doing pcb design and I feel like I'm missing something
just a couple questions though, how would I do a static electricity drain? just a trace from the shield to ground?
or is it more than that
worldly schooner
Resistor to ground
marble scaffold
what value?
worldly schooner
Actually, ignore that, I was thinking earth ground.
You just just tie it directly.
marble scaffold

Electrical Engineering Stack Exchange
How should I route USB Connector shield on PCB? Should it be connected to GND plane right where USB is placed, or should the shield be isolated from GND, or should it be connected to ground throug...
yeah just found this post
supple pollen
I usually use a 1 megohm resistor
distant raven
I had seen some older design guides suggesting a ferrite bead for USB static electricity dissipation but then recently some hardware researchers found that ferrite beads can actually introduce some not so good noise into your design
supple pollen
I haven't seen ferrite beads used for static suppression, they're normally used for noise reduction. They're basically a small, lossy inductance.
distant raven
supple pollen
I haven't seen ferrite beads used for static suppression, they're normally used ...
It was in a TI design guide from like 2008 that I found like over a year ago
It was like a filter, it wasn’t just a ferrite bead either so I guess I should have clarified that 😅
supple pollen
I've seen some cute little modules used in rows to protect signals going offboard, each one with a capacitor and a pair of ferrite beads.
 heavy jasper
There are also these (feedthrough filters):

most commonly used for sending signals through EMI chamber walls or through completely sealed metal shielding boxes
 neon slate
Hey, I want to design a pcb that uses a ir remote to control a stepper motor. I made it with and arduino but I want to make it smaller. How would I do that?
I’m a noob to pcb design btw
unreal flax
You'd use a tool like Kicad, to create a schematic and then a board layout. It generates files you send to a fabrication house to make the PCBs, and you can either solder parts yourself or have them do it for you.
unreal flax
Often you can find existing designs for some boards, like Arduinos or Adafruit boards, either as CAD files or as just PDF schematics, but either way they'll be good references for how to design your own.
neon slate
Ok, got it
supple pollen
Even using chonky through-hole components, it's not hard to squeeze an Arduino into a small space. The left hand 14mm or so of this board is basically an Arduino

 ornate glen
👍
neon slate
Anyone know how to design a macropad pcb?
tough matrix
easiest way would be by copying Adafruit files
https://github.com/adafruit/Adafruit-MacroPad-RP2040-PCB

GitHub
EagleCAD PCB files for Adafruit MacroPad RP2040. Contribute to adafruit/Adafruit-MacroPad-RP2040-PCB development by creating an account on GitHub.
neon slate
Thanks!
tender cedar
Blinka-themed Stemma QT-compatible adaptor. I needed a adaptor with holes to loop the wires through for mechanical stability. It kind of looked like a python face, so I leaned into it.
 distant raven
On nice
tough matrix
some comments:
- there should be bypass caps on all vdd pins - check the datasheet
- it is suggested to add a cap and resistor to reset pin - again, check the datasheet
- ii seems that you broke SWDIO and SWDCLK to a 2-pin header. Normally for SWD programming you use a 5pin header (with 3.3v, reset, and gnd)
 rocky quest
ok I see
rocky quest
tough matrix
some comments:
- there should be bypass caps on all vdd pins - check the datash...
I used the schem from adafruit feather m0
tough matrix
I didn't check it, but I am sure they also included bypass caps
anyway, you can find the datasheet here: https://www.microchip.com/en-us/product/ATsamd21g18
It is over a thousand pages, but in particular, here is the relevant recommended schematics for power connections:

(in section 45, schematics checklist)
Same section also shows suggested cap/resistor for nRESET pin
and this: "Note that a pull-up resistor on the SWCLK pin is critical for reliable operations. Refer to related link for more
information." (45.7)
Quite possibly you can skip some of these pullups/bypass caps and it will still work. But I wouldn't recommend it
Finally, note that the traces between D-/D+ and USB connector must have impedance specified in USB specs - which means you need to pay attention to spacing between them and trace width. But I am not an expert there - probably others can say more. (I was not aware of it myself when designing my own breakout, and it still worked...)
worldly schooner
The effects of impedance is dependent on frequency. USB gets a bit finicky at high speeds, but for simple low speed applications, usb devices are actually fairly tolerant of impedance variations.
Once you get to high speed data, usb has an impedance spec to ensure your data doesn’t get deformed by unintended capacitance or inductance.
In other high speed data applications with multiple lines, signal timing also becomes an important factor. HDMI and LVDS not only have an impedance spec, but they also need trace length matching, as a mismatched trace length or cable length can cause two signals to not line up properly…
But you probably don’t need to worry about that.
distant raven
Yeah, samd21 don’t really require much in terms of impedance matching, especially for short runs.
Some other considerations with the samd21 is there are different scenarios where you might want to consider bypass caps and a ferrite bead on power but the average application doesn’t need those things and they describe a minimum implementation in the data sheet as well
If you’re using a LDO and are not doing critical analog data processing, you can ditch the ferrite bead and go with the minimum bypass configuration which is 3x 1uF caps on power pins.
@tough matrix’s application was dealing with stepper driver and other potentially high noise operations so a ferrite bead/inductor on the power input would have been valuable.
Switch mode or DCDC power supplies also require additional bypass and inductive elements on the power rails because of introduced noise.
But honestly all these possibilities is what makes the samd21 a great MCU.
supple pollen
Adding antireflection resistors (low value, 22Ω or 33Ω) in the USB data lines can help with impedance issues as well.
distant raven
supple pollen
Adding antireflection resistors (low value, 22Ω or 33Ω) in the USB data lines ca...
Yeah, and the random designs that have 27ohm ones
supple pollen
I hadn't seen that yet but I expect anything in that range would be fine.
distant raven
The RP2040 has it in their hardware design guide
 spice crater
this has likely been covered before, but is there an updated Adafruit Eagle Library? The one on GitHub hasn't been updated in 6 years and their downloadable schematics reference parts not available in the GitHub version....
 velvet patio
I've never had to take RF propagation into account before when doing a board but starting on one with an esp-01 and qwiic as a cheap $2-3 general sensor-to-mqtt controller. I presume hanging the esp's antenna off the edge of the board is the best way to proceed since that's the way I've seen other dev boards do it, but are there any basics for laying out the rest of the board (big ground plane or is that going to give weird reflections on the wifi?)? Sorry if its a stupid question but my radio-fu is weak.
distant raven
velvet patio
I've never had to take RF propagation into account before when doing a board but...
You can hang it over the edge or just leave an empty PCB below it, or recess the edge so it seems more continuous
supple pollen
spice crater
this has likely been covered before, but is there an updated Adafruit Eagle Libr...
Even if it's not updated, you can grab parts from the downloadable schematics (I do this a lot). You can either use File->Export->Libraries, or use exp-lbrs.ulp directly.
spice crater
Thanks
distant raven
Fun fact: there is PDIP package QSPI NOR FLASH
4MB (32Mb) that can be clocked at 133MHz
Just look up W25Q32JVDAIQ on Digi-Key
 sweet inlet
What do folks here do for manufacturing small batch pcbs cheaply? I have a design for an stm32 based board, and on jlcpcb the min amount is 5 and it comes out to $135 in total or so.
If I just want 1 to make sure the design works, what’s my cheapest option?
distant raven
Order a stencil with your pcb and all the parts and place with tweezers
sweet inlet
And using a soldering iron? You don’t need a reflow oven?
bright thistle
sweet inlet
And using a soldering iron? You don’t need a reflow oven?
Either you go with an iron and no stencil (steady hand and loupe suggested), or stencil, solder paste and at the very least a heat gun
worldly schooner
Depends what parts you're soldering.
bright thistle
Btw, oshpark and aisler have min batch of 3
worldly schooner
If everything has exposed pins, an iron will suffice.
sweet inlet
I’d want to solder 0402 size components
I think there’s an exposed pad on the mcu though
worldly schooner
0402 is probably as low as I would attempt with a fine point iron
bright thistle
worldly schooner
0402 is probably as low as I would attempt with a fine point iron
If you go a bit up in chat, you'll find a video of somebody hand soldering 0603→008004
Whoops, my bad, they're only the pictures, but I can find the link to the video easily if you want
worldly schooner
If you have a lot of components needing reflow, a hot plate is really good for it. https://www.sparkfun.com/tutorials/59
sweet inlet
Can I do this if I need to solder an exposed pad?
bright thistle

$2 for 10pcs PCBs & $7 for a SMT Stencil at https://jlcpcb.com/
An online price calculator and the order form is available at this link: https://jlcpcb.com/quote
I'm testing bigger tip with three tiny parts to see what happens, you should use smaller tip with smaller parts for easier
SMD Soldering - Hand soldering packages : 0603, 0402, 0201, 0...
worldly schooner
An exposed pad?
sweet inlet
On the mcu, under the middle is a grounding pad
worldly schooner
Yeah, the hot plate method is probably the best way to reflow solder paste under a chip without entering professional equipment territory.
distant raven
Yeah
I use a hot plate for basically everything
Hot plate + hot air for two sides boards
unreal flax
You can also do exposed pads with an iron if you modify the footprint to have a large via in the middle. That lets you melt the pad from the opposite side. A little janky but can work for a prototype.
sweet inlet
Thank you all! Time to buy things 😄
Last question, looks like the mcu I’m using is out of stock until next year at digikey, arrow, mouser, any other sources of parts I might not be looking at?
distant raven
What do you need?
STM32f401?
I’d say find another alternative. STM32 are essentially impossible to find.
Well, honestly most MCU are hard to come by
tough matrix
distant raven
I use a hot plate for basically everything
BTW, what hotplate are you using?
distant raven
LED Microcomputer Electric Hot Plate Preheat Soldering Preheating Station Welder Hot Plate Rework Heater Lab 110V 800W 200X200mm Plate https://www.amazon.com/dp/B07921YZDK/ref=cm_sw_r_cp_api_glt_fabc_PZR61QCPKDG8G54DWKRV?_encoding=UTF8&psc=1

LED Microcomputer Electric Hot Plate Preheat Soldering Preheating Station Welder Hot Plate Rework Heater Lab 110V 800W 200X200mm Plate
It’s not terribly great but it’ll do up to 300°C decently well
I mostly use it less than 175°C
 kind pecan
anyone know of linear control vca chips? it's intended for a non-audio control voltage
or a chip that can be biased to either mode
ping me if you reply
sweet inlet
distant raven
STM32f401?
STM32F411CEU6
distant raven
Ah yeah.. good luck finding that one any time soon. This chip shortage has been bad
sweet inlet
ooph -- jlcpb had more last time I checked, now they have 8
I do have some extra blackpills with the same chip, probably not worth trying to salvage them from there
looks like there's some on aliexpress though
distant raven
Don’t chance Aliexpress
If you want the STM32 either harvest chips off other boards or pay for the minimum order on JLC.
Harvesting isn’t hard if you have a good hot air gun and are patient with it
marsh nest
sweet inlet
looks like there's some on aliexpress though
In most cases, AliExpress is fine. Specifically for chips during the chip shortage? I wouldn't risk it.

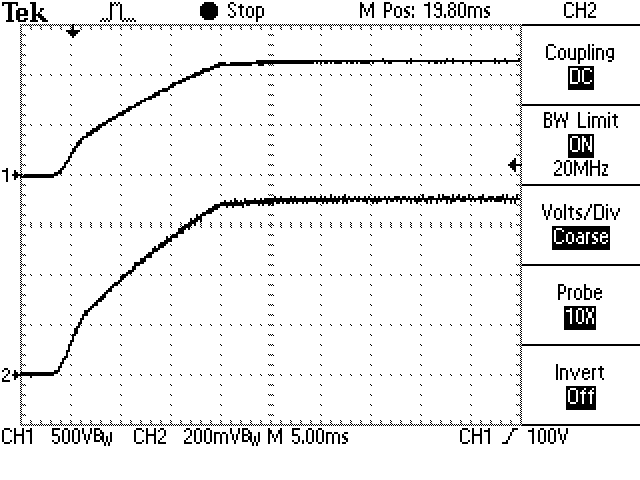
 sweet inlet
marsh nest
In most cases, AliExpress is fine. Specifically for chips during the chip shorta...
sweet inlet
marsh nest
In most cases, AliExpress is fine. Specifically for chips during the chip shorta...
Is LCSC generally trustworthy for parts? They have stock. I imagine so, they're the same company as jlcpcb right?
marsh nest
sweet inlet
Is LCSC generally trustworthy for parts? They have stock. I imagine so, they're ...
I'm not familiar with either, unfortunately
sweet inlet
👍
distant raven
I buy from them occasionally
I don’t necessarily trust microcontrollers from there but common components have been safe
marsh nest
....Writing up some initial software for the tankbot and using my PCB schematics for referencing pins and I realize I forgot to connect one (1) thing in the schematic. Was a little worried I'd have to run some long bodge wires, but turns out. Nah. Only a few mm.
I forgot to connect from the feather header to the input of the level shifter. But the output of the level shifter is connected just fine, and the level shifter is tucked directly underneath the feather on the opposite side of the board.

The bodge I'll have to make (On the PCBs arriving tomorrow)
supple pollen
@kind pecan The ancient CA3060, the newer CA3280, and the more or less unobtainable CEM3381 come to mind, but they're all old technology, it would seem likely there's something more modern available other than just using a four-quadrant multiplier.
Oh, I know that feel with the bodge wires. Hence my username.
 marsh nest
supple pollen
Oh, I know that feel with the bodge wires. Hence my username.
marsh nest
supple pollen
Oh, I know that feel with the bodge wires. Hence my username.
Heh, yeah
I was just worried I'd have to bodge from the feather to the input, and from the output to the header this is connected to. Which is... pretty far away
supple pollen
That one came from my home-rolled footprint generator that got the pin numbering backwards on one edge. Fortunately, I was only using a few pins on that side of the SIM808 module.
marsh nest
The ones coming tomorrow are the third version of this PCB, but the fourth effective version.
First version worked pretty well, but I hadn't taken into account the need for level shifting for the LED transistors. And because these transistors were inverted (One of the LEDs is common-cathode), that meant that I couldn't quite turn them off.
supple pollen
Ouch.
marsh nest
So I grabbed another one, cut some traces, and grabbed some level shifter breakouts I had lying around. And some bodge wires.
That was effectively a V2.
I did some updates and tweaks in V3, including a multiplexer so I can have multiple cameras and switch between which one is getting routed to the transmitter
supple pollen
That's starting to sound like a journey
marsh nest
The only reason there's a V4 is because I screwed up measurements on some other PCBs. This one I could have made work (It was about a mm off size-wise), but if I was ordering other PCBs, may as well re-order this one. I also added a header to connect a little DVR unit, too, which is cool!
And that's the line that I didn't have connected.
marsh nest
supple pollen
That's starting to sound like a *journey*
Oh yes
I mis-measured or typed the wrong thing or reverted to defaults, so my 1.25mm post switches wouldn't fit into the 0.75mm holes on two of the four PCBs I had ordered. This PCB was number 3 out of the 4. Plus side, PCB number 4 was perfect
supple pollen
We had a last-minute requirement to make it thinner, and ended up putting cutouts in the bottom panel for the thicker components
 marsh nest
supple pollen
We had a last-minute requirement to make it thinner, and ended up putting cutout...
marsh nest
supple pollen
We had a last-minute requirement to make it thinner, and ended up putting cutout...
Hey, it works!
Thankfully, this work is just a personal project of mine. A little RC tankbot that I've envisioned for something like. ten years or so. I got a version of it working last year, but having a servo for the elevation on the turret ended up being kinda jerky due to how the commands were being sent.
So because I was swapping out that motor, I.... rebuilt the entire turret.
supple pollen
As one does.
The ceramic house didn't want to put wraparound contacts on this module, so I ended up installing it upside down and hoping capillary attraction, flux, and wishful thinking would get good solder joints.
 marsh nest
supple pollen
The ceramic house didn't want to put wraparound contacts on this module, so I en...
marsh nest
supple pollen
The ceramic house didn't want to put wraparound contacts on this module, so I en...
Did it, though?
supple pollen
Happily, yes
marsh nest
Going from "Will this work? I have NO IDEA!" to "Hooray, it worked!" is always a good feeling
supple pollen
Truly.
kind pecan
supple pollen
<@!277133333773811712> The ancient CA3060, the newer CA3280, and the more or les...
yeah i found an old one when looking, but also figured out that there’s a way to use two exponential ones (or logarithmic i can never remember which) and some opamps to get a linear or in-between response
bright thistle
what's considered as a "standard height" for 2.54mm headers?
I'll be using it for selecting voltages with a jumper cap
worldly schooner
I think it's about 6mm of pin length? The headers I typically see are 8 or 9 mm from board surface, including the 2mm plastic base and and extra mm for SMD.
bright thistle
worldly schooner
I think it's about 6mm of pin length? The headers I typically see are 8 or 9 mm ...
thought so, went with it in the BOM 🙂
and the asiler BOM-i-nator is a breeze to use 😄
2 caps, a voltage regulator, a USB plug, 7 Molex-SL connectors and a 3-pin header, total ~€11 (for a single board), plus service and VAT
 slow oyster
Does anyone know what this type of UCB-C female connector is called?
https://www.adafruit.com/product/4396

This USB Type C breakout is kinda interesting, it looks similar to our right angle USB C socket breakout, but it's an 'inline' style with pads for soldering to the connections. ...
Trying to source the same part from Digikey/Mouser/etc and having a hard time finding it
considering Inline isn't an option
or even this style:

though that may just be a vertical through-hole connector with the PCB sandwiched between it?
long wraith
Inline USB C socket
or Inline USB Type C socket
"inline" meaning it's in line with the plane of the PCB, rather than sitting on top
The PCB doesn't actually go into the socket -- you can see the soldered connection from the back view
slow oyster
Right, but inline isn't an actual mounting option on mouser/digikey, so I can't seem to find it
and typing inline usb-c doesn't bring it up
Must be under a different name?
slow oyster
Digikey does have Freehanging (Inline) but that is plugs only and more for cabling because they include metal housings
unreal flax
Looks like "board edge straddle mount" is what they call it.
slow oyster
I looked at that too, but it's all plugs no sockets
Maybe it's in another category, I've been looking in USB, DVI, HDMI Connectors - Adapters
long wraith
Ok, I did a search for "USB C socket", then go to "USB, DVI, HDMI connectors", select "USB-C (USB TYPE-C)", and "Board Edge, Cutout; Surface Mount; Through Hole, Right Angle"
Got 2 results
slow oyster
Ok I'll try that thanks
long wraith
np
slow oyster
Ah nah those aren't the same thing
I need a socket that is about the same length as the plug past the board edge
I just can't seem to find the connector itself, only breakout PCBs
99% of all USBC sockets only stick out past the board edge by a few mm
I bet that second one I linked is just a vertical THT connector turned sideways
I only need the USB-C connector for power, and the case walls are kind of thick so a regular one isn't long enough, I need one with bare connector like the two examples above. Or I need to find one of those breakouts with actual mounting holes
Found similar ones to the one Adafruit sells maybe I'll just message them lol

aliexpress.com
Smarter Shopping, Better Living! Aliexpress.com
 fervent lance
Not sure if the right channel but there is something I never understood about PCB. The end result of a project is a PCB right and maybe checking if some peoples would be willing to pay to have you make the same thing for them. Do you need to include an arduino in the PCB ? Can you convert fritzing circuits to PCB ? Actual example: One if my arduino is busy forever sampling humidity and temperature from 4 0.50$ TM temperature/humidity sensors so I know what it is inside. I can't make that into PCB because 1 simple SMD chip that costs 3$ is 10x time more accurate than a single TM. So If I was going to use it I would have to make it a PCB from the start
So it seems PCB and arduino are two completely different fields?
I mean if I had used the SMD chip from the start it would be a completly different circuit but I don't even have the equipment to solder SMD chips so I have no idea how you prototype an SMD
slow oyster
SMD can be done with a regular soldering iron (in most cases) but I prefer using a stencil, solder paste, and a $40 hot air gun
You can probably find a breakout board for your SMD chip as well if you don't want to make a PCB for it
there are breakout boards for all types of SMD component chips, you just need to know what kind of package it is
You could also make a standalone PCB that you connect to an arduino via wires, you could make a HAT board for your arduino that plugs into the GPIO pin headers, or you can incorporate an ATMEGA chip directly on your PCB and basically have the arduino integrated in your design.
slow oyster
and what is the sensor itself? If it is popular at all there are probably already breakout boards for it
if not you can get a generic breakout board for that package and solder the chip on
fervent lance
so if I understand correctly there are 3 main options: 1) Have a PCB made to expose the connections myself 2) Buy a generic breakout board for that type of package 3) Check if the usual suspects near me have made a board for it (adafruit, spark, cana, digikey etc in my case) ??
But I still have to prototype it on an arduino before I PCB the final thing
fervent lance
Been a long time ago so I don't remember exactly, I think it was SHT-X not SHT-XX but if the only thing available is SHT-20 I guess I'll take that
slow oyster
Typically you can find a breakout board with that chip already on it if it is popular, i.e. this
https://www.amazon.com/GY-213V-SHT20-Temperature-Humidity-Transducers-Electronic/dp/B07RZF6FXM

GY-213V-SHT20 SHT20 Temperature Humidity Sensor Breakout Board Module Transducers DIY Kit Electronic
You can probably find that cheaper off of Amazon mind you
Otherwise get a generic breakout and solder it yourself, i.e. https://www.icbreakout.com/products/dfn-8-breakout-board-3x3-mm-0-65-mm

IC Breakout, LLC
ICB00120 - This is a breakout board that was designed to be a DIP adapter for the DFN-8 type SMD packages. Some of the DFN types that can be used with this board include: TDFN, UTDFN, XDFN, ODFN.
fervent lance
In an ideal world I'd like to have a bunch of breakout boards and be able to buy any chip off digikey and that chinese suppliers you guys keep talking about 😄
slow oyster
If you want to do SMD stuff though a hot air rework gun goes a looong way

CO-Z 858D Rework Station, 110V SMD Soldering Rework Station with Hot Air Heat Gun Set, LED Digital Temperature Display Screen Electric Desoldering Welding Iron Kit for Electronics Repairing
fervent lance
I mean sometimes I see very nice SMD chip for 1-2$ with much more performance than anything DIP and I'd sure like to try them
what about fumes/smoke alarm in a small apartment ?
marsh nest
There's also hot plates which are really nice, although I've yet to try any
marsh nest
fervent lance
what about fumes/smoke alarm in a small apartment ?
Fumes and smoke are minimal. And you can get an extractor, too
fervent lance
There's a fab lab near my home who have CNC/laser etching/large 3d printing/SMD stations/PCB fabs so I'll ask them about it as well plus they give free courses
slow oyster
You get more smoke when hand soldering with an iron imo
fervent lance
and it's like 5 minutes from my home by bus
fervent lance
I'm going to a basic soldering course next weekend with them
Haven't done electronics since like 2 years because I didn't have projects and the DFN problems so I'm asking you guys couple of question so I can ask them good questions
bright thistle
ping boards manufactured, tests done
Oh, nice, lemme check
Errors!
Wut?
fervent lance
What about dconverting fritzing schematcis ? My understanding is that arduino is open-source so they have to incorporate a bit of the arduino and the microcontroller when printing your PCB right ?
bright thistle
So much noise for nothing, they're intended to be open
 slow oyster
Never used Fritzing personally so no idea there
slow oyster
Incidentally I did find some of those USB connectors on AliExpress (and ONLY AliExpress...)

aliexpress.com
Smarter Shopping, Better Living! Aliexpress.com
So it'll take a month but at least I found em
worldly schooner
I wish there was a breakout board for TQFP-100, but it's way too obscure...
bright thistle
worldly schooner
I wish there was a breakout board for TQFP-100, but it's way too obscure...

universal TQFP100 (0.4mm and 0.5mm pitch) SMD to TH breakout board by ETT. Status: NS (New Stock) Double sided board 0.4mm pitch one side, and 0.5mm pitch the other. Comes unpopulated so Just add your own TQFP100 surface mount chip an
worldly schooner
Oooo, but it's out of stock.
slow oyster
Different places sell similar boards
 inland jungle
Order Chip Quik Inc. PA0223 (PA0223-ND) at DigiKey. Check stock and pricing, view product specifications, and order online.
proto-advantage has them too
slow oyster
Yeah and there's also this style which can do multiple sizes

Breakout Board for QFP Chips - 32 to 100 pins with 0.5mm Pitch
$20 is a bit silly for that though
and the breakout pins look like a pain to deal with
Good starter project if you want to start making PCBs lol
Get your own made for like $3 for 10
worldly schooner
I mean, yeah, but I'm not paying 20 bucks for 1 board. At that point I'd have my own made for less than that...
slow oyster
Yep
worldly schooner
I just haven't committed to it because I haven't the time to actually learn to program it afterwards haha
worldly schooner
The exact opposite of me ordering random stuff from China and waiting for a large freight container, and yet I'm still stuck with more mcus than I know what to do with....
slow oyster
I know the feeling
long wraith
worldly schooner
The exact opposite of me ordering random stuff from China and waiting for a larg...
Sell for a profit!
marsh nest
Drat!
So I had thought I had a connected net that I didn't have to bodge.
I was wrong.
Not a big deal, it's not terribly difficult, just annoying
long wraith
Do trace lengths and widths matter for the RP2040?
distant raven
Depends
If it’s USB, they generally want fat traces between USB port and the line resistor
worldly schooner
Depends what you’re doing with it? Usually that only matters when you’re working with ghz frequency applications where timing is super critical
distant raven
But if it’s like <1cm probably not a bit deal
distant raven
worldly schooner
Depends what you’re doing with it? Usually that only matters when you’re working...
RP2040 can’t do that fast lol it’s only PHY 1.0
Lol
12Mbps 😀
Woo
worldly schooner
Well, I’m trying not to assume anything since I was considering overclocking a pico for display output
And at that range, the pio lines do start to matter
Even if it’s not hdmi or Ethernet level strict
Rp2040 is only usb 1.0? I thought it was 2.0 capable…
distant raven
Anyway lol
long wraith
Yeah, not doing anything speedy, lol. Just programming and CP stuff
bright thistle
slow oyster
Yeah and there's also this style which can do multiple sizes
what I linked was double sided: front 0.5mm, back 0.4mm pitch 😉
uhmmm... in my pcb I left AZ1117 pin2 floating, since I'm sipping Vout from the tab... hopefully I haven't done a mistake!
fervent lance
slow oyster
So it'll take a month but at least I found em
you are in the Canadas ?
slow oyster
No, U.S.
worldly schooner
bright thistle
uhmmm... in my pcb I left AZ1117 pin2 floating, since I'm sipping Vout from the ...
There's always bodge wires...
bright thistle
worldly schooner
There's always bodge wires...
ಠ_ಠ
bright thistle
ok, made a further inspection of all the datasheets and of my routing, there should be no issue.
first two entries are related to the USB port's shileding contacts, that act as anchor points as well (but since I'm only sipping power, it needs no data lines, nor shielding)
third entry is AZ1117 pin2, but since it's internally connected to the tab... ¯_(ツ)_/¯
sweet inlet
I'm looking for a voltage regulator to go from 5v to 3.3v for an stm32.
The 5v is coming from usb, and I have a few questions:
- Nominally USB is 5v, does this mean I can use a regulator that's rated for 5.5v or 6v max input? Or do I need to give it some extra headroom?
- Can I use a dc-dc switching regulator, or could I run into problems with that? I saw something about noise but wasn't sure.
unreal flax
Yes, USB 5.0V should be pretty precise, so it's safe to have a max rating of 5.5V or so. And yes, you can use a switching regulator unless you are doing some precision analog stuff where a little power-supply ripple would affect those circuits.
bright thistle
@sweet inlet the one I'm using accepts up to 18V max, outputs up to 1.35A, and has versions with fixed outputs available
 distant raven
I’d you only want to handle usb voltages down to 3.3V and are okay with tiny packages, this is a good one. https://www.digikey.com/product-detail/en/NCV8177AMX330TCG/NCV8177AMX330TCGOSTR-ND/6166740
sweet inlet
unreal flax
Yes, USB 5.0V should be pretty precise, so it's safe to have a max rating of 5.5...
Thanks!
sweet inlet
distant raven
How much current do you want?
I measured my breadboard prototype at around 200ma, my designer requires ~160ma, I've heard I should budget here too
sweet inlet
distant raven
I’d you only want to handle usb voltages down to 3.3V and are okay with tiny pac...
Thanks!
distant raven
If you want a nice easy to use LDO with a solid 500mA in a SOT-23-5 package, the TLV75533 is a great option
It’s my go to LDO
Super stable, super low I_q
Only place that has them currently is LCSC from what I can tell
Granted 2x normal price
$0.66 a piece
sweet inlet
ah -- the smaller package looks similar to what you linked, too https://www.digikey.com/en/products/detail/texas-instruments/TLV75533PDQNR/9356536
Order today, ships today. TLV75533PDQNR – Linear Voltage Regulator IC Positive Fixed 1 Output 500mA 4-X2SON (1x1) from Texas Instruments. Pricing and Availability on millions of electronic components from Digi-Key Electronics.
sweet inlet
unreal flax
Yes, USB 5.0V should be pretty precise, so it's safe to have a max rating of 5.5...
Is it a good idea to put a fuse on this board just in case?
distant raven
A fuse isn’t a bad idea
A Schottky diode would work just as well
Except it only blows once 😀
The MBR0540 or MBR0530 is a good option
I personally use the MBR0520 in the SOD-123 package
It has a 500mA rating and only about a 0.6V drop across the diode
So it makes my 5V lines around 4.95V on average
sweet inlet
thank you!!
bright thistle
@distant raven wouldn't a PPTC be good as well?
distant raven
Sure
PTC fuses have their place
Particularly in places where the input voltage and potential for surge current isn’t well known
Like if you power over USB from a wall WART
 haughty wolf
with emphasis on the wart lol
bright thistle
extreme emphasys and prejudice
elder peak
Other than the voltage drop, you don't hear any SOD stories about putting an extra diode in.
marsh nest
I'm looking to make a proper interface board for the hull parts of my tankbot. Currently it has a feather motorwing running all four motors (Left tread, right tread, turret traverse, and turret elevation), and that's probably going to stay because it's pretty convenient. I might strip it down and integrate it into the board, but that doesn't change things.
The other thing I have is for controlling the hull lights and monitoring the battery. There's two headlights, and I plan on adding two tail lights at some point, largely because I can. I'm wondering what the most reasonable method to accomplish this goal is. I'm currently using a SeeSaw, whish is all great and all but I look warily at the chip shortage eating all of those chips up and making the SeeSaw unable for people to get. So I'm looking for alternatives.
I see there's the LC709203F for battery monitoring, but that's single-celled (And I have a 3S battery)
distant raven
You can find a chip that has alternative programmable GPIO
The ADS7138 (possible 7318) is an ADC that can have its 8 input pins used as GPIO. It configures over I2C
marsh nest
Another caveat is that... I am not up to figuring out a complex library for things. Even if I hadn't been neglectful of my various electronics stuff for.... too long, that's not a skill level I've been at. So things with CircuitPython libraries would be excellent
marsh nest
distant raven
The ADS7138 (possible 7318) is an ADC that can have its 8 input pins used as GPI...
Ooh, I'll take a look
Looks like 7138 is the right number. DigiKey has WQFN packages, which... hmm. Not sure I've ever dealt with those before
heavy jasper
Do you have a 3S battery with fully complete internal protection for balancing and such? (Which is to say, you can just look at the output voltage and trust it’s balanced internally?)
distant raven
I have written a partial library for the ADS7138 for circuitpython
marsh nest
heavy jasper
Do you have a 3S battery with fully complete internal protection for balancing a...
https://smile.amazon.com/gp/product/B06XNQGZY6 This is the one I purchased.

HRB 3S 11.1V 5000mAh 50C-100C LiPo Battery XT60 Plug for RC Plane Tracxas 2872X, DJI F450 Quadcopter,RC Airplane, RC Helicopter, RC Car/Truck, RC Boat
distant raven

GitHub
Python driver library for the ADS7138 Analog to Digital Converter - adc7138-python/odt_ads7138.py at main · skerr92/adc7138-python
It’s for a board I’m making but haven’t exactly launched yet
marsh nest
distant raven
It’s for a board I’m making but haven’t exactly launched yet
Makes sense that you knew it right off hand then.
distant raven
I need to finish it out and get it published to pipy
heavy jasper
It’s a bit unclear, though really it primarily matters on charging (that’s where the dangerous situation actually manifests - cells out of balance far enough to make a reasonable output voltage while one cell is over-discharged, then charging that configuration), and I assume you’re not charging on this machine or running for spectacularly longer periods than the RC drones it was designed for. So probably fine to just monitor bus voltage.
marsh nest
heavy jasper
It’s a bit unclear, though really it primarily matters on charging (that’s where...
The whole tankbot is something I've built largely from the ground up. I bought a chassis that had motors and treads and have built everything else. But yeah, I use an external charger and monitor the voltage, cutting things off when it gets too low.
Neat thing is that this battery has a little connector that breaks out each individual cell, which is what's used for charging.
heavy jasper
One note for the ads7138 is that it has gpio, but no pwm output, so if you want to do brightness control on your tail lights, for instance, might have some trouble.