#help-with-wearables
1 messages · Page 3 of 1
 mint goblet
did you set the pin and langth?
and did it say it uploaded ?
may or may not have maid said mistake in the past
 remote oar
I set it to 8 and I always use pin 6
 strange fjord
Maid-sama?
mint goblet
on the strand test or yours?
 candid cosmos
Those LED sequins are still lit? They need to be all shut down.
remote oar
I cant shut them down I will cry haha
plus all the other neopixels will be unconnected too
candid cosmos
- There is no crying in electronics. 2. Sometimes in troubleshooting, you gotta tear down and work your way back up.
mint goblet
- If there is crying, something could get wet, and that would be bad.
candid cosmos
The journey of a long string of lights begins with a single neopixel.
candid cosmos
well, if things don't work out in time for the show, there's always the fairy lights from the craft store.
mint goblet
but have hope, we will try and help
candid cosmos
US Army Engineers motto "Essayons" - Let Us Try.
mint goblet
@NoobTeacher#1374 have you had any luck?
remote oar
I've got about 2 months left to complete them. I'll update you guys. But I am going to start second one and just be more careful with the sewing. I might start with just the neopixels then add the leds afterwards too.
mint goblet
will the back be seen @remote oar ?
remote oar
Nope, it will be sewn to the costume.
mint goblet
well you could skip the thread and use silicone wire with yellow electrical tape
it will save you alot of trouble and with practice be fairly flat
remote oar
I've already got the thread, it will take a few weeks for that to ship etc and apply through the budget haha, drama.
mint goblet
weeks ? where are you that shipping is so slow?
also you could likely get in localy for less then $5
remote oar
Alright so i wanted to start simple and keep building because one of my set of llights somehwere in the mix was probably sewn incorrectly. Now I cannot get two to work at all haha
mint goblet
it looks like to have the clips on the 2nd in that series ?
remote oar
should I connect down at the first light? hmm
mint goblet
yeah
mint goblet
the micro controller is on ? and the gators are going neg to ground post to 3.3v (or VBAT)
remote oar
Yeah and i changed the code to test 2 neopixels instead of 8
mint goblet
did you checkt the sketch to be sure your on the right pin? , I have done that a fe times
remote oar
pin 6 is declared
it works when i just use the clips on two unsewn neopixels
so annoying?
mint goblet
yeah, it's part of why I hate thread
can you post your sketch ?
I have a small test strip so I can try and replicate your setup
mint goblet
@remote oar I should be up for a wile to try and help, if your code works for me then we know it's the thread but seeing as it did not with the gator clips something esle may be up
remote oar
// NeoPixel Ring simple sketch (c) 2013 Shae Erisson
// released under the GPLv3 license to match the rest of the AdaFruit NeoPixel library
#include <Adafruit_NeoPixel.h>
#ifdef AVR
#include <avr/power.h>
#endif
// Which pin on the Arduino is connected to the NeoPixels?
// On a Trinket or Gemma we suggest changing this to 1
#define PIN 6
// How many NeoPixels are attached to the Arduino?
#define NUMPIXELS 2
#define BRIGHTNESS 50
// When we setup the NeoPixel library, we tell it how many pixels, and which pin to use to send signals.
// Note that for older NeoPixel strips you might need to change the third parameter--see the strandtest
// example for more information on possible values.
Adafruit_NeoPixel pixels = Adafruit_NeoPixel(NUMPIXELS, PIN, NEO_GRB + NEO_KHZ800);
int delayval = 500; // delay for half a second
void setup() {
// This is for Trinket 5V 16MHz, you can remove these three lines if you are not using a Trinket
#if defined (AVR_ATtiny85)
if (F_CPU == 16000000) clock_prescale_set(clock_div_1);
#endif
// End of trinket special code
pixels.setBrightness(BRIGHTNESS);
pixels.begin(); // This initializes the NeoPixel library.
}
void loop() {
// For a set of NeoPixels the first NeoPixel is 0, second is 1, all the way up to the count of pixels minus one.
for(int i=0;i<NUMPIXELS;i++){
// pixels.Color takes RGB values, from 0,0,0 up to 255,255,255
pixels.setPixelColor(i, pixels.Color(254,190,8)); // .mcdonalds is 254, 194, 8    (GRB so green, red then blue)

pixels.show(); // This sends the updated pixel color to the hardware.

delay(delayval); // Delay for a period of time (in milliseconds).
}
}
I connceted to 3.3 v instead of Vbatt and it worked. I am so silly
Luckily I dont apparently mind being embaressed in this large community
 green nest

mint goblet
cool beans @NoobTeacher#1374 , if you do that for each next one as you go you should be okay
candid cosmos
@remote oar Good to see you're getting things to work.
in your code, you might need to put the seBrightness command after the pixels.begin if your neopixels have not dimmed to comfortable working brightness.
pixels.begin(); // This initializes the NeoPixel library.
pixels.setBrightness(BRIGHTNESS);``` upbeat wing
I'm working on adding a softpot to my PiGlass wearable
Don't know if I'll able to mount it properly
candid cosmos
@upbeat wing all the cool kids are taping things to their forehead - tegaderm. what do you have some kind of membrane touch strip?
upbeat wing
yea
candid cosmos
maybe 3d print a wider eyeglass arm or something
upbeat wing
thats what i was thinking like a clip on flat section
upbeat wing
i just got the code working with my camera
swipe forward to zoom in, back to zoom out, tap for picture and then i have a positional based zoom control as well if you hold your finger down in the same spot
candid cosmos
nice, throw in a tilt switch or get accelerometer vector to lean in closer to enlarge or lean back to zoom out.
mint goblet
I actualy need to work out a project for mine
I keep getting ideas, but none of them are really gooi for where i am at skillwise or partswise
upbeat wing
@candid cosmos that would be cool, now that i have the camera working im going to try and do volume control
candid cosmos
haha, that you lean over to the side to increase or decrease volume.
upbeat wing
ill be using the softpot for now, i do have a berryIMU laying around somewhere
mint goblet
@candid cosmos how about a matrix that says stop shakeing me when you shake it ?
upbeat wing
that would be awesome but after the smoke comes out... what then?
candid cosmos
it slithers to the door, manipulates the door knob to open it and off it goes
upbeat wing
I'm going to try and demo my softpot zoom control on the next show and tell
Circuitpython for the win!
 light wigeon
If you build the extra smoke into it you can just spit one off.
Can you imagine a special LED matrix where you solder them all in, and the goal is to spectacularly puff one of 'em but none of the others? Like a flashbulb array.
Flashbulbs had like a network of tiny filaments (think very fine steel wool, but not near as dense). When you energized the flashbulb, it went off with a very bright light, and maybe made a sound, too.
Then it was toasted -- often the plastic melted a little.
Flashcubes came four sides to a module, and were pluggable.
That's for photography; the flash served the same purpose as modern.
https://en.wikipedia.org/wiki/Flash_(photography)#Flashbulbs
 flat dagger
On a scale of 1 - 10, how wearable would you rate an arduino mega?
 rocky drift
Between 3 and 4.
With specific work, it'll be fine. By itself, it's moderately large
flat dagger
My current design is actually more like a 3D printed arm band
rocky drift
That'll be large, yes.
But they had those for the old iPods
And they still have them for phones, some of which can be bigger than a Mega
flat dagger
That is true
It is more like a piece of plastic armor though xP
I have the mega, a LCD, a real time clock, an IMU, and a bluetooth module
mint goblet
Can you use a different board? Or is that just what you already have?
flat dagger
I have a mega and an uno
I might use the uno because I also need space for a small bread board, but it also has some problems with sending and receiving serial data
rocky drift
Mmmm bread.
rocky drift
That looks pretty spiffy!
flat dagger
I still need to attach that arduino in the background
 jade maple
Nice Pipboy!
 brave tendon
Are jumper cables capable of being permanent cables or no?
 static delta
@brave tendon you can solder them to your "things"
brave tendon
I heard that male headers don’t connect permanently to female headers, is that true?
 mortal edge
@brave tendon what kind of jumper cables are you refering to?
brave tendon
The standard premium ones sold on Adafruit’s site.
mortal edge
correct. they do not connect permanently.
depending on your application, you can use them like permanent cables. or maybe semi-permanent is a better term.
i've done that. where i've got various modules (pi, sensors, etc) that all have 0.1" header pins, buried in a project.
i used those style cables to tie everything together and called it good
ok for sits-on-a-shelf like projects, but if you're trying to put these in orbit, then you might want something a little more permanent
static delta
soldering them, they can work like any other wire. if you are intending to use them in headers, then no, it can be fine for some projects but as @mortal edge said, if you are creating something that is going to be remote and in production use, you want to use a permanent installation.
 meager mirage
The biggest issue I've run into when making the jumpers permanent is the fragility of the junction between the wire and connector (or solder joint if the connector end was clipped). The plastic coating of the wire is very inflexible and can't take a lot of bending particularly where the insulator has been cut. I completely switched to silicone wire instead.
brave tendon
@meager mirage Yeah, I plan to buy some of those silicone wire rolls. They’re pretty cheap and fit my budget so I might as well try.
mint goblet
And they are huggable
flat dagger
It now has room to fit a real time clock and MPU6050, but now it's also getting bigger than I intended xP
mint goblet
i will probably get around to sewing them into their case this week
 stoic slate
just posting this here as well
havent played with circuit python too much yet...thinking of sewing some LEDS into an overwatch hoodie of mine and getting some lucio sound files from the game to play at the push of a button..is this something that circuit python can handle?
 stark lodge
@stoic slate the sound quality is pretty low with the M0
stoic slate
hmm guess im better off with a different micro processor that can utilize mp3 's and speaker sheilds?
stark lodge
the m0 with an arduino would likely work better too
(because it runs faster than circuitpython)
stoic slate
m0 and arduino? wow im barely capable using 1 microprocessor let alone 2
stark lodge
arduino is the software that runs on the m0
stark lodge
the chip is the same between the two. trinket has more pins but gemma is easier to sew
stoic slate
awesome thanks! would those work with https://www.adafruit.com/product/1669 ?

Listen up! This set of two 2.8" x 1.2" speakers are the perfect addition to any audio project where you need 4 ohm impedance and 3W or less of power. We particularly like these ...
stark lodge
you'll need an audio amp too
did you see the lucio blaster guide?

Lights, music, and sound effects prop circuit design
stoic slate
i did! its a dream but im totally intimidated by the build plus my lack of 3d-printer for parts
stoic slate
thats great really appreciate the resource
stark lodge
😃
 hidden sierra
I did. Created in Fusion then sent through a cheep Maker Select.
 silk steppe
Whats with the bands...?
hidden sierra
Those are pull up cords. Used to close parachute containers. Just something temp till I make a permanent strap.
flat dagger
What type of microcontroller and screen are you using?
hidden sierra
Feather MO with a 2.4 TFT resistive touch.
mint goblet
I would love to see the raw output from that altitude
candid cosmos
@Wwaver-JT#6230 I do see and appreciate the bent in naming your device although that doesn't exude confidence in jump gear if you bought that off the shelf.
brave tendon
Anyone here know anything about EL wires?
mint goblet
So I found out that Joanns has simpliscity patterns for 99¢ today is the last day for anyone intrested in sewing a weareble from scratch
candid cosmos
@Girafficonical#2372 There's always something in Learn and some other EL wire projects to look at. https://learn.adafruit.com/el-wire/overview

Working with Electroluminescent Wire
light wigeon
.////////////
mint goblet
?
mint goblet
whats wrong ?
flat dagger
It's that awful language brain*****************
 twilit scarab
Wow this is more complicated than I thought
brave tendon
Is it okay to advertise a different company? It’s not like an Adafruit competitor but more of a useful accessory.
 grim cypress
Which one?
stark lodge
@brave tendon Its ok to link to. Just don't link excessively
 knotty nova
hello o/ What small or tiny chips would be recommended, for a tiny generative music synth ? from 8 or 16 bit.
Any options ? ty ^^
mint goblet
the CPX has a tiny speaker
but I am a big fan of the flora
I want to say somone did something on this
@knotty nova what are you looking to do?
knotty nova
a small synth, with memorie, turned on/off by a headphone jack
lets talk tomorrow 😃 Night o/ ^^
mint goblet
take a look at the learn page, search music, there are a bunch on there that may help point you
knotty nova
@mint goblet ty, Learn page ? you mean this #learn-adafruit-guide-feed ?
mint goblet
knotty nova
yeah turned to no  xD ty ^^
mint goblet
the spy theme could be fun , with your music
knotty nova
spy theme ?
mint goblet

Spy themes are just cool. Code songs in MakeCode or CircuitPython so you can have one at the ready at all times!
knotty nova
ooh 🤔
mint goblet
the learn pages are full of inspiration
knotty nova
The spy thing has to many extraneous parts though 🤔
mint goblet
the cpx tas alot on it cheep
it's a learning tool
the gemma is cheep as well, lots of people love it for small projects
knotty nova
the cpx tas alot ?
mint goblet
has
knotty nova
oh xD
mint goblet
sorry , eating
knotty nova
haha have a good one, take your time ^^
mint goblet
it's all good, I am also sorta the typo queen
knotty nova
mint goblet
okay who do you sub to to get that potato?
knotty nova
😦 now I feel bad for adverting
 that i use
mint goblet
that i use
mint goblet
so were you looking to do a wearable beatbox?
knotty nova
more like a music box, as compact as possible
and maybe even capacity charged, and one time played
box card ?
mint goblet
to play pre programed, or off an sd or ssomething ?
mint goblet
so you will need enough RAM to fit your music
knotty nova
I've see one chip solutions, but as far as I imagine there's allot of raw programming involved
mint goblet
unless you get an Arduino , or a CP board
knotty nova
cp ?
mint goblet
Circuit Python
knotty nova
arduino is just an atmel chip..
knotty nova
I think your food is going to be cold ^^
mint goblet
I am done eating
knotty nova
xD
mint goblet
but I still want to help you find something that fits
knotty nova
Great !
mint goblet
if you have the budget you could get a few and see what works, then keep the rest for other projects
The two in the spy theme may be a good place to start
knotty nova
I think I found something (: https://modularaddict.com/dspsynth-d4drum-ic
mint goblet
so you are planing on building your own board ?
knotty nova
not sure yet, will see (:
 fluid adder
We bought a v3 Flora last year, and finally are getting around to trying it. Unfortunately it disconnects from USB as soon as we download the sketch in Arduino 1.8 IDE
Any ideas why this might be?
(tried windows 10 and Mac OS 10.13)
 long mango
@fluid adder If you load a simple Blink example on it, does it blink? Not sure what you mean about it disconnecting immediately.
fluid adder
It disconnects from the available devices when the sketch compiles, and isn’t available when the download starts. I’ll write it up and send it to the support email since that’s probably a better place
long mango
@fluid adder If you email support@adafruit.com first they will just tell you to post in https://forums.adafruit.com. So best to start there.
fluid adder
Thanks!
mint goblet
did you try the factory reset method?
mint goblet
 rotund agate
Trying to make something like this: https://lifehacker.com/create-your-own-ios-notifications-viewer-with-an-arduin-1634875485 (Push iOS notifications to Arduino), except using an OLED screen in somehting like this, https://www.youtube.com/watch?v=ad2DNBWgB-0 (DIY smart glass). Anyone have a video tutorial on the programming required to do this?

Lifehacker
Sick of looking at your phone just to check notifications? DIYer Luke Berndt was, so he decided to build a little notifications viewer with an Arduino.

An update on my google glass project and I will show you how to make the prism for your own google glass!
 brisk tangle
Does anyone have a good link to a build that includes some version of wireless neopixels... for syncing them on different people? I was thinking of using a wifi feather that looks to io.adafruit for the trigger...?
 real axle
@brisk tangle https://www.youtube.com/watch?v=T1Ul7iN72lI by @somber ledge

In this video I will go through the table centres I created for my wedding. Each had a ESP8266 and a neopixel ring in it and they all worked synchronously to...
 rancid meadow
Hello. Question about Flora Gps module. Which external can the module use in Adadruit catalog ? The docs said Active Antenna. Is that the only choice ? The passive one does not work ?🤔
mint goblet
are you sure you need an extra ?
@csze#8680 ^
I am trying to find the requirement in the doc's but I am not seeing it
brave tendon
Nike Air Mags arrive in 5 Days!
rancid meadow
@mint goblet Not sure if I need the external Antenna but just want to keep my options open. The docs is from the product page at product/1059. .
mortal edge
@rancid meadow the info here would apply, same for the flora breakout:
https://learn.adafruit.com/adafruit-ultimate-gps/external-antenna
note the external antenna is optional, theres one built in to the module
mint goblet
thanks @mortal edge I was doing 4 thins an once
 pastel fossil
 severe coveBOT
Click the link for the product you requested
 @MakerSandbot#7501 by @Codingpro#9213
mint goblet
@MakerSandbot#7501 by @Codingpro#9213
mint goblet
oh thats odd, but okay
silk steppe
@mint goblet My Server has 6 Bots
brave tendon
Something I plan to use with my wearable, magnetic charging cables. You put a tip in the device you want to charge (supports USB C, Micro, and Lightning) and the cable just snaps to it when close to the tip. http://voltacharger.refr.cc/Giraffe
When your friends buy from your referral link, you get 10% of friend's purchase amount!
mint goblet
so I sorta have a hate of velcro, and an thinking small magnets for my bag. Thoughts from the better sewers here ?
candid cosmos
@mint goblet not a better sewer, I do occasional gutter talk...wait, pirate... What did you need the fastener to do, mount the matrix to the bag? You could try to make a pouch for the matrix and even add snaps/grommets to that to make all of the electronics removeable...or buttons or a bunch of short shoelace ties.
candid cosmos
ah, look at what is used on various ladies handbags/purses - you might need those neodynidiumum magnets and a metal plate to be strong enough
mint goblet
I do have some disks...
candid cosmos
just have it stick to some steel washers sewn in to one side.
mint goblet
that would likely work
 low nebula
Quick wearables question. What pins on the flora should connect a standard vibration sensor to?
mint goblet
as in the I2C ?
low nebula
The Adafruit #1776
mint goblet

The latest and greatest MiniPOV kit to hit the streets - MiniPOV4! We have added full color RGB LEDs to the kit as well USB programmability to make this the easiest, most fun ...
@low nebula
thats what that pid got me
low nebula
oops. The 1766
mint goblet
ahh thats a fairly basic one, it basicly just compleets a circuit. Did you see tow it was connected in a Gemma project ?
 low nebula
Which pi would A1 be on the flora?
 low nebula
Thanks!
light wigeon
am i in right section to post this ? https://imgur.com/a/7mkne
 mint goblet
ohhhhh
brave tendon
Looks like this project will have to wait. The sole of the shoe has literal concrete lol. Around mid-may, I’ll take apart the entire shoe.
brave tendon
$70.
mint goblet
sill, concrete
?
brave tendon
Structural i assume. I can’t imagine how flimsy it would be.
In May, I’ll gut the entire shoe and rebuild it bottom up.
brave tendon
Gonna have to take off the entire sole itself.
mint goblet
ahh heat gun time
brave tendon
To gut out the concrete and place in the electronics.
And then rebuild the top of the shoe.
rancid meadow
@light wigeon Wow that is cool. Is that to handle the over heat problem ? Which HMD is that ? Or is it totally your design ?
light wigeon
lenovo explorer , one of the "windows mixed reality" .
Custom IPD , im 5.7 limit was 5.9 , no physical adjustment , only software (your eyes cant match the lens resulting in a very tin "sweetspot") . Improved heat management by opening a window and add copper heatspreaders , the original design have no vents and run hot as hell after a while . Weight improvement (from 420g to 195g) i barely feel im wearing it . Fit my face with comfort (foam frame)
somewhat a "hardware" hack
these HMD are cheap now (200$) but full of flaws , even if the display and tracking are as good a the last vive pro upgrade .
rocky drift
So, I'm fishing for ideas here. Anti-static for putting, say, a voice box into a plush. Would just some sort of case be plenty enough?
 onyx arch
rocky drift
onyx arch
rocky drift
A) Personal preference: I hate cardboard
B) Was thinking more along the lines of something like a 3D printed enclosure.
candid cosmos
double insulated like a skilsaw
light wigeon
pink antistatic bag
 winter void
Use a antistatic wrist strap connected to the board. Run the wrist strap out. Wear it when using the project
strange fjord
I think I got lost to path of the convo
Anti-static wrist strap for enclosure?
Tho 3D printer seems like good idea, I don’t know how anti-static it would be, I’d say if ya want, some aluminum cans and rivets would probably work best with some nylon stand offs
rancid meadow
@Kao#0215 That is really nice mod. We were running our demo syncro playback for 360 video with multiple HMD and have the heat problem. End up building a hack together charging station with Peltier cooling.
light wigeon
haha 😄 nice idea
 neat plaza
Guys I have a motorcycle and I want to start adding some cool Leds mods...anyone knows some cool recommended DIY I should follow/look at?
strange fjord
If you’re talking about on clothes, they have EL wire with tutorials on that
On your bike, I don’t know
silk steppe
There is a saying RGB makes everything better
candid cosmos
You need to check your local laws regarding adding lights to a motor vehicle. They probably restrict colors. flashing and brightness so that you don't get mistaken for emergency/fire/police vehicles and don't become a distraction to others on the road. Although, there should be some info in auto forums for aftermarket product installs/mods. Note that autos are usually 12v systems whereas arduino is 5v/3v and have to account for that.
but for wearables, there are direction signal backpacks, gloves, jackets, not too many mods on helmets because you don't want to compromise any built-in safety, GPS jackets, haptic feedback, rider communication systems...
 twin rock
can I turn off the built in dotstar with circuitpython?
mortal edge
@twin rock should be able to. which board?
twin rock
Gemma M0, a neopixal project. I can't load both neopixal and dotstar lib without memory error.
mortal edge
are you using the .mpy version of the libraries? i got this to work:
Adafruit CircuitPython 2.2.4 on 2018-03-07; Adafruit Gemma M0 with samd21e18
>>> import board
>>> import neopixel
>>> import adafruit_dotstar
>>> ds = adafruit_dotstar.DotStar(board.APA102_SCK, board.APA102_MOSI, 1)
>>> ds.fill(0)
>>>
Thanks to all, I found the dotstart mpy file, set color to (0,0,0) and brightness to 0.1 and it is now off.
mortal edge
@stark lodge is your approach better? so it doesn't interfere with CP using it for status?
neat plaza
@Techguy12 🔥#6066 @strange fjord @caitlinsdad#8800 thanks guys for the tips..I want my motorcycle and I to be as bright and visible on the road as I can be.. Caitlinsdad.. Thank you..yea, a regulator will take care of that 12v for MCU. Those gloves/jackets integrated LEDs mods, if you buy them wear ready. They are usually expensive. That's why I want to make them..
grim cypress
How could I use this product with the micro:bit? goo.gl/YLzesz
candid cosmos
@grim cypress There seems to be a recent surge in questions on the UBLOX GPS modules. Is there some school or curriculum that is promoting its use for projects? From what I have seen, it might take some sleuthing to get things sorted out to connect it to an arduino, maybe a little more difficult if for microbit. I don't know if it is similar to anything adafruit has to even start, maybe look in the adafruit forums or post in #help-with-radio. Good luck.
grim cypress
It is pretty recent technology, especially for its small size. @candid cosmos
candid cosmos
@grim cypress thanks. everyone seems to keep busy with new products
grim cypress
Yep, if you get a chance, you should get one of those modules. Its pretty good for navigation and tracking.
candid cosmos
I've done orienteering, never got into geocaching though.
grim cypress
Ahh, pretty interesting.
brave tendon
I plan on selling my WIP project, just had too little time and too little money. It’s a WIP Air Mag kit, has the EL lights, 9V or 3V powered, and the shoes. The shoes however requires work such as gutting the sole to place the electronics and restructuring the fabric to appear more realistic. Was planning on putting an Adafruit circuit to make it rechargeable and auto-lacing but ended up being too costly and time-inducing for me. Message me if you’re interested in finishing my project.
upbeat wing

Build a Raspberry Pi based wearable computer
If anyone comes in here asking about this, make sure to @ me
 blazing void
Hey, im doing a student project and our task is to build a super compact Bluetooth bracelet with a few neopixels. We’ll be designing our own pcbs so looking for what ic’s would work best. There’s some NRF ones that have built in Bluetooth. Can we use one of these for communication plus neopixel control or do we need a separate processor to run the animations?
 stark storm
It should work just fine with a spare I/O pin. I see that the Adafruit Neopixel library explicitly lists support for "Nordic nRF52 (Adafruit Feather nRF52), nRF51 (micro:bit)" (with the usual caveats).
blazing void
Awesoem, thanks!
brave tendon
I’m selling WIP Nike Air Mags, msg me if you’re interested. Needs quite a bit of work and love which I don’t have time for atm.
 tender frigate

You are from the future with these futuristic video glasses. Or at least, an 80's version of the future. Wearing these turns your vision into what appears to be a 52" television a few feet ...
This product shows as discontinued
Can you guys suggest any alternatives
Or the parts I could use to build it
Thank you
brave tendon
I don’t recommend building anything like these. You’ll regret having to upload what you’re trying to watch to the device itself without having it distorted or stretched. @tender frigate
mint goblet
there is the google cardbard ?
 amber widget
@mint goblet I know it's a typo, and I'm not poking fun, but now all I can think of is a bard made out of cardboard that sings your Google search results.
amber widget
no don't be! It's an incredibly entertaining image. I needed the laugh 😃
mint goblet
well that's something
thinking of wearables, I need advice on that bag of mine, it's still sagging
I need a better camera
amber widget
I'm guessing, as I don't entirely know what you mean by "sagging", but have you considered adding boning? There's plastic "boning" available that's used in corsets (albeit awful for corsets), but it could add some rigidity to the structure if that's what you're looking for.
mint goblet
it has that.. sorta I used webbing on the backside
amber widget
I remember seeing it, if that's what you showed on show and tell not that long ago
mint goblet
nte led matrix is what lives in it
yeah
I can attach and take another photo if you like
amber widget
Sure, I'll see if I have any suggestions
mint goblet
it's not as bad when the bag is on my shoulder, but I have not found a good way to attach an attachemnt to the top due the the flap
amber widget
Ok so the bit with the matrix in it isn't the issue? It's the entire thing?
Is the bag leather?
mint goblet
yeah
canvas with a leather flap
the other bag is all canvas
but thats a backpack and I attach on the diag\anial with that
amber widget
Ok, so I think part of the issue is that it has flaps on the end of the matrix bit, so it hangs instead of the clips being right next to the matrix
have you thought about adding grommets to the bag in specific places to have better mounting points?
That would work on canvas or leather
mint goblet
i did, then I sav the price of a grommet punch
mint goblet
and I added it to the maker space wish list....
mint goblet
I am fine with taht
amber widget
Relative to the punch I mean
I don't know what your budget is, so I Shouldn't say "cheap"
amber widget
I think my kit was 6$ for 10 grommets and the punch bit that requires you to hammer it together
mint goblet
I do have the hammer 😉
amber widget
Well this one is $10 https://www.joann.com/metal-grommet-kit-silver/10702223.html so maybe not as cheap as I thought. I Think I had bigger grommets though.
mint goblet
I thought the 4 point straps would be a good stand is
amber widget
Oh it's on sale for 6
mint goblet
in
amber widget
I think maybe they're too long.
Is the issue
If they were shorter would they hold more up against the bag and sag less?
mint goblet
yeah I shoud have gotten the adjustment things
but I gould not find them
thats my own fault
amber widget
Can you stitch them shorter? I have no idea what they're made of
mint goblet
webbing
amber widget
Ah, that's more specialised.
mint goblet
I would have to cut them out and rip the seems
amber widget
It's doable, but requires a specific needle for a sewing machine, if that's how you do it. Heavier duty needle.
Depending on the webbing.
amber widget
I totally get it.... I've had to rip out some hardcore stitching before because I didn't want it to come out either.
You could add loops to the top of the bit with the matrix in it, and then hook those loops over the carabiners as well to hold it closer, and then the webbing would simply sit there for now...
mint goblet
the attach to the D rings that the strap is on, I am not sure if there is a better place?
amber widget
Basically make two new loops but only for the top.
mint goblet
the loop thing I did consider
amber widget
Well if I couldn't do any of the other stuff we talked about, that's where I'd go with it
amber widget
Seems like if you could attach the top corners of the matrix part of it where the D-rings are now, I don't think it would sag so much and the bottom connections could be left the same just to hold it down a little.
Yeah for sure 😃
mint goblet
?
amber widget
I was summing up what we already said, that wasn't anything new
I may have worded it badly
mint goblet
I ushaly use the loops on the bottom to the straps that close the flap and the top ones to the shoulder strap
amber widget
Right, but the matrix seems wide enough that if you put loops closer to the top corners of it, you could still attach them to the shoulder straps, and it would hold the matrix flat against the bag
Essentially it's a workaround to shortening the straps.
Add another mounting point instead of altering the current one.
But what I was saying, was that the bottom ones can be left as-is, I don't think they'd need to be changed.
amber widget
Yah that would make it more modular too 😃
 fickle sapphire
@mint goblet I've been drooling over Adam Savage's EDC One bag. It has a soft bottom lined with velcro such that you can put in a camera-bag or something stiff with velcro
possibly you can do this to the side of your bag? velcro-in the matrix
https://adamsavage.com/products/savage-industries-edc-one <- what I'm talking about, far too expensive for me but it's a great design

Savage Industries
Made in the US by Mafia Bags https://mafiabags.com Constructed primarily from upcycled and salvaged sailcloth, every bag is unique. Durable and lightweight. Bag comes with a web strap, as shown in the photos. Each bag is identified with a hand written serial number indicati...
also...pen-holder-loops in the bag are a really good idea
mint goblet
I will look
and holy crap that's not cheep
@fickle sapphire do you know what kind of clip that is for the shoulder strap?
fickle sapphire
It's made out of old sails and hand-made in california. still a very high price, but there are reasons I presume.
@mint goblet Not sure what the name of it is, but they look like modified carabiners (for climbing) but with a flat-portion
mint goblet
sorta like scissors ,
fickle sapphire
KINDA
candid cosmos
look for "flat snap hooks", like the ones used on tow strap webbing.
mint goblet
I was on the hunt for flat clips ages ago for another project idea, I think I have a thing for them
 honest berry
On the 13th I went to an event and they had some crowdsync light-up LED wristbands. I wanted to make a radio control center but due to proprietary tech, I decided to make a similar thing instead.
But I'm new to this and I need help with the circuitry.
Not to mention I don't want to infringe on their tech.
 keen pilot
@honest berry sounds cool, what was the visual effect like
honest berry
It had 15 different colors, and multiple blink patterns
The control box was radio frequency based
But I want to make more than just 15 colors
Search crowdsync technology
To find the company
keen pilot
don't have much advice but they look super cool 😃 i found a too-quick teardown of a similar product if it helps https://www.youtube.com/watch?v=BpiaC4UQBOw

Soundtrack composed and produced using Ableton Live9 with Native Instruments Reaktor Blocks
keen pilot
What's inside the crowd participation wristbands you find at major events?
honest berry
@keen pilot it should.
candid cosmos
@honest berry Look through the Bluetooth Controlled Neopixel Headphones guide. I think you will find that more advanced radio/wifi systems for communicating commands will be more complex and expensive. The master unit you saw may have been RF to some remote master console module but the IR beam for the individual wristbands is more practical for simplified electronics receiving and the "give-away" wristband unit. https://learn.adafruit.com/bluetooth-controlled-neopixel-headphones/overview

Animate your headphones with NeoPixels!
honest berry
Well I'm not giving them away they'll stay within the house, and also I've always wanted to build some form of radio frequency device
And this is a perfect
Opportunity
 potent valley
will coating conductive thread strands with fabric paint individually be sufficient insulation to braid them together? will the braid be able to flex and stuff without the coating cracking?
candid cosmos
@potent valley You are probably better off using the flexible silicone coated insulated wire available at Adafruit. The problem with conductive thread when you try to coat them - like with nail polish at connections - the liquid may seep into the fibers to actually insulate the fibers/contact pad and break the connection. Fabric paint is a little thicker but like painting surfaces that move, the paint will eventually work its way loose and crack. If you've already made your project with conductive thread, you could splice in at the flex joints a braided real wire "jumper" set for durability and reliability. The auto parts store will have some silicone insulated hookup wire if you need to get your hands on some quicker than ordering. Good luck.
potent valley
Ah ok, thanks @candid cosmos . I'm trying to find thin, very flexible wire (that needs to be insulated) and haven't been having much luck lol. If you know any good wire for that let me know
stark storm
The thinnest wire is magnet wire like this: https://www.adafruit.com/product/3522

For winding custom coils, or very fine-pitch rework, we always reach for magnet wire. Magnet wire is very very thin (0.1mm diameter!) copper wire with a very thin layer of insulation. ...
However, the most flexible (and pretty thin) is the 30AWG silicone insulated wire (it's also more durable to abrasion and repeated flexing than the magnet wire): https://www.adafruit.com/product/2003

Silicone-sheathing wire is super-flexible and soft, and its also strong! Able to handle up to 200°C and up to 600V, it will do when PVC covered wire wimps out. We like this wire for ...
light wigeon
Hi There, thanks for the great work and sorry for my bad english.
Im starting with the GEMMA V2 project and im trying the simple project with a neopixel ring. im trying the project as the starter (https://learn.adafruit.com/gemma-hoop-earrings/arduino-code) but i have difficulty uploading the code... Is this project compatible with the GEMMA V2 and if not is it possible to modify the code in order to make it work... Sorry for such a noob questions but you are my last hope :p THanks
candid cosmos
The Gemma may be fussy at times when you are trying to upload from the Arduino IDE. Check out the guide for tips https://learn.adafruit.com/introducing-gemma/introduction but the trick usually is to hit the reset button on the board at the right time so that the bootloader can communicate with the PC as it uploads the sketch. Also check in the IDE settings that adafruit Gemma is selected as the board and USBtinyISP is the programmer selected. Good luck.

Introducing Adafruit's mini wearable microcontroller
@light wigeon
candid cosmos
are you using a mac or windows 10?
light wigeon
mac :p
candid cosmos
for mac, the USB stuff is more sensitive, so you may need to try other USB cables or even get a USB 2.0 hub to pass thru.
candid cosmos
the gemma/trinket are based on the attiny85 chip which is an earlier chip and "hacked" to work with arduino. It works with USB2.0 so newer USB3.0 doesn't play nice.
light wigeon
😃
candid cosmos
on a mac, you wont see it show up as a port
light wigeon
i just changed the usb port (from left to right) and now the board is bliking
candid cosmos
that's a positive sign
light wigeon
the test run well
but the code https://learn.adafruit.com/gemma-hoop-earrings/arduino-code dont!

NeoPixel Ring Bling
error compiling for arduino gemma
that is more challenging than expected 😃
candid cosmos
Did you install the adafruit boards library in the IDE?
also the neopixel library?
candid cosmos
don't When you look in code and see anything like include.something.h , you usually have to install the device library
light wigeon
actully it did ring a bell like... 2 sec... and then i thought it was normal
so i whould install the librarie from github
candid cosmos
in the ide, top menu look to install library, just put neopixel in the search there to select
in ide look at top buttons SKETCH, INCLUDE, MANAGE LIBRARIES
pick Adafruit Neopixel
candid cosmos
I think you need the adafruit boards one when you read through the setup guide. You have to select Adafruit Gemma which is "slightly" different from the Arduino Gemma that shows up when you first install the ide
light wigeon
true! i havent noticed
candid cosmos
I need to leave, but the only other problem you may encounter is that your neopixel ring may be RGBW, you would need to just change the configuration parameters in the code, read how in the "adafruit Neopixel uberguide". Good luck.
light wigeon
it worked
almost 100% :p i have 4 leds not working in the random program
but i will check later i guess!
light wigeon
I'm new here. Anyone that can help with a wearable sensor to detect dehydration, I would really like to discuss it with you. I even have a scientific paper that explains how the sensors were made. I think this can be made using a wearable. I can't think of a better use for such a device. Any help, feel free to contact me. Thanks.
 gentle beacon
Anyone know of a way to disable the USB storage trigger on a Circuit Python Express? I want to use it as a keyboard on my iphone, but my phone keeps wanting to import images everytime I plug it in. If I kill the import, the HID keyboard works as desired. Just that one detail needs to be rectified 😃 thanks!
stark storm
That's a good question. I know the Teensy boards can emulate a variety of USB peripherals, but while the CPX can emulate a keyboard (https://learn.adafruit.com/adafruit-circuit-playground-express/circuitpython-hid-keyboard) I'm guessing it also continues to emulate a storage device.
gentle beacon
@stark storm cool, I had a little Arduino HID device and it worked EXACTLY one time on my iphone as a HID, then the iphone self defended and blocked the device!
stark storm
Ouch! I have a phone that lets me choose "charge only" mode to protect against being plugged into sketchy chargers, but apparently it does not switch instantly.
gentle beacon
@stark storm i may have to abandon the iphone HID idea and just go Android for this project..
stark storm
That's annoying.
gentle beacon
Very...
stark lodge
@gentle beacon do you mean the auto-reload?
gentle beacon
@stark lodge I mean the USB storage is detected as a storage device. When I plug it into my iphone it wants to import pics vs act as a keyboard 😦
stark lodge
we can't yet: https://github.com/adafruit/circuitpython/issues/1015

GitHub
A couple of forum posts recently have asked if HID or MSC could be disabled for security or device interference reasons. We need some kind of dynamic USB descriptors to do this. https://forums.adaf...
gentle beacon
@stark lodge ah ok thank you
light wigeon
hi everybody
i need some help (again) as a noob in adafuit community. I started quite simple with this project (https://learn.adafruit.com/gemma-hoop-earrings?view=all) step by step.
NeoPixel Ring Bling
my probleme is only 12 on 16 leds are working... did you know what possibilby can go wrong? The board? the library?
thanks for your precious advices 😃
stark storm
I can think of 4 things: one is that the code is configured for 12 LEDs (an easy thing to check). Another is that there might be a power problem: what power supply are you using? Another is that there's a bad connection between LED 12 and 13 – that's trickier to check, but gently pressing on those two (the last working one and the first non-working one) might shift things enough to make a temporary connection. The last is that one of the LEDs may have failed. If you think that's a possibility, try contacting AdaFruit support.
light wigeon
hey thanks for quick answer...well i copy past the code from the link i posted
i have 2 neopixel rings and it is the same probleme on both of theme so i think its not the material
stark storm
The code in that link is for 16 LEDs, so that's probably not your problem. Same on both? That's really peculiar.
light wigeon
for the batery i have a 3,7V 500mAh PKCELL
actually i went last week to the reseller because i thought the product was broken... now i see that its me that i did mistake
on ARDUINO i choose the ADAFRUIT GEMMA ATtiny85 board
maybe that is the problem
stark storm
Is that the Gemma you're using?
I know the code can be a tight fit on the ATtiny85, but it should work unless some Arduino update broke it somehow.
light wigeon
i guess: GEMMA AT Tiny85 3GPIO
humm... that is quite confusing for a start 😄
shall i start an other project and see if the probleme is still here
i wanted to start this one https://learn.adafruit.com/gemma_m0_clockwork_goggles?view=all
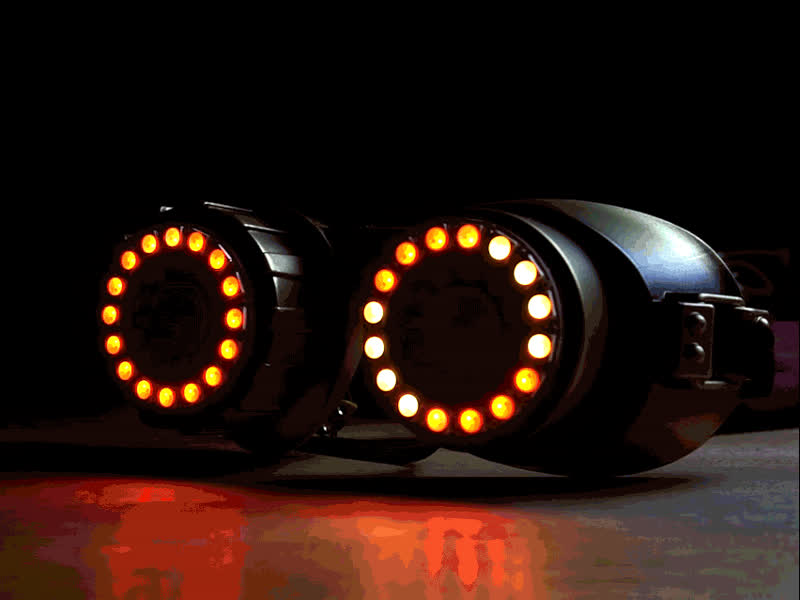
Animate your goggles with NeoPixel rings controlled by a Gemma M0 running CircuitPython
stark storm
It sure is. Having two fail in the same way is deeply strange. If it happened to me, I'd try another NeoPixel device and/or another controller and see if the problem changes.
light wigeon
well i have only this GEMMA V2 for the moment
amber widget
@light wigeon Did you buy the RGBW NeoPixel rings? Instead of RGB?
light wigeon
yes it is the RGBW NAtural Led
stark storm
Oooh, good catch! I forgot those were out there.
amber widget
The code is different for RGBW than RGB because of the extra bit needed to talk to the fourth LED in each pixel.
So since you're sending 3/4 of the number of bits you need, 3/4 of the LEDs work.
light wigeon
🤔
amber widget
For CircuitPython, you can add the fourth bit easily by changing the color tuple to (r, g, b, w), i.e. (255, 255, 255, 0). I don't know how to alter the code you're using though.
light wigeon
well actually i wanted this first project to work and see all parameters one by one because at the moment i dont catch all the code language 😃
i even dont know yet how to change the color or frequency
for the moment i hace for exemple :
case 0: // Random sparkles - just one LED on at a time!
i = random(NUM_LEDS); // Choose a random pixel
pixels.setPixelColor(i, color); // Set it to current color
pixels.show(); // Refresh LED states
// Set same pixel to "off" color now but DON'T refresh...
// it stays on for now...both this and the next random
// pixel will be refreshed on the next pass.
pixels.setPixelColor(i, 0);
delay(10); // 10 millisecond delay
amber widget
I don't know Arduino, so I can't tell you how to alter the code to work with your rings, but from what I can tell the project is designed to work with RGB rings. So something would need to change.
amber widget
You can format codeblocksby putting three backticks on either side of your code. The backtick is the one in the upper left of US keyboards, next to the 1 key.
light wigeon
i have french keyboard, but im going to look for it
amber widget
That's why I specified US keyboard... I know it's in different places for other languages 😃
light wigeon
😃
amber widget
That's the correct key. Three of them followed by all of your code, and then three more.
I thought you were asking if you'd formatted it correctly 😄 sorry
stark storm
It looks like the Arduino NeoPixel library has an optional third argument to specify the NeoPixel type.
amber widget
@stark storm CircuitPython has options like that so I guessed Arduino would too.
stark storm
So instead of:
Adafruit_NeoPixel pixels = Adafruit_NeoPixel(NUM_LEDS, PIN);
It would be something like:
amber widget
@light wigeon Also a single backtick followed by some code and another single backtick does inline code.
stark storm
Adafruit_NeoPixel pixels = Adafruit_NeoPixel(NUM_LEDS, PIN, NEO_WGRB + NEO_KHZ800);
light wigeon
im a little confused but im happy we found the solution
stark storm
I don't know the pixel order of your RGBW natural Led ring, so the colors might come out wrong, but they should at least light.
light wigeon
if we take the exemple i send you, where should i place the code?
stark storm
Replace the first line I mentioned (after "instead of") with the second line I mentioned.
light wigeon
ok
im uploading the code
... almost it! 😄
now only one is not lighting
ha my mistake... its on now!
wow
stark storm
Go team!
light wigeon
i dont know how i would do without you...
is there some books or notices that i could read about to help me?
or it is like a try and die 😃
stark storm
I know there's a wealth of good information out there, but I don't have any good suggestions, unfortunately.
light wigeon
ok so i guess i will be like a spam in this topic :p
candid cosmos
@light wigeon When working with neopixels, refer to this for a good overview https://learn.adafruit.com/adafruit-neopixel-uberguide/the-magic-of-neopixels Browsing through any other project in the Adafruit Learn section of their site is always good to pick up techniques and pointers. This 3 part guide is good to understand how to get around some of the limitations of using arduino with neopixels. https://learn.adafruit.com/multi-tasking-the-arduino-part-1/overview Good luck.

Everything you always wanted to know about Adafruit NeoPixels but were afraid to ask

Make your Arduino walk and chew gum at the same time.
stark storm
Multitasking in microcontrollers is an interesting exercise. I have one implementation of a 24-channel phase control dimmer in a Teensy 2, and I'm working on another one to draw text on a CRT by decoding the old Hershey vector font, transforming the coördinates, queueing them into a buffer, and then clocking them out the DAC pins at a regular rate. It's kind of hairy code, but it seems to be working.
light wigeon
@candid cosmos thanks. i actually start by the project on the LEARN section. as im started im not aware yet what is up to date and what need some extensions... but if i need something i might ask you... verry soon :p
stark storm
When multitasking, I like to factor out repeated stuff like the call to millis() and subtraction. So at the beginning of loop(), I'll have something like unsigned long curtime = millis(); and unsigned long schedtime; for each thing I want to schedule.
Then a simple test for curtime > schedtime will detect when it's time to run something, and in that block, I'll use schedtime = curtime + interval; to reset the time for the next time around.
light wigeon
😄
candid cosmos
When you get into programming neopixels, it helps to get into the mindset/paradigm of what a stop motion animator does. You have to structure your sketch like it is working frame by frame. Because the Arduino is essentially a simple one-tasker and takes some time to execute a command, if you are making the lights go through a rainbow fade it may never get around to sensing your switch to change the animation or move the servo. You use the big loop to go frame by frame - maybe calculate a color change, set the pixel color, sense switch, move servo a tiny bit and move on to next step, all hoping that you can squeeze in all that to make the animation look nice and not awkward.
stark storm
Yup, that's how my Hershey font code works. Each loop, it checks to see if it's time to emit a sample via the DACs, then it checks to see if it's in the middle of drawing a segment, if so, it calculates the next position, if not, it looks for the next segment, or the next character.
candid cosmos
All that ties in well with the "state machine" concept...and switch debouncing. Some basic concepts that are never taught to beginner programmers...like flowcharting to better understand what you are doing or attempting to do.
stark storm
Worse, a recent fad is to deprecate state machines in general.
candid cosmos
in real life, rage against the machine.
 mystic acorn
do not go gentle into that robot apocalypse.
rage, rage against the rise of the machine
candid cosmos
stark storm
Good advice, that.
 jaunty crypt
My droid friends are the IG-88's
light wigeon
Hi everyone, I would like to create some workshops with wearables to teach those who don't usually use technology in this way how easy it can be to get going. I have a gemma v2 from the sequin starterpack but to be honest, uploading from my macbook to this board is touch and go and not something I feel would give beginners confidence - which board would be the best to start with? I am looking for 1. small board 2. easy to program (makecode looks good for this I guess, but easy upload?) 3. cheap 4. low power requirement. what do you think?
stark storm
I'd suggest a Gemma M0. The genuine USB support makes the loading process much smoother, it's more powerful, and isn't expensive. I've never used MakeCode, but it's easy enough to program with Mu (which handles the upload for you). I taught a class of kids using Mu, and they got the hang of it pretty quickly.
candid cosmos
Hi @light wigeon, welcome. For beginners to coding, electronics, and wearables, my recommendation would be the Adafruit Circuit Playground Express board.(CPX). It may be a bit more expensive but worth it in terms of ease of use, has sensors embedded in it that you would want later on and the learning "ecosystem" that exists for it. In actuality, small tiny boards and conductive thread are really for more advanced users who know how quirky they can be and can use them without getting frustrated. The added cost is more of an investment that pays back in a better starter experience. Most of the time I just run the electronics off of a battery pack with standard AA or AAA batteries . For wearables, using the CPX means users can jump right in and create that LED blinking garment which responds to sound, light, touch, or temperature without needing to buy and solder on additional components. Browse through the Learn section on the Adafruit site to get an idea of the vast wearable projects you can do as well as all the starter tutorials. Maybe you can get some sponsorship for your workshop, there are educator packs that are sold by Adafruit. Good luck.
light wigeon
Thanks so much @stark storm and @candid cosmos I will try mu, and have ordered a CPX to see if I can make a good experience with it. Will definitely have a look at the educator packs too.
 heavy yoke
Just got and adafruit Flora v3 as a gift and I was wondering if anyone had a few tips and tricks as I have never worked with this before.
candid cosmos
@heavy yoke Be sure to check out the guide to getting started with Flora https://learn.adafruit.com/getting-started-with-flora/overview and then rummage through the Adafruit Learn section for all the great projects to make with the Flora. Good luck.

Adafruit's Wearables Platform
heavy yoke
Thank you @candid cosmos
light wigeon
Hi Gang!
Is there a page or some tutorial where i can find a way to learn how to code the LED for NEOPIXEL RGBW with a GEMMA v2?
Im trying many thing and i still have the demo code working... i really would like to know how to control each parameter and do my own animation.
thanks
and to continue, can someon explain me how to fix this kind of problem: whiteOverRainbow' was not declared in this scope! i get a lot of those lately
candid cosmos
@light wigeon In arduino, coding for RGBW neopixels is the same for RGB neopixels except there is an extra parameter in the color statement (R,G,B,W) and the specification in the setup line.
the error message you get probably points to a whiteOverRainbow function not properly coded or if that variable is not defined for the loop it is used in.
light wigeon
@candid cosmos ho ok , i'm learnin a lot and i think this is the next chapter! i will have a look
 ancient flame
Just a quick check, there's a way to wire up people as capacitive touch sensors, right?
The problem I'm trying to solve is having people high-fiving or bumping butts or otherwise bouncing off each other while dancing act as a trigger signal.
Or would accelerometers be a better idea?
stark storm
My guess is that it's theoretically possible, but would require some tweaking of thresholds, as different people have different capacitances. Further, if they're bumping each other with clothed parts of their bodies, it may not be workable.
ancient flame
So maybe glove and shoe accelerometers.
Impacts should read different than waving around.
stark storm
It seems to me that's likely to work better. Possibly try a vibration sensor instead of an accelerometer (there are versions of this that are more and less sensitive, too): https://www.adafruit.com/product/2384

The "poor man's" accelerometer/motion sensor! These spring-vibration switches are medium sensitivity non-directional vibration induced trigger switches. Inside is a medium ...
candid cosmos
@ancient flame This might give you some ideas - switches can be covered with a rigid plastic plate to make them larger pads. https://youtu.be/-nak-rK0qQc

Last minute mod: I added a 2nd switch to the thumb, so it doesn't trigger unless Joel wants it to! No more accidental counts. This project is basically a mas...
ancient flame
@candid cosmos That's probably exactly what I want! I'll watch the video when I have bandwidth - both mental and internet.
 short verge
can anybody recommend a good quantified self channel on DC?
 jolly flax

MIT News
Researchers incorporate optoelectronic diodes into fibers and weave them into washable fabrics.
 quasi perch
Ooo
 keen edge
So THAT’S what they’ll be putting in Adabox 9!
 queen inlet
i have a stupid question, i can connect strands of neopixels together via jst connectors to power them all via 1 5v trinket pro/power source with a powerboost correct, provided theres not too much distance and im not using a crazy amount of neopixels,?
candid cosmos
@queen inlet I don't use powerboost modules so I don't know if your setup will last long or the neopixel load at full brightness will tax the powerboost but basic wiring is ok with jst connectors if you want to put in a break. They will be more resistant to pulling apart than other connectors available and used in wearables. Just note that if you have factory installed wires and jst connector already on the neopixel strip, they may be wired up to the input or output end of the strip and you will have to connect to the correct end for things to work. Good luck.
 livid bluff
Question about the Gemma M0 - with a LiPo battery plugged in, does the battery get charged from the Gemma when powered through the micro-USB? If not, how are other folks re-charging their LiPo battery for a project?
stark storm
No, the Gemma M0 doesn't have built-in battery charging. I unplug the LiPo and plug it into a charger like this one https://www.adafruit.com/product/1904 when I want to charge it.
 lime kite
Hello Adafruit Discord community! I am working on the mad scientist goggles project as sold on the Adafruit website. I am trying to recreate a similar look to the DJ Rezz. In addition to the kit, I ordered an addition a pair of 24 x RGBW in order to create two circles of light over each eye, one 16 and one 24. A few starting questions:
I'm totally new at this so I am not sure how to wire the 24 neopixel rings to the smaller 16 ones.
Can I use the trinket that came with it to program all four neopixel rings? I also ordered a Gemma v2 to have for other projects so would this be better suited to handle this instead?
Similarly will the 3.7v battery be enough to power them?
candid cosmos
@lime kite To get familiar with neopixels, look at the following guides https://learn.adafruit.com/adafruit-neopixel-uberguide/the-magic-of-neopixels , https://learn.adafruit.com/sipping-power-with-neopixels?view=all and the guide for your goggles https://learn.adafruit.com/kaleidoscope-eyes-neopixel-led-goggles-trinket-gemma A Trinket and a Gemma V2 are essentially the same under the hood. So here are a few things: The googles kit may come with RGB neopixels and not RGBW and when the different kinds are both connected together may produce some unexpected colors, flashes, no lights. What you can try is to connect each kind to a different pin and code accordingly - chaining the rings together data out to data in to act as one long strip would not be good with the different kinds. The Trinket/Gemma should be able to drive such a relatively small amount of neopixels - under 100. Set the brightness to low to start out with to see how the battery can handle the load - usually when neopixels all turn red or dim, they are underpowered and when your animation freezes up.... When you get all your parts, come back and we can guide you along.
Everything you always wanted to know about Adafruit NeoPixels but were afraid to ask

LED smarter, not harder

Fashion headwear for cyberpunks, steampunks and Daft Punks.
candid cosmos
@smoky plume Is it a big kid or little kid size? Using good duct tape as a covering material will add up in cost and gum up those scissors.
 smoky plume
Big kid
Well, we bought two 32 meter rolls of tape @candid cosmos
So should be enough
Plus, if it rains on halloween, it acts as permanent paint
candid cosmos
Be sure to tape on a bunch of flashlights or bicycle blinker lights for effect...and fog machine...
candid cosmos
It's a chance to show off your mad maker skillz. Good luck.
smoky plume
Thank you! ^
Hey so uh, this is where I got the idea for my build, the tranforming motorcycle! https://www.youtube.com/watch?v=Rz9fcNDf3wI
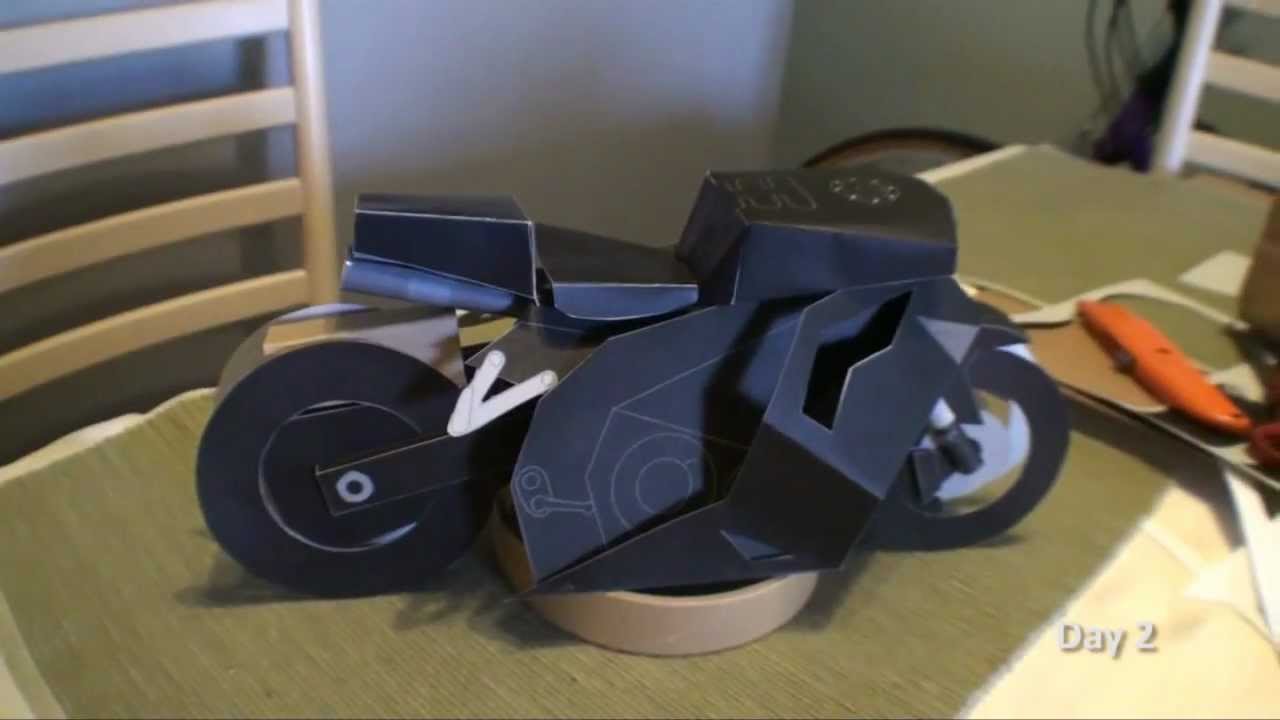
This what I'm going to be this year for Halloween. It's a motorcycle -- a sportbike and it transforms! I've never seen anything like it. Share this video if ...
 sand willow
I'm planning to make twinkling Halloween dresses for my girls and the idea of exposed conductive thread between the pixels has me nervous. In fact I'm convinced i'm going to either ruin some components or have a battery fire the first time they sit down... Has anyone had luck sewing enameled wire? I want to put 20-30 pixels on each dress and want the fabric to flow as naturally as possible all things considered.
candid cosmos
@sand willow You are better off using silicone insulated wire https://www.adafruit.com/product/3164 Enameled wire is kinda stiff and brittlely when flexed too much. You may need to learn to solder but that guarantees less of a headache when trying to connect and troubleshoot the entire setup. Btw, you could probably wind a lower bobbin with enamel wire on a sewing machine and topstitch it with regular thread. You wouldn't pass that through the needle if you wanted to experiment. Good luck.

Silicone-sheathing wire is super-flexible and soft, and its also strong! Able to handle up to 200°C and up to 600V, it will do when PVC covered wire wimps out. We like this wire for ...
 radiant bay
@sand willow Id trust your intuition and second the suggestion from @candid cosmos to use wire. I’ve used it for a maximum 25 pixels and seen significant drops and inconsistencies in performance to the point where I’ve changed direction on using it to keep a piece alive. The thread is fantastic and exciting for small projects but I am in love with that silicone wire. The thread can also be a pain to sew, to be honest. The 30awg is super tiny and amazing and you might be able to weave it through mesh fabric like thread.
@candid cosmos i dont think I’ve used enameled wire, tbh, unless I’m totally blanking on it. If there’s an issue of being brittle, it would probably also work well to keep it out of the machine and sew a zigzag stick over it to make a channel - i think Becky did this with the chameleon scarf.
Zigzag stitch*, doh!
sand willow
Thanks everyone, I went out and bought a 6 pack of the 30ga silicon wire. Now to figure out the animation logic! My girls are going to freak when they see them!
radiant bay
Awesome @sand willow! Can’t wait to see!
candid cosmos
@radiant bay magnet wire - enameled wire - getting brittle might not be the best term to describe it, it's extremely thin - from motor windings, wirewrapping to transformer thickness and is useful in some applications like those eyelash LEDs and covering with makeup. Use whatever you can get your hands on and make it work!
upbeat wing
my wearable mini bluetooth keyboard
not so much for typing as remote controlling a raspberry pi
upbeat wing
Lol it's ok
I may be able to but I think it would be a little bulky, I plan on bringing back PiGlass and recoding the commands to work with Bluetooth
candid cosmos
you need to hack an old blackberry device for an all in one on your arm
upbeat wing
I built this just so I could control it with the keyboard
candid cosmos
I think James Bond had some kind of joystick on a watch maybe.
upbeat wing
I got a Bluetooth joystick but I don't think I will be able to use it, on the keyboard you can set repeat frequency and I was able to tone it down but the mouse commands just happen so fast if I push forward for 1 second it recieves commands for 4
candid cosmos
hmmm, maybe @icy hollow might have some thoughts on joystick input.
smoky plume
Remember my motorcycle project? here is one of the wip pieces for the arm!
smoky plume
Ahem
smoky plume
<@&327289013561982976> am I able to post a stream here, related to my project?
As in, my own, where I am working on it
mortal edge
@smoky plume do you mean post a link to your stream?
smoky plume
Yeah
mortal edge
You can if it's on topic and generally complies with our #code-of-conduct
smoky plume
I believe it does
mortal edge
Then sure. The other thing is to try not to spam with the link - like post it here everyday or something.
smoky plume
Ok!
mortal edge
huh. where'd it go? did you delete it? i saw it
smoky plume
That was for twitch
Twitch wasnt cooperating , so i moved to yt
Can i resend the link? @mortal edge
mortal edge
sure. go ahead.

 opal dagger
@sand willow As @candid cosmos mentioned, silicone insulated wire is very nice. I love it for wearables. It's very flowy. I'd stitch it every few inches with regular thread, possibly to the back of the fabric, being careful not to poke through the insulation. In addition to the single conductor recommended, there is now multi-conductor silicone ribbon! A good candidate is this: https://www.adafruit.com/product/3892

For those who are fans of our silicone-covered wires, but are always looking to up their wiring game. We now have Silicone Cover Ribbon cables! These may look a lot like squid ink noodles, ...
 cedar mantle
Trucking through the Badge tutorial. Up next, print out the remixed case that will accommodate the battery for the HalloWing off of Thingiverse.
I'm hoping to be able to have this together + the speaker for fancy nametag at the Halloween party at our local MakerLab.
opal dagger
Nice!
@candid cosmos @upbeat wing https://www.youtube.com/watch?v=sQ3jg6KK3I8

007 gets to grips with his remote controlled BMW in TOMORROW NEVER DIES
cedar mantle
@opal dagger I love this scene
upbeat wing
All I got is a Bluetooth keyboard and this
cedar mantle
@upbeat wing add a tiny wireless camera and you're almost there
opal dagger
Oh, 1997, you were so cute. Did you imagine people would actually be doing basically all of this with their smartphones?
cedar mantle
@opal dagger best day evar... wireless camera on a rc car with a vr headset for the phone + a chicken coop
opal dagger
Oh yeah! That sounds great! I love my DJI Spark and Mavic Air drones. I get similar exhilaration, but I haven't tried a VR headset on those, yet.
cedar mantle
Fun thing about staying on the ground with the chickens though, it was like Jurassic Park!
opal dagger
Ohhhh. That's amazing. Yeah, scale and all. Plus, the character AI and rendering is so realistic 😉
candid cosmos
My idea book on wearables to get inspiration for your holiday makes...I didn't realize I made all that... https://www.instructables.com/id/Getting-Started-in-Wearables/

Instructables.com
Getting Started in Wearables: If it fits, it’s lit...If it doesn’t fit, we’ll make it fit…Squirrels.Just put that in because, anything you can wear is a wearable. But mostly here, we will talk about wearable electronics or really, how to get started in thinking about ...
 lilac axle
Are there any wearable platforms with wireless capabilities like Bluetooth or WiFi?
candid cosmos
@lilac axle I'll say anything is wearable - making it wearable is just a means of mounting the hardware... But bluetooth, wifi, radio, and cellular modules can be added on to arduino boards like FLORA or an UNO R3. If you are concerned about size, they are all pretty small but you have some that are built into the board like the ESP8266 or the Adafruit Feathers and the add-on wings. Depending on the project, you will find that you might need a controller app on a smartphone or some kind of connection to a "cloud" service like for IoT(Internet of Things). Good luck.
 cinder sluice
Adafruit flora is made to be wearable and you can buy a bluefruit LE attachment for it
I recommend looking into embedding solutions for the feather ecosystem tho cause then you can use Adafruit IO over WiFi, radio boards, etc
A feather huzzah for instance could be a good move
If you’re already a little experienced with wireless and don’t mind a brand with not as many project walkthroughs available I’d highly suggest looking into tinyduino stackable boards
lilac axle
I am trying to embed the board inside a hat, so something too big would look bad and feel extremely uncomfortable
cinder sluice
What sort of hat? Any of the boards I mentioned could be fine depending on the shape and placement
What other features does the board need to have? Sensors? Motors? LEDs?
 near stag
My 7 year old son will be Santa for his school play. What sorta of cool ideas can I do for his costume?
 hasty sparrow
Make his hat move.
candid cosmos
@near stag if he can have s hand puppet or stuffed toy of Rudolph we can certainly light up his nose. Other than that, lighting up the fur trim on the costume or props like a small tree would be in order.
 livid basin
I have some basic BLE questions. I'd like to get started on a project that uses BLE, but I have very limited needs. I really only want something that can detect IF a BLE connection is made (GAP?), and I don't want to send any data, but just have an ACK of the connection (1 I/O pin?). I'm using the CPX now, so not sure if Adafruit Bluefruit LE UART Friend would be the way to go (if I could use it with the CPX), or if something like the Adafruit Feather 32u4 Bluefruit LE is the way to go. I really like having the speaker on the CPX to use, and the LED's aren't bad. Or is there some other kind of "beacon" I can use to detect my phone? I've read the new "How to Choose a uC" that was just put out, and I know it states "If you want wireless communication between microcontrollers, you almost certainly do not want BLE.", but that's not what I want to do. I only want to use BLE to detect the presence of paired connection. Comments? Thanks in advance.
livid basin
Basically, we have a limited number and variety of sensors to use with our uC's, and I would like to use BLE as a sensor.
 tired marsh
From what I know about bluetooth (which is pretty limited), BLE devices transmit a 0-64 character "name" when asked, but otherwise don't broadcast their existence. What is the goal of using BLE as a sensor?
 grim night
@livid basin you may want to look at the new CircuitPython Library https://github.com/adafruit/Adafruit_CircuitPython_BluefruitSPI that should supports a BluefruitSPI Friend.. I have been playing with one attached to am ItsyBitsy M0 Espress. It should work with a CPX as well as long as the SPI pins are available. I assume you can do the same type of thing via Arduino with the BluefruitSPI friend or UART Friend but I have not tried. You can also use the Feather nRF52832 https://www.adafruit.com/product/3406 which has BLE support in Arduino and is "comming soon" via CircuitPython.

GitHub
Helper class to communicate with the Adafruit Bluefruit LE SPI Friend in CircuitPython - adafruit/Adafruit_CircuitPython_BluefruitSPI
The Adafruit Feather nRF52 Bluefruit is another easy-to-use all-in-one Bluetooth Low Energy board, with a native-Bluetooth chip, the nRF52832! It's our take on an ...
livid basin
@grim night Thanks...I'm getting confused. I posted this question on the forum as well and was told it is not possible. Also, I'm seeing that the SPI pins are not available on the CPX. I haven't tried this yet, as I have not tinkered with BLE myself. It seems like it should be possible if the uC device acting as a peripheral can 1) initially get paired to a central device (cell phone), 2) can send out advertising packets after being paired and 3) acknowledge that the pairing was established. Still trying to see what the best solution for this simple task is.
grim night
@livid basin Sorry -- it looks like I was mistaken about SPI on the CPX. I thought they were broken out to pads.
livid basin
@tired marsh Proximity Sensing. https://en.wikipedia.org/wiki/Bluetooth_Low_Energy
Bluetooth Low Energy (Bluetooth LE, colloquially BLE, formerly marketed as Bluetooth Smart) is a wireless personal area network technology designed and marketed by the Bluetooth Special Interest Group (Bluetooth SIG) aimed at novel applications in the healthcare, fitness, bea...
@grim night No problem. It sounds like I just need to pick up a device and see if I can get it to work like I want. Looks like a feather or ESP should do it.....
grim night
Unless I am mistaken - the peripherl sends out advertising packet "unitl" it is connected to another device. not after.
livid basin
@grim night Ok, that's fine. All I want is for it to attempt to connect, and set a flag if the connection is established.
Then that would be a nice , very specific RF sensor.
Since it is looking for a pairing of a known BLE device, you essentially have a way of knowing exactly who you are connecting to.
grim night
the software interface to the nrf51 based BLE devices (BluefruitSPI or feather bluefuiits) is completely differnet from the nrf52 based system (feather nrf52832,esp32). I am not sure of the status of BLE on the ESP32 in Arduino. I have not tried it. It is not yet supported in CurcuitPython and I think is still a work in progress on Micropython.
@livid basin take a look at this guide -- do any these examples fit your need.

Twice the Cortex M0 for a powerful BLE portable

Bluetooth Low Energy on a board that's thin and light, just like a...
livid basin
@grim night Ok, so it looks like the BLE modules, like the Adafruit Bluefruit LE SPI Friend do not have any I/O or "connection estabilished" capability other than the SPI interface. So I would have to go with the Adafruit Feather nRF52 Bluefruit LE to act as a detection device.
grim night
Cant you just set a GPIO pin yourself to report the status?
that is query the BLE device for connected status and then set a GPIO pin on your board.
Just to clarify, you need a microcontroller and the BLE SPI Friend or one fo the feathers with both on one board.
livid basin
Yes. Seems like the way to go. Still not sure what BLE device to use....guess I just need to pick one. Looks like $9 for a dev board
ESP32 WiFi-BT-BLE MCU Module / ESP-WROOM-32 , up to $25 or more for a feather.
grim night
what development environment are you using? For the ESP32 would you use the ESPRESSIF SDK or were you planning to use Arduino?
There are a lot of option -- same for the nrf52832 and also for the nrf52840 chips -- like this $10 nrf52840 "dongle" https://www.mouser.com/ProductDetail/Nordic-Semiconductor/nRF52840-Dongle?qs=gTYE2QTfZfTbdrOaMHWEZg%3D%3D&gclid=CjwKCAiA5qTfBRAoEiwAwQy-6TMMl1icHtONr48lPJdfF7bjHTyLB4DI_QmEH3TU-FDR0d2qNlR4JxoCQI0QAvD_BwE
or this 52832 board https://www.espruino.com/MDBT42Q
If you are familiar with javascript, the espruino may be a simple way to go.
livid basin
@grim night thanks.
grim night
You're welcome -- sorry for the information overload -- The options are rapidly expanding 😉
grim night
@livid basin aha -- teh SPI pins are valiable on a CPX in Circuit Python - on Pins A1,A2,A3-- see https://github.com/adafruit/circuitpython/blob/master/ports/atmel-samd/boards/circuitplayground_express/pins.c -- I have not tried hooking up a BLuefruitSPI frine, yet but will try it soon.
GitHub
CircuitPython - a Python implementation for teaching coding with microcontrollers - adafruit/circuitpython
grim night
@livid basin yes, it does work on the CPX -- let me know ifyou want the details - connected a bluefruti SPI friends to the CPX ( it uses most of the pads!!) and ran https://github.com/adafruit/Adafruit_CircuitPython_BluefruitSPI/blob/master/examples/bluefruitspi_simpletest.py successfully.
GitHub
Helper class to communicate with the Adafruit Bluefruit LE SPI Friend in CircuitPython - adafruit/Adafruit_CircuitPython_BluefruitSPI
livid basin
@grim night that's amazing.
grim night
just ran test of nepixel color picker -- worked fine.
livid basin
Super cool. A bit busy with work stuff..will try and look at that some time.
grim night
no problem. ping me if you have questions.
light wigeon
trying to get this gemma m0 working on w10, cant get the gemmaboot drive to open
its not a charge only cable
how do i go about troubleshooting this?
candid cosmos
@light wigeon https://learn.adafruit.com/adafruit-gemma-m0/windows-driver-installation It looks like windows 10 doesn't need drivers but try changing the port you are connecting to, USB3.0 has affected other things in the past, you might need a usb2.0 hub as a passthru if you do not have older ports on your PC. Good luck.

The Gemma M0 will super-charge your wearables! Small, light, and it's easy to use, so you can do more.
 humble wing
im having exactly the same problem
cant get gemma boot drive to show up
have tried everything the page says, different drivers, different usb ports, with a 2.0 hub, at a loss now
2 different computers, windows 8 and windows 10
5 different cables
 next zephyr
I working with the Flora, Gemma and the Playground Express with no issues at the end. I hope the CRICKIT will be delivered in some days todo more crazy stuff. It was a little bit of nightmare on W7 Pro to get it working under A-IDE 1.8.7. After 2 hours i got it. Stupid driver handling on Windows. It's a genewric issue to life with.
I came here to find some stuff and ideas and i hope i will find some. 1st i do that for my kids in the dark light time of the year and it works amazing.
Normally i work for tasmota on github. Writing diver and help people as admin on discord.
I also working on a wearable human monitoring device with muscle sensor, heartrate and oxygen value, GPS and multigas sensor. All hardware is in house and it needs time but the playground classic is my favor in this. I have a sonoff sv too with wifi on board. So have to see to get wifi on the classic going. For that i need some ideas or a hint which hardware can be used.
BTW: i saw the Adafruit Circuit Playground Express Enclosure. Which is a very good idea to isolate the electronics a bit. Very well done Adafruit! And now one for the Flora and Gemma, then Adafruit is a master of design 😃
 woeful comet
I have an idea for a project that would involve raising/lowering layers of fabric in a costume. Any ideas? Maybe a small, wearable motor?
woeful comet
Maybe I just need to do some experiments with a micro servo. Hmm.
candid cosmos
@woeful comet You are probably crossing into the realm of robotics when you develop your system. Fabric can be heavy and it drags along or gets caught up when it moves. Know that if you are using a microcontroller board you will have to make special consideration for driving and powering motors. One of the adafruit boards paired with a CRICKIT would work nicely. Also think about how to use pulleys or screw drives for your actuators. Hobby servos are strong but not really suited for heavy lifting. Did you have in mind moving a hoop of a garment? I've seen use of salvaged electric drill motors to serve as a winch in some costume expanding wings. Good luck.
@next zephyr Welcome! Be sure to look through the Adafruit Learn section on some great projects. Their blog is also great for browsing to get ideas, especially wearables(not to mention some of the things I've got mentioned there...)
woeful comet
@candid cosmos Thanks! Good food for thought. I'm still brainstorming so I'm not sure what the final might look like, but I was imagining raising and lowering sections of fabric like a stage curtain. You have some good thoughts for me to chew on though. The crickit seems kinda big and I was hoping to keep the tech as small as possible, but I actually have a crickit and haven't played with it yet so maybe this is a good reason to give it a try. 
stark storm
It might make sense to do just as you said: do some experiments with a micro servo. It's not much investment, and you'll learn the sort of things servos can do, and how to work with them. Then you can consider scaling up to bigger servos or motors like @candid cosmos describes, if needed for the effect you want.
candid cosmos
@woeful comet You could take a look at this https://twitter.com/sophywong/status/1017301647855214592 She also does work in costuming so you might be able to ask @indigo fern for ideas.


Prototype fan shoulder wing thingies powered by @adafruit Crickit and @MSMakeCode, stoked to be tinkering with motion! https://t.co/wcUAMxFtCi
Retweets
134
Likes
834
 Twitter
woeful comet
Twitter
woeful comet
@candid cosmos Love it! Always nice to find new people to follow, regardless. @indigo fern Very cool prototype. Thanks also for the thoughts, @stark storm .
candid cosmos
@woeful comet We aspire to inspire...
next zephyr
@candid cosmos thanks for your advies. I had read some but found nothing new for me. Have to say that i have more then 30 years of industrial coding experinece (Port of Rotterdam (main coder), Satelite communication, Chip production machines, Food industry, Medical industry, robotics, water barrier technics (deich, dijk) and so on...). But i will have an eye on it to see some new things.
@drifting sorrel Badly enough we can't get all new hardware from Adafruit in our local store. Ha, ha, they say Ada has to edit here web page (the one from the local store) so new things can be ordered. Fools, that can't be possible they think we are stupid here. I had written an eMail to Ada and the answer was foolish too, have to say it because they did not understand what's going on. So the sales team is not the lightes one i think. Sorry to say but i'm not alone with that...
But in any case it is good to have hardware that works and a good community that exsists here!
 native loom
CPX wearable with new Enclosure and 5v. power platform: https://youtu.be/qoexhPRR_xs

New enclosure for Circuit Playground Express from Adafruit mounted on 5 volt power bank using Velcro. There is Velcro on the belt so the CPX can be attached ...
 grand owl
@candid cosmos I believe the usb 3.0 issue is what I’m encountering on 2017 usb can ne Ted threw usb 3.0 hub connect threw usb to back port of 2017 Imac that’s a critical error by Adafruits part if that’s what I to am encountering
candid cosmos
@grand owl sorry but I think autocorrect got to your comment. If you think you have usb3.0 issues, sometimes it helps to connect through a USB 2.0 hub to the computer. Mac stuff is more sensitive or has more issues with using USB 3.0 on these microcontrollers.
next zephyr
This channel of adafruit is not so busy as all the others. Are there no people who using it? It can be used in Fashion, Robotic, for Kids in the dark time of the year, for Human Health Monitoring (i working on it) and so many other things. The Playground Express has a strong M0 CPU and in combination with the Crickit? Don't ask it's amazing to work with that combination of hardware.
stark storm
I monitor this channel, but only pipe up if I have a question or answer.
next zephyr
Hi madbodger
good to hear that someone is here ;-). I'm here because adafruit. coding is no issue for me because i have more then 30 years of experience in industrial coding
but i love the wearable stuff all in front because my health issues with my heart
the human health monitoring device will be based on a playground express with 4 or 5 sensors. and wifi to do some actions but only when needeed.
stark storm
That sounds like an excellent project! I think someone was talking about a similar project for monitoring dog health a while back, but I can't find that thread.
next zephyr
Right i found it via goole and it's amazing. They are some really good ideas out there and when every human would deliver one good idea in his live, humanity would be much further and wiser i think.
When the project is far enough to show something i will provide a link for it here.
stark storm
Sweet! And feel free to ask for advice.
next zephyr
so far i need it i will do that. And for sure for the xbee wifi part. it must be then a very small wearable breakout. But not today ;-). And thanks for the response to me.
candid cosmos
@next zephyr Thanks for stopping by. I usually check all the channels but I originally suggested this as a locale that would welcome others just getting into electronics or where other categories were just too technical. Wearables is a pretty open category which I guess a lot of my projects fall into. I'm trying to bridge the creative types with the new tech. Once you get your feet wet, you naturally move onto more advanced stuff so this is a great place to be.
 indigo fern
I'm not in here as much as I would like to be, but I always try to pop in when folks ping me if I can be of help (thanks @candid cosmos !  ) I love to see the cool projects people are working on in this channel 😃
candid cosmos
@indigo fern Fantastic meow glove on Show and Tell! If you get into circuit bending or want to do something with a full music meow range...add this https://www.instructables.com/id/Meow-Keyboard-Output-Jack/

Instructables.com
Meowsic Keyboard Output Jack: When Wilgubeast told me about the supremely annoying Meowsic Keyboard that played cat meows instead of tones, I knew I had to have one. Two days before Christmas I obsessively tracked it down to Target. I then obsessively visited five stores overr...
next zephyr
@indigo fern Hi, i had visit your site and i was surprised how much you have done. Really cool things. Thanks for sharing!
@candid cosmos so as i had written i have more them 30 years of coding experience with industrial stuff. Electronics, sensors, satelite technics and communication. You know the big harbor barrier Maeslantkeering Port of Rotterdam (The Netherlands)? It is done about the times when the sea is wild and gone high 😉 to have a save harbor and save the people against all the wild waters. Thats was my lifetime project.



The Maeslantkering is a storm surge barrier on the Nieuwe Waterweg, in South Holland, Netherlands. Controlled by a supercomputer, it automatically closes when Rotterdam is threatened by floods. Part of the Delta Works, it is one of largest moving structures on Earth, rivallin...
indigo fern
Thanks @candid cosmos !!! Omg I need one of those, why didn’t I think of “meowsic”?! I’d love to get into circuit bending, been watching a lot of Look Mum No Computer videos on YouTube, super inspired!
Thanks @next zephyr ! I like to try new things and I’ve learned sooo much from Adafruit 😊
next zephyr
@indigo fern Please can you teach me to make these wristband for the under arm? How do you get them closed around the under arm? Really i have no idea to get that done ;-). I wish to make three for my kids for wearable things.
next zephyr
@candid cosmos possible you can help because i'm a little bit irritated about the information from learn.adafruit. Different pages and different defines. Which one is the right one?
Some little question i have:
- Which is the external NeoPixel pin number on the Playground Express. I think it is A1 but did not fimd it on learn.adafruit
- Which pin number is it? 6 or 8 or?
I would use the seeaw library for the crickit and that are two questions:
-
- when using not seesaw lib the A1 on playground is the neo pixel output. Is that pin 6 or 8? Looks like my 1st question at all.
-
- when using seesaw the the solderpoint under the crickit has to be changed to 'ss' but first cut the A1 connection. Then pin number 10 should be used. Is that the right one for seesaw?
I found some hints on three different locations under learn adafruit, but no place where all in one is defined. Something that can possibly done for the furure?
I ask only because i have used the different example but nothing works. The rgb leds are working on the flora with external use, so the leds are ok.
The internal rgb leds from the playground express are working too? So i'm in the define war 😉
 robust aurora
1 : "The data input can originate from any digital pin on the Arduino, but all the example code is set up for digital pin 6 "
A1 is also D6 yes
Everything you always wanted to know about Adafruit NeoPixels but were afraid to ask


the third ones outta my area but gimmee a sec to check
"If you have a Circuit Playground Crickit then the NeoPixels are driven by the Circuit Playground A1 pad by default. This way you can use the MakeCode emulator and built in Circuit Playground CircuitPython library. However, if you want, you can cut the jumper underneath the Crickit and solder closed the ss pad so that the seesaw chip controls the NeoPixels (for advanced hackers only)."
https://learn.adafruit.com/adafruit-crickit-creative-robotic-interactive-construction-kit?view=all

Make your robot pal who's fun to be with using Crickit!
Only cut if you want to use a different pin then A1/D6 @next zephyr
To clear up confusion pin 8 is on board Neopixels. pins 1-6 can be used for externals
next zephyr
@robust aurora
1st thank you for your answer.
I used A1/D6 defined as: #define PIN 6
But it won't work so that's a little bit strange. On a Flora all is working. Will take the playground express away from the crickit board and test it standalone.
About pin 8 you are right:
#define CPLAY_NEOPIXELPIN 8
I don't code in makecode i use arduino ide and notpad++. Arduino ide for debug and download only ;-)
Ok will do the test again and report back. Possible i have overseen one thing.
robust aurora
I've only played with the circuit express in mu, but all other boards I program the same way as you:P
did you by chance set the pin to output as well ...?
next zephyr
i don't think so. have i todo that? Thought A1 was output as default
robust aurora
in setup
pinMode(PIN, OUTPUT);
ok will check it again and report back
robust aurora
if your using multiple pins on your board for various things I have to reccomend changing your variable name from PIN to NeoPIN or something that describes it 😛
next zephyr
i know ;-). but that's only some tests for the kids to have things for the drak time of the year, ha, ha.
aha the default strandtest from the Adafruit NeoPixel example works. So i must have something wrong in that case. will test further but not toady i think. Thank You anyway. And i will report later...
robust aurora
sounds good, I don't often check here, but someones usually around to help!
and if you are having issues with code you can always throw segments in here
candid cosmos
@next zephyr I don't have a Crikit so I can only point you to the learn guide. I think using Arduino programming may be a little more involved, especially for a beginner since the focus is to wean off of Arduino and go to CircuitPython which is developed to work well with it. Even with the Circuit Playground Classic and it's arduino library, pin names had to be referred to as board.A1 The Crickit guide has a step to install the Seesaw(I2C chip) arduino library which you may not have done. Feel free to ask in #help-with-projects for others to chime in.
next zephyr
@candid cosmos Thanks for your answer.
BTW: i'm not a beginner at all. I know about the difference in the pin naming. At the end i had read the *.h files and it was clear after all.
The issue itself was different because the learn sites name things sometimes so and sometimes so. I will write it down and send it to the guys who manage that stuff.
After some tests i took what i think it was right and it was working at all.
The other point is the pin 6 is overall the same it likes. So next step was to use and change the sample in Arduino to get it work with seesaw.
BTW: i soldered a switch for the solderpin A1/ss under the crickit board so that i can switch from one part to the other when it is needed.
Last point is the installation process. I do that by copy the needed things into the Arduino folder and it works everytime. The Seesaw lib was already installed because i needed servo and motor tests. So as i said i'm not a beginner in all that. I working on the esp8266 core to fix things and i'm writing drivers for the alternative iTead's sonoff firmware for Tasmota on github. You can find me there as a admin with the same avatar name ;-)
And again: Thank You for your advise and hints!
 verbal hatch
Using MakerMakeCode off line on Chromebook to block code RGB LED light show: Video here: https://youtu.be/0MUnMbI2S5g

Block Coding using Microsoft Make Code and Adafruit Trinket M0 processor board with 8 x RGB LED WS 2812-B neopixel ring. See links to code and hardware.https...
candid cosmos
@verbal hatch Nice. You'll get hooked on adding neopixels to everything. The trick to videoing or taking pictures of LEDs or neopixels in action is to turn down the brightness to very low. The camera will thank you for that. You can then turn the brightness up for regular use after filming your demo reel.
verbal hatch
I think at one point in filming, caitlinsdad, I set ISO to 100 on my Samsung J7. I'll try to do more with an oldie iPhone 6 that we only use for videoing now and on a DJI Osmo mobile. Yes, neopixels are not easy especially with sparkles in the code. I need to find a way to make an RGB LED extension for block coding the BrainPad by Gus Issa at GHI electronics. Do you know anything about adding extensions for non -Adafruit Cortex M (x) boards? I think his is M4. Thx. (or where I might go or who I might ask to get info . on this, like the "light" extension on Trinket M0)
candid cosmos
@verbal hatch That behind the scenes coding stuff is beyond me. You might want to wander into the #help-with-makecode channel and ask to see if MakeCode can be used in a similar fashion or if the mechanics for block code can be applied. Good luck.
verbal hatch
Looks possible, @candid cosmos, see the latest post at MakeCode. I too know nothing about the programming part but kids just love LED light shows and learning how to change them up with instant feedback. For Trinket M0 this coding with MakeCode is so much easier than Arduino which is easy enough for teens. We'll see how this progresses. BTW, how old is Caitlin? We are working up projects based on Music and wearable electronic fashion , especially to connect with girls. I'll have more designs to feature all this as things progress in the new year...unfortunately, Adafruit seems to be out of the Trinket M0, my new go-to board for block coding with MakeCode. I have 3 but now am hesitant to give them away in kits. I did ask Adafruit to contact me when the board comes back in stock..let's hope soon.
candid cosmos
@verbal hatch The kid is in college already...time flies. Hmmm, some places you might want to look for ideas or inspiration for wearables and wearable/music is instructables, adafruit blog and Learn sections. Smore magazine(new mag geared to ramp up girl's interest in STEM), Hackspace magazine(free pdf download) or even ask @indigo fern , she just made the cat meow glove. There was a youtube video of Ariana Grande using the glove music controller that was developed by Imogen Heap which was pretty cool. I guess further down the road with more advanced boards you can do all the NeoTrellis music stuff that John Park is working on for his show. I have found the Circuit Playground Express board is great for making since a lot of the basic sensors you want to use are built in and don't have to deal with the complication of adding them on to something like a bare Trinket.
You can also rummage through this guide. https://www.instructables.com/id/Getting-Started-in-Wearables/
Instructables.com
Getting Started in Wearables: If it fits, it’s lit...If it doesn’t fit, we’ll make it fit…Squirrels.Just put that in because, anything you can wear is a wearable. But mostly here, we will talk about wearable electronics or really, how to get started in thinking about ...
verbal hatch
Thanks, I'm looking at all your references and your yourtube channel. Good work, right up the alley that I'm interested in !
next zephyr
@verbal hatch Hi Frank, i think you are from good old germany?
May i ask why you do the coding in 'makecode'?
It is because you are not a C/C++ coder or because the hardware can't be coded in the old ways?
verbal hatch
See my response, mike2nl on personal message.
verbal hatch
I see MakeCode as a learning tool for young people and others. JavaScript based I think, so a basis for learning internet work and MakerMakeCode for development hardware like Arduino but better in some ways, works with Chromebooks on line but no fee and works with Chrombooks off line too.
next zephyr
in that cases you are right @verbal hatch
..
but when they are older i think it will be the next step to go to java or c/c++. These are the most used languages in the industry and badly enough we all have to live with it. Before that all changes hundreds of years have to go i think...
For now and my last 30 years in industrial coding and project mangament i have seen so many things that went wrong and good things too in different coding languages. So lets hope that people and the industry wakes up fast to get a good and well designed standard so that everyone in the world can contribute to the community. And when these MakeCode is a way to it then be it. We need only a way from that to the next standard i think...
verbal hatch
I'll make a video of this and the code for it; not especially complex or novel but I flatter myself that this is a contribution to the community because the coding to drive the dual neopixel rings on the hat was done entirely off-line but using a $79 Chormebook (E-Bay) and an $8,95 Adafruit Trinket M0 ; wearable with a $5.88 5volt battery pack. It will take me several minutes to make up the vid. and give links to parts. MakeCode used for programming. Chromebooks are said to work only on-line with the Chrome OS. ; proven here not true with MakeCode.
next zephyr
So all CPX are mounted on the Crickit's and nicely coded in C++. All works fine with my own new test program. Test is the real code, LIPO's with adafruit lipo loader and some clear instructions for loading. Next step is some toys for kids in wood for them. When it is ready i will bring it on the 25. december to the child hospital near my little city (500 souls). All of you have a nice and peaecful XMAS with her love ones.
 alpine hollow
Does anyone know if I can tear down a smartwatch to retrieve the gps and screen?
Mainly the gps
stark storm
I'm guessing it's highly integrated so the module that provides the GPS probably provides other functionality as well.
alpine hollow
Heck
stark storm
A lot of highly-integrated chips have been produced for the mobile phone market, and the trend just increased for smartwatches.
verbal hatch
https://youtu.be/ZKnWaWowsWs : Obviously, I'm not a musician ! Since the tune is recorded to the hard drive of the roll up keyboard and transmitted as digital (+ , -)output via earphone jack and wires to the earrings and since the earring inputs are just pos. / neg. it seems like there ought to be a way to record the tune to an SD card reader then wired to the Trinket M0 ? No ? This all could be worn as a costume, one would think.
Barbie mannequin wears LED light show pendant and small (8 Ohm, 0.5 Watt) earrings which are wired from roll-up keyboard via solderless breadboard. The Adafr...
@viscid stream , any ideas?
stark storm
I'm guessing you could simply digitize the audio and write it to the SD card, but I don't know enough about the keyboard to suggest more direct methods. I'm surprised a roll-up keyboard even has a hard drive.
verbal hatch
I used the term "hard drive" loosely , madbodger. I mean , as opposed to a removable micro sd card or some such. It just has a 'record' function with a ticking metronome that is almost as annoying as my piano playing !
 viscid stream
@alpine hollow Definitely not, but just grab a cheap gps module online 😃 Screens are fairly cheap as well, depends on what you want to build
@verbal hatch
*What are you trying to do?
native loom
To take the recorded output tune, which can be recorded by pushing the 'record' button on the electronic keyboard and which I show in the vid. can be played back via wires into the remote speakers (ear rings) ; record that digital output onto an SD card ,which the read/write module of the card is plugged into the 170 tie hole solderless breadboard shown attached to the mannequin's back (could be 400 tie hole). This then makes the music portable using 5 volt battery pack. Hence the neopixel pendant and music are wearable. Just wondering what code or system could be used to program the Trinket M0 on the breadboard to record the incoming signal from the keyboard's recorded output ?
stark storm
It's probably worth looking at whether the M0's ADC is fast enough to do so (I don't know offhand).
 covert void
Hey I was wondering if anyone had any recommendations for wearable displays. Something like a smart watch
next zephyr
@covert void possible an OLED 0.96" display. Small and use less power and with I2C bus (4 pin, SLC, SDA, +, -)
you can find them with blue background, white text, yellow/white text, yellow text and real color versions
..
i use them for my wearable human health monitor based on Circuit Playground Express
covert void
Thanks but a little too simple for me. I am looking for a medium-end display. Something similar to whats on the Pebble Time, Fitbit Surge
next zephyr
Then you can look at 16x2 or 20x2 or 20x4 blue LCD displays, or a e-paper one. But all need more power.
But yesterday i came along an 1.44" or a 1.5"oled display on ali express. Possible that size is OK for you? Lost the link but search for it.
stark storm
e-paper only needs power when updating
covert void
Thanks @next zephyr
@stark storm I am currently looking into using e-paper as its clean, simple interface, and low-power. Probably one from SHARP. My only problem is the backlight issue. I believe you cannot see its contents at night.
 tight glade
stick a led on top?
lol
light it from the front
like those thinkpad keyboard lights
next zephyr
Playground Express:
found some funny code about sound by notes. Good idea so far. I'm a big fan of Lordi and Classical Music. Why use notes only when you can use a MP3 Player.
A while back i wrote/updated a MP3 Player driver for the iTead's sonoff devices for the tasmota firmware to be more conform and that peace is working very well (xdrv_14_mp3.ino). You can wakeup with music or add music or sounds to actions via web, mqtt, HA and other inputs.
So why not use a Flora or a CPX?
Easy...DFRobot has a tiny little board that can work between 3.0 and 5V and has a serial in and output, Mono and Stereo speaker output and a DAC output.
Had done some little test with serial out on the CPX and the serial input only on that tiny player. It works..
Connected the two tiny Adafruit speaker on it (ID 1669) and voila, stereo sound. Yeah, no hifi but that is the next step in a backpack, ha, ha.
So now some sensors to the CPX (GPS, light, Heart sensor, XYZ, and so on). The heart sensor is funny because our heart reacts on moods from our self. I know because after my 4th heart attack in 2017 march 30, many things and me are very changed. So i copied some music on the SD card for happy mood, mid mood amd sad mood. Yeah the sad mood happens when you had 4 HA's. Unbelievable it works. While 24 hours i had the senosors connected and were gone trough the day and in 90% the sensor was right after 20 times fixing the code, ha, ha. Mood tracker..
Next step will be the 100% wearable with sound and mood light (led's on board).
Bad thing is we can't get the new case from adafruit here. That transparent one for the Curcuit Playground Express.
Ada ID 3915
The Lipo (in a small lipo safe case),the player and the breakoutboard forr the heart sensor can be put in a pocket.
the speaker i had placed a little top and front of the little holes of the shoulders.
In that project i will put a lot more work in to get it perfect. Possible i will publish it on my web page so everyone can do it's own.
next zephyr
https://www.dfrobot.com/wiki/index.php/DFPlayer_Mini_SKU:DFR0299
https://www.dfrobot.com/product-1121.html
https://images-na.ssl-images-amazon.com/images/I/51LEZYViDzL._SY463_.jpg

 silent pier
does anyone know if the jewel will fit with the 12 led neopixel ring? https://www.adafruit.com/product/2853
What is better than smart RGB LEDs? Smart RGB+White LEDs! These NeoPixel rings now have 4 LEDs in them (red, green, blue and white) for excellent lighting effects. Round and round and round ...
the outer and inner diameters are the same, but I don't know if it's just a snug fit or if they won't actually fit if you try to put them together
covert void
Hi, can anyone answer whether this display can be viewed in the night time? https://www.adafruit.com/product/3502

The 1.3" 168x144 SHARP Memory LCD display is a cross between an eInk (e-paper) display and an LCD. It has the ultra-low power usage of eInk and the fast-refresh rates of an LCD. This ...
/ how would I light it up?
stark storm
It's not light emitting and I think it isn't transparent either, so maybe just shine a lamp on it?
 sand thicket
front/side lighting
radiant bay
@silent pier it fits - I just tested a few and they're snug (so wires would have to stay on one side) and you may have to file down the jewel a bit
silent pier
awesome, thanks for checking on that @radiant bay
that will make my hoodie idea work 😄
 primal glen
I'm seeing weird behavior with my gemma MO. What does a solid pink/purple led mean?
light wigeon
If anyone is interested, I recently finished a holiday tie that used the CPX. The CPX is my new favorite board. Extremely versatile. For me, controlling the board with Python made development go much faster. https://www.instructables.com/id/The-Holi-Tie/

Instructables.com
The Holi-Tie: This is the Holi-Tie, a festive tie designed to be worn during the holidays. Loosely based on the Ampli-Tie by Becky Stern which uses a Flora board, the Holi-Tie uses a Circuit Python Express (CPX) microcontroller to drive the NeoPixel animations ...
 fair needle
Hey all, I've been looking into buying or making a device with the form factor of a wrist band or wrist watch that can communicate over bluetooth to a PC and can send customizable keystrokes when buttons are pressed.
Does something like this exist already? If not, what's a good way of going about getting parts that would compliment this form factor? I looked at the feather but it's rather large for what I'm wanting to do
I also realize I need to power the thing somehow. What's a good way to power something using bluetooth compactly?
I guess I'm asking for recommendations on two things:
- A small micro controller board capable of communicating over Bluetooth and is low-power
- A way of powering the device in such a way so that it's not bulky, preferably self-containable
I have soldering equipment, a 3D printer, access to a laser cutter, and access to a mill, and I'm going to design the wrist... thing in Fusion.
long mango
@fair needle See https://learn.adafruit.com/search?q=ble hid for a number of projects that do BLE HID>. For example https://learn.adafruit.com/bluefruit-nrf52-feather-learning-guide/blehidadafruit and https://learn.adafruit.com/introducing-the-adafruit-bluefruit-le-uart-friend/hidkeyboard.
The Nordic PCA10059 dongle is even smaller, but you'd have more work to do rolling your own software. If the software was careful to do power management, you could power it with a coin cell.
stark storm
You could look at some of the bluetooth gamepads (like Mocute) for ideas as well.
fair needle
Hey, thanks!
fair needle
I think if there was a FLORA or GEMMA that had on board bluetooth support, it'd be the perfect form factor for what I want to do.
candid cosmos
@fair needle You should look into one of the Feather boards with BLE. They are small enough for wearables and you don't need to wire up an external module to the Flora. You would also be able to add on the Feather wing accessory boards for things like a small display or LED matrix.
fair needle
I did look at the feather BLE, but it looks rather long for what I'm trying to do.
I could just run out and buy one at my local shop and try it out though
stark storm
Red Bear Labs offers the "BLE Nano", which is pretty small. I'm looking at using one for a cosplay prosthetic.
fair needle
Oh that's mad tiny and about the size I need
I might pick up a feather too just to see if I can still integrate it somehow, but thanks for the rec on the BLE Nano
 rancid hornet
Anyone know if there's a service that will etch custom LCD patterns?
stark storm
Yup. EEVblog did a series of episodes on the process.
rancid hornet
Thanks for the tip, gonna check out his series on it 😄
presumably this is the one you mean: https://www.youtube.com/watch?v=mo4_5vG8bbU
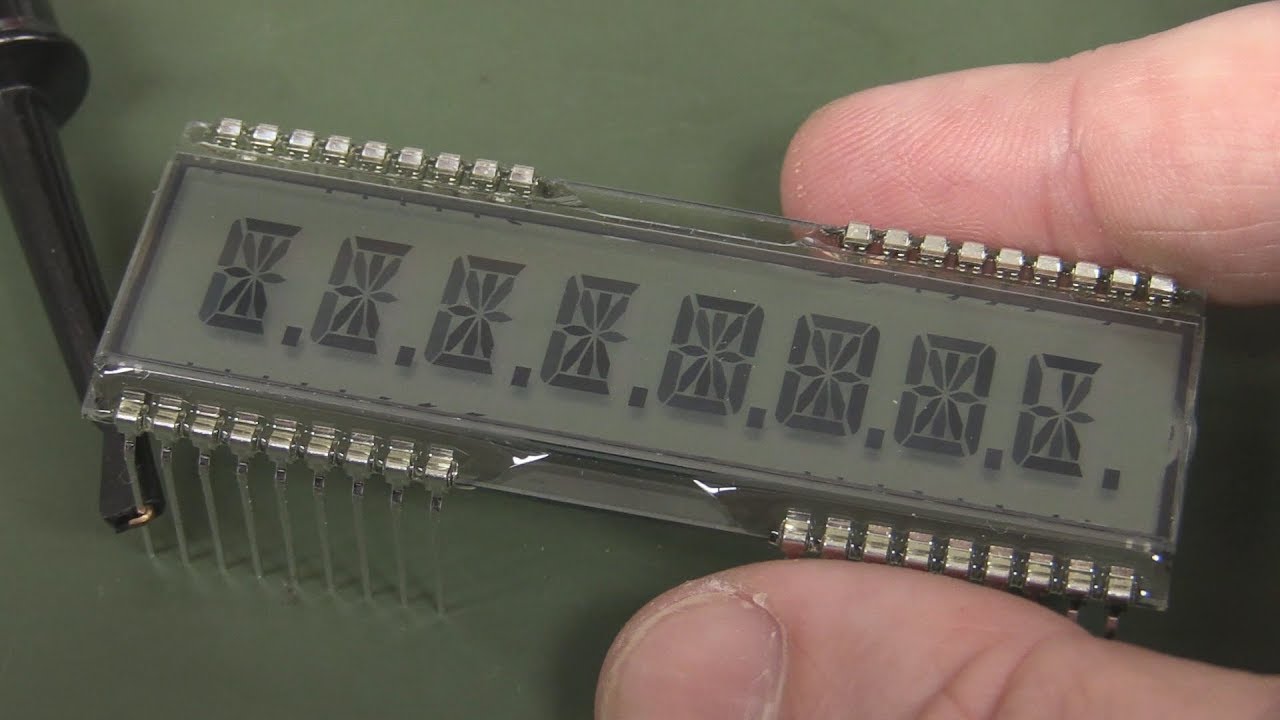
Part 1 in a series of videos on designing a custom LCD display. This tutorial covers how LCD displays work, the 3 different types of interface (DIP, Elastome...
stark storm
Actually this one: https://www.youtube.com/watch?v=ZYvxgl-9tNM

How to design a custom multiplexed LCD display. Dave takes you through what is required to design your own custom LCD display and what consideration you need...
Then there are follow-ons, like part 2 https://www.youtube.com/watch?v=10D5jpO45Lo

Part 2 of designing your own custom LCD display. Looking at the manufacturers datasheet for approval, and test design considerations. Part 1: https://www.you...
rancid hornet
I'm thinking it might be easier to just make some LED diffusers and do it that way. I'm wanting to make a flexible segmented b/w display for a costume.
stark storm
Ah, very few LCDs are flexible.
rancid hornet
Yeah, it was just one idea. I still could do it, but it seems like a hassle.
stark storm
I think your idea of LEDs and diffusers is likely more practical for that use. You could also use electroluminescent panels (which are flexible), but they require high voltage which you may not want in a costume.
rancid hornet
I saw some adafruit stuff about 3d printed flexible diffusers.
I thought about EL panels, but they're also more expensive.
stark storm
True. I bought some inexpensive ones from a surplus outfit, but in general, LEDs are a lot cheaper.
 tidal estuary
@rancid hornet if you want a small flexible display, epaper is the way to go
I just bought a 2.9" flexible b/w, and its great if you can figure out how to use the drivers
next zephyr
@tidal estuary have you a link for me?
- 2.9" flexible b/w looks fine for me.
tidal estuary
Good Display is a professional LCD display, E-paper Display (E-ink display) and OLED display factory in China, as market leading supplier,we have more than 10 years' products experience for both Standard and Custom Products.
But bear in mind a few things:
- This is horribly documented by the manufacturer, read through this GitHub for more information (managed by a customer, not GooDisplay) https://github.com/ZinggJM/GxEPD
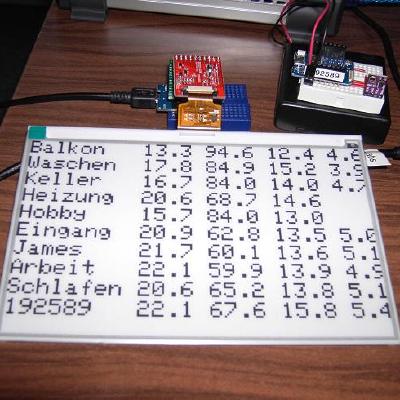
GitHub
A simple E-Paper display library with common base class and separate IO class for Arduino. - ZinggJM/GxEPD
- The refresh rate on these is very slow
- check out this arduino form post for questions, the maintainer of the GitHub is active here and very helpful: https://forum.arduino.cc/index.php?topic=436411.0 , maybe donate a display to him if you can
Good Dispay ePaper for Arduino
I'd also be happy to help you once it arrives, (I spent a week finding all this and connecting dots) send me a PM if you need help
oh and never press the reset button on the arduino if the epaper is connected, it'll cause permenant damage
final thing: to connect to an arduino board you need this (http://www.e-paper-display.com/products_detail/productId=403.html) adapter board or one similar
I'm using this display to create a cool wearable band, and pretty close to being done too
rancid hornet
I like some of those displays, though I'm trying to make a flexible display with a backlight (or LED/EL phosphor layers).
tidal estuary
oh cool
I don't know of any consumer flexible LCDs or OLEDs
If you manage to find any, definitely let me know tho lol
verbal hatch
This is , like, from a year and a half ago: https://www.displaydaily.com/article/display-daily/flexible-lcd-in-the-market-at-last
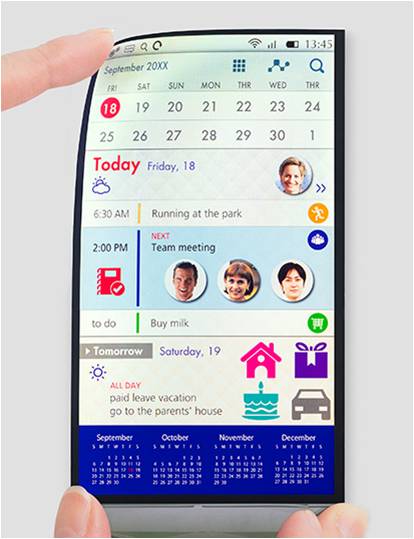
DisplayDaily
When it comes to flexible display, OLED shines while LCD struggles. But recent announcements are bringing new hopes for flexible LCD.
stark storm
Wow, that one surprises me.
next zephyr
It's a good one.
tidal estuary
@verbal hatch still not purchaseable ;p
 unreal bluff
do you think sewable neopixels could make a good screen?
stark storm
Yeah, maybe shining through something like a white lab coat for diffusion they could look amazing. You might have to run several power taps to various places, as sewable connections seem to me like they'd have more voltage drop that soldered-on copper wire.
unreal bluff
Ok thx👌
stark storm
By way of illustration: https://www.designboom.com/technology/dave-forbes-led-tv-coat/
a wearable lab coat covered front and back with LED panels serves as the display screen for video from an iPod or DVD player.
unreal bluff
Nice
I was thinking closer to a 100 * 40 or so matrix flexible
More or less
Probably less
stark storm
You could always start out with a small matrix then add to it. I'm guessing the pixels will be separated anyway, so adjusting the wiring to add more shouldn't be too much trouble.
silent pier
Morning (depending on location :P). I'm running into odd issues with an adafruit jewel + ring I wired up. When I run a simple routine (https://github.com/chris-schmitz/bullseye/blob/master/code.py) I'm getting odd colors from the pixels. When I hook up a neopixel strip to the same controller the pixels light up as expected.
I shot a quick video of the issue: https://vimeo.com/314258358
any idea of what could be happening? I'm hoping I didn't do something to mess up the jewel and ring
and here's how I have the pixels wired
I'm providing the 5 volts from the trinket m0 via an alligator clip to the exposed portion of the 5v power jumper towards the bottom of the picture
stark storm
Might be one is RGB and one is RGBW.
silent pier
hmm, I'll double check on that. I def tried to be careful when I was ordering to make sure I was getting the equivalent parts re: rgb vs rgbw, but I've made mistakes in the past 😛
ty
candid cosmos
@silent pier from the video, it looks like you have the half-moon elements on the neopixels indicating they are RGBW. But the good news is that the outer and inner ring are both RGBW. Look in the guide for RGBW changes to code. Good luck. https://learn.adafruit.com/circuitpython-essentials/circuitpython-neopixel

The next step in learning CircuitPython.
silent pier
🎉 🎉
that's totally the issue!
I love it when my facepalms make me realize that I prob didn't ruin my hardware ;P
ty @stark storm and @candid cosmos for the help 🙇
oh no! there's not an LED emoji for the white led ;P
stark storm
There would have to be a new Circuit Playground Friend, and we'd have to come up with a name. Blanco? Snow? Sunny? Gwyn?
silent pier
hmm, concentrated-rainbow 😛
not a very good character name
I do like blanco actually
radiant bay
Hermione
silent pier
@stark storm and @candid cosmos works like a charm now 😄 https://vimeo.com/314559687
stark storm
Beauty! That other effect was neat looking, but not what you were going for at the time.
silent pier
ha, def 😃
I was thinking "well, if I did ruin the neopixel rings I can at least use them in a 'random light pattern' project" 🙃
stark storm
One of my favorite tarot cards: "It may not be a perfect circle but it is a perfect ..... what ever it is" http://www.sleepbot.com/morgan/card/perfect.html
 real veldt
hey, I am curious, when it comes to wearables, how do you clean them, or at least the clothes they are on? Or am I misunderstanding wearables?
candid cosmos
@real veldt You can watch vid by Becky Stern for a quick overview. https://youtu.be/nkvHjZhROEg Good luck.

Becky Stern's advice on washing your DIY wearable electronics projects: http://learn.adafruit.com/washing-wearable-electronics/ -----------------------------...
real veldt
ahh, ok. Thank you 😃 I also did a bit more research
candid cosmos
It's best to design the electronics to be removeable, at least the mainboard and stuff, neopixels can stay on for a gentle wash...
 pliant fjord
Why don´t just use isopropanol?
candid cosmos
I think in general if you are considering using solvents to clean the entire garment, your own setup would be more expensive than a trip to the dry cleaners. A lot of wearable electronics are embedded in costumes and the materials or finishes on them may not tolerate the use of solvents, even a weak solution of rubbing alcohol. Soap and water probably work best to get out playa mud and dust.
light wigeon
I had been wondering
I wanted to create a z80 smart watch that runs basic on a screen and has a fold out keyboard for typing
Is it possible creating something like this?
stark storm
Everything but the keyboard seems like a reasonable personal project, but I don't know how I'd source or fabricate a fold-out keyboard on a watch size scale.
light wigeon
@stark storm I mean I want it to be where the keyboard flips out of the screen
stark storm
I think I understand, but I'm guessing the screen is no more than 30mm wide or so, and I don't know of any such keyboards, other than salvaged from things like calculator watches.
light wigeon
I dont want it that small
It's pretty hard to explain
I just dont want it smart watch small style
stark storm
Yeah, if you're thinking of something a little chonkier, some smartphone or Bluetooth keyboards might serve (Tindie sells one that might fill the bill).
light wigeon
But the most confusing is how to cram the CPU and all the computer in a small space
I dont want it smart watch style
Maybe something bulkier
stark storm
It's probably just a few chips these days, and I'm guessing you can get a Z80 in a SOIC or smaller form factor (or emulate one in a small FPGA if that's acceptable to you).
stark storm
Yeah, that might fill the bill.
stark storm
Right. For illustration, here's a nice little computer built out of through-hole DIP format chips in a credit card form factor http://www.sunrise-ev.com//membershipcard.htm
light wigeon
Interesting
I could just go full on surface mounting
Try to make the computer a bit bigger then a credit card
stark storm
That should be completely doable, and would probably fit on a single board. I did a quick look around and Zilog still makes Z80 chips, and offers one in a 44-pin PLCC just 16.5mm on a side.