#show-and-tell
1 messages · Page 18 of 1
 latent fog
I went for a 15 pin D connector for the cable running out to the buttons, I'm only using 6 right now so plenty of room for expansions, also plenty wasted space in the box
USB B connector for the charge cable but I could switch that out to a usb micro I just couldn't get one shipped right now
I also started to look at some of the feathers since they could do much of what I'm doing here with smaller footprints
 timid mantle
(also posted on the Arduino server)
Testing out the interactive REPL of Chika, my programming language for both Arduino and PC. It shows reading file content to the screen, compiling a source file, and running it. This is on the Adafruit Feather M0. If anybody would like to get involved in this project we're in the process of designing a personal-computer around this (with a bigger screen, keyboard, etc). Simply DM me 😄
The language has been developed over four months so it is fairly useable now. Think CircuitPython but leaner. Even the SSD1306 screen is being driven by a Chika program.
https://phunanon.github.io/Chika/
 misty knot
Finished my 500 rpm paint spinner
 sharp comet
Had some fun with Raspberry Pi and Neopixels this morning. Converting animations to act only on a subset of the full strip, and to make them all work simultaneously. 


 dusk zinc
very nice!
 bright solstice
....paint spinner? im just imagining somebody using such a device to sling paint randomly around a room
...kinda like this show i watched where this guy tried to paint his room using explosives
 upbeat geyser
Painting with explosives is fun. I know some guys who did a low-tech version, and it's been done on Mythbusters and a Sony ad, among others.
 solar yew
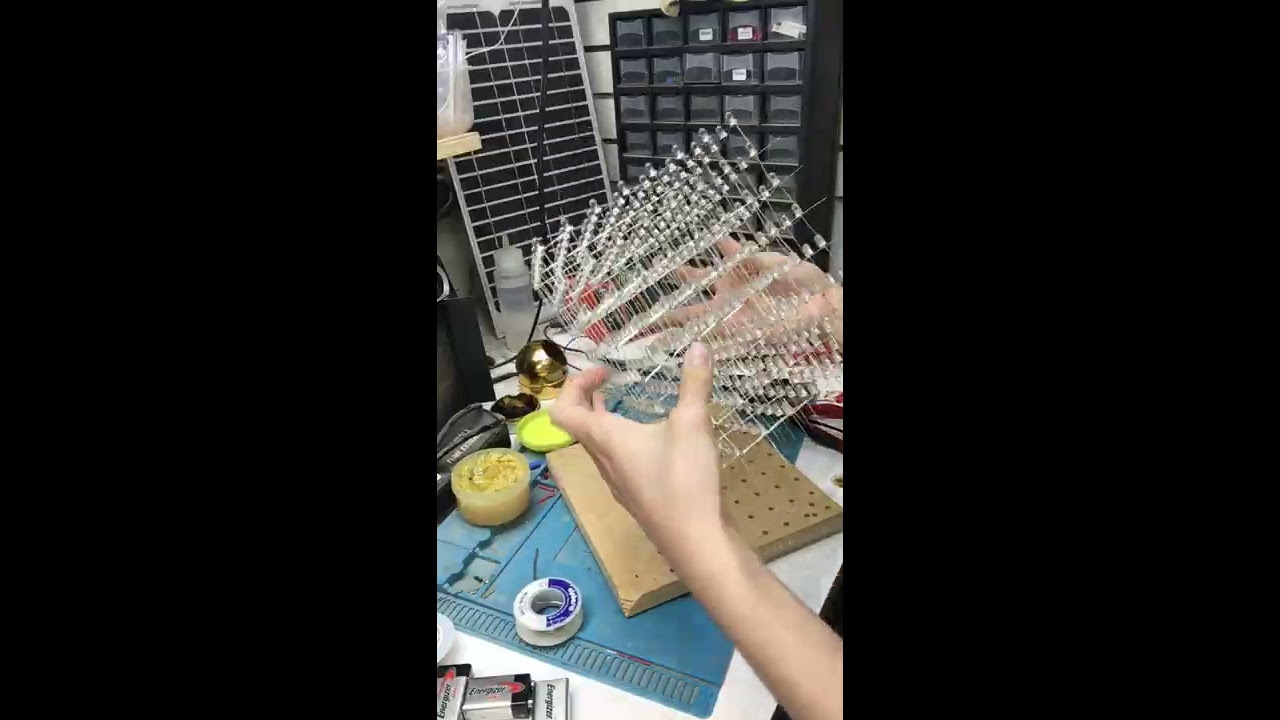
I've been building this for weeks. About 1,200 individual solder joints.
Song "Lightmare" by Creo
https://youtu.be/U0hibvFfRdg
Thought it would make more sense to put it here
I'm very happy with this
It's functionally flawless, but perhaps a bit flimsy. All 512 tested individually, and fixed 1 or 2 cold joints. It's ready for prototyping
 ruby ledge
Fast custom font rendering (50x faster than the Adafruit GFX library on color TFTs)
https://youtu.be/_youOfBrwJg
https://github.com/bitbank2/bb_spi_lcd
Unique feature - allows flicker-free overwrite of characters

This code will soon be part of my bb_spi_lcd library (https://github.com/bitbank2/bb_spi_lcd).
It's about 50x faster than Adafruit's version (using the same font files) and has an option to blank out the character underneath what's being drawn without flickering.
Will be in ...
GitHub
SPI LCD/OLED library which can be built for Arduino and Linux - bitbank2/bb_spi_lcd
 last pulsar
@solar yew Quarantine at its finest!
solar yew
@last pulsar Couldn’t agree more. I need to be doing something constantly
 solid pumice
I've been playing with the EdgeBadge, and decided to try to train my own model to recognize different words from the data set, then recorded a video about it with my good friends at Microsoft Channel9! https://www.youtube.com/watch?v=7TKHtzpGitU

AI on IoT is moving from the cloud to the edge, running models closer to the data. Traditionally the hardware to run these models on the edge has been powerful, with GPUs or compute sticks. But what if you could run a model in only a few kilobytes of memory on a tiny micro-con...
Ands yes, I work for Microsoft, so playing with this rather cool board was part of my day job! #BestJobEver
bright solstice
first time using a 3d printer! AT28C16 for scale https://i.imgur.com/m42EDm6.jpg
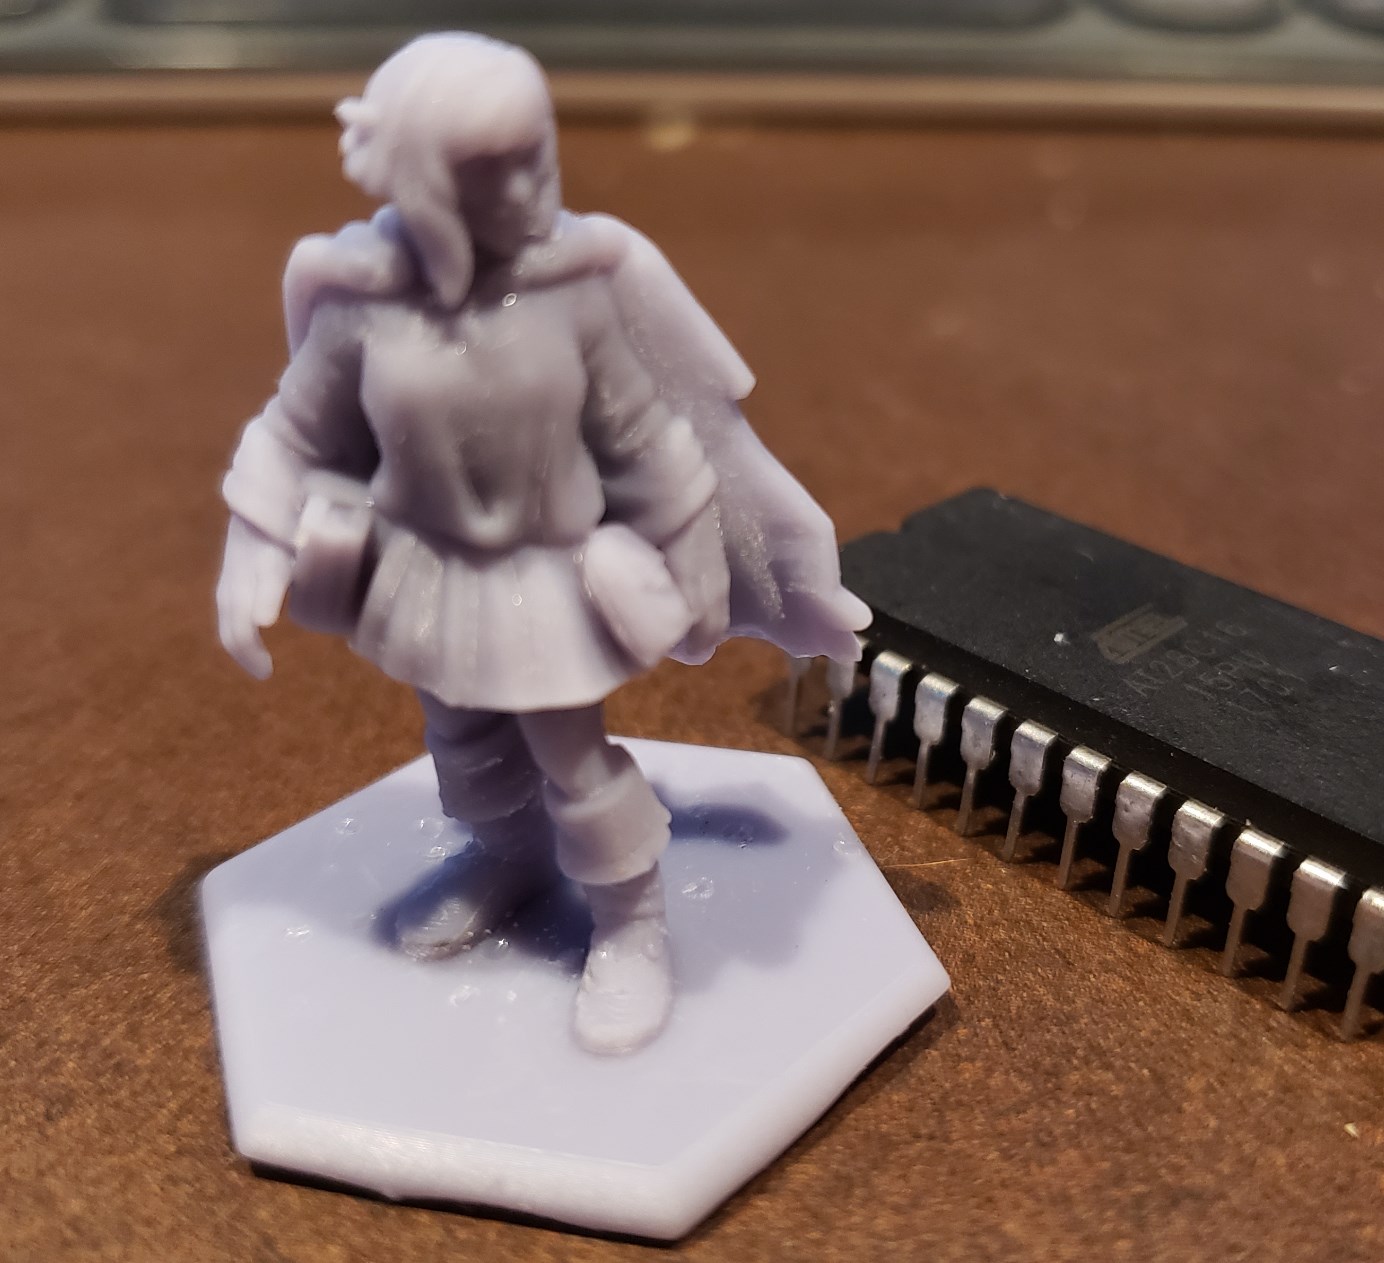
couldnt get the focus to work well 😦
bright solstice
I'm just surprised it worked well enough first go
 atomic hare
Just finished my first KiCad design: a mechanical 5x12 orthogonal keyboard PCB!
That's what I'd love to get, but white soldermask + ENIG for pretty pads costs a fortune! So the real one will be standard green. It's meant to be controlled by a Feather through the two I/O expanders, and has room for another board to pair it with extra features (e.g. Bluetooth)
 delicate basalt
http://ryantwalton.com/projects/pyportal-google-viewer finally got around to posting about my PyPortal google calendar display

RyanTWalton.com
This project actually started much closer to the new year and was mostly finished by the end of February. Unfortunately, I didn't get a chance to post it right away and some things have been going on... all over the world. According to the warnings fro
 scenic siren
@delicate basalt I've submitted it to be added to our Python on Hardware newsletter! Thanks for sharing!
delicate basalt
@scenic siren that's a first for me, thanks
scenic siren
@delicate basalt You're entirely welcome! Thank you for sharing your project. We're always looking for Python on hardware newsletter content. If you're up for it, you can always submit your own projects in a PR or an issue on the newsletter GitHub repo. Here is where we keep the current draft: https://github.com/adafruit/circuitpython-weekly-newsletter/tree/gh-pages/_drafts

GitHub
Community newsletter for python on microcontrollers - adafruit/circuitpython-weekly-newsletter
solar yew
Hi! It's almost ready: New Circuitpython library to support more flexible ePaper screens (1.1", 1.4", 2.1", 3.1" based on UC8156 driver IC) https://github.com/plasticlogic/pl-micro-epd

GitHub
Library and tools written in CircuitPython to control flexible organic displays from PlasticLogic. - plasticlogic/pl-micro-epd
sharp comet
That is really cool @solar yew! I'm going to submit that for possible inclusion in the weekly Python newsletter for next week.
solar yew
Thank you @sharp comet !
 queen solstice

#Robotics #Arduino #Projects
solar yew
My 2006 Mac Pro that i picked up for 56 USD a few days ago, only things its missing is a side panel and a second DIMM riser card, other than that it works fine.
 unkempt plover
Hello. I attaching my first successful pyportal project. I used the Pycon Countdown tutorial as the base of this project and modified it so that it is a countdown to the end of the pause for New York (currently 5/15). I added a photo of my kids as the background and have a photo of my daughter jumping for the end photo. I'm a relatively new programmer so this took me a really long time to get right. If anyone knows where there is more documentation for the pyportal library please pass this along. Stay healthy!
delicate basalt
@unkempt plover nice countdown! https://circuitpython.readthedocs.io/projects/pyportal/en/latest/api.html is probably a good place to start for understanding what options the PyPortal class offers. There are a number of learn guides available that use pyportal so when I was working on my project I used those as references for things like using displayio for screen layout and such
 robust sleet
upbeat geyser
robust sleet
upbeat geyser
Looks like an NE-2 in an ice cube?
unkempt plover
Thanks for the tip.
 grave harness
@solar yew Do tell your source! I need a another machine for projects ‘n stuff.
 topaz flicker
Currently having issues with a new project.
https://cdn.discordapp.com/attachments/693281371778449498/704597646110621736/JPEG_20200428_033814.jpg

That should be white text on black.
like https://media.discordapp.net/attachments/450018397657235462/704592725869068328/JPEG_20200428_031933.jpg

 cerulean helm
@topaz flicker The cables look pretty tangled. The issues on the screen also look like they are caused by faults in the cables. I would recommend to organize the cables, and then inspect them. Finding the fault will be easier with the cables all organized. Also, I think you should put questions about projects in the #help-with-projects channel.
upbeat geyser
Could also be the contrast setting
topaz flicker
Was just showing off what I thought looked interesting, I've isolated the problem to be on one of the display's flexible pcbs.
cerulean helm
All pcbs are flexible if you are angry enough
 snow roost
Thinking about joining the show and tell later today. Are the details posted anywhere on how to join the call?
scenic siren
@snow roost Hang out in the #live-broadcast-chat channel around 7pmET, and a Streamyard link will be posted. Click that to join. It will fill up, but remember it's an hour long show, so people will drop and space will open up. Keep trying to join if you find it's full.
snow roost
@scenic siren Thanks 🙂
topaz flicker
Soldered and put together. Not sure what is up with the bottom right corner with the noise, but hey it works somewhat.
topaz flicker
Solved the issues I had mostly, just had the wrong screen size selected for the screen settings. Also working on my own tiny library to make graphics a little easier to do for my project.
 upbeat geyser
Building an astable multivibrator (oscillator) using a dual triode vacuum tube with Lectron was fairly easy. Building a bistable multivibrator (flip-flop) was surprisingly tricky. Getting the circuit to balance properly with the low plate voltage available and no negative supply took some doing. It's a hybrid, using LEDs to indicate which state it's in.
topaz flicker
Nice!
 west zinc
Initial demo of a CircuitPython simple terminal. Objective is to emulate a VT100 terminal. Current features: cursor position, scrolling up and down, status bar, clear to end of line. https://youtu.be/Kp8AaYRiiVU

This is the start of a VT100-like terminal running on CircuitPython.
Hardware is an Adafruit itsyBitsy M4 with a 240x240 pixel TFT display with ST7789 TFT driver connected via SPI.
 warped violet
Ooooh, that looks fun!
sharp comet
Successful transmission back and forth between RFM9x nodes.
 lucid bloom
This week's quarantine project, an illuminator. You put things on top of a 24 neopixel ring and it lights them up.
warped violet
Ooooh, that's a bright idea
 tacit delta
cool 🙂
lucid bloom
I designed the base with openscad, I am going to make a better version at some point this was just to see if it worked like I thought it would.
 mighty umbra
I'm working on porting the web file editor from https://github.com/me-no-dev/ESPAsyncWebServer to circuitpython so I can program a robot over wifi.

GitHub
Async Web Server for ESP8266 and ESP32. Contribute to me-no-dev/ESPAsyncWebServer development by creating an account on GitHub.
ruby ledge
https://youtu.be/bBLSHR2ZrS8
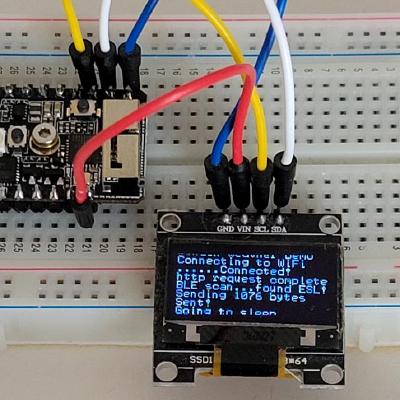
Virtual OLED display. It sends the I2C SSD1306 info over BLE to a Mac to display. 1 line of code changed in the sketch to switch from a physical display to virtual.
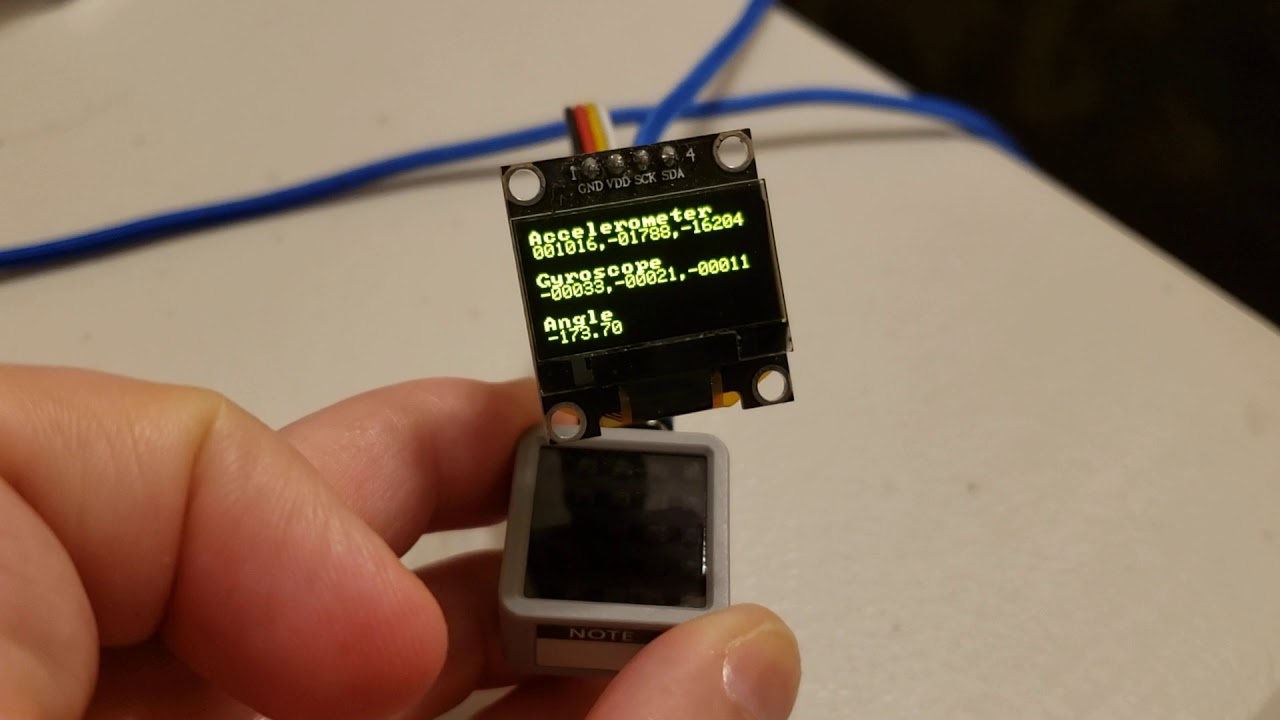
I've added a feature to my OneBitDisplay Arduino library where it can redirect the OLED commands and data over BLE to a virtual display which will interpret the information as if it's a SSD1306 OLED
(The Mac code is a complete SSD1306 emulator). It also works over UART
 median sequoia

 solar yew
CircuitPython ePaper receiving txt and GFX commands through BLE and mobile app. https://github.com/plasticlogic/pl-micro-epd
GitHub
Library and tools written in CircuitPython to control flexible organic displays from PlasticLogic. - plasticlogic/pl-micro-epd
solar yew
...and triggering of pre-stored pictures via BLE.
 clear matrix
@solar yew would it be possible to put these demo videos in the GitHub repo so all can see?
solar yew
Hi @clear matrix not sure if github accepts videos..? If not will check youtube account alternatively...
solar yew
Arm | The Architecture for the Digital World
The Fast, Affordable, Low-Risk Path to Silicon Prototypes
west zinc
cyberDÛCK has arrived.
Will finalize the mechanical design in a few days and wrap up the documentation.
 tiny swallow
Nixie speedmoeter on DIY e-bike.
Tad excessive for a first timer with coding.
bright solstice
dang, those tubes could be worth more than an average bike XD
warped violet
@tiny swallow what are you using for the speed sensor?
 torn viper
Rust on PSP

GitHub
Simple Hello World in Rust to run on a PSP. Contribute to sajattack/rust-psp-hello development by creating an account on GitHub.
haven't tried real hardware yet
Soon ™
tiny swallow
@warped violet I just tapped into the hall sensor output going into my motor controller.
tiny swallow
@bright solstice those are Soviet tubes that can be found for real cheap. They also rugged enough to handle the vibrations
cerulean helm
Building an astable multivibrator (oscillator) using a dual triode vacuum tube with Lectron was fairly easy. Building a bistable multivibrator (flip-flop) was surprisingly tricky. Getting the circuit to balance properly with the low plate voltage available and no negative supply took some doing. It's a hybrid, using LEDs to indicate which state it's in.
@upbeat geyser
i had to read this like 5 times
 hard oriole
blink without delay, circuitpython
Beginning coder here, circuitpython. This is my first blink without delay animation on my homemade matrix. 10 yellow column /rows. 10 different interval times on/off. Fast to slow, left to right.
west zinc
@hard oriole looks great. Can’t wait to see what it will do next. That’s a lot of wires!
hard oriole
Haha, yeah a lot of solder welds to babysit. Each vertical group of 8 neopixels is attach to a magnetic backing that i thought i would be using to move them around. It just breaks welds so i keep it in it's current config as much as possible 😊
hard oriole
Here's one that uses randrange to paint 2 similar colors on each bar. This one uses delay.
I already put something up on the Adafruit forums about this. Here's are some bitmap based animation I did in After Effects and got them playing with Aaron Averill's NeoSprite library: https://github.com/aaronaverill/CircuitPython_NeoSprite

GitHub
Library for updating neopixel arrays from sprite files - aaronaverill/CircuitPython_NeoSprite
scenic siren
@hard oriole I've passed your project onto our Python on Hardware newsletter editor. Great job!
west zinc
@hard oriole I bought some of these solderless connections. Haven’t had a chance to try them so no idea yet if they are any better than soldering.

eBay
Perfect performance partner for 12V led strip light WS2811/ WS2812B or related lamp. DC 5V 1M/2M 144LED/M WS2812B WS2811 IC 5050 SMD LED Strip Lights for Wedding. 5m 60LEDs/m WS2811 IC 5050 SMD RGB LED Strip IP65 Waterproof High Brightness.
hard oriole
@west zinc Thanks for the suggestion! I have seen those used on some matrix projects. Believe me, knowing the pain now, i would have used those or some other solution that totally locked down the wiring. I think i ruled those out at the time because it would have encroached on the start and end of each strip [see pic]. Maybe a job for a 3d print solution for sure. My pixel frames come from a cut up plastic florescent light diffuser.
west zinc
That’s creative use of what you have. Great idea. I didn’t realize you are soldering each pixel separately. Yikes you have a lot of patience! When you multiply rows x columns, the pixel count goes up fast. Good work to get this running.
hard oriole
@west zinc haha, no those are just spre parts. I at least kept the 8 pixels [ that are sold 60 per meter spacing] strip together, and chose the diffuser because it nearly matched.
west zinc
@hard oriole got it. And you were able to finish it and maintain your psyche both at the same time.
hard oriole
Nearly 😜
 spring cosmos
I feel like showing off my Picroscope project
solar yew
hi 👋 made a simple project and API for a blinking LED when a satellite is passing by https://github.com/redraw/satellite-passes-esp8266

GitHub
blink your LED when a satellite is passing by. Contribute to redraw/satellite-passes-esp8266 development by creating an account on GitHub.
 sweet chasm
looks like the watch from the 2 million dolarl mann. WHen the 2mil is right. BAck from the 70's.
clear matrix
If you all have links to your Python/CircuitPython/MicroPython or MakeCode projects, please put them with your submission for placement in our newsletters
 desert timber
@tiny swallow Nixies on a bike! Complete overkill and total violation of the KISS principle - LOVE IT!
tiny swallow
Easier on the eyes than a small lcd
 rapid dirge
Got myself a little helper to remind myself of taking my insulin 😉 https://flameeyes.blog/2020/05/11/insulin-routine-lockdown-and-electronics/

As you may know if you read this blog, I have insulin-dependent diabetes. In particular, I use both fast and long acting insulin, which basically means I need to take a shot of insulin every mornin…
tacit delta
thats awesome!
rapid dirge
still a bit rough on error handling, but getting there 😉
warped violet
Fun! If you are going all of the way over to an ESP, you should check out ESPHome, @rapid dirge.
rapid dirge
@warped violet yep that's the plan of investigation — for now it all started under the design principle of "stuff I had in a drawer" 😄
(this time ignoring the 8051s since I needed actual WiFi)
warped violet
Yah, in a great cosmic irony I had an ESP in the drawer and was waiting for an M4 to arrive.
hard oriole
I just noticed that there is now example code for a slot machine in RGB LED Matrices with CircuitPython https://learn.adafruit.com/rgb-led-matrices-matrix-panels-with-circuitpython/example-adafruit-machine. Since I posted a slot machine animation for my humble neopixel matrix 4 months ago in the forums, i'm going to claim influencer status. 🤣
west zinc
@hard oriole as they always say: Your influencer status combined with a dollar will buy you a cuppa coffee. Keep up the good work!
Sorry I couldn’t resist😀
rapid dirge
@west zinc where do you find a cup of coffee for $1 in 2020? o_O
west zinc
Haha! @rapid dirge you clearly appreciate the value of @hard oriole ‘s RGB-LED humble neopixel matrix, slot machine-influencer status!
rapid dirge
I find coffee places tend to be fairly venial when it comes to serving coffee, the status helps to serve it in a clean mug 😛
lucid bloom
I'm working on a autostreamer, which livestreams my vt220 music visualizer with a user controlled playlist. The vt220 has a pi 3. I had to use 2 pi 4s to do the streaming and music. I had to use 2 because one was having trouble doing it and I needed to separate the livestream audio from the music so I can battle people without horrible revurb.
lucid bloom
I'm waiting on a $5 USB soundcard to make the streamer silent and have better audio quality
Audio from one pi 4 to pi 3 via Bluetooth to another pi 4 via with USB soundcard. 😂
 plush gorge
Lol, it started looking like this. 😋 😉
Lol, doesn't look like that anymore. 🤣 🤪
I've had this for a while, but only just figured out the new frame design. So it's the demolition & scavenge for parts phase.
 sinful trout
Wife wanted a pulse oximeter, so she ordered one. I ordered a Sparkfun MAX30105 particle sensor board. My sensor arrived first, so now I have a pulse oximeter. She's trying to cancel her order ¯_(ツ)_/¯
warped violet
Seems like a sensor-able thing to do.
 timid berry
what does it do?
 fervent dust
Chess clock prototype with circuitpython
scenic siren
@fervent dust If possible, can you post your code to GitHub, write it up, or tweet it, or the like? I'd like to add it to our weekly newsletter, but we need to be able to link to something. 🙂
rapid dirge
@scenic siren by the way if you're looking for more projects still, I've added a quick README to https://github.com/Flameeyes/insulin-reminder (most of the design process is on the blog)

GitHub
Contribute to Flameeyes/insulin-reminder development by creating an account on GitHub.
ruby ledge
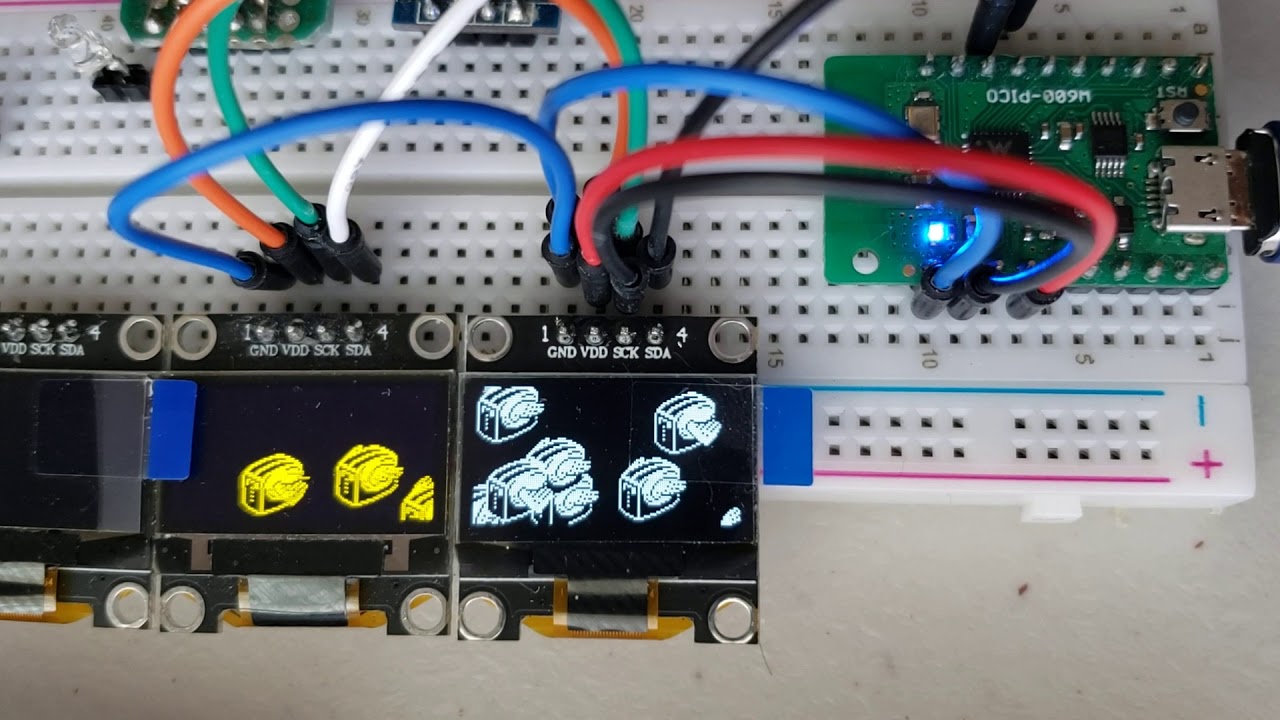
New feature - create any sized virtual display and render it across multiple physical displays.
ruby ledge
Allows you to create a virtual display of any size and render it on as many physical displays as you like
You can try out the code: https://github.com/bitbank2/OneBitDisplay/tree/experimental
GitHub
A full featured Arduino display library for 1-bit per pixel OLED and LCD displays - bitbank2/OneBitDisplay
scenic siren
@rapid dirge We are always looking for more content for the newsletter. I've passed it on!
rapid dirge
Will let you know when I do a Feather M0 edition of my Lego smart lights 😉
scenic siren
@rapid dirge Definitely! Please do!
 winged turtle
I have a little project to show off. It's not innovative, but I'm happy with the personal touches to "make it mine". ;)
Background: A couple weeks ago, the keyboard on my computer started malfunctioning. This one had a wonderful volume roller on it that I found I used quite often. Within 4 hours, I decided to make a desktop volume knob to fill the void, after digging out an old keyboard to make my computer usable again.
This is based on a Trinket M0 and a rotary encoder. I expanded the design with a couple touch-pad inputs, which currently just provide additional keyboard keypresses, but will eventually use for changing profiles on the device.
After struggling with designing cases for other projects in Fusion 360, this one turned out pretty simple and I was able to whip something up pretty quickly. Now for a couple pics:
custom volume knob case
custom volume knob parts
custom volume dial case getting closed up
custom volume knob dial
custom volume knob plugged in
 humble canyon
that is a sick knob
rapid dirge
That would not look out of place on the TARDIS, love it! 😄
winged turtle
I have a fondness for hexagons and designed the knurls for the knob for another project some months back. I'm really happy I got to re-use it and scale it up jumbo size for this project. Thanks for the kind reviews! 🙂
This is the first project where I've used heat-set inserts. They're awesome.
hard oriole
Gnarly Knurling! 🏄
winged turtle
Knob hex knurls... created sketches on angled planes using parameters to calculate size and spacing, then did a circular pattern of the features. I chose 24 to match the rotary encoder ticks per rotation, so the radial symmetry is preserved whenever the knob is not rotating. it's never "out of place". 😉
Since I just noticed that the center hex sketch wasn't fully constrained, I just corrected that (rotation of the polygon wasn't fixed to the vertical line).
west zinc
Nice hexes on the turny knob. Good idea for some variation vs standard knurling.
west zinc
Can’t wait to see the review on the knob feel channel: https://www.youtube.com/user/KnobFeel
 sharp comet
@west zinc The post about your Cyber Duck went up today on Hackaday.com! It's featured on the front page at the moment. Here's the direct link: https://hackaday.com/2020/05/15/cyberduck-quacks-like-a-cyberdeck/ Thanks again for sharing!
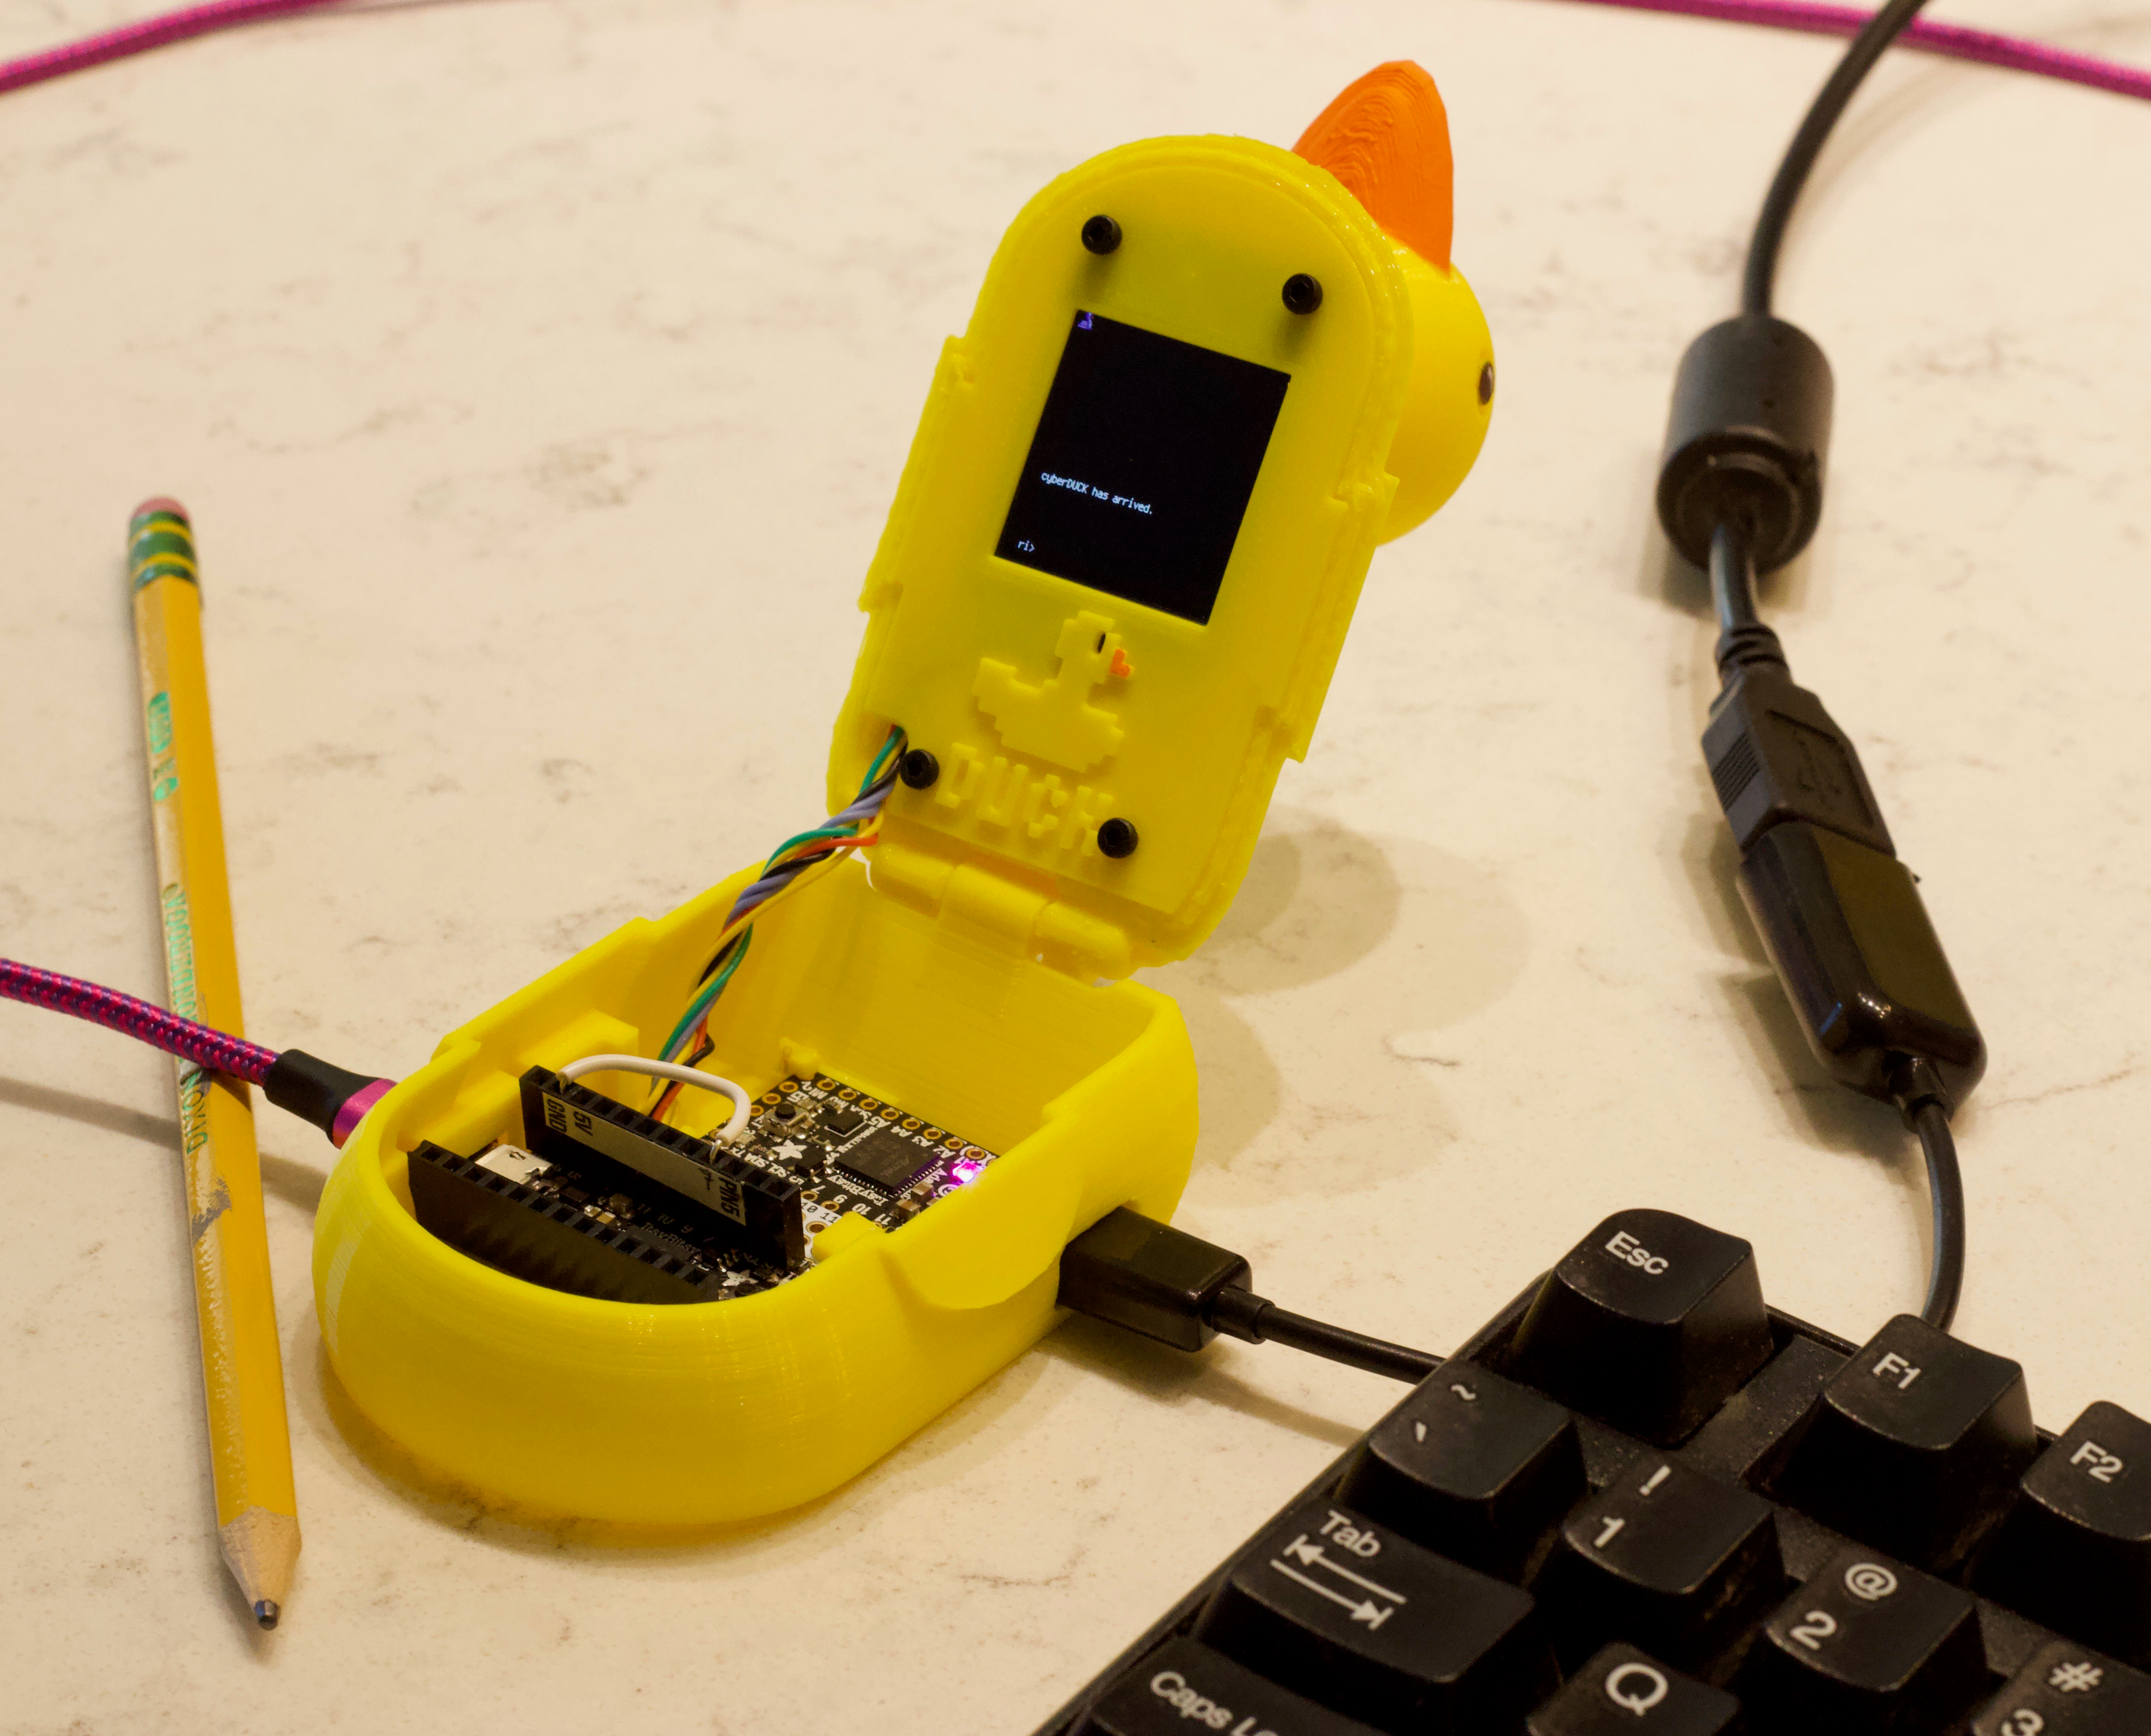
Over the last year or so, we’ve seen an explosion in the popularity of cyberdecks — those highly portable and occasionally wearable computers that would make William Gibson proud. A lot…
 ancient skiff
This is one of the favorite things I've ever found on Thingiverse: https://www.thingiverse.com/thing:1356547 and I've printed a bunch of them over the years.
The newest one was done in flex filament. You can turn it inside out!

No supports. No bridging. No retractions.
It has the astonishing property that the horizontal cross sections are simply connected and change continuously with height, so can be printed perfectly with spiral mode (or single-walled without infill).
This fractal is half of the o...
this is the "level 4" pyramid printed at 200% for larger internal gaps between the walls. I hope to do a "level 5" soon, but I can only print flex at ~15mm/s and the time estimate is 29 hours
solar yew
@ruby ledge love the virtual display.
want to try it with a color display like the 7797's or the 1331
west zinc
@sharp comet thanks for the note. I appreciate the interest. I hope others can get something out of it, even if only a good chuckle or smile.
ruby ledge
@solar yew I'm thinking about defining a general purpose virtual display that can be color or mono and take higher level commands instead of just immitating a real display device
solar yew
very cool
i remember the psp has a cfw app called pspdisp allong with a deamon.
that let you use a psp as a actual virtual display.
might be worth a look.
ruby ledge
right now it's sending pixels, but it would be better to just send text/gfx commands
solar yew
ahh i see.
ruby ledge
The video above is a different issue
it's creating a virtual frame buffer and then rendering across multiple displays
I also create a remote display which sends the data over BLE/Serial
ruby ledge
🙂
west zinc
@ruby ledge I like the idea. Are you thinking some kind of high level graphics interface for both text and graphics? Are you also considering taking inputs (button presses?) and sending it back to the server? Sounds like a great idea.
west zinc
@ruby ledge cool. Keep us all posted on it!
 long vine
Not my proudest project, but I needed a lantern on a pinch. Consists of an old 12V battery, 7W LED COB stuck to a heatsink with a mixture of cooling paste and glue, and a lot of duct tape. A total Macgyver solution
In action. Worked well enough to get the work done.
west zinc
@long vine when you generate that much light, no one will be able to tell how much duct tape you used!
long vine
Exactly!
west zinc
Someone on Twitter was asking about braiding machines. Here’s my prototype before I scale up. The prototype is more of a fidget spinner than braider but so far it has proven the design concept.
 candid crescent
Neat!
sharp comet
Reminds me a bit of this rope making widget I made:
west zinc
@sharp comet looks great. Mine is made from two boards and a coat hanger.
Also it is handy to have a “top” like this to smooth the process of the final twisting of the three yarns.
west zinc
Here is a action footage of a giant sized “top”:
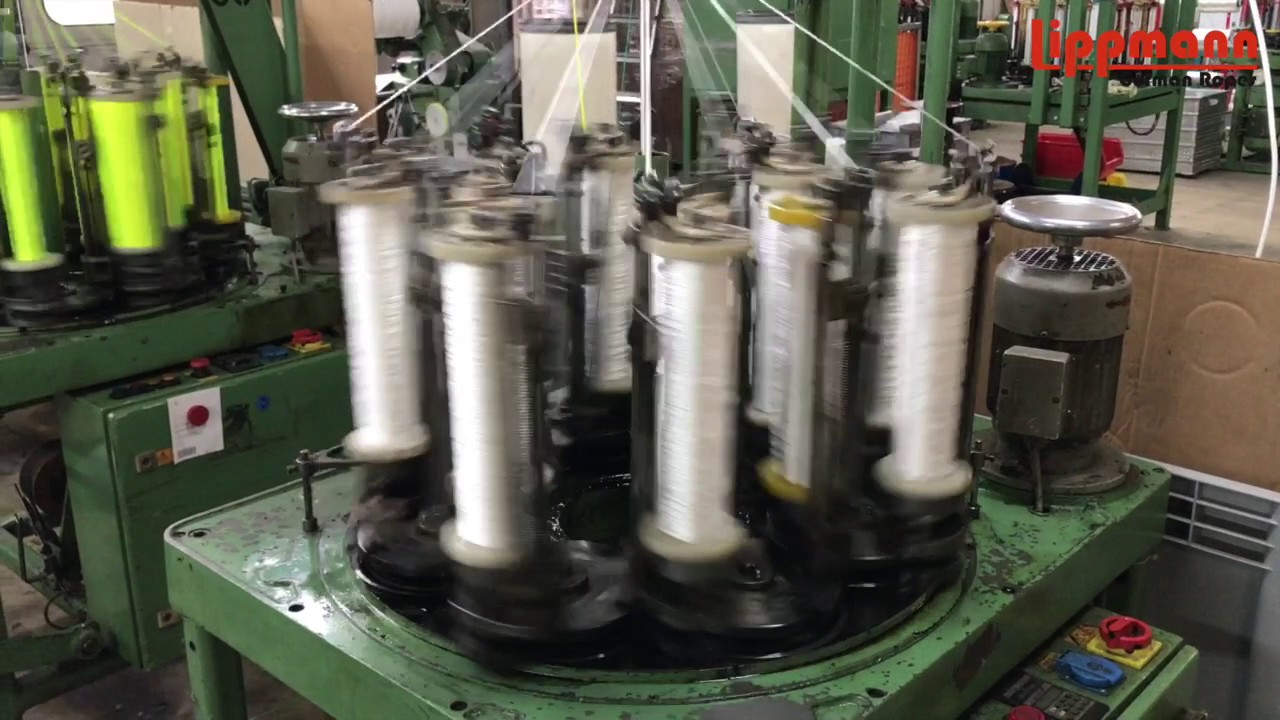
Seit über 160 Jahren stellen wir Seile her - Hier ein kleiner Einblick in unsere Produktion. For more than 160 years, we have been manufacturing ropes - here is a small insight into our production.
sharp comet
That is awesome! I planned on designing a piece like that but didn't get around to it. I kept using the version 0.0001 prototype.... Also known as a scrap of cereal box with some holes poked through it 😄
west zinc
👍
hard oriole
Playing with the new circuitpython support for LED Matrices:
https://learn.adafruit.com/rgb-led-matrices-matrix-panels-with-circuitpython/overview
https://learn.adafruit.com/circuitpython-display-support-using-displayio/multiple-tilegrids
64x32 RGB LED Matrix
RGB Matrix Featherwing Kit - For M4
CircuitPython 5.3.0
sprite sheet images[bottom left] nicked from Love, Death & Robots, n3tflix series website.
lucid bloom
So this is the streaming machine I made (top right) it's my vt220 project with some modifications and 2 pi4s. I had it as a musical guest on my stream. I have tts and figlet scripts so I can make it talk and display text. I'm hopefully bringing it to show and tell in the next couple days
That url links to localhost on a pi4 running mopidy
I setup ip logging and I can blacklist ips if I need to.
This is the streamer pi 4
I also have a USB cam under the picam, some services have problems with the streaming the picam so it's my backup. I'm using a USB soundcard for the audio so it's perfect.
 slow zenith
I was tinkering arround yesterday and got a small Pi robot running on my appartment deck. If anyone want's to drive it around and explore, here is the link: https://remo.tv/rich_bot/rbot-1eae4d61-bc81-4e27-a19f-fc387fe24332
 spiral pebble
This is a recent project I've added to the EEG neuro-feedback system I'm building with the 64x64 RGB LED display. Controlled by a Raspberry Pi, written in python.
My only significant complaint about this display is the intermittent flashes. At first I thought this may be related to using python but the included C demos do the same thing. I haven't been able to solve this and will likely make the device unsalable , users are distracted by the flashes. 😦

Using the 64x64 RGB LED matrix controlled by a Raspberry Pi micro-controller this project randomly chooses one of a multitude of phrases from Brian Eno's "Oblique Strategies". Additional effects are added for aesthetics, options include retrieving current temperatures from ar...
 lapis jasper
@spiral pebble the flashes may be due to running on the RPI because it's not great at timing sensitive tasks
spiral pebble
@spiral pebble the flashes may be due to running on the RPI because it's not great at timing sensitive tasks
@lapis jasper Oh, wow, I thought it was synced somehow. What would you recommend for a controller?
lapis jasper
I'm not sure. @ancient skiff and @hot ivy have played with those displays the most
ancient skiff
@spiral pebble We're using Arduino and CircuitPython to drive them. When it's operating properly, I don't feel like I see any unwanted flashing.
I implemented the CircuitPython part. But just from what experience I have, I think the Arduino graphics library might be a better fit for what you're doing. CircuitPython won't be good at showing hundreds of circles in displayio, while the Arduino library's approach will let you draw new circles on top of existing ones pretty efficiently. That said, I haven't actually used the Arduino library except for checking that my display worked right in the first place. My part in it was creating the CircuitPython bindings for the library.
check out these guides: https://learn.adafruit.com/rgb-led-matrices-matrix-panels-with-circuitpython https://learn.adafruit.com/adafruit-protomatter-rgb-matrix-library

Adafruit Learning System
RGBMatrix creates brilliant light displays

Adafruit Learning System
A guide to porting the Protomatter library to other microcontrollers
you should be able to take your existing matrix and hook it to a Feather M4 with the appropriate Wing
other boards work too, as documented, but require hand-wiring
spiral pebble
"[..] I think the Arduino graphics library might be a better fit for what you're doing. CircuitPython won't be good at showing hundreds of circles in displayio, while the Arduino library's approach will let you draw new circles on top of existing ones pretty efficiently. "
@ancient skiff
Thank you for the info! I'll check it out ASAP! I really like these displays, they're a lot of fun.
ancient skiff
@spiral pebble show us your progress and good luck!
 molten hull
hard oriole
molten hull
hard oriole
I got the large sprite animating using sine waves. I'm stoked to have circuitpython running on the RGB panel. I had used sine waves before on my modest neopixel matrix [video left] to modulate rgb values. This was after finding youTube video: Micro/CircuitPython NeoPixel Color Synthesis Experiments with Tony D! What a great teacher he is! Very much worth the watch. Anyway, I grabbed the sine wave that was controlling color on my neopixel matrix, and with a few value changes, now using it to drive vertical and horizontal sprite position on the RGB panel. Yay!
hard oriole
@ancient skiff fab job chef jeff! thanks for your circuitpython work! 🍴
 signal matrix
Designed my own box to hold a 3d printed lithophane. Has a LED inside that's powered by 5v microusb. My first project I've done modeling in 3d + playing with circuits! Excited to do more now.
 rain escarp
@ancient skiff How'd the crust turn out?
ancient skiff
@rain escarp a bit underdone actually, but still edible
hard oriole
I found displayio.TileGrid flip_x for my arrow sprite. I'm using a copy of the sine wave that i use to move the arrow left to right, but with the values clamped to return 0, 1 for flip_x.
 dreamy cave
Great, is the box also 3d printed or Mdf? @signal matrix
 modest lion
is this the dedicated bragging channel??
desert timber
go for it!
modest lion
is this where i proclaim my dominance upon all electronics??
desert timber
and modest too...
modest lion
well i cant brag if youre in here, since youre the one that solved one of my problems........
desert timber
<goes away quietly>
modest lion
but as soon as i finish this one last thingy, im going to paste videos and screenshots all up over this place
worthy of getting b&
desert timber
I swear I could invent an arduino time machine and folks would yawn - but LEDs! - that's cool
modest lion
although the hardware on my project is perhaps a bit embarrassing (although im unreasonably proud of it), the software is legit
and yeah i think everyone and their dog has made a BLE-controlled RGB LED strip, i dont think most people go to the extent of doing it all from scratch
desert timber
do tell - love to learn new things
modest lion
well ive gotta finish implementing my "animation" BLE service. the arduino firmware is done, im just stumbling through the UI on android
modest lion
(i dont even know what that is)
desert timber
it's a "blocky" style coding app from MIT, makes it easy to write Android apps for BT / BLE, https://appinventor.mit.edu/
 rain wyvern
So after my robot cat friend fell of my table during Wednesday's Show and Tell (live demo! LOL), I broke out the superglue and took a quick video. Adafruit Li-Ion batteries and charger on the belly. 🙂
 desert timber
very nice
 full zinc
Made a drawing program in MicroPython using a Microbit and 74HC165. Just barely works without running into fatal memory errors.
 cunning lava
got my feather bug assembled, now programming
 agile pelican
Elon Musk Machine [Java] A simple intro to my youtube channel: https://youtu.be/Jae1gb3Q8jU Github: https://github.com/KennjiNemera/musknamemaker

I'm bad, I know but I will learn. I was listening to Joe Rogan's podcast and heard Elon explaining his son's name - their was a pattern that I wanted to make a generator out of and here we are, reading this description together.
LINKS:
GitHub Repo: https://github.com/Kennji...

GitHub
A simple JavaFX application with the main aim of creating names similar to that Elon's trend setting example. - KennjiNemera/musknamemaker
 wise idol
I made a filtered water dispenser using an ESP8266 module, a Pololu IR sensor, and a NeoPixel stick for some nice lighting effects. The ESP sends data to Google Sheets to log how much water I use and tell me when to change the filter.
 coral palm
I have online classes, and my professors require us to use webcams.
Instead of buying it, I made one using a Raspberry Pi Zero W, a Camera Board, and mjpeg-streamer.
solar yew
i want to do electronics as a job.
i have a lot of practice knowledge but i am poor and unable to get paper work to back it up.
since i was 7 years old i saw a flip flop for the 1st time and i was hooked.
i could use some advice.
South africa is harsh right now.
timid berry
if you make it your job, you'll hate it as a hobby
lapis jasper
if you make it your job, you'll need another hobby 🙂
 hybrid stump
Some of us don't @timid berry
timid berry
yet
of course there can be different situations, but in many cases if your job situation is miserable even though you are doing something that you love, you'll grow to hate it, and not want to do it when you aren't at work.
hybrid stump
Wow imagine not working with a job you hate
solar yew
@lapis jasper that is not so bad
Another good question is if you were the victim of repeated hacking.
and your cyber criminal division is not good.
who can you turn to?
i just want them to stop and leave me alone.
it's been 7 years of attacks.
rapid dirge
ah, I should probably have posted this here yesterday 🙂 — I described a bit the stuff I did to get a flame effect with an M4 Express; there's one comment for something I'll want to try later most likely too: https://flameeyes.blog/2020/05/25/fake-candles-and-flame-algorithms/

The Birch Books LEGO set that I have been modifying has an interesting “fireplace” at the first floor of the townhouse. I have been wanting to wire that up to light up for the evening s…
 vale wasp
I think #general-chat is probably a good plce for this @solar yew but whatever online service you're using which hosts the login, enable 2FA
solar yew
Sorry.
modest lion
that looks pretty great @rapid dirge
latent fog
Wanted to say a big thank you to everyone that helped me with my data logging project. I got it into a really nice compact project box now that fits neatly on the bike, got all the bikes data feeds working, with a really nice interface board with an opto coupler for RPM counting and voltage divider for the throttle pos, I even hacked my own brake position sensor from an xbox controller trigger.
Checkout my mods to the Adafruit Dragon Tail to make it more compact for my purpose
 limpid flame
@upbeat geyser @desert timber i did some tests
with the big crystal
its gonna take 3 LED clusters
4 Leds each
upbeat geyser
That looks great!
limpid flame
and 8 singles
thanks 🙂
so it will be a total of 20 LEDS and the EL wire
i hope it still will work with that battery
upbeat geyser
Reminds me of this picture I took of a geode once.
limpid flame
sweeeeet
do you think it will be ok
20 LEDS and EL wire on 11.1 V
just drain a little faster hu?
upbeat geyser
I'm thinking it will be fine.
limpid flame
btw i solderd that stuff together for the testing
used gorrola tape to hold LEDS in place for now
🙂
sweet
thanks 🙂
gonna look super nice on the staff
with the other lit up crustals
i g2g now sorry, ill keep yall updated tho 🙂
desert timber
@limpid flame Soldering looks good, you should be fine w/batt. Looking good so far, curious to see end result!
solar yew
hello
I'm from Argentina and I have to use a translator to speak in that group but it doesn't matter
 marble tapir
I'm working on a larger project, but thought I'd share the ridiculous proof of concept I made while I'm waiting on a part: https://www.youtube.com/watch?v=J4o_M2mZs4o

Proof of concepting some ideas for a larger project, but figured this would be interesting on its own.
This uses an Adafruit Trellis M4 to control the FOSS virtual deck software Mixxx.
west zinc
@marble tapir Doesn’t look like a ‘toy’ at all. Sounds cool to me.
marble tapir
I fully expect the end result to be completely unusable for anything serious, but I'll consider it a win if I can do some scratching with it.
sharp comet
Blinking eye animations in Circuit Python inspired by this blogpost: https://arduinoplusplus.wordpress.com/2017/10/29/robot-eye-expressions-using-led-matrix-display/
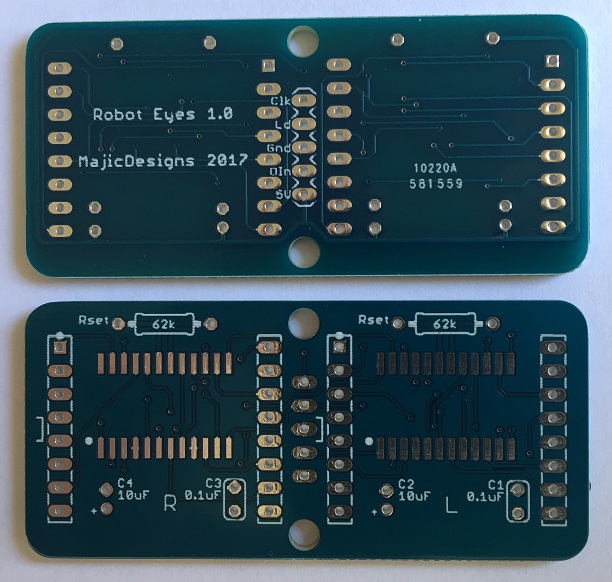
I was exploring ways to make a future robot project more appealing and came across a number of articles about animated robotic eyes created to convey expression or mood. This looked like a bit of f…
desert timber
@sharp comet also works wonderfully in a pumpkin at Halloween...
 untold bone
A few weeks ago @lapis jasper helped merge in countio into Circuitpython, a big thanks for that! This is a test run on one of our robots that uses countio to drive a PID on the robot motors to keep it driving straight. Also we use the encoder counts to get a better idea of distance (this is close, but not correct yet and needs some work).
https://youtu.be/X2pxJMzjheo

First test of a simple PID using motor encoders and CircuitPython's countio library.
 median spoke
@untold bone nice! I've been working on something similar but had no tried countio yet (my sensors are giving some false readings based on my setup)
lapis jasper
@clear matrix ☝️
clear matrix
Are you subscribed to the Python on Microcontrollers newsletter? Go to adafruitdaily.com and do so for a once a week spam free email
west zinc
Here’s a sample design used for learning how to design print in place wheels and sliders: Square box with sliding pin lid-closure. Took four tries to figure out how to loosen the parts without breaking the slider attachment pins! Added a hole underneath so I could help separate the sliders by pushing a pin through the bottom of the lid.
 sterile storm
Finally got around to making something with Circuit Python:

Made using Adafruit's CircuitPlayground
The CircuitPython code and 3D print files are available on our Patreon: https://www.patreon.com/DeadBothans
A write up of how it was made can be found on our blog: https://www.deadbothans.com/2020/05/27/bluetooth-droid-tracking-fob/
S...
hard oriole
I tried out CircuitPython LED Animations for Neopixels and Dotstars with my humble neopixel matrix. https://learn.adafruit.com/circuitpython-led-animations/overview It's easy to use, well documented and illustrated with animated GIF's. It has Helpers for remapping matrices, Animation Groups to play simultaneous animations, and Sequences to play lists of animations. Note: I'm wired zig-zag so an unmapped Chase “marquee” looks like a wave. Here's a sequence of rainbows:
(1.)RainbowChase, space 16, no map (2.) RainbowChase, space 8, no map (3.)RainbowChase, vertical (4.)RainbowChase, horizontal (5.) RainbowComet, no mapping (6.) RainbowComet, vertical (7.)RainbowComet, horizontal (8.)RainbowSparkle, no map (9.)Rainbow, no map
So after admiring the beauty and utility of this library I naturally set off to try to break it. Using the Animation Groups to combine animations, some animations combined better than others. Some caused minor flickering. The horizontal and vertical mapping worked great on whole matrix animations. But with Pixel Map ranges, I could only get whole color animations like: Fill, ColorCycle, and Pulse to work. Keep in mind I was trying to do this on one continuous strip. If I separated my matrix to 3 sections, 3 different data pins, I could make use of the library's ability to drive multiple pixel objects, and have more options.
(1.) 3 Comets, 3 different vertical maps, with RainbowComet, no map (2.) 12 Comets, 12 different colors and speeds (3.) 3 Comets, vertical map, a PixelMapped range with Pulse, and a PixelMapped range ColorCycle.
scenic siren
@hard oriole Excellent! Please file an issue or multiple issues on the CircuitPython LED Animation library on GitHub with the problems you ran into. https://github.com/adafruit/Adafruit_CircuitPython_LED_Animation/issues
GitHub
CircuitPython helper library for LED colors and animations - adafruit/Adafruit_CircuitPython_LED_Animation
 past yarrow
We were planning on getting rid of this perfectly working toaster so I decided to put a screen on it (and ordered a pi 4 from adafruit) and I’m in the process of turning it into a smart toaster 
 lusty siren
SmarToast
This is what I have been working on. Remote Control Tankbot.
I... Didn't quite get a picture of the Tankbot itself though.
past yarrow
Looks cool, and I have to complement that tv as well
solar yew
Here is my latest project a MicroPython based drawing robot project: GitHub repo https://github.com/russhughes/turtleplotbot3 and documentation https://penfold.owt.com/turtleplotbot3/index.html and for the bonus #sparky mistake https://penfold.owt.com/turtleplotbot3/assembly-part3.html#install-the-charger-boost-module

GitHub
The TurtlePlotBot3 is a MicroPython based 3D printed drawing robot powered by a TTGO T-Display ESP32 Module - russhughes/turtleplotbot3
west zinc
In lieu of live show-n-tell, maybe the discord will get everyone to share tonight.
Here’s a simple Markdown parser/render in CIrcuitPython (PC on the top, CircuitPython version on bottom)
sharp comet
Looking good!
candid crescent
For anyone who may be interested, QuickLogic has a new Feather-form-factor development board for their EOS S3 chip. It's a neat processor, with a Cortex M4, FPGA fabric, and DSP, targeted at things like low-power ML audio processing. They say they just got the first batch of boards in, and will be shipping pre-orders mid-June. https://www.quicklogic.com/products/eos-s3/quickfeather-development-kit/
lucid bloom
Initial prototype of my contactless number dispenser
timid berry
but someone touched the paper....etc. etc.
like contactless delivery of food, people had their hands all over the actual food etc.
lucid bloom
It's better than our old method by far with physical plastic disks. I will take precautions loading the paper. It's purely for rate limiting clients/taking one client at a time inside the building.
Due to the fact that our clients don't all have smart phones or internet access I have to do things like this. If they all had that access to technology I could make something a lot better to handle our current situation. I believe that access to technology should be a right.
If I could I would use shortcodes
sharp comet
@lucid bloom I like it. Part of my job is working on kiosks and I've been putting a lot of thought into using distance sensors as a very basic contactless input. I'm happy to see others going down a similar path.
I wish it were not coming along with such a dire situation, but I have enjoyed the exercise of "thinking outside the touchscreen"
lusty siren
It's still significantly reduced touching. So long as people only touch the paper they take, they're not adding any germs
lucid bloom
And we don't take the paper back they keep it
lusty siren
@sharp comet I feel like there's going to be a change in how UIs and the like for public use will be designed. Probably not major or fast, but people will think
lucid bloom
I would think a gesture sensor would be pretty good compared to a distance sensor. For more complicated input
lusty siren
I hate using gestures. They're always so weird and akward to do, for me.
lucid bloom
Like a number of fingers or something
sharp comet
Gesture I've considered as well but for general public they must be very basic gestures and the sensor must be very "forgiving" about not doing the gesture perfectly or else it can get frustrating like Andon mentioned.
Another idea I'm kicking around is using Tensor Flow Lite + Microphone to listen for "Yes", "No", and perhaps a select few other keywords. There is an Edge Badge example that can already listen for Yes / No, modifying it to send HID or some other input to a host machine should be pretty straight forward.
warped violet
I think gesture-sensitive interfaces for a punk space would be... fun
lucid bloom
Flip it the bird to reboot 😅
lucid bloom
So I gave it some thought and I'm going to add sms number dispensing to my project to reduce contact even further
past yarrow
@lucid bloom Thats really cool
lucid bloom
It all works now I just need to add a wordlist of fruit names, each week we will use a different fruit name as the trigger to give a number. It will be on a sign outside
lusty siren
@lucid bloom Bonus points if you use some more obscure fruits
solar yew
Also handy if you don’t know how to use the three shells.
hybrid stump
@lucid bloom How would people provide their phone number without contact?
Also I think your non-contact ticket printer is awesome! 😄
lucid bloom
@hybrid stump when they text our number with the trigger word we get a notification with their phone number/line number and they get a text with their line number.
 odd rover
@hard oriole I love the use of LED Animation! Re: But with Pixel Map ranges - that's clearly a bug. For the flickering, the issue will be that .show() is being called multiple times. Are the animations all in groups and sequences, or are you manually controlling them?
hard oriole
@odd rover Thx! Yes, with the ranges - Comet was failing with a slice error. Chase with ranges would alternate between black and color choice filling the whole range, like it was just getting values from the first pixel. The second movie I put up was from 3 separate tests. I will recreate them and document. I will need a little time :^) I wasn't using show(), but instead putting everything under a Group called animations, and While True - animations.animate(), just as in many of the example files.
@odd rover when ranges weren't letting me get an effect in an isolated area I tried to modify the horizontal width of a Helper. You can crop those from the far x or y side, but they are always pinned to the first pixel. I don't know if allowing an offset for a different starting pixel would help. Also when I did the 12 comet test, with 12 different speeds, they all start at 0, and you have to let them spread out, anothe place a starting offset might be nice. That one place I saw a lot of flickering, haha. Another thought I had was allowing a different background color for the effects would be nice, and help them feel customized for the user, less generic.
odd rover
Hmm - Maybe it was in a branch I never published that I fixed multiple show calls in a group.
Are you willing to file issues in github? https://github.com/adafruit/Adafruit_CircuitPython_LED_Animation/issues so I can look into your suggestions, ideas, and bugs? 🙂
GitHub
CircuitPython helper library for LED colors and animations - adafruit/Adafruit_CircuitPython_LED_Animation
hard oriole
@odd rover Shurething! I'm hoping to find a little time this weekend.
lusty siren
Finally remembered to take some pictures of my Tankbot.
Still need to finish up the turret. It's kinda.... exposed right now.
tacit delta
cool
lusty siren
Need to design and print the rest of the turret pieces. And pretty much re-design the controller to do everything I want it to
hybrid stump
@lucid bloom I see, that is pretty smart!
dreamy cave
@lusty siren the main body seems to be using aluminum pieces, is that from a kit?
lusty siren
@dreamy cave Yep, the body, treads, wheels, And drive motors are from a kit although it doesn't really come with a bottom plate so I cut some acrylic to fit. There's also a second plate inside the rear that's acrylic.
ruby ledge
I just submitted 2 Pull Requests which speed up the Adafruit_GFX library and Adafruit_ILI9341. 10+% across every function and some operations will be twice as fast. No loss of compatiblity. I hope Adafruit will merge them quicky.
https://github.com/adafruit/Adafruit_ILI9341/pull/64
https://github.com/adafruit/Adafruit-GFX-Library/pull/300
I did the same for Teensy's fork of these libraries
https://youtu.be/rIxWzx5_tas
GitHub
This is a simple, yet effective change for accelerating almost every operation of the GFX library. Switching between command and data modes on SPI LCDs is costly in terms of time. This change check...
GitHub
Performance optimization for drawChar() and drawCircleHelper(). The changes involve gathering pixel runs to avoid drawing 1 pixel at a time. The changes are generic and will run on any system.

The latest version of my optimized ILI9341_t3 lib for Paul Stoffregen's Teensy 4 boards. This will be merged into github shortly.
The numbers -
Benchmark Time (microseconds)
Screen fill 78243
Text 5094
Proportional Text ...
 marble canyon

 past yarrow
Inside that ADT box is a raspberry pi 3a, I’ll have more pictures later, ignore the motherboard on the top that’s just to a old dell optiplex and has nothing to do with this project 
west zinc
I was inspired by a recent Hackaday article, so I created a sparkline class for CircuitPython:

GitHub
various shapes! Contribute to kmatch98/Adafruit_CircuitPython_Display_Shapes development by creating an account on GitHub.
lusty siren
A wild Tankbot! This was the extent that it got before the camera cut out more than it was showing. About 250-300 ft? Also through to the other side of the house. With a clear line of sight I could get more distance, easily.
The controls were still solid even with the camera being nearly completely cut out. Which is good
 true jacinth
My 10 year old daughter's 1.5 meter alarm is finally finished: https://www.instagram.com/p/CBIhNy6hXBh/
We used a Circuit Playground Express and connected a US-100 ultrasonic sensor and a small vibrating motor disc to it using conductive thread. When someone gets too close, the heart vibrates for a moment and the LED's display a nice effect until the distance is over 1.5 meters again.
We modified a two-cell-coin-holder to fit a small LiPo battery. It felt safer to have it in a case.
We learned so much building this! And we had some awesome father-daughter-nerd-quality time. :-D
Thanks @desert timber and everyone else for helping us out!
Some work in progress pictures:
https://www.instagram.com/p/CBF6qDrBFKX/
https://www.instagram.com/p/CA8YCKSB-Nn/
desert timber
👍 @true jacinth Very nice, glad it all came together, WTG!
lusty siren
@true jacinth That's really cool!
timid berry
Now she needs a stun gun.
median spoke
@lusty siren that tankbot is really cool. Sending video / controls via wifi or using the LoRa radios?
lusty siren
@median spoke RFM95 for command and control. And a 5.8ghz drone transmitter/receiver for video.
past yarrow
Not exactly a project or anything, but this is a optiplex 3040 I grabbed for 135$ and it just arrived
 dim creek
unless you load it with raspberries to make a serveur room inn a box, i'm not sure it's adafruity 😉
past yarrow
I'll just install rasbian on it so it's just a giant raspberry pi
 sterile lodge
showing a computer you acquired is totally adafruity 🙂
 tepid swift
meta: Is show-n-tell live still a thing? or are we just posting here when we've got something?
dusk zinc
?showtimes
 topaz leafBOT
MakeCode Live - 3pm ET Tuesdays
3D Hangouts - 11am ET Wednesdays
Show & Tell - 7pm ET Wednesdays
Ask an Engineer - 8pm ET Wednesdays
Desk of Ladyada - Random hacker times
John Park's Workshop - 4pm ET Thursdays
John Park's Show & Tell - 5:30pm ET Thursdays
Deep Dive w/Scott - 5pm ET Fridays
scenic siren
@tepid swift This channel is for posting projects to show and tell for the rest of the week. Show and Tell live still happens at 7pm ET on Wednesdays, though it's an hour instead of a half hour now.
tepid swift
This is my "Multi-Flash" SAMD flash programmer. Built from a Feather M0 Express + OLED Featherwing. It acts like a USB drive when plugged into your computer. You just drag boot + app binaries over to it. Then disconnect it..... Now you can use it flash bare SAMD chips - over SWD with just a few wired connections (GND, RESET, SWCLK, SWDIO).
The code is designed to have easily adapted UIs: So, for example - it runs on a Circuit Playground Express - using the Neopixels as the progress bar.
I'm using it to program a bunch of boards I'm having built that have a SAMD21Gs on them - which of course come from the fab. house w/o any bootloader at all. I use this to put a UF2 bootloader + the current build of my app on them.
For debugging - here is it being used to with a CPX as the target:

GitHub
SAMD programmer. Contribute to mzero/multi-flash development by creating an account on GitHub.
The whole thing is basically a giant mash up of the examples from Adafruit_DAP_library, Adafruit_SPIFlash, and Adafruit_TinyUSB_Library. Thanks, Adafruit!!
 grizzled violet
Nice, so this should remove the need for an Atmel ICE or Raspberry Pi with flash software?
tepid swift
Yes. It needs no software running on your computer. It's totally self contained.
grizzled violet
that's amazing, if you can integrate it with running board tests afterwards it would make it a great all-in-one solution
tepid swift
Well.. totally open source - have at it! Would be easy to run what ever you want after the flashing is done.... and you have plenty of unused GPIO on the programming device left over to use to test
Now that Adafruit is shipping again... I've ordered their proto doubler for the feather so I can make a nice, contained unit. That or the trippler proto would give you plenty of space to connect what you need to test the target system.
once that arrives and is assembled... I'll give a short video!
median spoke
Weather station is starting to come together. Reports via WiFi to adafruit io. My 3D printed electronics case is not yet waterproof hence the large box at the bottom.
solar yew
Nice.
 civic vale
@median spoke where did you get separate instruments? Everywhere I've looked only seem to want to sell the instruments with an expensive display unit that I don't need. I already have a RasPi mounted under the eaves and was planning to mount a mast and instruments outside this summer, but everywhere that used to sell the (usually O.W.N.) instruments seems to only want to sell full systems, which is not what I want.
upbeat geyser
There's this set at SparkFun: https://www.sparkfun.com/products/15901

Whether you are measuring wind speed, direction or rain, this is the Weather Meter for you.
median spoke
@civic vale As madbodger pointed out the gauges are from SparkFun. They hook up via RJ11 though would be easy to cut the ends off to get the wires if needed.
The radiation shield I designed in Fusion 360 and printed myself (there are many others online as well). Inside is a BME280 sensor hooked up via I2C.
There are also 3d printed versions of the others instruments out there but would require adding in different magnetic switches or resistors.
civic vale
Thanks @upbeat geyser and @median spoke, that looks like a good basic set, and I know how to add temp/humid/pressure (I think), which gets me about 90% there. So, only a little bit more, but not tonight, I need to get to bed before the scary bright light appears in less than an hour.
sharp comet
Today in the "Happy Little Trees" of Programming we have this beautiful blue 
sharp comet
Making some good progress on adding support for the PewPew M4 to the pybadger circuitpython library
hard oriole
I gathered the courage to bend 5 of the 7 unused pins on my feather that were attached to my rgb matrix panel featherwing, with the idea of experimenting with button inputs. I then made a sprite sheet with 64 number squares, and practiced making code that would loop on any column or row with button presses. Two buttons take me left /right on a row, 2 buttons take me up/down on a column, 1 button to reset to frame 0, and reposition frame. I found a free 3d ironman mask online and rendered that rotating at 45 degrees per frame. Then a very modest amount of pixel cleanup to make a 256x256 pixel – 64 frame sprite sheet. End results... not as great as the journey.
 naive flicker
Cant exactly show it yet but today I'm making a power supply for my project the supply is gonna be in a box but on the box I'm going to put and iron man arc reactor on it as I'm a huge iron man fan
 modern lynx
@hard oriole I really like that, great idea. What do you think you'll do with the animation code next.
 cobalt dove
ESP32 running WLED controlling ws2812b strips. This was done a while ago as part of the #904rainbow thing where kids stuck at home due to quarantine would paint rainbows and put rainbows on stuff (e.g. windows) and post pictures of any they found to the school's social media pages... https://gfycat.com/whirlwindfarflunggrebe

If I had a taller ladder I would do the top eve too 🙂
hard oriole
@modern lynx I want to make a scrolling environment out of tiles, and i thought it would be cool to have the angle of the buildings [or whatever..] change depending on where they were on in screen space. This rotating object was easier to figure out in the meantime, and get some buttons working.
modern lynx
@cobalt dove nice! Can make a theme for every Holiday now.
cobalt dove
@modern lynx Yes, I had these lights up at Christmas but they broke right in the middle in several places (for unknown reasons--probably just poor quality). I took the time to replace the broken bits this weekend and setup the rainbow
ruby ledge
I always like to push the speed limits. The Teensy 4.x Wire library allows speeds of 100Khz, 400Khz and 1Mhz. I tweaked the clock registers to allow a stable 2Mhz. Here it is running on my OneBitDisplay library driving a I2C SSD1306 OLED:
https://youtu.be/EDGfJUg8DOo
Code change link can be found in the video comments
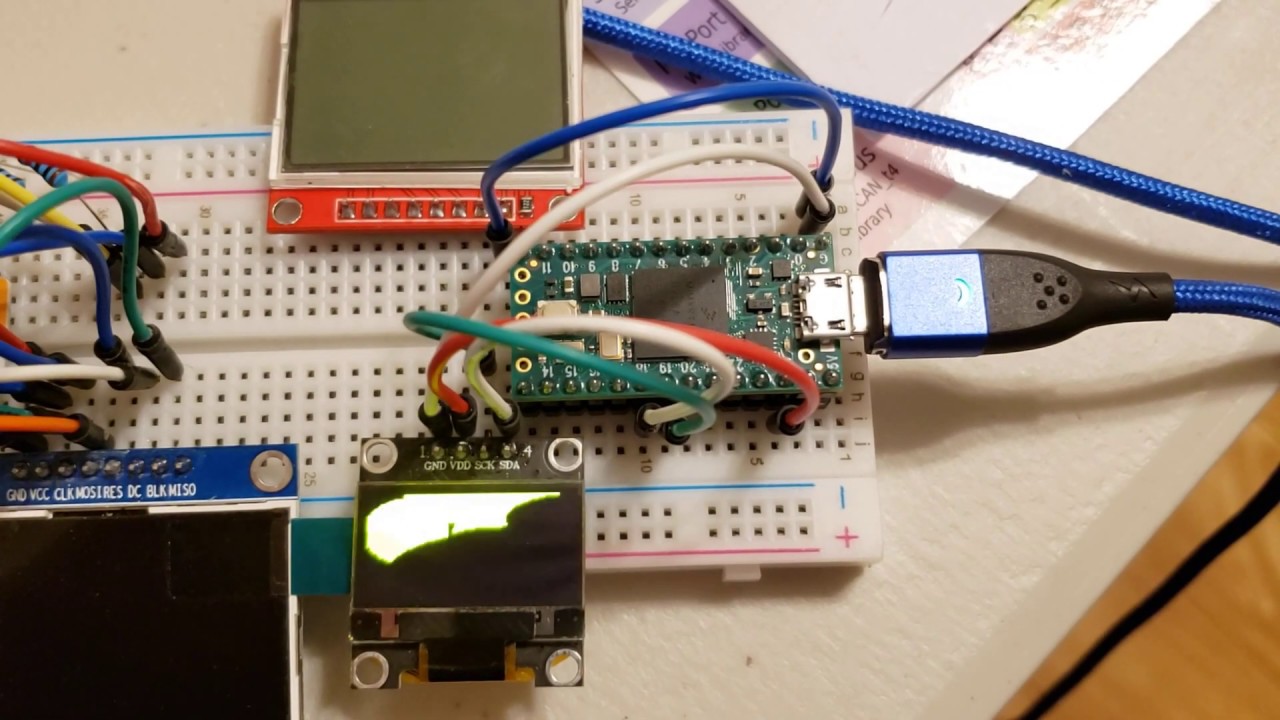
The Teensy 4 I2C speed currently only supports 100Khz, 400Khz and 1Mhz. I tweaked the clock settings to allow it to run at 2Mhz. See this forum post for more info:
cobalt dove
I made something awesome tonight! https://youtu.be/wO0Y42d_O9M

My RGB LED Pong clock now works in conjunction with OBS Studio to display when I'm recording! I spent a couple hours tonight figuring out how to use OBS's Python scripting capabilities and also fixing my clock (which has been offline for years). I'll upload the code for ever...
I wrote a Python script that adds MQTT support to OBS so you can make your own light-up "RECORDING" sign, or tie into any MQTT service to do whatever you want when you start recording/streaming! Want to broadcast that you're recording/streaming to adafruit.io when you click the the "Start recording" or "Start streaming" buttons in OBS? Well now you can! Well, you'll be able to once I upload the code anyway (it's late) 🙂
upbeat geyser
That sounds useful. I usually record in my basement, which is where the air conditioner is, and as soon as I start recording, the air conditioner likes to fire up and ruin my audio. I could use that to add an action to cut power to the air conditioner while I'm recording!
cobalt dove
@upbeat geyser If you record the sound of your air conditioner running you can remove it with audacity too 😁
cobalt dove
"OK bodger"
cobalt dove
If you doubt the powers of Audacity send me a sound file with 5 seconds of that air conditioner running before you say, "hello" or "check 1 2 3" or something (anything) and I will make your voice sound clear as day 😄
 vivid tulip
@cobalt dove
Your house looks amazing!!
You can rent a Genie lift from Home Depot and put up more lights. Start a crowd fundme and I'll kick in $20 ! 😉
https://www.compactpowerrents.com/rental-equipment/scissor-and-boom-lifts/

Rent scissor lifts and boom lifts from The Home Depot Rental. Our aerial equipment rentals help pros and homeowners reach new heights.
cobalt dove
@vivid tulip Someone taller than me (say, 6'2) could put up the brackets just by going out one of those front windows. Since I'm not tall enough it's dangerous to reach. Though, maybe if I had some sort of harness it'd be OK
vivid tulip
If you doubt the powers of Audacity send me a sound file with 5 seconds of that air conditioner running before you say, "hello" or "check 1 2 3" or something (anything) and I will make your voice sound clear as day 😄
@cobalt dove Another thing you can do is run all your audio through Reaper to clean up any noise and then record the output of Reaper. Saves the steps in post. https://www.reaper.fm/
cobalt dove
@vivid tulip Cool tip. Except reaper isn't free like Audacity. Personally I just enable the echo-cancel module in Pulseaudio and that takes care of 99% of all background noise and has a side benefit of slightly amplifying the audio (which is great for quiet mics). As far as I can tell it doesn't have any negative impact on audio quality at all
vivid tulip
I'd never heard of Pulseaudio, thanks for the info !
lucid bloom
I finished the number sign part of my number dispenser project. I added our logo (a piggy bank) as the transition between numbers. There is an alternate track to paper numbers and watching the sign that uses sms to give and call numbers
I am using this to control the sign
https://www.adafruit.com/product/2345

You can now create a dazzling display with your Raspberry Pi Model Zero/A+/B+/Pi 2/3/ or Pi 4 with the Adafruit RGB Matrix HAT. This HAT plugs into your Pi and makes it super easy to control ...
cobalt dove
@lucid bloom Man that thing is bright! Might want to print out a diffuser. I just made one today for my RGB LED display. One half of it is in this picture demonstrating the difference.
The camera doesn't do it justice. It's insanely bright. TOO bright since I'm going to have it on the wall right next to me. The 1.2mm-thick white PLA does a great job at toning that down.
It also makes each pixel wider
Video of the light diffuser installed: https://gfycat.com/spottedwavyamazontreeboa
 upbeat geyser
I like the look of the larger diffused pixels.
sharp comet
That looks awesome
cobalt dove
@tacit delta Have any dead LCD monitors to donate? Because I don't have any to play with 🙂
upbeat geyser
Where shall I send them? Alternatively, Lee filters offers some very nice diffusion material.
upbeat geyser
Using https://www.adafruit.com/product/1487 and a projection lense lets me have big pixels on a wall

Put on your sunglasses before wiring up this LED matrix - 64 eye-blistering RGB LEDs adorn the NeoMatrix for a blast of configurable color. Arranged in an 8x8 matrix, each pixel is ...
sharp comet
That is supper cool! how does one get a projection lense like that? is it like a replacement part for a projector?
upbeat geyser
I stripped three of them out of a discarded projection TV, but nearly any lense will do. They also show up as surplus fairly often https://www.goldmine-elec-products.com/prodinfo.asp?number=G19204
sharp comet
Neat, I'm going to have to get some of those. Thank you!
cobalt dove
@upbeat geyser Can you you put one of those tiny OLED screens behind that projection lens and record that instead of neopixels? I want to see if it would be feasible to make a dim projection clock for your dresser!
upbeat geyser
I might get around to that, but I'm not sure when
cobalt dove
@upbeat geyser Don't worry about it I just ordered that exact lens assembly. When it gets here I'll do my own testing
Hopefully it'll let me achieve my dream of having the ultimate projection alarm clock!
cobalt dove
The IoT MQTT OBS automated recording sign/pong clock is now complete! https://youtu.be/8PqMyGfUD38

The project I started last night has been finished! You can download the OBS MQTT script here: https://obsproject.com/forum/threads/real-time-mqtt-status.124678/
 gaunt cedar
Looks pretty cool! Those matrix displays are the ones using HUB75 protocol?
cobalt dove
@gaunt cedar Nope. It's the same type of panel that would be in an outdoor sign. It's basically just a bunch of RGB LEDs hardwired to some built-in shift registers. It can refresh insanely fast (because shift registers and LEDs are fast)
upbeat geyser
That's what HUB75 protocol is...
cobalt dove
I have never heard of HUB75
gaunt cedar
It is not really protocol I think
but it is kind of the name I find easier to find when searching for how to control those type of Matrix
cobalt dove
I've always known these panels as "P<number>" panels indicating their pitch. They're not all the same. They have different pins for different lines/colors/whatever
...but they're all essentially the same: Just a bunch of shift registers hooked up to LEDs
You just have to get the output pins setup right and you're good to go. The logic doesn't change for the most part
The panel I have on the wall is P10 but I have six P8 panels in a box
...just waiting to be used 🙂
upbeat geyser
HUB75 is a catchall for several of them (with varying numbers of lines/pins populated for different geometries and scan multiplex schemes).
cobalt dove
The P8 panels have different wiring and a different scan rate so the code for the P10 doesn't work for them
gaunt cedar
@upbeat geyser I usually use that name when searching for libraries or even ali express
I think the adafruit library works with those panels
cobalt dove
This is what I have in the box: https://www.aliexpress.com/item/32380385386.html

aliexpress.com
Smarter Shopping, Better Living! Aliexpress.com
gaunt cedar
I have tried running from an arduino UNO and I was fairly successful
I would like to know if any of you already used those boards that interface VGA to those type of protocols
I guess they are built around FPGA ...
upbeat geyser
While I've built LED matrix interfaces and VGA interfaces, I haven't interfaced one to the other. There are some open source projects that render video onto LED matrices, but I don't think any of them use VGA as an intermediary format.
I think you're right, and FPGA technology would be the way to go for that sort of thing.
gaunt cedar
The ideia was to use processing to design some motion graphics and present them on an array of those matrix
upbeat geyser
That's a lot easier than trying to capture/digitize/convert a VGA signal.
I built a scrolling sign that way, it works pretty well.
There's code out there to play animated GIFs on LED matrices too.
gaunt cedar
But running the processing code on a normal PC how did you interface with the matrix
I thought about using an arduino with firmata in the middle
cobalt dove
The BIG displays using these panels at say, stadiums all use FPGA-based controllers
They have these daughterboards that have insane refresh rates. Very cool tech
upbeat geyser
It seems to me that Firmata would work. I quickly decided Arduino didn't have the horsepower I wanted and switched to Teensy 3.2
gaunt cedar
hmm never used a Teensy maybe this is the time :p
upbeat geyser
Some useful info here https://www.pjrc.com/teensy/td_libs_OctoWS2811.html
If you did want to use FPGAs, there's a nice PMOD to LED matrix adapter available https://1bitsquared.com/collections/fpga/products/pmod-led-panel-driver

1BitSquared
The LED Panel driver Pmod is an ideal way to connect a LED Matrix Panel to your iCEBreaker FPGA project. You can build many interesting display projects and installations using that combination. You can also use this Pmod with a microcontroller or Raspberry Pi project as a vo...
gaunt cedar
I think the Teensy route will be easier
I don't use verilog or anything like that since college
upbeat geyser
I hadn't used Verilog since 1999 because the toolchains were obnoxious, but got back into it a few weeks ago when IceStorm became easy to install and use.
gaunt cedar
I think i am going to try to find how those big outdoors work and see if I can find someone that can have access to some of those type of systems (even if much smaller) so I can better understand their approach
I would think they had an HDMI or DVI or VGA controller that decoded the info for each pixel of the matrix display and send it via the "hub75" protocol
upbeat geyser
You can buy that off the shelf too https://www.adafruit.com/product/1453
gaunt cedar
exactly what I was looking for!
I had found those boards but all the info was in chinese :\
and was not really detailed like how it worked
upbeat geyser
There has been some good reverse engineering done on the inexpensive ones https://hackaday.com/2020/01/24/new-part-day-led-driver-is-fpga-dev-board-in-disguise/
gaunt cedar
It looks nice I am going to check it out for sure
Think I will start here https://learn.adafruit.com/adafruit-diy-led-video-wall

Adafruit Learning System
Tile together multiple RGB LED panels to create a giant LED wall!
cobalt dove
Should I be writing an article about how to make an IoT LED RGB panel display with MQTT and whatnot? I'd think there's enough articles out there like that these days
gaunt cedar
Maybe it is good for you to get it documented
cobalt dove
@gaunt cedar Yeah that's a good point
 cold tangle
I'm a big fan of writing everything down that I do (because it's impossible to remember everything). And in that case, you might as well polish it a little and put it online. Even if there are already similar articles out there, it's good to practice your writing skills (because communicating is a skill that needs to be practiced) and someone might benefit from it. I've found with my own blog, which is mostly about machine learning -- a topic that a lot of people write about -- that readers enjoy the fact that I go into great depth in my articles.
cobalt dove
@cold tangle Good advice. Lately I've been trying to tone down the details in my writing/speech because it takes up too much space/time (in videos) haha
Rather, I've been trying to focus on the concept of, "is there any way to re-word this to make it shorter while still communicating the same message?"
cold tangle
Yeah that's always a good idea. 😄 It's often possible to say the same thing with fewer words, plus it's important to find a balance of how much detail to go into vs. how much to leave out. And that largely depends on your audience. If you're writing for newbies you'll have to explain more than for experts.
 torn elbow
Programming is giving me trouble though..
cold tangle
Cool robot!
 soft ermine

YouTube
هل تريد تعلم الاردوينو ؟ هل تريد ان تتعلم كيف تصلح الاجهزة ؟ هل انت مبتدئ او طالب في الجامعة ؟ اذا انت في المكان المناسب. do you want to learn all about ardu...
mighty umbra
I'm working on a proof of concept for an open source Mindstorms or VEX like hub/controller. It is using the 8 serial ports on the Teensy 4.1 to extange data with motors/sensors and serves a web interface using the native ethernet port. Currently the web interface only displays an empty box for connected devices, but my plan is to add widgets for different device types.
https://github.com/ryang14/robothub

GitHub
Contribute to ryang14/robothub development by creating an account on GitHub.
cobalt dove
I finally got around to posting my parametric RGB LED light diffuser and wall mount .scad and models: https://www.prusaprinters.org/prints/34951-parametric-led-matrix-light-diffuser-and-wall-moun
 tiny briar
Swapped out the tft screen to something bigger and made the menu system faster! https://twitter.com/jensechu/status/1274505698647379969


I swapped in the wider screen on the homemade tamagotchi! I also made the menu a bit faster. I can't wait to swap in some real icons/art. 🥳
#tamagotchi #gamedev #たまごっち #ジブリ #arduino #screenshotsaturday #indiedev #indiegame #Ghibli https://t.co/wW2ztkZDks
 Twitter
 signal loom
Kinda odd but I just finished my server and network rack. Hope someone will find it interesting
lusty siren
Fruit tart, anyone?
 craggy parrot
Is that an Ada-Fruit tart...? Looks delicious!
lusty siren
I couldn't find any star fruit!
median spoke
That looks amazing
upbeat geyser
I think you have to beat level 4 to get the Starfruit seed. https://plantsvszombies.fandom.com/wiki/Starfruit_(PvZ)

Plants vs. Zombies Wiki
Starfruit is a plant appearing in Plants vs. Zombies, unlocked after beating Level 4-6. Starfruit attacks by projecting stars in five different directions whenever a zombie is in his line of fire...
lusty siren
Hah!
Had some extra fruit. And extra cream. So I made some mini crusts!
I still have extra fruit and cream but not NEARLY as much.
hard oriole
I animated a 3d character and tried to work it down to a low rez game character. This guy is still a little too big. 🙂 (RGB Matrix Featherwing for M4. Circuitpython. Displayio.)
tiny briar
Looks so cool!!!!
hard oriole
@tiny briar Thx! eventually i will work my way to a TFT and join the fun there ;^)
tiny briar
Yayyyy. I have lots of experience now hooking up TFTs and CircuitPython if you have questions. 😂
lapis jasper
@tiny briar I'm surprised you got it that responsive! Are you doing SPI or parallel to the TFT?
tiny briar
@lapis jasper Honestly all hardware is still so new to me I am not entirely sure. 😄 I am connecting via with the ICSP pins so perhaps that is SPI?
@lapis jasper here is my full setup
solar yew
my ThinkServer now has 8GB
lapis jasper
@tiny briar ya, that is the SPI connector. if you need more refresh speed 8 bit parallel would be faster. the pyportal does it that way
solar yew
I just found a NEWELEC MCS51 trainer board in the dumps.
it's a 8051 powered blast from 1995
Belongs in a museum
warped violet
I can't un-hear the Indiana Jones quote.
solar yew
hahaha
solar yew
Is it crazy that i feel emotions for machines?
naive flicker
No
solar yew
like when a machine dies.
i really feel sympathy for it.
cold tangle
I am often angry at my machines. 😄
solar yew
Office Space?
tiny briar
@lapis jasper thanks for the suggestion! I will have to look into it! Honestly I am already getting tons of requests to make custom ones for people... I really wish I knew how to make PCB boards and stuff...
it is all so daunting though ha
lapis jasper
@tiny briar you are in the right place to learn. this is the deep end of tutorial videos from ladyada: https://www.youtube.com/watch?v=Z7nSgrDasEQ&list=PLjF7R1fz_OOWJbMxQ3Pj4EKufAbbfO6RZ

From Maker to Market 01 – Concept – how Adafruit developed Circuit Playground, an educational board for makers – 6/25/2016 Saturday @ 10PM ET. Perhaps your gre...
tiny briar
Wow I'll watch this now thank you!
tiny briar
gotta do the time 8)
hard oriole
An old-school palette swap. Total excitement, i know. I'll have to find a use for this...
tiny briar
love it!!
 snow vortex
That looks amazing
 dense cargo
i hate this. you know my computer is restricted but a coding website called scratch is allowed. but now they put 0 minutes allowed and every time i open it, i ran out of time but i'll need to add one minute so i can copy paste the project
what should i paste
yea know i have a few animations and songs and games
and i still haven't finished the song Believer- Exit Snide Enter Heckyl
effyuefgefg
i'm thinking
oh i know! i'll paste The High Ground a star wars meme
 nimble sable
Building a game controller for my first project, here's a WIP
 north mural
Will there be a Show and Tell tonight? Not seeing a blog post about it.
Saw that Melissa finished the matrix sign. Pretty excited to see that in action. Looks awesome.
sharp comet
I think there is. I believe Scott mentioned that he was trying to work on something to show
north mural
👍
lapis jasper
@north mural yes, there will be show and tell. watch #live-broadcast-chat for the streamyard link and retry after every person if it's full
 subtle jewel
More info for the anomaly detection device:
Tutorial: https://www.digikey.com/en/maker/projects/edge-ai-anomaly-detection-part-4-machine-learning-on-esp32-via-arduino/afacfc3dbaf24c6c94a55c4afae1afb2
Video: https://www.youtube.com/watch?v=Ya923oUF33U
Code: https://github.com/ShawnHymel/tinyml-example-anomaly-detection

In this tutorial series, Shawn introduces the concept of Tiny Machine Learning (TinyML), which consists of running machine learning algorithms on microcontrollers and single board computers.
In the previous episode (https://youtu.be/3lCeYjnuTAk), we deployed our Mahalanobis D...

GitHub
TinyML example showing how to do anomaly detection with Python and Arduino - ShawnHymel/tinyml-example-anomaly-detection
ancient skiff
Right now we can't stream MP3s, only a file from SD or built in flash works. We'd love to lift the limitation but so many other projects are calling. (I don't know if web transfers are fast enough anyway)
@subtle jewel I made the same mistake as you, better place to drop links during the live broadcast is #live-broadcast-chat !
 grizzled cradle
I designed, printed, and assembled this necklace for my wife based on this tutorial: https://learn.adafruit.com/glowing-scale-armor?view=all

Adafruit Learning System
3D Print Shapes on Mesh Fabric and Make Your Outfit Glow
upbeat geyser
The finished LED projector on the 3D printed mount, controlled by an old ATtiny based 5V Trinket. The NeoPixel array at full brightness throws a pretty good image via the surplus projection TV lense.
I'm aiming it at a sheer curtain to provide a cheery display for passers-by.
desert timber
What a great idea! I'll have to find my scrap projector zoom lens (if I ever get back to the office 😦 )
 hollow cedar
hey guys, what days are show and tell
sharp comet
@hollow cedar the Show & Tell show is live on Wednesday nights.
but this channel is active all the time. You can post things your working on in here any time you want
hollow cedar
oh thanks
scenic siren
@hollow cedar There is also another show and tell after JP's show on Thursday evenings.
?showtimes
topaz leafBOT
MakeCode Live - 3pm ET Tuesdays
3D Hangouts - 11am ET Wednesdays
Show & Tell - 7pm ET Wednesdays
Ask an Engineer - 8pm ET Wednesdays
Desk of Ladyada - Random hacker times
John Park's Workshop - 4pm ET Thursdays
John Park's Show & Tell - 5:30pm ET Thursdays
Deep Dive w/Scott - 5pm ET Fridays
west zinc
Not my work, but had to share this cool UI: https://twitter.com/t_uebo/status/1275683459353194498


 elder smelt
some of you may be familiar with the FaceApp
I have done something which can't be considered a big deal, but I wasn't able to automate and it's not implemented yet officially. Maybe with a matlab AI and some code we could make it change in real time and without glitching which would be amazing.
Let the video speak for itself
Any coments, please ping me please
 bold tiger
tossing my hat into the ring for the hackday prize this year
https://hackaday.io/project/173362-agricoltura-io screencaps of PCB design progress are on their way 🙂
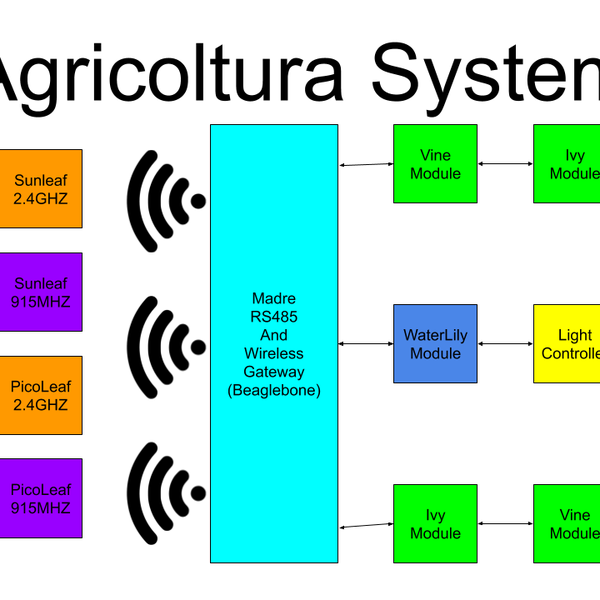
Agricoltura is the culmination of multiple projects I've worked on in the past related to the sensing and control of agriculture systems, notably HydroPWNics and SunLeaf.
Agricoltura aims to unite all the concepts of those past projects into a new system based primarily on RS...
 digital cargo
I made a really small project with CircuitPython Express board.
https://www.hackster.io/p5g41tmlx/let-me-play-gta-sa-chaos-using-circuit-python-4fff2e
nimble sable
Just completed my first Arduino project - a DOOM controller!
 hearty grotto
A quick proof of concept, where I tested a 3d printed channel filled with Bare Conductive paint. Was curious to see how it would turn out. It turned out better than I expected!!
rapid dirge
reworking my Birch Books project on CircuitPython — #sparky visited the first LEDs I tried on, so I went back to use the ones I actually have installed on the LEGO set 🙂
ancient skiff
I put together a short set of slides on infill optimization in cura: https://docs.google.com/presentation/d/1UEEeqrWlI71aQZxlWAmzxBd53xMf9Befph6YRUD9THs/edit?usp=sharing

 obtuse walrus
Challenged myself, 24 hours from starting in Fusion 360 to putting together a composite screen + analog audio Raspberry Pi Zero W gaming... thing. https://i.imgur.com/RdY1BAa.jpg
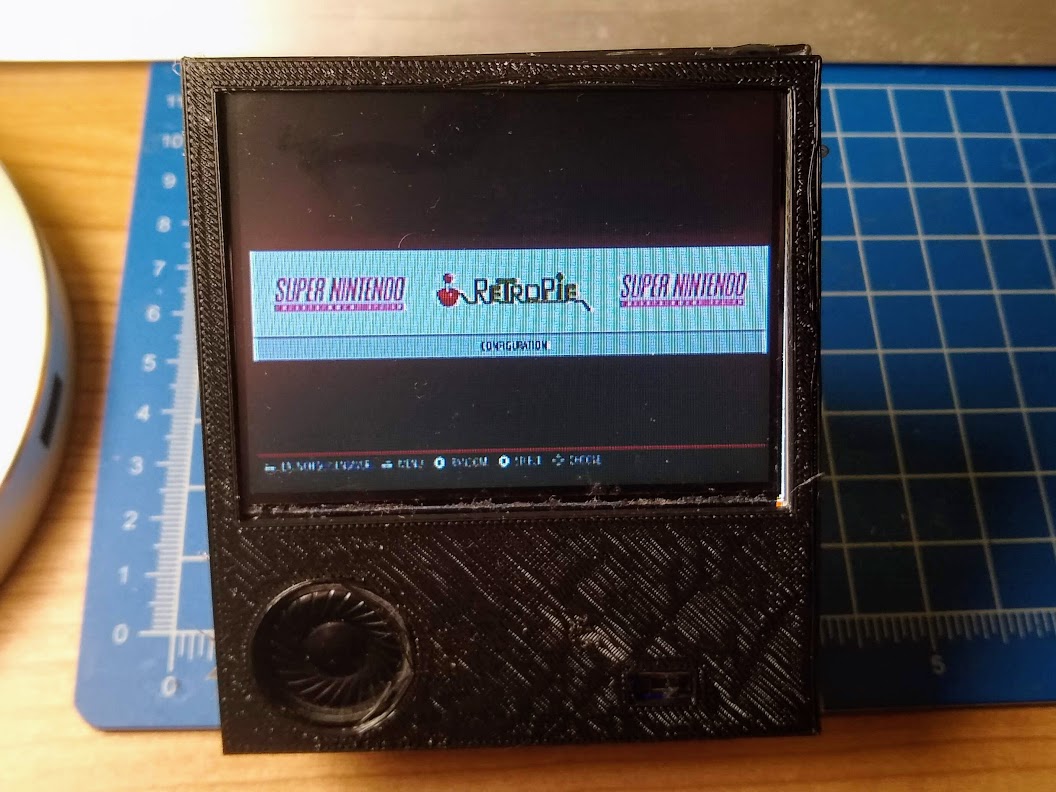
My printer hated going that fast and I only had solid core wire so it's VERY prototype :v https://i.imgur.com/q1sVbQx.jpg
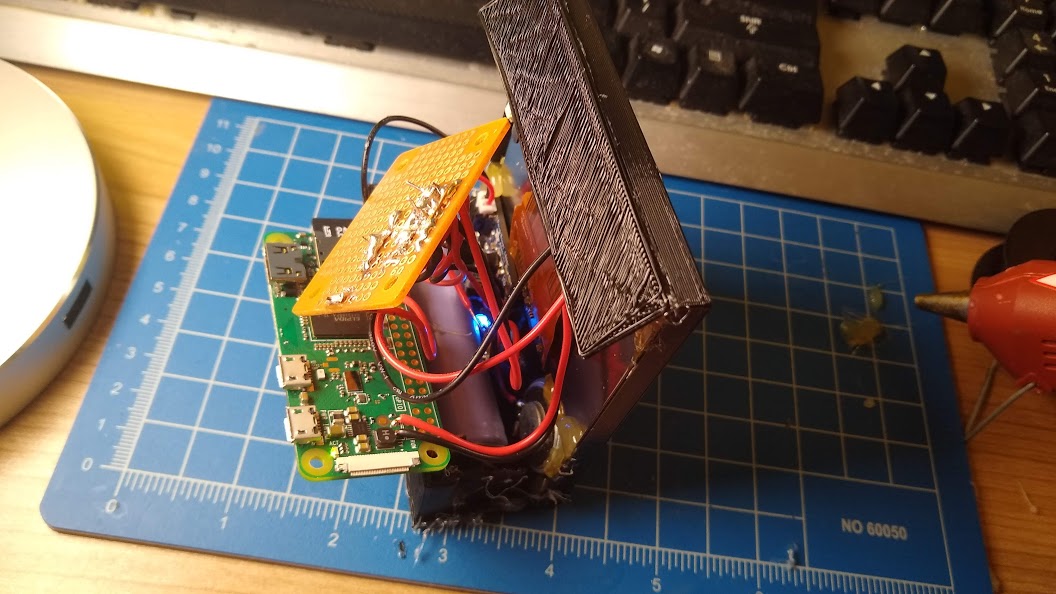
 craggy thicket
I remade a 70s radio to a Bluetooth speaker not really done get i wait on a Bluetooth receiver
I was thinking to repair it but RF is harder than I thought so I was like why not make a sleeper
ancient skiff
@obtuse walrus It looks a little rough but that just makes it charming
ruby ledge
I just added Win BMP RLE (run length encoded) image support to my bb_spi_lcd
@Arduino
library. What does that mean? It means you can use compressed image files effortlessly. GIF/JPEG are more compressed, but it's a easy way to save space on MCUs (even AVR). More to come...
GitHub
SPI LCD/OLED library which can be built for Arduino and Linux - bitbank2/bb_spi_lcd
 steel flint
https://github.com/dylanpoll/EmailLightBar this is my LED lightbar notification system I am working on at the moment, it is still in development but the end points are working and the express is, the email bot im working on atm and I am working on the expansion for listening to windows pushed notifications but let me know what you all think! feel free to message me constructive criticism !

GitHub
this is a LED light bar that increments LEDs for designated senders and by designated colors for those senders. I use this for work and school to know when a important email has been sent. - dylanp...
 foggy flame
Hello everyone!
This is my new project for advanced security systems in automotive - https://bit.ly/2VB5FAd
Check it out once!

Hackster.io
I am a student of grade 9. I have made this project for security and surveillance of vehicles from any part of the world. By Arijit Das.
 real nacelle
So this is where I can post for Show and Tell. My simple Bark Deterrent device. https://hackaday.io/project/173495-bark-cpx

A sound sensing device that generates a 17.5Khz tone to deter Dogs from barking
misty knot
Upgrading from my old 3D printer motherboard after I broke the last one
nimble sable
Decided to try building Hacker Shack's LED hat. I think I did a pretty okay job.
hard oriole
I accidentally specified 2 palette indices for the transparency of a tile once, and it worked. So in this test I tried to come up with a reason to have more than one transparent color. Hi-lighting a sprite with a border seemed like a good reason. So on this “coffee badge”, index 0 - the blue outside is always transparent, index 1 is the red border. Also I attempted to incrementally turn the rest transparent to fade in and out [but it looks a little ragged].
west zinc
Looks like I earned a ☕.
rapid dirge
Yes, the Circuitpython version of Birch-books is working!
sharp comet
Gorillas.bas coming soon to Circuit Python
upbeat geyser
Python running BASIC?
sharp comet
@upbeat geyser No (not at this time at least). It's a re-implementation of a game that was popularized on QBasic. But this one is written with only Circuit Python.
Although QBasic is one of the main things that piqued my interested in programming way back when I was young. Some part of me would be super stoked if we get to the point of having a basic interpreter.
 night zephyr
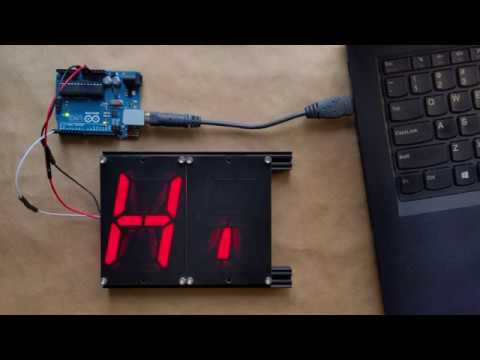
Modular open source sixteen segment display.
https://openkolibri.com/seg/16/
#arduino #technology #openSource
Check out this 16 segment display we made
rapid dirge
A few alterations to the code to work on the Trinket M0 and here's the testing lights working as a charm!
I spoke too soon XD it's acting up, but in the strangest of ways that is making me smile at least
(put it too close to wood, or get close with a finger, and it starts seeing phantom inputs … I guess I need to pull down the inputs
rapid dirge
yeah 1k pull down and it's working reliably
rapid dirge
And now all set up rather than using the test board!
hard oriole
Look what came in the mail today! A loaner TFT and half-breadboard from a generous community member. Thanks @tiny briar !!!
hard oriole
For you, made special! I want to experiment with toon shaders for 3d. I will share if anything works out. 🙂
tiny briar
Yay!! That is amazing!!
foggy flame
@junior agate Sir I have a problem regarding my project. Can I post it here ? Its regarding show & tell.
west zinc
A start at a mechanical 7-segment display. Two segments flip-flapping...
craggy thicket
Cool
hard oriole
@west zinc neat! I can only hope it makes a satisfying chattering sound when complete. 👂
west zinc
Sound is definitely already a feature pre-installed.
civic vale
@west zinc Heading for something like this: https://www.instructables.com/id/Mechanical-Seven-Segment-Display-Clock/ ?

Instructables
Mechanical Seven Segment Display Clock: A couple of months ago I built a two digit mechanical 7 segment display which I turned into a countdown timer. It came out quite well and a number of people suggested doubling up on the display to make a clock. The problem was that I was...
west zinc
Yep. My main inspiration is this: https://hackaday.io/project/163473-peters-7-seg-all-mechanical-display-prototype-2
With some of this one thrown in there too: https://cults3d.com/en/3d-model/gadget/7-segments
Main objectives: (1) use one servo per digit and (2) try to minimize parts count by using print-in-place where prudent.

This is a project i am working on. I now have a working 3D printed 7 segment display prototype, that is fully mechanical, can be used without any electronics. Se my youtube video for best description of it. https://www.youtube.com/watch?v=oHPHFjFOA3IThe goal is to be able to s...
 night panther
@rustic stag PT forgot to post the link to the Boredom Busting Breakout Bowtie after show ant tell today! :) Here it is: https://www.hackster.io/gpro1/boredom-busting-breakout-bowtie-c3f999 Thanks!

Hackster.io
You've got an interview at 10, but you're across the city and taking the train. This gadget keeps you entertained AND looking sharp. BBBB. By Greg's Builds.
hard oriole
I ported my rgb matrix animations to the TFT. Going from 64x32 to 128x128, there's more room to roam!
 marble mantle
and here is RoverWing extension board that David was showing on show and tell yesterday:
https://www.kickstarter.com/projects/david-bershadsky/roverwing

Kickstarter
RoverWing is a shield for Adafruit's Feather boards designed as an educational tool for making complex Robots with ease!
sharp comet
My Gorillas.bas clone for Circuit Python is playable now: https://github.com/FoamyGuy/CircuitPython_Gorillas

GitHub
Contribute to FoamyGuy/CircuitPython_Gorillas development by creating an account on GitHub.
 merry beacon
I tried putting together a tutorial-style repo on programming the PyGamer with Python, meant to be a next step after the last Adabox 12 tutorial. I got stuck on what to do next for a while, so hopefully this saves someone else some time and headache. https://github.com/abatula/pygamer_scrolling_game If you have any feedback, send it my way!

GitHub
Example of a side/vertical scrolling game for the PyGamer & PyBadge - abatula/pygamer_scrolling_game
solar yew
ancient skiff
I finished the 3d printed enclosure for an OCXO (oven controlled crystal oscillator). 5V goes in, very precise 10MHz comes out.
Tested against the GPS time, the short term error is on the order of +-4ppb or 1/8 of a second per year
inside is an older design by this fellow, the current version comes in a very nice enclosure. https://www.zachtek.com/product-page/10mhz-frequency-standard -- typically these devices use OCXOs that have been pulled from other equipment, they're a part that is very much worth salvaging.

ZachTek
This frequency standard can be used a time-base in the lab or to drive RF synthesizer and for various other applications were a stable calibrated Frequency standard is needed.It has four buffered outputs so it can directly drive up to four instruments.Internally there is a min...
craggy thicket
Finally done with the Bluetooth speaker from a 70s radio
Just missing some small pieces but that's just Astetic they are somewhere just lost them
sharp comet
@craggy thicket that is really cool! do you have the project written up online anywhere?
sharp comet
@merry beacon this PyGamer tutorial is really cool! Thank you for sharing.
vale wasp
@ancient skiff cool oscillator! How much did you drop on making it?
ancient skiff
@vale wasp I don't remember but the current model with enclosure is apparently $99 (and out of stock). The OCXO chips themselves are maybe $30-$40 on ebay used and the rest of the circuitry is fairly easy to understand if you want to design your own PCB
you need a voltage to adjust the frequency, regulated power, and an output..
vale wasp
Very cool, do you have something specific you are using that for?
ancient skiff
I'm using it as the precise timebase for a HP5315B Universal Counter; that, in turn, I'm using to measure the actual frequency of the 32.768kHz crytal of RTCs, so that I can compensate them to be more accurate.
the OCXO is "tuned" until it agrees very closely with the time from GPS satellites (to 10 parts per billion) so that's fine to measure these crystals, which are much less accurate (but much much cheaper)
vale wasp
Oh very neat, sounds accurate enough to use in a high frequency PLL
ancient skiff
yeah so it turns out (I haven't tried this yet) that for a lot of people these kinds of OCXO will work as inputs to clock generators like https://www.adafruit.com/product/2045

Never hunt around for another crystal again, with the Si5351A clock generator breakout from Adafruit! This chip has a precision 25MHz crystal reference and internal PLL and dividers so it ...
which reminds me of something else wild, building your own OCXO! https://qrp-labs.com/ocxokit.html
anyway, although it is out of spec you can use 10MHz as the input of the Si5351A and synthesize other very accurate clocks from it https://groups.io/g/BITX20/topic/si5351a_facts_and_myths/5430607
I believe that these GPS-locked units do something similar, though they have TCXO instead of OCXO. The GPS keeps the TCXO working at the right rate, so depending on your application it can be as good as or better than an OCXO since it is continually nudged to follow GPS time
GPS clock. Ideal frequency standard for supplying an external reference clock signal to the DG8SAQ Low Cost Vector Network Analyzer.

The Si5351 series of silicon-VCOs and clock generators is a quite remarkable achievement of technology. Earlier on, we needed two sets of dividers, PLL control logic, and a VCO – essentially …
 spiral rampart
Hello, I'm new here and wondering how can I bring my project at Show and Tell? I built somthing of a music instrument using Circuit Playground and like to show. Thanks
ancient skiff
@spiral rampart You can share photos & links about appropriate projects in this channel anytime. If you would like to be on the Adafruit Show & Tell video segments, the broadcasters put a link to "streamyard" in the channel #live-broadcast-chat at the start of the broadcast. Follow that link, and if time and capacity allows you'll get a turn.
?showtimes
topaz leafBOT
MakeCode Live - 3pm ET Tuesdays
3D Hangouts - 11am ET Wednesdays
Show & Tell - 7pm ET Wednesdays
Ask an Engineer - 8pm ET Wednesdays
Desk of Ladyada - Random hacker times
John Park's Workshop - 4pm ET Thursdays
John Park's Show & Tell - 5:30pm ET Thursdays
Deep Dive w/Scott - 5pm ET Fridays
ancient skiff
ET is US Eastern time, currently UTC-4
 random cradle
Made an amp with led strip
solid pumice
I built a thing! A week long project designed for families or schools to gather data using micro:bits and a Raspberry Pi and show it on an IoT dashboard. You use micro:bits to gather data from sensors, then use the radio on them to send data via a mesh network to a Raspberry Pi that sends it to a cloud service.
All the instructions are here:
https://github.com/jimbobbennett/smart-garden-ornaments

GitHub
The smart garden ornaments project! Contribute to jimbobbennett/smart-garden-ornaments development by creating an account on GitHub.
It's part of a month of IoT we're doing at Microsoft, all focused on the bad pun that is JulyOT - We've got a lot of other fun things there including AI powered smart home camera systems. https://julyot.com

TECHCOMMUNITY.MICROSOFT.COM
The month of #JulyOT is here! To celebrate, we have curated a collection of content designed to demonstrate and teach developers how to build solutions with Azure IoT services. Be sure to bookmark this page because for each week in July, we will be adding new content to this...
 summer shoal
west zinc
summer shoal
west zinc
Seven segments in action. https://twitter.com/CycleMatch/status/1283923200859144192?s=20


The video link above has sound so you can enjoy the full mechanical experience.
west zinc
A few project details:
https://hackaday.io/project/173798-mechanical-7-segment-display

This is a fully 3D printed mechanical digit display. It uses a few print in place parts and a total of 34 printed parts per digit.
desert timber
I don't know if that is a total violation of or the epitome of the KISS principle, but very very cool!
solar yew
Pcb for a watch
Still need to add the tp4056 lipo charger and ordered the wrong components for the supercapacitor and resistor for the rtc
hasnt coughed out magic smoke yet so thats great
desert timber
nicely done first smd project!
solar yew
thanks so much for all your help!
 mental coral
Who'd you get the PCB done by?
hard oriole
@west zinc fantastic project, and so audibly satisfying !!! 💯
 vast drum
got a RasPi + HQ camera set up in the garden taking timelapse photos of my flowers blooming... This thing really takes great photos
solar yew
Who'd you get the PCB done by?
OSHpark
i chose after dark because I thought it would be primarily black, with copper solder traces
but i messed up the pcb design for it so it looks a little funky
i think its fine though
solar yew
adjustable psu i am building
micro oscilloscope and pulse generator included.
i have 3 taps.
12v 5v and variable.
vast drum
Flower timelapse from my Raspberry Pi HQ cam in the garden last night 😍
mental coral
That's a pretty good and clear image.
Are you using the lens that came with the kit, or a cmount lens with the adapter?
vast drum
it's the "official" 16mm telephoto lens https://www.adafruit.com/product/4562
the wide angle lens is pretty good & clear too in the middle at least, more distortion/chromatic aberration near the edges
solar yew

Three tiny satellites that were only meant to operate for a few months are celebrating their two-year anniversaries of successful operation in orbit. All three CubeSats achieved their core and shared purpose: to test and validate new technologies to monitor Earth from space. T...
solar yew
I crossed a wire.
i thought it was insulated while testing..
and the smoke rose from mordor.
Already started building v2
solar yew

ancient skiff
Now with 3d printed enclosure
sharp comet
Thanks to JP's nice PyPortal Countdown guide I was able to whip up a Circuitpython Day cowntdown timer.
scenic siren
@sharp comet We were going to put one together! You beat us to it!
I passed the link on to PT and Anne. Can you post your code somewhere?
sharp comet
😄 yep, I'll push it and put a link soon.
scenic siren
Cheers! Feel free to tag me.
sharp comet
@scenic siren got it pushed into a repo here: https://github.com/FoamyGuy/circuitpython_day_2020_pyportal_countdown
GitHub
Contribute to FoamyGuy/circuitpython_day_2020_pyportal_countdown development by creating an account on GitHub.
clear matrix
Nice! I was tasked with doing the same yesterday. I'd like to write a guide, mirroring in much of John's guide but use your code with attribution. Are you comfy with that?
@sharp comet
sharp comet
@clear matrix Thank you! for sure that is fine by me. My code is essentially straight copied from JP with only the date changed.
and one of the iamge filenames I think
clear matrix
@sharp comet cool, I'll start work on it after my morning blog posts.
sharp comet
@clear matrix either foamyguy or Tim is fine. I don't have a preference of one over the other. Thank you.
sharp comet
It's "just" a 16 pin IO expander but getting it all wired up and working correctly still feels a bit like wizardry 🧙
west zinc
👍
desert timber
I'm gonna google up "neon dupont wires" those look snazzy 🙂
west zinc
@sharp comet saw your PyPortal counter on show and tell. Looks great. Couldn’t see close enough on the video but did you add a @terse totem style mustachio to Blynka?
sharp comet
Thanks 😄. She's got shades on. I found that picture in an art pack that is linked in the awesome-circuitpython repo. Here's the bmp from the countdown:
https://raw.githubusercontent.com/FoamyGuy/circuitpython_day_2020_pyportal_countdown/main/circuitpython_day_countdown_background.bmp
@desert timber the light from the LEDs along with the weird lighting in the room and the fact that I brightened the photo a bit make them look more neon and cool in the photo than they are to the eye.
I would totally get neon ones if they exist though!
desert timber
lol, i know, just teasing
sharp comet
@west zinc The new sparkline made it super easy to get the accelerometer data plotted:
dusk zinc
Not rocket science, but I wanted to prove to myself that standard analog multiplexer chips (74HC4051, 74HC4067) could switch arbitrary bi-directional digital protocols. So here, one device is hardwired to M4 I2C pins, 1 device's I2C SDA line is on multiplexer line 1, and the other 2 are on multiplexer line 0. ```I2C addresses: 0x48 0x5d
I2C addresses: 0x48 0x70 0x77
LPS35HW found
DPS310 found
SHTC3 found
ADS1115 found
LPS35HW 77 °F 994.8 hPa
DPS310 79.8°F 992.4 hPa
SHT3C 78.9°F 42%
ADS1115 10722 2.010v```Have to scan I2C twice, once for each multiplexed SDA.
upbeat geyser
That's neat! You're probably aware there are I2C multiplexers like https://www.adafruit.com/product/2717 but that should work for any digital signals.
dusk zinc
@upbeat geyser Yes, thanks, I do have one of those too. I was using I2C here only because it was the easiest protocol-thing to test with the generic multiplexers. Someone in the #help-with-circuitpython channel was asking about multiplexing 1-wire (and various other things) some days ago, and I thought this would work, but had no hands-on with it yet.
I wanted to make sure particularly there weren't any glitches when the bus switched directions through the multiplexer.
 simple lance
Here's my attempt at a clock with Arduino Uno WiFi Rev 2. I use NTP time and tried to use OpenWeather but hit issues with Serial not working
 coral mica
This is the current state of my long term pi tablet experiments
Based on a Pi 3a+ and 7in touch screen. Power is still an issue, the power boost 1000c I’m using only just keeps up any power hungry usb device is a complete no no!
upbeat geyser
There are, of course, beefier step-up regulators available like https://www.pololu.com/product/2891

This powerful synchronous switching boost regulator efficiently generates an output voltage of 5 V from an input voltage as low as 2.9 V while using an input current as high as 8 A. This regulator features reverse voltage protection, and unlike most boost regulators, it offer...
 wary lion


My latest completed BLERX project. A 1u rack filler with adjustable "knight rider" lighting effect. A commision from a friend for his guitar head rack. Used the #adafruit trinket m0, neopixels, and two potentiometers. #making #BLERX #FastLED https://t.co/NflORW5Zkh
Twitter
sharp comet
I made a productivity timer for Circuit Playground devices. Quick explanation video: https://www.youtube.com/watch?v=1NhO235O1VE and code: https://github.com/FoamyGuy/CircuitPython_CircuitPlayground_Productivity_Timer

GitHub
Contribute to FoamyGuy/CircuitPython_CircuitPlayground_Productivity_Timer development by creating an account on GitHub.
scenic siren
@sharp comet Sent to Anne for newsletter :)
sharp comet
I really like the way this 3D printed "Neon" Neopixel strip holder turned out:
vale wasp
@sharp comet nice job! I try to find uses or those since adafruit will sometimes just throw them in the box and I have a few
 thorn crane
Small project I made with a Trinket M0, arcade button and a Starbucks reusable hot cup... https://simonprickett.dev/making-a-single-button-keyboard/

simonprickett.dev
Recently we’ve all been spending a lot more of our time on video conference calls from home. I’m sure that, like me, you find yourself needing to mute your microphone and turn off the camera frequently. Perhaps something you can’t control is going on in the background, or some...
ancient skiff
iterating on a design for a jog wheel/shuttle, we'll call this an 'early model that showed promise'
 bitter hazel

After years of planning, months of basic electronics and programming exercises he’s finally completed a project by himself with little help (but with a ton of pestering) from me. He came up with th…
 round pike
So here's my current project: NFC Tag emulation (read: Amiibo). https://youtu.be/bRNZewXajJM

See the github page for more details: https://github.com/nitz/Odiin
Still pretty rough and all very "obviously devkit", but gets the point across as a MVP!
ruby ledge
I just released my Arduino GIF player library. It aims to allow playing GIF sequences from memory or SD card on any board with at least 32K of RAM. I've tested it on ESP8266, ESP32, Cortex-M0+/M4/M7.
https://github.com/bitbank2/AnimatedGIF
https://youtu.be/r-sUwICMUWQ
GitHub
A lightweight GIF decoder for playing animated files from memory or files on SD cards - bitbank2/AnimatedGIF
 coral mica
Thanks @upbeat geyser that looks interesting. I’m really tight on space and would like LiPo charging circuitry too, I’m very tempted to make my own!
upbeat geyser
Tablet engineering is like that.
hard oriole
I'm practicing parallax (in 2 directions) using 5 diplayio groups, one for each layer of depth.
buttons: left, right up, down, and coffee tally :^)
sharp comet
That turned out amazing!
hard oriole
Thanks @sharp comet! For me, it's a sandbox of things to learn, and a reason to learn them.
sharp comet
@hard oriole I really like the depth effect from the skylines in the background and trees and grass in the foreground. Also the trees changing to red/orange and back to green is a really nice touch as well. I will probably try to apply some of those lessons. Thank you for sharing!
west zinc
Someone made another of the 7-segment mechanical display. Now between the two of us we can count up to 99.
solar yew
That's great.
 random hull
Got the first fully contained battery powered wall mounted version of my IoT pop light project mounted to a wall! (well, a stud, but still 🙂 )
coral mica
Very cool!
hard oriole
@random hull do ya have a picture of it lit up?
random hull
@hard oriole I shot this vid the other day with lights in this new body. The fourth arm doesn't light up yet bc I only had 3 arms in the previous body and I haven't added in the fourth strip to the code yet https://vimeo.com/441841368

I got a bit of time today to sit down and wire the circuit board and lights for the v4 pop light prototype. There's still A LOT to do, but now that it's…
I need to fix a wiring issue in the circuit board and then I'll shoot another vid in the wall mounted version. I'm hoping to get the acrylic layers cut this weekend and if I do I'll have my first fully finished prototype :)
Also for context this is what the old body looked like https://vimeo.com/399727111

I spent some time today doing some quarantine soldering! I added a speaker and simple tones so that the controller can be a stand alone toy in addition to a controller…
hard oriole
@random hull looks like great fun! I like the new light shape too!
random hull
thanks! I'm really happy with my more recent progress and yeah, I def like the new body shape too. the first version (and the second and third versions) were ok, but this last one looks so much nicer
I'm going to make a bunch of these for my daughter's room and I'm planning on making a couple of different shapes that all have relatively the same body so that the component layout can be the same
and I'm 🤞 hoping to be able to figure out a custom circuit board design so I can put the esp32 directly on a board, but I'm much greener on that end so I'm not sure if it will happen, at least not in the near term
ancient skiff
I was intrigued by Colin's VOTE keyboard and wondered: what is the "best" selection of letters for a small keyboard. I wrote a program which tries to answer the question for keyboards of 1 to 6 keys. The output is long and contains light swears due to the base dictionary I used (oops!). Code and output: https://gist.github.com/jepler/3bf4578422884b767afd3819ae24302e and spoiler: the best 4 letter keyboard is "aest" which lets you type 57 different words totalling 257 letters.

 restive wasp
Hey everyone, can someone explain in further detail how the Show and Tell works? I have something to show and tell about, so is it just a matter of being here for 7 ET and wait to be called upon, or do I get in contact with people before hand to schedule what day to be here? How does that work?
scenic siren
@restive wasp To join, have your webcam and mic ready. Hang around in the #live-broadcast-chat channel, and a Streamyard link will be posted. Bear in mind it fills up fast, but people drop off after they present, so keep trying to join throughout the broadcast if you can't get in at the beginning. No need to contact anyone before hand. Show and Tell is always 7pmET-8pmET Wednesdays, so you don't need to worry about scheduling it.
restive wasp
@scenic siren Thank you very much!
scenic siren
You're welcome!
 short aurora
@ancient skiff You're the Jeff showing the magnetometer hack on Show and Tell last night?
ancient skiff
That's right
ancient skiff
yup
short aurora
Haha, now every time I see you I say, that's the great guy who helped me with my project - haha
Great stuff
ancient skiff
what projects have you been working on?
short aurora
It was the RGB matrix that wasn't working with the Metro M4
ancient skiff
aha that's been a few weeks ago
short aurora
I tweaked the code to use uLab and was able to make some variations:
Usual game
Two population with overlap in red
Contagion
ancient skiff
were you able to speed it up with ulab? I tried to while working on the guide but didn't get it to go too much faster.
short aurora
Not really, yours was way faster -using uLab added a few extra steps and such
ancient skiff
I feel like there should be a way to make it faster, I just couldn't find it
short aurora
Competition (related to #BLM)
ancient skiff
Have you considered bringing your project to the live Show & Tell?
short aurora
I really like how compact your code is - taught me how to use the logic to encode the number
Show and Tell - ha, not yet.
Just ordered buttons and have mocked out a UI to choose the games, perhaps plot out the generations
Plan to be done within two weeks
But thanks for the offer
ancient skiff
I hope sometime you'll feel ready. The audience are so receptive to everyone, so you shouldn't worry about that
short aurora
Haha, will do
I'm doing a 12 month challenge (project/month with meaning) and this is the first month project
One on time made me think of the time adjustment stuff you were showing, but not sure when I'll do it 🙂
ancient skiff
unfortunately we haven't fixed that bug yet so hold on to that uf2 I sent you https://github.com/adafruit/Adafruit_Protomatter/issues/13
GitHub
User "molecularist" on Discord reported a problem with the Adafruit RGB Matrix Shield and CircuitPython, which I reproduced. Some of the address bits end up inverted. This seems t...
short aurora
Month = 15-15th due to when I started
ancient skiff
that sounds good! I have been doing more projects lately but it's definitely got an "up and down" rhythm to it in my life
short aurora
If I only knew what I was doing, I would have helped haha
I was shocked when I saw I hadn't purchased anything in over a month - been using what I have
Felt wrong! haha
ancient skiff
Someone was telling me that when you brainstorm you should come up with 50 ideas, then expect to discard the first 10 because they weren't as creative as the ones you had to push yourself to find
doing more projects is a great way to exhaust the obvious ones and come up with some non-obvious ones
short aurora
Absolutely on both counts
Diverge before you converge on an idea
[BTW, I also religiously read everyone's project updates on the python newsletter - and I see you there too]
And, no, I'm not staking you - just have you in front of me as I keep learning from your code haha
ancient skiff
I do try to be pretty present on Discord as well. It's part of the gig, I guess you could say.
but now it's almost time to make dinner. Nice talking to you again though!
ancient skiff
(and if you blog / tweet the LED project drop me a line and we can probably get it on the adafruit blog too)
ruby ledge

M5Atom ESP32 driving OLED over I2C @ 800Khz
sharp comet
I'm tied up on Wednesday nights for a few weeks, catching up now. @ancient skiff Really neat magnet based knob input on Show and Tell.
ancient skiff
Thanks! It was fun, and people seem to like it. I wish I knew that the specific geometry I put the magnet in would work for others
 exotic sierra
If all goes well, I’m hoping to demo a feather I’ve been working on by mid August. Seeing projects like your magnet based knob gave me some ideas of additions to future designs @ancient skiff
ancient skiff
If it's about the position of magnets, the big thing I will say is pay attention to where the magnetic sensor is. It's not centered on the board. That's why the PCB is off center in the base of my jog wheel, so that the sensor is centered under the center of rotation of the magnet
you can measure it off of the open source PCB files, which load into open source kicad (but is intended from Eagle, proprietary software)
exotic sierra
I use Eagle so that shouldn’t be a big issue
 desert mauve
My embedded sys class project used the adafruit midi drum glove project as a base and added more sensors + bluetooth https://www.youtube.com/watch?v=OmQZySLzqGc&feature=youtu.be
 simple lance
Adafruit PyPortal Pynt talking to NTP and OpenWeather - my take on a clock/weather display
vale wasp
Very nice, like the custom head image
 runic sorrel
Woohoo! Got my ESP flasher/serial finalized and working! Open source - https://github.com/gcormier/eflashy32
Trying to post a picture of me holding it but having screen-capture issues in Linux... 🤦
Huzzah!
Spent maybe an hour and a few USB-C cables only to figure out I had the wrong resistors on the power signal lines. Woops!
warped violet
Once I wrote 330k on a silkscreen for a 330 ohm resistor and then wondered why I hadn't ordered any 0806 sized 330k resistors and also why the circuit didn't work right when I soldered some 330k resistors down.
upbeat geyser
Good use of pogo pins
runic sorrel
Between those, 2.54 regular header and 1.27mm header I hope I'm covered!
upbeat geyser
I'm also fond of these spring loaded clips for pogo pin programming
runic sorrel
Wow that is a very elaborate setup! 3d printer clip, custom PCB's! Those are larger pogo's that fit right inside the pin of the male header?
What size?
upbeat geyser
I bought the clip already assembled, I suppose I could dig it out and measure them (they may well be male pins soldered into ordinary pogo pins)
 halcyon plaza
 obtuse moon
I love it when components come together.
ancient skiff
From time to time I return with amazment to this project: build your own OCXO https://qrp-labs.com/ocxokit.html
(not mine)
 lunar lava
This is Mark Estes' Table code originally written for LEDMatrix for WS2812, that I ported to my Framebuffer::GFX API, then ran on top of Smartmatrix::GFX, and more recently ported on FastLED_RPIRGBPanel_GFX which I wrote as a glue driver to run on a Raspberry Pi.
Left is a 192x160 array (3x5 RBGPanels 64x32) and right is a 384x256 array (3x4 RBGPanels 128x64) which is stretching what you can run on an rPi before the refresh rate becomes too low to be usable.
Frame build info: http://marc.merlins.org/perso/arduino/post_2020-03-13_RGB-Panels_-from-192x80_-to-384x192_-to-384x256-and-maybe-not-much-beyond.html
lunar lava
Video of the bigger one when I was still building it: https://www.youtube.com/watch?v=fJQpB_crqp8

RGBPanel 384x192 resolution running Table Mark Estes14 with LEDMatrix, FastLED_RPIRGBPanel_GFX on top of ArduinoOnPc-FastLED-GFX-LEDMatrix
Code:
https://github.com/marcmerlin/FastLED_NeoMatrix_SmartMatrix_LEDMatrix_GFX_Demos/tree/master/LEDMatrix/Table_Mark_Estes14
and
https:/...
And a video of the smaller one: https://www.youtube.com/watch?v=b7f2l-qdVNw

Probably the limit of what you can output on a single rPi3.
3 chains of 5 panels (15x 64x32 pixels = 30,720 pixels).
This then runs Table Mark Estes14 with LEDMatrix using FastLED_RPIRGBPanel_GFX on top of ArduinoOnPc-FastLED-GFX-LEDMatrix
Blog post: http://marc.merlins.org/pe...
coral mica
Posted my Moon Phase E-ink display as my first project on Hackaday.io. All CircuitPython powered and an interesting learning process! https://hackaday.io/project/174149-moon-phase-display

I've used this project as a way to learn. It includes my first custom PCB, one of my first 3D prints, my first encounter with open source graphics software and some cobbled together CircuitPython code. I plan to write an update on each of these highlighting what I've learned, ...
I should say thanks again to all the folks here who have helped along the way and the fantastic authors of the Adafruit learrn guides.
west zinc
👍 nice design and case
 raw sparrow
Just finished this project. A smart mirror for my wife
random hull
I'm making progress on a work project. The gondola is a new take on my boss' original design (it didn't have the casters and it was one whole piece), but the pen actuator is my original design https://vimeo.com/446860786

Testing out the new pen actuator and caster gondola. Still some changes to make but it's coming along well.
it's so cool to hook it up and see it actually work
marble mantle
cool! what is the whole project? looks like iRobot Root robot
well, not quite, of course. But somewhat similar
random hull
the whole thing is a raspberry pi driven art installation. I'm trying to find a good video of it. Here's one of the vids from last year when I redesigned the motor mounts to work with large suction cups: https://vimeo.com/356479000

This is "Drawing robot motor mounts" by Chris Schmitz on Vimeo, the home for high quality videos and the people who love them.
marble mantle
wow
random hull
those cups held for almost a year before I had to pull them down to bring them home
my boss made the project and I'm working on refactoring the code to run as a multi-client API to drive multiple bots at the same time
I've got most of the client management done and I'm working on porting the old code over, cleaning it up a bit, rewriting parts that are cumbersome, decoupling stuff, etc https://vimeo.com/446637590

I'm working through the API and client code for the drawbot project. The client and room management is in place and I'm starting to port over the bot…
(The web code is the part that I'm actually good at 😛 )
(i.e. I'm originally a web dev and am a learning intermediate with electronics and fabrication)
oh, yeah here's the page on our company's website about the original project: https://paradowski.com/play/drawing-robot

Paradowski Creative
forgot we had that
cerulean helm
My homemade air hockey table. Infrared auto-scoring coming soon!
Apparently whiteboards have the same finish as air hockey tables.
I cnc milled a bunch of holes
 torn elbow
It can move much faster but I'll upload another video once it's closer to finished, waiting on servos to arrive
 vernal sluice
I am working on a project with a group of students from around the world (5 of us) and we are making a esp32 weather station project kit we hope to sell to get people into IoT. What is cool about it is that it allows people to focus on the micro controller side of things because we take care of the web side of things.
Our website is https://weatherstationproject.com and we would like it if you could take a minute to upload some code to your esp, create an account on our website, test it out and report bugs and suggestions! The code is here: https://gist.github.com/Michael2MacDonald/f2072b049555a347bcc325ab1c9ac757. Feel free to add any sensor you want as long as they are listed in the sketch.
ancient skiff
thank you. You can really see the ringing artifacts from my 3d printer but .. so be it
also my penmanship lol
ruby ledge
I just released my JPEG library for Arduino. Much faster and more functional than anything out there. It needs about 17.5K RAM for it's data structure.
http://github.com/bitbank2/JPEGDEC
GitHub
A low memory JPEG decoder for Arduino. Contribute to bitbank2/JPEGDEC development by creating an account on GitHub.
ruby ledge
Some perf numbers from my example sketch on various boards
ancient skiff
Next project calls for a keypad. I'm going hand wired. I'm currently debating whether I care about ghosting as I don't have 24 diodes on hand.. (the out of place key is deliberate)
 mellow wedge
oooo I just discovered this channel exists! Fun seeing a community of makers and what they've made!
Just finished this project. A smart mirror for my wife
@raw sparrow That's really cool. Did you follow any type of guide? And is that UI completely custom?
raw sparrow
@mellow wedge thank you. I did not follow a guide but I used an application called MagicMirror
If the UI was custom that would be pretty insane
untold bone
Did some testing with our students this weekend with some of our upcoming CircuitPython powered mecanum mini robots. Little bit of maze movement and line following: https://www.youtube.com/watch?v=DQCAv4Tm9jQ
https://www.youtube.com/watch?v=e5QG2Opfbnw

Robot Club - Mecanum Robot - Powered by CircuitPython - Line Follower

Robot Club - Running our custom built CircuitPython powered mecanum wheeled robots through our maze.
 fervent stream
Learn how to control a Traxxas Teton brushed motor R/C truck with a PlayStation 2 controller
https://www.youtube.com/watch?v=243xFXF-J-0

How to connect everything and use a PlayStation 2 controller for steering and throttling a Traxxas Teton.
GitHub - https://github.com/emryscass/traxxas-ps2
Discord - https://discord.gg/MSeFQE
sharp comet
It proved a bit difficult to photograph, but I managed to get rainbow colored custom fonts loaded by adafruit_bitmap_font
west zinc
That’s cool. Is the font rainbow or do you have a function to rainbowify a bitmap?
marble mantle
@untold bone neat! what are the mecanums you are using?
These seem to be much smaller than what I had met before
sharp comet
@west zinc I use the wheel() function from lots of neopixel examples to fill a palette with colors 0-255 then when setting values in the bitmap use a value based on the x position to determine the index to store at each location within the bitmap.
I did it directly with adafruit_bitmap_font but I think this technique should be relatively easy to use with bitmap_label
west zinc
👍 cool. Thanks for explaining your technique.
untold bone
@marble mantle they are from Yahboom, they are pretty cool: https://category.yahboom.net/collections/a-wheel/products/37mm-mecanum-wheels

Yahboom
Description The four omnidirectional Mecanum wheels consist of two left and two right wheels, which can create a complete Mecanum wheel drive system. Each wheel has 6 axles, and the rotation axis of the axle forms a 45-degree angle with the plane of the wheel, which has a stro...
torn elbow

Apologies for the vertical video- I was too psyched. Been waiting for parts forever and now my boy is moving
west zinc
Lot of servos! Looks cool.
ancient skiff
@sharp comet I did a per character rainbow in an rgbmatrix demo but that beats it!
sharp comet
My code for it is here: https://gist.github.com/FoamyGuy/11bfd66dc26b8c9331c341145d289714 if anyone is interested.
fervent stream
@torn elbow , very cool! do you have a youtube channel where you go over your projects?
torn elbow
@fervent stream I don't have a channel, though it has been a thought for a long time
To be honest most of my stuff isnt nearly as interesting as that hexapod
I do have a simple website that I keep reasonably updated, acts more as a resume than anything- sterminare.github.io
sharp comet
My soon to be Circuit Python powered Factorio Rocket Launcher button hardware has arrived
desert timber
Turn your key Sir!
exotic sierra
It’s not perfect, and there are a few issues programming it (possibly reversed the voltage when plugging in an external supply) but that’s okay.
Probably just need to build one up one more time and it should program right up 😬
vale wasp
Very nice, what IC is that?
vale wasp
Ah, very cool
exotic sierra
I’m sure designing a feather for some MCU is super easy, like really any of the Atmel chips. It’s a bit of a different beast with the MSPs. It’s a bit frustrating lol
But I definitely plan on at least showing it off tomorrow on show and tell if I can make it on
upbeat geyser
Some packages are easier than others...
sharp comet
Awesome!! 🌈
random hull
aw yeah! we’re finally finishing up the documentary and website for the spacecam project we did last year!! https://vimeo.com/448717760

This is a story about launching a camera into space. It’s about following curiosity wherever it leads (or lands), and the unexpected things that happen when…
 icy sonnet
Just a proof of concept at the moment, but an esp32 can be used to wire-sniff the serial monitor between the computer and an Arduino, allowing for a hardwired serial monitor.
I'll be building this into a case for use in classroom teaching environments (and to make filming serial based projects easier online).
Nice thing about this method (as silly as it is) is that all normally used ports remain accessible so it doesn't change the sketches uploaded.
sharp comet
Neat!
torn elbow
My hexapod is now battery powered, very exciting for me as I've never made a wireless bot before
Next step is controlling it instead of just running routines
west zinc
Can’t wait to see what this hexapod will do next. Looks cool, especially with the sonar eyes sensors.
torn elbow
Thanks! I put the eyes on mostly because it looks cute. But It'd be trivial to get it working, not sure what I'd use the sensor for though, I guess to avoid walking into walls
lapis jasper
@west zinc make sure to send that to @clear matrix for the newsletter
clear matrix
Tweet to @anne_engineer or email anneb(a)adafruit .com
ancient skiff
A good start. I don't use captive nuts much in my 3d printing but this seemed like a reasonable choice here. Need to fix other dimensions, re wire the keypad, and move the code to a feather
lusty siren
It's not fancy.... Yet. Figured you all might enjoy a "before" picture. Game Boy Color, with a multi-cart (one you can load many games into). The fun begins tomorrow though, when all the mods get here.
Technically the mods are for the other GBC I picked up. That teal one is in near-perfect condition, especially with the electronics and such, so I figure it'll be the one I keep fairly stock.
spring cosmos
Mechanism for my joystick is complete, yay
lusty siren
@spring cosmos Oooh that is cool.
spring cosmos
I think when I make the body I will have to learn how to do resin moulding to make a transparent case because it looks so neat 😛
lusty siren
@spring cosmos Yeah, they really are! I do resin molding with dice so if you have any questions feel free to ask! It's moderately simple and there's a few things I have picked up that should save you some time and frustration.
spring cosmos
Will I need a vacuum chamber?
lusty siren
I don't use one, I use a pressure pot. But there's silicones, resins, and methods you can use if you don't have one.
And speaking of clear cases... I modded the Game Boy like I said I would.
spring cosmos
nice
I was looking at 2 part resins and silicone but at the moment it seems crazy expensive
lusty siren
It's... not cheap.
The silicone you'll want is Sorta-Clear 12. The trick that people have found with that is if you put it in the fridge, it'll end up degassed with almost no bubbles. It's pretty thin and easy to work with.
From what I've seen the best resin to use is Liquid Diamonds, since it's pretty thin as well, and again. That helps it get rid of bubbles.
don't put resin in the fridge, though, since it releases some fumes as it cures and you really don't want that near your food.
spring cosmos
thanks, I will give that a go when I'm at that point
west zinc
I can’t handle these jokes.
spring cosmos
And through the magic of 3D printing
I love living in the future
and now I realise there's a reason joysticks have springs
lunar lava
More fun with my RGB Panels (arduino code running on a rPi, which is required for running so many pixels (allmost 100K) on a single MCU: https://www.youtube.com/watch?v=PbuB-QE-WjQ

See http://marc.merlins.org/perso/arduino/post_2020-03-13_RGB-Panels_-from-192x80_-to-384x192_-to-384x256-and-maybe-not-much-beyond.html on how the panels were built on top of rPi but running Arduino code.
And http://marc.merlins.org/perso/arduino/post_2020-01-01_Running-Fast...
 wary roost
Have you tried that LED film they have been showing lately? and that looks amazing,
exotic sierra
Nothing like bringing up 3 Nano boards you designed yourself 😄
 ionic helm
soil sensor/itsybitsym0/characterlcd
 high marten
after a bajillion years its kinda working. i need to multithread it and get a cooler for my pi cause its thermal throttling, but once its cooled down to something reasonable i should be able to work out timings to make it look smooth
clear matrix
?serverinfo
topaz leafBOT
 adafruit
Owner
adafruit#3230
Region
us-west
Channel Categories
8
Text Channels
54
Voice Channels
6
Members
24688
Roles
34

ID: 327254708534116352 | Server Created
·
ionic helm
Just soldered wires to the switches on this cheap amazon HD spy camera. Im going to hook it up to a trinket M0 to operate it. It will go into an underwater enclosure to be used as a baited remote underwater video recorder (BRUV). I will be using SCH 80 PVC pipe and fittings for the enclosure.
 hushed sparrow
Got my e-ink display from adafruit this weekend and made a "pwnagotchi" 🙂 It's a small device that "eats" wifi handshakes, made a video on the process here if anyone is interested:
https://www.youtube.com/watch?v=2DIPVpcjR1I

The pwnagotchi is an awesome project built for the raspberry pi zero that allows users to capture Wi-Fi handshakes as pcap files. Pwnagotchi is open-source and extensible, meaning developers can modify it and add their own code. Join me as I install and configure pwnagotchi on...
cobalt dove
You guys might think this is cool: I invented a new kind of 3D printable magnetically-actuated, electrically conductive switch today that pairs with my 3D printable magnetic separation key switch: https://youtu.be/t-PjrFusP0Q
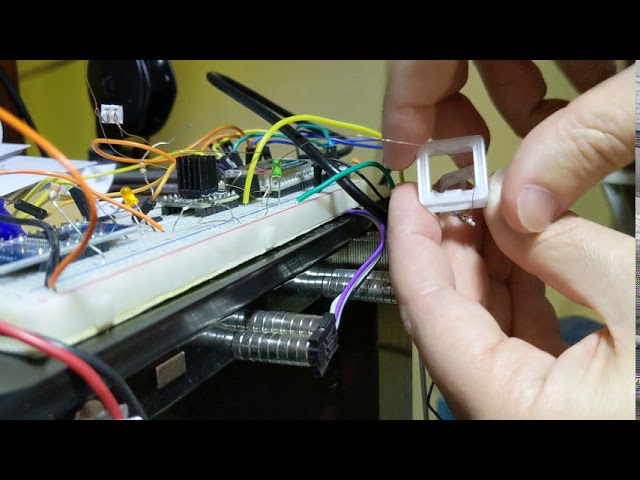
I've done it! Perfect reliability and brain dead simple assembly: A 3D printable electrically conductive magnet-actuated switch! I made it to work with my 3D printable magnetic separation key switch but it should work with just about any small magnetic moving nearby. It's just...
Soon I'll be showing off a whole keyboard made with nothing but 3D printing, magnets, and wires blood sweat and tears Love! I hope! Soon™
 half reef


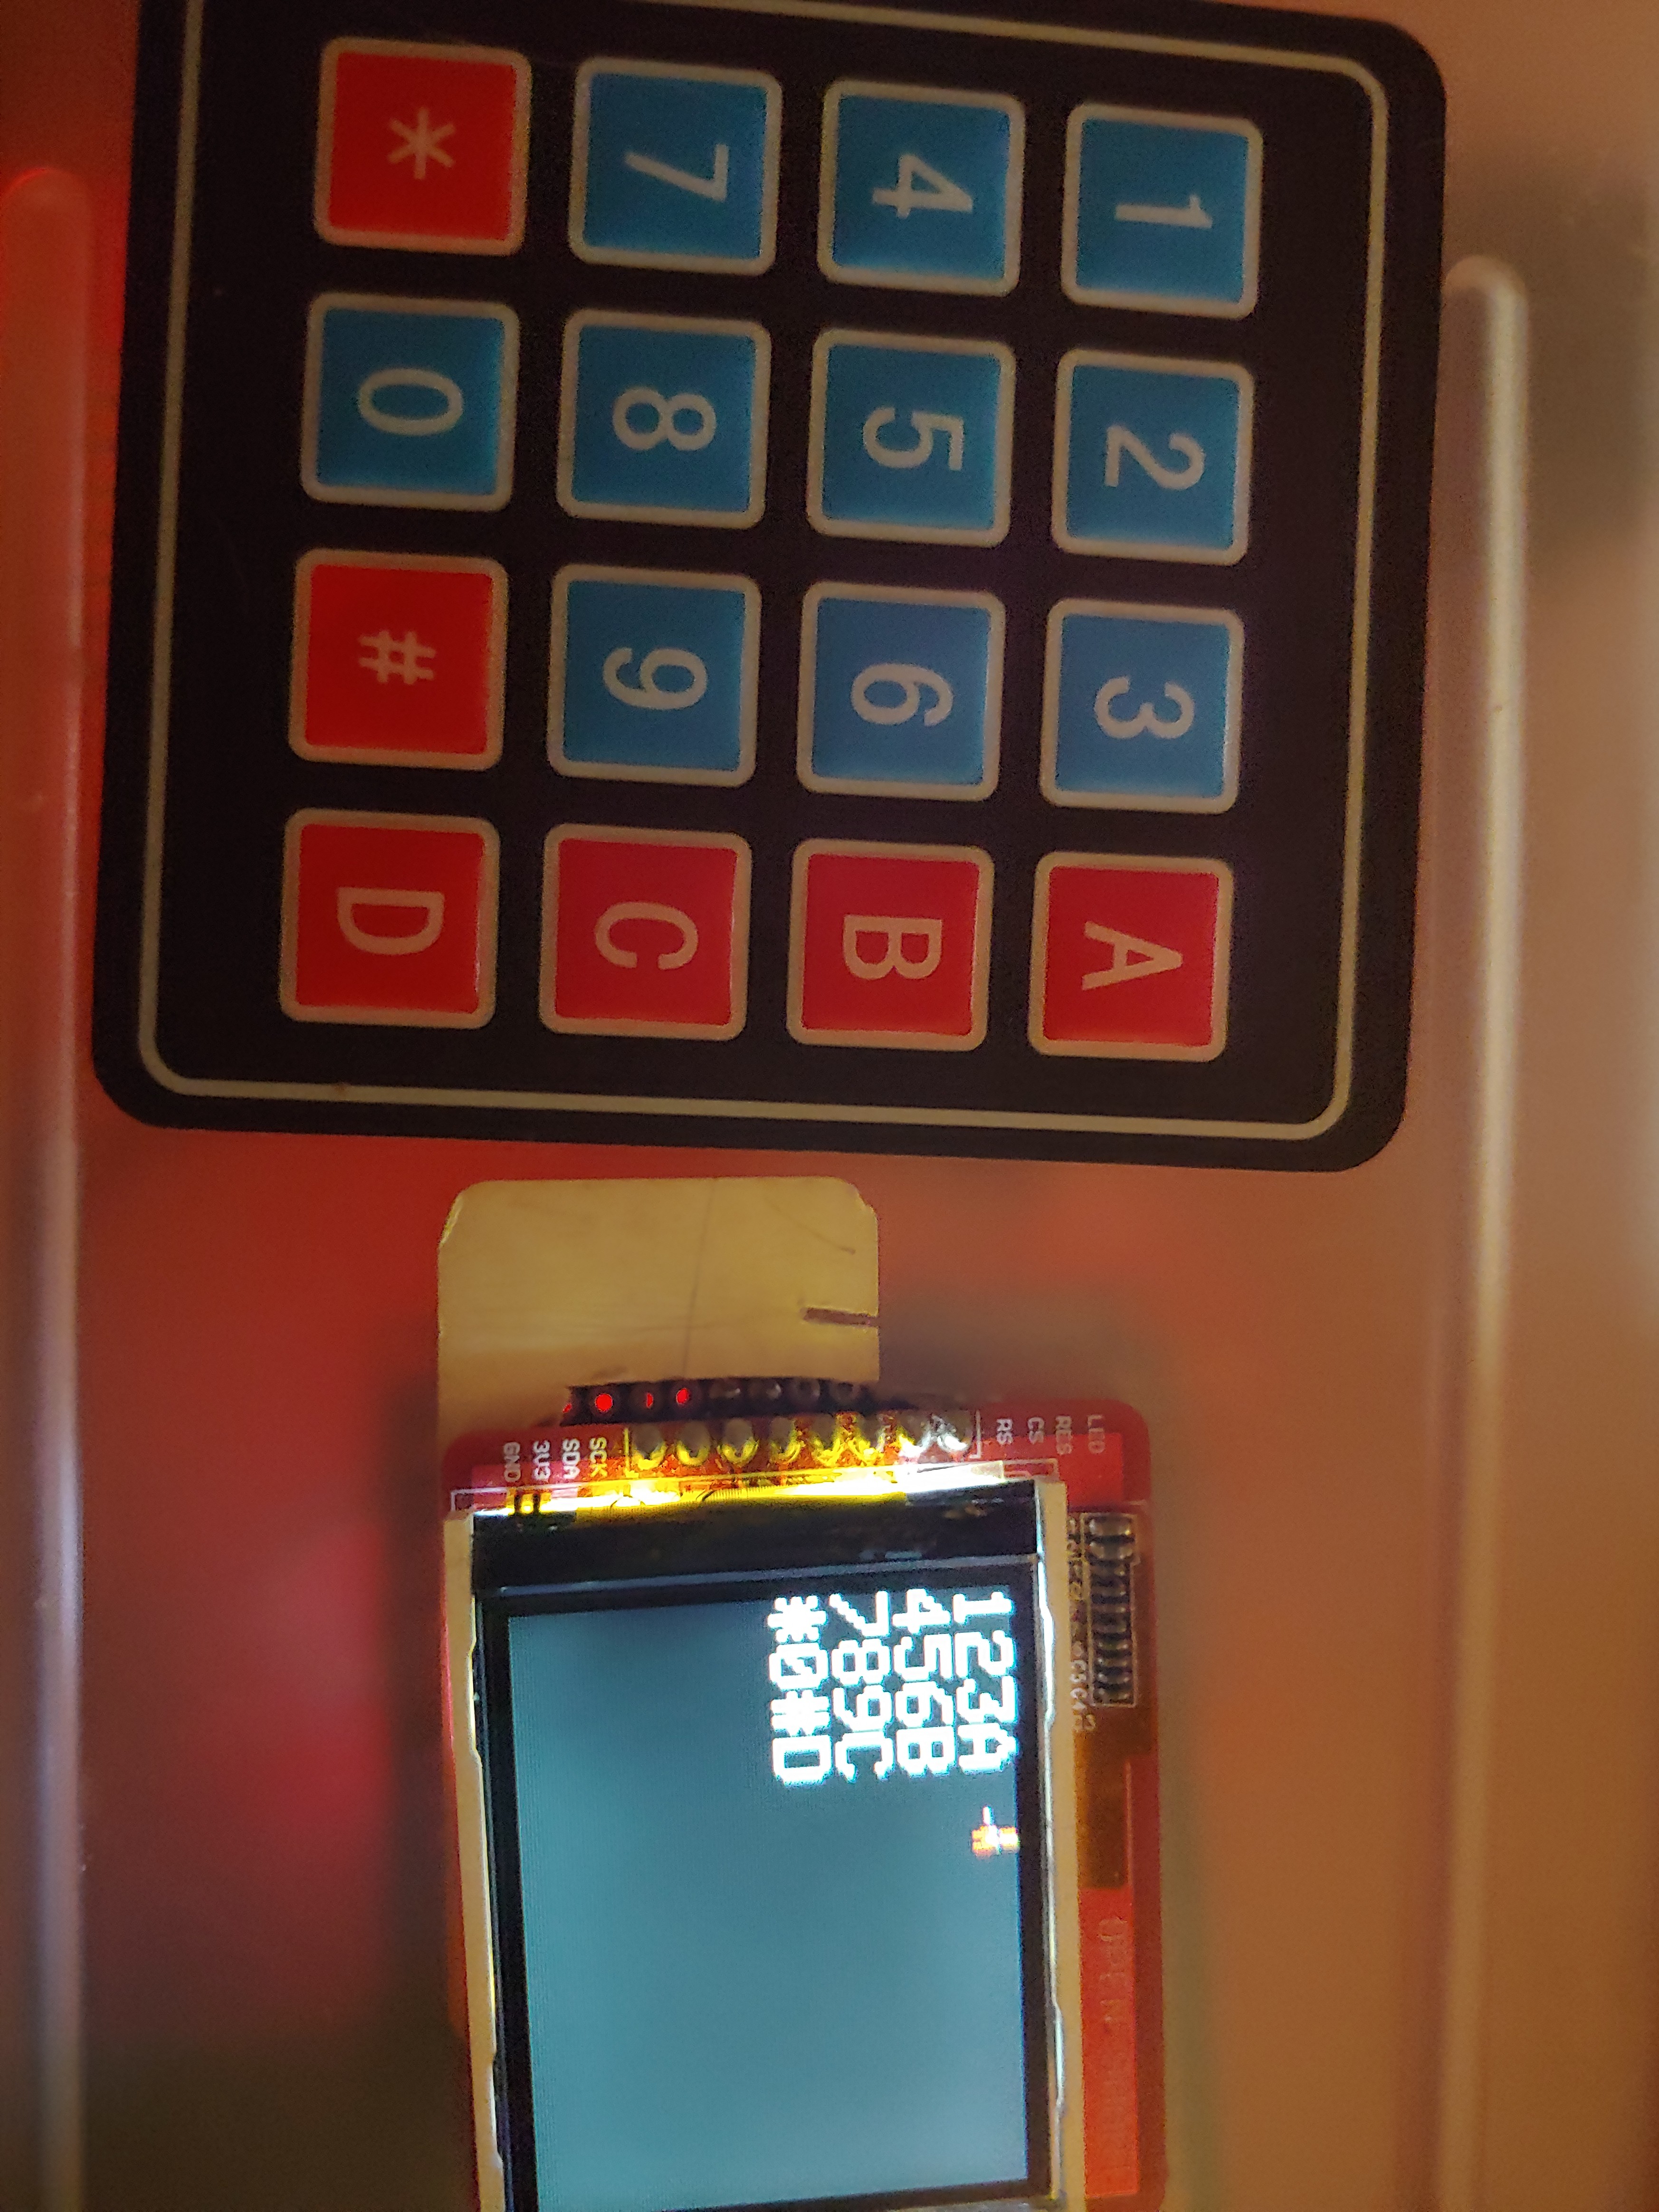


 ancient skiff
Stm32f405 feather
But most any m4 feather could work (the code is circuitpython)
vale wasp
Very nice, love it, could you do one with Cherry switches? 😜
I see you chose a sharp display, should have really good battery life, what do you get now and how optimized is the code for power usage?
ancient skiff
I have not. One featurei want is to paste the numeric result over USB so I have imagined it working "tethered"
Cherry switches would be fun but need a custom PCB. I guess a 3d printed plate design could work though
This is just perfboard
 round zodiac
Any suggestions on where to get very inexpensive illuminated tactile switches that have or can support an RGB LED shining thru a translucent cap? I need them to be less than $1. Something like these? http://www.rucoe.com/ProDetail.aspx?ProId=193
High Quality Illuminated LED Tactile Switches and Tact Push Button and Electronics Switches Manufacturers and Suppliers in China.
cobalt dove
@ancient skiff You can try my 3D printable key switches. I got a PoC working today to demonstrate that they do indeed work really well 😄 https://youtu.be/BCX-nEAebeE

NOTE: Re-uploaded because Youtube seemed to have fouled up the previous try.
I now have a working Proof-of-Concept of my key switch! It works great and doesn't miss a single keypress! Though in hindsight I probably should've used a resistor so the LED wouldn't be as ridiculo...
cobalt dove
@ancient skiff I haven't posted the models but I've shared them with many. You want to try it? Here! Haha
If your printer isn't well-tuned I can generate an .stl with a higher tolerance too. It requires a 6x2mm N52/"grade 5" magnet for the top and a 3x1.5mm magnet for the stem (any grade though the higher the better). The magnet sizes are parametric though so if you can get ahold of magnets that are merely close to those sizes I can generate a .stl that'll work 😄
BTW: I tried using a 3x1mm N35 magnet in the stem and it was awfully weak though it did work. It was ~32g of force which is lighter weight than any keyboard I've ever heard of haha
Also BTW: If you plan to print that I recommend printing in PETG @.16mm layer height (or around there... .2 works good too but sometimes the sheath doesn't turn out as nice-feeling). Ideally you'd want to print the stem in a different layer height than the sheath (body doesn't matter; go for .3mm if you want!).
Make sure there's zero first-layer squish or it can bind a bit in one corner. I recommend sanding it off with 320 grit or higher sandpaper. It won't impact the smoothness at all don't worry 😄
ancient skiff
I'll have a look. Sounds like a challenging print and for certain I don't have appropriate magnets on hand
I mostly don't go below. 2mm layers, my printer has some problem with very low extrusion rates, it severely under extrudes even though at .2 to .3 it's fine. I don't understand it