#show-and-tell
1 messages · Page 12 of 1
 leaden frost
 solar yew
You had to think, to think that, before saying it. Or typing it. :) mu hee hee ha ha
I'm more inclined to holding two contradictory ideas in the mind at the same time, and adjusting to how it feels to do so.
 fiery plank
I have a few other antenna systems that I wish to share later
fiery plank
My 2meter (144MHz-148) jpole antenna I had help making. It was the first one I made with the help of my Elmer (mentor in ham language) it is centered on 146MHz
 warped cobalt
Mine was made out of ladder line, it’s fantastic for portability
$5, at a ham fest, which I missed this year because they decided to hold it on Easter weekend
Being it’s in one of 3 most populated cities in the state, I really didn’t feel like going there
fiery plank
I am in the second biggest city in Kentucky. Our ham fest is quite small considering
The largest city has a slightly bigger turnout than ours
fiery plank
Last one for today.
Portable 5 element 2 meter yagi. SWR is 1.5:1. Split driven element
Talked about 25 miles with it. I should be able to talk 200+ miles
48 inch boom
warped cobalt
Flipping huge
The one I was talking about is RARSfest, which is biggest in state, but conflicting with holiday and local colleges isn’t too good of idea given location is right by sporting complex. Charlotte’s is 2nd biggest turnout
fiery plank
73s GN
fiery plank
@warped cobalt the elements of the 2meter yagi are made from music wire (steel rods)
warped cobalt
If I can get my piano retuned, I may have some of that around
fiery plank
Not piano strings either
@warped cobalt
These rods are not really wire
Music Wire, Spring Steel, .055 In, PK15 https://www.amazon.com/dp/B01LYECTOJ/ref=cm_sw_r_cp_apa_I.Z1AbKSHX2WB
This is what I bought. It needs to be stiff ish
solar yew
@fiery plank Looks like the J-pole is resting against a railing at the top of the staircase. and that the picture was rotated 90 degrees.
48 sound about right. Resonance is about 38.4" for a half-wave dipole at 146 MHz.
Yagi antenna designs can often approach a square form factor, with just slight elongation on the boom to make it unsquare (more rectangular). 48" boom fits that description.
I would have guessed the elements were made out of brazing rod.
fiery plank
@solar yew yes the picture was rotated 90°
I had a booger of a time soldering the music wire. I had a $6 3rd hand that kept falling apart. :| You get what you pay for. So, I just ended up borrowing a soldering gun and soldering on top of my parents granite table. It didn't hurt the table by the way.
 clever pebble
new part as more flatten cable but round connector back as torso get spool for the cable
solar yew
@fiery plank the usual wisdom was to get a huge soldering iron to solder directly to longer solid antenna wire, on the notion that such wire is an efficient heat sink.
The one time I had to solder solid antenna wire my friend already had the huge soldering iron, and did the honors.
My typical indoor antenna is made from stranded insulated wire; I usually solder a 'solder lug' to it, and use a threaded fastener to bind it.
Lately though I mainly use the Buddipole system, which is a press-fit similar to banana jack hardware, at the feed-point.
Through my exposure to the Buddipole I'm a huge fan of off-center-fed dipoles, as they're a better impedance match when erected at very low height (reachable with a short step-ladder).
fiery plank
@solar yew
Off-center-fed? Do you mean end-fed?
clever pebble
this bot have box with cable spool behind the torso
the headDock need more work but cablespool and box need adjust the size but torso need more thinking as how it will look
fiery plank
My portable HF antenna go bag. And yes, that is a Kyrbes skull patch
Frequency card/tuner for the super antenna with the 10m-40m coil
Setting up the tripod
Setting up the rest of the antenna. It has a telescoping whip, but I forgot to take a picture of it
Attaching the 80meter coil
The table or pole clamp. If i have 2 of these I can make a dipole.
And then the radials for a more efficient radiation pattern
I saved for 5 months for this set of antenna equipment. It was $300
solar yew
@fiery plank I mean off-center fed. As in not in the center, nor from the end. Off-center.
I think 'windom' is possibly a name for it.
fiery plank
Cool
 hidden saffron
Nfc stickers, reduce having to give out business cards
Excuse the poor phone quality of the camera
hidden saffron
Apologies if anyone was offended by my previous icon, may have forgotten about youngin's on here
 fervent beacon
 random hull
I posted this link in the circuit python channel and then saw this show and tell channel so I'll post it here too 😃 I've been working on a project for a while to build a sound box for my daughter using the adafruit trellis. This project has helped teach me 3d modeling, 3d printing, circuit design, how to use several components that are new to me, and python. https://vimeo.com/265899480

I recently was able to come back to the trellis sound box project and finally knit together the trellis and sound code using circuit python. It took me a bit…
and I'm almost done. Now that I have the code converted over to circuit python from C the next step is to write a little pattern memory game a la the old simon games 😃
 keen temple
I designed a new quadcopter model based on the Peon230. https://www.thingiverse.com/thing:629338

Designed for strength, function and light weight, build yourself this 230 size Quadcopter frame.
http://youtu.be/-e-3kbXzwzkhttp://youtu.be/jaZK9bDb17Uhttp://youtu.be/BU2Z-EG56js
Suggested Setup:
-Motor: RacerStar 1806 2280kv or Racerstar 220...
 onyx grove
Cooooooooooooooooool
 lapis jasper
@grave shadow what are the dimensions?
onyx grove
@grave shadow Any plans for an enclosure ?
 grave shadow
@lapis jasper 10cm^2
@onyx grove sure do have something up my sleeve
prolly something like my last one..
onyx grove
That looks coool
grave shadow
ty
grave shadow
green one was.. 12$ of pcb's (I have another for 9 sets) knobs are 1-2$ each, same for sliders, teensy's 20$.. so about $50-60
black one was closer to 80-90$
aud
annnd jlcpcb for the green ones, but the black one used pcbway
I think I prefer pcbway, as the finishes seem a little better.
grave shadow
also different colors other than green without costing too much more.
good to experience things at least once.
onyx grove
Thats the problem LOL
grave shadow
though I've found that PCBWay can get pretty good results in 1/2 the time and 1/4 the costs
they also have a referal program + review program, where they pay out for just showing off your projects.
which I have done to a couple reddit posts on the arduino sub
grave shadow
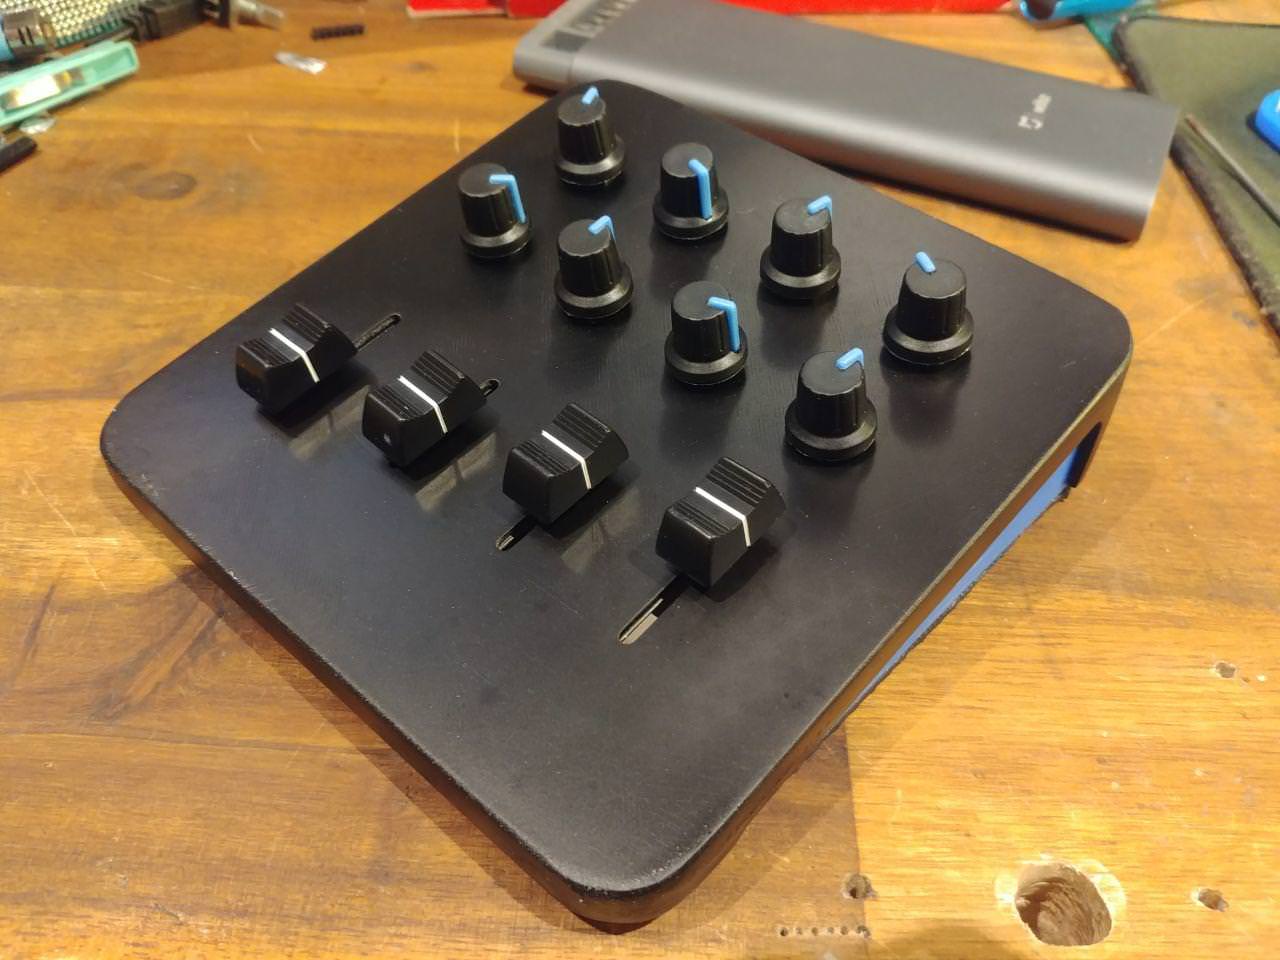
reddit
65 points and 25 comments so far on reddit
and same one on 3d printing
xD
they pretty much just cover the costs of your boards + postage
but free pcb's nonetheless.
 scarlet robin
hi everyone! i make plushies that can play like musical instruments :D
so far, i've made a turtle timpani, corgi keyboard, giraffe guitar, octopus ocarina and a cow bell!
working demo of cow: https://twitter.com/its_ashworks/status/988637806271475712


My cow commission is done! I stumbled upon some very weird issues that I couldn’t seem to find the answers for— the Bluetooth connection seemed report disconnecting every so often. I’ll be sure to hop on the @adafruit Discord soon to fin...
 Twitter
was wondering where i could go for bluetooth feather troubleshooting? 😮
scarlet robin
yay! thank you so much 😄
lapis jasper
you should join a show and tell stream!
scarlet robin
i'd love to!!
unfortunately, some of the plushies i've made are missing eyes/limbs since my roommate's dog got to them 😅
the only ones who survived are my octopus and my turtle-- and i'm currently waiting for my turtle to get back from france, haha! how do i join a show & tell stream?
lapis jasper
@scarlet robin https://learn.adafruit.com/how-to-get-added-to-the-adafruit-google-plus-show-and-tell-circle/about-show-and-tell

Have an amazing project that you want to show to Adafruit? Here's how to get added to the Show and Tell Circle on Google+
I can also try and get you the link here
scarlet robin
sweet! thank you 😄
lapis jasper
@scarlet robin mention me if you need help 😃
 vernal ferry

It’s surface mount soldering time #ts100 #gowiththereflow #atsamd21 #oshpark #solder #circuitpython #prototype #arduino
 Twitter
woooh SMD soldering time :}
 shrewd zinc
 raw kayak
Here is a screen grab of my Feather MO, TFT Shield and BMP280 in a 3D printed housing. Home brew altimeter in the wild. I do some rotation based on altitude and forgot to clear screen. That's what testing is for. This is zero fun testing. No fun what so ever.
onyx grove
Woah Its in Sky
raw kayak
It's been very accurate to 15k feet.
raw kayak
@onyx grove
raw kayak
Skydiving.
raw kayak
I've got a couple hundred jumps. Just started this project over the winter.
 woven relic
Got this cool little oled display off of Amazon! The top section of the display is yellow and the bottom is blue.
onyx grove
Noice
 tidal citrus
they call them 'jumps' because 'technical falling' was not good for marketing
leaden frost
the first step is the biggest. it's not the fall that will get you, it's the sudden stop.
woven relic
@tidal citrus I love your profile pic!
tidal citrus
thanks 😃
woven relic
Make me think of the bubble backpacks that you can put cats into and carry them around!
 signal loom
Cool
woven relic
I got to see someone doing that one day at a convention!
tidal citrus
it's a space helmet
signal loom
@woven relic you gonna do show and tell today?
woven relic
hmmmm. i dont have anything atm. I have a new version of the nerf fan gun in the works but all my parts at the moment are in a box to be sent off to my buddy who im commissioning to design and make the whole shell for me.
signal loom
Want a custom name plate for the gun?
woven relic
maybe! depends on if I'll have the space for it!
tidal citrus
I was tempted to show off my nearly hose matrix , but this room is a mess
signal loom
Cool just let me know
@tidal citrus just do what I do and move everything so you look clean
woven relic
lol @tidal citrus I just cleaned my room up a little bit today! I could show off my lightsaber but my code is a little bit buggy
@signal loom What do you make them out of???
tidal citrus
I could trow a sheet over it, but ther are other issues
signal loom
What the name plates
woven relic
Yeah!
signal loom
Whatever you want
woven relic
oh cool!
signal loom
I got a laser cutter
woven relic
lol
signal loom
I can do a stencil design for you
woven relic
Cool! I'll definitely let you know when I get the thing back in my hands!
woven relic
That sounds cool!
I gotta make a voltage checker now for my fan gun project. it'll be checked by my teensy and then output to the display
woven relic
Woooo! I have a voltage divider working with my arduino and its mostly accurate, im testing it with a 2s lipo and its jumping between 7.36v and 7.41v the proper voltage is 7.36v according to my lipo checker. I also have it displaying the voltage to my small display!
onyx grove
Now Thats Awesome
 eternal maple
Stunning.
 strong phoenix
@raw kayak holy moly! that is amazing!
 rain escarp
@raw kayak That's beautiful. Your creation?
raw kayak
It is. Used metal strut from the hardware store to create the shape. All thread to form it.
rain escarp
That is indeed a work of art. If you have a post on how you built it - even at a high level - I know I wouldn't be alone in saying we'd be super excited to read it!
clever pebble
not mine but this is cool https://twitter.com/mutzl/status/987593220971532288

Starting in a few minutes. May the demo gods be with me! #GlobalAzure #bootcamp #MVPBuzz
 Twitter
 vernal ferry
Got mah pcb's from OSHPark 😃 Was toying around with the first board version, this one's really the one I was waiting for.. :}
 terse totem
@clever pebble that's so cool looking!
clever pebble
he even presented it in the event as it was global and where i was he wasnt there butso cool what parts he used to made that happen
 balmy brook
I designed and 3D printed this case and it looks really good! You can get the model from my thingiverse! It has different types of tops and fan sizes! Please check it out here: https://www.thingiverse.com/thing:2871856
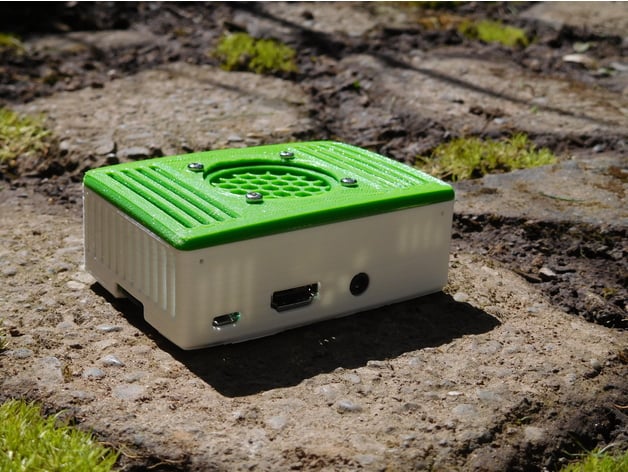
Looking for a case thats not ment for playing around? Then your in the right place! I designed this case using the thought of having something that was clean and looked great, whilest being mostly ment for work. It was a great build and would lov...
 south ravine
Medication reminder system for mom-in-law with Alzheimer
Raspy interfaced to google translate fo4 voice. Sends sms to care givers when pills are taken Orr missed - allowed mom to live at home alone for awhile longe
 proper kindle
hey i got another for the blue sparky pin. i just botched a pi upgrade from jessie to stretch and killed my bear
leaden frost
@south ravine that's great. There is a growing need to address concerns in elder care. Maybe you could expand that system into a wearable reminder pendant or bracelet when they don't see the flashing box. I hope you document your build somewhere.
onyx grove
@vernal ferry What board is that for...?
south ravine
@caitlinsdad#8800 thanks! I have a system overview but can’t figure out how to include a PDF
vernal ferry
@onyx grove learning how to design a pcb and such 😃
onyx grove
Ummmm I mean what board is that...?
vernal ferry
@onyx grove its a Trinket M0 (based on LadyAda's OG design) with SPI flash (based on @karmic fjord / @cunning lava) and also added the same lipo charge circuit as found on the Feather M0 Express
onyx grove
Cooool Nice Idea
How much did it cost...?
How much SPI Flash do you have...?
Nd whats the use...?
😅 😅 😅 😅
vernal ferry
@onyx grove ordered the parts to build around 10 trinket m0's at first (last year) and built like 2-3 to learn how to SMD solder and instead of making more I stopped so I can learn how to build my own board layout.
I have like ~5-6 SPI chips.
The use for the board? No particular purpose. I exposed all the pins on the MCU so I can also work towards learning how to make those pins accessible
vernal ferry
AHHhh.. well I was thinking of using it to store images for things like the LED wand maybe
onyx grove
Ooooh
vernal ferry
@onyx grove yeah next revision those will be pins- the first part is to get the spi chip working first and also get a better idea of size
onyx grove
Ummmm I was also thinking of making trinket variant
vernal ferry
could also use the spi flash for storing some stuff like settings for whatever it is
onyx grove
Oh
vernal ferry

Here, I share technical solutions that arised during the development of my solar-bike.
onyx grove
To even start I need Soldering setup Parts and PCBs
I have seen that
On Kickstarter maybe
🤔 🤔 🤔
vernal ferry
super tiny
vernal ferry
why did you drop your idea?
vernal ferry
ahh yeah you need some to get the right equipment stuff too
onyx grove
OFC
vernal ferry
I got my reflow station for christmas x)
vernal ferry
the TQFP version should be easy
onyx grove
Yeah Normal Soldering Iron will be enough for it
I had to make a custom Samd21 version to support my designs LOL
😅 😅 😂
I mean In Eagle
vernal ferry
aH!
onyx grove
Hehe
Ladyadas design was nice but wasnt able to understand the pinout and positioning (Talking about samd21 m0 Feather)
vernal ferry
what was confusing?
onyx grove
Ummm She arranged the pins in Schematics (Part) according to features and pin types mainly I arranged them according to their Pinout
vernal ferry
@onyx grove its probably mostly related to the format, whatever fits the board best
vernal ferry
my assumption is that based on the footprint and pin outs of a feather if you're designing a feather with a new mcu you still have to do the same pin-outs for all of them so that they're compatible, and each mcu has different pin configurations with different capabilities so whichever will fit best
onyx grove
Ummmm i was not using another mcu
Same mcu but removed some bits redesigned according to my needs maybe
@vernal ferry
vernal ferry
is the pin out the same?
onyx grove
TBH I first tried to use samd21e18 before even Ladyada did but I dropped the plan becoz of software
Nope
The board layout is different
I think me and Ladyada are connected LOL
@vernal ferry
 onyx grove
What's that...?
vernal ferry
just the idea that "if this exists, that exists; if this ceases to exist, that also ceases to exist".
onyx grove
Wheel of fortune..?
vernal ferry
#philosophy
vernal ferry
lol


 solar yew
If you avoid the cult meeting you can't get sucked in. ;)
Kind of like inviting the vampire in across your doorstep. You get what you deserve when you let it in.
The Dorje Shugden controversy is a controversy over Dorje Shugden, also known as Dolgyal, who some consider to be one of several protectors of the Gelug school, the school of Tibetan Buddhism to which the Dalai Lamas belong. Dorje Shugden has bec...
vernal ferry
@solar yew haha I'm well aware of these! I go the secular route
solar yew
I just woke up one day (unnoticed by me) without any remaining belief in anything like this. Tibetian Buddhists got the last of me, in a string of religious inquiries by me.
I still hang onto some odd astrology-related nonsense that I can't seem to shake.
vernal ferry
@solar yew far from beliefs, more like old-school DIY tips to get different perspectives
for me anyway
solar yew
It seems to me that life is too short to figure this stuff out definitively. You can spend decades under any one system, only to have it casually undermined by a singular observation you'd missed.
In the case of the Dalai Lama I just like to mention dorje shugden and let the reader investigate. Once the Emperor isn't wearing any clothes the rest of it falls into place.
vernal ferry
@solar yew heard of what's going in Myanmar? Watched a few documentaries on it 😐
solar yew
No but I have a friend who's from a nearby area (border town, pretty much).
Lives here, now (USA).
I don't get much in the way of current events -- amazes me how little the people I know care about such matters (and I am lazy and prefer someone else's synthesis but not someone else who does it for a living! hah)
keen temple
Arduino-chan and Metro-chan art made by me. What does everyone think?
 stable kayak
Noice
 full ether
I'm trying to build something that can balance on two wheels
I know it's cliché but I've managed to mate Lego and Arduino together
 cedar dew
This is the outcome of my Altair inspired throwing knives. 3D printed, mould then cast in resin
 delicate shuttle
@keen temple you should make one of those for the raspberry pi you made me remember this https://en.wikipedia.org/wiki/OS-tan

The OS-tan is an Internet meme that originated within the Japanese Futaba Channel. The OS-tan are the moe anthropomorphism/personification of several operating systems by various amateur Japanese artists. The OS-tan are typically depicted as wome...
 steel slate
I am not sure if this is the right kind of "mistake" for a #sparky (but def. a recurring mistake on my part). A single image photodrama detailing how my how-to-make-a-battery-with-a-lemon project devolved into a how-to-make-a-spare-set-of-test-leads project. Always remember... to never forget... don't put your toys away with batteries in them. ( I always thought plastic was kind of resistant to acids... things that make you go... hmmmm....)
 keen vortex
DSLR Camera Wireless Controller: http://bit.ly/2BSkm9P
This project uses @rustic stag hardware almost exclusively.
lapis jasper
Ordered this from OSH Park last night. Its a GameBoy cartridge to run CircuitPython on so the GameBoy is programmable with Python.  🕹
🕹
stable kayak
I love the thought of that
eternal maple
Very nice!
 frank wolf
I finished the hardware for my RGBW NeoPixel color tuner. It's how I pick hues and intensities to get the colors I want, and the display tells me the values for each color-element of the pixel.
The case was for a small ratcheting screwdriver and bits. I laser-cut the new faceplate, and double-sded foam tape holds a Trinket Pro 3v inside. The rotary encoder will drive a menu system, and it uses an ILI3941 TFT display. The FTDI-friend connection is extended through the case wall near the handle.
signal loom
nice!
frank wolf
The "brite" pot is read to set the Brightness value of the library (since that's a new setting, and I haven't hacked with it yet), and the pixel above it shows the combined values of the other pots. Otherwise, the pixel above R only shows the current RED intensity, the G pixel shows the intensity of GREEN, etc.
eternal maple
Wow. Excellent build! Like the Penguin-like case.
frank wolf
@eternal maple , I was lucky! It was just deep enough to use header pins on the TFT display (and short wires with connectors to the header pins), but I needed to use nylon stand-off collars on the nylon screws to get that placement right. I also cannot add a knob on the rotary encoder and still close the lid. But the case was "free" (it held the tools that I wanted, and would have wound up in the recycle bin if I hadn't done this with it. 😃
eternal maple
@frank wolf Repurposed case -- nice! Yeah, I keep a bunch of nylon and metal stand-offs in lots of sizes and lengths in the inventory. I've shifted to nylon for most projects now.
frank wolf
Next adventure, Si 7403 FM Receiver with RDS using i2c...
 hexed swallow
@lapis jasper That looks sweet hope it works!!
tidal citrus
@frank wolf wull you be doing a full write up on this?
lapis jasper
me too @hexed swallow !
eternal maple
Started to learn KiCAD today. Will take a while to master but will certainly push my PCB designs up a notch. The 3D visualization tool is fantastic for positioning components and watching for physical conflicts.
signal loom
Wow
 compact furnace
I wanted to show off a game I made for the Arduboy! (Arduino-based gaming platform on Adafruit.)


Just released Midnight Wild for free for the #Arduboy! You can download it right now! #Cowboy #GameDev #IndieDev #PixelArt by: @greayyscale
Likes
156
Twitter
Please tell me what you think! 😃
lapis jasper
@compact furnace That looks awesome! @cunning lava and I are interested in similar style games with CircuitPython
compact furnace
Oh, yeah? I have yet to do any CircuitPython stuff.
lapis jasper
yup! @cunning lava is selling a uGame: https://www.tindie.com/products/deshipu/game-10-game-console-kit/

Tindie
A handheld game console programmable with python.
and I have a gameboy cartridge on order that should be able to use the GameBoy hardware from circuitpython
compact furnace
Wow, that is cool. Like a Pokitto.
stable kayak
Ooh, nice
lapis jasper
yeah, they are way smaller than I imagined 😃
 cunning lava
that is a really well made game
 leaden hull
@cunning lava the uGame looks fantastic to help illustrate some kid coding workshop
the soldering on the battery is a bit annoying, I'l not used to that but I have to try
cunning lava
yeah, without a case it's hard to have a proper battery connector there
some people have 3d-printed cases for it, though
leaden hull
@cunning lava first I'll test it with USB, then I'll see if it can be a 3D project for my son who is discovering mechanical conception
cunning lava
sounds like a plan
frank wolf
@tidal citrus , did you mean a write-up on the color tuner, or on the FM-RDS receiver? 😃
I plan to do the color tuner (not sure if Hackster, Instructable, or Adafruit...)
tidal citrus
I think we are partial here 😎
cunning lava
Testing the accelerometer on the CircuitPython conference badge I'm designing.
lapis jasper
awesome @cunning lava !
strong phoenix
@cunning lava nice! reminds me of those little pocket ball-and-maze games.
stable kayak
This one demo is enough to make want to get myself one of these things.
solar yew
@Fabulous Robot#5588 do it
vernal ferry
@lapis jasper L.O.V.E that Gameboy Cart :D!
lapis jasper
😄 hopefully it works
solar yew
@compact furnace Dude please tell me a bit more about the arduboy
fps?
is there a webiste with good info?
google is failing me or i am failing it idk..
compact furnace
arduboy.com is a good starting place! It can theoretically run about 100FPS.
It is based off of the Arduino Pro Micro and uses an Atmega32u4, so it has 32kB of flash, 2kB of RAM, and 1kB of EEPROM.
Online, there are like 250 games and they are all free.
cedar dew
Hey Guys. Just sharing my progress on my Eye of Agamotto project. I’ve managed to complete the gesture sensor to lighting control so far. On to the stepper motor next https://youtu.be/Qgt2udUrnAc
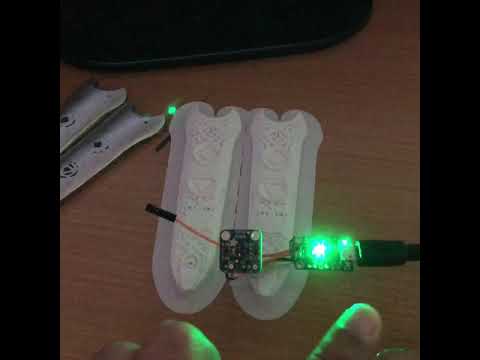
This is step one in my Eye of Agamotto project. I intend to use gestures to turn on and change the lighting effects then a stepper motor to open the eye and ...
compact furnace
That is legit! Love the idea!
eternal maple
Just had a breakthrough. Successfully hand-soldered a 10-MSOP (DGQ) package with 0.5mm pin spacing. I used lead-free paste with a T18-S4 HAKKO tip at 610F. The PCB pads were pre-tinned with lead-tin at the factory. Not being able to use the smaller chips was a project showstopper for some new stuff I wanted to do -- no more! 
 lusty siren
@eternal maple Soldering that sort of SMT stuff is always amazing
My personal method for chips like that is:
-Get one corner with solder. Set the chip in and align it.
-Get the opposite corner to make sure the chip sits still
-Giant solder blob on all sides.
-Flux.
-Solder Wick.
eternal maple
I've tried that, but my hands aren't steady enough for anything smaller than SOIC unless I use blue-tack or thermal tape. Using paste helps to hold the chip in place to help tack that first pin. I didn't have to use wick or additional flux, as well.
 ruby ledge
I've written some highly optimized code for I2c bit-banging and fast line drawing on the SSD1306 OLED. Here's a video of it in action running from an 8Mhz ATMega328. Blog post and code to follow shortly. https://www.youtube.com/watch?v=aQxOtyEr6eQ

8Mhz Atmega328 using bit-banging and very optimized Bresenham line drawing code. The line drawing demo uses my generic line draw function for everything in t...
blog post about the I2C code here: https://bitbanksoftware.blogspot.com/2018/05/fast-ssd1306-oled-drawing-with-i2c-bit.html

What The SSD1306 OLED displays are very popular with hobbyists due to their low cost and easy interfacing. The majority of the ones ...
Blog post describing the code: https://bitbanksoftware.blogspot.com/2018/05/optimized-bresenham-line-drawing-on.html

What Jack Bresenham invented a low computation line drawing algorithm many years ago. The benefit of his algorithm is that it uses only i...
solar yew
@ruby ledge i find the ssd1331 color displays are running horridly slow but i know it must be possible to run it a lot faster
ruby ledge
My code runs fine on the SSD1331, but I find that they run too hot. After a few minutes, the controller is too hot to touch.
 long vine
nothing groundbreaking, but I bodged together a device that dispenses a shot of vodka whenever I die in WoW (video of it in action starts at 1:57)
https://www.youtube.com/watch?v=-3HrNo_Wx1E

This isn't a tutorial, but gives you some technical details of how it actually works.
solar yew
tuns out overclocking the luma driver on rpi is easy
spi clocked from 32 to 64 mhz
seems to be cool
will run extended tests on the ssd1331
been running for over 10 mins
frame rate from +- 4 to 8 and holding
no heat noticed
i'm feeding it 3.3v
ruby ledge
At that rate, why only 4-8 fps? What software are you using?
ruby ledge
128x128x16bpp = 262144 bits per frame. At 32Mhz SPI, 32000000 / 262144 = 122 FPS (max theoretical framerate).
solar yew
@ruby ledge luma

GitHub
luma.oled - Python module to drive a SSD1306 / SSD1322 / SSD1325 / SSD1327 / SSD1331 / SSD1351 / SH1106 OLED
ruby ledge
in general, Python = slow
lusty siren

Instagram
0 Likes, 1 Comments - Jason (@andon_rt) on Instagram: “Look at this! A working menu system!”
solar yew
@ruby ledge
well pure asm is just going overboard 😆
 west dune
I made this lab bench power supply.It can output 13.5V and 3A
The input power is 12V and 3A.On the side is a fan too
solar yew

Josh gave Stefan a challenge to make an IKEA chair fly in less than six hours. Watch the No Plan Plane: https://youtu.be/y0ydLjsWdHg Watch us make a Little T...
😆
 neat locust
Uveiling ahead of Maker Faire, for show at our Hacker Space booth next weekend... Laser-cut 1/4" acrylic, legends and instructions etched into the parts. The RFID reader is under a fluorescent-yellow 1/8" sheet, marking where to hold your fob, and it picks up edge light from the Tori logo. RGB Neopixels behind the logo show a 50% brightness "white" until you scan, and then your fob serial number is represented by a sequence of colors drawn on the logo for 2 seconds. Every fob is different from another, but is consistent in what it shows. Driven by an Adafruit Arduino Pro Mini, It's mounted to a sheet of clear, etched acrylic, and the wires go through the acrylic to the board. The MCU is held in place by a piece of double-sided foam tape. The FTDI-friend interface is facing up for easy reprogramming in place. A barrel connector makes it east to run from a wall-wart power supply.
A colorful badge!
Idle, the logo is white, and edge-lights the RFID cover, which highlights the instructions etched in the acrylic
The Arduino Pro Mini is mounted to a small sheet of acrylic, with holes laser-cut for all the pins. The wires come through the acrylic to the board, and a piece of foam tape holds the board to the acrylic.
vernal ferry
@eternal maple nice smd work!
vernal ferry
I've had this image in my head since I got the pin:
https://www.instagram.com/p/Bi0n_ZdlcBB/

Instagram
1 Likes, 1 Comments - Timothy (@adaywithtimothy) on Instagram: “@adafruit ‘s sparky as an Olympic cauldron blue smoke #celebratemistakes #sparkythebluesmokemonster…”
eternal maple
The Trinket's limited pin count is perfect for most of of my planned (and existing) projects and the form factor keeps project enclosures small. CircuitPython is the cat's meow for these projects, as well. The biggest drawbacks I've encountered using the Trinket have been the lack of simple high-capacity battery management and stackable breakouts. The Trinket must be very jealous of the Feather's broad range of add-on boards. I decided to experiment with creating a Feather-like ecosystem around the Trinket, mostly focused on my core projects: simple one-motor robotics (the StringCar), weather sensors, and music. The first batch of prototype boards were sent off to OSH Park yesterday. After testing and fixing, I'll share the board layouts and BOMs via OSH Park. Here's the family portrait as of yesterday. 🐕
leaden frost
@eternal maple That's cool. Does that mean you have something that converts a Trinket M0 to a "Feather" board to accept Feather wings? A Universal Board Converter-Adapter thingy? now if you can only do that for interchangeable cordless drill batteries.
eternal maple
@leaden frost In a limited way, yes. The Trinket M0 can support I2C and UART communications in addition to USB serial. The adapter has jumpers to map the I2C and Rx/Tx pins to the corresponding Feather pins. The adapter also has a 100mAhr charger and a circuit to support the EN pin for on/off control.
I envisioned using some of the I2C FeatherWings with the Trinket M0.
So why not just use a Feather M0? The adapter can also support the other "Rover" boards so that they can stack with a member of the Feather MCU family.
If this works as designed, I expect the Wing adapter will evolve to provide more pin-to-pin adaptability rather than just the limited UART and I2C mapping.
leaden frost
Thanks. That DSP-G1 board paired with the Trinket may fit on a stylus revolutionizing Drawdio.
 tacit quail
Hi 😃 I've been tinkering with the Gemma M0 I received at PyCon and I have created three simple projects that reuse code but in different ways to control neopixels . Nice easy board to work with! http://bigl.es/friday-fun-adafruit-gemma-m0-and-neopixels/ 😃

bigl.es
Friday Fun has been away for three months! Have I been sat around watching TV? Yes....I mean no, I've been busy with work. But I'm back and this time its a personal project...! /me pauses for laughs Meet Gemma M0 Last week I was in Cleveland, Ohi...
 brazen dune
Very nice post @tacit quail !
tacit quail
Thanks @brazen dune I'll see you tomorrow at the Jam
brazen dune
Yes indeed. Hope to be at makerspace too, we should try out an adafruit badge from the learn system! @tacit quail
tacit quail
@brazen dune sure 😃 Do you still need a LiPo battery charger?
brazen dune
Yes I think I will, do you have a spare I could borrow?
 upbeat geyser
Now to build an ItsyBitsy to Feather adapter, since apparently the ItsyBitsy M4 will precede the M4 feather and the M4 Gemma.
brazen dune
@scenic siren ^^ Gemma M0
 scenic siren
@tacit quail Great post! Do you mind if we blog it up?
lapis jasper
I'll put @tacit quail 's post in the newsletter as well
scenic siren
Ok! Still finishing up the blog post.
eternal maple
The FeatherWing MIDI interface with piggyback synth PCBs just arrived. My first KiCad project! Now let's see if they work...
 bright hull
@tacit quail neat! nice headers on that pi also.
eternal maple
Yeah, we're good to go. 
solar yew
greenage.
upbeat geyser
The advantage of AdaFruit breakout boards: I can lift the designs and integrate them on my own boards. That's basically a BlueFruit LE in the upper left corner and a FONA 808 in the upper right corner.
 terse nacelle
Nice one. Did you manufacture the board yourself? @upbeat geyser
upbeat geyser
I had it made by Circuithub.
terse nacelle
Ah nifty! Didn’t know about circuithub. Is that a popular service here?
solar yew
$60 for the new arduino... $60 thats horrific
i cannot see it selling at that price
so by the time is gets here i have paid twice that
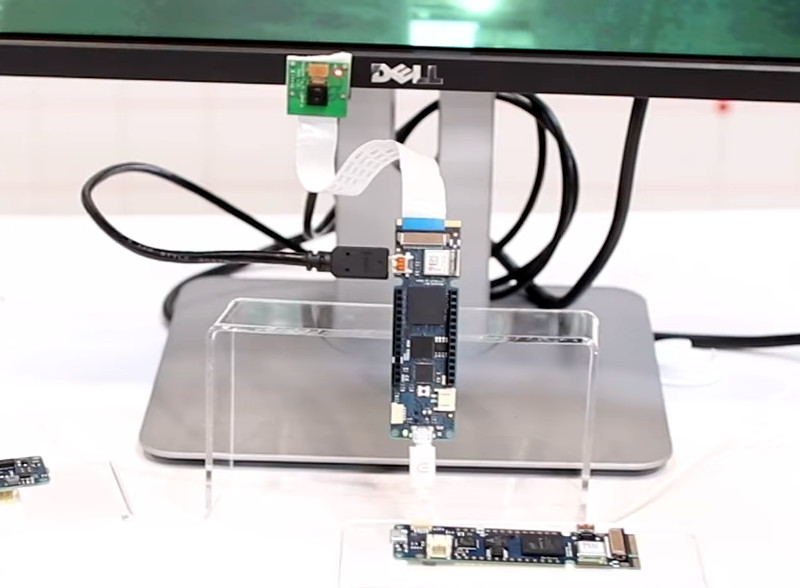
This week, Arduino announced a lot of new hardware including an exceptionally interesting FPGA development board aimed at anyone wanting to dip their toes into the seas of VHDL and developing with …
and then there is a chance it gets aborted like many others,
You know i'm tired of america rolling in money while the rest of the planet burns in poverty
strong phoenix
@solar yew its an FPGA dev board. That alone isn't a cheap thing to do. To boot (from the article):
Also on board the Vidor is a SAMD21 Cortex-M0+ microcontroller and a uBlox module housing an ESP-32 WiFi and Bluetooth module.
That's a lot to pack into a board, and keep the price point at $20...
lapis jasper
@solar yew its pretty clear to me they are no longer focussed on the beginner market where price really matters
solar yew
@lapis jasper unfortunate as it's a nice piece of kit but if you only let the rich play your user base shrinks,
amount of code and examples shrink,
it's like runescape and we know where rune scape went,
lapis jasper
@solar yew Yup. Thats why I like Adafruit's low cost electronics
solar yew
i really want a nice fpga board, the power can be astounding.
i guess i'm also full of trash, but hopefully pricing will drop.
lapis jasper
@solar yew yeah, that'd be fun. I like the ICE40s since they have an open source toolchain
ruby ledge
I'm working on a new GIF animator/converter for playing animations on AVR micros (especially suited for ATtiny85) connected to a SSD1306 OLED via I2C. It compresses this animation about 3.6:1 (56 frames compresses to 15k). It requires 0 bytes of RAM for the player code (writes changes directly to display buffer). Video is running unthrottled on 8Mhz ATMega328 https://www.youtube.com/watch?v=bR2E6PxxYTE

This is the source file
I need to document everything and will be releasing it as open source soon
ruby ledge
simpler animation running on an ATtiny85 https://youtu.be/l557jHgrOHQ

This 11 frame animation fits in 1906 bytes when compressed with my inter+intra compression scheme. Code will be release soon :)
cedar dew
Here’s a video of my Laviathan Axe 3D printed combined with a basic lighting effect that’s a spin off from the Hero power core sketch - https://youtu.be/RYJLRUfcKFA

3D print + Trinket + Neopixels = Awesomeness This project was done to show off the awesome effects that a few cheap electronic components can add to your pro...
solar yew
Did the reef aquarium show-and-teller tell where they got those wonderful, clear-top project enclosures with the very large internal dimensions? They were 'flat' (like the pancake MacIntosh computers, or a pizza box kind of shape -- but thicker).
solar yew
everyone has a ssd1306, here i'm sitting with a ssd1331 that is stuck at 3 fps
so lame
ruby ledge
@solar yew SSD1331 can easily do 60fps with SPI. What mcu/cpu are you using and what software are you driving it with?
solar yew
@ruby ledge tried driving her with a nano but that was no good
si i have her hooked up to a pi
right now willing to learn to code anything and use any lib
So suggest me a language and a lib and i'll do it
using a pi now because i want alot more speed.
some one else here gave me a mouth full that thats the display speed limit and i would need to drastically OC the display
and that was odd to me...
because the data sheet said otherwise
the other thing i tried was running nanoscreen to display the frame buffer but i still have no clue how to get it to work as most of the guides are trash
so i figured the next step would be just drawing manually
anyway i hope you got some idea's to share or help
i can code C "fast?", can code python "slow"
but yeah still seeing 3 fps even on the pi
ruby ledge
Try running my code on your pi --> https://github.com/bitbank2/SPI_LCD
GitHub
SPI_LCD - A simple C library for directly communicating with SPI-connected LCD displays
@solar yew ping
solar yew
@ruby ledge You my man.
are a legend.
ruby ledge
I hope it works for your display. I don't have a SSD1331, but I do have an SSD1351 (128x128 OLED)
I just started growing support for more displays as I was buying them. That code is really for any 16-bit SPI LCD. The init sequence and some of the commands change, but the functionality is basically identical across all of them.
I started toying with the idea of an Arduino version of that code, but I haven't come up with a use case and large color displays are kind of too much for Arduinos to handle due to their lack of RAM.
solar yew
Yeah the ram is a breaker
managed to code a tiny raycaster but it still drove me nuts
eventually slimmed down a few of the libs used but still hit limits
rain escarp
I remember a few weeks ago, there was this awesome Show & Tell'er who did a project of wireless picture transmission for a trail camera. Did he post any further details on his project?
ruby ledge
new blog post about my SSD1306 animation project: http://bitbanksoftware.blogspot.com/2018/05/practical-animation-on-i2c-ssd1306.html

Intro I can hear the thought forming in your head already, "Why write another blog post about those ubiquitous little OLED displays, isn't ...
 feral talon
https://www.youtube.com/watch?v=yhJFTiiwSlk&t=3s
A little dated hardware wise. But still a fun-with-adafruit lesson!
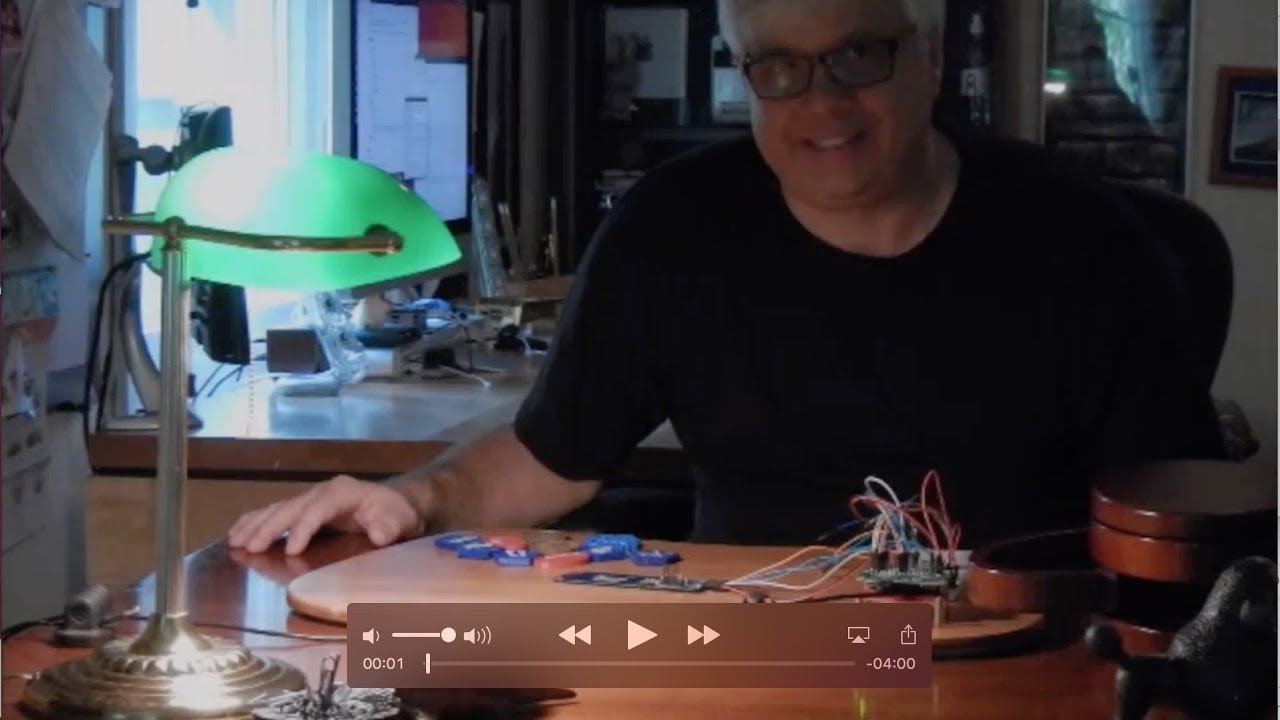
The final development version of my NFC-based Sonos controller in action. Written in elixir and deployed using the Nerves framework.
 drowsy zinc
Finally finished my bluetooth pulse sensing teensyduino colour LCD smart watch!
it's hella ugly! 😄
UGLY UGLY UGLY!
only problem is it has no UI feature for changing the time, you gotta plug it into a computer and run a little java program to grab the time from the PC and send it down the USB serial
just a big nasty window that says "TIME SYNC"
aaaaaand I'm now realising I forgot to put in a power switch. So I guess this thing is just gonna keep going until it dies? Poetic... almost.
solar yew
ahh finally my ssd1331 is doing 60FPS
Stunning, thanks for all the help
@ruby ledge
my raycaster has never looked cuter
ruby ledge
Great news, thanks for letting me know it worked
ruby ledge
@solar yew What is a ray caster and do you have a video of it?
ruby ledge
I give you a lot of credit for getting it to work. Most people who clone my repo don't understand how to code and give up after trying to run it without setting the right options/parameters
solar yew
@ruby ledge a little digging under the hood is all it takes
hidden saffron
I mean when showing off exhibits at a makerfaire, light up bow ties are the way to go right? Embrace the full geek
lusty siren
Go big or go home, right?
leaden frost
@hidden saffron No pocket protector? Oh, no pockets...dang, you got that covered.
hidden saffron
I mean lit up pocket protector sounds fun
warped cobalt
Need a shirt with 2 pockets
solar yew
That's a pocket electric fence!
leaden frost
An "As seen on TV" or "As Seen on Show and Tell" product?
hidden saffron
How did I not think of that... i laser cut everything...
leaden frost
@hidden saffron Awwww, twirling servo driven light up bowties are necessary.
fiery plank
@hidden saffron you two look cute together
signal loom
@hidden saffron I think I topped the laser cut bow tie. I have a full length laser cut tie
warped cobalt
@hidden saffron ya just getting brighter eh?
hidden saffron
I mean put a full length tie, lit up and lazer cut on a servo?
Mind the chin now eh
warped cobalt
Almost feels like it should say something at that point
hidden saffron
Clown noises?
 wintry obsidian
My first project ever! I'm really proud with how it turned out. Now, to make a custom animation to play. 😁
hidden saffron
Thats pretty cool! Which matrix is that?
wintry obsidian
The 8x8 yellow green
 ionic spire
That is so cool!!
 plush gorge
Magnetic levitating platform design that I'm working on.
plush gorge

These are designed for 16.4mm diameter 6mm thick or smaller round magnets. I'm using rare earth neodymium magnets, not sure if it would work other kinds of magnets.
First may I say I'm a newbie to working with magnet fields. That being said, when arranging the magnets, I've ...
Here's the link to the Thingiverse page with STL files etc. Lol in case I'm not the only one that wanted of these floating platforms.
lusty siren
Oh, that's cool. @plush gorge if it works, I'd definitely be interested in taking a poke at it (Once my printer is back online)
 coarse peak
I've never understood why magnets don't wear out ... or do they ?
signal loom
@coarse peak they do. After a lot of constant repulsion or heat
 small solstice
They slowwwwwlyyyyyy lose their magnetic field
solar yew
iirc molten rock aligns to the Earth's current magnetic field (if it can align at all, depending on specific metallurgy).
I think they can leverage this to discern large changes in that field, over geological timespans.
There's no 'battery' inside the atom to provide the Weak Force, the Strong Force and all that stuff.
So atoms don' t run out of power, I'd suppose.
I think we get used to thinking on a macro scale about things that do 'run out of power'.
I would like to hear a 90 minute talk on this by someone who really understands its nature.
coarse peak
Apparently the degradation is slow - that fridge magnet will hold for decades
solar yew
It is amazing, come to think of it.
 marble tapir
My family of Neopixel-powered RGB musical instruments (and accessories) is expanding.
solar yew
@coarse peak
https://van.physics.illinois.edu/qa/listing.php?id=340
The best analogy I've read is comparing a magnet, to glue.
solar yew
better:
http://www.feynmanlectures.caltech.edu/II_13.html
13–5 The magnetic field of a straight wire and of a solenoid; atomic currents
cite: You will have to accept, for the moment, that all magnetism is produced from currents, and that in a permanent magnet there are permanent internal currents.
In the case of iron, these currents come from electrons spinning around their own axes. Every electron has such a spin, which corresponds to a tiny circulating current.
Of course, one electron doesn’t produce much magnetic field, but in an ordinary piece of matter there are billions and billions of electrons.
Normally these spin and point every which way, so that there is no net effect.
The miracle is that in a very few substances, like iron, a large fraction of the electrons spin with their axes in the same direction—for iron, two electrons of each atom take part in this cooperative motion.
In a bar magnet there are large numbers of electrons all spinning in the same direction and, as we will see, their total effect is equivalent to a current circulating on the surface of the bar.
(This is quite analogous to what we found for dielectrics—that a uniformly polarized dielectric is equivalent to a distribution of charges on its surface.)
It is, therefore, no accident that a bar magnet is equivalent to a solenoid.
/end_cite
13: Magnetostatics
The Feynman Lectures on Physics
Feynman • Leighton • Sands
coarse peak
Thinking of "permanent magnets have permanent internal currents" ... is ok for an analogy but hard to accept
Anyway this started with the magnetic levitating platform showandtell - will it gradually stop levitating as magnets wear ... Will it fail sooner if more weight is on it...?
solar yew

Epistemology ( ( listen); from Greek ἐπιστήμη, epistēmē, meaning 'knowledge', and λόγος, logos, meaning 'logical discourse') is the branch of philosophy concerned with the theory of knowledge.
Epistemology studies the nature of knowledge, justification, and th...

Instructables.com
This is a project that will amaze and inspire! What good is all of that science know-how if we can't do something cool with it, right?With this project we are going...
 junior agate
https://i.imgur.com/nDp00qM.mp4 Made a little mailbox to sit on my desk and let IFTTT + Adafruit.IO + Gmail let me know of incoming emails
 scenic siren
Here's a link on how to participate in Show and Tell: https://learn.adafruit.com/how-to-get-added-to-the-adafruit-google-plus-show-and-tell-circle/about-show-and-tell
Have an amazing project that you want to show to Adafruit? Here's how to get added to the Show and Tell Circle on Google+
solar yew
what happned to ask an engineer?
 lucid bloom
Gonna try and demo new features on my airsoft computer, I added a laser range finder and some more software features. I broke the camera cable so I ordered some more. I hope I can get it ready to demo in time
fiery plank
#pew
keen temple
I'm designing a new drone. What design do you like better, right or left?
warped cobalt
Hmmm, I like left for the longer arms, but right has triblades, and that normally isn’t done
Tho, that does help keep it compact for carrying
lapis jasper
@keen temple I want one now that focuses on being quiet
signal loom
@keen temple wider props are more stable but compact trirotors are faster and more compact
lusty siren

Instagram
0 Likes, 1 Comments - Jason (@andon_rt) on Instagram: “Refurbished TV! 50 inch plasma. Only needed a replacement power board.”
Also, my feet.
lucid bloom
I got the laser range finder working, the crosshair and GPS overlays are made with opencv so they don't appear in the video
https://youtu.be/9i8ikXsLy5I

 proper dirge
Finished printing and test fitting the initial design of the extruder carriage for my 3d printer build. Need to finish the belt clamp and do some tests, but so far so good.
keen temple
My Engineering Week (EWeek) competition robot finally got approval to be shared on our Lockheed website: https://www.thingiverse.com/thing:2947885

Claw and Tank Robot designed by Charles Crawford III for Lockheed Martin Engineering Week (EWeek) 2018, team Spark Chasers. Inspired by: RC Speed Tank by Bryant87, EEZYbotARM MK2 by daGHIZmo, Mantis Gripper by 4ndreas, and Robot Arm Plattform by Runkel
hidden saffron
New server at work
Going to be running all our ticket software and webservers in here
lusty siren
Where did you get an old ATM from?
hidden saffron
Im programming for a locksmith company so we have them laying around
Typically we cut off the top half and turn the bottom vault into a safe, but this one I got my hands on first
Also interesting note, this particular machine was just pulled off the streets but still ran Windows XP
hidden saffron
Ngl havent dived too much into that. Was more excited to be able to dive into programming new features. The graphics was surprisingly really good
Thats mondays project:P
warped cobalt
That is partly funny, but really resourceful in recycling
hidden saffron
Is there a way to post videos to discord?
warped cobalt
Given how old it looks, not surprising it was still on XP-chan
hidden saffron
majority of atm's I touch are still xp and its terrifying
fiery plank
and thats why they are a threat to your money
 ionic sun
If I want to join a show and tell, are the instructions at https://learn.adafruit.com/how-to-get-added-to-the-adafruit-google-plus-show-and-tell-circle/get-added still accurate? It says 'post here' to be added but I don't know where that is. I can't see any means of posting.
Have an amazing project that you want to show to Adafruit? Here's how to get added to the Show and Tell Circle on Google+
lapis jasper
@ionic sun it should be. sometimes the event doesn't get posted until right beforehand. if you are on discord I can get you the link too
signal loom
First fusion 360 project! Business card holder. If only we had some cards...
And yes this is a render
signal loom
lusty siren
@signal loom I could give you some Phoenixborn business cards, but I don't think that's what you are going for.
 lapis saddle
My name is Jeromey and a friend and I started Tactical Mod Works, a small company that sells modified nerf guns. I am designing a custom gun similar to the FDL series. The first gun will be featuring a circuitpython itsybitsy so customers can upload code simply. Look out for the Oblivion FP1, coming within the year. I will try to get it on show and tell when it's done.
 mossy carbon
WIP now taped up for test next step is te sew it with invisible thread. I'll be visible next time i'm walking out late 😃
fiery plank
Cool
vernal ferry
Have been buried in projects for uni... here's a series im working on as a mock PSA for Makers Making Change, a local version of ATMakers
Looking forward to working on more hands on electronics stuff to share during break :3
lapis saddle
@mossy carbon lookes great
@vernal ferry can you send a higher res version? I want to read the small writing in the bottom row
vernal ferry
@lapis saddle Lorem ipsum sit dolor amet 😄
its all place holder text, just have to show the prof there's space for text
lapis saddle
Ah
fiery plank
@vernal ferry salveas, quid agis?
vernal ferry
@fiery plank https://baconipsum.com/ XD

Does your lorem ipsum text long for something a little meatier? Give our generator a try... it's tasty!
fiery plank
Lol
upbeat geyser
I was just awarded US patent 9,996,996! huge grin
lusty siren
Ooh, nice number. What for?
upbeat geyser
It's a way to derive a good digital signature from an analog device (electrically, like an array of resistors) using a microcontroller and no additional hardware.
lusty siren
That sounds awesome
 glad roost
 opaque meteor
Oh hey! I was given a suggestion to post DIY shields here, and funnily enough...I made one! Very easy to make and use. Makes it easier to work with Arduino Pro Minis.
https://www.hackster.io/IainIsCreative/making-a-screw-shield-for-the-arduino-pro-mini-c0a54f

Hackster.io
A quick and simple lesson on making a screw shield for the Arduino Pro Mini! By Iain.
eternal maple
Getting used to using a hot air station for the first time. Thought I'd start by removing components from a dead irrigation controller to get used to how to heat the board evenly while keeping the temp low (270C) with slow fan speeds. Pretty happy after the first training session -- getting the hang of it. Reminds me of dumpster diving behind the local TV repair shop as a kid, then taking a discarded chassis home to extract the parts.
lusty siren
Looks like I have everything set up to be on S&T Live on Wednesday
 queen lagoon
just finished making making several mods for my 3D printer:
a z-brace
a 60deg tilted LCD cuz default is 90deg
a auto-bed leveler probe, by way of a BLtouch sensor and a full firmware flash
and a hook for my bed scraper and scissors
https://www.thingiverse.com/make:507892

Cocoon Create Touch is the Australian rebadge of the Wanhao Duplicator i3 Plus
and cuz it wouldn't fit properly on thingiverse,
 leaden orbit
nice 😄
 crude river
Hello, I'm hoping to join the Show and Tell tonight to share my robot project https://www.roboruckus.com/

RoboRuckus is an entirely free and open source project inspired by the board game RoboRally, but implemented with actual robots.
strong phoenix
@crude river there is a pinned message (thumb tack button at top of discord app) with instructions on how to join the S&T.
crude river
Wonderful, thank you!
 whole birch
One thing for the last presenter. I watched a video a few days ago, and of course cant find it now. The guy in the video tested several cheaper moisture sensors. He found that cheaper they are, the faster they die. Basic physics of 2 charged plates in water, one looses electrons the other gains them, but they take the metal with them. He showed $1 sensor that in just few hours completely lost the copper from one side.
strong phoenix
@proper tiger ^^^
 proper tiger
@whole birch that is super helpful thank you! The capacitive touch with nails method I’m using currently is giving me mixed results and that could be why...
lusty siren
@proper tiger Moisture sensing, by its very nature, is a bit of a pain
What about... indirect, though? I'm not familiar enough with compost to know if it would work, but perhaps a humidity detector? I don't know if aerial moisture would be a good enough measure for soil moisture, though, even in a sealed container
proper tiger
I hadn’t thought of that... but my guess would be the probes need to be in the compost to get a good idea of the moisture levels.
strong phoenix
relative humidity is definitely going to lag behind the internal humidity, and that will even vary based on external weather/environment factors. non-scientist opinion 😄
solar yew

TS100: http://bit.ly/2tscVQW QC3.0 Power bank: http://bit.ly/2MkUepb Banana ruler: https://twitter.com/jon_raymond_/status/981924976650407936 Power Patreon: ...
Very sup prized by the performance
leaden orbit
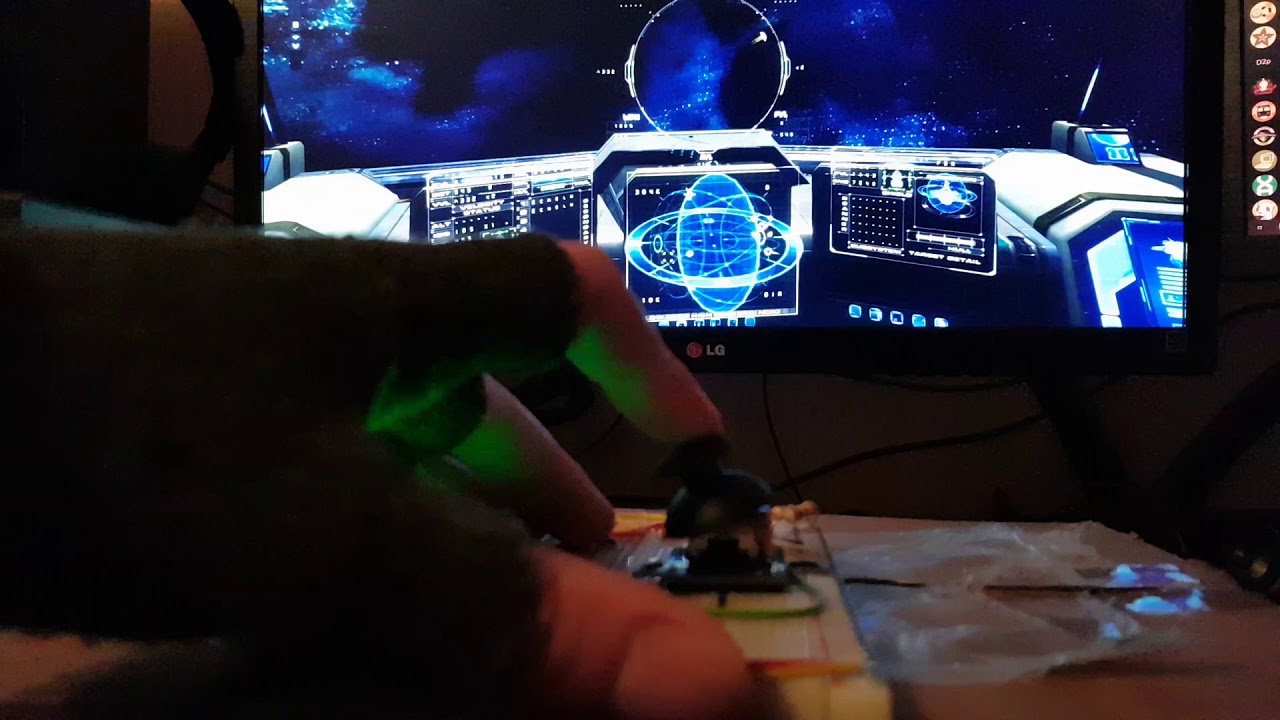
some pics from today's tinkering. got the analog stick set up and working, but ran out of RAM trying to get it working nicely 🙄
also couldn't integrate it with the last week's worth of work on the 3x MCP2317s GPIO HID functionality. will experiment with an M4 Express when I can get my hands on one 
solar yew
Water weighs something.
Give two pots identical care and weigh the control pot. Or weigh the potted plant.
Or both. ;)
lapis jasper
@leaden orbit is your code somewhere?
leaden orbit
it can be, give me a sec 😅
this one is the keys working, and it works great:
and this one is the analog stick, which also works great
the trouble is i cant have them both running at the same time 😅
this is from my tinkering with my raspberry pi, i wanted to get these functions set up on the Feather M0 Express but i just couldnt - it uses up too much RAM 😢 😛
leaden orbit
 lusty siren
@leaden orbit What game is it hooked up to?
woven relic
I'd say this is show and tell worthy!! https://hackaday.com/2018/07/01/nintendo-switch-gets-internal-trinket-hardmod/
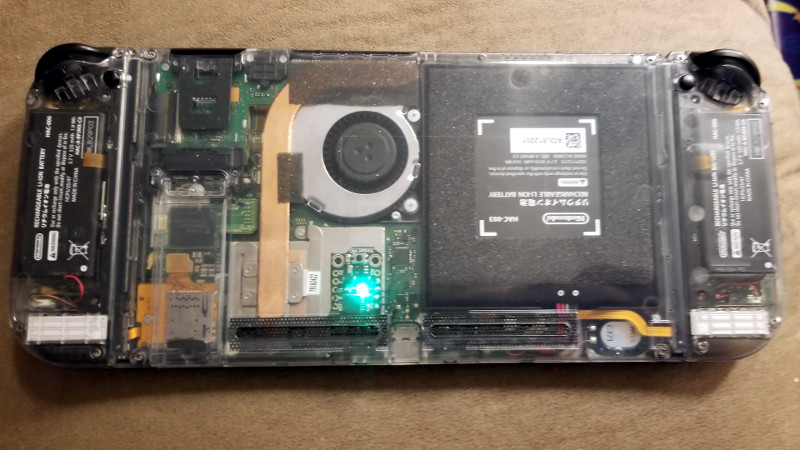
If you haven’t been following the Nintendo Switch hacking scene, the short version of the story is that a vulnerability was discovered that allows executing code on all versions of the Switch…
leaden orbit
@lusty siren That's Evochron Legacy 😁
lusty siren
@leaden orbit Ah! I played a bit of Mercenary... Many years ago
 ancient skiff
Ancient frequency meter calibrated to GPS, reading 10MHz+-5Hz
Then used to recalibrate a 4.320MHz oven-compensated crystal scillator in a slightly less ancient device
final goal: to measure the accuracy of wristwatches and pocketwatches. This one loses 0.16 seconds per day according to the display
 unborn sphinx
does it measure the watch magnetically or via vibrations?
ancient skiff
I think this one works by sensing vibrations.
actually, both. "An Electro-magnetic/Electric-field detection microphone is used for QT-99, "
My friend does all kinds of watch repair, but would rather do mechanical and tuning fork. quartz watches just aren't all that interesting to him, I think. http://timeguy.com/cradek/
The watch in that photo is an Accutron, which keeps time with a macroscopic tuning fork that vibrates at 360Hz
unborn sphinx
also mechanical watches are soooo muuuuch haaaarder to repair, so you'd be paid a ton
ancient skiff
They are collectible, not disposable.
unborn sphinx
one of my favorite things with mechanical instrumentation is jewels; you'd think as someone my age that the jewel is somehow making your micrometer oscillate correctly but no, they use needle bearings and the needle rests in a jewel because rubies and such are just so dang hard that a real sharp needle in a little hole in a ruby can be super perfect, super smooth, and extremely low friction with a very long lifespan
 ancient skiff
yes right up until https://en.wikipedia.org/wiki/Mechanical_watch#'Jewel_inflation'

A mechanical watch is a watch that uses a mechanism to measure the passage of time, as opposed to modern quartz watches which function electronically. It is driven by a spring (called a mainspring) which must be wound periodically. Its force is transmitted through a series of...
it's like the megapixel or gigahertz war, but in the 60s
"Around the 1960s this 'jewel craze' reached new heights, and manufacturers made watches with 41, 53, 75, or even 100 jewels.[18][19] Most of these additional jewels were totally nonfunctional; they never contacted moving parts, and were included just to increase the jewel count. For example, the Waltham 100 jewel watch consisted of an ordinary 17 jewel movement, with 83 tiny pieces of ruby mounted around the automatic winding rotor.[20]"
unborn sphinx
well that's just cheating
any chance you can get at that first frequency meter? I'd love to see down into it more
ancient skiff
@unborn sphinx I don't think I have any other photos of it, and it's not in my shop
unborn sphinx
darn
ancient skiff
I can't find anything about the device and hardly anything about the company on the internet, either
the displays are the edge-lit type, where each numeral shape is etched on a glass slide
unborn sphinx
ooo, like LEXIE displays
I thought those were relatively modern, with cheap acrylic and cheap laser etching
ancient skiff
oh not at all
 ancient skiff
I guess "lightguide" ? https://en.wikipedia.org/wiki/Lightguide_display first related patents in 1914 according to wikipedia!

A Lightguide display (also known as an edge-lit display) is an obsolete electronic mechanism which was used for displaying alphanumeric characters in electronic devices such as calculators, multimeters, laboratory measurement instruments, and entertainment machines such as pi...
I am fairly sure that in this type of display it is mechanically etched glass, not plexi like you'd do nowadays
 tacit ember
Greenhouse watering. Here are some pics of the greenhouse watering system I built, uses a 2 channel power relay, 2 solenoid valves, Adafruit Metro and the moisture sensors are 2 nails imbedded in plaster of paris (analog input). I also used a TMP36 to get the greenhouse temperature. The next step is to get it on the web so I can look at it on my phone. It was a fun little project, easy to do. The idea for the moisture sensors came from an Aurduino projects for dummy's book I had. Enjoy! This picture is the moisture sensor I used 4 (2 beds, 4'X6' long)
Solenoid valves (12 volt)
Metro and 2 channel relay board
some of the wiring
Metro mounted to the installation tile (old floor tile)
Closer view of the 2 channel relay board
TMP36 for greenouse temperature
wires soldered to TMP36
 patent robin
I have been collaborating with my glassblowing wife on a lamp project. She made the shade. I turned the base out of wood. I have a 24 pixel neopixel ring embedded in the base. I am using an itsybitsy m0 Express with a backpack for battery power. I am using capacitive touch to cycle through the lamp settings.
eternal maple
@patent robin Beautiful.
patent robin
Thanks!
 cerulean cloak
Lately I've been making 3d printed record players.
3d parts and electronics (amplifier, motor control) were custom built. I used a cheap player as a template, but at this point only the motor, cartridge, and drive belt are purchased.
Here's another I finished a bit ago as a gift.
unborn sphinx
how's your needle pressure?
unborn sphinx
yea I was figuring that arm might be incredibly light
cerulean cloak
Platter wobble is the worst part. Perfect circles are the kind of things that drive people mad.
But figured a few things out
unborn sphinx
don't those hanging delta printers work better for concentric prints?
cerulean cloak
Oh awesome, haven't heard of this: https://en.wikipedia.org/wiki/Hangprinter
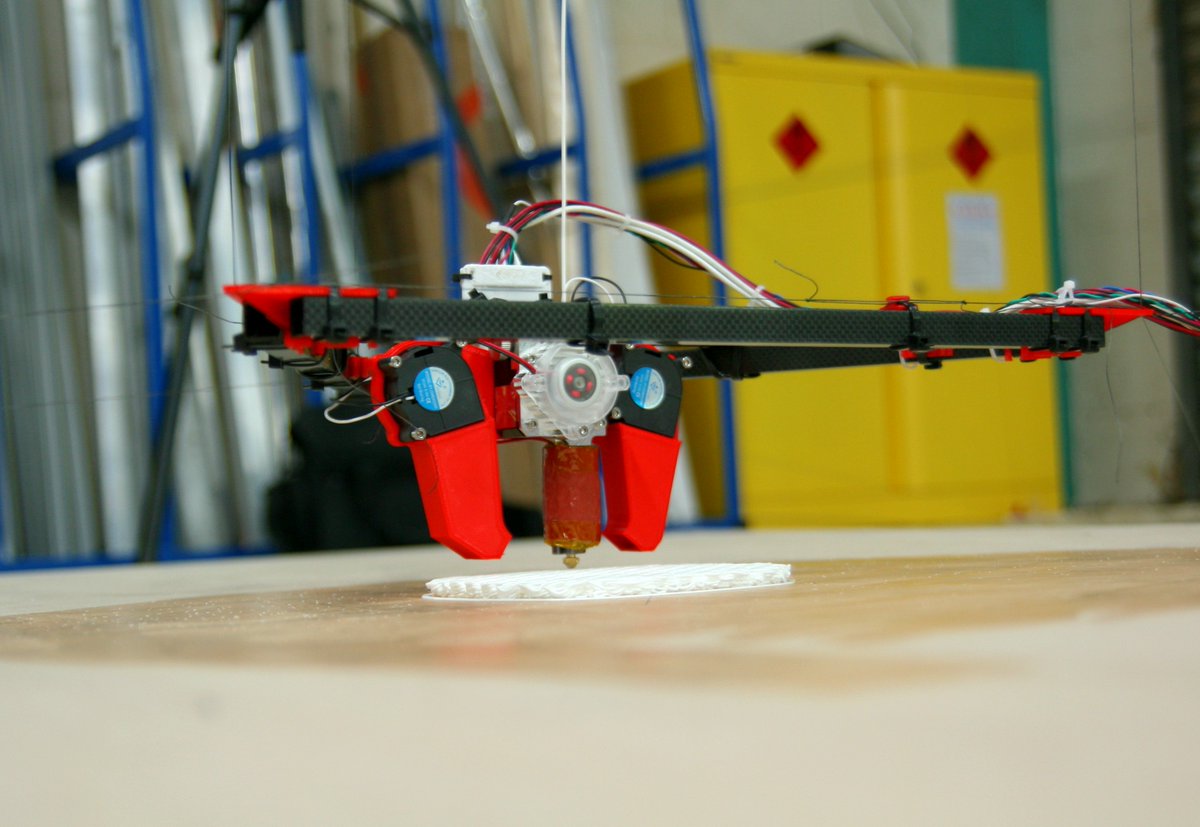
Hangprinter is an open-source fused deposition modeling delta 3D printer notable for its unique frameless design, it was created by Torbjörn Ludvigsen. The Hangprinter uses relatively low cost parts and can be constructed for around $250 USD. The printer is part of the RepRa...
unborn sphinx
the hanging part might be unnecessary

you can make really big ones by hanging the platform, but the 3 axis control system just works well for circles as I understand it
cerulean cloak
I'm not sure I'd print another platter, TBH. I'd probably try the heavier platter approach.
 delicate basalt
hm, 3 axis delta... have seen those on packaging equipment... my buddy makes an inverted 3 axis with a boom... wonder if he could miniaturize it 🤔
sorry didn't mean to derail that thread
unborn sphinx
I wonder if you could put the needle on the delta printer and have it trace the groove to play the record with only the cartridge rotating
cerulean cloak
That's a fun idea. Frame of reference thing.
I'd been dreaming up a fairly heretical idea of to reduce speed deviations. Rather than try to get a wheel to spin perfectly, buffer the audio and rotational speed, and modulate the playback speed of the buffer.
unborn sphinx
it'd be superheretical if you did that in any kind of digital way yea
cerulean cloak
Or just have it run Shazaam and play the track from Spotify.
unborn sphinx
the universe would uncreate you
I think if you metered the rotation of the platter and had an analog buffer system to eliminate variations that would actually be pretty innovative; if it hasn't been patented before there are analog music nerds with a lot of money
upbeat geyser
I think there was a commercial product that did the buffer clocking trick. There was another one that measured the runout and automatically adjusted the location of the center pin to correct it. And yes, these were both targeted to people with money to burn.
 karmic fjord
Confirming: there's a S&T tonight, as I recall.
scenic siren
@karmic fjord Correct.
karmic fjord
Cool. I'll try to get a spot tonight.
scenic siren
@night flint Check out the pinned message in this channel for a post about how it works.
 night flint
@scenic siren insta-crash on Firefox
scenic siren
Not for me... Not sure what to tell you there.
night flint
Opened it on Chrome, worked as intended
#linuxlife
Added my comment on the G+ page 😃
karmic fjord
I've pretty much switched to chrome other than on iOS. It works better in my experience for Google sites/apps.
That's on Linux as well as MacOS.
I've switched to my MacOS machine for web cams/chat/streaming and will try using multiple cameras again. It would be nice to be able to use my "workbench cam" on Show&Tell.
night flint
My machine is a ThinkPad T580 with Fedora 28 on it
karmic fjord
Redhat... I used that in the prefedora days. A little over a year ago I switched my main workstation to a custom built machine running Ubuntu. It's been great.
unborn sphinx
prefedora has to be a distro....
karmic fjord
It was just RedHat then
night flint
RHEL ❤
night flint
Excited for S&T 🙃
upbeat geyser
Doesn't anybody use Yggdrasil any more?
unborn sphinx
the variant of eggdrop?
night flint
https://twitter.com/_Coffee2Code/status/1011000630331236352 here's some more Stream Deck stuff with my software by the way


Well hello there images.
Alternative software for the @elgatogaming
Stream Deck in development now!
Planning to support all features of OG software and more!
#elgato #streamdeck #elgatostreamdeck #floss #foss #opensource #gaming #linux #osx https://t.co/6WMEW6GW6o
Twitter
Tore that part out to replace it with ZMQ stuff 🧐
After that I went on to continue with configuration 🤔
lusty siren
http://phoenixborntech.com/2018/07/05/as-seen-on-show-and-tell-digibadge-mini/ Some DigiBadge pictures for you all. Now with a virtual Show and Tell sticker!
night flint
Nice sticker 😎
I'll be writing a post later (tomorrow or the day after that) on my blog for the S&T feature and a bit less text and more "this is what it is right now" with videos and pictures 🤔
People that want to work on my project are very welcome to do so, by the way
frank wolf
I helped build a thing at Red Bull Creation last week. Part of my contribution was the electronics module which included an Arduino UNO, a 4-Relay board, and an interface circuit, and fuses on all power legs (mixed 5 and 12v supplies, with common ground). The are sandwiched within 3 layers of laser cut/etched acrylic, so you can see the wiring.
It's the "High-Five machine". Security-door style electromagnets hold two facing chairs at the top of their ramps. When the riders each push their pushbutton (simultaneously), the relays break the power feed tothe relays, and the riders slide down past each other and give a High Five. 😃
It was a 72-hour clock. With 4.5 hours left, I was finally able to work with the frame, and make the wiring harnesses, and mount the neopixels. We finished with about 30 minutes to spare.
We'll be showing it this Friday in Oakland, CA, at Oakland First Friday, from 5-9 PM PT. If you're in the Bay Area, come see us.
neat locust
There is a short video on YouTube that sums up the albeit brief experience of the High -Five Machine at https://youtu.be/bB1sF4iP0RU 😃
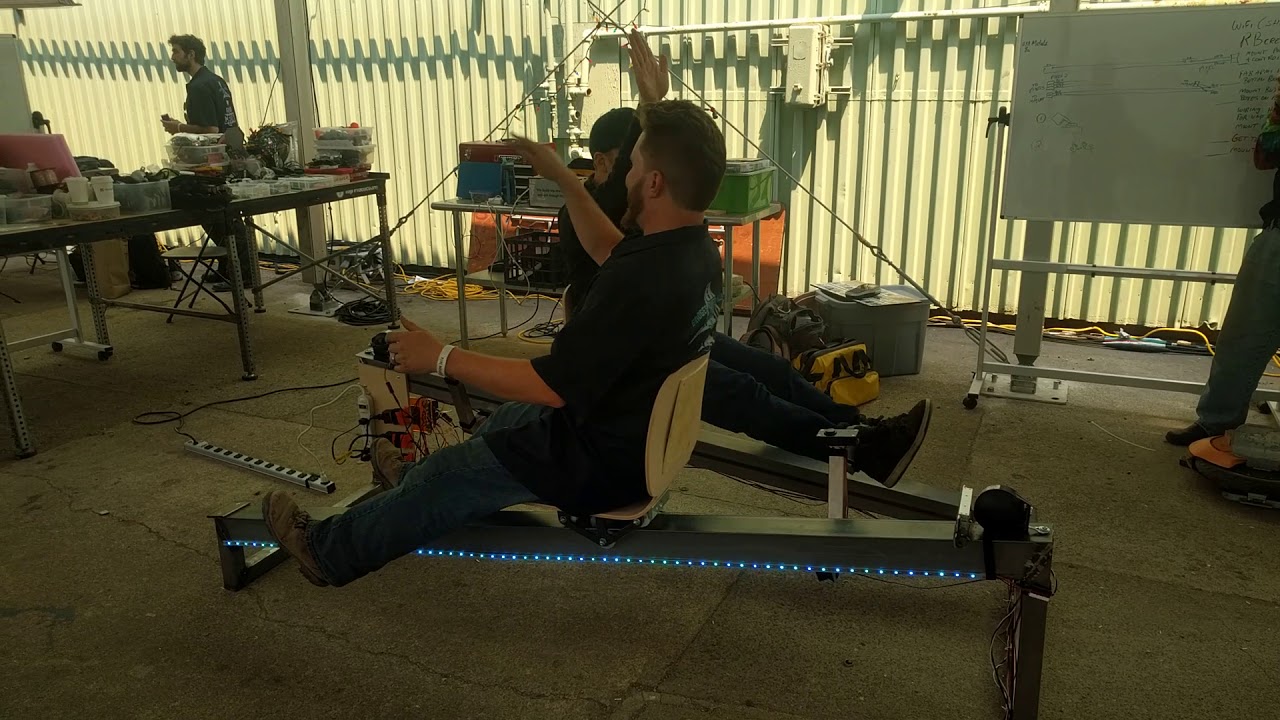
Trying the new High-Five machine at #redbullcreation, by #upstreamsocial
unborn sphinx
could also be a fist jousting machine if you got some puppets
lusty siren
Puppet Jousting!
lusty siren
DigiBadge Mini: About the size of the Show & Tell sticker.
lusty siren
@delicate basalt Is that running Pi stuff, or is it connected to the car's computer?
delicate basalt
right now it's running a demo webpage on Rpi. hope to get a pican hooked up to read values from car computer
lusty siren
Sounds awesome. Are you going to hook up a Pi Camera for a backup camera? Will the cable even work at that length?
unborn sphinx
probably not but you could set up a second pi and run ethernet between them
delicate basalt
probably not, my car's new head unit supports a backup camera so i would use that first
if i get everything working i will try to document it to share
this will be my first attempt at a real project
strong phoenix
@delicate basalt found this when i did a similar project (OBD, not CAN). "in stock" is a rarity, and i wish they would open source it... https://mausberry-circuits.myshopify.com/collections/car-power-supply-switches

Mausberry Circuits
delicate basalt
my understanding is that the obd port is really just the port to connect to the bus, unless they have an obd gateway
really the easiest place to get connected to the bus is on the back of the port
I ordered one of those supplies, but have ready iffy comments about order fulfillment
strong phoenix
well, OBD standard MUST be supported. most modern cars run CAN, but they support OBD protocol through the connector. some (most?) will also support CAN through the OBD connector. mine does, but i wasn't confident in rolling the CAN communication on my own (with resources) and bricking my ECU.
delicate basalt
ah, right, I know my car does run CAN Bus with a HS CAN and MS CAN, my main intent is sniff the communications unless i feel comfortable enough to send some basic commands
strong phoenix
which manufacturer?
delicate basalt
mazda
strong phoenix
ahh. i have no resources for them. 😦
delicate basalt
that's okay, i found a code chart in some forums so it gives a starting point
i need parts to come in, and time when i can get my car close enough to outlets to plug in a simple workstation
do you recall how long it took for your mausberry board to come in?
strong phoenix
haha. yep, i remember those days. carrying an A+, usb hub, and keyboard to the garage. i actually never ordered one; they were always out of stock. 😆
i abandoned the project. the gui was close to completion, and all of the HID was pretty much done. i was installing an actual oil pressure sensor that included some substantial work. i moved on... 😄
delicate basalt
ah, it's too bad adafruit doesn't sell it, would be here in like a day
what did you write the gui in?
strong phoenix
main program ran in python. gui was in LUA, via a display signage program i found: https://info-beamer.com/
info-beamer.com
A new way to do Digital Signage. Get started for free!
here is the repo (probably way out of date): https://github.com/sommersoft/RasPegacy
delicate basalt
will have to look into it (the gui and the repo). my current display is html in kiosk mode, figured I could write values to a file with python and display with html. mainly just because that's what i know already
solar yew
 upbeat geyser
I think you'll find charlieplexing isn't practical for common-anode or common-cathode RGB LEDs.
But I could be wrong, creative layout might allow you to use them.
leaden frost
I think I tried to charlieplex LEDs including a few that were different colors. Some of them burn out because different color LEDs have different forward voltages and upset the "matrix".
But luckily neopixels came out and never looked back.
lusty siren
Last one... Number 36.
rain escarp
@lusty siren no one ever stopped at number 36 😃
lusty siren
@rain escarp It's 36 of the replacement buttons. Hot air took the chips off, but the buttons nearby didn't all like it. So I had to pull them off and replace.
When I'm done with BronyCon prep, I'll have 80ish total
I think it's 82 if don't mess up
rain escarp
Very cool. Well, hot actually.
Who’d ever think that someone’s hot air bothers those around them. Hmm.
unborn sphinx
somebody aughta make a little spatula thing out of high temp plastic or maybe silicone that can somehow attach in place, probably by weight or a clamp thingy, that lets you block off sensitive components when doing hot air work
so you can just raise the shields and be good
lusty siren
@Greys I was considering making some aluminum blockers, but ran out of time to make it when I was doing the hot air
fiery plank
Close the blast doors! Close the blast doors!
 twin light
I built a thing!
https://www.youtube.com/watch?v=-_xaSA5cCK4&feature=share

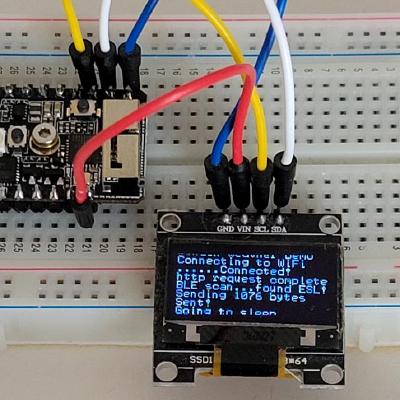
Searching for your WifI's. Counts wifi access points. ESP32 and CircuitPython Express.
It scans for open wifi access points then sends the count via serial to the Express board for display. The other board is an ESP32 running micropython.
 swift hemlock
Very cool
lusty siren
That's really neat, @twin light
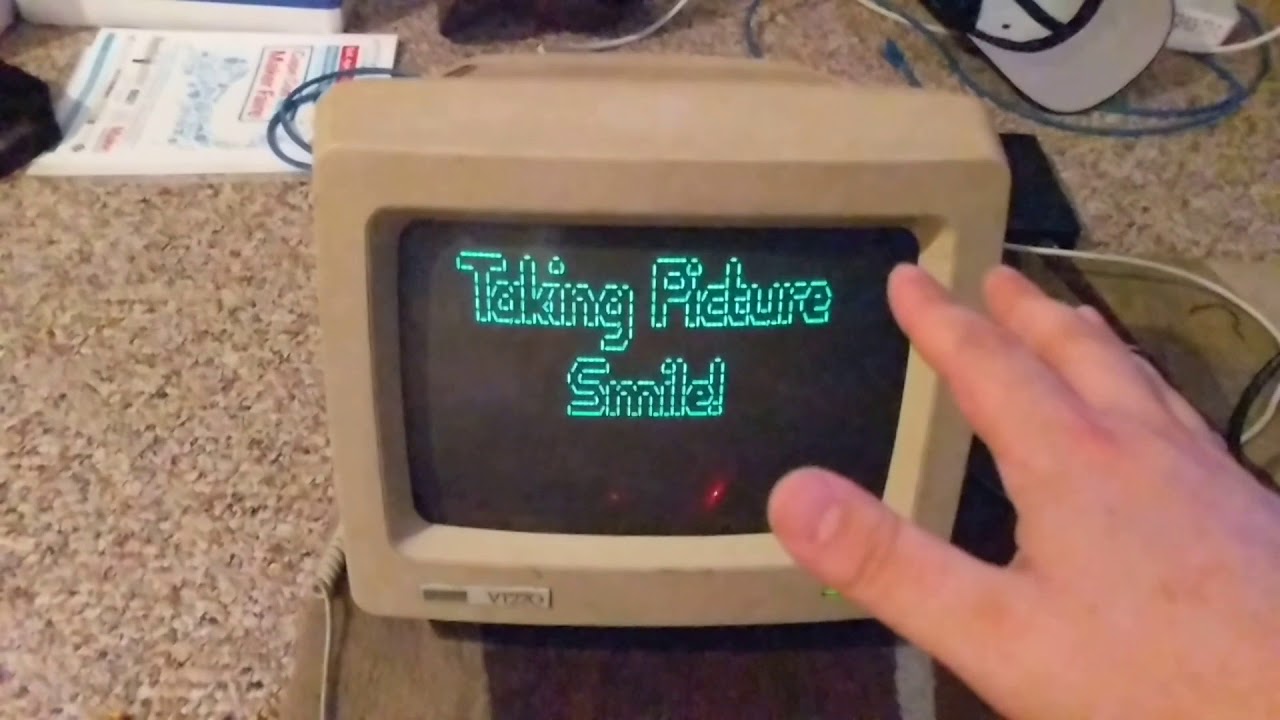 unborn sphinx
is that screen like 6" diagonal or is there a lot of perspective
lucid bloom
Perspective
upbeat geyser
What size are you thinking: http://www.vitriol.com/images/tech/tubes/crts1.jpg
 unborn sphinx
Industrial Monitor- Monochrome CRT Display 6 inch Open Frame or Kit Monitor
LP 06 Series.
I think under 4" it's not really useful anymore
unborn sphinx
that looks familiar, either I know that station or that's a typeface some logonizer used to come with
twin light
@lusty siren @swift hemlock thank you both 😃
 rotund stag
WGBH is a pretty important PBS station, they've produced a ton of content.
upbeat geyser
I used to use a VT640, which was a VT100 with a "RetroGraphics" modification to add Tektronix 4015 graphics emulation. It didn't run at a fast scan rate, so the modification included replacing the CRT with one having a longer persistence phosphor.
lusty siren

Line art by @SophieAScruggs - It's a neon-esque pony busy, using EL Wire! So far, I only have Fluttershy, but I should be able to get one (Maybe two?) of each of the mane six done for @BronyCon. They'll be in a shadowbox, and are sized on standard 8.5x11" paper.
 Twitter
 fleet tapir
I got pi hardware pwm going few weeks back
lusty siren
A second EL wire pony: https://twitter.com/AndonRT/status/1019789466960125952
 lusty siren
Last one for now (Although I have three more to make): https://twitter.com/AndonRT/status/1019820007268573184
 upbeat geyser
Got my code to draw Hershey font characters using the dual M4 DACs working!
junior agate
@upbeat geyser that is sweet!
eternal maple
@upbeat geyser very cool
 verbal kraken
So this is the place where I post imgur albums of equipment I find and take apart, right?
lusty siren
@verbal kraken Sounds good to me!
delicate basalt
I’ve been fortunate enough to travel to a couple locations with a local company that makes robotic packaging equipment.
delicate basalt
Packaging trade show
Demo machine at trade show (single cell construction to demonstrate module functions)
lusty siren
Book Horse, made out of EL Wire: https://twitter.com/AndonRT/status/1020859294311477248
 fiery plank
@lusty siren you should totally make a sign saying "welcome to the pony corral" out of EL wire
lusty siren
@fiery plank Well, I am selling these at BronyCon, so ponies and horses are a given.
 neon nexus
I'm sooooooo close.
 dire furnace
28% keyboard?
steel slate
upbeat geyser
Oooo Lego® integration!
neon nexus
@upbeat geyser Awesome!
@dire furnace Yes. It's a proto that a friend made. He just finished a groupbuy for a production version of the board.

reddit
76 votes and 86 comments so far on Reddit
neon nexus
haha, good question.
neon nexus
The keyboard uses an atmega32U4, so it's highly programmable.
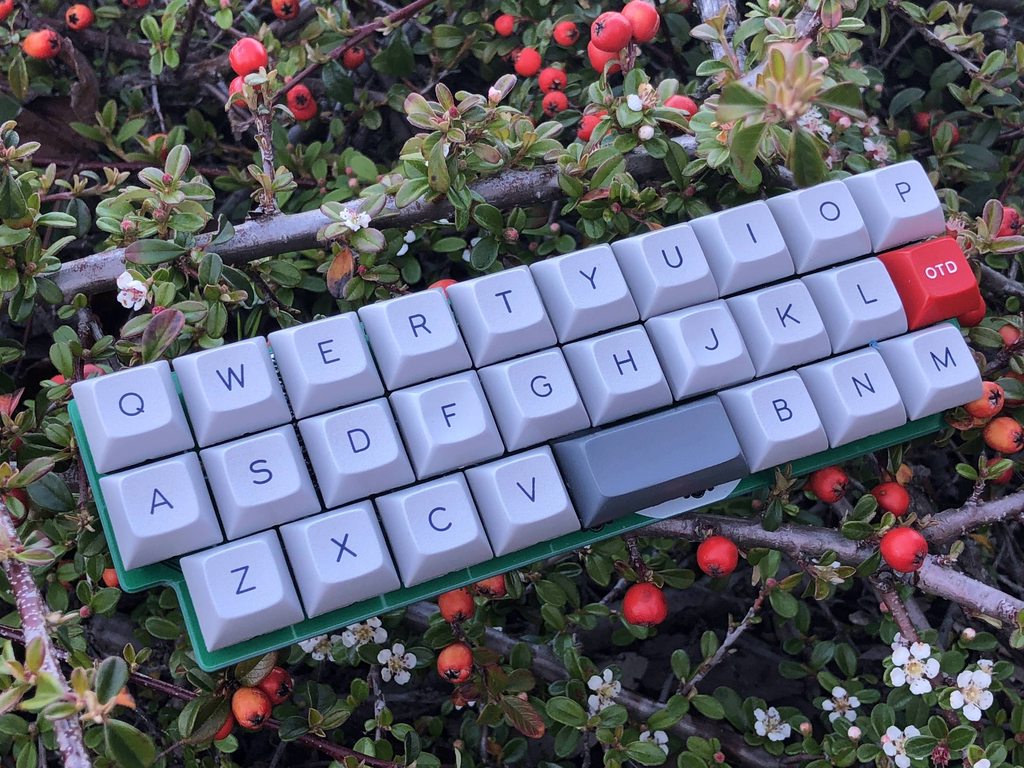 neon nexus
Most keycodes are on separate "layers," so I use keycaps to remind me what functions are on different layers.
dire furnace
Ahhhhh right okay
neon nexus
If you're curious as to what my layout is. 😅
solar yew
That gets a Carlin award.
If you nail two sticks together that have never been nailed together, before -- someone will buy it from you.
-George Carlin
(prettyified for dyno consumption) (sorry, George -- how Ironic is that?
ruby ledge
My latest blog entry about optimizing write speed (on Intel CPUs): http://bitbanksoftware.blogspot.com/2018/07/mind-cache-reference-to-mind-gap-in-uk.html
Memory read and write performance may be identical as far as the physical memory is concerned, but CPU manufacturers have designed unique ha...
 tawny ocean
Nice work bit. I glanced at your code. You may want to sleep a bit before capturing your time.
ruby ledge
glad you like it; I run thousands of iterations over a large block of memory over many runs to get a reasonable estimate
 proper vector
Hi all! I've just started using Arduino and finished my first project recently. It's a banana controller using the Adafruit 12 x Capacitive Touch Shield for Arduino and a Leonardo. I used it to play (and beat!) Donkey Kong Country 2.
https://clips.twitch.tv/CaringAnimatedBananaGivePLZ
I feel quite accomplished and I'm excited to make more silly controllers in the future :3 I'm especially excited to experiment with conductive thread and fabric since I'm into fiber arts like embroidery, knitting, etc.
 upbeat geyser
That's bizarre and wonderful!
proper vector
😁
lusty siren

I think I'm confident enough to call myself proficient with connecting EL Wire together.
 radiant finch
@lusty siren what are you mounting it to?
lusty siren
@radiant finch It's connected via 24-gauge craft wire to a poster board backing. Then it's put in an 8x10 shadowbox
radiant finch
do you have any pictures with it off in light?
and are you cutting/resoldering or just packing extra behind?
radiant finch
@lusty siren Very cool, thanks !
lusty siren
It gets very pokey in the back.
lapis jasper
@proper vector looks awesome!
strong phoenix
@lusty siren those are looking mighty sweet! well done!
lusty siren
I'm hoping to get a picture of them all together
woven relic
Oh hey its FlutterShy
lusty siren
@woven relic Indeed! I made one each of the Mane Six and will be selling them at BronyCon this weekend.
woven relic
oh nice!!!
lusty siren

All six lightboxes for sale at @BronyCon this weekend. The line art was done by @SophieAScruggs and I brought it to light with EL wire. Booth 516!
 Twitter
lusty siren
Twitter
lusty siren
@unborn sphinx Phoenixborn doesn't need to credit me. Phoenixborn is me.

(And yes, I do use every opportunity I have to use that emoji)
unborn sphinx
🎊 same
lusty siren
I think using a Metro M4 for this is overkill, but hey.
unborn sphinx
is that for displaying prices or a sale ticker?
leaden frost
They have those LCD shelf price label thingys at the department store. Don't know how they get updated though.
delicate basalt
really? i must not shop at fancy enough stores 🤔
Think a pi zero and a computer monitor might be a better price list display, as cool as it is having it on a 4 line LCD
lusty siren
@leaden frost I have never seen those, but I ha e thought about what it would take to make them.
 urban juniper
The Kohl's near me has e-ink displays for price signs.
leaden frost
@lusty siren Maybe @marsh quest can do a teardown of the electronic price tags - articles say that they are wireless and tied back to the store database or updated with a palm-sized device.
@urban juniper I've seen the LCD ones but I haven't looked close enough to see if they were e-ink.
upbeat geyser
The Kohls ones are made by Altierre. There's a surprising amount of information in their FCC filing: https://fccid.io/W22-ATAG250/User-Manual/User-Manual-1173934

FCCID.io
2.4GHz Electronic Shelf Label User Manual details for FCC ID W22-ATAG250 made by Altierre Corporation. Document Includes User Manual User Manual
If you want to do your own teardown, you can pick one up for $5 from eBay: https://www.ebay.com/itm/331686716248

eBay
Altierre ATAG400 Electronic Retail LCD Display Sign Kohls AS-IS | Business & Industrial, Retail & Services, Labeling & Tagging Supplies | eBay!
Apparently powered by an ATmega16.
junior agate
@upbeat geyser don't tempt me like that...bookmarked
lusty siren
@junior agate Buy three!
junior agate
@lusty siren it could make for a good makerfaire badge....
lusty siren
Indeed
leaden orbit
idk what im doing, but im doing it 👌
fiery plank
So what's it gonna be?
 burnt wyvern
Male end of a custom plug I made, Sw is just short for switch and the number next to it indicates which switch it is, which means it’s just for a button, LED is the led to illuminate the button, the P after the Sw along with the number next to it is the PIN number of the switch, and Gnd is just ground if you didn’t already know (BTW this is for an Adafruit Trellis project)
delicate basalt
fabrication is 3d printed?
 bitter hazel
Have you guys ever needed to bring one of your projects on a plane? Im worried about my son taking this to the airport today
small solstice
Serious question: what country is he flying out of and where is he going?
If the answer to either one is America, then yes I would be very worried
what I would suggest is if possible, take it apart to some extent
unborn sphinx
I think actually having it all assembled makes the purpose very clear and aids the kid's position
let's cut to the chase, an uninformed person who didn't actually think about it could claim it's a bomb
I would say don't have it out anywhere near security, and maybe put it in a checked bag
ruby ledge
@bitter hazel I've brought a backpack full of suspicious looking equipment on flights MANY times; no problem
 solid scroll
I would actually say have it out, like you would a laptop. The might ask you to turn it on.
unborn sphinx
mmm, yes; but like a laptop you wouldn't be using it while in line
woven relic
Wooooooooooooooo!!!! My lightsaber project is basically done!!!! as long as i can get in i plan to show it off on Show n tell
unborn sphinx
how cool is it?
woven relic
pretty stinkin cool
upbeat geyser
The Kohls programmable retail sign showed up. I thought it was one of the little (matchbox sized) ones I usually see (the auction pictures didn't have a scale reference). However, this one is a big thing, the size of a fair-sized tablet! Quite a nice unit for $5.
burnt wyvern
@delicate basalt the black part is 3D printed, the white is probably going to be aluminum
delicate basalt
👍
leaden frost
@upbeat geyser Cool, the smaller one is probably the individual item price tag one. https://youtu.be/EkjEGoaCdAk

Don't always rely upon the prices on these tags to stay the same from the time you put it in your cart to the time you checkout. They can be updated remotely...
 marble oracle
Hi all, I would like to share with you project of mine. You can find it here at github ( https://github.com/fablab-brno/CircuitPython-Watch ) and it´s watch powered by Circuitpython. It runs on battery so you can wear it like normal watch. It has 2 touch areas, one for showing time, second for changing animation. Animation can be dipleyed before / after time is showed. Let me know what do you think about it. Thx
Here is also youtube video when is running demo program (same as gif at github) : https://youtu.be/-UQK9DWjLHE

GitHub
Contribute to CircuitPython-Watch development by creating an account on GitHub.
 proper vector
I hadn't thought about bringing something like that on a plane... I'd bet at the very least they're going to take a look at it. I remember flying with a friend who brought his Blue Yeti microphone and both ways security had to take it out and inspect it
but the people who are inspecting it should be informed enough to be able to know that it's harmless after inspection, right?
That watch is neato burrito, mzuzelka
vernal ferry
I'm thinking of designing a character to slap onto my PCB designs and here are some of my initial sketches xD
idk if it has enough affordance or if it looks like an alien tofu with circular hands
unborn sphinx
I think you should use all of them depending on what will fit on the board
upbeat geyser
I like 'em, especially the bottom one laying out taking a nap.
leaden frost
@vernal ferry Nice work. Here's an old one I did "The 555 timer chip, caught flashing LEDs, when a bit goes bad."
vernal ferry
@leaden frost cool! wonder what he has for sale!!
unborn sphinx
clock signals
vernal ferry
Testing out this new way of adding a silkscreen layer
 solemn bolt
Here's what I'm working on. Twich chat controlled Robot Battles. https://hackaday.io/project/159572-twitch-chat-controlled-robot https://www.twitch.tv/theotherlonestar

https://youtu.be/ub5exsFBzhAWith the use of ESP8266s and small robotics platform I am giving control of small robots to twitch chat. The ESP8266 connects to the IRC twitch chat channel and looks for commands. When a command is found the ESP8266 sends a serial command to an Ar...

Having lots of fun with it.
vernal ferry
@solemn bolt Ooo is it on right now?
solemn bolt
I just went offline. Sorry. Live tomorrow at 2pm eastern
I should have posted here first. I didn't want to skirt the line between sharing and promotion
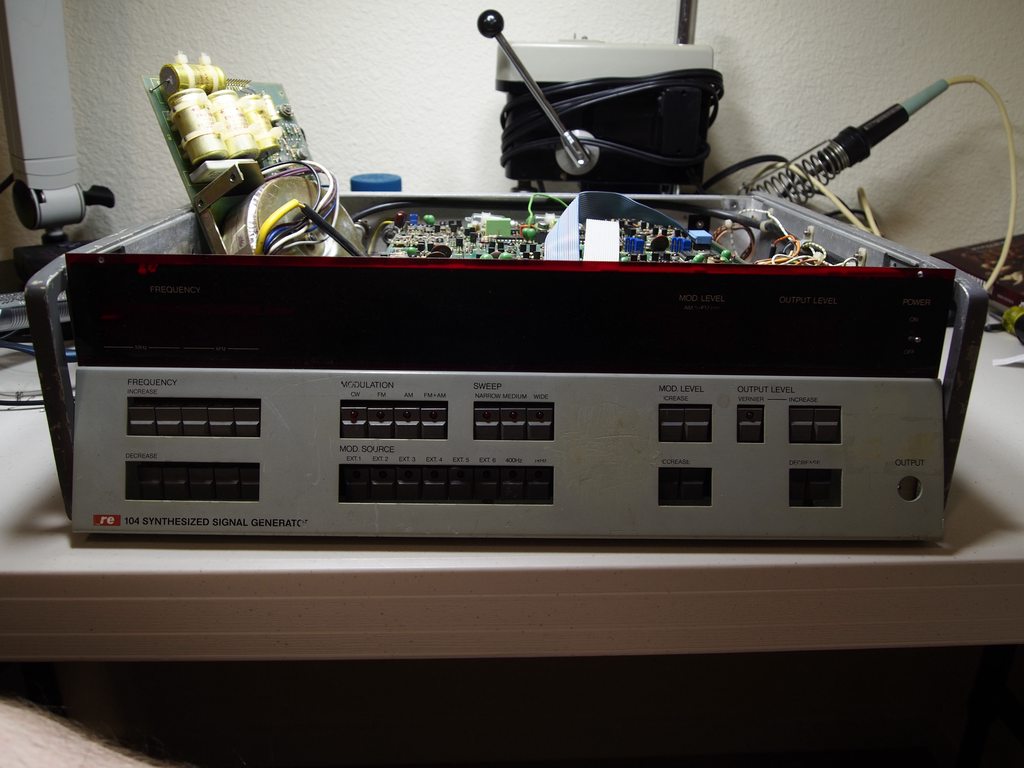 lapis jasper
@solemn bolt its fine to let people know you are going live. just don't post it multiple times in a short period. a heads up a few hours before and a going live post is totally cool
solemn bolt
Thanks @lapis jasper Good to know. I promise not to be spammy.
solemn bolt
Going live with my Twitch Chat Controlled Robot Battles. Stop by and let me know what you think. https://www.twitch.tv/theotherlonestar
ruby ledge
Hacking on the SMART Response XE this week. It's basically a high end Arduino (ATMega128RFA1) with built in ZigBee transceiver. Will be releasing some code soon.
ruby ledge
first set of code here: https://github.com/bitbank2/SmartResponseXE
GitHub
SmartResponseXE - Arduino library with LCD and Keyboard support for the SMART Response XE classroom communicator
radiant finch
@burnt wyvern what is the blue at the bottom? https://cdn.discordapp.com/attachments/334905778857050125/473402788634820619/image.jpg

@ruby ledge what can you do with one of them?
@leaden frost I use to have a job changing the prices of all the electronics at sears on sundays at 2am, those electronic screens would have been heaven
ruby ledge
@radiant finch My first project is a wired VT100 emulator to use as a battery powered terminal. Next I'll try to get the wireless working to talk to a ZigBee USB dongle
some people are using them for gaming

Community
A friend sent me one of these Smart Response XE devices to mess with. They are normally used for classroom voting. We figured out how to drive the display and keyboard, and I added a speaker onto this one, as the PCB comes with a place for a speaker but isn’t populated. (...
radiant finch
@ruby ledge thanks!
solar yew
delicate basalt
@radiant finch Re: the connector, I believe the blue lines are the line out wiring diagram
radiant finch
@delicate basalt do you know what its made in?
delicate basalt
i think the center was going to be 3d printed, wrapped in aluminum if I recall correctly
delicate basalt
oh, no idea
burnt wyvern
@radiant finch I was just finding ways to position the wires but then forgot to delete it after
radiant finch
what is it made in?
burnt wyvern
Fusion 360
solemn bolt
Hackaday did a story on my project! https://hackaday.com/2018/08/08/twitch-plays-battling-robots/
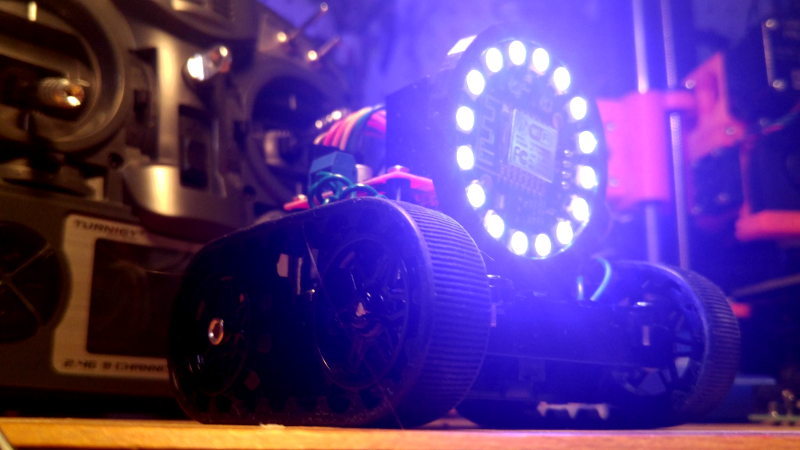
Audience interaction reached an all-time high in 2014 with Twitch Plays Pokemon, an online gaming stream where viewers were able to collaboratively command an emulated Game Boy playing Pokemon Red.…
unborn sphinx
I've got a great idea for your next project, Twitch Plays Roomba
solemn bolt
haha. Twitch vacuums my floor.
unborn sphinx
the extreme way to go would be to set up a fake space for the roomba to operate inside of with ARG stuff happening, so there's objects with clues and actors crossing the space
solemn bolt
I had a similar idea. I've thought about making a Twitch Plays Escape the Room with stuff like that. Lots of connected devices that twitch needs to interact with to solve puzzles. Could be cool.
 eager pine
Hey y’all! Had some downtime today, so made these with Gemma M0 and two NeoPixel rings and a pair of safety glasses! This is the Kaleidascope Eyes tutorial code
leaden orbit
omg thats great
looks like some mad scientist glasses from a weird tv series or something
eager pine
yeah i kind of like the crazy wires - i'm looking for materials to add for diffusing the light, or could 3d print something
solar yew
radiant finch

Got the code done for my gps desk clock, time to print an enclosure. Its using a Teensy LC, BMP180 for temp and G28U7FTTL GPS for getting the time/date. Display and BMP180 communicate over I2C, the GPS communicates over serial.
I tried to use a timezone library but I wasn't able to figure out how to feed it the time from the GPS so I will just use a switch for now
 frosty tusk
Working joystick with just a few wires, cardboard, rubber bands, conductive tape, and a CPX. First part of my larger project.
Super cheap to make—no micro switches required.

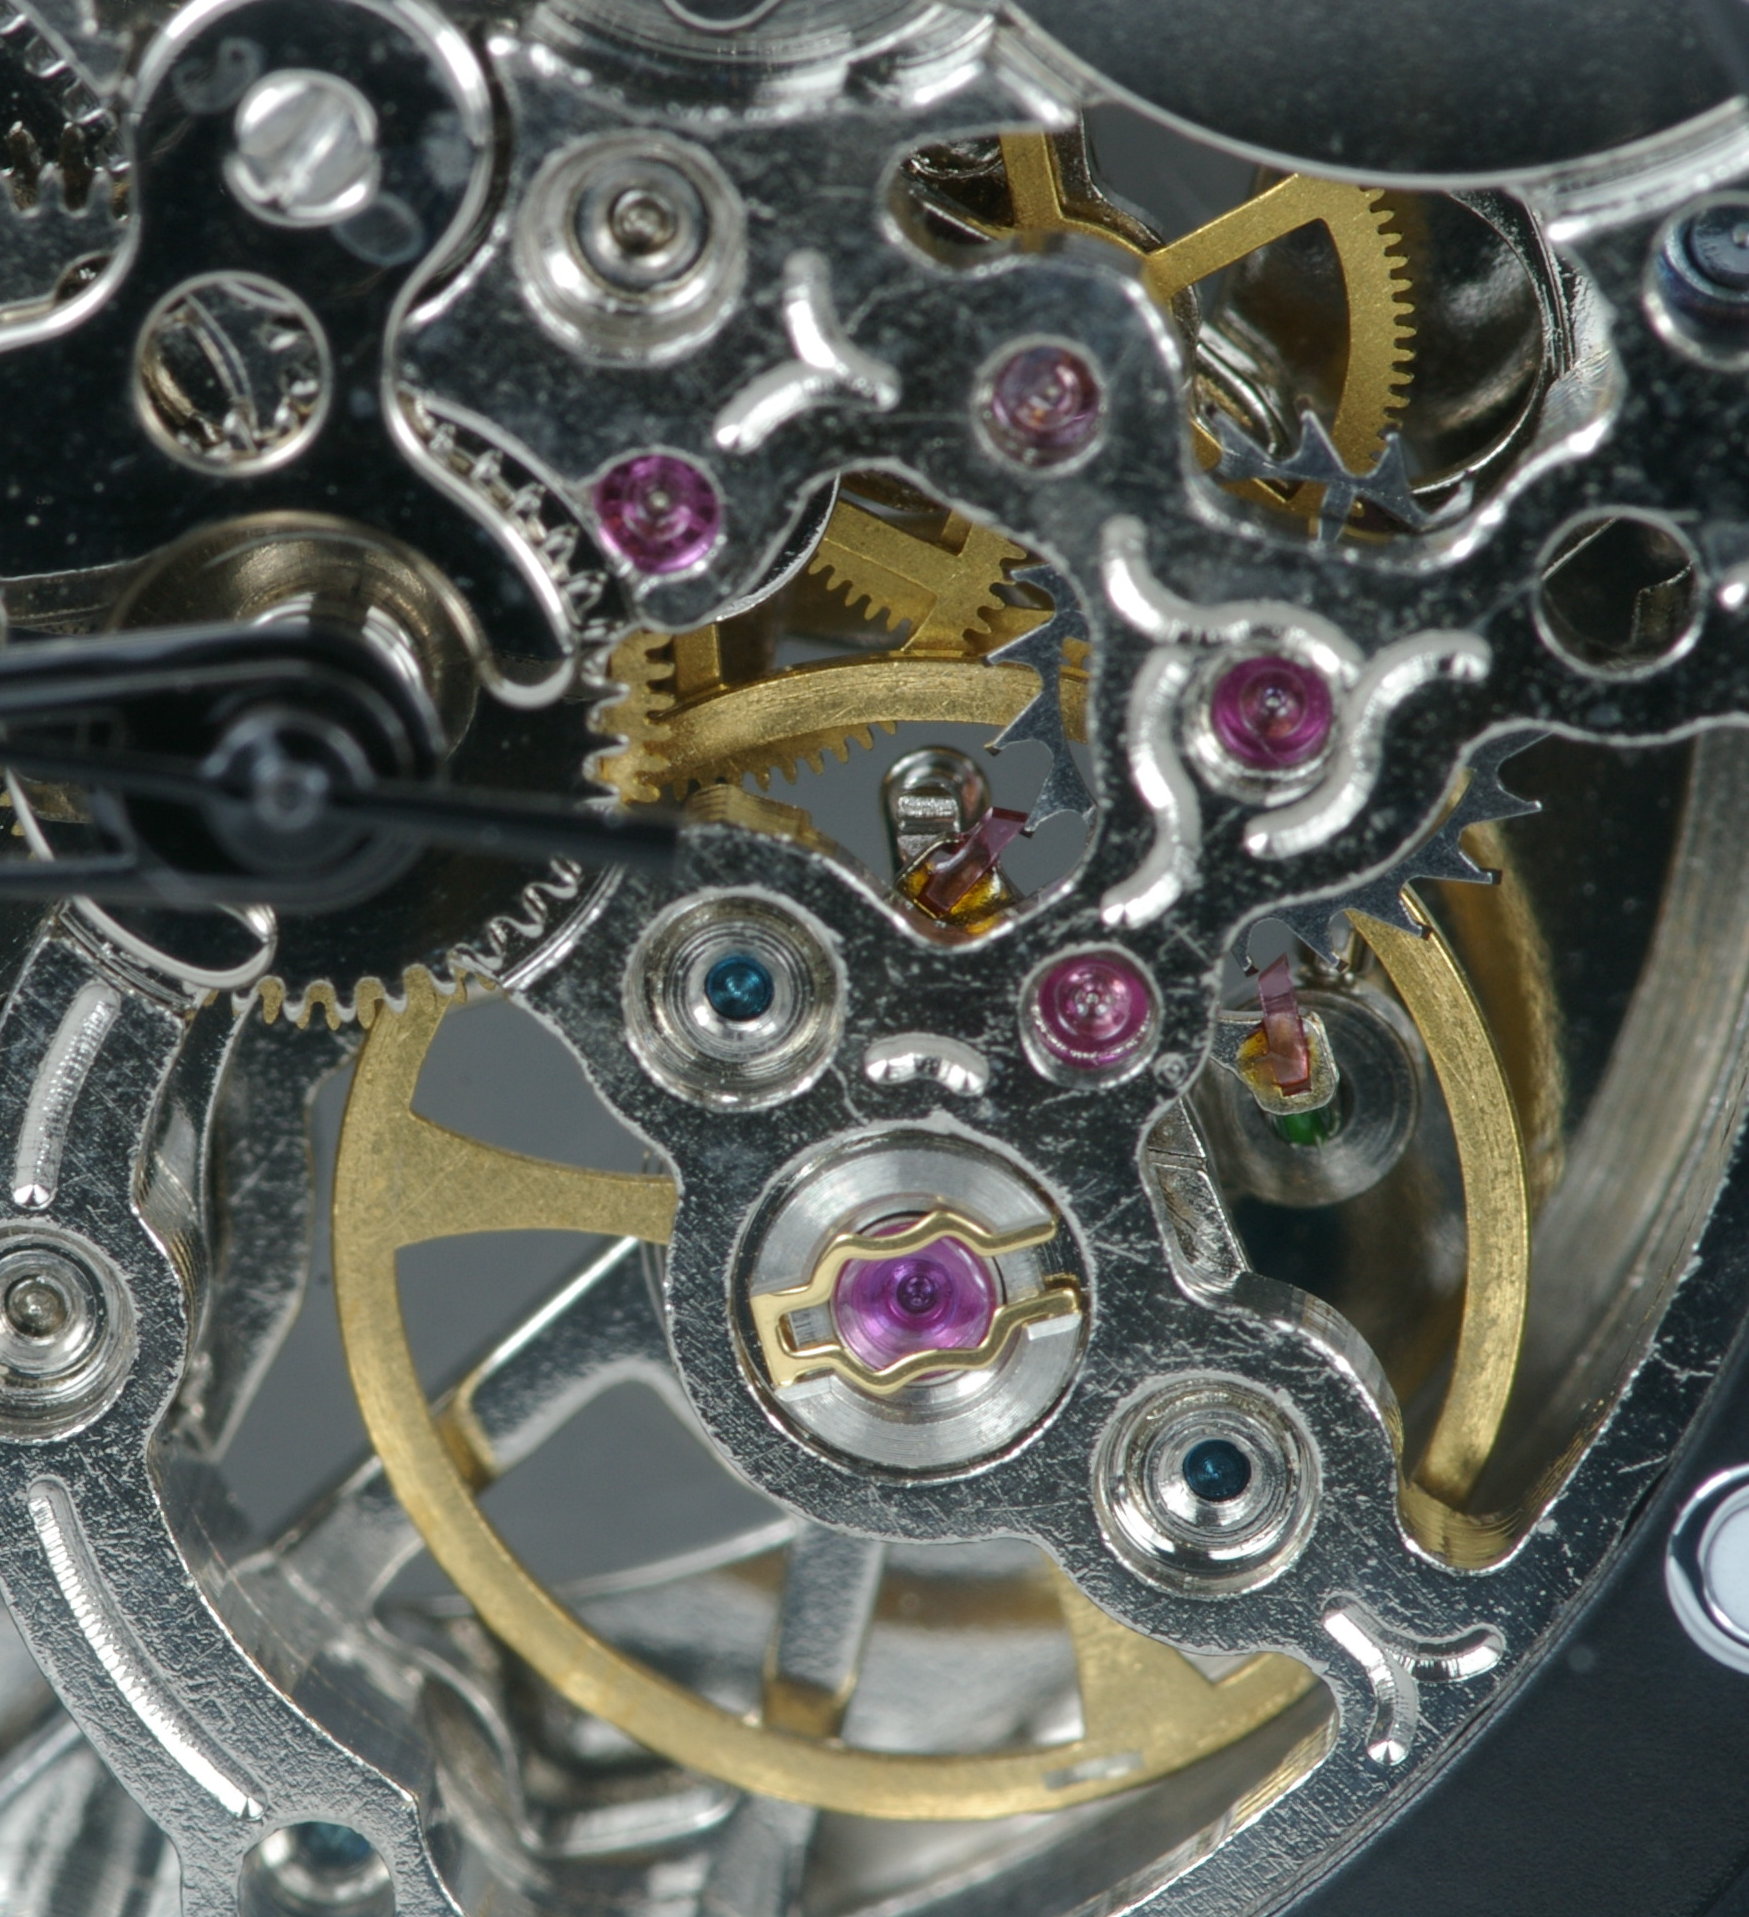


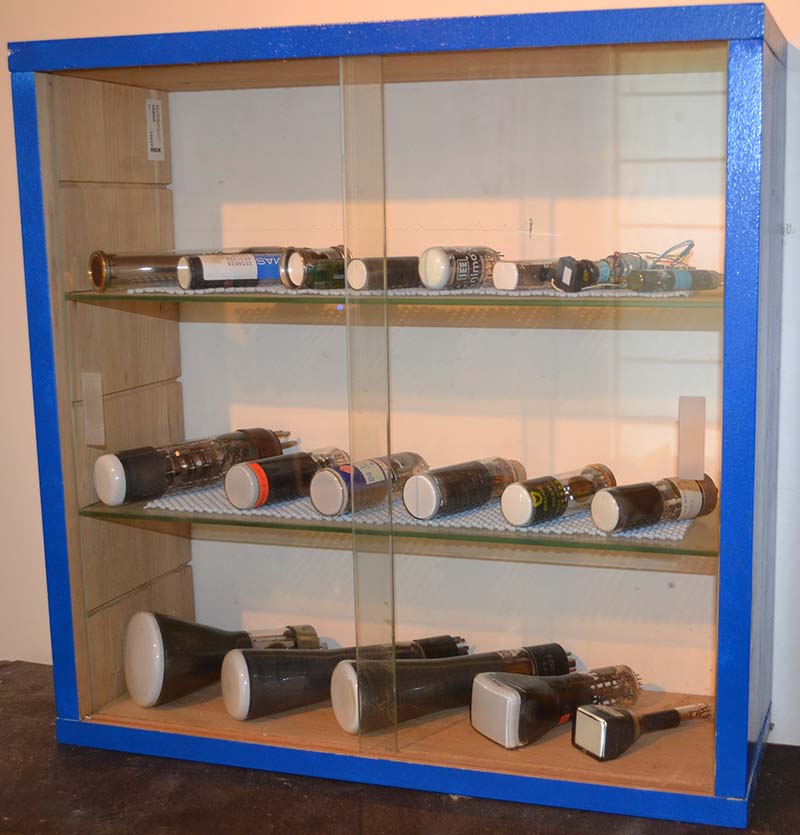


Rough right now. Time to make a better one now that my prototype is done.
west dune
This hungry robot i made