#show-and-tell
1 messages · Page 8 of 1
 feral acorn
They are open in the bottom and work well. However not great for a light sensor obviously
You’re going to want to put conformal coating on the connectors etc, but not on the sensors. This protects from humidity and some rain.
(I was not using Sparkfun’s kit)
Measuring rain and wind was the hardest thing for me to get right for a solar powered solution as you need to have something monitoring them all the time and can’t sleep it
I went with an external chip to count rain and wind and woke up the microcontroller every 5 minutes to collect and transmit all data
And to be clear, the sensors were in the solar shield but the microcontroller was in a sealed box, conformal coated and with silica packs inside.
Final tip: proper placement of weather instruments means keeping away from roof, walls, and so on which can make the range of Bluetooth problematic. Commercial solutions use other radio frequencies. Adafruit should have something that would work (but I haven’t done that myself)
 normal zealot
From the Sparkfun forums Nate (I think the CEO) seems to be the one that wrote up their weather station tutorial they have. Seems like he just oversized the LiPo and let it run and has gotten a few seasons out of it with the solar cell and charger. (Kind of surprising to me) https://learn.sparkfun.com/tutorials/weather-station-wirelessly-connected-to-wunderground/discuss
@feral acorn thx for the info. Do you have a recomendation for brand and application technique for the conformal coating? I have not used that before
feral acorn
I saw there they are thinking of switching to a ESP8266, curious how that works out for them. This was my first solar powered project, most complex one overall, so it was full of learning and I’m not expert for sure.
The coating I used was this one
It is pretty easy to apply, just want to be sure not to cover up sensors. There is a guide on the company’s web site ISTR (MG Chemicals)
If you put the sensors in the type of box they suggested I don’t see how it would be accurate (calibration wouldn’t help).
I should be clear my goal was to have a station that has the gold star from wunderground.com, meaning highly accurate
normal zealot
@feral acorn thx. Ill look at giving it a try
 ionic spade
@mystic ruin I don't have a level shifter but I'll add that to my list of things to read about. As @glad roost pointed out, there is a VBATT connector that will output whatever is powering the CP (USB or JST, whichever is higher).
ionic spade
@glad roost I accidentally found out that that if you supply power TO the CP's VBATT pin, it will (at least momentarily) power the CP ... there's nothing stopping it. I forgot how it happened, but it definitely wasn't intentional. Anyhow, of course Adafruit Support warned against doing that again :). Side note; Yesterday I allowed my project to crash (CP NeoPixels freeze bright white-ish) and then checked the voltage on CP's VBATT (just to see what it would read) and it showed 2.7V, the Feather's 3V read about 3.0V. I reset the setup and then checked the levels pre-crash and they were 2.9V (CP) and 3.3V (Feather). I guess that probably just means the voltage drop across the CP increases during a crash, maybe cuz of the NeoPixels lighting-up. Not sure why the Feather, during the CP's crash, also shows about the same voltage drop across it's 3V pin though. Next I want to figure out how to check the current draw for each, just want to think through HOW to do that ... already blew my spare fuse doing it wrong on a different project :).
ionic spade
Does blowing a multimeter's fuse (or two) while trying to learn how to measure current count for #sparky  ? It was a noob mistake but also an "ah ha" moment. I'll probably do it again a few more times to be honest.
feral acorn
Not just noobs do it. I think I saw LadyAda recommend keeping a stash of spares
 umbral fog
@ionic spade Yeah, that's not just a noob mistake. if it were, then the pro grade multimeters wouldn't have fuses in em, cuz the pros wouldn't need em
 upbeat geyser
APA102 chip on Gemma M0
ionic spade
@feral acorn @umbral fog - lol ... whew, good to know and good advice. I didn't want to wait two whole days for Amazon prime but had a heck of a time finding 750mA fuses locally ... ended-up paying like $2 for 2 at my local Ace Hardware store. No dramatic pictures but in the year I've been tinkering, only killed 1/3 of an RGB (my only common anode...came from Radio Shack) and 2 fuses.
 fallen grail
hey folks, don't know if this is the right channel but I have some questions about the astro pi project...
 calm sparrow
@fallen grail Try the #help-with-projects channel
fallen grail
@calm sparrow thank you, i'll drop by that channel
calm sparrow
You're welcome @fallen grail!
 solar yew
From a blown up motor controller to a homemade arduino with the wrong chip and an led Christmas tree with an led soldered the wrong way round shows we all make mistakes #sparky #mistakes message is always use chip socket, make sure your wires are all inserted 100% so they can't touch and to always double check before soldering! #sparky #learning
 proper dirge
spent a good half hour trying to figure out why my motor was only getting a trickle of current, but my power supply seemed to be putting out all it had. Can you spot the mistake? Luckily no sparky this time.
 rare frigate
Your board is plugged in to wrong end of breadboard?
proper dirge
Good eye lol. It reversed the ground and power rails. I felt so foolish it took so long to catch.
 plain stream
Oh jeez I always forget they aren't symmetrical.
 bright sky
Did some hacky hacking tonight 😃 https://twitter.com/chalkers/status/904571974927564800


Today I learned about packet sniffing with Node.js on Windows and a built a proof of concept! #JavaScriptIoT https://t.co/I271JHN2Hu
 Twitter
Should work on macOS and Linux
 vernal ferry
@mystic ruin thanks for the help 😄 -- I can finally see under my monitor
also featuring @plucky otter on the display 😛
 mystic ruin
Anytime!
vernal ferry
@mystic ruin using blynk for the first time x)
mystic ruin
I've never used it actually, it looks very nice though
I've recommended it to people a few times though
vernal ferry
@mystic ruin super easy to use, plan on running my own blynk server for fun to see.. since it costs $ per module ..
mystic ruin
For plain toggling between colours something like telegram works well and is free (it suits me though since I use telegram already) but it wouldn't be able to do sliders like blynk can
vernal ferry
@mystic ruin the free blynk stuff is actually suitable for most small projects, not sure if the experience is the same if self-hosted
 robust fiber
Adafruit IO does sliders well too
vernal ferry
not sure if its a bug or what, but using sliders/other input on blynk disconnects my esp8266 and i cant change the modes after..
will try it on adafruit io tomorroh
 orchid bluff
I was using an Arduino as an automated camera and learned what wire the pin socket things like (hint: not 30 gauge)! #sparky
vernal ferry
using another project to test a project.. 😛
progress on the color tool im making.. this one's running on micropython, i want to eventually make it all run on circuitpython but still working on figuring out how to best handle the sensor data..
 clever pebble
Diy soldering to fix this led lensing P7
ok still it show the light but it's always on so switch still dont work
rare frigate
The digital library guide I did made it into this months MagPi magazine for one of 10 pi zero w projects you can make
mystic ruin
congrats @rare frigate !
rare frigate

Share books with a WiFi access point.
I also found my intercom project mentioned from a tweet I had done. I ended up using the alexa wand though since it was a lot easier than setting a pi up.
@mystic ruin thanks
plain stream
That was you, Kirby? Awesome!
 trim breach
mystic ruin
trim breach
mystic ruin
I made a video on programming an esp8266 (feather huzzah) with the Arduino IDE
https://youtu.be/AFUAMVFzpWw

How to program any ESP8266 development board using the Arduino IDE My Recommended ESP8266 Boards: Wemos D1 Mini Clone* : http://s.click.aliexpress.com/e/uzFU...
 lucid bloom
I added imgur image uploading to PiGlass, when it uploads I send a push notification to my phone with the link so I can share it via text, email, etc
plain stream
Nice!
vernal ferry
@mystic ruin watching now!
mystic ruin
🤗
vernal ferry
Made a ESP8266 led control page 😃 not sure what to even call this..
mystic ruin
It's probably more aimed for beginners than yourself @cascade
vernal ferry
I was going to do it via MQTT etc etc but that seemed more complicated and involved for just controlling lights...
mystic ruin
I call if progress!
vernal ferry
@mystic ruin I am technically still a beginner ..
mystic ruin
Look at you with your nicely styled buttons 😂
vernal ferry
@mystic ruin is a web designer
mystic ruin
Us mere mortals down here trying to get by with bootstrap 😂
vernal ferry
I set up an environment for bootstrap like a week before they launched the new version that isnt backwards compatible ._.
mystic ruin
@mystic ruin is very far from a Web designer 😋
vernal ferry
@mystic ruin still good video review
mystic ruin
Thanks, I wanted to have a point of reference where I can start making videos that people might be interested in making that are not necessarily into making yet
Like a youtube subscriber counter or crypto currency display
vernal ferry
@mystic ruin oooh, never dabbled with any crypto currency stuffs
mystic ruin
Coinmarketcap.com has a nice api for getting prices of stuff
I made an Arduino library for it
vernal ferry
@mystic ruin if i built one .. id have it play audio samples from the price is right 😝
mystic ruin
You see a price is right to me isn't the same thing as it is to you
We would have watched the UK one
vernal ferry
@mystic ruin oh! X)
robust fiber
@vernal ferry how did you implement the buttons?
 warm sage
Tap tap tap is this thing working?
 prime widget
Yes, @warm sage
vernal ferry
@robust fiber was reading a switch on SD2 , @mystic ruin pointed out that I could use the reset button (push twice, using a different library) to invoke the AP config page I have a spare button to do what I wanted the extra button to do xD
 frail widget
two revisions of my flagship project. it's coming along nicely
robust fiber
@vernal ferry Ah when you select the button, does the webpage jump to another page? Currently the implementations I know do that, and it can be a bit annoying to navigate.
vernal ferry
@robust fiber nope, made it ajaxy by @mystic ruin 's suggestion
robust fiber
@vernal ferry would you have code on Github I can look at haha
vernal ferry
yeah sure, im about to upload an updated version
vernal ferry
@robust fiber https://github.com/eighthree/Simple-LED-Strip-Controller/blob/master/ledstrip_controller/ledstrip_controller.ino

GitHub
Simple-LED-Strip-Controller - ESP8266 Based LED light strip controller via a web browser
robust fiber
Thanks @vernal ferry!
vernal ferry
@robust fiber np! I'm expecting to re-use a lot of what I plopped on here for my other projects. LMK if you have any suggestions/etc. 😄
robust fiber
Sure thing
vernal ferry
@robust fiber how the buttons look like on the project
also, responsive.. so works mobile phones and such.
robust fiber
aw that's very cool! How long did it take you haha
vernal ferry
today.
xD
was working on a micropython colour sensing thing but was encountering the same soft-resets from the esp...
 terse totem
@mystic ruin really nicely done, and clearly explained on the ESP8266 video
mystic ruin
Thanks a lot @terse totem !
 woven frost
So some of you may have seen I was working on a discord bot for a server Im on. Well I finished it and it's running and working well! I have it running on a Raspberry Pi for now as its free but may move it to a vps in the future.
What it does: We have a forums website that we use to keep everyone up to date on stuff we're doing, we found ourselves often posting links on our discord to newly created threads as people are lazy and don't check the website often. So we wanted to automate that! Luckily the forums software was use has an RSS output option so I used that to grab the latest threads (new only) and then parse the data and spit it out in a nicely formatted message to the discord server. My bot checks every 15 mins if there has been a post made and if there has been, then it messsages discord with a link to it.
How it works: I grab the RSS feed every 15 mins (it only contains the most recently made thread), then because the forums software labels the threads in order (i.e. if the last thread was #143 then the next would be #144) and then the bot checks to see if the thread it is analyizing is a newer then the last time it checked; if so then it sends a message with the thread title and link to it. That way it will only ever send a message at least 15 mins apart (to keep the annoyance at a min). And to be honest we only get a few posts a day so even every 15 mins could lengthened. See attached a pic of how the message is formatted! I've blanked out the main url for privacy.
plain stream
that's pretty cool!
mystic ruin
A 2 minute clip from my stream Sunday of the WiFiControlled RC car working

Its a pretty fun and simple project, just need:
- A RC car (I used one with a wired remote, bigger is better as you have more room)
- An ESP8266 board (feather Huzzah or similar)
- A motor driver (that supports two motors)
Code is here:
https://github.com/witnessmenow/WiFiControlledRCCar

GitHub
WiFiControlledRCCar - Adding WiFi controls to a cheap toy car
It hosts a webpage on the ESP8266 you can connect to with your phone or PC to control the car
calm sparrow
@mystic ruin that's slick
mystic ruin
thanks @calm sparrow
vernal ferry
@robust fiber did you find use for my LED strip example?
Update on my LED controller.. now works with homekit and has a colour picker 😃
feral acorn
Cool, how’d you do the homekit integration?
vernal ferry
@feral acorn I use homebridge, which runs on my raspberry pi -- was looking for plugins and found a simple plugin that controls them via HTTP/HTTPS -- so while I was writing the bits to change the colours on the fly through the colour picker, I just had to make the format work with the plugin. 😄
@feral acorn although technically should work with Google assistant implementations that are the same..
feral acorn
ok, was wondering if you’d done the iOS11 route, hoping homekit will be open enough with that release
vernal ferry
@feral acorn I didn't want to specifically build around homekit support, its just a nice bonus 😄
lucid bloom
I got PiGlass to send and receive texts messages with twilio, I'm gonna see if I can make calls with my mems microphone
proper dirge
Not really electronics, I know, but here is the work table I made from pallets so I would have a space for projects.
terse totem
nicely made
 eternal maple
@proper dirge we call that "maker infrastructure"
terse totem
@proper dirge really nice sanding and finishing on the top. did you oil/wax it?
proper dirge
Thanks
@terse totem It's a satin poly on the top. It took several coats, but came out nice.
terse totem
Looks great. I see you've got plenty more pallets ready to be transformed...
proper dirge
lol you should see the stack of broken down pallets inside the shop.
eternal maple
@proper dirge Have you had any experience with wipe-on poly finishes? I have some and have been itching to try it.
proper dirge
@eternal maple that's what's on the top there. I love it. It goes on thinner than what you may be used to, but if you put the time in, it comes out really nice.
eternal maple
@proper dirge Good to know. I'm making some birch ply workshop shelves that'll get the wipe-on treatment. Thanks!
feral acorn
Nice space for making
mystic ruin
Awesome table, I can barely assemble stuff from ikea 😂
robust fiber
@proper dirge I would like to work on some pallets, but all I got on hand is sandpaper. Not sure how far I can get with that.
Can't really get very far in woodworking if you are renting
@proper dirge any recommendations on how to start?
 keen temple
Lessened learned, don't leave a PLA printed quadcopter in your car in Florida... #sparky
keen temple
This ABS 3D printed hand caught on fire during a robot competition. Remember to plug in your 'Balance Charging Socket' when you are fast charging your LiPo batteries... #sparky
mystic ruin
Lipos scare me @keen temple
I'm pretty sure that I bought the same charger as you too, but still haven't used it
 indigo patio
@rustic stag First time using NeoPixels and WOW THIS IS BRIGHT! (Which I'd consider good)
proper dirge
Oh, I'm still very much a novice, @robust fiber .
mystic ruin
Is that the table you shoot your videos on @proper dirge ?
proper dirge
indeed
mystic ruin
I thought it was the floor in the first video, then noticed you had a mouse on it in the second video so was bit confused
mystic ruin
😃
I converted a ikea desk lamp into a camera mount for my overhead shots. It works really well actually. I'm using two go pro adapters to connect it to the light
vernal ferry
great idea @mystic ruin ! :]
robust fiber
Qi charging station. Still figuring out the case for the bottom.
Tapped the charging LED to tell me when it is charging something.
Starts to animate the neopixels when it is doing so. Still adapting the firewalker shoes code for a smooth fading tail animation.
@mystic ruin I flipped the ikea lamp upside down 😄 two uses!
mystic ruin
the lamp that keeps on giving @robust fiber !
robust fiber
Indeed @mystic ruin 😉
prime widget
Yup, awesome lamp. #ProjectEnvy
lucid bloom
Doesn't look like I will be able to get twilio phone calls to work with PiGlass😞
But SMS, MMS and faxes work great
clever pebble
@lucid bloom have you find tiny projector for piglass
lucid bloom
I'm working on screensharing
I'm going to my local makers Meetup soon they haven't seen me since our last maker faire, so they haven't seen my new smart airsoft gun, PiGlass or my 7bot. Here the old versus new smart airsoft gun
The latest smart airsoft gun was actually the inspiration for PiGlass
 shut sigil
Will we see it on SnT soon? I'd love to see it in action.
lucid bloom

https://plus.google.com/+adafruit 1) Add +Adafruit Industries to your circles 2) Post a message/comment HERE and say you want to show off a project and we wi...
I haven't finished the build guide yet but all you need in terms of tools is a drill, hacksaw and long needlenose plyers
Here's a demo of me shooting it https://youtu.be/W5wOcUbw3i8
@shut sigil it also has about 50ft of night vision thanks to the IR camera and IR taclight
shut sigil
@lucid bloom I watched the SnT listed above. Very nice. Night vision has got to be awesome to use.
lucid bloom
@shut sigil yup it's very fun
mystic ruin
Spent a bit of time doing this over the last few days, I'm looking to make a how to video on making a simple solder free crypto display using an esp8266
(just for you eagle eyed crypto currency checkers, the $ symbol should be a euro)
calm sparrow
@mystic ruin You wrote that in Circuit Python right? 
mystic ruin
I can't be purple just yet @calm sparrow
mystic ruin
I do really want to try it but I have such a backlog of stuff I want/need to do I'm just not sure when I'll get to it!
calm sparrow
@mystic ruin I hear ya there.
mystic ruin
Yeah it's funny, I released a library for coinmarketcap.com api, so the sketch for the above project is actually really straightforward
I'm probably not going to be the person writing low level drivers for new displays etc, but very happy to try make somethings I can do easier for others
GitHub
Contribute to simple-arduino-crypto-display development by creating an account on GitHub.
For anyone interested in it
calm sparrow
@mystic ruin Any help is much appreciated. Thanks for posting your code!
mystic ruin
It's one of the things I like about the maker stuff, is how open it is
vernal ferry
Cool @mystic ruin ! Will look at those when I start using displays with my ESP boards 😄
Used collin's "Ampli-Tie" to no-tie-fy me when laundry is done. Just tested it with a wash/dry cycle ☺
https://github.com/eighthree/Simple-LED-Strip-Controller/blob/master/examples/mic_sensor_example/mic_sensor_example.ino
GitHub
Simple-LED-Strip-Controller - ESP8266 Based LED light strip controller via a web browser
 marble tapir
My band and my light up tuba (though one of my less visually interesting patterns): https://www.facebook.com/marko.bajic.794/posts/10101540717457228

My favorite part of the Lantern Parade. How did I forget about this song???
You'll also see a sousaphone with a big face on it, I did lights for that one too, but it's too subtle for the camera to pick up. It sparkles and and "breathes".
Slightly better vid. Both of these are after more than two hours of parade...so we don't sound our best. 😄 https://www.youtube.com/watch?v=O09qQYglAcI
 eternal maple
@jaswope pretty darn cool! Lots of energy even after parading for two hours!
lucid bloom
I'm getting a new free toy in a few months, it uses eeg and eye tracking to type and carry out commands this is what it looks like
😊
plain stream
interesting!
I was about to say "oh tell matt his piglass has competition" and then I looked at who said it 😃
shut sigil
@lucid bloom Sort of like my Google Glass where you could blink and it would recognize it. I need to find a use for those things.
lucid bloom
Yea the wink to take pictures, no one really developed any eye tracking apps for it
shut sigil
I know, it bombed. But I still have mine. My great great grandchild will sell them to Mike and Frank for a couple of bucks. 😃
lucid bloom
I sold mine last year
 rustic stag
hi @bright hull ! you won a #sparky pin! however! you work with us, so no pin for you, unless you really want it - we'll be picking the next one randomly shortly 😃 https://blog.adafruit.com/2017/09/12/cater-celebrating-mistakes-together-with-sparky-the-blue-smoke-monster-adafruit-discordapp-adafruit/

We are giving away some Sparky the Blue Smoke Monster pins in the Adafruit Discord chat! All you need to do is post your wonderful mistakes in the #showandtell channel and we’ll be reviewing …
prime widget
That's adorable. Fortunately, I haven't blown up anything or even released the smoke (yet).
clever pebble
so
 woeful flame
Not exactly blue smoke, but I finished soldering 144 LEDs into a 3D printed housing with the Adafruit LED charlieplex board, then lent the soldering iron against the PLA #sparky
prime widget
@woeful flame Oops. We don't have a good "smelly" emoji, except the poo, and that could easily be misconstrued.
prime widget
That's awesome, @woeful flame !
woeful flame
Powered by a trinket as well 😃
 cedar root
I finished up (well at least stuff works 😃 ) my summer irrigation project that uses Feather m0 RFM69's, Feather Huzzah, Adafruit.io to automate watering of my backyard based on moisture sensing...in case anyone is interested -> https://bitknitting.wordpress.com/2017/09/12/summer-project-automatic-irrigation/
The summer is pretty much over so I decided to finish up my summer auto irrigation project with a post. I’ve had a few posts about the progress I have made on my summer project to implement an aut…
prime widget
I'm very interested! Thanks for the link!
 lapis jasper
@cedar root you should demo it on the show and tell stream too!
 bright hull
@rustic stag all good. just wanted to play along. 
cedar root
@lapis jasper on demoing - when I watch the show and tell these amazing projects that blink or show images are shown...can you imagine watching water dripping? I have to face reality - auto irrigation doesn't show well...although it totally improves eating well. I've had a terrific growing season. A bit touch and go with bird competition particularly for the blueberries and strawberries. Blue Jays are brutal. Seriously. I would not want to be a finch in a garden that has a blue jay patrolling it.
lapis jasper
the gear that makes it auto water is interesting!
mystic ruin
@cedar root I definitly would be interested in it!
 scenic siren
@cedar root Agreed, I was even telling people about it today.
lapis jasper
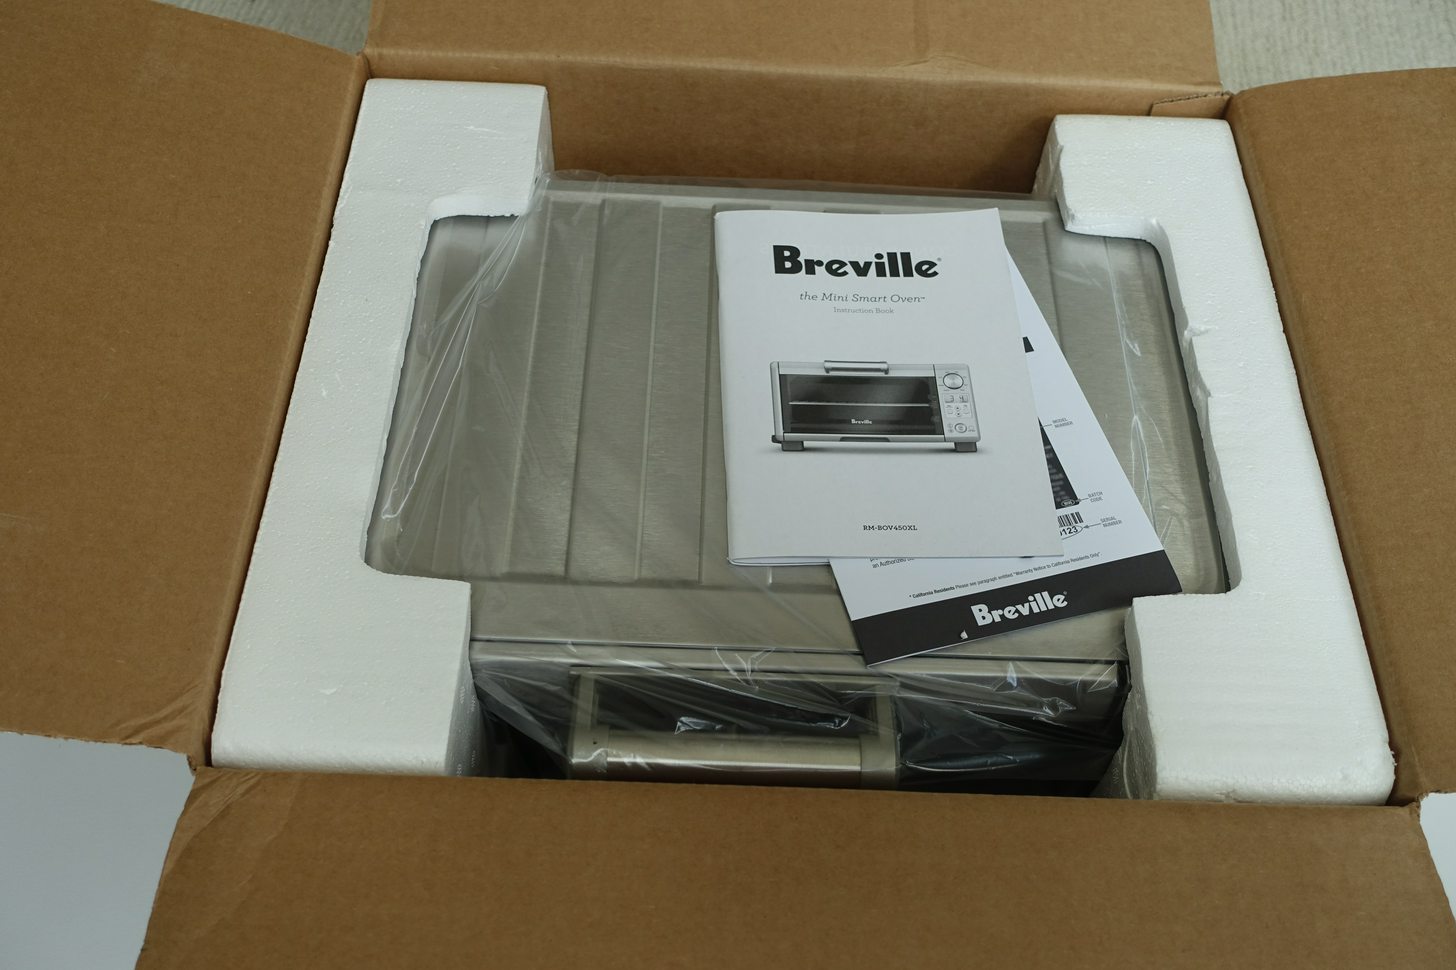
@glad roost @umbral fog I got my toaster oven for use as reflow and finally satiated my desire to see inside: https://imgur.com/gallery/btLq7
its two boards and I'm hopeful I can design a new control board for it
plain stream
@cedar root just talking about it, and the code you used, etc would be very interesting!
feral acorn
@lapis jasper now that’s a real unboxing
 glad roost
@lapis jasper We got ours a couple of days ago and really like it as a toaster, especially the "A Bit More" button. Is there any readable printing on the microcontroller chip?
glad roost
@lapis jasper F0411. Maybe this: http://www.futureelectronics.com/en/technologies/semiconductors/microcontrollers/8-bit/Pages/9031250-UPD78F0411GA-GAM-AX.aspx
lapis jasper
do you see a description of markings?
I was thinking it'd be fun to try and dump the code off of the chip 😃
new album link: https://imgur.com/a/5GCnK
 glad roost
I just Googled the larger number (no luck) and then the smaller one. One hit had TQFP in it, and that helped narrow it down. There are some other F0411 chips that are quite different. I was wondering if you could reprogram it and not have to redo anything about the oven at all. Just bring out some JTAG or SWD wires...
lapis jasper
yeah, I was tempted. I really want it to run circuitpython though 😃
I also cut the ribbon cable so I'd need to redo that at least
mystic ruin
I appreciated that you put the screws on the metric side
lapis jasper
I generally prefer mm
mystic ruin

I did some work tonight on the crypto display, I tried out using string literals to program a Web page for the esp8266
Worked great other than the ssl WiFi client was crashing if the Web server was runnin
I had all this nice Web page stuff done, and just had to take it out again!
GitHub
Contribute to simple-arduino-crypto-display development by creating an account on GitHub.
The sketch as is will crash when it makes a request, but I'm pretty happy with the string literal stuff, pretty sure I'll use that again. Might make a decent reference for people too
cedar root
@plain stream @lapis jasper @scenic siren @mystic ruin @prime widget I want to thank you all for your kind comments and support of my auto irrigation project...if you scroll backwards on the posts from here: https://bitknitting.wordpress.com/2017/09/12/summer-project-automatic-irrigation/ i tried my go at documenting the project as I learned stuff. it goes through challenges i had w/ the hardware - like using standard irrigation valves - sharing 24 v w/ 3.5v....power management...
The summer is pretty much over so I decided to finish up my summer auto irrigation project with a post. I’ve had a few posts about the progress I have made on my summer project to implement an aut…
clever pebble
@terse totem have made mystery box
i wish i can share my mystery box image with you guys
it's timemachine kinda mysterybox
ok here is my mystery box https://www.instagram.com/p/BY-0-RJAMS8/?taken-by=janisku7

Instagram
0 Likes, 1 Comments - Jani Turunen (@janisku7) on Instagram: “My #mysterybox #throwbackwednesday old school project”
plain stream
Nice! What was inside?
clever pebble
I wish I remember
the electronics case have being carved by hand
with tools
if i remember right it was a electronic kit, and that detect if someone walk bast it but it have sensor in the side so i was thing what is that
clever pebble
https://www.instagram.com/p/BY-5OC6AnjP/?taken-by=janisku7 and battery the second one https://www.instagram.com/p/BY-7UK3glCI/?saved-by=janisku7

Instagram
1 Likes, 1 Comments - Jani Turunen (@janisku7) on Instagram: “Inner parts from #mysterybox #diy #throwbackwednesday”

Instagram
1 Likes, 1 Comments - Jani Turunen (@janisku7) on Instagram: “This ➕9V battery was powering #mysterybox #diy #throwbackwednesday”
that box was made before 2000
today I would use milling tool perhaps more
@plain stream so Hope that explain what is inside
plain stream
before 2000!
clever pebble
1998 perhaps
umbral fog
@lapis jasper since the flash ate em: what're the markings on what I'm assuming is the actualy MCU?
nevermind.. apparently it was a case of phone screen eating it....
plain stream
@cedar root have you been on show and tell with this yet? because if not you absolutely need to
this is awesome
that isn't your adafruit io key though, is it?
solar yew
I made a bracket set to support my camera rig 😃
lapis jasper
@ogredrew I spent a while last night tracing all of the traces and trying to determine pin funcitonality. Still not done yet though
woeful flame
This one definitely let out the blue smoke, giving it a test drive the day before the competition and the Mosfet went bang! Didn't really need that late night of soldering. Then the new one went bang,. If you didn't fix your short, it isn't fixed! #sparky
terse totem
@clever pebble that's very cool, and seriously old school!
clever pebble
yeah it is and funny thing is that there is tissue paper between wood and circuit
 bitter minnow
a little better pic of my pumpkins
vernal ferry
#sparky
Welp.
Happened just now.. The lipo connectors were reverse.... :<
Where could i look up that part and would I still be able to use the board if I replace this part?
mystic ruin
Worth a shot
vernal ferry
board still works..
mystic ruin
Yeah definitely worth a go so
vernal ferry
wouldnt trust it connected to my computer though in case... it ppooofs
vernal ferry
im not sure.. its part of the battery circuit..
i cant find that part. not sure what to search, its KDCV
mystic ruin
What board is it?
It's probably boost or maybe cut off voltage detection, I guess they would be first inline for a battery
Pinout matches this
And that's the battery circuit of a feather
Go adafruit for being open source hardware 👍
vernal ferry
its a wemos esp32 board
looks like this is the part! is there a way to find a better version of it?
if im ordering some edit: ordered! x)
 eager pine
omg @bitter minnow your pumpkins are amaaaaaaazing!
prime widget
High power rocket flight computer prototype....
plain stream
@solar yew is there a guide somewhere for your hardware-based randomness generator?
mystic ruin
@vernal ferry funnily I just implemented reverse battery handling into something last week
As kindly pointed by @shut sigil, the full bridge rectifier will reverse the voltage if needed
You can get them as a module that isn't too big (I think)
normal zealot
Given the contents of @rustic stag #adabox005 -- Pi Zero + Joy Bonnet -- I bet others would be interested in this 3D printed case I designed and built a several weeks ago for my Pi Zero W + Joy Bonnet: https://tinwhiskerz.com/2017/08/01/pi-zero-w-joy-bonnet-case/ #adabox

When I first saw the Adafruit Joy Bonnet for the Raspberry Pi Zero I know I had to get one and try it out. :-) I liked the idea of having a small RetroPie rig I could keep in my pocket. As if I nee…
plain stream
thanks! 😄
prime widget
@plain stream +1 on adorable son! His reaction to MineCraft was priceless.
umbral fog
@mystic ruin @prime widget The problem is that minifoos KNOWS he's adorable......
plain stream
oh, he also wanted us to start the stream back to back with our arms folded
lucid bloom
I got a crimper, connectors and wire, I made custom jumper wires and jumper resistors for PiGlass
scenic siren
@plain stream lol
 karmic fjord
My hacked Trinket M0 "Express": Trinket M0 with 2M SPI flash. See https://daveastels.com/2017/09/01/trinket-m0-express-hack/ for nore details.
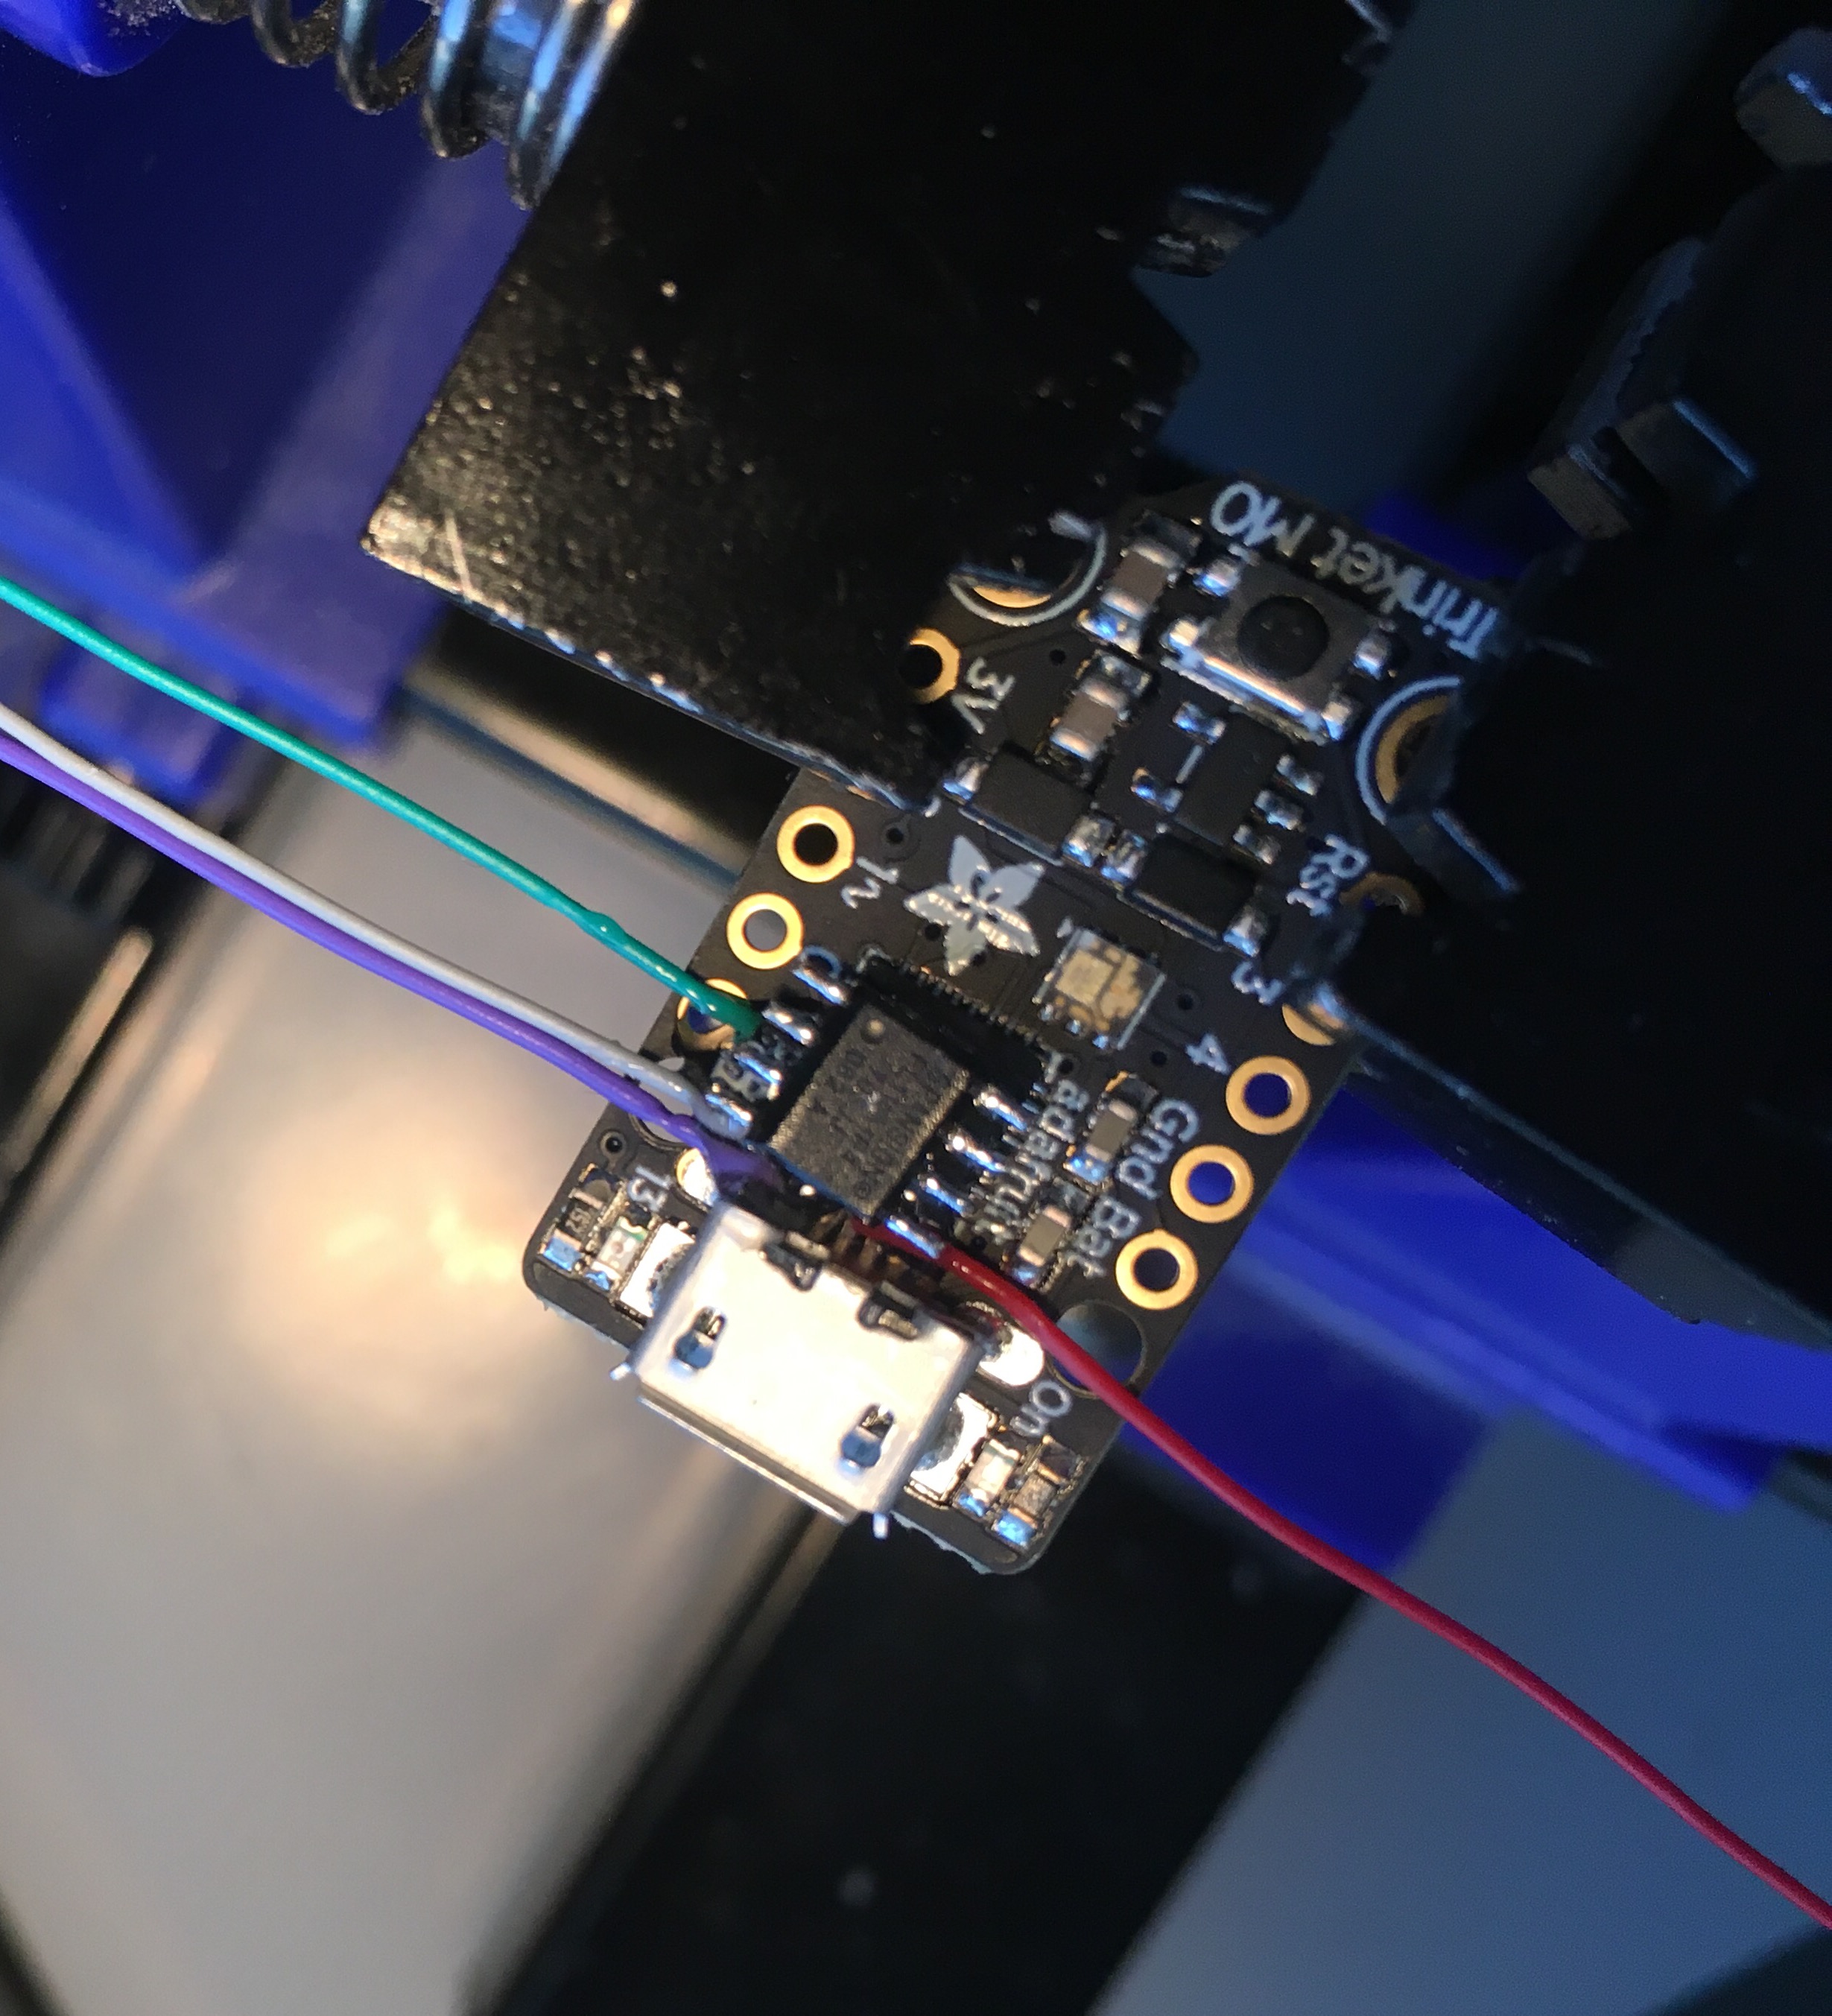
Introduction I am a huge fan of the SAMD21 boards that Adafruit is producing. What a huge step up from the ATMEGA328 or 2560. 48MHz, 32 bit ARM Cortex-M0+, and loads of flash and ram. I have severa…
 native juniper
sparky the blue smoke monster is my spirit animal
calm sparrow
@thorny bluff Nice!
 thorny bluff
The setting will be the "hard part" I think. Lol
feral acorn
That’s really cool @thorny bluff
thorny bluff
It's basically the "cosmic turtle" but with a semi-precious stone. My 5 year old daughter wants to be "princess Sofia" for Halloween. If you're not familiar with the show, she has a magic amulet. I'm trying to show her that theres beauty in engineering. (that, or Daddy is a dark wizard.)
calm sparrow
@thorny bluff Love it. Hahah yes, I've actually seen it. My Cousins watch it. I have a little girl on the way though.
thorny bluff
Avoid it as long as you can @calm sparrow
calm sparrow
@thorny bluff Haha okay, I'll try!
 vestal jasper
#sparky A simple circuit to allow me to download logs off of my scuba diving computer. It had been a while since I had down electronics and had forgotten about diode polarity. So it didn't work until I remembered that simple fact. Now I'm consuming all the electronics information I can get.
eager pine
that's gorgeous @thorny bluff
lucid bloom
I pulled off a Google Glass feature, the picture in picture with the camera view and screenshot
the code is really simple, take a screenshot, take a picture from the camera and combine them
import cv2
import numpy
import subprocess
subprocess.Popen("./raspi2png", cwd='/home/pi/raspi2png')
subprocess.Popen(["raspistill", "-t", "500", "-o", "camera.jpg"], shell=False)
Load image and screenshot
img1 = cv2.imread('camera.jpg')
img2 = cv2.imread('snapshot.png')
#top-left corner
rows,cols,channels = img2.shape
roi = img1[0:rows, 0:cols ]
img1[0:rows, 0:cols ] = img2
cv2.imwrite('test.png',img1)
mystic ruin
Firstly I apologise for the portrait mode (what was I thinking), but I was messing around with a neopixel ring and an ikea lamp and figured this by accident
 lapis jasper
@eager pine from Seattle Mini Maker Faire showing off her awesome Selfie Bot: https://youtu.be/kri5OOp3nEs

Sophy shows off her selfie bot from Seattle Mini Maker Faire. https://sophywong.com/
eternal maple
@eager pine Very cool! The finished project is excellent.
lapis jasper
link to show and tell: https://hangouts.google.com/hangouts/_/6qgpwhh22zdplieb6vw74khowue
indigo patio
And here's the link to the stream! https://www.youtube.com/watch?v=56FhHaasGH4

CHAT IS HERE! http://adafru.it/discord ----------------------------------------- Visit the Adafruit shop online - http://www.adafruit.com Subscribe to Adafru...
lucid bloom
ive posted my twilio code on github, there are 4 programs. Two will work on any pi and the other 2 will only work with other programs on PiGlass. SMS.py and readSMS.py are the two that will work by themselves
https://gist.github.com/matt-desmarais/b7076f6393d8be48260399eefeeb50cf#file-sms-py
https://gist.github.com/matt-desmarais/b7076f6393d8be48260399eefeeb50cf#file-readsms-py
Here is the rundown of the programs
SMS.py prompts for a phone number then a message, then displays them to you and asks if you want to send it.
readSMS.py reads the last 10 text messages and numbers them, then asks you if you want to reply to a message, if you do you pick the number of the message then type your reply. then displays it to you and asks if you want to send it
newMessagePushNotification.py sends push notifications to my phone when a new text is recieved, with the number and message content
textLinks.py will ask for a phone number and that last x number of pictures taken that you want to send as links.

 cunning token
I don't work with ATTINY85 development boards often, but when I do I always make the mistake of killing the Zener diode between the USB power and ground (by shorting it). Mostly because when I use them on breadboards, I forget that the power pins are all in a row. Oops. This is a board from one of my projects, where I decided to double down on the sketchiness by simply brushing away the charred remains of the diode and using a jumper. Luckily, this board will never be used in a USB port again so it's unlike to kill a USB port anytime soon but I've made a habit of reminding myself not to do this! #show-and-tell #sparky
 crimson egret
@terse totem , you asked on the show about a somebody with a physical challenge trying, asking for advice on how to solder.
I know is not the same thing, but I have used Z-Axis tape to do arduino like boards on paper, but the normal use is for prototypes or small repairs.
You just cut a little square of the tape, peel it, stick it on top of the PCB without solder paste or anything, and then just put the chip or led or resistor on top of it.
Hope it works....
Oh and Adafruit does have it in the products 😃
glad roost
@crimson egret @terse totem There are commercial one-handed soldering irons with solder feeders, though they're expensive: e.g., http://www.hakko.com/english/products/hakko_fx8803.html
mystic ruin
@glad roost I've seen non Hakko branded similar ones
One of the grocery stores near me have different special items every week and one week it was one of these
for like E20 or something
(that seems ot be coming from china though)
 plucky otter
You could also use solder paste and hot air.
glad roost
@crimson egret @terse totem @mystic ruin @rustic stag Ha - now I remember there was a forum thread about one-handed soldering: https://forums.adafruit.com/viewtopic.php?f=44&t=88001
 cunning quest
@vestal jasper what dive computer do you have? Is this idea adaptable?
proper dirge
Well, after more hours than I care to mention, my interface is starting to look like something that may eventually grow up to be usable. Eventually the picture there will be from a live camera, and the panel on the right will have sensor data (distances, compass direction, etc). I still need to add status lights to the blank spot below the photo, and once the camera is set up, add in the camera controls.
For now this will be interacting with a huzzah breakout using Circuit Python through the webrepl
calm sparrow
Very impressive @proper dirge! You've out so much time into this, it'll be really rewarding when you're done. It already looks great though!
You should share this to the CircuitPython channel too. This has to be if not THE first, one of the first projects like this and how you're using socket to send stuff to the webrepl. Certainly is the first for CircuitPython, not sure about micropython
indigo patio
proper dirge
Thanks, @calm sparrow I'm hoping to get a lot of it done this weekend. I should be able to get most of it done assuming there's no major hiccups. It's been interesting, that's for sure. I'll post more in the #circuitpython-dev channel when I get a bit further.
Making things look nice is just not in my wheelhouse
clever pebble
@proper dirge is that made with what?
proper dirge
@clever pebble The gui is HTML/CSS. It's using websockets and javascript to connect to, and communicate with, the webrepl Circuit Python client running on the ESP
calm sparrow
@proper dirge functional > pretty
clever pebble
fuctional can be pretty as well @calm sparrow
vernal ferry
finally got the second prototype of my colour tool finished 😃 now for the software side ...
scenic siren
@vernal ferry Nice!
vernal ferry
@scenic siren ty ty! I'm hoping to eventually port it over to circuitpython ;3
proper dirge
@vernal ferry is that for detecting color?
vernal ferry
@proper dirge yeah 😃
got some smartphone lens adaptors and using a wide angle/fisheye
case is modular so i can swap out aperture sizes and or lenses infront of it
i thought adding a polarizing layer between the sensor and subject would help but it reduced sensitivity a lot
proper dirge
Oh cool. I used to color calibration of monitors at a large photo lab. It's amazing how far things have come.
indigo patio
@vernal ferry That's cool!
vernal ferry
@indigo patio 😄
thorny bluff
MVP of the “Amulet of Avalor.”
It’s a little junky on the back side, but hoping it’ll blend into my daughters costume...
Much thanks to the following folks:
The authors of: https://github.com/FastLED/FastLED
CSLDesigns for assist with setting: https://www.youtube.com/channel/UCDGPRi_lFPh8jpVUEfPG6-g
And of course the fine folks at adafruit...
GitHub
The main FastLED library (successor to FastSPI_LED). Please direct questions/requests for advice to the g+ community - http://fastled.io/+ - we'd like to keep issues to just tracking bugs/enha...

YouTube
Welcome to my channel. My name is Christina Larsen and I make handmade jewellery and other creative crafts and aim to share my skills and ideas with everyone...
Now onto the tiara...
proper dirge
Oh, that is reall cool looking @thorny bluff
thorny bluff
tyvvm @proper dirge it's been a lot of learning through messing up... 😉
proper dirge
If you're not messing up, you're not trying hard enough
scenic siren
@thorny bluff It's beautiful! Well done!
calm sparrow
That's awesome @thorny bluff!
thorny bluff
Thanks @scenic siren and @calm sparrow... 😄
calm sparrow
Haha, looking good @vernal ferry!
proper dirge
I got my weekend project of a circuit python driven rc car at the level of completeness I'd hoped at this stage. The car itself is runnng a circuit python script. I am using a web page on my computer and communicating with the webrepl through websocks to send calls to that script, and parse the return values. This seemed like the logical route. Why build an interpreter for my project when one is already there?
The web page I'm using to control it really needs some love. Itis not pretty, but it is working, and that's the important part.
https://youtu.be/QW2E9n7fNeU

Part three of my car/robot build. Quite a bit has changed with the build. I'll be using an Adafruit ESP8266 Huzzah Breakout instead of the Arduino Uno that I...
feral acorn
Very nice project Brad. Do you plan a write up on how you got to this point?
calm sparrow
Great job @proper dirge! It's awesome
proper dirge
Thanks!
@feral acorn I hadn't thought about that, but I don't see why I couldn't. I'll just need to find/set up a place to host it.
feral acorn
I'd find it useful
mystic ruin
@proper dirge Instructables just launced a motor competition!
you could write it up there and enter it
I made some progress on the my remote camera trigger device
https://gfycat.com/HeavenlyDearestFritillarybutterfly

Cause I love punishing myself I stated out with a HC-06 bluetooth module and flashed firmware onto to that is HID compatible
scenic siren
@mystic ruin That's really neat!
mystic ruin
The HC-06 is on the white breadboard and there is an ESP8266 on the small one, when the footswitch is pressed in sends a "Volume up" command, which triggers the camera
Thanks @scenic siren
It works really well, but I would suggest if people want to make it they should get the Bluefruit Ez-key as that seems to support HID out of the box

Note: This product is currently undergoing a revision and will be available again soon!Create your own wireless Bluetooth keyboard controller in an hour with the Bluefruit EZ-Key: ...
oh ..."Note: This product is currently undergoing a revision and will be available again soon!"
proper dirge
@mystic ruin That is really cool. How does it trigger the camera? Is there something attached to the phone?
I used anHC-06 (or was it 05?), a while back with a leonardo to act as a keyboard for sending macros. I feel your pain. To say the documentation on those is lacking is putting it nicely.
Oh, do you have a link for that contest?
mystic ruin
It's connected as a Bluetooth device to the phone, so it's acting as a keyboard
Volume up on a keyboard or headphones triggers the camera
proper dirge
oh, ok, so it is sending via bluetooth straight to the phone. That's pretty cool. Nice job
mystic ruin
You were sending commands to leaondro that was acting as a keyboard was it?
mystic ruin

Instructables.com
We like to move it move it, you like to move it move it, let’s all move it, move it for the Make it Move Contest! Your project can move on its own or by your power. Make it fly, run, glide, skip, wiggle, roll, or propel, no matter what you make, all you need to do is make it move! Get it in gear to win a PivotPi Starter Kit, EmpathyBot Kit, or Raspberry Pi 3 from Dexter Industries! Incorporate motors into your project for a chance at the judges’ prize! Don’t let your projects be stagnant. It’s time to get up and move!
Thanks!
I got the idea from a youtuber called Evan Kale, he flashed one of those modules with hid firmware for a project
He has a good video on it, but he uses a parallel port
To flash the module
I haven't had a PC with one of those in about 10 years at least!

Arduino makers and hobbyists will appreciate this one. Here's how to turn a $3 Bluetooth module (HC-05 or HC-06) into an HID module (like the RN-42 or BlueSM...

GitHub
csr-spi-ftdi - USB SPI programmer/debugger for CSR BlueCore bluetooth chips, based on FTDI USB to UART converter, for Linux and Windows
Is what I used to flash it with an ftdi chip
I think I'll try make a video on it this week
I'd recommend checking some of evans other videos out too, I think they are really good
He strikes a good balance of showing you really good and interesting stuff and being enthusiastic and entertaining with it
mystic ruin
@vernal ferry i guy I worked with was just asking about building something for detecting when his laundry was done, do you have more info on the project?
lucid bloom
I want to make a logo for PiGlass and I'm trying to think of a new feature to add, if anyone has any suggestions let me know
 oak fog
@lucid bloom Does it have GPS?
oak fog
Okay, I think that could be a cool feature, but I don't know
lucid bloom
I'll definitely give it a try walking directions would be cool
oak fog
Oh yeah!
@lucid bloom Also, about the logo, I could do one, it shouldn't take too long, but I'll have to do it when I get back
lucid bloom
Not a problem
oak fog
I have an appointment first, but I'll try to get to it!
lucid bloom
Thank you very much
oak fog
No problem!
vernal ferry
@mystic ruin Yeah its actually an example code for my led strip project
@mystic ruin there are a few ways to approach it, I went the audio route
@mystic ruin the other examples ive seen measures the power draw of the washer/dryer unit, others use piezo
 brisk pond
hi @vernal ferry you won a #sparky pin! Please email sparky@adafruit.com. Congrats! 😀

We are giving away some Sparky the Blue Smoke Monster pins in the Adafruit Discord chat! All you need to do is post your wonderful mistakes in the #showandtell channel and we’ll be reviewing …
 potent jolt
Didn't understand the difference between negative ground and positive ground when using LM7912 instead of LM7812. Not a mistake I'll make again! #sparky
bright hull
@potent jolt looks like a good one to tag with #sparky
potent jolt
@bright hull Thank you! Fixed.
The regulator still works, actually. Took me a while to figure out exactly what happened, but the cracked case is damage caused by the electrolytic cap that blew right next to it. As you can imagine, it made more like a flash than just a spark, and a loud pop like a firecracker. Was glad I always wear my safety glasses.
bright hull
also. nice photo! 👍
potent jolt
Same incident as above. Melted the plastic around a couple of points on the breadboard.
I started doing electronics projects in high school 35 years ago. Somehow it look until a year ago to learn that ground can be positive. I was following the datasheet from TI for the LM7912 and where it said I should connect to ground I connected to negative. I knew it didn't look right, but I connected the power after I wired it like I thought the datasheet indicated.
I've made a lot of mistakes over the years, and damaged a few components. Usually it was carelessness or misunderstanding a procedure. This stands out for me as the time the components decided to teach me a lesson.
vernal ferry
@brisk pond aw yeah! ty ty! I shall!
vernal ferry
@mystic ruin thanks to your suggestion about using that ws2812b library 😄 -- 2.0 of my desk light will have.. pleeeeenty of light effects to work with.. just gotta make it look/work better 😃
plain stream
Hot diggity dang
indigo patio
@lucid bloom Hopefully this is close to what you were looking for? If not, how should I change it?
oak fog
Oh, whoops I used my other account @lucid bloom but @indigo patio is me!
mystic ruin
Looks awesome @vernal ferry!
 onyx grove
Wohooooo! So many Sparky
vernal ferry
@mystic ruin 😃 I’m excited to work on the interface when I get home later. For some reason after x period of time the ESP crashes 😦
mystic ruin
Dang
There is a command Esp.getfreeheap() or something
I'd wager that you eventually are running out of heap memory or something
Another thing is some people say they work better if you put a cap on the power rail of the esp8266
Never noticed
vernal ferry
@mystic ruin will look into that thank you! What size cap? Using a wemos d1 (the uno formfactor)
lucid bloom
I'm gonna try and demo some PiGlass features that no one got to try at the maker faire because I was having bandwidth issues with my 4g hotspot
 junior dust
CAD explosion!
mystic ruin

Remember the movie “Groundhog Day “? Original Saturday Night Live cast member Bill Murray re-lives Groundhog Day over and over again. And still again. Kinda like the ESP8266 when it repeatedly rese…
@vernal ferry
clever pebble
Joy bonnet explosion
crimson egret
I can never watch show and tell live. I'm normally teaching a class at that time.
So in advance, thanks everybody for your cool projects. This show is something I haven't missed since the last 3 years or something like that.
mystic ruin
Enjoy the show later guys, I was hoping to show the Bluetooth remote camera trigger but I'm too tired! 😴
prime widget
@mystic ruin Rest up!
 buoyant breach
Yes! My exam finished 5 minutes ago so I can join Show and Tell!
 restive acorn
Hello everyone from Rockwood Tn!
 glossy umbra
Got my Adabox and since it came with a pi0 going to build a car hard drive that syncs mp3s in the shared folder when it connects to my home wifi. Thanks @plush mulch DiCola for the tutorial on making a pi a drive.
restive acorn
Is it just IOS compatible?
lapis jasper
@pliant mango
 sudden sable
Walls with silhouette cutout windows.
Roof
Dry assembled lantern - opening at center to allow use of candle.
G Code file from Turnkey on Inkscape containing the window.
G code file for the roof.
Source file - made some code I call ScripG in python to take this human readable file, make Gcode instructions for the laser cutter at Rochester Makerspace. Allows splice of external Gcode like the silhouettes.
 woven relic
ohhhhhhh my friend would love this!! she loves birds/crows
sudden sable
Gcode file for the perforated lines, edge cuts.
@woven relic
Would you like a modified version? Happy to make/facilitate making.
woven relic
maybe. lemme talk to her about it.
woven relic
**** flashing light warning****

Google Photos
Had to make a link to my google drive for the video since i cant just upload videos to discord.
I have a couple little modes for my leds. Most of these are the demos from the FastLED library. though the first one is my creation and still needs work on it.
woven relic
found the best laser gun sound effect ever!!! https://freesound.org/people/OBXJohn/sounds/365635/

Freesound.org
Kid saying "I'd take my laser gun and go pew pew pew pew".
Recorded with Blue Microphone and Audacity
vernal ferry
@woven relic xD pew pew
vernal ferry
A prototype of my ESP8266 LED strip controller v2 control panel 😄
proper dirge
very nice @vernal ferry. Is that a page running on the ESP8266?
vernal ferry
@proper dirge yup! v1 was heavy, v2 offloads a lot on client side
proper dirge
what are you using to program the ESP?
vernal ferry
arduino rn
proper dirge
Awesome. It looks really good.
vernal ferry
@proper dirge thanks! I'll be posting updates as i go, I expect it to be more fully fleshed out once i get the other parts working 😄 lmk if you want to try it out once i get it to a usable state
proper dirge
Yeah @vernal ferry , I certainly would. I've been using mostly Circuit Python lately on one of my ESP boards, but I always like to see new stuff. You can literally offload everything to the client using the webrepl interface in CP
vernal ferry
@proper dirge I could totally make a CP version of this but wont have the same featureset
proper dirge
no?
vernal ferry
using a bunch of libraries to do the light animations and wifi manager for ap and such
could still make a CP version tbh, would just be simpler
proper dirge
ahhhhh...gotcha
vernal ferry
would be fun to try porting it though!
proper dirge
I look forward to seeing it progress. It looks like a really cool project
If you're interested, here's a small sample project I put together in CP communicating via websockets. https://github.com/notthatbrad/Circuit-Python-Web-Interface

GitHub
Circuit-Python-Web-Interface - A basic web page based interface to interact with esp8266 boards running circuit python
proper dirge
yeah...well, allegedly. We'll see how far it gets
vernal ferry
Good example btw, does the index file live outside of the esp?
proper dirge
Thanks. Yeah. It stays on your computer or wherever as long as it's on the same network as the ESP
 proper dirge
Oh wow. That would be cool.
Is that what you're going to do with the lightstrip controller?
vernal ferry
Nah, its going to be mainly be a web-interface so i an access it on my phone or tablet
but can see it being useful on another project
prime widget
@vernal ferry And when I saw that Electron post I immediately thought of the RocketLabs Electron booster.... 🚀
vernal ferry
hahah!! ground control to major @prime widget
prime widget
Namespace collision. 😃
vernal ferry
got that song stuck in my head now hehe
prime widget
Speaking of space, at 9:30 p.m. PDT Elon Musk is addressing the International Astronautical Congress about the future of ITS and the SpaceX plans to make humanity a multiplanetary species. You can watch live at http://spacex.com/webcast/
vernal ferry
oooh
is this the space elevator?
@prime widget speaking of mars:
https://youtu.be/R3O9TgZwMuE

In the season premiere of our new show Space Craft, Loren Grush tries on innovative Mars and Moon space suits at the University of North Dakota campus, learn...
prime widget
No. Space elevator is a silly idea with current materials (do the physics). This is the SpaceX BFR and the lunar/Mars colonies.
Ooooh, thanks @vernal ferry - that looks like a cool link!!!!
vernal ferry
😄 #space
prime widget
Or, as Elon has said, "because who doesn't love rockets?" 😉
vernal ferry
@prime widget about to watch the first ep of Startrek Discovery x)
its all connected xD
prime widget
I haven't seen it yet!!! I should watch that between Elon's speech and Formula 1 Free Practice 2.
plain stream
I mean I really really want to go to space
but at this point lunar colonies, or even economically feasible space trips, seem past my lifetime
feral acorn
I think getting cargo to Mars is quite feasible. But I think the health issues for humans in transit and living on Mars is much trickier and the solution isn’t clear at this stage.
clever pebble
@plain stream spacenation org can be one way to make it
plain stream
I'm not saying it won't happen, just that there are lots of steps to get there, and with my current age, life expectancy and income whatever's possible before I die won't be able to include me
I really hope I'm wrong, though!
clever pebble
in 2024 to mars
 gleaming belfry
in 2222 to the moon.... again
eternal maple
Hacked the HUZZAH-based weather station to show battery status. Needed a hardware mod on the TFT FeatherWing to scale and route the battery voltage signal to the ESP8266's 0-1v analog input pin. #MakerFun
gleaming belfry
I made this Midi to arduino speaker/buzzer conveter program and this is my arduino playing the Super mario theme, its a Small project that i did https://www.youtube.com/watch?v=c8xESa9-bZ8

Soooo i got a 16$ kit and made this You can ask me if you want to know how easy it is to put music on a Arduino
a Speaker will sound better
i also tryed every daftpunk song and most of them work really well
woven relic
I need a new one of those power boards for a breadboard. Mine got messed up. Though I do have a voltage stepper that I can adjust from like 3v you 55v or something like that and it puts out 2-3amps
woven relic
Also getting a teensy audio board and a few more hall effect sensors on Monday!! Gotta quickly learn how to trigger and play audio files in an attempt to rush my project in time for show and tell. Worst case is it won't be done In time and I show it off either incomplete or wait almost 2 weeks to show it complete.
gleaming belfry
HAve you guys seen this im thinking of getting a few of them, you can also use it as a rubber ducky
sorry
here is a image of it
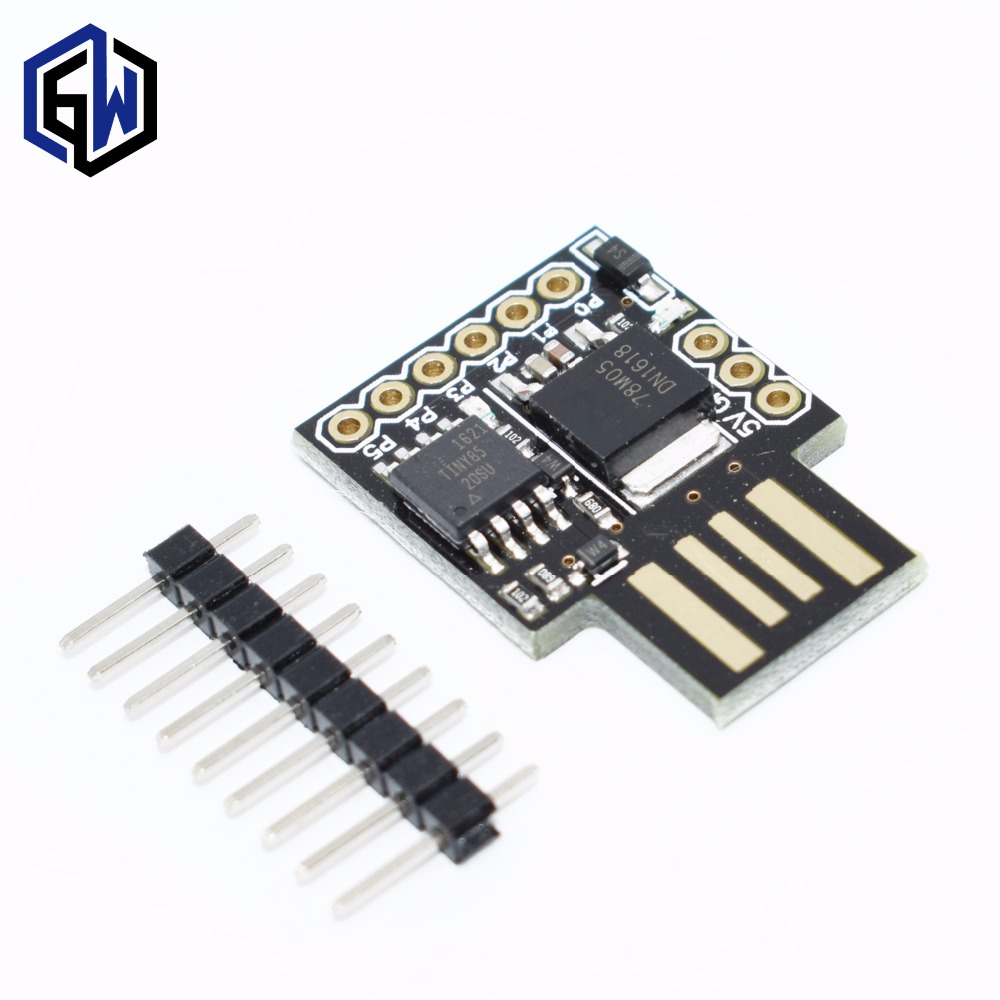
there only 1$ each
😃
but 30 to 50 day shiping
BUT Shipping is FREE
 spiral scaffold
@gleaming belfry the HID is implemented using v-usb which is not true USB hence it's not very stable for USB rubber ducky type applications.
gleaming belfry
i know its space is not sutible ether but it can do its job
woven relic
Wooooo paint!!! 😸
 fallen light
https://www.thingiverse.com/thing:2562449 I designed and printed a mini dreamcast!

This is a small Dreamcast measuring only 100mm x 100mm x 36mm. It's super cute as a desk toy for your cubicle or looks adorable right next to your full sized Dreamcast in your game collection! I tried to make it detailed as possible and also accurate as possible to challenge how well I can model things, and I'm happy how it came out.
clever pebble
what about mini C64
fallen light
Oh that's an awesome idea, I'm definitely adding that to the to do list.
https://twitter.com/sparrows89/status/901029902476029952 I actually designed this too, and it's going to fit a raspberry Pi and a small mechanical keyboard I have

WIP. I'm making a retro micro computer with a mech keyboard from @OrtholinearKB and a #RaspberryPi . I should be ready to print soon!
 Twitter
thorny bluff
Twitter
thorny bluff
Hopefully that’ll end up being a harness for fiber optics... 😃
(Side note: I wish the soldering and assembly portions of these projects came as easily as the programming... )
and another side note... why is it, no matter HOW hard I try... I always get superglue on my fingers? Every... Stinking... Time...
eternal maple
@thorny bluff: I switched to gel-type superglue for just that reason. It happens less often now...
woven relic
I have Gorilla brand hot glue :3 it's gorilla glue in hot glue form. Works pretty well sometimes!!!
fallen light
I find that using a nail polish brush works pretty well. You can buy a cheap brand and clean the brush with acetone, which is pretty common if you do 3d printing.
woven relic
Oh that's a great idea!!!
thorny bluff
It’s not the best picture, but the harness lights the strands, so I’m taking it. Lol
woven relic
That looks cool!!!
 spice dust
Started this project 2 years ago, finally finished it just in time for my daughter and GeekGirlCon.
Hmmm. Not sure why there's no preview?
woven relic
Thats pretty cool!
spice dust
Feather M0 Express, PAM8302 amp and CircuitPlayground
Thanks to all those here who helped!
spice dust
Correction--CircuitPython!
spice dust
Ok, let's try uploading it to Youtube instead of Discord: https://youtu.be/OGKbCwkeldc

I built a portal gun for my daughter to use for a Halloween costume 2 years ago. Unfortunately, as I was assembling it an hour before go-time I shorted out t...
brisk pond
hi @gray inlet ! you won a #sparky pin! Please email sparky@adafruit.com. Congrats!

We are giving away some Sparky the Blue Smoke Monster pins in the Adafruit Discord chat! All you need to do is post your wonderful mistakes in the #showandtell channel and we’ll be reviewing …
eager pine
@spice dust was so great to meet you and your family at Geek Girl Con, and see that awesome portal gun in person! Great work!
spice dust
Thanks, @eager pine--good to meet you too! My daughter had a great time and wants to go back next year. Thanks for letting me know about the event!
eager pine
@spice dust oh awesome! glad to hear it! plenty of time to make her next costume hee hee 😃
spice dust
@eager pine Don't let my wife hear that! She's probably already dreading it!
eager pine
apologies to your wife @spice dust i am definitely a costume enabler
spice dust
As you should be, @eager pine!
eager pine
really though, I love the portal gun you made - i would have no idea it was made of soda bottles!
you should show it on show & tell!
spice dust
Yeah, I was thinking about that. What's the process?
 fickle otter
I don't know if it counts as a fail for the purposes of the contest, since the build part went well and even came out nice-ish looking... but I just realized that I did not properly understand the physics of the wingsails I am building and therefore picked the wrong airfoil. As a result, they're very sluggish to respond to control inputs... to the point where control on the water is fatally compromised. DOH.
eager pine
@spice dust on wednesday before show & tell starts, they post about it on the google+ page, comment on that post that you'd like to join, and they'll invite you
@spice dust here's a link to how to do it: https://learn.adafruit.com/how-to-get-added-to-the-adafruit-google-plus-show-and-tell-circle/about-show-and-tell

Have an amazing project that you want to show to Adafruit? Here's how to get added to the Show and Tell Circle on Google+
spice dust
I have a #sparky story that dates back 2 years, to when I first built the portal gun: https://forums.adafruit.com/viewtopic.php?f=19&t=83571&p=423091#p423091 After blowing the amp, Adafruit returned my money (yay!) but pulled the board from stock while they checked out what happened (kudos, but 😦 ) and it took a while for me to find the Teensy Proto Shield as an alternative. I didn't have any luck with that one, though, so I took another stab with the Feather M0 Express and outboard amp.
eager pine
@fickle otter hello! how goes your sail-bot?
spice dust
Thanks, @eager pine, I'll take a look
eager pine
@fickle otter at least you know what an airfoil is 😉
fickle otter
We were in the water on Sunday... and while it did sail and we were able to steer it, it was not really controllable, because the wings responded sluggishly.
An airfoil is just a thing that produces lift when you push it through the air... like an airplane wing, or our sails (or any sail, really).
fickle otter
Yeah... we're going to put in more of the electronics and give them bigger tails before we go out again.
fickle otter
https://www.ladonproject.com/blog/ has a nice pic of it in the water. I wrote my name and phone # on the sails to assist recovery if we lost it, and all of the photos we took managed to have that side of the sails. The pic here has had that crudely edited out.
Ladon Project
😃
You can only really tell b/c my cheesy editing managed to cross the shadow of one sail on the other.
eager pine
nice! looks legit sea-worthy!
fickle otter
That it is!
While launching it, I dropped it from about 18" up and the hull went all the way under before popping up. There's a small leak in one compartment, but it leaked no more than a couple of teaspoons of water in an hour, so I am not too worried.
eager pine
nice! what body of water are you testing in?
fickle otter
Greenlake
It's protected, near a weather station... and there's a boat rental place in case we need to go fetch it.
eager pine
smart
it can't go too far away in Greenlake!
@fickle otter great to hear your boat's coming along! bedtime for me, talk to you later!
spice dust
Hey, that's my neighborhood!
woven relic
Gonna do a little PRE-SHOW AND TELL show and telling. @junior dust @wicked horizon this is the same thing I showed you two last week. It's in my hands now and I'm excited to get things moving in it!!! Basic lights are done, I'll be adding more backend code for the lights later and a paint job will happen this weekend. The 3d printed section is actually in 4 parts and I need to bond them together somehow (any ideas would be nice, it's PETG) there is another section that I will need to work on that is on the reverse side of the gun. But it will come in a bit
junior dust
@woven relic the light diffusion looks really good!
woven relic
@junior dust Thank you! once i throw in more varried light modes it goes a little meh but still looks cool! Might just be something i have to play around with for what does and doesnt look good.
on a side note would you have any recommendation for bonding all of the sections of this together?
junior dust
sure I tend to use E6000 because works well with flexible stuff but takes a while to fully set
woven relic
Thank you. might try some of my gorilla hot glue for temp to hold it together till im done and then do E6000 once im ready for it to be more permanently stuck together!
bright hull
@fickle otter try adding trip strips
fickle otter
@bright hull The stuff I've read on them doesn't mention any effect on pitching moment... Do you have a reference that does?
bright hull
not off hand. what airfoil section are you using?
woven relic
ok. i got 45 minutes to get a hall effect sensor installed in this thing before show and tell
 visual canopy
Good luck, last time I was going to share I was in the same boat.
lucid bloom
May the force be with you
clever pebble
may the force be with you!
visual canopy
Tonight I am ready to share my project that I built with a Trinket MO that I won the first time I went on Discord.
eager pine
@woven relic suggest lots of ventilation for E6000 - so great for sticking things together but very fumey. At work we let it vent in our spray booth until it’s completely dry 👍
lapis jasper
yay @visual canopy
eager pine
Looking forward to it @visual canopy !
visual canopy
Thank you for your help with it @lapis jasper !
lapis jasper
no problem @visual canopy
woven relic
I have no idea but my hall sensors are no longer working...
visual canopy
Where do I find the link to the google hangout?
lucid bloom
someone usually posts it here
 uncut meadow
oh
clever pebble
phil post soon i think
uncut meadow
ok
lucid bloom
i hope i killed all the bugs in my code
uncut meadow
good luck
umbral fog
@lucid bloom There are always, ALWAYS more bugs
umbral fog
My personal theory of development: don't bother trying to kill all the bugs, cuz they'll just breed new ones. Just worry about corraling them off so they're easy to deal with when they happen
uncut meadow
Where is the link
umbral fog
Or, as they did with Linux to start with: When in doubt, PANIC!
visual canopy

Google+
Post a comment here to be added!
https://plus.google.com/b/112526208786662512291/events/cqgcrjifjevamujrpijq44pds7k
https://youtu.be/bFva2PLgEWQ
Live chat for all is here: http://adafru.it/discord
- Add +Adafruit Industries to your circles
- Post a message/comment HERE and say you want to show off a project and we will add you the “Show and Tell” circle.
Then just look for the hangout announcement on the very same page later for your invite. There’s an 8 to 10 (at the same time) people limit per hangout, so if it’s full try later or just pop by next week same time. Some weeks are packed!
At 7:30pm ET you will see a link to the hangout. Just keep your mics muted until we call on you and have your project ready.
For those who just want to watch, you’ll be able to watch it live on Google+ ‘s broadcast feature on Adafruit’s page AND it will be recorded and uploaded to YouTube automatically.
Want to join the #showandtell Here’s how:
https://learn.adafruit.com/how-to-get-added-to-the-adafruit-google-plus-show-and-tell-circle/about-show-and-tell
How to video:
#adafruit #arduino #electronics #hardware #opensource #projects #raspberry #computer #raspberrypi #microcontrollers #LEDs #LED #gemma #flora #bluetooth #bluefruit #neopixel #neopixels #wearables #art #askanengineer #showandtell #madewithcode #teamarduinocc #WHChamps #NationOfMakers #micropython #circuitpython
Post a comment there to share
uncut meadow
where is the hangouts link
lapis jasper
@uncut meadow relax. here it is: https://hangouts.google.com/hangouts/_/wbdf22e5rvbvfalem3dgyvideae
visual canopy
That is a rad controller @wicked horizon
 quick mortar
The eyes have it...
prime widget
Nice Blade Runner reference there, @marsh quest !
quick mortar
Does it display Celsius also?
lapis jasper
@visual canopy looks really good!
spice dust
Huh. Musta messed up with Hangouts--I didn't make the cut!
lucid bloom
me niether it happens
spice dust
I think I must not have clicked through accepting terms in time, or something. Maybe next week!
lucid bloom
thats the attitude!
visual canopy
@quick mortar , it is measuring in Celcius, but displays as Fahrenheit since that is what they use in schools and on TV here in the states
clever pebble
@lucid bloom did you get bug fixed
spice dust
Yeah, I was one of the first 10 comments so I was looking for an invite. But I might not have been fully active yet. It's ok--just wondering about the process!
lapis jasper
@spice dust you never got a call on hangouts? next week I can hook you up with the link. just ask me for it
spice dust
I've watched on youtube before but not Hangouts, so I had to accept terms on Hangouts and I think I must not have active if someone was trying to invite me.
lapis jasper
ah, ok
spice dust
I got an e-mail and clicked on it, but there were a few prompts to get through.
lapis jasper
it does have you confirm that you are ok being on a live stream
spice dust
Yup. I stepped away to see if my daughter wanted to join after I thought I was in but came back to a prompt.
lapis jasper
oops! I can help next week if you need it
spice dust
Nah, I think I know the process now. All good!
lapis jasper
cool cool!
lucid bloom
@clever pebble this what I see on the vufine and the 2nd is the text sent to my teammates those are all simulated gps coordinates
The bugs I was having were opencv related
fickle otter
@bright hull Wortmann FX L V-152
It has a decent max Cl for a symmetrical foil and the Cm is both small and monotonic
bright hull
based on what data?
fickle otter
airfoiltools.com has polars for a huge variety of airfoils
woven relic
mehhhh i looked at my portion of show and charades, the lights didnt show as well as i had hoped..
bright hull
@fickle otter did you make sure to compare data at same reynolds number?
fickle otter
Yup... I used the 100k Re for comparison, n=5
My problem was a bit upstream of that... I assumed that a low Cm would be best. This was not correct... and my tails are too small.
bright hull
hmmm. yeah. i was eyeballing ~60k based on your photo.
pretty low
the tails are those t shaped things coming off the trailing edge? what are they for?
fickle otter
Setting the angle of attack of the wings
The wings are free to rotate
Chord is 250mm, so Re=100k is a bit on the optimistic side.
fickle otter
5 m/s is what I've been mostly using, so about right on the speed.
bright hull
i bet trips would generally help out. but i can see those tails being the bigger (smaller) issue.
fickle otter
The design goals are a bit different than airplane wings... for example, on most points of sale total force (drag + lift) is more important than getting the best L/D ratio.
bright hull
yeah. so don't worry about adding trips. it'll help L and will also increase D.
a simple diagnostic would be to do some tuft viz on the lifting surface
fickle otter
Yeah, I think the next time we're going to have good wind + crew availability is either Sunday or Monday
I'll hot glue on some tell-tales before that... as well as enlarging the tails and adding a bunch of onboard data acquisition.
fickle otter
GPS, hull orientation, sail orientation, tail position, and relative wind direction.
My first cut at a windvane failed b/c the skate bearing's drag was excessive, especially with the magnet in... so I ordered a replacement windvane pot from Digikey.
Super low drag, but $17.60 for a pot is pretty spendy
bright hull
ideally you want the sails free floating / rotating? but need pot for orientation. but it's got sticktion.
fickle otter
No, the pot is for the windvane... it's the recommended replacement part for a well recommended vane/anenometer set that's pretty widely recommended.
Sail orientation is from a compass mounted in each one.
fickle otter
Just the mount for the initial try... I found out it wasn't going to fly before that test so I left it off.
bright hull
white patch on front of orange hull?
fickle otter
Nope, black object on top of the right-hand wing.
fickle otter
Tacking 😃
I can back out the relative wind for the boat because I know how the sail is oriented relative to the boat and magnetic norrth.
bright hull
yep
 bitter valley
So I wasn't at show and tell today, but boy do I have something to show.

Hooooooo BOY that was fun. Alginate moulding my head for making cosplay armor... my gods... THAT was an interesting experience. Two hours... Two hours, a lot of patience, and some awesome friends at...
lapis jasper
Looks cool @bitter valley
bitter valley
Yep! After work tomorrow (today technically) I'm going to be coming back to add another layer of plaster if it needs it, and then hopefully do a pour of hydrocal.
lapis jasper
@bitter valley keep posting pics! I'm excited to see how it turns out.
bitter valley
Definitely. I also want to eventually do a video series when I get my costume parts finally made.
Like my cosplay page and it will keep you up to date on most everything I'm up to on the costuming front.
bitter valley
https://www.facebook.com/High-Vibes-Cosplay-467861040280536/ posted pictures of the finished mould as well as a "First timer" postmortem.
plain stream
@bitter valley I like the wide angle shot of you just... hanging out 😃
bitter valley
Haha. Yeah, my friends have a good eye.
eager pine
@bitter valley nice!!! Very brave 😃 now you can make all kinds of head things!
bitter valley
That's the plan!
proper dirge
Woohoooo! Got the attiny set up to control the speed of the motors on my roverbot using the encoder discs. Now I can put one on each wheel and use analog values to tell it what speed to go.
woven relic
Woooooooo!!!! getting closer!!!!!!!

Google Photos
if you go to the link its an actual video
my project REALLY blows
eager pine
@woven relic sounds like it! 😜 looking good!
How is it going to blow air into your suit? It’ll be attached inside somehow?
woven relic
Hehehe sanku @eager pine !!! still gotta do a lot to it. Im gonna end up using epoxy putty on the outside of the shell and then dremmeling at more of the plastic inside until i can fully fit my lipo inside it.
and it wont actually be hooked up to my suit. this will be a prop blaster i can carry around and share coolness with others. I actually have one of these fan units broken down and have a part of it installed inside the head of my suit. and its hooked into a usb battery pack along with an adjustable voltage stepper. i adjust it anywhere between 5v and 12v depending on where im gonna be suiting. though its something that has to be done BEFORE ever putting the bodysuit on.
eager pine
Oh I see! How awesome to build a prop that does something nice for other people!
I love the pulsing light section
woven relic
thank you @eager pine ! I have it programmed to do all sorts of other light patterns too. i just didnt show them in the last video. Here is a video of the modes i have so far: https://photos.app.goo.gl/rbFRxaiem7Ch9rIs2
a handful of those are actually just the examples from the fastLED library. i gotta come up with something of my own too.
Also, my original version of the nerf fan thingy was a box made out of legos that only had 2 fans in it, EVERYBODY loved it, for both the creativity behind it and the fact that it usually cooled them down!

Google Photos
fickle otter
Oooh, cool glowy things!
bitter valley
ITS. SO. DERPY!!!
When I die, I want this exact bust to be on my family's memorial.
fickle otter
That is an impressive piece of work
bitter valley
The nose is a bit crooked, the mouth is... stretched? And the alginate shrunk and became embedded between the layers on the left side.
But all things considered, it's useable!!
It's functional!
fickle otter
(Especially since I'm reasonably certain that if I tried that my tiny little bit of claustrophobia would make me freak out)
bitter valley
THE MEASUREMENT CHECKS OUT! IT'S USEABLE!
fickle otter
Awesome!
scenic siren
@bitter valley Great job!
eager pine
Grats @bitter valley !
thorny bluff
Many thanks to the “celebration spectacles” tutorial and the fine folks in #help-with-projects
scenic siren
@thorny bluff That looks great! Nice job!
clever pebble
looks interesting
eager pine
@thorny bluff hey awesome! Did you sort out that Gemma or switch to the other one that was working?
thorny bluff
@eager pine yes / no. I think we chalked it up to a non-write protected boot loader that got written to.
proper dirge
I think this is the most wires that I have used to breadboard a single project.
 stable kayak
Oh my.
keen temple
I am getting back into OpenCV! Next is to get it on a Raspberry Pi.
lapis jasper
Good to see you @keen temple ! Its been a while sinc eyou've been on Show and Tell!
keen temple
@woven relic I guess it is a racing drone, but I am not that good at flying it yet. I plan to make it more autonomous. @lapis jasper I would like to go for the drone badge by flying it on the show and tell soon. Are there any Adafruit microcontrollers specifically for drones yet?
lapis jasper
@keen temple nope. I did some drone stuff before adafruit though. most flight controllers use stm32
keen temple
@lapis jasper Well, I'll leave it up to you to design one for Adafruit. I will try to get openCV on a Raspberry Pi 3B next.
lapis jasper
@keen temple my first one didnt go well. I doubt I'll make another
woven relic
Boom!!! First nerf gun with a usb port
woven relic
Do I have enough wires in such a confined space??
 leaden frost
@woven relic A.B.K. - Always Be Knolling.
woven relic
not entirely sure what that means. but ok!
leaden frost
you can look up the wiki but essentially a saying to keep everything neat and organized, in this case wirewrap, bundle and route wires cleanly to save you headaches later in troubleshooting, modding or maintenance. Get that tube of a zillion assorted nylon tie-wraps, handy for things like this.
leaden frost
what did you use for the light diffuser panel? is it an original part or 3D printed?
woven relic
its a 3d printed part. my buddy modeled and printed it for me
plucky otter
@woven relic Your Nerf gun is starting to look like my SEM.
woven relic
lol yeah really!!!
plucky otter
From experience, that is not necessarily a good thing...
woven relic
ok good. most of my wires are bundled together in some way/shape/form
leaden frost
@woven relic Cool. Depending on the look of the lights, I like to diffuse neopixels under a rigid bezel even more with additional polyester fiberfill or that stuff from an air conditioner filter.
woven relic
oh it looks great under this thing! i have 2 strips inside with 16 neopixels each
leaden frost
protip - if you need to take pictures or vid of your rig, do a strip.setBrightness(10); to set really low brightness on neopixels so they don't blind the camera. It's tough to capture the beauty of neopixels or LEDs in action.
woven relic
ohhhhhhhhh!!!! thank you!!!!
im actually using fastLED but its pretty much the same thing
when programming though it would actually help a lot if i plugged the thing in though...
leaden frost
I've found the info and examples here inspired me to create some Fastled project. https://www.tweaking4all.com/hardware/arduino/adruino-led-strip-effects/#library

In this article I'll show you a several LED strip effects for NeoPixel and FastLED. The code works for both libraries and any strip they support (theoretically).
leaden frost
the embedded vids there don't work for me in chrome but seem to work in other browsers
woven relic
huh
leaden frost
The Fastled example page with the embedded videos don't play for me when using Chrome browser, may work for others or it's just the system setup I have.
mystic ruin
I have been messing around with a Bluetooth HID module and a capactive touch sensor, I now basically have a Bluetooth Makey Makey board
I'd like to add some more features, but the basic, touch a pin and that pin sends a keyboard event is working
scenic siren
@mystic ruin Nice!
lapis jasper
@mystic ruin @quasi vault has been asking about bluetooth hid
mystic ruin
oh cool
@quasi vault Im using a HC-06 flashed with RN-42 firmware, working pretty well so far!
cunning quest
@mystic ruin could you post a schematic? I have a few ideas i want to try with it!
mystic ruin
Sure @cunning quest
Video on how to flash the firmware here
https://www.youtube.com/watch?v=y8PcNbAA6AQ
But it might be easier to just buy a RN-42 😃

Flash HID firmware on to a $3 Bluetooth devices so you make it act like a Bluetooth keyboard/mouse or game pad! Unlike other methods for doing this, this met...
Adafruit's Bluefruit is due a revision i think, but currently they dont have one available (afaik)
For the touch part im using this
But adafruit have a 12 key module that should work the same

Add lots of touch sensors to your next microcontroller project with this easy-to-use 12-channel capacitive touch sensor breakout board, starring the MPR121. This chip can handle up to 12 ...
Wiring is simple, BT module connected to software serial running on two GPIO pins on my ESP8266 (D6 and D5 on my Wemos D1 mini)
Cap touch sensor connected to D2 - > SDA and D1 -> SCL
Gist
Arduino code for a bluetooth Makey Makey running on an ESP8266
Code here, but it needs work!
leaden frost
@mystic ruin Hi Brian, this person turned on the bat-signal, it may something to put your work to good use. https://forums.adafruit.com/viewtopic.php?f=8&t=124724
mystic ruin
The RN-42 should work if im reading it right, but i dunno is it cool to be recomending non adafruit stuff on their forums?
Replied there @leaden frost
leaden frost
@mystic ruin Thanks. Sharing is Caring. That's how it's supposed to work.
mystic ruin
for sure
An old work firend got on to me there last week, the charity he works for was looking for someone to build them an arduino device for measuring water for one of their service users. It's a pretty straight forward project and I said I'd be happy to help out
It kind of really made me think that there is probably tonnes of problems we as makers could solve for people
The Atmakers.org site sounds amazing
Seems to be US only though
leaden frost
I'm one of those general use makers who also dabbles in electronics, various stuff on instructables but yeah, there is a lot of things we can do as community service. I'm proud to have done this for my kid's class in the 6th grade and later for a high school https://www.instructables.com/id/Rehearsal-Cubes-for-acting/

Instructables.com
A cube by any other name is a cube but this is a rehearsal cube.They are used as stand-in props to help block out or act out a scene. There are endless combinations...
leaden frost
That high school saw the instructable 9 years later and asked me to help out.
mystic ruin
ha
brisk pond
hi @cunning token ! you won a #sparky pin! Please email sparky@adafruit.com. Congrats!

We are giving away some Sparky the Blue Smoke Monster pins in the Adafruit Discord chat! All you need to do is post your wonderful mistakes in the #showandtell channel and we’ll be reviewing …
 ionic spire
hi all, I finally completed a small milestone towards turning my bookshelf into playable snake (and maybe eventually playable tetris) but so far i have a 3x10 grid that I can control like this:



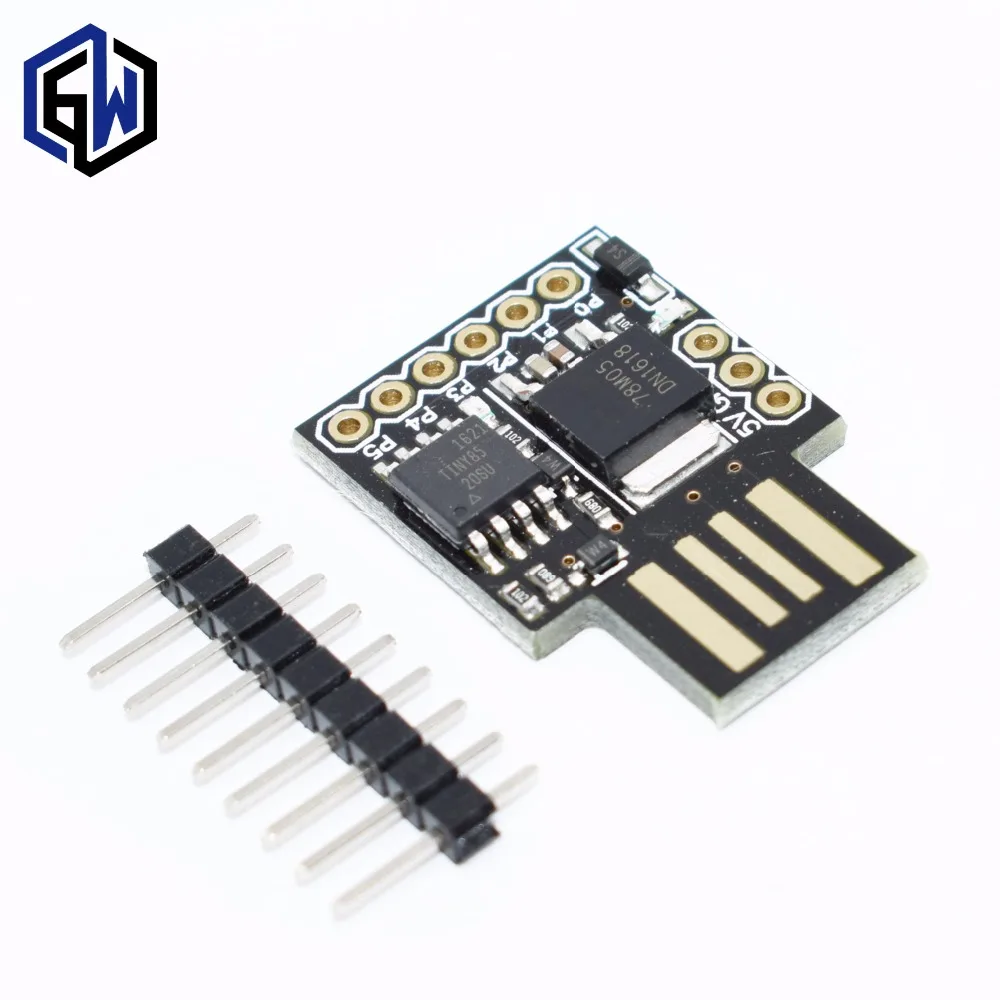
I used #neopixels and an #arduino on my bookshelf. I'm eventually going to further segment it to turn it into playable snake. #adafruit https://t.co/fqUuSVoPUz
Twitter
bright hull
nice! looks really fast.
ionic spire
Yeah I threw together some code that I found online
the rainbow is actually from test code that adafruit provides for neopixels
plucky otter
@ionic spire Very cool! You should show it off on show and tell tomorrow! I might have to do this in my shop sometime...
ionic spire
@plucky otter thanks! I was thinking about that
 spring elm
@ionic spire that's very cool
ionic spire
@spring elm thanks!
lapis jasper
great job @ionic spire
ionic spire
@lapis jasper thank you!
scenic siren
@ionic spire That's really neat! Nicely done.
ionic spire
@scenic siren thanks 😃 Took me all summer
scenic siren
@ionic spire Worth it!
ionic spire
yeah now that it works xD
cunning quest
@ionic spire how do you dectect touch? Capacitive touch sensor?
ionic spire
detect touch? It doesn't do that
spring elm
...how will snake be 'played'
ionic spire
ooh
spring elm
or will just be an animation?
ionic spire
i'm not there yet, I have to change everything around
I just wanted to test the wiring and see how to control each shelf
I'm actually going to take a break from this project for a while now that it works and come back to it later
but I know some guy made playable tetris, I was following his guide
and he used a raspberry pi and plugged in a PS3 controller in one of the USB slots
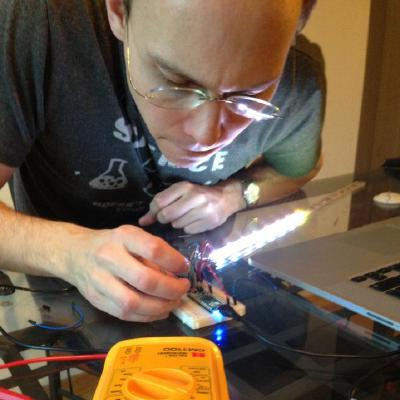
GitHub
bookworm - I've created a bookshelf made of a 14x9 grid of squares. In each square are four neopixels hooked up to two Fadecandy controllers and a Raspberry Pi. This project contains some javas...
eager pine
@ionic spire awesome!
 reef flax
Here is a little project I knocked up so that I can display stuff on a small display attached to my Raspberry Pi. SDL2 on the RPi tartgets X11 and so needs to be rebuilt if you're after it working in the console. So here is my simple solution. 😃 https://github.com/HamAndEggs/FrameBuffer

GitHub
FrameBuffer - Simple light weight direct frame buffer rendering with a built in font. Just one header and source file.
plain stream
Not going to be able to be on S&T tonight so here’s my progress so far
It’s the control box for my Super Dinosaur costume (the joysticks are for the tiny T. rex arms to control the robot [ie my] arms)
Everything but the Ethernet jack is from Adafruit, including the box (which had Adabox 005 in it!)
Going to use cat 5 cable as an easy way to transfer power, ground and two data lines to machinery mounted on each shoulder (laser and Gatling gun)
bright hull
neat. it seems to have a personality. four eyes. two antenna.
what data are you running over the cat 5?
plain stream
Neopixels. And speakers, hopefully, but I have to figure that out.
bright hull
tested it yet? how long is the cable run?
bright hull
could work. definitely give it a try.
plucky otter
@plain stream if cat5 doesn't work, try cat6, it is a bit heavier gauge.
clever pebble
then cat7
 lusty siren
And then, if that doesn't work... Just go find an actual cat.
leaden frost
Cat5 cable works great for all projects. Best thing is the wires are paired up to use as a double run and they are color coded. Still haven't put a dent in the 1000' plenum grade spool I got as surplus cheap.
clever pebble
well if you want more performance oyu can get Cat6
leaden frost
I don't think there is any appreciable difference when working with neopixels and power. Kinda like when the big box stores try to upsell their HDMI cables.
 small nexus
@woven relic I know I'm a bit late to the party, but your work is fantastic! So when you mention suit are you talking about a fur suit?
woven relic
Hehe thank you @small nexus. And yes I do mean fursuit
small nexus
@woven relic Nice! Attending any conventions any time soon?
woven relic
I'll be at FangCon next week. And then after that no fur cons until Furry Weekend Atlanta in April
lusty siren
FangCon? Sounds like it bites
lucid bloom
not gonna make it tonight, unforseen setback
small nexus
Dang, won't be at any of those
woven relic
Need to hit up Furry Weekend Atlanta. One of the best ones out there
Would anyone be able to take the show and tell sticker and turn it into a stencil for spray paint? Or at least digitally edit it to print it off and cut a particular way to use as a stencil?
bitter valley
Progress! Using the cast of my head and successfully made my first pattern with it. Miles ahead of what I was able to make with my old duct tape head dummy.
The main helmet I will use for the fiberglass mould will be made of floor mat foam, but for the face mask, I may use craft foam with sandwich board as support struts. The eye holes are intentionally smaller than what they will be because I'm going to carve out an area for the paintball mask lens from the foam helmet after I make it.
The eyes were only open so that I know exactly where my eyes are in the helmet.
bitter valley
I ALREADY MADE THAT PUN TO MY GIRLFRIEND! Beatcha to it. ;P
lusty siren
Hah!
eager pine
@bitter valley awesome! whenever I make helmet-type-thingy-patterns based on my actual head size, i have to scale them up or they are too small. the thickness of the final material vs the paper pattern ends up making a big dfference. do you usually scale up a bit from the pattern?
 coral gull
@woven relic I don't know if you are familiar with it, but there's a Telegram group for DIY makers that has A LOT of fursuit related stuff. It's called "The WIP Zone"
It was created by the furry artist Matrices, who has many tutorials on fursuit making
woven relic
@coral gull I know of the group but I'm not in it. I also don't do work on fursuits unless im looking to do something specifically to my own.
coral gull
I see. I don't really make fursuits myself, but I find the craftsmanship behind them astounding
woven relic
I understand. Im in a fursuits group for electric fursuits. Very nerdy
bitter valley
@eager pine Basing the mould off of a floor mat foam build of the helmet will give me a final piece scaled up by 1/2"
clever pebble
Artyfakes is doing this week Wonder Woman gear from foam (had to correct)
bitter valley
Nice! I need my stuff to be a bit more durable though, which is why I'm taking the extra step of moulding and fiberglassing.
eager pine
@bitter valley Nice! Can’t wait to see it 👍
bitter valley
But no, you guys, if you get some helpers who have even a remote clue what they're doing, alginate moulding is not that hard. I have no idea how I got by without this thing before.
bitter valley
And then mixing and pouring hydrocal is pretty easy as well.
 hollow hull
#sparky I put the button on backwards!
http://electronics.onebeartoe.org/battery-chargers/powerboost-500/
This is for the PowerBoost Charger enclosure I showed yesterday.
bitter valley
@clever pebble Yes, and it is a pain in the ass.
clever pebble
@bitter valley totally as you can hurt yourself or someone who do that could accidentally when cut it hit to skin and make wound
woven relic
Guys guys guys guys!!!! He did a thing!!! And he used a nano!!!! https://youtu.be/FILJznSr6fs

The SR-1 Semi-Automatic Portable Railgun is a field augmented circular bore plasma armature railgun capable of firing 6x19mm conductive armatures as well as ...
lusty siren
@woven relic He did a thing AGAIN. He's already made a 3D printed railgun before.
woven relic
Yeah but this is his newest one!!! The video was posted in the last 24ish hours.
lusty siren
That guy is insane and quite talented.
coral gull
Hey, I have a little tip for the people who might wanna do the Show-and-Tell, but either don't have a webcam or want better video quality. There's an app called DroidCam that allows you to use your Android Phone's camera as a webcam, via either USB or WiFi. It also allows you to use the phone's mic if you want.
You also need the DroidCam software on your computer, and it's pretty straight forward to use. The program makes the camera detectable as a webcam, so you can use it with streaming softwares, video chat, etc
woven relic
Oooh!!! I've never heard of that one Blackcorvo!!! Thanks for that!! It could be helpful at one point
coral gull
I discovered it when looking up ways to film myself playing Cuphead on a keyboard (which I have yet to do, but the setup is pretty much ready).
woven relic
Ah cool
Just gitchu a newer xbox one controller. They got bt and you can also just plug it In and it works
coral gull
I'd rather use a USB controller if I were to use one, but in this case it's supposed to be a challenge
besides, I'm more used to using the keyboard rather than a controller, and they're usually expensive here in Brazil anyways
small nexus
So this project is still a work in progress, but I thought I might share what I have so far. The lighting is two neopixel rgbw rings running of an adafruit Gemma m0.
 stark hazel
Sort of a triple #sparky here. I got an Uno so was finally able to fix the bootloader on a Trinket I had screwed up months ago. While working with a cheap RGB LED strip I forgot to use PWM pins for blue and green. When I desoldered and soldered to the correct pins, the other PWM pin I had been using somehow had its pad disconnected from the board.
Doing this stuff at midnight isn't always the best idea. 😃
shut sigil
@woven relic I knew the day would come when a rail gun like this would be feasable. It's the power that was always the limiting factor. I worked in a Magnetic Components department for 20 years and we often talked about building a rail rifle. Many sketches, but backpack batteries was just not practical. The semi-auto aspect is the other impressive part. Very nice mechanisms and I beleive I heard them mention 3D printing. Thanks for the video. 😃
bitter valley
https://m.facebook.com/story.php?story_fbid=473181453081828&id=467861040280536 - I has a cosplay page now. Need to remember to share that instead. :P

After the helmet comes body armor. Many thanks to my girlfriend for helping me with this. :)
woven relic
I are doing a paint!!!
ionic spire
@woven relic oh cool
woven relic
The blue is soooooo pretty!!!!
lusty siren
It blue you away?
woven relic
Yes
calm sparrow
the Trinket M0 and Gemma M0 with newly added pulseio support. https://www.instagram.com/p/BaVAZ3tBsy6/

Instagram
4 Likes, 1 Comments - Kurt Henderson (@kurticusmaximus) on Instagram: “Lady Ada herself added CircuitPython pulseio support for the @adafruit Trinket M0 and Gemma M0…”
 slim sierra
Feather Huzzah webserver Power Relay!
🤓👍🏼
calm sparrow
Nice @slim sierra!
brisk pond
hi @normal zealot ! you won a #sparky pin! Please email sparky@adafruit.com. Congrats!

We are giving away some Sparky the Blue Smoke Monster pins in the Adafruit Discord chat! All you need to do is post your wonderful mistakes in the #showandtell channel and we’ll be reviewing …
normal zealot
@brisk pond Awesome, thank you 😃
lusty siren
@normal zealot Add some tomato sauce and some meatballs, problem solved, right?
woven relic
Well I took the rest of the tape off the gun.
theres a handful of minor mistakes and goof ups.... But im not gonna bother fixing them till after the con. might redo a couple parts afterwards. otherwise it looks pretty good
brisk pond
Friendly reminder to post your #sparky moments with a picture in the #show-and-tell channel for a chance to win a pin!
woven relic
That moment when your project is finally coming together!!!!!!
woven relic
welp.... everything was going GREAT. I had everything working so i closed up the project and when i screwed it shut i plugged it in to test and my ubec converter fried!!!!!! and i dont exactly have time to get a new one before i leave for my convention tomorrow....
#Sparky
lusty siren
@woven relic Where is your convention? There might be a Fry's or Microcenter on the way or nearby