
#show-and-tell
1 messages · Page 3 of 1
 marble oracle
 lapis jasper
marble oracle
After long time and do not really know how 😀 , I finally made this display work...
lapis jasper
marble oracle
After long time and do not really know how 😀 , I finally made this display work...
Nice! Glad you got it working
 empty basin
Been having fun with the new printer at work


 onyx laurel
empty basin
Been having fun with the new printer at work
onyx laurel
empty basin
Been having fun with the new printer at work
we've got one of those flexi-dino-guys on display in our Create Space in the library I work at
onyx laurel
empty basin
Been having fun with the new printer at work
Does your 3D printer allow you to use multiple colors on one project? Our flashforge and lulzbot might be able to swtich out midprint, but I don't even know for sure. We don't do it for patrons at least.
 golden cipher
This is pretty cool. Feels like something I'd wire a bunch of my lights and lamps and such to in the basement and mount it to a wall. Any indicator of like fuses or anything? Maybe it's an audio switchboard of some sort?
 carmine flare
golden cipher
This is pretty cool. Feels like something I'd wire a bunch of my lights and lamp...
carmine flare
golden cipher
This is pretty cool. Feels like something I'd wire a bunch of my lights and lamp...
I haven’t had time to open it yet. If there are fuses in there, they aren’t user friendly to repair 🙂
It has a little stand with feet on the back, so it sits nicely on a desk.
 pallid saffron
carmine flare
I haven’t had time to open it yet. If there are fuses in there, they aren’t user...
pallid saffron
carmine flare
I haven’t had time to open it yet. If there are fuses in there, they aren’t user...
somewhere in the dim-dark recesses of my brain is telling me that it's a lighting control board (e.g. less than stadium size, possibly high school auditorium?)
empty basin
onyx laurel
Does your 3D printer allow you to use multiple colors on one project? Our flashf...
Ours is capable of automatically switching colors mid print, it can even do color changes not on layer shift, but it needs to purge filament every layer there is a change. Hello to another fellow library staff member!
 hardy veldt
Made a V3 of my LED holders when I realized you can totally solder resistors standing up. Freed up another column as a result. Didn't have to make this many but iterating on the design was some good fun/practice.

 shy ore
My very first PCB, a basic board to simplify running power to a bunch of buttons, breakout boards, etc. A lane for each of ground, battery, and MCU regulator output. Decided it was time to learn KiCad after spending hours fussing with splicing and questionable soldering hacks. A power rail featherwing would be awesome!

 pulsar mortar

Well its finally done 🙂 My air fryer turned coffee roaster
now to work on the worst part: documentation


 wide brook
pulsar mortar
wide brook
pulsar mortar
Congrats! It looks like an industrial automaton
pulsar mortar
wide brook
Congrats! It looks like an industrial automaton
yea the original air fryer looked odd too lol. Looks like something you would see in starwars
wide brook
You need to add a big honkin' EMERGENCY STOP button to it
pulsar mortar
lol that does nothing other than display a message "what emergency?"
pulsar mortar
I am sort of working on V2 for the controls only because of the way I communicate with the TFT is kind of funky. Its over USART and its the only option I had, so I had to use two different compliers because XC8 doesnt have support for a GLCD (and I dont think I could have found a library-Im also a tad lazy, I wanted that work to be done for me).
There will be a different TFT (greyscale) since this one gets funky with colors and there is much being displayed either. I might also try to mechanically design a roaster instead of using an airfryer as this is kind of big, but Ive already used it once and it does the job (currently drinking a roast I did Wednesday)
 peak bolt
I built a travel sized air conditioner for camping. Bike battery plus buck boost plus peltier cooler and a lot of tape. Blows hot air out one end and cool air out the other, lowers temp by 4 degrees, which isn’t much but not bad for a prototype.


 clever stone
The Adafruit seesaw enables creating I2C client devices.
If you’re interesting in programming AVR chips like the ATtiny1616 but prefer to skip the Arduino framework, then take a look at “AVR Coding 102: Creating I2C Client devices”.
“AVR Coding 101” covered the basics from blink and charlieplexing to timers and Serial UART. The 102 content is a bit more DIY but includes multiple examples for creating I2C client devices - displays, keypads, encoder panels, touch controllers, and bar meters. There is even a full example using the ACK1 (AVR Coding Kit) - the same hardware used for the 101 lessons.
The AVR Coding 102 takes a different path from the seasaw library. It is less general purpose and focuses more on the development of higher level devices.
All the content is under the MIT license.

 lucid bloom
My home assistant data got one of the food pantrys ac units fixed the other unit is not capable of maintaining temperature and so it is being replaced early next week. I provided the landlord with the data from home assistant and it went over really well. These images are of a working unit 9 and a not so working unit 8.

 lucid bloom
This issue has likely been occurring for years it's just no one is usually in the building in the mid late afternoon. It happens every time the outside temp goes over 74F.
 calm badge
nano MUD w/MCP for displaying 2d pictures of the items/monsters
carmine flare
Update: removing the top panel reveals this unit to be a 1985 “MICRO CONSOLE” from a company called Gilderfluke, which seems to still be in business! They make animation and show control hardware.

Turns out these are displays, but not a type I’m familiar with:

 dark cairn
looks like 7seg, but like, I have never seen ones like this.
The pcb thooo, that is definately older than me.
pallid saffron
it's scratching something in the back of my head
 crystal pier
dark cairn
looks like 7seg, but like, I have never seen ones like this.
crystal pier
dark cairn
looks like 7seg, but like, I have never seen ones like this.
Are they neon?
carmine flare
crystal pier
Are they neon?
I don’t think so! But I haven’t seen them powered on either.
 north mural
You can still get switches like that from the same company that makes the adafruit step switches. Swixtronics or something like that.
looks like it could make a really neat step sequencer.
if it was for light show controls should be pretty easy to do. does it have DMA protocol plugs for intelligent lighting?
carmine flare
north mural
if it was for light show controls should be pretty easy to do. does it have DMA...
I think the ports are IDE, to connect to an IBM-PC 🙂
crystal pier
IDE is pretty disc-specific. I would expect it to be either ISA or parallel port.
(likely the latter as the earlier ones especially were all outputs)
north mural
ah i missed that. interesting piece of equipment.
carmine flare
crystal pier
IDE is pretty disc-specific. I would expect it to be either ISA or parallel port...
You’re right, the connectors are confusingly similar
 feral orchid
carmine flare
I don’t think so! But I haven’t seen them powered on either.
feral orchid
carmine flare
I don’t think so! But I haven’t seen them powered on either.
I think they're just LEDs
There's an IC in there that lights the LEDs up
With certain control signals probably
Maybe integrated decoder?
 eternal maple
carmine flare
Turns out these are displays, but not a type I’m familiar with:
eternal maple
carmine flare
Turns out these are displays, but not a type I’m familiar with:
Those look like LED displays made by Hewlett Packard. I recall two versions, one with a parallel binary input (BCD, octal, or hex) and one with a serial counter input.
carmine flare
eternal maple
Those look like LED displays made by Hewlett Packard. I recall two versions, one...
This seems very possible. My dreams of repurposing this board are dwindling 😂
north mural

My assortment of temp sensors from left to right (NIST traceable thermometer, freezer thermometer, feather weather station (with openweathermap data in blue), antonki temp display, echo show)
OpenWeatherMap and Echo Show are saying it's 71F. If that was the case I would be wearing a sweater or hoodie in Florida. They're about 10F incorrect.
My feather weather and antonki temp sensors are the most accurate against the NIST thermometer.
pallid saffron
well, it also depends on when "x" (for whichever provider) was updated -- iirc openweathermap is like 40 minutes or more via the API?
north mural
Most of the time openweathermap and echo show are about 3-5 degrees off but today in particular they're way off.
I'm in Florida in the middle of summer, it's not going below 78F for any reason this time of year.
pallid saffron
i knda depend on more "hyper local" weather (weather underground) because it's 5-15 degrees diff between here and the airport
north mural
Yeah my point is don't rely on online weather from any source for accurate local temperatures.
north mural

A neat thing I discovered is between 80F-90F the BME280 sensor from Adafruit is extremely accurate. Can highly recommend.
 fathom summit
Embeded Lua and FatFS on my QMK firmware, wrote a small editor (cant edit yet lmao) which, in the demo, both closes and executes the file 🤓
 last bronze
@wide brook it came back from ze repair!


Turns out it was mismatched configuration jumpers and the manual was just wrong
wide brook
last bronze
<@930143452749004830> it came back from ze repair!
I'm glad it works, but can't help but wonder how you can fit all this gear in one home, and what you'll do once you have to move
last bronze
wide brook
I'm glad it works, but can't help but wonder how you can fit all this gear in on...
I have a designated workshop room with my dad, we mainly take care of our train models there, but I have my own electronics area
And also a pretty large room
lucid bloom
Good data resulted in a very fast ac unit upgrade, I installed home assistant less than 2 months ago and it is already paying off.
- Collect data
- Give data to landlord
- Watch landlord turn on a dime to fix the problem
I've been nominated for the H2HC for my work at the pantry over the last 5 years leveraging diy tech for good. I won't know if I win until November. If I win the pantry gets 100k and I get bragging rights
https://h2hcollaboratory.org/what-we-do/innovation-prizes/


The Hunger to Health Collaboratory (H2HC) Prizes for Innovation will identify and highlight successful efforts to address food and nutrition inequities in communities throughout the United States.
north mural
That is awesome!
lucid bloom
It would be cool to win im banking on this part of the criteria
Take an innovative approach that has potential regional or national scalability or community adaptation
If I were to do it all again I would start with home assistant. I reprogrammed all my fridge/freezer alarms to work with ha and that's what I would suggest starting with. Having open source home automation technology watching over food pantries all over the place would be amazing. Giving anyone access to the system from their phone is nice, it's no longer my sole responsibility to receive alarm notifications. I am working on a few tutorials in case I do win I want to be able to make it easy for beginners. The food pantry ordering system crashed when I turned it on this morning cuz it ran out of paper. I ended up having to delete the days autogenerated files cuz the paper issue messed them up, after that and a reboot everything was fine. 1 roll lasted 3 years because numbers are 1.5 inches and most numbers are given by sms.
fathom summit
fathom summit
Embeded Lua and FatFS on my QMK firmware, wrote a small editor (cant edit yet lm...
Improved a bit and cleaned up the code 😁
https://github.com/elpekenin/qmk_firmware/tree/fatfs/keyboards/handwired/onekey/keymaps/fatfs_spi_sd

 nimble sapphire
 junior barn
@warped siren on Real Python podcast.
Great interview and a wealth of links to information and tools!

Are you looking to advance your CircuitPython projects? Would you like a collection of resources and tools to help you along your path? This week on the show, Tod Kurt is here to discuss building projects with CircuitPython.
 warped siren
junior barn
<@352910176736772096> on Real Python podcast.
*Great* interview and a wealth of ...
warped siren
junior barn
<@352910176736772096> on Real Python podcast.
*Great* interview and a wealth of ...
thanks!
 rich linden
Hi. I'm interested in sharing a little about my bot project. Are there any guidelines for posting on this channel? Thanks.
 scenic siren
rich linden
Hi. I'm interested in sharing a little about my bot project. Are there any guide...
scenic siren
rich linden
Hi. I'm interested in sharing a little about my bot project. Are there any guide...
Hello! As long as you're adhering to our #code-of-conduct and continuing to keep this a welcoming, inclusive place, there are not really specific guidelines for posting here. You can post images, links (not too many too quickly), code, etc. to share your project. You're welcome to share here!
rich linden
Awesome! Thanks.
 drifting crater
Weather display coming along nicely!
 fathom summit
Embeded Lua and FatFS on my QMK firmware, wrote a small editor (cant edit yet lm...
fathom summit
fathom summit
Embeded Lua and FatFS on my QMK firmware, wrote a small editor (cant edit yet lm...
C-Lua interop is a bit painful to get used (moving around the text buffer to make you own editor is worse tho)
This is already making runtime changes to a script file being run 🤓 -- no computer/flashing involved
PS: uppercase writing implemented right after the vid, and therefore the color constant renamed
crystal pier
I want to do an embedded Lua project at some point. Lua is a far simpler language with a much faster VM than python, so it makes more sense to me than CPy.
crystal pier
Now with press-fit variants!
https://www.printables.com/model/512753-qtqwiiccliq-better-din-all-the-things

Printables.com
v2 of Qwiicplate improving almost every aspect of the original design - now with screwless variants! | Download free 3D printable STL models
north mural
Simple PIR sensor added to strip lights turns them into motion sensor lights for getting out of bed in the dark.
Just thought about it as a monster alarm for a kids room to have the motion sensor under the bed or in the closet. I don't have kids but it's a cute idea.
This is going in a guest room so when family visits it'll be a nice convenience.
rich linden
I've been working on a robotics project for sometime now. For me it's been more about learning than anything else. Working with CAN bus to communicate sensor data to the SBC.


side panels are removable and held in place with magnets

 dusk zinc
That looks amazing! Fit and finish are 💯
 inland trout
But what is it? 😄
rich linden
Loosly I would say it is a differential drive robot that has the potential to autonomously navigate while avoiding obstacles.
pallid saffron
it ain't tiny, is it?
rich linden
No, small wasn't a design criteria. I wanted a platform that I could attach whatever I want to play with. Has a great deal of battery capacity as well!
last bronze
@wide brook wish me luck, turning in my competition entry tomorrow, might win a guaranteed spot at a uni 😄 (had to build a 1kHz sin generator)

 crystal pier
Not familiar with that brand of scope
wide brook
last bronze
<@930143452749004830> wish me luck, turning in my competition entry tomorrow, mi...
Hey, seriously, best of luck!
last bronze
crystal pier
Not familiar with that brand of scope
oh, that just says "Oscilloscope S1-64" in funny letters 😂
last bronze
wide brook
Hey, seriously, best of luck!
thanks!
clever stone
seesaw-esque 🤩
An I2C Client device with dual neopixel bars. The I2C data is minimal: choose bar color, set attack/decay, then just 2 values (L/R) to update the bars. The onboard attiny1616 does all the heavy lifting of computing attack/decay, updating and maintaining the color selections. Firmware is just 3600 bytes.
clever stone
clever stone
seesaw-esque 🤩
An I2C Client device with dual neopixel bars. The I2C data is mi...
While this Dual Neopixel board uses the same ATtiny1616 as the Adafruit NeoDriver - I2C to NeoPixel Driver, they are worlds apart.
This board implements a small number of high level I2C commands and has a bunch of code to implement those few commands. If you want new commands or different behavior then you’d update and reflash the firmware.
The Adafruit NeoDriver - I2C to NeoPixel Driver has a more generic set of commands and as such, can do lots of things (without climbing under the hood). However, it won’t be as spritely as a lot of commands need to be sent to achieve dynamic visuals.
The code running on this device board is on an ATtiny1616 which means it’s compatible with the Adafruit seesaw ATtiny1616 board.
last bronze
wide brook
Hey, seriously, best of luck!

3 sources confirm it's a perfect 1kHz
With a perfect sine and 0 noise
wide brook
last bronze
fingers crossed! All the best!
 exotic sierra
clever stone
While this Dual Neopixel board uses the same ATtiny1616 as the Adafruit NeoDrive...
exotic sierra
clever stone
While this Dual Neopixel board uses the same ATtiny1616 as the Adafruit NeoDrive...
This is honestly really cool
clever stone
exotic sierra
This is honestly really cool
I have not tried yet but I’m pretty sure all the code will run on the Adafruit ATtiny1616 seesaw. The only task would be looking at its schematic to match its “number” scheme to the original PORT:PIN syntax. After that, all the examples in the AVR Coding 102 materials will work directly … including these neopixel bars 👍🏼
 cunning lava
Family photo: fluffbug, weebug and bigbug together.
 pallid saffron
awwwwwwww


 stark latch
Pretty sure the TI-30 was the 2nd calculator I ever had. I think this was the first.
 pallid saffron
and yes, i even wore it on my belt
 stark latch
pallid saffron
and yes, i even wore it on my belt
stark latch
pallid saffron
and yes, i even wore it on my belt
Definitely before my time. Earliest I remember anyone using was the SR-40.
wide brook
pallid saffron
and yes, i even wore it on my belt
Electronic slide rule calculator. That's some crazy marketing right there. "Like slide rule, but better!"
(Or is there another reason they wrote that on the box?)
pallid saffron
wide brook
(Or is there another reason they wrote that on the box?)
well, in my particular case, it did replace a slide-rule 😀
crystal pier
I wonder if it used a lookup table internally.
north mural
LORA portable range finder. Will help determine how far from my nodes I can go before signal loss.
Will be battery powered ESP32-S2 Reverse TFT on an RFM95 Featherwing and high gain antenna.
you know... for mailboxes that are really far away 🙂
rich linden

The other day someone shared a picture of a magnetic core memory. This is a rather large board which is 4k bits. My father in law worked with a machine that used this. Kind of cool.
north mural
did the range test today. got as far as line of sight around the corner from house before it went out. my receiver is in the back of the house behind two concrete walls so even that is pretty good. if I put the receiver on a high pole way above the tree line i bet it would go for miles.
in flat land Florida the best I could do with my RFM95 setup was about 200 feet because suburbia, houses, and trees in the way.
still better than wifi range though
i'm afraid to put it on a pole that would become a lightning rod.
The RFM/LORA depends heavily on line of sight. It doesn't deal with scattering well at all.
Though it did go through 2 concrete walls... 🤷
clever stone
Took the “theory” and made them “reality” - Continuous Range data from touch controllers.
The circular controller generates either 0..255 or 0.359.
The grid controller generates X-Y pair with 0..255 for each.
Here are close-ups of the PCB:


 leaden orbit
i built half a sofle and it mostly works!!


 hearty lagoon
clever stone
Took the “theory” and made them “reality” - _Continuous Range_ data from touch c...
hearty lagoon
clever stone
Took the “theory” and made them “reality” - _Continuous Range_ data from touch c...
Can you tell us a bit more about how these work?
clever stone
hearty lagoon
Can you tell us a bit more about how these work?
Hi! I’m finishing up the code, documentation, and then the tutorial … so there will be plenty of details.
In the meantime, a quick overview:
The layout of the physical touch sensors results in multiple being active at the same time. I’ve written “interpolator” code which identifies which raw data have the greatest influence. They are processed to compute any value between adjacent sensors along with the relative influence of each. The result is the “continuous range” data.
BTW: One implementation of these uses an ATtiny1616 to drive both and provide I2C commands to get the processed values so the main controller just treats these as high level “under interface” devices and doesn’t need to bother with reading the raw data and processing it.
 errant pasture
Have had a ton of progress making a parametric monophonic synth within CircuitPython's synthio library lately! Still have a number of bugs and features to work out, but it's sounding mighty phat. https://www.youtube.com/watch?v=uuqIeZu2VT8

All of the audio is mostly untouched and direct from the Pico except for a touch of limiting. I am still working around issues related to interference with the I2C display and filter resonance distortion. So, apologizes for the clicks every now and then.
Code Repository: https://github.com/dcooperdalrymple/circuitpython-synthio-mono
hearty lagoon
clever stone
Hi! I’m finishing up the code, documentation, and then the tutorial … so there w...
Awesome! I will keep my eyes open for the release of the tutorial then
 burnt wyvern
rich linden
burnt wyvern
rich linden
I completely forgot about these, I absolutely love outdated or absurd data storage methods like this (this one wasn't as absurd though)
Makes me wonder if there's some way to DIY these in batches and use it with a modern microcontroller as actual storage
inland trout
The other day someone shared a picture of a magnetic core memory
This is the one that was shared here I think:
https://www.hackster.io/news/a-core-memory-shield-for-the-arduino-d86ad1c76340
https://jussikilpelainen.kapsi.fi/wordpress/?p=213
(not mine)
burnt wyvern
Are these normally super expensive?
 covert dawn
Hey, I wrote a CircuitPython library to drive the inexpensive SYN6988 speech synthesizer / TTS boards you can find on AliExpress. If you need to add voice prompts to your project (maybe for accessibility) this board works better than I'd expected for English speech.
https://github.com/scruss/circuitpython-SYN6988

GitHub
CircuitPython library for the YuTone VoiceTX SYN6988 text to speech module. - GitHub - scruss/circuitpython-SYN6988: CircuitPython library for the YuTone VoiceTX SYN6988 text to speech module.
Demo of the board through screen capture audio loopback: https://user-images.githubusercontent.com/425706/249488026-bf107dc3-3db7-4eb7-90a4-6cfe5986529f.mov
hardy veldt
Proof of concept for audio-reactive shaders using a Teensy 4 and an optimized ILI9341 library since the basic examples don't really cover fft; here, the circles in the middle are reacting to a narrow bass frequency. The fps is intentionally capped at 60 (double-buffered 120 for vsync), but the Teensy can drive this display at much higher framerates even with the fft running, which is really nice.
last bronze
@wide brook 3rd place, got the spot 😄 unfortunately the distortion was a bit high, but eh
wide brook
last bronze
<@930143452749004830> 3rd place, got the spot 😄 unfortunately the distortion wa...
Good job! That's one major stress off your life
Congratulations!
burnt wyvern
Someone brought these two in for an auction I'm volunteering at. He told me they were Arduino boards lol.

I mean, I see how you could mistake the two if you're not a maker.
crystal pier
That reminds me I still need to build my Stratum 1 NTP server with my old pi.
last bronze
burnt wyvern
Someone brought these two in for an auction I'm volunteering at. He told me they...
Me want buy lol
wide brook
burnt wyvern
Someone brought these two in for an auction I'm volunteering at. He told me they...
pi1! :D I used to have one, used it till it gave up its spirit
last bronze
Moar meters
 lucid bloom
I got the hardware working for what will eventually be an esphome single door/double door freezer alarm. My goal is for it to be quick/easy to make, easy to set up and easy to get working as an alarm in home assistant. The next step is to make an automation that is functional then use that as a basis for a blueprint.

 north mural
Thats a neat idea. Shows how you can save energy/money by not keeping the door open any longer than necessary.
lucid bloom
Also catching them when they die or slowly freeze over. The logic for detecting a problematic freezer is 1 hour over 20F and that logic is turned off during operating hours. Recently had an alarm go off after being reactivated. I had to unplug the freezer for 48 hours. The old system had been going off a lot and then when the new home assistant system did the same it was time to check it


The importance of the alarms is that issues get solved early on our terms and do not get to a crisis point.
What's cool is I can trace the issue back to roughly a month ago, it was ok on may 17 and 24th but after that it was progressively freezing over, the old system went off every week and then when the old one went off twice in a day and the new one went off two weeks in a row I had to do something


 last bronze
Got a pegboard to finally organize some of my tools 😄

 warped siren
covert dawn
Hey, I wrote a CircuitPython library to drive the inexpensive SYN6988 speech syn...
warped siren
covert dawn
Hey, I wrote a CircuitPython library to drive the inexpensive SYN6988 speech syn...
This is very cool! I want to get one of these boards and try this out
I've been goofing around with more CircuitPython synthio stuff. Got one of my boards from back in May semi-populated and coded up a quick step sequencer https://www.youtube.com/watch?v=2Ca5fP6Zp_w

Trying out some synth interface ideas in CircuitPython using one of my "picostepsynth" (aka "picostepknobs") proto PCBs and synthio.
I really want to use pots, but I also want the pots to do multiple things. So figuring out a "knob pickup" algorithm that works intuitively is challenging. I'm getting close tho.
#raspberrypipico #circuitpython #...
covert dawn
warped siren
This is very cool! I want to get one of these boards and try this out
It's rather hard to track down a specific board. I think that the SYN6xxx chips are all inter-compatible. I have some more boards on the way. Ping me if you get a board and it's not doing the thing for you
wide brook
covert dawn
Demo of the board through screen capture audio loopback: https://user-images.git...
Nice demo! For some reason (probably because I don't know Chinese), its Chinese voice sounds better than its English one
I should probably not be surprised, since it's a Chinese product, probably aimed at the domestic market?
covert dawn
Very aimed at the domestic market. From the very little I know about them, I think they're used in ATMs.
The English voice may not be great, but it's far better than it really needs to be. It gets most words right (or close enough). In the past you had to mess around with Arpabet phonemes to make speech chips say anything understandable
wide brook
covert dawn
Very aimed at the domestic market. From the very little I know about them, I thi...
Yeah, I had no idea speech synthesis ICs (1) still existed and (2) have progressed so much. If you don't mind me asking, do you know Chinese?
covert dawn
No, I don't. I'm hoping the examples I chose aren't beyond cringe. I was careful to make the driver accept not just ASCII characters so you can send Traditional Chinese characters to it and it will make sense of them. Maybe someone can use this for voice prompts in an assistive technology projects
last bronze
@wide brook I've bought one of my dream meters
a tape recorder!

didn't arrive yet, hence the pic is bad quality :v
but it's this exact one
wide brook
last bronze
a tape recorder!
You can age it by the country indication. "MADE IN CZECHOSLOVAKIA"
last bronze
wide brook
You can age it by the country indication. "MADE IN CZECHOSLOVAKIA"
😄
to get free shipping it's coming with one of those lol

not sure what I'll do with it
but
is light = i like
 meager summit
This was a silly project I made to automate the monotony in Tears of the Kingdom. Yes, I know there are less obtuse ways to do this, but this was lazier for me, lol! https://youtu.be/M_fhMhpAUck

Using the power of automation to reduce monotony in video games.
burnt wyvern
I got an old 42 inch plotter from an auction for free, an idea that came to mind was making a giant punchcard-like graph of every bit in the Super Mario Bros. ROM data. I managed to dig out my old NES data archive and make a quick Python script to create an image of the whole thing. It fits on the plotter and is a whole 40 feet in length. Obviously I didn't print the whole thing because paper and ink is expensive. But it's cool that in theory it would work. Here's the first foot or so of the print.
 last bronze
burnt wyvern
I got an old 42 inch plotter from an auction for free, an idea that came to mind...
last bronze
burnt wyvern
I got an old 42 inch plotter from an auction for free, an idea that came to mind...
Can I see ze plotter?
burnt wyvern
last bronze
Can I see ze plotter?
Sure, it's an HP DesignJet 800
 last bronze
Nice one
 lean elbow
Needed some timers for cooking so I built this over the weekend. Programmed with CircuitPython on a Propmaker Feather, to take advantage of the battery charging and the I2S audio amp. Automatically enters deep sleep when not in use to preserve battery life.

 tame dawn
Just wrapped up my latest project, a very simple audio book reader. I built it for my mom who, as she gets older, has more of a hate and less of a love relationship with technology. I documented the project if you're interested https://learn.adafruit.com/u/ntynen/pages/simple-audio-book-reader

 short summit
tame dawn
Just wrapped up my latest project, a very simple audio book reader. I built it f...
short summit
tame dawn
Just wrapped up my latest project, a very simple audio book reader. I built it f...
That's very cool! And I'm impressed you included the CAD and STL files in your Github repo, too
I think that just might show up in the weekly Python on Hardware newsletter 🙂
tame dawn
short summit
I think that just might show up in the weekly Python on Hardware newsletter 🙂
Thanks! It was a fun project. Always looking for projects to improve both my coding and 3D printing skills
carmine flare
Showing and telling a setback. Last week my battery charging project was working:

But now it is very much not working, and I don't know why:
 north mural
😦 what kind of battery for 2.64v? get help in the hw channel for your design?
tanking from 2V to 1V that fast means 1V drain somewhere perhaps?
carmine flare
north mural
😦 what kind of battery for 2.64v? get help in the hw channel for your design?
It’s an unorthodox design, and I think the only sensible advice would be “don’t do this.” So I can’t really ask for help.
Just trying this anyway because I think there is sometimes value in trying bad ideas.
It’s two AAA size 1000mah NIMH cells, in series. So, fully charged voltage is about 2.8v. I am attempting to trickle charge them with 10ma from a GPIO. The entire “charging circuit” is a single 47ohm resister and a diode.
Terrible idea? Sure. But the math checks out. And it was working until I left the device powered in overnight and the cells got depleted. I swapped them out for fresh ones but same dropping voltage. It seems I may have fried something on my Pico but the GPIO still seems to be functioning.
Science! Or something.
north mural
Win some lose some. Keep at it. Gaining experience is learning all the ways not to do something.
last bronze
Finally arrived 🤤
 crystal pier
Anyone need a DIN-mounted spring latch?
https://www.printables.com/model/520680-din-mounted-spring-latch

Printables.com
Extended version of 3D Printy's spring latch design that can be attached to DIN rail clips | Download free 3D printable STL models
wide brook
crystal pier
Anyone need a DIN-mounted spring latch?
https://www.printables.com/model/520680-...
Thanks to your printables profile, I just found out 3D printable funnels are a thing that exists. In my defense, I've never worked or looked into 3D printers before
crystal pier
That is somehow still my most popular model, by a wide margin.
wide brook
You never know when you need a funnel!
crystal pier
Indeed
And PETG is surprisingly chemical resistant.
I need to print one for my cat's food tank.
wide brook
PETG food tank for the pet :P
crystal pier
Too many grooves in printed parts for that to be safe without epoxy.
But I will print a funnel to make it easier to pour catfood.
wide brook
crystal pier
But I will print a funnel to make it easier to pour catfood.
post a pic here! :P
crystal pier
Sure when I print it.
 vernal vigil
Is there a stream tonite?
 scenic siren
vernal vigil
Is there a stream tonite?
scenic siren
vernal vigil
Is there a stream tonite?
Yep! In 30 minutes.
 queen veldt
It’s not done yet, but I felt the need to share it in its current state

 queen veldt
crystal pier
<:STL:982317462806724618>
queen veldt
crystal pier
<:STL:982317462806724618>
STL and Manual will be shared once I'm done with it
everything except hardware is printed including compound planetary gearboxes
wide brook
crystal pier
<:STL:982317462806724618>
I love this emoji 😂
lean elbow
Built this last summer and realized recently watching Lada Ada and PT retrofit old toys with new tech that I never showed this off. I gutted an old NES Zapper and squeezed in an ItsyBitsy RP2040, a 400mAh battery and battery charger breakout, an I2S amp and small oval speaker, and a Neopixel. I also used one of the cool magnetic USB connectors for easy charging, and a switch to power off completely. Designed and 3D printed a small part to mount the switch that fits into the cord outlet, and a little diffuser piece for the barrel to show of the Neopixel better. Code is written in CircuitPython.
 tame dawn
lean elbow
Built this last summer and realized recently watching Lada Ada and PT retrofit o...
tame dawn
lean elbow
Built this last summer and realized recently watching Lada Ada and PT retrofit o...
This is so cool!
hardy veldt
Finished soldering my LCD audio visualizer so I figured I have it run side-by-side with my LED visualizer to some music. It's overkill but I love that the Teensy can handle two 1024 sample ffts (adds variety at least) and still push lots of frames. Still have some to-do's, more effects, etc., but notably the flickering circles since it's not actually flicker, it's persistence of vision at work as it's only rendering one of each kind of circle.
hardy veldt
Made some changes and I'm pretty much done with this type of visualization. Now it triggers more amplitude-based effects, there's a decaying waterfall at the top, and the flickering is dampened a bit by some coincidental rendering quirks.
This one's better suited for music so my next vis setting is gonna be spline-based that's tuned for voices.
short summit
tame dawn
Thanks! It was a fun project. Always looking for projects to improve both my cod...
We featured your project as the Project of the Week in the Python on Hardware newsletter: https://www.adafruitdaily.com/2023/07/10/python-on-microcontrollers-newsletter-circuitpython-8-2-0-stable-released-and-more-circuitpython-python-micropython-thepsf-raspberry_pi/
tame dawn
short summit
We featured your project as the Project of the Week in the Python on Hardware ne...
Thank you so much! 
 main loom
They're here!
Not soldered, but I just had to make sure all the important components actually fit.

 lucid bloom
My remixed project is almost done. This is what I started with
https://github.com/rpigu-i/rfidsnatcher
I replaced the board with a feather and I modified the code that would send a sms if a default key was detected into a captive portal with card info making the device more like a card reader that checks for default keys. I increased the number of keys to check as well with all the default keys listed at https://github.com/XaviTorello/mifare-classic-toolkit

GitHub
Arduino RFID cloner and SMS sender. . Contribute to rpigu-i/rfidsnatcher development by creating an account on GitHub.

GitHub
RFID / NFC :: Mifare Classic 1k info and tools. Contribute to XaviTorello/mifare-classic-toolkit development by creating an account on GitHub.
hardy veldt
More visualizer nonsense. Simpler this time with a focus on vocal frequencies, though I did recycle the noise shader to populate the background. Next would be something involving triangles and/or fractals, if I can figure out how to draw them.
 solar yew
Hi I'm thinking of making a device a lot like the flipper Zero but with more features and it has an entrance for a RF antenna, I did some 3d model of the device and wanted to share if you have any tips for me please tell them so I can improve my project.
 grand turtle
I made a high precision low noise ADC breakout board 🙂
 grand turtle
just spotted that missing resistor in the photo! hahaha
 peak marlin
I have several devices that use the OpenWeatherMap API that display weather info around the house.
Once I get past a certain point (especially when testing), I have hit the API rate limit.
So to fix that, I wrote some code to get and cache the data from OpenWeatherMap every 15 minutes and provide an endpoint for all the devices to use - many requests but only one API call.
https://github.com/DerBroader71/owmcache
Hope someone (anyone) finds it useful

GitHub
Local network cache for OpenWeatherMap. Contribute to DerBroader71/owmcache development by creating an account on GitHub.
There are currently versions in Go and CPython but I will also be doing a CircuitPython version, so you can have a device providing it instead of an SBC or computer.
feral orchid
grand turtle
I made a high precision low noise ADC breakout board 🙂
What IC?
Looks cool 😎
grand turtle
feral orchid
What IC?
ads131m08
intention is to do some wild crazy emg sensing w/ it
feral orchid
And why a high speed CSI-like interface
grand turtle
8 channel high frequency adc readings
breaking it out so that a microcontroller with highspeed usb can beam into my confuser
feral orchid
So just an fpc for the adc channels
 feral orchid
It looked like a high speed serial interface at first
grand turtle
yes i preferred it over the other connections i've seen before and JLC has flex now 
crystal pier
Ah yes that won't hurt signal integrity at all 
feral orchid
But upon closer inspection, it's just differential ADC channels
grand turtle
crystal pier
Ah yes that won't hurt signal integrity at all <a:LouieGetsIt:101916202242174158...

i spoke with an FPC company before I had the electrode ends manufactured and i followed their recommendations 
 lilac tundra
grand turtle
just spotted that missing resistor in the photo! hahaha
lilac tundra
grand turtle
just spotted that missing resistor in the photo! hahaha
oof
wait nvm u can just solder it on
 kind burrow
OK, at DJDevon's urging (nudge nudge, wink wink) I'm gonna post first Show from a relative beginner. Totally credit FoamyGuy - I copied the basic code from Deep Dive some time ago, and didn't know you could do something like this. The code could be optimized, but haven't had the time...
This is running on ESP-S2 Feather TFT, but I've also ran modified code on PicoDVI Picowbell on my TV, with more circles. In this program, I had to limit the # of circles since I got memory full error if too many...
I don't have a video, but the circles constantly randomly change colors. This is a relatively simple program but I was amazed at the results (for a noob like me) .
I left out a line in this code below... the for loops should say:
for i in range(NUM_CIRCLES):
Several versions of this code hanging around...
 grand turtle
lilac tundra
wait nvm u can just solder it on
grand turtle
lilac tundra
wait nvm u can just solder it on
yep! i actually hand assembled these so it's really my fault haha
lilac tundra
grand turtle
yep! i actually hand assembled these so it's really my fault haha
noice it looks like its been manufactured by how good the quality is lol
grand turtle
the stencil makes it quite easy, easier than many think. hardest part is following your BOM!
lilac tundra
yep
I just hot-glued a servo on a plug-in power distributer and just finished coding it
now I can use it to control appliances!
lilac tundra
I JUST FINISHED IT!
now I can control my lamp using a simple ir remote
I should make a yt vid on it
kind burrow
Don't know if anyone's using STM32, but I heard LadyAda talk about ST boards several times, I got the bug, and got one. Nucleo-L476RG from Digikey. Guess I wanted a challenge... As far as I can find, there isn't CP support.
https://www.digikey.com/en/products/detail/stmicroelectronics/NUCLEO-L476RG/5347711?s=N4IgTCBcDaIMoBUCyBmMAZALAdgGwCUBxAAiQGEBVAGhAF0BfIA
It uses STM32CubeIDE to program: here's a really good starting out vid:
https://www.youtube.com/watch?v=hyZS2p1tW-g
I've managed to get Adafruit SSD1306 Prod 938, and a Seed RTC working, thanks to excellent videos, and github - links below.
I already had the shield wired up, and it fits on the board with its Arduino style pinouts. To not get too technical, the ST's I2C needs to be set to I2c3, so the I2C output uses "Ard" pins A4/A5. Don't want to overload anyone - this is a definite learning process.
OLED setup vid:
https://www.youtube.com/watch?v=z1Px6emHIeg
github library:
https://github.com/afiskon/stm32-ssd1306
DS1307 github library:
https://github.com/eepj/DS1307_for_STM32_HAL
BTW - this board runs Arduino sketches perfectly, but I wanted to learn the new IDE, a "painful" but rewarding process ha ha.
This is the link you need for the board to be added to Arduino:
https://raw.githubusercontent.com/stm32duino/BoardManagerFiles/main/package_stmicroelectronics_index.json
There are lots of examples folks on github have programmed. Here's one.
https://github.com/DanielMartensson/STM32-Libraries
A lot of this stuff is still way over my head, but I'm a glutton for punishment😄


We’re kicking off a new video series! This time, we create a set of tutorials around getting started with the STM32 ARM microcontrollers. To begin, we go over the STM32 naming convention for its processors and introduce the Nucleo development boards.
The STM32 series is based on the ARM Cortex architectures. Specifically, we’ll be looking at th...

In this tutorial I will show you how to create a simple OLED project.
You will learn:
- how to connect the OLED (ssd1306) with a NUCLEO-F103RB board
- how to set up a CubeIDE project
- how to integrate an external OLED driver from GitHub
- how to display text and change the background-color
Link for the external OLED driver:
https://github.com...
GitHub
STM32 library for working with OLEDs based on SSD1306, SH1106, SH1107 and SSD1309, supports I2C and SPI - GitHub - afiskon/stm32-ssd1306: STM32 library for working with OLEDs based on SSD1306, SH11...

GitHub
An STM32 HAL library for the DS1307 real-time clock IC. - GitHub - eepj/DS1307_for_STM32_HAL: An STM32 HAL library for the DS1307 real-time clock IC.
last bronze
Got another beautiful meter 🤤
lilac tundra

I said I would include the schematics here but I have put it in the video.
"Roblox 3008 OST - Friday Theme" YouTube, uploaded by uglyburger0, Jan 18, 2020, https://www.youtube.com/watch?v=UYq0xU_7F98.
just finished this project
 ocean frigate
Ah like a DIY switchbot, and safer than rewiring mains through relays. Neat
lilac tundra
ocean frigate
Ah like a DIY switchbot, and safer than rewiring mains through relays. Neat
Yeah!
kind burrow
If anyone is interested, I couldn't get the DanileMartensson LCD code to work at all.
THIS one works perfectly:
https://www.youtube.com/watch?v=EYrHRSeAUUc
The link to his code files is in the vid, the only changes I had to make were as follows:
If you have "hal" files for a different board (such as stm32f4xx_hal.h like his example) you just have to rename the includes in his code - mine needed to be stm32l4xx_hal.h since my board is L476 (not an F series). The compiler flagged errors, and just renaming the includes worked fine.
OK, I'm officially done boring everybody with this stuff. But it is fun...

STM32 Nucleo for beginners
Code and diagram are at https://www.micropeta.com/video61
main loom
Let's go!
It works. My little NeoPixel control board. Slight confusion from the fact that passing 0 to the colorHSV function returns green, not red.
Or maybe my LEDs are actually RGB order, not GRB.

Still, I'm absolutely stoked that it actually works
Ok, yeah. Doublechecking the function use, 0 should be red. Guess I'll change the color order.
 trim talon
it just shows solutions posted to Twitter, nothing too smart
kind burrow
Howdy again. I REALLY like this plug-and-play setup, so show it off.
Details: Pico and PICowbell from Adafruit, RFM69 breakout,
Pico Decker Quad and Display Pack 2.0 from pishop.us
I had already wired up the Cowbell to handle the breakout, receiving outside data from Feather M0 RFM69.
The display is nice and large.
The code I show is the demo from library bundle, and I added the buttons code.
https://www.pishop.us/product/pico-display-pack-2-0/
https://www.pishop.us/product/pico-decker-quad-expander/


PiShop.us
American Raspberry Pi Shop. One stop shop for all your Pi needs. Raspberry Pi add-ons, HATs, accessories, Starter Kit, Media Center kit, RetroPi Arcade kit, Ultimate Kit, and many other project kits. PiShop.us is approved Raspberry Pi re-seller and carries all official Raspberry Pi boards and products.

PiShop.us
American Raspberry Pi Shop. One stop shop for all your Pi needs. Raspberry Pi add-ons, HATs, accessories, Starter Kit, Media Center kit, RetroPi Arcade kit, Ultimate Kit, and many other project kits. PiShop.us is approved Raspberry Pi re-seller and carries all official Raspberry Pi boards and products.
north mural
Finishing up a personal project using a Fitbit to display my mom's heart activity on a TFT Featherwing. Light blue indicates she's either sleeping or in a deeply restful state right now. ❤️

Compared to an avg heart rate of 45-50 a month ago. Seeing this brings me great comfort.
Thanks to @languid nebula for all the recent updates for uplot to help make this work.
dark cairn
Just a cool picture I took.
 north mural
Changed my plotting graph to cartesian. Plotting fine. The magic sauce I needed was something like my_plane.clear_plot_lines(). It's now graphing and refreshing properly every 15 minutes with the last 15 minute avg heart rates from Fitbit.

Wish there was a way to change the line color depending on y-axis value. Maybe will submit a feature request.
crystal pier
My entry to the paper towel holder contest:
https://www.printables.com/model/531400-spilldin-din-mounted-paper-towel-holder

Printables.com
My entry to the paper towel dispenser competition. Also, please fix the licensing system Prusa. | Download free 3D printable STL models
crystal pier
By the way, I don't normally ask people to like and download my models for the sake of popularity, but in this case I am trying to force Prusa to acknowledge the CERN OHL.
last bronze
@wide brook the Soviet generator has unfortunately died 😦
I hope I can get it working again, but I'm worried the ICs might have died
lean elbow
My take on a version of the star fragment lamp that doesn't require a WiFi connection. I used a QT Py M0 and a Neopixel driver BFF, and a RTC breakout (I still have a few of them from before the stemma qt redesign). I soldered all the boards onto a perma-proto and designed a case that would allow me to mount the perma-proto via its mounting holes, using a couple heat sink inserts and screws. Operation is simple, just press the button once at sunset, and it will fade on over the next hour. Seven hours after pressing the button it will begin to fade back out, and by hour 8 it will have faded out again.


 wide brook
last bronze
I hope I can get it working again, but I'm worried the ICs might have died
wide brook
last bronze
I hope I can get it working again, but I'm worried the ICs might have died
Well, if the ICs are dead, you'll probably have little luck finding equivalent western ones, unless they are direct clones... @upbeat geyser probably knows more about those sorts of things though, I think he has repaired ex-USSR stuff in the past....
last bronze
wide brook
Well, if the ICs are dead, you'll probably have little luck finding equivalent w...
found the ICs, they're available and all, but unfortunately it's most likely the transformer 😦
and to make things even worse, there are no voltages listed on the schematic
grand turtle
Hey guys, I made a Nordic library for KiCAD. Looking for contributors to help finish up the custom footprints Nordic has for their BGAs and aQFNs.
https://github.com/hlord2000/nordic-lib-kicad
It has full PCM support and all symbols defined for modern Nordic parts.

GitHub
Nordic Component Symbol Schematic + Footprint Library - GitHub - hlord2000/nordic-lib-kicad: Nordic Component Symbol Schematic + Footprint Library
 elder token
Not exactly sure if I can put this here, but I think I will be told if I can't... >_>
Because my brain decided that it wants me to develop a DIWhy 16 bit minicopmputer from scratch...
http://warringersworlds.net/category/dwmc-16/
wide brook
elder token
Not exactly sure if I can put this here, but I think I will be told if I can't.....
Hello! Have you considered implementing everything in an FPGA instead of using discrete components?
elder token
Where is the fun in that?
wide brook
Hah, I guess that's fair :P
Please don't consider this a "you're doing it wrong" kind of thing
elder token
FPGA would be comparably easy and perhaps a good way to validate the design before building it in descrete components.
wide brook
That sounds like a good idea :)
(And you'll also have a version of the design that will work at much higher fmax)
elder token
I'm not taking it as 'you're doing it wrong'. Always open for ideas... :p
Also for developing a monitor/OS. :p
wide brook
Yeah. Personally, I find working with FPGAs much more fun than working with discrete components, but that's just me 😅
elder token
I'd also have to learn how to use FPGAs, while discrete components won't be a problem. So the other way around from you.
wide brook
Most FPGA software has a schematic entry form, but it's inefficient and inflexible, so you'll have to learn a hardware description language
I use verilog. https://hdlbits.01xz.net/wiki/Step_one is a decent tutorial
Then, it's a matter of picking up a chip, which will also select the toolchain you will use
Some lattice chips are supported by an open-source toolchain, but for the rest of them, you'll have to use closed-source software
elder token
Hmmmm...
Well, I do make any logic diagrams in the software Digital, which does export to Verilog.
wide brook
The question is whether the output is synthesizeable, and what you'll do if you run into some bug
So, learning verilog (or VHDL) is still recommended ;)
elder token

GitHub
A digital logic designer and circuit simulator. Contribute to hneemann/Digital development by creating an account on GitHub.
Possible.
wide brook
Also, verifying your circuit will be much easier if you enter it using HDL
You could use something like https://www.cocotb.org/
You can also synthesize said HDL to a specific FPGA (or other technology library) and then verify the LUT/gate-level implementation
 split wren
ive used iverilog in the past to sim verilog on pc
wide brook
split wren
ive used iverilog in the past to sim verilog on pc
Yeah, iverilog is OK, as long as you aren't working with encrypted IP (or using SystemVerilog to a non-trivial degree). Verilator is an option too
Most FPGA toolchains also come with a simulator
elder token
Concerning my project... I just discovered that Ferromagnetic RAM is a thing... Technically Core memory in IC form. HYPE!
last bronze
elder token
Concerning my project... I just discovered that Ferromagnetic RAM is a thing... ...
Do link, please
Am intrigued now
elder token

Ferroelectric RAM (FeRAM, F-RAM or FRAM) is a random-access memory similar in construction to DRAM but using a ferroelectric layer instead of a dielectric layer to achieve non-volatility. FeRAM is one of a growing number of alternative non-volatile random-access memory technologies that offer the same functionality as flash memory. An FeRAM chip...
Okay its ferroelectric ram
wide brook
elder token
https://en.wikipedia.org/wiki/Ferroelectric_RAM
Resistive random-access memory (ReRAM or RRAM) is a type of non-volatile (NV) random-access (RAM) computer memory that works by changing the resistance across a dielectric solid-state material, often referred to as a memristor.
ReRAM bears some similarities to conductive-bridging RAM (CBRAM) and phase-change memory (PCM). CBRAM involves one elec...
 candid crescent
elder token
Okay its ferroelectric ram
candid crescent
elder token
Okay its ferroelectric ram
Ah, I thought you might have been referring to https://en.wikipedia.org/wiki/Magnetoresistive_RAM
Magnetoresistive random-access memory (MRAM) is a type of non-volatile random-access memory which stores data in magnetic domains. Developed in the mid-1980s, proponents have argued that magnetoresistive RAM will eventually surpass competing technologies to become a dominant or even universal memory. Currently, memory technologies in use such as...
vernal vigil
I have published the hardware & software for the KB2040-based FM synth module that I showed off on the S&T stream a couple weeks ago: https://github.com/Len42/Dexy
GitHub
DX7-inspired FM synthesis on a Pi Pico. Contribute to Len42/Dexy development by creating an account on GitHub.
It was a long time in the making, and there are still some features I want to add, but at some point I have to call it done and start actually using it.


 late magnet
Woo, 3d-printed XDA-profile keycaps for my Macropad RP2040, now just to actually finish the side of the software that runs on the computer to update its configuration live instead of requiring a recompile like it does now


...And actually seeing that close-up of those keys in that first picture it makes them look atrocious, but they're tiny so it doesn't looks okay from a few feet away, lol...
 fresh junco
In this project, I used Arduino, ultrasonic sensors, and Max/MSP to create a virtual instrument. Would love to know your thoughts about it. Thanks!!!

Soundstallation 1; Arduino + Ultrasonic sensor
composer-performer: Ramin Akhavijou
The artist's statement:
In this project, an exploration was undertaken to create virtual instruments that challenged the limitations of conventional music-making through the utilization of technology. To accomplish this, I delved into the realm of ultrasonic sens...
dark cairn

I am so scared of breaking the display a 2nd time I decided it's box time!
The usb dongle is attached to the main lash so it can be disconnected without you losing it.
The zipties can be easily slid off so you can open the box.
 cedar moat
Hi all. I just want to show appreciation to the Adafruit team for making CAD models public.
This has been a game changer for helping me add these parts to my PCB editor.


GitHub
CAD files for various boards, components and parts - GitHub - adafruit/Adafruit_CAD_Parts: CAD files for various boards, components and parts
 autumn orchid
Miniproject related to the current rp2040 pio encoder discussion in #help-with-circuitpython @ancient skiff
The 10kppr HID scrollwheel of doom for testing encoder implementations with pio.
 feral orchid
elder token
https://en.wikipedia.org/wiki/Ferroelectric_RAM
feral orchid
elder token
https://en.wikipedia.org/wiki/Ferroelectric_RAM
Adafruit even sells some FRAM breakouts.
exotic sierra
You will soon be able to program your ICE40 FPGA from circuitpython! Coming soon to a community bundle near you! 🙂
 languid nebula
exotic sierra
You will soon be able to program your ICE40 FPGA from circuitpython! Coming soon...
languid nebula
exotic sierra
You will soon be able to program your ICE40 FPGA from circuitpython! Coming soon...
That is so cool!!!
exotic sierra
languid nebula
That is so cool!!!
It’s part of my master plan to make fpga more accessible to makers 🙂
fathom summit
Not if you live in other side of the sea 😿
Very kewl project, good job ❤️
exotic sierra
fathom summit
Not if you live in other side of the sea 😿
Very kewl project, good job ❤️
Board files and BOM will be open source
So you can order bits from your favorite supplier, PCB from Aisler
fathom summit
Ping me then 😁👀
exotic sierra
Well, I’d love to see someone implement a neopixel driver on it
wide brook
exotic sierra
Should be available this weekend
That's fast! When did you begin designing it again?
exotic sierra
wide brook
That's fast! When did you begin designing it again?
I did something initial 4 days ago but didn’t touch it until today
wide brook
Fast indeed :P. How many layers is it?
exotic sierra
2 layers
languid nebula
fathom summit
Perhaps hardware accelerated displayio? 😆
I have some libraries in mind that could use that 😊
fathom summit
Which language/tool is even used for that thing, btw?
Reply and move onto #fpga maybe
exotic sierra
fathom summit
Which language/tool is even used for that thing, btw?
Yosys OSS CAD Tools with Verilog
exotic sierra
Voila! IcePython: https://github.com/skerr92/Oakdevtech_CircuitPython_IcePython

GitHub
A library for programming iCE40 FPGA from Lattice Semi - GitHub - skerr92/Oakdevtech_CircuitPython_IcePython: A library for programming iCE40 FPGA from Lattice Semi
Board files coming to GitHub soon as well
fathom summit
some code feedback if i may
- isnt
for _ in range(8) # or 100slightly faster than a while? (definitely looks cleaner to me) len(file) > 0check as a guard clause would reduce indentation
curious... what happened to the "have to invert", was that a mis-read of something or did you end up feeding inverted file into the library?
very cool how easy programming the thing is 👌
exotic sierra
fathom summit
some code feedback if i may
- isnt `for _ in range(8) # or 100` slightly faster ...
First, for statement with unused i causes a linting error, I’m going to add more robust file name checking soon
As for inverting, turns out not necessary
I just needed to try and read back data from the fpga to get it to start lol..
wide brook
exotic sierra
First, for statement with unused i causes a linting error, I’m going to add more...
ha, python linters can be weird sometimes. I still use the for :P
exotic sierra
One guess is that the read back allows the internal osc to start on a SPI clk reference in peripheral mode
fathom summit
exotic sierra
First, for statement with unused i causes a linting error, I’m going to add more...
_ is the convention for "unused", does the linting also complain about that?
fathom summit
yeah, exactly how i wrote it
exotic sierra
I don’t know if it complains about it
exotic sierra
fathom summit
yeah, exactly how i wrote it
I guess I’m still confused. Do you mean
some_function(_) or
self._myvar
fathom summit
neither, i mean: ```diff
- i = 0
- while i < SOMETHING:
-
i + 1 -
# some code
- for _ in range(SOMETHING):
-
# some code
Ah, okay. Yeah I’m don’t know if it’s complain
I’d assume yes? But I’ll give it a whirl in a bit
 small ginkgo
Hello, I want to share my latest build, I made a midi controller pedal with a feather RP2040, the main feature is that it is configurable with a json file. It has an oled screen, rgb neoleds and even an iternal battery. https://github.com/yeraym/tamazaque_controller_cp/


GitHub
Tamazaque guitar pedal midi controller in Circuit Python - GitHub - yeraym/tamazaque_controller_cp: Tamazaque guitar pedal midi controller in Circuit Python
exotic sierra
The lattice featherwing is available for preorder here —> https://www.oakdev.tech/store/p23/Lattice-FeatherWing.html#/

Oak Dev Tech
How Chill! An icy edition to your feather wing collection brings a Lattice iCE5LP4K FPGA to your Feather'd shenanigans. Programmed over SPI, this FPGA feather wing brings every pin of the iCE5LP4K to 0.1" headers and the RGB open drain pins to a tiny yet bright RGB LED.
I generally try to avoid preorder but it’s the best option I have right now for delivering products at the moment
 north mural
A microcontroller with only debug headers with micro usb... i'm intrigued as to its use.
hardy veldt
The start of a tamagochi thing, graphic lcd and all, though with an extra button for spacing reasons. Using some desoldered parts from a failed project, which thankfully have castellated edges, so it made sense to repurpose them here.
 exotic sierra
north mural
A microcontroller with only debug headers with micro usb... i'm intrigued as to ...
exotic sierra
north mural
A microcontroller with only debug headers with micro usb... i'm intrigued as to ...
Not even a debug port, neopixel connection 🙂
north mural
I missed the wires attached. Why not use headers or some terminals?
exotic sierra
north mural
I missed the wires attached. Why not use headers or some terminals?
I didn’t have any strips attached at the time of the picture
north mural
Looks like wires from your multimeter so there's some kind of attach points there somewhere.
exotic sierra
north mural
Looks like wires from your multimeter so there's some kind of attach points ther...
If you look, the probes for the multimeter is on the desk
north mural
Hence my confusion. I thought you literally snipped them and soldered them to the board, just the way the photo is angled. 😛
 zealous eagle
Happy Birthday Jerry! - cpx paint stick
 last bronze
Finally fixed an error in my lil shift register based "expanders" which prevented them from setting the last bit, turns out I just put >= instead of > in the code 😂
fathom summit
Do your keyboards also warn about GitHub notifications + show current song on Spotify and resources usage + autocorrect some typos? 😆
 feral orchid
Buck-boost Laser driver assembled and working (with a high power led as a test load)! I'm surprised how low the noise on the output is. Less than 10mV pk-pk!


I'm not using a ground spring, so it isn't the best measurement, but measuring it properly would probably mean a lower noise measurement
grand turtle
made a new bioimpedance measurement featherwing :) uses an ads131m08 and is battery powered. not isolated but hoping that is not necessary!
 inland trout
First 3D-print project in years: Case to use a Raspberry Pi Pico with Picoprobe as Debugger for other RP2040s.
My case has big labels for all pins and JST-XH compatible plugs to prevent accidentally plugging it in the wrong way (but I can still use jumper cables). And on the bottom it says which drivers are correct in case windows screws them up again.
(I should get better wire colors for the JST XH wires, but I didn't crimp them myself, they were replacements for LiPo balancers so they're only red+black.)


 wraith hearth
So my project is coming along okay.... except.... I wanted to use a heatsink with fan on my pi, but I also wanted to use a witty pi 4 lev7, so now I gotta design around it lol
wraith hearth
Hey, everybody so right now this is kinda what I'm dealing with. I wanted to use the Wi-Fi directly connected to the Pi 4. But I was also going to use this really nice cooling system on my pie. 4. And they just don't mesh together. So now I've got a decision to make.
 inland trout
First 3D-print project in years: Case to use a Raspberry Pi Pico with Picoprobe ...
inland trout
inland trout
First 3D-print project in years: Case to use a Raspberry Pi Pico with Picoprobe ...
files now on printables: https://www.printables.com/de/model/544622-picoprobe-enclosure-with-labels-jst-xh-compatible-
Please ping me if you print it and the tolerances are messed up. I only printed it on the ultimaker S5 in the local makerspace and it barely fit. I can adjust it and upload different files if you want.
I hope obj, stp and ipt files are good for everyone to allow printing and editing.
hardy veldt
It looks cursed and the case is hacked together (stuck on the tin with E6000, and opened the hinge holes for power switch and USB access) but I love it. XD
Practically though, I've been using it to learn to code finite state machines (by setting the date/time via buttons) and devising a lipo battery meter, which can be recycled for other projects.
 exotic sierra
neat!
hardy veldt
Thanks. I was supposed to use your Cast-Away RP2040 here but the fit underneath that screen with the qt py lipo bff charger was a bit too tight, so I ended up with a kb2040 that was already scuffed since I desoldered it from a failed project. Good reason to practice soldering castellated edges at least.
exotic sierra
Indeed 🙂
wide brook
hardy veldt
It looks cursed and the case is hacked together (stuck on the tin with E6000, an...
Is this a nokia lcd screen?
exotic sierra
Doing a little product photography for IcyBlue FPGA


 wide brook
exotic sierra
Doing a little product photography for IcyBlue FPGA
wide brook
exotic sierra
Doing a little product photography for IcyBlue FPGA
I'd recommend using a sheet of A4 instead. I know this is a paper towel, but it reminds me too much of 🧻 ;)
The picture is gorgeous
exotic sierra
It’s not a paper towel actually
It’s a backdrop material that came with a photography kit I bought a while back
wide brook
Then I don't know anything xD
exotic sierra
Here’s the black canvas

It’s a weird material lol
I try to wash it out with what little editing I can do on my phone
wide brook
Yeeeah, I'd use the black canvas :P
Otherwise, it looks like you're using paper towel or toilet paper as a backdrop :P
exotic sierra
I have to use white for CrowdSupply
exotic sierra
That’s their requirement
wide brook
I truly do not know anything lol
exotic sierra
They usually edit the photos more
wide brook
I guess it's easier to tell if it's real?
 wide brook
exotic sierra
https://www.crowdsupply.com/oak-dev-tech/icyblue-fpga-feather
wide brook
exotic sierra
https://www.crowdsupply.com/oak-dev-tech/icyblue-fpga-feather
So, "launching soon" will become Actually Soon?
exotic sierra
Hopefully
wide brook
Huh, TIL 🔜 is a thing. It looks Very Bad in dark mode though
exotic sierra
yeahhh
crystal pier
exotic sierra
Doing a little product photography for IcyBlue FPGA
What license is it released under?
exotic sierra
MIT includes this bit
THE SOFTWARE IS PROVIDED "AS IS", WITHOUT WARRANTY OF ANY KIND, EXPRESS OR
IMPLIED, INCLUDING BUT NOT LIMITED TO THE WARRANTIES OF MERCHANTABILITY,
FITNESS FOR A PARTICULAR PURPOSE AND NONINFRINGEMENT. IN NO EVENT SHALL THE
AUTHORS OR COPYRIGHT HOLDERS BE LIABLE FOR ANY CLAIM, DAMAGES OR OTHER
LIABILITY, WHETHER IN AN ACTION OF CONTRACT, TORT OR OTHERWISE, ARISING FROM,
OUT OF OR IN CONNECTION WITH THE SOFTWARE OR THE USE OR OTHER DEALINGS IN THE
SOFTWARE.
I need to modify the license to include hardware in the language
simple as adding and/or hardware
wide brook
hmm... don't hw-specific licenses exist?
I seem to remember CERN releasing something to that effect
exotic sierra
CERN OHWL is fine
but I license my software under MIT so I tend to just use a modified license

GitHub
Contribute to Oak-Development-Technologies/IcyBlue development by creating an account on GitHub.
the language is a bit weird and I need to refine it a bit
wide brook
I'd suggest looking into hiring a lawyer once things get more profitable
exotic sierra
oh absolutely
crystal pier
CERN-OHL-P v2 is very nice. It's permissive (like MIT) but includes additional patent protection.
exotic sierra
I'd like to work on an Open Source License that can cover both hardware and software source files. right now it's a bit janky to do both
but i'm not a lawyer and I don't know any lawyers interested in tech that would work for free.
wide brook
      code which can be applied to Make or test a Product or to
      prepare a Product for use, Conveyance or sale, regardless of its
      medium or how it is expressed. It may include Notices.```
IANAL, but the CERN-OHL-P seems to cover bothCERN handles that pretty well, basically it takes a 'modular' approach.
crystal pier
It is heavily underutilized.
Although honestly I'm just relieved you aren't using GPL. That's an absolute mess when it comes to hardware.
exotic sierra
on the other end of the spectrum, you have Prusa talking about commitment to open source but also not really opensourcing much at all
and then Creality that kind of open sources stuff kind of steals open source stuff and tries to convince people otherwise..
and then Bamboo who ripped tons of OSS and it making bundles
we can just take it to #general-tech
exotic sierra
👍
exotic sierra
wide brook
huh, I did not know this server had access-controlled channels
Generally we don’t tag them for reasons
split wren
now i'm curious, what is the name!
crystal pier
split wren
now i'm curious, what is the name!
🔒 No Access
Virtually all servers larger than a few people will have a number of access controlled channels.
grand turtle
exotic sierra
https://www.crowdsupply.com/oak-dev-tech/icyblue-fpga-feather
how difficult was it to get into crowdsupply?
exotic sierra
grand turtle
how difficult was it to get into crowdsupply?
Not terribly hard. The big thing you need to show is that you have a working prototype
wide brook
crystal pier
Although honestly I'm just relieved you aren't using GPL. That's an absolute mes...
I am not at all surprised to read this, but I'm curious as to how said mess is produced
fathom summit
If someone is interested, my TOML library for CircuitPython is somewhat complete now. Please open issues/PRs (or any other sort of feedback) if you find anything that could be improved 🙂
https://github.com/elpekenin/circuitpython_toml
grand turtle
i made a kicad template for qtpy boards :) https://github.com/LordsBoards/Xiao-QT-Py-KiCAD-Template
 sharp bobcat
Just wanted to share a fun weekend project: https://github.com/flavio-fernandes/scooter-boombox . Thank you for the awesome learning guide, Ruiz Brothers. ❤️
Pictures posted here: https://www.flickr.com/gp/38447095@N00/1dYq76b2zK

GitHub
Soundboard Speaker remix from Adafruit. Contribute to flavio-fernandes/scooter-boombox development by creating an account on GitHub.
 low pulsar
fathom summit
If someone is interested, my TOML library for CircuitPython is somewhat complete...
low pulsar
fathom summit
If someone is interested, my TOML library for CircuitPython is somewhat complete...
(not any useful feedback) but sounds like it was a fun implementation - and more fiddly than I realized 🙂 out of curiosity, did porting the python 3.11 tomllib implementation become too tricky/too big? I suppose it would be even better if it was able to implement the ful spec (warts and all)
fathom summit
i didnt even look for tomlib's source, just did from scratch to learn(and mees up 😛) as much as possible
low pulsar
nice
I guess the current circuitpython reads the settings.toml file from C in some non-compliant way? It does feel like a rather tricky format after all, and any useful implementation would tend to be on the larger side either way...
fathom summit
im pretty sure it happens at C level, yeah
and only supports base10 ints and strings as of now
low pulsar
Ack. It'd be intriguing to hear the discussion that settled on toml. I guess (bar inventing a new format or settling for csv/tsv files) it might be the best of current options
wide brook
low pulsar
Ack. It'd be intriguing to hear the discussion that settled on toml. I guess (ba...
I mean, ini files aren't that bad :P
low pulsar
Yes, lots of options (and corresponding exciting discussions on which to pick I imagine 😁. Was a bit curious it landed on something also needing a non trivial parser, but it looks like the actual subset parsed is basically the easy bits. So maybe it landed at the pragmatic place in the end.)
wide brook
low pulsar
Yes, lots of options (and corresponding exciting discussions on which to pick I ...
Relevant XKCD:
https://xkcd.com/927/

Fortunately, the charging one has been solved now that we've all standardized on mini-USB. Or is it micro-USB? Shit.
grand turtle
i made a BME680/nRF52840 sensor that's just a bit bigger than a 2032 coin cell 

I will probably throw on a BME688 instead that sounds fun
lapis jasper
low pulsar
Yes, lots of options (and corresponding exciting discussions on which to pick I ...
toml choice was made here: https://github.com/adafruit/circuitpython/issues/7274

GitHub
(Motivated in part by #7270 and in part by my own experiences.) I have been thinking about alternatives to dotenv. I have seen these issues with the current scheme: The dotenv syntax is poorly spec...
low pulsar
lapis jasper
toml choice was made here: https://github.com/adafruit/circuitpython/issues/7274
Thx, and interesting!
lilac tundra
I just finished assembling my camera surveillance system.

Now I need to wire and program
low pulsar
lilac tundra
Now I need to wire and program
It looks pretty cool. What does/will it be used for?
lilac tundra
surveillance
it can pan and tilt
pan - lego motor on the bottom
tilt - servo on the top
low pulsar
Nice. Hope the rest of it goes smoothly
lilac tundra
yeah I am really excited because this is my first project that I am really close to finishing
all of my other projects didn't work
btw I didn't even laser cut the acrylic, it was from an Arduino car kit
pallid saffron
heh - i've manged to forgo the servo mounting plate and have bolted servos straight onto the technic pieces
lilac tundra
pallid saffron
heh - i've manged to forgo the servo mounting plate and have bolted servos strai...
lucky you but this was a very snug fit so I used it
pallid saffron
no, looks better than my hack - i'm thinking of making some mounting plates myself
 devout verge
What are you using to control it that supports both the lego motor and normal servos?
lilac tundra
devout verge
What are you using to control it that supports both the lego motor and normal se...
I have stripped the lego motor's wire and I plan to use my L289N Module with it, the servo on the other hand will easily be controlled with my RPI's GPIO(with a capacitor)
oh and if you are wondering the camera uses USB so it will be easily integrated with the RPI

 tender basalt
Check this out! You paste the link to the tutorial you need help with (needs ?view=all at the end), and it uploads it to gpt and you can ask questions about it: https://youai.ai/ais/adafruit-project-helper-unofficial-703d96d6

YouAi
An AI that lets you upload a project from Adafruit, then ask it questions
lilac tundra
lilac tundra
alright, slight problem
the motor is so heavy that it makes everything lean one way
but it has an easy fix
 burnt wyvern
This isn't the most technical and impressive thing here, but I just (mostly) finished this Python script that automatically detects song changes with shazamio and logs it to a text file that OBS reads and displays on my stream! I sometimes stream my record collection in a few discord servers so it's really helpful to have it automatically detect the song so I don't have to check the track list every time someone asks what song is playing.
short summit
burnt wyvern
This isn't the most technical and impressive thing here, but I just (mostly) fin...
That's very cool! I love that.
burnt wyvern
Thanks! Also I'm not sure if copyrighted music is allowed to be posted so I tried to get the least DMCA-able part I could lol
short summit
And thanks for letting me know about shazamio, I haven't seen that before, I might have to play with that
 vernal oak
playing around with pi eyes on round tft's 😁
split wren
freaky!
 vague spruce
Here's some pics and details of my latest greenhouse setup using ESPHome. This has used various Adafruit parts over the years but currently the only Adafruit part is the SHT40 T/RH sensor.
There are two ESP32s which bidirectionally communicate over CANBus. My goals for this upgrade:
- operate independently without a constant network connection to my home assistant server
- robust operation [1] with nodes able to hot plug into the network (for power failures or temp disconnects)
- support future upgrades of various sensor nodes placed throughout the greenhouse
- simple wiring
The larger switch box on the outside contains the main control unit which
- broadcasts CAN commands to the smaller box to turn on humidifier
- listens for broadcasts about temperature and humidity from the smaller box
- controls irrigation solenoids and a ventilation fan with Solid State Relays
The smaller box on the inside controls ultrasonic humidifier equipment and is attached to a seperate breakout box containing a temp/RH sensor for more accurate sensing. The breakout box is also fitted with a Noctua 40mm fan, which is PWM controlled.
[1] In my experience I was only able to get hot plug CANBus to work reliably with the SN65HVD230 transceiver rather than the more common TJA1051T, which is used on the Adafruit CAN Pal.


 north mural
That is a very cleanly built system. 👍


 crystal pier
PCBs are very difficult to photograph.
Especially if you want the entire board in focus.
 polar crag
yep
crystal pier
And cameras absolutely hate soldermask.
exotic sierra
crystal pier
And cameras absolutely hate soldermask.
Green soldermask, definitely

Purple, not as bad
I also realized I missed a perfect opportunity to call this the 40 feather
crystal pier
Oh I've had my share of trouble photographing OSH Park PCBs. That being said I think the issue was between the desk and chair.
split wren
pebkac basically?
 wise island
This is a little board I made. It is a low cost STM32 with an IR receiver, 3axis sensor and 49 1mm RGB leds... I wanted to do something with arc traces and rotated components. Just submitted V2. This version works ok, but the LEDs are kinda dim due to the multiplexing. So that should be fixed in V2...
 wise island
polar crag
that thing looks like it would be great for wearables
wise island
polar crag
that thing looks like it would be great for wearables
I published the project if you want to have it made. It's the version I'm having made right now... There are some buttons, diode and voltage regulator that are hand soldered on the back... https://oshwlab.com/smischny/stm32f030c8t6_copy_copy
In EasyEDA open source hardware lab, open source square pools all kinds of electrical design engineerings together to realize resource sharing easily.
dark cairn
Another freshly baked diWHY

I know I should only use it's 3v3 as ref but idc.
The wonkier the better.
 rose barn
 cunning lava
new version of ugame22 assembled by jlcpcb arrived just in time for the circuitpython day
 north mural
cunning lava
new version of ugame22 assembled by jlcpcb arrived just in time for the circuitp...
north mural
cunning lava
new version of ugame22 assembled by jlcpcb arrived just in time for the circuitp...
Why 8.0 alpha?
cunning lava
north mural
Why 8.0 alpha?
that's what I had already built, from last time I was working on it
north mural
Looks great. Got a little speaker and qwicc. What do you use to mount the screen to the PCB?
cunning lava
it's held in place by the case's front plate https://cdn.hackaday.io/images/805121661111944514.jpg

but if you don't want a case, you can use a two-sided tape
 grave owl

GitHub
Tool to automate Wash>Reaver workflow with cyberpunk themed output. - GitHub - d3k4-k3rb3r0s/CarWash: Tool to automate Wash>Reaver workflow with cyberpunk themed output.
 red pebble
Smoker temperature controller based on ESP32 boards in work:

that's the pendant controller breakout board
and the main controller breakout board:

boards are on order from seeed fusion
designed in Eagle
The boards will communicate with one another via ESP-Now
This is an incredibly slow PID loop trying to control the temperature of an egg style charcoal smoker
I'm running a pair of PT100 sensors, one measures air temperature and one can measure the meat temperature
wraith hearth
Can't wait to show off my project once my 3d printers print well enough lol
 slim finch
I couldn't get my writeup for this project finished in time for circuit python day, but for the past year I've been building a sleep sensor system that integrates with the rest of my home. Based on the amount of sleep I've gotten recently, it'll turn of or "sunset" the plant lights in my living room at night to encourage an earlier bedtime when I'm tired. It also toggles the bedroom RGB LEDs to red patterns at night, and turns off the lights when I fall asleep, and in the morning it turns off the 'wake up blue' lights once both my partner and myself are out of bed. The sensors are MPU-6050 IMUs connect to the bedframe by a magnetically attached, 3d printed enclosure, and connect to a QT Py ESP32-S2 which gathers the data from the IMU and transmits it to a local server on a Raspberry Pi running Flask. The data is processed and based on that, and the recent sleep history, my home adjusts its lighting states and modes to help me get better sleep. The whole design is fairly low power and out of the way so my robot vacuum can get under the bed without issue and I don't need to worry about stray wires getting caught by it. It wouldn't be possible without CircuitPython.


 west zinc
Just got this Makerfabs ESP32-S3 7-inch touchscreen GT911 touch chip working. Yay for CircuitPython day!
 north mural
slim finch
I couldn't get my writeup for this project finished in time for circuit python d...
north mural
slim finch
I couldn't get my writeup for this project finished in time for circuit python d...
You could do it with a Fitbit watch too. It has sleep detection based on heart rate and sp02. The Fitbit API example I wrote could easily pull sleep data and oodles of other data to integrate with whatever you want. Fitbit devices however are not cheap. When it comes to heart rate & sleep, they're very accurate. It even tracks your REM cycles. Fitbit (unlike Apple watches) allows you to pull your own data and do whatever you want with it. As a DIY solution your work is very impressive according to the graphs. I think you would really love playing with all the data a fitbit makes available to you.
 slim finch
That is really cool and the fitbit project you've been working has been awesome to see!
For me the fitbit isn't an option because I don't wear one and I don't want to 'clock into bed' by remembering to put it on each day. That was a primary design constraint of the build for me--tracking sleep in a completely out of the way fashion that doesn't impede any chores, and so I don't have to 'live around' the sensor. But I've loved seeing the updates and I didn't know the api gave access to quality of sleep data too! It's been fun seeing how much you've done with that data!
kind burrow
This project is a total clone of Liz's "Feather RP2040 DVI Video Synth", except using a Pico. (And I don't have a 3D printer, so it's a thin wooden "craft" board from Walmart that I drilled holes thru).
The only changes to Learn guide are for Pico pins, not Feather RP2040. Picowbell DVI.
The buttons are one cheapo from Ada (Product 3105) that I soldered leads to (for the LED light), and a QT PY Neo BFF (I like the big button...)
The pot wiring underneath is a challenge, but what multiple wiring project isn't? 😀


 north valve
Not in time for CircuitPython Day but I finally finished up code for an environment eink display that posts CO2, temperature, humidity, and pressure to Adafruit IO
Spent lots of time learning displayio on eink as well as learning more about the SCD40 and BMP280 sensors. Thank you to all the contributors of those learning guides and libraries.
https://www.somenice.com/2023/08/environmental-sensing-using-an-eink-display-and-circuitpython/

 last bronze
While trying to somehow set my oscilloscope for X-Y mode I came across some nice looking patterns, enjoy


Possibly more to come as I still haven't figured out the XY mode 😂
 frosty topaz
Take one of my super simple 3d printed light and sound box. It will probably become my pomodoro timer at home, but I misplaced my cylindrical battery and forgot to include an on/off switch…
Built with a propmaker rp2040 and an 8x8 neomatrix, it’ll eventually have a little 3d printed figure of some sort on top of the lights. It includes a speaker for notifications, and an accelerometer for tap detection.


 north mural

successfully took apart a 16 pin IDC cable. tiny little punch downs in it. then proceeded to break it while crimping. win some, lose some.
because i got the big 5mm pitch panels the included cables will not reach vertically and adafruit is out of stock. so i got some ribbon cable from digikey which was the perfect fit but then broke the connector. will have just have to source some longer cables. i do not want to attempt that again, need a microscope and not worth the hassle.

Can't connect all the panels together now. 😦
dark cairn
north mural
beeeeeg repl go brr



 sand grotto
north valve
Not in time for CircuitPython Day but I finally finished up code for an environm...
sand grotto
north valve
Not in time for CircuitPython Day but I finally finished up code for an environm...
I like the CO2 gas icon on the dashboard. And all of it of course, the eink display / font is nice n clear 🙂
lucid bloom
Next Wednesday will mark 3 years of using my food pantry ordering system. It has been used hundreds of times for thousands of orders. It's made up of a pi zero w and a pi 3B. The total cost of the hardware was $250-$300 for the number machine and the number sign and it is connected to about $1200/year worth of discounted services. It may not be the best system but it works and I can count the number of issues we have had over 3 years on my hands all of which were related to service outages.
https://github.com/matt-desmarais/FoodPantrySystem

GitHub
Food Pantry Numbering/Ordering System. Contribute to matt-desmarais/FoodPantrySystem development by creating an account on GitHub.
lucid bloom
Except for that one time the receipt paper ran out during startup and crashed everything 🙄
north mural
dark cairn
beeeeeg repl go brr <:blinka_heart_circle:1049422278397526108>
Half brrr then hard fault more often than not. There are a lot of bugs lately.
north mural
lucid bloom
Except for that one time the receipt paper ran out during startup and crashed ev...
Ever hear back about your contest entry for your efficiency gains?
lucid bloom
north mural
Ever hear back about your contest entry for your efficiency gains?
its not announced until November 16th. if i win I'm on the hook for
in Boston, at other H2HC meetings, and will be available for H2HC media relations or other related purposes.```It would be cool if I won but if I don't I won't lose sleep over it, I already got to talk at a new hope which was pretty cool and I get to assist people in my town who need help from behind the scenes. Most clients don't even know my name.
north mural
Got the MatrixPortal S3 working with 4x 64x32 5mm pitch panels (on a circuit python 9.0 alpha build).
north mural
lucid bloom
It would be cool if I won but if I don't I won't lose sleep over it, I already g...
Sometimes it's better to be known for what you do. What you do becomes part of who you are.
lucid bloom
Some people know and a few know everything, its just the most of the people we serve don't really know who I am or what I do because I'm in the back room packing up the orders.
crystal pier
Most clients don't even know my name
Batman.


 restive forum
At least he managed one, last good film before he ruined Batman...
crystal pier
Who?
exotic sierra
Affleck?
exotic sierra
restive forum
At least he managed one, last good film before he ruined Batman...
Ben Affleck Batman were considered the best more recent Batman movies. Better than George Clooney Batman
restive forum
exotic sierra
Ben Affleck Batman were considered the best more recent Batman movies. Better th...
A dead potato would do a better job, compared to Clooney and his Batnipples. 😅
exotic sierra
restive forum
A dead potato would do a better job, compared to Clooney and his Batnipples. 😅
Nothing will be 1966 Adam West Batman movie
Lol
restive forum
Ohh lawd... that's terribad.
exotic sierra
Don’t dis Adam west, he’s a true Batman icon lol
Speaking of 1966 Batman: for your enjoyment 🙂 https://youtu.be/fjNks6EUO6E

This episode is brought to you by Movies Anywhere. It's not a collection until it's all in one place. Bring your movie collection together today at https://moviesanywhere.com/welcome
►►Subscribe to ScreenJunkies!►► https://fandom.link/SJSubscribe
►►Watch The Honest Trailers Commentary►https://www.youtube.com/watch?v=iyyP7xOsKTU
►►Watch Power Le...
restive forum
exotic sierra
Don’t dis Adam west, he’s a true Batman icon lol
Ohh, don't get me wrong.. Mayor Adam West is an absolute Legend.
Just saying the cheese and ham 1960s Batman is just so horrendously dated it feels more like a parody.
exotic sierra
restive forum
Ohh, don't get me wrong.. Mayor Adam West is an absolute Legend.
Just saying th...
That’s the allure 😉
restive forum
Hehehe
exotic sierra
Jokes aside, 1990s Batman is my favorite
restive forum
I'm going to need more coffee for that camp.
exotic sierra
Something about fighting a frozen Arnold is very satisfying
restive forum
👍
exotic sierra
Anyway, we’re a bit off topic for this chat lol
restive forum
😅
pallid saffron
restive forum
Ohh, don't get me wrong.. Mayor Adam West is an absolute Legend.
Just saying th...
IT WAS SUPPOSED TO BE SILLY!
restive forum
 pallid saffron
Hey, you were the one saying it was cheesy 😀
And it is over 50 years old, so "dated" is accurate (also describes me, but that's a different story)
exotic sierra
pallid saffron
And it **is** over 50 years old, so "dated" is accurate (also describes me, but ...
I ate a lot of dates as a kid, so I’m probably pretty dated as well
pallid saffron
🥁 🥁 💥(rimshot?) -- had to edit around a cat
sand grotto
 crystal pier
Oh no.
wide brook
crystal pier
Oh no.
Apparently, it'll run on ms azure, which might hopefully prevent reliving the exploit-laden memories of VBA
crystal pier
Great, so it'll require a cloud subscription.
fathom summit
and internet connection
and then pay to use somemost features
crystal pier
All this when you could just ditch excel and use python in the first place.
 stiff kestrel
X86 Bootloader (512 bytes) text editor
north mural
north mural
stiff kestrel
X86 Bootloader (512 bytes) text editor
I'm not even sure what I just watched there
MatrixPortal S3 feather weather coming together nicely on 4 panels. It's 128x64. I want to do a 256x128 but I'm not sure if it'll work. Need moar screen real estate.
split wren
north mural
I'm not even sure what I just watched there
when booting x86 in legacy mode, the bios loads the first 512 bytes of the disk into ram, and executes it
devout verge
Finally a use for the old windows laptops I have lying around
split wren
devout verge
Finally a use for the old windows laptops I have lying around
or just install linux
it should have zero trouble running text editors for things like circuitpython
kind burrow
Thanks to JEPLER from the CP Day 2023 session! Full disclosure (open source?), I took his WrappedTextDisplay class here:
https://learn.adafruit.com/infinite-text-adventure/coding-the-infinite-adventure
modified, took out a lot of code and some generic calculations (hard-coded some values for my display).
Nice! Thanks!

 last bronze
@wide brook got the little almost-digital one! 😍
 pallid saffron
that's.... adorable?
restive forum
pallid saffron
that's.... adorable?
No, it's a scope. 😅
wide brook
last bronze
<@930143452749004830> got the little almost-digital one! 😍
It's... an oscilloscope with a distance measurement? o_O
solar yew
Wait... oscilloscopes have that now?
last bronze
wide brook
It's... an oscilloscope with a distance measurement? o_O
there's a resistor between the ends 😂
it has a voltmeter and a resistance meter
no distance yet :p
last bronze
pallid saffron
that's.... adorable?
it has a carrying handle and a front cover, basically a travelscope 😂
 wide brook
last bronze
there's a resistor between the ends 😂
wide brook
last bronze
there's a resistor between the ends 😂
I got autocorrect'd: resistance -> distance
last bronze
wide brook
I got autocorrect'd: resistance -> distance
ahhhh
was wondering why you thought about distance
wide brook
Do you know who manufactured this?
 last bronze
lemme find the name, I know it's latvian for sure
Vilnius Plant of Radio Measurement Devices
wide brook
Why is there a high voltage warning over the probe connectors?
last bronze
cause it supports measurements up to 1kV 😄
wide brook
*supported . I wouldn't trust it now :P
split wren
my scope only says <=400v peak
wide brook
Unless it's undergone significant service
last bronze
I would tbh, the measurements are only ~1% away from my brymen
split wren
my scope is already arcing over internally, something with the crt
last bronze
and it was properly stored, isn't even dirty inside
wide brook
Nah, I meant I wouldn't trust it to safely measure 1kV w/o significant service
last bronze
split wren
my scope is already arcing over internally, something with the crt
show da scope 👀
ahhh
 last bronze
tbh it's a really convenient multi tool, not exactly great when it comes to specs, but 10MHz is enough for most measurements I do 😄
split wren
and an older shot, when i bit-banged 125mhz on a pi4, lol
 last bronze
I want an analog-digital scope so much
split wren
something is clearly struggling, but the scope is only rated for 100mhz, so i dont know what to blame
last bronze
there's something about text on a monochrome crt that makes it look so good
wide brook
split wren
something is clearly struggling, but the scope is only rated for 100mhz, so i do...
I was about to say that your scope appears to be experiencing bandwidth difficulties
last bronze
split wren
something is clearly struggling, but the scope is only rated for 100mhz, so i do...
only 100MHz 
split wren
i'm fuzzy on the exact sample rate, how did i measure a 125mhz on a 100mhz scope?
and its not aliasing
adding a nop into the delay slowed it to 80mhz
 last bronze
@wide brook I'm wondering if I should try to collect all the C1 series scopes, all the way from 1 to 199 I think 😂
wide brook
no
last bronze
already got the 64 and 112, only 98 to go
wide brook
I do not recommend collecting o-scopes
split wren
 split wren
last bronze
show da scope 👀
split wren
last bronze
show da scope 👀
a better photo
last bronze
nice!
split wren
the crt photographs better in the dark
wide brook
most crts do
split wren
thats why all of the trace photos are in the dark
what you cant see, is that this is the full depth of the dresser
last bronze

that's my big boi
a 50MHz soviet chonker with X-Y mode that requires configuration beyond my understanding of knob-turning
wide brook
Time to open an ebay shop and start flipping them :P
last bronze
nuh!
split wren
ive also got a carry handle on mine
last bronze
the chonker is a gift from a teacher, never flipping him 😛

 last bronze
the big one's got it too, but it still weighs 20kg so it's not exactly portable 😄
wide brook
split wren
That's something I'd expect to see posted on an IRC channel some years ago :P
split wren
lol
last bronze
It does have an IRC vibe
split wren
the far left monitor is for rpi usage, currently running into a drawer under the central monitor
last bronze
Here's my current "setup"

Pardon for the mess on da desk but I had to repair my rpi between working on my soviet generator lol

 last bronze
Is that discord but cli?
wide brook
Is that... irssi? 🙀
split wren
that drawer is full of pi's, it has ethernet, composite, usb, and vga
yes, that is irssi
wide brook
Running over screen, as it should :P
split wren
yep!
the little red switch hanging out of the drawer, goes to the reset pins on the pi

so when i'm working on code, i just have a tiny switch hanging above the keyboard, and i whack that after each build
wide brook
split wren
yep!
Please tell me it's running on a remote VPS :P
split wren
its running on an ancient gentoo box in the other room
which never reboots and never gets updates
wide brook
split wren
so when i'm working on code, i just have a tiny switch hanging above the keyboar...
How do you send the code to the pi?
JTAG?
split wren
c2d ~ # ls -lh /usr/bin/irssi
-rwxr-xr-x 1 root root 1.1M Oct 26  2014 /usr/bin/irssi
Sounds like a good way to eventually get pwned
split wren
wide brook
How do you send the code to the pi?
its usually configured for network boot, but i also use usb-device boot sometimes
wide brook
Wait, how can it netboot without firmware?
split wren
the pi3 has netboot support right in the boot rom
the pi1/pi2 can netboot if the SD card has only bootcode.bin and nothing else
the zeros will go into usb-device mode if they fail all other boot sources
so, if i just plug a pi-zero into my pc...
[Mon Aug 28 18:36:29 2023] usb 1-12.1: new full-speed USB device number 122 using xhci_hcd
[Mon Aug 28 18:36:29 2023] usb 1-12.1: New USB device found, idVendor=0a5c, idProduct=2763, bcdDevice= 0.00
[Mon Aug 28 18:36:29 2023] usb 1-12.1: New USB device strings: Mfr=1, Product=2, SerialNumber=0
[Mon Aug 28 18:36:29 2023] usb 1-12.1: Product: BCM2708 Boot
[Mon Aug 28 18:36:29 2023] usb 1-12.1: Manufacturer: Broadcom
this pops up
Bus 001 Device 122: ID 0a5c:2763 Broadcom Corp. BCM2708 Boot
and a pi02w
Bus 001 Device 123: ID 0a5c:2764 Broadcom Corp. BCM2710 Boot
[clever@amd-nixos:~/apps/rpi/usbboot]$ ls ../circuitpython/ports/broadcom/build-raspberrypi_zero/rpiboot
bcm2708-rpi-b.dtb       bcm2708-rpi-cm.dtb      bcm2709-rpi-2-b.dtb  bcm2710-rpi-3-b-plus.dtb  bcm2710-rpi-zero-2-w.dtb  bcm2711-rpi-cm4.dtb  fixup4cd.dat  fixup4x.dat   fixup_db.dat  start4cd.elf  start4x.elf   start.elf
bcm2708-rpi-b-plus.dtb  bcm2708-rpi-zero.dtb    bcm2710-rpi-2-b.dtb  bcm2710-rpi-cm3.dtb       bcm2711-rpi-400.dtb       bootcode.bin         fixup4.dat    fixup_cd.dat  fixup_x.dat   start4db.elf  start_cd.elf  start_x.elf
bcm2708-rpi-b-rev1.dtb  bcm2708-rpi-zero-w.dtb  bcm2710-rpi-3-b.dtb  bcm2710-rpi-zero-2.dtb    bcm2711-rpi-4-b.dtb       config.txt           fixup4db.dat  fixup.dat     kernel.img    start4.elf    start_db.elf

[clever@amd-nixos:~/apps/rpi/usbboot]$ sudo ./rpiboot -m 1000000 -l -d ../circuitpython/ports/broadcom/build-raspberrypi_zero/rpiboot/
[sudo] password for clever:
Loading: ../circuitpython/ports/broadcom/build-raspberrypi_zero/rpiboot//bootcode.bin
Waiting for BCM2835/6/7/2711...
@wide brook if you then put all of the normal /boot files into a directory, and point rpiboot at it, you can boot the pi over usb-device
in this case, make BOARD=raspberrypi_zero rpiboot prepares that directory for me
so i can iterate on circuitpython builds without uSD swapping
[Mon Aug 28 18:40:53 2023] usb 1-12.1: New USB device found, idVendor=0a5c, idProduct=2763, bcdDevice= 0.00
[Mon Aug 28 18:40:57 2023] usb 1-12.1: New USB device found, idVendor=0a5c, idProduct=2764, bcdDevice= 0.00
[Mon Aug 28 18:41:06 2023] usb 1-12.1: New USB device found, idVendor=2e8a, idProduct=100e, bcdDevice= 1.00
it will enumerate 3 times during boot
first from the maskrom
then from the firmware
then from circuitpython
wide brook
Is this done over tftp or something, like PXE?
split wren
a custom usb protocol
split wren
wide brook
Is this done over tftp or something, like PXE?
https://github.com/raspberrypi/usbboot/blob/master/main.c
basically the same idea as to how circuitpython emulates hid/msd/midi
the rom is just doing a custom protocol, which no drivers exist for
and this code then uses libusb to drive it
wide brook
Sorry, I skimmed the chat and thought rpiboot was doing the netboot...
split wren
nope
but netboot is tftp
for the pi models with ethernet (all of the b family, the pi400, and the cm4), it will fetch the /boot files over tftp, when doing netboot
pi3 can fetch bootcode.bin over tftp, directly from the rom, with the dram still offline!
pi1/pi2 need a copy of bootcode.bin on an SD card
pi4/pi400/cm4 always has bootcode.bin onboard in SPI flash
the .bin then fetches start(4).elf over tftp, which then fetches your arm kernel
wide brook
wait, if dram has not been brought up, where is it storing bootcode.bin?
split wren
in the 128kb L2 cache
wide brook
For some reason, I did not expect the videocore to have an L2 cache 😆
Or an L1. Or any cache, for that matter
split wren
the videocore used to run the entire os, back before the SoC had an arm
wide brook
I know. But somehow I.... IDK why I even thought that actually lol
split wren
lets head over to #1133148976691032104 to not spam this room up too much
 autumn gorge
first time making anything like this. its used for spotify API it will use 4 mechanical keyboard switches and a potentiometer to control spotify. now i just gotta code

 last bronze
autumn gorge
first time making anything like this. its used for spotify API it will use 4 mec...
last bronze
autumn gorge
first time making anything like this. its used for spotify API it will use 4 mec...
Got any case for it? :p
stark latch
Prototyping a 2x3 keypad with a few non-standard characters. The protoboard with the M0 Feather and OLED display will eventually be replaced with a Trinket.
 autumn gorge
last bronze
Got any case for it? :p
autumn gorge
last bronze
Got any case for it? :p
not yet
last bronze
@wide brook I finally have 2 faces of disappointment
 grand turtle
designed this 6 port usb hub w/ an esp32-s3

also breaks out a bunch of gpio, 5V, 3.3V, and various peripherals for debugging. each usb port has an led indicator and a load switch to turn it off.
sand grotto
grand turtle
designed this 6 port usb hub w/ an esp32-s3
That looks great! By chance do you know if there is an easy way that the data lines can be disconnected separately from the power lines? Currently using expensive dpdt relays on an old prototype.
grand turtle
sand grotto
That looks great! By chance do you know if there is an easy way that the data li...
the hub IC stops communication through software iirc
stark latch
I decided to make a practical example of a custom keypad using the parametric keyboard OpenSCAD code I've been working on. This is a 6-key keypad for my laptop. The keys are: en dash, em dash, degree, superscript 2, pi and multiplication sign. The only non-printed parts are the Trinket M0, the 6mm tactile switches and a few pieces of wire (about $10 total).
 pallid saffron
since i now have a small "fleet" (and growing) of raspberry pi spread out across the domicile, i added an MQTT-based "alive check" and a display (i decided it would be more amusing without using a printer or label maker)
 split wren
heh
ive just been using prometheus and grafana, and could setup alerts in discord for that
 pallid saffron
i've got an MQTT server running because of HomeAssistant, so it was just "there"
split wren
yeah, ive also got MQTT so HA can talk to my old thermostat setup
pallid saffron
this way i also don't have to have a browser open (they are running at 0.005 brightness 😎 )
split wren
grafana is configured to leave a message in discord if things go out of bounds

so i could close the browser and still be reminded when things start to go wrong
pallid saffron
yeah i did stuff like that when i was working -- i'm really old school and like the "blinken lights"
split wren
yeah, i just ripped the whole grafana server from my job, lol
the login page is still setup to only allow people from my work g-suite acct
pallid saffron
why? you can just run a docker image and set it up yourself
split wren
so any co-worker could be snoopin on my graphs
it is running on my own hardware, i just copied the config files from my job
and i dont need docker, nixos does things just fine
 limber briar
stark latch
I decided to make a practical example of a custom keypad using the parametric ke...
limber briar
stark latch
I decided to make a practical example of a custom keypad using the parametric ke...
Seems nice. Is your openscad code open source?
What did you use to print the keycaps?
stark latch
limber briar
Seems nice. Is your openscad code open source?
What did you use to print the key...
Still working on the OpenSCAD code, but I'll post it on Printables when it's stable. The entire thing (aside from the Trinket and switches) was printed in PLA on a Prusa MK3. All of it's in black except a thin layer of white for contrast on the recessed key text. The STLs and Arduino code are posted here: https://www.printables.com/model/569035-6-key-usb-keypad
It's currently only set up to generate Windows key sequences, though. Hoping I can figure out a way to detect OS and switch accordingly.

Printables.com
A 2×3 USB keypad for typing characters not typically found on keyboards | Download free 3D printable STL models
limber briar
stark latch
Still working on the OpenSCAD code, but I'll post it on Printables when it's sta...
Thank you very much
 wide brook
Hey, I recognize that brand! It's "ELEKTRONIKA"(spelling/transliteration error?)!
last bronze
wide brook
Hey, I recognize that brand! It's "ELEKTRONIKA"(spelling/transliteration error?)...
Yup
wide brook
last bronze
Yup
Did you seriously pass the pi through an UHF modulator to get it to display on the screen? :P
last bronze
wide brook
Did you seriously pass the pi through an UHF modulator to get it to display on t...
Yup :p
 half echo
stark latch
Still working on the OpenSCAD code, but I'll post it on Printables when it's sta...
half echo
stark latch
Still working on the OpenSCAD code, but I'll post it on Printables when it's sta...
Great work!
I've been tinkering with FreeCAD myself instead and made a macro that spits out a keyboard plate.
https://github.com/Axeia/KeyboardGenerator
stark latch
half echo
Great work!
I've been tinkering with FreeCAD myself instead and made a macro th...
Nice!
half echo
Well that was fun, got my Banana Pi Leaf S3 to display my PCs temperatures 🙂
https://youtu.be/1HS-VA6bWbc
I guess this marks my first semi-serious/useful project.
Excuse my phone struggling with the exposure
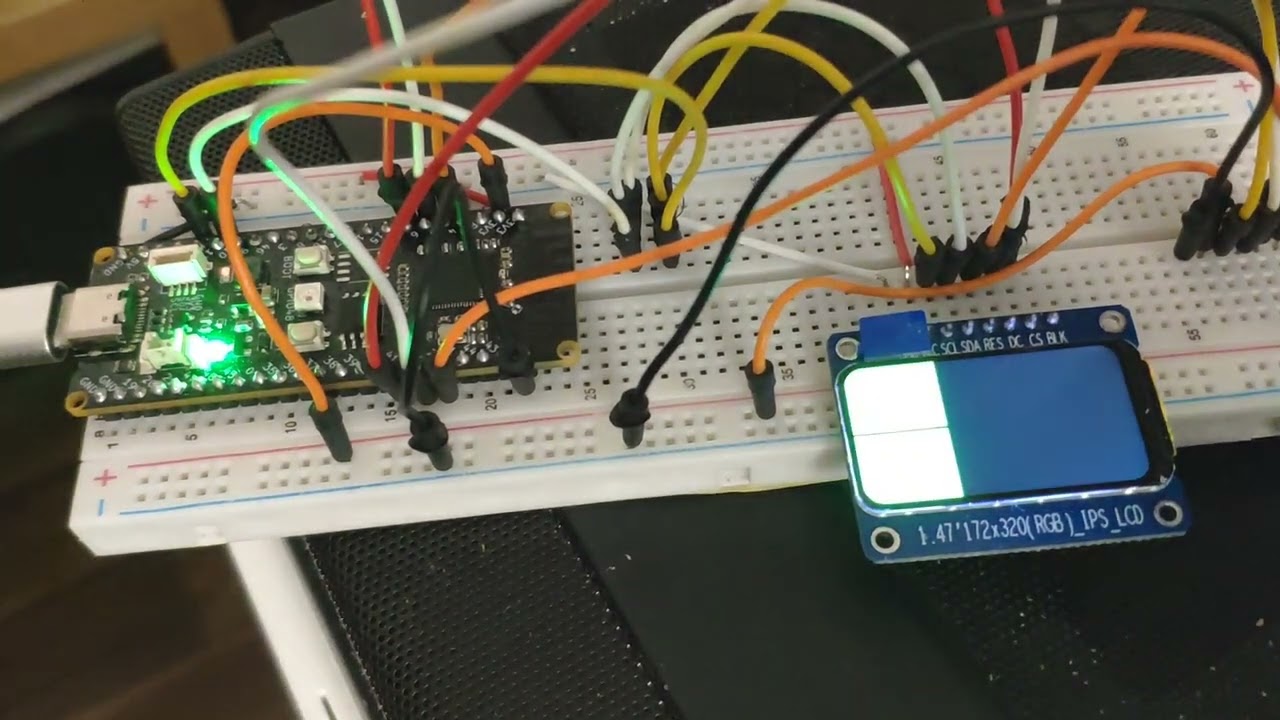
A banana pi leaf S3 (an ESP32-S3 board) displaying the CPU and GPU temps of my PC.
The PC is running Libre Hardware Monitor, a free program for windows that displays hardware information. It comes with an option to set up a simple webpage with all the data of your system, I read the data from this webpage on the BPI-Leaf-S3 and parse out the re...
short summit
half echo
Well that was fun, got my Banana Pi Leaf S3 to display my PCs temperatures 🙂
ht...
very nice! glad you got it working
burnt wyvern
Im at a museum in Norway, thought I'd show this. It's apparently for a genetics related device? I couldn't find much info on it.

They also had a laptop motherboard on display for some reason lol
 high imp
Some work on a 64x64 adafruit matrix display

▶ Subscribe: https://www.youtube.com/channel/UCqyPRKnXxjDJOQAXV__6yNw
Click the Bell Icon to get notifications about my future videos!
▶PCBWAY : https://www.pcbway.com
#rp2040 #pico #kicad
 final lake
Is "Show and Tell" only for hardware and project related things or is it also possible to join with a software, like a module or lib that one created?
languid nebula
final lake
Is "Show and Tell" only for hardware and project related things or is it also po...
I have seen soft projects as well
north mural
final lake
Is "Show and Tell" only for hardware and project related things or is it also po...
Having a demo to show what the software does is kind of the whole point. If you want to show a library then you should have an example of what the library does. To keep it brief as possible you could even play a pre-recorded demo with OBS.
Here's a good example of a ton of code I wrote in a pre-recorded demo. Showing the code itself is boring to most people without the end result. https://www.youtube.com/watch?v=sdJcgPCqKFE

Are you searching for Steam's Partner Sales & Reporting JSON API? It doesn't exist, stop looking. The only option Steam currently supports is CSV exporting or Analytics integration. This demonstrates about 90% of the process for automated exporting and parsing of CSV data for Steam Game Developers. This demonstration will be of tremendous help t...
clever stone
I have been disassembling and reversing a badge from the folks at IRONWOOD CYBER. They put a lot more effort in the hardware and software of their creation than just about anyone. While tracing the PCB I realized they had connections to the 3D printed retaining clips around the edge. I thought these chips were just to hold things together. But they were actually printed with conductive filament and form the touch pads!
The copper colored PLA cover is just decorative. It’s the black PLA that is conductive.

 exotic sierra
clever stone
I have been disassembling and reversing a badge from the folks at IRONWOOD CYBER...
exotic sierra
clever stone
I have been disassembling and reversing a badge from the folks at IRONWOOD CYBER...
That’s really inventive
Thanks for sharing this cool find
last bronze

 feral orchid
Back with more Tesla coil stuff. This is a single mosfet true class E driven coil.

 rose barn
Does it accept arbitrary songs?
feral orchid
rose barn
Does it accept arbitrary songs?
Somewhat (only square wave audio and midis that have been converted to square wave). I'm still working on some stuff to make the music sound better. Only very few specific songs actually sound good on it. The rest get garbled during some of the song or completely distorted
 cedar dew
“These are not the lights you are looking for”
I added some pixels to my Hex-Wall activated by a gesture sensor
rose barn
Wow!!
feral orchid
Nice
sand grotto
Today I learned about rr
Replayable debugging from mozilla https://rr-project.org/
lapis jasper
Preview for tonight. Custom sized boxes to store dev boards/flat things in an Ikea bookshelf.


 pallid saffron
pizza pi anyone?
 proven coral
@sand grotto if you are using kicad for development, check out the usb3740b-ai2 and usb3470b-ai9. $1.09 USD from digikey.com the ai9 might be easier to hand solder as it is .5mm pitch UQFN. it's a USB DP DM switch chip. It might be a good idea to have the disconnected side of the switch terminated in some way.
sand grotto
proven coral
<@375674153203662851> if you are using kicad for development, check out the usb3...
Oh legend, I've had a beer, so will digest this properly another day 😄 Happy with smt/heat gun so probably try them all
proven coral
sand grotto
Oh legend, I've had a beer, so will digest this properly another day 😄 Happy wi...
Glad to help. I'm familiar with some of these kind of chips because I was actually designing a device that could swap the TX/RX pins on the outside to the correct pins on the RP2040.
sand grotto
Classic, yeah my original thought for similar, but then I got an actual need where two usbs had to be reconnected at software will, and one needed full disconnection
proven coral
In response to render posted by Adafruit on instagram. Uses the 4" touch screen for a numeric keypad... and maybe a little more.
 sand grotto
love the translucent key-mechanisms
proven coral
it's a poor render actually. the glass is a stand in for the actual display in a fusion360 render.
sand grotto
🙂 Always room for improvement I guess, I am also plagued by perfectionism
proven coral
Voltaire: Perfect is the enemy of good.
sand grotto
at the very least the enemy of done 🙂
proven coral
That appears to be a further refinement of Voltaire's original quote. If it's good, it is done.
Slightly better view
 sand grotto
lovely
cunning lava
got the xiao sense camera working in circuitpython
 lucid bloom
Phase one of my project is complete rather than go for the goal from the start I'm doing it in phases.
- Object detection
- Pan tilt camera object detection/object tracking/firing solution for multiple detected objects
- Build an airsoft turret
After phase 2 is done the code will be done and then it's just a matter of constructing a turret that I already know will be functional.
last bronze
I love how the huge pew pew appears on the screen lmao
lucid bloom
my approach is to have moving and firing be separate threads so if it moves across a pew pew zone then it will fire regardless of how its moving. I may be able to just have it pan back and forth and then it would pew if it was panning across an object
dark cairn

GitHub
Circuit-FileTransferProtocol-Python, a simple blocking ftp server for circuitpython 8.x! - bill88t/CircuitPython_FTP_Server
exotic sierra
dark cairn
https://github.com/bill88t/CircuitPython_FTP_Server/blob/main/ftp.py
Finally don...
I’m curious now.. I want to try using this to update a bin file and reprogram an fpga
exotic sierra
I think my files are less than 80kb
dark cairn
It's slower downloading off of the boards, around 11kb.
For uploading it goes up to 200kb
That on a dio flash board
dark cairn
exotic sierra
I’m curious now.. I want to try using this to update a bin file and reprogram an...
serve_till_quit exists for such scenarios
The main implementation is non-blocking!
exotic sierra
Gotcha, can it write it right to the cirpy drive?
dark cairn
ya, no deps pretty much
exotic sierra
Sweet
dark cairn
Not all clients will work with it however. It only supports one active connection. Filezilla is working a-ok tho.
Oh and web-workflow needs to be off, since it triggers a socket bug when in combination with the ftp server.
I have not made the readme yet.
I just finished the thing.
exotic sierra
Gotcha, I haven’t used web workflow in a while
dark cairn
I will make full notes, docs and examples by tomorrow if you wanna check back!
exotic sierra
Sounds good
dusk zinc
@dark cairn looks cool! intended to be run from boot.py due to remount?
dark cairn
dusk zinc
<@614096041083404300> looks cool! intended to be run from `boot.py` due to `remo...
it does the remounts on it's own when it needs a write
dark cairn
you can if you disable usb
dark cairn
it will fail graceully if you try to write with the board having usb on
it can operate readonly just fine
it's for boards without usb for the most part
you can just disable usb if you want rw just like how I do
and have safemode for usb
dusk zinc
yup, that works
last bronze
@wide brook got another one for free 😂
 exotic sierra
Hey all, I’m closing down my Tindie shop, but before then I’m selling everything 30% off. If you’re interested, my shop is here: https://www.tindie.com/stores/oakdevtech/

Tindie
Oak Development Technologies or ODT is a small form factor hobby electronics developer and manufacture based in the United States! We work …
last bronze
exotic sierra
Hey all, I’m closing down my Tindie shop, but before then I’m selling everything...
why are u closing? just out of curiosity
exotic sierra
last bronze
why are u closing? just out of curiosity
Things aren’t working out, sales are not enough to try and keep things going.
last bronze
ah
exotic sierra
Things took a hit last year when musk took over twitter which caused a combined exodus of both my community and overall reach of content. Things just aren’t the same anywhere anymore. I know a handful of maker businesses who are throwing in the towel because things have gotten so bad
restive forum
Ohh, yeah.. even my employer's engagement on Twitter dropped harshly.. but it's not massively relevant to overall business prospects.
drifting crater
Made a little weather display that uses an EPaper screen, ESP32, and Powerboost 500 + 2000 mAH battery. The case is made of poster board lol. There are magnets on the back to allow it to stick to the fridge. (I had to use 8 of them, the battery is pretty heavy!) It's been running for a couple of days so far, and still no low power symbol.
 exotic sierra
restive forum
Ohh, yeah.. even my employer's engagement on Twitter dropped harshly.. but it's ...
exotic sierra
restive forum
Ohh, yeah.. even my employer's engagement on Twitter dropped harshly.. but it's ...
Looking at Adafruit’s twitter. They pay for a blue check and have over 225k followers. They’re struggling to get over 6k impressions per post
exotic sierra
drifting crater
Made a little weather display that uses an EPaper screen, ESP32, and Powerboost ...
Nice work! It looks really nice
restive forum
exotic sierra
Looking at Adafruit’s twitter. They pay for a blue check and have over 225k foll...
Yeah, Elongated Muskrat really messed things up.
candid crescent
exotic sierra
Things aren’t working out, sales are not enough to try and keep things going.
Definitely sad news. I had ambitions to eventually do a Tindie shop myself one day, so your example has been inspiring over the last couple of years. 🫡
exotic sierra
candid crescent
Definitely sad news. I had ambitions to eventually do a Tindie shop myself one d...
Probably easier to do as a hobby shop than anything serious
wide brook
drifting crater
Made a little weather display that uses an EPaper screen, ESP32, and Powerboost ...
Looks lovely! Which display did you use?
drifting crater
wide brook
Looks lovely! Which display did you use?
Waveshare's 4.2in epaper display
wide brook
drifting crater
Waveshare's 4.2in epaper display
thanks!
cedar dew
I finally mounted my discs and batons and I made electric circuit pieces with channels for the wires.
north mural
That's a really nice wall. I like the circuit design element too.
exotic sierra
Teaching my son to solder using permaproto from Adafruit and some LEDs
 north mural
i like the idea of the battery plug on the + & - on the permaproto, i've never seen that done before. makes a lot of sense.
cunning lava
cunning lava
got the xiao sense camera working in circuitpython
reading qr codes works pretty well too
 exotic sierra
north mural
i like the idea of the battery plug on the + & - on the permaproto, i've never s...
exotic sierra
north mural
i like the idea of the battery plug on the + & - on the permaproto, i've never s...
Next one I’m doing will use potentiometers to mix and make more colors
split wren
cunning lava
reading qr codes works pretty well too
heard of the wpa qrcode thing?
echo 'WIFI:S:name;T:WPA;P:password;;' | qrencode -o wifi-test.png

if you try to scan that code on a phone, it will offer to auto-connect to name with password and WPA
with the above code, you could auto-store that to NVM and bring an esp32 into the network
devout verge
Yeah that’s a really helpful feature. Whenever someone new comes to my house I just show them the QR code instead of reciting the SSID and password (even though I do have it memorized)
proven coral
exotic sierra
Hey all, I’m closing down my Tindie shop, but before then I’m selling everything...
ouch, sorry to hear that @exotic sierra . And here I was looking forward to having the money to buy one of your fpga feathers.
proven coral
devout verge
Yeah that’s a really helpful feature. Whenever someone new comes to my house I j...
My samsung has the ability to share ssid and passphrase via qr code right from the wifi connection screen. This is helpful for my home wifi because the passphrase is 63 random letters and numbers. I don't want to spend the time to memorize it.
 grand turtle
Successfully running zephyr on esp32s3 n4r2 feather (i made a PR to have it added to zephyr)
Feat new bioimpedance featherwing
 kind burrow
Howdy . I adapted this PyPortal project (I don't have one) to my Qt Py ESP32 and ILI9341 TFT. Good exercise for me converting to a totally different display and wifi code than the dedicated PyPortal.
Took some tweaking width/height numbers to fit on my display, but looks good. I'm bypassing low values (like 1), so there's not so many bars.
https://learn.adafruit.com/pyportal-uv-index/code


Adafruit Learning System
Check the UV index at a glance on your PyPortal.
north mural
Now driving 9 matrix panels with the Matrix Portal S3.
 sand grotto
north mural
Now driving 9 matrix panels with the Matrix Portal S3.
sand grotto
north mural
Now driving 9 matrix panels with the Matrix Portal S3.
What's the tearing / refresh speed etc like, or is that for later stream 😉
north mural
It's manually refreshing every 30 seconds and only for about 2 seconds to update the label. There's a lot of static/glitching with that many panels, can't use auto_refresh.
It's almost like a requests type of project with a polling rate of 30 seconds from a stemma bme688 sensor.
It looks better in real life. Trying to take a picture without scanlines is tough. Can't see any scanline in real life.
Yes will be on Show & Tell tonight with it. Trying to hurry up and print 2 more quad brackets. At 2.5 hours per bracket going to take 5 hours.
cunning lava
cunning lava
first animation
 sand grotto
north mural
Yes will be on Show & Tell tonight with it. Trying to hurry up and print 2 more...
sand grotto
north mural
Yes will be on Show & Tell tonight with it. Trying to hurry up and print 2 more...
the curse of 3d printing
scenic siren
cunning lava
first animation
That is adorable. 😊
cunning lava
thanks, I'm trying to do it in a style that is simple enough to animate, but still cute
north mural
cunning lava
first animation
Love it!
north mural
Tried adding a 4th row right before show and tell to surprise everyone with 12 panels but didn't quite work out.

here's the back of the 9 panel setup.
lucid bloom
I enjoy the coding the most out of the different aspects of a project so I got the minimum required hardware that I could start coding a smart turret. this is the scanning sequence i came up with for it to do if no targets are detected.
    while time.monotonic() - start_time < 300:
        # Pan to the left (negative direction)
        while pan > min_angle:
            if(len(targets) != 0):
                break
            panServo.set_angle(pan)
            pan -= pan_increment
            time.sleep(scan_delay)
        while(len(targets) != 0):
            time.sleep(2)
        # Pan back to the right (positive direction)
        while pan < max_angle:
            if(len(targets) != 0):
                break
            panServo.set_angle(pan)
            pan += pan_increment
            time.sleep(scan_delay)
        while(len(targets) != 0):
            time.sleep(2)
I use the picamera2 event loop, I use the pre callback to detect objects/draw boxes/decide to fire and then the post callback to move around based on how many objects are detected. I'm still far from done and the code needs to be cleaned up but it is functional.
0 objects, scan
1 object, track and fire
2 objects, bounce back and forth and fire
3+ objects, constantly fire and berserker mode
https://gist.github.com/matt-desmarais/efe892120065fe94dade1eacee20fae8
 north mural
Got 12 panels working now. Github Project Page: https://github.com/DJDevon3/My_Circuit_Python_Projects/tree/main/Boards/espressif/Adafruit MatrixPortal S3/192x128 RGB Matrix


 eternal maple
north mural
Got 12 panels working now. Github Project Page: https://github.com/DJDevon3/My_...
eternal maple
north mural
Got 12 panels working now. Github Project Page: https://github.com/DJDevon3/My_...
This is amazing progress. What power supply capacity are you using now?
north mural
2x 5V 18A PSU's. Each is powering 6 panels.
eternal maple
Wow. Creating your own weather with those, eh?
north mural
Can do up to 4 bit depth comfortably. 5 creates scan lines that hurt the eyes. It's twice as bright in real life than in the picture.

This is bit depth 4, the previous picture was bit depth 3.
I think I can add more but I'd run out of wall space. This is as large as I want to go.
eternal maple
I haven’t looked at the HUB75 signals with a scope yet, so I’m not certain about how nicely the signals propagate from panel to panel vis-a-vis bit depth.
Again, excellent work and perseverance on this. You definitely rock in my book.
north mural
With video you can see the scan lines of bit depth 4 with shutter speed but you don't see them in real life.
this is bit depth 4, cannot see scan lines in real life, easy on the eyes
that's bit depth 5, can see scan lines in real life, very hard on the eyes. Worth noting that I do not have auto_refresh enabled. Only "updates" once every 30 seconds.
eternal maple
That’s an interesting noise artifact. Wonder if sign manufacturers use shielded interconnection cables and a ground plane enclosure/mounting system.
north mural
I think it's just a matter of the CPU blitting speed. Most signage would use a 1080p signal with very specialized boards capable of sending the signal much faster.
Using RGBMatrix and framebufferio, unsure if there's a way to overclock the frequency.
or duty cycle or whatever
eternal maple
Yeah, but they’d be blitting at the cable interface in the same manner. I’m guessing that the panel is either picking up noise via the signal path or power supply, or there’s some sort of data clock sync timing issue. Might need to allow data lines to settle before applying the clock pulse.
I’m officially out of my wheelhouse now.
north mural
so am i, not many people have done a matrix this big, at least not with circuit python
north mural
eternal maple
Yeah, but they’d be blitting at the cable interface in the same manner. I’m gues...
As Jepler pointed out the length of the signal at that size might degrade too. Each row of 3 is 38" x4 rows is 152" for the main data bus line to travel.
I don't know if each hub has a 5V data line booster. It would make sense if it does but I don't know that for a fact.
eternal maple
north mural
As Jepler pointed out the length of the signal at that size might degrade too. ...
I assumed that each panel buffers the output data to the next. Time to pull the schematics.
… and get out the o’scope
north mural
eh I'm happy enough with 12 panels. if someone wants to make a bigger matrix i'll let them sort out the schematics.
I don't have a scope
I just hook things up... and pray. 😛
eternal maple
Of course there’s an excellent Adafruit learning guide that describes the interface protocol and limitations. Starting to get an understanding of the complexity, particularly for how bit-depth is managed. Amazing that it works so well on small microcontrollers. https://cdn-learn.adafruit.com/downloads/pdf/32x16-32x32-rgb-led-matrix.pdf
north mural
eternal maple
Of course there’s an excellent Adafruit learning guide that describes the interf...
If the max is 50hz how can I tell what Hz RGBMatrix and frambufferio are running at?
eternal maple
north mural
If the max is 50hz how can I tell what Hz RGBMatrix and frambufferio are running...
Are you referring to the measured data transfer limit of around 50MHz? I’m thinking that the driver sends an “on” for a particular pixel color in amongst the data for all pixels in a row then turns it “off” (by readdressing that row) after a delay proportional to the desired pixel brightness. There’s a whole lot of data refreshing going on especially when the bit depth is > 1.
So the data transfer rate and display blanking rate are configured in the driver somewhere, certainly limited by CPU clock/timer parameters.
north mural
I’m more used to working with tft’s so I equate it to a refresh rate?
eternal maple
My understanding isn’t quite there yet. Will need more time with the whiteboard.
north mural
At the end of the pdf ryan says 50hz works best. On tablet so can’t copy/paste from a pdf for some reason.
eternal maple
But in general, the driver must be sending row data (and corresponding addressing) at a rate proportional to the bit depth —with a fixed, albeit very high, pixel data but rate. Higher bit depth = slower frame refresh rate.
north mural
More color = more data. Lines up with my experience so far.
 north mural
The bit depth does have a correlation with performance and scan lines. Ive done bit depth 6 once without it hard faulting and was unbearable to look at with the scan line frequency.
eternal maple
north mural
The bit depth does have a correlation with performance and scan lines. Ive done...
Also has me wondering about the display blanking signal (OE) timing and how the driver controls that pin.
north mural
Yes. My guess is they would have already optimized the driver with that datasheet experiment in mind.
I have no way to verify that though.
eternal maple
I’ll take a look at the driver code again tonight and see if this new information makes it less confusing.
… all in the name of my mantra: display brightness control for all the displays.
north mural
I do have palette fader in there but it’ll perform the same with or without it. I know PhilB has an open topic on some protomatter and rgbmatrix stuff which dan or melissa are porting into cp. all above my head. I just use whatever comes in cp and libraries.
eternal maple
Yeah, PaletteFader doesn’t do much if the bit depth is low and the palette was already optimized for brightness. Setting normalize=True might make a difference.
eternal maple
north mural
I do have palette fader in there but it’ll perform the same with or without it. ...
Waiting for that (currently fictional) S3 + FPGA MatrixPortal board.
 lone horizon
not fancy, but functionl. Thermostat for my garage heater with buttons or web form to set the temperature.


 last bronze
Snatched another one, pre and post cleaning


 rancid kestrel
I got KiCad to run on Android phones and tablets! Just don't be afraid to get your hands dirty: https://2231puppy.tech/posts/personal-setup/kicad-on-android/
What life? Why exist? How live? Why do I mean? If you find yourself asking asking these big questions, you’re probably a robot. No offense, ChatGPT. A real human would be asking much more important questions of themselves:
How the heck do I run KiCad on Android? Because there’s nothing more important in life than running an open-source EDA suite...

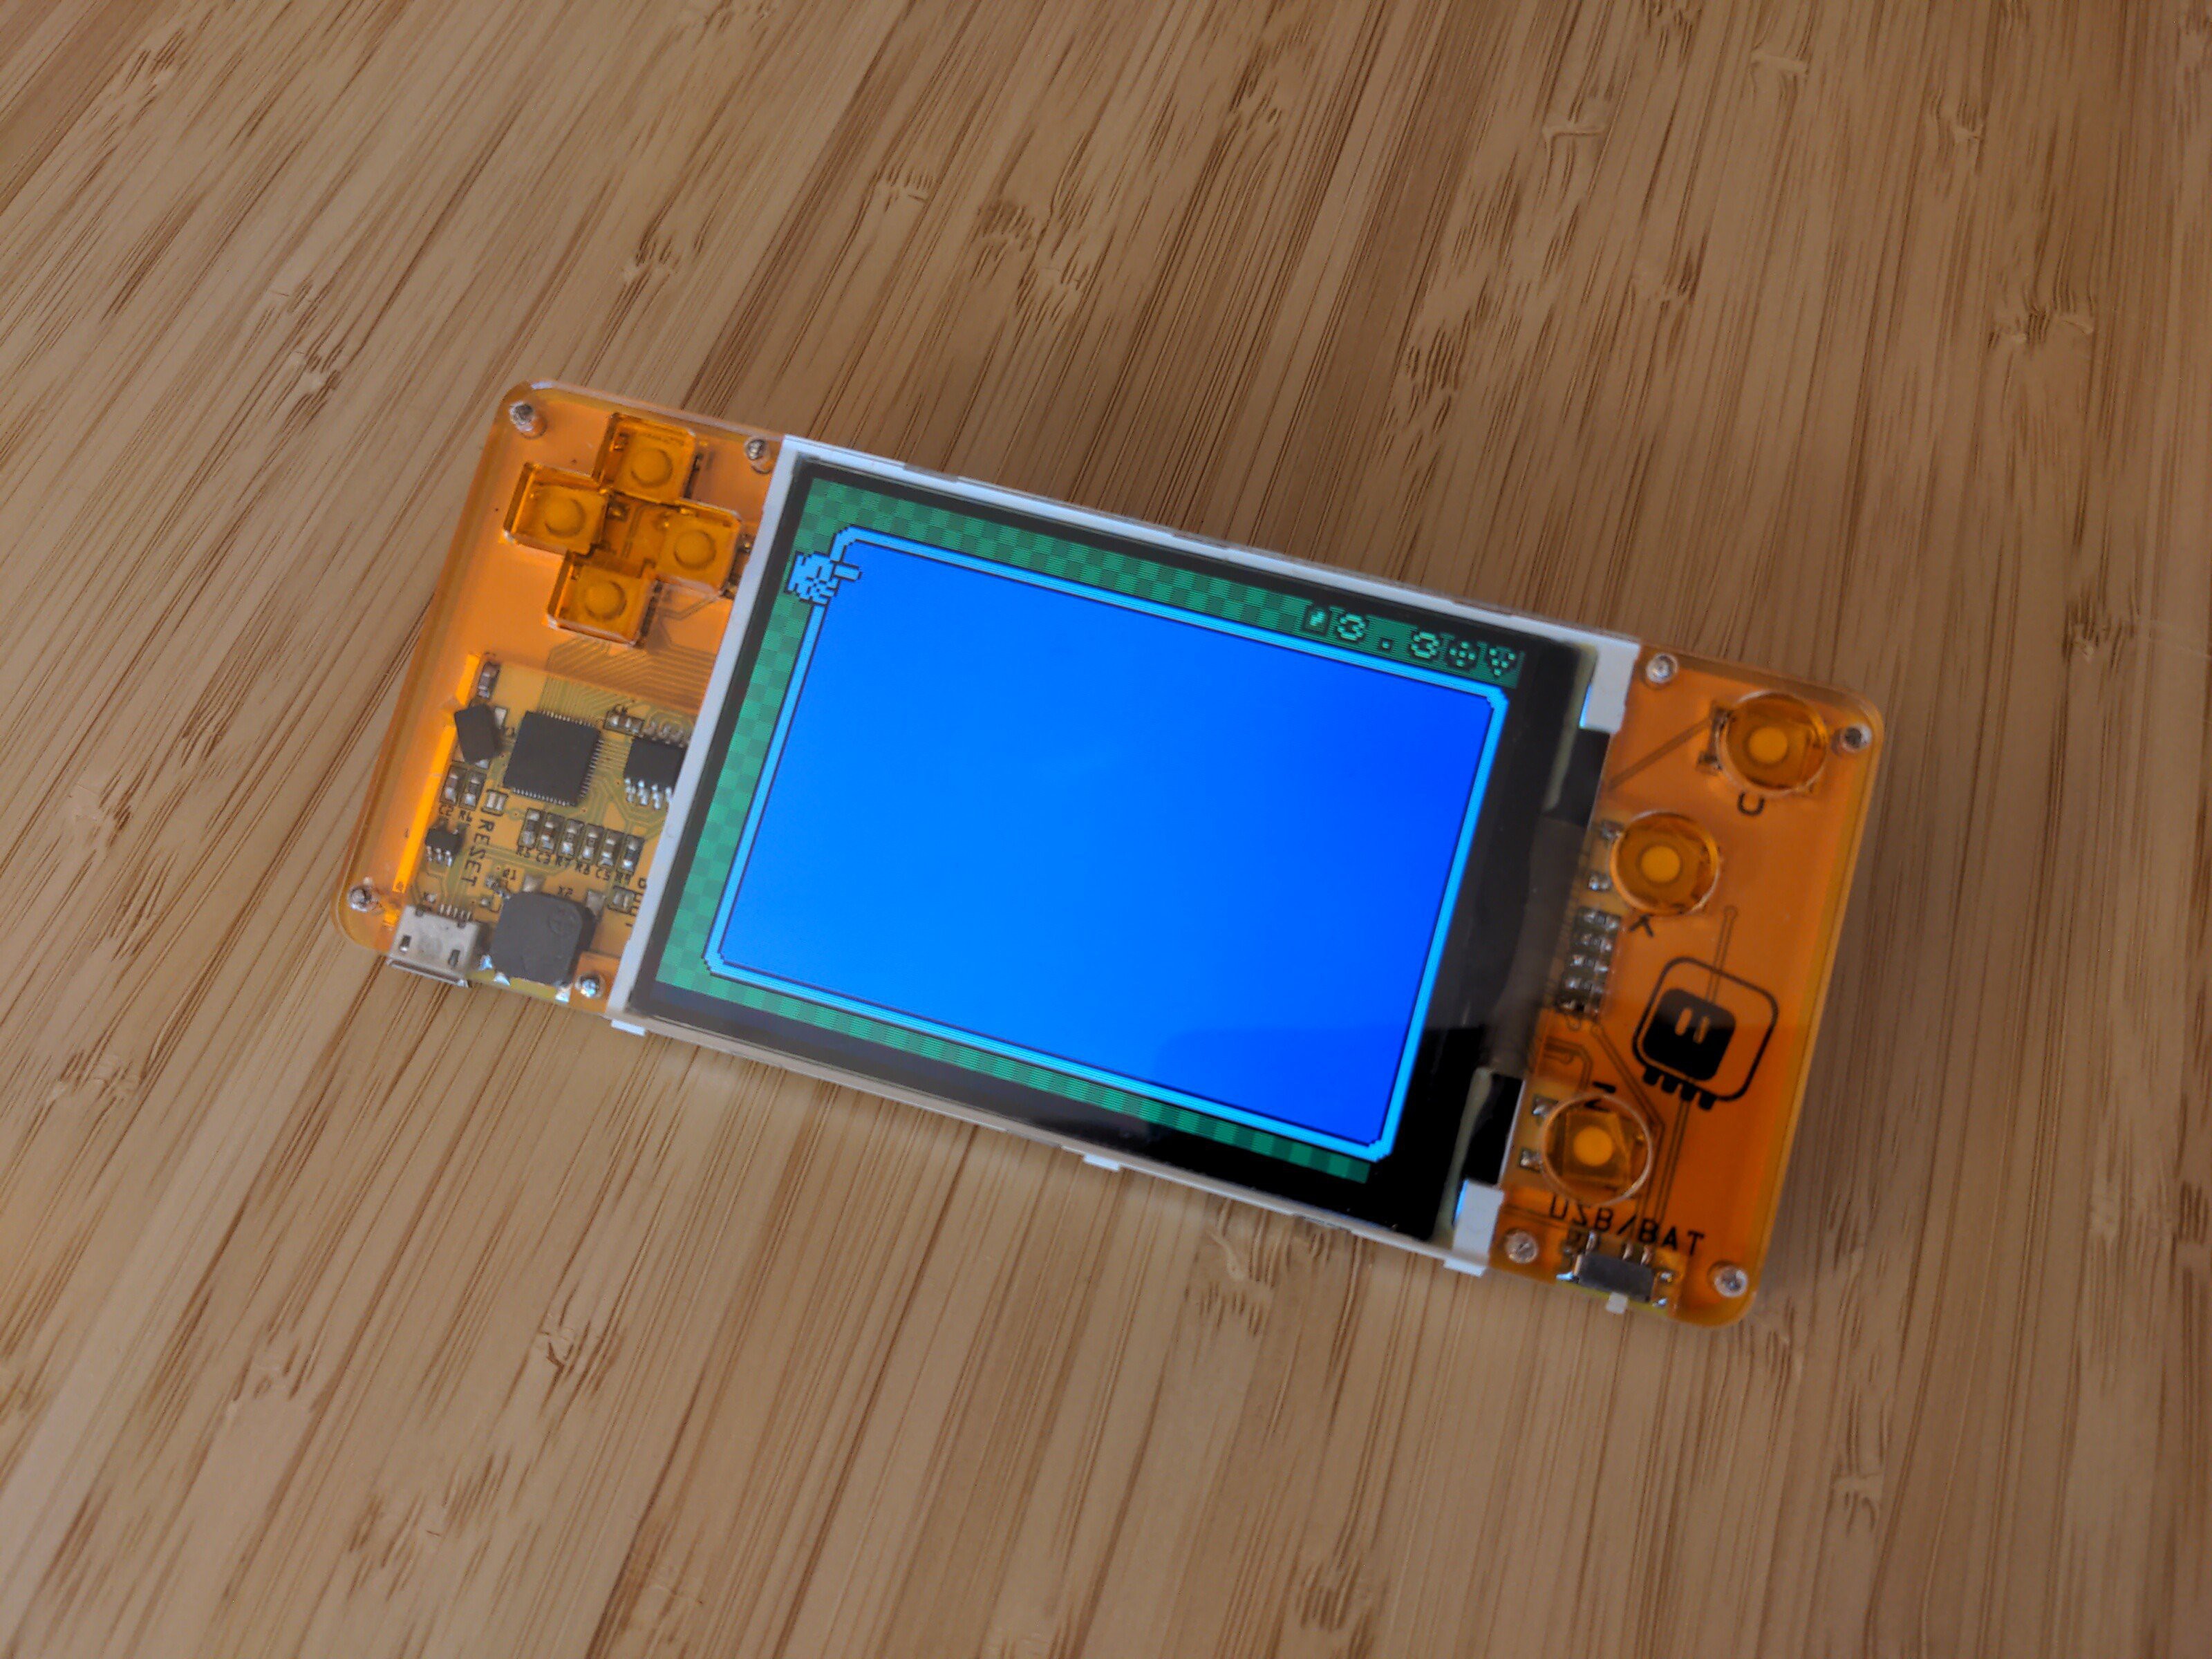 burnt wyvern
New computer monitor lol
Doesn't have the best colors. But I guess that makes sense since it is a TFT.
last bronze
wide brook
But it looks electronic! 😅
Ze keyboard is a prime example of soviet spring mechanisms
 brave temple
burnt wyvern
New computer monitor lol
brave temple
burnt wyvern
New computer monitor lol
Can I get a picture of that with banana for scale?
burnt wyvern
brave temple
Can I get a picture of that with banana for scale?
"anything but the metric system" because bananas are a superior size comparison because you can eat them!

Also left in an even smaller OLED display I had lying around
brave temple
I'm making some cyberpunk jewelry (aesthetic - gonna wax seal a pico after I solder it and present the raw board as a part of the project) and so wanted scale comparisons of various lcds
pallid saffron
burnt wyvern
Also left in an even smaller OLED display I had lying around
holy fritos! what pixel size is that? nm -- found 'em (64x48 .66") dang!
north mural
north mural
from tiny displays to huge displays. no matter what size you want, it's doable.
pallid saffron
indeed - have you seen videos of that (interesting?) new "video dome" put up in Las Vegas? it's.... impressive
north mural
yes i think the ruiz brothers showed it during a 3D hangout. That thing is unreal.