
#help-with-3dprinting
1 messages · Page 41 of 1
 empty sedge
 agile gorge
Pffft, that's nothing a heatgun or blowtorch can't fix
 unkempt lake
holy cow
yeah so that kind of thing was the reason i put off getting into 3d printing in the first place -- it seems like it can be very messy at times
agile gorge
Heatgun will melt it right off
Or you could plug it.in and turn the heater on
Itll.come right off
unkempt lake
i'm still thinking about my toaster oven (tm). was thinking about putting some kind of temp sensor in there and making it a reflow oven so I could make some more non-working electronic projects
not like i'm making bagels in the basement anyway
so i could try something, just to get a little more rescue experience under my belt
 karmic brook
Heh, I've been there

 inner cedar
Mine just had a leak

 unique pendant

 elder oxide
Oof

 half dew
I switched to a mosquito hotend ... was a lot of extra money but it can be torqued cold and haven't had any leak problems since I got it
karmic brook
Does that need changes in the slicer configuration?
half dew
Not sure if it does on its own - I did it at the same time as a BMG DD upgrade which needed some extrusion changes due to the switch from bowden to direct drive. I'm guessing if it can just swap out from whatever you already have it'll mostly just need some z-offset changes if its taller or shorter than the old hotend.
karmic brook
Noice
unkempt lake
i got that darn "set" screw out of my heater block. those new screw extractors i got worked like a champ. i did heat the thing up a bit with the heat gun first. i put painter's tape on the heat block to try and prevent any major scratches and on my vice, but i made a tiny one anyway. oh well - it is very shallow. the whole process took less than 10 minutes but i did load up with 2 morning cups of coffee first 🙂
i also got some Bezos special import uxcell 1.5 mm rods on the porch a while ago. they seem stronger than the 1/16 bits i was working with before -- i guess i will find out, but i have 10. i'll pop the hotend in the toaster oven with a couple of hot pockets (tm) so I'm not wasting any lunch time or energy and then it's showtime at the apollo for the cleaning my hot end does not want but fully deserves.
inner cedar
I have about 18 hours to finish this print. OctoPrint doesn't think it's gonna happen

Oh wait that's better

Does anyone know if there's a way to get better estimates? I've noticed Cura will give one thing when I slice, which is similar to OctoPrint's estimate, but then Cura's OctoPrint monitoring screen gives another, which starts crazy high
empty sedge
I'm sure you've heard me say this before
Prusa i3 MK3 with prusa slicer does this better
inner cedar
I have not, but I have heard people rave about Prusa printers and their slicer, lol
empty sedge
prusa slicer has very good time estimates and puts checkpoints into the gcode that display much closer time remaining on the LCD. Octoprint doesn't pick up on these for us though
inner cedar
Octoprint seems to be kinda sorta accurate, unless you set a minimum layer time, then it has no idea, lol
empty sedge
but we're running an older version of octoprint and old Cura for hackerspace members. The latest octoprint doesn't support our LDAP authentication or the other plugins we require
inner cedar
Oof
half dew
inner cedar
Does anyone know if there's a way to get better estimates? I've noticed Cura wil...
Progress bars are really really hard. Prusa Slicer does really well on their printers and pretty good on my heavily modified ender 5 but they probably invested a lot of time to make it create those estimates.
inner cedar
Ok, big problem... Used the Filament Change option in Cura, printer paused, changed filament... how do I restart it?!
Google is not helpful
Halp T.T

 thin breach
inner cedar
Does anyone know if there's a way to get better estimates? I've noticed Cura wil...
thin breach
inner cedar
Does anyone know if there's a way to get better estimates? I've noticed Cura wil...
IIRC there's an adaptive timing plugin for octoprint. It starts bad like always but gets accurate quickly.
Sorry my stuff is packed up right now or it would be easy to check what it is.
inner cedar
Any idea how to continue my print after it paused for a filament change? X.x
I need to continue this ASAP... staying awake until it's done, and it still has a couple hours left
thin breach
not sure... are you using octoprint/
thin breach
i'll try to help you figure it out 'cause nobody who knows anything is here, but just to be clear:
you are running octoprint as the server
but you have cura set up to send to octoprint
do u think a resume from octoprint is as good as resuming in cura?
(That is, do you think in your setup the G-code is all uploaded to octoprint and just the monitor is showing in cura)
inner cedar
It gets sent to the OctoPrint server, but Cura's controls are tied to it. Both had "pause"... I thought maybe if I paused it, it would then give me a resume, but Cura just started spinning and still getting the "busy: paused for user" in terminal
inner cedar
It also just says pause
thin breach
so pushing does not resume?
inner cedar
It doesn't have buttons, just the screen, which has pause and cancel
thin breach
oof i'm only ender 3, no touch screen
anyway, touching the pause on the screen is not resuming, correct?
inner cedar
I hadn't tried that, I'm afraid it'll disconnect it from OctoPrint -- I've had that happen before when touching the printer's interface
empty sedge
you should be able to resume from the LCD on the printer
inner cedar
But it doesn't say resume, just pause
thin breach
this guy is an expert
empty sedge
yeah, clicking the knob on my printers would resume
I don't know what LCD you're running on ender 3 though
inner cedar
Monoprice MP10
empty sedge
no idea how that touchscreen works. It sounds like the stock firmware and "pause" don't work as they should
but the post I found had the opposite problem: pausing from the LCD did nothing
inner cedar
I hit "pause" on the printer, said "pausing..." for a moment, hit resume, then it instantly said pause and nothing happened
I had also tried M108, nothing...
inner cedar
Like an hour? But I need to do the filament change -- I need it to swap colors -- and I have 5 changes after this, total print is like 5 hours
And it's almost 11 as it is
thin breach
really bad situation, very sorry to hear it.
 inner cedar
So I just restarted and took out the pauses, and I'll pause manually at the right layers
inner cedar
So I'm an idiot... Forget to change the filament and the head fell off... So it died almost immediately, and was running failed for an hour...

loud and numerous expletives
agile gorge
The head fell off? How's it attached, with magnets?
inner cedar
Yup. Which is nice if you need to get at it, replace nozzles, etc., But... That can happen
First time I've had it happen tho
agile gorge
Interesting, magnet attachment like that should be a little more positive, like with a keyhole notch for those studs
It would make falling off almost impossible
inner cedar
Yeah, that would be good. They're pretty strong -- it just must have had a bundle is fundament get up on top of the one piece and it caught hard
I'm just glad I was doing PLA and not ABS, I think 110C on the bed would have murdered the extruder fan
This time I WATCH while waiting to change filament

Thankfully I realized I could bump the speed up quite a bit because I had just slowed it down for a very complex model
Ok, good, caught the problem there -- one side didn't adhere to the bed properly, so it must have come up high enough to catch the head
I'm doing a set of horns, so I decided to just do one instead of both... that also cuts how long I'm waiting to swap filaments [I just have to do it 12 times instead of 6]
Probs one tonight and one in the morning... I'mma be dead tomorrow DX
inner cedar
Manual success! But very annoying

... It failed shortly after I walked away. I kinda want to throw it out the window.
Just... OctoPrint was disconnected. No warnings or anything.
No log.
WHY
 inner cedar
So it happened AGAIN... Apparently OctoPrint decides the printer isn't responding WHEN I HAD PAUSED IT
To heck with the 10 second timeout... it is now 120 seconds.
Sometimes I hate printing

 toxic kite
also, dunno if I can leap to assume octoprint is to blame on the pause timeout, did the printer stop servicing temperature info requests (console)?
inner cedar
I'm not sure -- it doesn't show the console, it goes blank after the printer is disconnected. But I set the timeout long long, so hopefully that won't be a problem... starting again because the last try, I forgot to lower the extruder before resuming
toxic kite
blerg, I haven't used it in a half year or such, but I recall there used to be a gcode terminal on the octoprint interface, for what thats worth
inner cedar
It goes blank on disconnect
toxic kite
it outright disconnects on timeout I gather, I'm guessing the pause is halting all serial servicing on the printer firmware then
inner cedar
That's what I think too, which is dumb
toxic kite
it surprises me when printer firmware works sometimes, dumb, but not enough einsteins with shotguns presiding over the state of affairs
inner cedar
.... now nothing is sticking at all
toxic kite
tried changing where the print starts on the bed? (or is this too big to afford the luxury?)
inner cedar
It wasn't sticking entirely, so I moved it, then it didn't stick at all
toxic kite
hmm, fiddly, wondering if that is bed leveling or something else
inner cedar
And I had moved it to a place that was fine earlier...
I hope the bed isn't warping

no stick
toxic kite
nozzle too high? surface too dirty? surface too clean? unfavorable lunar phase?
inner cedar
Probably that last one... trying glue
inner cedar
So I got it sticking, did the manual filament change a couple times... but even with a 2 minute timeout it did the same thing. I've given up on that for now, and will just cut it up in pieces and print when I arrive...
half dew
inner cedar
So it happened AGAIN... Apparently OctoPrint decides the printer isn't respondin...
What are you running octoprint on?
I've had issues with octoprint on a pi3 b+ when I have too many plug-ins installed
agile gorge
inner cedar
So it happened AGAIN... Apparently OctoPrint decides the printer isn't respondin...
if you're printing from octoprint, you must pause from octoprint
agile gorge
pausing from the printer would practically mean to ignore all commands coming in...
 next lake
inner cedar
This time I WATCH while waiting to change filament
next lake
inner cedar
This time I WATCH while waiting to change filament
There's always an Altoids box around!!
empty sedge
@inner cedar newer marlin firmware can tell octoprint that it's busy when paused or waiting for you to change filament
by "newer" I mean "2018 or newer mainline marlin" I think
 unkempt hollow
Hi 3d pro's. I'm a software and hardware guy who's been drooling over 3d printers for years.
My brother just got me a 3rd hand prussa mendel (1/2?) With a homemade pcb and arduino serial board. Gotta assume some ramps/grbl thing, looks like standard arduino 1284 plus drivers like I've got upstairs. Its got an attached atx power supply and a couple of cracked bits (mostly fine), but there's a third endstop (light-gate) that might be for z-direction but no obvious marker to break the gate. There's also 3 switches, 2 are fans and the third is unknown. Its also got loads of jumpers like a pc motherboard, most but not all are jumped.
I'm terrified of turning it on, but will do anyway, just wondered if any advice 😅

 empty sedge
3d printers are a lot better now
we finally took apart our old prusa mendel last year but we haven't powered it up for 4 years at least
unkempt hollow
I know, for sure, but it should move/ squirt out something given a line of gcode, hoping its capable of rough parts nothing fancy
empty sedge
I don't think it's worth the trouble
unkempt hollow
As an adapted cnc something or other?
empty sedge
yours looks newer than ours so it at least has a "flat" heated bed and linear bearings and belts that aren't broken
not sure what that control board is. weird
oh, ours was maybe an original mendel. single z motor on the bottom driving belts to drive two leadscrews. all roler bearings. wider more complicated x belt path.
Anyway, connect USB only and see if you can connect with pronterface. you probably have to try a few baudrates. I'm guessing 115200 or less.
it should power up over USB only to talk to it. See if the endstops work with M119
also see if the temperature sensors are working. Just keep your hand on them for a while and see if they rise from 22C (or whatever your ambient is) towards 24 in about 20s
then I'd power it up and see if I can jog each axis by 1mm and it moves 1mm in the direction I expect
if so, try homing one axis at a time. get ready to reset it if it's going wrong
switching off the power supply won't immediately stop it
I'm not sure what your hotend is but I'm guessing a j-head or clone which should be okay at printing PLA but you don't have a part cooling fan nearby so to get reasonable part cooling you will probably have to print more than one part at a time or print parts that are relatively large (maybe 3 inches square at a minimum)
60mm/sec will probably be your top print speed
wades extruders work fine, but 2.85/3mm filament is kind of unusual unless you're ultimaker
your firmware probably doesn't have thermal runaway protections enabled so it will try to catch fire if the thermistor falls out of the hotend
and getting the firmware updated on there is going to be a whole thing because you'll pretty much have to configure marlin from scratch or get an old copy of arduino and maybe whatever changes made to it to upload to that board, though it might be old enough to just be running "arduino mega 1280" bootloader
unkempt hollow
Interesting, no fire so far... attached serial but no response, powered atx and got START....WAIT...WAIT on serial 115200baud. Tried M119 got response, looked up what I was running and realised it gave endstop status so triggered each with cardboard and working fine.
So how do I switch on the bed heater? I've gone fully renegade and started some G1 commands, also worked out it zeros on boot so had to manually reset position and reboot. Scared to print anything but now I think I just need some slic3r or cura setup
agile gorge
you need to home in order to set 0 position properly
assuming you have all the endstop flags in place, you can G28 to home
bed heater is controlled via gcode as well, presumably?
@unkempt hollow take a look at the gcode documentation on marlinfw.org
unkempt hollow
I did the homing after reading more of the g-codes, which led me to add a flag for the Z endstop/light-gate. Couldn't see the heater and more importantly I'm a silly fool, I didn't look at the software you suggested.
I found the model is the reprappro mendel, am currently trudging through https://reprap.org/wiki/RepRapPro_Mendel_commissioning where it mentions pronterface, I just used serial monitor for arduino 🤦
agile gorge
serial monitor is fine, pronterface jst makes it a little nicer
unique pendant
$300 off Daedalus printer from R3D. They haven't been this inexpensive since they introduced the first builds. I have a friend with one of these. Prints are just as awesome as the Railcore, but it comes fully assembled and ready to print right out of the box. These guys used to sell fully built Railcores, but they didn't do well in shipping. So they designed this printer that would ship well. https://www.projectr3d.com/

PROJECT R3D (Copy)
3D printer manufacturer known best for RailCore Kits and the new Daedalus 3D Printers
agile gorge
Nice printer, $2600, expensive though
 maiden harbor
Does anyone know of an STL modification software or slicer that will let me manually add small circles for helping with bed adhesion? I can't use a raft for this print, and since it's a Makerbot, the slicer won't let me use a brim or skirt.
I feel like I've seen this kind of thing before in a slicer, but I can't find it anywhere.
 agile palm
maiden harbor
Does anyone know of an STL modification software or slicer that will let me manu...
agile palm
maiden harbor
Does anyone know of an STL modification software or slicer that will let me manu...
In cura you can add a plug-in that will do that.
Just look up "custom supports for cura" and a video should pop up on what to do.
maiden harbor
Awesome, thank you
agile palm
Np!
empty sedge
in prusa slicer you can add shapes from the right click menu
and you can export back out to STL
maiden harbor
I'll give that a look as well, thanks
 weary lichen
@maiden harbor Third option is Meshmixer. It's a lot more complex but you can do quite a lot of fiddling with STLs in there too
unkempt hollow
Thanks folks, we're making progress, I can print!
@empty sedge @agile gorge probably wouldn't have got this far without your input
 maiden harbor
weary lichen
<@!223128291735764992> Third option is Meshmixer. It's a lot more complex but yo...
maiden harbor
weary lichen
<@!223128291735764992> Third option is Meshmixer. It's a lot more complex but yo...
I started with Meshmixer, but the learning curve felt way too steep for the amount of time I have for this project. I'll probably go back to it once I get this shipped, it seems like an awesome tool.
weary lichen
maiden harbor
I started with Meshmixer, but the learning curve felt _way_ too steep for the am...
It's pretty good. The stuff I wanted to do was pretty simple and it did that well enough. For more complicated things, I'd say Blender is more powerful and can probably import stl files, too.
maiden harbor
Yeah, I tried blender a while back and noped out real fast lol, I'll stick to fusion for now.
 timid venture
Anybody know how to create this rippled/textured surface using actual geometry that can be felt on a 3D printed model?
 empty sedge
timid venture
Anybody know how to create this rippled/textured surface using actual geometry t...
empty sedge
timid venture
Anybody know how to create this rippled/textured surface using actual geometry t...
https://www.youtube.com/watch?v=eFrSeppuGZg
You could also selectively get the same effect in blender
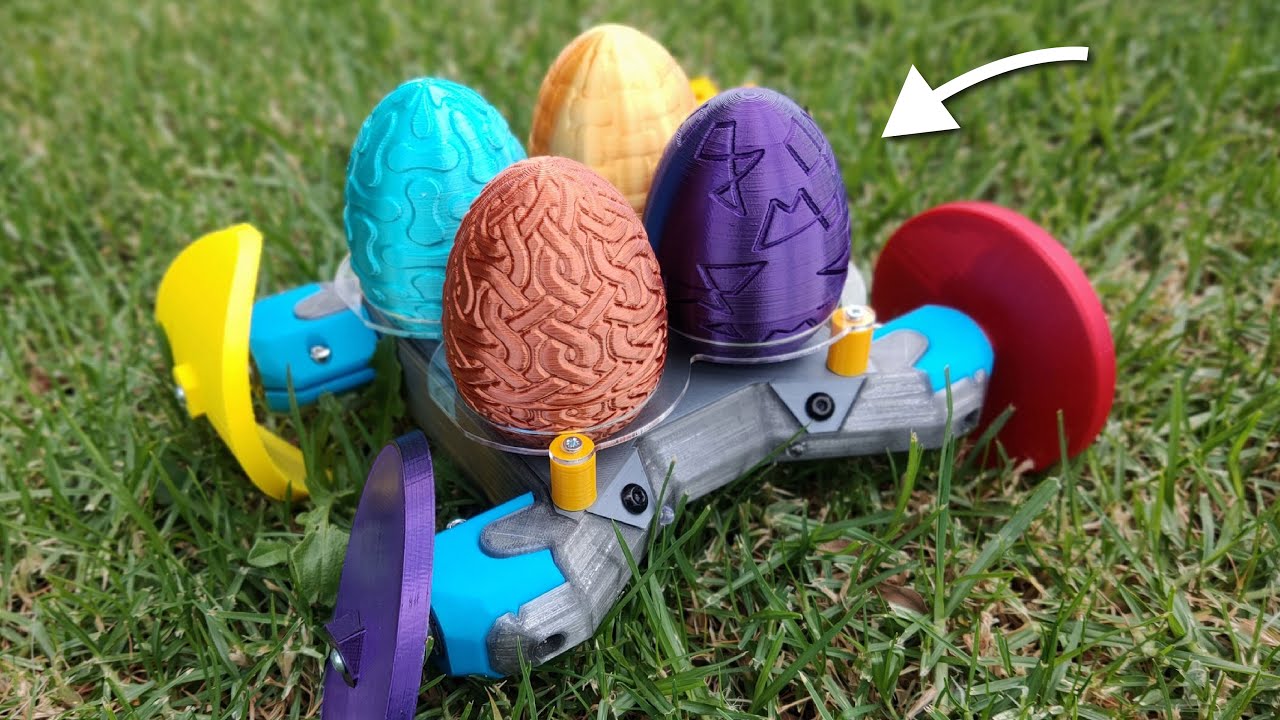
The latest IdeaMaker from Raise3D lets you use any image for custom texture on 3D Prints, so I used it to refresh an old Easter Egg cache design! In this video, I'll show you how to do it.
IdeaMaker 3D Printing Slicer - https://www.raise3d.com/ideamaker/
Textured Egg Cache and IdeaMaker Templates - https://www.makersmuse.com/textured-easter-eg...
timid venture
Appreciate the link I checked out the video! That method seems to be possibility.... When it’s done in blender, can it be more precise? Only asking because this is for a headlight of a car and I don’t want the pattern wrapping around the entire model. Only for very specific sections where the lens part of the headlight is
I saw there was a section in the video where he discussed modifiers which seems like you’ll be able to block out certain sections from getting textured but it’s basically just blocking out anything above or below that marker on the Z axis, correct?
empty sedge
Yeah, there aren’t a lot of options to control the area in that slicer
In blender you can use multiple materials or UV unwrap to get exactly the effect you want
For example https://www.youtube.com/watch?v=xL6qf6WBois

In this video we'll be going over how to displace textures at the topology level.
 marble swallow
Anyone have suggestions for removing the supports on this print? It's a flat face with a shallow cut out design on the supported side.
 empty sedge
split it in two?
marble swallow
I thought about that too, that way I'd be printing a flat surface, I'd have 8, 14 hour+ prints. Running an Ender 3 V2 with .4 nozzle, nothing too intricate so is a .8 nozzle worth testing out?
empty sedge
your volumetric print speed isn't going to increase much going from 0.6mm nozzle to 0.8mm nozzle so go 0.6 with thicker-than-you-do-with-0.4-nozzle layers and slower print speed
even with a 0.4mm nozzle you could be doing 0.3mm layers
marble swallow
empty sedge
even with a 0.4mm nozzle you could be doing 0.3mm layers
Doing 0.2 layers with a 0.4 nozzle, haven't dialed in settings for a 0.6 but that's the fun of the adventure
inner cedar
half dew
What are you running octoprint on?
Pi 3 B+, but no plugins installed
inner cedar
agile gorge
if you're printing from octoprint, you must pause from octoprint
I did, I think it was just OctoPrint being dumb. I figured out there's a different GCODE combo I can use, was able to do it via USB in Cura, need to test in OctoPrint
Plus Cura's OctoPrint plugin directly pauses in OctoPrint
inner cedar
next lake
There's always an Altoids box around!!
Lol, yeah
inner cedar
empty sedge
<@!381566293368897537> newer marlin firmware can tell octoprint that it's busy w...
Yeah, it's running newer Marlin, and tells OctoPrint it's busy, but OctoPrint apparently doesn't give a schnitzel
[apologies for string of replies/pings, I was at a con for the week, lol]
 iron remnant
Clearly there were cons for you being at a con.
inner cedar
XD
 sand mountain
Has anyone here tried SuperSlicer? It's a fork of PrusaSlicer and I'm not gonna lie, I'm a fan
inner cedar
Never heard of it, lol. But I'm open to new things. Going to try PrusaSlicer and see how it does vs Cura
sand mountain
PrusaSlicer rocks! SuperSlicer is better tho. It has retraction/temp/etc calibration prints with dynamic settings
inner cedar
Nice, I'll have to look at it
iron remnant
Yah, I figured "Eh, don't have a Prusa, might as well use the fork" so I've been using SuperSlicer.
It would probably make somebody's brain asplode.
I just defaulted to show-me-all-the-buttons-plz mode.
agile gorge
It's a lot of settints
inner cedar
Tweak ALL the settings!
 sullen zinc
ooh https://www.thingiverse.com/thing:4747414 3D printed costar-style stabilizers for long keycaps

Keycap stabilizer designed to work with the SiCK-68 Mechanical Keyboard and MX-compatible keycaps made with KeyV2: Parametric Mechanical Keycap Library. Other combinations of keys and keyboards might also work, but your mileage may vary.
What you need to print (per key)
2x KeycapAttachment_V1
2x StabilizerSlot_V1 OR 1x StabilizerSlot_V2 (either ...
inner cedar
hmm
 arctic dragon
How viable is it to weld two flat PLA surfaces together with a hot air station...?
"weld"
inner cedar
I dunno... You might just have a lot of warping and melting
arctic dragon
For anyone curious, it does work, and it does warp. Using a hot air station at soldering temps was probably just idiotic on my part, but with simple high tolerance geometries it is viable
 arctic dragon
I just use what I have, and unfortunately glue is not one of them at the moment LOL
inner cedar
Lol
sullen zinc
sullen zinc
ooh https://www.thingiverse.com/thing:4747414 3D printed costar-style stabilizer...
These work very nicely! I used a modified keyv2 that integrates the "attachment" part right into the keycap, and used some 0.8mm brass rod to bend the stabilizer out of. Now to print a bunch more.
 inner cedar
I need to find the 0.4mm nozzle for my tiny printer so I can print keycaps, the 0.8mm isn't accurate enough >~>
sullen zinc
no, there are some small features. 0.4mm is up to the job, but a smaller nozzle would probably be even better. really, a resin printer is probably the best idea 😜
I decided to change the design so that the wire could clip in, instead of being pushed through. this allows the clip to be fully bent before it's placed in the keycap.

Is mm3 a natural unit for people who were well educated in metric? seems like ml / cm3 is what I am used to hearing volumes given in..

(aside from fluid ounces, whatever those are)
 solemn parrot
That is a strange unit, I feel like cm^3 is the more "acceptable" unit compared to mm^3
I've never really encountered it before
inner cedar
sullen zinc
no, there are some small features. 0.4mm is up to the job, but a smaller nozzle...
Yeah, 0.4mm is good, but currently I only have 0.8mm on my printers XD
inner cedar
Well that isn't right
 agile gorge
sullen zinc
Is mm3 a natural unit for people who were well educated in metric? seems like m...
agile gorge
sullen zinc
Is mm3 a natural unit for people who were well educated in metric? seems like m...
Well, it's much easier to say 1mm³ than 0.001cm³
It's a matter of scale
Then things like sigfigs become significant
sullen zinc
But that would be on the order of .001 gram of filament, or 400um of filament
for this particular task
agile gorge
Yes, and we're measuring these precise amounts
karmic brook
You could just use µL.
half dew
arctic dragon
I just use what I have, and unfortunately glue is not one of them at the moment ...
I recommend getting a 3d pen - they're very useful for welding 3d parts together and repairing printing mistakes
inner cedar
sullen zinc
Weird. Extrusion multiplier problems?
No idea... It doesn't happen on everything, and I just had a successful print with no issues like that with the same settings
unkempt lake
I had a leak with my phaetus dragon hotend. I think it was due to a burnt bowden tube end that was caused from another mistake. I don't know the proper terminology, but perhaps "heat creep" was involved. Along with a nice mess of PLA, I have (I'm fairly sure) a large partially melted length of filament from the heat break going towards the hot end.
Last time, I successfully pushed a filament clog through with a vice, a 1.5 mm rod and a fairly warm hot air station gun. It took a couple of tries but not that long.
This time, I'm not sure I'll get rid of that outer clog. There are 2 tiny M1.4x12 screws and I have tried very carefully to unscrew them, first with the provided allen wrench, then with a torx t5 bit, and i can't get them. I'm not getting that heat block off -- I don't think heat will help.
I am considering employing a seriously crappy toaster "oven" -- It is so crappy it has no temperature setting, only "Bake". It has a timer on the other knob. It has to be the worst toaster I've ever owned. But it is in the basement and ready to go.
Say that appliance can reach 500F or so (doubtful). Can a hotend be overcooked at that temperature? Is this a good route? I don't want to use something I might cook a hot pocket (TM) in.

 empty sedge
unkempt lake
I had a leak with my phaetus dragon hotend. I think it was due to a burnt bowde...
empty sedge
unkempt lake
I had a leak with my phaetus dragon hotend. I think it was due to a burnt bowde...
if there's no plastic parts 260C is fine
teflon/PTFE breaks down around that temp and you don't want that but it looks like you've removed the thermistor, heater, and teflon tube already
I don't think you need to go that hot though. at 100C (boiling water) the plastic will soften and you can pull off big pieces with pliers and gloves
I don't know how that hotend is assembled, but on e3d blocks the nozzle seals against the heat break by having the two threaded sections run into each other. The nozzle doesn't seal if fully bottomed out on the heater block
inner cedar
I dunno if the oven is a good idea -- you might end up with the plastic turning to a messy burnt crud you can't get off
unique pendant
I used to get clogs with my 1st generation Mosquito hotend and put it in a 500 degree F crucible several times to burn out the plastic. Have to take off the heatsink tho'. Worked beautifully every time.
inner cedar
I had a printer get hard crusted stuff I never got off after burning it >~> YMMV
half dew
unique pendant
I used to get clogs with my 1st generation Mosquito hotend and put it in a 500 d...
Interesting - I got my mosquito to avoid clogs and I've been good so far - any idea what caused them?
unique pendant
1st iteration had a problem with PLA. They revised the diameter of the heat break to fix the problem.
agile gorge
@unkempt lake can you get the nozzle off? Once there, take a soldering iron to the heatbreak and melt the rest out, better if the iron is adjustable, and you can set something like 180c
 brittle hornet
I added a bake-able polymer clay to my printed keycaps.

It was interesting. One of the PLA's distorted, one didn't [worked just fine]. I used a bake time half of what was recommended. 15 min. @ 230 F. The polylite PLA got taller on it's printed Z, and thinner on the x y [these were printed standing on edge].
 half dew
I love seeing all the different ways people go about custom keycaps.
I ended up going relegendables with custom printed bases and vinyl/translucent plastic.
 inner cedar
half dew
I ended up going relegendables with custom printed bases and vinyl/translucent p...
inner cedar
half dew
I ended up going relegendables with custom printed bases and vinyl/translucent p...
Ohhh, that's smart
 pulsar zodiac
Is there a rule of thumb on how to calculate the length of filament needed to make a part of a specific volume, or does that depend on too many factors?
inner cedar
If you know the weight of the part, you can do simple math. A 1kg spool of 1.75mm filament is ~330 meters, pretty easy math from there with the part weight
pulsar zodiac
How do you calculate the part weight for a part?
inner cedar
Yeah, slicers usually tell you the weight, volume, and length of filament used
agile gorge
Mass and volume are easy derivations from length
inner cedar
If you know the volume of actual printed area [not the total internal volume of the print] you can calculate weight based on the weight of a known volume of PLA, since you know it's 330m per 1KG spool, you can get the weight of a 1.75mm^3 piece
agile gorge
It's not exact because of sparse fill
agile gorge
And solid layers and perimeters
pulsar zodiac
Thanks. Appreciate the info.
unkempt lake
@agile gorge @empty sedge I think I'll have to chalk this up to a learning experience. The last time I unclogged the PLA clog from this hotend, I could not push it out with a 1.5 mm rod horizontally clamped in a bench vise. I used my hot air station to heat the entire thing to ~= 190C for a few minutes each time, but I could not for the life of me push it out (I'm not the hugest guy but I am pretty strong and I used my weight as leverage).
After a few tries, I thought maybe I could try heating it up and tapping it with a hammer and a wood block. Well I think that pretty much did it. I am still learning but perhaps that leak was due to me breaking the "seal" or tightness of the heat block and the heat break.
I do have a replacement coming tomorrow, and I don't anticipate an immediate problem. What worries me is what will happen when this happens again.
What was happening before I took things apart: I had several prints start and then stop after only a couple of layers, maybe 10 minutes in. My bowden tube was definitely not correct, slightly off/burnt due to more "operator error". I had to disconnect it and pull the filament out several times, perhaps 3 different times.
So I think my hammering and the burnt tube did my hotend in.
The only other thing I might do: I bought a wire saw, diamond wire / whatever -- 0.6 mm wide. there are 2 M1.4x12 screws that I think I mentioned -- could never get those out. I can get at them through the sides though, and given a little while, watching tv, i can slowly cut them in two, unscrew them with pliers, get more tiny fragile screws and a heat block, and try it again. I received the hot end fully assembled but I have the assembly instructions. But that's a side thing, and it could be that i royally screwed up the thing with the slight nudges of the framing hammer
unkempt lake
the nozzle came off easily
agile gorge
And yes, you can disassemble it
unkempt lake
i can't get the heatbreak b/c of those tiny M1.4x12 screws
could not do it before and now of course the PLA is on them 😦
tried T5 torx and also (first) the provided tiny allen wrench
i think i'll have to cut them and find replacements when i get a replacement heat block
unkempt lake
it's really in there. i broke a 1.5 mm rod from both ends
i'm not giving up and i'll get that out
i have tried heating with the hot air station for a few minutes before each push attempt
agile gorge
That impressive...
unkempt lake
yeah i'm about 200 lbs 🙂 hehe not huge but
agile gorge
If you broke a rod, the problem isn't force, imo
unkempt lake
it may have been angle
i started with a hobby clamp on vise
the remains is slightly bend
bent
but i have 9 more
do you think the hammer loosened the connection between heat break and heat block? that's where the leak occurred
it is hard for me to push perfectly straight. i do my best. but this time even the hammer was really not moving the clog
agile gorge
The heatbreak screws into the hot block
And the nozzle screws so that it sits flush against the heat break
If you have a leak, it's because the nozzle interface isn't secure
Only way it wouldn't move successfully, I think, is if you kink the tube maybe
unkempt lake
well, I had that burnt bowden tube for one. I think that was part of it. there wasn't a good connetion there.
and also what you said re: nozzle. I think it was tight enough. the manual says to heat the hotend to 285C, wait at least a minute, and then tighten the nozzle. I did that. I was pretty careful about that part.
would a misshapen bowden tube cause a leak as well? I read that it's a problem. I have since snipped off an inch with the creality tube cutter that came with the capricorn tubing.
and thanks for your help, by the way. 😄
i think that 285 temp is sound. I have that pt100 connected now and i did an ice bath calibration to get the resistance at 0C
 worldly isle
Is it just me or is cad software kind of clunky? The ui is full of buttons and it doesn’t run very smooth. Tried out fusion 360, solidworks, and onshape; onshape seemed the least clunky but still clunky. Also tried shapr3d which seemed smooth but wish it was parametric.
Coming from Figma for design, I expect everything to run like butter and have minimal ui.
empty sedge
hah
solidworks and other older packages have a lot of features and tools and redundant ways of doing things that may make them seem overbuilt
onshape is getting more and more that way over time, and of course so will everything else
empty sedge
Maybe you want an art tool not a cad package? Though the big ones like maya, max, and blender all have the same huge collection of features.
solemn parrot
Art tools could be a good path to go depending on what kinds of things you want to 3D print. For my uses having parametric design (like Inventor, F360, Solidworks) is great but I can see how someone would not need or want those features
agile gorge
@unkempt lake mosquito you said? there's no bowden tube that should melt or be misshapen
 tight cove
hey, I need help with setting the Z axis on my Mars 2 pro, I have loosened the screws, homed it, tighter the screws, lifted the Z until the paper was slightly lose then set the Z=0, but when I press home again the paper can nolonger move again
unique pendant
empty sedge
Maybe you want an art tool not a cad package? Though the big ones like maya, max...
What do you mean by art tool? I'm starting to learn Blender because F360 has such limited rendering capability. I build my models in F360, and then import them. All I need is rendering. Is there software that's simpler/intuitive to use for just rendering?
weary lichen
unique pendant
What do you mean by art tool? I'm starting to learn Blender because F360 has suc...
Blender, Maya, etc are designed more towards "Sculpting" 3d models, and for meshes, often used in games and the like. FreeCad/Fusion360/etc are designed around parametric modeling and are more often used for building things. This means there's no need for a "better" rendering engine. In fact, in many cases, there's arguments to be had that a simpler rendering system is better. The cases where an engineer looking at parts would need to have those parts textured with normals and lighting and such are fairly few, while the cases where a game designer would want them are many. So, different tools.
I think your method of designing in a cad program and then going to a mesh program is probably going to be the best. I've seen some pretty spiffy renders out of Blender, so it should do what you want.
inner cedar
Assuming the printer is itself working and has all the things, sans packaging... Should I buy the open box?

 knotty laurel
Personally I would not, since the chances are high that someone bought it, found that something was broken, returned it, and the store is just putting it back on the shelf without actually checking it out.
unique pendant
Also, it's only $30 less than brand new.
inner cedar
Hmmmmmm......... Well, I can check it out before purchase.... And return it tomorrow if there's a problem, lol. 30 day return window
inner cedar
unique pendant
Also, it's only $30 less than brand new.
Where did you see it $230? It's $262 on the Creality site
And $279 on Amazon, jeeze
unique pendant
279 - 249 = 30. Or is that ad you posted not for the open box?
Oh, I see. 199 for the open box. Sorry, my bad.
empty sedge
unique pendant
What do you mean by art tool? I'm starting to learn Blender because F360 has suc...
I don't have any rendering-focused suggestions unfortunately. Blender can do great but there's a lot to learn there potentially depending on how much of the app you want/need to.
inner cedar
unique pendant
Oh, I see. 199 for the open box. Sorry, my bad.
Yup, that's what I'm looking at. I had to come to Micro Center anyway... Gonna pounce. Worst case I bring it back
inner cedar
Welp... Maybe that's why it got brought back. Unfortunately a lot of people return and say they just didn't want it instead of saying there was a problem because they're afraid they won't get a refund.

Printer is cool to the touch
Current extruder temp (reflecting my body heat)
 inner cedar
Mmm... No boot now. I think it's dead
 unkempt lake
agile gorge
<@!356239124694302722> mosquito you said? there's no bowden tube that should mel...
unkempt lake
agile gorge
<@!356239124694302722> mosquito you said? there's no bowden tube that should mel...
I think it may have occurred when I first installed it wrong and I had to heat the hotend to 285C, which I think is past the comfort zone of the capricorn bowden tubing. I don't know what burning / melting teflon? smells like, but there was a really bad odor I never smelled before. The hot end clogged up that very fist time and the filament never reached the nozzle. I am ashamed to admit that I used a shorter nozzle not meant for the phaetus dragon, and I think that was the start of all my problems since it didn't seal well with the rest of the hotend.
When I later examined that end, it was discolored and didn't seem to have a smooth end like it had after I'd cut it initially.
But going back to what you said earlier: I now think it could be that my hammering on the heat block end of the hot end with the 1.5 mm rod and the wooden block may have tapped the assembly back a tad, and caused the bad "mating" with the nozzle.
I definitely did the 285C heating / waiting / tightening the last time around. I did not do that with a cool hot end. I tightened to a reasonable amount.
I'm just chalking it up to a series of stupid mistakes that I'll just have to learn from. The replacement cost was not that bad.
agile gorge
@unkempt lake if it's a mosquito, there's no melting of capricon
oh, dragon
same difference
and the dragon uses a standard v6 nozzle
unkempt lake
right. and i used the one from my e3v2 standard hot end. 😦
unkempt lake
so i guess the short nozzle i used didn't mate, and the filament would not come out (which it never did inititally) and then i caused the problem. and there was not a mess that time.
that happened on try #2 post hammer-time
oh well
unkempt lake
inner cedar
Mmm... No boot now. I think it's dead
so could it be a firmware problem? was this a return? you should try to reflash it. it's very simple -- just find the proper firmware for yoru board version (most likely 4.2.2 but you should check it yourself under the hoood).
Just put the firmware .bin file in the root directory of a microSD card. you can have other directories in the root of that card but the upgrade will only work if you have the one .bin file there.
Power it off, insert the microSD card in the slot, power back on, there will be a short animation (I think) wait a short bit, turn it off, yank that card out (important). then power back on.
It might fix your issue.
You should also check if your screen has proper firmware if that doesn't work. that takes a couple more minutes as you have to disassemble it to get at its separate microSD card for flashing. Instructions and files can be found on the web.
Give it a shot.
Oh yeah, make sure to rename the firmware.bin file to a new filename, i'd just append a timestamp to it, e.g. filename-20210817-0800.bin or just anything really.
inner cedar
unkempt lake
so could it be a firmware problem? was this a return? you should try to reflas...
Yeah, I tried flashing, no joy -- it looks like it's starting to boot, then nothing. It was indeed a return/open box... I'm just taking it back and getting a fresh one for the $50 extra.
 silent mortar
What is the best course available for Fusion 360?
I designed this mouse in Fusion 360 in high school.

But I kind of forget some of the funcionalities of Fusion 360.
 broken orbit
inner cedar
Assuming the printer is itself working and has all the things, sans packaging......
broken orbit
inner cedar
Assuming the printer is itself working and has all the things, sans packaging......
No, I wouldn't. A new Ender 3 is well worth the $250 ||that's what I have :)||
broken orbit
inner cedar
GOT IT
OOF
inner cedar
broken orbit
No, I wouldn't. A new Ender 3 is well worth the $250 ||that's what I have :)||
I mean, the V2 at $250 seems like the better value -- it's just upgraded overall. Gonna swap for a new one tonight
$50 off would have been nice if it worked XD
broken orbit
inner cedar
I mean, the V2 at $250 seems like the better value -- it's just upgraded overall...
Yeah 👍
IKR
inner cedar
I knew it was a gamble
broken orbit
Yeah - it always is
inner cedar
Sometimes it works out, like the PyGamer for $24
inner cedar
I think like 80% of the time at least. I think I got my Ender 3 Pro open box? I can't remember. I know my Inland dual extruder I got for cheap cheap cheap open box, $130, was originally $1000... Just needs some work XD
inner cedar
I'm insane XD 5 might be my limit
broken orbit
LOL
inner cedar
And yeah, $130! Even if I need to rebuild it, it's a great deal for the base! Enclosed, X/Y carriage for the extruders and Z bed movement, pretty stable. Not the fastest, and an old interface, but I'm going to build a CP control board for it, probably
broken orbit
considers new project
inner cedar
adds as project #95478302785343
unique pendant
silent mortar
What is the best course available for Fusion 360?
The built-in training in F360 is actually pretty nice and easy to follow step-by-step.
unique pendant
Actually, maybe the built-in training is only on the educational license. Now that I'm no longer using the educational license I don't see it any more. However, it does have a learning tab that's very helpful, but that's not really organized to bring you through learning how to use F360 step-by-step.
agile gorge
Mostly learn by watching youtube
At least it was pretty easy for me to learn that way, and I generally hate learning off of videos
brittle hornet
I'm a longtime Maya user, now trying to pick up some Fusion. Although I'm a bit of a hack poly modeler [more accomplished in nurbs], Maya for me means known pathways and ease of use. In Maya, it is ridiculous how many times I have to delete /flatten history while progressing from one construction step to the next to get things to work. So for me, multiple saves are needed, and retracing steps to iterate and tweak. From what I have seen editability is much better in Fusion, and I think iteration and active history are more important with design for print.
inner cedar
So, OctoPrint -- I see arguments online about using the Pi 3 A+ for printing. Some folks say it's impossible, some people say it's perfectly fine, and a couple say it's fine for printers with a larger buffer [sounds like 32-bit MCU based ones] but not for ones with small buffers [8-bit] -- what do y'all say?
empty sedge
I use a pi 3b and it's fine, but I'm not running any extra plugins with octoprint. both printers have atmega2560 avr
hackerspace is running pi 4b which makes on-pi-slicing a lot faster
either way, make sure you have a good power supply and aren't causing the pi to underclock due to low voltage
inner cedar
Yeah, 3 B/B+ are on the recommended list. I think the A+ is the same processor as the B with less RAM? I'm slicing on a PC and sending over, so not worried about slicing time. I just want to make sure that printing isn't impacted
empty sedge
does the $10 difference mean that much to you?
inner cedar
With the number of printers I'm outfitting, yes XD it adds up
According to DigiKey the only real spec difference is 512MB of RAM instead of 1GB
No idea how memory intensive OctoPrint is...
empty sedge
if you're building a farm there's other software than octoprint
I'm guessing this means 512MB would be fine
top - 13:51:30 up 112 days, 10:52, 1 user, load average: 0.63, 0.57, 0.51
Tasks: 112 total, 2 running, 110 sleeping, 0 stopped, 0 zombie
%Cpu(s): 27.4 us, 1.3 sy, 0.0 ni, 69.8 id, 0.0 wa, 0.0 hi, 1.5 si, 0.0 st
MiB Mem : 874.5 total, 335.6 free, 133.9 used, 405.0 buff/cache
MiB Swap: 100.0 total, 100.0 free, 0.0 used. 636.7 avail Mem
inner cedar
Not so much a farm as I have 5 printers, lol. Want to use the B/B+ models I have for other things too, no need to tie them up with printing if the A+ can do the job. They're all on WiFi anyway
iron remnant
Yah, for me, it was either get a new Pi or use a Pi 1. I figure it's probably better to have a Pi 4 because that maximizes the chances I'll be able to recycle it over time.
inner cedar
I still have my Pi 1 somewhere...
Most of my Pi projects get indefinite use -- I know there's a Pi 2 somewhere in my house that's acting as a DNS server. I have no idea where I hid it... but it's there and working, lol
unkempt lake
i set up my pt100 overkill thermocouple and the max31865 to the rPi via h/w SPI. I did an ice bath calibration, so I guess it's a tad more accurate now. I got the new dragon and it's working and I'm pretty stoked.
One thing bugs me, and I can't seem to find out what is going on. When Klipper restarts, the temp goes haywire for about 20 seconds or so until it normalizes. That is, it goes really low, I mean like a large big negative integer, totally unreasonable, like several hundred thousand negative degrees, i.e. less than 0 kelvin 🙂
So yeah the universe apparently stops in my basement when this happens. This reading kinda "halves" until it arrives at the actual temp. Klipper does not shut down.
I see it from any Moonraker interface, like Fluidd or KlipperScreen.
Has anyone seen something like this while operating a printer?
 vestal thicket
I'm joining the cool kids and bought a used Ender 3 v2 today. Best part is 1) It's already assembled and 2) it's leveled pretty well already.
inner cedar
vestal thicket
I'm joining the cool kids and bought a used Ender 3 v2 today. Best part is 1) I...
Glad yours worked out, I had to return the open box one I got from Micro Center, lol. Ended up just shelling out the $50 to get a fresh one
vestal thicket
That's a bummer. I haven't had good luck with open box at MicroCenter. 😦
inner cedar
Printers are particularly hard there -- new folks to printing will often get them, try setting them up, do something wrong, and cause some sort of damage that isn't obvious [like shorting the hotend when putting in the nozzle, damaging the board, but not in a way that's obvious until you go to print], and return it out of frustration, and then the next person [read: me] will find that out. A lot of OTHER products [read: PyGamer I got for $24] are perfectly fine
vestal thicket
inner cedar
Printers are particularly hard there -- new folks to printing will often get the...
Good to know! Any idea how the quality of Microcenter's PLA is?
inner cedar
vestal thicket
Good to know! Any idea how the quality of Microcenter's PLA is?
I'd stay away from the regular PLA; the material consistency isn't great -- diameter and density can change enough to impact print quality, and even cause clogs/jams. Color can also be WAY off roll to roll. PLA+ is pretty good; consistency of diameter, density, and color are all pretty close along the roll and roll to roll. I think there's another category now, a higher tier? But I haven't tried that
vestal thicket
Cool, I'm impatient and probably get some PLA+ then. Thank you!
inner cedar
Hah, can't go wrong with that. No problem!
inner cedar
Pi 3 A+ update: Currently running my Ender 3 V2 on it, and it seems fine. Haven't done anything nuts, just did a test disc [20mm circle 2mm tall] and it just went, no hiccups. Now printing a mount for a camera, which says about 2 hour print time, so we'll see how that goes
It's already streaming the camera, both to the OctoPrint page and Cura, but CPU usage is staying under like 10% max on one core, most of them staying like ~1-5%, memory usage 100M/365M pretty constantly
iron remnant
Cool, I guess that means you got an A+ on Pi sizing.
brittle hornet
https://giphy.com/gifs/lnjzpz4TXIJns28UJ2 Mark Theriault used 120 prints of a water sim to make this stop motion Benchie. 🚣♂️
 vestal thicket
on my Ender3v2, when I pre-heat it before it starts a job, some stringing comes out of the extruder before it starts. Does that mean I need to clean it?
and then it prints one line like it's supposed to, but as soon as it starts the skirt, the filament just strings and balls up. I thought it was a leveling issue, but I'm not sure (after leveling this thing about a dozen times)
I bought it used (and assembled) and my first print turned out pretty good yesterday. Then I installed a BLTouch and I cannot get this thing dialed in now
actually, I guess that would be the nozzle
brittle hornet
If you've already checked the bed level, I would give it a good cleaning with alcohol. Then you might want to try a coat [or 2] of glue stick on the bed. A lot of times I have a print fail, I clean up, new glue stick down, and everything's good! Get back on that horse 🏇 😁
vestal thicket
thanks
vestal thicket
it was the Z axis offset. Printing benchy now!
inner cedar
brittle hornet
https://giphy.com/gifs/lnjzpz4TXIJns28UJ2 Mark Theriault used 120 prints of a wa...
That person deserves, like, an entire truckload of cookies
Am I crazy for leveling by eye?
inner cedar
Another OctoPrint on Pi 3 A+ update: I did a timelapse, and it took like 8 minutes to do a timelapse of a 3.5 hour print, resulting file is 34 seconds long at 640x480. Not sure if it's memory or CPU that did it, but it had a warning that it wasn't recommended to start another print while it was rendering
I need to fix the angle, lol. Also, I'd love if it had the whole thing in frame, but it brings the bed all the way up front when finished -- anyone know if there's a way to get it to keep it at the center, finish the timelapse, and then bring it forward?
agile palm
brittle hornet
https://giphy.com/gifs/lnjzpz4TXIJns28UJ2 Mark Theriault used 120 prints of a wa...
This is literally the coolest thing I have seen.
empty sedge
you need to check your end of print and octoprint after-print gcode, but I don't know if there's a way to put only one of those after the timelapse
inner cedar
So I'll probably have to remove the line that brings it forward and do that manually
I'll grumble, but I can live with that, lol
empty sedge
try moving that line out of your slicer end gcode into the octoprint one
inner cedar
Ohh, I didn't realize OctoPrint had GCode start/end on top of what the slicer feeds it
inner cedar
Upgraded my printer

 young condor
i have a prusa i3 or whatever and i broke the ex truder then bought a new better one when it was available but then put the whole thing in a box and forgot about it for 3 years
xD
even if i fix the extruder it's possible there may be other problems with it now... like the rubber bands maybe they dried out or something
and i'm not sure i want to do the work to figure it all out or just buy a new better model. but without fixing it i couldn't really sell it.
because there's a good chance there's nothing wrong with it and you could install this new extruder and it's better than ever
or that you could do all that and it sitll won't work
and one of those is worth a lot and the other isn't worth as much
and i'd probably have to sell it closer to the lower price
so why not just keep it in case one day three more years from now i want to fix it
i think this is how hoarding starts
maybe i'll just throw it out and buy an even newer one later
the problem i had with 3d printing was things wouldn't always adhere. and all it takes is one error and you lose the whole design.
there was a lot of learning aroudn overhangs and stuff. and things got better with better sheets later that made it easier
but there are also a lot of other materials to figure out
it's pretty cool but far from practical for home application
but one day...after the great war...
inner cedar
The belts on a 3D printer are typically made from something other than natural rubber, so they don't decay quickly. If they haven't been like, baked in the sun for 3 years, they're probably fine, but you can always replace them. I doubt anything else on your printer would be greatly impacted by the time idle; just might need to lube your shafts and turnscrews and such. Generally the cost of getting a printer up and running again is way less than a new one
karmic brook
Agreed, you may need to adjust the tension on the belts, but they're probably fine.
vestal thicket
inner cedar
Ohh, I didn't realize OctoPrint had GCode start/end on top of what the slicer fe...
Just catching up on Discord from last and thanks for this tip - installed OctoPrint yesterday and didn't know this either!
inner cedar
I actually tried moving the "present print" code over -- it stays centered since I took it out of the end code in Cura, but does not present after the job completes
empty sedge
you might tneed to remove the m84 from your cura end gcode also?
inner cedar
Ahh, that might be it
 frozen wasp
I'm having issues with my bed adhesion and I'm not sure what to do about it
empty sedge
It's super late for me, but it'd help to have more info. what plastic on what print surface on what printer? is it only certain parts of you part or everywhere? have you tried brim or raft? have you tried cleaning the bed surface or something?
anyway, I'm sure someone else will chime in
frozen wasp
PLA on glass; it's between warping in just the corners, to about half of it curled up to it just detaching; used both brim and raft, and it just moved the problem to the brim/raft and basically made it impossible to remove; and I've cleaned it with both water and IPA (dried off for a while after the water)
weary lichen
frozen wasp
PLA on glass; it's between warping in just the corners, to about half of it curl...
Have you tried putting glue stick on the glass after cleaning? I was having similar issues on an unheated buildtak bed... And then glue stick was like magic
frozen wasp
I tried that, and it's actually why I needed to clean the print bed
inner cedar
Level? If glue isn't helping, your bed may be too low from the extruder
empty sedge
do you have a heated bed? Are you sure you're really printing PLA not something else? If you get it too hot PLA should smell sweet
I've used 8:1 diluted elmers glue on glass heated bed when printing PLA because if you get the nozzle too low PLA can stick well enough to pull chips out of the glass.
inner cedar
I use the purple disappearing Elmer's glue stick on my baby printer... And did take a chunk out of the glass once DX
Actually that was before the glue
I had my extruder too close to the surface and it was sticking too well
frozen wasp
inner cedar
Level? If glue isn't helping, your bed may be too low from the extruder
Checked leveling
inner cedar
Hmm...
frozen wasp
empty sedge
do you have a heated bed? Are you sure you're really printing PLA not something ...
No, yes, smells sweet sometimes, mostly when it fails and clumps up around the extruder
My printer doesn't have support for a heated bed
empty sedge
ouch. you might have better luck printing on blue tape than on bare glass then
frozen wasp
Like, painter's tape?
inner cedar
Baking cookies smell is how I've heard it described, just as long as it doesn't smell like burning cookies. But no heated bed is most likely the issue
inner cedar
frozen wasp
Like, painter's tape?
Yes
frozen wasp
Only issue with lack of heated bed is that it's not really a customisable unit, so even if I got a heated bed, I'd need to externally manually control it, and if I'm doing that, might as well make a new print bed assembly
inner cedar
Oof
brittle hornet
frozen wasp
Only issue with lack of heated bed is that it's not really a customisable unit, ...
A spare thought: Make a temporary printer enclosure with cardboard. If that seems to help look into making, building, or buying something more fireproof permanent. 😁
inner cedar
I have a "permanent" cardboard enclosure for my MP-10, lol. Used a 2D printer box, made a "door", added a light in the top, lined it with foil... Worked pretty well for ABS printing
Unrelated, I think my 0.8mm nozzle has grown to like 1.4mm
Weeee
frozen wasp
It's in a cupboard
results so far have been more warped than on my desk, or just complete failures
 low forum
inner cedar
I have a "permanent" cardboard enclosure for my MP-10, lol. Used a 2D printer bo...
low forum
inner cedar
I have a "permanent" cardboard enclosure for my MP-10, lol. Used a 2D printer bo...
that's a pretty ingenious and fun idea.
inner cedar
It was certainly convenient, lol. That was near the beginning of the plague -- I was printing face shield brackets from ABS, and I didn't have time to design and build an enclosure
low forum
I just moved so I have a ton of boxes too. hah
I guess the only bad thing is, it's a bit of a fire hazard
inner cedar
Lol. If I hadn't just gotten a big MFP, I would have had to have used a patchwork of boxes
Uhh... Where did that message go?
low forum
yeah, i don't know
inner cedar
Did you see that?
low forum
i saw the notification
inner cedar
Hmm
low forum
Sometimes discord eats messages and then regurgitates them later
inner cedar
Lol
... well that isn't right

Huh... Apparently it didn't feel like doing most of the model
 empty sedge
inner cedar
So I measured... 1.1mm hole XD
empty sedge
inner cedar
So I measured... 1.1mm hole XD
Are you printing fiber-filled or glow-in-the-dark filament with a brass nozzle?
inner cedar
Actually, I just realized the walls are 1mm, so it can't do a 1.2mm wall, lol
empty sedge
I don't think an enclosed chamber is going to make much of a difference for PLA
inner cedar
empty sedge
Are you printing fiber-filled or glow-in-the-dark filament with a brass nozzle?
No, just plain PLA, which is why I'm surprised the whole is so big!
It is a brass nozzle
Maybe I've had it on there longer and done more printing than I thought...
RIP keycaps, can't do it on this printer until I get a new nozzle
... but I CAN print "big" things really fast!
1.2mm layer height GO
inner cedar
Oh, yeah, that failed almost immediately, lol... Bad adhesion
frozen wasp
so I did something and the adhesion is working so far
inner cedar
Yay! What'd you do?
frozen wasp
Electrical tape!
I covered the print bed with electrical tape, and did nothing else and it's working without warping
Well, did nothing else new
It's still in the cupboard
inner cedar
The only potential issues I can think of are 1] having the bottom of the print stick to the tape too much and not being able to remove it, and/or B] having the tape gunk the crap out of your bed due to the heat
Although the heat won't be on it for long since you don't have a heated bed
inner cedar
You'll find out if my first potential issue is actually an issue when it finishes XD
frozen wasp
I mean, yes
inner cedar
Fingers crossed
frozen wasp
@inner cedar worked like a treat, came off super easy
inner cedar
Huzzah!
brittle hornet
I'm waiting for this print removal technique to fail on me horribly, it hasn't yet. When I have a print with a broad bottom that doesn't want to let go of the bed with gentle persuasion, I unclip the glass and take it out to the garage with the print stuck to it. I stand the plate sideways on a soft dropcloth, and strike the print gently near the base with a rubber mallet. One hit 🔨 and it always comes off quick and clean. 😁
iron remnant
I dono if that technique is necessarily all it's cracked up to be.
inner cedar
Just put it in the freezer
frozen wasp
It's weird, I get the easiest removals from the build plate that I've ever had, but I also have the best adhesion I've had
inner cedar
Adhesion is a weird thing
 spring seal
Any tips on SLA adhesion? Is that a problem with SLA printers? Seems like it would be, but also harder to resolve.
iron remnant
It's OK, I'd have punned if you hadn't.
low forum
Sticking (😂) with the bed adhesion discussion, it seems like no matter what I do, I've got a low spot in the bottom right corner of my bed on my ender 3 v2. I'm wondering if i should just not worry about that since I don't use that area too often?
low forum
the thing that's frustrating is that it was actually working better when I was manually leveling my bed. I've got a BL Touch and it seems to have made things worse
I just replaced the springs, and when I did that, I re-adjusted the Z offset, manually leveled the bed, and then ran the BL Touch. I'm wondering if there is an order of operations issue here
inner cedar
I found that I have spots where my Z axis sticks on my Ender 3 V2 when I went to print something tall >~> which is the problem I had with my Ender 3 Pro, but this is like, 8 spots, not just 1
unique pendant
You still need to tram, even with a BLTouch.
low forum
If I understand you correctly, I believe I did?
low forum
Tramming is bed leveling right?
empty sedge
yes
low forum
going to do some more research. But what I've done thus far, post BL Touch install and new spring install is use a piece of paper to level the bed at 4 spots (the spots above the springs) and the center. I just think I'm doing some stuff out of order with regards to setting the Z offset value that is necessary after installing the BL Touch.
Also, figured it'd be helpful to point out I'm using an alternate firmware.
agile gorge
Doesn't really matter, z offset is orthogonal to mesh creation
The mesh is relative to the probe position
And until you have everything well configured, you should g29 after g28 in your start gcode for a print
low forum
Ah, ok. G29 creates a new mesh, right?
agile gorge
Yes
low forum
I'll give that a shot tomorrow morning!
unique pendant
There’s terminology confusion. Tramming on an Ender 3 is always manual, using the thumb wheels under the bed. Some call that bed leveling, which can be confusing because “mesh bed leveling” is what you do when using a BLTouch, which is not manual. Some call that bed leveling.
inner cedar
Huh, I've never heard the word "tramming" before, was always referred to as bed leveling when you manipulate the wheel screws under the bed
Is it crazy that I do that by eye?
unique pendant
inner cedar
Is it crazy that I do that by eye?
Maybe not crazy, but less than optimal.
low forum
i use a piece of paper
and yeah, the G29 after G28 and I still end up with spaghetti instead of a first layer
unique pendant
low forum
and yeah, the G29 after G28 and I still end up with spaghetti instead of a first...
Sounds like your z-offset is too high.
low forum
i'll try adjusting
iron remnant
"Tramming" is the CNC term, if I understand correctly.
So, currently I'm getting actually consistent results on my Ender 3 v2 by aligning the frame using some clamps and 1-2-3 blocks, replacing the springs, tramming roughly using a feeler gauge, then using a BLTouch with the bed viewer plugin for octoprint to get it trammed more closely, and then G28 followed by a G29 before I print, where the z-offset was determined by printing a desiccant container with a grating on the bottom and printing the first layer over and over again until it would print correctly.
(Oh, also, I slowed down the first layer because, at least with PETG printed on blue 2090 tape, it wouldn't adhere well enough)
This being 3D printers and stuff, I'm quite certain that if anybody else tried to follow what I did they'd find it wholly unsuitable for getting a consistent first layer.
low forum
I think I found another issue.
I think I need to just start from the beginning and make sure everything is set up alright. I moved recently and I'm just getting things set back up, so, even thought i was careful in bringing things like my 3d printer over to the new place, I'm sure I jossled some stuff loose
unique pendant
Just got this link in my email. Might be helpful for first layer tuning. https://www.matterhackers.com/articles/3d-printing-essentials-first-layer?utm_source=MatterHackers+Newsletter&utm_campaign=960dc504a8-EMAIL_CAMPAIGN_2017_01_30_COPY_01&utm_medium=email&utm_term=0_dccd3cdce8-960dc504a8-127279465

MatterHackers
The first layer of your 3D print is the foundation of everything that comes after, which makes it such an important part of the 3D printing process.
low forum
nice!
inner cedar
I get perfect first layers!

... Having trouble with upper layers.

Anybody know of a decent, free 3D scanner app? Or software to do it with a Pi or something? Or, I have many webcams, maybe free software to scan from many cameras at once?
empty sedge
Meshroom?
inner cedar
I'll look into that, thanks
inner cedar
empty sedge
Meshroom?
Yeah, this is exactly what I was looking for, thanks!
inner cedar
low forum
hopefully not speaking too soon though 😉
Shhh, you'll jynx it!
low forum
it might be a small print, but it worked finally...
 inner cedar
Huzzah!
low forum
huzzah indeed
marble swallow
Should I take the gamble to print this without support inside?
 inner cedar
Is it flat on the top inside?

 inner cedar
I'd try printing it standing up, closed end down, if you want to avoid digging out supports. You might get droopy insides with it laying that way with no supports
marble swallow
Cura seems to disagree where the model needs brims 😅
 inner cedar
Lol, silly Cura
marble swallow
Rafts it is
inner cedar
Rafts good. I just had to switch to rafts for something that REFUSED to work with brims, despite the magical glass of this printer
marble swallow
Is it possible to increase the width of rafts?
I have great adhesion but my nozzle randomly drags throughout tall prints
inner cedar
Yes, you need to go into Preferences > Settings and check "Raft Extra Margin", that controls the raft size
marble swallow
inner cedar
Yes, you need to go into `Preferences > Settings` and check "Raft Extra Margin",...
I selected Brim distance and set it to 0 and it cut 2 hours off my print
inner cedar
marble swallow
I selected Brim distance and set it to 0 and it cut 2 hours off my print
Hmmmm... Brim shouldn't make a 2 hour difference for any print. Something strange there
marble swallow
When I set it from the raft to the fixed Brim
My initial layer speeds are slow to make sure I don't underextrude my base. I've fixed my E steps multiple times, it always checks out but I still get underextrusion randomly
inner cedar
Hmm... Which printer is that?
marble swallow
Ender 3 V2, all metal extruder upgrade
Side note, Cura is incredibly inaccurate at estimating time when I print horizontally, it's 100% accurate on standing up prints.
inner cedar
Very strange... I haven't modded my V2 at all yet. Only issue I've run into is Z hiccups over 90mm
marble swallow
My 3d print problems have multiplied, prints aren't sticking, I've done mesh leveling, cleaning the bed, etc. I've narrowed it down to a really weird phenomenon where I use a 0.8 nozzle but Cura is deciding to program the brim lines to be so close that the nozzle pushes away previous lines like it's using a 0.4 nozzle.
 inner cedar
Did you tell Cura it's a 0.8mm nozzle?
marble swallow
Yep, always has shown 0.8 with 0.8 width
inner cedar
In the extruder settings?
marble swallow
yes
marble swallow
 inner cedar
Hmm...
marble swallow
The previous picture, the bottom one is a successful brim, the top/right one is the smooshed one
inner cedar
And it only happens with 0.8mm? Super weird
marble swallow
Just printed fine yesterday, this is after a nozzle tip change just in case I had a clog I couldn't clean out. New tip, messed with layer height, still destroying the brim before I can even print
inner cedar
And you checked level and all after switching?
marble swallow
Checked level about 15 times today, using BLtouch, mesh leveled, adjusted leveling screws, adjusted again to be as close to 0 as possible.
Reinstalled Cura and it seems to be better. When in doubt, blame the slicer
inner cedar
Lol, Cura is kinda dumb tbf
unique pendant
marble swallow
Yep, always has shown 0.8 with 0.8 width
You mean 0.8 mm line width? That's too narrow for a 0.8 mm nozzle.
marble swallow
unique pendant
You mean 0.8 mm line width? That's too narrow for a 0.8 mm nozzle.
Wait, I thought the rule was the nozzle "size" is the intended width?
unique pendant
Ideal line width for 0.4 mm nozzle is 0.47 or 0.48. If the math applies, the ideal for 0.8 nozzle would be like 0.92. But you can go higher or lower. If you're at the same line width as the hole in your nozzle, you wouldn't be getting any squish, and probably not sticking very well I would guess. Honestly, I've never tried doing the same line width as nozzle size so I don't know for sure. I've always let the automatic width settings handle it on S3D except when we were all printing Covid shields.
marble swallow
Never knew that, I've never had a problem with a not-wide-enough line before, might try that to speed up prints then. 0.8 is default for 0.8 nozzle
Jk, I see that if I'm pushing line width higher, I'll need to drop my layer height
unique pendant
I’m no expert. Others here certainly know better for these kinds of details.
inner cedar
Oh... I always have line width == nozzle diameter
weary lichen
Largely speaking, so have I, but thinking about it, it does make sense that it'd be just a little wider
inner cedar
Hmmm....
marble swallow
I've been a dope and pressed the limits on height, so I'd do 0.8 width and 50% height (0.4). I started with 0.2 height and that took forever even on 0.8 nozzle, once I made the height higher, it sped up my prints by a lot without any sacrifice in quality.
inner cedar
I want a 1mm nozzle and a 0.025mm nozzle
 river cipher
Im having a hard time printing resin objects with supports 😦 I get great results when printing without supports. I cannot get an object to stick to the supports. Generating the supports in meshmixer, 1mm post diameter .5mm contact point. The print just finished and the supports printed beautifully but cursed kirby is just a lump at the bottom of the vat. Should I try increasing the contact area?
 empty sedge
probably. resin isn't really my thing so someone else will have to chime in
unique pendant
marble swallow
Never knew that, I've never had a problem with a not-wide-enough line before, mi...
Default line width for a 0.8 mm nozzle is 0.96 in S3D. I think Cura is for people who know more about what they’re doing. I’ve always just done what S3D suggests and everything comes out just fine. (Except a few clogs early on before upgrading hardware, but that’s not the slicer’s fault).
inner cedar
river cipher
Im having a hard time printing resin objects with supports 😦 I get great result...
obviously this is a sign that you shouldn't be doing this thing
marble swallow
unique pendant
Default line width for a 0.8 mm nozzle is 0.96 in S3D. I think Cura is for peopl...
Just looked S3D up, did you really pay 150 for that?!
inner cedar
That'd be a pretty nice Adafruit order.... 3/4 of the way to free shipping...
unique pendant
marble swallow
Just looked S3D up, did you really pay 150 for that?!
Yeah. I’ve had it for years. Even though it’s a dinosaur, it still gives me better results than Cura or Prusa Slicer have, and it’s so much easier to use, so for me, it has been worth it. I think if I would have stuck with either Cura or Prusa, I would think they’re easier to use. 😆
inner cedar
I've had S3D suggested to me, I just never could afford it and/or felt I needed to get it XD
But I do need to try the Prusa slicer...
unique pendant
I think if I was starting out today with 3D printing, I'd stick with Prusa Slicer. S3D still has some things over Prusa, but they're subtle, and S3D hasn't updated in years. Prusa seems on top of things and they're constantly listening to users and updating. At the time I bought it, S3D was the clear choice over all other slicers. I'm always mystified by Cura's organization, but I'm sure that's just something you get used to. Friends who know a lot more than me say Prusa is the way to go these days.
Some people still swear by ideamaker too, which I flirted with for a while. It has some cool features.
 unique pendant
I think the best thing about S3D is their support. They have engineers on staff that will personally help you solve problems (that's what you're really paying for). I've used them a few times, and they've been very helpful. Also, their troubleshooting web page is great, even if you don't use S3D. If you do, all the fixes use the S3D terminology so it's a little easier. https://www.simplify3d.com/support/print-quality-troubleshooting/
inner cedar
When you say "they haven't updated in years", do you mean like, no new features? Or literally no changes at all?
unique pendant
Literally no changes since like 2018.
inner cedar
Wowzers
unique pendant
They've announced that they're about to release a new version since about 2018 too. All the time. Finally, they've been pretty much silent on the issue since early 2020.
unique pendant
Word is that the owner did all the coding and he won't share it with his engineers to make improvements/updates, so he has to do all the coding himself. That's guaranteed suicide of the business right there.
inner cedar
Yuck
One-man coding operations BAD. There's a reason that successful software companies have TEAMS of people to work on any given thing
unique pendant
You need teams to succeed at anything. That's just being a grownup.
inner cedar
Anything at larger scale, yeah. One person can't do ALL the things.
[solo is fine for hobby and home projects XD]
unique pendant
Even then, nobody's on their own. Look at this Discord for instance. We're all helping each other succeed. 💕
inner cedar
Collaboration good!
Oh, yeah... if anyone is getting an Ender 3 V2, I'd suggest printing this and adding it first thing https://www.thingiverse.com/thing:2925230

24/05/2018: Updated to v2 which reduces filament by about 25% and print time by about 15%.
This will support the Z-motor and align it correctly to prevent the leadscrew from binding. You will no longer have to use paper/card or leave the motor loose to prevent the binding.
Check pics for installation.
Rotate the model in your slicer like I've s...
Even being careful I had Z axis issues after the first ~90mm, but I added that and got a perfect 200mm tall cone no problem
[Well, it got wobbly at the infinitesimally smol tippy-top, but no Z weirdness]
iron remnant
...I guess this makes you a supportive member of the community, then.
inner cedar
I try, lol
low forum
inner cedar
Oh, yeah... if anyone is getting an Ender 3 V2, I'd suggest printing this and ad...
Is this a thing that's happening on all Ender 3 V2s?
I still am having bed adhesion issues on mine. Now matter how well trammed my printer is, i get one good print, then it's completely out of whack after that. 😦
I'm having to adjust the z offset at the beginning of each print
inner cedar
low forum
Is this a thing that's happening on all Ender 3 V2s?
Not sure what the rate of occurance is, but it's a thing that has been happening on the V1 as well
inner cedar
low forum
I'm having to adjust the z offset at the beginning of each print
Hmmm... Is everything secured tightly? That sounds like things are moving
low forum
well, i just tightened the bearings up again, but they are back to being loose.
inner cedar
Have any threadlock to try?
low forum
I think I'm not explaining it correctly, and I cannot remember the name of the nut I'm tightening, but it's the "funny" one. the one that kind of acts like a cam
inner cedar
Hmmm... Pics?
 inner cedar
Oh, that spins freely on mine too, it shouldn't need tightening
low forum
ah ok
then maybe I have the other side too tight. I might walk through a set up video again and just make sure I didn't mess something up
inner cedar
Yeah, don't want to have anything too tight
 shy kelp
Any chance that Adafruit can release the CAD files for the individual parts for this product? https://github.com/adafruit/Adafruit_CAD_Parts/tree/main/5128 MacroPad RP2040 Kit

GitHub
CAD files for various boards, components and parts - Adafruit_CAD_Parts/5128 MacroPad RP2040 Kit at main · adafruit/Adafruit_CAD_Parts
low forum
well, TIL:
 inner cedar
Yup. It's possible your bed is too cold, but likely too hot
empty sedge
it's called an eccentric nut
low forum
empty sedge
it's called an eccentric nut
Thank you 😹
brittle hornet
empty sedge
it's called an eccentric nut
well! it's not the first time I've been called that!
low forum
Three things helped me with my bed adhesion issues in case anyone is interested/searches around and is curious...
- Slower first layer speed.
- Raising the hotend temp to 205
- Lowering the bed temp from 60 to 50.
I did end up using some glue stick on this last print just to be sure. But my first layer looked really good compared to what I was getting before. Very excited to have this figured out. Fulfilling to get it figured out and learn more about the process!
 lone trout
I'm interested in getting a case for my Magtag like https://learn.adafruit.com/magtag-3d-printed-stand-case. Does anyone have a suggestion for a 3d printing service I could use that is affordable and good to work with? I haven't been able to talk the wife into letting me get a 3d printer just yet....
agile gorge
@lone trout jawstec is the first place I check
 unique musk
Hello! I am trying to import Adafruit CAD parts into Autodesk Fusion 360. I've downloaded them via github but for some reason when importing them into Fusion. I always get "Unable to insert" errors when I try to do this. Can anyone point me to a guide to using these parts? Thank you.
inner cedar
Anybody know of a "hub" for OctoPrint servers? I'd like to be able to view multiple servers in one browser tab so I don't need 4 open DX
unique musk
unique musk
Hello! I am trying to import Adafruit CAD parts into Autodesk Fusion 360. I've d...
Problem solved - you need latest version of Fusion 360
inner cedar
Yay self solving! I can't find my answer XD Everybody wants to run multiple printers from one Pi, I just have multiple Pis I want to have in one tab, lol
iron remnant
A "simple" matter of a single-page React app?
inner cedar
Hmm.... I can look into that, haven't used React
iron remnant
So, like, two options would be to either make a frame with each OctoPrint as an <IFRAME> tag
or to write something that polls the OctoPrint API for you to construct a dashboard.
inner cedar
These options sound like what I want, probably the former to start and later for later
inner cedar
iron remnant
So, like, two options would be to either make a frame with each OctoPrint as an ...
Welp... Sadly, that didn't work. First it refused to connect or would say "couldn't find the file", thought it was because iFrames are supposed to use a FQDN, so I added HOSTS.TXT entries for my servers, same thing. Then I dug around and found out OctoPrint had disabled iFrames for security apparently, so you need to do ~/oprint/bin/octoprint config set --bool server.allowFraming true sudo service octoprint restart to re-enable... But then when you try logging in, it just blinks and goes back to the login
iron remnant
Ugh.
iron remnant
Some accusations were lobbed in my direction about this, but I can assure you, I was framed.
inner cedar
lmao
inner cedar
Oh, apparently there was a checkbox in Server settings, lol
Lemme just... try rebooting the thing, just in case...
Ahhh crap I had restarted it while something was printing
Thankfully it was a test that didn't matter
low forum
iron remnant
Some accusations were lobbed in my direction about this, but I can assure you, I...
very appreciative of the puns
 tight totem
What is the best settings to avoid this
I’m a beginner
Using C reality CR10 max
Any tips would help
 fair badge
@tight totem Thats an issue with build plate adhesion
You could try increasing the build plate temperature to help the plastic melt and stick to it
tight totem
I tried till 110 which is max and still same problem time to time
Is there anything else which I need to look into
low forum
seems like a z offset and bed leveling issue as well.
inner cedar
Is there a big gap between the extruder and plate?
inner cedar
Printing at 0.64mm layer height... This feels nuts
Is there a good reason I shouldn't be using my 0.8mm nozzle that has expanded to 1.2mm? XD
agile gorge
I need to try 0.6mm layer height with 1mm line width on a 0.8 nozzle
inner cedar
Well that was an ugly failure XD Pins were messed up and wouldn't go into the Pi [it was a Pi 3 case], ended up breaking, missing one of the tongues going between the USB ports, overhangs fell off... lol
Now I just print a crappy cover at 0.8mm, lol


 empty sedge
yep. going slow enough to get enough extrusion volume and simultaneously getting enough part cooling when printing with fat layers and a giant nozzle is a whole thing
elder oxide
Lol
 raven coral
i have a 3d printer running marlin firmware and i need to do pid autotuning for it, but i dont have the right cable to connect it to my laptop, could i just make a gcode file with the pid autotuning commands and then jut have it tuned like that?
empty sedge
I don't remember if the pid tune actually applies the values or not
also, if eeprom isn't enabled then that won't work
inner cedar
empty sedge
yep. going slow enough to get enough extrusion volume and simultaneously getting...
A thing I need practice with XD

 half dew
inner cedar
A thing I need practice with XD
half dew
inner cedar
A thing I need practice with XD
Whats your temperature at? Can it go higher?
I compromised with a .6 nozzle but I've since upgraded to an extruder/board that supports high temp printing so I might try a .8 for PLA again
empty sedge
In my experience bumping the nozzle temp doesn't make enough difference when you have a nozzle that large. You need to reduce the volumetric extrusion rate to something your printer can handle
brittle hornet
Here's my last print. I started modeling in NURBS curves and converted that to POLYS. With lot's of steps in between.
 iron remnant
I guess this makes you a 3D printing nurb.
unkempt lake
For those of you who happen to remember my violence and failure to unclog my first phaetus dragon hotend (finally used a hammer, block of wood, 1.5 mm rod and a vise -- do not do this -- and still didn't get the PLA fiilament out of the thing), I received my second one a couple of weeks ago.
All in all it has been great. I have learned how to set pressure advance and the rotation distance in Klipper and I had more than a few prints in PETG and PLA (sticking with these two for now).
But as luck would have it, I managed to clog it up again. Last night, I did an hour's print at 235C in PETG but the mass of it was very small (just three rj45 repair end clips). When I was done I reheated to 235 and removed the PETG to drop it in the bag and plastic box with the desiccant packs. When I got up this morning to try and put PLA in the hotend for a small print, I heated the hotend up to 235 and was unable to extrude the PLA.
Probing from the top, my thin 1.5 mm rod goes maybe 1 to 2 cm inside. I took the nozzle off and it seems okay -- there is some volume space at the top where it screws in. Looking at the heat block , the clog seems to start just above where the nozzle thread ends and the rest of the heat break / hot end top begins.
I am not certain, but maybe my heat sink / heat break fan is not up to the task, although it has worked before. it is just the stock 40x10 fan that came with the ender 3 v2. I have 3 other amazon 40x10 fans that are dual ball bearing that could be better, but I'm willing to spring for a 40x20 fan. maybe that would help.
unique pendant
The important value for hotend fans is static pressure. You want that high, but the higher it gets, the noisier the fan, so it's a compromise.
Also, 235 is pretty low for PETG. PLA can handle higher temps too -- actually required if you're going to use wider nozzles and faster printing. I like to use cleaning filament when going to PLA from PETG just to be safe, but it's not usually necessary. Doesn't take much. I got this in 2017 and still have a whole lot left. https://smile.amazon.com/gp/product/B00MVIYNFW

eSUN 3D Printer Cleaning Filament 1.75mm Natural 0.1kg for All 1.75mm FDM 3D Printers, 1.75mm Cleaning
Also, if the clog is in the heat break, but not in the nozzle, it's probably just mildly expanded filament. I've been able to push that out just using a drill bit a little smaller than 1.75mm diameter (blunt end against filament) and firmly but carefully pushing the hotend down over it (with the pointy end of the drill bit against a metal plate). This is with e3D V6 tho'. Not sure how Phaetus will respond.
unkempt lake
@unique pendant thanks a lot. I have a bench vise here and a few 1.5 mm steel rods. the first time this happened with the old dragon, i pushed out the PLA with a drill bit, whatever SAE bit it was. i know i had 2 of them and both are gone 🙂
i'm a bit scared of breaking one inside. maybe if i just expose a very short length, like 10 mm out the top of the vise, i can do it little by little
i saw a post on the Prusa forum that recommended heating the nozzle to the appropriate temperature, but leaving the heat sink fan off (not running). letting the heat break get warm for a few minutes, then pushing the filament out. i might try that first because i'm scared i'll break off that rod inside the hot end
unique pendant
unkempt lake
i saw a post on the Prusa forum that recommended heating the nozzle to the appro...
Honestly, I would definitely not do that. I did that once and it made it so much worse.
As long as your nozzle is off, and your 1.5mm rod is not sticking out too much, you can very gently use your bench vice (with wood protecting your Phaetus) pushing through in the direction filament normally goes.
It shouldn't require much pressure at all.
half dew
empty sedge
In my experience bumping the nozzle temp doesn't make enough difference when you...
Ahh, my printer can handle it - but nothing on my printer is stock anymore
inner cedar
half dew
Whats your temperature at? Can it go higher?
235C, not sure it can get much higher than that... Filament is only rated 205-225C as it is, lol. This thing isn't meant for this nozzle, and this nozzle isn't supposed to be that size XD I think the hole is also lopsided
half dew
inner cedar
235C, not sure it can get much higher than that... Filament is only rated 205-22...
Its tricky because the faster the filament moves through the nozzle the less time it has to heat up
inner cedar
Unrelated... weird render error -- one of these things got a platform in it for some reason when I multiplied. Cleared the weird one and multiplied the object again, didn't do that
 inner cedar
half dew
Its tricky because the faster the filament moves through the nozzle the less tim...
inner cedar
half dew
Its tricky because the faster the filament moves through the nozzle the less tim...
Yeah. I had it go at a snail's pace, I just don't think the poor thing can handle that volume no matter what, lol
Monoprice Select Mini V2... comes with a 0.4mm nozzle
I ordered new nozzles for it
empty sedge
I don’t understand how you wore down your nozzle so much. I forget what my hackerspace has done but we have never worn down a nozzle printing PLA or PETG
inner cedar
No idea XD I was printing plain PLA... and an identical nozzle on another printer doing more volume faster didn't have that happen
empty sedge
Glow powder can do that, or carbon or glass fibers
inner cedar
Yeah, I know mixed filaments like that can certainly do it fast for brass. I think it might have been defective...
arctic dragon
Might also be a low-quality generic nozzle?
unkempt lake
@unique pendant I will take your word for it. My question is, though -- how can i get the pt100 and the heater out of the block without making things too much worse?
The set screw for the heater unscrewed fairly easily this morning, but I think there is a tiny bit of black PLA coating at least one end. It is likewise for the pt100. I have not tried to unscrew its tiny grub set screw but I suspect it will likewise loosen.
a) I can set my hot air gun to 100 C (its lowest setting) and just point it at each small affected spot to see if that loosens it.
b) Alternatively, I could perhaps disconnect each separate cable from the mobo / raspberry pi and just drag the whole thing along with me...
a) seems better -- it will only be 100C and the clog has to be almost all PETG given the hour long PETG print I did last night.
maybe b) is safer?
inner cedar
arctic dragon
Might also be a low-quality generic nozzle?
Possibly... No idea what the brand was. I got a handful of 0.8mm from someone at the beginning of the plague so I could print face shield frames faster, no packaging
empty sedge
unkempt lake
<@449766464342458371> I will take your word for it. My question is, though -- h...
I’ve dunked heater blocks in a mug of microwaved water (without hotend in the mug) for softening the plastic
unkempt lake
ok that sounds like a good idea. the block is attached at this point and i'm fairly certain i'll break things if i try to remove it. maybe i could heat up the water in an old work coffee mug and lower the z axis a bit, make sure it doesn't go lower with wood blocks under the x axis rail or something and hold it there for a minute or two?
everything definitely powered off / unplugged at that point of course 😄
scratch that, umount it then dunk it myself. just a bit tired over here
inner cedar
Uhh, that sounds like a BAD idea -- you should never put metal in the microwave!
unkempt lake
just sitting here poking at a triple string of old PC 12v 40x20something fans on my desk:
could just heat the still-connected and mounted hotend/nozzle to a conservative 70c for a minute or two.
two 4010 fans are normally connected and at the moment are hanging loosely from their power cords, but cooling the heat block should not matter at that temperature...
after heating, then i could turn the thing off and attempt to loosen the pt100 and heater from the heat block
i know this is common sense here, just dont' want to have to order another hotend because i did something silly (again)
 inland orchid
Is this safe? I am working on a custom case for my Ender3 Pro. I have a bracket I am designing to hold a BTT E3mini v2. Anyway, is is safe to place screws ANYWHERE close to the board itself? I hope that makes sense. Right now I have a bracket screw not that far from the wires that go to the PSU. Is this safe? Below is a screenshot of the board and the bracket screw I am thinking of adding.
 inner cedar
So long as there aren't exposed wires touching screws and/or anything pinching the wire, I'd imagine it should be fine
inland orchid
K. I was thinking of moving the "bracket screw" further away, but was not sure if I was just being overly protective.
weary lichen
@inland orchid If the wires are moving continuously, that might be a problem. There's a handful of printers that the heated bed wire routing isn't great and they wear out. But for power supply wires? Things that stay still? You'll be just fine.
inland orchid
Thanks @weary lichen and @inner cedar . The case I am designing actually houses:
- Printer PSU
- Raspi Pi4
- 5v PSU for the Raspi Pi4
- BTT E3 mini v2
- Original navigation screen
- All wires
Most importantly. NO buck/boost converters. Just 24v fans and as much of the original case used as possible.
iron remnant
That's one way to buck/boost the trend.
inner cedar
lol
inner cedar
inland orchid
Thanks <@!85813260359565312> and <@!381566293368897537> . The case I am designin...
Do you have it so you plug in 1 power cable that splits off internally for the printer PSU and Pi, or two mains connections?
inland orchid
I am intentionally using two separate power plugs.
inner cedar
Gotcha. Personally I'd do single [maybe tiny power strip inside?] for convenience
agile gorge
unkempt lake
For those of you who happen to remember my violence and failure to unclog my fir...
This hot end does not clog regularly, do you turn off your printer while it is hot? This is a recipe for clogging
If this is what you did, you have melted filament stuck to the cold end of your heat break
And if so, you will need to melt it out, perhaps with the method you heard about earlier: heat up the hot end without cooling fans, then extrude, once it's out, turn the fans back on, and then set heat to 0, and wait for the hot end to cool down before turning the printer off
unkempt lake
agile gorge
This hot end does not clog regularly, do you turn off your printer while it is h...
I regularly let the machine cool and turn itself off, but in this case I did not. You are exactly right.
Thank you very much for letting me know. I seem to be making some very basic errors.
I have still not done anything to address this clog. I'll give it a shot here in a little while after I have a cup of coffee. actually two cups of coffee.
agile gorge
Do the fan trick, run the heater on for a few minutes without a fan and try to extrude through
Once you're able to extrude turn on the fan and keep extruding
That should hopefully clear it out
unkempt lake
so at this point, I have the hotend mounted just by itself -- with 4 screws from my printed PETG mount. the fans are dangling.
I have a petg fan duct that mounts to the main mount and I can just attach that with no fan. it has 4 holes for the 4010.
i could use maybe 4 twist ties and then clip it on so to speak i suppose once it extrudes? then turn the thing off and fix it properly
thanks a lot. first the coffee and then the basement
inner cedar
So I want to add some illumination to a few printers. I was thinking of adding a frame for NeoPixels around the extruder -- but what's the best way to power them? Just add a power/data wires in the sleeving for the extruder, or do I have another option? I'd also like to mount them along the X axis and Z axis, but not sure how to do those at all...
iron remnant
I am undecided between two possible evil plans for my printer's illumination. I was mostly figuring that I'd drive them off of the existing 24v power supply and I can't really decide if I want to use my cute little switching power supply board to drive a few discrete LEDs or if I want to use a 24v COB LED strip.
I was figuring frame mount tho.
There's a zillion strip mounts that plug into the 2020 extrusion slots.
inner cedar
Is that the aluminum a lot of printers use? Like the Ender series?
iron remnant
Yep! I need to blog about 2020 extrusion some.
inner cedar
Ah, cool. Where to mount would be my question....
iron remnant
You can get pre-cut pieces of 2020 extrusion from Misumi USA with holes drilled and tapped and stuff and it's not even absurdly priced.
A strip on the bar on the top seems like a good spot.
Especially now that I set up a drybox for my filament so there's no longer any filament spool.
inner cedar
I guess I could have it stick from the front of the top bar and point down... I'd like to light up the nozzle area too -- currently with overhead lights, it's impossible to see with the camera
iron remnant
One trick would be to split the hot-end fan wiring and run 24v off of that.
I designed these cute little boards with a AL8861 on them but you can't get that chip right now. 🙂
inner cedar
The one thing with using the fan power -- isn't that switched from the controller? I don't want the lights to go off with the fan
iron remnant
So there's two fans. The hot-end fan is always running, the part-cooling fan is not.
inner cedar
Ohhh, I only saw the one on the Ender 3 V2...
I know my Monoprice Select Mini V2 only has one
iron remnant
Yeah! So, if you look at the front of the Ender 3 V2, there's a axial fan sucking air in and blowing it on the hot-end from the front.
Then on the side, there's a radial fan sucking air in and blowing it down at the part.
inner cedar
Hard to see with the shroud XD
iron remnant
I.... I took my hot end apart as soon as I got it just because I wanted to understand what was there.
I have yet to mod it tho.
I want to mod it.
inner cedar
... I just realized I had taken the shroud off because I wanted to remove the Bowden tube, lol. I just forgot. But I see it now
iron remnant
I have a quiet 24v 4020 replacement fan that I've not gotten around to printing a mount for and installing.
inner cedar
I can't even hear the fans on mine XD
iron remnant
I have a hard time balancing my love of really high CRI lighting against my love of colored lighting, so I completely understand the desire to put some NeoPixels in there.
inner cedar
I just need less darkness for the camera :P
iron remnant
Well, you can run some 5v neopixels off of a Pi with Octoprint.
There's even integrations.
inner cedar
Getting the power/signal there is the hard part XD
inner cedar
iron remnant
There's even integrations.
Ohh, I didn't know that!
iron remnant
Yeah, no better way to know which one out of the farm has decided to give you the raspberry and jam than some NeoPixels driven by Octoprint.
inner cedar
lol
iron remnant
So, the way I've got my BLTouch run is that I just used some little cable ties.
inner cedar
Oh, speaking of "farm" -- do you know a good way to manage/view multiple OctoPrint printers at once? Instead of different windows/tabs?
inner cedar
iron remnant
So, the way I've got my BLTouch run is that I just used some little cable ties.
Does that come with the wire? All I have is like, telephone cable and CAT5/6/7
iron remnant
So, I got an official Creatily-branded BLTouch so it came with the right wire.
So, the general standard way to wire a string of NeoPixels is to get a JST connector and some wire there, and you can usually find the cables pre-crimped on Amazon.
I like the pigtails that SparkFun sells because they use 18 ga wire.
iron remnant
Doesn't need to be braided. Braided will cause inductive stuff.
Probably not enough inductive stuff to matter necessarily.
inner cedar
I wouldn't imagine for something like that having an issue with inductive interference
inner cedar
Yeah, I know XD
iron remnant
Yah, I had the suggestion earlier about putting the OctoPrint instances in an IFRAME.
inner cedar
Ahh... Yeah, that's broken, lol
iron remnant
This feels like something somebody would have already done.
inner cedar
[I have bad memory]
inner cedar
iron remnant
This feels like something somebody would have already done.
If they did, I can't find it... My searches always give me discussion of multiple OctoPrint instances on one Pi
iron remnant
The Spaghetti Detective will kinda do that.
inner cedar
Spaghetti Detective? XD
iron remnant
One of the better named pieces of software.
Third after "Comcast" and "Bees With Machine Guns"
inner cedar
I'mma have to disagree with that first one
iron remnant
iron remnant
YEAH! It was BOTHERING ME.
It felt WAY TOO OBVIOUS that somebody hadn't thought of it.
iron remnant
Gnight!
raven coral
is there a way to create a gcode file with cura that will not have my printer extrude plastic, but still have it follow the print path
i need to test something with my printer
arctic dragon
raven coral
is there a way to create a gcode file with cura that will not have my printer ex...
I believe you can go to Extensions > Post Processing > Modify G-code, select the Search and Replace script, and replace all G1 with G0. This should stop all extrusions while maintaining the same motions.
arctic dragon
Ah, that's wrong, some printers treat G0 and G1 the same
You'll have to setup your gcode to remove all instances of E**
raven coral
Well my printer is running marlin 2.0.x
arctic dragon
Well, the easiest way is to just remove all the filament, then stick something into your filament sensor to keep it engaged (if applicable)
raven coral
well that could work but im trying to troubleshoot why does my hotend temperature drop on the first few layers
i've even made a small little fancy bracket for the thermistor to be sure that it wont wobble and give wrong reading
empty sedge
probably because the part cooling fan when next to the glass is cooling the nozzle more
raven coral
empty sedge
probably because the part cooling fan when next to the glass is cooling the nozz...
that might actually
huh
but the first layer seems to go well
without it rapidly dropping temperature
empty sedge
the fan is off the first layer for PLA
raven coral
im using petg
empty sedge
why is your part cooling fan on for petg?
inner cedar
Does first layer have a different temp than other layers?
raven coral
thats what cura did, i didnt really configure that
granted, the fan has no proper enclosure so it doesnt work that well as a part cooling fan
but my god if that was literally the problem all the time
inner cedar
Cura does have different settings for the initial temp [first layer] and overal temp
 empty sedge
huh, looks like I'm wrong. the prusa profiles also use part cooling on petg
raven coral
inner cedar
Cura does have different settings for the initial temp [first layer] and overal ...
well i dont have those settings enabled, so im using the default ones it gives me
empty sedge
anyway, the "no fan on first layer" thing should still be true with cura for petg
I haven't used used the recent cura to say where that setting is though
raven coral
 inner cedar
By default it does have initial vs. regular print settings
empty sedge
raven coral
yeah that looks like it gets up to full fan speed at 0.9mm or layer 3 with those settings
empty sedge
yeah, that will turn the part cooling fan off
broken orbit
raven coral
Wish me luck, I really hope it'll manage to finish the print this time
Good Luck
LOL
broken orbit
 but yay
low forum
When one models holes for M3 (or other sized) screws to be self tapped (I don't have any threaded inserts handy ATM), do you under size them a tad bit? I just set the diameter to be about .1 smaller than an M3 screw.
karmic brook
I undersize them slightly and make them slightly non-round, and add an extension on the layer axis so the screw won't wedge the layers apart
low forum
I wouldn't have thought of that last bit, and making them slightly non round. That's good advice
inner cedar
karmic brook
I undersize them slightly and make them slightly non-round, and add an extension...
Por que?
karmic brook
The undersizing is to give the screw threads something to grip. The slightly non round is to avoid too much force/pressure building up, by giving the displaced plastic some voids to flow into. #help-with-3dprinting message
raven coral
Quick question, if i add bltouch and enable it in marlin source code and then upload it to my printer, will it automatically figure out the bed leveling for all prints and also add the small offset so there's a slight gap between the nozzle and the bed?
empty sedge
no
raven coral
oh
empty sedge
you'll also need to set the z offset so the first layer is the right height off the probed position
and also probably change your start gcode to include bed probing
inner cedar
So... It... Forgot some bits of the first layer?!?!
 solemn parrot
Hmm
Maybe the nozzle is a bit too close to the bed? That has happened to me a lot in the past
inner cedar
No, there's no extrusion at all in those spots... Didn't happen on the previous print or the one I just started
It's like it just didn't extrude
Thankfully that's the bottom of a drawer, and isn't a structural issue, so I didn't waste 6 hours XD
solemn parrot
I know that happens to me sometimes if the nozzle is too close, but that also could be because my printer is really cheap and the bed probably isn't consistently flat at all lol
 clever skiff
inner cedar
So... It... Forgot some bits of the first layer?!?!
clever skiff
inner cedar
So... It... Forgot some bits of the first layer?!?!
I am assuming this was an unattended print and you didn't see when it laid down the first couple layers? It could be that the nozzle accidentally pushed those lines around so you didn't get anything on layer 1? Possibly nozzle too close to the bed?
inner cedar
clever skiff
I am assuming this was an unattended print and you didn't see when it laid down ...
It was unattended, but no, it didn't push anything out of the way; there weren't any strings that would have been those spots -- they would have gotten caught up in the later layers, since the outside of the shape was laid first. There's just a lack of material. And the nozzle didn't get too close, it just seems to have not extruded at all there
raven coral
if my retraction distance is too high, will it cause stringing aswell?
unique pendant
Too much retraction isn't likely to promote stringing, but can cause a clog by getting melted filament up into the heat break. Stringing is more complicated than retraction alone. Here's a good guide on it https://www.simplify3d.com/support/print-quality-troubleshooting/stringing-or-oozing/
Other things that cause stringing include: filament too wet, steel nozzle, TPU filament.
Here's my favorite retraction test model: https://www.thingiverse.com/thing:1642140

Just a test object to try and balance retraction settings. The round base shows Z-Scar (zits, blobs, etc). The small towers show stringing and underextrusion due to rapid retracts. You can measure the small towers with a set of calipers to test under extrusion. They should not get thinner as they get taller.
Should look like this if tuned properly:

 last panther
!
raven coral
unique pendant
Too much retraction isn't likely to promote stringing, but can cause a clog by g...
can lower temperature also cause stringing?
im printing with petg and i have retraction distance set to 6.5mm with speedd at 25mm/s and i still saw stringing with it
and im printing at 220C
unique pendant
Settings really depend on your printer. Direct drive? Bowden? 220 is pretty low for PETG. I generally print PETG around 240-260 depending on brand, printing speed, and nozzle size. If you're getting stringing at 220 with a brass nozzle, your filament is probably wet. Do you have a filament dryer?
raven coral
sadly, i dont have a filament dryer
the printer seems to be built upon the foundation of an anet a8, but it is more homemade than storebought
to print at a higher temperature i'll need to get a sleeve for the heating block because once i attached the fan to not let the heat creep from the hotend, it wont reach temperatures above ~233C
it probably could reach if i were to reflash the firmware and increase the time needed for it to reach target temperatures, but that would cause safety concerns for me
and its a direct drive
the label on the filament ssays somewhere around 225-245 temperature
but as said above, it really has to try hard to reach higher temperatures than 230
trying to do an auto PID calibration gives me an E1 heating error
presumably because it's taking too long to heat up to temperature
karmic brook
You could always make your own filament dryer
raven coral
food dehydrator
anyways if the filament contains moisture, would it cause some spots in the print to get printed unevenly
not sure how to call it
inner cedar
Filament can be more saturated in some spots then others, so your might get inconsistent results
raven coral
hmm this might be the situation i have here
i still need to later on try to level my bed again because sometimes when i tighten the spring screws, the Y axis motor starts to struggle
presumably because the bed base gets bent a tiny bit, making it not be able to smoothly follow the guide rails
 stuck trail
https://www.amazon.com/gp/product/B07TMX9WFW/ref=ppx_yo_dt_b_asin_title_o03_s02?ie=UTF8&th=1 if anyone has time, I just need help with verifying information about updating the firmware on my ender 3 pro.... the link I posted is a link to the upgraded board I bought, I know I need to update the firmware to have it work with my BL touch but I do not know what firmware file to use because I am not using the OEM board but the upgraded one.... I found this https://www.th3dstudio.com/hc/downloads/unified-2-firmware/information/what-is-the-unified-2-firmware-faq-and-features/ but the commit logs on github don't really make it any more clear. I don't expect anyone to figure this out for me, but if someone works with printers enough and happens to know something please let me know I would appreciate it a lot.

Creality Ender 3 Pro Upgraded Silent Board Motherboard V4.2.7 with TMC2225 Driver Marlin 2.0.1 for Ender 3/ Ender 3 V2/ Ender 3 Pro/Ender 5 (Customized and Non-Standard Matching)
Filter by categories Clear Results Customer Service Downloads Guides Product Information Product Information EZABL Pro Advanced Setup EZABL Duet Board Setup Information EZABL Firmware Setup for “Vanilla” Marlin EZABL Pro Fusion 360 Models - 12mm & 18mm Heater Recovery After G29 with the EZABL Storing Bed Leveling Mesh & Updating Your Slicer Usin...
I think this is the correct one? https://www.th3dstudio.com/hc/downloads/unified-2-firmware/creality/creality-ender-3-3-pro-ender-5-5-pro-firmware-v4-2-x-board/
stuck trail
figured it out in the end...... I am cursed I swear..... I hate how scummy amazon electronics pages are. It literally states it has the bootloader and all the tutorials assume the printers do
 karmic brook
I stopped doing business with them years ago and haven't missed them at all.
stuck trail
karmic brook
I stopped doing business with them years ago and haven't missed them at all.
you sold me on that months ago after I had issues with clearly not even possible to work knock off ttgo esp camera boards.... I bought this in 2020 and finally went to swap the board as i have time to deal with this BS
this has been a really wild ride tbh
karmic brook
Ouch.
stuck trail
I essentially am taking a stab in the dark atm attempting to re create the bootloader it should have using the instructions for the older boards but with the newer boards firmware attached
amazon comments leading me in directions

if this doesn't work I have already tried every option that should
even tried out about 20 sd cards of different sizes and with different format/particians and also firmware file names etc.
karmic brook
I'm impressed with your persistence and hope you prevail
stuck trail
karmic brook
I'm impressed with your persistence and hope you prevail
thanks, if you or anyone else has a recomendation for a better board for a ender 3 pro v1 with BL touch installed please let me know. I have also changed out the heater and improved it a bit in general.... but honestly.... I am kind of so let down on this one that I don't see myself trusting it. I want to use my printer with a octopi setup as well if that changes anything....
stuck trail
https://www.reddit.com/r/Ender3Pro/comments/pjao0x/ender_3_pro_v1_v427_silent_upgrade_seems_amazon/ posted on a 3d printing subreddit, and a bot replied stating it auto detected a link to a fake review/product 😄
reddit
3 votes and 1 comment so far on Reddit
 mossy solar
i spend more hours trying to get my printer to calibrate and print something than i the printer actually prints
half dew
mossy solar
i spend more hours trying to get my printer to calibrate and print something tha...
What printer did you purchase? Unfortunately this is sort of the state of the less expensive 3d printer market (< $500). We're still in a land where if you want something that prints out of the box and is a tool rather than a hobby/project Prusa mk3 or other industrial printers are the way to go.
mossy solar
half dew
What printer did you purchase? Unfortunately this is sort of the state of the l...
artilliery genius
i used to have an anet a6, worst decision ever, bought an anet a6
hoping to buy a prusa i3 latest version or something bigger and nice from micro center, something with ABL and maybe an enclosed printer
 strange ledge
I've got a couple of Sanguinololu boards that I really should try using..
river cipher
I kept having thermal runaway on my bed a few minutes into each print. I wanted to replace the bed anyway, so I upgraded to a mk52 heater 24V (and of course changed the rest of my electronics to 24 as well). But now when I go to heat up, it rises a few degrees, and then my graphic LCD beeps continuously, but not displaying any error message. Any ideas? Marlin on SKR v1.4
Nevermind. Turns out it was my UPS being overloaded and beeping at me. I hate peizo buzzers 🤦♂️
half dew
mossy solar
hoping to buy a prusa i3 latest version or something bigger and nice from micro ...
ABL definitely helps - I added a bltouch to my ender 5 and it improved things a lot. The biggest improvement was putting on a much nicer extruder and hotend though.
Also... ditching the glass bed. magnetic pei sheets work a lot better - the glass was only better for PLA for me and nothing else stuck to it unless I used glue/tape
stuck trail
mossy solar
i spend more hours trying to get my printer to calibrate and print something tha...
believe me I get it. I spent a few days and it turned out I was pranked by the amazon vender who sold me the part I was using..... I just opted to buy a new board for 75$ and will take the losss
honestly, I have the ender 3 pro atm, I have had a few prior and I love it. my current issue was not the fault of the printer, its the fault of the system board I was upgrading to. the ender series are so easy to modify and build and are reasonably priced and have a solid community following
it is super modular so if I want more later its not something I can't look into
even if I want a entirely new printer thats a lot bigger, I could take all the performance parts off it
 gleaming veldt
Just checking in to see if someone designed any case for the new co2 sensor - SCD40 ?
stuck trail
https://www.youtube.com/watch?v=8u4izLA-SCo anyone ever try something like this out? I have seen a lot of attempts at this but these seems the best so far....
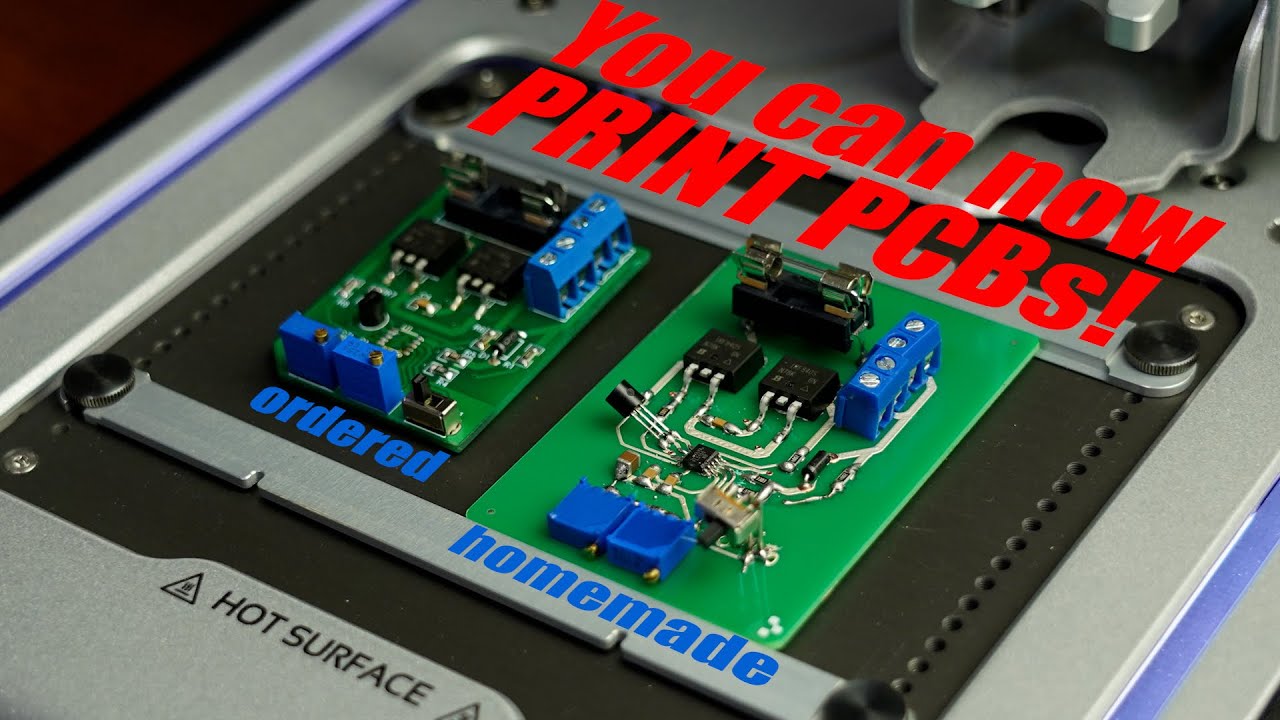
Voltera V-One PCB Printer on Elektor.com: http://bit.ly/Voltera-more-information
Elektor Member Offer: (60% Discount on Digital Membership): http://bit.ly/Elektor-offer-for-GreatScott-Followers
Code = GreatScott60
Previous video: https://youtu.be/s6SAjQYhssk
From Idea to Schematic to PCB - How to do it easily!: https://youtu.be/35YuILUlfGs
Home...

 unique pendant
I have not seen that combination before, but every time I see something weird, I dry my filament and that fixes it. I get little bumps like that sometime if I don’t clean my bed thoroughly and there are little spots that aren’t sticking well.
Just a suggestion, with a large flat piece like that, you probably don’t need the brim.
(unrelated to your problem I’m sure)
empty sedge
Burnt bits like that are common when you’ve got long strings.
I’m guessing it’s the typical ender clog issue.
empty sedge
shy kelp
What’s the issue with stringyness and Burnt bits?

Chuck shows you a simple hotend fix for your Creality Ender 3, CR-10 or just about any Creality Printer. He uses a technique created by Luke Hatfield to create a higher temp insert for the Hotend. But Chuck adds his own twist to the design to give you a higher temperature solution. He explains all the reasons behind the design so you will fully ...
inner cedar
I suddenly started getting fuzzies... Fresh dry filament
I think it's weather related
elder oxide
Attempting to print a tombstone I designed to fit these two boards. Fingers crossed 🤞


front to hold LED acrylic
 elder oxide


Not bad
big for the LEDs to poke though is slightly too small, the opening for the LED board is too narrow long wise, and the spot for the BREAD 2040 was too short length wise.
inner cedar
Design hard
elder oxide
indeed. i'm not a professional 3d cadder
inner cedar
I've made 3 revisions of my watch casing so far and they all are wrong for different reasons XD
elder oxide
inner cedar
Thankfully I did a smart and printed in PLA instead of wasting my TPU
inner cedar
The TPU isn't insanely expensive... But it is more expensive, so I save it. Plus it's really really slow
elder oxide
yeah
i bet
a buddy of mine set his printers to print with Acrylic
lol
now that's a hard material to print with
inner cedar
Acrylic?!?!
elder oxide
i might be confusing materials but i'm pretty sure
yes, acrylic is right
it's called PMMA
inner cedar
APPARENTLY YOU CAN DO TRANSPARENT https://www.stratasys.com/explore/blog/can-you-3d-print-plastic

Stratasys
Multi-material 3D printing technology makes creating custom translucent and transparent parts easier than ever. Read on to find out more about transparent materials, how 3D printing them works, and possible applications.
ACTUALLY CLEAR WHAT