#help-with-3dprinting
1 messages · Page 40 of 1
 pale dove
pale dove
pale dove
What you might want to do is make the boot out of pla with some insets in the bottom for tpu or rubber squares, so from the outside you don't see them, but you still have traction
Then you can have spares with double sided tape or something for when the squares inevitably fall off
Just gotta make sure the pads sit past the pla when compressed under body weight
 inner cedar
I'll have to play with it. The point of doing a bottom of the boot [vs. the original plan of just having a shell that comes to the floor over regular sneakers] is so I can hold my foot up and show up a thruster on the sole; if I can't figure out how to do it in a way I can walk and not have it fall apart, I'm not really gonna spend too much time on it
pale dove
True true
inner cedar
I have a lot of modeling to do XD
Especially around thermal control and electronics...
pale dove
Lol I bet, no fun to cook in costume. My friends who used worbla constantly complained about how hot it was.
inner cedar
I also need to test the cooling system... it involves Ln2
inner cedar
I'm gonna be the coolest Iron Man ever
pale dove
XD
inner cedar
But yeah, really need to test... I designed a heat exchange core that should allow me very precise control over temperatures, and then basically it's just tubes and pumps to move coolant around
 solemn parrot
What are you building the heat exchanger from? Or is it an OTS part?
inner cedar
Copper and aluminum for the thermally conductive parts, plastic insulators, stainless steel for gearing (used to change how much conductive material is exposed to the Ln2 chamber)
solemn parrot
So is there a gearset moving the conductive material in and out of the chamber? That sounds like a unique approach to controlling the heat transfer
inner cedar
Yeah. The Ln2 chamber is surrounded by insulation that wraps around it and seals it. Gearing pushes the conductive fins between the layers and into contact with the chamber -- more fins and surface area, more contact. And then outside of that is just insulated tubing and pumps to move chilled coolant
I've also played with a layered design, where there's an inner and outer core, inner core is super cold and outer core is less cold, but I think more insulation will be fine to keep the "cold from leaking"
solemn parrot
Interesting
I wonder if just varying pump speeds for the coolant would give you enough control over the heat transfer though
I can see the gearing solution being better for getting a burst of a lot of cooling but of course it's more moving parts to potentially be a problem
Although that depends on if you can control the speed of the pumps, since I know some pumps are really only on or off
inner cedar
Pump speed control too. Multiple loops for better control, so I'm not sweating in one place and cold in another
I have no idea how effective it'll be XD
solemn parrot
I may just be prematurely optimizing too 🙂
inner cedar
Never too early to optimize, is it? Lol
solemn parrot
How long are you expecting it to keep you cool? I assume you top off the LN2 each time you use it and then it gradually boils off
inner cedar
Hoping at least a few hours... But yeah, I figure I'll need a supply and have to top it off. I figure it's the best way to get the most cold by volume/weight -- electric cooling would require heavy batteries and/or short runtimes
solemn parrot
Yeah that makes sense from an energy standpoint. Seems to me that one of the challenges would be making sure the coolant doesn't get too cold, which I can see the gearing solution being handy for tuning if you aren't doing a ton of heat transfer calculations
I also just found out that ethylene glycol (antifreeze) makes I guess what you would call a eutectic solution with water. I knew it stopped freezing of course but I didn't realize there's a dip in freezing point down to about -50 C at a specific concentration of antifreeze
inner cedar
Yeah, no complex heat transfer calculations here XD essentially just thermal probes to get temps for the fins to decide if they're too warm, and push them in, or too cold, and pull them out. Might need the second layer core if temps fluctuate too much on insertion, but I don't think it'll be a problem. And ethylene glycol is what I planned to use so I don't have to worry so much about freezing
solemn parrot
Almost sounds like removing and inserting control rods in a nuclear reactor lol. Will you have to get more specialized thermal probes/thermistors because of the low temperatures?
 karmic brook
I don't know if that's the most cold by volume, ice might beat it, but it might have an edge by weight. However, I think LN2 would freeze water/glycol.
inner cedar
Ohhh yeah, -196C, plenty cold enough to freeze both with ease in direct contact. And yes, it's kinda like a nuclear reactor setup, except it's the exact opposite XD I plan on having the temp probes be outside of the hyper-cold area, but there are ones that can handle Ln2 temps easily
karmic brook
Yeah, you don't need SQUIDs or anything exotic like that for something that warm.
inner cedar
warm :P
Speaking of which... I think my design can work for heating, too, altho I haven't run into situations where I need more than a second layer of pants and my Duster
solemn parrot
karmic brook
I don't know if that's the most cold by volume, ice might beat it, but it might ...
I would have to find the numbers, but speaking intuitively N2 might have an advantage in that it's boiling the nitrogen as opposed to just melting water.
Latent heat of vaporization of fluids - alcohol, ether, nitrogen, water and more
Alright so for nitrogen the latent heat of vaporization is 199 kJ/kg and the latent heat of fusion for water is 333.5 kJ/kg
So by mass water is better
inner cedar
So ice "has more cold"? One of the reasons I wanted to use LN2 was that I don't have to worry about leaks the way I do with water/ice -- and it'll get lighter over time as it boils away
solemn parrot
Actually I think I still need to do more math. So, latent heat of vaporization/fusion is the amount of energy it takes for a substance to change phases, either liquid->gas or solid->liquid for the latter. One thing to note with those numbers is that while you put in the energy to make the phase change, the temperature of the substance doesn't change

So ice at its melting point has more cold than nitrogen at its boiling point
inner cedar
I haven't done that sort of stuff in a while XD
solemn parrot
However, the nitrogen after it boils would still be very cold and would still take in more energy as you heat up the gas
inner cedar
So to optimize it I want to keep gas from escaping until it reaches near ambient...
solemn parrot
That would be optimal yes. I suppose an advantage with using ice is that it's probably easier to transfer heat into the cold water vs cold gas
inner cedar
And I don't need to worry about expansion and pressurization with water
I guess I really should test both
solemn parrot
Yeah, the expansion with the nitrogen could be a bit of a safety issue if pressure starts building up imo
Maybe you could just route the gas vent line through a large heat exchanger so pressure doesn't build up
inner cedar
Ohhh yeah, it can be really dangerous. But I have pressure relief valves in the design, I just hadn't thought about holding the gas to absorb more heat before venting
karmic brook
I would advise you to always allow gas to escape if any pressure builds up, otherwise it rapidly becomes very dangerous.
solemn parrot
Just a really long tube to make sure that the gas gets closer to ambient temperature
karmic brook
Jinx
inner cedar
Yeah, I can easily do that, coil wrapping around the LN2 chamber a few times before it goes out
karmic brook
I'm envisioning a string of heat exchangers in series, but that may not be necessary in the end analysis.
inner cedar
I do have a design version with 2 layers -- inner core with LN2, then an outer core that has isn't kept as cold, then the heat actually gets exchanged from the outside there
I was thinking of using rings that have a composition that goes from high to low thermal conductivity, and can rotate to reduce or increase thermal conductivity between the inner and outer cores, but... that's complicated manufacturing XD
solemn parrot
Yeah that might be more of a Mk. 2 version lol
inner cedar
Or Mk. 3, lol
solemn parrot

Hopefully this is legible if you open the original or zoom in, but assuming my math is right (and anybody feel free to correct me) water actually still has a slight advantage in how much energy it will absorb
Even though the nitrogen is colder initially. I think it might be difficult to get the nitrogen fully to ambient temperature, which would reduce the amount of energy actually absorbed by the system.
inner cedar
Ahhh.... so... I might be better served by super-cooled water ice?
solemn parrot
I think you might be. As cool (no pun intended) as it would be to use liquid nitrogen i think practically water ice is the way to go
inner cedar
Actually assuming your math is right, yes XD
solemn parrot
That too
inner cedar
Well, thankfully, my design still works for water ice! Just can skip the safety valves and LN2/Nitrogen gas safety features
Not sure how cold I can ice to be...
solemn parrot
Yeah, that would be something to look into. I assumed a starting ice temperature of -18 C which is what the US FDA recommends home freezers be set at
If you can find a way to chill the ice more then you would get even better performance. If you have access to LN2 then maybe you could cool the ice with that but not carry the LN2 with you
inner cedar
Ehh, they seem close enough that I'd probably just use the LN2 if I had the LN2 handy... only a 10% difference, but you'd probably also "lose cold' during transfers
Actually I'll need to figure out what my access to ice is where I plan to use this... I might only have a fridge... but cold water will work, even if it won't work as long
solemn parrot
Ah ok, I forgot that there might not be access to a freezer for this. I was thinking water would be better from an ease of handling perspective but without a freezer that does change things
inner cedar
Yeah, I was gonna get a big canister of LN2 ahead of time. But I can also have a chest freezer full of ice'
I'll be in a hotel, so there might be a fridge at least...
But that's way closer to ambient
solemn parrot
If you only have a fridge then LN2 is the way to go. A lot of the energy that the ice would be able to absorb comes from the phase change. Hotels in my experience do often have ice machines though...
inner cedar
True true, ice machines do exist... and I would probably only be taking like a bucket worth at a time every 3-5 hours maybe, if I had to guess?
Also, I just tried wiping off my screen several times because I didn't realize a mark was actually from your hand-written notes page XD
solemn parrot
Oh sorry lol
inner cedar
It's cool, lol
solemn parrot
Alright so quick math I just did, the average person dissipates about 100W of heat continuously. Based on that, to cool a person for 5 hours, it would require 3.8 kg of ice or 4.2 kg of LN2
That's also assuming 100% efficient heat transfer from the person to the coolant loops and then from there into the ice or LN2 ofc
inner cedar
Hmm... any idea how much a hotel ice bucket weighs? Just the ice
Wait, what's the volume difference between ice and LN2?
I guess the volume of gas for when the LN2 boils off also makes a difference...
solemn parrot
Ice is 0.91 g/cm^3 while LN2 is 0.80 g/cm^3 so ice would have 13% lower volume
But like you mentioned you would also be boiling off LN2
inner cedar
Ohhh, so it's ~10% better thermal absorption per kg AND lower volume... Yeah, ice sounds better and better XD
Boring, but more efficient :P
I'm very glad you were around, this simplifies my life! plus ice is free from the hotel XD
solemn parrot
Yeah, no problem. I would say the deciding factor between ice and LN2 would be whether you have access to ice in the first place.
But glad I could help reason things out with you
inner cedar
Yeah. Even if I have to go buy ice, it's not a huge deal, and it's actually easier to get a hold of than LN2 [I was going to get it from a supplier in my home state and take it with me traveling, but ice I can get at a supermarket or convenience store anywhere]
Actually... what about dry ice? or is that similar to LN2 that it starts colder but absorbs less heat?
I think dry ice is pretty low density...
solemn parrot
Yeah that's a whole nother set of calculations for dry ice. I could run that real quick later tonight
inner cedar
No rush, I'm not building tonight XD
inner cedar
Oh, cool
solemn parrot
Ok, so it was a little tricky to figure out dry ice since it sublimates straight into a gas, but it seems that it may absorb 676 kJ per kilogram
inner cedar
Ah, so that might be the best! Still would need the pressure control and venting, and that would be harder to load than ice or LN2...
solemn parrot
Yeah in terms of energy absorption it is. Loading would be more difficult, although you can purchase it in pellets I believe
inner cedar
Yeah. Breaking up a brick also wouldn't be insanely difficult
solemn parrot
It would seem to me that CO2 edges out LN2 then unless it's cheaper/easier to get LN2 for you
inner cedar
Yeah
45% more energy absorption than water per kg, and also like 70% more dense, that's a serious advantage
75%?
So... I... think that's like 78% more energy per volume?
dry ice vs. ice
I think dry ice is pretty cheap... and I think it's available in some supermarkets
solemn parrot
Yeah I think for portability dry ice is the best choice. The drawback is again just making sure the pressure is vented and then making sure the gas also gets used for cooling before it's exhausted
inner cedar
Thankfully I designed for that XD just was planning for a liquid. Although that eliminates the issue of making sure it doesn't spray liquid if the valve ends up under the liquid [although that would really only be a problem if I did a handstand, which... hahaha no]
karmic brook
Yeah, I bought a chunk of dry ice at a supermarket a couple of weeks back in order to pull off a family surprise
The Penguin website will let you look up stores that carry it
solemn parrot
Y'know it's a bit amusing that this channel is ostensibly for 3d printing but we've filled it with discussion of thermodynamics
inner cedar
It's related to a 3D printing project at least XD
And I didn't know about the Penguin site, awesome!
 verbal sail
Has anyone experimented on printing out pcbs of custom shapes (such as a curved sheet)?
 iron remnant
There's this company but mostly they just end up printing regular old flat circuit boards: https://www.voltera.io/

Voltera
Prototype on your desktop with the Voltera V-One PCB Printer
verbal sail
I'm wanting to make a pipboy but integrate the traces into the shell as much as possible so am wanting to make sure its possible
 empty sedge
verbal sail
Has anyone experimented on printing out pcbs of custom shapes (such as a curved ...
empty sedge
verbal sail
Has anyone experimented on printing out pcbs of custom shapes (such as a curved ...

I developed a new chemical process to make double-sided PCBs with a laser cutter, and some common chemicals. This is intended to be used on SLA 3D-printed parts, but may work on many materials.
Refs:
http://infohouse.p2ric.org/ref/29/28004.pdf
http://citeseerx.ist.psu.edu/viewdoc/download?doi=10.1.1.527.5817&rep=rep1&type=pdf
you can also get a flex PCB made, that uses orange polymide instead of fiberglass
verbal sail
I'll look into that link. The chemical may be a little hard to obtain depending on what they are but It sound interesting at least
iron remnant
And there's just general purpose conductive fillament.
verbal sail
I'm thinking of using that too, but am unsure if it can meet my needs. If it can. Great, if not, I'll have to do something different
iron remnant
It's an interesting space, I think.
Oh, also, there are definately syringes and stuff that can be mounted on a 3D printer where the extruder normally is.
I kinda covet the time and space and energy to make a Jubilee simply because it's probably more fun with a tool-changing setup than regular.
verbal sail
Thought. How about printing the part with copper filament and standard pla then electroplating it to give the copper a smooth, solid form so it looks like a normal trace
solemn parrot
That sounds like it could work, it would definitely need some trial runs though. I guess I would wonder if there’s enough surface area for an electroplating solution to bond to the metal particles in the filament though.
Maybe you could print the conductive filament in the shape of the traces really thin and then glue them to a PLA board that has recesses to slot the traces into?
verbal sail
So, print the circuit, plate it and secure it to the board like an inlay?
 arctic dragon
The problem I foresee with a 3d printed circuit board is the deformation you're going to have to deal with if you plan on soldering components onto it afterwards. I would recommend designing the circuit separately, and using eaglecad or something to form fit that into the plastic after. If you're considering a curved body, flex pcb is best, though it does come with a slight added cost.
You probably won't get a perfect curvature out of a flex pcb if your component density is high, but at least it gives you more options to insert your circuit.
 hoary shell
hey guys, advice needed for a one off hobby project of mine. i would need to make/print a hollow plastic part in place of the red wireframe, it needs to follow the bottom shape of this enclosure, as precise as possible, and if possible, look as if its an extension of the shiny chrome stuff (reflector)
obvious solution would be to model it in CAD or similar and have it printed but, I don't know how to take precise measurements, is it even possible to take measurements of uneven shape like the one in picture and apply it in a 3d modeling software?
 karmic brook
There are 3D scanning approaches that do things like that. Some just using phones or webcams, and some with custom hardware.
hoary shell
never heard about that technique, how do I google it? is it precise?
sounds interesting!
karmic brook
"3D scanner" will get you started
verbal sail
@hoary shell so far this is the cheapest I found
 solemn parrot
hoary shell
hey guys, advice needed for a one off hobby project of mine. i would need to mak...
solemn parrot
hoary shell
hey guys, advice needed for a one off hobby project of mine. i would need to mak...
I know that Autodesk Inventor, Fusion 360, or Solidworks will let you place pictures of something in a sketch and then you can draw over it to create those complex shapes. Unfortunately I know not many people have access to that software
verbal sail
solemn parrot
I know that Autodesk Inventor, Fusion 360, or Solidworks will let you place pict...
Blender allows something similar
inner cedar
Yeah, 2D reference images in Blender can be pretty helpful, although it's best if you're only trying to do like 3 axis references... More axis and precision are hard. There are (or at least were) a number of 3D scanner apps and software you can feed a bunch of images from all around the target into that will generate a 3D model
verbal sail
I want to do something similar by just taking pics around a tree and dragging vertices, but haven't found a good tree to test my capabilities with yet
karmic brook
I know of a great tree for that, but it's about 1400km from me and even farther from you.

THE GREAT BANYAN TREE, at Crescent Lake Park, St. Petersburg is a living "jungle gym" for generations of children.
Here's me and a couple of my cousins climbing it
 verbal sail
It is beautiful
 agile gorge
solemn parrot
I know that Autodesk Inventor, Fusion 360, or Solidworks will let you place pict...
agile gorge
solemn parrot
I know that Autodesk Inventor, Fusion 360, or Solidworks will let you place pict...
@hoary shell Freecad can do this as well, there are tutorials on YouTube about it, built in, no add-ons necessary
 plush gust
Has anyone made a 3D print of a battery holder for the Playground Developer Board Enclosure? Would be kinda nice to have something that makes that awesome enclosure portable and wireless.
 slow sail
Hi, I finally got my skr mini e3 v2 to work with an ender 3 v2 stock display however when I try to autohome or to move a single axis nothing happens. I checked all the connections, swapped cables, swapped motors, checked the stepper drivers and currents in the firmware. Any idea of what could the problem be?
empty sedge
can you enable the motors and do they hold position when you do? M17
if not, are you powering the board with 12V or 24V? USB alone would probably let you program it but never enable the motors
there are two power inputs. if you want to use this on a 3d printer you need to connect both
well, that's what I'd assume but the schematic shows them connected. weird

GitHub
BIGTREETECH SKR-mini-E3 motherboard is a ultra-quiet, low-power, high-quality 3D printing machine control board. It is launched by the 3D printing team of Shenzhen BIGTREE technology co., LTD. This...
slow sail
If I try to move them via the lcd(which I think is the same thing as M17) they don't even hold their position and yes i am powering it with 24V
empty sedge
M17 is just enable, it doesn't move
slow sail
ok I'll try
empty sedge
see if both power inputs have the correct voltage by probing the screws on the screw terminals
weird, this is unusually cost optimized with one 20A automotive fuse
slow sail
with M17 they don't hold their position
slow sail
empty sedge
there are two power inputs. if you want to use this on a 3d printer you need to ...
what do you mean by two power inputs?
empty sedge
at the bottom left
 slow sail
yes
empty sedge
and that 20A fuse is fine?
except for your firmware I'm running out of things to have you check
slow sail

seems fine to me
but i am not an expert
in my firmware i have set 2209 for all axis, 580mA rms for xyz an 350 for e because i am running an orbiter
empty sedge
what printer?
slow sail
ender 3 v2
empty sedge
here's sample config for ender 3 skr mini e3 v2 https://github.com/MarlinFirmware/Configurations/tree/import-2.0.x/config/examples/Creality/Ender-3/BigTreeTech SKR Mini E3 2.0

GitHub
Configurations for Marlin Firmware. Contribute to MarlinFirmware/Configurations development by creating an account on GitHub.
should be a good starting point. I'm not sure what would change to go to ender 3 v2
slow sail
the screen
i wished i could use their config but marlin does't fully support e3 v2 display
empty sedge
what are you running then if not marlin?
slow sail
i am running marlin with a few modifications by jacob myers
GitHub
Marlin is an optimized firmware for RepRap 3D printers based on the Arduino platform. | Many commercial 3D printers come with Marlin installed. Check with your vendor if you need source code for yo...
it isn't the original but an adaptation for skr mini e3 v2
empty sedge
ok, so a marlin fork. it's probably still worth comparing your config to the marlin skr mini sample to see if you can figure out if you have anything wrong.
slow sail
ok
empty sedge
[I use winmerge for stuff like this]
slow sail
thanks for the advice
empty sedge
you can also use M122 and see if you can talk to the trinamic drivers. you get more info with TMC_DEBUG defined. https://marlinfw.org/docs/hardware/tmc_drivers.html#tmc2208
slow sail
the differences I found that affect the stepper drivers are adaptive step smoothing, active in my config, the current used for the home in my config is like the normal one, while in the end 3 config it is half, software driver enable in my config is enabled, monitor driver status in my config is enabled, I have also enabled sensorless homing. That's it
slow sail
 empty sedge
yeah none of those difference would cause the symptoms you're describing where the motors never get enabled
slow sail
at this point i think the board is broken
a weird thing i noticed in the picture is that i sent M17 to enable motors but the tmc drivers report that they are disabled
empty sedge
I guess you could try normal marlin and you won't get the LCD working but you can see if you can enable the motors
empty sedge
yeah, troubleshooting is like that sometimes
slow sail
I disabled software drive and now it works also with marlin fork
last question before i go in a 2 hour trip to reassemble everything, i saw in a video that there is a dedicated menu to tmc drivers however i do not have any idea of why?
empty sedge
the trinamic drivers have a lot of things you can tweak
there's an adjustment used for sensorless homing
obviously adjustable current
also adjustable microstepping
also you can configure the "silent" behavior to optimize for either detecting skipped steps, or for being more quiet
also you can configure the "silent" behavior to turn off at high speeds where it'd be more likely to cause skipped steps
there's probably more I'm forgetting
unless you're working on a custom machine I don't think you get much out of tweaking those
slow sail
ok thank you so so much for the help
 tight totem
Is creality 3d printer good and durable?
empty sedge
for the price, and with a little bit of work they're good printers
I don't know what you're asking about durable. It wouldn't survive falling to the floor and I wouldn't want to travel with their machines because you may need to adjust them each time you set them up
I prefer the prusa i3 mk3 because it's a workhorse with great slicer profiles already built it reliably puts out good parts if you give it reasonable filament, but even the kit is a lot more expensive
tight totem
Thanks
 ember narwhal
For microcontroller boards like the itsybitsy, qtpy, tinys2, etc that do not have mounting holes, is there a "standard" design for mounting these in a case of some sort? Snap fit? Slide the board in on rails?
karmic brook
Not really a standard, there are lots of ways you can go. These, for instance. https://www.adafruit.com/product/1116

Having difficulty attaching a PCB? This kit is especially useful when there are no mounting holes - as with the original Raspberry Pi. Instead of gluing, taping, epoxying, etc. use these ...
 loud silo
ember narwhal
For microcontroller boards like the itsybitsy, qtpy, tinys2, etc that do not hav...
loud silo
ember narwhal
For microcontroller boards like the itsybitsy, qtpy, tinys2, etc that do not hav...
We have many projects with 3d-printed cases, e.g.: https://www.thingiverse.com/thing:4158903
look further in https://www.thingiverse.com/adafruit/designs for examples
example projet: https://learn.adafruit.com/usb-hid-crank-controller/3d-printing
ember narwhal
loud silo
We have many projects with 3d-printed cases, e.g.: https://www.thingiverse.com/t...
Thanks for the example. I actually found this one for the qtpy too - will keep digging through that link for more inspiration: https://www.thingiverse.com/thing:4840755

Lemon Keypad on YouTubehttps://youtu.be/qPjJ2EhG8aY
3D hangouts – Lemonhttps://youtu.be/89oRp64lFfU
DIY USB-HID With a Twist of Lime
Make a custom USB-HID keypad in the shape of a citrus fruit. This keypad features six mechanical switches for controlling media players like Spotify, iTunes, YouTube, etc. Powered by the Adafruit QT Py RP2040 and ...
 timid rock
I have some white PLA i haven't used in a while. It looks like the white has leeched out, or that it is dirty. However it has been in a box. I don't recall it being this way before hand. Any idea whats up?
 unique pendant
PLA can go bad and break down after a number of years. You may want to throw that out rather than run it through your printer.
solemn parrot
inner cedar
It's related to a 3D printing project at least XD
Any progress on the cooling system? I'm honestly pretty interested in seeing how it turns out
 lunar oar

@somber summit I have returned.
I got a new board and it worked... mostly... I am sorry to bother you but I mean we got this far so you might be able to spit out the answer compared to me being mind boggled over it. They read room temp, normal, I set the target temps, extruder 200c and bed 60c, normal, they heat up, the extruder is heating up slowly, not normal... when it hits around 80c, it reads "heating failed, printer halted, please reset" so uh yeah (I also replaced the thermistor and heat cartridge)

Hoping anyone can help, this is just been brutal
karmic brook
I'm guessing one of a) wrong voltage cartridge, b) wiring issue, or c) cartridge not having good thermal coupling to heatblock.
inner cedar
solemn parrot
Any progress on the cooling system? I'm honestly pretty interested in seeing how...
Unfortunately no DX I've gotten very busy, and I'm not even going to be able to finish the whole suit -- I'll basically be doing a full gauntlet, parts of boots, partial glove, and a helmet, all with battle damage to make it look like most of it got blasted off... Saves on print time XD
 somber summit
@lunar oar i concur with madbodger as those would be the areas i would begin checking myself.
lunar oar
@karmic brook @somber summit
I just checked the voltage of the heat cartridge! It seems the one I bought was 24v compared to the original which was 12v. Both 40w
So is that it!?
oh i feel like a buffoon. I'm so embarrassed i bought the wrong one. Im still gonna check if it said on Amazon it was 24 not 12... i could have sworn lol
 karmic brook
Quite possibly. There could be some other issue, but that would be sufficient to cause what you observed.
lunar oar
thank you a million
somber summit
i wouldn't be surprised if it was packaged wrong, I once ordered a GPIO breakout board and received a PoE adapter instead....
solemn parrot
inner cedar
Unfortunately no DX I've gotten very busy, and I'm not even going to be able to ...
Aw that's too bad. Hopefully you'll get to use the cooling for another project though. If you choose to work on it again I am definitely interested in offering help any way I can.
inner cedar
solemn parrot
Aw that's too bad. Hopefully you'll get to use the cooling for another project t...
Oh, I'm 100% still going to build it! Just for con next year
 inner saffron
how do i make a usb port cutout for the raspberry pico in fusion 360?
karmic brook
I'll often subtract a box from a panel to make an opening.
solemn parrot
inner cedar
Oh, I'm 100% still going to build it! Just for con next year
Alright nice, I'm really interested in seeing how it turns out
lunar oar
@somber summit @karmic brook

Thank you guys so much!! I couldn't have done it with out you!
somber summit
@lunar oar Your very welcome
 brave maple
I've been using my Ender 3 hooked up to a raspberry pi for awhile now but I just tried to connect it directly to my Windows 11 PC via USB and it isn't being detected. It just shows up as "USB Serial" in Device manager with the little yellow warning sign. Does anyone know what this could be?
 pine mortar
Is it prolific USB?
brave maple
I'm not sure what you mean
pine mortar
Hmm what error does it show?
karmic brook
There are a few different USB-serial chips in use, your machine may need the driver for whichever chip you have. You can look up the chip from the USB vendor ID and product ID if it doesn't have an identification string.
 pine mortar
Double click that
Hmm I thought windows had automatic drivers for that chip these days.
They do have a download on there website http://www.wch-ic.com/downloads/CH341SER_ZIP.html
brave maple
OK I installed that and it doesn't have an error anymore but cura still doesn't detect it
Never mind just took a minute!
Thanks for the help 🙂
pine mortar
Glad you got it sorted 😄
 elder ridge
I need help with my Ender 3! It reads error max temp but it is not hot! What can I do?
pine mortar
Check your sensor and it's wiring
elder ridge
pine mortar
Check your sensor and it's wiring
Underneath the pcb, right?
pine mortar
Not familiar with the Ender itself sorry
agile gorge
Max temp would be a short
elder ridge
agile gorge
Max temp would be a short
Nozzle side or PCB?
agile gorge
Anywhere along the circuit for thermistor
 ornate raven
@elder ridge have you recently made any mods to the printer or did this appear suddenly (as in during a print)?
 half dew
even the wire coming from the thermistor in the hotend is super fragile - is it possible it collided with a part, or you touched it while cleaning the nozzel, etc? Tightening the screw that holds the wires down too much can short it. Its one of those things that even scary to check with a multimeter because even if it wasn't broken before you were checking it - you might break it in the process.
elder ridge
I changed the whole nozzle wiring! How can I check it with the multimeter?
arctic dragon
If you have a safe place on your boards to check the resistance across the thermistor, see if you get a non-zero value.
karmic brook
The thermistor should have a highish value (several thousand to several tens of thousand ohms), the heater should have a lowish value (a few ohms to a few dozen ohms). There should be infinite resistance between the heater leads and the heatblock, and between the thermistor leads and the heatblock.
agile gorge
hot end thermistors typically have a ~100k resistance at 25C
and P=V^2/R so depending on your heater power and hot end voltage, you can deduce what R should be (and what it should measure)
e.g. 50W heater on 24V would be 11.5ohms
karmic brook
Sometimes a cold heater will be lower resistance
 unkempt lake
i'm new to 3d printing, running klipper on an ender 3 v2 here, and i'm enthusiastic. so i'm interested in this adafruit product for a phaetus dragon (i believe it is very similar to a e3d v6?) https://www.adafruit.com/product/3290 along with the max31865 controller you also sell. is this a viable option? i'd like to use a 3 wire pt100 such as the one you stock, but i do not know if it is compatible or not / what the standards are.
thank you very much for any input. 😄

For precision temperature sensing, nothing beats a Platinum RTD. Resistance temperature detectors (RTDs) are temperature sensors that contain a resistor that changes resistance value as its ...
also, if i did this, would there be a way to add some more shielding for possible electrical noise? currently, the raspberry pi and the ender are both on a small UPS
(if that matters in terms of noise or not)
ornate raven
@unkempt lake I suspect your control board will be the limiting factor. As you have realized, thermistors and RTD's are not hot swapable. I don't delve into the programming of the control board(s) of printers but I suspect there are settings there as to the type of temperature sensor and what kind of signal it returns. I'm interested to know how it all works out for you. I prefer the accuracy of a RTD over a thermistor or thermocouple.
unkempt lake
ornate raven
<@!356239124694302722> I suspect your control board will be the limiting factor....
Klipper runs on the rPi, which controls the Ender. So the controller/amplifier? will connect to the pi3b+. At this point I have the first spi interface used up, but as i understand it, there are 2 more. So I'll have to get those config.txt wacko parameters set, and hook it through Klipper. I have seen that there is built-in support for the max31865 chipset, and just the pins need to be configured.
I guess what I need to know is, is there a standard physical dimension for the pt100 sensor? If not, can this be changed by a layman with a soldering iron and a hot air station? and light competence with both? 😄
it has to go in a heat block and there's a slot there as i understand things, but i'm not sure about the depth and dimensions of that hole (yet)
ornate raven
@unkempt lake Adafruit list the pt100 as 4mm x 30mm and thats pretty big. A thermistor is not much more than a bead on the end of two wires (as a comparrison). So yea, if it was me I'd know for sure about the hot end dimensions before ordering upgrade parts. Just my opinion.
unkempt lake
right. that's a good one. i'm looking, there is a mechanical drawing of just the block on aliexpress, and it looks like that's going to be too long. still can't see the diameter of the hole.
hmm well maybe i'll have to dig around a bit
thanks for your help 😄
unkempt lake
@ornate raven and after more digging i can use a 3x15mm one, and bezos has one here: https://amzn.com/B08C9XHN9L and 1.5 meters or so so i can loop it around the table if i want to
Amazon.com: 3D Printer Part UM2 m3 x 15mm PT100 Temperature Sensor A Thermocouple Sensor 1.4m Cable for Ultimaker 2 Ultimaker 2+ Extended+ 3D Printer: Industrial & Scientific
agile gorge
ornate raven
<@!356239124694302722> I suspect your control board will be the limiting factor....
A quick clarification, a thermistor is an rtd
@unkempt lake there's no reason to use a pt100x on an ender3
And if you want a pt100, get one from trianglelab or mellow on aliexpress
As for 3 or 4 wire, you can turn any 2 wire pt100 into 3 or 4 wire, you just split the lead into 2 wires on one or both sides
The doubling up of wiring is done to correct for resistance in the wire run
unkempt lake
agile gorge
<@356239124694302722> there's no reason to use a pt100x on an ender3
thanks for your reply. yes, i get the feeling i'm wandering in overkill territory. what i really want is reliability. that is, my printer is in my basement, and if something prints overnight, i don't want some kind of problem down there.
i'm not an engineer 🙂 so I don't know what the best solution is. pricewise, that sensor i linked and a small board to go with it, it's not significant. if it is a bad idea, i'll do something else.
unique pendant
unkempt lake
i'm new to 3d printing, running klipper on an ender 3 v2 here, and i'm enthusias...
Welcome to 3D printing! The Dragon is a copy/interpretation of the Mosquito, not the v6. I must say, for being new to 3D printing, it's highly unusual to be running Klipper, which is a very advanced firmware with so many parameters it makes the head spin. To use Klipper to its greatest advantage, it is typically installed on more advanced printers that do not typically have hardware issues that need to be solved to improve print quality. Is there some reason you are putting so much upgrading into your Ender? For a printer of that class, you might get farther with hardware upgrades first, such as the Micro Swiss extruder https://store.micro-swiss.com/collections/extruders/products/micro-swiss-direct-drive-extruder
And possibly an X-axis linear rail? It's better, also, to try and take it one step at a time. It sounds like you've already outfitted your Ender with Klipper. As far as PT100 goes, maybe you can use the e3D system? It's well documented.

Micro Swiss Online Store
Micro Swiss Direct Drive Extruder is a drop in system for CR10 / Ender Printers No modification required, simple plug and play No printed brackets or sandwiches Features: Dual-drive train Hardened tool steel, CNC precision cut gears Adjustable filament grip Easy filament loading Short, highly constrained filament path
unkempt lake
unique pendant
Welcome to 3D printing! The Dragon is a copy/interpretation of the Mosquito, not...
well, i usually dive in head-first 🙂 when i got this printer, i wasn't sure exactly where i was going with it, as i'm more of a programmer than a builder. i've been doing all my designs in openSCAD as scripting comes much more naturally to me.
I know that the ender3 is an introductory printer, and yeah, i'll have all these nice toys/sensors on a honda civic 🙂 but it's a great learning experience and at some point i'll move up.
unique pendant
unkempt lake
well, i usually dive in head-first 🙂 when i got this printer, i wasn't sure e...
That is absolutely true, and nothing wrong with that! More power to you. I'm interested in your results.
Is there a way you can use the e3D PT100 system in your setup? Not that I would know any better, I'm just thinking that since it's specifically designed for use with 3D printers maybe it will work as expected.
Looks like the little amplifier board has 3 pins at least.
As far as worrying about things going awry in the basement, I use a Nest Protect which alerts me if there's smoke or carbon monoxide.
unkempt lake
yes definitely, i am talking to a friend who is recommending that setup. only thing is, i think i'd like an spi interface direct to the rPi
unique pendant
There's also a fire extinguishing setup... let me find the link...
unkempt lake
he said his e3d thermistor works fine in his setup
unique pendant
Yeah, I use e3D thermistors in all of my printers.
unkempt lake
ok i can do that, i run home assistant here
i could maybe put the e3d pt100 setup on the adafruit board --> rpi3b spi1
unique pendant
Well, I guess I remembered wrong. What I was thinking of was a power-cut to the printer through a smoke detector: https://www.thingiverse.com/thing:2148191

Have you ever worried about leaving your printer running for those long 20 hour prints? With a heated bed, hot extruder, and cheap power supply, there's a lot that could go wrong. I have worried about leaving my printer unattended and wanted an automatic smoke detection and shutdown solution. This post contains all the information you need to b...
unkempt lake
maybe i should get some sensors as you describe and wire them up. i haven't tried that kind before.
unkempt lake
unique pendant
Well, I guess I remembered wrong. What I was thinking of was a power-cut to the ...
i just looked at this a few minutes ago. I misread your message. this looks like a great project! I already have that iot powerstrip -- i got it for a dehumidifier pump project and found another failsafe method, so it's up here on a shelf.
agile gorge
@unkempt lake there's no real additional reliability to come from a pt100
it has better temperature accuracy, and supports up to 450C operation, the latter is not at all useful on an ender, and the former is not useful for most consumer filaments (you should pretty much always temp tower)
yes, other safety mechanisms are better, automatic relays for shut off, etc.
karmic brook
I'm amused at someone with a power outlet icon saying "more power to you"
ornate raven
@unkempt lake , it is your project to build. I see no safety issues with what you have planned. Perhaps some overkill for a "basement project" but you seem to have things under control. I think it great that you are thinking about turning an E3 into a high end printer. As has been mentioned by others, one step at a time is good advice (IMHO).
unkempt lake
At one point after college, I worked in a chemical analytical lab, with some nice gc/mass specs, um.. well lots of instruments, and I had to make standard solutions and small jobs like that, get some liquid nitrogen for a tech (that stuff is pretty nutty), etc. anyway I liked doing all the calibrations and things, pH meters etc. but i was a bio major and then wound up a programmer (modest one though).
anyway I just liked doing that stuff and i haven't really had to tune things like that in a long time. so this is fun.
agile gorge
An ender3 can't really be turned into a high end printer no matter how much money you throw at it, that bed slinging is a pretty big limiting factor
There's certainly enhancements to make it print very well though
unique pendant
👆 That's one of the nice things about Ender3 for beginners. You will learn a lot about hardware and 3D printing while spending a lot on upgrades. The trade-off, of course, is that you'll have a lot of down time that you wouldn't have had if you started with a better quality printer such as a Prusa. A common discussion here on this forum. 😉 I think, if I were to do it all over again, I would probably do what @unkempt lake is doing. After finishing all that work throughout the Ender, you'd be ready for doing a great job building your own quality printer like a RailCore.
inner cedar
I think the important thing to consider when it comes to upgrading something like the Ender 3 is why you're doing certain upgrades -- if you're trying to get high-end results, yeah, you're better off moving to a higher end platform to begin with. But if you just want to do it for the sake of learning and practice? It's a lovely base to start with. Personally I run mine mostly stock XD
unique pendant
👆 Excellent point!
inner cedar
Sometimes it really is more fun to just upgrade something than to buy a better one... even if it might cost more in the end
unique pendant
Eventually through all the upgrading I think we all realize that we'll never get better prints out of our first printer, which is why we then buy more expensive printers 😂
inner cedar
I don't even have my first printer because it died, lol... Ender 3 Pro was my upgrade and I love it. And basically the time on the first printer (well, there were TWO of that one, got replaced once with the same model) was free because the money got forwarded into the Ender 3 Pro! Gotta love Micro Center's replacement plans!
unique pendant
I started on a Xinkebot Orca2 Cygnus (gMax knockoff) which wasn't bad, but as most lower end printers, needed a lot of work to get OK prints. I then replaced that with a Formbot Raptor2 from Tiny Machines in the USA, which was 100% better, but still needed a couple upgrades like the X-axis (rail), genuine v6 hotend, and for cooling. (also eventually needed to upgrade the bed wiring to silicone). I still use the original extruder which is a gMax knockoff which works great. I then built a RailCore which makes ludicrously gorgeous prints, always works without complaining, and is ridiculously fast. It's my go-to printer for everything under 300 x 300 x 300 mm now. Anything larger goes to the Raptor -- which still makes really gorgeous prints -- can't actually tell much difference other than the print size. The old Xinkebot btw got totally transformed with a Duet2 wireless and Titan hotend with Bondtech extruder running large nozzles at the local maker space (talk about throwing money at something!). Chugging away happily making really big and pretty nice prints. 🙂
inner cedar
It's just amazing how far the lower end has come -- like, the Ender 3 is like a Titan compared to some of the high-end printers I remember from the early days of at-home printing. The machines were always thousands of dollars, so most people built their own, but even high end machines couldn't compare to the Ender 3's printing now!
arctic dragon
I started on an anet a2, which was not a printer I'd recommend, but it was dirt cheap for its time and had an aluminum frame if I decided to make something else out of it. I only ever got one print out of it, and it wasn't even a good quality print by any metric, but I learned so much from tinkering with it that I don't regret it in the slightest.
karmic brook
I still have my first printer (Monoprice Mini Delta), and I've upgraded it several times, but I haven't used it in a long time. At the moment, the Prusa serves me well, if I go for another printer, it would probably be a Railcore.
inner cedar
I need to get all the printers I currently have working before thinking of buying more XD
karmic brook
That's like saying "I'll finish all my current projects before I start any more", it's crazy talk.
karmic brook
We all have a problem, just some of us have different problems
 inner cedar
ha
 gritty galleon
Hey all! So I was looking at the chocolate mold tutorial (https://learn.adafruit.com/3d-printed-chocolate-castings/3d-printing) and I just wanted to check if y'all think there's any specific modifications or properties my 3D printer should have if I'm doing this? (Like how with food-safe 3D printing the nozzle has to be stainless steel)
I had assumed I can probably just use any trusted printer like a regular Ender 3, but just wanted to double check since this is the first time I'm trying this

Adafruit Learning System
Make custom chocolate treats with 3D printing!
unique pendant
You're probably OK with an Ender 3 and PETG, tho' I'm no expert and have never done any food-safe printing. The real food safety problem with FDM prints is the layer lines will promote bacterial growth, and you can never get prints really clean/sterile. Maybe if you just use them for one day? There's lead in most brass so filament touching any brass can give you traces of lead in the print. Keep in mind, there are very few commercial espresso machines that aren't loaded with brass so if you ever go to cafés and have lattés, cappucinos, espressos, etc. IMHO, all this fuss over food safe 3D printing is a bit like ignoring the plank in your own eye while you complain about the splinter in your neighbor's.
I know @signal finch has looked into this much more deeply than me and is certainly a better source. I'm probably totally wrong. 🤪
Wait a minute... that link shows how to use a 3D print as a buck to make a silicone mold, so probably no issues there. After all, it's on adafruit.com so it must be safe, right?
inner cedar
There are two things to consider when it comes to 3D printing around food -- if you're going to be selling the resulting molds or food that came in contact with them, from a legal perspective, they MUST be food safe, and that would entail getting filament that's ensured food safe [that exists!], a printer that's food safe [sterilized, has safety features to keep contaminants out, and has components that will NOT potentially leach heavy metals or anything toxic into the filament]. The big reason for this is that if you don't use food safe equipment and materials, and someone gets sick, you could be on the hook!
For personal use, you just want to make sure you use PLA and not ABS. I'd recommend cleaning filament, which will take out any crud of any sort left from ABS, or at least print a good deal with PLA after using ABS. Try to clean everything well. Most extruders and nozzles are made from steel and brass, so you shouldn't have to worry too much about heavy metals...
Keeping the molds clean is the hardest part -- bacteria LOVE to grow in crevasses, and PLA is actually somewhat biodegradable, so it might contribute further to growth! And you can't really clean it too well because if it gets to hot it melts... So you're best off doing vaccuforming to create an HDPE plastic cast as a mold, or print a negative and then use silicone to cast a mold from. The chances of the silicone picking up any REALLY bad stuff is pretty slim, so it should be safe... just something you wouldn't want to take a chance on for sale.
gritty galleon
Makes much sense! Yeah I was thinking it's probs fine especially since its from adafruit - just had to double check in case there was any common knowledge abt what 3d printer to use I was just missing haha. Thx y'all! This helps plenty~
inner cedar
No problem :D
inner cedar
I mean, not really, it's not too hard to make someone really sick if you're not careful
agile gorge
Make someone sure, but in general, it's not really easy
Soap and water cleans it up fine enough
Plastic cutting boards are notorious for trapping bacteria. People pretty rarely get sick off them
inner cedar
It's mostly only a legal worry for products being sold. Only takes one person to make a legal mess
 queen laurel
Does anyone know if Adafruit made Lego-compatible STL files for the Trinket M0? I can find a bunch for STEMMA and a Raspberry Pi Pico, but I'm looking for a Trinket M0 holder.
loud silo
queen laurel
Does anyone know if Adafruit made Lego-compatible STL files for the Trinket M0? ...
I think nearly all our 3D models are on Thingiverse, so that’s the place to look.
queen laurel
@loud silo Thanks, I looked there first and it's where I found the STEMMA, QT Py, and RPi Pico holders you guys made. I guess I'll have to modify an existing STL! 😀
solemn parrot
How do you go about modifying STLs with accurate dimensions and not just guessing at placement or dimensions of features by eye? My CAD background is entirely with parametric programs like Autodesk Inventor and Solidworks, and those don't allow for editing STLs since that filetype is just a triangle mesh.
unique pendant
Mesh to brep command will allow STL editing in F360. That’s in inventor too, or at least it used to be.
loud silo
With a websearch, I found a number of how-to's for STL editing in Solidworks, and also some for Inventor, e.g. https://blog.trimech.com/editing-stl-mesh-files-in-solidworks. Some of the Solidworks techniques rely on recent features.
queen laurel
I use Blender to edit STLs when I need to edit them. I actually already edited a STEMMA Lego piece to fit the trinket for my purposes. Not too difficult when it's really just moving and scaling that needs to be done. But more extensive editing is difficult if you leave it in the native triangulated version.
lunar oar
Just got an Ender 5 Pluse, the printer itself seems a-okay, i upgrade the bowden tube to an capicorn and the extruder to all metal, the problem comes with the left z gantry... it would squeak as if it was close to breaking and would not fully reach the bottom where the motor meets. this all occurs even with out the rest of the printer assembled, i tried to lube it up a bit and that didn't to the trick, and didn't fix the fact it would meet the bottom, the right z gantry works perfectly too... i removed the left lead screw and it seams that is the problem, there is no squeaking and it can reach the bottom, i rolled the lead screw on the table in hopes to see it not roll properly, but it seems to roll fine... there is the smallest of bends in the middle, do i try to get a new lead screw?
agile gorge
@lunar oar don't fully tighten the lead screw nuts on z
Do not overtighten these screws
 lunar oar
@agile gorge I think that may be it!!!!
agile gorge
The system needs a little bit of freedom, otherwise it will bind
lunar oar
You see on my CR10 I have that fastened down with some zip ties, which give it some room to grove
And these on the E5+ is secured withe screws... And they were very tight...
I'm testing it now
Hmmm, this happens when moving from 390 mm to 410 mm, that doesn't seem right, it doesn't happen on the other side either...
But it is going down and there is less squeaking!
Should I tighten it even less?
agile gorge
It should not be tightened at all @lunar oar
It should be completely loose, the screws should just be there to keep the nut from spinning freely
lunar oar
agile gorge
It should be completely loose, the screws should just be there to keep the nut f...
Well now they are very very loose, and that still occurs...
There's is more squeaking when going down than up, and the screw still does that, but only when at the bottom...
Is it harmful to the print themselves or the printer? It does still have four alignment screws too... Maye it's time that it does that...
 safe haven
hi pls can someone help me with setting up octopi with my 3d printer
arctic dragon
Don't think I can necessarily walk you through it, but if you're stuck I can answer questions or help debug?
safe haven
nice
that should work
so ive installed octopi onto my sd card and turned on my raspberry pi
do i need to plug my raspberry pi into my printer now
@arctic dragon
arctic dragon
Not necessarily, it won't be doing anything with printer until you set it up.
It shouldn't make a difference if you're at the point I'm thinking you're at.
arctic dragon
Default is username: pi /pw: raspberry
safe haven
when i enter the login it wont let me enter my password nvm it just wasnt showing me entering characters
also what does the opening web browser on local network mean
arctic dragon
If you're in the shell, the password entry doesn't show you the characters typed, you just have to type it carefully haha
As for login, you are expected to access this via a web browser. If octopi.local doesn't work, you'll have to find the IP address of your RPi.
At this point, you can plug your 3d printer into the USB port.
If you haven't already.
safe haven
how do i find my raspberry pis ip adress if i havent connected it to the internet
surely it wouldnt have one
arctic dragon
It would not. Um....
safe haven
i havent had an opportunity to connect it to the internet yet either
arctic dragon
If you didn't configure the Wifi ssettings through the Pi imager when you imaged the SD card, you'll have to turn off the Pi and put the settings into a txt file via another PC.
There should be a file named octopi-wpa-supplicant.txt in the root of the SD card.
safe haven
okay ive done that
safe haven
arctic dragon
There should be a file named `octopi-wpa-supplicant.txt` in the root of the SD c...
once ive done that should it just connect to the internet
arctic dragon
Well, your Wifi network, anyways.
Once that's done, you can put everything back together and power it on. The Octoprint should be accessible from any web browser on the same network via octopi.local or your RPi's local IP.
arctic dragon
There is a Bonjour requirement for that to work. You may need to get the RPi's IP if it doesn't.
safe haven
how do i do that
arctic dragon
After you login to your Pi, the command should be ip addr
...if I recall correctly, anyways.
arctic dragon
There should be a line somewhere with some ip address
Usually starts with 192.168
three digit number at the end?
safe haven
i cant find one
arctic dragon
My generic Linux knowledge and my RPi knowledge is getting mixed up haha
Are you on the same Wifi network?
safe haven
yeah
safe haven
notepad ++
arctic dragon
Hm, that should be okay
safe haven
but i first just used notepad
arctic dragon
As long as you didn't use WordPad, apparently that one can cause issues
safe haven
but even after i try and redo it, the file always appears as the edited version
but surely if it gives an ip adress that means its connected
arctic dragon
A valid 192.168 address, yes.
safe haven
mine isnt a 192.168 one
arctic dragon
Is it 10.1?
safe haven
thats what mine is
arctic dragon
You might need to recheck your wifi settings then
If there's no issues with the passphrase, you might have to reimage your SD card with the Wifi settings...
safe haven
wdym
arctic dragon
Did you use the Raspberry Pi imager to install Octopi?
safe haven
yeah
arctic dragon
Try it again, but this time, open advanced options by using the keyboard shortcut ctrl+shift+x to configure your Wifi connection.
Assuming you typed your wifi credentials right and it still doesn't work.
arctic dragon
In the raspberry pi imager?
safe haven
thats what im doing
arctic dragon
Did you select OctoPi?
safe haven
yes
safe haven
hmmm
i think it might have something to do with the fact that when i first opened the file i ddint use notepad ++
arctic dragon
I just remember there is a way to have wifi settings preconfigured when you image it
That is possible.
safe haven
and for some reason it keeps bringing back the file that ive already edited
even when ive completely reformatted the sd card
safe haven
arctic dragon
That is possible.
would you know how to solve it if that is the problem
arctic dragon
Uhhhhhh
Not off the top of my head.
To my knowledge, reformatting is basically the nuclear option, nothing should survive that.
Maybe it's something on your computer?
Restart?
agile gorge
Google headless raspberry pi wifi setup
Or edit wpa_supplicant.conf now, as you're able to log into the pi anyway
safe haven
agile gorge
Or edit wpa_supplicant.conf now, as you're able to log into the pi anyway
wdym
 shy kelp
$ man 5 wpa_supplicant.conf
inner cedar
Do you think a dab of super glue between two pieces of filament would cause a problem during printing?
inner cedar
Just a tiny dab XD I want nothing stuck
 coarse spade
you might be able to use some fire (a candle -- or I guess some other source of heat) and some care to melt the pieces together
inner cedar
That was my other thought
Super glue came to mind because it can't impact the diameter, melting and pressing ends together might make it too thick
arctic dragon
You might be able to file it down after?
If you have the craftsmanship to handle a delicate spliced joint....
inner cedar
I wanted to do it on the fly XD choices
coarse spade
I mean this is a 💰 solution, but I wonder how much work it would take to make https://www.mosaicmfg.com/products/splice-core-pro work standalone

Mosaic Manufacturing
Splice Core Pro for use with Palette 2 Pro. Please note: will not work with Palette 2 units.
arctic dragon
At that point, you might as well just buy a palette 3 and enjoy multi-filament printing...
inner cedar
I'm trying to design my own XD
 fading viper
@sullen zinc Got a successful print of a single key. I might use some of the values in the openscad file to tweak the size down ever so slightly. This one fits, but feels just a tad tight. I did .25 layer height on this one for a little bit faster of a print, but I think I may drop that down a bit as well in order to get an extra layer or two underneath the number cutout layers. Printed on a Lulzbot Mini
My aim is to experiment with nail polish or perhaps other paints dripped into the cutouts to make the contrasting colors.
 sullen zinc
Nice!
inner cedar
Lulzbot, fancy
fading viper
inner cedar
Lulzbot, fancy
I ❤️ my Lulzbot Mini. I've got a few other printers over the years for various reasons but I always come back to this one because it's the one that seems to consistently require the least amount of tinkering and messing with settings and things. I tend to spend my "tinkering / troubleshooting" mental budget on software development so when I go to print something I really appreciate a printer that "just works" more often than not.
inner cedar
Lulzbot seems to be hit or miss in my experience... I've known people, like you, who use it without issues and it just works. But when I was working at Micro Center, it was a constant battle to keep them working properly, both the TAZ Mini and TAZ 5/6.
fading viper
My main gripe with it is the 2.85mm filament. They got new owners a year or two back and seem to have started making the shift over to supporting 1.75mm I'm thinking of getting a new toolhead for that, but now I've got a bunch of 2.85mm filament saved up that I'd hate to go to waste 😖
inner cedar
I would get a new tool head ASAP, but wait to switch (at least permanently) until your use the 2.85mm up
iron remnant
Well, let's not get a head of ourselves here.
inner cedar
Just getting ahead of the possiblity of the 1.75mm toolhead disappearing, leaving the printer stuck forever at 2.85mm
'cuz it could happen... companies disappear
Even bigger ones sometimes
It's not like the toolhead will go bad sitting
iron remnant
Therefore, it's a good way to head off a problem.
inner cedar
Mhmm
unique pendant
Agreed. Lulzbot has already filed for bankruptcy I heard, or maybe that's just rumor?
inner cedar
I haven't heard that, but even if they haven't... I still think it's better safe than sorry to have the intended hardware ASAP
One of the first results for a "lulzbot bankruptcy" search https://hackaday.com/2019/11/12/the-past-present-and-uncertain-future-of-lulzbot/
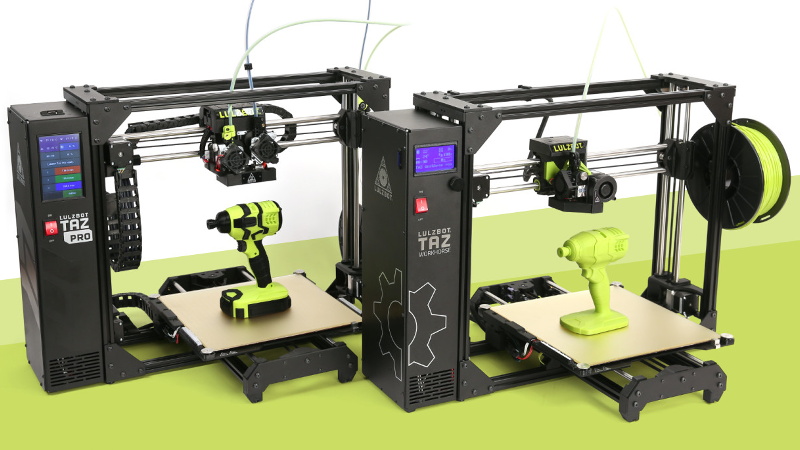
Considering that it’s only existed for around a decade, the commercial desktop 3D printing market has seen an exceptional amount of turnover. But then, who could resist investing in an indust…
I didn't read the full article
unique pendant
intersesting. I always wanted to get a Taz 6, but they weren't big enough for my needs. Always waiting for the Taz 7. Kind of like waiting for Simplify3D 5 😂
agile gorge
What's the allure of lulzbot?
Seems like a meme name that shouldn't be taken seriously
 toxic kite
open source, and I've seen nobody crying about it being bad
 sinful mortar
IIRC, the parent company for LulzBot got acquired, their store was still active early 2000 and shipping product. However, they haven't maintained their fork of Cura for their printers and it is quite out of date.
inner cedar
looks at Cura 15.04.6
iron remnant
I think one of the not-entirely-awful aspects of 3D printers over... say... regular printers... is that at least a bunch of the bits involved are open source infrastructural pieces as opposed to buying a printer from HP and getting taken advantage of in all sorts of ways.
sullen zinc
Is there a reason that thread-forming screws aren't commonly used to fasten 3D printed parts?
someone tell me before I order a bunch from mcmaster for experimentation 🙂
half dew
I've used those, or taps - but they only work well if you make holes for them that have enough perimeters in my experience
I didn't find them better or worse than other options really - depends on the part
sullen zinc
I like heat-set inserts but in making models to share that creates a barrier to use..
as in, I don't figure most people have the inserts
karmic brook
I make holes with extra recesses in the direction of printing, so the screws won't wedge the layers apart. Works pretty well.


 inner cedar
You should be good, just make sure the printer isn't bumping against the wall. It is recommended that you print when you can keep an eye on it... better safe than sorry
shy kelp
inner cedar
You should be good, just make sure the printer isn't bumping against the wall. I...
It has enough room, thanku
inner cedar
No problem ^_^
I've left my Ender 3 Pro running unattended before without issue -- but it's up to you if you want to do that
shy kelp
I've seen horror images of the cables getting stuck in the print lmao
inner cedar
Thankfully that's not something you have to worry about too much with the Ender -- the cables are well guarded, so it's not really possible for them to get caught. You can also use OctoPrint to allow you to view and control your prints remotely, so if you check and something is wrong, you can shut it down.
inner cedar
So I've had this issue with gaps, banding, and stringing. As you can see, some sections are really good, others are not. I'm feeling like it's not an issue of settings -- I've tried temps up and down, speeds, flowrate, retraction, and the gaps remain. It also doesn't happen on every model, at least not consistently. The fact that it's chunks on the Z axis makes me think there's something up with it mechanically -- any ideas?
 arctic dragon
What kind of printer? Do you see your z-axis motion jitter as you go up and down?
inner cedar
Monoprice Select Mini V2. Not that I can tell, but it's hard to make up go up and down (the jog controls are trash)
 arctic dragon
Does it have a USB port for direct G-code control?
The horns coming out look like a lack of support, but the inner warping could be mechanical inconsistencies or temperature fluctuations?
If you have a well-sized cardboard box to put over it, you could try to eliminate temperature changes...perhaps.
inner cedar
It does have a USB port... Haven't tried direct control. The horns were supported -- it was printed upside-down with full support the length of them. It might be temp changes, there is a fan keeping me from cooking...
But the pattern makes me think not
Hard to take when printing, but see how it's swirling around on these pieces? Seems to go all the way around
 arctic dragon
What temperature and material are you using?
arctic dragon
If it's not a special kind of PLA, you could try 190?
Most PLA melts between 185 and 220 iirc
It's kinda weird that the lines are drooping that far
inner cedar
Actually, forgot, I did try down to 185 (it got bad under 200)
arctic dragon
Ah.
Can you add a delay between layers?
It could be not enough cooling time between layers
Does it feel kinda warm in the printing room? Maybe an external fan would help too...
inner cedar
Not sure how I'd add delays... I'm using Cura 15.04.6 for this printer. Room is probably about 75-80F, but this happens in temps as low as 40F (Windows open in the winter) and as high as 115F (dog days of summer with no AC)
I'm also wondering if it isn't consistently extruding and/or retracting as Z increases
arctic dragon
You mentioned a fan, where is the airflow of that fan directed?
I think Cura has a minimum layer time for the delay.
Is there an extruder fan?
inner cedar
Yes, fan on the extruder. One Fan is about 10 feet away, pointed not really in the direction of it, some obstructions in the way. Also an obscured ceiling fan above. But this also happened in a room without a fan
agile gorge
Looks like underextrusion
Not enough steps/mm, you have a clog or idler tension is too low
Or flow rate too low @inner cedar
inner cedar
I suppose I can try increasing flow rate again... Bleh
somber summit
@inner cedar just gonna recommend that actually. But i would check the mechanicals that @agile gorge recommended to check. if your idler tension is too low, the extruder gear will slip on the fillament while trying to drive it.
@inner cedar out of curiosity, what is your retraction distance set at?
unique pendant
inner cedar
So I've had this issue with gaps, banding, and stringing. As you can see, some s...
Looks like wet filament to me. Did you try drying it?
(also intermittent clogging which can be part of wet filament as well)
inner cedar
somber summit
<@!381566293368897537> out of curiosity, what is your retraction distance set at...
4.5mm at 40mm/s
Have not tried drying the filament, not currently set up for that
Trying to remember if it always did this, or if it's a recent issue...
The weird part is that sometimes a dozen layers are perfect, sometimes not
And not always the same place
somber summit
@inner cedar I noticed you have a bowden tube style printer and the thought that the filament might be hanging up inside the print head during retraction moves has crossed my mind.....
shy kelp
Wait, do I have to keep the paper holders on during the 3d printing process?
inner cedar
shy kelp
Wait, do I have to keep the paper holders on during the 3d printing process?
Paper holders?
inner cedar
Ah. Binder clips is the name. Isn't the Ender 3 a magnetic bed? You only need it on one like the one I've shown because the glass bed isn't secured at all
inner cedar
somber summit
<@!381566293368897537> I noticed you have a bowden tube style printer and the th...
Any ideas how to see if that's the case and/or fix it?
shy kelp
Regular ender 3, it doesn't feel magnetic?
inner cedar
Ah, yeah, doesn't look like it... Mine is a metal plate that I can pull up, on the Pro, which sticks out on the side to grab. So if the bed is loose without the clips, then yes, you need to keep them on
shy kelp
oki
shy kelp
Ok I set up stuff to level my bed, loaded my fillament, what else am I supposed to do before it's print ready?
inner cedar
Once you're leveled and filament is loaded... Time to try printing! I'd just make sure it extrudes before starting to print
Benchy is a good first print

Creative Tools Creative Tools supplies 3D printer and 3D scanner products incl filaments, accessories and support and also 3D software for leading CAD, modeling, animation, and rendering.
#3DBenchy is a 3D model designed by us at Creative Tools specifically for testing and benchmarking 3D printers. It is a small recognisable object that you can ...
 inner cedar
Is that Cura?
shy kelp
yes
inner cedar
Ah, the red? That's normal to see red on the sides
Test cube also does this

Well that came out messy XD
 unique pendant
Definitely wet filament.
inner cedar
Guess I gotta bake my filament
unique pendant
I can post a link to a very inexpensive do it yourself filament dryer when I get home.
shy kelp
It's not sticking to the bed ;-;
It works perfectly fine with this other test print that makes sure it's all levled but it just doesn't start sticking to the bed with my imported model
inner cedar
Try enabling platform adhesion, I'd try a brim first
Ugh, test with same settings seems... Fine? Better at least


 inner cedar
I think I have multiple issues -- increasing flow rate did help some


100%, 105%, 110%... Although that feels like a marginal improvement for a big change

Top is most improved
 shy kelp
:>
 unique pendant
@inner cedar This works extremely well. https://www.thingiverse.com/thing:2669646

3-4-19 There is now a single piece version for 330mm/13"+ print beds: https://www.thingiverse.com/thing:3468826
3-4-19 Glue up version prototype:https://www.thingiverse.com/thing:3470025
Original:
This is a riser for the common Rosewill/Best/Flexzion/Yobo food dehydrators. It holds 2 1KG spools. With this mod, you don't need to destroy your fo...
inner cedar
TIL you can get home food dehydrators
inner cedar
shy kelp
:>
Hexagons are the Bestagons
Oh, yeah... Something is up, left to right flow rate is 100%, 105%, 110%, 150%
 shy kelp
I printed a 10x10x10mm cube and it gave me dimentions of 9.9x9.7.9.8. Perhaps the print is too small or it doesn't matter that much but are there factors I have to consider that effect the end print size to account for size differences?
inner cedar
Prints can shrink a little. Is that XxYxZ?
unique pendant
If you really want to calibrate your printer properly: https://github.com/superjamie/lazyweb/wiki/3D-Printing-Calibration

GitHub
Random scraps of my knowledge. Contribute to superjamie/lazyweb development by creating an account on GitHub.
Also, those cubes are way too small to do accurate steps. Use this.
unique pendant
What is your print volume?
inner cedar
120mm^3, like I said XD
unique pendant
Oh, sorry. I thought you were talking about the STL, which is flat, so I was confused. 🤪
Yes, scale it down then, but be sure you know what the measurements should be.
inner cedar
lol
unique pendant
Also, you have to have properly dried filament before you do any calibration or you will have totally wasted your time. Wet filament does weird things.
inner cedar
Still not sure it's a wet filament problem.... This happens with fresh from the package filament too
unique pendant
I've had plenty of wet filament out of the package. Now I always pop every spool into the dryer before I use it and no problems since.
inner cedar
I've also used filament that was fine on another printer
This printer isn't the greatest to begin with XD
unique pendant
this is my favorite scale tuning STL for Z but I also like to lay it down and use it for XY. You have to drop it below the bed a little so you don't have to worry about supports.
inner cedar
I'm wondering if it's just the filament not being fed properly since 100% and 150% flowrate are very similar results
unique pendant
Does your kitchen oven go down to 50 C?
inner cedar
Ugh, I think the rear fan is cooling
I don't think so... I do have toaster oven that I was gonna turn into a PCB oven, could probably make that do the right temp
unique pendant
kitchen oven temp control is way unreliable tho' and it fluctuates like crazy at low settings. PETG would survive, but I don't think PLA would.
inner cedar
I need to get some temp probes for this toaster oven
inner cedar
Well, I feel very dumb... I had forgotten that I had switched that printer from a 0.4mm to 0.8mm nozzle. Durr.
unique pendant
Mmm. That might do it. 😁
inner cedar
XD
 brittle hornet
A month or so into printing. Having much fun. Here are some pegHeads. The base noggin was a quick thing in the free version of zbrush. I used Maya for booleans and the pegs. I have learned to do custom supports with a Cura pluggin. Also learned to add pauses and temperature changes in the gcode.

 inner cedar
mmm pauses
Y'see tho, I'm insane, and instead of pausing the printer, I just manually feed in a different color filament while it's running
solemn parrot
Do you have a direct drive or bowden?
inner cedar
Bowden
solemn parrot
Ah ok
inner cedar
Not insane enough to try it on direct drive XD
solemn parrot
Do you think it's easier or harder to do that with a bowden vs direct
Ok that answers my question lol
inner cedar
I don't think it would be possible on direct drive without pausing since the head is moving... unless it's slow, consistent movements
solemn parrot
Fair enough. I was thinking more along the lines of actually getting the filament through past the extruder motor tbh
I have an Anet A8 which is a dirt cheap Prusa Mk3 clone and sometimes it takes a minute to get the filament actually going down the throat tube
inner cedar
Probably easier on most direct drives -- there is a risk of catching on the edge of the tube, particularly on some models, with a Bowden
Just getting past the motor anyway XD
agile gorge
unique pendant
Also, those cubes are way too small to do accurate steps. Use this.
Printer x y z steps should not be calibrated, if so, there's something really wrong with the printer
On a belt driven printer, it's either 32 or 40mm per revolution with standard 2mm belts
So that'd be (200or400 / 32or40) * 16microsteps (most common) = steps/mm
 acoustic spire
agile gorge
Printer x y z steps should not be calibrated, if so, there's something really wr...
acoustic spire
agile gorge
Printer x y z steps should not be calibrated, if so, there's something really wr...
lol I just ran into this. Turns out my machine is the odd duck with 19 tooth pulleys not 20!!!
So uh. Anyone using precision piezo on a Delta? I just cannot for the life of me get mine leveled
acoustic spire
Thinking that might be a solution to my issues with other z probes
unique pendant
agile gorge
Printer x y z steps should not be calibrated, if so, there's something really wr...
I don't believe I said to change your motor steps did I? If so, I was wrong and you are correct, and I apologize for any confusion. However, every 3D printer is different because there are tiny variances. Also, filament shrinks no matter what you do. It depends on your firmware on how you correct for scaling problems after factored in all of your tolerances such as nozzle size, belt tension, all fasteners at the appropriate tightness, E-steps, all slicer settings tuned, etc. For Duet, which is what I use most frequently, you would use scaling M579. For example, here's mine for my RailCore: ;Scaling M579 X1.0032 Y1.0035 Z0.9963 ; Scale Cartesian axes As you can see, the factors are in the thousanths of a mm.
empty sedge
acoustic spire
lol I just ran into this. Turns out my machine is the odd duck with 19 tooth pul...
Check the printing on your belts to see if you're running GT 2mm pitch or MXL 2.032mm pitch
agile gorge
unique pendant
I don't believe I said to change your motor steps did I? If so, I was wrong and ...
Sorry, I thought that was the implication, also, it tends to be an absolute amount of distortion, not relative
acoustic spire
empty sedge
Check the printing on your belts to see if you're running GT 2mm pitch or MXL 2....
Thank you. I checked that but it was really just the pulleys are odd. My delta is.... specially blessed with weirdness 😄
So I was reading up on it more and saw in the Anycubic Kossel printers FB group that it's recommended not to use bed leveling, just the delta config, I'll give it a whirl once I get the time to go back to it later in the week. I might have just been overthinking things.
shy kelp
dang, just found out that that biodegratable fillaments are basically a lie 😔
agile gorge
All the compostable plastics are a lie
shy kelp
So my new fillament is actually not catching really well on the stepper motor and it's skipping. what do? It seems like it needs a lot of force to pull the 1k spool?
(ender 3)
(PLA)https://www.matterhackers.com/store/l/175mm-pla-filament-purple-1-kg/sk/M46G60RF

MatterHackers
MH Build PLA is an affordable PLA filament intended for producing quality, 3D printed parts. MH Build PLA comes in a wide selection of bold colors to choose from. MH Build PLA is made with price in mind for any maker, from beginner to advanced, in a wide selection of bold colors.
shy kelp
noz clogged, it was painful but it seems gud now
shy kelp
What beds do you all use? my starter ender 3 buildtak is giving me aneurysms 
unique pendant

235-235mm Mamorubot 3D Printer Platform Polypropylene Build Plates for CR-20 Ender 3 Ender 3 pro Easy to Remove Good Adhesive Smooth Surface
inner cedar
shy kelp
What beds do you all use? my starter ender 3 buildtak is giving me aneurysms <:y...
I still use the stock bed on my Ender 3 Pro, haven't had any issues with that. Glass on my Monoprice Select Mini V2. Still stock on my Monoprice MP10, but that bed is fracked up, so I'm debating if I just want to replace the BuildTak or do something else
arctic dragon
shy kelp
What beds do you all use? my starter ender 3 buildtak is giving me aneurysms <:y...
Blue painters tape can be a pain for larger beds, but it's a nice temporary workaround until you settle on something more permanent.
inner cedar
You can get giant sheets of painter's tape, but it's rather pricey compared to a roll
iron remnant
I got a giant roll of not-really-2090-painter's-tape and the reviews for PLA were fine but ugh it's gnasty with PETG.
inner cedar
Oof
unique pendant
FR4 can handle all of that so you don't have to fuss around with tape. It's not flexy tho' so you have to be patient and wait for it to cool to get your print off.

 inner cedar
Looks like burnt filament?
shy kelp
Oh, so it’s ok?
inner cedar
Probably, it can happen -- sometimes a bit gets gunked in the extruder, burns like that, then gets pushed out with the good stuff. I wouldn't worry about it, that's just a small spot that won't impact the structural integrity of the print
You can use the "atomic pull" to clean gunk out https://support.3dverkstan.se/article/10-the
"The Atomic" or "Cold Pull" is a simple process that should be your first line of defence if you have started experiencing under extrusion or bad print quality
coarse spade
"atomic pull" always makes me afraid I'm going to accidentally vaporize my block when I try it
coarse spade
do not pour LN2 on your printer before trying a cold pull
inner cedar
cracks block oops
unkempt lake
i made a PLA mount for my ender3v2 for a phaetus dragon. i finally got everything together and wired up, and then when i went to extrude to calibrate esteps, nothing came out.
turns out that the little pla threaded cylinder that mates with the bowden fitting warped to the side a tad. i am just guessing but i don't think the filament is making it all the way into the hotend - i found a small mangled chunk in the top of the hotend when i loosened the fitting.
would it be possible to re-insert the bowden fitting and maybe heat it with a hot air station gun at a low temperature and maybe coax it back to the perpendicular?
thanks for any input. i don't really know what to do next other than to put the old parts back on
i was planning on changing the PLA to PETG but i have not been able to do that yet. one thing i might consider is finding a local person to make at least that gantry bracket in PETG for me.
 balmy tinsel
@unkempt lake It's a bit hard to visualize what you're seeing. Could you upload some pictures so we can take a look?
inner cedar
So, does anyone have the Monoprice MP10? I kinda ruined my buildplate because I'm dumb, and need a new one -- does anyone know if the one on Monoprice's site is just the BuildTAK material, or is it a whole metal sheet too?
unkempt lake
@balmy tinsel i took the hot air station to it at 100C and just let it heat up slowly, held it more straight with the needlenose pliers and then held it until it cooled. it is still not 'true 90' but the filament now goes through with the power off and cranking the filament by hand. a friend suggested just rubbing the sides of the hole with the appropriate SAE drill bit for 1.75 mm. so I'll try to just nudge the tolerance out -- the hole feeds the hotend of the phaetus dragon.
before I sent that message, I could not move the filament at all. so it's progress!
inner cedar
daheck happened

That's the front
Here's the back

Only the one side here is... Ok
 karmic brook
Adhesion problem?
inner cedar
Possibly? It does seem like the layers aren't bonding
But it also seems to be shrinking in the front
Not sure if it's a draft problem or what
Here's my settings, 0.8mm nozzle

I had raised my temps because I was having issues with stringing and flow
[225C is the max recommended for the filament I'm using]
balmy tinsel
Are your X and Y belts properly tightened? Does a small circular print come out normally?
inner cedar
Let me try that. I think my belts are good, I printed a calibration cube that wasn't totally blorked
empty sedge
inner cedar
Here's my settings, 0.8mm nozzle
I doubt your hotend can push through plastic that fast. .8 * 65 * .64=33mm3/sec. I doubt you can do more than 10-15
inner cedar
Ahh, so maybe reduced speed?
empty sedge
yeah, drop your speed a bunch and/or drop your layer height
inner cedar
Gotcha. I guess I'd need a better hotend to do both, huh
empty sedge
yeah, the long-melt-zone hotends like e3d volcano help with higher plastic rate but you also need a better extruder
inner cedar
Gotcha. I've had the volcano recommended before, just never actually got to it XD
empty sedge
just the volcano with the same extruder will probably have similar limits
inner cedar
Ok, cut down to 0.48mm layer height and 40mm/s
Now we wait...
I need a bigger UPS XD
inner cedar
empty sedge
I doubt your hotend can push through plastic that fast. .8 * 65 * .64=33mm3/sec....
Ok, it's not too far along, but after cutting speed and layer height, it's looking WAY better -- can't get a good look, but it's not the dookie storm it was before. Thanks!
balmy tinsel
Great thinking on that @empty sedge, I completely overlooked the nozzle size.
inner cedar
I bet that's the issue with my little printer too... hadn't even considered that the nozzle couldn't keep up with the flow, even tho it keeps temp
inner cedar
So I don't have complete shrinky mess, but I've got these seams at seemingly random places, and the top just turns into a mess... Any ideas? Mostly worried about the top


I printed a second one at a slightly lower speed, and the pattern was the same
Currently trying a small version with lower temps...
Ok, did a tiny one, grabbed it immediately... top was bendy
Def temps
empty sedge
you need more part cooling
the randomly placed seams is where the perimiter ends. There are options to put them in the same spot or randomly everywhere.
I'm not sure what settings to adjust to make them smaller. Probably linear advance k-factor or maybe retraction settings
inner cedar
Cooling fan is at 100%, not sure what to do about cooling then...
empty sedge
better fan, better fan duct
or print two parts at a time so every other layer you have time to cool
or make the layer height lower, the speed lower, or raise the minimum layer time
Oh yeah you can also reduce print temp
inner cedar
Mmmk, better fan/duct are not immediately viable options [need to get prints done in the next couple days, no time to wait for parts], so let me try those adjustments
Found that "Lift Head" was disabled, so minimum layer time was ignored. Enabled that, left it at the default 5s for minimum, let's see how that goes
Mostly need to get the tip to print properly... I can sand out the other imperfections if need be
inner cedar
Ok, that was waaaay better with minimal layer time enforced
 unkempt lake
so i had a problem with my gantry mount -- i mentioned a bit of it last night -- here is a photo of the aftermath
 inner cedar
Oof!
unkempt lake
some guy on thingiverse has a mod to this gantry mount that reinforces that broken fitting to the bowden fitting. i'm game to try it. i think my tube pulled it to the side
my question is, how fvital is the parts fan? old fan was a blower type and i have a new one that is a standard 4010.
inner cedar
Yeah, def split on the seam. I'd try reprinting it at a different angle so the seam isn't across that axis -- if that's your only printer, super glue should get it working for emergency printing
unkempt lake
this is PLA here. i could jumper the old fan to a 12v p/s ac adapter and let it roll
oh really? i didn't think of super glue
would be easier than puting all the original parts back on
my plan is to: make a new 'mod' mount in pla, then hopefully do this whole thing in petg -- roll in box under that desk
inner cedar
I wouldn't recommend using it glued long term, but if it's a choice between glue and no printing at all... Glue is preferable
One time my stepper mount broke on my printer for the extruder, so I just held the stepper in place while I printed a rough new one, lol
Result was sloppy and gross because I made it the most extreme fast print possible... but I only had to hold it for 5 minutes, and then was able to use the gross one to print the 25 minute nice one, lol
unkempt lake
right! well this morning, i had that tube braced with string on the mount -- tied it off on two long screws like a boat
i'm pretty new to this and i have one other question. this is the top view of my hotend now:

i am not sure if i need to get that out or not, maybe the (attempted) extrusion and the temp caused the extra force to break what was already a fragile joint
inner cedar
In the middle of the blue? What is that, stuck filament?
unkempt lake
yes PLA
never got to the nozzle -- the nozzle is totallly clean
it's brand spanking new
inner cedar
Ahh... If it didn't get to the nozzle, it probably isn't crudding up, should be just able to push it thru
As long as it isn't jammed
unkempt lake
think i should heat it with hot air? i have a rework staion, could set the temp
i tried but only focused on that spot
inner cedar
I'd see if you can just pick it out cold first
Should be able to take off the nozzle and push it out with something narrow
inner cedar
I'd try something straight, not threaded, like tweezer tips
Want to try to avoid potentially scraping the inside of the barrel
unkempt lake
so uncle frank here (no relation) has a method for clearing the heat break: i'll give it a shot here in a bit. https://youtu.be/IDYg66mxrM4

I have a quick tip for you; my DIY 3D printer was clogged entirely, I found that the heat break had a piece stuck in the heat break.
In this video, I show you my technic to unclogged it safely without drilling or anything that would damage the heat break.
Let's take a look together at what I did.
Videos that might interest you:
Retraction C...
inner cedar
Yeah, like that
unkempt lake
that seems to be where the clog is. poking in a paper clip from the bottom, it goes in a little ways
inner cedar
Doesn't need to be a drill bit, but something stuff and round
unkempt lake
i don't have much else but i do have a good number of drill bits and a strong bench vise here like uncle frank
do you think the super glue will hold for nearly a 5 hour print? i don't know much about super glue and heat
inner cedar
Possibly? It doesn't do well with high heat, but the heat that would impact it would also melt the plastic, so that shouldn't be a problem. More an issue of how well it adheres to the plastic and how strong the bond is
unkempt lake
ok, well i got a box of the name-brand SG from amazon a while back, should be good to go. i'll put a good coat on there.
thanks for all your advice. 😄
inner cedar
Worth a try! Worst case it doesn't work, lol
unkempt lake
right, then i'll either have the mount printed somewhere or put the old h/w back on the printer
inner cedar
If it doesn't hold, personally I'd just put the original back on to print a new one
Also, I always have extras at the ready of things that the printer needs to work
Well, now anyway, lol
unkempt lake
right! backups are key
unkempt lake
ok i'll try and SG that PLA tube back on there. i'm off to the basement
inner cedar
Good luck! 
unkempt lake
so i made 2 steps forward, but i took a few steps backward. pla got on the heater cartridge screw of the dragon hotend, and when i tried to get the hex screw out, it stripped the head (small pan head 2.5 head but m3 screw).
I'm not the best at this kind of work but i get by (more of a coder/programmer). what i have seen a few YT guys do is to hammer in a Torx socket (I think a T15 would work in this case) and then take the ratchet wrench to it. I'd definitely heat it with my hot air gun (not sure of the temp to do but maybe 150C?), have the hot end in a vise and then make the attempt.
If I get the screw out, can I replace it with an M3 of the appropriate length from my box of M3 screws, or is that a bad idea? Maybe I'd need a special metal?
empty sedge
Heat will help to remove it.
I'm guessing it's a stainless screw. Once you get it out and it's cool check it with a magnet. Stainless is weakly magnetic
inner cedar
So... Having an issue with my Ender 3 Pro... I haven't used it in a while, and when I did, it was perfectly fine. Well, now it seems to intermittently just stop rising on the Z axis -- If I touch it it'll continue moving up. Have it go up and down a few times, eventually it stops... but then I try printing and it does it again. Any ideas what might be going on? I can't see anything
 elder oxide
Possibly a loose connection on the z stepper
Try unplugging the cable and reconnecting it
I have an Ender 3 Pro as well
inner cedar
Ok, worth a shot... I had touched the stepper and it seemed to go. It also makes noise when it happens, like it's still moving, but still....
Let me try that
Just the stepper end, or both ends?
elder oxide
Try the stepper end first
The board end requires taking off the bottom panel
Or top panel I can’t remember lol
inner cedar
Too much work :P
elder oxide
Lol
inner cedar
Ugh... Went to download that 6 sided twisty vase thing, and the model I found has a top to it -- why does it have a top?!
They expect you to remove the top 3 layers by hand
inner cedar
It's supposed to be just a straight up thing like a vase, no top. Not sure where the original model is...
elder oxide
Hmmm yeah, makes sense
Try this one? https://www.thingiverse.com/thing:2173745

I made this low-poly twist vase specifically to hold http://www.thingiverse.com/thing:84075 and it looks great in really shiny/transparent materials.
TIP: The default size is quite small. If you want one that's just under 200mm high scale it to 165%.
UPDATE: I tried printing a version of the vase that was scaled up 165%. Looks great even when i...
inner cedar
I actually decided I don't need to worry about it -- I don't want to print the whole thing. It happens after the first inch or so
uhoh

uhoh

Oh, wait, once again, I have done the dumb. I had turned off the PSU, but the controls were powered via USB by the Pi.... Must have crashed the printer when I tried printing without the rest of the printer having power
I need another Pi camera and a mount for it, lol
 inner cedar
Smort
Maybe I should put a distance sensor on the Z axis so I can tell if it's moving
elder oxide
It usually moves 0.1-0.3mm at a time, very hard to visualize in short periods of time
But yeah maybe a distance sensor will work
Or Octoprint should show you the current print height
inner cedar
I don't see it listed. But that would only be where it thinks it is
elder oxide
Should be under gcode viewer
inner cedar
Ah, yeah
elder oxide
 inner cedar
I should put a failed one next to it so I can see when it gets closer to where it was happening
elder oxide
Yeah good idea
inner cedar
Fingers crossed...
elder oxide
Speaking of printing, I need to print off a few more things
inner cedar
About half way there
 elder oxide
Living on a prayer
inner cedar
lol
Grah, I'm so on edge, and there's someone with a saw randomly cutting outside, keep thinking my printers are making the noise
elder oxide
Oh no lol
My toxic trait of 3D printing is seeing I have a 3D printer and not using it for 1-2 months
And also buying more filament when I haven’t used what I already have
inner cedar
Lol. I had a printing hiatus for a few months -- I was printing masks and face Shields at the beginning of the pandemic, ended up breaking the belt of my MP10, and then the group I was printing with collapsed, and I just stopped printing because I was too busy to fix the MP10 and didn't have much to print
I have 20KG of filament >~>
elder oxide
😅
inner cedar
Almost...
 elder oxide
I was printing ear savers for a few weeks
Then demand fell off
I still have like 30 left
inner cedar
Hmm... It seems like it skipped Z movements?

And there was like a lump at the back

I shouldn't have used a "complex" test model
I'm gonna let it go for a bit and then try a simple cylinder
That should be "perfect"
Well, MP10 seems to be doing fine. Still having a few issues, but not getting garbage
elder oxide
Yeah, takes some tuning
It might be worth upgrading your board if the issues persist
inner cedar
A bit stringy, but it's sticking, and doesn't look like swiss cheese

 inner cedar
Oh, yeah -- ordered a belt that was supposed to be the bed belt specifically for this printer... Way too big. Had to cut and STAPLE IT
 elder oxide
But different sizes for different parts
empty sedge
inner cedar
Ok, worth a shot... I had touched the stepper and it seemed to go. It also makes...
A buzzing sound when it stops moving would mean it's skipping steps. there's probably something binding or nearly binding
inner cedar
empty sedge
A buzzing sound when it stops moving would mean it's skipping steps. there's pro...
It didn't really sound like a buzz? It sounded like it was still running normally
empty sedge
then maybe you have a coupler slipping
inner cedar
That might be it... Thankfully it's not stopping at least -- it made it a few mm above where it all-out stopped before
But I was reading that making the coupler too tight can also cause issues, so not sure how to make sure it's tightened just right
elder oxide
It should move without being jerky
inner cedar
Let me try with the simple cylinder and see if it's actually just the model or if it's the printer
Ah, no, def the printer... Happened at the same height the other one stopped


It catches going up when I jog now, instead of stopping
Sometimes....
And now I'm jogging up and down with no problems
Grrrrr
Well, at least the MP10 is working... Ok. Not great, but good enough


Nnnnope that's not right
It was wobbling back and forth at the bad layer
I can't feel anything binding, I don't know what to do... Same height every time
This should be a hollow tube aside from the very bottom, but as you can see it kept filling in filament until it made a "cap"


Would coupler slipping happen at the same place all the time?
empty sedge
it could also be one of the v-rollers binding
but I don't know why that would happen at the same spot in the travel
you can check the v-rollers by disconnecting the leadscrew and seeing how free the motion feels by hand
inner cedar
I just don't understand why it happens sometimes
inner cedar
empty sedge
you can check the v-rollers by disconnecting the leadscrew and seeing how free t...
Let me try that...
Actually I might use it as-is because I have a very short print to do and my other printer is busy >~>
Oh wait no I can do baby printer
Yay options!
 elder oxide
Printing out the 16mm at 110% height to see if it will fit the JST connector tape
unkempt lake
i went to Lowes (big box hardware store) and i got a set of Torx sockets. the T15 is my target here. Still just thinking about the insanity of driliing a pilot hole, then a 7/64" hole in that stripped heater cartridge screw (m3 screw, ~= 2.5 mm and change in diameter (of formerly good hex socket target) at this point.
stats:
7/64" drill bit ~= 2.778 mm
T15 torx bit ~= 3.27 mm from outer point to point
inner radius of Torx T15 "star" -- about 2.7 mm on my calipers
tools:
3 inch ratchet extension
T15 socket for ratchet 1/4" drive
fairly decent hammer (framing i think)
skills:
not great hitting nail straight with hammer
a bit nervous
very determined but also ready to reorder hot end from Canada
 unkempt lake
well i got the filament out
and it extruded this morning
but then i realized a little while leter that i did not fundamentally understand the function of the (2) 4010 fans
as in, i had them reversed. the regular fan was blowing on the part cooler duct
so...
got pla on said screw
and then i couldnn't get it out. so. yeah. well that's the breaks i guess
inner cedar
Couldn't get the screw out?
unkempt lake
i have tried heating it up a bit. it's a button head. i don't know if i can get a grip on it
yes, that's the meat of it 😦
i have a half-decent hot air station
inner cedar
Button head as in sticking up? You could cut a slot and use a flathead screwdriver
unkempt lake
i dont' know what the best call is. i have a problem with bolts. strength and delicacy are not a good combination for me
i saw a motorcycle guy do the hammer torx in -> get the screw out thing
but it's a much bigger bolt situation
i do have a dremel though
inner cedar
Gotta be careful with the hammer+screwdriver method, that can shatter smaller screwdrivers and damage the rest of the thing. Slot is pretty safe
unkempt lake
right. yep.
so okay, i don't use the dremel very often. i hope i have a decent small cutter
inner cedar
Slow and steady wins the race
unkempt lake
can i do this with some other saw? i don't know maybe a hacksaw? those blades migtht be too thick?
inner cedar
If you have a tiny hacksaw, maybe? But Dremel will probably be the easiest, cuts fast and precise. Just gotta be gentle
unkempt lake
i'm seeing these carpenter's pincers?
inner cedar
?
unkempt lake
i can be a bit rough but i do like tools 🙂
to grab the round head maybe?
putting the hot end in a vise?
i can be gentle. maybe if i have something to steady the dremel
locking pliers? like um. vise grips. i only have the large ones in the house though
and i think i'll scratch the heck out of the thing
inner cedar
Depending on the size of the head, vise grips might work? But if it's a round head, probably won't be able to get a grip
unkempt lake
screw removal pliers. hmm. sorry to keep flooding you with my thoughts here :/
but this actually looks practical -- this guy fixes guitars -- https://youtu.be/5YmrdB8xRlQ

Stripped out screw head? No problem!
Removing stripped out screws is always a pain. Use this handy set of pliers to grip and remove screws with stripped or damaged heads.
http://www.stewmac.com/Luthier_Tools/Types_of_Tools/Pliers_and_Cutters/Screw_Removal_Pliers.html
StewMac has everything you n...
thing is, i could probably use a tool like that. i don't really get it, but stripping screws is like my achilles heel.
inner cedar
I mean, we're talking about 3D printing still, so valid discussion XD Yeah, those would work, see if you can get a set
That looks like it'll make a lot of contact, regular pliers/vice grips probably won't make enough contact to pull it off
unkempt lake
here's an engineer pair. i got their solder sucker and i was TOTALLY impressed at how easy it was to use.
https://amzn.com/B002L6HJAA

ENGINEER PZ-58 Screw Removal Pliers Extractor Pliers (Combination Pliers), with unique non-slip jaws for quickly removal of damaged or rusted fasteners
inner cedar
Definitely easier than the slot method
unkempt lake
i do not know what it is with me and screwdrivers. i am not what you would call a clumsy person. this ex-cop was on a trip with a group i was with, out of the country. he told me i walked like a thief. i took that as a compliment as i like to be sneaky
anyway i think i'm more like a clumsy oaf where unscrewing bolts is concerned. and i am conscious of this fact, and i had erector sets as a child, and i don't have to think about which way is clock/counterclockwise. but it happens a lot.
my brother in law does the dremel slot thing when he encounters those security bolts. he worked in a garage for a bit after college and is quite handy. so he's gonna get one for xmas
inner cedar
Sometimes you just go too fast and... oops
inner cedar
Uhhhhhh.... Why is my extruder leaking? I made sure it was tight when I switched nozzles
 inner cedar
Flow seems fine...
elder oxide
I’ve had where it was partially blocked before and it causing oozing
inner cedar
Bleh, I just put in this nozzle, how would it get blocked?!
... The filament is now, somehow, jammed, and I can't pull it out
elder oxide
Heat up the head then pull
It’s possible you also have a gap between the Bowden tube and the nozzle
inner cedar
I heated it up, disconnected the Bowden tube, grabbed the filament with pliers, and pulled hard
Everything is a messsss
It seems like the block came loose
elder oxide
😳
inner cedar
End me
Uggghhhhh
Ok.... this is another case of me being an idiot
I didn't realize the threading on the new nozzle was shorter, it didn't make it up to the tube inside the heater neck
elder oxide
😀
inner cedar
I need an assistant
agile gorge
inner cedar
Uhhhhhh.... Why is my extruder leaking? I made sure it was tight when I switched...
Must tighten the nozzle at temperature, 2Nm is enough
Oh, you got your answer I guess
And yes, the nozzle head shouldn't bottom out on the heater block, rhe neck should bottom out against the heatbreak
inner cedar
Yeah, I just wasn't paying attention
iron remnant
Sometimes it's really important to thread carefully.
inner cedar
 shy kelp
More general info, but would it be best to try to go nuts and bolts to secure 3d printed parts together or are other options better? if so which ones should I aim for and what else would I need for it
inner cedar
Depending on what you're doing, you might be able to do dowels/pins, but screws/nuts and bolts might be good. Adhesive is also an option. But it all depends on specifically what you're doing
shy kelp
Yeah it's probably best to stay back for a bit
inner cedar
You can also tap holes in prints for screws instead of nuts
unkempt lake
@inner cedar i received my screw extractors today, but I'm going to wait until tomorrow morning to try them.
my present clog is worse than the one i had a couple of days ago. i had only a small success getting some of it to pop out. i managed to break both of my 1/16" drill bits (i used the smooth end). I wonder if I should order another hot end entirely
inner cedar
oof
unkempt lake
but i will not give up on this one
i have 10 1.5 mm lathe rods on the way
100mm long
not sure what that thing will be like afterward
inner cedar
 unkempt lake
i have really tried to be careful. it's pretty frustrating. i used the heat gun at 160 for a few minutes 🙂
hehe yeah well i run into walls a lot as a programmer. no new tale to tell
the screw extractor -- it looks like a real champion
inner cedar
Although at least if you screw up with software you can just Ctrl+Z it XD
unkempt lake
yes this is true 🙂
oh, forgot to mention. one of the 4 mounting screws -- i took them out and put them on my workbench, i think they're M3. anyway it is hiding in my garage somewhere
but i have a box of those so thats' okay
i did clean up a lot of leaves, cobwebs and debris during my search. so i have that going for me, which is nice.
inner cedar
I need more printers
unkempt lake
I'm still going through possible recovery options here:
The 100 mm 1.5 mm rods arrive tomorrow evening.
I have an old beaten up toaster oven in the basement
I have a decent temperature-controlled soldering iron station
and also a hot air rework station.
So:
- put the rod in the heater block up the filament channel a little ways
- heat the rod with either:
2a) the heat gun at maybe 160C?
2b) a tinned soldering iron at a low temp (possibly with SMD low-temp solder paste if needed or just tinned with regular solder at regular hotter temp, then allowed to cool to low-ish 250F-ish? temperature) -- hold contact for a bit to let the rod heat up - OR preheat toaster oven to whatever low temp i can, reasonably, and then leave the hot end contraption in there for maybe 5 minutes?
3b) grab it with a cloth, take it to the vise and hopefully get it out with one of the 1.5 mm rods clamped in the vise, and a firm push or 15, doing my best to be careful.
Before this I'll have to get that stuck heater cartridge screw out + heater with the screw extractor.
Does this sound reasonable?
empty sedge
@unkempt lake I don't have the full context but is this really worth your time?
A new heater is like $7. You can drill off the screw head, and once the head is gone and heater removed it should be easy to remove with pliers because it won't be jammed any more by pushing down on the heater.
unkempt lake
no, it's not worth my time.
empty sedge
I don't know what kind of clog you're trying to remove but you should order new parts anyway, at the least so you can get running again and try slow ways to fix them like just let it sit in acetone or see if you can jam a thin steel wire for unclogging nozzles up the nozzle tip after heating the nozzle even if you only heat it by putting it in hot water you made in your microwave
unkempt lake
drilling off the screw head -- this i have not done. what's involved with that exactly -- I have 2 other heaters i got in the package i ordered, i'll murder that heater cartridge no problemo
empty sedge
You get a drill bit, you center it on the hex you stripped, and you drill until the head pops off.
unkempt lake
i did actually, the new hot end is on the way, just have to wait
empty sedge
The drill bit size isn't very important, just needs to be bigger than the threads. It can be bigger than the head of the screw if you'd like
obviously it's easier on a drillpress or at least if you can put the part you're drilling in a vice but there's not a lot to it
unkempt lake
ok so m3 thread, can just take a look, i have a box of them here to eyeball
i'd love a drill press, i don't have one at this point but do have a decent bench vise
empty sedge
yeah, 1/4" bit would be is fine. 1/8" would also work but won't be any easier
3/16" also good
unkempt lake
the clog is very long and goes all through the heater block to the top and to nearly the bottom of the heat block
it was my lack of knowledge that got me to this point, if i didn't have the fans in the wrong order, it would be fine
PLA btw
empty sedge
I was able to remove a like 40mm long petg clog by letting the hotend completely sit in hot water then pulling out the filament with pliers. Being 3mm probably made it easier though
oh, PLA is stickier so that's not as easy
unkempt lake
thing is i just got the last similar clog out only a few days ago by putting a 1/16 drill bit in a vise and pushing it out
but this time. no dice. i mean it only moved about 2 mm
empty sedge
It took tons of force when I've succeeded at doing that. It's not worth the trouble to me. The RPM detection on the prusa i3 mk3 has saved me a bunch now
my hackerspace printers haven't had a bad clog like that in a while
unkempt lake
well i'm a bit unsure i could ever do this again.
yes, and if i had just known that the main fan went on the main heat block. well i guess i should have known that
but it was a new printed mount and i'd never seen the fans spinning before since they were covered up by the old mount
i like a good struggle but these things are so delicate
thanks for your advice. i have to go out of town next week, and i'll just put this aside for now. most likely i'll just put the new parts back on the printer when they arrive and maybe frame this thing /put it in a shadow box / hang in the guest bathroom