
#help-with-3dprinting
1 messages · Page 39 of 1
 verbal sail
verbal sail
verbal sail
And my y movement keeps trying to go past the trigger thing
 frank valve
What kind of printer? It's hitting the y endstop and continuing to try to move toward it? I'd wager that's some sort of issue with the connection likely if so.
Re the image: if that's the first layer it could be the z index is too high or it's under extruding because of a blockage, dirty extruder gear / filament flakes building up, wrong esteps, or filament diameter discrepancies (although the latter usually causes uneven extrusion at random and this seems uniform).
I guess it's the top though given the other parts seem okay and it would be an overhang for those solid pieces on the side if it was the bottom layer. That's very odd.
verbal sail
It's an ender 5 plus. I think I fixed that particular issue. I think I put a wire retention clip in the wrong place and it created a stop.
On the print, it's the first solid layer. Everything else is support

Bottom

Top
 dreamy oasis
Hi all I've recentely started having some issues with our flashforge adventurer lite old gcode on the printer is working fine but new prints even after restoring defaults are not adhering properly has anyone seen this happen before?
 unique pendant
Take a look at your new G-code and see if it's setting the first layer higher than the old G-code.
Look for your first G1 instruction with Z information such as: G1 Z0.20
@dreamy oasis
dreamy oasis
unique pendant
Take a look at your new G-code and see if it's setting the first layer higher th...
Thanks for the suggestion what ended up working out was rehoming the z-axis and also ended up having to use some slightly different raft settings.
unique pendant
Oh, you should home before every print.
dreamy oasis
unique pendant
Oh, you should home before every print.
I was but adjusted the Z axis offset a bit is what I meant
verbal sail
is it possible to 3d print with wire or something to give the print conductive properties? i want to introduce leds to a print without having to add external wires or holes. kinda like a conductive lego
unique pendant

ProtoPlant, makers of Proto-pasta
Electrify your prints with Proto-pasta Conductive PLA! Print simple circuits and touch sensitive devices on your 3D printer.
 verbal sail
Shiny. I'm making a dome for my ender 5+ out of replicator blocks and want to put lights in it so I can see better having a line of the blocks be conductive would be great
 half dew
verbal sail
Shiny. I'm making a dome for my ender 5+ out of replicator blocks and want to pu...
half dew
verbal sail
Shiny. I'm making a dome for my ender 5+ out of replicator blocks and want to pu...
Look at youtube reviews for that filament - its been fairly hit or miss for people from what I've seen. Another approach is to print grooves that you can press wire in to.
verbal sail
I need a little help setting up a monitoring program for my ender 5+. I need to adjust the steps and have no way to see how many the machine is taking now
half dew
verbal sail
I need a little help setting up a monitoring program for my ender 5+. I need to ...
I would try this: https://www.pronterface.com/ I have an older Ender 5 Pro so I don't know if its the same (I think Creality has changed the mainboard in the printer since then) but I think you should be able to connect your printer to your computer and use pronterface to interface with it. https://teachingtechyt.github.io/calibration.html Is a great resource made by Teaching Tech on youtube that has a lot of great information
verbal sail
i tried that and couldnt figure it out, i currently have ultimaker cure
 unique sail
Is there a site anymore that sells DIY 3D printer parts. My old go to Makerfarm is no more.
Ive checked around and I get just a few parts here and there.
unique pendant
What country are you in?
 shy kelp
Would anyone happen to know where I can get a replacement part for this? The tiny black screw holding the dual gear part that slides onto the stepper motor just stopped working today 😦

Oh, I wonder if I could try a machine screw and just grind it off ... i have no idea lmao
I used to visit the hardware store - they had dozens (hundreds?) of cardboard boxes about 11" wide by 1.5" tall on drawers separated by a dozen compartments.
Bring a sample and match the threads.
 empty sedge
@shy kelp it's a m3 setscrew, probably only 3-4mm long
I think you won't find one at home depot. Your local ace hardware might have something though
shy kelp
This might be what I'll order:
https://www.amazon.com/Keadic-Internal-Cup-Point-Assortment-Handles/dp/B07RJX41K6
or yeah going to a local hardware store would be better
shy kelp
Fastenal (spelling?) had a lot of stuff when we visited there.
 merry cobalt
does anyone have the 3d file for Gene Starwind Caster (Outlaw Star) #3DThursday #3DPrinting from the adafruit project https://blog.adafruit.com/2017/05/11/gene-starwind-caster-outlaw-star-3dthursday-3dprinting/

Adafruit Industries - Makers, hackers, artists, designers and engineers!
MakotoKamui shares: From the classic anime Outlaw Star, this is my take on Gene Starwind’s Caster gun. Be warned, the grip isn’t the most comfortable, and the rear sight doesn’t r…
empty sedge
@merry cobalt the thingiverse link is dead now
the closest I could find is this 11 euro etsy listing https://www.etsy.com/ie/listing/527532840/outlaw-star-caster-print-kit

Etsy
This product includes 3D print files for making your own life-sized replica of Gene Starwinds Caster gun from the popular anime series Outlaw Star. Please note that the images above are renders of a 3D model and the picture of the printed caster is an example so you can see the actual size and print
merry cobalt
Thank you @empty sedge
verbal sail
my ender 5 + isnt talking to my computer, or at the least, its not communicating with ultimaker cura
verbal sail
And is there a service that collects failed prints and scraps and recycles it into new filament
empty sedge
nope. new resin pellets is under $2/kg so it's not worth the trouble
empty sedge
verbal sail
my ender 5 + isnt talking to my computer, or at the least, its not communicating...
see if your printer shows up in windows device manager under "Ports (COM & LPT)". If not, check that it's on and try another USB cable. The one you're using might be for charging devices only
 tough stratus
I'm learning to work with these brass insets and am finding that they strip the PLA pretty easily. Does anyone have any tips around hole shape, diameter and inset iron temperature?
verbal sail
empty sedge
see if your printer shows up in windows device manager under "Ports (COM & LPT)"...
The cable came with the printer
tough stratus
 verbal sail
empty sedge
see if your printer shows up in windows device manager under "Ports (COM & LPT)"...
verbal sail
empty sedge
see if your printer shows up in windows device manager under "Ports (COM & LPT)"...
I think I found the problem, I just dont know how to resolve it. The drivers are not installed. Keeps giving me this:
 half dew
verbal sail
I think I found the problem, I just dont know how to resolve it. The drivers are...
half dew
verbal sail
I think I found the problem, I just dont know how to resolve it. The drivers are...
https://support.th3dstudio.com/hc/downloads/drivers/ch340-drivers-th3d-uno-creality-v1-1-x-v4-2-x-board/ I don't know which board your creality has but you could try this driver. I didn't need to install any for my ender 5 pro but its possible I already had them installed
Filter by categories Clear Results Customer Service Community Information Discounts Shipping Questions Warranty & Support Downloads Drivers Programs STL Files Unified 1 Firmware Unified 2 Firmware Guides Bootloader Community Guides DIY Guides Programs Troubleshooting Upgrades & Printer Information Wiring Information Product Information 3rd Party...
verbal sail
That worked! So happy
unique pendant
tough stratus
I'm learning to work with these [brass insets](https://www.adafruit.com/product/...
All the answers to your questions are here: https://hackaday.com/2019/02/28/threading-3d-printed-parts-how-to-use-heat-set-inserts/

We can make our 3D-printed parts even more capable when we start mixing them with some essential “mechanical vitamins.” By combining prints with screws, nuts, fasteners, and pins, we ge…
The plate-press technique, described at the end of the post, is critical for excellent results.
If your soldering iron has a temperature control, I typically use 400 degrees for PETG. I don't remember what I use for PLA but you could use less. Of course, if you just use a budget iron, you won't have to worry about setting any temp. 😄
 errant stump
shy kelp
Would anyone happen to know where I can get a replacement part for this? The tin...
errant stump
shy kelp
Would anyone happen to know where I can get a replacement part for this? The tin...
Couple days late but I second looking at your local mom/pop hardware stores first. I have two near me and both have an entire row of little trays of random screws and bolts including super tiny ones! Home Depot and Lowe's do not have much metric and what little they do have seems to stop at M4 or M5. However, you can buy some small M2 & M3 screws online at Home Depot and they will ship them to you free. Good deal if you only need a couple of some random size.
 feral venture
hey! any suggestions on a good open source/free cad program? turns out fusion 360 is limited time only D:
(for 3d printing, of course!)
shy kelp
errant stump
Couple days late but I second looking at your local mom/pop hardware stores firs...
I just ended up ordering a cheap pack on Amazon lol
verbal sail
Dow do I reset my printer to factory standard
errant stump
feral venture
hey! any suggestions on a good open source/free cad program? turns out fusion 36...
Fusion 360 seems to have removed the text on the website making people think it was only free for a year. It was kinda misleading because it wasn't. Now it says "Fusion 360 for personal use is a limited free version that includes basic functionality and can be renewed on an annual basis.", which is how it's been.
unique pendant
@verbal sail which printer do you have?
verbal sail
unique pendant
<@!393614551985291264> which printer do you have?
Ender 5 plus. I keep zeroing the bed but it never seems to work. At one point I zeroed it and it kept starting the print at 13mm above the bed
unique pendant
Are you setting the Z-offset properly? Resetting the printer will not solve an incorrect Z-offset.
Here's a comment from my Duet Gcode that helps me remember how to do it properly: Customize your offsets appropriately - do a paper test, and put the probed value in the Z value here. REMINDER - A LARGER Z offset value moves the nozzle CLOSER to the bed
So with Marlin on an Ender, you can either do the math, or use live Z-offset adjustments with the dial on the control panel (my preferred method because I always mess up the math 🤪 )
Also remember that you have to tram the bed before doing a paper test.
And you should do the tramming with a hot bed and the paper test with the bed and nozzle at your usual printing temperature. Be careful! Don't burn yourself! 🙂
verbal sail
Tram?
unique pendant
Tram = make the bed exactly the same distance from the extruder nozzle at all 4 corners by adjusting the tram screws (those little dials under the bed).
With a standard Prusa-style printer, you'd have to make sure the Z frame is perfectly 90 degrees to the Y axis, and then the X axis is perfectly 90 degrees to the Z-frame first, but with the Ender-5, you shouldn't have to worry about that (hopefully, or something is terribly wrong with the build).
What I like to do is use something metal and heavy like a 123 block (or 25-50-75 block if you're anywhere but the USA) between the bed and nozzle, and move to each corner sequentially while adjusting the tram screws underneath until all 4 corners of the bed are exactly the same distance from the nozzle. -- That's tramming.
This should be done with the bed to temperature like 60 degrees if you typically print PLA, 70 if you prefer PETG. The nozzle doesn't need to be hot during tramming, but should be hot during the paper test.
verbal sail
I did something similar then auto leveled
unique pendant
Of course, if you do not have a perfectly flat bed, which is typically the case on the more affordable printers, you may have to put a nice sheet of FR4 on with double-sided Kapton tape. If you want to do that, if you can't find a 350x350 you can always get a glass company to cut down a larger plate like this. https://www.amazon.com/470-470mm-Mamorubot-Platform-Polypropylene-Adhesive/dp/B087X1GND6/
You have to set the Z-offset before auto leveling.
verbal sail
It was working well until I updated the e steps and tried to print something via usb
unique pendant
Updating e-steps and printing over USB is very unlikely to cause Z-offset problems.
Did you check your G-code to make sure you didn't have any weird Z height commands?
Sometimes printing over USB can have unpredictable results tho'. I only print off of the SD card on my Marlin printers for that reason.
verbal sail
I did. But I'm going to be looking it over tomorrow.
unique pendant
I'm happy to help you troubleshoot.
verbal sail
unique pendant
Sometimes printing over USB can have unpredictable results tho'. I only print of...
I was having issues printing from sd as it wouldn't show the prints
verbal sail
unique pendant
I'm happy to help you troubleshoot.
I'll take you up on that tomorrow
Maybe the second
unique pendant
SD cards can go bad. Apologies in advance if I don't respond right away. My job can be somewhat unpredictable.
verbal sail
I get it. I'm nothing if not patient.
unique pendant
I'm not sure I get you tho'. What do you mean by show you the prints from the SD card?
verbal sail
I put a couple of prints on it and it wouldn't show up in the list on the printer
unique pendant
Oh, yes. I've had that before when I have too much data on the card (like more than 25 prints on an 8GB card). When I erase it and just put the one print on there it works fine.
verbal sail
I had maybe 6
unique pendant
I suppose if they were large files, or it's a small card, it might have the same effect.
verbal sail
Maybe
 river cipher
I keep getting thermal runaway on my hotend, thought it was a bad heater cartridge so I replaced the heater cartridge, decided I was done with v6 clones so bought a genuine e3d v6 with genuine cartridge etc.. thought all was well but lo and behold still getting thermal runaway errors. Theyre genuine, ive caught the temperature dropping from 210 to ~190 before thermal runaway kicks in. I dont suspect it to be the part cooling fan. I just finished a 1.5 hour print with no issues, but tried running the identical gcode again and it thermal runaway'd within 5 minutes.
All I can think of at this point is cold drafts? so Ill try enclosing the printer. Heatbed is having no issues staying at temp. Have done PID autotune.
 somber summit
Had that same issue with thermal runaway. It would start out fine but once my cooling fan kicked, it would slowly drag my nozzle temp down till it triggered the low temp alarm. I ended up getting a silicone cover for my hot end. I have not had that issue since.
river cipher
unfortunately I cant fit one on my hotend in the prusa i3 mk2.5 carriage :/
somber summit
@river cipher that is a total bummer... Have you tried reducing the cooling fan speed in the slicer settings? I lowered my down to about 50% fan speed and that did help to reduce the thermal loss on the nozzle. Do you know how many watts your nozzle heater is? If it's 40 watts, maybe try a 50 watt cartridge?
river cipher
somber summit
<@!320634828594741249> that is a total bummer... Have you tried reducing the coo...
Yeah youre totally right. Just manually heated to 210, turned on the cooling fan, immediate drop to 195 and not really recovering. Set fan to 50% and it only drops to around 207 and then recovers.
Just confused as to why some prints are successful and others arent. But the issues been identified, going to limit to 50% in slicer. Im used to underpowered cheap fans that dont put out enough air at 100% so ive never had to limit the fan speed before..
somber summit
@river cipher I hear ya. Running PLA, i never had that issue until recently myself. One print would print fine and the next print, which was the same print, would fail. I ran 100% fan speed on my prints up to that point. That silicone cover i installed made a world of difference on my hotend. The temp does not even fluctuate anymore. And I am back to running 100% cooling fan speed. I don't know anything about your printer, but i would search for ways to insulate the hotend... if it's possible.
river cipher
somber summit
<@!320634828594741249> I hear ya. Running PLA, i never had that issue until rec...
Got it on there. Quite a squeeze but I got it on there. Awesome. Lets see if it improves things.
river cipher
Wow, huge difference. Set fan to maximum, dropped from 210 to 209 and then recovered. Problem totally solved with the sock.
somber summit
@sterminatore awesome! May want to redo the PID auto tune with the sock on but that's only a suggestion. Happy printing!
 rotund cedar
hey guys, i wanna start to learn 3d printings. which program is good for me to start?
unique pendant
rotund cedar
hey guys, i wanna start to learn 3d printings. which program is good for me to s...
You don't actually need a program other than a slicer to start, but you will need a 3D printer. The consensus on best printers for a beginner are Prusa Mini, Prusa MK3S, and Ender 3. All are great choices and make great prints. Prusas will give you less hardware headaches and will not need to be upgraded. Ender will need a fair amount of tinkering, upgrading, and fine tuning. All have a huge community and great support where you can find help when you need it. Popular free slicers are Prusaslicer, Cura, and ideaMaker. Simplify3D is a great slicer but costs $$ and it's a bit behind the times, but I still get my best results from it. You can download STLs (the files of things you can print) at a few places but the largest is thingiverse.com. If you want to make your own designs, that's a whole other ball of wax, but one of the most popular is the free or paid versions of Fusion 360. There's also FreeCAD which seems to be rising as the best alternative. Some people like Blender too, but it's not really designed for precision as I understand it (I could be wrong, version 2.9 seems to be a revolutionary upgrade).
I forgot to mention that the tinkering/upgrading/fine tuning on Ender is actually a great way to learn about how 3D printers work mechanically/electronically. Your 3D printer choice really depends on how you want to spend your time learning -- what ratio you want of fixing vs. printing.
 elder oxide
@unique pendant creality actually made a pretty nice printer for kids and beginners
It’s not a terribly big build volume but $169 for a mostly 1 touch printer that doesn’t require assembly isn’t too bad
Creality Cr-100 Mini 3D Printer with Fully Assembled and Intelligent Leveling, Best for Kids Children Beginner Students STEM Educational Toys https://www.amazon.com/dp/B0851F9SJK/ref=cm_sw_r_cp_api_glt_fabc_FG57FC6JTKKVK1QZVY6E?_encoding=UTF8&psc=1
It’s kind of cute looking too lol
unique pendant
Has anybody here tried it and verified it's going to work as claimed? It may be only that I got the only 6 Creality printers needed to be upgraded/fixed, but my experience with Creality has been that the designs are less than optimal.
elder oxide
Idk my Ender 3 pro has been great
I have a buddy who has 6 Creality printers and prefers them hands down over other brands
He said he rarely ever has to fix them
unique pendant
Well, there you go. That's great to know!
elder oxide
And he prints nearly constantly with his 3D printing business
unique pendant
I have not been so lucky.
elder oxide
I think like anything it could just be mixed quality
I’ve not had great experience with Prusa printers and Fusion3 printers
But creality has been doing good for me.
The way these things are made (any brand) I think experience is just going to vary wildly
unique pendant
You may be correct. However, the difference in quality of parts is very obvious between Prusa and Creality. But as you point out, that doesn't necessarily mean printer up-time for everyone. In this channel alone there are many more requests for help for Creality and other printers than for Prusa printers, but that's not really a scientific sample.
rotund cedar
unique pendant
You don't actually need a program other than a slicer to start, but you will nee...
i mean i wanna start in the designing and modelling part, for the printing i will give it to somebody else
 ruby matrix
One thing I've wondered with regards to 3d printers and their needs is about their environments. Do they need fairly consistent environmental condition? Such as temp, humidity, vibration, wind/airflow, etc?
Or asked a different way, what are the non-printer factors to consider when 3d printing that newcomers may not know about that would affect their rate of success?
river cipher
Difficult question because it depends greatly on the material being used, the size of prints being produced, which printer is being used, etc etc etc
In general you want to limit drafts especially when printing with ABS because it can cause it to warp or even crack
For some materials like nylon (and to a lesser degree, almost everything else) humidity is a big issue that causes brittle filament, moisture boiling in the nozzle leading to bubbly extrusion and bad surfaces. This process can happen in a matter of hours (in case of high humidity and nylon) or over months (moderate humidity and PLA), but can almost always be reversed by using a food dehydrator (or if you're careful, an oven)
Some materials need a heated chamber (typically specialty materials like carbon-fiber nylon, PEEK) but these materials are exotic at best and the majority of people, especially beginners, will never need to consider this. Room temperature is fine for the majority of printing the average person does with most materials (although ABS likes a slightly warmed chamber, but this can be achieved with a good enclosure without chamber heater elements (the bed and hotend provide enough ambient heat in this case, typically)). Although excessive cold (like an unheated garage in the winter) can cause issues, especially with ABS.
river cipher
ruby matrix
One thing I've wondered with regards to 3d printers and their needs is about the...
Thats all I've got, notice the healthy use of 'typically' and 'most' etc because these things really depend on a large combination of factors but that's the general advise I've seen and can confirm
for beginners the reccomended material is almost universally PLA because it doesn't need an enclosure (temperature consideration not typically required), doesnt need a heated bed (though adhesion benefits greatly if you have one), melts at relatively low temperatures, absorbs humidity relatively slowly (typically takes months for me to notice the effect, which is longer than my spools typically last), and is not especially susceptible to warping or cracking unless in excessively cold ambient temperatures, and not very sensitive to drafts, and doesn't smell very much.
ruby matrix
So with a relatively affordable printer which uses PLA, some patience and practice (read: trial & error), a beginner should typically be successful most of the time?
river cipher
PLA gives you the greatest chance of success with most printers and configurations, yes.
ruby matrix
Awesome, thanks. And for an affordable printer, invest a bit extra for a heated bed?
river cipher
I'd reccomend it. Honestly these past few years, the vast majority of printers I've seen coming out, even budget ones, have heated beds, so this shouldnt be a problem.
Id reccomend it because it gives you better adhesion with PLA, but also gives you the option of using other materials later on when you're more comfortable, such as ABS, which requires it.
I will amend that PLA requires active cooling of the part, while some materials, such as ABS, do not.
ruby matrix
Oh that "shouldn't". We've crossed paths several times, in dark alleys and more dubious neighborhoods.
river cipher
But most budget printers include active cooling too.
ruby matrix
Active cooling, like a fan or something?
river cipher
Yes.
You need a fan for cooling the heatsink of the hotend, and another fan for cooling the plastic as it comes out of the nozzle.
ruby matrix
Or put printer in a mini-fridge? 🤔
river cipher
I mean.. it used to be standard practice to put your printer in front of a box fan before tool mounted cooling fans were popular.
But with your aluminum buildplate you are trying to heat over 100 degrees C (sometimes),your power bill won't appreciate the cold environment.
Nor will your groceries.
verbal sail
@rotund cedar hi. I m just starting myself. There are many programs out there for 3d design and some will recommend others as easier, but I recommend you put in the time to learn blender. Its simpler than it seems but has the added benefit of being able to be used as a game creation engine. Give me a minute and I'll link you to a great beginner's tutorial that is clear and informative.
@rotund cedar https://youtu.be/bpvh-9H8S1g here is the tutorial.the first thing you really make is a simple mine craft scene where the building collapses. Then a sword, which was so fun. Then a scene around the sword that you can animate

Your journey awaits in this new Blender Beginner tutorial series. Dive into Blender 2.9 with CG professional Robby Branham!
CG Fast Track Course Library: https://www.cgfasttrack.com/library?utm_source=youtube&utm_medium=link&utm_campaign=BFT2
Download files: http://cgfasttrack.com/blender-fast-track2?utm_source=youtube&utm_medium=link&utm_camp...
verbal sail
Is there a replacement print plate people recommend for the ender 5 plus
empty sedge
@verbal sail for PLA?
verbal sail
empty sedge
<@!393614551985291264> for PLA?
Currently but I may be adding htpla, which, as i understand it, is roughly the same thing
rotund cedar
verbal sail
<@725763296258424842> https://youtu.be/bpvh-9H8S1g here is the tutorial.the firs...
oh yea im learning blender also and i watch this blender tutorial too, but i search online and some people say blender is not precise for 3d printing, is it true? or is there any minus side in using blender?
empty sedge
it's an art tool not a CAD tool so getting stuff that's particular dimensions requires discipline in blender, where a CAD tool would have a completely different workflow and you would essentially just put a dimension on a sketch
verbal sail
rotund cedar
oh yea im learning blender also and i watch this blender tutorial too, but i sea...
I find it works decently cor simple stuff currently but you should check the dimensions in a slicer program to make sure they are right. I made a lucet and had to correct the dimensions before I could print
rotund cedar
verbal sail
I find it works decently cor simple stuff currently but you should check the dim...
oh okay, thanks for helping
 elder ridge
Anyone here good at Fusion that could help me out with a model?
half dew
verbal sail
Is there a replacement print plate people recommend for the ender 5 plus
Do you mean the entire heated bed? I replaced mine with the one from gulf coast robotics because mine wasn't flat and using a glass bed just added so much extra work and inconsistency to printing. I swapped back to the creality magnetic pei sheets once I put the new heated bed on and my prints have been "set it and forget it" ever since (I also have a lot of other upgrades though - such as a BLTouch, linear rails (these don't really make printing more consistent but lower the amount of upkeep - I swapped to them when my rollers/bearings wore out), and a bondtech extruder + slice engineering mosquito). Mines just the Ender 5 Pro though - I don't know if they make a replacement bed big enough for the Plus
verbal sail
Just the glass. Creality sells a replacement. Could you pm me what you can on your upgrades? I may be able to use some of them @half dew
 deft cave
idk if this is the right place to put this

but is there someway to make the highlighted line make a shape with the other edge its connected to
that way i can extrude both
empty sedge
in autocad?
river cipher
elder ridge
Anyone here good at Fusion that could help me out with a model?
How good, what kind of model?
 manic grotto
Hey so do heat insulation chamber things actually emit heat into the room or something, I don't even understand the physics of how it would, because I just got mine and it feels really hot in here while printing... but perhaps its just placebo at work
empty sedge
it's not the chamber unless you've added extra heaters to it
 ruby oar
Right, does anyone know how to properly make holes and pivots in 3d printing?
especially for gears and such?
my holes are either too small for my components to fit or a tad too large for it to fit snugly
can i just use a simple rotary pivot or is it better to use a ball bearing when connecting gears?
how large do i have to make holes for rotary pivots
1-3 mm off?
 karmic brook
Depends on your printer, slicer, and settings. Some people just add a "windage" parameter to their hole size and adjust the value empirically.
 short crag
What’s y’all’s go to pla
ruby oar
karmic brook
Depends on your printer, slicer, and settings. Some people just add a "windage"...
any rule of thumb?
because i dont know my printer nor slicer
elder oxide
short crag
What’s y’all’s go to pla
Hatchbox has been good to me
short crag
Ok
karmic brook
Several articles on this blog cover 3D printing, hole sizes, etc. https://softsolder.com/2015/11/19/hard-drive-platter-mood-light-3d-printed-structure/

I kinda like the short, squat aspect ratio
unique pendant
Also, if you need absolutely precise holes, you should print them a little smaller and use a drill to get the precise diameter.
If you're going to need precision all around, that requires carefully tuning the printer (e-steps, x, y, z) and a highly tuned profile in your slicer. Regarding filament, Hatchbox is pretty good, but I get more consistent and generally slightly better results from Atomic (for PLA and PETG), Snolabs and Prusament (for PETG), and Proto-pasta (for PLA). There are so many variables tho', it's good to try a variety.
karmic brook
Most of my holes are lower precision (like for self tapping screws), and I use a combination of rectangular and circular hole geometry to avoid having the screws wedge layers apart when installed. But that's an easier problem to solve than gear axes.
ruby oar
i see
alright then
i guess ill just make holes that are slightly bigger then
also, do you think it's better to use ball bearings for rotating pivots or can we just do it vanilla with a hole and a pivot rod?
karmic brook
You'll get better concentricity and stability, and lower friction with bearings. Whether these are important depends on your use case.
 agile finch
ruby oar
my holes are either too small for my components to fit or a tad too large for it...
agile finch
ruby oar
my holes are either too small for my components to fit or a tad too large for it...
You may want to try “crush ribs” if you want a tight fit: https://hackaday.com/2020/10/15/adding-crush-ribs-to-3d-printed-parts-for-a-better-press-fit/
 ember narwhal
agile finch
You may want to try “crush ribs” if you want a tight fit: <https://hackaday.com/...
ember narwhal
agile finch
You may want to try “crush ribs” if you want a tight fit: <https://hackaday.com/...
Linking the video the author made to actually model crush ribs in F360 because that's the part I was interested in after reading that: https://youtu.be/kJ_ukmL5Uls
Crush ribs are great for 3D printing or injection molding. Making them in CAD has a few tricks. Here's my way in Fusion 360.
Support us through Patreon: https://www.patreon.com/imakerobots
Or make a one time donation: https://www.paypal.me/imakerobots
Every like, share, and subscribe helps!
Our site: http://marginallyclever.com/
Instagram: ...
verbal sail
has anyone ever used electromagnets to effect a tool (Hotend) change on a 3d printer before? it would offset the whole hotend assembly by less than adding a second hotend and requires only 2 or 3 changes to the carriage system and frame and maybe a new bit of firmware and gcode. still will need the second extruder, hotend, and new board, but means that the hotends dimensions will be unaffected and may even require little to no offset changes for the nozzleif you build the electromagnet on the side rather than the back, you could offset the magnet rather than the hotend. The hard part is setting coordinates for the different hotends and getting the custom parts made
unique pendant
This is currently the most reliable design for tool changers. They've been working on this for years so I wouldn't be surprised if they considered and rejected electromagnets for some reason. https://e3d-online.com/pages/toolchanger

E3D Online
E3D-Online 3D Printing Parts for 3D Printers. HotEnds, Extruders, Nozzles and more. E3D V6, Volcano, Titan, Hemera. Parts for Prusa and Lulzbot 3D Printers.
verbal sail
I'm looking at it and liking it, but am unsure if it will work on my ender
 signal finch
I pre-ordered it
What are you expecting it to do for starters?
It's not an automatic system as they originally advertised
But it is the best quick change I've seen and they appear to be producing units
I want to be able to change heads quickly, and ideally from a tool storage. My hope is the community will provide some solutions to try
I think it would absolutely work on the ender but you can contact them to ask
Tiny machines is trying to make their stuff work with it I believe
@unique pendant what do you model in?
unique pendant
F360
shy kelp
Is there an easy way to mod the firmware on ender 3 pro v2 ? I heard it wasn't easy but I can't remember why
 lost roost
@shy kelp Without doing any research, I remember reading that the Ender 3 V2 (I don't think it has pro in the name, unless there is another printer i'm unfamiliar with) ships with 2 different versions of mainboards. And there isn't really a way to tell which you have without opening it up (which is easy, i've done it). So, i'd think that's the first thing you want to check.
Hi, i'm wondering if someone can help me troubleshoot an issue i'm having when slicing a model. I downloaded a scad file off of thingverse (https://www.thingiverse.com/thing:4216443/files). I ran it through openscad and saved the file as an STL. Then I opened up the file in Cura and saved the file as a gcode so I could print it. However, the gcode file that Cura is outputting doesn't seem to contain any of the instructions to print this object. Before I even save the file, the estimate says it will take 0 minutes to print. I can see the model in Cura (see screenshot) but the gcode file seems to be empty (aside from pre and post print instructions).
I tried to slice other files that have worked in the past and those worked/printed fine, so it seems to be an issue with this specific model. This is my first time saving an STL file from openscad, is there a step i'm missing? I can't figure out why the STL file doesn't seem to contain any of the print instructions for the model.
I attached the STL file that was generated by openscad, as well as the gcode file generated by Cura.
 empty sedge
lost roost
Hi, i'm wondering if someone can help me troubleshoot an issue i'm having when s...
empty sedge
lost roost
Hi, i'm wondering if someone can help me troubleshoot an issue i'm having when s...
Your walls are too thin. Unless you have a 0.25mm nozzle or something Cura doesn't see thick enough walls to print
if that's the shape you want you can get it "easier" by printing a solid box with no top and bottom layers, and changing the infill type, density, and angle to get the grid pattern
lost roost
@empty sedge ahhh, that makes a lot of sense. I think I do have an 0.2mm nozzle. I've never tried it out so it might be cool to test it here. But if not, i'll try your other suggestion. Thanks a lot!
 lunar oar
I have a print that is a square base around my bed. I have it so that it is 7mm in height, but the left side (where the stepper driver is) is where it should be, but the right side is lower than the left. I have a Creality-CR10 by the way. It has a good initial layer, and a have what looks like over extruding too. Can anyone help me with this? Why are my prints lopsided?
 empty sedge
lunar oar
empty sedge
lunar oar
If you have only one Z motor then that'd be caused by the preload/tension on the v-wheels on the other side being wrong
lunar oar
empty sedge
If you have only one Z motor then that'd be caused by the preload/tension on the...
is there a way to fix this than buying a dual motor?
empty sedge
properly set the preload on the v-wheels
I don't have a machine like that, but you should be able to find instructions online to make it so it doesn't bind
ember narwhal
Discovered firsthand today that you can't make things out of PLA if you plan to leave them in a hot car
Whee
lunar oar
ember narwhal
Discovered firsthand today that you can't make things out of PLA if you plan to ...
do you have pics lmao?
ember narwhal
nah, and it wasn't anything catastrophic anyway - just enough deformation to make me go "huh"
empty sedge
lunar oar
Is this normal?
it's supposed to be that way. the z screws have rolled threads which typically results in them being bent. If you constrained both ends it would try to wobble the rest of the motion so the top end is left free
ember narwhal
Looking into getting a direct drive replacement for my Ender 5 Pro to have better TPU success. Any recommendations on one that's particularly well suited for that printer?
half dew
ember narwhal
Looking into getting a direct drive replacement for my Ender 5 Pro to have bette...
I tried the Printermods kit and since it uses the original stepper it was kind of heavy and had a negative effect on the rest of my prints. I ended up swapping it out with a Bondtech DDX for Creality and its been great. All their settings are spot on and its printed everything I've thrown at it so far. (I also added a mosquito hotend but that isn't required). there are newer options now but this has been working great so I'm sticking with it
ember narwhal
half dew
I tried the Printermods kit and since it uses the original stepper it was kind o...
Yeah was definitely hoping to avoid using the original stepper due to weight. Will check out the Bondtech stuff, thanks!
Where did you get yours from?
half dew
ember narwhal
Where did you get yours from?
I ordered direct
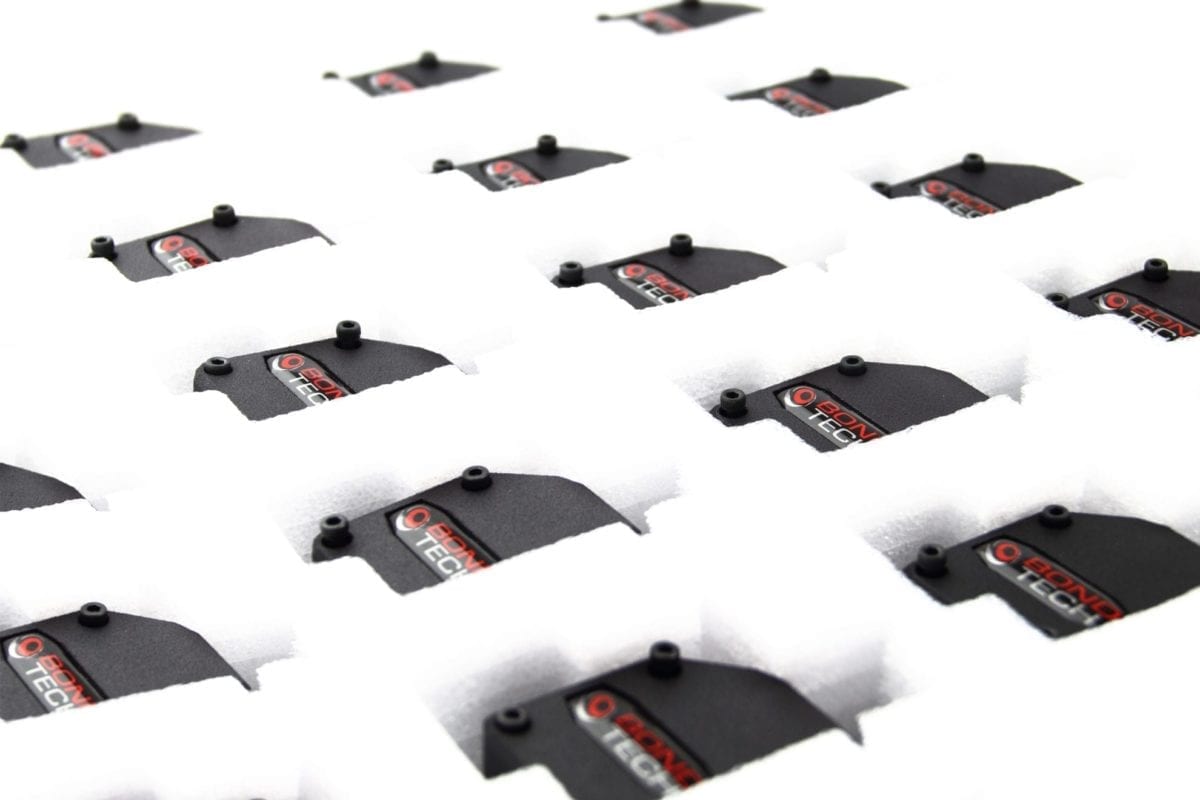
Bondtech is the manufacturer that creates dual drive extruders and extrusion upgrade kits that give you more precise, more reliable and faster 3D printing
It looks like they have a new v3 DDX for creality that is a bit more simple than what I had.
ember narwhal
oh wow that's super reasonable
half dew
There are other options - I know e3d has some and I think there are cheaper clones of almost everything - but I haven't used any of them personally
I also have the parts to do the high temperature upgrade so I can print with high temp nylon and such - but I'm waiting until I have time to replace the mainboard with something a little better
ember narwhal
Which mosquito did you get? I see there are a bunch of options
oh nvm it looks like I'll need the 24v one non-magnum
half dew
yeah - thats what I have. I recommend getting the torque wrench too - the nice thing about the mosquito is you can change out the nozzles cold - but you still don't want to over-torque them
I'd also grab an extra thermistor while you're at it - they're so easy to break
half dew
ember narwhal
oh nvm it looks like I'll need the 24v one non-magnum
Oh, and I think you may need some adapter kits but I'm not sure what - their online chat support was great at helping me. (I also needed a different fan shroud since I converted to different fans at some point)
rotund cedar
hey guys i wanna ask something, why i can't move those layer? when i try to move it it just doesn't change. thanks in advance!
 unique pendant
@rotund cedar those aren't layers, they're all your different sketches. F360 doesn't work with layers like Photoshop does. What are you actually trying to do with your model?
rotund cedar
unique pendant
<@!725763296258424842> those aren't layers, they're all your different sketches....
i want to sort the sketches and the components like layers and group in photoshop to make it easier to find and edit. is there any way to do that?
unique pendant
I am not aware of a way to do that. But you can name them different things to help you remember what stuff is on them. It's a different way of thinking than Photoshop. If you want to combine sketches you can copy them and add/subract from them, but you can't stack them to work together like you can with photoshop. Or, at least, I'm not aware of a way to do that. I have always used my sketches to perform operations for 3D modeling (e.g. extrude, etc.) or to export them as DXF so I haven't really explored other options with them. There are pretty good tutorials/answers on Autodesk's web site and help from F360 that might have some info about other ways to use sketches.
Anyway, iirc, just right click (control-click if you're on Mac) on the name of the sketch and you can rename it what you like.
rotund cedar
unique pendant
Anyway, iirc, just right click (control-click if you're on Mac) on the name of t...
oh okay thanks for answering!

 ember narwhal
Any idea what could cause a print to just... stop? No power outages or anything, it just stopped here:

The nozzle was even stuck to the print when I saw it this morning
No filament tangles or anything, no clue what could have made it just stop like that
empty sedge
If you didn't "safely remove" the sd card from the computer you sliced on, you could've reached the end of the saved gcode
ember narwhal
empty sedge
If you didn't "safely remove" the sd card from the computer you sliced on, you c...
I always eject it from within Cura and checked the gcode just now - looks fine, shows all the end post-print bits and all
empty sedge
weird
thermal runaway detection triggering would also have a similar result but should show a message on the LCD
ember narwhal
yeah, nothing on the LCD - not even a "STOPPED" message like when the nozzle clogs
LCD just looked like normal pre-print
it HAS been hotter lately here but nothing ridiculous - still 72 or so inside
empty sedge
you'd trigger thermal runaway if the heater or thermistor wires are partially broken or connection is burnt somewhere
ember narwhal
yeah I feel like that's not the issue
gonna print a calicat and see if it happens to that
ember narwhal
empty sedge
you'd trigger thermal runaway if the heater or thermistor wires are partially br...
turns out my cooling fan has a lovely buildup of filament dust etc
guessing that caused it and some timeout wiped the screen message or something before I could see
shy kelp
empty sedge
did you leave those in a hot car?
no lol could it be that im printing too slow? maybe 200 C is too high?
Or maybe my settings are bad? idk
ember narwhal
shy kelp
Or maybe my settings are bad? idk
is that the top layer or the bottom? I can't tell
and is it warping or more like hollow bubbles?
shy kelp
its warping on all the walls
the bottom layer is the bit with the white streaks from older prints
ember narwhal
maybe belt slippage?
that's weird
if it looks like actual heat damage, the nozzle might be getting pushed against another layer
do you notice anything unusual when it's printing those areas?
shy kelp
theres no bubbling tho, ik z axis slipping when i see it and this ain't it, its so weird! it looks like over heating related
but the room i print in is somewhat cold
oh wow heres another thing
the walls aren't sticking
of the print
shy kelp
ember narwhal
that's weird - nothing strange in shell or infill skin settings?

maybe cubic is bad?
shy kelp
this looks all good too hmmmmM
 ember narwhal
40% would give you enough touch points for a considerably solid skin connection
if it's cold where you're printing, it could be the temperature variances vs it being too hot
how cold is cold?
ember narwhal
the PLA will have more or less "squish" when cooling if it's colder/hotter and I could potentially see that happening
okay that's not cold to me
maybe try a new nozzle?
shy kelp
its possible its the filament
its the first roll i got without a spool so maybe something with the mixture messed it up
shy kelp
oh wait come to think of it the other pla i print (a diff spool) had the same exact issue
shy kelp
ember narwhal
how does that even work?
oh i meant to say you can buy em without spools and you put a reuseable spool on it
ember narwhal
it's just one of my troubleshooting steps in weird temperature stuff
how slow are you printing?
also maybe try 200C instead for PLA
shy kelp
 shy kelp
ender 3 pro v2
ember narwhal
you could probably even get away with a higher print speed to be honest
shy kelp
yeah probably lol what would u recommend?
ember narwhal
try bumping it to 60 and see how that works
hopefully you have a small part you can reproduce the issue with
that's the worst part about troubleshooting some of these issues - the wait
 ember narwhal
like the whole issue is?
shy kelp
nah its just that model
ember narwhal
ah okay haha
shy kelp
im trying to find a wall calib test
ember narwhal
a 20mm calibration cube scaled up 150% or so might do in a pinch
shy kelp
ember narwhal
a 20mm calibration cube scaled up 150% or so might do in a pinch
I figured it out (i think, my theory is printing lol)
ember narwhal
Oh?
shy kelp
walls were being printing this way (cross section)

and thats why they seperated since its just layers touching
Changing the wall thickness to 0.2 does this:

which should make it stronger
and it shouldn't do the weird warping
🤞
lol
ember narwhal
that's interesting
my walls look like the first image and do fine
but they don't have gaps between the lines
@shy kelp can you post the shell settings you had before? 0.2mm wall thickness isn't the way to go here imo
In your second image, you're creating an infill section rather than a different wall type
Your walls end up being weaker since they're infill surrounded by a single 0.2 layer now
shy kelp
ember narwhal
<@456226577798135808> can you post the shell settings you had before? 0.2mm wall...
oooh really?! I had no idea
it was 0.8 which resulted in the lines above (first image)
ember narwhal
mine are set to 1.6 with a layer height of 0.2
the wall line count setting is thickness / wall line width
so in your second image it would result in a wall line count of 0.5
0.8 should be fine though
hrm
 wide valley
What's a good bang for your buck 3d scanner to buy?
empty sedge
@wide valley what do you want to scan?
empty sedge
wide valley
What's a good bang for your buck 3d scanner to buy?
Try your camera. https://www.youtube.com/watch?v=vU6PoarLEzs
In this short video, we will cover the entire process of 3D scanning in the free and open source software, Meshroom.
Download Meshroom here: https://alicevision.github.io/
Download MeshLab here: http://www.meshlab.net/
Background Track: Broke For Free - XXV
Outro Track: Tavs & MadEye - Clean
wide valley
@empty sedge a tool, I'm doing research on behalf of a friend who has an object that needs to be carefully measured
 novel crest
I have a question about the stl files that Adafruit created for the Magtag 3D printed stand case (https://learn.adafruit.com/magtag-3d-printed-stand-case/3d-printing). Which unit of measurement was used to create them (mm or inch?). I'd like to know this to make sure that the prints that I want to order on treatstock.com get printed correctly. Thanks!
shy kelp
ember narwhal
hrm
Update: My theory worked! the walls caused the issue, and the 0.2/0.4 size walls worked, no warping! Super weird but I guess it makes sense.
unique sail
Looking for a Micro SD insert that could go parallel or 90 degrees to convert to standard SD Card socket. Need to follow the 3D printer and not stick out or have a long ribbon cable. Anyone have any solutions. The ones I've found are poorly made and won't hold into my Ender 3 pro Micro SD socket. would there be a way to make one? What pins would I use?
empty sedge
unique sail
Looking for a Micro SD insert that could go parallel or 90 degrees to convert t...
Sure it's possible but I don't understand what exactly you're changing
depending on how much trouble you want to go through it might be easier to replace the control board and LCD than to design something that fits exactly as you have in mind
verbal sail
I need a bit of modeling help with a print. I'm trying to adapt the mechanism from the clicky pens to a pair of buttons. Thta part I can do. What I cant figure out is how to make it so that when one button is pressed, the other releases. Please help.
empty sedge
a bunch of pens retract when the clip is lifted
verbal sail
I'm needing it to operate like how a blender works: press a button and it latches into place, press another and the first releases while the second latches
verbal sail
I can figure out how to get one button to trip the other, but only one way. I can't figure out how to do it 2 way
empty sedge
so do you want only one of two buttons to be down?
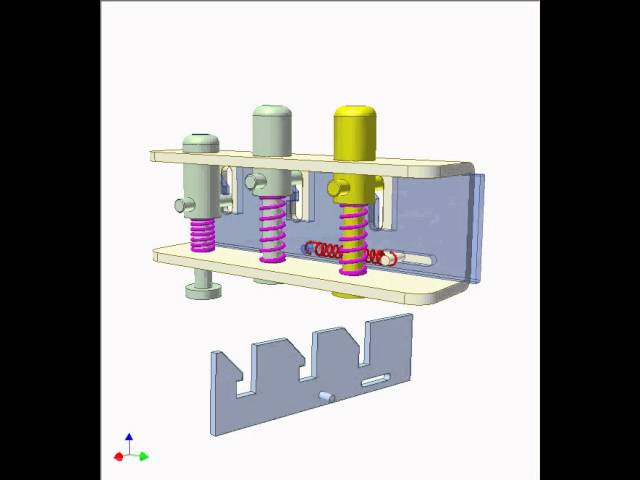
The mechanism is used for speed control of desk fans
Push first green button to get speed 1.
Push second green button to release the first one and get speed 2.
Push yellow button to release the green button in down position and get OFF.
Half way pushing of the green buttons (in up position) has the same effect as pushing the yellow button.
The g...
half dew
Is there anything that explains how those clicky pens with multiple colors work? I think those pens automatically release the other pins when one is pushed
 near locust
I am doing an model kit built of a prusa
Original Prusa i3 MK3S+
Is my faux wood floor flat enough?
how really flat do you need to be?
empty sedge
@near locust Should be fine. Alternately, do you have a fancy granite kitchen counter or a big piece of glass?
near locust
I have glass and grante countertop but I am not willing to impose on my family
 torpid grove
Unless I'm missing something I wouldn't think that having a super flat surface to rest the printer on would matter to much. Just as long as the print bed itself is level to the print head and axes of the printer.
half dew
It might help putting it together since it will be easier to keep everything square. Getting a thick piece of granite or butcherblocck countertop reduces printing noise a lot once its together.
 mental rune
i want to buy a 3d printer which one can i buy with like 500 bugget
empty sedge
prusa mini
 visual glen
do you recomend creality ender?
empty sedge
I think the prusa machines are worth the extra money
 pulsar zodiac
Anyone know of a service that will do large 3d scans and provide a model/point-cloud?
ember narwhal
What does everyone recommend for a good shiny metallic filament? Particularly gold & copper.
unique pendant
I've had great results from Polyalchemy Elixir silk filaments.
Biofusion is the best gold I've ever used tho'.
ember narwhal
Have never heard of those brands. Guessing they're not cheap ones you can find on Amazon?
unique pendant
Well, to be fair, you did ask for recommendations for good filament. 😉
Of the Amazon ones I've tried, I think the Kyuubi was OK. The color is different from roll to roll tho' so if you need consistency, don't count on it. I've never gotten anything I'd call excellent from Amazon. Acceptable is generally true tho'. I have pretty much stopped buying anything at all from Amazon if I want to be sure to get genuine factory firsts.
ember narwhal
unique pendant
Well, to be fair, you did ask for recommendations for *good* filament. 😉
Of th...
Haha, good point. For me, eSun/SUNLU/Overture/Hatchbox seem to be fairly "consistent" for the cheaper brands on Amazon, though each company seems to do better for different materials in different ways
so they're only consistent within the same brand 😄
unique pendant
Regarding Hatchbox... It's good, but for only a few dollars more you can get Atomic, which is really excellent. Hatchbox used to be my go-to brand, but I haven't used a single roll since I tried Atomic. Snolabs is pretty awesome too.
ember narwhal
Will check those out, thanks!
 gray quarry
lunar oar
gray quarry
lunar oar
 karmic brook
So I joined EAA with the hope of using my membership to get access to Solidworks, only to found out Solidworks is DOS-only. And Fusion no longer supports High Sierra. I guess it's time to upgrade to Mojave.
 iron remnant
I guess it didn't meet your high flying expectations then
empty sedge
@karmic brook Mojave seems like a good place to stop upgrading
karmic brook
That's my plan. I have a lot of 32-bit applications I still use.
elder ridge
Who has a MP Select Mini V2, I need some help with the bed heating up
unique pendant
Do you still have the original bed controller? These are known to be problematic and also a fire hazard in their stock configuration.
 weary lichen
elder ridge
Who has a MP Select Mini V2, I need some help with the bed heating up
weary lichen
elder ridge
Who has a MP Select Mini V2, I need some help with the bed heating up
Have you re-wired the bed? The wire routing is done poorly, and will eventually break.
elder ridge
weary lichen
Have you re-wired the bed? The wire routing is done poorly, and *will* eventuall...
I'll try that later today! Thanks
weary lichen
elder ridge
I'll try that later today! Thanks
If memory serves, it's four wires (The sensor and the heater wires). You'll need either a printed side plate, or a drill for the sideplate for most of the re-route methods. There's also one that fiddles with the fan in the back but I don't care much for it personally. I'd recommend replacing all of the wires just to be on the safe side, since you don't know how worn out any of them may be
elder ridge
weary lichen
If memory serves, it's four wires (The sensor and the heater wires). You'll need...
Any wire type recommendations? Which wires should I buy?
elder ridge
weary lichen
If memory serves, it's four wires (The sensor and the heater wires). You'll need...
Also, every time I start a print, a weird noise starts. I need to turn it on and off multiple times in order for it to stop making this noise! Has this happened to you?
weary lichen
elder ridge
Also, every time I start a print, a weird noise starts. I need to turn it on and...
What type of weird noise?
elder ridge
weary lichen
What *type* of weird noise?
Hard to describe, dont know if its the motor
weary lichen
elder ridge
Hard to describe, dont know if its the motor
First instinct says it's the fan
As far as wires go, I'm really not sure off hand. My Mini V2 has been sitting pretty neglected over the past.... while
elder ridge
weary lichen
First instinct says it's the fan
But I think it comes from the tower
weary lichen
elder ridge
But I think it comes from the tower
Could be the Z-axis motor or the extrusion motor, then. Top or bottom?
elder ridge
weary lichen
Could be the Z-axis motor or the extrusion motor, then. Top or bottom?
Bottom
weary lichen
elder ridge
Bottom
That'd be the Z-axis motor. It's a weird motor and a lot of people replace it, but that gets a bit involved.
Do you use Reddit?
elder ridge
weary lichen
That'd be the Z-axis motor. It's a weird motor and a lot of people replace it, b...
ooofs
elder ridge
weary lichen
Do you use Reddit?
Totally
weary lichen

reddit
They also have a discord server which has been useful for me in the past: https://discord.gg/N7XeTCk
elder ridge
weary lichen
https://www.reddit.com/r/MPSelectMiniOwners
Thanks!
weary lichen
elder ridge
Thanks!
There's a wiki and a whole ton of information on the printer available.... somewhere in there. The rabbit hole is as deep as you want it to be, honestly.
ruby oar
Excuse me, does anyone know a good workflow to know that your mechanics in your 3d design will work irl?
like for example, you have a fusion 360 project that you want to print, any tips to check if one part fits the other or if a part will break down etc.
another question, i've found out that printing my components with 50% infill is really expensive, would switching to 25% infill make any difference as to 100% to 50% infill?
it is a small prototype that handles light loads such as mini solar panels
but there are a lot of components, and they're huge
i'm also open to suggestions that are much cheaper than 3d printing
empty sedge
laser cut plates can be cheaper than 3d prints if can make your design work for that
but hobbyist 3d printers make really inexpensive parts if you only need a few of them
karmic brook
I think Fusion can do some strength/load calculations with assemblies of separate parts, but I don't know how.
You can always do it by hand with a pencil and paper.
ruby oar
karmic brook
You can always do it by hand with a pencil and paper.
What do u mean by pencil and paper?
karmic brook
Draw the assembly, calculate the radii and torques, then work from there to the stresses/forces at work
unique pendant
CNC kitchen proved there’s no mechanical advantage to printing above 15% infill. @ruby oar
unique pendant
Well, I went to find Stefan's video and I couldn't find the one I remembered so maybe I'm remembering wrong, or maybe it wasn't Stefan's experiments. That being said, as I recall, higher infill is indeed stronger overall, but the rate of increase of strength at a cost of print failure risk and time is basically not worth it, especially with problems that are introduced with higher infills. The optimal strength to weight parameters (again as I recall) are 4 perimeters with 15% infill so I usually print parts that need to be strong at 0.2 layer height, 4 perimeters, 15% infill, 5 bottom layers, and 7 top layers (always PETG, tho' PLA can be stronger). All this with a 0.4 mm nozzle. I adjust accordingly with a 0.6 mm nozzle to equal the thickness, but that's just based on heresay.
Prints that don't need to be strong I generally print with 2 perimeters and 7-10% infill depending on how big the print is. ALWAYS check your preview line-by-line before printing tho' and this will keep you from making any big errors.
ruby oar
right, are there other alternatives to 3d printing?
would cnc machining achieve something similar yet cheaper?
unique pendant
Depends on what you’re making and what kind of strength you need. Can you be specific about what you’re planning?
karmic brook
There are other 3D printing technologies that produce stronger parts, there's also techniques like lost PLA casting to us 3D printing to produce molds to cast metal parts. CNC is effective, but whether it's cheaper depends on a whole bunch of parameters.
 inner cedar
I've seen some people 3D print a mold, cast wax in the mold, and then do lost wax instead of lost PLA since wax can leave less residue and melts/burns more easily
unique pendant
There is a special filament for investment casting that skips a lot of those steps called Polycast. I’ve used it. Prints beautifully in its own right. I ended up deciding to use metal leaf on it, though, instead of casting it in bronze, so I can’t speak to the rest of it.
inner cedar
Being able to print and immediately cast if it's like wax sounds great. I know some folks also like the 3D printed mold and wax method because then you can cast many times with wax and reuse the mold, instead of printing multiples to do lost casting with
 sacred hamlet
There's a process to print with a metal/polymer blend that gets sent for processing which shrinks and sets to a solid metal part
 agile gorge
Ultimaker has been advertising it lately, it's a basf filament
ember narwhal
Has anyone found a creative way to mount a QT Py or other microcontrollers that don't have mounting holes? Trying to design a case for one and I'm struggling with making the board stay snug.
elder oxide
ember narwhal
Has anyone found a creative way to mount a QT Py or other microcontrollers that ...
You can design a tension clip
ember narwhal
Any examples you know of?
elder oxide
Not off hand, but think of it like the little clips on some cable connectors
Having two on the header pin sides should be enough
ember narwhal
Like the clips on a CAT5e?
elder oxide
No, think more like a molex connector with a hook kind of clip
Like the clip on this connector: https://www.mouser.com/ProductDetail/Molex/39-01-2020?qs=dvxwXVM4mZW4gNBJW5u1fg%3D%3D&mgh=1&gclid=CjwKCAjw1uiEBhBzEiwAO9B_HUfBULsqxc28wSbJ3J-owUwVHPB9XySmtgJrZs5y7hbe19bWL2a0WBoC4WYQAvD_BwE

Mouser Electronics
ember narwhal
Ah okay, that makes sense. Thanks!
karmic brook
There's also these https://www.adafruit.com/product/1116

Having difficulty attaching a PCB? This kit is especially useful when there are no mounting holes - as with the original Raspberry Pi. Instead of gluing, taping, epoxying, etc. use these ...
lunar oar
 empty sedge
This is what happens when you use the wrong material profile and don't watch your print. There's a heater block under there somewhere.
 inner cedar
Oof... I've had blobs like that before... Sometimes in the middle of a print tho
empty sedge
^ that's why we don't let hackerspace members chose which material profile to use any more
inner cedar
Yeah, gotta protect those printers!
 inner cedar
I usually watch the first several layers if possible
 stuck cargo
same, when I can
Problem is, my last few prints have been huge & the first layers are taking like 10 minutes lmao
agile gorge
I usually try to speed my first layer up a bit, perimeters qt the slower speed with infill at much higher
I do first layer perimeter 40 and infill 70
Probably can speed up infill more
stuck cargo
Oh, that's a unique tactic
agile gorge
Perimeters are what I have the biggest problem with sticking on the first layer
stuck cargo
Personally, I print the first layer hotter & slower to get the best adhesion possible
agile gorge
I print subsequent layers at 100 and 200, perimeters and infill
stuck cargo
oh jeez, what printer?
stuck cargo
do you have any experience messing with firmware/mainboards of printers?
agile gorge
I don't use marlin
stuck cargo
oh nvm then, lmao
agile gorge
I use rrf on both my printers
stuck cargo
context: I've been messing with my printer's firmware lately (ender 3), and I'm considering buying an SKR board (so I can use linear advance)
I'm generally hesitant about big upgrades on this printer though, because at the end of the day, it's still an ender 3
like... I worry that I'm wasting work on a printer that's inherently limited
agile gorge
Should be able to update to marlin 1.1.9 for lin adv
stuck cargo
I bought a silent board when I was a noob, and that eliminates linear advance :/
agile gorge
Should still be able to flash marlin to it
stuck cargo
agile gorge
Should still be able to flash marlin to it
yeah, done that
like I said, I've been messing with the firmware
I just can't use linear advance, so I'm considering an skr
agile gorge
Don't need to do that, enable it in firmware and g2g
stuck cargo
you don't understand lmao
linear advance straight up does not work on silent boards
something to do with stepper driver incompatibilities
stuck cargo
 agile gorge
Usually you can jumper it off
Guess its only configurable by uart. Yep, it'll be easier to just get another board
 elder lintel
stuck cargo
I'm generally hesitant about big upgrades on this printer though, because at the...
elder lintel
stuck cargo
I'm generally hesitant about big upgrades on this printer though, because at the...
Ender-3 with an SKR is a completely different printer IMHO. I've got a dozen to choose from and 9/10 that's my daily driver.
inner cedar
The Ender 3 can get even better? :O
elder lintel
Stock it's quite good, but there's a few upgrades either for quality or usability or both that made it a lot better.
inner cedar
What else would you recommend? Anything cheap and easy that makes a big difference?
elder lintel
My favorites are SKR, PEI magnetic bed, and SeeMeCNC EZR Struder
But other people think other things are essential
 plucky drift
Direct drive upgrade for the Ender 3 is great. I have it on one Ender for the different types of filament, and have one that's stock ... stripped down for speed with the original bowden style extruder. Lighter hot end for faster printing.
elder lintel
It's easy to get carried away😅
inner cedar
I feel like at a certain point of upgrades, you might as well just build a new printer XD
elder lintel
normally yes, but a lot of the ender-3 upgrades are still cheaper since there are so many vendors
plucky drift
For $40 you can get the direct drive kit from my buddy, he owns this company here in good 'ol North Dakota
https://www.fargo3dprinting.com/product-category/parts-and-accessories/creality-parts-accessories/
Fargo 3D Printing
He knows the guy that machines those kits, they're top notch.
inner cedar
Maybe I should get another and mod the snot out of it...
plucky drift
HA that's just what I did. I have my workhorse that's stock, and the other one has all my experimental mods on it 😛
inner cedar
Then you can have all the fun AND stability, lol
plucky drift
Just installed a 0.2mm nozzle on the Experimental one (first for me), some settings are harder to dial in with all the artifacts being that much smaller.
inner cedar
I haven't been able to touch my poor printers in a while, but I was actually going the opposite direction and experimenting with 1mm nozzle printing
plucky drift
That's a chonker
I like printing with 1mm, if you have the "grain" right it can make some much stronger parts.
inner cedar
And huge things without it taking 1000 years!
I have a Monoprice MP-10, which has a HUGE print volume... I'm planning to print milk crate sized storage bins
plucky drift
Thanks for the reminder. I was going to print a ukulele and was dreading the time, I'm gonna print it with the biggest nozzle I have ... which I think is 1mm. That extruder motor is gonna get a workout.
plucky drift
6"? For some reason I think that's the size nozzle they use when printing concrete houses.
oh, for your Ender, right ...
inner cedar
Yeah XD for regular plastic filament printers with 1.75mm filament, lol
elder lintel
Over 0.8 you want to look at a volcano hotend or something. Watts into plastic quickly becomes a bottleneck with nozzle size, you can still only print as fast as you can melt.
inner cedar
Yeah, I definitely noticed that with a 1mm nozzle on the MP-10; I was fiddling with temps to try to compensate, but a better hotend would certainly make it easier
agile gorge
@elder lintel are there any other cool maker/3d printing discords to hang out in?
elder lintel
agile gorge
<@521930266151878656> are there any other cool maker/3d printing discords to han...
Not off the top of my head sorry...
This is probably the best...
unique pendant
@agile gorge there are many. What printer do you have or want? Most Discords are dedicated to a specific printer or type of printer. There is a very busy one run by Billie Ruben too.
agile gorge
Only fdm for me, I'm already on all my branded discords @unique pendant
I'm not familiar with Billie Ruben or their discord
inner cedar
There's also a 3D printing channel on the Strange Parts Discord, if you're familiar with Scotty from Strange Parts
Another sphere of makers/hackers over there
unique pendant
Billie Ruben’s is just called “3D Printing”. I think there’s an invite on her YouTube channel.
agile gorge
Only one I saw there was "friends of Billie ruben"
There's a big "3d printing" discord that I left pretty quickly, didn't care for too much
elder lintel
Billie is fantastic and highly recomended.
inner cedar
Maybe we should have a list of great 3D printing YouTube channels :D
 austere sundial


Hey im having a problem where a part of my print get smashed,what could cause this
unique pendant
is that the top of the print where it's happening? any side views of the problem area?
unique pendant
If, however, you're photographing the prints upside-down, you need to lower your Z-offset.
austere sundial
unique pendant
is that the top of the print where it's happening? any side views of the problem...
Its the bottom
unique pendant
OK, your nozzle is too far from the bed. Lower your Z-offset. Make sure your bed is level too.
austere sundial
unique pendant
OK, your nozzle is too far from the bed. Lower your Z-offset. Make sure your bed...
I have a bltouch
unique pendant
I’m not sure I understand what you’re saying. BLtouch oy any probe, you still need a correct Z-offset. Yours is too high. What firmware are you using? If you’re not sure, what’s your printer? I can try to help you with adjusting your Z-offset.
 spark sable
I have a problem my nozzle stuck to heating block and I can't remove it.
agile gorge
Heat it up and remove it
inner cedar
I've found sometimes that I need to heat them up, and have channel locks or an adjustable wrench that lets me grab the heater block CAREFULLY, being sure not to short the heater cartridge, while turning the nozzle. That can require quite a bit of force, and can be difficult to do without possibly shorting/damaging something... but if you, say, left the hotend on over the weekend without filament passing thru so it cooked some to charcoal, it might be the only choice short of replacing it
But hot will likely be far easier than cold, because when the filament is cool, it can be like lock-tight
agile gorge
@spark sable how do you mean it doesn't work? do you have a proper size socket/wrench? are you supporting the heater block adequately? how much torque are you applying? how much did you apply when installing it? -- it can also be easier to remove the hot end entirely so that you have better leverage
unique pendant
Nozzle is typically 7mm, e3d heater block is 17mm, but off-brands are variable. You can use a crescent (adjustable) wrench. Must be hot.
spark sable
I installed it with my hand and then a quarter turn.
Also after 2 or 3 try there is no place to wrench to grip.

@agile gorge
agile gorge
oh dear, what have you done
inner cedar
Oh gosh... it looks like you rounded that nozzle... You need something that can dig in for grip
That really IS stuck
agile gorge
you need vise grips at this point
inner cedar
Yeah
 strong jackal
anyone able to help with octoprint? shows I have a good serial connection to my Mini+ but I don't see any data or have any control. Also receiving back from my Prusa "?$G" unknown command
empty sedge
you probably have the wrong baudrate
strong jackal
empty sedge
you probably have the wrong baudrate
hmm it seems like there is some data coming back but just not the right stuff. Recv: X:86.74 Y:117.14 Z:5.40 E:0.00 Count X:8980 Y:11611 Z:2436 Send: ?$G Recv: echo:Unknown command: "?$G" Recv: ok
empty sedge
yeah, in the connection on the top left, disconnect, and choose a different baud rate
agile gorge
?$G is not a valid ckmmand
strong jackal
115200 is the only one that connects
agile gorge
Baud rate sounds correct
You have some weird auto command on comnect that is incorrect
Like your cat jumped on your keyboard in the settings screen
strong jackal
afaik everything besides the serial connection is default install
agile gorge
You have ?$G somewhere, find it and remove it
strong jackal
agile gorge
You have ?$G somewhere, find it and remove it
where would i look for that?
strong jackal
so on the one gcode related tab 'gcode scripts' in settings, that command isn't listed
agile gorge
There's probably something in your connection settinfs
strong jackal
oh i found it. forgot i did install a grbl support plugin. all good now
 inner cedar
Oof! It shattered?!
spark sable
No I drilled 3.5mm hole in to the nozzle
After litlle bit squishing and force its out
inner cedar
Oh deer... well... it looks like the heater block is OK, that's the important part
 bleak pollen
👋 Anything I can do to reduce the "contraction" of printed holes in 3D prints? (Aside from making the holes slightly larger in the model)
unique pendant
Are you sure your steps are properly calibrated in X, Y, and Z? Your slicer should be compensating for the width of your extrusion, so if your printer is spot on in calibration, dimensions of your print should be spot on as well. If you want very precise holes, though, it's actually best to print them a little smaller and then drill them out with the exact size drill bit you need.
That being said, precise X, Y, and Z calibration can be very very tedious, and if you don't need exact precision, there's no shame in designing the holes a little larger to compensate, and to save yourself going down the rabbit hole of perfect calibration.
bleak pollen
TBH I've never done much X, Y, Z calibration except for the first-layer calibration (I own a Prusa Mini).
I was thinking more that because the holes are built vertically (i.e. they face out), there is some sinking due to gravity when the filament is still hot. Does that make sense?
empty sedge
@bleak pollen look at the reprap logo
also you can go up a bit then have a flat top. For example the smooth rod hole in the i3 x ends
https://github.com/prusa3d/Original-Prusa-i3/blob/MK3S/Printed-Parts/STL/x-end-idler.stl
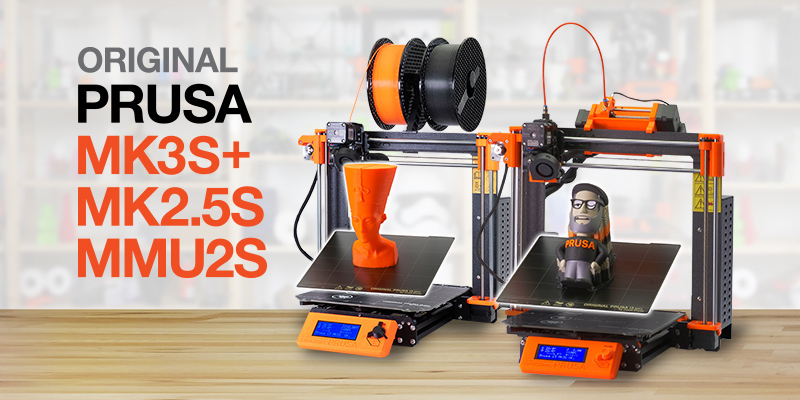
GitHub
Original Prusa i3 MK2 3D printer printed parts. Contribute to prusa3d/Original-Prusa-i3 development by creating an account on GitHub.
agile gorge
@bleak pollen holes will shrink due to physics, you can size them larger in cad, or make adjustments in the slicer, I usually do it in cad
inner cedar
Different materials have different amounts of shrinkage, and temperatures can make a difference (lower temp == less expansion), but I'm not sure how much you can control for shrinkage from those factors. You can print at closer-to-melting-temp for your chosen material, but you'll be prone to more clogs, and would probably want to print slower
Adjusting your models would probably be best -- you can also touch up your holes with a drill or file if you make sure there's enough material to the walls around the hole
agile gorge
Shrinkage is always going to occur, and holes will always shrink because there is no material to prevent it from collapsing
inner cedar
Yup, can't get rid of it, only minimize it. If you have a dual extruder, you can use water soluble filament to hold the holes open and wash it away later, but there's still gonna be some. It's not like reductive manufacturing where you can get "perfect" sizes
unique pendant
Hm. My prints always come out virtually exactly the size I designed them. But I did spend a lot of time calibrating x, y, and e steps. Z was already spot on. Maybe the calibration process corrects for shrinkage then?
I also print mostly in PETG, and some occasional PLA. Maybe that has something to do with it too?
agile gorge
@unique pendant for holes on xy plane? Make a 3mm hole in cad and print it out, it'll end up about 2
5-2.8mm depending on shrinkage
unique pendant
If holes are smaller than designed, that’s expansion, not shrinkage.
unique pendant
Expansion of the plastic
unique pendant
Not on my printer. Maybe you’re overextruding?
empty sedge
agile gorge
<@449766464342458371> for holes on xy plane? Make a 3mm hole in cad and print it...
Which direction of holes are we talking about? going down? or sideways?
agile gorge
Xy plane
empty sedge
interior vertical holes shrink because the extrusion bead likes to take the direct straight-line path not the path the nozzle follows so it cuts across the inside of the hole slightly making it slightly narrower. As the hole size gets smaller it can help to reduce the number of faces on the hole and enlarge the hole slightly to get the hole the size you're looking for. Here's an ancient post about it. https://hydraraptor.blogspot.com/2011/02/polyholes.html

When Reprap machines print holes they tend to come out undersized, even if the linear dimensions of an object are spot on. There are several...
unique pendant
Hm. Maybe I’m underextruding! 😂
agile gorge
Material shrinks as it cools and collapses into the unsupported hole
The straight line hypothesis has merit, too
unique pendant
That’s a very interesting post @empty sedge. They do bring up in the comments the role of the slicer in correcting/compensating for this problem. I think it’s much more complicated than shrinkage.
agile gorge
Large holes are less affected, but small holes, like for screws are clearly in need of being oversized
unique pendant
Anyway, to get to the original problem, easier to design bigger than wanted, and drill if you need precision. 🙂
bleak pollen
Thanks everyone! My holes are small (2.5mm radius), so looks like my best option is to modify the design 👍
unique pendant
Oh, duh. Check this out. Choosing M3 automatically designs the hole bigger! That explains a lot! 🤪
 inner cedar

ember narwhal
unique pendant
Oh, duh. Check this out. Choosing M3 automatically designs the hole bigger! That...
Oh hey, now I have a reason to use the hole feature.
agile gorge
That's interesting, fusion360 does it automatically for 3d printing?
Or is it generating a clearance hole, and not one thats.intended.to be tapped
Because iirc, 3.4 is roughly clearance diameter for m3
 unique pendant
I think it's for everything. F360 doesn't know I'm designing for 3D printing or anything in particular. I just choose whatever size bolts I'm using and don't worry about it. If you want it tapped, there's a choice for that too, and it has always fit fine for me.
agile gorge
"Fit: normal" looks like a regular clearance hole
So you mean m3 drops into holes designed at that size?
unique pendant
Right up against it iirc. Might be fun to do a size test like in the article @empty sedge posted last night. Too bad I'm up to my earlobes in another project atm! 😄
ember narwhal
unique pendant
Right up against it iirc. Might be fun to do a size test like in the article <@!...
The day this is not true for me is the day I... start another project. 🤣
stuck cargo
I’m considering switching to Fusion from Inventor, but idk if there’s any benefits
unique pendant
I switched from Inventor to Fusion simply because it was easier to modify designs others had made because they were also working in Fusion. It was a difficult switch because, even tho' Autodesk makes both of them, the tools behave a little differently, your designs are in the cloud, you can't work offline without planning ahead, and other stuff, so it takes some getting used to. Also, my student status changed and Inventor was no longer free for me -- of course, now Fusion is no longer free for the operations I need to do, but it's cheap. The rendering was super nice on Inventor too, but now is "less than optimal" on both, so I'm learning Blender for that.
One nice thing about F360 is that I can work on my designs no matter what computer I'm at, which is totally awesome, but lazy. 😄
agile gorge
I just use freecad because I don't know any better
shy kelp
I think the autodesk founder runs (or ran) fourmilab.ch
This site is developed and maintained by John Walker, founder of Autodesk, Inc. and co-author of AutoCAD.
lunar oar

 gaunt arch
unique pendant
One nice thing about F360 is that I can work on my designs no matter what comput...
gaunt arch
unique pendant
One nice thing about F360 is that I can work on my designs no matter what comput...
there are good render tools inside f360
unique pendant
@gaunt arch Thanks for your input. I'd have to say, though, that it depends on your definition of good. In F360, you can move around a set of preselected lighting environments, but you cannot add or subtract lights. You cannot control the brightness of lights individually either. You also have very little control over your camera. Those facts, for me, make it not very useful. Even Autodesk's extensive help on the subject says that if you want that kind of control you have to move to a "real" 3D imaging program (they suggest 3ds Max of course). However, the F360 materials are pretty good and can be edited as in a normal way you'd expect in a 3D imaging program. It's OK, F360 is meant for manufacturing. It is not meant to be used for rendering so it's a nice add-on to have it at all. It's great for designing my sculptures. It's just not powerful enough for my needs when it comes to rendering them.
 ruby sphinx
Hello, I am having trouble with the extruder knocking noise. I have tried a new nozzle, and my nozzle isn't too close to the bed. Recently, I replaced the stock ender 3 tubing with capricorn tubing due to having filament stuck in the stock tubing and discovering the end was burnt. It isnt installed wrong or anything, and I do not know what's wrong. Any ideas?
inner cedar
I've had some issues with knocking if the temp was too low and the speed was too fast -- sometimes the filament would be pushed too hard and it would slip, causing a knock
ruby sphinx
Yes, my (infill) speed was pretty fast, and I lowered it down, but I still have the issue.
inner cedar
What material and temps?
ruby sphinx
I mainly print in PLA at 200 and PLA+ at 205
inner cedar
Try 210 or 215, see if that helps
inner cedar
Good luck! Don't be afraid to go up more, up to 230 should work
ruby sphinx
Oh wow, I print at PETG Sometimes, not often, but i print at 240
inner cedar
[double check your filament's temp ratings]
I tend to print at 210-215, but have run plain PLA at 225 and 230 on occasion
Especially at faster speeds
ruby sphinx
Do you use cura and ender3 ?
inner cedar
Yeah
Ender 3 Pro specifically
Well, that's my main, lol
I had access to a TAZ 5 at my one job and did some crazy things with that
ruby sphinx
Yeah thats a cool printer
inner cedar
It was interesting XD one time I thought it was gonna shake itself apart, lol
ruby sphinx
Weird
Update:
My print is coming along good. It has made the sound about two times.
Update two:
It started doing it alot, and very frequently.
I stopped the print.
I started the print at 215, then went up to 220, then 225
And then stopped it
inner cedar
So 225 it doesn't do it at all, but the lower the temp the more it happens?
stuck cargo
have you cleaned your nozzle? Lmao
Like... PLA flows well at 185°, if you’re needing 210 then there’s probs a clog
empty sedge
the "clog" could be that the PTFE isn't sealing against the back of the nozzle so there's a gap there that plastic goes sideways in and makes it harder to push through

Chuck shows you a simple hotend fix for your Creality Ender 3, CR-10 or just about any Creality Printer. He uses a technique created by Luke Hatfield to create a higher temp insert for the Hotend. But Chuck adds his own twist to the design to give you a higher temperature solution. He explains all the reasons behind the design so you will fully ...
inner cedar
stuck cargo
have you cleaned your nozzle? Lmao
Sometimes if you're trying to push it fast enough, the filament doesn't actually get to the same temp as the extruder, so you need to increase the extruder temp to compensate -- kinda just trying to push it past what it should do, lol
ruby sphinx
@empty sedge that definetly could be an issue, especially since i just installed new tubing i probably did it wrong
empty sedge
yeah, watch that video he has a workaround so you won't make that mistake again where you print a shim and the bowden push-fit coupler will press into the nozzle a short length of tubing and your longer length doesn't have to butt-up exactly any more because it's on the cold end of the hotend
ruby sphinx
watching it now, thanks for the advice
shy kelp
Hey guys, I'm running out of filament and need to buy new. For a long time, I've used Prusa's filament on my Mk. 3, because it's high quality and never has any tangled up strands on the roll. The filament strand is just perfectly stacked on the roll.
Now I wonder if there's a cheaper alternative but same, or nearly the same, quality out there.
What do you use as your quality go-to filament?
(PLA, 1,75mm, black)
empty sedge
I've had good luck with hachbox PLA but also will get atomic filament when I need something nicer or can afford a 3.5kg spool
I've had back luck with esun petg. It arrives needing to be dried again
shy kelp
Cool, thanks.
I've used esun too. Mostly works, but does occasionally cause hiccups which is no fun to come home to after 14 hours of printing time.
unique pendant
I pretty much only use Atomic and Snolabs now. I also use Protopasta, but they’re not cheaper than Prusament.
 sly hawk
hi, does anyone understand buck converters?XD
i tried installing a more silent fan on my ender 3, got a buck converter and i wasnt really sure how to set up the voltage, from the vids ive seen people plugged it in and adjusted the screw but when i plugged in mine one of the capacitors exploded
empty sedge
sounds like you might have powered it up backwards
sly hawk
i dont really think so
i checked multiple times
i didnt plug in the fan tho, was scared of that getting damaged
empty sedge
anyway I haven't heard of using a buck converter for fan control. Did you connect it to a fan output or directly to the power supply?
sly hawk
ok so i bought a more silent fan which was 12v
but ender 3 runs 24 so i had to convert it
i had a buck converter with a volt meter on it and i wired the converter to the mother board of the printer, as if there was a fan connected
i didnt connect up the fan tho cause it was more expensive compared to the b converter
empty sedge
typically the control board rapidly switches the fan output on and off with a mosfet on the board. I could see a buck converter not being happy about that
to do that cheaper, it's the negative side of the fan that is switched. The positive side is tied directly to +24V
sly hawk
well first time i powered it on i saw smoke comin out immediately, so i plugged it out
then i tried to mess around with the screw to mess with the voltage and 10 seconds after powering the capacitor blew up
empty sedge
so to run different voltage outputs you can have multiple power supplies with the negative sides all connected together, and connect the positive side of your load (fan) to say 12V, and the negative side of the load (fan) through the mosfet on the control board to ground
sly hawk
humm
i mean another way to do it would be simply have 2 fans but i wanted to go simple way and use the buck converters
empty sedge
if you wire two fans in series it will work for a while but will die
agile gorge
you can't put the buck converter on the fan port, you put 24v from the psu through the buck converter, take +12v from the buck converter and wire it to a fan, take the gnd of your fan port and wire it to your fan
that's how you make it work
sly hawk
I didnt understand a single word from that
😂
I did it the way i saw it online
Could it happen because i didnt plug in the fan or had the voltage set wrong? I mean i dont think its the voltage
agile gorge
you need to show what you did
sly hawk
Well i threw the converter into trash but i can take it out 😂
Slapped insulators around it lol
empty sedge
 sly hawk
I had the converted hot glued on the side and had 2 wires on out and 2 on in

In were wired the way fan was before
I cant remember how i had the red and black on left anymore, but it was same as on right+ the out wasnt plugged into the fan
well you see on all the videos i watched on this they simply wired the fan to the converter and converter to mother board

Many viewers have asked Chuck to show how to install a Quiet 12V NOCTUA Fan on 24V ENDER3. Chuck shows two options and step by step how to make them work. after watching this video you can decide if the Noctua Fan is what your Creality Ender 3 needs and you'll know how to install it. All in this episode of Filament Friday.
Noctua 12 Volt 40mm x...
for example this
(watch from like second half cuz 1st he was trying something that didnt work)
sly hawk
im trying to find out what i did wrong so when i get new one it wont happen again
unique pendant
I have only ever wired buck converters from the power supply and never had any issues. If you don't want your fan on all the time, the wiring diagram above looks pretty good. Looking at your hot glue work, are you sure no electrical contact was made to anything from the bottom of the buck converter board? That could short something out right quick.
One thing to keep in mind about those Noctua fans... they are very quiet, but most don't have the static pressure required to actually cool your hotend properly and you'll get clogs.
sly hawk
i didnt connect the fan at all first of all
and second i taped the converter with a double sided take, so all parts only touched the tape and hot glued a lil bit on top (board only) to ensure it wouldnt fall off
the way its glued together there i just slapped tape over it cuz i was affraid of somethin comin out of the capacitor
bleak pollen
hello! How practical / common is embedding items inside a 3d print. That is, during printing, have the printer pause, a human puts an item inside a "pocket", and then unpausing the print to finish. I've seen it done with magnets. I'd like to embed an aluminum ring. Anything I should consider before investing time in this?
 elfin stag
I do it pretty often and it's never caused me issues. Biggest thing to be aware of is that it helps for the embedded part to be pretty warm (bed temp or warmer) when you put it in to minimize warpage
also, cura has a really handy plug in for automatically stopping st the right height
bleak pollen
cool, glad to know!
inner cedar
If you're not trying to add a fitted item that has to be snug, you can just toss it in after the pocket is tall enough, without even pausing if it's not moving too fast. I've done that before -- sometimes I put secret notes in things like a time capsule
sly hawk
yo guys how do you think i could set up the buck converter i was talking about last time?
i dont really wanna plug it into the printer again to prevent it blowing up... so maybe if i plugged in a classic 1.5V battery, (just to see if it works), and plugged in the fan on the other side (so it has a place to output the power) i could use that to set it up to the 12 V i need? and then id plug it into the printer and make it run
it works in my head to say the least, but i dont really have much experience in this field
agile gorge
Just run your printer psu directly into the buck
Then plug the fan into that, and it should work
But you cannot put the buck on the fan port
sly hawk
Well last time i tried that it blew up😂
I didnt plug in the fan cuz i didnt want to break it while it had cost more
agile gorge
last time you did it wrong 😛
you got a good wiring diagram from sphereinabox already
sly hawk
Quite possibly
agile gorge
do as he drew and you'll be fine
agile gorge
it would be good to find someone that understands electronics a little more locally to help you
you don't have to open your power supply
you tap into the same leads that goes to your control board
sly hawk
Well u see
Thats exactly what i dont wanna do
I tried to find components which would make it so i wouldnt have to solder anything together
Cuz i dont have the stuff needed for it
agile gorge
there's nothing to solder together
get some fork terminals or bare wire, whatever, insert it into the same place your control board gets power
otherwise, yeah, find someone that's more adept locally
river cipher
Any idea what causes the thin perimeters to jut out? its supposed to be a smooth front face, happens consistently across the entire part

speed is consistent and so is volumentric flow rate

 lofty pebble
I'm no expert, but I've seen people recommend enabling retraction (so the extruder backs up and reduces the pressure when it needs to move) or even just reducing flow rate by some small percentage. It looks like your printer is trying to push more filament than there is room for, so when it gets to an edge it spills out a bit.
Also, I don't know if you'll have much success with those 90 degree overhangs. If possible, maybe split the model in two and turn onto the sides, so all the variation is on the top, and then you can glue/pin it together for the best precision
unique pendant
Looks kind of like the Benchy deckline problem which has to do with infill, but you also have zits/blobs at your retraction sites. Voron uses Klipper, so you might want to look into pressure advance (PA), but you should fix retraction issues first. This might help: https://www.simplify3d.com/support/print-quality-troubleshooting/blobs-and-zits/
ruby oar
Guys, i need help
due to bad planning and tons of new ideas, i have to disassemble and reassemble my 3d prints
the worst part is, i used a lot of hot glue gun that the connections have become too hard to separate
is there a way to remove or dilute dried hot glue without melting the 3d print?
i could use any help i can get, i recently just stabbed my thumb with a philips screw driver trying to pry the hot glue off T_T
 quasi scaffold
Isnt it easier to print new?
ruby oar
i only got 3 weeks till a deadline and i can only use a service which will take 1 week or less, i can't waste anymore time
so yeah
i need some way to remove hot glue
empty sedge
rubbing alcohol / isopropyl
empty sedge
ruby oar
i need some way to remove hot glue
Soak the glue in rubbing alcohol for a minute, maybe try to rub it in a little, and the glue will loosen. If you keep adding more as you peel the glue back you should be able to remove the glue as one large piece cleanly off whatever it stuck to
 empty sedge
that one is molded around the sockets. Since you have to buy sockets anyway might as well choose another connector buy the sockets and housings and crimp tool
popular connectors I use:
JST XH (2.50mm pitch wire to board connectors used on lipo balance connectors, and common in chinese 3d printer controllers)
JST SM (2.50mm pitch latching wire to wire connectors often used on LED strips)
Molex KK 2.54mm pitch wire to board connectors for 3-pin computer fans but available in 2 or more pins
the cheap "dupont" connectors are a clone of an old bourns design also have 2.54mm pitch
This page has info on crimping wires. https://sparks.gogo.co.nz/crimping/index.html
tough stratus
I have the off-pitch sockets from a mis-purchase years ago, but yeah I really want a finished looking housing. It's being glue mounted to the back of my PC to expose power led and pwr switch pins. So I guess a housed JST isn't a bad idea but like the break away properties of rgb terminals. If a cord gets tripped on or something it could dmg the connector or worse and bend some of my mobo pins
 timid venture
Any idea on how to stitch this properly? I’ve tried both the stitching patch tool and it’s not seeming to work. Trying to get this thing to be solid for 3-D printing
 empty sedge
I'd use blender for that instead of fusion. I bet you're going to have trouble with the eyes and mouth also though
[in blender I'd box select everything around the ear hole, hide non-selected, deselect, select non-manifold, then fill]
timid venture
@empty sedge Yes gave me lots of trouble! This model was not meant for 3-D printing as it came with separate eyes mouth teeth and everything lol!
I know nothing about blender
Oh and plus it was just a bunch of surfaces
dreamy oasis
Has anyone here used an original mosaic palette? I'm getting the error 211 invalid splice distance which they say needs a new cable from them to fix but anyone know of a fix that works that won't take a few weeks to hear back from them and get the cable?
sly hawk
yo can anyone help me please?
i got an issue on my ender 3, i cant get the fillament to stick
like i start a print and the skirt gets stuck on, but print itself wont
empty sedge
@sly hawk what kind of filament from what brand?
What temps are you using, and what surface are you printing on?
sly hawk
PLA, verbatim i think? 200 50 glass
empty sedge
bare glass?
sly hawk
well idk if theres anything on it, lol
ik some people use stuff like gluestick but so far i had no issues, tho i added ton of stuff to the printer
basically havent printed for half a year due to upgrading
empty sedge
I stopped printing on bare glass because when you mess up the first layer height PLA can pull chunks out of the glass
that said, 50C seems low to me as a bed temperature for PLA
sly hawk
well my first layer wont even stick
empty sedge
I'd think you should be doing 60-65C
empty sedge
one more thing I've had trouble with on bare glass: the glass needs to be clean and have no oil on it for stuff to stick.
sly hawk
also how about cooling?
unique pendant
Totally agree with @empty sedge re: sticking. I like to clean the glass with a razor blade and Windex or IPA before every print. Also, Magigoo helps. I used to use hairspray on the bed, but it's quite a mess and bad for your lungs. As far as cooling. 1st layer should have no cooling at all for PLA to help it stick. After that, it really depends on your fan/shroud setup. I don't use Ender3 very often, but iirc, we have ours set at 100% starting with second layer. If you get too much stringing or fluff like cotton candy, though, you can back it down.
I also converted all of our Ender3's to FR4 beds as it has proven to be extremely reliable for sticking and super easy to get the prints off after cooling. Not flexible tho' so you have to be patient for cooling.
sly hawk
ye, didnt help at allXD
i tried like everything i thought of so far... might go back to the old bed for now
unique pendant
Dumb questions, sorry, but it's happened before. Are you sure it's PLA? Also, are you sure it's dry?
sly hawk
yes
XD
i only print pla
also im 100% sure this one is pla, if i wasnt, cuz its the first fillament ive ever got, i had it for like 2 years now
didnt really print with it too much, still got a bit left
 split raven
I have been printing some drawers and they all end up with the same type of artifact / error in one of the corners. Any idea why this happens / how to correct? https://imgur.com/a/fNzmBr5
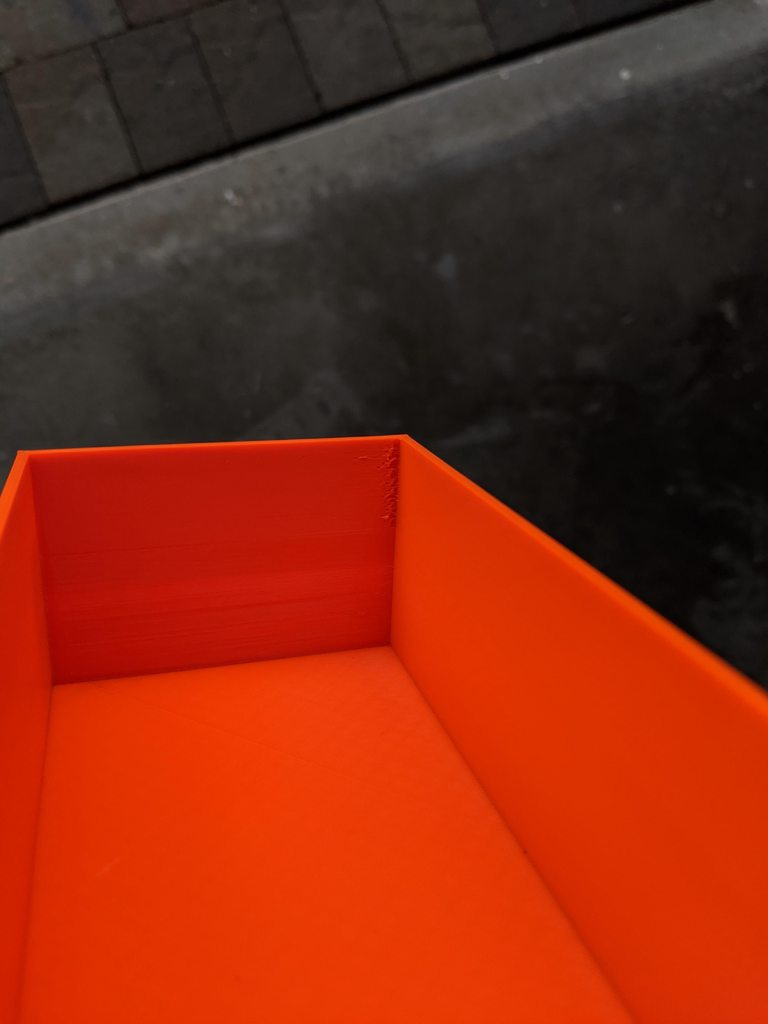 unique pendant
@split raven Your coasting setting is too high. That's Simplify3D terminology. What slicer are you using? It will likely have a different term for the same thing.
This can also be caused by too high a setting on Pressure Advance. But if you're using PA, you'd probably not even be asking questions here. 😄
@sly hawk If the filament is 2 years old, you might try drying it and reattempting a print.
split raven
It's prusaslicer
unique pendant
I'll ask a friend, since I only use S3D, and get back to you.
split raven
Awesome, thanks!
unique pendant
In the mean time, if anyone else uses PrusaSlicer here, what it is is a setting that controls the extruder at the end of an extrusion, where the filament isn't being pushed on anymore, but before retraction.
sly hawk
oh i tried my newer fillaments too
same resuls
results*
ive put on my old bed, adjusted the z offset (i got abl) and its working amazingly
so for now ill stick to it
 arctic tendon
hi
unique pendant
@split raven I'm assuming that's at the end of the extrusion right before retraction, right? Or is it at the beginning of an extrusion? (which would be a different setting).
split raven
unique pendant
<@!462408216362483712> I'm assuming that's at the end of the extrusion right bef...
I am not sure. I can try looking at a gcode visualizer to see the exact path the nozzle is taking
There is a travel path there that could be the cause
 unique pendant
Here is my friend's reply: There is no direct equivalent to S3D's coast setting in PrusaSlicer. Tweaking with retraction distance and speed, along with Pressure Advance are the tools available to work to improve that issue.
Most are in this area in Printer Settings

I hope that makes sense, I'm sorry I don't know much about using PrusaSlicer.
split raven
Yeah, I can try, you think I need more retraction and slower or the other way around?
unique pendant
Other way around.
Well...
less retraction, and slower, so not really other way.
split raven
hehe, ok
I'll let this one finish and try that for next print
I still have a few of these to go through
unique pendant
Try changing one thing at a time and that will help isolate the issue better.
split raven
They are very long prints though, so not easy to test (6 hour print)
unique pendant
Also, watch carefully to see if it's at the beginning or end of an extrusion line.
split raven
I wonder if the issue would show up if I scale it down
unique pendant
You could make a little test model. Maybe a 30mm cube or rectangle without bottom or top layers, and without infill, and with 2 perimeters?
split raven
I will try design a simple test case and see if I can reproduce
empty sedge
@split raven the marlin firmware linear advance has a test print generator. not sure if it applies to klipper
https://marlinfw.org/docs/features/lin_advance.html
https://marlinfw.org/tools/lin_advance/k-factor.html
the prusa slicer configuration for i3 mk3s has the linear advance set in the filament settings custom gcode
split raven
will check it out, thanks
lunar oar
i think i just shorted my cr10...
i was using a wrench, lcd went white, it restarted, but all was well, now my extureder temp reads 273... its not 273
i tried to fixed one problem, two more came
anyone got any idea how to fix it?
sly hawk
why were you working on a printer while it was plugged in...
lunar oar
sly hawk
why were you working on a printer while it was plugged in...
changing the nozzle, i had it heated up so i could change it
sly hawk
ah ok
somber summit
@lunar oar I would check your temp sensor wire for damage and replace it if need be. I would also check your nozzle heater wires for damage. Sounds like you had a short somewhere around the nozzle area. Some printers use the same type of thermal sensor for both bed and nozzle, if this is true for your printer, you can swap your bed and nozzle wires around on the main board and see what you get for temp readings. If you still get a 273 ish with your bed plugged in to the nozzle temp port, then there is a problem with your main board. However, if you get a reading of 273ish for your bed temp with the nozzle temp sensor plugged into the bed port, then your issue is with the wiring/nozzle temp sensor itself. Hopefully that helps you to narrow down your issue.
lunar oar
somber summit
<@407633527224532999> I would check your temp sensor wire for damage and replace...
grazie!
lunar oar
somber summit
<@407633527224532999> I would check your temp sensor wire for damage and replace...
Could you tell me what I'm switching?
 somber summit
@lunar oar I believe it would be the 2 plugs in the top left corner of your board, I can make out the E-Temp plug but i cannot tell what the next plug over is saying...B-something.. where it says Creality3D V1. can you get me that last digit?
@lunar oar IF you could also get me a close up photo of the board area I circled in Blue without the ribbon cable (marked with a red X) in the way, I would be able to see if there is any obvious damage or not.
 lunar oar
somber summit
<@!407633527224532999> IF you could also get me a close up photo of the board a...
lunar oar
somber summit
<@!407633527224532999> IF you could also get me a close up photo of the board a...

How is that one?
I've worked with circuits many times before and I don't see any anomalies,
lunar oar
somber summit
<@!407633527224532999> I believe it would be the 2 plugs in the top left corner...
So I switched the two, but the information is the same

I think I'm still going to buy a new thermistor and heating element and replace it, they are older, and I'm willing to make sure that it isn't that problem
somber summit
@lunar oar let me do some double checking quick in the firmware for that board and confirm a few things but you may be replacing your mainboard as well. it's not a good sign that your nozzle temp is still reading max temp if you have the bed temp sensor plugged into that port.
somber summit
@lunar oar yeah, i'm 99.9% sure now that your extruder temp sensor port is fried on your mainboard. IF the mainboard was good, switching the plugs around should have switched the error over to your heating bed and your heating bed would have the 274 temp.
@lunar oar And your bed reading is 0....it should be reading room temp if your extruder temp sensor was working correctly.
lunar oar
@somber summit With all that being said Ima buy the parts still, if it still is a problem ill fix the circuit,
somber summit
@lunar oar of course, the best of luck to ya.
lunar oar
somber summit
<@!407633527224532999> of course, the best of luck to ya.
Grazie... Thank you for all you're help today!
somber summit
@lunar oar no problem, reach out if ya got more questions.
unique pendant

 silent mortar
What's the best product to make the 3D model fix in the basis?
People told us to use Karina (it's a hair product).
But I am so skeptical this works...
 arctic dragon
Depends on what kind of bed and what kind of material. I have heard good things about gluestick and hairspray, though.
unique pendant
best = Nano Adhesive but it's US$50 per bottle. 2nd best = Magigoo.
Personally, I only use Nano Adhesive any more because I like not having to worry about print failures.
 crude kettle
I'm wanting to build an heated enclosed 3d printer. However, the temps may be too high for a Bl touch. Any recommendations on what I can
 magic ridge
Is there some material that can be used in 3d printers that block out temperature (cold)
 knotty laurel
magic ridge
Is there some material that can be used in 3d printers that block out temperatur...
knotty laurel
magic ridge
Is there some material that can be used in 3d printers that block out temperatur...
You might consider carving things out of foam, since that's a good thermal insulator and easy to CNC or hand-cut.
unique pendant
@crude kettle This guy is very experienced in hi-temp 3D printing and he makes a probe for just that purpose. He is based in Denmark. https://hightemp3d.com/products/remoteht-bed-level-probe-3d-printer

HighTemp3D
It's here! A high temperature probe for the RailCore II 3D printer! We offer free worldwide shipping.
crude kettle
Does anyone have a good opinion on a high flow hotend? I'm looking at; Nova from 3d passion, Mosquito Magnum plus and Magnum regular from Slice Engineering, and the e3d high flow hotend. I like their designs but don't know what to get
inner cedar
The E3D Volcano was recommended to me at one point, but I haven't looked too much into it
 tight leaf
The Dragon HF hotend by Phaetus (formerly my TriangleLabs). The guys at Voron swear by it (or the Mosquito)
lunar oar
@somber summit So I installed the new thermistor and heat cartridge, no results... In addition, part of the glass bead got stuck in the hot end. I was planning to get the heat cartridge in so i could bassically, in hopes, melt it out, but nothing. Do i buy the new board? and should i buy a new hotend?
unique pendant
I would get a new heater block at least. Probably don't need a whole hotend.
somber summit
@lunar oar A new main board is a must as we know from the previous tests that the sense pin is fried. I'm not sure what you mean by "glass bead." Could you explain that or send a picture....better yet....do both? But the new board will get your heater back up and running. Did you ever locate the area of wire where the short occurred? On a side note concerning the main board, do you intend to replace it with same board, or you gonna drop in an aftermarket board? Only reason I ask is your board is very similar to my Anet A8 board in regards to the main processor as well as the motor drivers installed. I replaced mine with the SKR 1.4T and installed TMC2209 drivers and have been very happy with that choice. My printer is super quiet in regards to motor noise and I'm able to enable a lot more features for my printer.
 inland sage
I'm looking for recommendations on printing these "articulated fingers" parts. I'm curious what people like to recommend when printing small odd shaped pieces that dont have a ton of surface area on any one side. Splitting them would mean glueing a lot of small parts which seems messy and tedious. Rafts + Support is the best i have so far. Any ideas would be greatly appreciated.

this is an image of all the "thumb" parts

 somber summit
@inland sage do you intend to print all those parts in one go?
inland sage
that was my intention, yes
it's so many individual parts, it would be like 75 files if i printed each part on its own
but i'm open to the idea of arranging them in groups, like with ike
 crystal ivy
inland sage
I'm looking for recommendations on printing these "articulated fingers" parts. I...
crystal ivy
inland sage
I'm looking for recommendations on printing these "articulated fingers" parts. I...
Im making a delta IV heavy(rocket) model in fusion 360 to 3D print and i wanted recommendations on magnets to hold the boosters and stages etc together. If theres a different better or easier method im all ears (I really want the booster to be detachable though)
 upper ember
I am looking for the NeoKey 1x4 QT I2C 3d file - anyone at Adafruit have access to this?
empty sedge
inland sage
I'm looking for recommendations on printing these "articulated fingers" parts. I...

The secret to making the gutter work: offset the second layer by half the thread width
 tight cove
does anyone know why my fresh install of Cura has no profiles/materials?
Cura: 4.9.1
OS: Linux
I also added my printer


2021-06-15 21:13:07,147 - WARNING - [MainThread] cura.Settings.ContainerManager.getContainerMetaDataEntry [60]: Could not get metadata of container Unknown because it was not found.
2021-06-15 21:13:07,166 - WARNING - [MainThread] cura.Settings.ContainerManager.getContainerMetaDataEntry [60]: Could not get metadata of container Unknown because it was not found.
2021-06-15 21:13:07,179 - WARNING - [MainThread] UM.Qt.QtApplication.__onQmlWarning [411]: file:///home/harry/.local/share/cura/4.9/plugins/MaterialSettingsPlugin/MaterialSettingsPlugin/qml/MaterialPreferences/MaterialsDetailsPanel.qml:91: TypeError: Cannot read property 'container_node' of null
i get those errors when opening the Materials settings
fixed it
had to install these packages cura-resources-materials cura-binary-data
marked as optional dependencies from here: https://archlinux.org/packages/community/any/cura/
 fiery ivy
I'm seeing kind of a weird issue on a Monoprice Select Mini V1. I'm in the process of rehabbing a donated printer and I've had 2 failures in almost the exact same place on a benchy. It looked like the printer stopped feeding filament at the same place but I'm at a loss as to why. If anyone has any ideas on what can cause this issue (or what the issue might actually be!) I'd appreciate it.
 unique pendant
exact same place strongly implies a gcode issue. Maybe check the gcode at this level?
fiery ivy
I'll check and try re-slicing the model
 sweet tinsel
:
i have the creality ender directdive extruder hotend upgrade and would massiveluy appreciate anybody who would run me through connecting it to a RAMPS board....
sweet tinsel
what do i do to fix this sitruation on my printer? also one surface is 0.76mm too small...


 novel lark
@sweet tinsel Here are some troubleshooting resources I like, with visual examples:
https://www.matterhackers.com/articles/3d-printer-troubleshooting-guide

MatterHackers
Use this guide to help you identify and solve the most common issues that may occur while 3D printing.
All3DP
Got 3D printing issues? Check out our 3D printing troubleshooting guide to all common 3D printing problems and their solutions. Includes both FDM and SLA.
sweet tinsel
@novel lark thank you so muh, brb, goin to check them now
empty sedge
sweet tinsel
what do i do to fix this sitruation on my printer? also one surface is 0.76mm to...
Looks a lot like the backlash or loose belts on one axis
sweet tinsel
@empty sedge tbf i'm still unclear on exactly HOW tight is TOO tight/not tigh tENOUGH........ probably another reason why me an the ex-mrs lasted so long, looking back on it... :p
empty sedge
sweet tinsel
<@!459925076200914976> tbf i'm still unclear on exactly HOW tight is TOO tight/n...
There's two things:
- the carriage should move freely if you take the belt off the motor
- the belt tension doesn't need to be super tight. probably tight enough so that when you pluck the belt it plays a low note is fine
backlash can be caused by a loose pulley setscrew also
sweet tinsel
would either of those problems ALSO cause dimensional inaccuracies in my prints...?
cuz i had an xyz cube come off the bed the other day almost 2mil short on the one axis...
empty sedge
sweet tinsel
would either of those problems ALSO cause dimensional inaccuracies in my prints....
yes. backlash will make your parts undersize by the amount of backlash on that axis
lunar oar
somber summit
<@!407633527224532999> A new main board is a must as we know from the previous t...
Sorry for responding so late!! I haven't ordered anything yet. But the thermistor has a glass bead at the end of it, this got stuck in the heat block, and i cannot get it out. I dont think i will upgrade the board, instead just rock with the same one. I dont need it quite, and i heard that the quite boards some times lack the consitant quailty of the normal boards.
 agile gorge
@lunar oar there's 2 options for those, throw the block away, or get an m3 nut embedded thermistor
Glass bead thermistors suck
 inland orchid
Got a few questions for someone who is experienced in powering a RaspiPi with the 24v PSU that came with my Ender3 Pro.
I currently have a raspi pi4 with OctoPi installed and loving it. So I'd like to try to power the Pi with the PSU on the Ender3 Pro. So I did some googling and came across this on thingiverse:
https://www.thingiverse.com/thing:4647380
This gave me some inspiration, but this is also my 1st major mod for my Ender3 Pro. My goal is to remove the Controller board, PSU, Pi and combine them all in a single case like the one noted in thingiverse.
So what are my questions?
- I have a fritzing pict and I am curious if the layout I've done is sound.
- Next goal is to add some relays to turn the LED and SRK controller-board on/off via the Raspi Pi. I have some relays, but looking for advice.
pls note, the fan at the top of the image represents the PSU fan. I intend to upgrade it with a quieter 24v PSU fan.
The box at the top represents the 24v psu that came with the Ender3 Pro and the screw terminals it has on it.
I suppose another "goal" is to use as few buck converters as possible. I have no problem using 24v fans unless there is a specific reason not to.

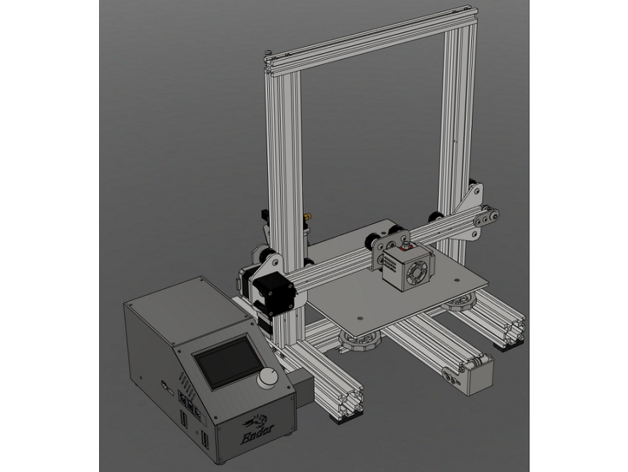
This is a compete redesign of the original thing.
V2
Bigtreetech SKR Mini e3
Bigtreetech SKR 1.4
Bigtreetech SKR 1.3
Standard Ender
And more.
Raspberry PI 3B
Mean Well LRS-350-24 PSU
Creality 3d 12864 lcd display screen
40x40x20 Noctura
1 x buck converters LM2596
IEC320 socket
V1
This case is designed to be used with:
Bigtreetech SKR Mini e3
Ras...
 teal holly
upper ember
I am looking for the NeoKey 1x4 QT I2C 3d file - anyone at Adafruit have access ...
teal holly
upper ember
I am looking for the NeoKey 1x4 QT I2C 3d file - anyone at Adafruit have access ...
After some searching I found https://github.com/adafruit/Adafruit_CircuitPython_NeoKey it seems to have an example that works. It would be helpful if the technical data for NeoKey would point to the code to make it work.
GitHub

GitHub
CircuitPython & Python library for NeoKey. Contribute to adafruit/Adafruit_CircuitPython_NeoKey development by creating an account on GitHub.
arctic dragon
inland orchid
Got a few questions for someone who is experienced in powering a RaspiPi with th...
- Looks good, just make sure your buck converter is sufficiently rated for the pi's power draw.
- For something with a known load like LEDs, I'd recommend using some transistor over a relay. Cheaper, silent, less modes of failure, and they're readily available in pretty much any form factor you want. It'll give you more freedom with your led control, as they switch faster and more reliably.

I think your controller board is drawing up to 20A, which will probably need one of these guys: https://www.adafruit.com/product/1794

When you need to switch a lot of power, P channel MOSFETs are best for the job. These P-FETs can switch over 60V and 25A (with proper heat-sinking) and are TO-220 package so they fit nicely ...
The LEDs, depending on the quantity you're trying to power, can most likely use something smaller, like https://www.adafruit.com/product/976 perhaps?

Transistors are powerful little electronic switches, and when our little NPN transistors aren't power enough for your project, we have been known to use these beefy TIP120 Darlington ...
Relays are a tried and tested technology that works reliably in many applications, but I personally prefer to avoid using them for anything that I plan to leave on for long periods of time. They're great for engaging high-power or unknown loads (like motors) intermittently, but for most hobbyist electronics projects, they're a tad overkill.
Wiat, Pi is 3.3V logic, right? Might need some of the smaller transistors to help drive the big boys. This looks like it's getting complicated... If you want to drive the controller board with a relay for now, it's probably a bit easier. I still recommend using transistors for the LEDs, but I should probably spec them properly instead of just tossing random Adafruit offerings without reading...
agile gorge
Relays aren't overkill, they're not the right application. They have limited switching cycles, and they have a delay when switching
arctic dragon
Well, not for the LEDs. They would work for powering the controller on/off.
 prisma kestrel
who wants to 3d print me a plate for cyberdeck? 😄
 agile gorge
Bummer
arctic dragon
agile gorge
That makes no sense, unless you mean as a power switch
Yes, a power switch.
Turn controller board on/off AND control LEDs.
agile gorge
Yeah, that's pretty much the main application of a relay, to switch power infrequently
inland orchid
Hey all, great discussion. Y'all are giving me a lot to think about.
 brittle hornet
In the Aquila manual.
 iron remnant
That's a lot to swallow, I guess.
prisma kestrel
if I don't have 3d printer, how do I get the CYBERDECK Expansion Plate? Sorry, im kinda new
unique pendant
Looks like that 's unique to Adafruit? Probably just going to have to put in your email to be notified when they're back in stock, unless somebody here has one laying around that they'd sell you?
brittle hornet
Greetings. I'm new to 3d printing [this week]. But long-time 3d guy. Here's a pic of my self assignment, print in 2 passes. Modeled in Maya > export OBJ > to Cura. Base printed in ABS, and letters in PLA. Nameplate for my computer.
 somber summit
@lunar oar Hey......no worries about responding late. I'm a little late in responding myself....stupid full time job. I've never had to deal with that issue before but if it was me and I had a small glass bead stuck in a metal hole that no amount of tapping on the block could resolve, I would find a small metal pin that fits inside the hole and break that glass bead down further into smaller pieces and then, find a drill bit just slightly smaller the hole and use that to clean out the broken glass particles.
I don't know where you heard such a thing about boards, but I will tell you that is not the case at all when it comes to quality. (All boards are quiet, it's the choice of drivers connected to motors that makes the motors noisy...thus the whole system is obnoxiously loud.) Quality comes down to how fast your main board is, how well you can tune your printer and how many options you have available to tune said printer. Lets take a look at main board first... Yours (and my old one,) have the Atmega1284P chip which is a 8bit processor running at about 16MHz with 128KBytes of flash. It's slow when compared to the current hardware available for 3D printers, I couldn't enable some of the features that I wanted to improve my print quality due to program size limitations, and I NO additional pin availability for additional hardware.
My current board, an SKR1.4T, has a LPC1769 32bit chip runs at 120MHz with 512KBytes of flash, and has additional pins for more hardware connections for controlling fans , lights, etc. as well as monitoring sensors like run out. After installing this, I saw a notable reduction in print time due to faster processing speeds, as well as better print quality because I was then able to enable things like linear advance and arc support in the firmware.
@lunar oar I'm not trying to sell you on anything but it sounded like you were misinformed on some things so I really wanted to correct that so your able to make a better informed buying decision for yourself.

My old main board status was upgraded to paperweight...
agile gorge
Mainboard is usually a last feature to upgrade, when your current board can't support what you need imo @somber summit
Klipper makes the Slowest 8 bit board a speed demon
And thats a $10 upgrade with a raspberry pi zero, and requires no rewiring
Only get a new board if you need a specific feature that your current board doesn't have
somber summit
LOL....funny you should mention Klipper...literally just spent the last 3 hours installing it on a PI and getting it configured and tuned for my TronXY.....which was a massive pain.
agile gorge
Always a learning curve with something new
Klipper itself isn't any more of a pain than marlin
Less so, once you've learned it
Admittedly, it isn't shrink-wrap friendly like marlin, but marlin is much more of a pain if you aren't on a shrink-wrap configuration
somber summit
What you say is true, and learning it I am. I am liking what I am seeing with Klipper though.... I noticed a big difference in speed right away. And it's got some interesting features that I plan on digging into here soon.
prisma kestrel
I came here first hoping someone from the maker community would be able to help, but that wasn't the case unfortunately, so instead going with a 3d printing company. Was hoping to give someone a few $$ at least
knotty laurel
prisma kestrel
I came here first hoping someone from the maker community would be able to help,...
You may have wanted to be a bit more explicit about the sort of transaction you were looking for. But learning how to use 3D printing companies is a good step regardless.
unique pendant
prisma kestrel
I came here first hoping someone from the maker community would be able to help,...
Oh, I totally misunderstood your question. Sorry about that. My favorite print companies are Jawstec (an actual company) that prints an opaque nylon in several different colors (get vapor polished if you want it to look as nice as possible)) and Treatsock (where you can choose from several different independent print farms). It seems you'd rather help a small independent maker, and you can choose one with Treatsock. Hope this helps!
https://www.jawstec.com/
https://www.treatstock.com/

Jawstec is a nylon 3D printing service provider with fast online quoting, an expert staff, & great service, guaranteeing our work exceeds expectations.

Professional manufacturing services for business
lunar oar
somber summit
<@!407633527224532999> Hey......no worries about responding late. I'm a little l...
Thank you @somber summit!!
somber summit
@lunar oar Your very welcome
 shrewd rose
prisma kestrel
if I don't have 3d printer, how do I get the CYBERDECK Expansion Plate? Sorry, i...
shrewd rose
prisma kestrel
if I don't have 3d printer, how do I get the CYBERDECK Expansion Plate? Sorry, i...
Order it from some 3D printing dude
Just give him stl file and layer size ( 0.2mm should do) and ABS/PLA both will work
 thin crypt
Hello, what's a good, easy-to-use software to design some enclosures for the Pi? I'm trying to find some enclosures for the Pi Zero W that would fit a small speaker, a power bank, and a motion sensor, but it would be cool if I could just 3D print it at home
unique pendant
thin crypt
Hello, what's a good, easy-to-use software to design some enclosures for the Pi?...
Hi Aaron! First, check Thingiverse, MyMiniFactory, and Prusa for STLs that may already fit your needs. Design software is never easy-to-use in my opinion, but I like Fusion 360. There's also TinkerCAD, FreeCAD, and others. There's people that also use Blender, but it requires some acrobatics to do accurate CAD if I understand correctly.
thin crypt
unique pendant
Hi Aaron! First, check Thingiverse, MyMiniFactory, and Prusa for STLs that may a...
Thank you. I'll watch a couple videos first then 😄
 timber knot
@thin crypt - I've been able to make all of my custom enclosures and other parts using TinkerCAD. I looked at Fusion 360 but the learning curve was pretty steep.
fiery ivy
Does anyone know of a slicer that works with the Solidmaker resin printer? It looks to be abandonware and even when their proprietary software was available, it wasn't working. The scraps I can find indicate that the slm files are custom gcode but I haven't really dug into it yet. No chitubox support and the (extremely outdated) posts on their facebook page indicate that they've gone dark. Any help is appreciated!
 wooden girder
@thin crypt I usually find something close on thingiverse and build off of that in windows 3d build program
arctic dragon
fiery ivy
Does anyone know of a slicer that works with the Solidmaker resin printer? It lo...
Honestly, if it's truly abandonware, I'd look to just replace the controller board entirely. If you can find the current controller and identify its connections, it might be easier to stick a known-good controller board with active support.
Fair warning: It'll cost some money, so you might want to figure out your needed materials and budget before hopping on Amazon with your credit card.
fiery ivy
arctic dragon
Honestly, if it's truly abandonware, I'd look to just replace the controller boa...
Might be a fun project 🙂 thanks for the warning about the cost tho!
arctic dragon
No problem. I know something like nanodlp controller is designed for this kinda stuff, but it's a proprietary piece of hardware with its own software. Reprap is the cheaper option, but I'm not sure if it adapts well to sla printers...
Oh nanodlp software is free
Just need a raspi
inner cedar
So... I'm doing an Iron Man cosplay, and just thought about making it so that my boots actually have NeoPixel rings on the bottom for thrusters -- solid PLA should be able to easily hold hundreds of pounds without breaking up, right? I imagine it might get chewed up walking on concrete, but it would be for like 3 days max, and I don't mind having plates that are replaced as they wear out
 solemn parrot
I would guess it can as long as you're not stomping or jumping, given how brittle PLA can be
inner cedar
Hmmm... Possibility of running around... but maybe I should do ABS?
solemn parrot
If you have access to ABS I would say that would be more suited to running. I assume you don't have access to TPU or other flexible filaments? If you did maybe you could print a thin sole to cushion the impact? I have zero experience making footwear though
inner cedar
Ohhh yeah, I could totally do TPU/TPE and use adhesive to put it on the bottom. Color might be hard... should be red or gold, really, but not sure how easily I can source certain colors
 pale dove
I'd almost suggest whatever you print grab some shoes from a second hand store for the rubber if you're going to be on the multiple days
inner cedar
Maybe I should just print the top and not the bottom, and use aluminum for the bottom of the boot... Although that might be noisy clanking around XD