#help-with-3dprinting
1 messages · Page 27 of 1
 stray spruce
 serene laurel
Coool. Thanks @stray spruce
 sullen zinc
weekend progress getting my qidi tech I back up and running: new X axis motor cable arrived, I finished printing the drag chain "thing" for flashforge, which required reworking one part slightly to fit the qidi's frame. Unfortunately, the X axis home/limit switch wire (which goes through the same flexing) appears to have given up the ghost while I was wiring everything back up, so now I have another part to replace. Until then I think maybe I can just change my init code to "G28 Y" instead of "G28 XY" as long as I remember to manually shove X to its home location before starting my parts. But since the real project for the week is printing xmas ornaments that fit on my other 3d printer I'm not in a terrible hurry.
I love vase type 3d prints when I know I want to make a lot. These take just 28 minutes plus preheat time
 faint granite
for pink_vampire https://www.instructables.com/id/PCB-Heater-Diy-Joule-heating/

Instructables.com
PCB Heater (Diy Joule Heating): I found a website whilst searching online which documented some experiments done with printed circuit boards with a serpentine pattern etched onto them, To use them as a heater.
Uses for a heater like this could be:
• To submerge in a liquid...
 versed wren
this interests me, because I want to make a box that will store and heat my mugs
serene laurel
Ohhhhhhhhhh Those are really cool @sullen zinc
sullen zinc
@serene laurel I neglected to share the URL for the design: https://www.thingiverse.com/thing:2729117

This is a tree ornament for your tree.
 novel torrent
@coarse thistle probably don't need help anymore or somenone told you but I'm fairly sure if if you just change the measurement type it changes everything over if that's what you mean
 gleaming umbra
Guys,
Which software do you suggest for designing of the enclosers to begineer?
 boreal wyvern
@gleaming umbra TinkerCAD is a super easy place to start. But if that doesn't feel like enough power, Fusion360 might be better.
gleaming umbra
Thanks
 coarse ruin
if you have long term plans to learn CAD.... start with Fusion360... if light weight use is likely... TinkerCAD.
sullen zinc
woohoo printing again
(bum X axis motor cable replaced, bum X home switch motor worked around pending replacement)
serene laurel
20 mows at once! MADNESS!!!
coarse ruin
i'm pumping out snowmen army... for holiday stroll....
 dull dove
I'm attempting to flash a bootloader to my Ender 3 using a USBasp, however I'm running into an issue - the Arduino IDE's Ports menu remains greyed out even after connecting the printer to the PC via the USBasp. All the correct drivers are installed, and the USBasp is recognised by Windows, but Arduino doesn't appear to be assigning it a Com port. Can anyone think what the issue might be? I'd quite like to avoid bricking my brand new printer.
coarse ruin
6 pin connector plugged in backward?
dull dove
Nope. Pin 1 is aligned and the board receives power.
coarse ruin
if no COMx then drivers are a possilbity... it may not have completely installed. check device manager
 sonic plinth

I recently got a tripod and decided to test it out with this this timelapse. Enjoy! http://www.3dbenchy.com/download/
What do you guys think of my video? Thanks!
 lofty sigil
I am very sad. I thought I found a heck of a deal on a Snapmaker 3-in-1 printer/CNC/laser for just $60. Beware -- these are part of a fraud/scam network of dozens of domain names playing whack-a-mole on social media. DO NOT ORDER. Did my research and found out before getting hit myself.
 lunar oar
I want a 3D-printer for Christmas. And I am new to the 3D-printing world. I have some ideas build. Though, I have no clue what printer I should get. I want to get a high-quality printer because printers are expensive and I don't want to repeatedly buy new printers. Can anyone help me?
 tardy fox
@lunar oar I have to point you in Prusa's direction based on what you've said. they're solid printers that you won't have to fidget with much after you have it built and tuned. they do cost more but if you have the budget for it I say it's 100% worth it. I've had mine since June and I am extremely pleased with it. I added the MMU2 on about a month ago now and it's maintaining the positive trend.
you can get them in kit form (~$200 cheaper) or fully built. personally I recommend the kit as it familiarizes you with the printer's mechanical and electrical workings in a way that's helpful if you have any trouble later on. I really enjoyed building it -- but be prepared to spend a weekend doing it if you go this route. took me about 14 hours to complete. I wasn't working particularly fast but I also wasn't dragging my feet.
if you get the kit, you will not find a better-documented, better-presented process. their docs and physical presentation are absolutely incredible. parts are bagged, logically grouped, completely and very clearly labeled. they're numbered and the numbers on the bags correspond with "chapters" in the build guides. I don't think I've seen a better-documented anything. seriously. 😄
you get all the parts and tools you need to build the printer included in the kit.
also, if you get the MMU2, you'll find it is set up the same way in terms of the build process/docs/etc.
you can probably tell I was pretty impressed. 🤣
lunar oar
Okay...thanks! I will look into that.
coarse ruin
PRUSA +1👍
 violet needleBOT
Adafruit Industries posted 3D Hangouts - GPS Tour, Trellis Bumpers and Boats

iPad Flexible Bumper https://learn.adafruit.com/ipad-pro-bumper/overview GPS Tour Guide: https://learn.adafruit.com/gps-tour-guide/ HalloWing M0 Express http...
violet needleBOT
Adafruit Industries posted 3D Hangouts - GPS Tour, Trellis Bumpers and Boats

Multistreaming with https://restream.io/ iPad Flexible Bumper https://learn.adafruit.com/ipad-pro-bumper/overview GPS Tour Guide: https://learn.adafruit.com/...
violet needleBOT
Adafruit Industries posted Fusion 360 Tutorial – Trellis M4 Flexible Bumper

In this tutorial we'll make a simple 3d printed bumper using flexible filaments. This provides protection and comfort to the acrylic case. Adafruit NeoTrelli...
sonic plinth

This is something I am making for my YouTube channel. The final product will be painted in the end. More information is yet to come.
I am going to make this for my youtube channel. Should be loads of fun making lol.
serene laurel
Am I allowed to throw my printer out the window????
 spice estuary
Why?
serene laurel
It's driving me insane. I'm having issues leveling my bed.
Is there an easy way to tell if either my heated plate, glass plate or the carriage the hot bed rides on is warped? I've taken the glass bed off and placed it on a flat surface (both sides of the glass) to see if it was warped and has wobble to it but saw none. Can I try similar for the heated bed? And is there some way to test the carriage as well? I'm about to just order a new carriage and heated bed for it....
The issue im having is that even after homing the z axis and leveling the bed I get one corner that will be raised as high as the assignment knob will allow and it is still a fair distance from the nozzle (like 2-4ish mm). I've spent the last 5 days doing nothing but trying to level it.
 real compass
you should be able to push the carriage around if its not powered. if you do it slowly you could check the gap between the nozzle and the print surface
also it's possible that it warps only when its heating up
it can be tedious because if you move one corner up or down it moves the whole surface. its a back and forth deal...
serene laurel
Yeah but it's this one corner that I cant seem to get right.
real compass
2-4mm should be visible only with a small straight edge or good metal ruler
serene laurel
I dunno. Ill try some more today when I get off work in like an hour. But Ive been fighting it for the last 5 days. I should've gotten it leveled by now...n
real compass
its hard to tell without actually seeing it
coarse ruin
which printer do you have?
you need to use a dial gage if you can't detect it with the head move + gap check method
the bed needs to be flat under 1 layer height (~ 0.1mm) or.... you need mesh bed leveling.
serene laurel
@coarse ruin I have a Wanhao Duplicator I3 Plus. And as of the last 5 days I definitely haven't been able to get it that close
coarse ruin
and you use clips to hold the glass to the bed?
serene laurel
I have a mat of this thermal silicone stuff between the bed and the glass. That holds it in place well. And I have to use clips in 2 corners because if I don't hold those corners down then it won't lower with the bed when I try to lower those corners. It'll lower with one corner but stay at one height on the other corner
coarse ruin
and you use manual bed leveling?
my guess is... there is something between the bed and glass that is causing the warp.
the silicone is squishy and would take up any small object, but some times a piece of clear PLA gets in places you don't notice.
the only other thing i can suggest is take the clips off the bed... heat up the bed and then put the clips on... it might be heat induced stress in the build plate / glass
p.s. there are several mods out there doing auto / mesh bed leveling for the I3 https://www.instructables.com/id/Wanhao-Duplicator-I3-Plus-Auto-Bed-Leveling/

Instructables.com
Wanhao Duplicator I3 Plus Auto Bed Leveling: This instructable will help you establishing the so called "auto bed leveling" on your Wanhao Duplicator i3 Plus printer.It will use a modified version of the original Wanhao firmware and an optical sensor with some rewiring.There ...
so there is firmware to "fix" this problem for good. I can't say this is the best path for you but i know the mesh bed leveling on the PRUSA i3 MK3 mesh bed leveling is very good.
real compass
can confirm, I never had an issue with bed leveling on my Prusa i3 Mk3
serene laurel
Hopefully before Christmas im planning to get the bltouch bed leveling sensor for my printer. I don't have to really modify anything except the firmware on it. Which won't be hard for me to do.
serene laurel
ok then. I THINK i got it leveled
real compass
🤞
serene laurel
Well that didnt work. but i got it now. I have it printing but I cant get simplyify3d to purge the extruder at the start
 serene laurel
Thanks everyone that was trying to help me fix my printer yesterday. I think Ive gotten it working finally. I got a new thumbwheel printed successfully yesterday, So im gonna try a few more prints later today and hopefully those go well
 crude kettle
Great, hope it goes well.
sonic plinth

This video talks about how I 3D printed and painted a Nuka Cola Machine after assembling it and everything. Enjoy! https://www.thingiverse.com/thing:3243146 ...
My latest video!
serene laurel
Wooooo!!! I added a new feature to my printer :3
http://blookatkreashuns.com/#webcam
sonic plinth
Nice!
serene laurel
Now i dont have to leave a room light on at night or in the mornings
sonic plinth
Cool! I don't really do that with my printer since it works so well lol.
It prints well 90% of the time.
serene laurel
Well the lights are because I go to work really early in the morning and Sometimes I start a print before going to work. And now I can just turn on the leds so that When I check the webcam through octopi later on I wont be in the dark. my parents dont like me leaving a lamp on,
sonic plinth
Nice!
crude kettle
@serene laurel
I hope you have security if you want to keep that up.
Wait......I could give my Pi a website?
 distant dove
serene laurel
distant dove
serene laurel
Yeah the ip itself is hidden. And plus you need a password to control my octoprint
serene laurel
@crude kettle Yeah you can map your external IP to a domain. I paid for the domain through godaddy and I also used their tools to route the domain to my external IP. so you cant really view the IP. plus you need a password to access my octoprint server
coarse ruin
security on a Rpi... is.. not the best but also not critical for it's application... just make sure you have plugged all the forwarding attack possiblies.
versed wren
What you can do is get a cheap vps, run a vpn node on it, have the pi connect to the node and only allow access over the tunnel, or run a tunnel endpoint in your home not on the pi. Then you can tunnel to the VPS VPN and be able to access it without anything being publicly reachable
coarse ruin
or just be there while printing...
sonic plinth
Someone payed me $150 to replace the motherboard on their xyz mini 3D printer. Then they couldn't figure out how to tune settings in Cura as it turns out and they bought a new printer. Ironically if they had asked me to I would have helped them figure it out. Now they are giving me that printer. It's not like I didn't offer to help them.
sonic plinth

This is a Raspberry Pi Nuka Cola Machine that I am hoping to write an image for to be able to allow the Pi to play Fallout on. This is for my YouTube channel. Enjoy!
crude kettle
Well, a printer is a printer. @sonic plinth
sonic plinth
Yeah. Your point? @crude kettle
crude kettle
I mean that it can still great printer.
sonic plinth
Oh it is a great printer I am not saying it isn’t. I just think he’s making a stupid decision is all. @crude kettle
crude kettle
Yeah, if I ever have a chance to get a printer and fix it up it'll be great.
I do have one though
spice estuary
@sonic plinth Sometimes all ya can do is let them know, then enjoy the free nice printer ya got. Sadly, I gave up counting how many times I heard that happening.
sonic plinth
Thanks!
 eager juniper
Anyone know where I can get a stand-alone leveling tool for my print bed? The only problem with my printer is it doesn’t have auto leveling and the manual leveling helper system is garbage. I’d need one that’s not just linear like those bubble leveler things, but something that tells me when the whole 2D plane of the bed is level.
serene laurel
For some reason since updating my printer's firmware whenever I run my cooling fan it causes the hot end to drop like 30c in temp causing a thermal runaway
@eager juniper I got tired of my bed getting out of level, it was all sorts of messed up whenever I tried to level it. I ended up removing the bed springs and now I have no issues leveling it. It sounds odd but it's super nice now
serene laurel
Mwahahahahahaha!!!! 82 little kittehs!!!!!
 short raven
dzzi... I use a micrometer against a known good frame or other fixed element. in my case it is the Y rails.
coarse ruin
dial gauge and an adaptor for the z-axis is what you need. you can find designs on thingiverse for your type of printer.
p.s. nicknames... still learning discord. (IonEwe)
violet needleBOT
Adafruit Industries posted 3D Hangouts – Trellis Bumpers and Clackers
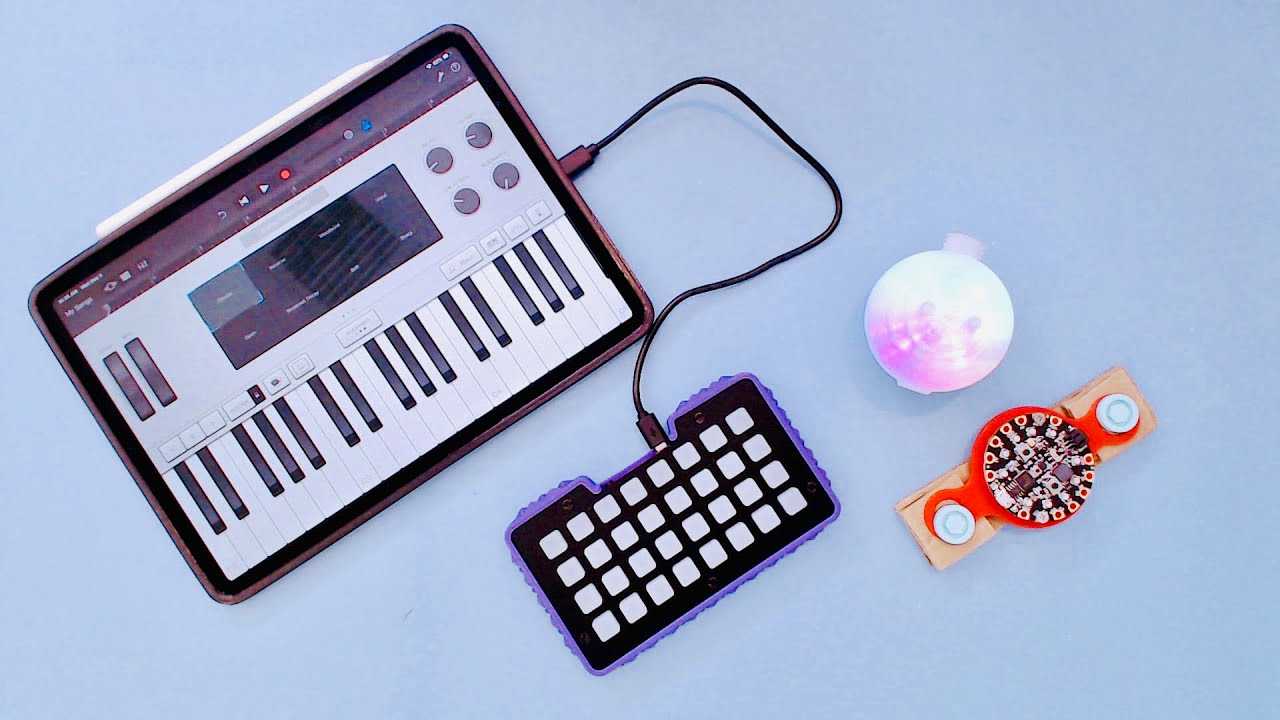
Multistreaming with https://restream.io/ Code, Build Instructions, and Source Files: https://learn.adafruit.com/neotrellis-m4-bumper NeoTrellis M4 Kit https:...
violet needleBOT
Adafruit Industries posted 3D Hangouts – Trellis Bumpers and Clackers

Multistreaming with https://restream.io/ Code, Build Instructions, and Source Files: https://learn.adafruit.com/neotrellis-m4-bumper NeoTrellis M4 Kit https:...
serene laurel
Ok what's the best way to clean this off?? I have a new wraps of cotton and kapton tape coming tomorrow
violet needleBOT
Adafruit Industries posted NeoTrellis M4 Ninjaflex Bumper #3DPrinting

This is a simple 3d printed bumper for the Adafruit NeoTrellis M4 designed for flexible filaments. This provides protection and comfort to the acrylic case. ...
coarse ruin
@serene laurel ah... if that is ABS... soak in acetone... however, the leak pattern you have there suggests that the nozzle is not seated against the filament heater tube.
if it is PLA use cutters to get off the large masses.
note soaking in acetone might damage whatever is holding your thermocouple / thermistor in place and will definitely remove most of any thermal compound.
if you can heat the head above 100C it will make things easier to remove / disassemble.
check out this video starting at about minute 5 https://www.youtube.com/watch?v=tDq1Du9gaWM

"It’s just a tiny hole in a piece of metal with a thread". Yeah, sorta... but there's more to them! Learn which type of 3D printer nozzle is right for you an...
serene laurel
Thanks @coarse ruin. I never thought about it being a leak. I have new parts arriving today to replace it and upgrade the thermistor to a better one. And I have a new hardened nozzle coming as well. I can get the thermocouple out but not the thermistor so I figured I'd upgrade it
coarse ruin
once you get the goop off it the heater should be removable. There will be a set screw holding it in place.
you should have a thermistor or a thermocouple not both... the heater is the larger cylander.
the vid goes though the head rebuilding process....
is there a better vid from adafruit south folks?
serene laurel
Ah ok
My bad. Well I got a new thermistor since I couldn't get it out at the moment
coarse ruin
always good to have a backup for when you need it.
serene laurel
Yup
I'll definitely try your advice though. See if I can get it all apart
My current thermistor will handle up to just under 260ish C I think. This new one is good till a little over 300C
serene laurel
well fudge,..... I stripped the threads of the set screw for my heater cartridge and so i was drilling it out. Ended up drilling into the cartridge itself....
Now I need a new heating element for a mk10 extruder asap
 shy kelp
In case anyone is curious, I am printing something and have an Adafruit IO dashboard for the environment specs going right now: https://io.adafruit.com/jdoscher/dashboards/fabrication-lab

Adafruit IO is the easiest way to get your projects onto the Internet of Things!
It's also on Telegram as @jprinterbot
coarse ruin
@serene laurel brute force is not the way in this case...
serene laurel
Thats what I found out....
coarse ruin
i've never had one so crusted up that i could get it apart with some careful method... fortunately all the parts are online and easy to find for not much $$$
i recently rebuilt a lolzbot taz extruder... that one was a bit different... still.. it just took time and effort.
serene laurel
Yeah I ordered a new one from http://ultimate3dprintingstore.com
coarse ruin
i use an ultrasonic cleaner, chemicals, and time...
serene laurel
ah
coarse ruin
a bit of heat on PLA and it softens up.
likely you had burnt PLA in the threads.
the ultrasonic clean makes that stuff just come out.
serene laurel
Alrighty. I'll have to look into one of those some day
coarse ruin
IPA and lye desolve PLA... but can also damage other parts.
serene laurel
IPA?
coarse ruin
hydrochloric acid will peel most anything off brass... but also will damage other parts.
IPA = Alcohol.
serene laurel
Yeah i dont have any HCL lying around.
coarse ruin
these are all things you can get down at the hardware store.
serene laurel
I have rubbing alcohol
coarse ruin
that is IPA
serene laurel
ah
coarse ruin
Lye is drain cleaner
HCl only comes in gallon jugs for concrete floor etching/cleaning
some 3D printers come with a washing station that uses IPA and lye to desolve supports (PLA supports)
HCl is also used in some brass polishing products like brasso
maybe tarn-x
anyway you have to be VERY careful with those products as they damage your skin very easly
and never get the HCl anywhere near the lye... as it can lead to some very exothermic reactions.
this is the one use https://www.harborfreight.com/25-liter-ultrasonic-cleaner-63256.html

Harbor Freight Tools
This ultrasonic cleaner makes it easy to clean items like hardware, fasteners, small metal parts - even jewelry. Just fill the cleaner with an appropriate ultrasonic cleaning powder (available separately), mix with water and choose a preset cycle. The ultrasonic cleaner works...
but there are cheaper / smaller ones...
and always try to remove the larger chucks with mechical means first
coarse ruin
lolzbot head jab befoe
i cleaned the head with methods i mentioned...
heat, chemicals and ultrasonic.
lolzbot extruder cleaned, partially assembled
coarse ruin
the entire area on the right of the bottom picture was full of 3+ colors of PLA (?)...
serene laurel
Any Fusion360 pros got any advice for learning it? or tips that you wished you learned sooner?
 opaque gust
I'm still learning but videos from the Fusion360 team are usually good, and I've been working my way through the Layer by Layer videos
sonic plinth

This is my attempt to build a raspberry pi that can play fallout on it inside of a Nuka cola machine. Enjoy! https://www.thingiverse.com/thing:3257695 3D Pri...
Enjoy!
versed wren
idea, a lightbulb shaped frame composed of interlocking flat pieces in the profile of a lightbulb, probably 4 pieces to create an 8 wing frame, with flats on the profiles so that you can wild a strip of neopixels around and have it land on a flat as it goes from bottom to top
versed wren
I was working on it yesterday
it turned out that adapting the base profile to the stepped profile was a lot more work than I had expected
there are design concerns still to be resolved, like I plan to shift the alignment tooth to one side so it'll print better, and I think I'll make the cylinder flatted with space for washers
coarse ruin
i haven't had much time to design stuff lately... but... here is a minimal new thing https://www.thingiverse.com/thing:3275190

This is a housing for a Lepton USB from group gets
The front and back snap together if the tolerances are right or just glue them.
There is a support built into the area around the window.
https://groupgets.com/manufacturers/getlab/products/purethermal-2-flir-lepton-smart-i-...
 teal totem
Greys, it looks dope
shy kelp
@versed wren looks cool- I tried something slightly similar for a lamp shade using my XCarve CNC machine. Unfortunately I did not like my result. Yours looks much cooler, what are you making out of it?
 brittle oxide
Hey @supple stratus @idle crest and other <@&327289013561982976> - we are having an impromptu live chat among the 3D Printed AT Switch designers if you'd like to join us at 9pm https://zoom.us/j/703259756

Zoom Video
Zoom is the leader in modern enterprise video communications, with an easy, reliable cloud platform for video and audio conferencing, chat, and webinars across mobile, desktop, and room systems. Zoom Rooms is the original software-based conference room solution used around th...
versed wren
that's not really appropriate for here
 hollow depot
its about 3d printing and control things, not more. the rest is in the heads of the people, not in mine.
versed wren
Eh, the vocabulary of that page is clear
hollow depot
and is that bad, or you think in that way? It is research and build with hardware we use. Same as 3d build weapons or not? In Europe we have no issues with that, specially the netherlands.
 stuck inlet
@hollow depot I agree with @versed wren. although it pertains to some topics, the other aspects may make others uncomfortable
violet needleBOT
Adafruit Industries posted 3D Hangouts – Grinch Fireplace and Ball Drop

Multistreaming with https://restream.io/ What is “Ask an engineer”? From the electronics enthusiast to the professional community – “Ask an Engineer” has a l...
 idle crest
good morning folks!
boreal wyvern
morning!
idle crest
This week’s #help-with-3dprinting project on Adafruit Learning System
https://learn.adafruit.com/grinch-fireplace/

Have the Grinch come out of the fireplace!
violet needleBOT
Adafruit Industries posted 3D Hangouts – Grinch Fireplace and Ball Drop

Multistreaming with https://restream.io/ Code, Build Instructions, and Source Files: https://learn.adafruit.com/grinch-fireplace/ Circuit Playground Express ...
coarse ruin
@hollow depot this is an all ages channel... so... not "bad" just not right for here. In general I don't agree with this kind of thinking, but you can't fix people.
sonic plinth

This is the full review of my Da Vinci Minimaker 3D printer. This video entails all details of what I have gone through and upgrades to date. Enjoy!
serene laurel
Woooooohooooo!! my first 3d model ever successfully printed out yesterday. Except i made the measurements slightly wrong so im now printing a new version with updated measurements.
OK so i need some advice as well, Im not sure if I should ask in here or #help-with-projects so im asking here, i feel it a bit more relevant to here. In my project I have a flat piece of plastic and my micro controller is going to rest on it. However, the whole assembly is going to be inside a metal tube and I need a way to keep the microcontroller on the flat board it will be on. I would use pin headers but I dont have the space internally for that. And I dont want to glue the microcontroller down either. Sadly the microcontroller does not have mounting holes either so that rules that out.
 karmic brook
Something like this, maybe? https://www.adafruit.com/product/1116
 fiery idol
How about a slider? Some groves that the board could slide into.
versed wren
if you have access to a 3D printer you could print out a C with the grooves on the open face so the C would fit inside the tube and hold everything stable
the C could be as long as the board, a section of the board's length, or maybe just 5mm, print two, put them at the ends of the board
serene laurel
@karmic brook Those are really cool! but i dont think those will work for this
@versed wren Im trying to imagine what you mean and cant seem to.
@fiery idol I may be able to look at doing something like that, I'll have to see though
fiery idol
Okay.
serene laurel
Something similar to your idea may actually be a good solution for this
serene laurel
So weird bug I just had on 3 attempted prints. Its laying down the base layer and some areas clearly have more filament than other sections. Should I just let it keep on going? or does something need adjusted?
karmic brook
My first guess is a filament feed issue.
serene laurel
hmmm ok
tardy fox
yeah that looks like an extrusion issue if I had to guess
serene laurel
Just pulled out the filament from the hotend. It definitely looks a bit chewed up from the gear
serene laurel
Weird. I restarted the print with similar results. However, this time I let it continue on and its printed over those sections just fine and looks fine now as well
Yeah its definitely carrying on like nothing is wrong. and it all looks level where those spots were at
karmic brook
Looks like a glass bed, so I wouldn't expect it to be warped.
serene laurel
Yeah ive got glass on my bed :3
Its defintely going just fine now!
Maybe this will work today? http://blookatkreashuns.com/#control
karmic brook
Hmm, can't access that URL without a login
serene laurel
dang.
Here, this one might work: http://blookatkreashuns.com/webcam/?action=stream
karmic brook
Yup, that one works, thanks!
serene laurel
Cool!
serene laurel
Hopefully these print out nicely :3
coarse ruin
Azure Skies - This is likely 1) filament with stuff in it that isn't PLA/ABS, 2) bad filament, 3) low or high hobb gear tension, 4) aliens, 5) some of the above, 6) all of the above.
sonic plinth
Hey guys! Guess what? I am doing a 17 hour print for my YouTube channel lol.
sonic plinth
Finished it!
serene laurel
Thats very similar to what im going for @versed wren I think im getting closer to what my final version will be. but its definitely a process
violet needleBOT
Adafruit Industries posted Elf Door #3DPrinting Timelapse @adafruit #adafruit

Every week we'll 3D print designs from the community and showcase slicer settings, use cases and of course, Time-lapses! Elf Door by Nicholas Dimelow (bugman...
serene laurel
I might be able to make it to 3d hangouts! at worst i'll be there for the end lol.
violet needleBOT
Adafruit Industries posted 3D Hangouts – CPX Trees and Ball Drops
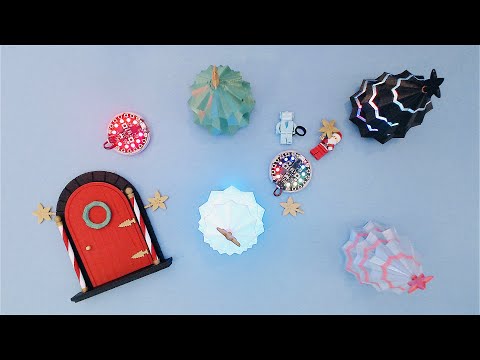
Code, Build Instructions, and Source Files: https://learn.adafruit.com/circuit-playground-christmas-tree/ Adafruit Circuit Playground Express https://www.ada...
violet needleBOT
Adafruit Industries posted 3D Hangouts – CPX Trees and Ball Drops

Multistreaming with https://restream.io/ Code, Build Instructions, and Source Files: https://learn.adafruit.com/circuit-playground-christmas-tree/ Adafruit C...
serene laurel
Maybe If im lucky I will be able to give an update on my lightsaber project!!
serene laurel
Darn it. I think i forgot to save my project on my desktop at home because its not the same version I remember working with yesterday at home. Ive been working on it on my laptop on my lunch breaks at work.
karmic brook
Grump. Sometimes it's worth storing the project in a shared space (such as Google Drive) or portable media when developing in more than one place.
 cloud halo
I have a question about the little starfruit tree toppers from Wednesday's 3D Hangouts.
It was mentioned it's better to print two of them at the same same time. Why is that?
coarse ruin
probably cooling time when it moves to the other.
serene laurel
Ughhhhhhh. putting kapton tape on a glass bed is impossible
karmic brook
Why? Doesn't stick?
serene laurel
Its a butt to get it down nicely and get all of the bubbles out of it
karmic brook
I can think of two approaches. One is the same as getting photoresist film on copper clad board: spray the bed with a thin layer of soapy water first, then walk the bubbles off the edges. The other is to apply the tape in a vacuum chamber.
serene laurel
Ok so ive tried both regular water and soapy water. The issue I was having with soapy water was that even after getting it squeegeed it still wants to slide around a lot and will not stay in place. I am currently using tape that is not the exact size of my build plate so it requires a couple strips. I ordered new tape though that will fit the entire bed in 1 strip.
karmic brook
It's a fiddly process. I wonder if the people that put protective plastic on phones have tricks for it.
versed wren
disable the adhesive while you work
soapy water, alcohol, heat sometimes
good screen protectors are permiable also, so the air leaks out over time and the water/alcohol evaporates
I'd be surprized if captan tape is nearly so permiable, but once you've got it on there flat you should be able to leave it in a warm place, or with the bed warmer on, and it'll stiffen up
serene laurel
Alright. thank you very much for the help guys. I laid out painters tape on my glass for now until i get the larger roll of kapton tape
 chilly oak
Trellis M4 3d printed case https://www.thingiverse.com/thing:3301526
serene laurel
Very cool Roy!
 serene marlin
Never 3D printed in my life is there a link to what the best budget 3d printers are?
or other resource
coarse ruin
"best".... very subjective
chilly oak
Yeah, very. Do you want a pre-made one? A kit? What type of printer do you want? How much do you think you'll print? Do you want/need more than one colour at a time? Google is your friend!
versed wren
Do you have a budget?
It helps to ether start by looking at what features you care about cost to set a budget or what you can even look at within a budget
coarse ruin
"budget" is also subjective... for work... 5K$ is discount... a personal printer for me.. maybe 1k$... for light weight users that make min wage.. 200 -300$
violet needleBOT
Adafruit Industries posted Fusion 360 Tutorial – CPX Mount @adafruit #3DPrinting
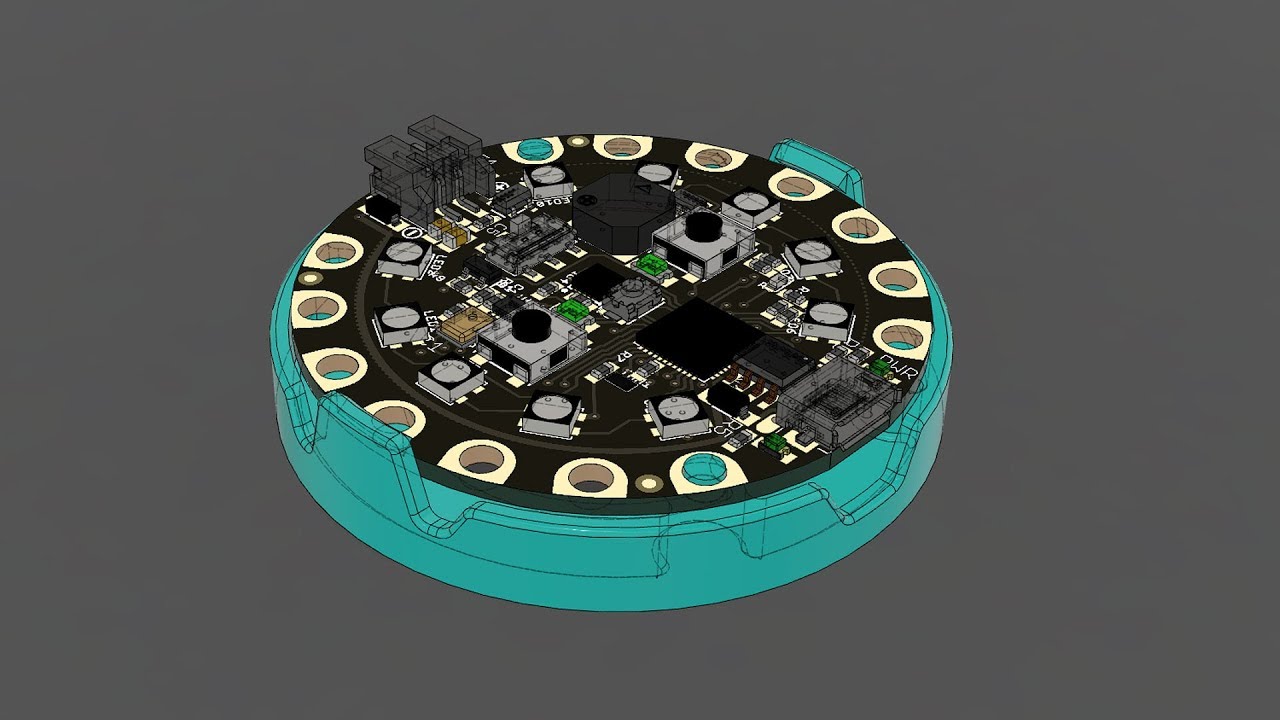
In this tutorial we'll take a look at designing a snap fit mount for the Adafruit Circuit Playground boards. Adafruit Circuit Playground Express https://www....
sonic plinth

This is a 3D printed pickle rick I made as a Christmas gift I made for someone. Enjoy!
 vivid karma
I’m relatively new to 3D Printing, especially Repetier and Slic3r. Anyone here fancy themselves a Slic3r expert? I can not seem to figure out where these settings are coming from in my resulting GCode. If it matters, I’m running the Slic3r that’s embedded in Repetier Host. It will not honor the filament configuration and keeps overriding with the settings pictured. These settings are in the Slic3r_Settings.ini but anything I do to modify that file gets overwritten by something on next Slic3r processing. Been tearing my hair out for about 6 hours now on this. 😕
vivid karma
In late breaking news, seems to relate to settings made during the Configuration Wizard. Hasn’t helped me figure it out yet, but it’s a clue. 😃
serene laurel
So as my extruder is laying down filament all it wants to do is stick to the nozzle. its driving me nuts because I cant get it to lay down filament and stick. I the bed and nozzle about 0.2 mm from each other
Any ideas what the heck is going on?
vivid karma
Heated bed?
serene laurel
Finally got it working
 carmine gull
@serene laurel - I print primarily in PETG. Of all of the things that work for me to make it stick is Aqua Net Exreme Hold hairspray. Removal of the print either needs a slight tap or pry. Cleanup is alcohol.
shy kelp
Just ordered a Creality Ender 3 Pro. First foray into 3d printing.🤓
fiery idol
Congratulations @shy kelp, welcome to the world of 3D Printing.
shy kelp
Thank you. I'm an older guy with a need to be young again. 3d printing and coding just seem like natural progression. Know what I mean?
fiery idol
I'm fairly young, but yeah I understand what you mean. I went from programming, to 3D Printing. Now I sometimes use them hand-in-hand. I wrote a program that I can use to interface with my 3D printer through OctoPrint using LabView.
It's kind of pointless since OctoPrint has its own web interface, but I was bored and it seemed like a fun challenge.
chilly oak
You might like OpenSCAD then, programmatic 3d modelling.
 ornate raven
glanced at a beginner tutorial on OpenSCAD. I like it. thanx @chilly oak
chilly oak
OpenJSCad is nifty too.
coarse ruin
@ornate raven you can't print new body parts.... mosty...
ornate raven
😫 way to ruin my day @coarse ruin
coarse ruin
well... okay... but don't say i didn't warn you... https://3dprint.nih.gov/collections/prosthetics
spice estuary
I remember first time I seen that kid set up table at maker faire
violet needleBOT
Adafruit Industries posted Circuit Playground Express Ornimate #3DPrinting @adafruit #adafruit #timelapse

Every week we'll 3D print designs from the community and showcase slicer settings, use cases and of course, Time-lapses! Circuit Playground Express Christmas...
serene laurel
Woooo!!! If im lucky then I may have my final or near final version of my chassis for my lightsaber's electronics
coarse ruin
i have a certian double blade to do also... it came with no sound, incandescent bulbs... so clearly in need of upgrade... but a nice housing so... worth the effort i think.
serene laurel
Oh definitely!!! My code is currently made for a teensy and a couple other boards :3 I wrote a decent chunk of the code myself
Wooooooo!!! My print finished and it looks like it will work once i add a couple parts to it!
I may be able to have a working lightsaber in time for Show N Tell tonigh!!!
serene laurel
Youre welcome to look at my code if you want. Its currently missing a few things I removed when i was trying to make it work on the Feather M4 but I'll be adding those back in shortly
coarse ruin
link?
serene laurel
Here you go @coarse ruin . the main one of course is Skysaber.ino in several of the folders i have side sections i was making simple test sketches for different components with the intent of putting them into the setup() of my main code. So every time i boot up with a fresh battery It runs through a couple of tests to make sure everything is peachy. I'll probably add in a combo to skip those as well

GitHub
Contribute to AzureEmpyrean/SkySaber development by creating an account on GitHub.
Also at the top of my code there is a link or 2 i believe that should link to the fx board I am using with my teensy 3.2
coarse ruin
just a fyi... something like if (millis() - mpuTimer > 500) is a lot slower than if (millis() > mpuTimer { mpuTimer = millis() + 500; dootherstuff()} especially when mpuTimer is a long.
serene laurel
yeah thats one of those parts I didnt write. I originally started with someone else's code for a lightsaber and kept certain parts of it while removing others and also adding plenty of my own
coarse ruin
i want to see it work... and i will refrain from any other code comments... some would consider me OCD about code structure and formatting.
serene laurel
Hey, im open to remarks. Id still consider myself a noob at programming and what not
coarse ruin
one of my general practices is to write comments before writing code...
serene laurel
Also, Ive shown off a version of my lightsaber on show n tell before. it used the same code. but this version has better electronics in it
coarse ruin
i don't watch show and tell very often because of schedule conflict... if you don't show tonight i will go and look up back youtube shows.
serene laurel
Yeah at the moment im fairly sure i wont be ready in time
coarse ruin
found it. 08/01/18 show.... you know the sith have all teh dark chocolate cookies 😃
wanted to see the swing motion effects but not in the vid just the impact and sound.
serene laurel
On impact it actually inverts the color that it is currently on. and it works on the rainbow wheel effect tooo!!!!
coarse ruin
I like the unified pin defines. I will rework this concept.
I'll be using the prop wing so most of the code has to be redone anyway.
serene laurel
Yeah. I was sooooooo wanting to do the prop wing for mine. but the feather m4 is not supported by FastLED yet. and I dont have the time to convert my code from arduino to CP in the time span I need it in
coarse ruin
i have 2 blades to upgrade... a simple one that just needs sound and light... and the maul blade that needs just about everything...
serene laurel
And I got the pin defines from the guy who made the code I started off with. kept that idea too. He had it all sorted out in similar method.
See im going fancy with my code. It works on 2 buttons. 1 for main on/off typically and the other will change the blade color. but if you multitap one button it will change to different light modes and effects
coarse ruin
yes i also now understand the BT references... which i won't be using.
serene laurel
Thats fine!
coarse ruin
i probably will do Cap Touch for buttons
serene laurel
that would be cool.
my whole handle is machined aluminum and I wear a big fluffy costume. so cap touch doesnt work quite as well for me
coarse ruin
the maul blade needs LED and mounting, Speakers and mounting, Batteries and mounting... and likely blades and mounting... it's a mess
lots of CAD...
serene laurel
So i got this really cool idea of using pogo type pins for contact points inside the saber itself. my chassis for the electronics makes contact to everything with pogo pins and the blade also makes contact with them as well. That way i can easily remove the blade and carry just the hilt if desired or i can easily remove the electronics to swap out a battery or to work on it
coarse ruin
sure... pcb for the blade contact pushed up against pogo's. Use several for each pin so when you swing and put stress on the joint it will have a compressed and uncompressed side and... for the added current carrying ablity.
twist lock or quater turn.
could use a pin type system also
serene laurel
I just wish i had a simple way of doing the wires for my buttons. I have to put a nut around the wires and what not and secure them in place but im using the rgb metal push buttons from adafruit and also their ws2811 driver chip so i can control them like normal neopixels.would be kinda nice to have a pcb that sits just beneath the buttons and makes contact with each of the pins on the bottom of the button
Hey @grand edge any chance you could either stock or design and then stock some rgb metal push buttons like what you already have but instead of having the pins all broken out it has a neopixel in it or maybe the ws2811 driver chip in them?
karmic brook
I'd probably use "faston" style connectors if I wanted to hook up the pushbuttons quickly and easily.
serene laurel
I'll take a look at those @karmic brook
Ahhh yeah those connectors. I dont think I have the room to use them in this
karmic brook
Yeah, they do use up some space. You could make custom PCBs and solder the switches directly to them, but that may not be worth the effort/expense/time. Which leaves just soldering wires on them (that's what I generally end up doing).
serene laurel
Yeah for now ive soldered wires to them. I custom pcb would be nice but i have to fit the assemble into a hole barely wider than the threads. and once in I dont have room to hold a chip in place and solder it there as well
karmic brook
I was thinking a small PCB barely larger than the pins, that just adapted them to an ordinary header. Something similar to these: https://a.pololu-files.com/picture/0J6833.1200.jpg
 serene laurel
ohhhh. yeah that would be cool
would be cool to have something like that and it has space for the ws2811 driver chip and breaks out the couple pins needed on the drive
karmic brook
That would be slick, and likely possible. It would end up like the pictured board: you'd solder the WS2811 to it, and likely the wires too, then solder the board to the switch. It would be a very compact and solid assembly.
serene laurel
It would be an awesome product!!
shy kelp
@serene marlin ender 3 is really popular and has a huge community behind it
novel torrent
Ender 3 is fantastic
 short raven
I loved the Christmas Tree print project, but I only had one CPX, so I made a second out of a spare Trinket and NeoPixel strip I had. Turned out greats
fiery idol
Nice.
shy kelp
Woot. Got my printer yesterday. Creality Ender 3 Pro. Assembly took about 2 hrs. Let it set at room temperature for 12 hrs and started adjustments. Letting it set was a good idea. All axis had to be adjusted. One got tight and two got loose. Bed level was hardest part of whole assembly. The new magnetic mat was a pain but a great indicator of warpage of bed. Once bed was level, the mat flattened out. Printing the little test dog right now using the supplied filament. Was sure at first there wouldn't be enough but I'm well over half way with the print with about half the filament left.
fiery idol
Congratulations on getting your first 3D Printer @shy kelp! Welcome to the world of 3D Printing.
shy kelp
Thanks @fiery idol . Not as noisy as I expected but slower. Admittedly I made no adjustments to the print. Opening up Cura is next project. I wanted to see what I could do straight out of the box.
fiery idol
Cura is pretty nice. Some 3D Printers can be quite noisy, I know mine is.
shy kelp
Most noisy is the power supply cooling fan. I think a larger diameter more open box might be appropriate.
sonic plinth

This is a 3D printed Egar Allen Poe Raven like thing with skulls you can download here. https://www.myminifactory.com/object/3d-print-raven-skull-2902 Enjoy!
shy kelp
5 hrs 31 minutes to print the little dog. Still have sample filament left.👌
My first 3d print.
sonic plinth
That does not look like it should take 5 hours lol.
shy kelp
My first so, I have nothing to compare to.
fiery idol
I think my printer is pretty slow. The speed of the print depends on the settings of the printer. For example, if you want a higher resolution print, the longer it will take to print.
 spice raptor
@shy kelp Nice! Congrats on getting a 3D printer. I want to but I have to justify the purchase to my wife. What make/model did you buy? I can see the Ender logo.
fiery idol
He got the Ender 3.
spice raptor
Sorry wasn't following the earlier conversation.
shy kelp
Ender 3 Pro. About $90-100 more than the 3 but has improved stability, magnetic bed, and other features.
fiery idol
How much was it?
shy kelp
Also has upgraded power supply. Read a lot of bad things about the original PS.
fiery idol
My power supply is loud, and sometimes the fan makes a weird noise. I have the Creality CR-10.
shy kelp
I paid $269 via my Amazon prime account. Free shipping.
fiery idol
Wow, that's a pretty good price.
Mine was ~$500. It was pretty much assembled though.
shy kelp
Yeah my ps fan is noisy. I think a bigger one with a modified enclosure will help.
fiery idol
I was thinking about using a small computer power supply I have laying around.
shy kelp
It took two episodes of Marvelous Mrs. Maizel to assemble.
Mine needs 24v and I don't think pc ps's have 24v.
fiery idol
I think my printer only needs a max voltage of twelve. There are ways of getting 24v off of a CPS, but I don't think it is the safest way to do it. You can connect - to -12v and + to 12v.
shy kelp
Hmmm... Wouldn't be my first choice.
fiery idol
Yeah, I could always try to replace the fan in my power supply, but I am kind of lazy.
fiery idol
Yes, they are 12v, but you can get 24v off of them by connecting - to -12v, and + to +12v. It's not the best thing to do though.
 ancient crypt
Hello, have anyone heard of a 3D printing service where you send your layout designs to individuals who own 3D printers and they actually do the printing for you?
spice estuary
3D hubs?
shy kelp
Shapeways as well
versed wren
I think they want to be connected with an individual rather than a manufacturer
fiery idol
@ancient crypt 3D Hubs is a service where your designs are sent to a person with a 3D Printer. You can select a printer by distance, price, materials, etc.
ancient crypt
@fiery idol thank you so much for the tip. I was not aware of that. Their prices seem reasonable
fiery idol
@ancient crypt Your welcome. I have not used 3D Hubs before, but yeah their prices can be some what reasonable.
coarse ruin
3D hubs RIP...
violet needleBOT
Adafruit Industries posted New Year Eve Ball Drop @adafruit #3DPrinting #CircuitPython

Celebrate the new year by building a working scale replica of the Time Square Ball Drop with Adafruit Feathers and NeoPixels! Learn guide, code and 3D files:...
shy kelp
can anyone help me with Th3d firmware
shy kelp
if i have a Uno r3 will that work with installing the bootloader or do i just need an Uno
hollow depot
The UNO, or better the real one has 100% a bootloader on chip. There are a lot of chinese clones which are need it, but there are also some models with it. Normally you don't need to burna bootloader
violet needleBOT
Adafruit Industries posted Chainmail Wallet #3dprinting #timelapse @adafruit #adafruit

Every week we'll 3D print designs from the community and showcase slicer settings, use cases and of course, Time-lapses! ChainMail Wallet https://www.thingiv...
serene laurel
That feeling when you cut something out of your 3d model without any measurements at all and and when you actually measure later on your measurement is spot on and everything fits purrrrrfectly in that place.
 low shore
Just inserting a strip of #neopixel a into a hollow piece doesn’t always give the desired light diffusion effect even if it’s kept in the silicone sleeve. The strip won’t do that well rattling around in the prop either. My solution is a plastic backing that holds the strip in place and can be glued to the prop. This way I control exactly where the neopixel strip is placed and use a recurring pattern to connect the strips needed to get the desired length.
serene laurel
Whatcha makin @low shore ???
 small beacon
@low shore Some of the diffusion tricks are to sand the "lens" plastic from the back or front to scuff and scatter light. You can also wrap or bundle the strip in parchment paper or any kind of paper, fabric - it cuts the brightness a bit though. My favorite is to use fiberfill batting - stuffed toy or quilt/pillow stuffing. You need mini air gaps. I find that packing foam or bubble wrap doesn't do too well. Good luck.
low shore
@serene laurel Assassins Creed Sword pieces of Eden
serene laurel
Ohhhhhhhhh thats cool!!! Which AC is that from???
low shore
AC Unity
serene laurel
Ahhhhhhh cool!!!! I just started playing Odyssey the other day.
tardy fox
all morning? wow...that would take me like three weeks 🤣
 versed marlin
The hitch is the project needs to be done before I go to bed. I still have some programming, most of the wiring, and all of the sewing to do.
Not to mention the cover, the battery door, and the contact plate.
 night kraken
Lookin good! 😄
versed marlin
Sadly my project missed the deadline (before I go to bed). Also I somehow added about 10mm to the length of a AA battery without realizing it. I'll have to keep going on it some other day.
Nice to see most of the components fit though.
night kraken
i hate it when i make something, it prints, and turns out nothing fits xD
When its too small, ok ill remove it by hand, but when its too big... rip
karmic brook
When it's too big, it would be cool if you could put it back in the printer and fill up the extra space. What I usually do is fill it up with a block of wood, bolt (when I need something conductive) hot glue, or (once in a while) a printed spacer.
versed marlin
Well this print is scrapped but I might as well print the last piece so I can test the fit.
At least that way I'll know if the dimensions of the post are right.
lol what I don't get is it's the microcontroller I swapped between the test and final prints, and somehow it's the length of a AA that I got wrong.
BTW that control box is meant to drive this. https://photos.app.goo.gl/NCEVCB6pGJvPCaNYA

Google Photos
karmic brook
That's the sort of mistake I make too: the tricky parts I pay attention to and triple-check, so I generally get them right. It's the ordinary, common stuff where I make a typo, divide backwards, or somesuch and get it wrong.
versed marlin
Funny thing too, first time I measured it I was super careful not to cross the leads with my calipers. Second time, eh whatever only shorting it for half a second.
Technically my second measurement should have been more accurate because I had better surface contact lol
karmic brook
I know that feel! Plastic calipers exist (there's a video where someone plays with a €2 set), but I usually just tuck a piece of paper under one blade (and then subtract the paper if it's the sort of thing where that would matter).
versed marlin
see that would have been the smart thing to do
well pretty much every piece was a failure, but bore unexpected fruit.
the striker plate was flexible enough I could fix the posts and it still works to actuate the cherry switches
shy kelp
What is it? A wireless keypad or something?
sonic plinth

I recently found an old 3D print of mine and I decided to finish it up. Enjoy!
sonic plinth
Do people like my video? I am kinda worried it isn’t going to do well do to the number of dislikes I received for it.
serene laurel
Anyone printed with the Hatchbox Wood filament?
coarse ruin
@serene laurel i have a spool of it i did some quick tests.... seemed ok. I'm going to use it for a very large wood "bender".
serene laurel
Cool thanks!!!
lofty sigil
I am about to dip my toe into 3-D printing
I don't own a printer myself, but my good friend does and I need to print a few small pieces for a project
I have a Feather Huzzah, a Ultimate GPS Breakout, and a 16-channel Servo Controller board that I need to mount inside a case
so I am going to 3-D print little shims with hex-shaped holes where the mounting screw holes from the board would be
I can put nylon hex nuts in the holes and use nylon screw to fasten each board to its shim
and then use glue or tape to secure the shim inside the actual case
Where is there a good tutorial on how to create your own shapes/objects for printing?
versed wren
do you have some modelling software currently?
lofty sigil
I think I have access to EagleCAD -- will that do it or is that circuit design?
versed wren
that's circuit design, but Eagle integrates with Fusion 360, it's currently the best option if you're just getting into CAD because it's very popular, there are probably hundreds of thousands of tutorials about it at this point, it works well, it's parametric, and now it has integrations with the EDA suite you're using.
Hobbyists, startups and makers may qualify for free use of Fusion 360. Learn more about licensing and download Fusion 360.
lofty sigil
I got my EagleCAD license via the Digikey/Adabox offer
haven't every really used it
Okay, Fusion 360 downloading...thanks for the pointer.
Is there any way to take the PCB designs that Adafruit does and import them in to use as the base object (so I can line up mouting holes, etc.)?
night kraken
Guess you mean this? 😛 https://www.youtube.com/watch?v=S8U09Pj1m6M
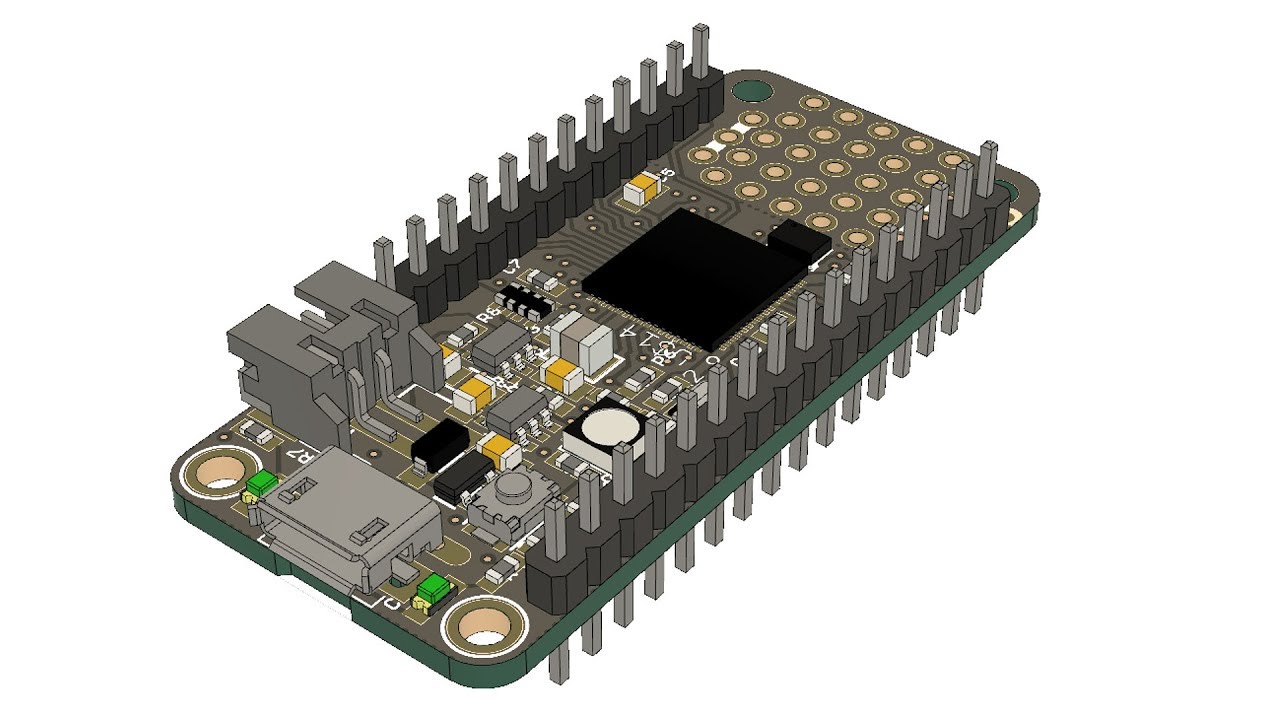
In this video I walk through the workflow of turning an adafruit board into a detailed 3D model. I use Autodesk Library IO to generate custom components to p...
versed wren
in eagle I haven't found a good way to do that no. Eagle's paradigm consists of building stuff up from bottom to top, so you have footprints and symbols that combined to form components, components combine to firm schematics and then you use the footprints of the components in the schematic to build your board. I have not found a simple means to convert a board into a component. That said some things exist as components, Adafruit maintains an eagle library which does contain components for developing featherwings
lofty sigil
That sounds about right
Thanks, I will go watch that and wait for Fusion360 to install, and come back if I have further questions
versed wren
disclaimer: I have not used fusion360 and won't be able to help with that
lofty sigil
no worries
versed wren

GitHub
Slowly building up a collection of parts we use here ... This file includes some library parts from microbuilder.eu Most of 'em are either Eagle parts that I've changed a little to make the...
lofty sigil
I figure if I can get my questions translated into the right terminology so I can get my searches correct I'm ahead of the game
versed wren
digikey is a great source to get components too, many products have a listing for 'UltraLibrarian', which will let you download files that can be imported into an existing library
this is the most common voltage regulator used on Feather boards, you can see under Documents & Media the EDA / CAD Models field has a link to SnapEDA, that's like UltraLibrarian but different
https://www.digikey.com/product-detail/en/diodes-incorporated/AP2112K-3.3TRG1/AP2112K-3.3TRG1DICT-ND/4505257
You'll find that most of the time it's not valuable to have 3D models of most components. You may want models of the JST socket and stuff like that, but you can replicate those in Fusion 360
Linear Voltage Regulator IC Positive Fixed 1 Output 3.3V 600mA SOT-25
lofty sigil
All I really need at this point is the shapes/objects of the boards themselves
so I can design some mounting shims for them
versed wren
using parametric modellers can be a little weird to learn, but it's not hard. Learning how to design things that will 3D print well is more difficult because there's just a lot of truths to internalize
night kraken
@versed wren Ultralibrarian ? where is it on digikey 😮
versed wren
on the product pages
night kraken
Hmm
versed wren
if you go directly to ultralibrarian they make you start an account and stuff, also their search is useless. if you go through digikey they don't and you can actually find stuff
night kraken
im looking on a product
but i cant see it
i think im blind
the one u linked, the AP2112K
versed wren
that one uses SnapEDA, which is the same as Ultralibrarian but different
night kraken
aaah i see haha 😄
Im looking at SNAP EDA
ow
they ask money for a 3d model
lol
well that aint fun
versed wren
the 3D models aren't useful
versed wren
your enclosure will not be near enough to the surface of the board for the volume of the AP2112 to matter at all, the JST might, header pins might, USB sockets, general tall things might, but most components are very very short
 tribal egret
@night kraken not all snapEDA footprints are paid
...you can use circuits.io to convert various other lib formats like Altium Library files -> Eagle
versed wren
I would hope all of the footprints are free, I've only seen the 3D models with a pricetag
tribal egret
@versed wren you can request for them to design a footprint for you and all that (2d/3d footprints too i think) for a fee
(If we already have it, download it free!)```now that's a different
violet needleBOT
Adafruit Industries posted Hovering Planter @adafruit #3DPrinting #Timelapse #adafruit
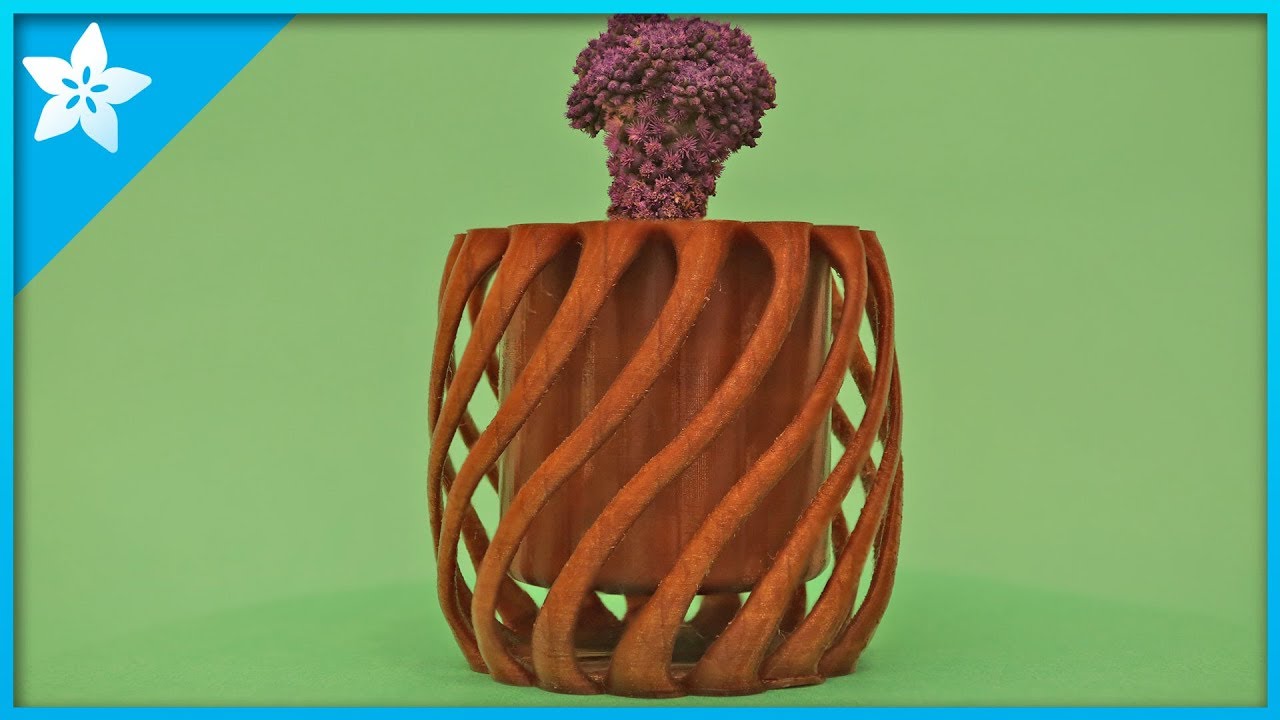
Every week we'll 3D print designs from the community and showcase slicer settings, use cases and of course, Time-lapses! Hovering cup / planter luckyx182 htt...
 wary dove
I figured out why my prints were stopping midway through.
 sly shadow
😂
karmic brook
Long ago, I had a similar bug in a system with a speech synthesizer, so it would intone the verbiage leading up to it, then just start robotically repeating "YOU-YOU-YOU-YOU-YOU"
chilly oak
https://www.thingiverse.com/thing:3343425 Stand for Grand Central M4 Express

A simple stand for the Adafruit Grand Central M4 Express to avoid scratching your desk.
https://www.thingiverse.com/thing:3338843 stands for feather, feather doubler, feather tripler
violet needleBOT
Adafruit Industries posted 3D Hangouts – Adventure Time Cups and Cubes

This week’s #3DPrinting project on Adafruit Learning System https://learn.adafruit.com/adventure-time-coffee-cup-lamp Adafruit Circuit Playground Express htt...
chilly oak
violet needleBOT
Adafruit Industries posted 3D Hangouts – Adventure Time Cups and Cubes

Multistreaming with https://restream.io/ This week’s #3DPrinting project on Adafruit Learning System https://learn.adafruit.com/adventure-time-coffee-cup-lam...
low shore
Hi Guys. This is my completed build of the Assassins Creed Sword of Eden from Assassins Creed Unity.
Printed in PLA+ with a gold leaf and paint finish with a few neopixel a running off a trinket MO that also uses one of the pins for a cap touch switch
Last but not least just a video showing off the effects
shy kelp
Wow, that is a really well done project
How did you get the leds to shine through? Translucent filament + paint?
 lapis cipher
Yay 3D printing :D I've got two Ender 3 printers. Maybe might acquire a DeltaMaker since as they're local to me and I know the guy who runs it, it'll be relatively easy for me to buy one and not pay shipping
low shore
@shy kelp the whole piece is printed in translucent PLA+ then I cover what I dont want light to shine through
The brighter part has a thin layer of gold paint
sonic plinth

This video entails how to program a 3D Printer based around the marlin firmware. Enjoy! https://github.com/MarlinFirmware/Marlin Download! ^
sly shadow
@sonic plinth What is the use of this? 😄
sonic plinth
Marlin is a 3D printer firmware for Arduino printers. I explained as fast as I could how to use it lol.
 shrewd rose
What could be issue here
Hotend @230C
Bed @105C
for some reason won't go above 105c if goes shuts printer down with error BUT that's probably faulty Themermistor
Can be improper alignment of nozzle and bed level??
ABS
tardy fox
ummm it's hard to tell but it looks like your first layer is either not squished enough or it's too squished
or your bed is not clean
its abs...are you printing in an enclosure?
ABS is hard to print...what's it look like if you print with PLA @shrewd rose?
shy kelp
@shrewd rose that's a Perameter in Marlin I believe
Looks like you need to re level tho
shrewd rose
if you are referring to MAX_TEMP for bed
yea i checked that
@tardy fox and it's not closed but yea it does this kinda other abs i have
pla is ok when printing
this was the other abs i had
both are old so may be moisture kicking in
I'll update if I fix the issue
 green pine
Today, cr10 mini conversion stage 1 complete
Getting rid of the control box. Adding a touch screen pi.
If anyone has an idea where I might find a purple Bowden. Hmu ❤️
boreal wyvern
@shrewd rose hotend temp may be too low. we print our abs at hotend temp: 260-270C. Formerly we used 230-240C and the results were super inconsistent
shy kelp
Also her hotend setup is not up to par, maybe she should consider buying an e3d V6 clone from Trianglelab. They also sell a clone bmg extruder. From what I've seen and heard, quality is usable, but not as good as the genuine stuff.
While you're at it, get a titanium heat break
@shrewd rose
shrewd rose
hmm
shrewd rose
It's better now
bed@105 and nozzle@260
bed was off
by a lot
opened and level and re screwed
coarse ruin
several things look off there... probably the exturtion ratio, the layer height... and just about everything in the picture with the extruder (floppy wires, uninsulated heatblock, nozzle that looks like it's made of charcoal, no heat break?, etc.)
 austere oar
Layer height for sure. The nozzle looks like 0.8mm where 0.4mm would look better.
boreal wyvern
@shrewd rose our nozzles are 0.35mm, so we set layer height at 0.25mm and extrusion width at 0.35mm. It can take a few test prints to get your feeds n speeds settings to optimum-level. But it looks like you are off to a strong start.
shrewd rose
@coarse ruin yea that's what happens when leave it un checked
failed prints leave some nice marks on it
@austere oar yea Thing was I used the same Gcode and previous one even tho I changed the nozzle
cause I was worried about nozzle clogging
using a vernier caliper the width of extrudes wire was about 2.4mm
or 2.1 ish I think
@coarse ruin How much does an insulation effects
and this one is not equipped with heat break since we are not using those hotends
plus I'm thinking of adding some layer cooling
coarse ruin
the heatbreak is neccesary. With out it you get filament pre-heating and the filament can't be gripped by the extuder gear accruately, usually causing under extrusion. insulation in this case is the least of your worries.
violet needleBOT
Adafruit Industries posted 3D Hangouts – Time Tracker Cube and Astrolite

Code, Build Instructions, and Source Files: https://learn.adafruit.com/time-tracking-cube/ Feather HUZZAH ESP8266 https://www.adafruit.com/product/2821 8x Ne...
violet needleBOT
Adafruit Industries posted 3D Hangouts – Time Tracker Cube and Astrolite

Multistreaming with https://restream.io/ Code, Build Instructions, and Source Files: https://learn.adafruit.com/time-tracking-cube/ Feather HUZZAH ESP8266 ht...
shrewd rose
so some minor tweaks
better temps now
better bed leveling
" Different filament "
Let's see how it turns
it's looking kinda good in image
But it's not at that level Will update with a better pic once done
shrewd rose
Mr.Stark I'm not feeling so gpod
back to marlin
😩 💦
so far I feel the nozzle was partially inside the layers so that is one
 junior dome
I'm guessing the value of the steps per unit for the Z-Axis stepper need to be adjusted/looked at.
tardy fox
yeah, I think that's some kind of Z-axis issue. I'd measure how high that's supposed to be (based on the model) and then compare that with how high it actually is. that might shed some light
they way it's perforated makes me think you've configured it to do a .2 or .15 layer height but it's actually doing like a .5 layer height when it moves. haha
either that or you have a major extrusion problem.
but based on that pic with you holding the printed model next to the one on the screen, I'd say you have a big Z-axis calibration issue
...the height of the printed model appears to be wayyyy off (it's too tall). @shrewd rose
 queen canopy
The 3d printed head for my fortune telling machine I'm building. I made it in Scluptris myself
 south kernel
Hi! I’m wondering where folks go for Prusa support. Is there a discord or are their forums still my best bet? Thanks!
tardy fox
their forums seem to be super active. what's the issue @south kernel?
south kernel
@tardy fox I’ve been having difficulty with calibrating and getting it to print well since running ninjaflex through it. I’ve used the forums before.
I probably just need lots of patience and time with it.
tardy fox
I haven't personally tried that (yet), but yeah I'd take a stroll around their forums
I know that using any flex can be difficult
violet needleBOT
Adafruit Industries posted Fusion 360 Tutorial: Poly Cube Build - Layer by Layer #3DPrinting #3DHangouts @adafruit #adafruit

In this tutorial we'll build a parametric cube with hexagonal corners. This design method was used in the creation of the time tracking cube project. Learn, ...
sonic plinth
I must of forgot to post this here lol.

This was by far my best 3D print I have painted yet with one minor problem. You will have to watch the video to find out the problem. https://www.myminifacto...
karmic brook
That's a real shame. Can you repaint it after it dries, or would that dull all the fine details?
sonic plinth
I can repaint it. The only problem is that took about three hours to paint. I would need to schedule something in advance. @karmic brook
small beacon
@sonic plinth Don't worry too much about putting on the sealer before the base coat is dry. It's an opportunity to do a more fantastic job of fixing whatever didn't come out right. I had a few house painting projects where the paint peeled off weeks later and had to figure out how to redo it. That, my friend, is experience. Live and learn.
sonic plinth
Thanks! I am in the process of repainting it now lol. I just need to find the time. Thanks! @small beacon
 modern willow
I have a ? what would be a good 3d printer for a beginner ?
small beacon
@modern willow That's actually a tough question without finding out your needs and expectations of a 3D printer. How comfortable are you with using software and tinkering? Setup and fine tuning of the machine is up to you when you get it to run. Are you creating the actual models to print or just want to get something off of Thingiverse? What's the largest object you may be printing, a small phone case or a part for a cosplay costume? Budget is also a concern, cheaper is not better. Good luck.
coarse ruin
i'd 3D print large objects if time allowed. But it is rare for low cost printers to run for days with out failure I've never been able to push the limits of volume on my printers due to the "Reliablity" related issues.
e.g. extruder fail, run out sensors, build plate adhesion, etc.
^ that guy has Rep2 and PRUSA i3 Mk3
tardy fox
yeah I finished a 38-hour job with my MK3 last week and it turned out purrrrffffeeeccctttttlllyyyyy 😄
+1 for Prusa for sure
@modern willow it kinda comes down to this: what is your budget and do you want to print stuff or do you want a project (something you'll mod, fix, tinker with...more than doing actual printing)? for me, the Prusa i3 MK3 was the right fit. I wasn't looking for a "project printer" for my first printer. yes, they cost more, but the reliability is there. you can set it up, calibrate it and just print. if you want to do mods later, you still can -- but for a beginner, it's probably better to get something that you know will "just work". then if you want to tinker later after you have a good feel for how it's supposed to work, then you can move on and start modding, hacking, etc.
...if, OTOH, you're the type that wants to tinker and/or fix stuff that's not quite right all the time, by all means, there are many, many other options. you can even build your own from scratch (in the same sense that you can build a PC). it just depends on your technical skill level (these things are mechanical and electrical so be ready to do some of both), patience level, and expectations in terms of the quality of the prints you get out of it. 😄
karmic brook
Just fired up my first 3D printer (Monoprice Mini Delta) for the first time. Had a few issues with adhesion, but found a workable setup. After printing a few parts to upgrade the printer itself, now I'm finally printing the case for the AdaFruit "Animated Flame Pendant" project I built a while back.
shrewd rose
Ok so after tweaks
The end broke but that's a separate issue for now
It's printable and satisfactory
shrewd rose
That side not print was me tinkering with bed leveling but once done
Looks neat
Few more tweaks left till perfection
:FeelsGoodMan:
shrewd rose
There is slight layer shift but
All Good here
@tardy fox @shy kelp @boreal wyvern @austere oar @coarse ruin
Thanks for the suggestions
coarse ruin
you can work retraction settings now that you have a reasonable Z.
just as a note cleare, black, and white filament tend to be the hardest to see defects with. So when doing test prints it can be useful to use colors that are not as saturated (tan, grey, etc.)
shy kelp
I'm just gonna spread the news a bit, sorry if this violates the COC, https://twitter.com/ReneJurack/status/1086707921700966400?s=09

#E3D #toolchanger is up and running 😎💪 one of the first ever prints on that machine was also an endurance test and printed for 14h over night. 1mm volcano with #prusament silver and 0.4mm microhotends with #fillamentum green/luminious red and #dasfilament @toms3dp in...
Likes
134

 Twitter
Not sure if this qualifies as spam
stuck inlet
@shy kelp seems on topic to me. I worry about spam when its posted to many other channels too
violet needleBOT
Adafruit Industries posted 3D Hangouts – Astrolite, Pearl Sword and HalloWing Macs

Hang out with Noe and Pedro Ruiz and learn how to build 3D printing projects with electronics! Code, Build Instructions, and Source Files: https://learn.adaf...
violet needleBOT
Adafruit Industries posted Astrolite NeoPixel Upgrade #3DPrinting @adafruit #adafruit

Guide: https://learn.adafruit.com/astrolite-neopixel-upgrade Astrolite by Hasbro, introduced in 1969, was a building toy set made of clear tubes that snap fi...
violet needleBOT
Adafruit Industries posted 3D Hangouts – Astrolite, Pearl Sword and HalloWing Macs

Multistreaming with https://restream.io/ Hang out with Noe and Pedro Ruiz and learn how to build 3D printing projects with electronics! Code, Build Instructi...
karmic brook
Which? The stringing?
violet needleBOT
Adafruit Industries posted Fusion 360 Tutorial – Print-In-Place Hinge – Layer by Layer

In this tutorial we're taking a look at a 3D printed, print-in-place, hinge with user parameters. The features are scalable so the tolerances can be easily a...
karmic brook
Ah, the missing sections. Could be a few things. My first guess is a filament feed problem.
 blissful marlin
Earlier I tried to do a test cube print
and the print had a lot of gaps in between the layers
I though underextrusion first, but I calibrated the extrusion already
karmic brook
That makes sense. Could be some dirt clogging the nozzle, a filament feed problem (slippage), or perhaps something is causing drag on the filament.
boreal wyvern
@blissful marlin sometimes it is a partial clog in the nozzle, sometimes some filaments need higher extrusion temps and that can cause irratic extrusion.
karmic brook
I'm just getting started myself, and weirdly, it's going better than I expected. I had some adhesion issues to begin with, which I'm dealing with using hair spray until I can replace the build platform with something more appropriate.
 median gorge
I am trying to print with PETG with my CR10S and I seem to be able to print the raft that my project will sit on, but when it starts to print the part the plastic doesn't seem to want to stick to the raft?
karmic brook
Perhaps disable the cooling fan for the first few layers?
median gorge
I switched back to PLA and what I found was that it was printing some supports, but not printing the part it's self. So I rebuilt the piece, but now the piece is peeling up from the raft before I am 50% complete.
karmic brook
I've had issues with the raft peeling up, but not with adhesion to the raft. I'm guessing it's cooling and shrinking as it's printing. I'm not sure what the best approach to address that is. Some people box in their printers so there's less cooling air flowing through. I suppose you could also add stress gaps in the design, print in pieces or a different orientation, or try adjusting parameters like infill.
I'm no expert, I've only been playing with 3D printing for a few days myself, so just throwing out some thoughts: I could be way off.
 vagrant drum
anyone else experience extreme slowness with thingiverse of late?
karmic brook
Seemed zippy enough for me last night.
Tried it just now, seems fine. I'm guessing there might be a network routing issue between you and thingiverse? I suppose you could do a traceroute if you're curious.
It does have two IP addresses, maybe try the other one?
vagrant drum
yea that's what i figured - just looked at a couple form posts going back to nov 18
lots of random reports of slow/not slow
oh man they are on cloudflare - now i'm really surprised
probably just fios letting me down
karmic brook
The downloads appear to be hosted on dropbox.
boreal wyvern
@median gorge I have been told that every petg is different and needs tweaks in how you print with it. I have only played with it a few times but what i found was it needed similar temps to ABS and an enclosed controlled environment to avoid temp shocks. It is super sticky/gooey which means you have to print at almost half the speed you are used to printing. I had to change nozzles after I switched away from the petg, it seemed like there was still some in the nozzle that wouldnt come out. I had issues with stringing and super slight skipping, but otherwise I did eventually get some okay prints.
median gorge
@boreal wyvern thank you
violet needleBOT
Adafruit Industries posted Fusion 360 Tutorial – Eagle PCB Joints

In this tutorial we'll take a look at applying Joints to PCBs in Fusion 360. The issue in this project is the PCB could not be repositioned in Fusion 360. Th...
shy kelp
Not really informed about 3D printers/printing. I'm interested in messing with prosthetics. Does the 3D printer you use matter much? Any recommendations for a beginner?
karmic brook
Printers vary a lot in capabilities, cost, ease of setup, etc. I'm just getting started in 3D printing, and started with an inexpensive, basic printer, realizing that it would take some extra effort and have limited capabilities.
For a beginner who has a good amount of money to spend the answer is going to be different from a beginner who doesn't. Similarly, a beginner who doesn't mind a bunch of fiddling would prefer a different printer from a beginner who just wants to start printing stuff.
shy kelp
I don't mind fiddling around if I have to. I just don't want to spend hundreds on something so advanced that I just don't need, though I don't mind dropping the extra cash if the features are good.
I'm looking at OpenBionics stuff, though didn't see any printer recommendation.
karmic brook
I'm certainly not an authority, I'm just beginning myself, but the (admittedly cheap) printer I started with is a Monoprice Mini Delta. The plan all along was to learn on it, find out what I liked/disliked, and move to a fancier printer sometime in the future armed with more information.
That said, my current guess for my next printer is a Prusa i3 MK3. I'm also eyeing the Ultimaker that AdaFruit sells – I'm using the Ultimaker Cura software (along with OpenScad) to drive my current printer. Another likely candidate is the Lulzbot series.
There are a lot of really nice options out there, which makes it tricky to choose.
Poking through the OpenBionics website, looks like they're using an Ultimaker to build the Brunel Hand they offer, and possibly a BQ Witbox as well.
They apparently also use a few different Lulzbot printers, and a Robox. I'm not surprised they have a stable of a variety of printers.
small beacon
@shy kelp I was browsing through the Brunel hand project that you want to to get into. Interesting field. One of the assembly sheets mention ninjaflex and PLA as the material of the 3D printed parts. Ninjaflex is the rubbery type filament and is difficult to use if you don't have a good 3D printer that can adjust to it. The PLA is the more common plastic as opposed to ABS (tougher, has "fumes" when heated during printing, needs a heated printbed/closed no wind draft print area for it to work well). Catch @supple stratus and @idle crest on their Adafruit 3D Hangout webshow on Wed 11 AM ET to ask for recommendations. Good luck.
coarse ruin
the limitation for flexibles is that they more or less require direct drive.... i.e. not ultimaker with bowden. I've had no problems with my PRUSA or Rep2 with flexibles... Flexibles need to be printed slow. (i.e. 1/4 or less the speed of PLA)
karmic brook
Ah, good point. Otherwise you end up trying to push a wet noodle and it would just get fankled up in the bowden tube.
shy kelp
Thank you this info helped a lot!
coarse ruin
the monoprice from adafruit would likely also work.
karmic brook
The Inventer II? I thought it was PLA only.
coarse ruin
well... says it can do slicer and cura... so likely you can get it to work with TPU's....
most anything that does PLA and has direct drive can do TPU / PUR
karmic brook
That makes sense.
violet needleBOT
Adafruit Industries posted 3D Hangouts – HalloWing Mac, Swords and Shields
Multistreaming with https://restream.io/ This week’s #3DPrinting project on Adafruit Learning System https://learn.adafruit.com/hallowing-mac/ https://www.yo...
violet needleBOT
Adafruit Industries posted 3D Hangouts – HalloWing Mac, Swords and Shields

Multistreaming with https://restream.io/ This week’s #3DPrinting project on Adafruit Learning System https://learn.adafruit.com/hallowing-mac/ https://www.yo...
violet needleBOT
Adafruit Industries posted Mini Mac SE #CircuitPython #3DPrinting

Build a mini mac with HalloWing that displays boot screen actually plays startup chimes! It uses the Adafruit HalloWing M0 Express and runs Circuit Python. T...
 serene quest
Just a second ago I recived and installed a glass bed on my printer, I leveled it and such. I tried 2 prints. On the second layer of both, there was suddenly a very high pitched WHRRRRRR sound and the printer stayed it place. I immedetly unplugged it both times. What could this be?
serene quest
It was the part cooling fan. There was tape stuck in it. This is embarassing
 willow sedge
@serene quest We've all done something that was basically tape on a cooling fan.
serene quest
yeah, but it caught me off gaurd because it was so loud and high pitched 🤷
karmic brook
Sudden noises like that make me jump. To the worst possible conclusion.
 novel lark
Hmmmm. Tape on a cooling fan. Filing that away for April 1. 😈
karmic brook
It makes a surprising amount of noise. Guess how I know.
 nova bloom
anyone have a favorite stl they love for pi 3? i need to do a customization and am looking for any suggestions. and, yes, i know they aren't all the same boards 😃
serene quest
My extruder heater seems to be dead. No resistance and the board is outputting 12v fine
at the worst of times...
karmic brook
Might be worth checking for a bad connection. While the heater itself may be dead, if it's just a bad connection (which is also possible), you'd probably be able to fix it yourself fairly quickly.
 glad loom
Does anyone know how to clear the printer head from the part for timelapsing purposes?
I figured there’s a gcode command but using the prusa slic3r I thought there was a setting to move it out of the way for each layer
boreal wyvern
@glad loom this guy uses simplify3d and he goes through his settings at about 7:00 https://www.youtube.com/watch?v=Is10iN43UjI

My personal process for taking great 3D printing timelapse videos may be a bit unorthodox, but it works great and definitely doesn't involve burning your han...
glad loom
Thanks I’ll check it out
boreal wyvern
I remember they mentioned it on 3D Hangouts, but i can't remember which episode it was.
you're welcome!
violet needleBOT
Adafruit Industries posted 3D Hangouts – NeoPixel Shields, ePaper and Axes
Multistreaming with https://restream.io/ Shop at Adafruit: https://www.adafruit.com/ ----------------------------------------- LIVE CHAT IS HERE! http://adaf...
violet needleBOT
Adafruit Industries posted 3D Hangouts – NeoPixel Shields, ePaper and Axes

Multistreaming with https://restream.io/ Files, code, learn guide: https://learn.adafruit.com/rose-s-shield-steven-universe/ Adafruit Circuit Playground Expr...
 thorn shoal
Just did an unboxing of my new Prusa i3 Mk3 kit https://www.twitch.tv/videos/376169266
 sonic plinth
Why did my Y axis skip steps near the top of the print. It was printed at 80mm/s at 200 c for extruder and 50 c for the bed. I think it was a result of wires getting stuck on the bed but I don't want to be wrong. Thanks! FYI this is an ender 3 we are talking about.
 modest elk
Hello, I got my first 3d printer around 4 years ago and have gotten 3 more since. Around a month ago i purchased an ender 3 after reading so much about it. Normally i use s3d but, because of the terrible settings implementation i want to move to slic3r pe. I am using the profiles provided by sn4k3 on GitHub, and my own profile and i keep getting terrible prints. If anyone could lend a hand or share there own profiles, that would be greatly appreciated. The first picture has both the s3d print and the slic3r one, the right side is the s3d. The second pic is just the slic3r
modest elk
ok, i dont know what happened but I reinstalled and it fixed everything
vagrant drum
first layer skips
anyone have ideas why this might be happening?
it looks like there is a lot of tension on the spool when ever it does and sometimes there is some 'crackling' sounds - almost like it is trying hard to pull the filament in
i thought of loosening the spool (by simply spinning it in place), but there is all sorts of mentions online of having tight spoool
tardy fox
@vagrant drum looks like a Prusa...try loosening the screws with the springs near the top of your extruder, the two that hold the little door flap down that pinches the bondtech gears together. if those screws are too tight it'll over-pinch the filament, create too much friction and then the motor can't push the filament through into the hotend. it's either that or your temperature is too low and it's hardening in the hotend and, as such, stops extruding. if there's too much tension on your spool/filament it'll either snap or (more likely) grind down the filament in a spot and never start extruding again (because it ground down an area and can't grip it ever again). if it randomly starts and stops extruding, that's probably not what's happening.
this randomly starts/stops extruding and extruder motor clicking suggests to me that either your extruder temperature is just a little bit too low or your bondtech gears are over-pinching.
vagrant drum
@tardy fox thank you. I’ll try adjusting the temp and screws!
violet needleBOT
Adafruit Industries posted Fusion 360 Tutorial – Parametric Angles

Working on a stand-up case for a display and micro-controller. Needed to drive the view angle of the screen with user parameters. Adafruit 2.13" Tri-Color eI...
night kraken
Hey guys, whenever i start my print, and my printer head moves to the center of the bed, its already extruding ...
i need to cut it away real quick before it actually touches the bed, otherwise i have to start again
is this an issue in cura?
karmic brook
Might need a tweak in the startup gcode to do a brief extruder reverse or somesuch?
night kraken
well im a simple man, i have no idea how to use gcode haha
i also found out, when i made a design in Fusion 360, in Milimeters, it actually exports in wrong dimension to STL
i made something with a length of 45mm
but it exported as 10mm
violet needleBOT
Adafruit Industries posted 3D Hangouts – Py, Bonnets and Stands

Multistreaming with https://restream.io/ Files, code, learn guide: https://learn.adafruit.com/raspberry-pi-zero-stand/ Project Video https://www.youtube.com/...
karmic brook
I'd look around for a support forum for your printer, and see if they offer some canned gcode for you that you can just paste in to Cura. Generally those are commented so you can see which section is doing what, like ```
;Retract the filament
G92 E1
Then I'd go to one of the gcode cheat sheet sites and look up what G92 does http://marlinfw.org/docs/gcode/G092.html
 zinc nebula
Good morning 3d printer folk! I would like to attempt to print the Time Tracking Cube. I realize that this project may be above my skill level. I do not know how to add different icons/images to the panels. I am using Tinkercad. Any suggestions for me?
 supple stratus
@zinc nebula Yes! Use this STL – https://github.com/adafruit/Adafruit_Learning_System_Guides/blob/master/Time_Tracking_Cube/STLs/ttc-side.stl
GitHub
Smaller programs and scripts to display "inline" in Adafruit Learning System guides - adafruit/Adafruit_Learning_System_Guides
zinc nebula
@supple stratus Does that have the icons embedded already? I don't see anything different on that .stl
 bright walrus
what did you open it with?
zinc nebula
I have the link opened in my browser. But the original .stl I downloaded from the project sight, I have opened in Tinkercad.
bright walrus
ah
zinc nebula
I'm probably over my head with this project because I am very new to 3d printing.
bright walrus
Havent printed in a while but try opening it in the one you use to export to your printer like prusa for example
maybe ;p but dont let it discourage you
zinc nebula
My printer is a community printer. So I use Tinkercad for everything. The printers in our community are all Makerbots.
bright walrus
ah gotcha
zinc nebula
grins Okay - I am nothing if not tenacious!
bright walrus
3d printers are an amazing tool and you dont realize how much you rely on it when yours breaks and you can no longer use it ._.
zinc nebula
Heeheehee, yeah, I don't really have that problem because we have about 20 of them.
It's a little Maker Lab.
bright walrus
lucky
zinc nebula
YEs!
bright walrus
My nearest makerspace is in like boston :/
which is like 45 minutes from here and I cant drive
zinc nebula
Our university library got a grant.
zinc nebula
It really is. So I thought, "Hmmm, I should use this resource!"
bright walrus
my adafruit order arrives today 😄
zinc nebula
So I am learning to 3d print. And I am hoping that I can figure this "adding an icon" thing out.
Luck you! I love Adafruit!!!
bright walrus
yeah ill talk about it in a sec, what 3d design software do you use?
zinc nebula
Tinkercad
bright walrus
ah
when i started 3d printing I just printed stuff straight from Thingiverse until I was comfortable designing my own prints
I used Autodesk Inventor because I had become familiar with it due to my schools engineering program relying on it heavily
zinc nebula
I took a 3d printing class in Instructables and they used Tinkercad so I did too.
bright walrus
from what ive heard tinkercad is really good
I would never suggest inventor
its UI is awful, its extremely difficult to use, and the learning curve to get into it is steeper than f(x)=x=1
I was just already used to it .-.
zinc nebula
Yeah - it all depends what you get familiar with I think.
zinc nebula
So @supple stratus - do I just overlay an icon onto that design?
@bright walrus Yes!
violet needleBOT
Adafruit Industries posted 3D Hangouts – Py, Bonnets and Stands

Multistreaming with https://restream.io/ Files, code, learn guide: https://learn.adafruit.com/raspberry-pi-zero-stand/ Project Video https://www.youtube.com/...
zinc nebula
Gonna get me one of those ...that was a great show! Thank you Noe and Pedro!!!
@here okay so back to my solid panels on the Time Tracking Cube. How would I go about laying an image/icon on the solid panel for this project? If this isn't what this channel is intended for, I totally understand. I haven't really search around for this topic but I was hoping that I could find some help here.
zinc nebula
@here okay so I think I am getting it. Do you just print the logo files on the Time Tracing Cube and then glue them into the side pieces?
Is this an inappropriate channel to be asking this on?
karmic brook
I'd use the Surface function in OpenScad, no idea with Tinkercad.
zinc nebula
Hmm, the only clue is in the PDF -- Task Panels
Now it's time to install the special task panels for time
tracking. Use stickers, vinyl decals, or different colored
parts to tell the tasks apart. Sticky note or label for
something with more legibility
Maybe the little logos aren't 3d printed at all!
@karmic brook Surface! Hmmm, I will check in Tinkercad to see if they have anything like that. Thank you!
zinc nebula
@supple stratus - So the Task Panels and the logos. Are they each 3d printed separately and then the logos are glued to the panel? Or ... how does that work? It isn't obvious to me from reading the instructions.
 honest path
Guys, are there fusion360 components available for the Featherwing tripler?
honest path
I mean, is there a fusion360 component for the tripler featherwing with headers?
violet needleBOT
Adafruit Industries posted Pi Zero Stand #3dprinting #adafruit #raspberrypi

Display your Pi Zero on your desk with this simple yet useful 3D printed stand. Files, code, learn guide: https://learn.adafruit.com/raspberry-pi-zero-stand/...
night kraken
@karmic brook Yesterday, well 2 days ago i asked about my printer extruding when its moving to the center of the bed, i think i found the issue....
This is in my CURA START GCODE
G28 ;Home
G1 Z15.0 F6000 ;Move the platform down 15mm
;Prime the extruder
G92 E0
G1 F200 E3
G92 E0
it 'primes' it
karmic brook
Yeah, there's usually code to do that. May need to be fine tuned.
night kraken
Well, something else with my printer (i got an ANET A8)
When i hold the down or up buttons in the menu, or anywhere else, it makes the fan spin really fast? XD?
When i hold those, it increases my fan speed for some reason
south kernel
Super grateful for the 3D models of adafruit parts on GitHub. Wish I had seen before starting my last project, but it’s coming in handy now! Everyone knows about this, right? It’s amazing! Thank you!
I would like to add a request for a model of part 1489 (6mm slim tactile button) as I don’t see it. Someone let me know if Im missing it!
 tropic dragon
I want to make a phone. The only material I have is pls. How can I make it stronger?
boreal wyvern
@tropic dragon One way to add strength would be to embed metal or bamboo parts into the print as it is printing. Lulzbot did this well with their watch: https://www.youtube.com/watch?v=E6Qhk9lH-nI

You've got the time, we've got the model — 3D print your own functional wrist watch! ▲ Get the 3D Models ▲ https://www.lulzbot.com/make_time ▲ Used in This V...
the key is to make a negative space that is the same shape as what you will insert. then determine when is the best time to pause the print so you can insert the object without the nozzle hitting the foreign object.
tropic dragon
Thanks
 meager axle
I saw this video https://youtu.be/CjH5KGw3Psw a while ago and I'm wanting to try it out now. In the video, he prints onto tulle mesh, but I found a fabric called Oly*Fun and I'm wondering if it will work. It's a lot stronger than tulle, and is what biodegradable reusable bags are made of. It doesn't have holes, just small circles with less material (fabric is thinner in these spots) so I'm not entirely sure if the plastic will bond with the fabric, and it likely won't bond to itself on the other side. It doesn't need to be too strong, but the fabric needs to not tear. Here's a picture of a sample I got to test with before buying more:

Learn how to 3D Print a pattern directly onto Fabric for Cosplay - super easy and very fun Liked the video? Buy me a coffee ➜ https://www.buymeacoffee.com/Un...
It appears that the spots are actually fused together to prevent the fabric from falling apart
meager axle
Has anyone ever attempted to print onto this fabric before?
violet needleBOT
Adafruit Industries posted Fusion 360 Tutorial – Animate PCBs
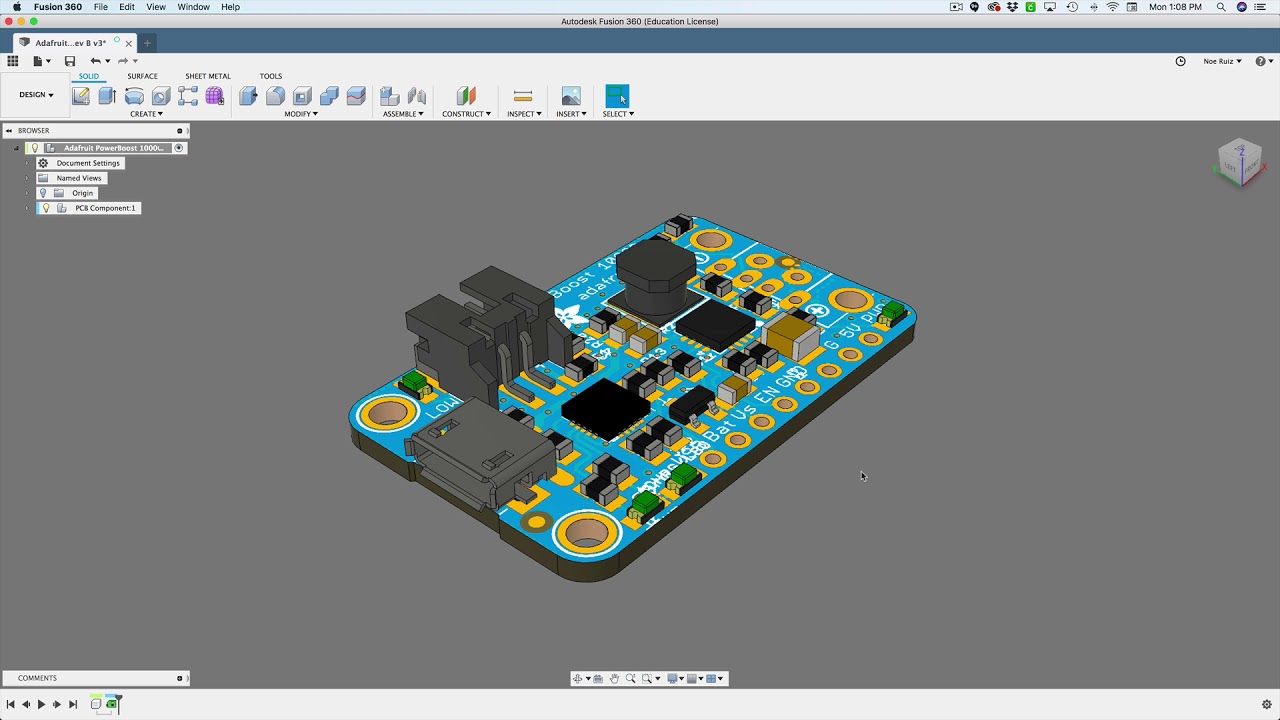
I like to make animations of PCBs spinning. Rotating things in the animation workspace can get a little weird. Here's how I set them up in Fusion 360 using J...
meager axle
Does that refer to printing on Oly*Fun?
small beacon
@meager axle That sample of fabric you have is probably made from Olefin, one of those synthertic bonded/pressed fiber fabrics. Olefin doesn't like high temps so you might want to just test to see how it reacts when melted filament touches the surface. A lot of makers are demonstrating or trying out the 3D print directly on fabric thing. The trick is to embed the fabric as an inner layer so it can act like rebar in concrete.
meager axle
@small beacon I'm not sure that's the company, I got the name from the hobby lobby website. I'm trying to sandwich the fabric between 3d layers and wondering if it will work with this fabric
Though if it's sensitive to high temp, I may have to use something else
violet needleBOT
Adafruit Industries posted 3D hangouts – LED Swords and PyPortal

Files, code, learn guide: https://learn.adafruit.com/obsidain-sword-steven-universe/ Project Video: https://www.youtube.com/watch?v=aZGqZ9dl0nU Portable PyPo...
karmic brook
There's this writeup on 3D printing and fabric which might have some useful info https://www.sparkfun.com/news/2698
idle crest
#3DPrinting Live Episode #222 – LED Swords and PyPortals https://www.youtube.com/adafruit/live #3DHangouts
YouTube
Multistreaming with https://restream.io/ Files, code, learn guide: https://learn.adafruit.com/obsidain-sword-steven-universe/ Project Video: https://www.you...
idle crest
Custom Fonts for Circuit Python Displays:
https://learn.adafruit.com/custom-fonts-for-pyportal-circuitpython-display

Learn how to generate bitmap fonts!
Portable PyPortal learn guide:
https://learn.adafruit.com/portable-pyportal

Make Portable PyPortal Projects
violet needleBOT
Adafruit Industries posted 3D hangouts – LED Swords and PyPortal

Multistreaming with https://restream.io/ Files, code, learn guide: https://learn.adafruit.com/obsidain-sword-steven-universe/ Project Video: https://www.yout...
Adafruit Industries posted 3D hangouts – LED Swords and PyPortal

Multistreaming with https://restream.io/ Files, code, learn guide: https://learn.adafruit.com/obsidain-sword-steven-universe/ Project Video: https://www.yout...
 shadow mica
i have a question how hard is it to 3d print pneumatics
karmic brook
You'd need fairly smooth surfaces, so you'd have to either use some sort of liner, or some sort of surface preparation.
shadow mica
the reason i am asking is because i can't find tiny pneumatic stuff like the lego pneumatics for a good price
karmic brook
Ordinary cheap plastic syringes are the usual choice.
small beacon
@shadow mica You could look around to see if anyone has made pneumatics using ninjaflex or other flexible filament but this guide seems to use a more involved "lost wax casting" method of production. https://learn.adafruit.com/silicone-robo-tentacle/a-little-background

Build your own soft pneumatic robot using 3d printing and silicone casting
shadow mica
the reason i am asking this is because i can't find tiny liner actuators to do the job
karmic brook
If you look at the pneumatic lab kits used in schools, they're just syringes https://us.vwr.com/store/product/8877295/pneumatic-hydraulic-jack-set
This style has mounting brackets and is affordable https://teachergeek.com/products/14cc-cylinder-set-40-pack

TeacherGeek
SKU: 1823-53 Single SKU: 1821-53 TeacherGeek plastic, project 14.5 mL cylinders are specially designed for STEM | STEAM | DIY | Maker Space...
tropic dragon
How does pla decompose?Can it decompose while sitting in a room?Thanks
shy kelp
@tropic dragon this might help- sitting in a room out of sunlight probably won't do much: https://www.reddit.com/r/3Dprinting/comments/48apqa/what_happens_to_pla_that_has_been_sitting_in/d0if465/

reddit
205 votes and 58 comments so far on Reddit
shadow mica
and i just made one of these today https://cdn.discordapp.com/attachments/211662625174585344/549337333032288256/20190224_130810.jpg

out of pla
 random condor
thats one of those multi directional wheels right? how well does it roll?
not really sure how they work in general though
shadow mica
rolls pretty well for a 3d print
 vast salmon
your robot get tires?
shadow mica
the robot i have uses a tank tred but the one i am building from scratch will use these
shadow mica
now i have a question four left wheels or two per unit
https://cdn.discordapp.com/attachments/314464447055921153/549411610326990859/JPEG_20190224_220511.jpg

@karmic brook what do you think
karmic brook
I'm not sure what you're asking
shadow mica
should i use 8 wheels or four per robot
karmic brook
<@&327289013561982976> this looks dubious
stuck inlet
@karmic brook banned
violet needleBOT
Adafruit Industries posted Fusion 360 Tutorial – Surface Mazes

Create complex bodies using the line tool, surface extrusion and thicken commands in Fusion 360. Bit of a maze type shape that is easy to create and modify. ...
 worthy hamlet
Anyone have any ideas how i could mount 1 or two sensors to these glasses (current design with two sensors), I want to eventually put real lenses in so they cant stay there...
violet needleBOT
Adafruit Industries posted 3D Hangouts – PyPortal Projects

Multistreaming with https://restream.io/ ASK AN ENGINEER 2/20/19 LIVE! ----------------------------------------- LIVE CHAT IS HERE! http://adafru.it/discord ...
violet needleBOT
Adafruit Industries posted 3D Hangouts – PyPortal Projects

Multistreaming with https://restream.io/ ASK AN ENGINEER 2/20/19 LIVE! ----------------------------------------- LIVE CHAT IS HERE! http://adafru.it/discord ...
 cobalt quarry
Suggestions for a glue for PLA? Superglue?
karmic brook
You can solvent bond it with tetrahydrofuran, which is basically what's in PVC primer. https://softsolder.com/2013/05/05/pla-vs-pvc-purple-primer-win/
serene laurel
So a buddy of mine wants a ball prop for his costumes. I was thinking of printing a ball in two parts using TPU or TPE so it is flexible and has a bit of bounce to it. But he also wants it to have leds inside of the ball as well. My plan is to use a couple of neopixels and some mcu and a button or two to control it all. It will need to come apart so that it can be charged and so the leds can be adjusted. What would be a good way to design this ball so that it fits together nicely and flexes but also holds the electronics and wont just fall apart all willy nilly?
karmic brook
I'm thinking threads, magnets, or snap latches.
serene laurel
My thought was giving the 2 halves threads and having them screw together too
I was just curious to see if anyone had any other ideas i might not have thought about
coarse ruin
one possiblity is material change... i know TPU and PLA bond... so print some of the ball's base with PLA and then change to TPU (pokemon ball style)
not sure if it world work with PETG + TPU
PVC solvents no longer use THF in the US.... (at least the ones i have checked.)
well lookie there.. the cleaner doesn't... but the primer does....
also... purple only.... not clear
eager juniper
My flexion extruder is oozing out of every possible place no matter what kind of filament I put through it, what gives?
The ultra flexibles prefer to exit through the side rather than the nozzle (lol) and the PLA just gets burnt and mushed up near the bottom. Has anyone had a similar problem or does anyone know why it’s doing that / how I can fix it?
It’s printing okay with PLA for the most part but there are a handful of burnt chunks sneaking into my prints 🙊
 open lake
is the creality CR-10 / 10S / 10-S5 worth buying, or is it an el-cheapo get what you pay for jobby?
open lake
thanks
coarse ruin
CR10 is a reasonable large printer. I suggest increasing the nozzle size to 0.6mm and do upgrades if you can afford them.
 tidal trout
best printer for someone who never touched 3d printing for like max $400? with wifi or at least usb
a lot of people told me to get ender 3
but i can afford a bit more so why not get something better
open lake
i was looking at using a 3d printer for lost-pla casting
so, the large printing capabilities are what interested me.. so the print resolution doesn't need to be amazing, but it would need to be a fairly accurate print.
shadow mica
interesting https://www.cvra.ch/blog/2016/airtank
The CVRA is a club building robots for the Eurobot contest
karmic brook
3D printing makes sense for tanks if you need a specific shape/size. Otherwise it's probably easier to repurpose some other container.
coarse ruin
flash forge finder is a good option...
i think you find that there is lot of post work with CAST pieces... accuracy is limited with metal casting.
that is over size it and surface where needed with mill, drill, tap, etc.
shadow mica
wow @karmic brook look at this this is kind of what i want to do max of 10 psi this guy did a study https://www.youtube.com/watch?v=eGgwuANScyM

Sorry for the bad audio! I don't know what happend! In this video I do everything I can to seal 3D printed parts, making them air-tight. ********************...
open lake
@coarse ruin i have a lathe, and a mill.. so boring and facing etc.. isn't an issue. the problem with making patterns for casting is that there's a limit to the complexity of the part.. lost-pla casting has opened up a whole new world of possibilities
coarse ruin
sure... I've cast things with Alum, zamac, copper and brass, in lost foam, lost pla and sand cast. When using the term accuracy the typical expecation is ~0.007"... which isn't happening in a casting (in an non-pro setting). if you want fine detail you might look at some of the casting plasters from rio grande or other suppliers of ultracal, ransom&randolph, investment mixes (metal dependant).
open lake
hah, 7 thou... in my dreams 😄
shadow mica
-.- can't cast here too cold and lathes and mills cost so much
i wish i had a lathe
that was a nice tool to use
open lake
where's here?
shadow mica
labrador
open lake
you live in a dog?
shadow mica
province
open lake
i've no idea where that it XD
shadow mica
cannada
shadow mica
900$ cad for a benchtop
shadow mica
keep in mind that is a bench top that for a proper lathe it's like 2 grand cad
open lake
i bought a boxford 4.5 underdrive fair few years ago
it's basically a southbend 9.5, underdrive
you see them selling on ebay, with zero tooling/accessories for £1,500
which is probably close to 2k cad
i thought canada was supposed to be good for stuff like that?
open lake
ah well.. micro lathe it is then 😛
shadow mica
it because the only demand for it is big companys
shadow mica
your telling me
karmic brook
I have another friend in Canada, we send each other stuff that's hard to get in our countries. Shipping is annoyingly expensive, though.
blissful marlin
When I extrude 100 mm on my cr-10s5 via the LCD I get 100 mm out
When I do the same in octoprint my bearing on the extruder does not grip and the extruder gear starts eating into the filament
Via octoprint it extrudes faster
is that normal?
Or is there a problem with my hotend?
karmic brook
You may need to tweak either your hotend temperature or extrusion speed.
 golden epoch
sorry wrong channel
violet needleBOT
Adafruit Industries posted 3D Hangouts – PyPortal Case

Files, code, learn guide: https://learn.adafruit.com/pyportal-case/ Project Video: https://www.youtube.com/watch?v=KYEBMq09bWA Adafruit PyPortal https://adaf...
violet needleBOT
Adafruit Industries posted 3D Hangouts – PyPortal Case

Multistreaming with https://restream.io/ Files, code, learn guide: https://learn.adafruit.com/pyportal-case/ Project Video: https://www.youtube.com/watch?v=K...
novel lark
@supple stratus @idle crest Your snap-fit cases are inspiring, and seem to be pretty durable. Any tips for making the snap-fit tabs durable? Do you favor ABS or PLA for snap-fit stuff?
 boreal lava
Has anyone used a sonoff switch, powerswitch tail, or similar device with their 3d printer? If so, what were your thoughts?
coarse ruin
google. "octoprint power control" and you will come up with results
violet needleBOT
Adafruit Industries posted PyPortal Case #3DPrinting

3D print a case for the Adafruit PyPortal! Build a portable IoT project using Adafruit's PyPortal and PowerBoost. Get started with circuit python and program...
violet needleBOT
Adafruit Industries posted 3D Hangouts – PyPortal ViewMaster and E-ink FeatherWing

Files, code, learn guide: https://learn.adafruit.com/pyportal-view-master/ Project Video: https://www.youtube.com/watch?v=KYEBMq09bWA Adafruit PyPortal https...
violet needleBOT
Adafruit Industries posted PyPortal Wedge by @at_makers Timelapse Tuesday #CircuitPython #3DPrinting

Every week we'll 3D print designs from the community and showcase slicer settings, use cases and of course, Time-lapses! Bill Binko / ATMakers https://www.th...
 valid crow
I feel like this will be a fun project. I always wanted a 3d printer and to mess around with solder and audrino. https://youtu.be/3p8BP7B7Pmw
I just do not know whether to use a extruder and hothead or the 3d pen. And if the extruder can I follow the small tutorial or should I buy different parts???also what software would I use. I thought about grbl, but I want something where I can just upload the 3d object and export it as gcode.

This part 1 out of 2 on how to build Tinkernut's 3d printer from scratch. This 3d printer is very simple and cheap. ►Tinkernut's video: https://www.youtube.c...
Dm me your answers/sughestions/improvements or if you made something like this before.
karmic brook
I've played with GRBL, that's about it.
 raw spruce
can you like screw into a 3d print just by drilling through it or should i add like threads or a hole to the model
boreal lava
Yes @raw spruce drill slowly (the plastic will melt at higher speeds), and slightly smaller than you want it to be. The only issue you will have is if you are drilling through infilled sections. If you can add the hole to the part, that would be best. It can be tough to size them properly, but if they are a bit small you can always drill them out a bit. The extra perimeters around the holes will help the screw "bite" in better.
violet needleBOT
Adafruit Industries posted 3D Hangouts – PyPortal ViewMaster and E-ink FeatherWing

Multistreaming with https://restream.io/ Files, code, learn guide: https://learn.adafruit.com/pyportal-view-master/ Project Video: https://www.youtube.com/wa...
valid crow
Is the ender 3 worth the $200??
karmic brook
Nick posted a review about a month ago: https://www.youtube.com/watch?v=t5jI_DIrE4E

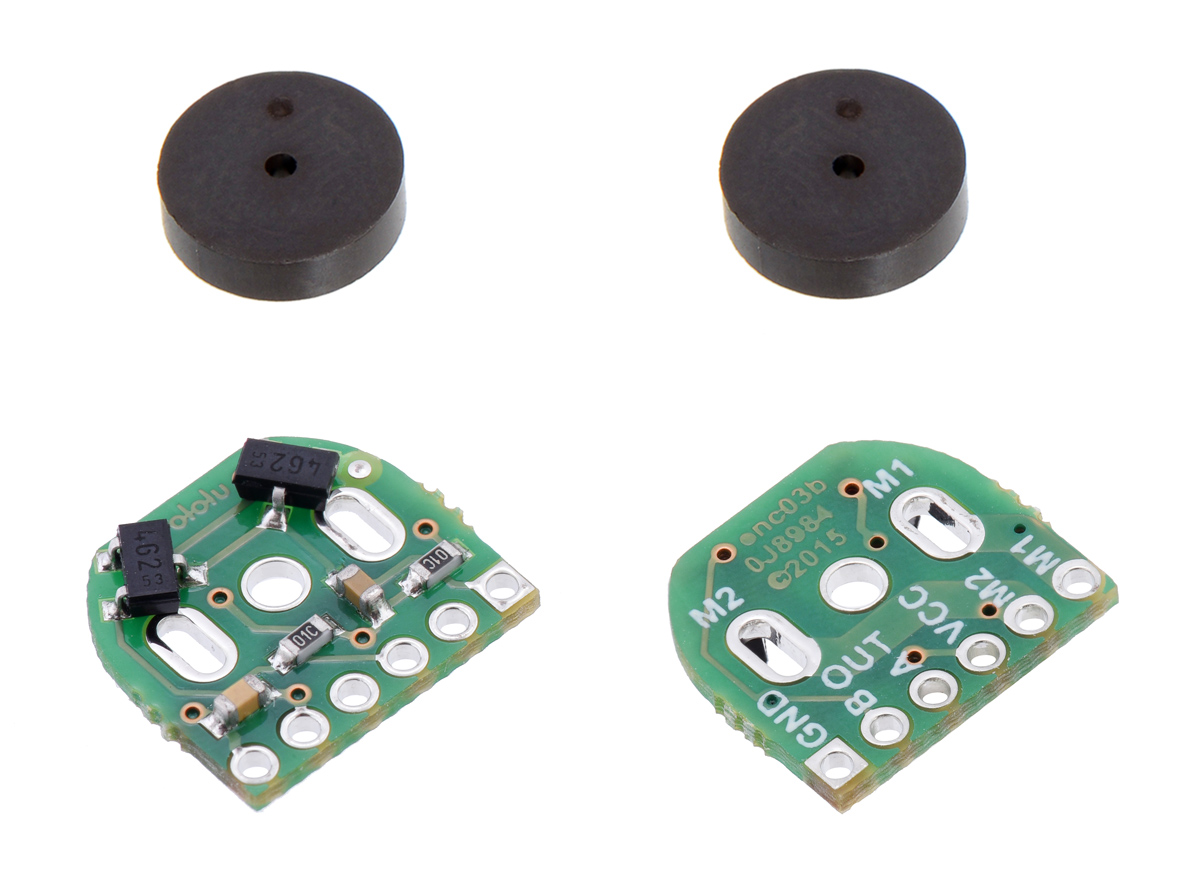


I ended up getting the Monoprice Mini Delta, which runs $127-$170 depending on when you buy it, I like it, but it needs some (fairly easy) tweaking to make it work its best.
valid crow
@karmic brook yeah I figured if u was gonna spend 170 I might as well spend the extra $30 and get a better machine with a bigger bed.
violet needleBOT
Adafruit Industries posted PyPortal View Master SlideShow #CircuitPython #3DPrinting
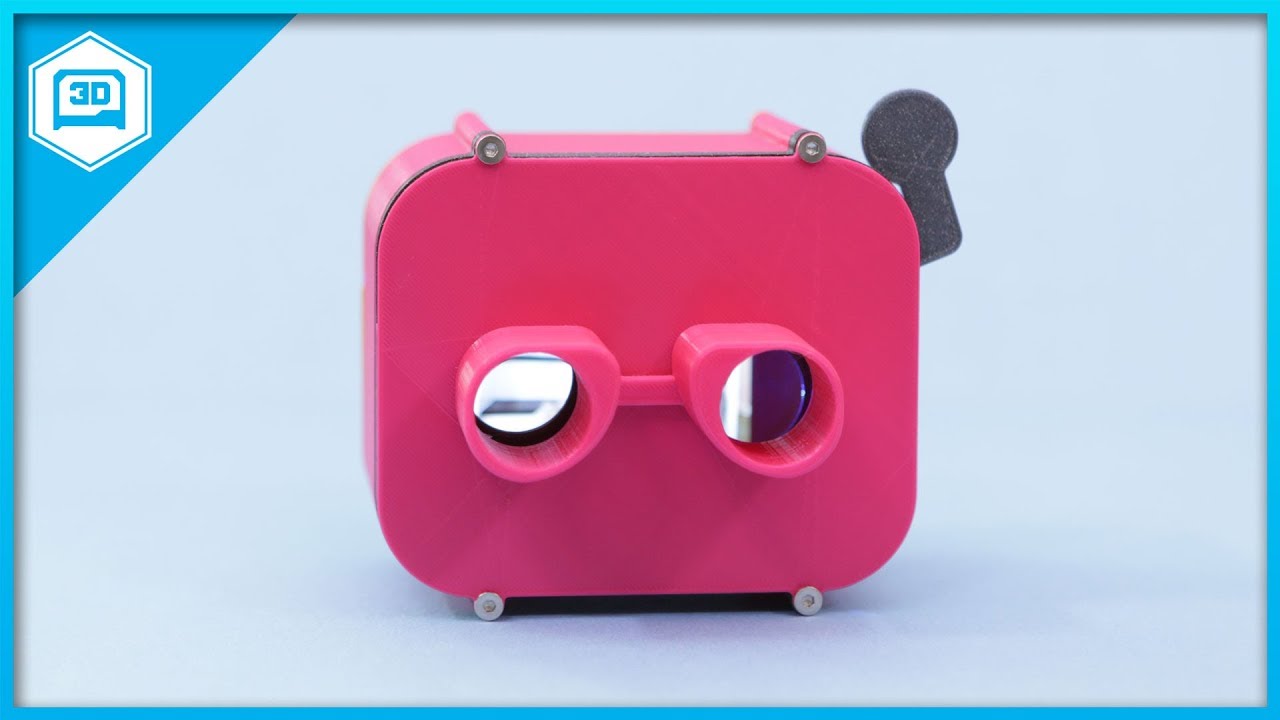
Guide + Files: Guide: https://learn.adafruit.com/pyportal-view-master Build a View-Master inspired device using Adafruit PyPortal. Pull down on the crank to ...
boreal lava
For anyone running octoprint, do you have a suggested SD card size?
I see 8GB is the standard suggestion, but in real world use is it better to go larger? How large before just having excess space?
 sonic hollow
I went 32 a couple years ago because I had one handy. it's 12% full now.
and it's not like I need to keep all these .gcode files on the pi.
boreal lava
Perfect, thanks. Sounds like the 16 I put in there should be plenty then.
violet needleBOT
Adafruit Industries posted Eagle Tutorial – PCB Silkscreen Layers

Learn how to add silkscreen graphics to the manufacturing tab in Autodesk Eagle. Use the change tool to move objects in footprints. ItsyBitsy M4 https://www....
raw spruce
@boreal lava thank you i'm gonna try putting holes in the model
 deft cave
hey im kinda new to cad and i wanted to make a file simmilar to this one:
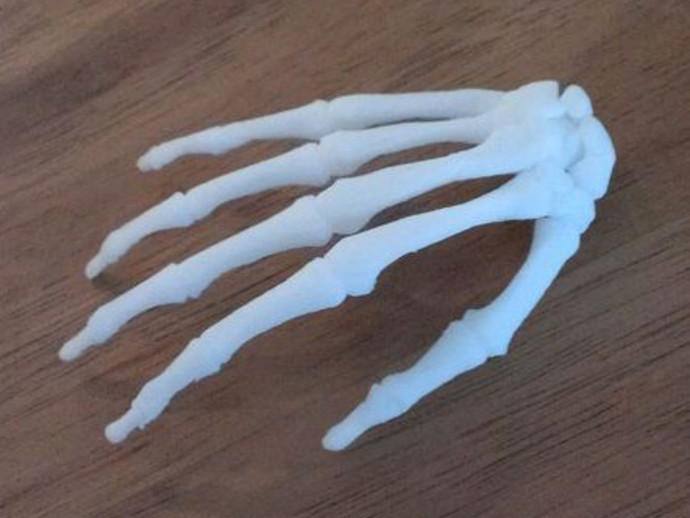
The hand skeleton from the BodyParts3D database, using TiZeta's cut down import into blender:
http://4shared.com/get/QconRIAF/BP3DScaledDecimated_simplified.html
Licensing and full detail parts are available from the BodyParts3D database:
http://lifesciencedb.jp/bp3d/?l...
this is what i got so far
the only 3D thing i know how to really do is extrude lol
what steps should i take to make it more "handy"
im using inventor btw
shy kelp
You have x and y, now add z (depth).
shy kelp
I'm not familiar with Inventor. But you have to "extrude" your x-y up (or down) to add the 3rd dimension. A box becomes a cube and then the cube is trimmed or beveled to become the shape. Your fingers need to be broken down to the individual pieces.
shy kelp
Good, I was afraid I was muddling up my explanation.
deft cave
ty
boreal lava
@deft cave Not sure about inventor, but with fusion 360 my first thought would be to do each finger bone by sketching 1/2 the profile, then adding an axis along two points, and create the object by doing a revolve around the center. That should get a pretty reasonable starting point. I'm pretty sure there's better ways, but maybe that will get you started.
boreal lava
Another thought would be to sketch three or four key crosscuts of the finger bone, and use a loft. You might be able to get a really reasonable looking finger bone that way.
modest elk
I just got a bltouch working on my ender 3, but after the home or level routine instead of going back to 0,0 it just stays where it is. Any help would be appreciated.
 fickle hound
I was getting a bunch of stringing with my CR10 mini when doing things like supports, though I was able to fix this by slowing down the print rate and retract rate, although I've seen it not retract when going over gaps. Using CURA, is there anyway to make the printer retract more?
(Also I think the fan for the hotend kinda wants to die, lol)
modest elk
@fickle hound what version of cura are you using?
fickle hound
@modest elk 3.6.0
(actually second look, it's still stringing ever so slightly, but it's a lot better)
modest elk
ok, what is your z-hop (z lift on retraction)?
fickle hound
yeah, also seems un-needed. Cura says it's for avoiding pieces, although I'd think you'd have a bigger issues if you were hitting the piece you were printing, lol
modest elk
true
yeah im not sure what your issue is, if you want you could send me your profile and I could try it out on my printer
fickle hound
If you don't mind taking a look. I've probably done something really dumb, lol.
(also this is being used to print something kinda tall and thin)
That's the correct file, right? lol
I also have had issues with the printer taking a few seconds to actually start laying material even though it's laying the foundation of the build, so I'm wondering if something is wrong with the nozzle
modest elk
what do you mean? is the nozzle not putting out material?
I'm not sure if this is the problem, but I would raise your retraction speed to between 40-60mm/s
fickle hound
Alright. And what I meant is like, it'll trying to put out material at the start of a print, but nothing comes out until 3-4 seconds later
So you're left with like, 75% of a skirt or something, lol
It seemingly is fine afterwards though, but idk how to see if there are other issues later on in the print
modest elk
Ok, what is probably happening is that at the end of last print or the priming of the nozzle the printer retracted making it take longer for material to get to the nozzle
I like to put a extrude 10mm at the beginning of my gcode
fickle hound
Alright, I'll try that. And about the retraction speed, I had it at 40mm/s before and it was still stringing. I guess 60mm/s would be worth a try
modest elk
Then im not sure, I also like to lower my retraction distance to around 2mm
when im using a faster speed
Honestly I just got my first creality printer about a month ago, im used to the anet a8
fickle hound
lol, it's fine. I got this printer less than a week ago, and it's my first one 😂 I'm just having fun being able to create what I want
modest elk
Well I hope you enjoy it, its an addicting hobby to get into (especially since the price is just getting lower and lower)
fickle hound
thanks, and yeah, it already is pulling me in
modest elk
If you cant get anything to work with cura, I would suggest trying out Slic3r Prusa Edition; It is what I personally use because of its speed and simple UI
Not to mention the amount of controls it has
fickle hound
Yeah, I'm thinking of switching over if I can't get this to work. Apparently other people with the same printer have been getting much better results with other software
modest elk
Cura used to be one of the best in my opinion (back in the 15.0.0 days), but that was around 5 years ago.
I briefly tried out simplify3d but stopped using it because of how buggy the UI was. I have been using Slic3r Prusa Edition for about 2 months now and have had few to no issues with it
fickle hound
rip, that's a long time ago. Is it that Cura has become worse, or have other software caught up and surpassed Cura?
modest elk
Honestly I feel cura has gotten worse. Although it is more powerful than it used to be, it is slow and confusing in my opinion.
For me at least it doesn't always save my settings
fickle hound
Alright, I'll take a look. Thanks for the help
modest elk
Anytime
boreal lava
I have a general question for everyone. Assume you are printing a 3d part that includes both a main part, and one that fits into a slot. What would you consider to be an acceptable tolerance for that print (e.g inserted part should be printed x%/mm smaller)?
modest elk
It depends on how tight you want the fit
boreal lava
Sure. You can obviously file a tight part down, but for hypothetical purposes what would you consider good?
modest elk
Well the clearance depends on the tolerance of the machine it is printed on
 glossy knoll
0.3 mm works fine for me
modest elk
In my experience around .5mm would be a good starting point
sonic hollow
I don't have a good rule but yeah, I also use 0.3mm as a first guess.