#help-with-3dprinting
1 messages · Page 15 of 1
 faint sky
 coarse coral
Thanks a lot for that tip! I never actually knew that. Don't worry, I'll be sure to keep it powered and the future version is planned with cm5 or whatever so maybe I'll figure out a custom battery circuit
coarse coral
coarse coral
Thanks a lot for that tip! I never actually knew that. Don't worry, I'll be sure...
I've got a battery indicator I'm going to look and see if I can get some voltage out on other pads of the pi sugar and add that to the build. Even as a physical visual since i haven't seen Ben begin to integrate that to software altho @karmic brook gave me the idea about how to start with that. Future plans


 coarse coral
so clean, so smooth - #printenvy
faint sky
umm that's the housing for the matrix panel. it's probably molded abs. i wish i could print that cleanly, especially with a .8 nozzle. 😄
the brackets will look more like crosses that join panels together.
They'll end up looking something more like this

One mistake I made with the 5mm panels is not realizing the corners of the physical panels are not 90 degrees. They're cut at about 80 degrees. I think it has something to do with mounting and weight in a large array. Because of the angle when 2 panels are placed together there is supposed to be a small gap. 1.50mm gap to be precise. Without it a large array ends up looking more like a convex shape instead of a flat array of panels. Didn't realize that until someone used the brackets to put 25 panels together and the lack of the gap adds up quick. Not making that mistake again, this is really what the corners look like. They're not 90 degrees.
 faint sky
Finished with the panel model for tonight. Will work on the brackets tomorrow. https://www.printables.com/model/770106-hub75-25mm-pitch-matrix-panel-model
 civic aurora
faint sky
If it's indoors PLA should do fine. If it's outdoors you'll want to go with PET...
civic aurora
faint sky
If it's indoors PLA should do fine. If it's outdoors you'll want to go with PET...
Great idea!
My challenge is that the images from the light box are affected by bright sunlight streaming in thru the window, which is highly variable (ex, at night). I’m trying to capture the same image independent of normal indoor variations in temperature, light, UV light (remember that cameras pick that up) and humidity.
I didn’t know about cinefoil. It can take up to 150ºC, which is good because my chips are heat resistant to only 125ºC, so the foil should be fine. I need to figure out a design that doesn’t trap heat from escaping the light box.
That door is only 1x2”. Depending on how thick it has to be to be light-proof (infill: 100%, for sure!) it might be 2-4oz, so I was thinking of a hinge that could be 3D-printed, rather than attaching a external hinge. I need to test UV light penetration, too, since the cameras will pick that up and it could affect white balance… I want the same image no matter what the lighting, temperature, and humidity will be.
I think the ESP’s max out around 125ºC, and there’s an SD card in the camera that I also have to consider.
The competing needs of airflow, parts traveling thru the imaging stage, and repeatable imaging are proving to be the hardest nut to crack, so far.
 ashen moat
are you pushing 125C in practice?
for lighting, another way to defeat natural light is to add artificial light, which would let you control brightness and temperature.
faint sky
Started printing a bracket prototype to check the hole spacing. First thing I've printed in months. Feels good to design & print something again.
 faint sky
Hole spacing for quad bracket fits well. Need 4 panels to be sure.

 misty ibex
Why not long enough for 2 screws on the one on the bottom right?
 balmy pulsar
O_o
misty ibex
Oh, but it does have pins... Didn't notice that at first
faint sky
misty ibex
Why not long enough for 2 screws on the one on the bottom right?
This is just a flat hole test. The final design will be much thicker. Each bracket can’t go past 50% of the height or width of a single panel so that they can be chained horizontally or vertically together. It’s not as obvious why with a 2 panel or 2x2 arrangement. It becomes necessary with 3x3 or more.
Yep there are little plastic alignment pins on all of these types of panels. Some of the holes are for those.
misty ibex
Well, once you get 30x34 panels setup, you'll have a 1080p screen...
faint sky
The prospect is tempting but insanely costly. It would have to run on a Pi. Matrix Portal S3 will only do about 320x192 with 5mm panels. I'm hoping it'll do more with 2.5mm panels because the signal length will be considerably shorter. A 5mm panel is about 12", so a 5x5 array is 25 feet in signal length. With 2.5mm pitch a 5x5 array is only 13 feet. That's just a theory. It will likely remain as a theory for a while as proving it would cost about $1000 in panels from Adafruit. 😕
faint sky
Each quad bracket provides horizontal and vertical rigidity to the structure by butting directly against each other. This was unfeasible with 5mm panels as each bracket would have taken a full build plate per bracket, instead I concentrated the rigidity on each quad section. With 2.5mm panels the brackets can be half of each panel's width & height. Using 2.5mm panels allows for an even more rigid support structure than with 5mm panels. That means you can rely on 3D printed parts for a rather large 2.5mm array without needing metal scaffolding.

 vocal flax
faint sky
This is just a flat hole test. The final design will be much thicker. Each brack...
vocal flax
faint sky
This is just a flat hole test. The final design will be much thicker. Each brack...
Friendly reminder that you can make flat x tests with regular printers
faint sky
vocal flax
Friendly reminder that you can make flat x tests with regular printers
I don't have a regular printer that is easily accessible. I only need to print about 2 or 3 things every year so I keep it stored in a closet.
ashen moat
vocal flax
Friendly reminder that you can make flat x tests with regular printers
yeah but I've never calibrated my regular printer
vocal flax
You don't need to calibrate 2d printer
It comes calibrated you just need to print without scaling in printing screen
ashen moat
I was half-joking, but also I wouldn't trust a consumer printer and an arbitrary app to be dimensionally accurate together out of the box.
nearly every online print-and-measure tool (like for glasses or something) includes a printable scale so you can verify dimensions or scale as necessary, for that reason.
 vivid helm
They aren't. My dad is a custom woodworker who occasionally prints templates spanning multiple pages, and he ended up getting a different printer because the one he had was no longer dimensionally accurate (likely due to software changes).
ashen moat
yeah, I bet even small errors would really be a problem for multi-page templates. that's a shame.
ashen moat
all that said, calibrating an accurate 2d printer workflow for checking alignment faster is a cool idea, and paper recycles.
misty ibex
I have an Ender 3 V2 and use SuperSlicer. Haven't used it for about 2 years and setting it back up. And good news guides out there?
faint sky
misty ibex
I have an `Ender 3 V2` and use `SuperSlicer`. Haven't used it for about 2 years ...
New guides on an old printer? Most people that do guides tend to focus on the newer models. The V2 has been out for quite a while now. There are plenty of V2 owners though it was a very popular model. Finding some youtube videos for updates/mods/etc.. should be pretty easy.
Anyone working on new designs or prints they want to share? I'm always interested in hearing what people are working on.
misty ibex
faint sky
New guides on an old printer? Most people that do guides tend to focus on the n...
Mostly didn't know if there were new thoughts on things like temperature trees and such
faint sky
Calibration shapes are always a good idea. I’m unfamiliar with superslicer. Cura has made many advances with calibration helpers. If it’s been 2 years hopefully superslicer has too.
Not much if anything changes with a printer. Its the slicer that changes most.
ashen moat
faint sky
Anyone working on new designs or prints they want to share? I'm always interest...
test rig to validate mounting dimensions/methods for the components of a CD changer (9.5mm drive, USB-PD breakout, raspi, LED driver board) and keep the bits together during development
 vocal flax
vivid helm
They aren't. My dad is a custom woodworker who occasionally prints templates spa...
vocal flax
vivid helm
They aren't. My dad is a custom woodworker who occasionally prints templates spa...
It's possible that those errors are caused by letter size (inch standard?) and A4 (metric standard?) Both are really close but not exactly the same. personally and professionally use this method for various things (test fits, PCB production, clothing or wood templates etc.) Used various of different printers never had issue. In Adobe print page I only needed to check if I'm printing original size or fit to page.
Assuming the PDF is right size result will be right size if right paper type selected, and printing original size.
ashen moat
okay, gonna try exporting a simple square from OpenSCAD to SVG and printing from Inkscape to a Brother laser and will measure the result. 😝
gonna cross fingers that Brother's Linux driver is up to snuff
ashen moat
150mm square in OpenSCAD imported via SVG to Inkscape (needed to remove stroke and add fill to get dimensions correct), printed at 150 x 150.5 on my calipers, and diagonals seem within 0.5mm of each other on a millimeter-marked ruler. so, my setup's not bad!
faint sky
That does sound within reasonable margin.
cd changer components can be very small, that's impressive.
vocal flax
I made PCBs with 0.15 clearance
I wasn't able to etch it that precise but it's nice that I was able to transfer it
ashen moat
I mean the changer will be 4 individual disc drives; I'm not printing any moving parts.
faint sky
Hole and peg test print vs 1st bracket prototype.
 vivid helm
vocal flax
It's possible that those errors are caused by letter size (inch standard?) and A...
vivid helm
vocal flax
It's possible that those errors are caused by letter size (inch standard?) and A...
Nope. Everything was configured properly for 11z17 pages.
faint sky
I've gotten so used to using middle tolerance (which most people rarely use) that it might throw off the fitment for others. :/
Does anyone else prefer middle tolerance as their default?
ashen moat
PrusaSlicer hasn't implemented tolerance settings yet, but I've seen a video on it and I'm looking forward to trying it.
not yet for Superslicer or Orca, either. Cura's one up on that feature.
vivid helm
PS handles perimeter generation differently. IIRC it's similar to "middle" tolerance.
faint sky
I've only ever used Cura, didn't know that. :/ Admittedly my experience with other slicers is non-existent.
ashen moat
I needed a small power supply for a 12V fan to use as a solder fume mover, and I had a couple of the Adafruit HUSB238 USB-PD breakouts on hand. configured one for 12V/1A, attached a salvaged fan connector, and used the Ultimate Box Maker parametric design on Thingiverse to generate a snap-together box (with my own custom bits to anchor the fan connector). printed in Polyterra matte PLA. works great!


 faint sky
That's cool. Well designed. 👍
ashen moat
thanks! the box kit does a lot of the heavy lifting, letting me think about higher-level stuff like board fit and strain relief. switching to a 5V => 12V boost converter would make it compatible with more power sources, but this is what I had in front of me.
 stark lance
Hi i have a question, i want to make this Soundboard, and i need this 3D prints.
Where can i find out how much Filament i need for the prints.
https://www.thingiverse.com/thing:3750704

Check the learn guide link for code, build photos, circuit diagram and more!https://learn.adafruit.com/neotrellis-soundboard/
This is a sound board using Adafruit’s NeoTrellis. This lets you trigger audio files so you can play it like a musical instrument. Each button can have different sounds so you can build your own sample kit. All of the ele...
 silk citrus
I'm really confused by the keyblade print. I'm a first year design student and we have huge workshops at campus. I'm attempting to print the test tube to see how the threads will work but I can't even make out the threads on the print downstairs..
Help plz <3 :C
Omg.. Nevermind.. I'm an idiot.. I enabled support
faint sky
stark lance
Hi i have a question, i want to make this Soundboard, and i need this 3D prints....
One thing you can do is download the model, remove all the internal components like the battery, feather, standoffs, etc.. until it's structural components to be printed only. Then save that as a file, export to STL, open it in a slicer program like Cura, slice it, and the slicer should give you an estimate on filament use. That should provide you with a very rough estimate on filament use with grams. If you know how much a meter of filament weighs then you calculate cost per distance. You can do it with individual STL components and then add them up. Combining them into 1 model is a faster estimate but also more rougher estimate.


Cura in particular isn't very good at calculating exact print time or filament use. Other slicers I've heard are much more accurate. That's the basic principle anyway. You can enter how much a spool of filament costs and it can automatically calculate the cost per print of every print.
faint sky
Made a model for the ST7796S display https://www.printables.com/model/775540-st7796s-display

Printables.com
A model of the unbranded Chinese 480x320 ST7796S TFT SPI Display | Download free 3D printable STL models
Much easier to design enclosures with an accurate model of the display.

Figured out I've been exporting to stl which is good for printers as a mesh. However .stp files are much better for importing into existing 3D projects as an additional component.
Thanks to @vale wolf for asking for the STP file. It was a nice discovery. STL meshes rarely import correctly and must be scaled to fit before even thinking about converting them back to a solid. Don't have that issue with STP files. 🤗 Will be sharing the STP file with all my printables shared models going forward.
 velvet radish
My enclosure can reach 30C when printing, does that negatively affect PLA in printing? Should I try to cool it, if so how?
faint sky
velvet radish
My enclosure can reach 30C when printing, does that negatively affect PLA in pri...
30C exterior or interior temperature? That's well within operating temperatures for the internal electronics if that's what you're worried about. Most electronics are designed to handle up to about 40-45C safely. 30C is well below that limit.
It will not negatively affect extruding the PLA, if anything it will help. You might have to adjust your bed temp, nozzle temp, and cooling within an enclosure. That's something you'll have to figure out what your printer & enclosure works best at. You can print some temp towers and calibration shapes to dial in your settings the same as you would do if there wasn't an enclosure. All setups are different and need to be calibrated to their environment.
 iron remnant
There's a pile of discussions on the Voron discord about this.
And otherwise.
Basically, PLA is weird compared to most other plastics in that it actually kinda likes to be cooled, so if the enclosure is hot-ish, it won't bridge as well.
30C is not "that" hot.
For ABS/ASA and PC you want to target a much roastier 65C, maybe even a bit higher.
(which is why a Voron is required to be printed in ABS/ASA)
The classic advice is just to take the doors off.
I don't like this because, as I drone on constantly about, just because ABS smells really bad and is known to produce toxic fumes, it doesn't mean that the cocktail of chemicals and microplastic particles that PLA emits is actually safe.
If you are printing with a stock printer that came enclosed and the profile supplied... probably no action is required, assuming the manufacturer has done even a vague amount of homework.
If you are modding or maybe building a Voron, we're just starting to see some really neat projects like this: https://github.com/nevermore3d/StealthMax

GitHub
Non-warp Nevermore Max Frame. Contribute to nevermore3d/StealthMax development by creating an account on GitHub.
Where there's an exhaust option that sucks air through the filter as it exits the chamber so that it should remove hot air from the chamber and also not potentially kill you slowly over time.
Or there's the trendy thing of using a CPAP blower and hose on your part cooling fan to create a cold air intake. If you do that, you are also obligated to add a spoiler, offset racing stripe, and tacky MUGEN sticker to your printer.
But... yeah, 30 degrees is not actually that hot and especially if you are printing an enclosed-style printer, has probably been vaguely compensated for with the design
ashen moat
iron remnant
If you are modding or maybe building a Voron, we're just starting to see some re...
I read the whole project description on github and still can't figure out what that thing is or does. wild. 😆
maybe it's one of those things where it came out of a community dedicated to whatever they are, and they forgot to add the context for people outside that community
"A non-warp Nevermore Max Frame" -- I would need to know what each of those words means, heh
iron remnant
Oh yeah, they are kinda being bad about that?
So, basically, there's a whole pile of designs around the notion that you run air through a bed of activated carbon (or a catalyst, which is newer and potentially more effective in some ways) and they all kinda borrow ideas from each other.
ashen moat
like an exhaust fan for an enclosed build chamber?
iron remnant
So, the trick is that if you put it such that it sucks air from inside the chamber and also exhausts air out into the chamber, this means that a relatively slow fan is going to pick up a lot of particles and VOCs because it's got a lot of air changes.
ashen moat
oh, so it filters the air inside the box without exhaust. that's cool.
iron remnant
The Nevermore Max, however, is designed such that it can be mounted internally but also externally so it can safely-ish exhaust as well.
And, since it's inside of Voron printers, where you aren't allowed to talk about heating your Voron on the official discord but you are allowed to talk about putting a bed fan on and adding insulation panels so that the printer can reach above 65C while printing... some of them warped.
iron remnant
I mean...
I have a Voron 0.2 partially assembled and I know that I'm warped.
But dono the Voron community is ... a thing?
I guess my specific annoyance with the Nevermore people is that it's important for a healthy industry to get a better handle on the filter thing and ... docs would help?
Also, I should actually write up a blog article on the subject about Fusion 360 and 3D printers so that I can properly say "I told you so" when AutoCad decides to put the screws on open source 3D printer designers in new and interesting ways.
ashen moat
what's the concern re: printer designers?
iron remnant
That Fusion 360 will lose more features such that the current model of exporting a file and checking it into github such that a person can work around the lack of a manual by loading the Fusion 360 file will be curtailed.
Because they've already done various things there and presumably Fusion 360 has enough mindshare that they don't need to play nice.
ashen moat
wow, didn't think of that. parts designed in older versions of F360 using a particular license may not be openable/editable in later versions under the same license since features have been removed?
velvet radish
iron remnant
If you are printing with a stock printer that came enclosed and the profile supp...
It's just a creality ender in an enclosure
I'm printing a temp tower rn (forgot to do it for the new "suspicious Amazon" filament I just got) so we'll see what quality it can produce
iron remnant
Yeah, so it's mostly a matter of calibration. If anything you'd want to bump up the fan speeds
But 30 is not very hot on the scale
faint sky
Started on the 5mm pitch matrix panel. Getting every little detail including the tiny little screws in the screen that most people don't know are there.


They’re really really tiny screws
 velvet radish
I'm printing a temp tower rn (forgot to do it for the new "suspicious Amazon" fi...
velvet radish
velvet radish
I'm printing a temp tower rn (forgot to do it for the new "suspicious Amazon" fi...
Well, my temp tower failed at 205C (I think due to filament grinding? I had this problem at 200C)...that explains why all my prints at 200C are garbage or failed hopefully...
Filament grinding due to under extrusion is a possibility right?
misty ibex
@faint sky thought of you today. Walking through times square and you can see all those square led panels...
faint sky
velvet radish
Well, my temp tower failed at 205C (I think due to filament grinding? I had this...
Do you mean nozzle grinding?
faint sky
misty ibex
<@126221640559362048> thought of you today. Walking through times square and you...
I thought most of Times Square went to a matrix of tv flat panels a long time ago.
velvet radish
faint sky
Do you mean nozzle grinding?
No, the extruder motor and gear grinded the filament down so it couldn't push any more...

Wow it just happened again
I'm going to try another filament, I'm sick of dealing with this
faint sky
Are you getting clogs that might prevent the filament from being pushed through? When that happens the extruder is being commanded to push more through... so the filament in the extruder ends up looking like it just went through a shark attack. You'll likely also notice a loud click when the extruder gear skips.
misty ibex
faint sky
I thought most of Times Square went to a matrix of tv flat panels a long time ag...
Nope. Some are still old school
velvet radish
faint sky
Are you getting clogs that might prevent the filament from being pushed through?...
No sign of a clog, I was able to easily push filament through the nozzle and when I pulled the filament out, it was a nice cone
faint sky
Might be time to take apart the extuder and compare the parts to known good ones. It doesn't take much for an extruder gear to go out of spec.
Many times pieces of filament can work their way into the gears and cause issues, have seen that happen a lot. At the very least you'll be able to inspect for things like that.
faint sky
Fact that you can push it through manually but the extruder gear cannot suggests a problem with the gear mechanism.
faint sky
Making progress on the 5mm matrix panel model. I've discovered either a design or manufacturing flaw. The middle column widths vary by up to 2mm. So any brackets you might design for these panels might fit better one way vs spinning the bracket around by 180 degrees. There's nothing I can do about that other than make a notation for anyone trying to make their own brackets for these. It's not a measuring error. I've measured each 10 times. The column on the left is 22mm wide, middle is 20mm, right is 21.5mm.
 ashen moat
man, that's disappointing. manufacturing variances like that are so hard to deal with.
I'd be tempted to model up a compressible shim to print in TPU to soak up those out-of-spec dimensions.
though you're trying to build something that looks like a monolithic panel out of smaller panels, so those differences might cause alignment issues you could spot with the naked eye.
faint sky
It's not a major concern for structural support since the issue is horizontal in nature... unless for whatever reason you decide to stack them vertically lengthwise which would be an inefficient configuration anyway. The housing has those columns going vertically for support not horizontally, so they're designed to be stacked horizontally. The variance only happens in the middle columns. Each mounting hole (especially the corners) and the outside perimeter near them matters the most at least with the brackets I've designed.
 outer narwhal
sometimes weird asymmetries in mechanical designs can help damp unwanted resonances. not sure whether that’s the case here
ashen moat
designing a mount for a new E3D Hemera V2 extruder. there's a weird frame that surrounds my old extruder's NEMA17 motor. the motor's mounted to the frame by 3 screws into the motor's face, so the plan is to replace the motor with a printed replica, mount two hasps to the Hemera, and slide the hasps over the replica motor that's mounted into the existing frame. elegant? not really. practical? maybe. only one way to find out!


 faint sky
There are many motors that have mounting holes on the face. That's not unusual. Interesting design. I love seeing DIY bolts and matching threaded holes. Those are so hard to do correctly.
ashen moat
oh, I meant the loop that runs around the motor body seemed unusual, not the face-mount.
thanks! I borrowed experience from my previous designs to get the thread generator settings right. ever since I found the BOSL2 library, I've used it extensively. it makes so many things cleaner and easier in OpenSCAD, and it includes thread generation functions.
the printed threads worked on the first try, just had to work the stiffness out by working the screws in and out of the holes. however I need to reprint the hasps; my delta's X and Y are pretty well-calibrated, but Z is printing too large. I'll need to fix that or scale my models until after the new extruder is in.
faint sky
My concern with threaded parts is sharing the model. If someone else's printer isn't calibrated like mine then they'll never match up. I think it's safer to use metal nuts & bolts as those are unwavering in their tolerance. If I was making it for myself I wouldn't have any issue with it. Since I share most of my stuff on printables it has to be universally usable no matter what others tolerances are.
iron remnant
Yeah, when it comes to the wide variety of printers, you have to thread carefully.
ashen moat
eh, all my stuff's parametric, so if it doesn't print right, you customize screw_clearance to be a little bigger and try again
you're right, though. I think you have to let go of the reins if you're sharing your models. do the best you can, and hope people have a printer with the same calibration problems you do. 😛
or design everything to be printed in TPU where tolerances are much less important. it's freeing, really.
in the same way that I have problems with other people's designs, I expect them to have problems with mine. printing published models is at least partly about finding workarounds for designs that were only tested on someone else's printer. for threaded parts in particular, when they're not parametric, I've found scaling the positive-threaded part a smidge around its axis works well.
though I'll admit, I designed a sewing kit last year with 17 individual printed pieces, many of which depend on proper clearances, and a friend offered to run it thru their print service for me, and just thinking about negotiating all those tolerances with a professional service--who would be doing me a favor--was enough to make me wanna lie down
I also think making a nice model that prints well for you is 90% of the work, and then if you want to share it, cleaning it up to be customized, documenting printing suggestions, taking nice photos, maybe assembly instructions or a video; that's the other 90%
faint sky
I've only done parametric once and it was utterly confusing. I wish Noe would do more layer-by-layer videos. They were an essential part of my learning curve but parametric design was a bridge too far just starting out. I'll take another shot at it someday.
ashen moat
you can get a little lost in the calculations. it's a little like a spreadsheet-driven 3D model. at least in OpenSCAD, it can be tough to name all the dimensions and second-order calculated dimensions in meaningful ways, and you can wind up with tough-to-decipher piles of formulae that totally made sense when you entered them. losing track of which way is up, that kinda thing, heh.
faint sky
yeah i'm a point and clicker. spreadsheets are not my idea of fun. 🦥
ashen moat
there are times when I yearn for point-n-click
coarse coral
@faint sky


 faint sky
Very well done. I feel like a custom PCB might save you from a lot of that wiring.
If you provide me with a routing diagram I can come up with a PCB for you no problem. That should make your future installs plug and play.
coarse coral
That would be sweet but how would you make the PCB cater for the space needed in the centre screen and rpi4? Would it just have a hole on the middle of the PCB? I did do a PCB for this in kicad with mounting holes for the itsybitsy, buttons etc but there were issues such as having right angle push buttons for the trigger is fine if mounted reverse side to each other of the PCB but the trouble is the distance between those right angle triggers is very small making the case design hard to be ergonomic. @faint sky
I just feel a PCB would be smarter with a compute module and for the level of this project it's a beginner thing for me
ashen moat
got the new Hemera V2 extruder mounted, went back thru the whole long calibration process for everything, and it paid off. defects are super visible with this matte filament. still some tweaking needed for corners, but the uneven layers have vanished. same 0.3mm layer height on both. I'm real pleased.

 faint sky
Looking much better!
faint sky
coarse coral
That would be sweet but how would you make the PCB cater for the space needed in...
Can you show some pictures of the underside of the display where all the wiring is plugged in from the feather (or whatever that board is)? An adapter board might require a little more depth but it would be plug and play. If there needs to be a cutout in the center of the board to accomodate the Pi that is doable too.
coarse coral
faint sky
Can you show some pictures of the underside of the display where all the wiring ...

 coarse coral
Mega cool
faint sky
I'm confused, where's all the red wires? Are they wrapped in looming?
coarse coral
Red wires come from itsy bitsy which you can see slotted on the lower left of the centre area. All the wires just feed off the itsy bitsy pins around the screen and pi perimeter to whichever button area.
faint sky
oh i see those go to all the peripheral buttons, joystick, etc.. hmm yeah there's no easy way to do that with a PCB.
I thought they were all going to the Pi from the ItsyBitsy for some reason.
coarse coral
I do actually have a kicad of something. Let me fire up pc and see if I can show
Itsy bitsy to buttons and then itsy bitsy to usb of pi as hid gamepad
That's the plan
faint sky
Might be able to make an adapter PCB that you slot the joystick, and some buttons into. It wouldn't cut down on the wiring but it would cut down on the disorganization of wiring routing everywhere.
coarse coral
Maybe we can work on a V3 together some time but maybe not worth it for this case design today
faint sky
Could also turn all the wires into a 12-pin IDC cable to route from the ItstyBitsy to the other side with the joystick and buttons. 3 separate adapter PCB's... but it would make installation plug and play.
coarse coral
Because PCB would end up making the case design change to make more sense and even if case design didn't change there would be dimension changes in the heights , I think probably wiser to just finish this up, test out the hardware combo and see what's good for next
faint sky
That is true. You would have to redesign a good amount of the enclosure and it's a beautiful enclosure design as it is.
coarse coral
You are kind, sadly it lacks any nice filleting but I do like the simplicity of it and little curves at triggers and lower left and right.
Just installing kicad to see if I can open this schema
faint sky
I think it's pretty amazing. The way the case feels can be iterated upon over time. I love the large standoffs with heat inserts. It looks very professional.
coarse coral
Yeh inserts are so worth it, the previous had none of that and it was dicey when assembling to the post. Some times the threads just didn't grab and it was a wrestle
Hopefully when the face is printed it will all be nice and snug and I know it's a total hack but the kapton tape rocked my world
faint sky
I've found if you make cylinder holes for them the printer will create cylinder walls so they grab better. Otherwise you risk the chance of inserting into an infill cavity.
coarse coral
Yeh SketchUp you punch everything out yourself there's absolutely no focus on a printed part with SketchUp
faint sky
Have you tried Fusion 360? It's literally based on SketchUp and there is a free version that has the ability to make threaded holes. Fusion 360 is just a much nicer version of SketchUp. I started with SketchUp so I have experience with both. Can highly recommend Fusion 360 as a nice free upgrade.
coarse coral
Well if I can learn fusion whilst Windows is installed maybe 🤔😃
faint sky
oh right linux? sorry my memory isn't that good.
coarse coral
Yeh I have windows today for some reason and should really setup a lasting dual boot but man I had so many hardware things happening with these pcs

started with this a previous version had drill holes for mounting an rpi4 model b to the underside and 4 drill holes to mount the screen above, with a cut out to run the cables through. it was much tighter building this but the battery hat (pisugar) needed some weird orientation that really messed with assembly

cool! kicad keeps backups in the project folder. was able to find an earlier version
 faint sky
I could roll that into 2 pcb's np. due to the sise of the entire handheld it would make more sense to split it into 2 pcb's with a ribbon cable attaching them rather than 1 large pcb. it would be far more expensive to make 1 huge pcb than 2 small ones.
coarse coral
faint sky
I could roll that into 2 pcb's np. due to the sise of the entire handheld it wo...
That would be cool for sure but things would change more with a version 3, I reckon it would be fully slim using a compute module. There's some good examples out there with cm4.
Ideally it would be cm5, battery charge circuit, led and battery indicator with output for a fan and external storage and screen all from a single pcb
coarse coral
@faint sky should have done this first time round
 coarse coral
@faint sky itsy bitsy works fine as gamepad, not noticed any speed issues. Now need to figure out how to program the analogs
faint sky
Even if you can find the CM4 you'd need the CM4 breakout hat to do anything useful with it. Because they're hard to get no one would be able to replicate your build easily. Using a CM3 (it has pin headers) or Pi 3 or Pi 4 makes more sense.
 peak birch
Ok idk which channel this is technically supposed to go in but I’ve been having trouble with the adafruit usb rechargeable fume extractor project. Could anyone help?
 elder oxide
faint sky
Even if you can find the CM4 you'd need the CM4 breakout hat to do anything usef...
elder oxide
faint sky
Even if you can find the CM4 you'd need the CM4 breakout hat to do anything usef...
CM4 are very available right now
faint sky
are the addon hats though?
can't really have one without the other so it's a double purchase. They should just come bundled together.
elder oxide

You can use the piunora as a carrier board
Adafruit also has stock of the official RPi CM4 https://www.adafruit.com/product/4787

Exposing every interface from Raspberry Pi Compute Module 4, the Compute Module 4 IO Board provides a development platform and reference base-board design for the most powerful Compute ...
faint sky
elder oxide
Adafruit also has stock of the official RPi CM4 https://www.adafruit.com/product...
I'll check it out. Still haven't even plugged in my Pi 5 yet. So many projects. 😅
Still working on finishing the 3D model for the 5mm matrix panel.
ashen moat
there are a lot of different CM4 carrier boards
faint sky

Printables.com
Model of a 5mm pitch matrix panel for DIY bracket designs | Download free 3D printable STL models
vivid helm
balmy pulsar
you wouldnt download a television
The great part about that meme is that the music in original anti-piracy ad was—in fact—pirated.
iron remnant
I think I should set it up on myself as a goal to create something where the project name would best be titled in the meme format.
balmy pulsar
im gonna make steam boat willie merch
faint sky
iron remnant
I think I should set it up on myself as a goal to create something where the pro...
Those blue TT motors are wide open for some good project names.
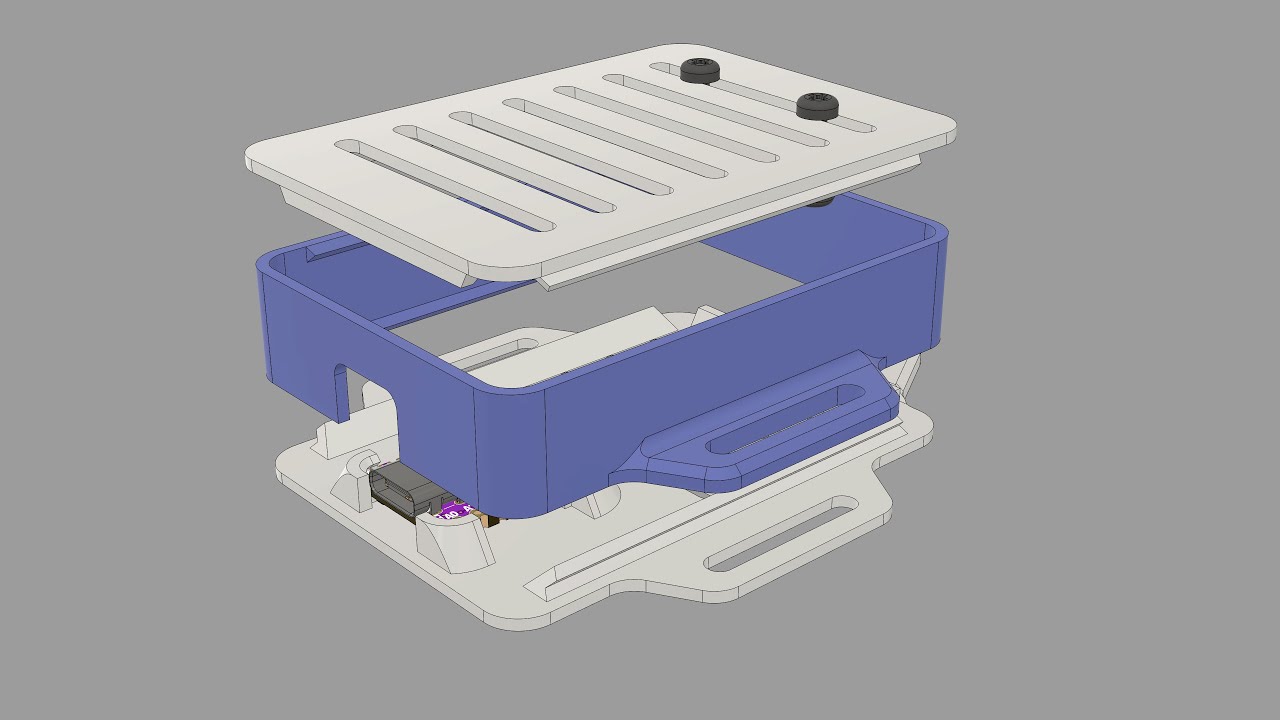
Just about finished designing the first prototype enclosure for the ST7796S display and adapter boards that I've been working on for weeks. The little cutouts on the corners are for 10mm x 3mm magnets. Should make getting into it much easier if changes need to be made. Have a custom PCB on the way that's just a row of switches that get mounted to the top.


Have yet to add the USB panel mount on the back. Starting printing the front first so have plenty of time to add other features for the back lid.
vocal flax
coarse coral
Yeh I have windows today for some reason and should really setup a lasting dual ...
If your hardware allows use windows host VM it really makes difference imo
ashen moat
faint sky
Just about finished designing the first prototype enclosure for the ST7796S disp...
I like the magnet slots a lot. like t-nuts without the screws.
faint sky
ashen moat
I like the magnet slots a lot. like t-nuts without the screws.
Thanks, that was kind of the idea. I need to get one of those little 3D pens to fill in the void after inserting the magnets. Couild use a soldering iron but that gets messy quick.
Will be redesigning the 3.5" TFT Featherwing enclosure in this same style. Currently the back lid just sits on top and there isn't a way to attach it. So this is what I came up with to solve that issue too.
This old design has an obvious issue. There's no way to mount the lid. That's what lead me down this path.
 ashen moat
faint sky
Thanks, that was kind of the idea. I need to get one of those little 3D pens to...
ashen moat
faint sky
Thanks, that was kind of the idea. I need to get one of those little 3D pens to...
tiny snap-in covers for the magnet slots. TPU if you don't want to worry about tolerances. Sugru if you have it?
faint sky
I could always drill through or melt through with a soldering iron but that's not the point. It's a bad design. The stand is superb just the back lid was never finished.
ashen moat
or chuck up some filament in a drill and friction-weld
faint sky
I've never tried that. Interesting. That might work for filling in the magnets.
ashen moat
I've been meaning to give it a shot for ages, but I keep making designs that don't need to be bonded together.
oh, actually, the last example I saw, the person was 3D-printing the sticks to use in a drill, which I thought was smart.
faint sky
I have 1 design I've never finished because I couldnt' figure out how to print it as 1 piece. Now can just print it in half and weld the two halves together. Really looking forward to that one.
faint sky
ashen moat
oh, actually, the last example I saw, the person was 3D-printing the sticks to u...
That's cool, never thought of that. Well, I'd never heard of using a drill with filament before today either.
ashen moat
it's cool. there were apparently friction-welding toys 30+ years ago?
faint sky
The workshop webcam soldering lamp with built in vacuum port. https://www.printables.com/model/452082-solder-webcam-lamp

Printables.com
Combines workbench lamp, fume extractor, and webcam mount. | Download free 3D printable STL models
Was trying to figure out how to print it as 1 piece with the internal cavity. Duh, just print it in half and weld it together. Finally figured out how to tackle that one recently.
ashen moat
soldering by webcam is something I haven't tried, though I can see how it would be helpful
faint sky
it's more for youtube recording projects than using it as a monitor... or for show & tell.
ashen moat
oh, nice
ah, forgot it's also called "stir welding", though I think that's more commonly applied to doing it with metal.
looks like there are some models for printable tips/bits online
faint sky
first i'd heard of friction welding was for plastic joints. i think some thin aluminum can be friction welded too. the joints are weak but can be useful for simple things.
i haven't even started printing the stand yet. you have me anxious to hurry up and print it so i can try the drill on filing in the magnets. 🙂
if you can put filament in a drill and rotate it to weld... can you make a circular saw blade out of filament? now you have me questioning so many things lol.
a 3D printed saw blade has disaster written all over it but it's still curious. that would be a neat idea for myth busters if they were still around. :/
ashen moat
heh, yikes. at least with a consumable plastic welding bit, the rotating mass is kept small and the friction heat concentrated. a 3D-printed saw blade or grinder disc might work for styrofoam? maybe? anything sturdier would make a mess, I think, especially trying to weld with it.
iron remnant
Friction stir welding is excellent for aerospace metalworking. The Smarter Every Day guy got a tour of the ULA plant building Vulcan rockets and they made him blur out the FSW machine because the machine itself isn't a secret, but the tool (meaning the part that smooshes into the part) geometry is very very secret
ashen moat
it's fun when the printer gets to the ironing layer and starts going ham, smoothing over the top surface at travel velocity. steppers go brrrrr
faint sky
I do ironing as slow as possible about 15-20mms. It allows the nozzle to re-melt the immediately surrounding area every pass. You don't get that effect with max velocity. The downside is it's slow but the finish on top surfaces is excellent. I love the ironing feature.
faint sky
Also probably worth noting that ironing doesn't work as well with a .8 nozzle due to the additional surface area. The nozzle temp is the same so you lose some ironing efficiency for re-melting the surrounding area with larger nozzle sizes.
vocal flax
faint sky
Thanks, that was kind of the idea. I need to get one of those little 3D pens to...
Sandpaper 🫡.
faint sky
Actually I picked up some card scrapers that are much better than sandpaper. Requires some hand burnishing but works extremely well.
This does work as well as advertised. https://www.youtube.com/watch?v=a4e9JJkinvk
vocal flax
faint sky
This old design has an obvious issue. There's no way to mount the lid. That's w...
Personally I see a clear path of some slots/ribs on bottom and screwed in using either inserts or trapped nuts
ashen moat
faint sky
I do ironing as slow as possible about 15-20mms. It allows the nozzle to re-mel...
interesting, I run 50% flow, 150mm/s, 0.2mm passes, 0.6mm nozzle, and I normally get a very smooth matte finish. I started at about 60mm/s, 30% flow, and 0.1mm passes, and didn't get a surface finish as good. I read suggestions to crank the speed, so that's where I went. I haven't tried slowing down; I'll give that a shot, too. what flow rate do you use when you go that slow?
card scrapers look really intriguing. how often do you have to rebuild the edge on them?
example, though the trough of this drag chain link is curved, so there are visible layer steps
 faint sky
3D printing even with ironing will not leave a perfect surface. That's a tiny place to get into but a small burnished area of a card scraper might help.
Well it's an intentional burr and it's metal vs plastic so it lasts for quite a while. Some people especially chefs sharpen their knives regularly. How long it lasts is relative to how often you use it, how you use it, and on what material.
There is no correct answer to that question, it's relative.
ashen moat
meant to say the print in the pic was with ironing on, though not a lot of wide open flat spaces for it to shine.
faint sky
ashen moat
interesting, I run 50% flow, 150mm/s, 0.2mm passes, 0.6mm nozzle, and I normally...
I don't adjust flow rate the slicer does it for me. With a .8 nozzle ironing is almost a futile gesture.
ashen moat
I have a better example, but it's so matte and smooth that it doesn't photograph properly, heh
faint sky
Yes I can tell ironing was on. You can see the very fine tracks and that is normal. The bits near the edge are still under the gap rule so you will notice that when it has to bridge a tiny gap intersection.
The higher layer pieces on the sides came out excellent.
ashen moat
yeah, it can be a gamble on very small areas. sometimes it creates a lip that hangs over the edge, or sometimes ironing a thin corner can cause it to curl up. I can usually take it down with a deburring tool, but I prefer when it comes out just right on its own.
faint sky
That's an interesting piece. What's it for?
ashen moat
drag chain! pic from the parametric model author's thingiverse page:
 faint sky
Also I found for very fine sanding you can get things called sanding sticks. They're basically like foam nail files women use except typically for hobby modeling like sanding details on model airplanes and such.
The orange multi-layer is an interesting touch.
ashen moat
my printer didn't come with great cable management; the wires sort of hang off the delta effector and sometimes ride up over the edge of the bed. I've been meaning to do something about it forever. another option would be to run the wires up the center of the machine, but I don't know if I can extend them that far.
faint sky
Modular tracks are a very common solution. People have been doing that since the days of the first 3d printers. I wish all printers came with them.
ashen moat
yeah, I like that; the design includes a mode that emits a rectangular shape to be used as a modifier area in your slicer to change colors. I'd probably just do it with layer pauses if I were after it.
I've seen sanding sticks in hobby/craft stores but haven't used 'em myself. I do a lot of functional prints, so my post-processing is often with cutting tools to make parts fit properly. I could use more experience (and patience) with finishing steps for top-notch appearance.
faint sky
9 hour print here we go.
 ashen moat
excite! also 😳
what factored into picking that layer height vs. finer or much coarser?
faint sky
there are some layer heights that work better as a factor of 2 or 4 depending on the nozzle diameter and line width. with a .4 nozzle i would use a layer height of .2 but could go down to .16 or .12 for highly detailed precision. i figured the .8 nozzle would work in the same way. i would never set it to .15 for example. there is a reason for using factors of 2 or 4 but I can't remember why exactly.
honestly i should probably be using a .4 layer height.
if i was to do this print with a .4 nozzle it would probably take 12-14 hours. the .8 nozzle does help but i lose a ton of detail. because i usually print fairly big & thick components it's an acceptable sacrifice.
 arctic dragon
If there’s any reason whatsoever, it’d be something to do with the slicer and how it calculates tool paths. From a physical standpoint, extrusion width can be controlled by extrusion speed vs travel speed, so the layer height should be a mostly independent variable that can vary continuously throughout its practical range.
faint sky
it might have been something like layer height strength tests from cnc kitchen showing no benefit for some layer heights. there was a technical reason i just can't remember why. :/
ashen moat
I tend to do 0.4mm layers on a 0.6mm nozzle because I want as much speed as possible, and drop to 0.2mm for final prints if visual quality matters, based on the general advice to stay at 0.3 or thinner on a 0.4 nozzle.
I've thought about trying a 0.8 or 1.0 nozzle for much faster big prints, but I think 0.6 is a decent quality/speed tradeoff for me.
I picked up a 0.25mm nozzle and I'm looking forward to seeing the detail it can produce at small scales, though I'm not crazy about swapping nozzles back and forth for different purposes.
faint sky
I actually went the opposite direction and just ordered a 1.2 nozzle. Like if I just want to make a hinged box then I don't care about detail. The print time becomes a major factor. My LORA mailbox for example was a full build height item but at the end of the day it's just a mailbox and detail doesn't matter. It took 70 hours with a .4 nozzle and I still can't even believe it actually finished without a single glitch.
With a .8 nozzle it would have cut 3 days of printing to 2 days.
 ashen moat
totally. big parts, low detail, huge layers. nice to be nice, but better to be done.
congrats on a 70-hour print. I've never tried more than about 12 hours, didn't trust my printer.
faint sky
ST7796S TFT display stand. first prototype print finished.
 ashen moat
looks great!
faint sky
Yeah not bad for .8 nozzle
 rustic pine
has anybody made a case model for the memento with the add on light included in the design?
I see the two from the adafruit page
but they don't include the LED backpack
I was thinking I could just design an extender
but then I realized the back needs holes for the LEDs
faint sky
Fit could be better. The screwdriver holes in the bottom was a good idea.


 faint sky
rustic pine
has anybody made a case model for the memento with the add on light included in ...
faint sky
rustic pine
has anybody made a case model for the memento with the add on light included in ...
Not yet because there were a very limited supply available during the launch of the memento. They're out of stock so I can't get one and until I do I can't exactly design a case around it. I don't know if the PCB has 3D files yet, if it does then I could make something with it. I'm not aware of any case designs with it.
The Camera Enclosure Kit PCB's are not available yet. Without the kit or access to the 3D PCB files can't design a case for it.
You could in theory make a case for it based on inferences. For example the thickness of the PCB would be the same as the Memento. The Neopixels can be found in Adafruit CAD Parts... you could make an educated guess on a 3D enclosure with it.
It's just much easier to wait until they release the 3D files for it.

Since measurements of some of the aspects of it are known you could scale the image and create a 3D model with a certain degree of accuracy if you absolutely want one pronto before they release the official 3D CAD parts for it.
iron remnant
I am a huge fan of phat nozzles. I've got a nice little collection of CHT nozzles
ashen moat
how do you clean a CHT nozzle? seems like cold pulls won't work. liberal use of cleaning filament? I have a 0.6 CHT I've been waiting to try til other mods are done.
iron remnant
Liberal use of cleaning filament yah
coarse coral
@faint sky @karmic brook


 faint sky
Beautiful build. Aww the buttons are SMT, tough call to solder into them but seems necessary.
coarse coral
It could be better in so many ways I know this, it's a hack in every area from the trimmed screen to the patched in buttons to the rats nest of wiring as a bundle to the routed cable extenders but I am very happy with it. Thanks for the help here
coarse coral
faint sky
Beautiful build. Aww the buttons are SMT, tough call to solder into them but see...
Yeh the patched in buttons work. I could have just set it all at max brightness and volume and let the os handle it but I figured why not
 shy kelp
It's not public on what resin even are? I mean dental resin (those for fake tooths), is totally fine biocompatible and safe, meanwhile common resin is the worst kind of biohazard that you can easily buy
faint sky
resin is just the binder, the teeth are made of porcelain which are fired in a kiln so they're very much sterilized. i wouldn't go attempting to 3D print your own teeth except for like... cosplay.
shy kelp
faint sky
resin is just the binder, the teeth are made of porcelain which are fired in a k...
No in the cheaper option you can use resin as the conponent of your tooth
But it's a paste like form
arctic dragon
Dental resin is more commonly used for aligners and retainers than actual teeth, at least where I’m from…
shy kelp
I guess that I'll have to ask the dentist, but in Italy they're all uncooperative, you ask something they don't answer or make up stuff, like I asked for a xray export, they gave me a badly printed a4 paper because "they don't have anything else", I asked for the digital file, they just told me to go elsewhere... i mean you could have made me pay for it, I ask for pricings they do not answer
shy kelp
Sorry half way rant here
iron remnant
I have my most recent MRI data.
I haven't had the time to do anything with it.
Considering the uses of one's bones for witchcraft I figure what I really need to do is just 3D print some of my bones but only give them to my friend who loves me too much to do anything and my other friend who has shown her loyalty by not yet trying to eat me.
arctic dragon
Oh, but they do use uv-cured resin for fillings and related repairs. Not 3d printed, of course.
balmy pulsar
iron remnant
I have my most recent MRI data.
i asked for that once by they wouldnt send it to me
faint sky
Guess you'll just have to read some datasheets and create your own MRI.
balmy pulsar
um. no
faint sky
Ah sorry yeah bad idea no medical device questions here. I'm tired.
balmy pulsar
haha
even besides that
i expect an mri is quite a dangerous machine
big magnetic fields
iron remnant
Yeah, it's really easy for the whole thing to go south on you
vivid helm
iron remnant
Yeah, it's really easy for the whole thing to go south on you
Rapidly. From across the room.
balmy pulsar
iron remnant
Yeah, it's really easy for the whole thing to go south on you
sometimes north
ashen moat
my local health network provides scan imagery on CD in a proprietary format with a windows-only autoexec viewer app. 😔 last orthodontist I dealt with was confused by the request but happy to email STL exports of 3D-scanned teeth.
coarse coral
@faint sky need work to be the best it can be. More plastic next month I think and a reassembly
My printer quality has suddenly fallen off a cliff. Not sure what the problem is. I already did a recalibration last week
faint sky
Looks great to me!
vocal flax
Those monotonic lines look like something needs tuning
faint sky
In the world of 3D printing something always needs tuning. Can only chase perfection, cannot catch.
arctic dragon
I almost suspect filament quality rather than printer tuning. Seems like the discontinuities are broken up in sections based on print sequencing or something.
faint sky
It's a typical ironing result. Compared to people who print spaghetti regularly stej's print is probably perfect to them. Quality is sometimes relative.
balmy pulsar
So ive opened my little cnc to outside work. small runs, molds , etc. if anyway needs something message me. little enclosures would be fun! 🙂
faint sky
🧐 What do I need CNC'd? I'll have to get back to you on that. I'm sure I can come up with something.
@balmy pulsar A longer print surface for my y-carriage. How flat can you make a piece of aluminum for a modified longer print bed?
balmy pulsar
flat yeas. long no. im limited to 8"x8" for sheets on the vacuum
but i can do printer parts pretty well.
faint sky
Yeah I need 12" at minimum.
balmy pulsar
yeah 12 too long.
mostly i can do 8x8 flat on vac. and 4x4x2 or so in the vise for "solid" parts
vocal flax
faint sky
It's a typical ironing result. Compared to people who print spaghetti regularly...
Every spaghetti I printed had an error in front of the screen
faint sky
consider yourself lucky. they can turn into some gnarly hotend blobs if the conditions are right
The internet is filled with these types of images. Some of it is spaghetti related other times its a loose nozzle.

It's recoverable most times but not fun to clean.
 red nova
This is a model for a case for a RPI pico together with a usb adapter. How do I make the lid stay in place?
 faint sky
red nova
This is a model for a case for a RPI pico together with a usb adapter. How do I ...
faint sky
red nova
This is a model for a case for a RPI pico together with a usb adapter. How do I ...
snap fit? there seems to be enough surface area for it
hmm i designed a case and lid that was kind of similar. used snap fit and it worked out great.
Actually it snap fit together so tight that I needed a pick to separate them. https://www.youtube.com/watch?v=zm0cvGM-3JI

Demonstration of final prototype. Includes on/off power button, two way tint film as LED diffuser, 1/4"-20 standard camera screw mount, USB power with 150mah battery charger, printed in Polymaker 2-color Silk PLA.
I used this video to learn how to do snap fits. Was made by Adafruit's Noe Ruiz (who you can ask questions in a live stream every Wednesday at 11am EST in #live-broadcast-chat https://www.youtube.com/watch?v=iXZvdST_OSs
In this tutorial we'll take a look at our snap fit case for the Adafruit QT PY ESP32-S2.
Learn Guide
https://learn.adafruit.com/qt-py-snap-fit-case
Fusion 360 Share Link
https://a360.co/3FfD73e
QT Py RP 2040
https://www.adafruit.com/product/5325
3D Printing Projects Playlist:
https://www.youtube.com/playlist?list=PLjF7R1fz_OOWD2dJNRIN46uhMCW...
snap fits do require you to know your printers tolerances so you account for them in the edge and lip design.
and many prototypes
red nova
Are there other options to join two parts?
arctic dragon
red nova
Are there other options to join two parts?
Screws are pretty easy to design for. In most cases, direct threading into a straight plastic hole works just fine, but if you want you can insert captive nuts or threaded inserts.
ashen moat
I think some people use superglue (cyanoacrylate) for PLA. there's friction welding (search this channel for the last time it came up). there's all manner of joinery from the woodworking world, like dowels, biscuits, dovetail joints, threaded inserts...
misty ibex
I love threaded inserts!
ashen moat
if you don't mind your case (or part of your case) being a little flexible, semi-flex TPU lets you design all your clearances a hair small and the flex soaks up tolerance variations. feels good not to stress so much over tolerances.
faint sky
One thing I've learned with heat inserts is to design a cylinder hole exactly where you want it. Otherwise you'll try to insert into an infill void and your inserts gets lost inside your part like loosing change in a couch cushion. Especially for parts where you're printing at at like 3% infill... you'll want those cylinder walls for grabbing onto the heat insert. Even if you print with 90% infill, cylinders still help to grab onto the heat insert the best.
ashen moat
 faint sky
Got this neat little wifi spy camera to install in my car. Unfortunately it gets so hot it'll melt the case and start a fire. The Amazon listing I purchased it at has already been completely removed after people started posting images of melted cases. It has excellent image quality, other than the heat its exactly what I wanted, so I wanted to attempt a modification before having to return it. Added some heatsinks which reduced the temperature by about 70F down to a more reasonable 98F total. Now I need a new case to accommodate the heatsinks. I could just cut holes in the existing plastic case but I was also thinking of adding a tiny fan into the design for even more cooling.

 vocal flax
faint sky
It's recoverable most times but not fun to clean.
vocal flax
faint sky
It's recoverable most times but not fun to clean.
I specially bought metal brush for cleaning those because the heatblock i had was very out of spec it leaked through the threads (and its v6 so a lot of threads)
I am still yet to put on my best heatblock, I am hesitant.
faint sky
Putting it on and tightening the threads is the only thing you can do.
ashen moat
a little TPU deflection is fine
(it was not fine)


 steel storm
red nova
This is a model for a case for a RPI pico together with a usb adapter. How do I ...
steel storm
red nova
This is a model for a case for a RPI pico together with a usb adapter. How do I ...
Tape
steel storm
arctic dragon
Screws are pretty easy to design for. In most cases, direct threading into a str...
Nobody suggested tape :/
ashen moat
I don't think any of my tapes stick well to PLA. =/
arctic dragon
steel storm
Nobody suggested tape :/
Because tape doesn’t stick very well to prints in my experience. Unless you are thinking of some specific tape for this purpose, most common tapes only stick to prints that have been smoothed post-printing, and even then don’t stick super well to PLA or PETg. Not recommended for long term lid securing, so I usually don’t recommend designing for tape.
The sanding and cleaning required to get decent adhesion with tape is a fair bit of work. At that point, I’d rather just wrap the whole thing so the tape adheres to itself.
steel storm
arctic dragon
Because tape doesn’t stick very well to prints in my experience. Unless you are ...
ive used stuff like this on 3d prints

people seem to only talk abt blue painters tape
this is my goto tape for stronk stuff
if not i use one of my 50 rolls of electrical tape lmao
this stuff works as electrical tape too
arctic dragon
steel storm
people seem to only talk abt blue painters tape
Blue painters tape is usually discussed as a printing bed surface. It’s meant to be temporary and not a means of securing two printed pieces together.
steel storm
arctic dragon
Blue painters tape is usually discussed as a printing bed surface. It’s meant to...
mhms
i use the strong tape with the fabric inside
or strings or smth idk
seems to stick to my pla prints well
is it called duct tape? maybe
arctic dragon
I’ve had not great experiences using electrical tape on prints. Can’t speak for the 3m stuff you linked, but it looks like some specialty stuff I’ve never used before.
steel storm
not rlly

i think im talking about duct tape
idk lols i got a couple rolls of this kinda tape, sticks well to pla prints as far as i can tell
isnt too expensive and holds many things together too :D

 arctic dragon
Duct tape is strong enough for sure, but I don’t like how it looks on small prints personally. Almost ruins the aesthetic of a printed part in my opinion.
But yes, I’m sure it could hold a lid onto a print.
steel storm
arctic dragon
Duct tape is strong enough for sure, but I don’t like how it looks on small prin...
yeaaaaa but it sticc
and it hold :>

 ashen moat
oh, come to think of it, I have used gaffer's tape (or thinner spike tape) on occasion. it's great stuff, generally useful, and held two halves together for a MIDI controller case
I've heard good things about GT3 but haven't tried it myself.
ashen moat
arctic dragon
Duct tape is strong enough for sure, but I don’t like how it looks on small prin...
it's not so bad aesthetically if the part is destined for an environment where tape is common, like theater production, audio production, etc.
not for bonding parts together, but I have some printable waterslide decal paper I've been meaning to try for labels on printed parts.
balmy pulsar
ashen moat
it's not so bad aesthetically if the part is destined for an environment where t...
aircraft maintainance...
balmy pulsar
balmy pulsar
feather dvi case idea
or pi zero. seems that will fit too.
ashen moat
taping over switches to prevent unwitting disasters, for instance
 ashen moat
balmy pulsar
aircraft maintainance...
ashen moat
balmy pulsar
aircraft maintainance...
but in truth, anything with a large control panel probably has some tape on it
balmy pulsar
ashen moat
taping over switches to prevent unwitting disasters, for instance
russian planes are mostly duct tape
ashen moat
3d-printing a new black box after you've jimmied the original and taping it closed 😆
balmy pulsar
not quite.
air india once landed at yyz with a damaged door, and they wanted to just tape it closed. its not technically duct tape, its the foil one. they calle it "600 mile an hour tape" but it is really just the stuff you get at any ahrdware store
ashen moat
ha, nice
balmy pulsar
air india has a ... history.. at yyz though, so they were forced to repair the plane properly
faint sky
hey, general chat. we went from tape on 3D prints to tape on planes.
faint sky
That is going to be so cool. a metal NES controller?
balmy pulsar
front shell stock nes control guts. back shell pi (or feather dvi) with hdmi out.
it might be a wee bith thicker, or have a "bulge" on the back
also it can have an input for a second control for 2 player
in some ways the feather is easier. but the pi has retropie
hmm
faint sky
interested to see how you intend on hooking up the feather dvi from within the nes controller. won't that require an hdmi cable? those can get pretty thick.
balmy pulsar
hdmi cables go out to a tv
it needs to be stacked with the adalogger. that is what might make it fat
could be more hacky, but then its harder for other people to do it
faint sky
the hdmi connector is taller than the stemma so you just have to account for the hdmi cable thickness.
if it's going to be the same dimensions as a real nes controller i doubt you'll be able to stack an adalogger on top.
balmy pulsar
logger goes on the back. but yes. it will make a little bulge
might be goot for make a universal control, where the clip/screw on the "brains" to the back
faint sky
Hmm maybe if you solder them directly together it might be possible to get the adalogger flat but doesn't that have an RTC battery? that'll make it thicker.
balmy pulsar
provided they dont get in the way of fingers
yes, rtc battery
also it needs a battery too
that makes the pi more annoying
faint sky
the battery makes it thicker than most featherwings. it's going to be a tight squeeze.
balmy pulsar
the battery is not any taller than headers. but i mean it needs a lipo
faint sky
and if the case is metal won't that be more likely to cause a short? All the pin headers against a metal case sounds like a receipe for bad things.
balmy pulsar
feather has to go vertical too, so the hdmi points out toward the tv
nah, just put some protection
faint sky
there's no way that'll fit
balmy pulsar
it fits. barely. nes is 55mm tall
faint sky
a feather is longer than an nes controller is wide... gotta be.
balmy pulsar
feather is 52
faint sky
really. wow. 3mm of play. that's tight.
balmy pulsar
yup. usb on the bottom. hdmi top. the bump has to be about 35-40mm wide. to fit connections to battery etc.
controller is 124mm wide
faint sky
i'm looking forward to seeing progress updates on this. sounds like a really neat project if you can pull it off. i have my doubts about the stacking height of the adalogger in there.
balmy pulsar
and about 17.5mm thick
stacked adalogger on dvi is about 15mm
thick housing thickness and a gap for buttons.
so ill need a bump of maybe 5-7mm
faint sky
I just soldered together a charlieplex last night where i layed two pcbs flat back to back. inserted pin headers through both, soldered them, then removed the plastic separator strip.
balmy pulsar
cant do that here as they need to stack the "right" diection.
so i need regular headers i expect.
still need a spot for a lipo too. those are 8mm thick
likely will be fine off to one side
just need a nice 1S rc pack
600-700mah
faint sky
it's just the general idea of getting them to be as slim as possible.
balmy pulsar
sure. but i also want to then share this out so its easy for other people
faint sky
 balmy pulsar
yeah
faint sky
that took more effort than i'd like it to be. sometimes you gotta do what you gotta do.
balmy pulsar
ha
 faint sky
you can get low profile female headers that are about half the height of regular headers.
oh that's cool.
balmy pulsar
yeah
faint sky
cm4?
faint sky
ah, that's pretty amazing and you had enough space to fit a lipo.
balmy pulsar
not mine
ha
but yeah.
so now. do i use a zero (which i have on hand) or do i try the feather. theres goods and bads for both
digikey s have the dvi feather in stock for $21 plus 8 shipping.
vs needing a pi charger whihc will cost only slightly less
pi will fit fully inside control
faint sky
i think you'll get more practical use out of a pi zero. the feather dvi has a lot of limitations and was basically just a proof of concept.
faint sky
yeah and for the nes controller where space will be much tighter
balmy pulsar
zero runs nes, snes, gba, and even some playstation games
plus theres the pi zero 2
hmm
so... i need in the "bottom" a pi, a battery, a port for controller 2, and a pass through for a reinforced HDMI cable
faint sky
seems more practical to add BLE to the controller and put the zero in a box near the TV. wireless hdmi would be neat, don't even think that's a thing. i guess the concept is you still have a wire like the original NES controller but it just goes straight into the TV. that would be so weird to play.
balmy pulsar
oh, and a battery charger with exposed usbc
faint sky
does it get hot? would heat be an issue containing it inside the controller?
faint sky
because heat + lipo + metal controller could end up very dangerous.
balmy pulsar
faint sky
because heat + lipo + metal controller could end up very dangerous.
thats literally every phone
faint sky
they have millions into R&D and regulatory examinations.
balmy pulsar
so they claim
faint sky
this is true, that's the expectation.
balmy pulsar
my galazy still gets hot enough to burn skin
anyhow. should be all good in that regard.
id like the back to come off tool free somehow. to access ports and card
faint sky
i hope so. looking forward to seeing more. can't wait to see the CNC'd controller. i've never seen a metal nes controller before. that's the stuff of legend.
balmy pulsar
ha. yeah. theres a cool all metal gameboy case
$130. so theres a market
not that i mch care about that
faint sky
didn't know that. i could see how it could be tempting. can chuck that thing across the room and not worry about breaking your controller. 🤣
balmy pulsar

is there a pi zero 3d cad model?

ha. someone made a metal housing already

neat
balmy pulsar
position of pi

face up
so far pretty easy
bit of room for gpio soldering

now. whats a good pi charger
balmy pulsar
adafruit powerboost 500 charger

dont know the dimensions of the port yet so have not cut a hole
balmy pulsar
hahaha. someone had the pcb board on pcbway. $44cdn for 10 boards shipped. well that works. i need to find the membrane button parts and this is a go

420mah gum stick battery. should last up to 3 hours gaming. 1 hour to charge.
 faint sky
The Pico DVI is a feather so it does have pass-through charging. You can game while you charge it.
Might need to make a cutout for the USB plug on the end of the feather for easy usb cable access or perhaps a magnetic charging connector.
balmy pulsar
rearranged a bit, fits a stock amazon 380mah battery now nicely.
messed around with pcb to fit better
need some parts not to do final positioning of ports
balmy pulsar

 rocky rune
I'm designing a new front panel for a SFF PC. The current one uses hooks & tabs to stay in place like this (red), but this looks like a pain to 3D print especially because they have to bend laterally (unless I print it through a company, maybe?). What's the best way I could secure a panel to the front of the PC (which is modeled in green)?


I'm thinking maybe I could use some kind of click-in system that clicks into the circular holes, or maybe use screws
But I've barely done anything with 3D printing before, let alone something using screws. I know threaded inserts are a thing but I don't think the screws would have a head wide enough to grip the existing holes (which have ~6.3mm diameter)
rocky rune
or maybe I could print a little thing to make the holes' diameter smaller
ashen moat
you might be able to make some grommets for those holes, yeah. or maybe print some thin slotted screw holders to fit into those tab slots that expand when you drive a screw into them, like drywall anchors. or drywall anchors could work.
vocal flax
Use self tapping screws. Make posts and holes on the red piece (posts to not blow out front side and minor diameter holes for threads to bite in.) and holes on the green piece (to make sure screw head will push on green piece instead of compressing plastic.) @rocky rune
faint sky
Front panels come in different shapes. While the size is standard the panels themselves can vary. You could just skip trying to print a front panel for a din plate and instead just print the entire din insert (which gets screwed into place from each side of the interior of the case like DVD drive would).
Something like this. I don't see a problem with printing the entire thing.
 shy kelp
Without one of those flexible like screwdriver things, how can I get out this motor from the chasis of an old i3 mega?


The L shaped tools don't reach there
faint sky
A really long screwdriver will do. I've done it. In a pinch you might be able to attach ratchet extensions together and then put a screwdriver bit in a hex socket.
vocal flax
shy kelp
Without one of those flexible like screwdriver things, how can I get out this mo...
do you have any model or seller name?
faint sky
For a really long screwdriver? SnapOn probably has one but their single screwdrivers are probably more expensive than my 3D printer. Just measure the distance and find something online with the appropriate length shaft.
Oh are those not phillips? They might be hex heads hmm they'll you'll need a long allen key set.
Here's a set with 9" shafts https://www.amazon.com/EKLIND-55198-Cushion-T-Key-wrench/dp/B004F7OPF0
Problem is the longer and thinner the shaft the more likely you might break it.
There are 6" versions too. Depends on the depth you need to get at.
shy kelp
Oh I did not meant the screws for the shaft. i meant the screws that hold the stepper
balmy pulsar

ready to cut tomorrow. eeek.
(bottoms)
can also just use this is a battery powered pi zero case, without the NES top plate.
 strange ledge
😄
 rare willow
does anyone happen to have a link to flat keycaps with a cherry stem that are 2u and 2.5u respectively? i cant seem to find any on thingi or printables
balmy pulsar
they are super easy to model your own.
faint sky
shy kelp
Oh I did not meant the screws for the shaft. i meant the screws that hold the st...
From the picture the best I can tell is that they are allen/hex head screws? If they're phillips then you just need a long screwdriver. Some 3D printers use all allen key hardware and some do use phillips screws. If it's the motor housing screws then likely hex head and the link I posted to the long allen key set should help.
faint sky
rare willow
does anyone happen to have a link to flat keycaps with a cherry stem that are 2u...
I think Adafruit has some that you can put labels in. I don't know if the size is exactly what you want but the tops are flat clear. https://www.adafruit.com/product/5039

Get ready to customize your keeb with a 10 pack of two-part plastic keycaps for your next mechanical keyboard or NeoKey project.Each keycap comes with a off-white base ...
They're called Relegendable because you can print little squares of paper and label them yourself under the clear plastic top.
If you want to print your own then no, sorry that's not something I go out of my way looking for.
rare willow
yeah they’re not exactly what i’m looking for, i’m looking for longer buttons, thanks tho!
 random urchin
rare willow
does anyone happen to have a link to flat keycaps with a cherry stem that are 2u...
random urchin
rare willow
does anyone happen to have a link to flat keycaps with a cherry stem that are 2u...
This might work. https://www.thingiverse.com/thing:468651
Looks like it's highly configurable, at least.

Thingiverse
KeyV2 is out!
This library is deprecated, and a new version has been released! please check it out here: KeyV2
Summary
I got halfway through making a parametric novelty keycap base before I realized there are decidedly few basic keycaps on the thingiverse website, so I took a detour to make a good one. This library has slowly grown to where you ...
 fervent lagoon
alright, i'm "fixin' to" get into 3d printing and one of the first things i want are some clips/holders for the small SSD1306 128x32 displays (no mounting holes) for use on a swirly board, so need 2.5 mm standoff type
can't find anything and trying to find a "generic breakout board clip.holder" isn't turning out anything useful -- any clues, amigos? finally got a hit (30 minutes!)
faint sky
The Ruiz brothers have some swirly board mounting projects. I like the concept of the swirly board being used as a template for standardizing mounting spacing. It doesn't matter where the standard comes from. as long as there is one. The Swirly board is a good starting point for a standard.
 hushed turret
I love them. I used one as the basis for my NASA lunchbox. I also soldered terminal blocks to everything to make it easier to experiment with.

that's an early shot, I ended up using a propmaker feather and added a couple more breakouts
I just put some standoff mounts for some heat set inserts and used some screws to mount it
faint sky
oh that looks nice.
hushed turret
Thanks! I'm happy with how it worked out, though a future iteration will have better cable management, this one ended up a mess once everything was actually hooked up lol
misty ibex
I wish the slotted holes were a little bigger so the cables could fit through so the underside was more usable...
iron remnant
fervent lagoon
alright, i'm "fixin' to" get into 3d printing and one of the first things i want...
not quite what you asked, but https://github.com/nophead/NopSCADlib is pretty fun for "I have a generally standard-ish piece of hardware that I would like to make things that connect to and am comfortable coding things instead of using CAD" applications.

GitHub
Library of parts modelled in OpenSCAD and a framework for making projects - nophead/NopSCADlib
..except it doesn't have the SSD1306 display in question. I should actually sit down in my copious free time and submit some upstream patches, LOL.
fervent lagoon
that's... impressive 👀
faint sky
Nice collection, that sums up a ton of work in 1 image. 👏
 wooden kelp
so i'm trying to get octopi working but my pi semes to not like my 32GB micro sd card. dose octopi not work on anything bigger then 16GB? what am i dooing wrong? i have a raspberry pi 4 model B 8GB RAM from adafruit by the way.
arctic dragon
wooden kelp
so i'm trying to get octopi working but my pi semes to not like my 32GB micro sd...
It should be fine on that size. Are you flashing with the raspberry pi imager?
wooden kelp
arctic dragon
It should be fine on that size. Are you flashing with the raspberry pi imager?
yes
faint sky
Finished the enclosure for the ST796S display.


 faint sky
You're not going to get pretty results with a .8 nozzle but what it lacks in detail it makes up for with sheer bulk. 19 total hours of print time. Probably would have been double that with a .4 nozzle.
arctic dragon
faint sky
You're not going to get pretty results with a .8 nozzle but what it lacks in det...
No, but that’s also something that can potentially be compensated for in post processing. Filler and paint is still quicker than quadruple plus print time…
faint sky
yeah i plan on taking a card scraper to it tomorrow.
ashen moat
the little ventilation holes rendered nicely. halving the print time for a big print is worth the tradeoff. what do you think caused the trouble spot on the back corner?
faint sky
the curved angle. the back of the enclosure was face down on the bed so that's where supports were connected.

I have a heck of a time removing supports. Been struggling with them with the .8 nozzle. They fuse to the part. I've tried a lot of different settings and slowly making progress. I need pliers to remove them. :/
Likely has to do with using tolerance: middle setup all the time.
Yes I was surprised all those little vent holes came out looking great too.
No matter how I flipped it, it was going to need supports somewhere.
 serene quiver
faint sky
I have a heck of a time removing supports. Been struggling with them with the ....
serene quiver
faint sky
I have a heck of a time removing supports. Been struggling with them with the ....
Have you tried reducing support density? My slicer defaults to something like 20% which is way too much and basically makes the supports part of the print. I usually use 2-5% depending on if the supports are standing on the bed or on the part.
faint sky
serene quiver
Have you tried reducing support density? My slicer defaults to something like 20...
yes, my support density is currently at 1%
the .8 nozzle makes it kind of hard. with bigger layer lines you don't get the fine detail needed for good tear aways on supports. it's a work in progress.
wooden kelp
Does anyone know where to buy a custom 3D printer pei sheet build plate 230*230mm. I want tiny creeper faces all over it. so all my 3D prints have tiny creeper faces on the bottom of them?
faint sky
@wooden kelp interesting idea. PEI is a coating so you can cut out custom shapes with a laser cutter if you want. i'm unaware of anyone that sells them like that. textured pei is a sandblasted metal sheet with a PEI coating. my guess is you're asking about a textured sheet. even if that was a thing the stencil patterns would be at different heights. this would be most critical on the first layer which could cause nozzle scraping from the different z-axis heights of the stencil pattern.
You can get PEI as a film but to really apply it to a sheet you need heat, lots of heat. The textured PEI sheets have already undergone this process.
You can get a large textured PEI sheet from a larger printer. The CR10Max for example. Then cut the sheet to your designed dimensions.
I think the desired effect you're looking for will require a custom sandblasted sheet. I'm unaware of any service that can custom sandblast with the level of detail you might want.
You could go in the opposite direction and start with a sandblasted sheet and then have someone CNC mill it, then apply the PEI coating.
ashen moat
wooden kelp
Does anyone know where to buy a custom 3D printer pei sheet build plate 230*230m...
I found Ember Prototypes linked from a couple of places for custom-textured PEI plates:
https://www.emberprototypes.com/products/custom-textured-pei
https://emberprototypes.myshopify.com/products/custom-textured-pei-plate
arctic dragon
wooden kelp
Does anyone know where to buy a custom 3D printer pei sheet build plate 230*230m...
Alternatively, a similar effect could be applied using a custom tool path. Might be a few extra steps, but worth considering. https://youtu.be/zSgW0KoguXc

If you found this helpful, please consider supporting me on Patreon:
https://www.patreon.com/BillieRuben
Or buying something I've designed:
https://www.billieruben.info/shop
And if you have any questions, or you just want to hang out, you can find me here:
- Twitter: https://twitter.com/BillieRubenMake
- Discord: https://discord.gg/WpGdD...
wooden kelp
arctic dragon
Alternatively, a similar effect could be applied using a custom tool path. Might...
That looks cool but at the end you/me will waste filament having to cut the excess off so this is out of the question but cool NVM the less.
vocal flax
faint sky
<@816788988580986880> interesting idea. PEI is a coating so you can cut out cus...
There is no sand blasting. Textured pei is spring plate powder coated with pei.
faint sky
Interesting, always figured it was fine grain sandblasting. I can see why manufacturers prefer the film, that's much faster to make.
vocal flax
wooden kelp
Does anyone know where to buy a custom 3D printer pei sheet build plate 230*230m...
2 ideas 1 buy a smooth pei sheet and get it laser engraved at a shop that does signs or do branding on objects. They usually have laser engravers.
2 again smooth sheet. Create pattern and print it on 2d printer and cut out sections to create a mask. Apply it on pei sheet then carefully sand unmasked places with moderately coarse sandpaper ( I'm gonna assume something like 180 but make sure to get a variety of grits so that you can achieve your desired look. Try to start from high grit so that you don't have to decrease thickness of plate too much.)
I assume the same effect can be achieved by smoothing unmasked parts of textured sheet but I'm gonna assume that's harder.
faint sky
Even the smallest imperfection greater than 0.2 will show up in a probe measurement.
Trying to keep that surface level while sanding would probably be impossible by hand.
it might be doable with a laser etcher
or just go with that service that was already linked. i didn't even know that was a thing.
vocal flax
I don't think it's that critical, but that effect might be more pronounced on glass beds
faint sky
glass beds you can use sandpaper on and do some diy etching if you're careful enough.
vocal flax
faint sky
it might be doable with a laser etcher
Imo that's best bet but harder one.
faint sky
could have a vinyl graphic printed out and then carefully sand the glass details.
there might even be a chemical process you could use kind of like making your own pcbs. there are probably a hundred different ways to do it. a service that specializes in it will save you the aggravation.
vocal flax
Btw there are some pei tape/adhesives that don't require much heat. Afaik 3m pei sheet only requires heat to handle expansion and contractions, usually (max bed temp + 25c )/2
Probably acetone irritates pei
But I'm not comfortable with suggesting chemical processes. Also they are harder to control
It might be possible to just scorch some lines on the sheet but again that requires experimentation
wooden kelp
Can you point me to a product that I can print my design on a 2D printer. I have a inkjet printer that supports 8.5x11", and A4.
vocal flax
Print the pattern you want I assume creeper face. various different ways of designing it. Easiest would be probably copy paste an image on power point and print the page. @wooden kelp
Then cut out printed sections
Then sand it l
wooden kelp
vocal flax
Print the pattern you want I assume creeper face. various different ways of desi...
What type of paper should I use?
vocal flax
For pattern regular paper can work
If you don't rip it while sanding
More resilient option is those plastic transparent sheets
Convenient one might be l create a solid model with pattern and 3d print thin sheet
Which is already applied on the print surface
That could be pretty easy method
coarse coral
since boards like the itsy bitsy don't have drill holes, does anyone have a preferred way to fit it down inside a 3d printed part?
faint sky
Depends if it's going to have headers or directly wired to the holes. Just treat it like a rectangle that needs to be sandwiched between a top & bottom enclosure... same as any little box.
coarse coral
i just made this and hot glued before but the hot glue despite what i was told stopped it functioning

it's using headers so needs vertical space above. i guess i could do some clamp like you say for the middle section.
faint sky
or you could just print the whole case in hot glue
don't do it, it's a horrible idea... but possible.

 ashen moat
lack of mounting holes is an unforgivable sin for a dev board IMO
vivid helm
ashen moat
lack of mounting holes is an unforgivable sin for a dev board IMO
Poorly placed mounting holes without sufficient clearance are worse.
I'm looking at you, Uno.
ashen moat
the Uno does look pretty silly, though at least the rear two holes seem usable. and we are in the 3D printing channel, where two mounting holes and a custom panel will get the job done. 🛠️
I think 1+ usable mounting holes is better than none, even if the board has many useless mounting holes.
vivid helm
ashen moat
the Uno does look pretty silly, though at least the rear two holes seem usable. ...
One of them is usable. The other is too close to the header to fit an unmodified nut (ask me how I know, I dare you). But yeah, it's less of a problem with a printer.
ashen moat
wow, definitely not obvious from photos.
vivid helm
Yeah, it is unfortunately a mistake of history. I've seen people suggest that making an Arduino clone is a good first PCB design project. And, while true, I would never suggest it as a reference for good PCB layout.
outer narwhal
that off-grid placement of a pin header is going to be with us forever, isn’t it?
vivid helm
outer narwhal
that off-grid placement of a pin header is going to be with us forever, isn’t it...
Sadly, yes.
In all honesty Arduino should have spun another revision early. Sometimes it's worth breaking backwards compatibility.
I'm not actually sure why they tried to put a gap there in the first place. It's not for keying, as the other side has a different pin count and properly spaced gap. They could have very easily used a single footprint there.
outer narwhal
i remember someone official stating that it was an error that they didn’t catch before it went into production
strange ledge
outer narwhal
that off-grid placement of a pin header is going to be with us forever, isn’t it...
I HATE THAT!
vivid helm
strange ledge
*I HATE THAT!*
Everybody hates that. But then again, x86 exists.
 faint sky
the original uno was targeted at beginners. a staggered footprint prevents people from connecting addons upside-down or in the wrong order... an issue that is possible on the Pi Pico for example. The adafruit feather has an offset footprint to differentiate each row of pins. Hindsight being 20/20 the Uno could have offset each row better by using an offset configuration like the feather. However, it doesn't really matter what the pinout is as long as users cannot accidentally connect addons backwards and fry their board and addon. It might seem like a proprietary connector but it really is in the best interest of beginners.
Adafruit's Printables doesn't have an itsy bitsy case. That might have made things easier for you. :/
 loud silo

Electrical Engineering Stack Exchange
How do you get around the annoying pin spacing on the Arduino?
Where pin 7 and pin 8 are not standard spacing.
Why is it set up like this?
vocal flax
vivid helm
I'm not actually sure why they tried to put a gap there in the first place. It's...
"But they seperated the ports" kinda useful if you don't use their adjective pin naming
Also kinda understandable to keep backwards compatibility. After all if they broke that they might not have made it this far
vivid helm
vocal flax
Also kinda understandable to keep backwards compatibility. After all if they bro...
If they did it a immediately after the first production run, there wouldn't have been much to lose. Also, most shields probably could have still been used simply by bending some of the pins.
 young condor
Can anyone help me with information on deciding which 3D printer to buy?
shy kelp
young condor
Can anyone help me with information on deciding which 3D printer to buy?
It mostly depends on your budget. Bambulabs maintain the promise of a (mostly) plug and play solution, whereas other cn manufacturers usually don't
vocal flax
young condor
Can anyone help me with information on deciding which 3D printer to buy?
- What do you expect from printer to be? "Something to tinker and 3d printer itself as hobby" or "a tool and 3d printing as hobby"
- What's your budget?
- Do you have any size constraints?
fervent lagoon
well, I was waffling back and forth whether I wanted to jump into this (even for very minor stuff) and freakin' Longest River in the World throws up a Tina 2S on sale, which coincided with a minor windfall, so that's what i ended up going with
shy kelp
Hm apparetly dental resin is still toxic:
https://www.ncbi.nlm.nih.gov/pmc/articles/PMC3532765/
😕
iron remnant
Fun. I had to get a mercury amalgam filling removed some years ago and they put in a dental resin one so I guess I get to have the full cocktail.
shy kelp
I'm full of fillings since my mouth is a disaster.
It came to my mind as my dentist was talking about the cool 3d printing tech while uv filling my tooths.
In a nutshell, it seems that as much those pastes are less toxic than the commercial resins, there's still a lack of open docs, and in most cases those are just claims by the manufacturer of said resins huh
The more you know
iron remnant
Yeah, I've got a bad feeling that the entire 3D printing industry is going to be buried under lawsuits a decade or two out.
fervent lagoon
i know from disasters -- almost every one of my (remaining) lowers is now a crown, so the amount of resin in there is considerably less 😏
iron remnant
I guess you don't have to worry about a life unfulfilled.
fervent lagoon
drill, baby, drill
balmy pulsar
mill baby mill


 shy kelp
There's not a ~1k like laser hand scanner similar to those used in dentistry, in size?
https://www.medit.com/medit-scanners/
Except that those usually start at 20k. So not so friendly

Medit
Explore the pinnacle of scanning technology with our Medit scanner lineup; each scanner meticulously engineered with the end practitioner in mind.
Or even remotely similar, with the same application but less expensive
No maybe this thing is camera based, I haven't really read through the website
fervent lagoon
yay - first 3d print was successful - except the 🍆 raft is stuck to the bed
ashen moat
fervent lagoon
yay - first 3d print was successful - except the 🍆 raft is stuck to the bed
can you remove the bed and toss it in the freezer for a while? sometimes that helps release stuck parts. you might try disabling the raft, too; people usually recommend against them except for very specific cases.
fervent lagoon
freezer trick sounds pretty good - it was a demo print and i literally unboxed it, and printed (Tina2)
and while i'm waiting on that, i set up the networking (becuase i can 😈 ) and it shows up on my wifi as espressif -- how interesting!
balmy pulsar
prints often release once the bed cools. but it depends on the type of bed
fervent lagoon
pei magnetic - freezer trick didn't seem to do it (30 minutes)
arctic dragon
fervent lagoon
pei magnetic - freezer trick didn't seem to do it (30 minutes)
The flexible bed? How hard stuck is it? Can you bend it at all?
fervent lagoon
yes, it's flexible and it does bend - i'm gonna let it sit in the freezer overnight, betting on the difference in contraction factors between metal and plastic
faint sky
Once my surface cools down below about 40C the prints just slide right off. Weird.
Putting in the freezer is a common solution but it's a band-aid, you shouldn't need to do that in the first place.
ashen moat
fervent lagoon
pei magnetic - freezer trick didn't seem to do it (30 minutes)
well, nuts. I've mostly heard good things about PLA releasing from cooled PEI, and on my unheated bed, I even get poor PEI adhesion without a glue stick. sorry yours is stuck. yeah, if it's spring steel, flexing may be another way out.
it could be that the first layer was too close to the bed and really smooshed on there tight? if that was the first print, there might be a lil tuning to do.
faint sky
To get that stuck... maybe even melted to the PEI coating. I don't think bed heating at its maximum could do that but this is a common issue so maybe it's possible.
Is it a textured PEI sheet or smooth PEI?
I've heard of people with glass beds having the same issue. The print can get so hot it fuses with the glass. I've never experienced it but I've seen plenty of pictures.
When they go to remove the print it takes a chunk of glass from the bed or shatters completely. Not enough stick and you have spaghetti, too much and you get prints stuck to the bed surface. :/
fervent lagoon
after a bit more flexing, i heard some cracking and i've got a corner loose and some leverage!!!
buying some alcohol tomorrow for sure!
balmy pulsar
ha
i guess the raft was flexing as much as the plate
do you not have a little scraper that came with the machine? like a putty knife thing
balmy pulsar
faint sky
I've heard of people with glass beds having the same issue. The print can get s...
ive heard of that with petg. normally my issue is nothing sticks at all 😛
pla almost always self releases on cool down on my glass bed
fervent lagoon
my supposition is that i may have jumped the gun on trying to pop the print off the bed, thus ensuring it was completely flexible enough to bend with the plate itself
and no putty knife (something else to add to the shopping list) - although once I got something up, my lego "wrench" worked pretty good (has a flat pry-section for separating reluctant bricks)
iron remnant
You might want to consider a palette knife instead.
I got these: https://www.amazon.com/gp/product/B00PKSV4KW/

Product Description
Putty knives will tend to scrape away the coating.
fervent lagoon
oh, i was going for plastic putty knives: i only use metal implements where i know i have zero chance of scratching serfaces
i also ordered a replacement 😏
iron remnant
K, my Ender 3v2 very helpfully came with only a metal implement.
faint sky
i have no idea why it's sticking so much that you need a scraper tool and/or a freezer. my parts literally slide right off when the surface cools to ambient. if you have so much squish and a super hot bed i'd think the nozzle would be so close to grinding on the surface during initial layer.
what are you running your nozzle and bed temp at?
my only guess is that your bed temp is too hot and you can probably dial it back by -10C.
the problem with that is if you lower your bed temp too much it might not stick at all and you'll find your parts getting knocked off and turned into spaghetti. these things are a delicate balance and every printer has its own personality.
iron remnant
Getting the piece to stick just right... not too much, not too little... has a lot of people with some very strong opinions.
As it it's a religion. With various adherents.
faint sky
It's because 3D printers can be so tempermental that it kind of is fearing the wrath of God if you do something drastically different. Some people do have cult like preferences to the point there are sects of certain teachings lol.
fervent lagoon
i was relying on the "out of the box" printing experience and i rushed getting the piece off the plate and didn't let it cool properly -- anyway, i've gotten the remains off and i thinkthe plate's ok, but as i mentioned earlier, i have a replacement on the way
thanks for all the inputs!!!!!!
faint sky
ah that makes much more sense
ashen moat
a few basic tools I use:
- flush cutting pliers
- plastic putty knife after I've lifted a corner of a print
- plastic razor blades with scraper handle, brilliant for lifting corners & flat stuff
- deburring tool, safer than a knife for edge cleanup
- needle-nose pliers for support removal
- digital calipers, when designing parts or checking printed dimensions
- open flame, for cleaning up minor stringing very occasionally when I can't solve it with slicer settings
fervent lagoon
open flame i got -- found a unknown-aged bic lighter in a drawer that still worked (last time i think it was used was like 3 years ago!) that i'm using for shrink-tubing 😈
iron remnant
Also, generally a blob of hex head keys.
Because most everything in the 3D printer world is some sort of hex-head screw
faint sky
One emergency tip is to keep a roll of 3M painters tape nearby and always print with a healthy sized brim. In an emergency you can tape it back down if it starts to lift from warping.
Also I keep flush cutters (came with the printer) available at all times. Sometimes I have to trim some spots as it goes. Even a slight over extrusion will compound the taller your part gets.
I don't mind stringing as much because I've dialed in my stringing pretty well. If you have an issue with a ton of stringing an extended BBQ lighter is a good idea mildmojo. I know stringing does bother some people mid-print. Light stringing is harmless but heavy stringing can certainly cause issues. I just let it go and clean it up afterwards. One quick pass with a lighter cleans it right up.
iron remnant
Yeah, 3D printing really gets people strung out sometimes
fervent lagoon
🤣 i just read this after putting in a new filament and watching the "purge" for about 3 meters of "stuff"
fervent lagoon
2nd print went (almost) flawlessly and popped right off the plate when i let it cool down properly - there's a little "dribble" that happened at the start of the print that i need to clean off, but the plate is still functioning and i got me my first usable thingie!
faint sky

why are you purging 6 feet of filament? purge settings can be customized (depending on your slicer). for cura the startup gcode is in machine settings.
the initial purge line should take the length of the bed and can be done automatically prior to a print. does your printer not do a purge line before printing?
fervent lagoon
it does a purge on filament load and then a wee bit before printing -- please keep in mind that this is a < $200USD printer, so it's not going to be quite the same as you fancy-pants folks (i am really space limited)
faint sky
it's not the size of the printer that matters but the size of the imagination. i've seen people model an entire car with a mini, printing it piece by piece. it just means printing more pieces and fusing them together.
3d modeling skills also helps, a lot, and is kind of part of the entire journey.
fervent lagoon
i am not daunted by any means -- i've already got my second print (servo motor mount) in use! (ironically, i'm now printing a cap for the xacto knife because the one that comes with is for 💩 )
serene quiver
fervent lagoon
it does a purge on filament load and then a wee bit before printing -- please ke...
Price doesn't mean much. Mine is an OG ender3 which are pretty bottom of the barrel until you replace the board and learn how to compile firmware.
fervent lagoon
oh, i'd heard/read about that! 😈
the only problem i've run into now is that one of the things i really really really want to print is too big 😆
quick informal survey - which 3d printer sites do you belong to (e.g. thingverse, printables, etc.)
 vestal thicket
Printables, I rarely use Thingverse anymore
random urchin
I have accounts on: Printables (use most of the time), Thiniverse (use occasionally), Cults (use very rarely).
strange ledge
I still need to decide on a course of action, regarding 3D printers...
I definitely want to DIY, but all I have is 2x Sanguinololu boards. 😛
faint sky
Printables. Thingiverse was complicit in letting people's models get reuploaded with no attribution and no moderation. Printables is a far superior website anyway with badges, achievements, remixing, and a more friendly maker culture. This is just my personal opinion.
Adafruit moved to Printables and that was enough for me. Where they go I follow.
fervent lagoon
i'm in --- oh my ... 👀
vocal flax
fervent lagoon
buying some alcohol tomorrow for sure!
Pei and alcohol can be dangerous just so you know. Pei can be dissolved, and it behaves differently when it's hot and cold. I don't remember which is which but one of them makes it dissolveable in polar solvent other is apolar solvents. Double check if alcohol is fine to use.
faint sky
I use dawn & water on a damp kitchen sponge when i clean the surface every couple of months. avoiding touching the surface helps prevent hand oils from getting on there and greatly increases the time between cleanings.
iron remnant
I mean, do understand that neither Thingiverse nor Printables nor Makerworld are actually highly expensive marketing venues for their respective owners, where Thingiverse's problems are because of Utilimaker. So presumably it's only a matter of time before Josef does something to cause the decline of Printables, y'all are invited to set up a deadpool for it. On the other hand, all of the cool stuff is largely there.
And, like, Makerworld gives me the heebie jeebies, as someone who has worked on back-end and cloud infrastructure stuff for most of my career.
fervent lagoon
as someone who has also worked on the "plumbing" as well, if you got heebie jeebies, i am staying far away
ashen moat
I only belong to Thingiverse, mostly because they used to be the leader (pre-Ultimaker), and a lot of alternatives popped up while I was away from printing for a couple years. I've started searching Printables more, but they don't seem to support Customizer for letting people generate custom versions of your OpenSCAD models.
faint sky
The license for a model is set by the creator of the model. If you set it with the appropriate license you can certainly share and remix models. Actually, part of Adafruit's Printables license is that you're not just allowed to remix their models but are encouraged to. As long as you're not blatantly ripping off hundreds of models and calling them your originals with minimal changes then you've got nothing to worry about.
I'm not a fan of the new slicers that automatically upload your model to some database of theirs and then tries to lock you into some kind of proprietary ecosystem.
Printables has a massive following and they are the leader, it's their lead to lose sure. The same can be said for any industry leading company no matter the sector.
shy kelp
faint sky
I'm not a fan of the new slicers that automatically upload your model to some da...
What?
faint sky
creality cloud?
fervent lagoon
i'm avoiding cloud 💩 for reasons
i am eyeing octoprint, now that i have a spare Pi
ashen moat
faint sky
The license for a model is set by the creator of the model. If you set it with ...
if this was a reply to my Customizer remix comment, I was meant web support for remixing/customizing parametric models, not a license. you can annotate variables in your OpenSCAD model to expose them for editing when opened in the Customizer app UI on Thingiverse (or in OpenSCAD itself), which lets users create custom derivatives on the fly. like I have a tripod-mount lens ring that lets you pick your camera lens from a list and choose different mounting options and thicknesses. I miss that feature on Printables. (random example screenshot)
 faint sky
oh it has a parametric plugin? that's pretty neat. didn't know that.
that's a pretty advanced feature for a website, they must have spent a good amount of time integrating that.
ashen moat
yeah. it's a little clunky. IIRC the preview is a server-side rendered static image, which can be slow and frustrating for 3D. its output is a new remix object published on your account instead of a direct download, which was well-intentioned but spams the site's DB for popular models. still, it's much more convenient than downloading OpenSCAD. they've had it for a very long time, a decade or more? even before OpenSCAD itself added a Customizer-ish UI.
I haven't searched around to see if there's a current standalone Customizer-like service, beyond the soon-closing MakeWithTech site. they tried and failed to monetize with extra stuff.
arctic dragon
Despite the accessibility customizer offers over openscad, I don’t have a super positive experience with customizer. Openscad has worked much more consistently for me, and the learning curve to edit parameters isn’t nearly as steep as creating models from scratch.
iron remnant
Yeah, I think the big problem with Thingiverse is that they treated customizer-based models as models like everything else.
But, also, there's not a package manager for OpenSCAD and I dono you figure out how to properly sandbox OpenSCAD at scale without blowing out the hosting budget.
I feel like there's probably some UI/UX to be done around shared parameter sets for parametric models... and to be charitable you can probably make that work across FreeCAD and OpenSCAD. Because if you aren't customizing, why are you 3D printing? Injection molds are orders of magnitude less trouble.
But, yah, OctoPrint or Fluidd/Mainsail+Klipper are great. Basically the first thing I did when I got my first printer was set up OctoPrint. For my current Voron build, it's all going to be containerized.
ashen moat
the OpenSCAD app's builtin customizer does support parameter sets. for my models, I sometimes make the first parameter a presets multiselect for common variations.
if you use third-party packages, I think thingiverse might provide a few in customizer? otherwise, gotta bake all your packages into your .scad file, which isn't great. would be nice if it could import from URLs like newer javascript envs.
I saw a couple murmurs about customizer in Printables, and it sounded like they'd shift it to the front end by running OpenSCAD in the client under WASM. that would solve hosting concerns.
Klipper was a huge upgrade for my old Marlin-based printer. its community can be prickly, tho.
ashen moat
arctic dragon
Despite the accessibility customizer offers over openscad, I don’t have a super ...
part of it is definitely how much care the author put into designing the part, the parameters, the param names, descriptions, and types. it's a whole second project to set a model up well for Customizer. 😔
iron remnant
I mean, it's fine. After the whole xz debacle, I'm going to find some friends for a long troll where I abuse the klipper maintainers, etc etc etc until I can brick everybody's printer because prickly communities are a threat.
(have I been mad about open source communities for over a decade? Why yes, yes I have)
My longstanding rant is that the open-source-facing hardware world ought to have some concept of a package manager in competition to the closed-source world of PLM tooling because OMG that world is the bad.
But, yah, kinda what I was thinking was the OpenSCAD's customizer interface but even awesomr.
vocal flax
faint sky
The license for a model is set by the creator of the model. If you set it with ...
Printables don't have "true" open source license options. It can be the user's fault but the platform also have some problems
vocal flax
fervent lagoon
i **am** eyeing octoprint, now that i have a spare Pi
Remember to exercise cyber security
fervent lagoon
thanks, but i'm pretty good at that 😃
vivid helm
vocal flax
Printables don't have "true" open source license options. It can be the user's f...
Yeah, that's why I have a bunch of models drafted but not published.
To be honest I'm considering leaving the platform entirely.
iron remnant
I am waiting to have some time so I can work on a proper self-hosting option that has previews and workflows and stuff and I'm at least going to recreate everything I've got there.
I am figuring that it's only a matter of time before Josef Prusa says or does something that gets the entire community deeply angry at him.
And, overall, the situation kinda mirrors the way things were when Digital Photography was new and exciting and everything where people were very excited and built up a community on sites that were not actually making money and so eventually everybody's sad because the site sucks now because perverse incentives only last for so long.
mumble mumble mumble Fediverse 3D printables site mumble mumble mumble
civic aurora
Does anyone know of an enclosure for the Adafruit GamePad? (https://www.adafruit.com/product/5743)
The challenge is that it's got two tiny short-throw buttons (start & select) that are mounted far below the plane of the other 4 buttons and joystick, which makes it harder to design a button "extender" that is precise enough to touch individual buttons yet still reaches the same level as the other controls and is stable (doesn't mis-align in the space above the button).
Clues?

Make a game or robotic controller for any I2C microcontroller or microcomputer with this tiny gamepad breakout board. This design has a 2-axis thumb joystick and 6 momentary ...


 strange ledge
balmy pulsar
i could cnc you one 😛
strange ledge
balmy pulsar
i could cnc you one 😛
You should make me a waterblock instead. 😄
strange ledge
Indeed.
balmy pulsar
i have some old opteron 1u copper heat sinks that are 4-6mm thick at the bottom
(render farm from resident evil 4 :P)
strange ledge
🙂
strange ledge
*rabbit
balmy pulsar
also have some 6mm polycarbonate
a "nice" modern cpu water block is about $100-$150. or am i looking in the wrong places
i dont do water coolihng, so not my area
ha
ha wood water blocks
anyhow.
strange ledge
Err, yeah... 3D printing.... 😛
fervent lagoon
iron remnant
I am waiting to have some time so I can work on a proper self-hosting option tha...
well, i've got the time but my "expertise" is in deep background business systems
strange ledge
Could use 3DP for prototyping a cooler.. 😄
balmy pulsar
hehe
iron remnant
Well, there's https://tcpoly.com/purchase-ice9-materials/

Purchase high-performance raw materials directly from TCPoly. We offer our advanced 3D printing materials in filament and pellet form.
fervent lagoon
🆘 i'm doomed -- i've already printed a thing and decided it needed fixin'
faint sky

Every time you print something you'll always notice room for improvement. 3D printing can be a never ending pursuit of chasing perfection, if you let it.
3D printing is meant for rapid prototyping. Don't get caught up in the chase for aesthetic perfection.
arctic dragon
I think that while this is generally true for most, there are definitely enthusiasts who really enjoy diving way too deep down that rabbit hole. If your printer is a means to an end, definitely don’t forget your end for the means, but if you really want to chase perfection for the process, go for it.
ashen moat
I think my problem is waffling between ends and means. sometimes I want the ends but my printer's in means mode mid-iteration, with no quick path back to ends mode.
iron remnant
I mean... I'm in the middle of replacing my Ender with two Vorons.
fervent lagoon
hey, gotta fail sometimes to get ahead (yeah, it worked, but bleah) - basically trying to marry an MG90S servo to LEGO without said servo shredding gears and/or popping off the contraption -- now i only have to try the other 15 designs i found
my widdle printer will do just fine for "good enough" and that's where i'm sticking (just finding "good enough" though is a bit of a fun slog)
iron remnant
Part of my Evil Plan is that I decided I was too unwilling to actually take my Ender 3v2 apart and Do Things to it so I've got a Voron 0 that can print any of the parts for a Voron Trident and then the Trident will be the "real" printer.
Then again, I also have a lot of things that I want to do other than printer mods and test benchies so I guess I'm just complicated.
fervent lagoon
👿 i have spent all morning fighting with octoprint, a raspberry pi 4, and an [expletive deleted] USB cable and i almost got it to work, but the 💣 server keeps refusing to connect to either the printer and/or any browser
vivid helm
fervent lagoon
👿 i have spent all morning fighting with octoprint, a raspberry pi 4, and an [...
What printer?
This sounds like a backpowering issue.

OctoPrint Community Forum
Printers that show backpowering issues try to draw their 5v power from devices connected via USB. In the case of a connected Raspberry Pi, that can cause undervoltage issues and thus negatively affect stability and performance - we've seen crashing Pis, vanishing WiFi and so on. There's a simple fix that involves putting electric tape or otherwi...
fervent lagoon
for bleeping sake...
vivid helm
fervent lagoon
for bleeping sake...
Yeah, there are a lot of poorly designed printer control boards.
Plus every generation of pi has poor power design.
fervent lagoon
i'm just a software guy, but smh
vivid helm
Octoprint tries to warn you if it thinks there are power issues, but that's kinda tough to do when there a power issues...
It's a common enough problem on cheap printers that the octoprint discord has a bot command to link that page.
fervent lagoon
"really simply, just need tweezers and electrical tape" -- and steady handes, eyes that can see that small 💩 , etc.
if this doesn't work, i'm sacrificing the cable and cutting the power line
random urchin
A company called PortaPow makes USB power blockers. https://www.amazon.com/PortaPow-Cased-Power-Blocker-Single/dp/B094FYL9QT

PortaPow USB Power Blocker - Stops Charging, Allows Data (Single Pack)
fervent lagoon
and about 30 seconds after i cut the red wire...
random urchin
BTW, I had power issues with the RP4 I'm using for Octoprint — kept getting low power warnings. Finally tracked it down to this nifty little inline USB power switch that I was using. The wires in the switch's cable weren't sufficient to handle a RP4's current draw (even though it was advertised as compatible with a RP4), resulting in a voltage drop across the cable. Once I removed that switch, the warnings stopped.
 fervent lagoon
holy frijoles -- the printer is rebooting with only the usb cable plugged in -- with no pi on the other end (i tried with one i didn't hack up, too)
email sent to support -- this will be interesting
fervent lagoon
random urchin
BTW, I had power issues with the RP4 I'm using for Octoprint — kept getting low ...
crud -- i got those things all over the place
random urchin
I've got a bunch of similar ones too. Never had any problems before, but the RP4's power requirements were too much for that thing.
vivid helm
random urchin
I've got a bunch of similar ones too. Never had any problems before, but the RP4...
And it's not your fault. The Pi 4 and 5's power requirements are... excessive. And, unlike USB-C powered laptops, the pi runs at 5V.
faint sky
Yeah that's a common issue I see questions for all the time. I was thinking about designing my own PCB just for that. Came to the realization that if it ain't broke don't fix it and using the sd card is good enough.
serene quiver
I have a 3A buck board wired to the printers 24v PSU, dialed to 5v and hooked to the 5v GPIO rail.. problem solved.
faint sky
In my haste to design the rear of the enclosure I forgot to add a hole for a USB cable. 🤦 Fixed.

 fervent lagoon
serene quiver
I have a 3A buck board wired to the printers 24v PSU, dialed to 5v and hooked to...
fervent lagoon
serene quiver
I have a 3A buck board wired to the printers 24v PSU, dialed to 5v and hooked to...
i have a warranty... 😀
vivid helm
faint sky
Yeah that's a common issue I see questions for all the time. I was thinking abo...
I've thought of designing a power HAT before, but on the other hand I don't particularly want to fix their mistakes.
fervent lagoon
yah, i tried some of the HAT that supposedly back-powers the Pi and whatever is on the board, but i don't have a megawatt 5v power supply 😀
 iron remnant
I thought about making a 3D printer HAT but I feel like most of the stuff I wanted to put in there has been obsoleted by Klipper.
fervent lagoon
i'm looking at slicing software (linux) and what. the. bloody. bleeping. fudge. -- "this is a fork of a fork of a fork of a fork" seriously?
fervent lagoon
and they all have the same broken dependency!!! fun
 ancient crane
I'm super new to robotics and am looking to 3d print a custom attachment for my step motor. I have no clue where to start when it comes to measurements. How do I ensure my design will snap into the motor tip properly etc..
Also I don't own a printer I am planning to design the pieces and print them at a local shop
faint sky
Use a digital caliper to take precise measurements in mm. It might take a couple attempts at the prototype because all printers have different tolerances for thermal expansion or contraction.
fervent lagoon
the stepper motor should have the shaft dimensions listed (they're pretty standard) -- also whether or not they're D-style (part of the shaft is flat); if you're using one of the "common" 28BYJ-48, i would imagine there are already some designs you can utilize
faint sky
Consult the local shop for their tolerances, they'll know how much spacing you might need between the 3D model and what will actually be physical contact.
If I print something with a .2mm air gap on my printer it will produce a .2mm air gap but on someone else's printer it might be .3mm, .4mm or not have an air gap at all. Tolerances are very important to know.
iron remnant
Okay, yay I have a functioning Voron Zero now.
faint sky
Isn't that just step 1 in your master plan or having a 3D printer create parts for another 3D printer? 1 down!
iron remnant
Well, also, my Ender 3v2's hotend is broken and I was kinda annoyed to have 2 non-functional printers and 0 functional ones.
ancient crane
fervent lagoon
the stepper motor should have the shaft dimensions listed (they're pretty standa...
I see these are the exact specs
*Frame Size: 42 x 42mm
*Body Length: 39mm
*Shaft Diameter: Φ5mm
*Shaft Length: 24mm
*D-cut Length: 15mm
*Number of Leads: 4
*Lead Length: 1000mm
*Weight: 280g```And yeah i guess Ill try looking for something already out there and work on it
ancient crane
faint sky
Consult the local shop for their tolerances, they'll know how much spacing you m...
Thank you, Ive never printed before so I would not have known to ask about this
ancient crane
Also to be more specific
I want to 3D print an attachment to snap on to the tip of the motor and the other side would be 4 small prongs branching out to fit in the 4 holes in the picture
 faint sky
Possible but 3d prints dont handle torque well with such a thin component. Prongs of that size will be delicate and probably shear off depending on the speed and torque of the motor.
A better idea might be to use metal prongs and heat insert those into the 3d printed base.
ancient crane
faint sky
A better idea might be to use metal prongs and heat insert those into the 3d pri...
Ah okay, so theoretically would I be able to find a blueprint that already clasps onto the tip of the motor, and then modify it to have a wide enough square base to insert the metal prongs into?
faint sky
They're called motor shaft couplers and they're for going from shaft to anothertype of shaft. It might make it easier to use a coupler it might not, dependson the motor shaft.
faint sky
ancient crane
Ah okay, so theoretically would I be able to find a blueprint that already clasp...
Yes that would more effective than a 3D print but again it depends on the speed and torque. If you want it to be a slowly rotating display piece then a 3d print will work fine. If you want to set a world record for an AI solved rubix cube using rotating motors you'll want something that is capable of far more torsion and shearing force than 3d printed material.
ancient crane
faint sky
Yes that would more effective than a 3D print but again it depends on the speed ...
i see so something like this

ISH
then I would just need to figure out how to install the prongs
to fit

actually like this
ish ...
only this motor has a D shaft so I would need to actually find one that fits but
faint sky
yes, that one. will make your project much easier. as long as your motor shaft is compatible with the coupler. there are different shapes and sizes.
ancient crane
this puts me on the right track atleast
faint sky
yup!
ancient crane
tysm !
faint sky
might even be able to find someone to weld some metal prongs on there and completely skip the 3d printed part.
ancient crane
that would be awesome
or maybe come up with a different way to insert them somehow ...
faint sky
that is up to your imagination as the designer. good luck!
ancient crane
Thanks !
steel storm
vivid helm
And it's not your fault. The Pi 4 and 5's power requirements are... excessive. A...
surprisingly laptop usb c chargers work for pi 5
pi 4 too :D
no trouble with either
steel storm
ancient crane
I want to 3D print an attachment to snap on to the tip of the motor and the othe...
best if u use some little steel rods for that
vivid helm
steel storm
no trouble with either
That's going to depend heavily on the charger. Laptops though usually operate between 14 and 20V, which is what those chargers are designed to deliver.
steel storm
vivid helm
That's going to depend *heavily* on the charger. *Laptops* though usually operat...
my laptop charger is usbc with 5v, 9v, 12v, and 19v i think
but outputs 5v for pi
ancient crane
steel storm
best if u use some little steel rods for that
Just don't know how to position them properly and then stick them to the coupling connector
I wonder if super glue would be strong enough and let me bypass welding
steel storm
yep
superglue works
just scratch up the surface that bonds to the plastic so theres more surface area
you would be surprised by what superglue can do
fervent lagoon
steel storm
but outputs 5v for pi
it will but if you have a multiport charger, the output will vary according to whatever is plugged in needs at any given moment, which will lead to undervolt conditions
steel storm
ah yes, if u power stuff directly from the rpi usb ports then it brownouts
coarse coral
@faint sky my final build for the hardware stack. 2.5 is complete. Still using a model b


 faint sky
Heck yeah! Looks awesome!
vocal flax
ancient crane
I'm super new to robotics and am looking to 3d print a custom attachment for my ...
I highly suggest taking a known good design as a first diy printer. Ive built mine and I wanted to have a printer to build the printer. Also design and/or creativity requires iterations, and the unusable parts are cost if you're using a service.
ancient crane
vocal flax
I highly suggest taking a known good design as a first diy printer. Ive built mi...
so you are telling me to buy a printer
vocal flax
ancient crane
so you are telling me to buy a printer
Not really, I'm suggesting building an established design, instead of designing from scratch. Like prusa bear, ratrig, voron etc.
ancient crane
Ah I see what you mean
vocal flax
It's an old design but if you can get 3mm steel and laser cutter maybe p3steel
I've iterated my parts so much sometimes just the increase a pocket by .2 mm it can get tedious fast@ancient crane
ancient crane
I see, the issue is I dont know how to adapt an already made design
and i feel like the already made stuff wont work for my use case
vocal flax
I haven't read previous messages yet but maybe I can help with brainstorming.
ancient crane
vocal flax
I haven't read previous messages yet but maybe I can help with brainstorming.
gonna try what someone else suggested first and use coupling connectors
with steel rods
might be able to avoid printing all together for this part of the project
strange ledge
Nah, I'm the guy that needs to build one. ^_^
coarse coral
Me reading the last few comments only because it's so out of my league today
 vocal flax
strange ledge
Nah, I'm the guy that needs to build one. ^_^
vocal flax
strange ledge
Nah, I'm the guy that needs to build one. ^_^
Glad that at least someone can benefit from my suggestion.
strange ledge
vocal flax
Glad that at least someone can benefit from my suggestion.
I've got 2x Sanguinololu control boards, so I have something to start with. 🙂
vocal flax
Oh we're those the ones with lpc MCU?
They are slightly annoying to start with a new printer
All the reflashing with SD is yucky imo
Would be nice if there were other way to program it
My new to me printer has skr 1.3 and not liking it
strange ledge
"using the ATmega644P though a 644, 1284 or 1284P is easily dropped in."
Cropped that a bit short.
iron remnant
Ironically the thing that was the most trouble out of my Voron build was the microcontroller board that's supposed to be the thing you just pop in, wire up, and ignore.
Although it still helps to have a 3D printer or at least access to a friend's 3D printer if you are trying to build a Voron from a kit so it might not work as a first printer.
fervent lagoon
dunno what i did, but RPi4 running Octoprint and connecting (i think there's a magic startup sequence that i stumbled across)
fervent lagoon
and an unexpected bonus -- my HomeAssistant setup auto-detected Octoprint, so now my printer is controllable through HA (sometimes i just love the 21st century)
 vocal flax
strange ledge
"using the ATmega644P though a 644, 1284 or 1284P is easily dropped in."
vocal flax
strange ledge
"using the ATmega644P though a 644, 1284 or 1284P is easily dropped in."
Oh NVM those mostly suffer from lack of memory (flash or SRAM)
strange ledge
Would that be a problem?
fervent lagoon
🎉 slicing from cura, using octoprint plugin, to octoprint on a pi 4, to a tina2s -- now all i need is a dust case that's also cat-perchable (because they will)
iron remnant
Glad to see you were able to cura your dependency issues.
fervent lagoon
i just had to string it along
balmy pulsar
fervent lagoon
and an unexpected bonus -- my HomeAssistant setup auto-detected Octoprint, so no...
O_O
 cobalt quarry
I'm having a problem with my printer (Prusa i3 mk3): after printing for some amount of time (a few minutes, half an hour, ... seems random) it will start clicking along with the filiment jerking back slightly. After researching it I have done the following:
- replaced the feed tube (along with the collet and heatsink)
- replaced the nozzle
- cleaned the feed gears
- updated the firmware
- got new filiament
These things improved the situation somewhat but hasn't fixed it.
Any ideas of things to try? I'm on the verge of stripping it for parts and junking the carcass.
arctic dragon
cobalt quarry
I'm having a problem with my printer (Prusa i3 mk3): after printing for some amo...
Does this sound result in a printer failure or interruption to extrusion? It sounds like your extruder gears are slipping due to high pressure in your nozzle. Could be your nozzle isn’t hot enough, or your flow rates are too high?
cobalt quarry
No, it chugs on happily.
I've bumped up the nozzle temp to 225. Again, it helps a little but doesn't fix it. For context, until this started happening it worked perfectly for many years (~6 maybe).
Also, this is independent of the model/file.
arctic dragon
cobalt quarry
I've bumped up the nozzle temp to 225. Again, it helps a little but doesn't fix ...
Hmm, could be a thermocouple drift. If you have a means of physically measuring the temperature of the nozzle, recalibrating the temperature might help?
cobalt quarry
Not really. Though it did somethign about temperature calibration in the new firmware as part of the overall calibration.
The flow seems fine other than when those "hiccups" occur.
vocal flax
I had a similar issue with my custom built, I used to use marlin sensor 1 but changing it to sensor 5 solved most of my issues
My suggestion would be if you can't calibrate then just replace the thermistor/thermocouple (whatever it uses)
cobalt quarry
I tried varying the temperature from a low with pretty much nothing coming out to a high making a goopy mess. There was variation in the grinding but nothing fixed the issue.
 faint pier
If you remove the nozzle, and hold the tensioner open, does filament move smoothly through the (cold) heatbreak when you push and pull on it? Is your tensioner maybe loose?
cobalt quarry
I snugged up the tensioner so it should be fine. The heatbreak was the one thing in the filament path that I haven't replaced. I'll check it.
faint sky
A loud click from a slipping extruder gear is a symptom of a couple of different things.
1. worn extruder gear (you say it's been running for years so this is likely)
2. Too much pressure from the filament roll (filament tangle due to backlash during changing spools). The filament is unable to feed any farther due to spool snag.
3. Too close of a z-axis or over extrusion causing pressure buildup in the nozzle with no where for new filament to go.  This can lead to clogs as well.
For whatever reason, the filament is unable to be pulled/pushed into the hot end. The extrusion gear looses its grip on the filament and rapidly slips making an audible single click. This click is very similar in sound to the nozzle catching on part of an over hang extrusion and making a small click. The click from a slipping extruder gear is louder.
Example of a filament tangle due to backlash from not keeping pressure on the spool during a spool change. The spool is unable to feed the hotend like this and the extruder will continually click. You'll find you're printing nothing but air, eventually, because even a runout sensor will not catch this physical error.

There are other reasons like a sliver of filament caught in the extruder gear and similar mechanical issues with the extruder. If nothing obvious is happening then disassembly of the extruder is most likely to find the root cause
ashen moat
the flow's really okay? not getting underextrusion? does the print time matter? sometimes heat creep can soften the filament in the cold end, causing a jam, or too much retraction can do the same thing, but you'd see underextrusion. could also be a partial clog; you could try doing some cold pulls to clean out the nozzle.
some non-all-metal hot end designs use PTFE tubing into the cold end down to the nozzle. sometimes this leaves a gap between the tube and the nozzle that soft filament can push into, creating a donut that puts extra drag on the incoming filament, like a partial clog. if yours is like that, check that the end of the tube is cut very square and pushed firmly into the hot end. you may need a clip to hold the locking ring in the extended position to keep the tube from moving, too.
could also be undercurrent or overcurrent to the extruder motor, but that shouldn't change over time. something to check as a last resort, if the motor gets too hot to touch (overcurrent) or is very, very cool (potential undercurrent).
faint sky
ashen moat
some non-all-metal hot end designs use PTFE tubing into the cold end down to the...
That's a good point. Another potential source of filament resistance is PTFE tube that has degraded over time causing a restriction in the filament loading from the extruder and potentially an eventual clog.
I have an all metal hotend so I forget about that one sometimes... and is precisely why I got a printer with an all metal hotend. PTFE clogs can be a serious pain to clear.
faint sky
started learning how to do parametric design basics today using an Adafruit video by Noe https://www.youtube.com/watch?v=dhMnX2LUnZo I need to make a couple different sizes of boxes and parametric will make things go much faster.
fervent lagoon
hmmm -- just ran across https://octoeverywhere.com/ -- thoughts?

OctoEverywhere
Free, private, and unlimited. Full remote access, next-gen AI failure detection, full webcam streaming, notifications, live streaming, and more. Check it out now!
iron remnant
There's OctoEverywhere and the competition is Obico.
I've played with Obico a while ago but it never really detected much.
But I also didn't have the camera in the right position, et al.
You can also have fewer ports out of your network by just using Home Assistant to control it, if you've done that?
fervent lagoon
yeah, i'm keeping it all local after further consideration, so HA for a blinky-light notification and PP local/OctoApp for fancier 💩
well, and "obviously" the octoprint web server
iron remnant
I think they are doing some interesting stuff maybe with image recognition to ensure the first layer is perfect, et al so it's an interesting problem and I'm assuming that it's actually some sort of machine learnining-ish thing and not just fifty offshore essentially-slave-labor people in a trenchcoat.
Obico does open source a bunch of their stuff.
And I think there might be some explicitly not-commercial open-source model sets out there.
But, also, if you are in the situation where you need to pierce your network for it, you probably want to think about fireproofing et al.
vivid helm
iron remnant
And I think there might be some explicitly not-commercial open-source model sets...
None that can meet the OSI definition.
iron remnant
I don't have the attention span at the moment to dig into https://github.com/DrAlexLiu/OctoPrint-PiNozCam

GitHub
AI model running on RPi for failure detection. Contribute to DrAlexLiu/OctoPrint-PiNozCam development by creating an account on GitHub.
fervent lagoon
- my wife has a bad relationship with cameras in general
- i have a sub $200 printer -- i sincerely doubt this would actually help 🤣
ashen moat
I thought OctoEverywhere was for accessing your printer remotely and Obico was for failure detection, didn't realize they were dipping in each other's sauces.
if I only needed secure remote access, I like Tailscale's not-quite-VPN for that kind of thing
faint pier
At least with Klipper/Moonraker's API, you can just set up a VPN tunnel
Since you are already using a Pi
faint sky
Not to brag or anything but I figured out a solution to avoid tailscale, klipper, VPN, octo-whatever issues. Use an SD card and walk it to the printer. Genius! 😅
vivid helm
faint sky
Not to brag or anything but I figured out a solution to avoid tailscale, klipper...
Or, if you have children, have them walk it to the printer.
faint sky
Maybe a really well trained cat?
vocal flax
fervent lagoon
hmmm -- just ran across https://octoeverywhere.com/ -- thoughts?
Just No. for cyber security reasons
vivid helm
fervent lagoon
hmmm -- just ran across https://octoeverywhere.com/ -- thoughts?
Well, the people who run it are well-established within the octoprint community. They've also been very forthcoming with security issues in the past, and addressed them promptly AFAIK.
random urchin
I saw this sequence (missing that akir was replying to something unrelated) and thought, "yeah, never trust a cat with your data". 😆
 fervent lagoon
i'm just glad they have decided that the printer is actually kinda boring!
iron remnant


Although, given this is an orange, he's probably mostly up to a zero knowledge sort of attack.
But yeah um, I'm going to have to ask my long-suffering darling spouse to get a stepstool and get my zero off of the top shelf because I can't lift things for a few more days so I can get the Pi Camera in place because right now I'm using my cellphone as a periscope.
fervent lagoon
"lift things"? as a sufferer from shoulder impingement, i hear ya
iron remnant
Yeah, I had a thing done to me last Friday that wasn't ... bad? But if I do too much it'll screw it up.
But it's like "Oh, it feels fine" but also "Honey, can you do all of my housework and other housework-like things?"
...this included dragging a Trident kit in which was a "Yeah, that's going to sit in the entryway till you can move it" situation
ashen moat
faint sky
Not to brag or anything but I figured out a solution to avoid tailscale, klipper...
honestly, after switching to network printing by pushing a button in my slicer, I will never return to the arduous process of plugging, unplugging, and navigating folders on my PC and on my printer's little clickwheel, hoping I can pick the right truncated filename out of the 150 STLs on a tiny LCD. that whole process can get in the sea.
fervent lagoon
and i have the power cord on an HA-controlled switch so i can power on/off when I need it 😈