#help-with-3dprinting
1 messages · Page 12 of 1
 misty gyro
It has defaulted to that.
I also added a brim to the support and made it huge: 12 mm width. That should make it stick a bit better
 faint sky
yup a wide brim helps increase the surface adhesion. if the brim itself starts lifting up that's indicative of too low bed temp or too much cooling.
12mm of brim is gigantic. i usually go with about 4mm brim.
however with your delicate object and very low surface contact then 8-12mm sounds reasonable.
misty gyro
That's a pleasant surprise, time to print grew a lot less than I was expecting. Which makes sense in hindsight, since it's only slow when actually extruding, and with that "lacy" of a model it spends more time moving than it does extruding.
faint sky
the problem with brim is if you're doing a full volume print then the brim will only extend out to the safe margin, something to keep in mind with brims.
i would expect a lot of stringing with that type of model unless you have your retraction dialed in perfectly. a quick pass with a lighter will clean up all minor stringing quickly.
didn't even know hair cages were a thing, had to look it up, very pretty.
misty gyro
True.
Of course, support brim doesn't actually do what I want it to, since looking at the preview there's no change, and the tooltip for "Enable Support Brim" explicitly calls out that it does *not print around the support" only under it. OK, so try it like that with Z hop and temp settings adjusted. If the support disconnects within the first few layers, I'll go the other route.
Strikes me Cura needs a little TLC in that area. I'd switch to Prusaslicer if I could make sense of it, and if it had options for this sort of thing.
faint sky
model sanding sticks might be helpful for cleaning up rough edges

Features: Promote your creativity and practical ability: These plastic model tool kits are helpful supplies for you to apply, while you are making your personalized figurines and miniatures, which can promote your creativity and enhance your practical ability. Portable to carry: Since these fine...
Can use an xacto to cut them into small strips for sanding between the lattice work
foam nail files work well too
as long as your z-offset and bed temp are set to grip material tightly then a brim does a world of good. it can be a pain to take off though, you might need snips depending on how well it gets attached to the print. a brim isn't like support material that comes off easily. the brim is part of the bottom layer.
misty gyro
OK. Promising so far. There are about three or four layers down now, and the support hasn't detached. So crossed fingers. I'll check it regularly watching for any issues.
faint sky
Here's what I'm currently printing. Anything tall and vertical benefits immensely from the additional surface area of a brim.


Because the bottom of my entire piece is already flat with a large surface area the brim doesn't have to be large. If I was doing a lattice dome like you I would definitely go at least 8mm brim.
The brim just helps a little to prevent warping and/or show signs of warping. If the brim detaches then I'll raise bed temp a little.
If you get warping higher up but the brim is still attached and nothing wrong on lower layers then reduce cooling. Warping happens from being cooled to quickly. Especially a problem during winter in an unheated room for example. The difference of ambient air temp vs the temperature of the print is what causing extreme warping.
Like going from a sauna and then jumping into a icy lake. Rapid shrinkage will occur.

 coarse coral
 faint sky

printed overnight and ran out of filament. went past the filament runout sensor. happy to report the bed and nozzle temp stayed at a consistent temp the entire time. loaded a new spool and it picked right back up where it left off.
this is different than pausing a print. during pause, eventually over about 30 minutes the bed temp and nozzle will slowly draw down to 0 and the print will detach.
after owning a printer for about a year this is the first time I've EVER run out of filament during a print for more than 5 minutes, out of fear the printer would eventually and slowly dial down to 0. I can sleep easier now knowing it will in fact be ready for a reload in case I fall asleep on it and not detach the print.
Thank God for filament runout sensors. ❤️
 shy kelp
Finally it did ship, but no tracking yet

 signal yarrow
2D Printing question but thought this would be the best place to ask.
I might be trying to do an impossible thing but want to ask before I give up.
I have a generic 2D Plotter. I can connect to it with the UGS (Universal GCode Platform software) via port cu.usbserial-10 . Which I'm guessing they're not showing the /dev/ part so the actual address would be /dev/cu.usbserial-10. I can send it GCode files that I create with Python successfully to plot.
I'd like to use Evil Mad Scientist's plotter library. Which is designed for their 2D Plotters but I thought might work on my plotter as well since I thought it might just send GCode instructions.
When I get their sample code from here, and replace the port like so:
ad = axidraw.AxiDraw()          # Initialize class
ad.interactive()                # Enter interactive context
ad.options.port = '/dev/cu.usbserial-10'
if not ad.connect():            # Open serial port to AxiDraw;
    quit()                      #   Exit, if no connection.
If I execute it, I hear a little noise from my plotter however I then get Failed to connect to AxiDraw /dev/cu.usbserial-10 .
Is there some handshake happening between Python and the software on the microcontroller that's not happening and preventing the connection?
coarse coral
sorry @signal yarrow that's outside my realm of knowledge. i haven't seen many people talk about 2d printing here, altho there are some CNC users. maybe they'll come along
 balmy pulsar
plotters are kinda like cnc, but they dont use the same type of control (new ojnes anyway)
speaking of cnc. after much vacuuming of kg's of iron filings...
 coarse coral
i'd love to roll some marbles down that
 vivid helm
balmy pulsar
speaking of cnc. after much vacuuming of kg's of iron filings...
vivid helm
balmy pulsar
speaking of cnc. after much vacuuming of kg's of iron filings...
Doesn't vacuuming those pose a fire hazard?
balmy pulsar
not really.
its the graphite dust that is a hazzard, but it isnt a big deal with iron. with carbon fibre it is horrible
can short out machine controls and do other bad things
vivid helm
To clarify: what I'm thinking about is the possibility of a thermobaric explosion. Fine powder in an oxygen rich environment can cause it.
coarse coral
vivid helm
To clarify: what I'm thinking about is the possibility of a thermobaric explosio...
let's do it
vivid helm
I'll be content to watch you do it from here.
 alpine glen
thermobaric explosions are probably against something in the adafruit code of conduct 😝
coarse coral
im just waiting for some fish
vivid helm
It doesn't need anything special, just the right conditions. Also we are very much getting into territory that could break the code of conduct.
shy kelp
coarse coral
<@456226577798135808> send me the ingredients
i think you got the wrong name lol
balmy pulsar
vivid helm
To clarify: what I'm thinking about is the possibility of a thermobaric explosio...
ha, nah. this isnt a fine powder. these are shavings. about as "fine" as table salt.
coarse coral
i have tortilla chips
balmy pulsar
ha
vivid helm
balmy pulsar
ha, nah. this isnt a fine powder. these are shavings. about as "fine" as table s...
Ah makes sense
coarse coral
i'd love some mac and cheese right now
 iron remnant
Yah, when I worked at a 3D printed car company and they had SLM printers, I didn't even really need the "fine metal powder might asplode" part explained to me, but they were not amused about me calling a piece of software "sparkler"
faint sky
12 hours to print 2 bracket halves that join together... and they're too big for the box. 🙄


Have to reduce each end by 6mm. In total 12mm off. :/
The gap in the middle shouldn't be there. Messed up in multiple places. This is why we prototype.
This isn't even the full shell, just the faceplate for fitment.
faint sky
Much better.

can't even tell it's 2 pieces. 🙂
the entire face will be covered with a layer of plexiglass with a mirror tint covering. You won't even see the black bezel hopefully.
 gaunt lily
Any tips for unclogging a nozzle? I've tried both using a needle and a cold pull with nylon filament. The needle came out clean but I couldn't get the nylon filament in enough to do a proper cold pull.
 stuck grail
gaunt lily
Any tips for unclogging a nozzle? I've tried both using a needle and a cold pull...
stuck grail
gaunt lily
Any tips for unclogging a nozzle? I've tried both using a needle and a cold pull...
I bought some thin metal rod that I was able to shove through the extruder. Came from a hardware store, Home Depot in this case, and was sold as some sort of musical instrument repair wire or something?
Let me see if I can find a link.
stuck grail
Might have been this: https://www.homedepot.com/p/312254397
coarse coral
gaunt lily
Any tips for unclogging a nozzle? I've tried both using a needle and a cold pull...
Take the nozzle out and use a solder iron to help the process
I usually just buy a ton of nozzles and replace when blocked. Can't be bothered messing too much and they are quite cheap
faint sky
That's not a bad idea. a pack of nozzles is pretty cheap and not the worth the hassle sometimes.
I had a clog so bad that even heating it up to 290C didn't clear it. Sometimes you just have to disassemble the entire hot end. Depends on the printer though.
Some Bowden setups are known for getting little bits of the PTFE crispy and they can get swept down into the nozzle.
coarse coral
Yeh you can get like £20 for 15 or something like all different sizes and types
I usually go with luter (brass) they seem to work pretty well
Yeh Bowden mixing is real
gaunt lily
Thanks y'all, I'll try those when I get a chance
I'm using an Ender 3 V2 which even came with a replacement nozzle
faint sky
same, the hardened steel are a little more expensive.
coarse coral
gaunt lily
Thanks y'all, I'll try those when I get a chance
I'm using an Ender 3 V2 which e...
Nozzle clog could be a symptom of nozzle too close to build plate causing it to backup
misty gyro
coarse coral
Yeh Bowden mixing is real
That's part of the reason I switched to a direct drive hot end on my Ender 3 V2. Works like a champ, and in just under two years of use, I've never had a nozzle clog.
 misty ibex
faint sky
Much better.
misty ibex
faint sky
Much better.
What exactly are you making (enjoying watching the progress)?
faint sky
At first was going to be a jewelry box with music when the lid is opened. Scrapped that idea for an infinity mirror with a TFT display. Not enough room for the lights so scrapped the infinity mirror idea. Not enough room for all the features. So just going with a mirror and vanity lights.
Then had to trim the end’s to fit and now don’t even think the recess is wide enough for two short neopixel strips. 😞 It’s a work in progress.
 misty ibex
Ahhh, I wish you luck creating something interesting. Can you embed the neopixel strips into the frame you printed to hold the mirror?
 vocal flax
faint sky
Have to reduce each end by 6mm. In total 12mm off. :/
vocal flax
faint sky
Have to reduce each end by 6mm. In total 12mm off. :/
For cases like this I suggest using paper templates. A quick drawing and 2d printer does the job fine.
 elder oxide
faint sky
Then had to trim the end’s to fit and now don’t even think the recess is wide en...
elder oxide
faint sky
Then had to trim the end’s to fit and now don’t even think the recess is wide en...
Have you thought about the skinny neopixel strips?
faint sky
I had not seen those, thank you. That might work!
Only 2mm recess for the lighting, probably not deep enough. 😬 It's not deeper because it would run into the mirror holding cutout.
It's 15mm wide. With the 4mm skinny neopixel I can make the recess deeper.


 faint sky
depends on nozzle temp and cooling. i've seen bridge gaps of about 100mm. you can do it with just the right settings. i call it airwalking because the filament hardens in midair with enough cooling. doing it without warping is voodoo magic i haven't figured out yet.
 lean flower
Nozzle temp is 210 with the fan going at full throttle. The high nozzle temp is too avoid the hot end from clogging
faint sky
nozzle temp is relative to the printer and thermistor, every printer is a little different in the range it likes to print. that's why temp towers and calibration are essential. what is hot to you might be low to others.
missed bridges are really hard to see in your image. the print looks pretty good.
Here's the backside of the mirror. Will likely take many iterations to carve out space for the display, feather, usb cable, etc...
 misty ibex
Will the display show through the mirror?
lean flower
Fully 3d printed uav fuselage. Still need to design the lifting surfaces and motor pods. And get a flysky micro receiver for comtrol. Its going to be a tail dragger when its done
 faint sky
misty ibex
Will the display show through the mirror?
faint sky
misty ibex
Will the display show through the mirror?
Im going to attempt to make a cutout in the mirror with a dremel for the display. It might go horribly wrong.
misty ibex
faint sky
Im going to attempt to make a cutout in the mirror with a dremel for the display...
Do you not have enough space to put it behind and use a two-way mirror?
faint sky

not with the display, feather, battery, and usb panel mount cord.
and will have to remove the pin headers and dupont wires to hard wire everything together to save space.
i'm hoping to put the two way mirror across the entire front face using a piece of cut acrylic and two way tint.
maybe it'll have an infinity effect, maybe it won't. i don't know.
There's about 12mm of space behind the mirror. That's all I have to cram stuff in there.
misty ibex
How thick is the mirror?
coarse coral
misty gyro
That's part of the reason I switched to a direct drive hot end on my Ender 3 V2....
Nice
faint sky
misty ibex
How thick is the mirror?
3.15 and gave it a tolerance of 3.5mm for each side of the holding bracket. The backplate bracket is adjustable and will grip it no matter the thickness.
pretty sure it's not a glass mirror
8x10 acrylic mirror https://www.amazon.com/dp/B0773XSBZM
2 pack in case I really mess up the first attempt. 🤷
dremel with a grinding disc will likely melt through it and i'm ok with that.
Here's the other side of the backplate (with mirror back). Has a place for the feather and battery compartment.

It's uh, a big battery. 100mmx60mmx11mm. 10,000mah

and yes i'll ensure the polarity is correct before i hook it up.
misty ibex
Could you use this 2-way: https://a.co/d/g6Kxx7U and then not need to cut? Same thickness (basically) and it's 10x10 so would need to trim one edge

SPEEDYORDERS Two Way Mirror 2 Way Acrylic Mirror Sheet - 2 Way Mirror See Through Mirror - Plexiglass Sheet - Smart Mirror - Two Way Mirror - Unbreakable Made in USA 1/8" 10x10 Inches
coarse coral
I'm selling a cr6se to anyone in the UK. £120 to me and you cover shipping is all I ask.
I've been quoted about £15 shipping
 faint sky
misty ibex
Could you use this 2-way: https://a.co/d/g6Kxx7U and then not need to cut? Same ...
faint sky
misty ibex
Could you use this 2-way: https://a.co/d/g6Kxx7U and then not need to cut? Same ...
Yeah that could work but it's already what I'm basically DIY making on my own and I already have the supplies.
misty ibex
Gotcha. I read it as you had two layers of mirror (the one you are cutting, and a piece of acrylic with tint)
faint sky
Well umm yes that is actually correct. I have 2 different pieces.
The acrylic mirror I purchased has some kind of epoxy back coating. The other piece I have is clear acrylic that I'll be applying 2-way mirror tint to.
I've used it before for 7 segment displays. I have a huge roll of it.


Just cut a piece of acrylic, apply the tint, and it looks like a mirror when the display is off.
Putting the actual mirror behind that and cutting a window for the TFT display... might make an infinity mirror. Just a matter of getting some light between the mirror and the 2-way tint on the top acrylic panel... but there just isn't any room for sideways lighting... hmmm maybe stuffing some noods in there might work!
misty ibex
Ahhh, now I got it.
coarse coral
nice sunglasses @faint sky
shy kelp
yeah those are some nice glasses
faint sky
those glasses also have the tint on them.
Though I didn't include that part in the video.
faint sky

There are many different ways to design the enclosure for this type of thing. This is what I came up with. 🤷
Pretty good idea of what it'll look like once it's all bolted together. The wiring will be much cleaner.
shy kelp
Eh creality took an ethernity to ship, but the shipping was quite fast
Likely they needed their time to extra check for duplicates and prevent abuses, I guess
shy kelp
coarse coral
so did u get a whole new printer or just parts?
Just the "upgrade kit" so the extruder/hotend part, a camera, a pla spool
But since I got a partial refund from the seller, I ended up paying the whole thing around 350/360 euros
coarse coral
that's really good if you can get the thing to work and print fast! as advertised!
misty ibex
faint sky
I like the little battery pocket. Am I assuming correctly that the screen will be on the top or bottom?
faint sky
The TFT display is the red one and is facing in the direction it's supposed to. Will try to make a rectangular cutout for the display portion of it, through the mirror, right where it is. It will be mounted using heat set M3 screws into the black bracket ears on each side.
shy kelp
I wonder what I could use to fill those holes
I know that there are some window silicone stuff that may do the job but idk
In the display area it's particularly big

 faint sky
Are there fans that vent outward? Could be used as the intake air for the fans?
Could always 3D print a filler piece to fill it . 2 part bracket that you bolt together from each side.
coarse coral
yeh i reckon that would work for sure
you can call it K1 Fast Brackets - "It's the first thing you print"

 strange ledge
 shy kelp
Nvm there's a backscrew holding the piece
I'd wish there was some YouTube content filter
So no more 10 minutes of no sense
coarse coral
ublock has yt shorts blocking
just add it to ur filters
be excited to hear how u get on with the k1. looks really good
such a bargain price also i hope
🤞
 bleak pollen
Has anyone embedded clear acrylic during a print to act as a "window" in the finished product? (It's an electronics case)
 half dew
I've never seen that specifically, but people embed so many different things I can't really see it failing
faint sky
during a print... not to my knowledge but that's a neat idea.
i couldn't do it even if i wanted to in my project because it's twice as big as my print bed. it's why i had to make it in halves.
for a small window just to show the microcontroller in an enclosure that's doable.
part of the problem with an embedded acrylic sheet would be ignoring the overhang without supports and using the acrylic itself as the surface.
vivid helm
Shouldn't have any issues doing it. I've embedded things like magnets before.
coarse coral
Yeh its a very cool concept
 arctic dragon
There are videos of people pouring sand into the infill of a print for a weighted base. I’m sure a window is doable with the right settings.
vivid helm
With gyroid you can just pour in epoxy (although you have to leave an end open)
faint sky
Some people use different thicknesses of rods for stuff like that too. Some for hinges, some for structure, some just for weight.
iron remnant
Obviously you need to weigh the options
This I saw lately and it looks really cool. Printing on fabric and adding sequins.

Recycled Plastic Bags never looked so Glam💙
.
.
Made with a recycled PETG from @basf_forwardam which is made entirely out of recycled plastic bags ♻️
.
.
#3dprintedfashion #3dprinting #3dprinted #3dprinter #bambulab #3dprints #additivemanufacturing
Likes
3535
 Instagram
Showed it to some circus performer friends
shy kelp
What's for silicone grease between the hotend part and the cooler block?
vivid helm
shy kelp
What's for silicone grease between the hotend part and the cooler block?
You're talking about thermal paste between the heater block and heat break?
shy kelp
vivid helm
You're talking about thermal paste between the heater block and heat break?
I thought at first it was thermal paste too, but apparently it's different, the "silicone grease" seems to be an insulator? Idk
vivid helm
Might be a nonconductive thermal paste, but it doesn't make sense to put grease there.
half dew
iron remnant
Showed it to some circus performer friends
We spend a lot of time making mirror costumes this way - the rise of LED props and apparatuses made shiny customs even better
coarse coral
brim me up scotty
coarse coral
faint sky
If you get warping higher up but the brim is still attached and nothing wrong on...
using brims to make sure tiny custom supports work. my pull off supports are .5mm as per makers muse recommendation, they work well
and yeh also smashed out a few good prints to proof my print today, doing a full proto print now and guess what it's already unstuck oops
faint sky
Haven’t tried it yet. Don’t even know if it’s the correct jst. I have spares from adafruit anyway. It’ll work one way or another.
Waiting on some new displays and UM featherS3’s to arrive. Decided against rewiring the ones pictured.
coarse coral
i haven't been able to follow your recent project but hope it's going well
faint sky
So will have to put off this project for 2 weeks. Will be out of town for a while.
coarse coral
nice have a good trip
i got a ton of smaller parts in for my hobby project today and didn't all work out and accidentally ordered 2 pin push buttons which was stupid, i guess i'll just make it work. maybe this is how it was supposed to be
faint sky
Depends if its a latching or momentary switch.
coarse coral
these are momentary but i'm just thinking about the footprint and weld
v1 hobby project used 4 pins but i cut off 2 lol for the design constraints
but v2 doesn't have these constraints. i'm sure i was just optimising within my own head space
just deciding if i want to roll a step up and charge circuit into a custom pcb or use a pre fab... pre fab seems to be making me happy but only because i'm not able to do SMD... that said i might change this knowing i can still do a through hole charge circuit
whatever. have a good trip all the same
shy kelp
Something is smoking after I mounted everything up
What a pain I don't have time for this
shy kelp
Maybe it's just the nozzle new that smokes for a while or bad unit idk
Everything seems fine
vivid helm
Creality and smoke are on a first name basis. That being said, what temp were you running there?
faint sky
smoke is concerning, is there anything you had to assemble that maybe you didn't route correctly?
faint sky
vivid helm
Creality and smoke are on a first name basis. That being said, what temp were yo...
that is a great question. everything is usually in celsius not farenheit.
vivid helm
Oh I always assume Celsius.
What I'm concerned about is whether they went above 240C, at which point PTFE tube starts to decompose and offgas.
I'm not sure whether that printer has an all metal hotend or not.
faint sky
I don't think the K1 does. Has metal extruder but not full metal hotend, the limit is about 240 yeah. I bet Cura would still let you do higher than 240 but then bad things would happen as you described.
vivid helm
Cura won't limit you, and Creality is infamous for their firmware builds.
half dew
shy kelp
Something is smoking after I mounted everything up
What a pain I don't have time...
This is why I bought a printer that promised less tweaking. Haven't had to deal with the printer being a hobby for over a year now but it cost me money (probably made up in time really though)
elder oxide
Creality issues are hit and miss. Sometimes you get lucky (like me) and only have print issues maybe once a year. Or you end up with a total scrap heap. There’s not really an in between
elder oxide
JLCPCB or PCBWay
arctic dragon
Or wood, if you have access to a wood shop
faint sky
Are you looking to hang it on a wall or a tilted stand?
The dimensions for each matrix panel are included in the product page. Should be able to design something in fusion 360 and send off to a printing service to print.
An upright stand is a bit tricky due to the weight of it wanting to lean forward. The base of the stand will need to be weighted in the back to offset the panel weight.
It’s doable for sure.
My house just flooded and preparing for a vacation or i’d spin up a quick design for you. I have a lot going on. If you need help and tips on designing your own stand there are people that can help with those questions here too.


The problem with a border fascia for matrix panels is you’ll lose at least 1px all the way around.
So its best to hook into the 3mm mounting screws in the back (if you panel has them).
An example of a tft stand is the basic idea but youkd secure it with 3mm screws in the back.
Heres 12 panels. Without the screw holes it would be much harder.

Then definitely use them in your design. You could create a wall mount bracket for 1 panel no problem but you mentioned an upright stand which means it’ll need a weighted base.
Ah ok those are the same 5mm pitch panels i have.
Each panel has 3mm screw inset on each corner of the panel.
Yes you can power 1 matrix panel directly through the matrix portal s3.
Yup. Its a great design. Ladyada put a lot of thought into that one.
Since i have some i might have some free time to whip up a design for you tomorrow.
Would you like it to be wall mountable?
Or a stand?
I might be able to design it in a way it could do both.
Then you can just take the stl and fire it off to a printing service.
I don’t usually accept friend requests. Would rather have chat visible so everyone can learn.
Dm’ing links im also not likely to click on.
Its nothing personal just a lot of things have happened to most helpers mods and admins here so its just a thing.
Github links i will visit and gists are great for sharing.
That looks great! Much cleaner than my usual code too. I’ll definitely be picking up some good habits from reading more about it. Very well documented too!
A stand will likely be as deep as it is tall. Then you weight down the back.
Pssh your code looks better than mine.
I can probably manage to make it hangable or as a stand. Will think about it tonight. Its bed time and about to go to sleep.
just measured the back and it's about 310mm x 145mm screw center to screw center. was a quick measurement with a ruler. if you have more precise measurements that could help.
the cad drawing associated with that product page is incorrect and not for the 5mm pitch panel, or at least not the version i have.
iron remnant
Well, I hope whoever screwed it up feels like a cad now.
shy kelp
260C (its perg) but it doesn't come from the ptfe
Everything looks fine
The only thing that perplex me is that the cables of the heating cardridge are just copper, or is the thin copper protection "skin" enough (something like the photo)?
 shy kelp
Idk
 arctic dragon
I’m assuming that’s enameled copper wire. Things that conduct electricity tend to conduct heat as well, and most plastic insulators don’t allow for temperatures above 150c. That being said, if there is anything wrong with it, it’s really hard to tell with the picture. There might be a spot that looks like it could be slightly burned, but it could just as likely be residue from something else…
Is that hotend rated for 260C? Most hotends either recommend 240 max or can go to like 500.
faint sky
Here's the backplate for a single Hub75 P5 panel for use with the Matrix Portal S3. Still working on a stand idea. Thinking about a print in place fold out so it can be a stand or hung on a wall.
 shy kelp
arctic dragon
Is that hotend rated for 260C? Most hotends either recommend 240 max or can go t...
shy kelp
arctic dragon
Is that hotend rated for 260C? Most hotends either recommend 240 max or can go t...
It should be rated for around 300C
Anyhow I may have some termal paste left in the wires
Although online I see that new hotend may smoke for a while...
faint sky
I was wrong it will do 300C and has a full metal hotend. The PCB for the nozzle fan is directly attached to the hotend heatsink though. Potentially turning some of the jst connector brown. That's pretty close to the heatsink. https://www.youtube.com/watch?v=_Er9MPy4S6s
That was just a quick measurement last night because I was curious. I took off a panel today and measured everything pretty well.

The most important thing is getting the hole spacing correct. You'll want to get some M3x10mm bolts and M3 washers. The brackets are 5mm thick.
lean flower
This temp tower is a mess. I have my retraction set to 5mm so i think i'm going to need more or turn on combing for future prints. Stopped extruding at 180C
 coarse coral
lean flower
This temp tower is a mess. I have my retraction set to 5mm so i think i'm going ...
coarse coral
lean flower
This temp tower is a mess. I have my retraction set to 5mm so i think i'm going ...
i had similar problems with neo max.
didn't find a solution for so much stringing. i just got a new printer
lean flower
I will keep experimenting until i figure it out or until i run out of filament
coarse coral
I tried retraction all the way up till 5mm and different speeds also. Didn't do jack
faint sky

backplate isn't touching stand base so will be printed with support material as 1 piece. just have to remove the infill and screw together


doing a triangular design would take up a lot of volume. maybe will add braces as another layer.
assembled back

assembled front

This seems easiest to weigh down the back with some heavy objects and can acts as a desk organizer of sorts.
To hang it on a wall just leave off the back stand and only use the back mounting plate. Use the provided screw holes with M3x10mm bolts and some hanging wire, don't need anything special to hang it on a wall.
faint sky

Printables.com
For 1 single 5mm pitch matrix panel | Download free 3D printable STL models
Probably best to print them as 2 pieces.
faint sky
lean flower
This temp tower is a mess. I have my retraction set to 5mm so i think i'm going ...
Ceasing to extrude when temp gets too low is normal. Don't worry about that. A bowden setup normal retraction can be quite high.
If you're still oozing and cooling is at 100% it'll create stringing. Have you tried calibrating e-steps to ensure your flow rate is accurate?
Also print speed matters, what speed are you printing your temp tower at per mms?
faint sky
It's about 6" depth. 3" depth for a fireplace mantle isn't much.
I can design a VESA mount and you can put it on a reticulating arm like a PC display. Position it however you want?
lean flower
faint sky
Also print speed matters, what speed are you printing your temp tower at per mms...
i'm running my machine at 70 mm/s the default speed was way to slow for me coming from the ender 5 max and Wanhao duplicator. the cr6 max is running default factory firmware. so i don't know what the e steps are set to by the factory. those settings are hidden on the machine
faint sky
According to your temp tower 215C looks best. Do a retraction tower test with 215C as the nozzle temp. Try different retractions. Also can try a retraction tower at different speeds. 50mms is typically the fastest you can go with Marlin and most Ender clones. Klipper is a different story but requires a lot of settings to be dialed in to perfection. Your tower looks great though! It's just dialing in the retraction and speed now.
Can tell you're printing slightly too fast because there's a little bit of ringing on the tower numbers... which is why I asked about your speed to begin with. 😉
What speed you want to print at and what speed your printer will reliabiliy print are always two different things. I wish my printer could print at 60-70mms but it just won't do it without stringing and quality issues. So 50mms is my absolute maximum. For the highest quality I'll print PLA at 30mms and for PETG 15-20mms but I can do up to 50mms as a rough prototype.
Also filament that has absorbed some moisture tends to print slightly worse than dry filament just taken out of the package (or from a filament dryer box).
Also avoid PLA+ filaments. It's easier to use either PLA or PETG. PLA+ settings are almost at PETG settings so by that point it's better just to use PETG anyway.
lean flower
i have been eyeing a filament dryer box from E-sun for quite a while now will be the next thing i buy for my filament. got some really bad rolls thats in some bad need of drying

3D Printing Store
The Esun eBox is a all in one filament storage conditioner. It has 3 main functions: Heating and Drying the filament Protecting the filament from dust and dirt in the environment Weighing the filament to inform you how much filament is left on the spool
faint sky
I'd watch ricky impey's video on the Sunlu one first before pulling the trigger. You can make it one of the best driers with a fan mod but it'll take some electronics modding.
The esun and sunlu's are very similar. https://www.youtube.com/watch?v=8ET9EJrA0v0
vivid helm
Eibos dryers are the only dedicated filament dryers I can recommend. Otherwise you'll probably be better off with a modded food dehydrator.
faint sky
Agreed. There's a new one about to come out that looks very promising.

https://sunlu-filadryer-s4.kckb.st/506d9156 (copy & paste into your browser after 3pm UK and 10am EST 13/9/23)
First 300 Backers pay only $79.99
Please read Kickstarter terms & conditions before backing.
I just got a whole room dehumidifier and an Eibos dryer but about to go on vacation for 2 weeks so won't be able to use them for a while.
Just arrived today. :/
I will still be posting here on mobile since my brother got a new Elegoo Neputne 4 he wants me to help setup. Should be fun.
coarse coral
faint sky
I will still be posting here on mobile since my brother got a new Elegoo Neputne...
Love my Neptune 3 plus. Like so much freedom with it! Neptune 4 also looks great! Let me know what you think.
Fyi setup should just be a nice 30 mins to an hour assembling and familiarising then another 30 doing a great levelling.
Any other tuning I haven't done yet, that said I'm printing so well now. Way better than all my previous printers and first try too.
shy kelp
I may have found the cause
The red silicone socket seems to have burned
Without it, it doesn't smoke
So I assume that's it, but...
 faint sky
The sock is there to help prevent buildup on the nozzle. You can print without it but you’ll be more prone to globing.
elder oxide
faint sky
The sock is there to help prevent buildup on the nozzle. You can print without ...
The sock caused me more issues than it helped. I haven’t used one in like 2 years lol
faint sky
That can happen too yup. They deform over time.
shy kelp
faint sky
The sock is there to help prevent buildup on the nozzle. You can print without ...
Yes but still...
Tried with the older black sock, and it fumes also
When it didn't with the old hotend
So idk, or is it running hotter than it's reporting or idk what
faint sky
Possible, pid tune?
balmy pulsar
speaking of pid tuning.... sigh. haha
 vocal flax
What's your job man? You always have the coolest stuff here
balmy pulsar
i just collect junk
ha
although today the junk is working. woo.
i bought those sanyo servo drives years ago on ebay, thinking i could use them for an old machine and it did not work. but now i have a new use for them and it seems to be working
shy kelp
faint sky
Possible, pid tune?
Done, but there's no difference
Still burning,
I've emailed creality about it, but what a pain
lean flower
My latest wiring mess. Still a lot more 3d printing to come for this circuit. The display is a 2.4 inch nextion display. Will need to design an enclosure big enough to fit a mean well 12v psu with the arduino and stepper driver inside. The power connection for the stepper is a bit jank but will be sorted in the future when the final system is built
 coarse coral
Neptune 3 Plus has corrupted 4 sd cards so far and can't get the printer to read any of them. Short file names, no directories (all gcodes in root). Trying a format of this card without "quick format" checked in Windows.
I knew there was a problem with the SD card side from start since the supplied SD card was only readable with the USB adapter that it came with and wouldn't read with my own third party reader. Wonder what the solution is, I have contacted Elegoo support. Fingers crossed it's an easy fix.
have a feeling it's a 8gb max limit altho haven't seen requirements of that, so going to try whatever to fix the corrupted original card and replace
coarse coral
managed to recover it with windows disk manager. explorer ui wouldn't let it format, it's now reading again with the printer
balmy pulsar
not 8gb, i think 16. but yes, i vaguely remember not being able to read large cards
coarse coral
yeh the sd card has corrupted again but seem to be able to fix it with disk manager. i'll probably just buy an 8gb next. tried another 16gb (low grade) and didn't get that, though i didnt do disk manager with it
faint sky
Well that sucks. I’ll keep an eye out for that. Apparently we need to build some tables before getting to his 3d printer.
lean flower
i actually built my cr6-max on the ground before moving it too the table where it sits now
coarse coral
faint sky
Well that sucks. I’ll keep an eye out for that. Apparently we need to build so...
yeh it's corrupting frequently now and only way to save it is disk manager format. balena doesn't give it a good clean write either, so yeh it's probably limited to 8gb and the one that shipped with mine is corrupting. hoping ia higher quality 8gb will solve this issue long term as the printer is running dreamy
faint sky
Hope it’s the SD card and not the formatting. That is concerning.
vivid helm
SD cards are notoriously unreliable.
faint sky
For some reason especially ones bundled with the printer. I think the Neptune accepts a USB stick too.
vivid helm
faint sky
For some reason especially ones bundled with the printer. I think the Neptune a...
Yeah random noname cards aren't going to last. For that matter, I wouldn't even trust name brand cards or flash drives off Amazon or eBay. Too many counterfeiters and bad actors who might put some less-than-friendly code on them.
Personally I recommend ordering directly from the manufacturers. Kensington, Samsung, and Crucial are all decent options.
iron remnant
I have stories that I cannot go into. But, ironically, yeah, your advice holds.
balmy pulsar
kensigton sd card locks?
as for the cards in the printer... i have issues with one of mine, but it is not the card's fault. i think (theory only) is that the heat of the printer does not play well with the cards or the reader. they often start out working, and then mid print give up.
but then are fine in my pc
vivid helm
balmy pulsar
kensigton sd card locks?
Sorry, I meant Kingston.
elder oxide
vivid helm
Sorry, I meant Kingston.
Lol Kensington, the SD Card of the Royal borough
 arctic dragon
All SD cards technically have a limited lifespan, so it’s best to go with reliable brand names if you can’t risk losing data.
On the other hand, the cheap stuff isn’t hard to replace, so merits to both.
 winged helm
Prusa slicer. How can I enforce supports where they are missing here?
 vivid helm
Well, first I want to point out that your first layer is way too high.
Second, PS does have manual support enforcers. Click the paintbrush on the left toolbar.
Third, what layer height and overhang angle is that?
winged helm
vivid helm
Third, what layer height and overhang angle is that?
.3 height, 26 angle. I changed to 90 and am painting in. How far would you lower?
vivid helm
winged helm
.3 height, 26 angle. I changed to 90 and am painting in. How far would you lower...
26° is a very shallow overhang even at 0.2mm, so it'll be tough to get it to look really good. That being said it you try 0.2 or 0.15mm layers with at least 3 perimeters at low speed with lots of cooling you may be able to get a decent result without supports.
winged helm
vivid helm
26° is a very shallow overhang even at 0.2mm, so it'll be tough to get it to loo...
Hmm I just painted in supports. Are you able to guess a good height to drop my first layer?
vivid helm
Try 0.2mm.
vivid helm
No, layer height.
Your z offset is printer-specific so I can't tell you what to set it aside from 'lower'.
winged helm
Ok
I feel like my printer regularly loses its initial calibration and therefore Z offset. About every 150 prints
vivid helm
That... sounds like a mechanical issue. Do you ever see/hear your z motors skipping?
winged helm
Nope. It's software. It completely resets
winged helm
vivid helm
That... sounds like a mechanical issue. Do you ever see/hear your z motors skipp...
Huh. This happened at - 1.19
 vivid helm
winged helm
Huh. This happened at - 1.19
vivid helm
winged helm
Huh. This happened at - 1.19
Too high still. You shouldn't see any gaps between lines.
coarse coral
winged helm
Prusa slicer. How can I enforce supports where they are missing here?
you can add supports to the model in autocad if u are able to. .5mm tabs to areas that need supported. they snap off really well
vivid helm
Still will leave visible scarring though.
Also the PS has a number of very good support options now.
vocal flax
@winged helm at right offset if you're using glass it gets very smooth and somewhat shiny.
winged helm
vocal flax
<@887510739462537236> at right offset if you're using glass it gets very smooth ...
Thx
winged helm
Why am I getting this result? I used complete coverage of organic supports in Asa, using an enclosure, with a drier, at 0.3mm


 vocal flax
Idk bottom of the part doesn't look squished
balmy pulsar
winged helm
Do I need to re do it in Asa? I did it in PLA
hypothetically no. But ASA may need a treatment to bond well to the plate. abs/acetone slurry is the norm for that.
im not totally sure whats gone one there though. is it just maybe too steep of an overhang angle?
oh, you said you had supports too?
vivid helm
balmy pulsar
hypothetically no. But ASA may need a treatment to bond well to the plate. abs/a...
Don't use acetone on a PEI sheet
balmy pulsar
ah pei. well theres your first problem 😛
vivid helm
I've done both PLA and ASA on PEI sheets without issues. I usually use glue stick for ASA though.
winged helm
Ah OK I'll try glue
faint sky
What speed? Seems there is more going on there than just a z offset issue.
If the initial layer doesn’t look good then almost inevitable there will be issues higher up. Sometimes it will recover and complete but most times will just end up as spaghetti.
coarse coral
anyone got a solution to reduce friction on 2 printed parts for longer term use with less maintenance?
i was thinking applying a layer of acryclic laquer but never tried before
half dew
I've seen a lot of makers use various types of grease/lube for parts that rub against each other like gears but other than that I'm not sure what will help. I think just any type of clear coat would probably add some protection
vivid helm
coarse coral
anyone got a solution to reduce friction on 2 printed parts for longer term use ...
PTFE lube is generally one of the more friendly ones on plastics.
faint sky
Ruiz brothers use lubricant called “reel butter” designed as a fishing reel lubricant.
winged helm
What causes this? I checked and there's nothing inhibiting motion. Using a drier and an enclosure. PLA, 0.3 mm

 vivid helm
Insufficient part cooling most likely.
winged helm
So turn up the fan?
vivid helm
If possible, yes.
You may need to put on a better fan duct, such as delta-p.

Printables.com
This is an alternative fan duct for MK3S(+) printers. | Download free 3D printable STL models
winged helm
Thx
vivid helm
winged helm
Thx
Just... don't print it in PLA. PETG is acceptable, but ASA (with the model scaled up by 0.5%) is preferable.
winged helm
vivid helm
Just... don't print it in PLA. PETG is acceptable, but ASA (with the model scale...
Oh I thought you meant in general. But you mean because of temp?
vivid helm
Yeah the mount comes in direct contact with the hotend heatsink.
winged helm
Yeah makes sense
coarse coral
vivid helm
PTFE lube is generally one of the more friendly ones on plastics.
sorry i forgot to mention these parts are moved by hand. anything that doesn't stick to people?
im thinking about trying tpu to minimise
coarse coral
winged helm
What causes this? I checked and there's nothing inhibiting motion. Using a drier...
that's very close to layer shifting but i'm inclined to say it is. to the point it looks like your coordinates are getting messed up. i had something very similar and was solved with reinstalling firmware as crazy as that may be
vivid helm
coarse coral
im thinking about trying tpu to minimise
TPU is stickier.
PETG does pretty well in mechanical parts.
arctic dragon
While some TPU filaments advertise low friction coefficient, most of them focus on friction in filament form for smooth feeding through a Bowden tube. The primary choice for low friction is usually petg, though expensive specialty filaments exist for those who need even less than that (and have a printer capable of higher temps)
vivid helm
If you really need low friction, take a look at IGUS. Other than that yeah PETG is probably your best bet.
coarse coral
just trying some tpu as i've got this handy. neptune is printing it so far with no issues, all i need is a teeny bit of reduced friction - will post results
coarse coral
tpu is suffice for my needs. thanks all for ideas
coarse coral
turns out i picked up the wrong sd card and was trying to use the 64gb one i have instead of the 8gb neptune shipped
 coarse coral
at least we know now a printer can read a 8gb partition on a bigger sized sd card
i left the remaining "unallocated" in disk manager whatever that means
vivid helm
coarse coral
i left the remaining "unallocated" in disk manager whatever that means
It literally means it's unallocated/unused. Also for whatever dumb reason Windows doesn't allow you to format a FAT32 larger than 32GiB, even though FAT32 itself can technically handle up to 2TiB (albeit inefficiently).
coarse coral
yeh i'd really like wifi on this printer even tho i keep everything handy in this one room wifi would make things nicer - it has a cable option maybe i'll try work with that
coarse coral
also learned that smaller layer lines with tpu reduce flex
vivid helm
With TPU I almost always recommend using gyroid infill because it's fully isotropic.
coarse coral
these are small button caps 10mm x 10mm so the flex doesn't really happen much altho i will certainly try gyroid
vivid helm
Ah makes sense.
faint sky
I have a 128GB sd card I use with the Ender 3 S1 Pro with no problem. Just have to format it correctly using a program like sd formatter.
Is it overkill? Yes, but was the only sd card i had at the time.
and i don’t trust them enough to use the supplied sd card or usb stick. Maybe that’s just me though.
coarse coral
faint sky
Is it overkill? Yes, but was the only sd card i had at the time.
an investment 🙂
 molten spoke
Hey, I'm making a 3d printed case for my rasp pi pico w. i had little experience with 2d designing in autocad. i used some models from thingiverse as context and made my own in onshape.
i dont have a 3d printer and this is the first time ill be getting something 3d printed. i will be using those online 3d printing services to get my part printed and delivered.
i can share the onshape document if you want to see. but i wanna know if theres something i need to worry about? like tolerances etc. if it will be printed properly or not.
what material would be better to get it printed in. ABS, PETG, PLA, ePLA, PLA GLASS
what layer height should i use
what infill % should i use
molten spoke
Onshape Document Link
The ones on the left are made by me. Mesh ones are imported from thingiverse
so if printing in pla with 0.1mm layer height. infill isnt making much of a difference in pricing.
30% is 175, 50%-187 and 100%-186 (price lowered for some reason idk)
in abs, 50% and 100% infill are about 200 (2.41USD)
if i use 0.05mm layer height, the price just doubles, makes sense. so im sticking with the 0.1mm.
can anyone check the document and see if it will be printed properly? should i be making it thicker or something? will the top cap fit properly without glue? with just a press fit.
also, abs vs pla? theres not a lot of difference in price
faint sky
For a normal .4 nozzle the most realistically dense part would be .1 layer height and 50% infill. The smaller the layer height and denser infill makes the print time considerably slower, and thus more expensive. It’s the difference in quality of a prototype vs a finished fabrication part.
If it’s the first time you’re ever having something printed I would recommend sticking with cheaper prototype settings like .2mm layer height and 25% infill. It will likely be cheaper and print much much faster.
Then when you get it in your hands if everything is perfectly to your satisfaction then have another part made with denser settings like .12 layer height and 100% infill (if necessary).
It’s rare to get everything perfect on the first attempt. Highly recommend going with rapid prototype settings first.
molten spoke
alright thanks for the reply.
 simple hedge
does anyone know how I export this as a solid object?

it's completely hollow for some reason

it was a problem with my cura settings 😭
coarse coral
might be worth doing a couple of versions if it doesn't change your price too much. that way you give yourself a choice or some markers if something doesn't come out how you anticipated
faint sky
simple hedge
it's completely hollow for some reason
Looks like 0% infill or something that had the same effect like vase mode. Glad you solved it.
misty gyro
vivid helm
It literally means it's unallocated/unused. Also for whatever dumb reason Window...
Bit of a necro, but it took me a few days to find this. Let me set the record straight and say that there's a very good reason Windows won't format a 64 Gb SD card FAT32. The SD card standard prohibits it.
https://www.sdcard.org/developers/sd-standard-overview/capacity-sd-sdhc-sdxc-sduc/
Turning this around, formatting a 64 Gb any card FAT32 is dumb in the extreme. FAT32 is a horrible filesystem. I'll just start with the fact that it can't handle files bigger than 4GB and leave it there, but there are many other things wrong with it. FAT12 came out in 1981 to support floppies, and FAT32 is just an upgraded version of that. Why would you even consider using a filesystem originally designed for floppy disks?
Why do you think NT based operating systems have been using NTFS for the past 30 years?
The SD card standard says to use ExFAT for 64Gb, there's no earthly good reason not to because all three major desktop OS's support it.
 vivid helm
misty gyro
Bit of a necro, but it took me a few days to find this. Let me set the record s...
vivid helm
misty gyro
Bit of a necro, but it took me a few days to find this. Let me set the record s...
Actually it's because this guy said so. Also, ExFAT is just as bad as FAT in many ways. In fact they removed one of the only data integrity mechanisms from FAT.
https://www.youtube.com/watch?v=bikbJPI-7Kg
The author of the Windows format dialog takes us on a retro tour of the dialog and explains how and why it was designed and why the system is limited to 32G on FAT32 even for large SD cards.
Plus I'm needing FAT32 for a legacy system.
iron remnant
The advantages of being an Apple II using dork kid is that I can say that I've hated FAT forever.
vivid helm
lol
ExFAT is a disappointment. They had an opportunity to define an entirely new cross-platform filesystem to address the numerous issues with the existing options, and instead they decided to slightly modify FAT and tack on royalties.
iron remnant
I'm glad that there's some folks who are actually posting their "I did this silly thing that you are now stuck with in Windows 11" videos because, given the rate at which tech companies don't hire actual qualified archivists to handle their records management and historical research problems, the only way anybody knows is because some guy made some clickbait.
vivid helm
Dave has some great videos.
He wrote a bunch of low level foundational code in what eventually would become Windows.
Just realized we're kinda getting off topic though.
iron remnant
Yah, I'm being flippant at the clickbait part.
But, yah, dono, I am so used to the Octoprint lifestyle that all of my SD card trauma instead circles around my digital camera.
Also, meh, I had printed a bike-helmet-hook for the entryway and adhered it with 3M Command Adhesive and it seems to have come unstuck while I was away over the weekend, so I guess the entryway organizer project will need at least some drilling.
vivid helm
SD cards are hilariously unreliable.
coarse coral
Yeh
shy kelp
I wonder why don't raspberries get emc by default
Whereas "competitors" do
misty gyro
vivid helm
Actually it's because this guy said so. Also, ExFAT is just as bad as FAT in man...
If you believe what he's saying in that video, I've got some ocean front property to sell you in Arizona. He is plain flat out WRONG. He may have written the original FORNMAT.EXE, but it's apparently been worked on since then,.
This is ciopied and pasted directly from a Windows command prompt. D: in this case is guess what. Exactly what he says I can't format, a 256 Gb SD card.
15:40 c:\>format d: /FS:exfat /q
Insert new disk for drive D:
and press ENTER when ready...
The type of the file system is RAW.
The new file system is EXFAT.
QuickFormatting 238.3 GB
Volume label (11 characters, ENTER for none)? DATA_K
Initializing the File Allocation Table (FAT)...
Creating file system structures.
Format complete.
     238.2 GB total disk space.
     238.2 GB are available.

      131,072 bytes in each allocation unit.
    1,951,612 allocation units available on disk.

           32 bits in each FAT entry.

Volume Serial Number is 5AA8-0118

15:40 c:\>```
There you are.  `Format D: /FS:EXFat /Q` formats it and reoports the formatted capacity as 256 Gb.

I don't know what axe he has to grind, but as you can see, FORMAT.EXE (and the context menu formatter) have no trouble at all with formatting things correctly.You're formatting it with ExFAT, not FAT32. Also the 32GB restriction doesn't apply to the command line tool... so I don't really see what your argument is.
misty gyro
I think you're mistaken. The 32 GB limit most certainl does apply to FORMAT.EXE as well it should:
15:49 c:\>format d: /FS:FAT32 /q
Insert new disk for drive D:
and press ENTER when ready...
The type of the file system is EXFAT.
The new file system is FAT32.
QuickFormatting 238.3 GB
The volume is too big for FAT32.
Format failed.

15:50 c:\>```It never said it did, although when I tested it on win10 I had trouble getting it to work.
misty gyro
Look. Windows is just doing the right this, and adhering to the standard. You may not like the standard (I'm not at all sure why), but there it is. Like it or not, you should learn to live with it.
vivid helm
What standard do you think it's adhering to? FAT32 is not "standardized" in that sense. It's just old.
misty gyro
The standard it's adhereing to is what the SD card organization stated in that document I linked.
Standars says; 32 GB and smaller FAT32. 64 GB and larger EXFat.
vivid helm
FAT32 predates SD cards by a lot. Also Microsoft is in that group and are likely the ones who pushed for that rule, considering it meant that everyone making cards larger than 32GB would have needed to pay them royalties in order to be able to get the SDCard logo.
misty gyro
Ansd sure, exfat isn't as good as ext4 or NTFS or whatever MacOS is using, but it is an improvement over FAT32. And it's fully portable.
vivid helm
misty gyro
Ansd sure, exfat isn't as good as ext4 or NTFS or whatever MacOS is using, but i...
My whole point is that it's not really an improvement. But regardless this is #help-with-3dprinting and we are way off topic.
So I think we should probably drop it now.
balmy pulsar
stop FAT shaming
coarse coral
that's so 90s
 simple kelp
I've got a QT Py 2040 and NeoPixel BFF that I want to put into a 3d printed case. Can anyone point me to examples of 3d prints that use these parts that I can crib from?
faint sky
First thing I would do is pull up Adafruit’s Printables page and see if they have one for a QT Py.

Printables.com
Wipper Snapper now supports the Adafruit QT PY ESP32-S2! 3D Print a snap fit case for the QT Py and a STEMMA QT breakout | Download free 3D printable STL models
Seems like a good start. Keep in mind the Ruiz brothers have their printers dialed in extremely well and their tolerances might differ from yours for snap-fit parts.
vivid helm
Not sure if QT Py will fit, but I made an entire family of mounting plates.
https://www.printables.com/model/512753-v22-qtqwiiccliq-din-mount-for-stemma-qtqwiicthing-

Printables.com
v2 of Qwiicplate improving almost every aspect of the original design - now with screwless variants! | Download free 3D printable STL models
simple kelp
Ooh, awesome! Thanks! I think there should be enough here for me to modify for my use-case :)
 random urchin
faint sky
<https://www.printables.com/@Adafruit>
random urchin
faint sky
<https://www.printables.com/@Adafruit>
How did I not know Adafruit had a Printables account?!
faint sky
I’ve been meaning to get on that din rail train. Have your din mounts earmarked. 👍
vivid helm
balmy pulsar
din rail = magical item you wonder why you never used before
Because 🇺🇸 'MURICA 🦅
Personally I recommend getting the aluminum stuff. It's a bit more expensive, but you can cut it with a chopsaw.
vivid helm
Without damaging/dulling the blade?
balmy pulsar
sure
balmy pulsar
speaking of din rail.... need to somehow cram everything for the cnc into this. (not counting the compressor cause it is too big)

24v psu. 12v psu. 5v psu. bunch of terminals. control card and ideally the PC although it might not fit
it fits yay
ha
 gloomy anchor
molten spoke
so if printing in pla with 0.1mm layer height. infill isnt making much of a diff...
gloomy anchor
molten spoke
so if printing in pla with 0.1mm layer height. infill isnt making much of a diff...
petg is pretty good
faint sky
balmy pulsar
24v psu. 12v psu. 5v psu. bunch of terminals. control card and ideally the PC al...
What about using a 24v psu with 2 step down buck converters instead? Might save you some space. Unless you want three independent psu’s for whatever reason.
vivid helm
Or a single PSU with triple outputs.
faint sky
Didn’t know those existed. Makes more sense though.
vivid helm
faint sky
Didn’t know those existed. Makes more sense though.
Every PC power supply. Basically they use multiple transformer taps to get different voltages and then put additional regulation close to the load(s).
faint sky
Well yes but PC power supplies usually start at 12v right?
vivid helm
Yeah, but you can get higher voltage supplies in a similar form factor.
faint sky
Neat
vivid helm
I think some server boards run at either 24 or 48V, and lightly used ones can be pretty cheap on eBay.
Or you can take a look at Mean Well and Delta. They both make decent power supply modules.
faint sky
Might need something with active cooling so a fan hole is likely required.
With 3 small independent psu’s could get away with passive cooling, maybe.
balmy pulsar
faint sky
What about using a 24v psu with 2 step down buck converters instead? Might save ...
these are din rail psus. 10A. already have them, already hooked up. just need to cram them inside the cabinet.
 turbid dawn
Hi All, I just finished printing this big nutcracker in PLA (https://www.printables.com/model/98399-ornamental-nutcracker-over-24-inches-tall). It's going to be used on stage as a prop in a dance show. Any advice on glue? I've used CA glue in the past for most things but it seems quick to sheer off when a heavy part is dropped. Also on the table are hot glue (for the give/flex) and Weld-On 16 (hard for me to find). Anyone have any suggestions?

Printables.com
Nutcracker over 24 inches tall printed on Prusa Mini+ | Download free 3D printable STL models
vivid helm
balmy pulsar
these are din rail psus. 10A. already have them, already hooked up. just need to...
DIN THE THINGS 
iron remnant
Herr Brain has to yell to get heard over the DIN.
faint sky
turbid dawn
Hi All, I just finished printing this big nutcracker in PLA (https://www.printab...
Use a soldering iron and plastic weld them together? Adhesives can only do so much. Can also redesign it with nuts & bolts in mind.
vivid helm
faint sky
Use a soldering iron and plastic weld them together? Adhesives can only do so mu...
The adhesive will often be stronger than the base material, causing material to break next to the joint.
turbid dawn
faint sky
Use a soldering iron and plastic weld them together? Adhesives can only do so mu...
Yeah I had considered that but I'm trying to avoid weld lines, though if it's on stage you might not notice...
balmy pulsar
glue wont look any better than a weld thats sanded
simple kelp
Is there a 3d model of product number 4440 somewhere out there? Ideally something I can import into Blender. I'm not finding it on the CAD Parts Github repo...
balmy pulsar
doesnt look like it. i thgink there is a drawing you could model from
simple kelp
There's a step for 931 which seems to be closeish... I'll give that a go, and see if it's anywhere close :P
coarse coral
doing some gridfinity
 vocal flax
turbid dawn
Hi All, I just finished printing this big nutcracker in PLA (https://www.printab...
vocal flax
turbid dawn
Hi All, I just finished printing this big nutcracker in PLA (https://www.printab...
Hot glue sometimes can be hot enough to deform pla if walls are thin
turbid dawn
vocal flax
Hot glue sometimes can be hot enough to deform pla if walls are thin
Yeah, I'm going to do some experiments tonight. I printed a couple of legs in the wrong color (whoops) so I have some representative parts to try out. Also attempting to glue a magnet on to one of the arms for easy break away drama in a show.
The show must go on
iron remnant
In a development nobody quite expected, drama people are all drama people.
balmy pulsar
and now this dramatic reinacting
arctic dragon
Some hot glue guns are hot enough to use with PLA printed “glue sticks” haha
https://all3dp.com/weekend-project-3d-printing-sticks-for-pla-hot-glue-gun/

All3DP
Who needs a 3D printer when you have a hot glue gun? This Hackaday project from Donald Papp shows us how to use molten PLA filament to glue 3D printed objects together.
arctic dragon
turbid dawn
Hi All, I just finished printing this big nutcracker in PLA (https://www.printab...
In all seriousness, though, superglue is usually the go-to for bonding anything to PLA. Make sure the surfaces are sanded smooth, cleaned with alcohol, and fully dried before gluing for best results.
I hear plumbers cement works really well, but could discolor your parts.
turbid dawn
Yeah, I found a good youtube video that covered that (contact cement?). I've used Weld-On 16 in the past but it's almost $30 shipped on Amazon and I wouldn't say I like any Nutcracker that much.
balmy pulsar
arctic dragon
I hear plumbers cement works really well, but could discolor your parts.
plumbing cement is usually abs and acetone. (here anyway). not ideal for PLA. (great for ABS prints)
coarse coral
coarse coral
doing some gridfinity
didn't go to plan, a couple blocks decided to unstick mid pritn
coarse coral
definitely need to start using brim more, even with pla warp is real
coarse coral
think i found a buyer for cr6se 🤞 let's go sunday
would be really good because i keep losing my wallet
and thankfully the spool holder didn't break my toe last night
it was a close call, and the printer is also fine
When you wanted gridfinity but got this instead
 coarse coral
Printed this phone stand and bottle holder
 winged helm
Keep getting this surface finish. I tightened my belts. Could that help?
 winged helm
Update. Did not help. Doesn't seem to matter what material I print in
vivid helm
It wouldn't be printing if the firmware was corrupted.
coarse coral
had this problem almost identical
tried it over multiple prints
different positions on the build plate
tightened the assembly
only thing that fixed it was the firmware reinstalled
Similar problem here

@winged helm does every print do this now?
winged helm
coarse coral
<@887510739462537236> does every print do this now?
Yes. And I've reinstalled FW
coarse coral
did it fix it when you reinstalled? at least for a while?
winged helm
Nope
coarse coral
ah well, at least we can rule that out
belts tensioned enough?
any wobble on the hot plate?
the change seems fairly random on the z axis
like it shifts on whatever layer (x or y) but doesn't happen consistently on every layer
your extruded circles also have it on the y axis so it's like it's vibrating on both x and y
and does this quite inconsistently on the z axis
but doesn't look like vibration since the layer is consistently out
random urchin
winged helm
Keep getting this surface finish. I tightened my belts. Could that help?
Hard to tell from the photo... Is the layer shift visible on both the X and Y axes or just one axis?
winged helm
Both
coarse coral
@random urchin yeh u can see it on both
random urchin
How about a calibration cube? It'd be quick and it'd narrow down which axis is giving you headaches.
winged helm
Is that just a cube of some size?
coarse coral
it's got lettering on it
helps you figure out ringing also

I designed my own 20mm x 20mm x 20mm Calibration Cube in Tinkercad so I had my own test print for reference.
I call it the CHEP Cube.
It’s become a popular print for many people and it’s fun to see where it turns up.
The Images are from a print on my Ender 3.
I added two images printed at 0.12 using my CHEP 0.12 profile.https://www.chepclub.com...
random urchin
If it's only one axis, that points to an issue with that axis' belt, stepper or possibly the mechanical connection between the belt and the head / bed (depending on X or Y axis). If it's both axes, I'd start looking at bed wobble, since it's unlikely both X and Y belts went haywire at the same time. (I'm assuming the printer's a bed-slinger, with an X belt moving the head and a Y belt moving the bed)
coarse coral
yeh and it's quite sporadic looking as it goes up the layers, but the layer shifts 'leak' quite consistent amounts (part of me wants to say there's a programmatic error somewhere) however since the shifts are at fairly random intervals as it comes up the layers i'm inclined to say certain layers are drawn causing more vibration.... that said, walls are usually drawn first so the wobble would have to be from the wall itself which again just makes me feel there's a programmatic error somewhere instead of being vibrations as the walls are drawn.
coarse coral
winged helm
Keep getting this surface finish. I tightened my belts. Could that help?
but looking back at the photo it looks like it may only be x or y. not both
it could also be thermistor inconsistently heating the plastic, some layers more liquid than others if you know what i mean causing inconsistent flow
@winged helm do u have a temperature indicator on your printer? does it fluctuate a lot during a print?
winged helm
I'm not typically able to monitor my prints
coarse coral
i'd keep an eye and see if the temp is fluctuating all be it for 20 mins or so
if you're getting big jumps like +- 5degrees then the thermistor might be worth looking at, otherwise it very well could be somthing else
random urchin
I'm going to take a wild stab in the dark and say: It's the X axis and that either the motor mount or the idler is loose. Of course, that's without knowing what model of printer it is or even what type of printer, so I may be completely full of it. ¯_(ツ)_/¯
coarse coral
random urchin
I'm going to take a wild stab in the dark and say: It's the X axis and that eith...
it also does look mechanical, my bet is mechanical or programmatic. thermistor fluctuation or as @random urchin said wobble in one of the motor mounts or something code based (not sure what it could be though)
random urchin
winged helm
Mk3s
Oh! I've got one of those too. Did you tension the belt using the built-in diagnostics?
LCD menu -> Support -> Belt Status (I think)
winged helm
random urchin
Oh! I've got one of those too. Did you tension the belt using the built-in diagn...
X 261 Y 260
That seems within error bars
How can I check steppers and thermistor?
coarse coral
@winged helm the way i checked was to watch for fluctuation in the on-screen. when printing my printer shows me the current temp of the hot end and the build plate. if it fluctations outside 4 degrees above or below your set printing temp often i'd say that's worth speaking to prusa about
the stepper motors are fixed to move the build plate and gantry.... so 2 motors... somewhere on your printer. they should be afixed with some screws or allen nuts..... you could just give them a little tightening
winged helm
coarse coral
the stepper motors are fixed to move the build plate and gantry.... so 2 motors....
I tried tightening one of them. The x I think. It seemed to help?
coarse coral
Nice, and maybe just watch a print for a wee while over a few layers to visually inspect the temperature readouts. If it's within the 4 degrees I wouldn't say it has a problem. Just a hunch on the thermistor


 coarse coral

 coarse coral
coarse coral
coarse coral
Flexible wrist rest with tpu. A little bit more shallow than I would have wanted but it was on thingiverse
coarse coral
winged helm
99% of this looks good. i can only see 2 shifts. is this after you tightened the steppers?
winged helm
Just the x
coarse coral
i'd give your whole printer a bit of TLC.
winged helm
I have it in an enclosure so it's a pain to get out but I'll do that
coarse coral
tighten the gantry, the lead screws, and the steppers as you have, plus belts and hot plate
how long have you been running it without re-calibration?
winged helm
How do I tighten the belts? Mine are pretty close to the max as it is
winged helm
coarse coral
how long have you been running it without re-calibration?
Almost a year
random urchin
winged helm
Oh! You don't have "stealth mode" turned on, do you? I've heard of that causing random layer shifts.
coarse coral
might not need to tighten the belts if you think they feel good. they're supposed to feel a bit like a guitar string. that said, i think you should go round your stepper motors, the gantry and the lead screws, and hot plate
definitely worth re-calibrating after a year
winged helm
coarse coral
might not need to tighten the belts if you think they feel good. they're suppose...
How do I calibrate the steppers?
coarse coral
tighten them first just a little turn on all screws to make sure it's seated snug
i don't have a mk3 but i assume they are bolted / screwed onto the housing some how
winged helm
They are
random urchin
...also might check the grub screws holding the pulleys onto the stepper motor shafts. Should be 2 per motor.
coarse coral
equal heights

red nice and tight (eccentric nuts possibly)

black take build plate off and make sure hot plate is also snug

https://www.youtube.com/watch?v=CBiTCBVSBdE this could be the game changer for u
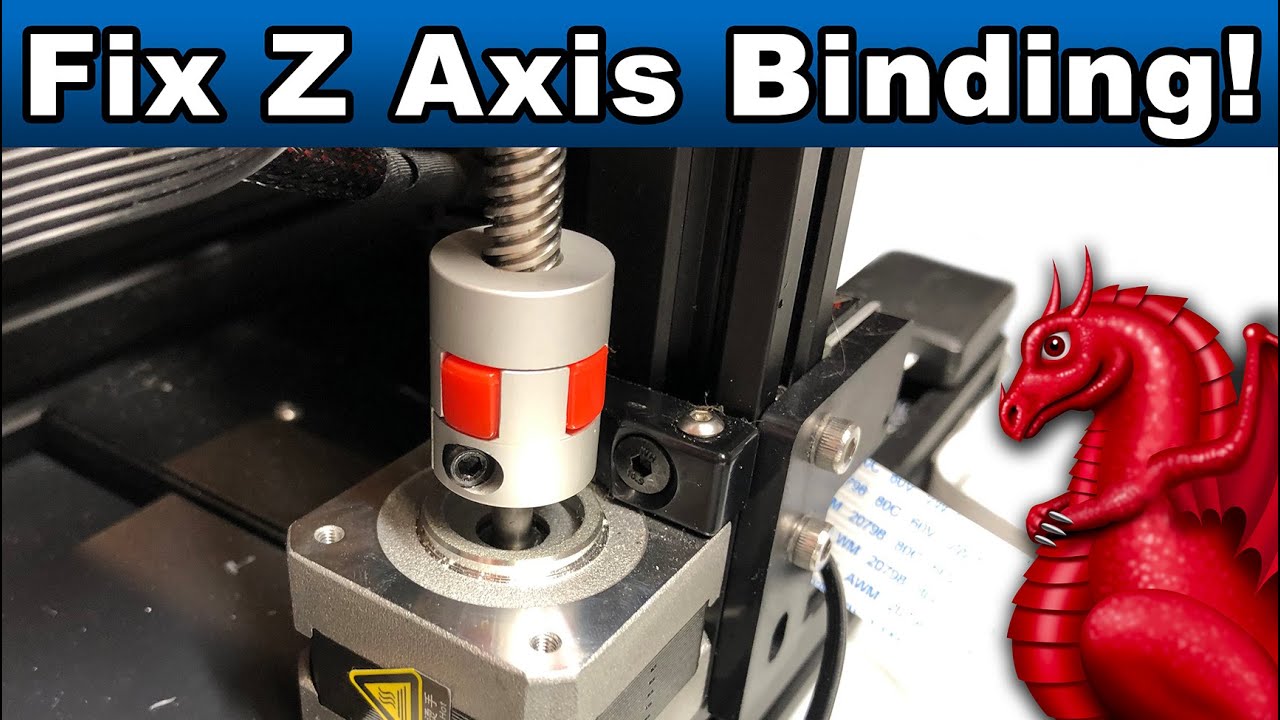
Learn the most common causes of Z-Axis binding and how to fix them. Applies to Ender 3, Ender 3 Pro, Ender 3 v2 (and all clones).
LINKS:
Get our FDM optimized fantasy terrain and miniatures here:
Supplies Links:
http://www.fatdragongames.com/fdgfiles/?p=5863
****************************************************...
random urchin
coarse coral
equal heights
Here's a nice 3D reference for the Mk3s+: https://drive.autodesk.com/de296501e/shares/SH9285eQTcf875d3c539d9640fa5f8e3afd8
It's interactive, so you can examine how things are put together.
Autodesk Drive
coarse coral
@winged helm worth watching https://www.youtube.com/watch?v=zKpNxqWie_8

In this video I'm going to show you how to level or tram your bed, set a bed mesh and set your z height on a 3d printer with a bed probe.
You may be surprised to hear that you still need to level or tram your bed when you bought a 3d printer with 'Automatic bed levelling'. Well unfortunately, this is very likely to be a little white lie that 3d...

One of 3d printing's biggest problems, especially when you are new, is levelling your bed.
In this video I'm going to give you 3 simple things you can do to put your levelling issues to bed once and for all.
.............................................................................................................................................
random urchin
winged helm
They are
I'm running out of ideas. You might have to try posting to one of the help channels on the prusa3d discord. I know the folks there can be a bit much, but they're also extremely knowledgeable about Prusa printer issues.
coarse coral
i think it comes down a full recalibration at this point. 1 year down the line, it's time imo
winged helm
OK I'll try those things thanks
winged helm
coarse coral
i think it comes down a full recalibration at this point. 1 year down the line, ...
So a full re calibration would be everything outlined here?
coarse coral
that's probably a interim recalibration. there's PID tuning but i don't know if you need that with a prusa
since it's a bed slinger you're basically looking to tighten all the physical parts again because vibration causes things to get loose a lil bit
so yeh, i'd do
- tighten hot plate
- clean build plate
- x and y belts tension to be nice and consistent
- tighten filament feeder / extruder
- make sure your gantry is level (right angle and distance (equal on both sides)
- tighten hot end assembly (and new nozzle) (because why not)
- tighten steppers motors x, y and z
Then you could do PID tuning (if that's a prusa thing)
Then run the your auto leveller
and do a little dance, get down tonight

probably take no more than 2 hours all in
random urchin
winged helm
OK I'll try those things thanks
There's also a help_mk3 channel on Prusa's "official" discord. Not entirely sure how to send an invite, though.
winged helm
Thanks again folks. I'll report back
winged helm
@coarse coral @random urchin it's back to normal! Tightened it all down and we're back in business. Thanks again

 coarse coral
looks great
shy kelp
bah no, I got no idea. it fixed itself; not an issue related to the version anyway
coarse coral
Are you still having k1 problems @shy kelp ?
shy kelp
I dunno. apparently fans can cool so much the hotend that it cant keep the temperature, and ence causing the printer to shutdown because it thinks its abnormal
coarse coral
k1 is cursed kewk
😐
hope u get it truly straightened out. don't forget u can still ask for a full refund
i admire your ability to stick with it. that's what i did with cr6se and it ended up really nice
but tested my patience a lot
balmy pulsar
shy kelp
I dunno. apparently fans can cool so much the hotend that it cant keep the tempe...
reduce fan?
shy kelp
balmy pulsar
reduce fan?
Well yes, but I didn't expect it
I'd like if it didn't happened/was preconfigured, but what can you expect by a 350€ printer, although the msrp is 500 🤷
balmy pulsar
um, fan speed is part of the process. changes for every material and nozzle and layer height.
also changes depending on object size. small objects need more cooling
as the layers comp[lete faster
shy kelp
Before removing the silicone it didnt happened
But idk how much isolation it gives, but it may be that idk
balmy pulsar
oh. why did you remove the silicone. that is critical for containing heat
shy kelp
balmy pulsar
oh. why did you remove the silicone. that is critical for containing heat
Because the newer hotend burns the silicone
coarse coral
shy kelp
Because the newer hotend burns the silicone
this whole thing sounds like a saga
shy kelp
balmy pulsar
somthing is wrong
Indeed I dm creality they say that they would ship a new hotend.
Here's the red burnt socket
 coarse coral
oh lordy
balmy pulsar
thats not right
coarse coral
im going to ask you to do something @shy kelp please return this printer and get ur money back. it.is.cursed.
balmy pulsar
haha
coarse coral
looks like wellington boots took a walk in a volcano
shy kelp
balmy pulsar
thats not right
I also tried with the black, it burned even that.
Likely the new hotend runs hotter to what it's declaring
I saw on fb groups, with lots of people with the same issue with the new hotend
coarse coral
just please return it
the things i have seen from this printer all seem major. reminds me of the ender 3 i got that was also cursed
shy kelp
coarse coral
just please return it
I'm well over the 2 weeks thing for returns
coarse coral
u have a year for a return
balmy pulsar
its electronics. it is not cursed. find the issue fix done
coarse coral
@balmy pulsar why should he fix his new product. that's not right
with no uncertainty - that's not how we do living
balmy pulsar
well sure. creality needs to fix it i meant. however that gets done. new hot end is fine, but clearly it is broken still
coarse coral
this printer has been posted in here for maybe 2 months, i haven't seen a single successful print
that is so wrong
2 months down the road and no successful print. that's not right
winged helm
Thoughts on PLA vs PETG for a crank arm?
half dew
I think PETG is more likely to crack
That is based on watching a lot of different tests and reading a lot of datasheet, however, the words used to describe filament properties are very ambiguous, though - so its probably best to just try yourself. Different types of strain can cause cracking and different filaments handle it differently. Best bet is to try and find something that will warp/stretch rather than break
I use PC for performance critical parts (annealed in an oven) - specifically, roller skate parts and hits held up to some crazy abuse.
winged helm
I only expect serious loads in the event of a mechanical stall. In that Case, my hw and software will stop the machine and reset
vocal flax
coarse coral
red nice and tight (eccentric nuts possibly)
A bit late but fyi prusa and i3 style (linear rods) don't use eccentric nuts. So nothing really needs to be calibrated for carriage.
vocal flax
winged helm
I only expect serious loads in the event of a mechanical stall. In that Case, my...
The strength doesn't make that much difference. I suggest printing it out of petg, because of how it fails. Pla usually just snaps, petg fails more gradually and somewhat controllable.
The difference? One breaks your knuckles, other probably gives you nasty scratches.
winged helm
Actually I think in this application, a snap is better than anything else
shy kelp
winged helm
Thoughts on PLA vs PETG for a crank arm?
Petg is usually better for everything
But a real pain with glues
winged helm
In reality it's probably not a big deal either way, because this crank arm is just a stand-in for an aluminum one that will be made to fit the application
vocal flax
winged helm
Actually I think in this application, a snap is better than anything else
How come snapping and hitting your hand to something quite fast worse than gradual overtime yield? 🤔
winged helm
So it just has to last for about 10 days of testing time
winged helm
vocal flax
How come snapping and hitting your hand to something quite fast worse than gradu...
Because the mechanism is not going to interact with hands, it's a crank arm like on a crank slider mechanism
Sorry I was not clear
vocal flax
Oh
Then it is more or less same, petg is a bit better but a bit more problems with printing.
vivid helm
Honestly I've always had fewer problems printing PETG.
Plus it has very strong layer adhesion.
shy kelp
Not so 3d printing but:
https://www.amazon.it/Sigillante-silicone-resistente-temperature-KLIMAS/dp/B08DNZNCD1/
(It's just silicone)
When used on a solid stamp like pla, it should solidify and easily come off? I mean it doesn't get glued to the plastic?
Creality is taking an ethernity to ship, so I was thinking to print a mold, and use it to make a silicone socket
They declare 1500C resistance, so it should be ok?

Sigillante in silicone resistente al calore, 1500 °C, 310 ml, resistente al calore e alle alte temperature, per tubo del forno, adesivo per forno, resistente al calore, colore nero, silicone KLIMAS
vocal flax
I've made my silicone sock with rtv aka liquid gasket
Technically the sheet says only resistant to 250 but it should hold up to 350
winged helm
Using PLA and my mk3s I am having issues with snug supports sticking really hard. How cnq I address this?
 coarse coral
you could just add .5mm bridges for ur print to walk over, they snap right off
add them in autocad not the slicer
e.g
 winged helm
coarse coral
you could just add .5mm bridges for ur print to walk over, they snap right off
winged helm
coarse coral
you could just add .5mm bridges for ur print to walk over, they snap right off
Sort of like a heat sink geometry?
coarse coral
just a reasonable distance your printer can handle. some printers can do 10cm as a bridge. my gaps were about 15mm - 20mm and you just need to make sure you close the perimeter also or it's walking into thin air
misty gyro
winged helm
Using PLA and my mk3s I am having issues with snug supports sticking really hard...
Is that sticking to the base plate? If so, try my trick for detaching models. After the print has finished, let the plate and print cool to room temperature, and then put them in the freezer for maybe 10 to 20 minutes. IME doing that, the model pops right off the plate, no trouble at all.
winged helm
misty gyro
Is that sticking to the base plate? If so, try my trick for detaching models. ...
No, sticking to the model
misty gyro
OK. In that case ignore what I said. 😦
iron remnant
But, rest assured.... it's a cool tip.
faint sky
Case for the 3.5" TFT Featherwing. They started making the smaller featherwing again but I don't have one of those and this will not fit for it without modification.

works nicely
 elder oxide
Looks great
faint sky
Designed the back half last night and let it print overnight. Even though I'm super sick can still feel productive thanks to a 3D printer.
vocal flax
That's a good construction and form factor might steal that in future
 shy kelp
Got a new hotend from creality... Will it burn too?
vivid helm
Creality is not known for making good hotends. Or printers.
coarse coral
i had metal sheer off my stepper motors on creality, the fans broke, the software was corrupted, the glass plate was horribly unlevel, it electrical arc'd, the roller belts snapped, the nuts weren't tight out factory, the filament holder was bad position, ridiculous stringing from stock
coarse coral
shy kelp
Got a new hotend from creality... Will it burn too?
if it doesn't annoy the user, it's probably not an official creality product
shy kelp
Oh well at least they're trying
I mean with lots of products the warranty doesn't really exist
Although it's a waste of time in my end, I can't be too mad
elder oxide
vivid helm
Creality is not known for making good hotends. Or printers.
Mine has been fine 🤷♂️
I have a buddy that runs like 10 without issue
Every company makes duds, creality seems to make a few more than what would seem normal.
 scenic plinth
Kinda a problem a small one at that
But
My 3d filament is kinda tangled over each other
So sometimes I need to manually kinda un roll it
I couldn't think of a fix for it
elder oxide
scenic plinth
My 3d filament is kinda tangled over each other
You can rewrap it, I’ve found it’s usually just one cross over that’s just moves back down the spool. Sometimes it’s much worse..
scenic plinth
Nah it's been like that for the last 6 prints
And basically since I got it
Idm too much tho
Can't wait till I print out my custom clock
elder oxide
I’ve found some brands are better about tangled filament than others. I mostly use Hatchbox PLA
Sometimes I use overture as well
faint sky
I've also found most times it's just 1 tangle, fix it and respool with tension and should be good to go.
If you need to respool the entire spool to be on the safeside you can fashion a drill attachment and respool the entire thing pretty quick.
Tangles typically happen when a spool loses tension and comes unraveled. Never let your filament become untensioned even while swapping in/out spools.
 wind glade
faint sky
Tangles typically happen when a spool loses tension and comes unraveled. Never ...
wind glade
faint sky
Tangles typically happen when a spool loses tension and comes unraveled. Never ...
Everything you said not to do here I experienced in the space of an hour this morning, then spent three hours trying to respool, with the picture above as evidence for how far I got. This is overture pla, and I wanted less friction, as the cardboard plus the enclosure was creating too much to print.
Sadly, my filament broke just as I was starting to re-re-spool, and tension was lost on both spools… disaster
faint sky
Live and learn. You won't make that mistake again.
coarse coral
shy kelp
Oh well at least they're trying
I mean with lots of products the warranty doesn'...
the distributer helped me fix the fualty cr6, they also took a full return on ender 3 electrical arcs) and they took a return on a neo max (crazy stringing). for 2 i got full refund, and 1 i got all the repair stock such as 120mm fans, 40mm fans and it was done by post. all printers i had for about 4 months except the neo max because that got returned within 3 weeks.
elegoo engaged me on an sd card issue within a week. so i think there are support / refund / exchange / repair channels. so if u bought ur printer from amazon, you can either request a full refund there (send the full package back to the amazon label) or you can contact the seller direct and ask for more parts. if you bought on amazon. i'd be simply saying to seller "hey i really tried to fix this, but from day 1 this is a faulty printer and i need a refund) they will likely do it.... even better if you bought from amazon tho because they will honour the refund
misty gyro
shy kelp
Got a new hotend from creality... Will it burn too?
Mine didn't. I managed to break the original Bowdn hotend on my Ender because I got a bit overzealous taking it apart. So I went out and ordered the direct drive hotend kit directly from Creality. Went on in an hour or two (I don't rush stuff like this), and it's been working like a champ ever since - that was like 15 months ago.
misty gyro
elder oxide
I have a buddy that runs like 10 without issue
This has been my experience with an Ender 3 V2. Other than the x belt needing to be tightened every month or two, it's been rock solid. Did they do a control board / software update when they released the 3 V2?
shy kelp
misty gyro
Mine didn't. I managed to break the original Bowdn hotend on my Ender because I...
A new hotend from creality has the same issue:
Likely I should just get this
Lmao
https://a.aliexpress.com/_ExXXMuB
 lucid flower
Hello hope this is the correct channel for asking but I'm looking for the .f3d files for the 1.12" 128x128 OLED (5297) and the Adafruit Feather M4 CAN Express (4759). I've checked the github repo but no avail of these particular prodcuts 3D files unfortunately.
 vestal thicket
lucid flower
Hello hope this is the correct channel for asking but I'm looking for the .f3d f...
vestal thicket
lucid flower
Hello hope this is the correct channel for asking but I'm looking for the .f3d f...
If they're not available in the CAD repo, you can file an issue to request it, though there is no promise if or when they might get to it
lucid flower
vestal thicket
If they're not available in the CAD repo, you can file an issue to request it, t...
No problem, appreciate the response 🙂
 willow wasp
New New New... prusaSlicer 2.7.0 alpha1 now with SVG embossing... https://github.com/prusa3d/PrusaSlicer/releases/tag/version_2.7.0-alpha1
faint sky
5297 is not available in CAD Parts. https://github.com/adafruit/Adafruit_CAD_Parts
@lucid flower You can make a request for it to be added by creating an issue in the CAD Parts repo here: https://github.com/adafruit/Adafruit_CAD_Parts/issues/new
vocal flax
I have an i3 style printer mostly custom made. Both my x and y axis binds at certain spaces I assume it's because my pulleys are not concentric enough but I can't slip anything in between shaft and pulley bore (tried some paper and aluminum foil no luck) and visibly there is no wobble when I turn motors while not connected to axis. Any ideas how I can fix this?
faint sky
Can you share a picture?
vocal flax
faint sky
Can you share a picture?
What par you want exactly whole printer or pulley or motor
balmy pulsar
woo. machine moved to new room and rewired. (still need to swap the spindle, but that is for later. now i need to start making escape keycaps.
 vocal flax
faint sky
Can you share a picture?
vocal flax
faint sky
Can you share a picture?
This is my y axis motor (it was in an awkward position I pictured as best as I could)

And these two are when it binds up (two different positions)

 faint sky
@vocal flax Is it binding because the gear is set too flush with the motor housing on the spindle? Have you tried a little bit of lubricant like dry PTFE lubricant?
vocal flax
faint sky
<@316890839026761728> Is it binding because the gear is set too flush with the m...
There is 1 paper space on it that's what I also thought at first
faint sky
and you're sure it's coming from the motor?
only thing I can think of is replace the motor, i'm not sure of another way to diagnose a binding motor gear other than to try a different motor.
remove the belt and check for physical defects on the belt and gear... other than that not much else to do.
can try moving the gear up the spindle a little and hope that works
coarse coral
what is the problem here @vocal flax is the belt slipping?
shy kelp
I'm not sure, does klipper need bed leveling commands (g29) on the start gcode or not?
vestal thicket
No, Klipper doesn't require it at the start
vocal flax
coarse coral
what is the problem here <@316890839026761728> is the belt slipping?
Movement binding up
vocal flax
faint sky
only thing I can think of is replace the motor, i'm not sure of another way to d...
Same results unfortunately
shy kelp
I should had listened to the reviews
It managed to damage the bed itself
 strange ledge
Wow.. that really did s..t the bed..
shy kelp
I may just get a bambu at this point, wishing that it ain't bullcrap
Anyhow, I'm not too sure, is a random pei bed fine or do I need some magnetic layer within the bed itself?
 faint sky
Looks like a z-offset issue, not related to pei unless the bed heat was so hot it burned through the pei film?
PEI is a film. There are different types of PEI surfaces. I personally prefer the powder coated metal PEI surface. Most manufacturers offer them now with the printer as an option or add on.
Depending on your bed surface dimensions, I'd get one from a reputable manufacturer. Elegoo, Creality, Prusa, etc.. all have excellent metal PEI surfaces.
 vocal flax
I have an i3 style printer mostly custom made. Both my x and y axis binds at cer...
vocal flax
vocal flax
I have an i3 style printer mostly custom made. Both my x and y axis binds at cer...
I've solved my issue. A friend of mine noticed dust on pulleys which they were very slightly grinding on the motor mount. I checked my measurements and for sure this was the problem I have used a pulley model from grabcad which was 1mm off so didn't trigger in fusion 360.
faint sky
Glad you got it figured out. That was a head scratcher. 🙂
coarse coral
shy kelp
I should had listened to the reviews
It managed to damage the bed itself
that looks exactly how it's supposed to be, i don't know how you think there is a problem at all (sarcasm)
vocal flax
faint sky
Glad you got it figured out. That was a head scratcher. 🙂
It shows me my pulleys are not concentric but belt stretch compensates for it. Considering my 10 year old belts were still usable this is nothing to be concerned about. The main lesson was not to trust random drawings online.
shy kelp
Any idea about how to replace this thing without spending a capital? There's a plastic tube between the extruder and the hotend , which guides the filament; the problem is that's too small and likely there's some heat issues since it looks like it has shrinked; anyhow this thing always ends up causing clogs
If you remove it, then it may work fine for a while, then the filament may bend itself since it isn't guided through the hole


 verbal sail
If only part has shrunk, trim it back
shy kelp
verbal sail
If only part has shrunk, trim it back
I want to substitute it all together
It hasn't yet managed to make a print without clogging
 tawny lodge
shy kelp
I want to substitute it all together
It hasn't yet managed to make a print witho...
tawny lodge
shy kelp
I want to substitute it all together
It hasn't yet managed to make a print witho...
So a bowden tube on what printer?
or is this a direct drive with a small piece of PTFE?
verbal sail
shy kelp
I want to substitute it all together
It hasn't yet managed to make a print witho...
Switch to direct drive. Kits are on Amazon for reasonable prices
shy kelp
tawny lodge
or is this a direct drive with a small piece of PTFE?
Direct drive with a small piece of ptfe
Likely the down piece hasn't enough cooling causing this issue, but I wouldn't want to change the whole block
tawny lodge
Yeah then trim it, order some more tube and improve the cooling on your heat break.
heat creep is a killer.
what hot end?
shy kelp
tawny lodge
Yeah then trim it, order some more tube and improve the cooling on your heat bre...
I dunno how, without making major modifications
It's a creality k1
tawny lodge
heard nothing good about the K1 extruder, you should contact Creality. They were replacing the extruder I think?
at least the early ones.
tawny lodge
shy kelp
I dunno how, without making major modifications
It's a creality k1
What filament?
If PLA make sure your chamber is open, that might be causing your heat creep.
coarse coral
shy kelp
I dunno how, without making major modifications
It's a creality k1
it's a particularly faulty k1. i have to suggest that.
iron remnant
It's not even called an Ender so I guess you have to [shrug in Creality] instead of [shrug in Ender]
vocal flax
Convert it to spider mosquito or sth
shy kelp
I ended up getting a bambu, wishing it's not junk as well 800€ T_T
Although I'm not sure if it's supposed to work well out of the box only with their filaments and slicers or I can use whatever I want without that many issues
 arctic dragon
The AMS works better with their filaments, but you should be able to use any filament within its temperature ratings.
vestal thicket
I haven't had issue with any filaments in my P1P and I'm using OrcaSlicer without any issues
coarse coral
shy kelp
I ended up getting a bambu, wishing it's not junk as well 800€ T_T
Although I'm ...
yas
that's one delicious looking printer. isn't that what adam savage bought?
half dew
coarse coral
that's one delicious looking printer. isn't that what adam savage bought?
He has the X1c - mostly the same but with a Lidar (which may or may not help with anything), and a more powerful processor so things like streaming video is smoother
coarse coral
yeh these bambu printers look a lot of fun. speed and quality seem to be really good, his functional parts looked very strong @half dew
half dew
coarse coral
yeh these bambu printers look a lot of fun. speed and quality seem to be really ...
I have a kickstarter x1c with the AMS. Its been the different between my printer being my hobby and my printer providing me parts when I need them
coarse coral
so u get everything with a printer like that. i enjoy the neptune 3 it's a big step away from creality but very familiar so far.
i can even push it to 120mm ish for some things which aint bad
half dew
I think the thing you lose is that if something goes wrong you're at the mercy of Bambu - its not full open source, only they make a lot of the parts, etc
Also, printing parts at full speed isn't great for strength and quality. I mostly use the speed for prototyping and then print super slow when I need functional parts
iron remnant
Yeah, I'm not super fond of the Bambu stuff because I feel like they are trying to make 3D printers into 2D printers and I'd like to avoid that.
I thought we'd sidestepped at least part of that when my friend got herself a fancy 3D printer ages ago that was all DRM-locked and then the company went under and she was like "Eh, not doing that again" so she got an Ender and (gasp) refuses to do any mods to it.
Okay, so Elegoo apparently is working on a 800mm x 800mm x 1000mm printer.
 noble fiber
Personally I don't ever see myself getting a Bambu for two main reason: unnecessary proprietary aspects, and forced cloud connectivity
Not denying they're pretty great hardware for the cost and can do a great deal to get people into printing that might otherwise not be able to
But I'm much happier with machines that won't do https://www.theregister.com/2023/08/24/bambu_lab_3d_printer_crazy/

Message brokering software blamed for dumping backed-up print jobs on idle devices
iron remnant
Yah I got called a CCP plant for pointing out that the Mk4 is not presently actually an open source printer, but as someone who has been doing cloudy things professionally for a very long time, the print job queue thing is super sketch and I'd not want a Bambu.
 ornate imp
forced cloud connectivity
only have used ender so far, but forced online stuff for things that literally do not need to be online is always a deal-breaker for me
vivid helm
iron remnant
Yah I got called a CCP plant for pointing out that the Mk4 is not presently actu...
Yeah I'm really not a fan of the direction Prusa is headed.
 sage peak
Yeah I'm not too bothered by the cloud stuff, can just use LAN mode as well. I have 5 X1C with AMS. My 8 Enders have been sitting idle waiting for someone to buy them lol
vivid helm
From what I understand not all of them support LAN mode, and they remove features if you use it.
iron remnant
I guess I'm just 3D printing's goth child, hatin' everyone.
But controlling the controllers for a print farm is huge vendor lock-in.
iron remnant
If everything's using Bambu cloud, this means that you couldn't schedule something else into your farm, et al.
shy kelp
At the moment I just need something that prints without issues, I don't have that much free time anymore. Replacement parts they don't seem go be that expensive..
But what other options I may had? Qidi x3 plus, too big, heard that there's not auto bed leveling up and foremost it makes you blind from ugliness; prusa I just dislike them, always had the impression that you pay for the name; custom building one, I thought about that too, but it's another project, and it was diverting my attention
Bambu should have a lan/cloudless option too, no?
noble fiber
So, they offer some functionality in lan-only mode, but the biggie is they still need online for any updates, and I think still an account+app for initial setup?
half dew
iron remnant
Yeah, I'm not super fond of the Bambu stuff because I feel like they are trying ...
I haven't really had that experience with mine - to me, the current situation, is much worse since it prevents access to 3d printing for most people
When it comes to the discussion about "open source" and 3d printers - the discussions don't ever seem meaningful to me. The words 'open source' don't actually mean anything on their own and the maze of licenses and what they allow or disallow requires lawyers to understand (unless its MIT).
vivid helm
Or BSD, or OHL.
There is widespread misunderstanding in the 3d printing community of what 'open source' actually refers to, even worse than the software world.
noble fiber
I'll take "confused opensource" over "definitely locked down" any time
Don't feel like having the paperweight status of my equipment tied to whether a single company decides to dissolve in the next year
half dew
Open source doesn't mean "not locked down" - which is the problem. this is why the confusion is bad
Its entirely dependent on the license whether open source means that a company has to share anything with the users - including even disclosing the fact that they used an open source library
What you specifically care about is referred to as "copyleft". Typically GPL licenses.
vivid helm
GPL does not work well for hardware designs; its misapplication is a big part of the reason this discussion has come up to begin with.
iron remnant
Hm, if I ever did something substantial I totally want to nag some people for an ethical hardware license.
But, yah, I feel like what the printer buyer really wants is more akin to the open system term than anything else, much in the same way that a lot of folks said "It must run Unix" in the aftermath of the death of the PDP-10 and accompanying rugpull.
half dew
I think that regardless of what your position is - open source doesn't work for people who need a fully supported device. Having both options is probably the best situation for everyone. I don't really see open source options going away anytime soon and you have to jump through some pretty big hoops to pretend that commercial 3d printing manufacturers haven't existed
iron remnant
Yeah, I mean the worst of all possible worlds is the vendor who makes semi-crappy printers where the actual value is the community who fixes all of the stuff wrong with it.
(winks in Ender)
Might as well just let the community design the actual printer.
noble fiber
And before that Tevo, and before that probably Anet
I'm just happy nowadays you can get stupidly competent $300 Prusa clones
half dew
vivid helm
GPL does *not* work well for hardware designs; its misapplication is a big part ...
I'm curious - I mostly come from the software side. Are there good copyleft licenses for hardware?
vivid helm
half dew
I'm curious - I mostly come from the software side. Are there good copyleft lic...
CERN OHL v2. There are three variants: P(ermissive), W(eak) copyleft, and S(trong) copyleft.
half dew
Sweet, putting those in my pocket for when I decide to finish/release a few of my projects
vestal thicket
You can certify it too with OSHWA: https://www.oshwa.org/
 willow latch
I'm looking for some project ideas if anyone wants to give feedback: https://www.youtube.com/watch?v=XymXIYupF2w&t=1s

Blog:
https://augmenteddefense.com/blog/
Discord:
https://discord.gg/exTdQpABxy
Project on Thingiverse:
https://www.thingiverse.com/thing:6162056
Leave feedback and get updates on Reddit:
https://www.reddit.com/r/AugmentedDefense/comments/17hcmuo/xr_pistol_design_feedback/
shy kelp
I thought that it was metal, but apparently it's all plastic

There are holes even in this one
arctic dragon
Nah, all metal enclosures of that size is just not feasible at that price point. It’s not particularly important to be airtight, as most hobbyist filaments are fairly safe to print and don’t require heated chambers as much as stable temperatures.
shy kelp
Mah a cheap thin sheet metal should had been cheap
Not really neccesary, but I mean 800€
I'll hope it'll work fine
iron remnant
The spikes from my air quality meter that's sitting by the non-enclosed printer beg to differ:

(which is why I'm probably getting a Voron soon-ish)
vocal flax
I bought Daikin air filter it's expensive but worth it
 nimble token
I made a big "P" but I'm having trouble slicing it
This is what it looks like with the infill set to anything but 100%

it looks good with 100% infill but I'm not crazy enough to print it like that

 nimble token
I made a big "P" but I'm having trouble slicing it
nimble token
nimble token
I made a big "P" but I'm having trouble slicing it
Okay nevermind I'm dumb!
I had spiralize outer walls turned on (vase mode)
wind glade
iron remnant
The spikes from my air quality meter that's sitting by the non-enclosed printer ...
Out of curiosity what air quality meter do you use? I’m in the market for one.
shy kelp
Hm so long so forth it seems printing fine
On the p1s it seems that there aren't ai options like spaghetti detection and exclude object while printing huh...
iron remnant
wind glade
Out of curiosity what air quality meter do you use? I’m in the market for one.
SEN54. Doesn't have as small of a particulate sensor as the PMSA003I that AdaFruit sells but it does have a VOC sensor. Both of 'em have ESPHome support and work over I2C. Mostly, the SEN54 was in stock when I got an itching to get one.
shy kelp
Bambu slicer doesn't have functions of optionizing a geometry for 3d printing by editing the geometry while retaining the shape?
I used to remove the shell, use the infill as structure, and paint over areas which I wanted to be more dense (to have more strength)
shy kelp
Nvm done in cad
half dew
shy kelp
Bambu slicer doesn't have functions of optionizing a geometry for 3d printing by...
Yeah, its definitely not 1:1 with Prusaslicer - There is that OrcaSlicer branch of Bambu that has a lot more and every once in a while they bring in the changes to Bambu
shy kelp
also how can I send and print plain gcode files?
A print failed, I was going to print the cutted version, but then I found out it uses some 3mf file, not human readable, yet the bambu slicer does allow you to export gcode, but I don't seem to find a way to make it print
 gusty sorrel
Hi everyone, is there a library of 3D models of Adafruit boards? I tried searching the server but I'm not finding anything.
 loud silo
gusty sorrel
Hi everyone, is there a library of 3D models of Adafruit boards? I tried searchi...
loud silo
gusty sorrel
Hi everyone, is there a library of 3D models of Adafruit boards? I tried searchi...
3D Models of Adafruit products:
https://github.com/adafruit/Adafruit_CAD_Parts
Learn Guide:
https://learn.adafruit.com/how-to-use-3d-parts-github-repo
loud silo
loud silo
3D Models of Adafruit products:
<https://github.com/adafruit/Adafruit_CAD_Parts>...
gusty sorrel
Thank you!
wind glade
iron remnant
SEN54. Doesn't have as small of a particulate sensor as the PMSA003I that AdaFr...
Haha those are a bunch of letters…. I forgot which discord I was in!
Is there a project page for the setup you have? I’m about to set up a workshop with wood tools and 3d printers, and want to make sure my lungs are safe.
Still a bit new to the whole DIY electronics thing
iron remnant
Um, not yet.
I think of it as ... um ... an easy tweak, but I'm thinking back and it really isn't, LOL.
It's only "easy" if you've already set up ESPHome, Home Assistant, etc a few times.
wind glade
Hahah maybe I’ll just get one off Amazon that’s “smart”
iron remnant
Eh.
What's the fun in that?
There's a whole world of fun projects to do with Home Assistant + ESPHome.
Bonus points: HA can connect to Octoprint and similar services.
coarse coral
shy kelp
also how can I send and print plain gcode files?
A print failed, I was going to ...
how are you getting on with it?
faint sky
3mf is a 3d mesh file, even if you could read it, it would likely be a ton of math. you have to slice the mesh file with the slicer. if there's a problem with the mesh file then slicers can sometimes complain and fail to slice them properly.
Cura will complain about my models not being water tight a lot. If your models aren't perfect it can throw errors and some slicer features might not work correctly with a poorly constructed model.
shy kelp
In the end I just sliced the cad, and printed it
For now it just prints, as I wanted, but it's really limited.
Also it really drives me nuts the way it links to the devices. I use my mobile hotspot as wifi, this one for some reasons in the lasts version, creates new subnets each time breaking stuff. But with this printer is particularly annoying because I need to reset it, to unlik previous links to I can link it
Also someone stole my idea (more or less):
https://3dprintingindustry.com/news/peopoly-launches-the-worlds-first-maglev-desktop-fff-3d-printer-the-magneto-x-technical-specifications-and-pricing-224861/
That's what you get with procrastination and brokeness

Time is running out! Nominate now for the 3D Printing Industry Awards 2023. Hong Kong-based 3D printer manufacturer Peopoly has launched the Magneto X, the world’s first MagLev-based desktop FFF 3D printer. Doing away with belts and pulleys, Peopoly’s new 3D printer employs a proprietary MagXY magnetic linear motor system for the X and Y […]
faint sky
That's.... not a bad idea.
iron remnant
I can see the attraction
shy kelp
Although that's not truly maglev. They still use a linear axis
noble fiber
I saw it at ERRF, was pretty neat
wind glade
iron remnant
There's a whole world of fun projects to do with Home Assistant + ESPHome.
Is there a central hub/documentation I can read up on home assistant and its capabilities?
arctic dragon
shy kelp
Also someone stole my idea (more or less):
https://3dprintingindustry.com/news/p...
Nah, the idea has been around for years, but here I think someone has (or had) a patent on this type of magnetic linear actuation.
Even if you had the money to make it, there is no guarantee you’d be able to sell it, at least in the US.
shy kelp
Mah they claim to be the "first"
Anyhow for the sale/patents I really dunno, as I see they're not actually really implemented, unless you're in the long run "stealing" market share
balmy pulsar
mag lev? sigh. i hate false marketting


 scenic bronze
https://learn.adafruit.com/3d-printed-case-for-adafruit-feather/parts Does anyone happen to have the fusion360 source for this case? (or when you try to access the source, do you also get a permission denied?)

Adafruit Learning System
A Multipurpose Enclosure for Adafruit Feather
vestal thicket
scenic bronze
https://learn.adafruit.com/3d-printed-case-for-adafruit-feather/parts Does anyon...
I get permission denied, too. Maybe leave feedback in the guide (on the upper left) that the link is broken
scenic bronze
vestal thicket
I get permission denied, too. Maybe leave feedback in the guide (on the upper l...
Will do, thank you so much.
faint sky
@scenic bronze I'm not sure where you're clicking to get a permission denied. Here's the repo it links to https://github.com/djecken/Adafruit-Feather-Box/tree/master/stls
ah the ac360.co link. seems that's some kind of shareable link directly from within fusion 360, weird. yes definitely leave feedback about that.
you can get all the stl files from the repo but the .f3d fusion 360 project file doesn't seem to be available for that one.
It is also available on Adafruit's Printables page https://www.printables.com/model/7191-adafruit-feather-box-enclosure

Printables.com
YouTube: https://www.youtube.com/watch?v=jy7a-z19UEQ NEW UPDATE April 8, 2016 – Added new parts for Adafruit 2.4" TFT… | Download free 3D printable STL models
This is why I love github and printables.. oh you're looking for a 3D printed enclosure from 7 years ago... here ya go. 🙂
faint sky
Working on a wall mountable cane holder for my mom.

One of these types. On the 6th iteration, getting close to a good design.
 balmy pulsar
nice
winged helm
Would polyurethane work to protect a resin print from the sun?
 misty oasis
Hello,
I’m a noob at 3D printer. I’ve printed a couple of things, like a basic boat and rabbit, but my prints turn out like the image shown.
I’m using a Ender V2 neo.
I have a 250 degree nozzle and 100 degree heat bet, print speed 90, and a Z axis of -0.01.
Perhaps it’s my settings? Or am I doing something wrong?
 faint sky
winged helm
Would polyurethane work to protect a resin print from the sun?
faint sky
winged helm
Would polyurethane work to protect a resin print from the sun?
Polyurethane is poor for UV resistance, UV resin is a little better, clear acrylic is used in automotive and offers the best UV protection but no clear coating will last forever.
Whatever you choose ensure it has a UV inhibitor in it.
faint sky
misty oasis
Hello,
I’m a noob at 3D printer. I’ve printed a couple of things, like a basic b...
What material are you printing with PLA? What is your nozzle temp and bed surface temp set at in your slicer? Typically with PLA the recommended nozzle temp will be the range printed on the spool. 90mms is a bit fast for a bed slinger realistically, slow it down to 40mms or 50mms. If you're using Cura it's always recommended to do some calibration shapes first.
If you mean that your actually using 250C nozzle and 100C bed temp that is way too high for PLA. You will get extreme stringing and first layer bubbling with those settings. Try 220C & 60C instead.
Enders will have a hard time printing near 100mms with the stock components. 50mms is a more realistic speed.
Calibration towers should be done to dial in your nozzle temp and retraction.
gloomy anchor
are there actually filaments that can resist the effects of humidity and can be "warp free" and "bubble free"?
faint sky
In terms of being hygroscopic yes PLA is one of the best and the reason why it's the default filament for most printers.
Warping and bubbling are typically caused by too low bed heat or too high bed temp respectively. 3D printers can be very fickle if you're printing beyond their capabilities or preferences.
They all have their own personalities in a way. You have to find out what your printer likes and does not like... and that takes time, effort, and eventually experience.
shy kelp
gloomy anchor
are there actually filaments that can resist the effects of humidity and can be ...
Petg I think
I took a spool that was opened for like 10 year and was printing fine, except that the filament was getting stuck by itself in the spool
Abs is similar but fumes
Whereas a pla with a similar story, was unprintable because it was really brittle, so it breaked itself
shy kelp
balmy pulsar
petg is extremely bad for bubbling and absorbing humidity
Then it's pretty surprising that it prints well O_o
balmy pulsar
you must live is a dry place. it does print well, but it needs to be kept dry.
misty oasis
faint sky
If you mean that your actually using 250C nozzle and 100C bed temp that is way t...
I tried the settings you suggested and it came out like this. Perhaps it’s my Z axis?
 faint sky
Yes, recalibrate your Z offset. Start with the center probe then realign the 4 corners with the center.
Here's a good video on tramming the V2 Neo https://youtu.be/0eqF4Tl3wiU?feature=shared&t=271
You want everything as level as possible without relying on autoleveling at all. This will make autoleveling work even better.
You will also want to ensure your slicer settings for the printer is using the bed mesh so you don't have to probe 16 times prior to each print.
misty oasis
How do I do that?
faint sky
That's one part I highly disagree with in that video... it's unecessary and a waste of time if nothing changes between prints.
Are you using Cura or Creality Slicer?
For Cura you would go into your Printer Settings and change the start gcode.
If Cura doesn't have a profile for your exact printer you can create a custom one and name it Ender 3 V2 Neo no problem.
misty oasis
faint sky
Are you using Cura or Creality Slicer?
Creality slicer
faint sky
Creality Slicer is just a clone of Cura anyway.
They work the same.
G28 ; Home all axes
M420 S1 Z10; Use Bed Mesh with Z-Fade

Edit the start gcode in Preferences>Machine Settings
Now when you do autoleveling it will save the bed mesh and use that for every print until you do autoleveling again. As long as you don't mess with the adjuster wheels on each corner your bed mesh should permanently stay the same.
M420 uses the bed mesh saved during autoleveling probing. 😉
CR Touch and bed mesh is a great feature to have by default.
S1 in the gcode means it's saving to memory slot 1 basically and Z10 will fade the autoleveling upwards from layer 1 to layer 10.
After layer 10 if your printer isn't perfectly aligned you'll notice defects.
G28 should home your axis to the closest left corner of your print bed. That is typically home prior to putting down purge lines.
misty oasis
The struggle is real 😅
Am I doing something wrong? Also I appreciate all your help
Counterclockwise = lower
Clockwise = higher
Correct?
faint sky
I honestly never remember which direction it is. When the sheet of paper starts getting friction is when you know you're going in the right direction. 😅
OK this is a common issue for beginners that isn't often mentioned. Prior to your initial manual probe you want your adjuster screws to have plenty of free tension. Loosen all of the adjuster wheels so you have plenty of spring height to work with, otherwise as you've found out the hard way, you might not have any free play to work with and you might max out the spring travel.
Ricky Impey has a great generic guide for 3D printer setup. Though it's not the exact model you have, the principle is the same for practically all bed slingers.
In this video I'm going to show you how to level or tram your bed, set a bed mesh and set your z height on a 3d printer with a bed probe.
You may be surprised to hear that you still need to level or tram your bed when you bought a 3d printer with 'Automatic bed levelling'. Well unfortunately, this is very likely to be a little white lie that 3d...
here's another generic guide he produced that also has some different tips and tricks https://www.youtube.com/watch?v=_Ic00W18_ck
and here's one for the S1 Pro that I have, which I reference every time I have to retram and recalibrate z-offset... which is honestly only about once every 3-6 months of printing. https://www.youtube.com/watch?v=GmhBYOEb-ro
It's not a matter of if you have to retram and recalibrate z-offset but when... because v-rollers degrade over time and mechanical parts wear. That will be part of your 3-6 month maintenance schedule that all 3D printer owners have to do.
iron remnant
With 3D printing, it's hard to give it your level best.
misty oasis
faint sky
OK this is a common issue for beginners that isn't often mentioned. Prior to yo...
Will do 👍
misty oasis
I reset the gear and it still doesn’t go far down enough
coarse coral
Music: The Inspirational
Musician: Soundscape
Formnext Frankfurt 2023
coarse coral
misty oasis
I reset the gear and it still doesn’t go far down enough
How far short are we talking? 1mm , 2mm?
coarse coral
On your printer you can adjust z offset via the touch panel. Have you tried that?
I mean how big is the gap between the nozzle and the build plate? If it's huge then there is something else but if it's less than a cm I think you just need to adjust z offset on your touch panel
misty oasis
I'm unsure, how do I check that?
coarse coral
In your touch panel you just try visiting all the menus and sub menus and just scroll up and down to get an idea of what settings are available to you. That's one step to just learning the 3d printer you have
Within one of these menus maybe titles adjustments or levelling you will find a setting called z offset when you increase or decrease that value the nozzle will move usually inline with your changes so you can visually see this
But keep an eye on it because if you lower the nozzle too much then you might scratch your build plate so when you find the z offset adjust it slowly and then now you know this setting I would reset all your build plate tightening because it's probably now a little bit too high
Just find the balance between build plate tension from the knobs and the z offset
misty oasis
what I've done so far is reset the configuration, auto home, set the Y to 0, and then used the paper to adjust the Z axis
I have it set to about -1.67
coarse coral
it sounds like you are confusing the y with z
The X and y is specifically the build plate. I've never adjusted X or y. The z axis is vertically up and down
You should adjust the z offset until the paper is nice and neat
misty oasis
misty oasis
what I've done so far is reset the configuration, auto home, set the Y to 0, and...
*set the X to 0, my bad
faint sky
If your z-offset is that far off where the adjuster wheel cannot make up the difference then possible the gantry isn't perpendicular during assembly or some other assembly issue.
Try to get the build plate so all adjuster wheels are the same height. Raise the gantry up a little and measure with a ruler from the left side to the surface of the build plate then do the same on the right side. They should be identical in height from the build surface. If it's off by 2mm or more you've got an assembly issue.
Do some measurements and use a square to see if everything is parallel or perpendicular true. The assembly has to be close to squarely true otherwise issues like this might be possible.
misty gyro
Chiming in here, but when I assembled my Ender 3, there was a little microswitch that detects the "Z home" height. The video I looked at said to use the four bed levelling screws to set the bed about half way up its vertical range. Then carefully lower the head by manually turning the "Z screw" that's driven by the stepper motor till it just touched the bed. Then move the microswitch up and down till it just triggered, and finally tighten it in place. At that point, everything was set, and I had (and still have) plenty of room to adjust the bed with the four levelling screws.
TL;DR is there a microswitch that detects when the head reaches "Z home"? If so can you move it?
faint sky
I think the switch comes off in favor of the CR touch on the V2 Neo.
coarse coral
misty gyro
Chiming in here, but when I assembled my Ender 3, there was a little microswitch...
Yeh there's usually something to stop it grinding through the build plate but various types as far as I can see. Not sure if ever there's both a switch on z axis and also hot end like cr touch. Maybe both are in play as a basic feature if not at least one when a bed leveller ain't present.
@faint sky had thought the gantry could not perpendicular also but the chances of it being so off to the point the nozzle is miles from the build plate I feel is low and also would be visually identifiable.
faint sky
coarse coral
Yeh there's usually something to stop it grinding through the build plate but va...
Only has to be off by 2mm or more left to right as that's the maximum that autoleveling bed mesh can compensate for. a beginner likely wouldn't notice that kind of deviation visually, until it comes time to do z-offset calibration.
coarse coral
I imagine this is just not dialling in the z offset but who knows there have been some non sequitur stuff with assemblies like @ly4c79 s k1 printer and my printers.
faint sky
I have heard that on some printers you can adjust the CR touch a little up/down so might be worth looking into. On my S1 Pro you cannot, there are only screw holes.
I just started using a new roll of Polymaker white and it prints completely different than the black. I had to dial back my z-offset by about .5mm simply because of the way it melts compared to the black. Every time you make a change to your printer you have to watch it and re-calibrate appropriately.
coarse coral
Yeh I noticed differences with eryone matte pla colours. Weird stuff
I haven't been printing much for a while now hoping to get started again in the new year 🎊
faint sky
I'm printing some channels for one of those silicon side-lit LED strips.
Makes it wall mountable. So far I've printed 4 and probably have another 4 to go.

Also printed a corner bracket.

Will use small brads to nail it into the wall above the baseboards. Will have a PIR sensor for motion activation in a dark hallway.

 coarse coral
faint sky
Will use small brads to nail it into the wall above the baseboards. Will have a...
coarse coral
faint sky
Will use small brads to nail it into the wall above the baseboards. Will have a...
What do you think about this type of thing for a wall mounted 3d printer shelf for a 3d printer. Printed in a colour that matches the wall paint and mostly hidden with the printer on top?
Are these types of brackets strong enough in abs for that type of thing, could be cool to make a discreet shelf and screw them to the wall joists
arctic dragon
coarse coral
Are these types of brackets strong enough in abs for that type of thing, could b...
No, for anything with that kind of weight, brad nails are not going to be sufficient to support a shelf. If you want something that can hold a 3d printer, I’d suggest looking at some other floating shelf designs on the internet.