#help-with-3dprinting
1 messages · Page 9 of 1
 vivid helm
Bre Pettis lied about a number of things.
 balmy pulsar
Um, thats more or less the entire purpose of shapeways...
 faint sky
yeah it's basically plastic let's not kid ourselves. then you get into ABS which is really toxic stuff. i'd love to print it just don't have the setup for it.
 placid grail
yeah but they do spray gold/silver over a resin so it's not worth much
balmy pulsar
vivid helm
Bre Pettis lied about a number of things.
Ya think? Ha, i had to develop fixes to make hsi silly printers actually work
placid grail
I used to watch the stream of a professional jeweler who did that for viewers
gold is too malleable to work in 3d printing
has to be alloyed
faint sky
some of the chrome coatings on plastic for automobiles is pretty convincing and lasts for years.
balmy pulsar
usually jewelery is printed in wax then case. but they do use the direct metal prints too. there is an EOS prescious metal printer for gold and platinum
vivid helm
But at least saying "PLA is corn" is nowhere near the level of irresponsibility required for the resin companies to make claims about their stuff being "nontoxic" and "water washable" with a picture of it being washed down a drain.
vivid helm
balmy pulsar
Ya think? Ha, i had to develop fixes to make hsi silly printers actually work
I fear Prusa is going in the same direction now.
faint sky
yeah umm putting resin down your drain sounds like a plumbing disaster waiting to happen.
vivid helm
AND IT'S STILL JUST AS TOXIC
placid grail
they sayd that for my clay too
All fun and games until the city and insurance charges you 30 M$ for causing floodings and damaging people furnitures/homes
faint sky
or in a high rise building where water starts leaking in every apt
placid grail
basically one day it's going to dry and clog everything
faint sky
think voidstar just had to deal with that last month... maybe his upstairs neighbor was putting resin down their drain who knows.
placid grail
pottery workshop have devices to prevent that so it's better to just show up at thge community pottery non-profit place
also jewelry school are fun 🤣
as much security as a bank
bah offtopic again sorry
got a little carried away
balmy pulsar
Construction workees were washing their mixers down the storm drains here. yay
vivid helm
placid grail
pottery workshop have devices to prevent that so it's better to just show up at ...
Resin is more toxic.
balmy pulsar
resin is toxic yes. clay blocks all the pipe
faint sky
this is all fine, we're chatting about 3d technologies, definitely on topic. resin, clay, silicone molds, all relevant ways to make things.
balmy pulsar
all bad
linus got some form of metal clay printer. i wanted to develop one of those ages ago, glad to see the idea wasnt dumb
placid grail
basically if you want to pass 2 security guards and have a rfid card with 3 picturs of you and bank style vault. Then take a course at a jewelry school
pretty serious stuff
faint sky
clay you can break up, resin can turn hard as a rock. i'd rather have clay in my pipes than a chunk of resin.
placid grail
Just for a 300$ 4h class
Nobody told me so I asked them I must have taken a wrong turn and ended up at the canadian CIA and where the school was but it was the right place 🤣
balmy pulsar
there was a place around here that did platinum wire? i forget exactly. but the employees needed to change clothes on the way out. cause even the dust on their shoes would be worth a fortune
faint sky
alright i'm done for the night it's getting late here.
balmy pulsar
sleepy time
placid grail
we didnt work with gold at my level but it was stored in the school so theft measures were pretty strong
vivid helm
By the way I have multiple 2.5L containers full of resin-mixed IPA that I still don't know how to get rid of.
placid grail
kinda stupid to waste gold on newbies
we couldnt bring stuff from outside and had to buy it at the jewelry school
balmy pulsar
one guy i shared my shop with had a mental breakdown of some sort, and his friend came to take his stuff. packing it all up i found a literal 1 lb bag of gold.
placid grail
even if you can find silver ring blanks easily on the internet
vivid helm
Paper towels and gloves you can just set out in the sun for a few hours to cure the residue. But evaporating that much IPA would take a very long time.
placid grail
 balmy pulsar
resin in ipa is broken down. i dont think it will cure after that
balmy pulsar
what are the pads, rafts?
balmy pulsar
oh ok
balmy pulsar
oh. built in modeled rafts i guess
vivid helm
balmy pulsar
resin in ipa is broken down. i dont think it will cure after that
Yeah but you can evaporate the alcohol and end up with a white slime that can be thrown away.
balmy pulsar
hm
youtube slime video?
:x
you need an ipa reclaimer. i guess thats just destilling
placid grail
they dont seem to come of so Ill have to ask here later I guess 🤷
balmy pulsar
well, if you have to cut them there should be little snips that came with your printer
although they are kinda poor quality
vivid helm
balmy pulsar
youtube slime video?
Sorry I can't find my picture of it (if I took one)
placid grail
balmy pulsar
well, if you have to cut them there should be little snips that came with your p...
In the final assembly clearly the pads are gone on all parts

but the guide said to print it without rafts and didnt come pre-sliced so clearly they are part of the model
so not sure
balmy pulsar
yeah they like to build in tehir supports and rafts so there are less issues
if they left a gap you may be able to peel them off. but it seems maybe you need to cut them
they are there to help prevent the corners form curling up
placid grail
Is there a way to figure out how big the pieces were before import in cura ?
It's smaller than what I expect and I feel like I should check if cura didnt scale it down without telling me
even thought the M4 holes are 4mm and the M3 holes are 3mm
 alpine glen
placid grail
It's smaller than what I expect and I feel like I should check if cura didnt sca...
alpine glen
placid grail
It's smaller than what I expect and I feel like I should check if cura didnt sca...
.stl files don't store their scale. They just use a number without any unit. How teachers like to say "20 What? 20 Potatoes?"
So if the stl was exported with cm but cura expects the unit to be mm (or something, idk what cura actually expects), the file is scaled wrong
You can open stl in windows 10+ 3D builder. I don't really like it but you can measure stuff in there and afaik it doesn't scale anything, it just displays the file. And when opening the file you can select the unit
placid grail
Ok seems like the size I have. Also I guess my 3d printer aint so bad 🤣

 keen raft
Making screw holes way larger than they need to be would be unlikely, so if they are the right size, your model probably hasn't been re-scaled
If any other prefix-metre was used in the CAD software, you'd have a deviation of at least factor 10, so that'd be fairly obvious. Inches to mm would be a factor of about 25.
You could still measure some known distances, though. It is possible to miscalibrate a printer and get dimensions that are slightly off.
placid grail
well cars are like 74 inches wide on average
and this is supposed to be 1:10 and wider part is 7 inches so I guess it's ok
just didnt expect that the wheels parts would be such a small width
keen raft
What I mean is that even a slight deviation, especially when multiplied along the whole car's length, can be substantial enough to make non-printed parts not fit
I'd definitely check the accuracy before printing a whole bag of parts. But there was some chat earlier that I only skimmed, so maybe you already did that.
placid grail
yeah Ill get a lipoly/lipoly bag/class D fire extinguisher to test the size
if it doesnt work anyway there's always the option of hammering it in 🤣
placid grail
It's so weird using 10% infill for r/cparts...
first thing people said to me is to uses petg instead and like 75% infill
balmy pulsar
you should also have a scale factor for shrinkage usually. 2-5% with pla. but this is usually only important if it has to mate with pre existing parts
placid grail
base plates now i need to cut & filler the circle pads off
 faint sky
look at that! looks wonderful!
vivid helm
Could someone with a Pi Zero (any version) please try printing this and letting me know how well it fits?
https://cdn.discordapp.com/attachments/936502000521187375/1122320314609713233/qtqwiicliq-pizero-stud.3mf
balmy pulsar
printer not set up right now
 random urchin
vivid helm
Could someone with a Pi Zero (any version) please try printing this and letting ...
random urchin
vivid helm
Could someone with a Pi Zero (any version) please try printing this and letting ...
I think I've got a Pi Zero that I can test with. Please Stand By...
vivid helm
random urchin
I think I've got a Pi Zero that I can test with. Please Stand By...
Final version is in #show-and-tell
random urchin
vivid helm
Final version is in <#334905778857050125>
The board clicked into place fairly easily. Works well enough that I left it in place and stuck it to the back of my "angel" picture frame.


 frozen wasp
got a new printer but the filament wobbles around when we try to print
 toxic kite
designed for thicker filament? driving movement too fast, loose thingies?
faint sky
defines wobbles. wobbles on the spool holder?
resist putting bearings on the spool holder, it will spin too freely. spool holders are designed to be offset so there's some tension on it. no tension will cause the filament to come off the spool when the extruder pulls it down quickly, it can unravel.
you do not want a free spinning spool, bad things will happen including knots when it retightens after unraveling.
this is the main cause of people complaining about receiving spools with knots in them. most don't realize it's due to the spool holder spinning to freely because they "upgraded" the spool holder with smooth free spinning bearings.
while not impossible from the manufacturer the majority of the time it's a self-inflicted wound.
at slow speeds usually not a problem. faster speeds with fast printing and faster retractions on a custom non-offset spool holder is more likely to cause unraveling, retightening, and knots.
offset spool holder good

free spinning spool holder bad

this is one of the biggest misconceptions for beginners, the offset spool holder is by design. it's tempting to want to make a free spinning holder but it's a bad idea.
knots can still happen with offset spool holders but not as much as a free spinning ones.
It's the same concept as one of these types of fishing reels. If you don't cast with your thumb on it to provide tension it will turn into a spaghetti mess.

and then you'll spend an hour pulling out the line and respooling it. same concept. stick with the offset spool holders.
toxic kite
my friend's 3d printer makes tons of extruder feed drive slipping noises, only reason I could imagine for free-rolling dispensers
faint sky
the clicking from an extruder means it either can't feed more due to a clog, issue with extruder gears, or too much tension from the spool.
keen raft
I think this whole friction-free spool holder issue is more relevant for direct extruders, because they might pull themselves up if there's a lot of friction which in turn changes layer height. And in a very random way, which is even worse. Probably not an issue with a bowden extruder mounted on the side of the printer.
faint sky
backpressure inside the hotend which can't push out filament also normally caused from too low of a layer height, overextrusion, miscalibrated esteps, etc..
it can happen for any setup that's trying to go fast. the faster and longer the drive & retraction move on the spool the easier it is for the spool to free spin. if anything i'd expect it to happen more on a bowden because they have much longer retraction moves than a direct drive.
bowden has the tube itself to add some friction though.
one of the nice things about the creality filament runout sensor is it also acts as a backlash stopper. unlike a normal guide the runout box has teethed gears that engage in a backlash condition.
the filament will just loop in the air until tension is relieved in the proper direction and the teeth disengage.
keen raft
Yeah, the downsides from spinning too freely affect all kinds of extruders, but if you can somehow manage those, then direct extruders might very well benefit from them while bowdens probably don't. That's what I mean 🙂
faint sky
yeah, anti-backlash mechanism could help any fdm printer. it won't help a free spinning spool to stop spinning though. would have to design some kind of tension or brake on it.
it's more about the spool and bearing itself than direct drive or bowden.
balmy pulsar
motorised spool holders synced the to extruder is the only sensible choice
oh, not sensible, i meant insane.
😛
 iron remnant
I mean, if you want to over-engineer it all, probably the way to go would be to have a buffer motor system that would keep a loop of slack filament in a buffer.
vivid helm
Spring-based filament rewinders do exist
balmy pulsar
precision force feedback to keep exact tension on the spool
 arctic dragon
vivid helm
Spring-based filament rewinders do exist
arctic dragon
vivid helm
Spring-based filament rewinders do exist
Gravity-based rewinders, too.
 vocal flax
There should be 1 way bearings. Why overcomplicate
Imo even 1 way bearings are overcomplicating
balmy pulsar
1 way bearing would not accomplish anything
you need a friction brake whihc is easy enough to make. something that rubs on the spool
 winged helm
My prusa mk3s has crashed on the last two prints (same file). What are some good debug steps.
?
vivid helm
winged helm
My prusa mk3s has crashed on the last two prints (same file). What are some good...
Pictures? Is it crashing on the print or on the bed?
winged helm
Unclear. Came back to it and the print is a huge mess and the head is in the corner
vivid helm
Ah, your first spaghetti.
My guess is that the print detached from the bed. It's likely due to either warping or infill issues.
balmy pulsar
winged helm
Unclear. Came back to it and the print is a huge mess and the head is in the cor...
oh, i though you mean software crash.
yeah, detaching from bed, warping up and hitting nozzle, or seeing as its the same spot, maybe theres a feature in mid air that cant print.
winged helm
Here's the model I'm trying to print. And where it fails.

 vivid helm
winged helm
Here's the model I'm trying to print. And where it fails.
vivid helm
winged helm
Here's the model I'm trying to print. And where it fails.
Is that 100% infill?
winged helm
15 I thought but I'll need to check after lunch
vivid helm
Also what layer height and material?
winged helm
Pla .3mm
vivid helm
That should be ok. The only issue I can think of is if you have a corner lifting up. That can be caused by a variety of things.
vivid helm
Try reducing the bed temp by like 10C.
keen raft
winged helm
My prusa mk3s has crashed on the last two prints (same file). What are some good...
I usually find it enlightening to be really close up watching while something fails. Many things are quite obvious while they happen, but turn into a mystery as the print continues (or fails, in this case)
winged helm
I'll see if I can try that. Thankd
faint sky
If it's a 24 hour print that method won't really work. If it's a 15 minute print i'll watch the entire thing to see if there is anything the slightest bit off and try to figure out why. This is part of taking it in baby steps from small prints to full volume prints.
For bed adhesion issues I go the opposite route and raise the nozzle and bed temp in increments.
and also will print with a large brim because if it does start to lift you can use tape on the brim to tape it back down to the surface in a pinch.
but again, that's usually due to too low of a bed temp and the tape is an emergency band-aid.
 barren cairn
Hi all! I need to design a simple enclosure for an esp32 and a DHT-22. I've never done any 3D modelling but I am a software engineer and fairly practical. I know onshape is the hot new thing, but I'm wondering if anything has any tips for a YouTube series to follow so that I don't feel like a monkey clicking on random buttons trying to make something appear.
vocal flax
If you want to learn and are willing to invest, Prusa research just released their fusion 360 course.
It was around 40 45 euro
Disclaimer. I have not used or seen contents. I have good faith in Prusa research and their track record is reliable for a company
 thin breach
barren cairn
Hi all! I need to design a simple enclosure for an esp32 and a DHT-22. I've neve...
thin breach
barren cairn
Hi all! I need to design a simple enclosure for an esp32 and a DHT-22. I've neve...
OnShape has their own video tutorials. Some are lightning fast so you wouldn’t spend more time than you need. After watching once, I tried recreating their piece - reviewing when I got stuck - and that worked great for me. If you don’t need a particularly good looking case you can be in business pretty fast. The tutorials instantly go beyond what you will need (presumably- creating the drawn plans was outside my hobby needs anyway)
Keyboard shortcuts are excellent. No bloat on the computer.
keen raft
barren cairn
Hi all! I need to design a simple enclosure for an esp32 and a DHT-22. I've neve...
Just something to consider: Onshape is really expensive, so if you ever need to apply the many hours you spend learning it in a situation where you need a paid license, you'd better be rich. Fusion 360 is a bit better in that regard.
vivid helm
vocal flax
If you want to learn and are willing to invest, Prusa research just released the...
They offer some of those courses via printables prusameters.
 deft crypt
Everytime I try to print something it ends up layer shifting
I've leveled so many times
But then again I did change to new filament . . .
Idk if that'd effect it
Would it?
faint sky
layer shifting is usually caused by belt tension or worn belt teeth in a specific spot. Since most printers start in the center those teeth get the most use. Center your axis then slowly manually move the axis by hand checking the teeth. Depending on which direction your layer generally shifts should give you a clue as to which belt to inspect as well.
typically x axis but i've seen some y axis shifts happen too. if all the teeth look good tighten the belt a little, don't crank down the belt tension or you could cause unnecessary torque on the motor and eventually burn up your motor or even in some cases... break the motor shaft.
do small tension adjustments in increments once you've identified the axis belt culprit. do small test prints until the shifts stop happening.
vocal flax
In my case, layer shifting was loose pulley
 shy kelp
Due to costant fails, I ended up throwing my printer in the junk
Do you have any suggestions for extruders and beds?
My bed is wrapped, the extruder keeps failing
Or any printer that doesn't need constant troubleshooting?
vivid helm
What printer do/did you have?
shy kelp
vivid helm
What printer do/did you have?
First a ctc i3 wood, then an i3 mega, the lastest didn't break apart while printing but endless troubleshooting as the first
vivid helm
AnyCubic i3 mega? AnyCubic is... not great. Also large bedflinger designs are all problematic.
The Prusa i3 MK3S+ is a reliable workhorse.
keen raft
shy kelp
First a ctc i3 wood, then an i3 mega, the lastest didn't break apart while print...
The commonality between those two is their really low price. Not every cheap product is bad, but you should ask yourself why Prusa asks so much more for essentially the same product.
shy kelp
keen raft
The commonality between those two is their really low price. Not every cheap pro...
I don't have experience with it, I always thought it was due to the lower volumes then becoming some sort of luxury kind of brand
May be wrong
keen raft
Well they would be stupid not to charge extra for their good name, and part of the price also goes into non-tangible things like support. But a lot of it goes into quality components that are then checked for tolerances, so that printers are very consistent in quality and specs
vivid helm
Volume has almost nothing to do with it. Branding has some impact, but a lot of the additional cost goes into getting genuine components from reputable companies.
And what venture said
Also Prusa does their own R&D rather than just copying other designs.
The i3 mega at least looks better than a lot of the other cheap printer designs out there (it uses linear rods rather than v-wheels), but large build volumes are still problematic with bedflingers due to the weight of the bed and issues with warping.
shy kelp
Anyhow anything else? I'm bored by cartesians by now
Any core xy or something faster? If I'm going to spend 1k, I'd like to not be still slow, although with less troubleshooting
Prebuild that is
vivid helm
Well, I recommend avoiding creality at all costs.
I've heard... mixed results about BambuLab. Scumbag company but they make some decent machines.
keen raft
shy kelp
Anyhow anything else? I'm bored by cartesians by now
Any core xy or something fa...
If you want to spend 1k, get a Prusa.
vivid helm
As a general rule CoreXY will be higher maintenance. They're more complicated machines.
shy kelp
vivid helm
As a general rule CoreXY will be higher maintenance. They're more complicated ma...
How so? They do not look that different
vivid helm
In comparison to a bedflinger?
First, x and y are coupled together via a system of belts and pulleys. The "x" and "y" motors do not individually control x and y motion (running a single motor results in diagonal movements). The x/y axis is set up as a gantry that moves only the toolhead. Second, the z axis is independent. Most CoreXY machines raise/lower the bed, but some (such as the Voron 2.4) have a stationary bed and move the entire xy gantry.
They are completely different motion systems.
keen raft
So you want a prebuilt CoreXY machine that is very fast, works out of the box and costs 1k or less?
vivid helm
Closest you're going to get to that is BambuLab, but I can't recommend them in good conscience because of their treatment of several open source projects (although to be fair Prusa's take on open source is getting worse).
vocal flax
That's either bambulab or Prusa xl and last I remember xl was not cheaper than 1k
Or build a
Voron
Ratrig vcore
Both really nice machines
Ratrig being complete kit from ratrig company and open source (idk how satisfiable to herr_brain tho. I have limited understanding of Aspen source but I always prefer and support it some way when I can)
Voron is a much bigger community and has many kit options available
You'll get some amount of fiddling to get things work well but it seems like you are used to it
vivid helm
vocal flax
Ratrig being complete kit from ratrig company and open source (idk how satisfiab...
Technically is licensed under CC-BY-NC, but they make it clear that is what the license is.
vocal flax
shy kelp
Due to costant fails, I ended up throwing my printer in the junk
Do you have any...
And for the extruder and bed, I have similar printer. I have graber i3 with some Prusa bear parts and they are serving me well so far. With a clone e3d v6 (recently added bimetallic heatbreak I am unsure if it made any difference but it looked way better part than "stock" parts I had) and bed was mk2a double power heater with glass and magnetic pp plastic bed. The heater PCB warps but meh its fine because glass is pretty okay, and plastic bed is not that rigid anyway. I thought about epoxying PCB to
Aluminium sheet
Glass
That could be solution to warping problem. Tho won't really solve warping just get a "decent" abl sensor and increase number of mesh points (mine is 16 points 4 by 4 square). From my modding experience warping is not much of a bed issue more of a mounting issue. Iirc reason why prusa is able to use glass fiber PCB (mk52 bed) as bed is because they added supporting screw on the middle and edges. And rigidly couple bed with spacers instead of commonly used springs (I use cloth pin springs for my bed 😅)
The v6 clone really served me well, had no issues other than too much retraction cloging it. I was gonna upgrade to mosquito mostly because I liked the idea of their mounting system (9mm grove mount feels like prone to vibrations) but never went with it yet because of money issues. My suggestion for the hotend is to just use good quality heatbreak. With quality heatbreak even the mediocre cooler and heater blocks work well. Nozzle is considered consumable by majority. Its mass produced and even cheap one is sufficient for bed slinger. I have never had problems with my cartridge never bought a secondary one so I have no idea on it.
vivid helm
Aluminum heat beds are what Vorons use. They are good as long as they are cast, not extruded.
They tend to be thick and can take awhile to heat though.
vocal flax
They are better than glass
Glass is pretty bad due to conductivity
afaik glass beds were the reason they added decreasing bed temp after initial layer
keen raft
You may remember when I recently asked about that horrible, wobbly mesh. I thought that the cause was a warped metal bed and that this in turn led to bad first layers and a constant need for Z offset readjustments. I have since solved this and I've learned two things: First, the glass bed didn't result in a better mesh, because something else on the printer is definitely bent, but it's still awesome, especially at releasing parts. I wouldn't go back. Second, whatever part is bent, the mesh actually takes care of it. The issue apparently was a bad nozzle all along. After four swaps, I've now got a high quality hardened steel one and all of my first layer issues are gone.
 novel apex
Heya question: I'm designing something that has multiple parts that will be joined by a bolt and will slide together via straight dovetails. What's a good clearance to allocate between parts? I tried searching for this but everyone says to print a tolerance gauge and set it to whatever passes, but I'm wanting to publish this and I don't think everyone will have the same print quality
vocal flax
Either post it paramedically or publish 0.1 0.2 and 0.3 tolerances
If someone has excellent printer or willing to sand it can print .1 and someone that has mediocre printer prints .3
keen raft
balmy pulsar
i dont remember any of this. what was wobbly?
Oh, it was a couple of weeks ago. The prints were actually fine after the first layer was down, but the mesh had some very consistent grooves along the Y axis. I believe the printer's X profile is bent a little, but the replacement from China doesn't even lie flat on a table so that's even worse. And since it's working now, I'm not changing anything until it breaks 😉
vocal flax
Perhaps time for a linear rail upgrade
keen raft
Yeah you did suggest that 😛
But as long as it works with ABL, I'm honestly fine with it. The deviation isn't that big.
 rocky rune
anyone got recommendations on how to 3D print gears? specifically ones that can do a 90 degree turn, I found geargenerator.com but it seems like it'd only be useful for geras used on the same plane
vocal flax
rocky rune
anyone got recommendations on how to 3D print gears? specifically ones that can ...
The keyword you are looking for bevel gear
balmy pulsar
fusion 360 has a plugin for gears. it is pretty useful
it does worm and bevel and regular helix/straight
example (obviously with more parts modelled to the gears)
 vocal flax
There are different tooth profiles just as planar gears (spur helical herringbone etc.) But generally called bevel and you can add different geometries in later revisions
rocky rune
Hmm alright. I was trying to avoid fusion 360 because I don't have a huge budget for projects so I don't want to lock myself into a paid platform (I've been using TinkerCAD and KiCAD) but that does look very nice
alpine glen
for hobbyists & students it's free
rocky rune
even if I'm prototyping something I might make into a commercial product later?
alpine glen
idk but I would guess maybe not 😭
rocky rune
do a lot of people use Blender for 3D modelling? I know it's usually more for animation but I've heard it's possible
vocal flax
You can try freecad but idk if it has gear stuff
vivid helm
rocky rune
do a lot of people use Blender for 3D modelling? I know it's usually more for an...
Yes, but it does mesh modeling. It's not really good for mechanical designs.
balmy pulsar
rocky rune
even if I'm prototyping something I might make into a commercial product later?
yes, sure
the terms are if you make over 100k you need to pay full price. for hobby free. and in between you can "apply" for a start up license. basically in your case, if you sell the product, pay for a lic.
novel apex
vocal flax
Either post it paramedically or publish 0.1 0.2 and 0.3 tolerances
Gotcha, thank you so much!
keen raft
I did a foolish thing and got myself a Vyper, thinking the strain gauge would be a great thing to tinker with... turns out it isn't. And it also suffers from huge extrusion problems that I can't really explain. Both the stock and their replacement motors are skipping even at very low extrusion speeds (both with the stock extruder, which also grinds, and a Micro Swiss Bowden Extruder). But there doesn't seem to be any blockage in the hotend (non-stock, E3D V6 with .2 nozzle) and it extrudes perfectly if I help the motor by pushing the filament manually.
Is it possible that their motors are just really, really bad?
vocal flax
@keen raft why strain gauge is not a great thing to tinker with?
I was planning on buying creality strain gauge and adapting e3d V6 to it
My luck with diy touch probe was bad (high range and standard deviation)
keen raft
vocal flax
<@205572952597594113> why strain gauge is not a great thing to tinker with?
I thought it would make things easier overall, compared to a BLTouch, and it kind of does, but it also comes with a bunch of drawbacks that the BLTouch doesn't have. Like:
- You have to heat the nozzle a fair bit. The idea is to make it warm enough to measure heat expansion and to also push any filament out of the way that may be stuck to it, but not so hot that it starts oozing. That's a difficult balance though.
- Any cables tugging on the hotend or the hotend moving quickly can trigger the sensor or push its analog output into a different range (Not sure what consequences this will have, probably less precision?)
- It pushes down on the bed pretty hard while probing, to the point where it damages PEI. Since the bed is mounted on a single rail, it doesn't put up much resistance and this can cause two major issues: First, it generates results that are too low, making the mesh useless. And second, if it triggers way too late (which it sometimes does, for no apparent reason), then the Z retraction for a second sample will not put it back above the bed. Instead, it will still be under tension when the second sample starts, but the electronics think this is drift and compensate for it, resulting in a second sample that pushes even harder.
- To counteract pushing down the bed, I moved it really slowly (0.5mm/s). Generating a mesh at that speed takes forever.
- To counteract the occasional hiccups in repeatability, I took a bunch of samples for each point, slowing things down even more.
The BLTouch, in comparison, is more accurate, more repeatable and generally easier to handle. The only downside is that you have to determine the X and Y offset once and then occasionally readjust the Z offset.
I've used (genuine) CRTouch and BLTouch probes and they are both really good in my experience
vocal flax
Thanks for the insights
Sounds like solvable issues
But maybe a good diy touch probe is better
Rn thinking about buying a replacement needles and creating rest of the probe myself
Or somehow adapt klippy, klackender to my machine
keen raft
Solvable, absolutely! But it is a bit fiddly and I think to do it properly, it would require both knowledge about and access to both the printer firmware and also the sensor electronics (and possibly firmware, if it has any).
Pushing a rod through a light switch is a lot easier than getting a binary result out of a drifting analog value
vocal flax
keen raft
Solvable, absolutely! But it is a bit fiddly and I think to do it properly, it w...
I have all those at my disposal since it's custom printer and ramps 😄 but I'm not that crazy, yet.
vocal flax
keen raft
Pushing a rod through a light switch is a lot easier than getting a binary resul...
My chance on that is not good so far but I will keep trying
I probably should just give up everything and convert myachine to voron legacy but I am not ready to jump on that boat yet
Rollers/bearings are expensive
iron remnant
Sounds like a real strain.
keen raft
Yeah, puts the user under a lot of tension
 misty oasis
Hello, I am in need of some assistance. I’ve had my printer for about 2 months and sometimes when I print stuff it doesn’t stick! I can’t figure out why it does this. I level it before the print and it’s at max heat. Can anybody help me with this?
 keen raft
misty oasis
Hello, I am in need of some assistance. I’ve had my printer for about 2 months a...
keen raft
misty oasis
Hello, I am in need of some assistance. I’ve had my printer for about 2 months a...
Some things you might want to try:
- Make sure your Z offset is correct. Maybe go a little lower. The first layer has to be squished a little, the extrusions can't lie on the bed like cooked spaghetti.
- Make sure the bed is clean.
- Make sure the nozzle is clean (wipe it with a folded paper towel at >180°C). Also make sure it isn't clogged or damaged (when you extrude in mid-air, the extrusion should go straight down, not curl back up onto the nozzle)
- Let the printer sit at the desired bed temperature for a few minutes before beginning. You want any heat-induced deformation to happen before you start printing.
- Create a new mesh before each print, especially if your bed has tramming screws that might inadvertently get turned.
- Increase mesh resolution (helps more if your bed is very bumpy, but takes much longer)
- If all else fails, try using adhesive (but that's kind of a workaround for other problems in my opinion)
frozen wasp
Can recommend cleaning the bed, we had bad adhesion and then we spritzed some IPA on it and it was perfect!
shy kelp
You can also use stick glue or hair spray to stick stuff in the bed
Just be aware that stick glue is a pain to remove
vivid helm
Glue stick is water soluble. It's only a pain to remove if you try to use IPA.
arctic dragon
A fresh PEI sheet just needs to be clean and oil-free for good adhesion. A worn bed might need a little something extra to get a good stick.
faint sky
Also a good thing to check occasionally is the the heater pad under the bed surface. Ensure it's adhered correctly and evenly all around. This can sometimes be a hidden contributor to uneven bed heating which can lead to bed adhesion issues in specific spots on the bed.
If you're using auto leveling and mesh probing with every single print as others have said, clean the bed, increase the bed heating and nozzle temp.
Higher nozzle temperature decreases viscosity of the melted filament and makes it stick better to both the bed and each layer.
Higher bed temperature helps ensure at least the initial layer adhesion is better. The taller the print the less of a factor bed temperature becomes... like at layer 100 bed temp plays almost no part in your print except if you have warping issues on the inital layer during a long print. At higher layer heights nozzle temp/cooling become the thing you'll end up trying to dial-in the most.
So if you're having issues with layer 1. Higher nozzle temp + higher bed temp + less cooling is usually the solution especially if you're using auto probing every print.
For PLA if you're printing with 205C nozzle temp & 50C bed temp, raise them in 5C increments until the first layer sticks. That is done in your slicer settings while slicing the model. If need be, raise them, reslice, and try again. That's usually the way to go. 😉
and yes definitely clean your surface, can see finger prints on it, which will absolutely destroy adhesion from hand oils. IPA, rubbing alcohol, or just soap + water, and plenty of drying time are all valid suggestions.
faint sky
usually after i clean with soap + water it takes a couple heating cycles for the detergent to evaporate, so my first couple prints after cleaning will not stick... but once it fully evaporates the amount of adhesion I get would take 100lbs of force to remove a heated print from the bed. always be patient after a print and let the bed fully cool down before attempting to remove a print. impatience and trying to remove a warm print from a warm bed is how most people end up taking a chunk out of their bed surface while removing a print.
 balmy pulsar
smear it with glue yes
(well, only where the print will go)
wipe with alcohol first if you have some
you can also use elmers white school liquid glue, brushed on. same basic stuff, PVA
keen raft
misty oasis
So I just rub a glue stick on my heat bed ?
Have you done a paper test, followed by a first layer calibration print?
I'd still guess that your nozzle isn't low enough.
misty oasis
keen raft
Have you done a paper test, followed by a first layer calibration print?
I haven't. I've really only had my printer for like a month so I'm a newbie to all this stuff
keen raft
Well then that is probably your main issue at the moment.
Hold off on the glue, then heat the printer up and wait a few minutes, then do a first layer calibration print. Adjust your Z offset while it prints and save the result. There's plenty of resources online on how the first layer should look.
Since you're already close enough to the bed to make some prints stick, you can probably just skip the paper stuff.
Also, not related to your first layer: Your bed heater cable (or the strain relief, at least) is mounted at a weird angle, you should check that it's firmly connected.
 misty oasis
Ok, will do
placid grail
keen raft
Yeah, puts the user under a lot of tension
this made me smile because in french tension is basically voltage and this is saying to put the user under voltage 🤣
vivid helm
"They'll talk, just increase the voltage."
keen raft
placid grail
this made me smile because in french tension is basically voltage and this is sa...
Haha, I didn't know that! That's a whole new unintentional pun 🙂
keen raft
I just learned that you can use Windows's CMD and PowerShell to ssh into a Raspberry Pi running Klipper to compile the printer firmware and also to scp the compiled firmware back to the Windows PC for transfer onto an SD card. No extra software required. Very neat!
winged helm
Doing a live z cal on my prusa mk3s. Does this seem too close? Or not quite there?
 vivid helm
Might be a little close.
 coarse coral
misty oasis
Hello, I am in need of some assistance. I’ve had my printer for about 2 months a...
coarse coral
misty oasis
Hello, I am in need of some assistance. I’ve had my printer for about 2 months a...
try uhu stick if all else fails
coarse coral
frozen wasp
Can recommend cleaning the bed, we had bad adhesion and then we spritzed some IP...
i find stick glue really easy to remove, i just take to a sink with hot water and let the glue melt and wipe it clean with a towel - then isopropyl alcohol and if i'm unhappy with tramming use uhu stick
takes 5 mins 🙂 and i'm set for a month of printing
i usually run a calibration for my printer before commiting to prints after this
but i just keep that on my memory stick, others may be fortunate with a wifi printer 🙂
 tough crag
Hello! Having some weird issue with slicing a model for a case for the macropad.
When printing the upper part of the case, it seems like the outer visible part (top) is not sliced correctly and almost looks unfinished or “internal”. I have placed so that part is down to the bed ofcourse, but it’s very strange. Have not come across this before.


The finish is way better on the “inside” of the model, and this is the finish I normally get. Not quite sure how to explain it, hope you can get a idea from the pictures
My best bet is that I’m missing some slicing setting

Printables.com
Snap fit case for the Adafruit MacroPad RP2040.
Requires no additional hardware. | Download free 3D printable STL models
keen raft
tough crag
The finish is way better on the “inside” of the model, and this is the finish I ...
Assuming this was printed upside down, it looks like some sort first layer issue. Could be a slicer setting I guess, but more likely the nozzle is just too far from the bed.
tough crag
Yeah I’m leaning to slicer issue. Because the bottom half printed “normally”
So for some reason the upper half is not sliced the same in regards to first layers compared to the bottom half. And no clue why 😅
keen raft
Setting a Z offset in the slicer would have the same effect. Or maybe a different first layer extrusion width. But these don't just change by accident 😉
tough crag
Yes it’s highly likely that I have done something, however I have sliced both parts again with default, and the top come out the same and not the bottom which come out great
Lets see if I can find something
keen raft
If it is a hardware issue, then it should affect everything you print. Have you tried printing something else? If it's a first layer issue, you can stop during or after that, so it won't take a lot of time.
And if it goes away during that test once you move the nozzle down, then that's your solution 😉
tough crag
Yes so, for example, the bottom half of the case, prints perfectly against the bed. I have only experienced this issue with this specific file and the upper half of the case
keen raft
Did you print the upper half in the same location on the bed where the lower half worked?
tough crag
Yep, center
keen raft
Can you take a picture of the bottom of the lower half?
alpine glen
is that file really completely flat on the bottom or is it trying to do some weird bridging? 🤔
keen raft
Looks flat in the Printables preview
tough crag
I will take a picture when I get back!
tough crag
alpine glen
is that file really completely flat on the bottom or is it trying to do some wei...
My initial thought was that there is something causing it to think that it is not really part of the outer layer so to speak
The model has a slight chamfer to it
keen raft
The chamfer is just an overhang to the slicer. This may slightly affect how the layers are generated, but not how they are actually printed.
What makes me think it's somehow revolving around the nozzle height is that you have some overextrusion in locations where the nozzle changes direction (e.g. at 1). These are the only spots where the extrusion is actually flat against the bed. Everything else is just lying there, not squished against the bed at all. This overextrusion is something you'd usually want to prevent, but in this case it's probably what's saving your print. You can see at 2 that straight extrusions have so little adhesion that they are actually dragged away from where they should be. And because the first layer isn't where it's supposed to be, it takes a few layers for everything to "normalise", as seen on the chamfer at 3, and then the print continues normally.

But I'm interested to see what the first layer of the other half of the case looks like!
tough crag
Here we go! Don’t mind the “bubbles” they are air bubbles from my bed adhesive. Didn’t take the time to properly clean it before running this as a test again

This shows the big difference between them
 keen raft
Mh, can't deny that there's a difference
This is always a bit hard to tell on photos, but I'd still say printing just a single layer and making sure that's perfect would be a good idea. There seems to be a gap between the individual extrusions even on the better half.

But I'm not quite sure why they would look so different if they were sliced with the same settings.
tough crag
Actually in life it’s even more difference. The good part is almost difficult to feel, meanwhile the other is hysterically bad. So I think this is more than just some hardware adjustment. The hardware might need some adjustment for sure, however, this is something else I think
Otherwise the printer produces good stuff I think. This is the inside of the part. Think it looks really good
 keen raft
Did you print the upper half first and then the lower half?
tough crag
I have actually printed both parts two times, just to confirm if something happened with the printer
But it prints the bottom half as good as the first time
So something strange is happening during slicing
I just don’t understand why 😂
keen raft
Indeed. It would benefit from pressure advance, that would get rid of these bulges on the corners, but other than that it looks very consistent.
 tough crag
Thanks for the tip! Will look in to that, and what it might be called in the slicer!
Appreciate that
keen raft
What printer are you using? Does it have some sort of probe?
tough crag
Its the Creality CR-6 SE
It does have bed leveling
function
Never had much difficulties with it. This is actually the first issue I had so far. And it looks very isolated to this use case
keen raft
That printer has a strain gauge. If they did a good job with the software, it shouldn't even require a lot of tuning for the first layer.
I feel like I'm quite focused on the first layer nozzle height, so I might miss something else here. Maybe someone else has another idea that goes in a different direction!
tough crag
I did print one with a wide brim as adhesion aid. Did not notice something weird with that. I guess that would come in to play also regarding nozzle height
What I can further test is to skip the bed leveling feature of octoprint, and just run the printers internal one as a debug
maybe its something up with that
still strange for it to experience issues with just one case though
keen raft
tough crag
Thanks for the tip! Will look in to that, and what it might be called in the sli...
Pressure advance is a firmware thing, most manufacturers ship their printers with a variant of Marlin which has it disabled, unfortunately. It's called Linear Advance there, but it's the same thing.
tough crag
So that is not a value that can be adjusted in the slicer? Not much for me to do there then 🙂
keen raft
tough crag
So that is not a value that can be adjusted in the slicer? Not much for me to do...
No, you would have to flash a different version of Marlin for that. Stuff like that can usually be found online, lots of people want the feature.
tough crag
Ah I see. Yeah, i know that there is a "community" firmware available for the printer. Have not bothered to check it in to much since everything has been working good so far
keen raft
tough crag
I did print one with a wide brim as adhesion aid. Did not notice something weird...
Brims help with corners lifting off the bed, but not so much with adhesion in general. But the mesh definitely has a huge impact.
I believe Creality uses glass plates with some sort of surface treatment. I've got something similar from a different manufacturer and PLA sticks to it so well you can practically lift the whole printer after printing two test cubes. So a need for glue is also indicative of something being wrong with the first layer.
Not sure what you mean with Octoprint's levelling feature, I don't use that.
tough crag
That is interesting
Yeah octoprint have a function to activate the bed leveling feature that the printer has built in
So you can either activate it from octoprint or from the printer interface directly
keen raft
You could try to heat it up, wait for a bit (glass doesn't transfer heat well, so a uniform temperature will take a few minutes) and then make a new mesh, just in case something is wrong with the previous one.
Especially if you don't make a new one before every print
keen raft
You're welcome! I still hope someone else chimes in and gives you a second opinion 🙂
faint sky
If you're using creality's slicer or cura look for "adaptive layers". There are many things that can cause changes between prints to affect layer heights but I've found that setting does the most amount of "real time adjusting" to the layer heights. Adaptive layers can be a good or bad thing depending on the result and it's highly dependent on your bed mesh accuracy.
Also if you create a new bed mesh prior to every print I've found the results may vary as the CR touch will rarely provide identical results for every probe point between bed mesh creations.
iron remnant
...this might not mesh with your expectations of how it works, of course
faint sky
Until you start reading the marlin FW docs all the cura settings are a mystery until you start experimenting.
iron remnant
You really need to be the cura-us sort.
misty oasis
misty oasis
Hello, I am in need of some assistance. I’ve had my printer for about 2 months a...
Today I'm going to clean the heat bed and want to know which strategy I should try with an Ender 3 V2 neo
- Smearing it with a glue stick (what do I do after that??)
- Rub some alcohol on it with a sock
Which one should I use?
 lusty wren
can someone let me know how best i should configure making this 3d print: https://www.printables.com/model/418381-webcam-project-using-an-original-apple-isight-cam/files

Printables.com
Updated project originally created by Max Braun utilising the iconic Apple iSight webcam and Raspberry Pi hardware. | Download free 3D printable STL models
specifically what material is best to use...
i think vero or abs like
keen raft
misty oasis
Today I'm going to clean the heat bed and want to know which strategy I should t...
Glue is not for cleaning 😉
Have you done the first layer calibration? Did that still not stick when you were done?
vocal flax
faint sky
Until you start reading the marlin FW docs all the cura settings are a mystery u...
There is 2 until in that sentence which confuses me more than slicer settings😅
misty oasis
keen raft
Glue is not for cleaning 😉
Have you done the first layer calibration? Did that ...
is that where you use the paper and then use the cog wheels, set the Z axis and then like preheat the bed and move the cog wheels down until it touches the paper and you repeat that like twice on all sides?
keen raft
misty oasis
is that where you use the paper and then use the cog wheels, set the Z axis and ...
No, that's a way to tram the bed. It's related, though and it's good if you've done it.
The next thing you need is a bed mesh. There should be a button called "levelling" in the main menu, just press it, the rest should happen automatically.
The last thing you need is a correct Z offset. You can use the paper test to get a rough value, but the fine tuning is much easier to do while printing.
And your bed should be clean, of course, otherwise even a perfect first layer won't stick.
faint sky
vocal flax
There is 2 until in that sentence which confuses me more than slicer settings😅
Guess I should have said once you start correlating Cura settings to Gcode. https://marlinfw.org/docs/gcode/G029.html
misty oasis
Ok I just cleaned it with Isoproply Alcohol on a sock, and I’m leveling it now. I’ll let you guys know if it worked or not 👍
 misty oasis
Really de-motivating
balmy pulsar
lower the head
until it scrapes the bed. then back off 0.1mm
looks to me like the filament is not even touching
gonna make some pizza dough
mmm
faint sky
try to get it close enough so that when it print it looks like a blade of grass, flat. Not enough squish. z-offset is too high.

a little squish is good. provides a flat top surface for the next layer to adhere to.
faint sky
balmy pulsar
until it scrapes the bed. then back off 0.1mm
Well yes but preferably while NOT moving to not actually scrape the bed. Scraping is very bad.
balmy pulsar
yes obviously not while moving haha
 lunar oar
Anyone with a resin 3d printer looking for some extra cash? I have a small 3d printing service and wanted to expand my production possiblity. As you know a fdm printer can't make a miniature the way a resin can. Basically if someone ever want's something that may be best suitable for a resin 3d printer, I would contact you and see if you're up for it.
vivid helm
I'm wanting to get rid of my resin printer.
lunar oar
are you comfortable taking this to the dms @vivid helm
vocal flax
We have flashforge creator 3 at work and it loses steps (y direction specifically) for high detail stls. Any guesses what could be the problem?
Bought secondhand from another business. It probably has 4000 or so hours on it.
Issue that is related to this is some y axis movements are noisy. The printer vibrates quite a lot compared to my custom i3 with minimal near none wear (a4966 driver 0.9 degree motor). While it prints if I touch (not so gently but neither too much force) one of y carriage sound/vibrations decrease significantly.
We have not tried anything other than oiling smooth rods but no luck
vivid helm
Sounds to me like one of the bearings is shot.
Also could be related to belt alignment.
vocal flax
vivid helm
Sounds to me like one of the bearings is shot.
That's what I thought as well but the bearings on that machine is very well fixed. I didn't want to jump onto that without taking second opinion
vivid helm
Have you ever greased them?
vocal flax
vivid helm
Also could be related to belt alignment.
How so? (I am trying to understand how can I identify if that's the case?)
vocal flax
vivid helm
Have you ever greased them?
No, we haven't disassemble the printer. As I said looks tedious linear bearings fixed with spring rings
vivid helm
vocal flax
How so? (I am trying to understand how can I identify if that's the case?)
Well, you can start by feeling the belt tension. If possible watch during the vibrations and try to determine if it is jumping. A misaligned pulley or idler could definitely cause that.
I've never seen a flashforge in person, and I don't know much about them. But I would definitely start with the belts and bearings.
vocal flax
At first I thought maybe belt tension but it seemed fine to me. Then I guessed y axis has a pretty long shafted motor (like 30 40 cm long shaft) and maybe it was bent but the pulley and 2 bearings (that shaft is supported with them) is within couple of cm.
The creator 3 (discontinued version) is pretty bad but the price was good on it and we had a person that we could blame if we didn't manage to get it working
vivid helm
Well, that could also definitely be an issue. Basically if anything is bent it can cause 
keen raft
vocal flax
We have flashforge creator 3 at work and it loses steps (y direction specificall...
On high detail prints only?
vocal flax
Low quality ones seems to be printing good
keen raft
My first thought actually was a lack of torque during microstepping but that doesn't really make sense, because it will microstep either way, no matter what's being printed. But if you print something really simple like a cube, it might always snap to the same wrong position and hide the problem that way.
But if the printer is modular enough to allow stuff like that, then swapping the X and Y connections might be worth trying, to see if the problem stays on the same physical axis.
faint sky
If it's got 4000 hours on it then there could be wear and tear anywhere. Belts are rubber and stretch over time while under tension naturally. Motors, rails, basically anything mechanical can wear. Give the entire thing a tune up.
Double check all axis are square, look for worn teeth on the belts that would be very common for missed steps. Can also try to calibrate esteps but that won't miss steps. The only thing that will miss steps is worn belt teeth or motor gears. It will likely be one of those.
If it's only missing microsteps that's probably a motor issue more than a potential belt issue.
vocal flax
keen raft
But if the printer is modular enough to allow stuff like that, then swapping the...
Can't change y carriage it's diecast
keen raft
vocal flax
Can't change y carriage it's diecast
I only meant the steppers, cables and drivers 😉
If the motor current was insufficient, for example, swapping these would very likely move that problem to the other axis.
vocal flax
Yeah y motor probably too expensive and/or not feasible to get it shipped and the motor drivers are embedded to motherboard not willing to change it since it really just works
faint sky
vocal flax
Can't change y carriage it's diecast
You can it's just not easy. That's part of the challenge.
arctic dragon
Check the nozzle for wear, maybe? Less obvious than the motion system, but if the nozzle is malformed it could cause some defects as well.
And that’s usually an easy replacement
vocal flax
I recently upgraded to marlin 2.1.2.1. in my configuration I must've made a mistake because my printer homes at z=5 always. Even if I abort sd print. It drops nozzle into the model and then homes x y which breaks all the mechanical calibration. Do you guys have any idea which setting I may be configured wrong?
tough crag
Hey!
While doing some maintenance on my cr-6 se I noticed some play in one of these (not sure of the exact name) .
It’s for the Z and it has one on each side. The right one does not show any play at all, but the left one is showing.

The nut was a bit loose also, probably from factory, but tightened that down. The play seem to be “internal” in this part. Not sure if they are replaceable and what kind of play is acceptable?
keen raft
tough crag
Hey!
While doing some maintenance on my cr-6 se I noticed some play in one of th...
It's probably not a big deal. The lead screws just determine the height on the Z axis, but they don't "guide" the movement. The wheels in the profile slots take care of that. There are actually lead screw nuts that intentionally allow movement along the X/Y-plane to counter lead screw wobble. And play in Z direction doesn't matter, because gravity conveniently keeps everything settled in the lowest position of whatever amount of play you have. The Z axis doesn't have the acceleration to rotate the thread out from under the nut before it can follow.
tough crag
Ah I see, makes sense for sure!
Thanks a lot.
And @keen raft , thank you for all help a couple of days/week ago with my first layer issue.
It turned out that my Z offset was just a little bit high exactly as you said. Everything looks great now!
faint sky
The z-screw holders are intentionally designed with a little bit of play to a point... the amount of play should be identical if you have dual screws. I've seen plenty of cases where the holders break and the lead screw starts to wobble. The straight "trueness" of your z-axis screws play a part too. If one isn't perfectly straight it can introduce issues and will likely break the holder over time. Keep an eye on the top of the screws for out of round play. If there is an out of spec wobble you'll see it at the top of the screw. Some FDM printers have a belt across the top that keeps both z-screws connected in parallel... which is a nice feature as it ensure boths screws are going up/down at the same rate.
Here's a good video on z-wobble, why it matters, and why you should care when checking your lead screws.
 short crag
To anyone with the ams unit dose it have to be directly mounted on top of the. Printer
shy kelp
This thing isn't a core xy right?
https://m.it.aliexpress.com/item/1005002553743610.html?gatewayAdapt=glo2ita
Ignore the pricing, I found it at around 270€, although dunno if worth it
short crag

Bambu Lab US
Bambu Lab AMS is an intelligent system that communicates with the toolhead to guarantee smooth feeding and automatic mid-print filament switching. It can detect the tension on filament and actively adjust the feeding pace. With RFID technology, Bambu Lab AMS identifies filament loaded inside and automatically configures the most appropriate prin...
keen raft
short crag
To anyone with the ams unit dose it have to be directly mounted on top of the. P...
This guy has it next to the printer: https://www.youtube.com/watch?v=nW9CUGIUVBY
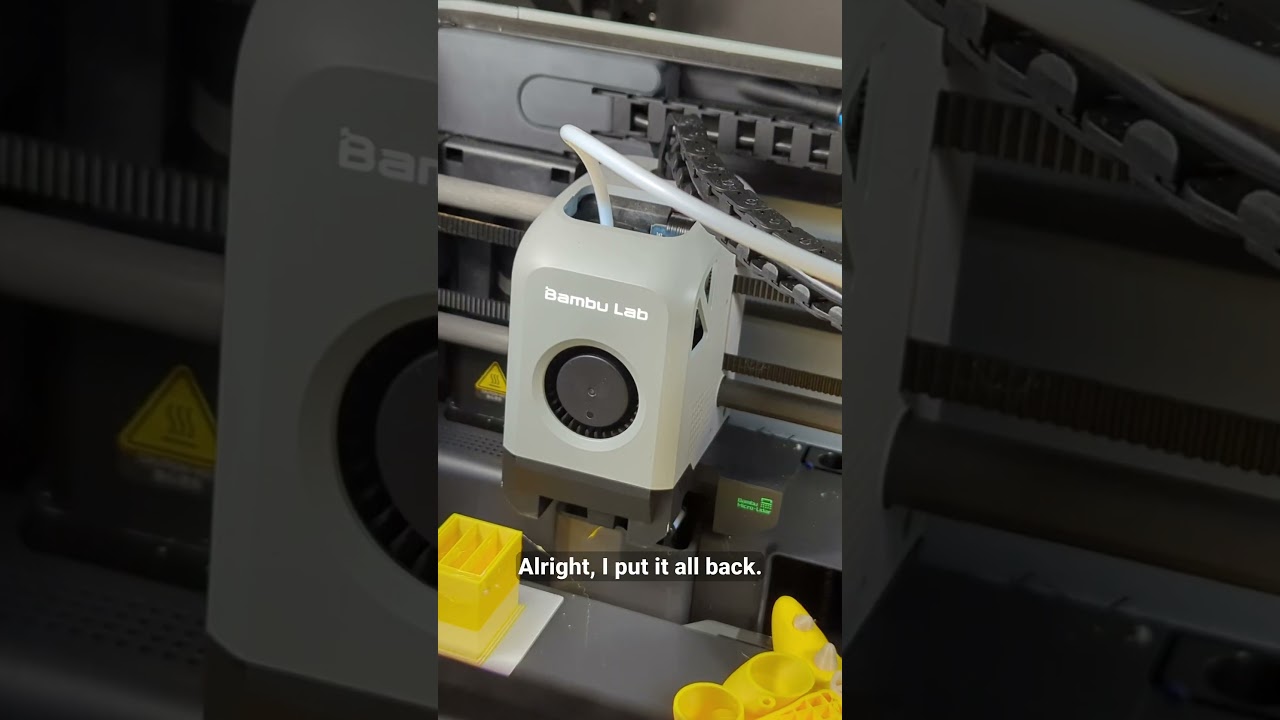
3D printing Bowser and one of the filaments is causing trouble.
3D model: Bowser - Super Mario Bros - Fan Art by printedobsession https://thangs.com/designer/printedobsession/3d-model/Bowser - Super Mario Bros - Fan Art-877567
Projects and affiliate recommendations:
https://bio.mihaidesigns.com/
Bambu Lab X1-CC 3D printer https:/...
short crag
alr thx
vocal flax
shy kelp
This thing isn't a core xy right?
https://m.it.aliexpress.com/item/1005002553743...
It says cartesian on some random website
vivid helm
I highly doubt it's corexy. Also I enjoy the fact that sermoon is using creality branding.
Also that printer has sketchy written all over it.
keen raft
vocal flax
It says cartesian on some random website
Cartesian just means it uses X/Y coordinates instead of polar ones. Could still be a CoreXY setup with that description.
keen raft
vivid helm
I highly doubt it's corexy. Also I enjoy the fact that sermoon is using creality...
Sermoon is one of Creality's printer series, like the Ender series.
keen raft
shy kelp
This thing isn't a core xy right?
https://m.it.aliexpress.com/item/1005002553743...
According to https://www.creality3dofficial.eu/files/html/20211125/Sermoon-D1_02.jpg, found on https://www.creality3dofficial.eu/de/products/sermoon-d1-3d-printer, it's an XY head design.
 echo flower
Anyone know of a 3D slicer that can do molds of STL's (other than cura, it's method doesn't seem to appear for me, even after enabling it)
vocal flax
keen raft
Cartesian just means it uses X/Y coordinates instead of polar ones. Could still ...
Printer style, such as Cartesian, Delta, CoreXY, or SCARA
Straight from marlin firmware documents
cartesian is actually a style 🙂
in 3d printer world context
keen raft
I think there is a bit of ambiguity to a lot of these terms 😛
"Cartesian" has developed some additional meaning over the past few years in the 3D printing context, but I'm not sure if that was intentional from the start.
vocal flax
keen raft
According to https://www.creality3dofficial.eu/files/html/20211125/Sermoon-D1_02...
yeah first picture clearly shows that it is a cartesian type. kinda looks like replicator (i think it was that one) motion system
keen raft
vocal flax
```Printer style, such as Cartesian, Delta, CoreXY, or SCARA```
Straight from ma...
Klipper does the same. The reasoning behind this is probably that a lot of the cartesian variants, while looking different in hardware, can actually be treated the same in software. Differentiating between these would create a bunch of duplicate settings. Or at least that's what I think why they do it like this. I think it's misleading.
vocal flax
it refers to motion system
and it named as cartesian even tho it can have other names
its just a technical term no need to think too much about it i think
tbh i wouldnt know anything better with 😄
keen raft
I care about these things 😛
shy kelp
So to sum up, is it stil slow as a standard cartesian, or not?
After 2 cartesian style printers I am very bothered
I want a second one
Dunno if to get that creality thing for 270€ or if I can get anything better that's mostly assembled out of the box
//I haven't yet decided what to get
keen raft
Honestly, I think for 270€ you would be lucky to get something that works well out of the box at all
You do really get what you pay for and you can only ever have two out of these three: Cheap, fast and good.
iron remnant
nods in ender
shy kelp
keen raft
You do really get what you pay for and you can only ever have two out of these t...
Cheap fast?
vivid helm
keen raft
You do really get what you pay for and you can only ever have two out of these t...
Well, if you pick the first option you can only pick one.
keen raft
shy kelp
Cheap fast?
How about something with a powerful hotend that you can use with a .8mm nozzle? That should speed things up while keeping it mechanically simple. And the models might even be "just" ripply, instead of coming out as semi-melted high-speed blobs.
vivid helm
I usually preface all 3d printer purchasing advice with two questions:
- What do you want to print?
- Do you want a printer or a project?
shy kelp
Eh I asked the same question a while ago, I got exhaustive answers, but I can't yet decide if to get some cheap crap or expensive
vivid helm
If you're going expensive then don't get crap.
Also creality is not actually good at printer design. They sometimes make printers that are passable with sufficient modding, but in general I recommend just avoiding them.
If you get an Ender 3 for $99 that's fine, but don't expect it to work well long term without investing at least another $300 in it.
 vestal thicket
My Ender 3v2 was a good starter printer, learned waaaaay too much about 3d printing, but I agree on the Creality comments
arctic dragon
My Ender 6 is serving me well to this day, but that’s also in part thanks to my awareness of its shortcomings.
shy kelp
Talking about cost cutting
I see a lot of AliExpress stuff like laser cutters using the same flat cnc cutted casing
Where could ai source similar solutions? Cuctom cnc cuts are expensive
arctic dragon
Laser cutting services like send cut send are actually pretty practical in low volumes.
Cheap mini CNC machines can be had for a fairly low price, but as with all of the cheaper machines, there are a lot of hidden costs that come with the operation of these things.
keen raft
shy kelp
Talking about cost cutting
I see a lot of AliExpress stuff like laser cutters us...
Assuming this is still regarding a printer: The first cost cutting measure here would be to ditch the enclosure entirely and print easier materials, but whether that's an option depends on your use case, of course.
arctic dragon
For CNCs, you’ll want a well ventilated workshop at minimum, if you don’t have a proper dust collection system. Things get messy fast.
vivid helm
shy kelp
Talking about cost cutting
I see a lot of AliExpress stuff like laser cutters us...
... Those laser cutters are all dangerous and should probably be illegal.
arctic dragon
For laser cutters, anything under 1000 is grossly unsafe due to high power lasers and potential fumes with certain materials. A proper enclosed unit is the way to go, unless you have the means and know-how of enclosing it yourself.
shy kelp
keen raft
Assuming this is still regarding a printer: The first cost cutting measure here ...
Yes that's for the printer
Maybe but using some mass produced thing, I could save a buck, since those things are like very cheap
keen raft
What exactly is cheap?
Spending money on stuff you don't need is never cheap 😉
So what do you need?
arctic dragon
Do you prefer a small printer ready to use out of the box, or something that takes a bit more effort to print a bit more stuff?
Is there something in particular you want to make with said printer?
A budget is also probably a good thing to know when selecting a printer, as it’s better to have one good machine you’re happy with over three pieces of junk you can’t get working.
shy kelp
keen raft
So what do you need?
In reality something that just prints, but I can't decide how much to spend. If to go again cheap 200~300 or under a 1k. But for what I am sure, I don't want yet another cartesian
I'd like to avoid investing time to buid a 3d printer, because I need it in the first place to build another thing, and I am yet wasting again time insensibly over being undecided
The story of my life, endlessly wasting time over overthinking and not doing actions huh
arctic dragon
Kingroon KP3S Pro is a solid sub 200 printer that’s mostly pre assembled. Cantilever designs aren’t particularly scalable, but the reviews suggest it prints just fine.
On the upper end of the scale, you got the BambuLab printers. Prebuilt P1S is fast, functional, and works right out of the box. Cant say I’m personally a fan of the closed source software among other things, but it’s a perfect fit for the less technically inclined, from the guys that basically defined the current generation of 3d printing.
keen raft
What's wrong with cartesians?
arctic dragon
That should’ve been my first question haha
 strange ledge
keen raft
strange ledge
keen raft
😂
arctic dragon
Wait @shy kelp what printer do you have now, and what don’t you like about it?
Oh, so you have experience with the early 12v printers from 2 or 3 generations ago. That’s an adventure. Let’s just say I’ve long set my anet a2 aside for a diy project in the distant future…
If you’ve exhausted yourself with the endless maintenance of an old i3 and just want it to work, BambuLab is a great upgrade pick. X1CC and P1P really made me regret my Ender 6 for a moment. You don’t need that bottom-tier beginner nonsense, unless you really want it.
While the Ender and Kobra printers are strictly upgrades from a Mega i3, they’re not going to feel as fresh as a flagship from the next gen.
vivid helm
arctic dragon
For laser cutters, anything under 1000 is grossly unsafe due to high power laser...
And potential to blind you/random people walking up/pets.
arctic dragon
Covered under “high power lasers” lol
Other fun honorable mentions for fun printers in 2023: flsun’s delta printer, ankermake m5, and Prusa xl.
Creality K1 may look tempting, but it’s honestly full of software issues you don’t need to hassle with. Stay away.
I think there’s the proforge 4 on kickstarter, if you have a LOT of money to spend on a really fun machine.
Basically a slightly cheaper Prusa do.
vocal flax
arctic dragon
While the Ender and Kobra printers are strictly upgrades from a Mega i3, they’re...
Are you sure v grove roller is upgrades to linear rods? 🤔
vocal flax
In my experience I probably prefer linear rods to bed probe or 32 bit controller
arctic dragon
Though unless something bad happens to the rollers, you’d be hard pressed to notice a significant difference between the two.
Creality rollers do kinda suck, but the motion stays smooth enough for long enough.
vocal flax
The linear rods are so reliable
Barely maintained them for 10 or so years
And it's mostly repeatable
I didn't used it for 6 months no maintenance just dusted off and worked (my printer similar to mega i3 maybe much older design)
But you might be right it depends. My usage is non typical compared to most people
vivid helm
arctic dragon
Other fun honorable mentions for fun printers in 2023: flsun’s delta printer, an...
Not even mentioning the hardware issues.
A lot of people have liked bambu, but I don't like them as a company due to their treatment of multiple open source projects.
faint sky
Any printer in the 200-300 range you will end up printing your own upgrades eventually or modifying it in some way. The build volume will likely be average or small at that price point and they'll skimp on quality components. Most printers today are fairly easy to assemble unless you get a completely unassembled kit for cheaper which is a valid option but I wouldn't recommend that to a beginner.
I'm against making any recommendations as a helper now. I don't want someone to be unhappy with a recommendation then come back to blame me or this community for it. Before becoming a helper I might have a long list of recommendations. It's not that I can't do it, I think it's just not a good idea for me to make recommendations now that I'm in a helper role.
What I can recommend is doing a ton of research yourself, possibly weeks of research on 3D printers, before settling on a decision that is the right fit for you and your goals.
 loud silo
I bought a used FlashForge Finder from someone who acquired Amazon returns and fixed them up as necessary. (Many were not broken at all -- they were just returns). FlashForge has other models. The sw is not open source but I have no complaints. The Finder does not have a heated bed so I just use PLA. FlashForge printers have a very solid plastic frame. Only addition I have is a full-sized reel holder
not the best, but has been reliable and easy to use
misty oasis
I've been thinking for a bit and here's what I'm going to do (from what i've learned)
- Clean heat bed (did it, tried a print and failed. should i re-clean???)
- Level printer
- Offset Z axis BEFORE PRINT
- Slow down the speed of the printer
- Make sure heat is max
keen raft
I stand by my advice to adjust the Z offset during a print.
faint sky
I adjust z-offset during tramming, and then tweak it during purge line and first print with large brim. Gives you enough time to ensure the bed is trammed properly and z-offset is tweaked on the purge line and brim if required.
as the purge line is printing i have my z-offset menu open to make small tweaks to ensure i get the proper amount of squish. too close to the bed and it'll eventually build up pressure in the nozzle causing a clog, too far away and you'll get surface adhesion and layer adhesion issues. even with a bed mesh you'll still want to tweak your z-offset to be just right.

you'll still want to do this even after tramming your bed perfectly and making a bed mesh. the z-offset adjust in real time during purge line and/or brim is the last step before letting it go. if you did everything right your whole print should turn out nicely.
typically i only have to do this about once a month (every 100-200 hours of printing time) as long as I don't move or touch the surface or printer to throw it out of calibration. it'll use the same bed mesh and z-offset settings every time after initial setup.
if you have a cat or kids that mess with the calibration you'll find your next print is way off and you'll wonder what changed. once it's set up and working well on a test print like a benchy then don't touch anything, and just keep your prints flowing one after another.
especially if you have a cat, get an enclosure, cats love sitting on the bed surface.
shy kelp
Huh also, are bambulabs, the only to integrate ai stuff?
Like if there are issues in the layers the printer should try to edit values to make so it doesn't print badly?
Either by using cams, lidars or whatever
arctic dragon
I don’t think they’re the only ones, as the spaghetti detective used AI and a camera a long time ago to detect print failures and stop prints. That being said, using ai to tweak values is something else entirely that I can’t speak for personally.
 half dew
short crag
To anyone with the ams unit dose it have to be directly mounted on top of the. P...
half dew
short crag
To anyone with the ams unit dose it have to be directly mounted on top of the. P...
A few days late on this. The AMS is connected to the printer through 2 things:
- The power/data connector
- A ptfe tube for the filament path from the AMS to the printer
You can mount the AMS anywhere within reach of those.
To add more support to that - I think the P1P supports the AMS and by default there isn't anything on top of hte printer you could put the AMS on 🙂
 stable crystal
excuse me sir, in this group is there a teacher who can teach 3d machining programs and parameters in fusion 360
faint sky
We do not offer personal tutors in parametric design if that's what you're asking. The main Adafruit 3D designers are Noe & Pedro Ruiz who do have parametric design videos on Adafruit's youtube channel called "Layer by Layer".
Here's their entire Layer by Layer playlist https://www.youtube.com/watch?v=8zwEyZs0kdE&list=PLjF7R1fz_OOVsMp6nKnpjsXSQ45nxfORb
balmy pulsar
i mostly throw up my hands and scream at fusion 360 machining....
like what the heck is this? haha
 faint sky
Looks like cake decorator mode if such a thing exists. 🤣
shy kelp
does exist an hotend/nozzle or the kind that's one block with the throat? something alike?
 keen raft
shy kelp
does exist an hotend/nozzle or the kind that's one block with the throat? someth...
keen raft
shy kelp
does exist an hotend/nozzle or the kind that's one block with the throat? someth...
That design appears to be missing a heatbreak
And a heater, for that matter
shy kelp
keen raft
That design appears to be missing a heatbreak
that drawing was quickly made to visualize what I meant. the revo e3d seems to be close to what I wanted. but it is somewhat expensive, clones seems to not be present yet
balmy pulsar
you wouyld never want something like that. the hot end is steel/titanium etc and the larger finned part is a heat sink. aluminium etc.
there are extended hot ends "all metal hot end" that extend well up into the heat sink. for use usually with high temp plastics wehre the PTFE tube will burn
they usually have an aforementioned break (an area where there is a tiny cross section) so not much heat transfers
the point being, you do not want heat to travel out of the melting zone. otherwise the filament gets soft and buckles and everything clogs
keen raft
Ah, you mean nozzle and heatbreak being one piece! Yes, it does exist - you answered your own question with the Revo example 😉
But personally I don't really see the benefit. Doing it like this combines a non-expendable part with the expendable nozzle, so you have to spend more money and replace more stuff once it wears out or clogs. Most of the advantages E3D lists don't really have anything to do with that combination of parts.
balmy pulsar
ah yeah. i see. yeah then you are stuck basically with very expesive nozzle wwhich will still clog and be ruined in the same ways.
hm
shy kelp
so their one block solution, isnt actually one block? it was mostly my preference to not have to tightly screw different parts together, and so having like lesser probability to have stuff to leak
keen raft
No, it's a threaded heatsink and you screw the heatbreak-nozzle part into it. But I guess you do save a minute doing that, because you don't need tools. You will have to re-calibrate your Z-offset again though, unless you have a strain gauge.
And since the threads are in the cold section, you don't need to heat the thing up to tighten it, but whether that's a big deal probably depends on the shape of your extruder. A regular V6 type has more than enough room in my opinion to grip the block with some pliers (adjustable pipe wrenches work well) and slip a (ratcheting/socket) wrench over the nozzle. No need for burns.
short crag
Dose anyone know why my ender 5 is doing this fyi it’s not the sd card the second card is from my ender 3
keen raft
short crag
Dose anyone know why my ender 5 is doing this fyi it’s not the sd card the secon...
Are there .gcode-files on there? Does it work if you power cycle the printer while the card is inserted? If so, it may work without a power cycle if you run M21 (e.g. from Octoprint) or by using a card-refresh option in the menu if one is present. If the menu doesn't have options to manually eject/refresh the cards and it doesn't auto-detect them, then Marlin might be misconfigured.
short crag
Ya there is g code on both sd cards I power cycle it does not help
keen raft
Then it's not what I thought 🙂
short crag
And there was something that showed up prior it was like something that reality must have put on the SD card but none of the other folders are showing up that creality put on there
keen raft
Manuals and example GCode probably
Make sure the GCode is on the root directory of the card
short crag
keen raft
Manuals and example GCode probably
that and other files
keen raft
Yeah then I really don't know
I'll be on my Klipper, sailing away into the sunset, in case anybody needs me 😛
short crag
its gunna be getting klipper soon
short crag
keen raft
Yeah then I really don't know
the dam issue was the file name was to long
keen raft
short crag
the dam issue was the file name was to long
Wow! Well things like that feel like issues from the past that you don't really think about anymore!
Glad you found it!
short crag
ya
 finite verge
Anyone here a DesignSpark Mechanical user? I stepped away from 3D modeling for a yearish and come back to find that my favorite modeling software has put some very basic features (like STL import) behind a paywall, and nuked all the licenses for the formerly free version to force upgrades.
Looking for recommendations for a new modeling software, preferably something with similar features to DSM that isn't tied to the goodwill of a large commercial company
vocal flax
What a terrible business decision
Anyway freecad might be what you want
But if you want complete cad experience you still need those goodwill of large companies. Fusion 360 is pretty good in my experience
short crag
i have never really had problems with fusion but for what you want freecad
 wispy oracle
I have never quite been desperate enough to use FreeCAD. I use Fusion 360 and I'd probably revert to using SolidWorks if Autodesk takes too many more pieces out of it
shy kelp
I am a fan of rhino
It's cheap and you can do everything
In the end they are quite the same, so I would download everything and then pick what I like most
faint sky
One of the benefits to using the free fusion 360 is every model created by adafruit is directly importable and editable. It's easier to follow their layer by layer tutorial videos using the same software they do. Also helps avoid file export/import issues with other programs that might cause artifacts.
shy kelp
Mah it's all bools
shy kelp
I can't recall what's called that open design with 3 z axis, so you can move your bed as with a delta printer with the nozzle
But outside the "perfect bed leveling", is there any special slicers that allows more stuff?
vivid helm
shy kelp
I can't recall what's called that open design with 3 z axis, so you can move you...
Voron Trident?
keen raft
shy kelp
I can't recall what's called that open design with 3 z axis, so you can move you...
This one by Denis Herrmann and Oliver Tolar from ZHAW?
https://www.zhaw.ch/de/medien/medienmitteilungen/detailansicht-medienmitteilung/event-news/zhaw-masterstudenten-entwickeln-neuartigen-3d-drucker/

 short crag
probably a bed level isue
vivid helm
Could also be a partial clog or part warping
vivid helm
What hotend/filament?
faint sky
Seems more nozzle temp and cooling related to me.
Printing too high of a speed vs its ability to cool at that speed is also a factor.
keen raft
 bitter adder
Underextrusion issue?
bitter adder
Underextrusion issue?
If we're looking at the top surface, then I'd say yes to that. Question is why. Bed levelling and Z offset are definitely not the issue after so many layers.
If you haven't changed anything, then a clog seems like a plausible cause. Check this by extruding in mid-air. If the extrusion bends sideways, this is a strong indication of a clog.
Alternatively, it could also be misconfiguration in the slicer - extrusion factor too small, nozzle temperature too low (resulting in high viscosity and less flow). Or misconfiguration of the firmware - Z steps/mm too small (resulting in layers that are higher than expected; this would also result in wrong Z dimensions of the printed parts), E steps/mm too large (resulting in underextrusion).
faint sky
setting the infill density a little higher will give it more interior walls and less bridging to deal with though it looks like a fairly small part
clog definitely possible. bottom/top layers look good but infill and circles look oddly out of proportion. raise temp by +5C, lower cooling, and slow down the speed.
this is fairly common with going too fast.
now if you tell me you're printing at 25-30mm /sec already then you've got other problems and should probably run some calibration towers.
 bleak flare
calibration towers?
... going to go search for those ...
bleak flare
oh nifty - calibration temperature towers... new things to learn!
shy kelp
vivid helm
Voron Trident?
Sorta
I meant like a non planar printing/slicing while using 3 axis extra
Although actually dunno if there's actually a difference or not
vivid helm
Yeah nonplanar printing on any 3-axis cartesian machine is going to have inherent limitations. In order to actually do it well there will need to be dedicated 5 axis printers not unlike the 5 axis CNC mills. In practice on a hobbyist budget such machines will likely have to be smaller and sacrifice print speed for normal parts.
vocal flax
Iirc nonplanar printing/slicing is patented
vivid helm
Not actually sure if that's the case.
balmy pulsar
evcerything has been patented at one point, but a lot of these were patented in the late 80s or early 90s, so they are expired now
bitter adder
keen raft
If we're looking at the top surface, then I'd say yes to that. Question is why. ...
I used cura and simplify3d and they both gave the same results. I think it's under extrusion
bitter adder
so i figured out the issue, my feeder gears and teeth are slipping on the filament and not extruding the filament at the correct length. I tried tightening the spring, no luck, i tried replacing it with the original feeder, no luck. I cleaned the hot end and still slipped on both.
bleak flare
my temperature tower printed amazingly well, the stringing stopped at 220 with the bridges and arches looking great between 215 and 195. All in all I am very happy with this printer! Especially now that I'm storing my filament properly and cleaning the bed between runs ;)
short crag
Probably a partial clog right
 faint sky
yeah and some bottom warping from it lifting. Bottom layer warping can be minimized by raising bed temperature.
When bottom layer warps it starts lifting upwards which then makes that corner lift up a little and the flat plane of your part is no longer flat. You'll notice some nozzle scraping which can lead to clogging and in the worst case with a huge corner lift... a giant blob starts forming around your hotend.
Warping causes over extrusion issues on the one corner and in extreme cases can knock your print off the bed and turn into spaghetti.
with warping, use a brim and raise bed temp by +10C
in this specific case the warping was minimal and the print was able to relevel itself which means you aren't too far off the optimal bed temp to prevent that from happening.
@bitter adder When extrusion gears slip you'll often hear a click. Clicking means too much pressure in the nozzle and the extruder gear cannot feed filament into the hot end. It's not necessarily a gear issue but a pressure vessel issue. Having too low of a layer height can cause backpressure that eventually fills the hotend (and clogs) not allowing more filament to feed into the hotend.
All FDM printer hotends work based on pressure. The pressure of feeding filament into the hot end is what allows melted filament to squirt out of the nozzle. If something gets in the way of that pressure balance like putting your finger over a water hose, by having layers too close, backpressure builds up.
The amount of melted filament and pressure starts to rise inside the hot end, past the heat break, and a clog occurs. Sometimes having z-offset too close and layer lines too close is a bad thing and will cause just as many issues as having it too far away. There is a goldlilocks zone and it's unfortunately in hundredths of a mm.
coarse coral
@bleak flare how is your 3d printing journey going? I recently started again after a few months with nothing. Definitely need to follow you with calibration towers for each roll of pla. It will save more plastic instead of ruined prints and what was it like 5g of plastic for the calibration. I also need to retram my bed. Ahhh the joys.
@faint sky full of tips!
coarse coral
short crag
Probably a partial clog right
I've seen this type of thing. Possibly layer shifting, don't rule it out. Different causes for later shifting. Could be the hot end going out the build area and compensating, could be corrupted firmware (which was my case because it was on all 3d models I tried)
Also was that on a support at all or did it come right of the bed with the arc? It's pretty pronounced arcing and looks more printed than warped. Just my opinion
However without seeing what you were intending to print it's hard to say
short crag
thx
bitter adder
faint sky
<@443171327378063361> When extrusion gears slip you'll often hear a click. Clic...
I ran it at an elevation of 100mm so there was no back pressure. The teeth on the actual extruder got gummed up with some old filament and caused some slippage
vocal flax
bitter adder
I ran it at an elevation of 100mm so there was no back pressure. The teeth on th...
That might mean/indicator to too much tension on extruder gear. Worth observing in the long run.
bitter adder
I think it was because the printer sat for 2 years not being used and I had some old filament. I ran it through some isopropyl alcohol and used a fine pick and was able to remove some of the gunk. I also adjjusted some settings to help. slowed the movements, raised the hotend temp, calibrated the E steps and changed the extrusion multipler
bleak flare
coarse coral
<@188453365661827073> how is your 3d printing journey going? I recently started ...
The journey is going well, after a flurry of printing everything i've settled into a groove of printing what I know I will use. The calibration towers used very little filament, much less than the dozens of failed runs because I was using too cold of a temp for the hot end.
I've also started to explore combining 3D printing with laser cutting, but the laser cutter requires a much larger work space than I currently have so it's on pause
shy kelp
Aren't there any solenoid/extruders? Like the extruder works like a solenoid, so it can move up and down, so it can compensate for uneven surfaces? I haven't yet bought the so cursed printer
keen raft
Has anyone tried using the exhaust of a refrigeration-type dehumidifer (about 30°C and 30% RH) to dry wet filaments?
 gloomy anchor
anyone used a metal filament before?
gloomy anchor
keen raft
Has anyone tried using the exhaust of a refrigeration-type dehumidifer (about 30...
nope, but usual descciant works
also an AC with dehumidifier
keen raft
Refrigeration-type dehumidifiers work like an AC, they just don't move thermal energy outside 😉
I'm asking because every drying procedure out there recommends using heat. I think this is just to increase the air's capacity to hold water, which means using colder and dryer air would yield the same result, but I'm not sure.
arctic dragon
shy kelp
Aren't there any solenoid/extruders? Like the extruder works like a solenoid, so...
Uneven surfaces? I don’t think I’ve ever heard of that before. An FDM machine uses it’s freedom to move up and down to compensate for a non-flat bed mesh, so I’m not sure where the solenoid comes in.
keen raft
I also don't know why some sources differentiate between "drying" and "keeping dry". I think a procedure for keeping dry has to either fully seal the filament or be just as effective at drying, otherwise it would pick up moisture again.
arctic dragon
keen raft
I'm asking because every drying procedure out there recommends using heat. I thi...


In this third blog post in the series, we will be delving into the methods to counteract such moisture, specifically drying filaments.
You’re not totally wrong, but there’s more to it than humidity. To effectively dry a filament that has already absorbed moisture, the heat provides the moisture with the ability to escape the filament.
arctic dragon
keen raft
I also don't know why some sources differentiate between "drying" and "keeping d...
Actively drying a filament requires the addition of heat to the plastic to pull moisture from the plastic, while keeping dry only requires some form of humidity control.
keen raft
Aha! So that would mean a dehumidifier on its own is actually not sufficient!
shy kelp
arctic dragon
Uneven surfaces? I don’t think I’ve ever heard of that before. An FDM machine us...
uneven bed surface* ; I mean using the nozzle part itself as probe, so it can also slight move up and down to compensate for uneven bed surfaces;
arctic dragon
Ah, are you thinking the type of bed leveling where the nozzle itself is the probe? Not many machines ship with nozzle touch leveling, but the ones I know of are the cr6-se and Prusa MK4.
Those use a strain gauge to measure the force applied on the hotend assembly, not to be confused with a solenoid used to physically move a load up and down.
keen raft
shy kelp
uneven bed surface* ; I mean using the nozzle part itself as probe, so it can al...
You can already do that with normal Z movements
arctic dragon
Other notable examples are the Voron tap kit, which uses an optical sensor instead of a strain gauge to detect contact with the bed.
shy kelp
arctic dragon
Ah, are you thinking the type of bed leveling where the nozzle itself is the pro...
Sorta, but by adding something like a solenoid to physically move the nozzle up and down to compensate the offset between bed and nozzle and maybe using it as a sensor itself
Ventrue is although right I can already do that with normal z movement
arctic dragon
The tricky part with bed leveling is detecting the bed surface accurately and precisely. Once the bed mesh is taken, the printer compensates for it with the vertical axis in software.
vocal flax
shy kelp
Aren't there any solenoid/extruders? Like the extruder works like a solenoid, so...
What does it bring to the table other than add complexity? You can already move gantry (or table) up and down.
coarse coral
bleak flare
The journey is going well, after a flurry of printing *everything* i've settled ...
yep definitely going to run some calibration towers, and bed levelling but I feel i gotta tighten some screws again (i might even put a layer of tape here or there) which I hate on the lead screws, build plate and gantry. Worth it though, absolutely worth it. 3 months this is just the type of thing you really should do imo.
i still really like Eryone PLA if anyone wants to try a new plastic. does a good job with layer lines being fairly seemless at times and colours and finish usually accurate. i especially like their matte series
vivid helm
I run mostly Polymaker.
keen raft
I like Extrudr filaments. Made in Austria! 🙂
bleak flare
coarse coral
i still really like Eryone PLA if anyone wants to try a new plastic. does a good...
i've been thinking about trying some matte finishes
coarse coral
yeh the mattes are cool, especialy on side finishes. top and bottom layers naturally are different and they really show on matte pla. for example if you use no glue the bottom layer with a glass build plate it turns out shiny which isn't matte at all, top layer you see the lines more naturally so it provides a different finish leading to 3 finishes which isn't ideal. shiny bottom, totally matte walls (the best parts) and then the top layer which is more akin to the sides but notibly different
with that all said the matte black is a good looking matte black so even though the finishes are different it's a kind of carbon black colour (talking Eryone specifically here)
keen raft
If a uniform surface finish is very important, it might be worth considering printing the model at an angle. Putting a cube on one of its corners, for example. That way all the surfaces are vertical overhangs (in this particular example, anyway), so they should look similar.
The downside is that this will probably require supports, which may introduce new problems.


 keen raft
winged helm
How hard would it be to 3d scan this surface without buying anything?
keen raft
winged helm
How hard would it be to 3d scan this surface without buying anything?
To what end? If you want to attach something, it might be easier to make a mould of the contact area and either cast that or use it directly. You could also scan that cast, if you have to have a 3D model.

 random urchin
winged helm
How hard would it be to 3d scan this surface without buying anything?
random urchin
winged helm
How hard would it be to 3d scan this surface without buying anything?
There's a phone app called widar that might be able to scan that. Also kiri engine.
 verbal sail
Is there a way to assure dimentional accuracy in resin prints?
verbal sail
I was thinking a traditionally printed mold to prevent expansion but I'm not sure about preventing shrinkage
I was thinking of making the mold with clear filament and installing uv leds into that mold before pouting in the resin and just curing it in the mold
faint sky
Calipers. Print something with a value you expect, measure, and tweak your settings to compensate for the dimensional inaccuracy.
This is the same concept for FDM or anything related to mechanical engineering. You input a value and measure the expected output vs real output. Compensate and calibrate.
verbal sail
faint sky
Calipers. Print something with a value you expect, measure, and tweak your setti...
I'm using a print I found on line that they claim is as close to the original part as they could get it
faint sky
You will need a set of good calipers though, a ruler will not suffice. 3D printers and calipers go hand in hand.
verbal sail
faint sky
You will need a set of good calipers though, a ruler will not suffice. 3D print...
I actually have a digital and analogue set so I'm definately good there
I'm also not using my own printers so I can't calibrate them
faint sky
If there are problems with the model you can attempt to scale but if the model is off in multiple directions for little things then scale won't help, you'll have to edit the model.
verbal sail
Would my mold idea work?
faint sky
Then all you can do is request to whomever owns the printer to calibrate it better. Chances are the model you found online might have dimensional inaccuracies. There's no guarantee of accuracy unless you make it yourself or throw it into a 3D program to measure the dimensions and compare them to what the output is.
You can make mold with 3D printers sure, the accuracy of those molds are up to you to measure, test, and verify.
verbal sail
I'm more concerned with the print staying in accuracy and combating the resin shrinkage than the models dimentional accuracy. I'm hoping pouring resin instead of printing resin will be more accurate
faint sky
oh you want to cure the resin with UV LED's manually. sorry i have no experience with that. a quick google search should show some results if that method is viable.
dimensional accuracy questions are kind of universal, manually curing resin not so much. maybe someone here has experimented with that method and can jump in. i have no experience with it.
you can make molds with conventional resin no problem, I do have experience with that, UV curing resin I have no experience with.
verbal sail
faint sky
you can make molds with conventional resin no problem, I do have experience with...
So normal resin is more dimensionally accurate
vocal flax
If you're going to cast it it'll be more convenient
I've casted some dices with resin using 3d printed molds
I needed some post processing on it
Mainly sanding and stuff
vocal flax
But that might be eliminated with good mold release and better resin
My mold release was literally lip balm😅
And I eyeballed the ratio
 pliant iron
What common 3D printing materials would be good for getting primed and painted with exterior latex paint?
pliant iron
The version that was printed long ago I think was PLA, and it seems to be holding up OK, just wondering if there is a better commonly-available paintable material for long-term outdoor use (midwest US - weather extremes).
loud silo
i made some house numbers with black PLA, northern exposure. They are about three years old and seem fine. Not painted. I'm thinking that if you paint with good paint, the base material matters less. There are UV-resistant materials (e.g., ASA). ASA gives off bad fumes and can shrink like ABS. I know nothing other than what I read here: https://www.matterhackers.com/articles/the-best-3d-printing-filament-for-outdoor-use and elsewhere
pliant iron
Thanks, dan. Yeah I think as long as the primer sticks it should be pretty good. The underlying material is then protected, from sun though not from temperature).
vivid helm
PETG has good UV resistance as well.
arctic dragon
vivid helm
PETG has good UV resistance as well.
PETG is also probably the hardest 3d printed material to apply paint to.
vivid helm
Hmm yeah not much sticks to it
iron remnant
I've had fairly good results with PETG painted by Krylon Fusion paint.
There's this guy who put some black PLA in the hot sun and it started drooping awful fast: https://www.youtube.com/watch?v=R2910kAJXao
🖨️ My 3D Printing Gear: https://kit.co/AllYourTech/my-3d-printers
Is PETG or PLA filament the right choice for outdoor, functional 3d prints? Today we take a look at the melting point of each material and help determine which one is the right filament for your print.
But, yah, I've had some PETG stuff painted with Krylon Fusion out there for quite a while now and it seems to be fine-ish, although we don't have freezing winters here in California.
faint sky
PLA will warp in the sun yes, PETG and ABS are better for outdoors. You can use acrylic enamel and clear coat with an airbrush like you would paint a car. A good primer can help.
vivid helm
ABS is sensitive to UV, so you don't really want that outdoors. ASA is fine though.
vocal flax
vivid helm
ABS is sensitive to UV, so you don't really want that outdoors. ASA is fine thou...
He said will be using primer and paint so that's uv resistance.
vocal flax
pliant iron
What common 3D printing materials would be good for getting primed and painted w...
I think your best bet is abs. I am working at a startup, and similar question arised what material to use, do we choose mjf pp12 or fdm abs or some exotic carbon fill. In the end to get presentable surface finish we are getting the prints post processed (sanding filling and painted).
We make industrial grade devices that can stand harsh conditions (welding shops, lots and lots of uv, and outdoor health and safety divisions). Consulted both industry specialists and academic professors.
pliant iron
Thanks all, good info as I now explore commercial print services. On the plus side, the prints will never be in direct sun (soffit under of the house eaves).
shy kelp
Hm I guess I'll get the cheaper option the p1s it's cheaper than the voron clone...
Also with a bank promo I get a discount of 100€, besides I also rebought a 3090 for about 650...
stable crystal
excuse me master, how do i make a surface like this in fusion 360 . great guidance
 balmy pulsar
yo generally dont. that is something better done in a program like zbrush
shy kelp
He could also use bump maps and bake those
balmy pulsar
in fusion? i didnt know it had that feature
shy kelp
Ah idk
On rhino it's present
balmy pulsar
yes, you can do this in many other apps
im not sure how you reintegrate it into fusion (assuming to make work with a solid model that will then be printed)
winged helm
What would be an effective method for modeling globs of wax running down this fake candle?
 random urchin
winged helm
What would be an effective method for modeling globs of wax running down this fa...
random urchin
winged helm
What would be an effective method for modeling globs of wax running down this fa...
If it were me, I'd import it into Blender and mess with the model in sculpt mode.
balmy pulsar
could try a fluid sim, but probably not worth the effort
(thats also in blender btw)
placid grail
If it was me Id run globs of actual wax down this fake candle and pretend I modeled them in blender
balmy pulsar
this is why you get paid the big bucks
iron remnant
Five ways to model candle drips. Everybody is waxing ecstatic about number three.
balmy pulsar
im modelling a taser 😛
faint sky
If it's for an LED candle I've used hollowed out real candles in the past. My only advice against that is from personal experience a wax candle kept over many many years can deform and is hard to clean and rejuvenate. An opaque white plastic or 3D printed candle should last a lifetime and is easier to clean. I do it in PETG to ensure it has a longer lifespan against UV too.
faint sky
balmy pulsar
im modelling a taser 😛
This does not surprise me, at all. 😛
balmy pulsar
ha
bzzzt
i need to 3d print some of my cg props one day. but i dont have the energy to repair all the models and make them "solid"
faint sky
That's been an issue I've dealt with in Fusion 360. I'll make a simple model, import it into Cura, and Cura complains it has leaks.
balmy pulsar
i got a couple of complains from JLC avout shells etc.
but i check over the model and it is fine
something is triggering faults that arent there
maybe a tolerance for triangle width?
faint sky
Yup, I could make a simple box, create a shell, and cura will say it has leaks. Either an issue with the file export or somewhere in the process the 3D model ceases to be airtight. It's really easy with Fusion360 for things to misalign by a thousandth and create a leak.
balmy pulsar
but VFX models are usualyl a big mess of garbage haha. surfaces, self intersections, etc. it tool a lot of effort to make a 3d printable rocinante
faint sky
They are there but you'd have to zoom in like 100000% to see the misalignment.
balmy pulsar
there is some of that. non stitched edges. but ive checkd in other software and found no errors
faint sky
yup and scanned models or complicated geometry makes it almost impossible to be airtight. I'm sure there's a way to check for that kind of thing but I haven't learned enough yet how to do it to the point cura won't complain at least.
balmy pulsar
meshmixer is supposed to be able to fix these things, but in my experience it just crashes when you try to do anything useful 😛
faint sky
exactly, there's a mesh fixer in fusion360 but i've found it causes more problems than it solves.
balmy pulsar
anyhow. i want to print the unsc longsword, but i dont think id be allowed to send it to jlc for "security" reasons. not sure. have to ask.
that one i made in fusion, so it is "solid"
faint sky
and anything over 10K triangles in fusion360 and might as well require a render cluster... oh wait you can't because it's all rendered online through their servers...
faint sky
unless it's printed in metal i don't see why a longsword would be a security issue, it's a prop.
balmy pulsar
but 10k tris? i have models with tens of millions. fusion is weird with meshes.
balmy pulsar
faint sky
unless it's printed in metal i don't see why a longsword would be a security iss...
security as in microsoft not wanting the model at a printing service.
since technically they own it
faint sky
not sure if cloud is optional for the free version.. haven't looked into it.
balmy pulsar
 faint sky
printing trademarked or copyrighted objects i have no idea about.
balmy pulsar
not copyrighted, this is the actual longsword model i made for the show. haha. it is "their" model
faint sky
yes but requires those diamond point things to do locally
balmy pulsar
diamond point. i never looked at that before. i dont "render" in fusion. only do interactive. any real rendering i do in 3dsmax/arnold
faint sky
i just usually take screenshots with snipping tool and call it a day. i don't need professionally rendered prototypes of a prototype.
balmy pulsar
the interactive render is all i need. i am not doing animations.
vivid helm
balmy pulsar
not copyrighted, this is the actual longsword model i made for the show. haha. i...
That's still copyrighted, and I'm sure your contract made sure that they are the ones who own it.
balmy pulsar
sure. what i meant is it is not ambiguous. i need their permission to do this. (they probably will want one too haha)
faint sky
sounds like a question for adam savage... i have no idea about prop copyrights. i've never printed a prop. i only do original industrial design stuff.
balmy pulsar
i want to print it maybe 1 foot long. paint it up.
faint sky
could always print it in sections. ruiz brothers just did a great zelda sword in sections. same for their lightsaber builds. it's sectional not printed as one piece so technically no single piece is copyrighted?
balmy pulsar
i think the jlc limits are 280mm. so maybe wings, fuse, tail.
faint sky
and if prop copyrighting was so over the top disney/marvel wouldn't allow any ironman helmets out there. and printables is filled with that kind of stuff.
balmy pulsar
like i said, this is different. this isnt a guy replicating a prop. this is me, the persona that designed the prop in the first place 😛
faint sky
it would still be a replica though
faint sky
if you're the one working on it then there's probably someone higher up you could ask if it was ok to do. i have no idea.
balmy pulsar
yes. i need to just ask and see what the rules are. if im allowed to send it to a service etc.
faint sky
very pretty
faint sky
i'd put the main air intakes more far forward, being so far back might as well be behind the engine. i mean it has a tail so it seems to be sub-atmospheric.
faint sky
ah, very cool, that makes a lot more sense. well done!
balmy pulsar
(and it is fictional :P)
it also kinda needed to at least look a little like the game versions even thoughg everyone hated it
faint sky
yes yes i know just something that jumped out as being too unrealistic but now there is an air of believability to it.
ahh that is a very satisfying design
faint sky
yup was my first thought, stealth but from the top the intakes looked wrong.
balmy pulsar
its also not a turbine. some sort of ion thruster. (whihc makes no sense but whatever)
faint sky
stealth vtol sounds really neat. for stealth though a v-tail is typically used.
oh ion thrusters of course, naturally. 😛
balmy pulsar
hehe
faint sky
well i think it's gorgeous and very well done.
balmy pulsar
thanks
it deserves more than just being blurry in the background haha
print nice and big
faint sky
sometimes i guess it's like that. i do watch adam savage a lot and sometimes designers will work for days for something that just a box of wheaties, in a cupboard, that isn't even shown.
it's a beautiful ship design and should be highlighted but that's just the way it goes. director gets the final decision on what gets shown and where i suppose.
faint sky
is that the internal engine assembly?
balmy pulsar
no thats a drone
faint sky
the pivots are interesting
balmy pulsar
yeah. supposed to be made of junk
balmy pulsar
its really thin and intricate with many parts. not sure if its easily printed
yup. tie rods. heim joints
faint sky
oh you want to 3d print that small? good luck.
balmy pulsar
no, i want to print it life size
whihc is about 1M centre to centre on the engines.
hang it form the roof
faint sky
oh wow, that might be doable... in many many parts.
faint sky
3d printed tie rods sounds challenging enough.
balmy pulsar
it might be viable to just make those real. its a real part after all
faint sky
perhaps but adjustable tie rods would require threading
balmy pulsar
i has a lathe
balmy pulsar
theres a little lcd screen that goes on the front of it (not in the render). could wire that up with a pi and play videos
faint sky
now there's an idea, kind of like odd jay's personal should robot except it's a little flying contraption that follows you everywhere.
balmy pulsar
we wanted a 6 ft roci as well. but determined it was not a model suitable for printing and would take a lot of actual paid hours to fix.
faint sky
could have a lot of uses, out of cell signal range? send your personal drone up as a relay.
balmy pulsar
haha
faint sky
even in a city, that would be neat to incorporate into a story
balmy pulsar
i highly doubt this drone would fly. for whatever reason they wanted only 2 engines
"sci fi"
faint sky
but it'll work with ion thrusters and a simple 9-dof sensor 😛
balmy pulsar
haha
faint sky
i mean if you want to make a good example of ridiculous 2 engine flight look no farther than star wars pod racing.
faint sky
if it's got anti-gravity all the rules go out the window
balmy pulsar
but sometimes its hard
vivid helm
Yeah they basically took the concept of chariot racing from the Roman and Byzantine empires and replaced the horses with jet engines.
balmy pulsar
zoom
faint sky
city sized star trek ships hovering over volcanoes is a thing
balmy pulsar
well yes. that makes sense
faint sky
the engines don't have to be the primary means of flight, only directional control like thrusters.
alright enough of the brain exercises, that's too addicting. nice models.
keen raft
balmy pulsar
haha. my hard drive has 0 bytes remaining.
Sounds like you need more than a bit of additional space
keen raft
Enough room for a few more byte-sized jokes 🙂
balmy pulsar
no jokes about hard drive size
winged helm
What might cause lift up with Asa?
keen raft
But more seriously, lack of adhesion may play a part, but shrinkage is probably the larger contributor. Basically the upper layers shrink, while the lower ones don't, because they are heated by the bed, so the whole thing turns into a banana shape.
Less of a difference between bed, print and ambient temperatures (ambient being the one inside the printer enclosure) would probably help.
balmy pulsar
asa is like abs. it will lift (though not as bad) if you do not have an enclosure and a strong bond to the bed (abs acetone slurry usually)
faint sky
Can increase bed temp but that'll only get you but so far. Warping can happen at higher layers unaffected by bed temp in which case you have to turn down cooling. it's not particularly a filament issue and it can happen with any filament type if the ambient air is drastically cooler than the filament temperature (during winter or under an AC vent). it happens more often with filaments that require higher temperatures.
and as Ventrue said, the cause is shrinkage.
balmy pulsar
it is party a filament thing, abs and asa (and nylon) shrink a LOT more than PLA
faint sky
because they're printed at higher temperatures which makes it easier to have an ambient temp vs filament temp difference to cause shrinkage.
it is not impossible to have the same effect happen with PLA
other than fumes this is the primary reason why enclosures are recommend if printing higher temperature filaments, it helps prevent warping.
balmy pulsar
CTE of abs/nylon is double pla though
its not just the marginally higher temp
anyhow. get one of them printer grow bags, the bed heat will warm the chamber up to 50-60c and that generally seems to solve the issue
🙂
faint sky
Here's an example. I print PETG and it warps. I turn off my ceiling fan and it doesn't warp. The marginal additional cooling of my ceiling fan provides just enough additional cooling to create shrinkage.
balmy pulsar
sure.
im just saying with abs and asa is is a lot more than marginal. you need that extra 20-30c
(i print a lot of abs and nylon)
faint sky
and by example I mean this actually happens to me during winter, with no enclosure. i just don't have the space for an enclosure. had to learn that one the hard way.
faint sky
Oh I have a computer in there. I just overclock it and let the room heat up.
balmy pulsar
hehe
faint sky
exactly. my room is the enclosure. i close off the HVAC vents and let the room heat up.
also the reason why i can't really print during summer. my house leaks too much. it's 83% humidity and every print fails. so printing for me in this house has become a seasonal thing. 😦
balmy pulsar
ew
faint sky
yeah i have to wait for winter to print cleanly. which is fast approaching! 🙂
balmy pulsar
dont remind me. i have a lot of work to do before it gets too cold
250sqft of concrete slab. a shed roof, and a ceiling
bleh
faint sky
that's a big project. i need to install insulation because obviously this house has almost none.
balmy pulsar
i had a wood floor, but it flooded then rotted. so im just gonna pour a slab. (this is in my shed/workshop). and the roof asphalt peeled up and it leaiked and rotted. so that needs to be redone. sigh. haha.
faint sky
kinda same, my shed is rotting and has a wood floor i want to slab. not 250 sq ft though, that's a huge shed.
balmy pulsar
oh, mines only 100sft. the other 150 is my porch which already has a slab but it needs to be covered over with new. technically it is called "screed mud" but it is still 3" thick so it is basically the same amount of work
faint sky
i'm probably going to tear it down and make one out of concrete blocks because hurricanes.
we make sheds very different down here. not sure i've seen a shed with a porch, that's basically a mini house.
ahh if i could screed thick concrete on the outside and put an AC unit inside might be able to keep the humidity out and use the shed for printing instead of the house. id' have to run the AC 24/7 year round though. There is no cheap solution for a well insulated house. :/
balmy pulsar


i built it like a proper building. block foundation on the bedrock. but then....

haha
we get these little flash floods. and my floor is below grade (10 ft ceiling in a 9 ft tall building
so at least with concrete, it cant be damaged, and it can have a drain
coarse coral
note to self. do not bump fdm printer mid print. especially if it means the belt and gears slip. this of course will ruin the print then on with layer shift
shy kelp
Dumb question, do I risk into putting printers here?
It's a water pipe
Either by increasing the temperature too much (I doubt but who knows), or by the humidity (as you can see from the black mold, I guess?)
There's not ventilation here
 faint sky
that does not look like a workshop kind of space to put anything and if you do you'll restrict access to the plumbing. if something happens with the plumbing then you'd have to move everything electrical out of there again. too much risk.
keen raft
This is certainly unexpected
faint sky
Did you turn infill down to 0%? Amazed it bridged that far.
On a positive note you now know how to DIY a whisk broom.
keen raft
That stuff was supposed to be support material. It all looked fine from a distance until the interface layer went completely off the rails 😄
What's interesting is that the actual model printed just fine. I had variable layer height on, maybe that caused it. I'm checking that.
faint sky
Without seeing the slice of what the supports were supposed to look like underneath i can’t even make a guess. That one has only happened to me when I completely disabled infill and the bridges were too far. Your bridges are 3 times longer than my max length before turning to spaghetti. It’s really impressive.
Ah but what speed are you printing. I usually print slow. I might be able bridge that gap with about 120mms.
keen raft
It's just PrusaSlicer's rectilinear support pattern, nothing fancy. Support speed was 60 mm/s I think.
To be fair, the extrusions were probably lying on top of each other to some extent, so I'm not sure this qualifies as true bridging 😉
balmy pulsar
thats the default in cura actually. it just is obscured so it looks weird
just a linear zig zag
faint sky
Thought grid was default?
balmy pulsar
maybe it is now. ive uses the zig zag alot
keen raft
Cura has the same style, it all just looks hairy once you start pulling the extrusions apart like a broom 😛
balmy pulsar
i thought it was default
faint sky
Its been so long since ive used defaults on any setting I honestly dont even remember what they are.
balmy pulsar
ayhow, im gussing it is heavily under extruding the support and it isnt bonding? not sure.
keen raft
I was just about to write that. I'm trying something similar right now and that definitely looks underextruded - but only on the supports, nowhere else. And I've already got it at 120% extrusion for the supports, because my organic supports have holes in them at anything less.
balmy pulsar
odd
faint sky
I find it neat the part printed fine. So why even include the supports?
balmy pulsar
ha
keen raft
Indeed. PrusaSlicer's supports have been strange since 2.6. They seem to consistently underextrude and it also keeps knocking them off the plate because it moives the nozzle through them after they're printed.
balmy pulsar
the top laye of support is meant to be underextruded of course. but not all of em
haha
faint sky
Unsure if prusa slicer has z-hop?
keen raft
faint sky
I find it neat the part printed fine. So why even include the supports?
The video shows what's left of the underside, the first layer and a bunch of these strings stuck to the plate. It's a top cover for a case and the economical way would be to print it upside down like a bowl, but I want the nicer top layers to actually be on top.
keen raft
faint sky
Unsure if prusa slicer has z-hop?
It has, but I prefer not to use it because it causes stringing.
faint sky
Oh i thought that was the top. Wow thats even worse than I thought. That becomes an initial layer issue possibly and not necessarily a support setting.
And even more impressive it finished. 🤯
3D printer Gods smiled upon you today for sure.
But the rest of your print look great. So strange.
keen raft
Yeah thats what I mean. PrusaSlicer must be doing something weird with supports in general. First layers are fine though, except for some irregular patterns in my glue residue that I don't want on the visible model surfaces, hence the idea to print it like this 😉
That's the top. I cancelled it at that point because it was obvious that it wouldn't work.

Excuse the dust 😉
keen raft
Must be the filament 😛
By the way, I finally got around to print this cap here from a few weeks ago in TPU. Kinda put that off because I had never used TPU before but apart from the fact that it was wet, it's really quite easy to work with. I was very surprised. And the results are amazing, layer adhesion is off the charts. I literally can't pull this apart.
 faint sky
I have yet to even purchase TPU. I'd love to find an excuse to try some, just haven't come across a project that's really needed it. Glad it finally worked out for you that's awesome. I know you were having an issue with those breaking with other materials. Print quality looks excellent.
balmy pulsar
how big arte those. they look clean
keen raft
faint sky
I have yet to even purchase TPU. I'd love to find an excuse to try some, just ha...
Try it, it's really fun! Seems like a great material not just for parts that have to be flexible, but also for parts that just need to be robust.
keen raft
balmy pulsar
how big arte those. they look clean
Diameter is about 18mm, but all the sparkles on the TPU are artifacts from the wet filament that go away with drying. The shape is also unnecessarily hard to print, I'll remove those ridges for a later version.
balmy pulsar
ah. they seemed smaller.
arctic dragon
I’ve always wondered if my 2-meter Bowden tube would be able to print TPU, but it’d be a darn shame to open a full spool just to experiment…
faint sky
Here's an interesting video on TPU with bowden. It is possible but there are potential extruder and bowden tube related issues compared to a direct drive. https://www.youtube.com/watch?v=eSfZlNCaMCo

Have you been looking for a way to print with flexible TPU? If so, you're in for a treat! In this video, I'm going to show you everything you need to know about flexible TPU printing with a Bowden 3D printer. I cover the basics of TPU extrusion, including how to set up your printer and print your first flexible TPU object.
If you're interested ...
The bowden tube itself can be a source of issues. Since direct drive doesn't use a tube that's one less potential problem but direct drive isn't a guarantee it'll work either. Your slicer settings and printing some calibration tests would be very important for any new filament... especially flexible filaments.
keen raft
I've upped my extrusion width to 200% (!) for the supports and that finally made them fuse. Seems weird.
faint sky
That seems like it should not be a thing. There's some other kind of setting that's limiting it then.
There's an option for not supporting bridges. If your top layer is filled with long bridges then at some point it might stop printing the support in favor of only bridges. Due to the gap distance this could show up as a bunch of long drooping lines.
What are your top and bottom interface layers set to? Having one of them be 0 could do it too.
keen raft
"Don't support bridges" is off and "interface layers" is set to 3.
faint sky
It's definitely support related since your print came out otherwise very nice. Try grid next time?
keen raft
Honestly if 200% extrusion works, I don't mind keeping that. I just think it's weird.
faint sky
I think it's weird too but I've learned not to temp the 3D printer Gods wrath by changing settings when everything is working correctly.
keen raft
True!
balmy pulsar
does the support print at a faster rate than the walls main print. i wonder if it might be going fast but not compensating for that speed change
keen raft
Supports were printed at 40 mm/s, perimeters at 60 mm/s and infill at 80 mm/s. So yeah, excessive speed might definitely cause this, but not in this case.
random urchin
Was just playing with a design printed in TPU to see if printable tactile bumps for membrane keyboards were feasible. The answer is: Maybe?
 vivid helm
The question would be how long they would hold up, and also whether they would be satisfying to use.
Of course, if the answer to either of those is 'no' you can certainly design and print a silicone mold.
random urchin
The prospect of creating something completely impractical never stopped me before. 😄
faint sky
Seems as if the walls make it a little more rigid than say a latex membrane. Can try to oversize the membrane button so the center is easier to press or perhaps chamfer or angle the button walls more so it's not a straight 90. That should provide just a tiny bit less vertical wall rigidity.
It looks like you do have an angle in there but it might need more if the outer rim of the wall is causing too much uneven feedback.
Great looking print though!
alpine glen
does the membrane button even have to look like a cylindrical button with walls all around it? Like, could you make it a bridge? (just throwing out a random idea)
faint sky
Typically a membrane is either for use with a resistance button pill, make it easier on the fingers with hard clicking buttons, or at attempt at water/debris proofing. Depends on the goal.
If the goal is to hold the carbon pill you'd design the membrane as a holder.
 alpine glen
conductive tpu filament exists as well (it's just extremely expensive 😭)
faint sky
or as a soft keycap for a tactile button

You can't really tell what the intention is with their membrane just from looking at the top. Either method might require a slightly different approach.
arctic dragon
random urchin
Was just playing with a design printed in TPU to see if printable tactile bumps ...
I would say definitely doable, but you may have to redesign the geometry to get the actuation distance and force you want.
faint sky
If TPU doesn't work out there is an option in Fusion360 that will automatically turn your model into a mold casing. It's pretty neat. You can print it in PLA and just pour silicone into it. It's a bit more work and requires purchasing two part silicone for molds but a valid technique and would be far more waterproof and squishy.
random urchin
alpine glen
does the membrane button even have to look like a cylindrical button with walls ...
I was just thinking about that. Next iteration is a square opening with a + bridge and an actuator in the center. If I print this upsidedown, it'll print flat; no bridging. Intent is to close a crosspoint switch (one wire crossing over another with a small gap) but, yeah, as @faint sky pointed out, it could be configured to hold a carbon pill.
 arctic dragon
Or, at least for the sake of testing, any small bit of conductive material.
The issue I see with the proportions in that design is the lack of constraints that ensure the center piece pushes straight down. Hopefully that won’t cause any issues for your actuation reliability…
random urchin
I'm trying it out right now using PETG, partly because it'll be more likely to press straight down, but mostly because TPU is such a pain to work with. 😄
faint sky
if possible I would oversize the cylinder so no matter what it'll make contact. bigger is better with that type of design. otherwise a small dimple might start forming on your finger where you're pressing the button while gaming or typing for example. have to think about the ergonomics of it too.
it'll work but after a while your fingers will probably start to hurt.
random urchin
Grid's PETG; key's PLA. Can easily get 1mm deflection out of it. The key could stand to be thicker and a bit more stylish. 😄
 faint sky
oh that's nice
didn't expect that kind of design. how to stop the keys from falling out?
random urchin
faint sky
didn't expect that kind of design. how to stop the keys from falling out?
Magic! Actually, it's just press-fit. There's a + shaped notch in the keycap's post that grips onto the center of the bridge. It holds fairly well, but I might want to deepen the notch a bit for a firmer grip, then scale up the actuator to compensate.
The crosspoint switch (similar to the one in the 2nd image) would sit beneath the key, and be activated when the actuator presses down on it. I've already done 3x4 keypads using an array of these crosspoint switches, but the tactile feedback is unsatisfactory.
Ultimate goal would be a fully-customizable qwerty keyboard where everything but the wiring is 3D-printed, then use a Feather or similar microcontroller to scan the keys and output keyboard messages via USB.

 faint sky
oh wow that's neat.
looking forward to seeing more, please post updates as you work on it. very nice design.
balmy pulsar
O_o
random urchin
faint sky
looking forward to seeing more, please post updates as you work on it. very nic...
Will do. I should probably push this over to #general-tech or #show-and-tell \
faint sky
If you would like but there's not a lot of action in here so posting 3D printing poject updates in here is perfectly fine to me including the good and the bad. This is a place unlike coding where we can learn from each others successes and mistakes.
random urchin
Well, I certainly have a lot of mistakes to report. 😄