
#help-with-3dprinting
1 messages · Page 6 of 1
 coarse coral
 faint sky
yup, got tired of searching for the thing so now it's always in the same place.
Got a long 8' USB cable extension running to a usb power hub. Cable wraps around the back of my storage stuff so it's out of the way.
coarse coral
cables are the worst, even after managing them they always come back. someday, somewhere
i can only imagine how those guys felt who's job it was was to make wire looms. all day
faint sky
if you ever figure out how to transfer 3-5 amps wirelessly let me know 😛
coarse coral
i'll do that
faint sky
i might end up making a custom circular PCB with 12V RGBW lighting for it. The fume extractor is 12V so it would make sense.
I need a bigger printer. 220x270 is just not enough for me. This is my 3rd project that is just beyond a flat footprint. Printing vertically at full volume always gives me anxiety and Cura has a serious issue with supports for this kind of shape. It keeps wanting to fill in the vacuum cavity inside the main body. 😞
coarse coral
maybe it's worth building a voron to your own spec
i heard cr10 max are good
but there was another which is similar to cr10max but a way cheaper
faint sky
I have all the materials to extend the bed to 500mm just need to plan it out.
but that's not going to provide more width which is what i need for this particular project.
coarse coral
nice
faint sky
they don't make ender extender kits for the S1 Pro specifically. 😦
coarse coral

ELEGOO Official
ELEGOO Neptune 3 Max FDM 3D Printer with Auto Bed Leveling, Dual-Gear Direct Extruder, Ultra-Quiet Printing, Dual Lead Screw Drive, Massive Printing Size 420x420x500mm /16.53x16.53x19.68 Inches 【Dual-Gear Direct Extruder】The dual-gear direct drive extruder with gears made of SUS303 stainless steel features adjustable extrusion force and a 3:1 re...
faint sky
well not all the parts. i still need to design a new main carriage and custom sized bed heater.
faint sky
tempting but only cost me about $100 for the supplies for a 500mm y extension
so far anyway...
coarse coral
yeh i'm all for upgrades
faint sky
it'll basically look like this after i'm done, hopefully. https://www.youtube.com/watch?v=BFpR9NgYveU
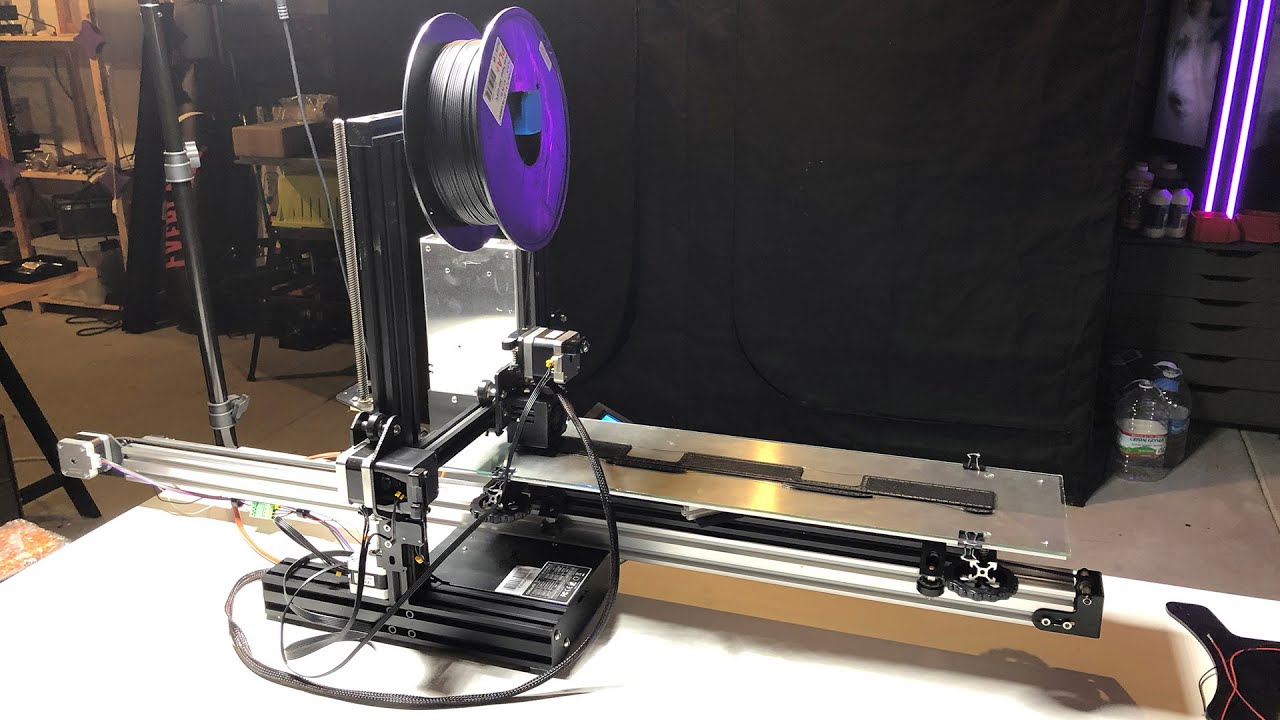
In order to better create my designs on the Ender-3 Pro, I decided to focus on building a bed that could print within an extended space of 6" x 22." This is a longer walkthrough of how to build my extra long conversion. The 4040 v-slot determines the max length with 8 inches the max width. In theory you could modify the design for a print space ...
 iron remnant
My urges to enlarge my Ender 3v2 are counterblaanced by my urge to just get a printer meant to be that large.
faint sky
Yes, that is the dilemma. I continually find myself making bigger and bigger projects. At first I was like I just need a little bit longer y-axis and now I've run into a situation where even that wouldn't work. I just need a massive printer. 😛
Now whenever someone asks how big of a thing can I print I'll just say "a full sized mailbox".
 blissful wasp
Hello! I am interested in eventually learning how to design objects for printing. Which software and resources would you recommend?
 vestal thicket
blissful wasp
Hello! I am interested in eventually learning how to design objects for printing...
vestal thicket
blissful wasp
Hello! I am interested in eventually learning how to design objects for printing...
Check out FreeCAD if you want something free and open source; check out Fusion360 or OnShape if you want a professional "free for hobbyist" software, or Tinkercad for a good starter software, or openSCAD if you have programming experieince.
Fusion360 is arguably the most popular
blissful wasp
vestal thicket
Check out FreeCAD if you want something free and open source; check out Fusion36...
Because I'm a programmer with zero design skills, I've definitely thought about picking up openscad a non-zero amount of times :P
vestal thicket
Foamyguy has done some Saturday morning streams of him using openSCAD, I wish my coding skills were better
blissful wasp
vestal thicket
Foamyguy has done some Saturday morning streams of him using openSCAD, I wish my...
If you make enough projects and read enough code, they'll improve
vestal thicket
blissful wasp
If you make enough projects and read enough code, they'll improve
I agree! My favorite podcast episode I've done is the interview with Nick Tollervey where he compares coding to music - need to practice every day to get better
blissful wasp
vestal thicket
I agree! My favorite podcast episode I've done is the interview with Nick Tolle...
I don't know who that person is, but they seem to have it right. You also have to get used to feeling that you are not understanding a thing for a while, and be comfortable in that feeling
iron remnant
Oh yeah, I really really really love OpenSCAD.
So, the trick is to understand that there's BOSL2 and NopSCADLib.
Like, the under-appreciated not-well-factored real benefit of OpenSCAD is that you can create a library of parametric part features and it's kinda painful to do the same in FreeCAD.
The intersection point, I guess, is that FreeCAD (and presumably the paid CAD programs that I don't use) have really good constraint-based modeling where, if you get used to how to not fight the constraint solver you can have your objects resize in a friendly fashion based on some parameters you set in a spreadsheet.
Whereas in OpenSCAD, you just use math and code to make the same thing, which eliminates fighting with the constraint solver but sometimes one or the other is more natural.
It's a lot easier to do deeper algorithms and math using OpenSCAD code tho.
Basically, I look at NopSCADLib and see all of the parametric primitives there that are totally designed for making OpenSCAD-based 3D printers because that's one of the things the initial developer of the library was doing and it causes me to want to make a really really good CoreXY open source fully-parametric 3D printer design because a lot of the really good modern open source CoreXY 3D printer designs assume non-open-source tooling.
It's a fool's errand and I'm like "Well, instead of making a 3D printer for some weird ideas of intellectual property purity and hackability, I'd rather make weird art" so I never quite get to it.
faint sky
my first 45 degree print. 35 hours to go. 🤞

Breadboard wire storage box. https://www.printables.com/model/449455-breadboard-wire-storage-box
This is just the bottom lid. 1 of 2 parts.
faint sky
Supports are hanging in there, adhesion is good.
faint sky
My nozzle is starting to hiss. Brand new filament just out of the plastic. It's starting to get really humid in FL. :/
coarse coral
that said i've just realised breadboards have clips (non locking) (my case has a use! yay!) on them
 elder oxide
Nice!
coarse coral
was useful
faint sky
About 1/3rd through and looking ok. Had a weird layer line happen.
 faint sky
The supports aren't actually touching the piece. WTH Cura?? It started moving and shifting. Looked closer at the supports in Cura and sure enough there's about a 1mm gap between the part and the supports.

Everything looks ok...

until you zoom in... which i didn't do. there's about a 1-2mm gap shown and in the real print too.
this tiny little sliver was the only thing supporting the weight of the 45 degree structure.

so i took my portable soldering iron and starting making some emergency support welds between the supports and the part. melted both surfaces together in multiple places. now the supports are connected and the print isn't teeter-tottering on that sliver. it'll ruin the surface quality but should hopefully save the print.
keep an eye out for stuff like this in the Cura 5.3.0 update. custom supports didn't work, at all.
faint sky
45 degree prints waste so much material 🥹
vestal thicket
Made a neat vise to help with microcontrollers. Link: https://www.printables.com/model/51074-fast-operation-vise
 coarse coral
.6mm for prototypes that's for sure. .4mm for bigger final pieces and .2mm for detailed areas in small quantities
.6mm low quality, .4mm standard quality and .2mm super quality as per cura default profiles with personal tweaks
faint sky
35 hours

@vestal thicket quality of your prints is awesome. I can’t do threads.
The shine on it makes it look like aluminum. 😮
vestal thicket
I always get so nervous on those 24+ hour prints
faint sky
This means i might be able to print a tr cowbell enclosure in 2 pieces
coarse coral
It's amazing it worked especially with that gap in supports I remember having a weird slicing issue which led to a complete fail . Yes gravity may help but not always
I'm printing 6 prototype parts at the moment about a combined total of 30 hours. Quite a basic shape so all parts printing at a nice speed
I'm hoping to make a radxa powered handheld with a good size screen. I've really enjoyed testing my last handheld which is going at the start of the month to my cousin
faint sky


Emergency welds at the bottom held it together all the way to the top
Support doesn’t touch even at the top.
coarse coral
I actually had to react to a stupid one at a time print earlier today, places the items too close and the other would have been hit by the nozzle. Two parts identical, at 49% I removed the first part as it was moving to its first start point of second part. Happened to be nearby at the time. Lesson learned.
coarse coral
faint sky
It's unreal how this is holding together haha
Looks like it could do a ski jump any moment 😂
faint sky
Textured PEI and perfect z-offset FTW
coarse coral
Haha 💯
faint sky

The line there is about where i caught it rocking back and forth. It was about to go. Can see some layer droop as it filled back in and caught up to level.
Having a portable battery powered soldering iron really saved the day. I had minutes left before it would have failed. This is why we should always continually check in on a print no matter how well its going.

Minimal damage. I can live with that.
coarse coral
If that's the only side damaged you could sand it down maybe
faint sky
Its just to store breadboard wires in the workshop. Aesthetics don’t really matter for this one.
Still have to print the top. My first hinged box.
 short crag
how can i prevent the extruder gears grinding through the filament
vestal thicket
and make sure your z offset is right too
short crag
ok thanks ill try that
faint sky
There's only 1 person in this community I'm aware of that also uses rhino. yes you'd be much better off seeking Rhino support from a rhino forum. Glad you got it figured out.
faint sky
Figured out why my support wasn't connecting. After updating to Cura 5.3.0 it wiped out most of my profiles and set support x/y distance to 2mm... instead of 0.0 which would be touching.
zoomed in close this time to ensure the material is there after slicing. hopefully the top will go a lot better with actual supports. 😅
 coarse coral
any ideas how to make a spring loaded trigger for a custom gamepad?
all i can think of is a basic wind pot that rotates with the mechanism but before embarking wondering if there are ready made solutions?
elder oxide
coarse coral
all i can think of is a basic wind pot that rotates with the mechanism but befor...
I think most have strain sensors connected to the spring
Oh wait
Scratch that, they use hall sensors
Small magnet in the trigger, moves across a hall sensor and the voltage is read back from the sensor
coarse coral
thanks
complex
i could get 2 of these and attach them to the armbars on my chair
You might recognize this interesting new component from behind-the-scenes studio clips of audio recording equipment or even music videos. A fader is a control device for fading or ...
faint sky
wow i'm blinded by the shine on that
your quality is awesome
spent the morning designing a mount to replace the tank turret with a first person video (FPV) camera mount
this little guy is about 2"x3"


The turret will do a 360. Don't think there's enough space to get the camera to pan upwards for full articulation.
coarse coral
Too cool
 bleak flare
my Ender 3 S-1 arrived! Unboxing it and starting to assemble - oh my word are the diagrams in the quick start guide tiny - wow
I am slightly concerned that the paper manual is v1.2 but the downloadable manual is v1.1 
coarse coral
ah very nice
my top tip is to level your gantry
essentially that means making sure that your gantry is the same distance on the left rod as it is right rod. but of course you should level your build plate, make sure the gantry is tight and not sloppy (it's an eccentric nut)
creality qc is bad but you can fix it by tightening bolts and levelling nice
bleak flare
I'll add to the pre-flight checklist
coarse coral
also don't make belts too tight
my stepper motor literally sheered with too tight belt
bleak flare
one of my first concerns is that it seems to be setup for non-US power
coarse coral
i think you'll have a 240 or 120 switch on it somewhere
bleak flare
yea, the screen had a note about that
so I have to find it and make sure it's set to 120
bleak flare
cool - i'm mostly color blind, so always worry when people try to get fancy
coarse coral
If it similar to mine the visible text indicated the voltage that is set. So I am in the UK and working with 240
 bleak flare
I saw a clear window with a sticker like that
so I may have to tilt it and break out the flashlight to check
bleak flare
thanks!
I am purposefully rolling slow on the setup
letting all the parts settle to the room temp and also not rushing the install
coarse coral
it's a nice looking printer
coarse coral
coarse coral
If it similar to mine the visible text indicated the voltage that is set. So I a...
in my printer push to right for 120v and push to left for 230v it's currently to the left and the text tells me that i am running 230v. i always find these switches confusing but when looking at it like that i don't think there is any mistake
bleak flare
yea, I remember from my early PC days when power supplies had these switches
coarse coral
what's your first print going to be with? pla?
bleak flare
I believe so, I went with the laser bundle so I'm using whatever filament it comes with
 bleak flare
indeed
I'm looking forward to laser engraving wood panels for some personal projects
coarse coral
no doubt
i want to get laser on mine only so that i can print a plastic part and then obliterate it with the laser beam
bleak flare
LOL
coarse coral
 coarse coral
totally
bleak flare
question I didn't think about, but now I'm wondering - do I need to worry about fumes?
coarse coral
agree pla is odourless ive never printed with anything else
bleak flare
I am quite sure I will be graduating to a larger printer before I attempt anything other than PLA
vestal thicket
yeah, with ASA and ABS you would need an enclosure anyway
bleak flare
but I will keep that in mind - my office does have a window that opens, so I can alway rig up a hood/fan
coarse coral
i recommend getting a box to store all your pla in and every packet of silica gel load it into the box
i've left a reel of pla out my box and well it became very brittle but literally the same pla in the box is fine
bleak flare
ah, i noticed the spool was sealed tight
coarse coral
I keep mine like this
 bleak flare
my girlfriend swipes all the silica gel packets for her use - so i'll have to keep some hidden
i'll get some tight sealing boxes to store everything between runs
coarse coral
that's ideal
bleak flare
oh - the paper manual is titled Quick Start Guide
the downloaded manual is Quick Installation Guide
bleak flare
goodness the head is making a racket during the leveling process - like it's trying to go past the right side
bleak flare
oh - one of the cables wasn't fully seated
bleak flare
the first print totally did not stick to the base, I realize I missed the z offset adjustment after levelling
coarse coral
yeh that's worth getting right
you should do the calibration print and take note of how the squares are
if some points are loose it means the build plate is too low in that area and adversely too high
you can take off the print sheet and tighten the bolts to remedy this, if there are really bad fluctuations you can use tape

This is a simple model to test your bed level and adhesion. It's roughly 200x200 and fits the Ender 3 and Ender 3 Pro bed perfectly. It's ofcourse usable on any printer with a print bed of size 220x220 or larger. I use it to track down bed leveling issues like warping and poor adhesion.
If you print it on an Ender 3/Pro with "Quality -> Layer he...
faint sky
Use Cura instead of Creality's slicer. Creality just rebrands their slicer from Cura anyway and they're usually far downstream of any recent updates.
Setup a custom profile in Cura, the S1 might be in Cura by default, my S1 Pro was not but I just used the S1's profile as a basis for my custom profile anyway.
The 240/120 switch on my S1 Pro had a sticker over it when it arrived. Luckily I watched a lot of videos about setup before it arrived so I knew to look for it before ever powering on the printer.
Ricky Impey's video series should be mandatory viewing for any new owner of an Ender 3.
Are you struggling to get a good first layer? This can be the first problem beginners come across. There are many tutorials for how to level your bed. Many of them leave you with more adjustments still to do afterwards. This simple method will give you a near perfect first layer within minutes on any 3d printer.
..................................
The only major difference between the S1 and S1 pro is the pro has an all metal hot end allowing for up to 300C nozzle temp, S1 can do 260C (PETG & ABS no problem)... and the touch screen interface. Other than that they're pretty much identical.
and this one in particular is excellent for setting up your BL-Touch for bed mesh

In this video I'm going to show you how to level or tram your bed, set a bed mesh and set your z height on a 3d printer with a bed probe.
You may be surprised to hear that you still need to level or tram your bed when you bought a 3d printer with 'Automatic bed levelling'. Well unfortunately, this is very likely to be a little white lie that 3d...
One of the many nice features of the S1 and S1 Pro is unless it's printing, your stepper motors are disabled (between prints) allowing you to freely move them for easy retramming.
The most important things to learn as a new owner is getting your bed trammed to pure perfection (within 0.05 on each corner), ensuring gantry is perfectly perpendicular to the build surface, and nailing that sweet spot for z-offset.
Here's the entire S1 Pro playlist. A lot of this will directly relate to your S1 as well except you would go about it in a slightly different way due to the control screen being different.
bleak flare
thanks for that amazing list of resources, I will go thru them each
I will need to check that my printer is on a level surface, that the gantry is squared up and all level, I was considering getting a 0.1 feeler gauge but for now will use the sheet of paper method
the only thing that I think I will need is to get a proper spool - but I also realized that I could probably print one ! ;)
 shy kelp
bleak flare
question I didn't think about, but now I'm wondering - do I need to worry about ...
shy kelp
bleak flare
question I didn't think about, but now I'm wondering - do I need to worry about ...
Even if pla and petg are safer than stuff like abs, it's best if you have a fume extractor or ventilated area of some kind
Burned plastic is not great to have close
Personally I use superpleccer slicer, I can make arc supports, so I use 0 infill but make a thicker shell, so I can save filament and some time
 rugged apex
Does anyone know how I can find the driver for NAU7802?
https://www.adafruit.com/product/4538
If you are feeling the stress and strain of modern life a Wheatstone bridge and you want to quantify it, this handy breakout will do the job, no sweat! The Adafruit NAU7802 contains a ...
shy kelp
rugged apex
Does anyone know how I can find the driver for NAU7802?
https://www.adafruit.com...
There are links in the description

GitHub
Arduino library for the Adafruit NAU7802 24-bit ADC - GitHub - adafruit/Adafruit_NAU7802: Arduino library for the Adafruit NAU7802 24-bit ADC
faint sky
bleak flare
the only thing that I think I will need is to get a proper spool - but I also re...
I thought that at first too. I'll assume you're referencing the small handfull of starter filament they provide. Yeah just get a spool. Amazon has a great selection of filaments. Micro Center (if you have one nearby) is also known to have a wide assortment. I think even Walmart has 3D filament these days.
Recommend you start off with PLA. Pretty much ignore PLA+ as it has no real additional benefit vs its additional cost. Standard PLA is the most popular filament for every 3D printer for good reason. It's not UV resistant and will warp in the sun so don't make something to put on your car dashboard from it. Start off making some small simple things. Get everything calibrated and slowly step your way up to larger prints.
bleak flare
shy kelp
Even if pla and petg are safer than stuff like abs, it's best if you have a fume...
good points, I will definitely keep the printer closer to the window in the office and put in a small fan to pull air out of the office
bleak flare
faint sky
Recommend you start off with PLA. Pretty much ignore PLA+ as it has no real addi...
yes, my plan is to order a few spools, keep to using only PLA until I get a feel for what the heck I'm doing and stick to small uncomplicated projects - hard to learn when more than one or two items are shifting/changing at a time
I was looking at my supply closet and noting all of the small boxes and hooks that i've bought in the past from the big box stores, i'm thinking that I can start with those items. Small boxes, flat plates for signs and decorative hooks and inlays to hang art around and in
shy kelp
bleak flare
yes, my plan is to order a few spools, keep to using only PLA until I get a feel...
For the same price petg is better
It's stronger let's say
bleak flare
i'll put PETG into the "things to explore next" bucket
right now I'm working on what a slicer is, why I need one and finding out how to not get lost in the sheer number of available things to print
shy kelp
bleak flare
right now I'm working on what a slicer is, why I need one and finding out how to...
It just gets your 3d model and converts it in instructions (gcode) to execute
My suggestion is to not get lost with crappy YouTubers and websites that make stuff more complex and longer than it really is for placing more ads I guess
bleak flare
i've only gone to youtube for two examples of the installation - they helped me validate that my attempt was at least not a complete botch job :)
everything else has come from here - lots of knowledge in the channel history
rugged apex
shy kelp
https://github.com/adafruit/Adafruit_NAU7802
I mean the firmware used by freeRTOS which cannot use the Arduino library.
faint sky
Benchy btw is an obligatory print. It's limited in diagnostics but it's the standard to compare against so it must be done. 🙂
I'd rather not recommend someone go straight for PETG. The amount of stringing and dialing in does take a level of knowledge compared to PLA.


Didn't get the hole diameter of the hinges right and had to hammer in the 2mm rods. It works, hinges stop at a 45 degree open angle. end stops work well.
coarse coral
cool box
nice inset open tab
@bleak flare
sorry for the quality ffmpeg -i input.avi -s 720x480 -c:a copy output.mkv
turned my video into a potato
faint sky
Very nice video guide @coarse coral !
coarse coral

 faint sky
He's got an Ender 3 S1 and I saw there's a profile for it.
Hmm I've not run into the issue where the files don't show up on the printer interface. Sounds like a bug.
coarse coral
frankly yes, it's odd
faint sky
There is a setting in preferences somewhere that will rename the file automatically. I actually turned it off because it makes the file names too long for my screen.
coarse coral
i think it's maybe a linux and file issue, i had the same problem with ender 3 and also cr6 before i upgraded firmware. so the common denominator is the fact i'm doing this on linux
bleak flare
that is an AWESOME guide - so many clues and tips
coarse coral
there are people who go way in depth with the configurations for slicing
faint sky
In preferences>general> scroll down and you'll see "add machine prefix to job name". If you only have 1 printer you don't need that enabled. Only makes the filename longer.
bleak flare
honestly when presented with so many options to tweak, I try to stick with good defaults until presented with a reason to adjust
coarse coral
faint sky
In preferences>general> scroll down and you'll see "add machine prefix to job na...
ah nice tip
coarse coral
bleak flare
honestly when presented with so many options to tweak, I try to stick with good ...
yeh same here there's only so much time in the day
coarse coral
faint sky
In preferences>general> scroll down and you'll see "add machine prefix to job na...
got it - thanks
faint sky
It is very easy to get overwhelmed because there is a lot to learn. The rabbit hole with 3D printers is as deep as you want it to be.
shy kelp
rugged apex
I mean the firmware used by freeRTOS which cannot use the Arduino library.
I have no idea what are you talking about, try asking in other more related subsections
shy kelp
faint sky
I'd rather not recommend someone go straight for PETG. The amount of stringing ...
Mah I always printed randomly, it never gave me a problem, except for leveling and making stuff stick to the bed, that's really annoying but that's for everything
Also you can postprocess things, to have a nice grain, I do place prints in the oven covered with salt
 faint sky
That's true, too much bed heat, not enough bed heat, level here, adjust there. It's a never ending dance.
It's like stacking stones. Once you have it just right you don't want to touch it least you unleash the wrath of the 3D printer gods.
 minor shore
Anyone on a corexy?
bleak flare
oh wow - that z offset is a very very tedious adjustment
now I have some material that is very solidly adhered to the plate - waiting for it to warm up so I can scrape it off
coarse coral
sounds like your nozzle is too low, maybe more offset
feeler guages are useful to have
or you can become one with your printer

 bleak flare
I ordered a set of gauges
I kept starting one of the built in projects it came with, since they all start with a single line on the left side
following the video that DJDevon3 posted above, I manually leveled the bed
and with my hand on the knob to tweak the Z offset as it was starting each, got it tuned in
printing my first benchy now
oh! love that Cura recognized the fact that the printer was plugged into the laptop as COM4 (usb-c cable)
it offered a direct print option and it's working wonderfully
coarse coral
that is great
im jealous you can send direct to printer
sounds like you are on the right track
bleak flare
I'm going to print the calibration cube next - that way I can look at the vertical measurement to see if my Z offset is good and other details
oof - benchy is going to take 4 hrs
coarse coral
.2mm nozzle really slow .4mm slow but nice quality .6mm much quicker and for some parts good .8mm nozzle fast but lacks a lot of detail
iron remnant
CHT nozzles are fun too. I've got a 1mm nozzle so I can print organizer things.
shy kelp
bleak flare
I'm going to print the calibration cube next - that way I can look at the vertic...
There are some printers that have functions of lidar/photo scanning the extruded filament and compensate the leveling from it
But dunno if marlin has integrations
faint sky
Gauges are not absolutely necessary to get. They'll definitely increase your accuracy but a sheet of paper will suffice. Everyone usually starts with a sheet of paper.
I actually don't use feeler gauges or paper anymore. I use the speed of light.
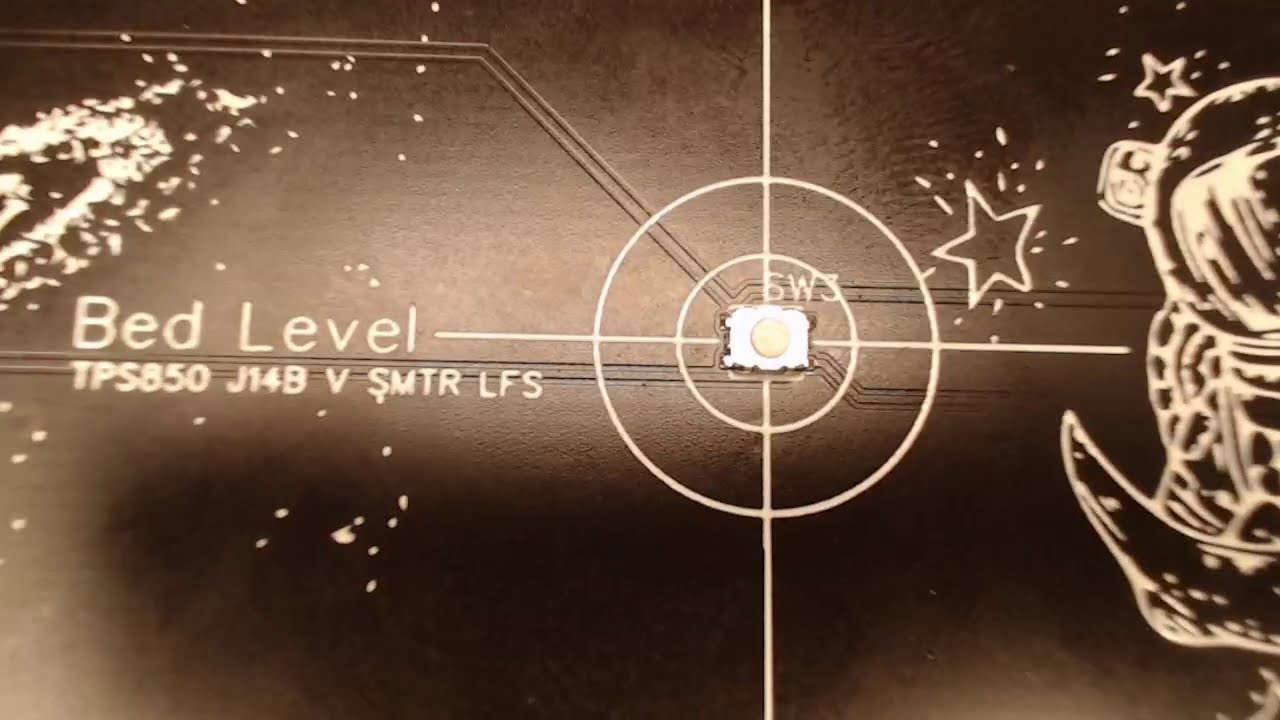
Based on the E-Leveler by CHEP. You can find the Open Source PCB design here: https://oshwlab.com/djdevon3/bed-leveler_copy
faint sky
I don't sell them but you can have them produced by JLCPCB using my files. https://oshwlab.com/djdevon3/bed-leveler_copy
 vocal flax
faint sky
Benchy btw is an obligatory print. It's limited in diagnostics but it's the sta...
vocal flax
faint sky
Benchy btw is an obligatory print. It's limited in diagnostics but it's the sta...
I've never printed a benchy
vocal flax
minor shore
Anyone on a corexy?
Not yet but I'm planning out one rn
vocal flax
faint sky
https://www.youtube.com/watch?v=AkGcRJ83Vnk
Suggestion. Manual focus could be better suited for top down bench video. 🙂
I also plan on making similar contraption because everytime i remove and install my probe the offset changes. This would help with offset
faint sky
I did switch to manual after that video specifically because auto wasnt working. Sucks to record a whole video then find it was too blurry.
vocal flax
Yeah I tried making video once, not my cup of tea
faint sky
Ive also gotten better at checking my monitor for focus but the pc monitor is 5 feet away from the camera.
The camera setup and recordings are a work in progress. Expect better videos in the future.
I got the idea from chep and just designed my own pcb.
vocal flax
Adding probe auto calibration would be nice but idk how many people would use it
faint sky

Sponsored by http://www.nextpcb.com/?code=chep
Chuck shows you an Electronic Tool he created for easier bed leveling on any 3D printer. The tool gives you visual (LED) feedback on when to stop adjusting the bed knob. He takes you thru the design and shows you how to use it to level your bed in this week's Filament Friday.
***** NOTE ***** There...
shy kelp
I'm sorry but this thing looks really dumb and unnecessary
I think that's better using a random switch with bed auto leveling
But everyone has it's own preferences so it doesn't really matter
faint sky
I think there are flaws in his design which is why i designed my own. It actually works really well.
vocal flax
faint sky
https://youtu.be/715Xop79Sus
Watched that one too. And now I'm wondering how can I make 2 same sized PCBs probably tape them up and sand together 🤔
I have dual z screws
faint sky
Print a crossbar to hold both.
vocal flax
faint sky
I think there are flaws in his design which is why i designed my own. It actuall...
Imo it needs a Schmitt trigger
faint sky
A pressure switch would be a better idea except the amount of z adjust is going to take forever with a bigger switch.
One of those flat pressure resistor things could work.
I also thought it looked dumb the first time i saw it. Maybe its just that my design is better, but it actually works well and has advantages over a sheet of paper.
vocal flax
Ohhh
Now that I think of it probably wouldn't work for my bed
My bed is little squishy
shy kelp
Dumb question, you can't exploit eddies currents to get an efficient (and cheap) maglev axis right?
vocal flax
faint sky
If you have bed springs then it’s supposed to be a little squishy.
Nah I use pp (polypropylene?) bed. It's not rigid slightly squishes
But i can print without heated bed 😁
faint sky
Potentially brilliant idea. Never seen an implementation of it. The weight on the bed surface would vary with material..
vocal flax
shy kelp
Dumb question, you can't exploit eddies currents to get an efficient (and cheap)...
What would the energy consumption be tho? 🤔
Kinda feels like would not worth extra energy, because my understanding that you would need to constantly power that contraption unlike screw mounts
faint sky
Might be a neat modification of a linear rail. I bet the high speed enthusiasts might like it. Would increase power to weight ratio.
shy kelp
vocal flax
What would the energy consumption be tho? 🤔
Nothing? just get a rod, and a magnet of some type; I think that it wouldn't really work, because Eddy currents as I know opposite the original field, but in a way you might get rid of attrition?
Idk
vocal flax
Oh real magnet I was thinking electro magnet
shy kelp
vocal flax
Oh real magnet I was thinking electro magnet
Yeah that won't be cheap
Having an array of neudinium magnets or electromagnets isn't cheap
faint sky
I don’t think it would necessarily even need to be powered or have a stator involved. Just use magnets to help reduce friction coefficient, would still be beneficial.
Using rectangular bar magnets on the linear rail might be enough in itself.
shy kelp
faint sky
I don’t think it would necessarily even need to be powered or have a stator invo...
Indeed if you want to be lazy, just add odrive
Although they are still more expensive than a single metal rod and fewer magnets
So I was somewhat curios to know if eddie currents would help at all or not or do nothing to begin with lol
faint sky
Magnet would have to be as long as the rail itself though, and powerful, and expensive.
shy kelp
faint sky
Magnet would have to be as long as the rail itself though, and powerful, and exp...
I am not sure if we are talking about the same thing 😅
https://youtu.be/bP200zhX63Q
Although here it's used for breaking systems so I guess not

It is very useful video to learn about eddy current and its principles. People who are working in engine dynamo meters.
But at the same time

I'm sorry fore being annoying and text walling 😓
faint sky
Would be neat to attempt fora personal project but i doubt manufacturers will go the route of expensive maglev vs roller bearings.
faint sky
Got some Ender PLA and they sent PLA+ have to print it at 220 instead of my usual 210. Same for the bed heat have to raise it up 10 degrees for PLA+
Did some "test prints" which were really just failures
Ender PLA+
Nozzle: 210 Bed: 60 = Adhesion failure
Nozzle 210 Bed: 70 = Ahesion failure at 25% lifted (hot end blob)
Nozzle 220 Bed: 70 = Adhesion failure at 50% lifted (spaghetti)
Nozzle 220 Bed: 80 + brim = Adhesion success
``` PLA+ is almost PETG territory for nozzle & bed tempsometimes it's like that
and with adhesion failures if you aren't watching the first layers go down and walk away... that's how you end up with a huge chunk of melted filament covering your entire hotend or a plateful of spaghetti.

Doesn't quite fit, printing another. turret a little too tight and cannot turn. Camera mount fits great though.
faint sky
When you start hearing little tiny cracks, like ice cube creaking, that's your adhesion lifting from the surface and it's just a matter of time before the entire thing lifts from the surface. small cracking noises = bad
why all the sudden issues? i retrammed my bed trying to make it better and made it worse. so have the slow process of dialing it back in.
bleak flare
I tried to upload a picture of my first print, but the system didn't allow it as it thought it was an explicit image :/
coarse coral
are you happy about it?
not the fact you are printing explicit objects but more so the overall quality?
bleak flare
haha - my first print was Benchy ;)
coarse coral
ryt "benchy" 😂 🙄
bleak flare
hahaha
coarse coral
lol
bleak flare
the ship was printed with the default PLA so was very white
and it was in my hand
so I think the automation thought it was something much more risque
coarse coral
.4mm nozzle? my first test print was a dog and then a benchy, both came out incredibly well. it was all downhill from there
bleak flare
yes
benchy was very smooth, all of the curves had no major issues that I could see or feel
the edges where sharp and the details on the roof and all of that seemed accurate
I was very happy
the calibration cube seemed perfect
now I am looking for a few SBC cases to try next
coarse coral
that's cool, over time you'll learn your own likes and dislikes and tune accordingly im sure
oh sweet im gonna be doing an sbc case soon also
bleak flare
the lack of cases to purchase is what spurred my purchase
coarse coral
haven't printed any yet though, i'm eager to see snap fits @faint sky has designed his own snap fit case in #show-and-tell for a seperate project
which sbc are you working with?
bleak flare
VIM3 is the primary, also looking at the adafruit Metros
and a few projects in mind for some of the feather boards (I forget their specific name)
bleak flare
orangepi was on my short list
but the one project needs to run Home Automator
err Assistant
bleak flare
I am a system programmer at my core
so my take on this is to sniff the network traffic
and see what it's doing
then work up diagnostic and/or debug tools
so when I tell the google lady to "turn on the light" why does it fail
coarse coral
neat
coarse coral
i might have to veer into android world with this sbc due to driver support which has left me into a big unknown at this point
bleak flare
i'm sure there are projects that do this somewhere on the internet
coarse coral
i dont even know if i can run python on android
bleak flare
you can
coarse coral
and pip libraries?
bleak flare
the same issues that you have with circuit python
you have to be really ready to dive into the code to tweak assumptions
coarse coral
well thanks for that, basically just answered my big worries
i mean all i really need is 3 main libraries
bleak flare
there are a number of android apps that basically are python frameworks
coarse coral
actually it's dank one of my libraries is based on uinput which i doubt android uses
bleak flare
python is good because most of the standard library will do 90% of what you need
bleak flare
I would avoid android also
instead use a network or bluetooth aware circuit python tool
coarse coral
on rock and orangepi vulkan isn't main yet but i hear they are working on it
i mean i could break out all my inputs into a teensy and make it usb but that's too much for me
i want a basic all in one project
bleak flare
I feel that
coarse coral
i've got too much cake to eat
coarse coral
spreading my time equally between cake and projects is imperative
battery powered rock will be interesting, it runs at 3a / 5v and can be powered over gpio so that should work
but it definitely needs a fan
exciting. well congrats on ur new printer
bleak flare
small fans shouldn't add that much to your power load
thanks!
I appreciate all the tips and help you and the others gave me
coarse coral
and u
i've got a 3d part to design and print which will be tiny increments. i need to make a spring loaded potentiometer moved with a trigger
making a handheld again and analog triggers are so desirable
so first i need the right pot which is loose enough so choosing from the zillion out there is a job
faint sky
coarse coral
haven't printed any yet though, i'm eager to see snap fits <@126221640559362048>...
@coarse coral what snap fit case are you referring to? the breadboard wire box is magnetic not snap fit.
I've done a couple snap fit projects. The C510 camera case, TR-Cowbell, and alphanumeric display are snap fit.
ah probably talking about the alphanumeric display, that was a tough one. a lot of parts crammed in there.
I did get the FPV turret print done in time for this weeks show & tell. 🙂
coarse coral
ah yeh i was referring to the show and tell from a week or so ago
i really need to get the snap fit into my parts
happen to have an stl of your print so i can see how you did it?
faint sky
I learned it by watching Adafruit's Layer by Layer videos. https://www.youtube.com/watch?v=VVmOtM60VWw

Learn how to design enclosures with snap fit covers! Use autodesk Fusion 360 to create a parametrically driven project case for electronics.
Layer by Layer CAD Tutorials Playlist:
https://www.youtube.com/playlist?list=PLjF7R1fz_OOVsMp6nKnpjsXSQ45nxfORb
3D Printing Projects Playlist:
https://www.youtube.com/playlist?list=PLjF7R1fz_OOWD2dJNRIN46...
I wish they would make more of them. Layer by Layer is an amazing series but there's so few of them.
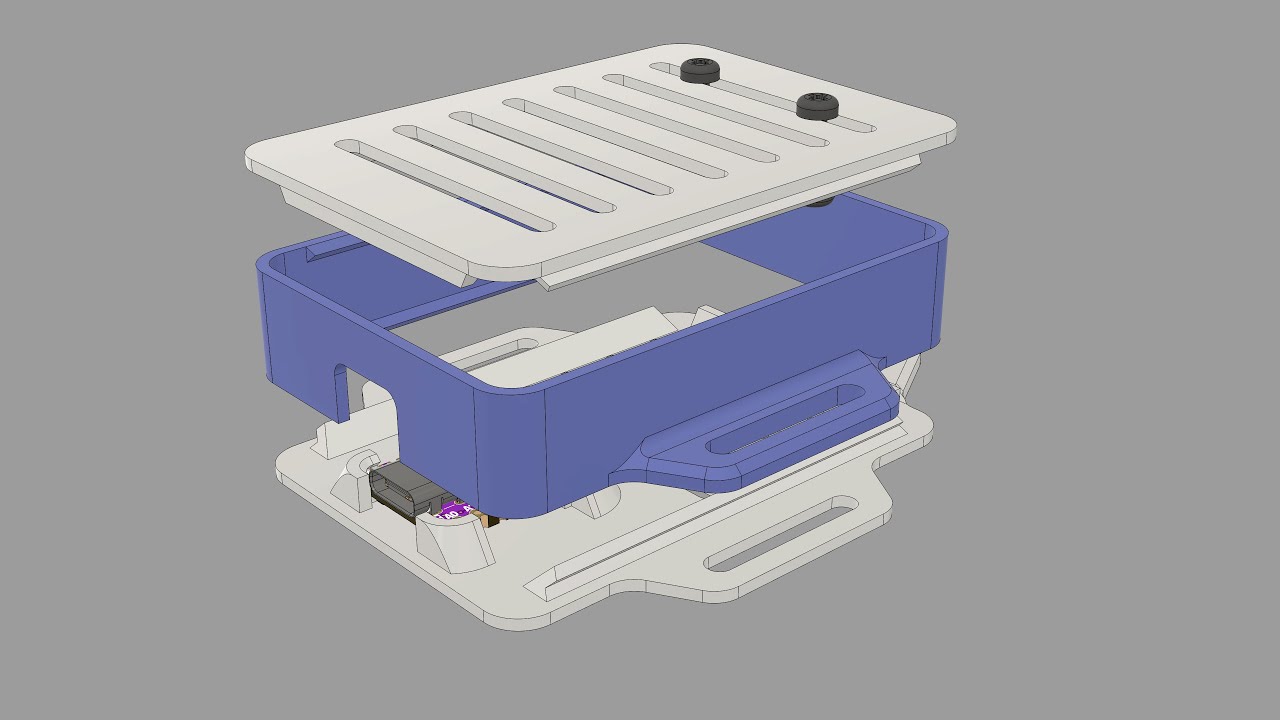
In this tutorial we'll take a look at our snap fit case for the Adafruit QT PY ESP32-S2.
Learn Guide
https://learn.adafruit.com/qt-py-snap-fit-case
Fusion 360 Share Link
https://a360.co/3FfD73e
QT Py RP 2040
https://www.adafruit.com/product/5325
3D Printing Projects Playlist:
https://www.youtube.com/playlist?list=PLjF7R1fz_OOWD2dJNRIN46uhMCW...
All the STL's I have are on printables. As soon as I think a design is ready I upload it there. Same for all of Adafruit's STL's 😉
Here's the files for the QT Py Snap Fit Case by Noe. https://www.printables.com/model/117246-qt-py-snap-fit-case

Printables.com
Wipper Snapper now supports the Adafruit QT PY ESP32-S2! 3D Print a snap fit case for the QT Py and a STEMMA QT breakout | Download free 3D printable STL models
 faint sky
I recommend printing some small tests pieces first to ensure your 3D printers tolerance will match up to the 3D model. I usually build in a .2 to .3 gap into the model.
Too tight and you'll need a sledgehammer to fit them together (which will break something)
Too loose and the lid won't fit at all
With that said, the way you've already printed tiny buttons for your handheld you'll have no problem with snap fit stuff.
Your printer's tolerance is dialed in better than mine. From what I've seen your tolerances are like .1mm and mine are like .3mm
coarse coral
Good tips I will try and sort this
 faint sky
@winged helm Did you check under the sheet? Under the carriage plate and look at the bed heating element? Maybe it's burning hot in that area? Is it actually liquid?
 winged helm
faint sky
<@887510739462537236> Did you check under the sheet? Under the carriage plate a...
winged helm
faint sky
<@887510739462537236> Did you check under the sheet? Under the carriage plate a...
I have looked there. It's ok. It's def liquid. Greasy
faint sky
Only thing I can think of is some kind of bearing leaking. The tiny little streaks in the corner are pointing at the z-axis motor. I haven't seen nor heard of anything like that one before. The splatter pattern is really odd. Some of it points in the direction of the z-axis motor but the huge globs that landed suggests some kind of high pressure water fountain effect as if it was high pressure hydraulic fluid.
I don't see any evidence around the z-axis motor mount... it had to come from somewhere. Weird mystery juice. 😛
Do you oil your lead screws often?
coarse coral
cool shortcut in cura to rotate a piece, hold shift for smaller increments
coarse coral
can anyone help with the best way to insert springs to two moving pieces of a 3d print, probably a latching system?
tension on pull, returns to default on release
coarse coral
coarse coral
tension on pull, returns to default on release
that's how springs work 🤣
im thinking something like this

these may be the right kind and strongest
 faint sky
That last one is what I was about to recommend before seeing it. You can turn any of the springs in your box into that style. Cut them short and put them round the end shafts on either end. One will work, use 2 if you need more tension.
coarse coral
yeh the more i think of the last not only are correctly orientated they are short and appear to be as reliable as any would be, using 2 would bolster it which is going to be important since it's the analog triggers for a gamepad
faint sky
Actually just saw this kind of spring for the first time this week, it's inside the tank turret. I was like "oh that's a neat idea".
It's so the barrel of the turret recenters itself up/down while driving
coarse coral
i hope it turns out to be a simple solution is the one that works just right. looking at how other gamepads do it the trigger systems appears to be a few more steps elaborate
that makes sense for a centre point to be helped along with a spring
 coarse coral
absolutely
i'll give it a chance and see how it goes, having to shift the other basic mechanisms to fit a more advanced trigger gear / pulley system wouldn't really work
trying to build on version 1, not wipe it out. which is why it's good that the springs fit within the footprint
faint sky
The thickness of the wire and how many coils will affect how much tension there is. You can easily modify it to be just the right amount of tension you need through trial and error.
coarse coral
if i have to use 4 thick springs i'm all for it. there's about 4cm horiztonal to work with
and the nice thing is the rod which the trigger rotates on will turn the potentiometer
need to wait for some cash flow to get these itsy parts and detail it in, thanks for help there. that's the plan
i'm tempted to 3d print molds rather than final parts, and use resin to cast all the pieces
bleak flare
second print "day" with my Ender S1 and except for having to scrape the outer bits (brim?) after removing the piece, it's going very well. Now printing a SBC case for the VIM3 - it's 4 pieces and the base is starting now
cannot thank you all enough for the guidance and support
oh, and I'm on my first real spool, some lovely gray PLA :)
vestal thicket
glad to hear it's going well. 🙂
faint sky
That's great bear! Keep us updated.
bleak flare
this case bottom has been going for 30 minutes, it's not very tall yet...
but it's also, by far, the largest in surface area, of my prints (haha, "prints" - i've done 3!)
bleak flare
I am finding that my work surface is littered with small bits and strings of filament, going to have to find a nice bucket to work over when removing excess filament :)
part 2 of 4 printing, cleaning up the first piece while listening to meetings
coarse coral
Yep I keep a bucket right next to the printer. I try to send all the loose bits straight to the bucket but some times I miss and they end up on the carpet. You can melt the scraps down in the future and re purpose
But as others told me I hope you have good patience because 3d printing you neeed logssss lol
coarse coral
faint sky
Actually just saw this kind of spring for the first time this week, it's inside ...
I think they're called torsion springs
 rough trout
bleak flare
I am finding that my work surface is littered with small bits and strings of fil...
rough trout
bleak flare
I am finding that my work surface is littered with small bits and strings of fil...
For real, and the small, stringy, flat bits stick to everything
faint sky
same, i keep a little trash bin next to the printer for excess support material, failed prints, purge lines, etc..
bleak flare
just had a model that is showing it being printed standing on edge - it's a lid but was oriented on edge. Cura was very intuitive on how to rotate the item and "snap" it to the bed. Printing this now!
i'm guessing the edge style has some benefit for different printer types? less surface area adhering to the bed?
rough trout
Sometimes the models are just produced with a weird orientation
coarse coral
@rough trout like this u mean 🤣

you can actually set the layer line orientation angle in cura
faint sky
The snapping is nice until you have something that doesn't have a completely flat surface. Have run into that a couple times with public models of figurines with concave bases meant to be stacked inside a diorama. It'll snap on odd angles.
So I run it through Fusion 360, cut a flat base for it, export and print that STL instead.
Extremely detailed models with more than 10,000 triangle tessellations can crash Fusion 360 pretty quick no matter what CPU or RAM you have.
Generally you only want to print vertically if a part is too big to be laid flat. Horizontal printing is better than vertical because of gravity. It's easier to knock over a tall print than a long one.
If your settings, bed, tram, alignment and everything is perfect then you can print full volume height objects without worry. It takes a while to get to the point where you have confidence a tall object won't turn into spaghetti.
coarse coral
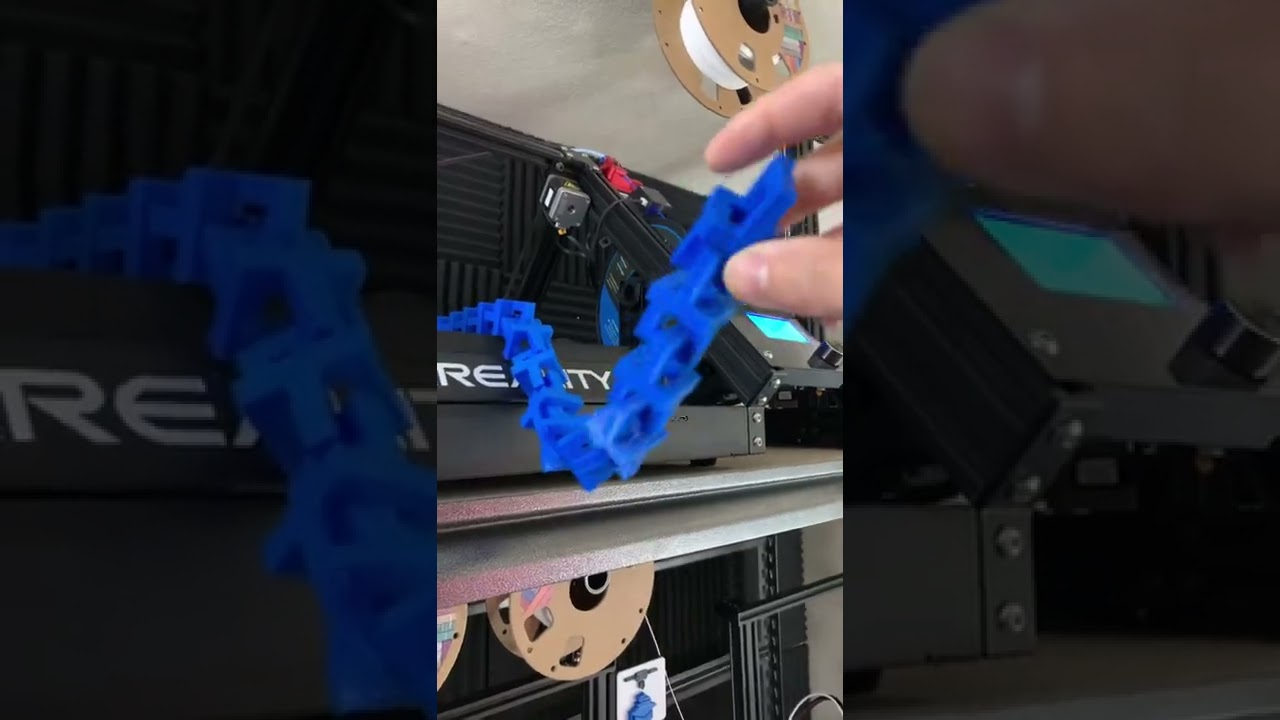
Using the #creality CR10 to make an extremely long chain. #3dprints #makers #create
faint sky
Came back to a filament runout error. Somehow it got caught in the sensor and the printer yanked on it until it was stretched thin enough to trigger the sensor.

No knot on the spool. First time this has happened.
faint sky
and it's a clog, z-offset was too close and it eventually backfilled the nozzle.
ramped the nozzle up to 275 and got nothing out of it with a manual push. whatever is in there is solid and won't budge.
means melted filament might be backfilled all the way up to the gears.
rough trout
All metal hotend on that one?
faint sky
yes and ramping the heat up didn't help 😦
rough trout
Daaaaang, it's stuck real good!
faint sky
I'm afraid I'm going to find bits of metal gears in the nozzle.
5 months of almost non-stop printing since I got it. this is going to slow down my rc tank project. 😦
 arctic dragon
Yikes. At that point, I think it's worth buying a replacement hotend to minimize printer downtime.
Once the prints are going again, plenty of time to look at the original one.
Wonder if there are any cooling upgrades you can make to help prevent that in the future.
faint sky
Actually wasn't that bad to fix. Maybe 10 minutes, 6 screws.
Went to the kitchen got an oven mit and laid that on the bed. Gotta fix it while it's running and hot.
I uhh did zap something by hitting the thermistor wires against the frame accidentally. Everything seems to work again including the fan. 😬
Started a new print and the fan kicked on layer 2 whew.
Today has been a day of sparks. First the RC receiver then my printer.
Nozzle is putting down nice layers.
shy kelp
whats the latest recommended 3d printer kits?
 arctic yew
shy kelp
whats the latest recommended 3d printer kits?
arctic yew
shy kelp
whats the latest recommended 3d printer kits?
Depends on your budget and needs
shy kelp
Indeed depends on budget but odrive>
vocal flax
I kinda wanna try making bunch of closed loop controllers with atmega328p (because I have excess supply at hand) and 3d printer with it
I am just unsure about how to program the controller
Like gcode engine and stuff
arctic yew
Shouldn't be too difficult
I mean if you have some experience
I have done stuff like that for work with some stm32 controllers and tmc2300 with encoder feedback
vocal flax
It's still step dir en interface
I am thinking DC motors close loop control
To get full benefit of continuous movement the drivers should be provided with distance/position, speed(?) Data
Also tuning of that system would be nightmare for sure
iron remnant
I think there are some open-source projects that do closed loop control with a brushless DC motor.
One advantage there is that you can move everything faster, although I guess I'm wondering where the threshold of advantage is.
Like, it's a clear advantage for large CNC mills but will a 300x300x300 printer benefit? not sure.
Another fun project to build is the Jubilee printer, which is a toolchanger design
faint sky
arctic dragon
Yikes. At that point, I think it's worth buying a replacement hotend to minimize...
This is a valid idea and I might pick up a spare for hot swapping nozzle sizes too. The simplicity of swapping the entire hotend takes less than a minute with 4 screws.
The clog should have been something that could have been melted. The piece I pulled out of the hotend was a long stuck piece. Didn't seem to be any reason it couldn't have remelted. That's what boggles my mind the most. There was nothing in the gears. Clog was from the nozzle to about 10mm into the hotend, all completely well within the remelting zone especially at 275.
coarse coral
you might have to clip your bowden tube or give it also a clean
residue build up is bad , i discovered that last week. can lead to a biscuity type print
faint sky
S1 Pro is a full metal hotend, no bowden tube.
coarse coral
oh cool
faint sky
filament is inserted directly into the extruder gears at the top. direct feed.
faint sky
all the youtube videos make the sprite extruder out to be a nightmare to clear a clog
coarse coral
nothing worse when prints are happening and you get a thing that stops it in its tracks. more patience plus skill
faint sky
which is true if the clog is in the extruder gear high up. if the clog is lower in the heatblock it's not much different from a nozzle clog on a bowden.
coarse coral
i haven't been printing much, really should do some protoyping
faint sky
Here's the video I followed to clear the clog. Was anxiety inducing having the hot end detached, on an oven mit, completely energized while working on it.

If you've found yourself with a hot end clog on your Ender 3 S1 Pro then you'll know it's not an obvious fix.
In this video I'll give you a quick step-by-step method to get your clog cleaned out and your 3d printer up and running again.
Affiliate links (If you purchase something after clicking any of the below links I may earn a small commissio...
The clog I had looked almost identical to the one he pulled out of his hotend too.
I was going to take a picture of it to share but I lost the piece that clogged. It vanished into thin air lol
faint sky
yeah that would be a really bad idea, any remaining liquid might explode your hot end or at least make a cute steam engine for a little.
faint sky
ordering some spare nozzles including a .8 based on your recommendation. now i might actually just pick up a spare hot end just for hot swapping between .4 and .8
coarse coral
hot swapping desirable but imo not a game changer
definitely a good move to swap nozzles depending on the part tho
faint sky
well the difference is i don't have to deal with removing hot nozzles and can cold swap the entire extruder assembly.
coarse coral
yeh more power to you if you see the gain
faint sky
for bigger less detailed parts the speed gain from .8 is something i'm looking forward to.
because i mostly do large prints
i don't print my own custom buttons like you do which require a lot of detail and smaller layer heights.
coarse coral
yeh the speed gain is huge. you might want to make sure you are using arachne for the .6mm and up
i hear it does a great job at fidelity even for higher diameters
faint sky
i think my default is arachne but not 100% sure, will look into it.
coarse coral
i printed with with marlin afaik which is not arachne unless cura has it enabled by default. it ships with v5 and up cura
faint sky
ohh yeah i'm using marlin
coarse coral
the speed gains are insane - satisfaction shall be restored
faint sky
if/when i get the spare i'll be picking your brain for .8 setup
coarse coral
i always use gyroid supports now, can get away with lower percetages - think it was you who mentioned that or @rough trout
faint sky
yup, gyroid is the way to go for infill.
coarse coral
i mean i just rolled with default and didn't try various manual settings / layer heights. i used the low profile on some and even the draft on others
faint sky
for really detailed prints i'll do .12 layer height with the .4 nozzle.
coarse coral
my prints may be seen to be quite successful - when supports didn't fail or w.e the common denomenator is i've been printing at 100% infill on all the parts. again inexperience here
faint sky
you know the massive TR-Cowbell 4-part enclosure? yeah that was all on .12 layer height which took days per piece.
coarse coral
.4mm is my fav nozzle by a mile. it can do lettering at .45mm the .6mm nozzle will never do that
yes i remember watching the print, +35 hours iirc
.4mm also does circle like and rounded edges like a champ without supports
altho a little support doesn't hurt
faint sky
 coarse coral
such a nice paint job on that thing
coarse coral
yeh the holes are ok but i prefer .4mm. doesn't matter if the holes are not for show but external you want them all to be precise
faint sky
finally got the top shell printed, doesn't quite fit. first have to replicate it with all dimensions correct before i can customize it to be waterproof.
coarse coral
i bet there's a spray you can use for waterproofing to avoid resin or whatever liquids
faint sky
the toy has the power switch, recharge plug, and holes for a little speaker on the bottom... not good for putting into water.
faint sky

 coarse coral
uft. can't water proof this easy
faint sky
starting on the top shell. then will make the bottom shell all one piece, thick with low layer height.
yeah some type of hydrophobic coating would be cool.
coarse coral
yeh got to work with what you have, that's going to a be a very thorough thing required
i've seen people use a pvc tube for submerssible things
but your parts are fixed so i don't know
faint sky
yes the precision they designed it with is normal for injection molding, 3D printing would have a hard time with it.
hopefully it won't be submersed.
maybe i should add a mini propeller and rudder to it lol
coarse coral
haha
vocal flax
Maybe paint it with nail polish?
arctic dragon
vocal flax
Maybe paint it with nail polish?
Only works for smoothing ABS, but works well if so.
vocal flax
For water proofing
arctic dragon
Yes
Ohhhh polish
Not polish remover
Wow, am I blind.
Not sure how well it’ll adhere to plastics, but an interesting approach.
Problem is you can’t apply nail polish on the gears to seal that hole…
Gotta design some kind of protective shell for that.
vocal flax
I'm pretty sure gears will work fine if they contacted with water
It's just to cover up electronics
faint sky
I'm thinking of some thick epoxy/resin coating on most of the shell. Rubber grommets where axles enter the shell. Pretty much the same approach you'd take with an amphibious tank. Ahh I should have designed it around the WWII landing craft instead. 😛
vocal flax
Functionally everything except electronics should work with some water splash or sth. Can't you just let it be?
arctic dragon
I mean, conformal coating is a thing, if you want to get some of that.
 balmy pulsar
conformal coating is fun when you want to repair industrial gear
faint sky
Yeah I don't have any of that. I do have some purple nail polish though haha
 shy kelp
how easy is it to get the raw materials for metal 3d printing?
ive seen some places sell aluminium powder and Fe powder but not sure if they are suitable for printing
shy kelp
shy kelp
ive seen some places sell aluminium powder and Fe powder but not sure if they ar...
It depends on your budget
Atomized metals for starters aren't cheap
how about the cheapest or mid range available?
seems like it could work?
https://www.jaycar.com.au/1-75mm-aluminium-finish-3d-printer-filament-250g-roll/p/TL4128 seems like a better start with filament I guess
coarse coral
.6mm works for this, no supports
i did 2mm depth on the grabbers and latches around the full part perimeter - latches are at 45 deg and grabbers 47.5 with a .2mm gap - with this part now assembled i see very little play which is ideal
 coarse coral
i get it - grabbers. very cool
coarse coral
coarse coral
i get it - grabbers. very cool
used this as the guide
thanks @faint sky for pointers
balmy pulsar
shy kelp
https://www.barnes.com.au/single-product/aluminium-powder/
I think that is going to be way too coarse to print with. also for many of the metals (aluminium especially) they can never see air. vac sealed and then argon chamber in the printer. otherwise the oxide will prevent proper sintering.
shy kelp
that sounds like a good point
faint sky
A new world of design does open up when you learn snap fit. It does kind of feel like that the first time you click everything into place. 🙂
coarse coral
Yes I wish it was on my first project now. Nevermind, it was very satisfying to put in place
Snap everything now basically
iron remnant
Yeah, you don't want to try working with aluminum powder of any sort close to that which would be useful for printing without a lot of care, a safety plan, and probably approval from the local authorities.
Aluminum powder is what makes sparklers go, so it's a major major explosion hazard, plus it's small enough to get into your lungs, etc.
If you want to experiment with 3D printing metal at home, things that use metal wire are probably a far better bet.
Or, for that matter, BASF UltraFuse.
 violet gust
what is the cheapest worthwhile 3d printer i can get that wont kill me on filament costs?
rough trout
violet gust
what is the cheapest worthwhile 3d printer i can get that wont kill me on filam...
They all use the same amount of filament. The cost difference is how much time you want to spend fixing it/getting it to actually print stuff
violet gust
rough trout
They all use the same amount of filament. The cost difference is how much time ...
i mean types of fillament, which one is cheapter
resin abs pla etc
arctic dragon
violet gust
i mean types of fillament, which one is cheapter
PLA is generally the cheapest.
arctic dragon
Any decent FDM printer will handle PLA just fine. What's your budget?
violet gust
arctic dragon
Any decent FDM printer will handle PLA just fine. What's your budget?
idk what the scale is for 3d printers recently
whats the scale recently?
price scale
arctic dragon
Scale?
You can print decent quality for as low as 150USD IIRC
Price goes as high as you want, but the best printers for hobbyist use today are between 600-2000.
violet gust
arctic dragon
You can print decent quality for as low as 150USD IIRC
im willing 250
arctic dragon
https://www.anycubic.com/collections/kobra-series/products/kobra is probably a solid 250USD printer.
violet gust
and what are filiment prices these d ays?
arctic dragon
PLA is around 20/kg?
violet gust
arctic dragon
PLA is around 20/kg?
usd?
arctic dragon
Yeah
violet gust
and what can u print with 1kg of filament?
arctic dragon
Quite a bit?
violet gust
@arctic dragon do u by chance have any examples?
coarse coral
@violet gust good questions. I usually print about 1kg a month, that gives me little ornaments, and I can work on my project with custom gamepads and cases for small computers.
To print a full gamepad. That's about 200-500grams
So you could print two gamepads with 1kg. So maybe about £20 a month for that, then you have the electricity of your printer and you should put £3-5 each month for spare parts
Some things use very little filament, like you could print a little tray or tubs for storing memory cards. They are maybe 50g
coarse coral
But you can always adjust your print sizes if you want to save plastic or make larger sizes.
Well if you print a small RC plane it would take time as 3d printing is slow
So really even if you print all the time you wouldn't use more than 3kg a month
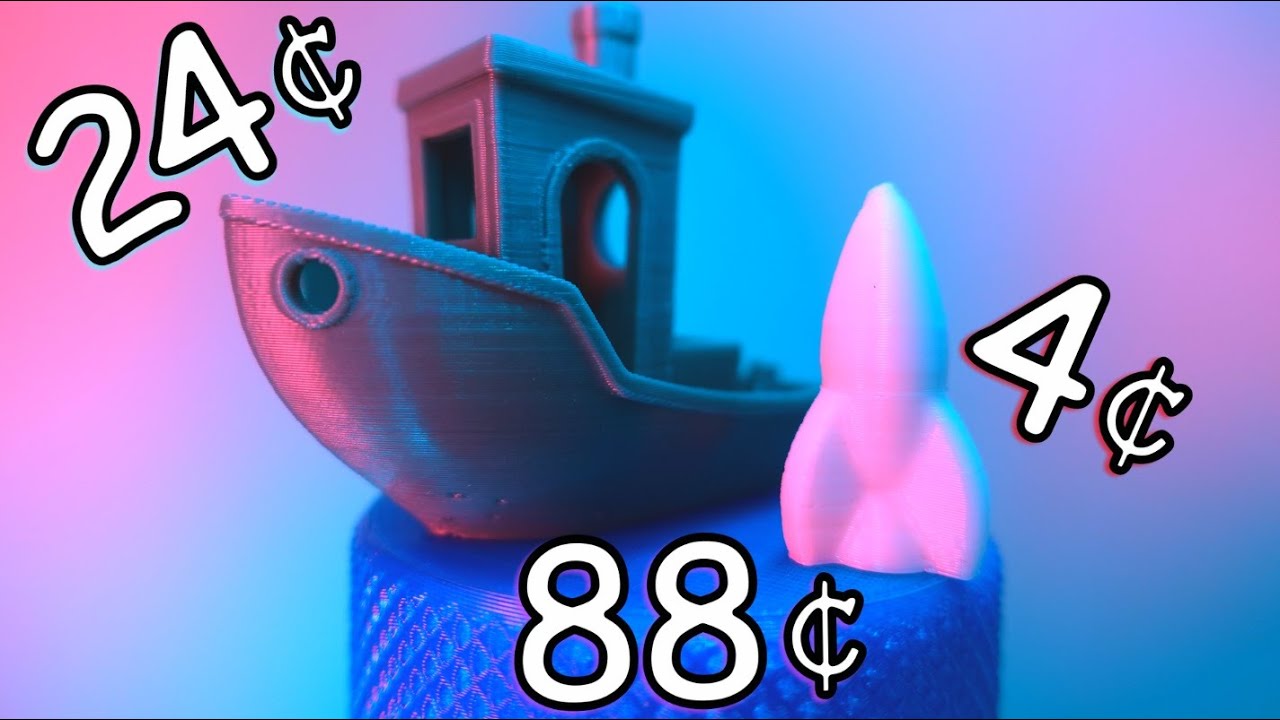
The PRICE of a 3D print depends on weight & filament cost. We're going to find out the real cost - 3d printer prices, filament prices, electrical costs, all to find the ACTUAL COST TO PRINT! Also, a blurb on Upcycling - I didn't realize how little I knew! Biodegradable? Sustainable? Recyclable? Upcyclable? LETS FIND OUT
Artillery Sidewind...
arctic dragon
Realistically, you're going to be mostly printing lower density objects, so a kilogram goes a pretty long way.
violet gust
arctic dragon
Realistically, you're going to be mostly printing lower density objects, so a ki...
thats what i thought
thanks for video
im printing mostly aviation and rocketry related parts
arctic dragon
Has anyone ever used an Ender 2 before? Considering a cheaper 3D printer for my brother-in-law and wondering if it's worth consideration.
violet gust
@arctic dragon would u say ender 3 worth it fro 279?
arctic dragon
Which Ender 3?
violet gust
arctic dragon
Which Ender 3?
v2
arctic dragon
Still a bit on the high side
You can get it refurbished for 180 or on sale for like 220-240?
violet gust
arctic dragon
You can get it refurbished for 180 or on sale for like 220-240?
even better
is it better than the kobra?
arctic dragon
They're comparable
You wouldn't be likely to notice a significant difference unless you put them directly side-by-side

ANYCUBIC KOBRA NEO 3D printer UPGRADE AUTO-LEVELING 3D PRINTER BETTER FOR BEGINNERS Printing Technology: FDM (Fused Deposition Modeling) Machine Leveling: 25-point auto leveling Extruder Type: Integrated Direct Drive Extruder Print Resolution: ±0.1mm Positioning Accuracy: X/Y 0.0125mm Z 0.002mm ...
coarse coral
Shout-out to the cr6se
arctic dragon
There are a lot of options in that price range, and CR6 SE is one of the better ones from what I hear
Hard to say one printer is better than the other, it depends on a lot of other factors like print size, speed, convenience, material, etc.
violet gust
arctic dragon
There are a lot of options in that price range, and CR6 SE is one of the better ...
which one is this?
arctic dragon
In the sub-500 price range, you're almost guaranteed to be making a compromise somewhere somehow.
violet gust
also all of these can print from autodesk inventor right?
arctic dragon

SainSmart.com
CR-6 SE, a workhorse designed for who defines creativity, makes 3D printing ever easier before. Much simpler assembly, plus with the auto bed leveling feature, it brings you an unrivaled out of box experience to date.
Anything that can create .stl files.
violet gust
perfect
arctic dragon
You'll need a slicer to convert STL to G-code.
Cura, Slic3r, and SuperSlicer are all free and work with almost any FDM printer available today.
violet gust
arctic dragon
Cura, Slic3r, and SuperSlicer are all free and work with almost any FDM printer ...
cool!
do u say fusion or inventor is best?
arctic dragon
Each have their own strengths, but Inventor is only free to students, while almost anyone can access Fusion360 for free.
violet gust
arctic dragon
Each have their own strengths, but Inventor is only free to students, while almo...
ok
violet gust
arctic dragon
Cura, Slic3r, and SuperSlicer are all free and work with almost any FDM printer ...
can the slicer estimate how long the print will take if i input a printer type?
arctic dragon
Yes
violet gust
@arctic dragon which slicer u say is best?
arctic dragon
I’ve only tried Cura and super slicer and I don’t think either is necessarily better
Just personal preference IMO
violet gust
arctic dragon
I’ve only tried Cura and super slicer and I don’t think either is necessarily be...
for beginer which one u recomend?
arctic dragon
They both have pretty easy to use basic modes for beginners.
violet gust
alrgith thanks
faint sky
violet gust
can the slicer estimate how long the print will take if i input a printer type?
This comes with a caveat that Cura in particular are way off on their ETA for most 3D printers except their own (Ultimakers), sometimes by hours.
So don't take the slicer's ETA for a print as gospel. It's a rough estimate which is usually wrong. By the time you print a couple of things you'll get a feeling for how far off your ETA's are and can do some mental math for the real ETA that a print will finish in.
For a 24 hour print, Cura for my printer can be as far off as 2-3 hours.
Always taking longer than the ETA, so about 26-27 hours in reality.
faint sky
violet gust
and what can u print with 1kg of filament?
My mail boombox took approximately 1 entire spool of clear PETG. https://blog.adafruit.com/2023/03/15/a-fully-custom-mailbox-alert-system-with-lora-circuitpython-lora-feather-treasuredev/
iron remnant
It was clearly worth it.
violet gust
faint sky
My mail boombox took approximately 1 entire spool of clear PETG. https://blog.ad...
ok
thanks
vocal flax
violet gust
<@98211350907490304> would u say ender 3 worth it fro 279?
Not really you can buy sovol sv06 for 260 or sth which is way better anything that uses v extrusions and rollers
vocal flax
arctic dragon
Has anyone ever used an Ender 2 before? Considering a cheaper 3D printer for my ...
Imo again sv06, but if it's cheap cheap (sub 200) why not.
shy kelp
arctic dragon
Has anyone ever used an Ender 2 before? Considering a cheaper 3D printer for my ...
Likely not the answer that you'd expect but they sorta are all similar in the cheap area
But unusually anycubic has great customer care. Although free repair parts do come from china and so stuff takes ages to come.
coarse coral
arctic dragon
https://www.sainsmart.com/products/open-box-creality-cr-6-se-leveling-free-fdm-3...
I actually bought from here and their support is quite nice, they have sent me replacements for faulty parts within the warranty. Friendly too
coarse coral
faint sky
So don't take the slicer's ETA for a print as gospel. It's a rough estimate whic...
I wondered why I missed all those appointments 😂
arctic dragon
I know a lot of the bedslingers are good, but I was hoping to find something a little less… permanent? Space is a concern, but I don’t know too many portable printers outside of the basically-a-toy class.
iron remnant
I guess the big problem is that the printer really needs to be aligned and making it foldable or portable is going to work against that greatly.
arctic dragon
Less so carryable, more so collapsible for storage...
Wonder if there are any foldables with auto-leveling...
 random urchin
iron remnant
I guess the big problem is that the printer really needs to be aligned and makin...
random urchin
iron remnant
I guess the big problem is that the printer really needs to be aligned and makin...
Well, there's this thing: https://www.youtube.com/watch?v=X_QLxTVtyng

This video is sponsored by JLCPCB - $2 for 1-4 layer PCBs ; PCB assembly from $0 : https://jlcpcb.com/DYE
Upside-down, compact, portable, and super fast 3D printer - Positron V3 has it all. A compact 3D printer that packs into a filament spool box, so you can take it anywhere you want. This design is looking at a 3D printer less like a station...
arctic dragon
I do remember that thing. If only those were available off-the-shelf...
Unrelated, but the upside down printing reminded me of https://www.kickstarter.com/projects/kokonisota3dprinter/kokoni-sota-3d-printer/

600mm/s Fast Speed|7-Color Printing|Inverted Design |21m/s² Acceleration|AI modeling |Accurate 0.1mm Detail |30dB Silent Printing
Hopefully this thing is as good as it advertises when it ships
balmy pulsar
printing upside down seems like a bad idea. its hard enough to keep heavier parts secure the right way up.
coarse coral
You mean gravity doesn't reverse with printer orientation. That's definitely a feature request
faint sky
Well you'll know pretty quick if you have bed adhesion issues
and also faster in 3D printing doesn't mean better, actually it usually means worse quality.
unless you really know what you're doing. most of the fastest printers are not commercial enterprises because there's way too many things to go wrong at higher speeds.
balmy pulsar
fdm printers arent really ideal for commercial anyway.
some of the new crazy fast ones ive seen are interesting though. 1000+ mm/s
vocal flax
arctic dragon
I know a lot of the bedslingers are good, but I was hoping to find something a l...
Idk kits are out yet but positron v3 is probably one of the best portable thing out there
vocal flax
random urchin
Well, there's this thing: https://www.youtube.com/watch?v=X_QLxTVtyng
I was talking about this. I found reprap version of this on GitHub called (iirc) positron lt.
Edit. Sorry for the ping forgot to make it off.
vocal flax
balmy pulsar
printing upside down seems like a bad idea. its hard enough to keep heavier part...
With good bed leveling and well calibrated probe it's not an issue for 180mm cube
I was thinking of building reprap version but 10x10 sigma profiles are not that standard
In future might think about converting to box profiles, because there are not many reprap builds around anymore.
coarse coral
96% what could it be

Designer Q&A:https://www.thingiverse.com/groups/thingiverse/forums/the-designer-corner/topic:30341
Stresstest your 3D Printer by printing this tiny collectable stocking stuffer.
update 14.04.18
Added a version called "excavator_extended" with bigger scraper for those having problems with it breaking off. This version also needs its own updated e...
I printed at .4mm standard quality profile in cura
Cr6se
205c
balmy pulsar
da plane
coarse coral
It's got articulated wings. So cool
elder oxide
coarse coral
It's got articulated wings. So cool
I’ve seen these, I’ve been tempted to print some
 sleek crag
Why would you want an F14. Nah, just joking, that's slick. But seriously though, the F15 is better. (I'm biased, because I fixed F15 for 3.5 years.)
sleek crag
Dude. The F/A117 is so ærodynamically unstable it will fall out of the sky if the flight computer fails. The F15 on the other hand is hydraulically controlled and has 4 hydraulic pumps driven from two different engines that are started with an onboard JFS. It takes a lot to lose control of an F15, as demonstrated that one time one landed whilst missing an entire wing:

In May 1983, two Israeli Air Force aircraft, an F-15 Eagle and an A-4 Skyhawk, collided in mid-air during a training exercise over the Negev region, in Israel. Notably, the F-15, (with a crew of two), managed to land safely at a nearby airbase, despite having its right wing almost completely sheared off in the collision. The lifting body propert...
coarse coral
wow. aesthetically tho the f117 is so appealing to me
sleek crag
Also the only airframe with a confirmed kill on a satellite, helped drastically by having a greater than 1:1 thrust to weight ration in certain configurations:
https://en.wikipedia.org/wiki/ASM-135_ASAT

The ASM-135 ASAT is an air-launched anti-satellite multistage missile that was developed by Ling-Temco-Vought's LTV Aerospace division. The ASM-135 was carried exclusively by United States Air Force (USAF) F-15 Eagle fighter aircraft.
coarse coral
i'm still modelling an f117 😂 sketchup is good with sharp edges
sleek crag
The F117 is fun, too, but for completely other reasons, like the ball it has to extend so other aircraft don't run into it while taxying, because the ground radar can't otherwise see it:
https://www.thedrive.com/the-war-zone/9540/the-mysterious-case-of-the-f-117-nighthawks-flip-down-radar-locators

The Drive
The F-117 had extendable antenna farms that could detect and possibly locate enemy radar emitters, or did it?
AH! That article has pictures of the thing, but talks about something else entirely.
coarse coral
must have been fun to work on those rigs, i had a flat mate who was training for commercial pilot license. he started with smaller engine planes and accumulated around 120 hours
he's now doing commercial from africa to madrid
big people carriers
sleek crag
ooh!
Also, the F/A117 is was designated as a Fighter Attack airframe for international treaty reasons. It's the same size as planes with similar designations but was used almost exclusively for bombing.
coarse coral
i suppose we just found my long term 3d project. model an f117 and make it fly (again)
if only i knew what dehydral meant 😂
sleek crag
Also the F15E is almost more of a bomber than an Fighter, too, since they beefed it up with more hardpoints, tech, and carrying capacity, but it can still hold it's own in the increasingly rare dogfight, if they drop all that ordinance first.
coarse coral
i need to check the f15 out, sounds like a champ
sleek crag
Yup. Should have been replaced with the F23, but politics got involved. I have literally fixed an F15 by pulling parts off of the YF23.
The F22 took a lot more work and money to get it flyable, let alone usable. F23 was basically ready to go.
coarse coral
it's nice when they come out like that lol
sleek crag
We're still using the F15 and making new ones, but the F22 project has ended. They're still using the ones they made, but not buying or making new ones.
coarse coral
im actually visiting the transport museum here in scotland soon. mostly old buses 🙂
sleek crag
I think that would have gone very differently if they had gone F23 instead.
coarse coral
there's a dinosaur in the building next door tho
coarse coral
i think my cousin will suggest we visit the dinosaur instead that's what wrong with them hehe
 sleek crag
hehehe
coarse coral
maybe we can do both


 tender sparrow
How do i fix bad bed adhesion on a flex bed?
vocal flax
Make sure temps and offset is right
Try cleaning bed surface. Depending on surface alcohol (may damage pei) or dish soap
tender sparrow
vocal flax
Make sure temps and offset is right
They are
balmy pulsar
what filament and what exactly is causing it to lift off. some materials do better with a coating
 lyric totem
I like to use glue stick, especially on parts with a small footprint
the better you spread it the better the surface will be
but not as good as without
tender sparrow
balmy pulsar
what filament and what exactly is causing it to lift off. some materials do bett...
PLA
It was peeling off then the nozzle was moving
tender sparrow
It was as level as level can be
faint sky
You do need to occasionally clean your bed. Filaments over time can leave a small residue and that's even if you're obsessive about never touching the bed with your hands (like me). An occasional cleaning does help. 👍 I'm against putting anything on the bed surface like glue stick or hairspray as they're just band-aids instead of dealing with the real issue which in this case is simply, time to clean the bed.
balmy pulsar
for PLA yes. other materials adhesion aids are mandatory
faint sky
i disagree, i've never used them for PLA+ or PETG. i have yet to do ABS or Nylon though because I don't have the fume extraction setup for something like that.
faint sky


FPV camera mount for an RC car. Didn't quite fit, used a soldering iron to make more space. Forgot to add the little screws on the side so got the model a bit wrong.
faint sky
It works though. Drove it around the yard today from inside the house using a little 840x480 camera monitor screen.
balmy pulsar
(i always love how the printing community will rename centuries old tech as something new and exciting cause they just found out about it)
the lighting rig is not printed i assume? part of the car?
faint sky
yes, soldering irons are great for making "fixes". will redesign another one. wanted to get this one put together before it got too dark to drive it.
yes that's part of the car and they are super bright, like cree flashlight bright. turns everything in a 10ft radius into daytime.
balmy pulsar
nice
i printed an rc car but have not got back to it to assmeble it up
i think im still missing a few bits
faint sky
the car itself was a christmas gift, it's pretty nice. will be modifying it with a new transmitter/receiver.
want to 3D print a cup holder in it and drive a beer to my neighbor. 🙂
balmy pulsar

Model 4: Landy 4x4 Hardtop model by 3D Sets brings these features: realistic body details, embossed into the part surface detailed interior selected parts are ready for multicolor printing by filament change The model measures approximately 45 cm in length at a 1:8 scale and is ready to be outfitted with your own RC equipment. It is suitabl...
faint sky
didn't know things like that existed, that's awesome. even the gears are printed.
balmy pulsar
i printed the gears in nylon
faint sky
the whole transmission, hubs, everything. that's cool.
balmy pulsar
i have a pic but i cant find it of everyting ive printed so far
its purple pla mostly
faint sky
haha it's even got a little radiator in there
balmy pulsar
i "silver leafed" the wheels as a test. looks cool as a base for being all rusty and beat up
faint sky
wow even interior bits like seats, steering wheel, shifter, etc.. that's very detailed.
balmy pulsar
everything
its huge too
18" long or so
takes a good 2 weeks to print
(on your typical small printer0
faint sky
you're right i didn't realize the scale at first. the seats are huge
balmy pulsar
the newest one is an a team van haha
the vw bug is cool too. that wasnt out when i started this one
faint sky
there's no mention of the scale there. 1:16?
balmy pulsar
1"8
faint sky
ah i see it 1:8
balmy pulsar
theres another group that does huge printed RC planes too
faint sky
yeah that's big. could drive around a cat in there.


 faint sky
Excellent print quality. Love the color too.
faint sky
barely fits... i'm going for it. 4 days 🤞
 iron remnant
Well, I guess you'll have a supportive audience.
 strange ledge
iron remnant
Well, I guess you'll have a supportive audience.
strange ledge
iron remnant
Well, I guess you'll have a supportive audience.
#dadjokes
iron remnant
strange ledge
#dadjokes
I have earned my role on this server.
strange ledge
I still haven't gotten it.. #disappoint
faint sky
and it failed 30 mins in. overextruding. need to recalibrate. that would have ended horribly.
coarse coral
I do wish I wouldn't get these random transitions from flawless finish to scratchy on the same top layers though. Any ideas what's causing this?
faint sky
how many top layers are you using? this is happening with ironing?
coarse coral
yeh i enabled monochromatic ironing
sorry monotonic ironing
0 top layers
but i'm assuming 0 is a magic number for cura to automatically figure out how many to make
coarse coral
yet the perimeter wall adjacent looks unflawed
strange ledge
I'm just guessing based on how it looks.. I have zero expertise.
coarse coral
it's also uniform so it looks like it's gcode problem
yeh something is definitely happening in that whole quadrant and comes to an almost sharp stop for the lower right portion
it's too precise for me to think it's calibration
but the slicer was showing steady lines on the whole part, no changes at that cut off point
vocal flax
Have anyone tried bimetallic heatbreaks?
I've ordered one and supposed to arrive soon. Can't wait to see if it makes difference
vocal flax
Happy to report mine worked great. Its a huge difference considering I'm coming from cheap Chinese knockoffs and Teflon lined ones
faint sky
What layer did the ironing happen on? Seems like it's the top of the bottom dish. It's simultaneously a top ironing layer and a roof.
If you have a bed mesh z-fade if it's below the z-fade height then it might not be done with leveling over x amount of layers yet?
I have my z-fade set at 10 so if this were to happen on layer 8 for example then it's still got 2 more layers to go until it completes the entire z-fade adjustment. This basically means your bed isn't perfectly trammed. Reason the higher bezels are fine is because z-fade would have finished leveling after layer 10.
The surface not ironing properly on lower layers but succeeding on higher layers is a clue. 😉
M420 S1 Z10 in your printer settings gcode will fade bed mesh correction over 10 Z-axis layers. I'm not sure if you're using z-fade for a bed mesh or not but something along those lines seems to be happening.
Getting your bed trammed to within 0.01 for ironing is a darn near impossible task without the help of a CR-Touch. I don't know about your CR-6 but my S1 Pro can only adjust z-offset in 0.05 increments so I have a 1/5 chance of getting it perfect. Most other Creality printers can do z-offset adjustments in 0.01 increments, mine can't. So the CR-Touch is an absolute necessity for my printer.
I have mine set to fade over 10 layers, if I have a roof below layer 10 it's a toss of the dice if it'll iron correctly because it's below the z-fade height.
Here's an excellent video about M420 which most new Ender's on Marlin use: https://www.youtube.com/watch?v=ra07eaJeL2w

In this episode the weird British guy is explaining something called M420 and where to put it in your start code, and why it always seems to have an S1 on it.
Also features some stuff about G29, G28, and maybe even some M500 for good measure.
Anyway, enjoy!
(you might hear some noise in the background of the video, does it bug you, can you ...
It's doesn't cover z-fade but you can look that up in the Marlin wiki.
vocal flax
Hey, Does anyone know a toolhead that incorprates 40mm hotend fan, mk8 (creality single gear) extruder, e3d v6 hotend and 5015 blower for print cooling?
for mendel prusa style printer.
 mental plume
I am looking at the resin listed here: https://www.amazon.com/dp/B0BWLRJJJN. They have the resin listed in terms of weight (1kg), but they do not specify the volume this provides (how many liters).
Or perhaps there is an easy conversion I am unaware of to determine the liter equivalent of this resin?
balmy pulsar
resin is about 1100g per l
so about 900ml
the print software should know this and tell you the weight of your part. but it is a bit annoying.
arctic yew
vocal flax
Hey, Does anyone know a toolhead that incorprates 40mm hotend fan, mk8 (creality...
Are you trying to rebuild the toolhead of a mendel?
arctic yew
Send some pics
vocal flax
I can send some pictures tomorrow (late at night) but it started as graber i3, some prusa influence with mostly geetech electronics (ramps 1.4)
added custom probe (made my own 🙂 🙂 )
arctic yew
I 100% know what you mean, I started way back when those were the most common printers
vocal flax
current holder is also designed by me but has flaws and i want to use something tried and true this time
vocal flax
arctic yew
I 100% know what you mean, I started way back when those were the most common pr...
its been 10 years since i started on this thing
vocal flax
https://media.discordapp.net/attachments/431179425241890826/1105832119349030912/image.png
Currently have this, but it doesnt have enough clearance on x axis and extruder holder is bolted on (seperate piece) not rigid enough also airpath is somewhat of a joke because its restricted by custom probe


I might go back to 30mm fan and use slower extruder acceleration
also my motors are interesting motors. They are 0.9 degree but have stubby shafts (only 15mm)
arctic yew
Yeah thats an interesting setup
vocal flax
its too much of a custom build
arctic yew
3Dman Dual Drive Bowden Extruder Universal Geared Extruders for Ender 3 V2, Ender 3 Pro, Ender 3 Series, CR10 Series, Mega S, Tevo Tornado, Wanhao D9, Anet A8 E10, Prusa I3 and DIY 3D Printer https://a.co/d/fxgGKB0

3Dman Dual Drive Bowden Extruder Universal Geared Extruders for Ender 3 V2, Ender 3 Pro, Ender 3 Series, CR10 Series, Mega S, Tevo Tornado, Wanhao D9, Anet A8 E10, Prusa I3 and DIY 3D Printer
I would do one of these extruders and mount the hotend directly to it
vocal flax
I'd love to stay and tell you about my custom monstrosity but gotta sleep
Gonna work tomorrow
arctic dragon
I assume Europe
vocal flax
My shaft is so small (hehehheh) that it can't seat bond tech gear and fit on prebuilt enclosure
Around EU
arctic yew
I see
vocal flax
Tr to be exact
vocal flax
arctic yew
3Dman Dual Drive Bowden Extruder Universal Geared Extruders for Ender 3 V2, Ende...
As I mentioned these are too big for my motor. Also, i am planning on creating something inspired by prusa's nextruder
Possibly with bondtech's lgx gears
arctic yew
I think you should
You should see if you can source them
Also have you thought about changing your motor?
They are not expensive
vocal flax
arctic yew
Also have you thought about changing your motor?
Don't really see the point
Already have this thing and it works
Nextruder seems like a better extruder compared to dual gear extruder
arctic yew
Nextruder is nice
coarse coral
@faint sky didn't have any ironing issues, it may have been belt tension
faint sky
good to hear 👍 print looks great.
coarse coral
yeh i've optimised this area to avoid rubbing on the band and chamfered the holding blocks to prevent it tearing
faint sky
i would not have guessed that to be a hardware issue. the learning never stops.
 lusty summit
I made a housing for a nena 17 motor and didn't realize how hot they get. It melted the housing I printed. What other options do I have? Can I get a more heat resistant filament, or should I get someone to just machine /print it out of metal for me?
arctic dragon
lusty summit
I made a housing for a nena 17 motor and didn't realize how hot they get. It mel...
That depends on whether or not your printer is capable of printing higher temp filaments. Do you know how hot your motors are getting?
What kind of printer do you have?
lusty summit
arctic dragon
That depends on whether or not your printer is capable of printing higher temp f...
I do not really have an idea, however it melted the pla.
I have an ender 3 V2 neo
arctic dragon
Does the motor enclosure have to be printed, or could you possibly redesign it for something like sheet metal?
lusty summit
I could probably use sheet metal. I even thought about buying a metal bracket, and then printing the rest that wouldn't be in contact with the motor
I am new to all of this
So I appreciate your help
arctic dragon
Laser cut sheet metal is a lot cheaper than 3d printed metal, if you do go that route. You probably want to start with seeing how hot your motors are actually getting before digging too deep down that rabbit hole, as heat resistant filaments do exist.
lusty summit
arctic dragon
Laser cut sheet metal is a lot cheaper than 3d printed metal, if you do go that ...
That's a good idea. I can try to run it for a bit and see how hot it gets and then see what filaments I can use. Thank you.
coarse coral
faint sky
i would not have guessed that to be a hardware issue. the learning never stops.
to be clear this change was for my model mechanism not the printer itself - printer seems to be running well but i have noticed some movement noises which i've yet to pinpoint. 6 months down with a lot of printing for 3 months after a solid calibration at start and then some smaller recalibration when repairs were needed. definitely feeling good about cr6se today after my horrible newbie experience with badly faulty ender 3 as my first printer 8 months ago
tighten v rollers, adjust belt tensions, tram build plate as best as possible, align z lead screws, firmware update, capricorn tubing
faint sky
ahh ok
vocal flax
lusty summit
I made a housing for a nena 17 motor and didn't realize how hot they get. It mel...
Abs might survive. More engineering version of abs is asa. Both are used with enclosed printers such as voron. Voron suggests printing parts in ABS. Additionally ratrig prints their parts for petg which one of their printer is enclosed (vcore)
faint sky
PETG has a slightly higher temp tolerance but it depends on how hot the motors are getting. I know some can almost burn if you touch them which even PETG won't handle.
Yes ABS or ASA but those are special engineering filaments that require ventilation.
vocal flax
lusty summit
I could probably use sheet metal. I even thought about buying a metal bracket, a...
For general nema 17 holder all you need is a vice (or something to hold metal firmly) and a drill
faint sky
I'm not even sure if ABS could withstand being directly against something that hot for extended periods of time. Silicone socks work very well for shielding printer nozzles.
Whatever they make silicone socks out of would do it but it wouldn't be a rigid structure you could build other parts onto.
If you only want a protector cover so kids/pets don't get burnt then yeah a silicone material would be worth looking into.
a heatsink might help. get a CPU cooler setup. seems overkill but should work.
lusty summit
vocal flax
Abs might survive. More engineering version of abs is asa. Both are used with en...
I ordered a roll of petg, will give that a try. I didn't want to do abs because I cannot ventilate the area, and if petg doesn't work I'll move the printer to try abs. And these motors can absolutely hurt to touch, but I did leave it energized by mistake which wouldn't ever be necessary for what I'm doing. Also they won't be working too hard, I could probably undervolt them if heat is too big of an issue.
lusty summit
faint sky
a heatsink might help. get a CPU cooler setup. seems overkill but should work.
I have some heatsinks I could use, and can probably rig a fan to cool the two motors down. Thanks for this idea.
iron remnant
The Voron people will patiently explain why A Voron Must Be Printed From ABS.
Nylon is still fairly reasonable to print and a bit better than PETG, if your printer is up for the heats. Nylon has the positive property that it's still fairly sturdy above it's heat deflection temperature in ways that most everything else isn't, but apparently it's still prone to creeping.
faint sky
The difference in glass temp between PLA and PETG is only like 20C. It's only slightly more resistant. Chances are if it's deforming PLA it'll deform PETG. Since you don't have ventilation it's worth a shot. Maybe a combination of heatsink and PETG?
I have yet to print ABS, ASA, or Nylon. All of them require ventilation.
faint sky
Figured out why I've been having issues with failed prints. After clearing the nozzle from a clog apparently didn't tighten it enough and there was a slow leak.
Filament was filling the gap above the heater block and slowly dripping down onto the nozzle which would randomly leave little blobs all over the print.
Couldn't see it at first because I'm using black filament and the gap is small without a flashlight.
Got a pack of new nozzles and socks. I'm going to try .8 nozzle because most of the stuff I print is industrial and doesn't need super fine detail.
balmy pulsar
O_o
arctic yew
faint sky
Got a pack of new nozzles and socks. I'm going to try .8 nozzle because most of ...
0.8 is cool to use, it can print very fast. Just make sure to adjust your flow rate to ensure that your hotend has enough time to heat the filament.
There are flow rate calibration scripts and models
faint sky
yup, will have to recalibrate everything.
actually got another all metal sprite extruder for hot swapping nozzle sizes 😉
on the s1 pro it takes about 1 minute to swap out the entire toolhead
arctic yew
.6 is going to end up becoming the standard
Not too much quality degradation from 0.4 to 0.6 and prints significantly faster
balmy pulsar
if your parts are structural, 0.6 and 0.8 are ideal. stronger bonds, and faster builds.
for the ornamental models 90% of printer buyers make, 0.4mm will likely stay the standard
faint sky
vocal flax
Do a double extruder setup
Never even thought about that. Not sure the S1 pro is setup for that I'd have to modify it somehow. I have no experience with dual extruders.
Would the gcode from Cura automatically handle that? I could see a problem with the unused nozzle oozing while not being used.
iron remnant
Yeah, I feel like most of the things I've been 3D printing are more towards the structural side so I have a full assortment of fat nozzles.
The big thing is kinda in the middle, tho. If you are just making cute models for painting or display, then FDM is kind of a bust anyways. Versus somewhat-useful-but-also-decorative stuff where 0.4 vs 0.6 is a bit of a toss-up still.
vocal flax
faint sky
Never even thought about that. Not sure the S1 pro is setup for that I'd have to...
Why wouldn't you? It should already have marlin configuration you just need to modify for dual extrusions
faint sky
Would I need a dual x-axis? it would use the same axis belt?
vocal flax
Hardest part about dual extrusion setup is calibrating offset but if you aren't using both extruders in one print it shouldn't matter
vocal flax
faint sky
Would I need a dual x-axis? it would use the same axis belt?
You can use same x gantry
You need to set offsets and stuff
faint sky
but what if i want to use both extruders for dual filament? that's very tempting.
vocal flax
faint sky
Would the gcode from Cura automatically handle that? I could see a problem with...
You can disable heaters, but if you want to do both nozzles then you need wipe tower
faint sky
ah
vocal flax
faint sky
but what if i want to use both extruders for dual filament? that's very tempting...
It opens up possibilities
And iirc you already have spare nozzle
faint sky
definitely, didn't even dawn on me duh lol
vocal flax
You just need to mount and calibrate
My next project is dual extruders, but i couldn't get my machine working as well as I wanted
So still struggling to start
vocal flax
faint sky
Would I need a dual x-axis? it would use the same axis belt?
thats called idex Independent Dual EXtruders what I'm suggesting is dependent dual extruders
faint sky
think i'll just stick with swapping out the toolhead for now. it's 4 screws and super easy. i looked into IDEX and that's a rabbit hole I really don't want to go down right now, maybe in the future
arctic yew
Idex can be annoying
The main issue with it is that the toolheads have to be perfectly leveled with each other
 neat lynx
Hey all, I'm spearheading a project at work to get a 3D printer setup for our patrons (We are a public library) I am currently putting together a procedures manual for our staff, as well as a patron guide. Does anyone have any good material for library staff and patrons alike? Any good recommendations for the way to handle things? We have a X1 Carbon and I have already gotten a good chunk of 3D printing supplies, the essential hand tools, a food dehydrator and plenty of dessicant. Any feedback is appreciated, feel free to ping or reply.
balmy pulsar
My only recommentation is to not let the customers directly touch the machine. if you want it to survive.
neat lynx
balmy pulsar
My only recommentation is to not let the customers directly touch the machine. i...
That is the plan