#avatar-optimization
1 messages · Page 62 of 1
 heady basin
 solid smelt
Make it larger, min shoulder height is 20cm iirc
 dusk badge
How can I export a unity asset to fbx and have it load correctly in CATS/blender?
 proper grail
import it into a unity project? If youve already done this and its an unity serialized fbx than the window -> package manager -> fbx exporter can help
 calm spade
dusk badge
How can I export a unity asset to fbx and have it load correctly in CATS/blender...
calm spade
dusk badge
How can I export a unity asset to fbx and have it load correctly in CATS/blender...
Make sure to select binary as blender doesn't read ASCII
dusk badge
calm spade
Make sure to select binary as blender doesn't read ASCII
I did and CATS still gives me an error
dusk badge
calm spade
Did you ask in the cats plugin discord ?
an error idk what its for tho
calm spade
 steep brook
not sure what channel to put it in so guess I'll put it here
anyone know a good tutorial/program for editing normal maps?
 stray tangle
@steep brook texturing of any kind is typically best done using programs like Substance Painter
you can sign up as a student to get it free
steep brook
ill check it out, ty
 regal cargo
what would be better: a lot of tiny images (read: 4x4 pixels) that can be swapped via animation or a single large image (i.e. 32x32, for 256 4x4 pixel images) where you adjust UVs / pixel offsets?
 buoyant holly
a larger singular picture is better than lots of little pictures
as lots of little pictures requires lots of materials
regal cargo
i didn't make it clear then: single material, swapping out the texture in that material
i.e. this isn't many tiny images for different parts of the avatar, this is a tiny image for the whole avatar.
that happens to be swappable with an animation.
calm spade
That's still a lot of textures, which is worse
buoyant holly
that would still make your avatar rank go up having multiple materials you swap between
regal cargo
i take it you can't animate textures like you can other material parameters?
and i thought all avatar rank cared about was how many materials can be active at once -- i.e. the number of material slots?
buoyant holly
nope that would involve swapping out materials and also 256 x 256 very small by Avatar standard so I wouldn't sweat the texture size going up
like you're not meaningfully saving terribly many meaningful Resources by going 4x4
regal cargo
yeah i didn't actually do the math before i started asking the question, heh.
it's less resources and more ease of use. context this is coming up in is a shader i made that uses a color palette, currently 8 colors but can go up to 16 colors for opaque materials.
so it's combining all palettes (that i'm probably still tweaking) into a single image vs having seperate images for each palette.
buoyant holly
256 kb would be the file size for your singular texture containing all the color variations
regal cargo
come to think of it it's probably easier to use a 16x256 texture or similar, then every palette ends up on its own line.
 crisp ermine
Avatar material limits are pain.peko.
 heady smelt
Nuu they are essential to lowering draw calls !!
crisp ermine
Frustratingly, I'm literally using the same material for 90% of all my stuff. It's just instanced along because I need plural meshes and the like.
solid smelt
Whats the reason you need multiple meshes?
proper grail
Materal instances are not supported on skinned meshes
 analog adder
anyone know how to make a translucent material for quest? im making a mask and I need a part to be translucent
buoyant holly
you cannot use any transparency on Quest avatars
analog adder
oh
then is there any way i can render another texture over it, see i have a visor that I want my eyes to render through the mask, all i need is the eyes to be able to be seen through the material
buoyant holly
you would probably want to cut holes out in blender
analog adder
alrighty
 marble rain
does having a few dynamic bone colliders actually cause you to drop to medium? or whasts the deal there?
 languid quartz
marble rain
does having a few dynamic bone colliders actually cause you to drop to medium? o...
languid quartz
marble rain
does having a few dynamic bone colliders actually cause you to drop to medium? o...
4 colliders will drop you to medium, and 8 collision checks will also drop you to medium
So you could actually be dropped to Poor for one collider if there are too many collision checks.
marble rain
mhm if i have 2 colliders would that drop me to medium as well? because it does seem like Good status is also 0/0 for that. and i am just wondering if its suppose to be 2/4=
languid quartz
marble rain
mhm if i have 2 colliders would that drop me to medium as well? because it does ...
Not sure, you could check in the SDK after adding the dynamic bones and colliders to see if that's the reason it's medium (if that happens)
crisp ermine
solid smelt
Whats the reason you need multiple meshes?
Sorry, meant "game objects" not meshes. I'm running into an issue where the setup of all this is making it so I may be forced to join all meshes and ignore shapekey stuff. I hope that doesn't happen, but I'm not sure what else I can do.
solid smelt
Well if it has a material on it its technically a mesh, but yeah what I usually do is merge all my props and then manipulate the bones (ie if you have a static prop, just give it a single bone that weights all of it)
crisp ermine
The issue with that is appear/vanish. I have a prop I have to apparate and disappear at will, or I have to work out how to set it up so that it can be temporarily effected by dynamic bones.
Tbh, that would be the preferred solution, but I'm not sure how to make it do the thing.
I have a censor bar, it's attached to my hip on a dynamic bone, and then I can "snatch" it to whack people on the head. If I could set it up so they're the same mesh instead of hiding one and showing the other, that'd save me a lot of bother.
And at least one material slot.
 lime iron
Don’t disable the object, disable the mesh renderer. Scripts get wierd when they are disabled
solid smelt
Just have the censor bar's root bone parent constrained to your hip, then on toggle/gesture the constraint swaps to your hand.
lime iron
You can animate the disabling of the dynamic bone script, but only the first script on each object/bone, you can’t animate it’s values
crisp ermine
Hm.
I'll have to look into that more.
It'd save me a whole material slot.
Same with me replacing my outfit swap with a dissolve effect, which I'm also looking into.
lime iron
And patent constraints will allow you to move the object between hips and hand
solid smelt
Yeah ever since constraints got added you should not do the old "to move an object from one point to another you need two objects" thing anymore
crisp ermine
Hm. Alright, that saves a lot of bother at the outset.
And fixes an animation issue I had, to boot.
I'll experiment with that tonight.
I still have to set up the constraints for all my fixobnes...oh lord.
 jagged turret
ok new here
is there a hard poly cap because everwhere i look says something different for different dates
are 30k tris acceptable
 forest fable
VRChat
The Avatar Performance Ranking System allows you to see how much a user's avatar is affecting performance via analysis of the components on that user's avatar. You can also use it on yourself to see how performant your avatar is. This system is provided to inform users what is likely the most perfor...
jagged turret
danke
 smoky summit
Im More Concerned about the Polygon count... when you have at 70k uploading into Unity and it multiplied roughly 5-7 times... why?
same thing happened to the Particles too
I honestly believe that the System that generate Poly Count and Particle count broke due to conversing from 2018 to 2019...
calm spade
you have mesh particles ?
smoky summit
hmm i tested without the particle stuff... which has some mesh particles which indicates rock debris... and the Poly count still at 200mil when my Whole model is at 62k
as in i moved the particle stuff outside the Hierarchy that the descriptor is assigned... and it still give me that high poly count
was it because of the Read/Write thing?
calm spade
Yes
 atomic grail
hey guys, so im trying to edit my avatar's radial menu on unity but i cant seem to find the command to change what shows up under expressions
 errant dawn
atomic grail
hey guys, so im trying to edit my avatar's radial menu on unity but i cant seem ...
errant dawn
atomic grail
hey guys, so im trying to edit my avatar's radial menu on unity but i cant seem ...
should really go in #avatar-help , but what exactly are you trying to edit? facial animations? toggles?
 jovial grail
i'm guessing the default one
which is there as more or less a placeholder, you can only entirely replace it
 shy orbit
For some reason, my avatar says it’s 214,783,647 polygons, but i had the model in blender where it should only be at 15,000 polygons , what is going on?
 royal pilot
Does anyone know a clear guide of how to optimize an avatar for quest?
languid quartz
shy orbit
For some reason, my avatar says it’s 214,783,647 polygons, but i had the model i...
If you updated to Unity 2019 ensure your SDK is up to date. You'll get an auto fix button for this.
 minor dome
Total noob question: All the tutorials I've found simply are "Step 1: Do the Thing" type.
How do you import the ActorDescriptior thing? I've created a new Unity Project, and imported the SDK3 package into it.
shy orbit
languid quartz
If you updated to Unity 2019 ensure your SDK is up to date. You'll get an auto f...
Thank you, I’ll check
 vapid bear
Is a polycount of 100k tris okay if half of it is just my character mesh duplicated for backface culling?
 sick timber
vapid bear
Is a polycount of 100k tris okay if half of it is just my character mesh duplica...
sick timber
vapid bear
Is a polycount of 100k tris okay if half of it is just my character mesh duplica...
No, I recommend only duplicating faces that need the backfaces.
vapid bear
ah, bummer. I've removed the face already and it's still a little over 100k 😦
sick timber
100k tris is a lot, even for PC, I would recommend cutting down the amount somehow
 silent slate
Question there is a way to use a light source without being penalized by avatar performance?
buoyant holly
no
silent slate
Ok ty
buoyant holly
because real-time light sources are expensive
because you're basically causing everything to be redrawn again
silent slate
Yeah I got it
I just would add a Minecraft torch
Also a glowing shader will affect it?
buoyant holly
you would probably be fine with a emissive material as that doesn't actually cast real-time light just makes it to where it stays right when it starts in the map
buoyant holly
if it actually cause lighting that affects the world and that are avatars yes that would be a hit the performance
silent slate
I see a avatar that have a working torch but I don't see any performance issue with it
And what about if the light is client side?
buoyant holly
my suggestion if you must have it would be to have a second Avatar with the real-time light so you don't take the performance ranked hit when you want to be in big crowds
 solemn juniper
so im trying to optimize but some of the bones are part of model like if i delete them things change rather than disabling movment how do i go about deleting those without killing the model
 acoustic latch
Blender, and merging bone weights, straight up deleting them in Unity can cause all sorts of problems if you are
calm spade
Dissolve them instead
 humble heath
solemn juniper
so im trying to optimize but some of the bones are part of model like if i delet...
humble heath
solemn juniper
so im trying to optimize but some of the bones are part of model like if i delet...
use CATS
it will delete the bone and the weightpaint will go to the parent
calm spade
(that's what dissolving is FYI)
solemn juniper
humble heath
use CATS
is that a program if so whats the full name?
humble heath
Blender Addon
humble heath
calm spade
(that's what dissolving is FYI)
I know but the person looking for help might not
humble heath
solemn juniper
is that a program if so whats the full name?
I dont have the file rn but looking for it wont be that hard, DM once you get it so I can show you
buoyant holly
solemn juniper
is that a program if so whats the full name?

GitHub
:smiley_cat: A tool designed to shorten steps needed to import and optimize models into VRChat. Compatible models are: MMD, XNALara, Mixamo, DAZ/Poser, Blender Rigify, Sims 2, Motion Builder, 3DS M...
solemn juniper
ok so i was able to get the addon and get it running now the issue is figureing out how to export from unity
calm spade
cats has an export feature as well
solemn juniper
see my problem is my avatar is in unity i need to get it over to blender yet i dont know how to export it out of unity something about a fbx exporter and package manger but theres no info on how to download or even install this addon
acoustic latch
You shouldn't need a plugin for Unity to get a FBX, the model should already be available in your assets as a fbx
acoustic latch
your assets are already on Disk, find the model, then just browse to that folder in windows, or right click in the folder and click on "Show in Explorer"
buoyant holly
you wouldn't do anything in unity to export it you would just in blender click import fbx and go to the location of the asset to important
 ionic echo
Does anyone know how I can replace the current face on my model with the one on the left?

 remote vine
Hmmm maybe there's an easier way to do it but the way I know how involves deleting the original face mesh then carefully stitching together the vertices of the new face to the body mesh, like some kinda messed up digital surgery. But if the model has facial expression shape keys they'd need to be remade.
heady smelt
In that case you'd hope the new face has shapekeys of her own
ionic echo
Oh heck well thats going to be fun
 normal nova
You can probably preserve the expressions as long as the welded vertices aren't affected by them


 unreal plover
Go into blender and prefix the roll bones with x, i.e. xHandRoll01RT_01
 radiant shadow
There is a small script you can add to unity that easy fixes that for you
Does not break prefabs either
 heady smelt
My project dosen't seem to let dynamic bones function, is there a way to fix that?
acoustic latch
heady smelt
My project dosen't seem to let dynamic bones function, is there a way to fix tha...
Did you buy Dynamic Bones from the Unity store? Are the scripts on your avatar and the root bone set? Do you have dynamic bones limited in VRChat?
What isn't working
heady smelt
acoustic latch
Did you buy Dynamic Bones from the Unity store? Are the scripts on your avatar a...
no, it's just all my plugins in my project aren't working
If I put it into a new project, it works
It works all good in unity, but when in vrchat, it refuses to work
stray tangle
heady smelt
It works all good in unity, but when in vrchat, it refuses to work
you probably have the in-game dynamic bone limiter on
Safety > Performance options > Dynamic bone
disable it
heady smelt
stray tangle
you probably have the in-game dynamic bone limiter on
nope
it's been off for awhile now
I got 2.8k hours, lmao, I've never ran into this issue making avatars
unreal plover
heady smelt
no, it's just all my plugins in my project aren't working
Are you on the latest SDK? Also check for build errors
heady smelt
Is there a really efficient way of say carving out the black a mesh designed for use with a texture on a material with cutout? So yknow I can NOT have to use cutout becuz I want to also have a quest variant and this is making it difficult >:((

I can't figure out a remotely good way to do this properly even at the cost of some of the detail where the real texture meets the black
that wasnt worded very well but I hope you can understand
 upper yacht
Either make hair or trace with polygons and have 2D hair
heady smelt
So I have to do it the long way ughhhhh
I cant find any youtube videos on it either, they just show how to tell blender to render it as cutout basically
sick timber
There's not many resources on it, you'll just have to trace it.
I'm surprised that no one has made something for that yet.
But why would you when you have an alpha channel
heady smelt
Because mobile shaders
I also forgot knife tool existed so that will make my life easier
sick timber
People still probably opt for transparency on mobile, but I wouldn't trust non-full-time 3D mobile game artists (most people who make avatars) to make sure it's effectively done.
heady smelt
Yea this model is extremely lightweight besides that but I can't upload this as an avatar to quest and have the black fallout with any shaders they let me use
unless there is now?
sick timber
I don't think there is
buoyant holly
nope you'll have to cut out the geometry as apparently transparency shaders are expensive on mobile Hardware
sick timber
I once made a testing Quest app where you could spawn a bunch of cubes with cutout with the UI Sprite default texture, gpu instancing was turned off, after at least 50 cubes, looking down the line of cubes still resulted in 90fps, but I doubt that's a proper test. But I still don't know what to believe anymore.
buoyant holly
those aren't skinned mesh renderers
normal nova
@heady smelt you're aware of the Knife Project op in Blender right?
heady smelt
normal nova
<@456226577798135808> you're aware of the Knife Project op in Blender right?
Im aware of the knife tool, not aure what the project op is
Is that like some super duper efficient way to knife stuff
tell me how pls
heady smelt
I need help im trying to make a avatar for my self but i play on qeust and my computer is not vr readdy
And im not good at this stuuf
 pure bridge
i heard taht if your avatar is small enough it just straight up returns a downlaod zize of 0

i should get there
buoyant holly
yeah but you probably couldn't make a terribly good-looking Avatar under a megabyte
 white badger
buoyant holly
yeah but you probably couldn't make a terribly good-looking Avatar under a megab...
white badger
buoyant holly
yeah but you probably couldn't make a terribly good-looking Avatar under a megab...
Yea, quality comes with a cost, even if the cost is just a non-excellent ingame overall performance.
 cosmic plover
has anyone made a tool that models where transparency is a texture for quest
cosmic plover
ig knife works
 normal shoal
i have never seen a transparent texture in quest ngl
 onyx harness
yep, knife is friend.
I've never heard of something that does it for you in any accurate manner. If you come across one I know enough people that could fill a small city that would like access to such a tool.
normal nova
buoyant holly
yeah but you probably couldn't make a terribly good-looking Avatar under a megab...
If you stylize it and vertex shade it it wouldn't be too hard I think
buoyant holly
FairPoint mostly made that simplification because that would require making a model from scratch
 glass ibex
normal shoal
i have never seen a transparent texture in quest ngl
glass ibex
normal shoal
i have never seen a transparent texture in quest ngl
fake alpha ftw, though I can't say how or it'll get nerfed like my fav shader. xD
normal shoal
imagine xD
 radiant apex
any unblocked shaders with twoface shading? like the polygons show on bothsides
maybe something unlit or toony
onyx harness
radiant apex
any unblocked shaders with twoface shading? like the polygons show on bothsides
for quest or pc?
radiant apex
quest
acoustic latch
Quest is stuck with the VRChat included mobile shaders, if you want a double sided mesh you will need to do it yourself in blender by duplicating the faces and flipping the normals for anything you want double sided
or something like that
radiant apex
oh okey
 indigo portal
anyone know how to do a blush effect for Quest? Apparently the Multiply particle effect doesn't work, and nor does the Alpha Blended. It's a transparent material that has a gradient alpha, it's already set up for PC.
 heady smelt
indigo portal
anyone know how to do a blush effect for Quest? Apparently the Multiply particle...
heady smelt
indigo portal
anyone know how to do a blush effect for Quest? Apparently the Multiply particle...
The only way to get it with the tranparency-esk look that I know of is to just make a face texture swap, one with blush and one without
indigo portal
ahcrap...
heady smelt
not the most optimized in terms of materials but yeah
indigo portal
wait fuck...it's using two different FX controllers then...
heady smelt
?
indigo portal
one version would be the on and off of the objects themselves to make the blush, and the other one (which would technically be in the same animation) would be the material change
indigo portal
yes, but the menus are shared between the Quest and PC variants
so there's a toggle button that activates it, which would go directly to the toggle animation
in this case, it would need to either be 2 different menus, or 2 fx controllers for the quest and pc respectively
heady smelt
I believe you can add a transition condition that can detect what vr you are on but it is an integer value unfortunately for your memory
indigo portal
hm, i think that would be needlessly complicated...
heady smelt
I forgot what integers meant what type of vr (or desktop mode) its probably in the docs somewhere oen second
I dont think it would be that much
aww the thing I was thinking of just can tell if its in vr or not meaning quest and pcvr is grouped together fuck
VRChat
This is a list of Parameters (case-sensitive) that can be added to any Playable Layer (animation controller) and change across all Playable Layers that include this parameter. User created parameters that are not in this list will exist only locally within that animation controller and are not curre...
radiant shadow
You can detect the vr type and use same FX controller, but if its a quest it does material swap instead of a blush blendshape (just a random idea never tried it)
indigo portal
well, its not a blush blendshape, it's literally a show-or-hide control
radiant shadow
🤔 eh nevermind it only detect vr type, so it would go derp both are VR
heady smelt
yeah i swear it could detect what one specifically
we are from the same parallel universe dude
idk how we got here
indigo portal
nevermind, the Additive particles in movile can work
it's not as dark as i'd want, but it should be fine
heady smelt
additive works? you sure?
pretty sure it just does a funi haha no transparency 4 u when you go ingame
thats what it does for my quest particles anyway
indigo portal
heady smelt
pretty sure it just does a funi haha no transparency 4 u when you go ingame
yea probably. it might be the same case as multiply, where it works enough to export, but doesn't work in vrchat
honestly im just gonna make circles, and remove the middle plane
use a standard lite toon shader emission thing for the blush
 robust sphinx
Hi! I've got a bit of a question when it comes to like... joining meshes together in Blender for optimizing.
I'm trying to get my model down to as little meshes as possible but I'm not sure about the face.
When it comes to rigging the face, should I keep the eyelashes, eyes, teeth / tongue, etc. separate meshes?

These are all the meshes I have currently lol
proper grail
for rigging and weight painting it makes it easy, but after its been assigned vertex groups there is not much reason to keep them separate. Fully finished model should be in as few pieces as possible
robust sphinx
Ohhhhh
Thanks!
Now I gotta figure out what vertex groups are... I'm lowkey like learning everything about blender as I come by them haha
 shadow ore
robust sphinx
Now I gotta figure out what vertex groups are... I'm lowkey like learning everyt...
shadow ore
robust sphinx
Now I gotta figure out what vertex groups are... I'm lowkey like learning everyt...
See that green triangle icon?
In the right hand pane, there should be an icon just like it. In the menu it opens there should be a box labeled “vertex groups”
When you go into edit mode on your model, you can assign parts of your model to vertex groups.
So for example, join all the parts of your avatar’s head into one mesh, then select them in edit mode by clicking on one of their polys and pressing “L” then find the vertex group for your head bone and press “assign”
Really your entire avatar should be one mesh save for things you want to toggle
shadow ore
Np!👍
proper grail
Not everyone makes the connection. So if youve got a bone (or whatever) named case sensitive exactly as a vertex group and an armature modifier linked to that whatever, than the vertex will rotate and move exactly as much with that thing as much as the normalized/percentage value between all assigned groups! (vrc has a limit of 4 groups tho, keep that in mind)
robust sphinx
That's a good warning, only 4 vertex groups.. ok ok
 hexed vale
Question is there a way to upload an avatar with more than 20k polygons to vrchat??
buoyant holly
are you talkin PC or Quest
hexed vale
PC
buoyant holly
that hasn't been a hard cap for avatars in a long while
VRChat
The Avatar Performance Ranking System allows you to see how much a user's avatar is affecting performance via analysis of the components on that user's avatar. You can also use it on yourself to see how performant your avatar is. This system is provided to inform users what is likely the most perfor...
hexed vale
buoyant holly
https://docs.vrchat.com/docs/avatar-performance-ranking-system#pc-limits
Thank you very much, for pc then there is no defined limit, that is, less is better
buoyant holly
less people are going to see you if you're over the 70,000 number but yeah it's not going to stop you from uploading
silent slate
question how i wanna use the same material but different color for this hat

how i "optimize" it?

 lone tiger
Animate hue change (if shader you use allows that) or do material swap.
unreal plover
silent slate
how i "optimize" it?
change the texture with paint/photoshop
 manic depot
buoyant holly
that hasn't been a hard cap for avatars in a long while
manic depot
buoyant holly
that hasn't been a hard cap for avatars in a long while
I don't even think Quest has a cap
I've seen 198k
But going over 100k isn't recommended
Also anyone who needs to lower polycount. I highly recommended against using CATS decimation
Though that's my experience
crisp ermine
Tbh, you shouldn't need more than 70k tris
Unless you're doing something really weird
Especially with normal maps
pure bridge
id say actually giving a shit about trying to optimize really fucking massive MMD avatars for vrchat is a great exercise in learning how to optimize animation-ready models for use in actual game engines, but when you start running into assets that for some strange reason look like low-poly triangle backgrounds, you also learn fairly quickly that the answer to all of your problems is either going to be "learn retopology and re-bake your texture maps," or the conclusion that literally just learning how to 3d model is less effort than trying to optimize sketchy assets
crisp ermine
Agreed
Sketchy assets will always be more annoyance than they're worth if you have any kind of personal investment in your avatar
pure bridge
still
crisp ermine
They can be useful for blocking stuff out, tho
crisp ermine
Ye I feel that.
pure bridge
except now i can model, which means that they wont be kitbashes
crisp ermine
TFW you get the topology juuust right
pure bridge
mine on the left, 1 mesh and 1 material

if it were me today i would have done 2 and 2 to account for blendshape lag and because i dont like having alpha textures on the same material as opaque textures
no toggles so i didnt have to worry about that noise, i used poiyomi's old RGBA shadow ramp mask feature to control things that i would have otherwise needed at least 3 different materials to do
pure bridge
i think i used something like 10 different assets to do this
last kitbash i ever made
crisp ermine
I have to do a deep dive on Poi later this week, add decals and other stuff.
pure bridge
i use SCSS now because the inventory system is fucking cracked lol
pure bridge
its an inventory system thats only really good for outfit toggles because reasons
but otherwise is the most performant out of any other option
because its not a material swap or mesh toggle
what it does is, get this, "stops" rendering geometry depending on its position on your UV map

GitLab
A surface shader for Unity providing cel-shading. (Forward rendering only)
crisp ermine
Hm. I'll look into that later.
I've been looking for an option to do that for clothing meshes, either was gonna use dissolve or just deal with a drop to medium.
(yuck, medium...)
pure bridge
no shame in medium
only thing that bumps my avatars up to medium is dynbones
which doesnt matter
crisp ermine
Ah, fair
pure bridge
since most people just have them off
crisp ermine
Dynbones are a killer
I only have the one dynbone, for my censor bar, lmao.
I just realized I have like...no pics of my new avatar.
Oops.
calm spade
Shaders
proper grail
pure bridge
if it were me today i would have done 2 and 2 to account for blendshape lag and ...
I asked cats plugin peeps if I could get a "Separate mesh by blendshapes" button standalone/similar to the one in the bake panel and they said maybe ^^
proper grail
How do you tell! some move like a mm
pure bridge
i just isolate the entire head
heady smelt
So an avatar in theory had 2 meshs, each 100k polys with their own material. If in VRChat I had a toggle that could toggle off the entire gameobject (for 1 of the meshs) with the mesh component on it, what performance impact would it still have ingame?
Poorly worded I have having a hard time with explaining a hypothetical
buoyant holly
https://gitlab.com/s-ilent/SCSS/-/wikis/Manual/Inventory-System not that it would completely answer it but here are some notes comparing different methods of toggling objects "How does a shader-based system compare to other methods?
"Seperate meshes
It's one less draw call per toggle, and draw calls end up being more expensive than just sending more polygons through in the first place. In practise, this is the most obviously expensive way of doing it, and merging things together will save a lot of performance in tight scenarios.
However, if you have shapekeys on meshes, combining them will make a mesh with more polygons which could be worse for performance. For that reason, it's best to keep faces and bodies/clothes seperate.
Shapekeys
Each active shapekey makes a mesh a lot more expensive to render, regardless of how many verts it affects, and the more active shapekeys, the slower the skinning process gets.
Surprisingly, this gets much slower than you'd think. Tests showed framerates getting crushed with high-poly meshes using a single shapekey, and the costs increased dramatically as more keys were active. This is not ideal if all those extra polygons are just there to be hidden.
Also, even if you use a shapekey to shrink your clothes, the armature movement will still move it and cause it to spike out. Not ideal!
Bones
Even if you shrink something with bones, other bones affecting it will reduce the effect of the controller bone without some weird trickery in Unity.
One workaround people use is to set up a second armature for items and then constrain them to the main one, but they'll lag behind in your perspective and the constraints aren't free.
Another workaround is to generate a bone with un-normalised weights from within Unity that can shrink a vertex group to zero by itself."
GitLab
A surface shader for Unity providing cel-shading. (Forward rendering only)
heady smelt
I will read for sure thank you
buoyant holly
and 100k polys is lot for and would pretty much automatically put you in very poor
heady smelt
Yeah I ask because someone in another channel was justifying using 200k polygons saying that if it was split up into different outfits and only 1 was active at a time, it would be perfectly ok
which I didn't believe was correct but I wasnt sure of it
#quest-optimization Most recent message there for context
buoyant holly
the performance rank system operates under the assumption everything's on at the same time
so you're not going to have a terribly good performance rank having two-and-a-half medium avatars of triangles on your avatar
heady smelt
For sure no
buoyant holly
then again I'm probably also not the best to ask about wearing many outfits as I just have a couple of VRoid Studio clothing that I could easily dissolve Edge loops on
instead of Marvelous Designer triangle soup
heady smelt
lol
buoyant holly
yeah I've seen some of that on Twitter
and the person who uploaded it bickering to people who dare to point out normal maps exist so you should optimize your stuff
heady smelt
How would N maps be involved in optimization?
buoyant holly
you don't render a several million Polly piece of clothing as you bake all of that detail into the normal map
 heady smelt
Oh right yeah the thingy where u make a normal map of the super high poly render and do a thing to make it on the low poly one
buoyant holly
that's pretty much how like pretty much most video game models are made that aren't like anime
so releasing a ludicrously high-poly piece of clothing is a bit inexcusable
 sullen lotus
How
can I find all the materials on an av? All I can see ~5 or so but vrc shows 17.
buoyant holly
every separate mesh counts as a new material for vrchat because it's a new draw call
sullen lotus
Thank you but that is a why
buoyant holly
so you'd probably want to combine meshes together
and potentially see if you can combine materials
sullen lotus
I have 3.
buoyant holly
3 meshes?
sullen lotus
Yea. For accessory toggles.
buoyant holly
okay then something else is up as that total wouldn't add up to 17?
sullen lotus
I found 6 in blender. And I have 1 for the eyes. Maths out i guess. The eyes also count as 2.

mm guess it dupes all materials
calm spade
You should use bones for toggles, for actual optimization
it's just a bone scaled up/down
buoyant holly
there is also a Shader that can do toggling that even performant compared to the bones https://gitlab.com/s-ilent/SCSS/-/wikis/Manual/Inventory-System
GitLab
A surface shader for Unity providing cel-shading. (Forward rendering only)
but I suppose it does have the downside of if people are blocking your shaders you'll show up with everything turned on
 zinc monolith
heady smelt
Yeah I ask because someone in another channel was justifying using 200k polygons...
zinc monolith
heady smelt
Yeah I ask because someone in another channel was justifying using 200k polygons...
did someone have 200k avatar on quest ?
what a gamer

crisp ermine
Shader method is lit, tbh.
The more I learn about shaders the more I'm like 🅱️ ruh.
stray tangle
buoyant holly
but I suppose it does have the downside of if people are blocking your shaders ...
that's the reason I don't do that lol
mesh toggles or bone scaling are the only two I will use
heady smelt
Bone scaling 4 life
solid smelt
I always aim to do bone scaling just to keep the materials combined
lone tiger
It's not that usable for things like weapon toggles or having multiple outfit versions, but for other cases I find it perfect.
solid smelt
Weapon toggles are actually perfect for both scaling due to them either being a non skinned mesh or easily compressed under 1 scaling bone. Outfits however are more difficult
 heady talon
crisp ermine
Outfits are pain.peko
heady talon
crisp ermine
Outfits are pain.peko
Ill show you pain if you dont show up to HS in like 5 minutes for a bit O_O good boy
 quaint venture
I've been using nara's avatar tool constraints for awhile now, but on the newest version of my avatar they don't work. Anyone have any ideas?
Like I have the dynamic bone script on the constraint root, and I can see it moving, but none of the bones constrained to it are moving
 oak cypress
Hey, I'm currently making a new Avatar, just modelling it now. Question; how much can I do with the model before I need to use unity? I can think only Modelling and texturing but that's it.
pure bridge
oak cypress
Hey, I'm currently making a new Avatar, just modelling it now. Question; how muc...
unity is a game engine, where you start to actually use your assets rather than create them. if youre creating a 3d character then youre probably using blender, or a number of different 3d programs. in any case, before you move to unity you should have a fully rigged, fully textured 3d character
so modeled, textured, and rigged (including weight painting) for animation
for vrchat specifically it also helps to create blendshapes during the rigging process since you can use those for mouth movements and gestures, depending on the style of avatar (for most humanoid avatars that aren't hyper stylized youre going to want this)
oak cypress
Ah, that makes sense. Thanks for letting me know. I'll be looking for someone to help me get it onto the game once it's done. I can handle those parts myself. Including blendshapes.
pure bridge
👍
the vrchat sdk is like night and day between sdk 2 vs. sdk 3, so sdk3 alone makes it much easier to get your avatar ingame and make it more complex. plus, the avatar tools that have come from it (avatar emulator and combogestureexpressions) make it even more powerful. so it wont take you long to get a basic avatar in game
though you may spend forever on materials like i do if you want funny stuff
oak cypress
Materials? I'm not aware of that but I do know what I want from the character
the question is getting the right person who knows how to implement it onto the character, THEN making it quest compatible.
unreal plover
quaint venture
I've been using nara's avatar tool constraints for awhile now, but on the newest...
Are you on the latest SDK?
New unity has different update order regarding Dynamic bones and constraints. Latest SDK should fix this and it'll work in game regardless
quaint venture
I was on the latest one as of the 2019 update but not the newest newest
unreal plover
Update to the newest newest, and it should fix it :)
quaint venture
I'll give that a try, thanks
solid smelt
Yeah unity broke constraints to fix some edge case, thankfully VRC undid it once you have the newer SDK
silent slate
question i downloaded a avatar and i noticed too many materials
i tried to use cat for atlasing it but it just output black and white texture
any idea why?
this is what i get
 buoyant holly
what kind of material setup you have going for the avatar
as the cats texture combiner grabs the diffuse material which it seems to be doing from the little landscape in one of the corners
buoyant holly
currently it looks like it's grabbing ambient occlusion
silent slate
there are some way to fix it?
buoyant holly
make sure your color textures are hooked up to the color slot

 buoyant holly
that's a screenshot from Unity so that's not going to help
I need the screenshot of your blender materials
 buoyant holly
okay something's up with your materials that there's no colors in the little circles
https://i.imgur.com/rpZPrdk.png can you show me this tab
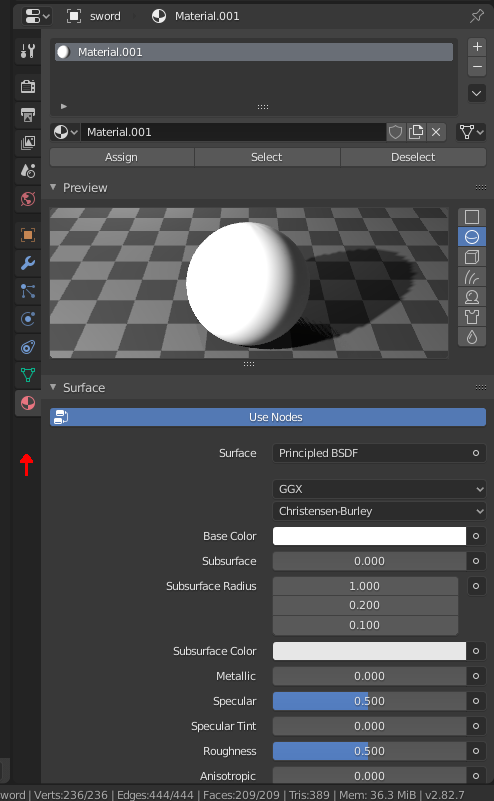 silent slate
where is that
buoyant holly
to the right
silent slate
 buoyant holly
click on one of your objects so it shows the material as you currently have the Armature selected
buoyant holly
it ok the fact that you're asking about material combining at all is a good sign
silent slate
 buoyant holly
would it be okay if I Discord called you so you could share screen so I can point stuff out easier
buoyant holly
yes
 mossy condor
so i was making my avatar more optimized in blender and all that so i could port it to quest, but when i put it into unity this happened. How can i fix it so its not see through on the inside

if i use a solidifier mesh, it doubles the polygon count and affects the rating which im trying to avoid
ok nevermind actually. All i did was reduce the polygons down a lot and added a solidifier modifier and it worked perfectly without going over the limit
heady smelt
mossy condor
ok nevermind actually. All i did was reduce the polygons down a lot and added a...
also looks like your blender camera and light imported with it, id delete those before exporting so you dont have to unpack your prefab to delete thme
mossy condor
yea i did delete it eventually
crisp ermine
On the subject of dynamic bones; does distant disable function properly in vrc? I'd like to help peeps by reducing dynbone calcs if I can.
lone tiger
That option is forced on in-client.
languid quartz
crisp ermine
On the subject of dynamic bones; does distant disable function properly in vrc? ...
This is forced on by default and uses a distance of 20 meters.
onyx harness
languid quartz
This is forced on by default and uses a distance of 20 meters.
Do you know if you were to change the distance value to lets say 5 or 10, does vrc overwrite that and set it back to 20?
languid quartz
onyx harness
Do you know if you were to change the distance value to lets say 5 or 10, does v...
Pretty sure you can change it and it won't be overwritten. Some users have changed it to 0 (on accident) and wondered why their dynamic bones don't seem to work at all even with the dynamic bone limiter disabled.
crisp ermine
Good to know. 20 is rather a bit far, especially for most stuff I use dynbones for.
I'd say that if the bone set isn't mission critical, I'd keep it at 10, imho, that's 30 feet, which is quite a distance.
acoustic latch
because it says you can't upload until you do it in the text next to it
heady smelt
^^^
one click fix brotha
the polygon count fixes
Even if it didnt, you still need to solve problems one step at a time, meaning if there is a big "Auto Fix" button you try that
pure bridge
day 1068 of people posting screenshots with autofix buttons and the cause of problems listed right there and wondering what to do
acoustic latch
or asking how to fix a thing that is fixed in the current release of the sdk

 onyx harness
Using context clues, maybe if you apply cloth to something that has no vertices. So I'm gonna go with no, you can't avoid that.
silent slate
sad
i don't think that cause "lag" is not much stuff
the stuff will cause lag are particles shit or special effects
onyx harness
Everything still has an impact but the vertex count is very low so it should be relatively alright in terms of performance. That's just my opinion though.
silent slate
it froze also my high end pc
silent slate
onyx harness
Everything still has an impact but the vertex count is very low so it should be ...
i think under 100 should be marked green
onyx harness
I will have to disagree there. I've seen some really nice particle effects that don't lag at all. They built with optimisation in mind
silent slate
yeah i say i am ok with particle but stuff like make you feel dizzy, fast colors ecc
onyx harness
if you want to lag people you can turn anything up to 11 and get the result
onyx harness
well then yeah, if it's designed to close your game it'll be bad for you. It's not really great to compare your models to those things as even 500k poly 250 material avatars would look good in that light.
silent slate
like this
onyx harness
yeah they makes some... interesting stuff. Though I can safely say your cloth band won't do that.
silent slate
silent slate
like this
and a question about the guardian how i block special like that ?
silent slate
onyx harness
yeah they makes some... interesting stuff. Though I can safely say your cloth ba...
i think also limited use of dynamic bone shoul be fine too in low quantity, there are no reason to mark the avatar as "yellow" for that
onyx harness
silent slate
and a question about the guardian how i block special like that ?
disable animations and/or particles and/or shaders. That's usually what they are.
onyx harness
silent slate
i think also limited use of dynamic bone shoul be fine too in low quantity, ther...
considering I have avatars which are green and use dynamics you might have to rethink your bone structure for those things you want dynamics on
silent slate
so they use special bones and use limited dynamic bones for triggering that?
onyx harness
Bottom line, can't have a lot of transforms being affected by dynamics, but you also don't need 10 bones per chain. 2 would do for a lot of things. My ears use 3; base, middle and end. That plus weightpainting to smooth out the bends and it looks fine.
you don't really need a lot of bones to have smooth movement.
silent slate
that is cool but i still don't know how manipulate bones
i see like is used for b00bies
or butts
 late quiver
silent slate
sad
late quiver
silent slate
sad
this isn't a excuse to not optimize
But a lot of VR chats optimization ticks are very very intense. I've had models with upwards of 200 cloth vertices and it was still fine for everyone involved.
What I mean even if it tells you that your model is very poor, it very well may not.
heady smelt
^
But if you see like a bunch of
 in the builder tab in PC builds then ur doing something wrong
lone tiger
late quiver
***this isn't a excuse to not optimize***
But a lot of VR chats optimization tic...
Cloth specifically has recommended limits that are very out of date. They were based upon Cloth in Unity 2017, where it had a severe performance regression: https://feedback.vrchat.com/feature-requests/p/redo-performance-rank-values-for-cloth
 solid smelt
Here's hoping they worked on their own cloth system for avatar dynamics
lone tiger
 solid smelt
Thanks for the extra details, was just going off of what they said in the dev stream 👍
Unity cloth is alright but I avoid using it since everyone calculates it locally, causing it to clip around colliders or get stuck for individual people and not others
late quiver
lone tiger
Cloth specifically has recommended limits that are *very* out of date. They were...
Thanks! I know only the basis of how unity works.
I used to use cloth a lot. The secret with cloth is having just enough moving to create the illusion of cloth but not enough where it over simulates and ruins the effect.
 tender sundial
heady smelt
tender sundial
heady smelt
hey
 nova hornet
Hey, is there anything (besides VRCQuestTools from booth)
to easily convert stuff like matcaps, emission, color/alpha, etc from a shader like Poiyomi and bake them into the texture itself?
with some stuff you can put the material on a cube and take a screenshot of it and use that as the texture
but I don't think that really works for matcaps
proper grail
I mean, matcaps ara screenshot of the material on a sphere
 pale pollen
I'm very new to avi creation, so excuse me asking. In unity I've found making toggles for different clothes is easier when the model has different meshes for different clothes. Although I could make a transparent shader instead. So question is: is it better for performance to toggle off the mesh and toggle another on or making it all the same mesh and making them transparent. Or is there yet another way to do it?
Oh, and I've also been wondering, a bit related: how much of a performance hit does the amount of materials on an avi have?
pure bridge
pale pollen
I'm very new to avi creation, so excuse me asking. In unity I've found making to...
depends depends depends. this article offers another inventory system, though the second half of it talks about the cons of every other common way you can do toggles https://gitlab.com/s-ilent/SCSS/-/wikis/Manual/Inventory-System
GitLab
A surface shader for Unity providing cel-shading. (Forward rendering only)
ultimately, toggles are going to incur some performance cost
acknowledging that is important. if you want optimized avatars, have multiple copies of the same avatar, at least two where one is a low-fidelity and basic avatar for events and large instances, and a high-fidelity avatar with all of the toggles and features you could have, reserved for small instances and friends
with that in mind, the best toggle is the most natural, which is to just have multiple game objects (meshes).
material swaps to transparency is sketchy because overlapping (and lots of) transparency will cause even PCs to lag
and shape key toggles, apart from being just as bad performance wise, are terrible to work with
pale pollen
So basically no way is really much better than any else? You just have to remove toggles if you wanna optimize? tysm anyways lol 😛
pure bridge
pale pollen
So basically no way is really much better than any else? You just have to remove...
pretty much. if you want toggles its going to cause performance
the real sin isnt unoptimization, its ignorance of unoptimization
be conscious of where youre going to use a given avatar
pale pollen
Right, makes sense
pure bridge
having a stacked avatar is fine if you dont bring it out in public
worlds are designed in a similar way. worlds meant only for like a handful of people have a lot more stuff on them than worlds meant for meany, and would likely start lagging if you brought in the average number of players (20) in a world meant for four, two, or one
that being said, as i said, a lot of pretty interesting methods of changign toggles themselves have cropped up in order to try and get around vrchat's safety rankings without a deeper understanding of unmentioned factors that cant really be as easily measured
for that reason, mesh toggles have an edge over material swaps and shape keys
pale pollen
Now that fallback avis have come out for real, I wanna make a highly optimized ver. of my avi, but it's alot of work XD
going form my stacked avi to a bare-bones one
minor dome
How do you reduce polygons in Blender 2.93?
I'm only finding tutorials that deal with 2.7, which has a different UI
buoyant holly
blender 2.8 tutorials would also work as it's in the same UI family as 2.9
minor dome
Still doesn't change the fact I can only find 2.7 tutorials
buoyant holly
try putting 2.8 in your search terms
minor dome
This is why I hate using Blender.
Tutorials are either outdated, or "just do the thing, 4head."
And in order to get a good tutorial, you need to sacrifice a goat to Todd Howard.
2.8 UI:
 buoyant holly
https://www.youtube.com/watch?v=8MkgXcidxg4 here's a short tutorial that uses a current version of blender on decimate

Making optimized Quest models is hard. But it doesn't have to be! With recently updated polygon limits and fallback avatars, it's a better time than ever to create something that represents you to Quest users! Hopefully this tutorial will help you out!
0:00 - Intro
1:27 - Blender
5:49 - Unity
7:09 - Closing
CATS Blender Plugin: https://github....
 buoyant holly
do you have any object selected
as those parts of the ui don't show up if there's no object selected
buoyant holly
could you take a screenshot of your whole blender screen
minor dome
 buoyant holly
you have the Armature selected not the actual mesh
minor dome
There we go.
So now do I need to do something extra for it to actually reduce the polygons?
buoyant holly
not that I can think of besides for putting on the decimate modifier
buoyant holly
you would need to be in object mode not edit mode
minor dome
That means nothing to me.
buoyant holly
the top-left where it says edit mode it needs to say object mode
Blender is Free and Open Source Software
Download: https://blender.org/download
Support core Blender development - https://fund.blender.org
--
This tutorial is part of the Blender Fundamentals series, produced by Dillon Gu.
Find more free tutorials on: https://blender.org/tutorials
Follow Blender on social media:
- Twitter: https://twitter.c...
minor dome
Right. Got it. Thanks.
buoyant holly
https://www.youtube.com/watch?v=MF1qEhBSfq4&list=PLa1F2ddGya_-UvuAqHAksYnB0qL9yWDO6 might recommend giving this playlist to watch for covering basic vrchat UI later
Blender is Free and Open Source Software
Download: https://blender.org/download
Support core Blender development - https://fund.blender.org
--
This tutorial is part of the Blender Fundamentals series, produced by Dillon Gu.
Find more free tutorials on: https://blender.org/tutorials
Follow Blender on social media:
- Twitter: https://twitter.c...
minor dome
I have VR Chat stuff down.
I can use Unity.
Blender just never wants to work with me, and 99% of tutorials out there just blitz through stuff, or simply are "Just do the thing."
buoyant holly
yes because the video would be like twice as long if it's having to cover you've never touched blender before
minor dome
Legit, when trying to find a tutorial on how to texture a model, it was three parts.
Import the textures.
Append the textures.
Profit.
And the accompanying screenshots were just the scene. No UI at all.
 serene bronze
Hey does anyone know how to add a prop that’s accessible through a emote dm me if u can help
 modern moth
Is it possible to export textures from Unity that've been modified with shaders?
Trying to help a friend optimize their avatar and it'd be hard to do so since they have multiple textures they recolor/change up using shaders.
calm spade
Well, the texture hasn't been modified so no ?
Can't they change parts specifically with a mask ?
recoloring takes 5 minutes in gimp, not sure what "change up" means tho
modern moth
Maybe? I have minimal experience with recoloring/shaders in Unity, I personally try to keep such changes outside of it so I have more control over them.
The main issue here is that I'm having trouble figuring out how the shader is modifying the textures in-engine. Is it simply overlaying a layer w/ the color? Is it recoloring the texture itself? Those grant totally-different results based on execution.
Since there's several textures, I'd like to Atlas them but if multiple have different recolors, kinda hard to do.
calm spade
Gotta recolor them in an image editing software
 winged forge
modern moth
Is it possible to export textures **from Unity** that've been modified with shad...
winged forge
modern moth
Is it possible to export textures **from Unity** that've been modified with shad...
do you mean you want to bake out a texture that is currently procedural?
modern moth
winged forge
do you mean you want to bake out a texture that is currently procedural?
I suppose that'd be the technical explanation for it, yes.
winged forge
modern moth
I suppose that'd be the technical explanation for it, yes.
so in something like Blender what you'd do is create a UV map for your object (might be different than the UV for the original shader, because the original shader might rely on mirroring, tiling, etc) and then bake the texture into the new UV map. it looks like people have tried it before in Unity: https://github.com/sneha-belkhale/shader-bake-unity

GitHub
Baking run-time shaders into textures in Unity. Contribute to sneha-belkhale/shader-bake-unity development by creating an account on GitHub.
I guess that's a little ambiguous: Even if you do this in Unity, you'd still make the new UV map (if needed) in Blender.
modern moth
winged forge
so in something like Blender what you'd do is create a UV map for your object (m...
That's the spice.
Appreciate it, my technical knowledge is admittedly pretty limited when it comes to texture-related stuff.
minor dome
Speaking of UV Maps, is there a way I can justify a bunch of UV rounded points into a straight line?
stray tangle
minor dome
Speaking of UV Maps, is there a way I can justify a bunch of UV rounded points i...
the Follow active quads function can help with that
along with straightening lines using S -> (X/Y) -> 0
minor dome
Active Quads doesn't work for me. Throws up an error.
 proper grail
No selected face found to follow..?
Thats odd usually just says "Select quad" in the lil bottom right warning bubble
 distant osprey
Does anyone know how heavy the shader Unity Chan Toon shader 2 is? I like this way more than poiyomi and i like to use like every feature of the shader ... two colors for shading shadows, the high color, rim lightling, outline, emission and of course a mat cap ... is that a big deal in terms of optimization? Or is this just marginal? Whats the best way to test the framerate of an avatar if youre having a decent pc?
( i tought about creating a private world and placing your avatar with a dancing animation like 60 times and see whats happening?)
proper grail
In the top right of the game window theres a stats button, the number of batches is the stress placed on cpu and tris drawn is gpu. For a fair measurement turn off shadows in the scenes default directional light. 1 mesh 1 single pass mat and unity ui will come up to 3 batches, the lowest you can get it
And the average limit to get to 90fps is 450ish batches for single core rendering
Very general, including world and other avatars
distant osprey
And this also takes heavy shaders into account? Like mesh shaders like this flame shader one? :0
proper grail
Can open up the gpu debugger window to see all that fun stuff, cant remember exactly how rn discord mobile
distant osprey
okay i will search fpr that terms, thanki
silent slate
question where texture with _S should go?
i know these are specular, where i have to put it? and which shader i have to use?
heady smelt
silent slate
i know these are specular, where i have to put it? and which shader i have to us...
I think autodesks shader supports that its built into unity
might not its been awhole
silent slate
i already fixed that i just used specular shader
now another issue, after using cat "optimization"

it messed the leg
any idea how to fix it?
fixed was some twisted shet

 heady smelt
silent slate
heady smelt
silent slate
the origin point of the armature is at the point that meets the floor, make it at the feet
ud do this in blender
 sacred cloak
Hey all. II hope this is the right place to ask... I was wondering how I can optimize long hair properly? I merged bone weights to reduce the number of bones, but it makes the hair move like crap/look like a wig. Is there something I am doing wrong, or a better approach?
silent slate
that is fucked... xD
unreal plover
sacred cloak
Hey all. II hope this is the right place to ask... I was wondering how I can opt...
If you don't need colissions you can use a single chain of dynamic bone on empty objects and then have rotation constraints from the hair bones to the dynamic bone chian.
https://github.com/Naraenda/NarasUnityTools#dynamic-bone-constraints

GitHub
Contribute to Naraenda/NarasUnityTools development by creating an account on GitHub.
sacred cloak
unreal plover
If you don't need colissions you can use a single chain of dynamic bone on empty...
ive used this before and was definitely considering it. tried it on a skirt a while back, but I think hair would work way better 👍
unreal plover
I always avoid skirts. It's either gonna show the world what's under when sitting, or it has clipping problems, or it doesn't perform well.
sacred cloak
weight painting is the only thing ive seen that works well and frankly idk if i have the patience to do that lol
unreal plover
I think the best i got was with 4 or 6 bones and just not letting it move a lot. Hopefully the new physic bones allows for some new tricks (or just more colliders without hurting performance that much)
sacred cloak
coming summer 2021
 unreal plover
I suppose if you're lazy you could the same as with the hair, just with multiple sources on the constraints
sacred cloak
thats what i tried to do, use the side as its own constraint, then the front and back as their own as well. just alot of clipping issues
unreal plover
I was also thinking that it would also probably be able to have the skirt always render infront of the legs with some shader magic. No clipping issues
Just a lot of work 😅 (and an extra material slot)
buoyant holly
unreal plover
I was also thinking that it would also probably be able to have the skirt always...
not as I'm not aware of any like games that do that?
unreal plover
Nah, it's more an idea that has been floating my head around to get around some the clipping issues with multiple layers of toggleable clothes. Without doing a lot of weight painting
Most games either just scale parts of the limbs down or just have it done properly in the first place
unreal plover
unreal plover
Most games either just scale parts of the limbs down or just have it done proper...
See BlueProtocols beautiful scaling lmao
 sacred cloak
unreal plover
If you don't need colissions you can use a single chain of dynamic bone on empty...
sacred cloak
unreal plover
If you don't need colissions you can use a single chain of dynamic bone on empty...
just wanted to say thanks for this. got it down from very poor to medium by removing colliders and using the constraints 👍
distant osprey
Hello I would like to know more about the dynamic bone skript and how it drawns performance.
1.) Does the size of the Radius matters even when no collider is assignet to the skript?
-> I Mostly assign a radius even when i dont have any colliders just in case someone wants to interact with my charakter using a mod
2.) Does the size of the radius matters when a collider is assignet?
someone told me that this would draw performance but i dont really believe that ... i guess its the interaction no matter how smal or big the individual spheres of collider and dynamic skripts are ...
3.) When does the performance drop? Does the performance drop if there are colliders assignet, even when an actual collission maybe never will happen because the collider is too far away and will never hit the bones
or does the performance drop when the collission is happening?
unreal plover
Performance is directly dependent on the amount of bone transformations and collision checks. The radius of the colliders do not matter
distant osprey
unreal plover
Performance is directly dependent on the amount of bone transformations and coll...
That means the check wether a collision is happening or not is always playing and therefore it does not matter if theres an actual collision, the performance will drop as soon as there is a collider assignet?
heady smelt
distant osprey
That means the check wether a collision is happening or not is always playing an...
dynamic bone colliders are checking rapidly even though there is no collissions happening yet yes
distant osprey
ahhh iseeee thanki!
stray tangle
the only way for it to know if it's colliding or not is to check
many times a second
heady smelt
collider scripts could instead check less frequently until they do start colliding but if you reduce the frequency of the checks (while not colliding) too much there would be a noticable delay in the initial reaction
but i think its a good comprimise
 heady wind
how to add an animator?

 slow flame
heady wind
how to add an animator?
slow flame
heady wind
how to add an animator?
You have to add the Avatar descriptor on the top object of your model. Yours is called "ruv" dont add the avatar descriptor on the "Body" or "Armature"
heady wind
slow flame
You have to add the Avatar descriptor on the top object of your model. Yours is ...
here?
 slow flame
Yes, make sure you delete the other one on "body" Also, is your avatar humanoid? It doesnt seems to have an animator (setting to humanoid adds one)
heady wind
slow flame
Yes, make sure you delete the other one on "body" Also, is your avatar humanoid?...
yeah i was gonna talk about it
it says i need to make it humanoid
heady wind
how to do it
stray tangle

 calm spade
It literally says auto fix
heady wind
calm spade
It literally says auto fix
when i press auto fix the whole builder ui disappears
calm spade
screenshot of your unity window ?
heady wind
nvm it worked this time
sorry for being dumb and thx for your time
radiant shadow
careful what you actually post , cause 🤦
heady wind
radiant shadow
careful what you actually post , cause 🤦
why?
 fierce seal
I've been looking for someone to help me with making a avatar of my sona but im dirt broke and i dont know how to rig, use blender, or anything like that
if anyone is willing to help me (which i really really doubt) ping me or dm me about it
I can try to pay you back in art trading or scultpures
acoustic latch
This isn't the place for that, if you want someone to make an avatar you really should be on the VRC Traders discord, and even then the chances of getting someone to do anything for free is low. The best thing would be to find an avatar that is already made and modify it to be close to what you want until you have money or enough skill to do it all. #community-servers-old scroll up until you see the VRC Traders discord
calm spade
Have you tried learning Blender ?
fierce seal
alright thank you
acoustic latch
A good place to look is on https://www.vrcarena.com/ for furry avatars, humans are all over the place
Download and upload various kinds of assets and tutorials for the different species found in the online multiplayer VR social game VRChat.
fierce seal
thank you for the help i appreciate it
 jovial garden
hey, which is better, 4 2k textures, or one 8k texture?
i dont know if 8k is too big or something along the lines of that
buoyant holly
4 2k textures would result in a 4K texture not a one 8k texture
But to answer your question using less materials is better so a single texture that has everything
stray tangle
one material with a 4k texture is best here
minor dome
Why is it when I decimate an .fbx in Blender, Unity doesn't recognise the face count decrease?
stray tangle
minor dome
Why is it when I decimate an .fbx in Blender, Unity doesn't recognise the face c...
when you import a file in unity, it makes a copy of the file and stores it within the project
you need to replace the file in the project to update it to the new version
minor dome
That's what I've been doing
stray tangle
either do that through the file explorer, or by directly exporting from blender into the new spot
also, make sure your model isn't unpacked
if you unpacked it, you will need to drag the FBX into the scene again
to copy components over to the new one, you can use Pumkin's avatar tools
minor dome
It's not unpacked, and I've been exporting into a folder, then dragging the edited .fbx out.
stray tangle
minor dome
It's not unpacked, and I've been exporting into a folder, then dragging the edit...
where are you dragging that fbx to?
minor dome
Into where the .fbx is stored in Unity
stray tangle
you might need to alt tab back and forth after doing so to make Unity realise the file changed
minor dome
It does.
stray tangle
in that case, everything's fine
minor dome
I've culled useless polygons, and it updates fine.
But when I decimate what's left over, it doesn't.
stray tangle
it's most likely the SDK not updating properly
try saving your project and reopening it
 blazing temple
how many texture sets can you use on a quest avatar?
acoustic latch
That depends on if you want it listed as good or not https://docs.vrchat.com/docs/avatar-performance-ranking-system#removed-categories
VRChat
The Avatar Performance Ranking System allows you to see how much a user's avatar is affecting performance via analysis of the components on that user's avatar. You can also use it on yourself to see how performant your avatar is. This system is provided to inform users what is likely the most perfor...
manic depot
blazing temple
how many texture sets can you use on a quest avatar?
You can use as many as you want but it's two will get you medium, and past that is poor and very poor.
I've personally not noticed much performance loss on Quest with alot of them but I merge the textures anyway.
Honestly feel bad for people on Quest 1
 exotic fulcrum
I'm trying to combine my materials but they either go all white. or they turn into an odd material i didn't even select.
like my model has chest hair. if i try to combine only the hairs. it turns into the pants material that i didn't even select
acoustic latch
exotic fulcrum
like my model has chest hair. if i try to combine only the hairs. it turns into ...
Are you talking about doing an atlas? Check to make sure that all of your materials actually have an image assigned, if they are just using the shader color, that can cause issues like this when doing atlas
exotic fulcrum
acoustic latch
Are you talking about doing an atlas? Check to make sure that all of your materi...
yes. they all have an image assigned. but it gets messed up.
acoustic latch
how many materials are there for this model
acoustic latch
are all the ones using the same image file named the same?
exotic fulcrum
actually there is no duplicated png. they all have their own.
acoustic latch
so all materials are using a different png
exotic fulcrum
yes
acoustic latch
you might want to do some manual UV combing first depending on how the images are.
Have you run the Cats Fix Model script yet
exotic fulcrum
ok. and yes
acoustic latch
To figure out if you can easily do some manual combining is look at how images are laid out for different parts, like face, body, hair, see if they could be combined into a single image and not overlap, like they are just cut out pieces from what could be a single image. If so, you could combine them all and merge the UV's for each of them without having to move things around
27 materials is a lot for the atlas scripts to figure out
 acoustic latch
every image is like that?
exotic fulcrum
I don't get why the atlas won't work either way. Like i pick say shirt pants and shoes. and it still doesn't work.
and yes. every image is like that
And this is what his shirt looks like
 acoustic latch
go through each material and disconnect anything that isn't an image attached to Base Color, then try again, or if you want, share what the shader looks like in shader editor
exotic fulcrum
Here is what the shader looks like for the shirt

i'm going to try what you said
i guess the shader that it is using has no base color option. so do i need to change the shader
acoustic latch
could be the XPS shader causing the problem, I think atlas is set up more for the Principled BSDF
exotic fulcrum
if i change it to the BSDF it just goes white.
acoustic latch
what does the shader editor look like though, Shift+F3 to open it
with the XPS Shader the active one
exotic fulcrum
Looks like this. i'll put closer pictures.
 acoustic latch
Yep, that would do it, if each material is like that, that could cause it to just go wacky.
exotic fulcrum
makes sense. it has a lot of things. it's really detailed texture wise
Model is pretty detailed texture wise.
 acoustic latch
If you want to keep all the extra shader stuff you will need to do extra work. You could try using the Bake option in Cats but uncheck Decimate, see what happens.
it might take a while to process if it doesn't just outright crash on you, which it shouldn't if you are using updated blender and updated cats
 exotic fulcrum
 buoyant holly
you would want the smoothness and metallic if you do have those textures
exotic fulcrum
should of put the updated picture
acoustic latch
Click Desktop first, then uncheck Decimate, forgot that
exotic fulcrum
so it has a diffuse shader, lightmap, specular, and micro bump. should i check metallic and transparency

and here's what it looks like originally
 acoustic latch
I think you have to keep transparency on to get metallic, but set the transparency to be the metallic, it should tell you when you check Metal
buoyant holly
I don't see any metallic Maps so I don't think you'll need that
 acoustic latch
if you want smoothness on you should probably set the Diffuse Alpha to be smoothness
Hover over Smoothness, it should say
acoustic latch
each option should give you information on what it is if you hover the cursor over for a moment
exotic fulcrum
ok i'm checking them out
acoustic latch
you should set the texture resolution to the max, which is 4096
exotic fulcrum
ok
exotic fulcrum
acoustic latch
you should set the texture resolution to the max, which is 4096
if blender isn't responding is it doing the baking correctly. I'm doing a gpu bake. and looking in taskmanager it's using only like 6 percent
it's been like 10min
acoustic latch
there are a lot of nodes for it to work with and 27 materials, it can take a while
exotic fulcrum
i'll leave it going then
i guess it did it. but when it finished a window popped up and looked like errors but it went away.

also some stuff is missing
actually only 1 thing is missing which is the holster.
exotic fulcrum
well the original isn't there
acoustic latch
it should still be in the scene somewhere if you left Quick Compare on
exotic fulcrum
if i click the shirt i can move it.

i don't see another

it's definitely the baked one though
acoustic latch
oh yeah so it did do it's thing at least. What does the material panel thing look like on the right, the one you shared first when I asked for the Shader Editor
exotic fulcrum
says cats bake at top
acoustic latch
find this and set Blend Mode to opaque if it isn't, for the bake model
 exotic fulcrum
i think it just duplicated everything
the shader node thing is the same for both shirts
some things are messed up when i move it. so i'm gonna try again
acoustic latch
before you do you might want to change one setting that isn't in that
exotic fulcrum
like the shirt to the left is connected to the shirt on the right by the button
ok. which setting
acoustic latch
Click the little TV icon and change the two sample settings to 1, that might speed up the bake, it might not

could also cause a slight loss in quality in the image it outputs, might not
exotic fulcrum
ok i'll try that
acoustic latch
I do know this has made baking textures a different way go many times faster for me. You can always change it back later if you save over, or just revert your project/scene whatever, later
exotic fulcrum
ok i'm trying again
now to wait
i think the reason it was missing the holsters was because it was a seperate mesh. So i made sure to combine them this time
so it's all one mesh
here's the error. sorry it's dark. tried to take the picture with nvidia but i guess it didn't get rid of the overlay.

my drivers are correct. let me check blender and cats
acoustic latch
you might need to restart blender
exotic fulcrum
ok
so i'm assuming the baking bakes all the little effects and stuff into a simpler version.
my blender is 2.83.5 so i'm going to update it
My CATS plugin is the latest though
acoustic latch
That could be it, 2.9.3 is latest? Something 2.9, just not the first release of 2.9, and not 3.0
 acoustic latch
you could probably uncheck the 2 shape key options
exotic fulcrum
ok i took those off
acoustic latch
I am attempting all of this as well now with what I am sure is the same model source as you
don't link it though
acoustic latch
I get that, I'm trying to see what needs to be done manually, and if you can even get the results you want using Cats without making changes to the shader setup first
exotic fulcrum
something seems to have happened with the belt. it's transparent. and the buckle. do you happen to know how to fix it?

backface culling fixes the belt.
nevermind i got it
acoustic latch
well it isn't too hard to switch the shaders to BSDF manually, don't know if this will allow cats different things to work better though
also you lose detail
exotic fulcrum
i don't mind trying the BSDF. i'm just waiting for the bake to finish
but yeah. i assume it loses all the normal maps and stuff and any extra detail. which i was expecting.
acoustic latch
yep, if you go through and add the Principled BSDF shader and attached the "Diffuse" to the base color and the Specular to the Specular, and the Alpha to any that have alpha I guess, then attach the BSDF output to the Material Output, you can atlas without problem it seems, so manual cleanup needed before automatic things
exotic fulcrum
ok. i'll try that. after this other bake. the bake i did worked. i just need to take of transparency. since it made him somewhat see through.
Is that something i just do in the material window. or in the nodes?
acoustic latch
yeah, I had that problem when I did a couple tests, the Islands that are automatically created end up being too small or it runs out of space for them, I don't know which. You would do what I suggest doing in the Shader Editor
 acoustic latch
See how I have the nodes connected to both the XPS shader and the BSDF Shader? That was what I was talking about with connecting the Diffuse on XPS to Base on BSDF, Spec to Spec, and you would do the same if there was an alpha. I'm only leaving them connected to show as example. Then once you do all of this you should be able to atlas
 acoustic latch
You could also do the Bumpmaps to the Normals on BSDF, but I'm not even going to figure out that Mess. Once you do this then you can at least optimze the Material count, and we finally complete what the channel is for
You can do Shift+A to bring up the Add menu, then go to Shader and then Principled BSDF, when hovering over the Shader Editor window
acoustic latch
Make sure to connect BSDF to the Material Output Node on all materials before doing the Atlas. You could also delete the XPS shader when you go through all before doing atlas, you don't need to though as long as the XPS shader isn't connected to a Material Output node

 acoustic latch
it looks correct without the Normal/bump map on it, figure out how to set that up and it should look like the xps shader does
exotic fulcrum
oh wow. so it's possible to make it look like the original. guess i'll play around and see if i can figure it out. atleast for now i can have it this way.
acoustic latch
the XPS shader is just a Principled BSDF with a lot of extra nodes in it connected to fix replicate what the game shader would be
 exotic fulcrum
oh ok. never knew how shaders worked
acoustic latch
I figured out a little when I was working on getting a Destiny 2 model in to Unity, the community shader is crazy, if you want a mess, try doing that.
exotic fulcrum
what shader do you use for a vrchat import. at the moment i only have poiyomi
i used to use a toons one from a while ago.
acoustic latch
I only use poiyomi anymore, and just mess around with the different settings until I get something I like, not always what it looked like in blender, just what I like
buoyant holly
and you'd probably also be fine with the standard Shader doing apbr realistic person
exotic fulcrum
ok. yeah poiyomi looked pretty good with the model imported.
acoustic latch
I can't help with doing PBR image for the Unity shaders, never used it, never learned it. All of this is just throw poop at a wall until it sticks and forms some basic shape of kind of what I want
Good luck with whatever you do after what I showed how to do, I'm off to sleep, which should have been like 3 hours ago at least
exotic fulcrum
acoustic latch
I can't help with doing PBR image for the Unity shaders, never used it, never le...
Just wanted to let you know i actually figured out how to add the knit fabric pattern. took me a bunch of trial and error but i got it.
 minor dome
What is a skinned mesh renderer, and how do you combine three into one?
Nevermind. Giving up on custom fallback crap.
sick timber
minor dome
What is a skinned mesh renderer, and how do you combine three into one?
A skinned mesh renderer is any mesh that can be moved with armatures. To join them, import the mesh into blender, select all the meshes, and hit ctrl + j.
minor dome
sick timber
A skinned mesh renderer is any mesh that can be moved with armatures. To join th...
What if the mesh can't be imported into Blender?
sick timber
minor dome
What if the mesh can't be imported into Blender?
What's the file extension of it?
And I'm sure there's some importer that someone made.
minor dome
.asset
sick timber
Did you buy the model?
minor dome
It's a free downloadable.
sick timber
From where?
sick timber
Oh, that's should be fine then.
buoyant holly
there should be the original fbx somewhere in the downloads
sick timber
But there's should be a model inside that file
minor dome
There's the .prefab that gets dragged into the Hiearchy
The .prefab calls upon a .asset
There is no .fbx anywhere in the project.
sick timber
There should be a skinned mesh renderer somewhere on the prefab.
Or three, as you've mentioned.
Find one, then find the mesh's reference.
 cosmic light
How tall is the average avatar? because 5' 8" or 1.1179m is too tall for the hub
onyx harness
If you have the .mesh and the .asset you don't need an fbx. It's something some creators do to deter people from taking parts of the models and redistributing them.
minor dome
I don't have either of those either.
buoyant holly
onyx harness
If you have the .mesh and the .asset you don't need an fbx. It's something some ...
you can't import those into blender so you can't do anything about combining meshes together into blender
sick timber
There has to be a file containing the mesh somewhere, in some file format.
minor dome
cosmic light
How tall is the average avatar? because 5' 8" or 1.1179m is too tall for the hub
Check your size by creating a 3D GameObject cube. The default cube is 1m on each side.
onyx harness
minor dome
I don't have either of those either.
the skinned mesh renderers has a reference to the .mesh
it quite literally has to
minor dome
Where do I find it then?
Because I've been through all these shitting folders a dozen times looking for anything, and all I can find is the .asset
buoyant holly
onyx harness
the skinned mesh renderers has a reference to the .mesh
it quite literally has t...
then you might want to get a new model as that's not really serve serviceable
cosmic light
onyx harness
the skinned mesh renderers has a reference to the .mesh
it quite literally has t...
Yes but how tall is the celling in a regular room because it's clearly less than 1m in the VRChat home hub
buoyant holly
the ceiling in the vrchat home is definitely more than one metre tall
onyx harness
minor dome
Where do I find it then?
You can find it using the skinned mesh renderer but once you have it you won't be able to import it into blender whilst retaining any armature information. Either check the Booth files for a model file or you'll need a way to export a prefab as an fbx / something akin to that.
minor dome
Some models' native scale is different to unity's. If in doubt, just go to GameObject > 3D Object > Cube. Scale the cube to the dimensions you want it to be, then size your avatar to the cube.
cosmic light
minor dome
Some models' native scale is different to unity's. If in doubt, just go to GameO...
I did and my character's head is sticking out of the roof in the hub
buoyant holly
can you share screenshots
onyx harness
cosmic light
I did and my character's head is sticking out of the roof in the hub
what's the y scale of the cube you used?
onyx harness
My model has a Y scale of 1.83 which makes it very close to 6 foot
buoyant holly
could you share a screenshot of your very tall model
onyx harness
I'm now wondering if the viewpoint is just being pushed up
buoyant holly
as it sounds like something is messed up on the scaling Factor on something
minor dome
onyx harness
I'm now wondering if the viewpoint is just being pushed up
That could do it.
cosmic light
onyx harness
My model has a Y scale of 1.83 which makes it very close to 6 foot
Now the new cube I made is smaller than when I first did it
the model started out at 0.06 and I made a 1.7272 cube and upscaled it
Now the new cube that I just made is less than half the avatar's height and I used the same numbers
buoyant holly
could you share some screenshots


 buoyant holly
no wonder you're hitting your head on the ceiling you're like 3 meter
onyx harness
I mean, we figured it out. I run my cubes with an X and Z of ~0.2-0.3 and then play with the Y scale
buoyant holly
so how tall do you want the avatar
onyx harness
well, something scaled your cube up unless you managed to change the default unity scaling in the project settings
which is unlikely
buoyant holly
normally you would have that as a cube scaled to 1.727
can you show a screenshot of your cube with like the inspector
to make sure you're starting with a proper one meter cube
cosmic light
 sick timber
When scaling the cube, keep the x and z at 1 to keep it approximately proportionate to a humanoid.
But yeah, that avatar is huge
It should be the same size as the cube
buoyant holly
okay looks like your cube is fine now and no wonder your avatar was hitting the ceiling
cosmic light
The avatar got bigger when I imported it to VR chat
sick timber
It's already huge, probably more than 4m.
cosmic light
Because that cube is the same size I used to scale it in the first place
sick timber
The cube's in-game size would be 1.7m tall
1 Unity unity = 1m in-game
And that's a constant.
You should make your avatar smaller
onyx harness
nah, taller. Look down on the 10 foot eboys
buoyant holly
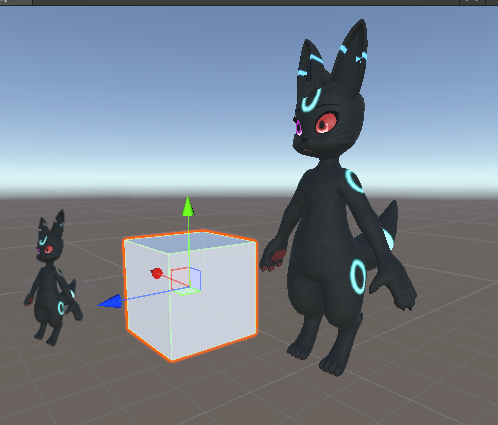
 cosmic light
 buoyant holly
yes now it should actually not be Giant
buoyant holly
hopefully it behaves better now
cosmic light
How do I fix sinking into the floor when crawling?

and how do I fix the hands crossing over each other when clapping?
 minor dome
Remake those animations with your not-human model in mind.
cosmic light
non-human model?
buoyant holly
you have shorter limb proportions then a adult human which is what the animations are modeled off of
cosmic light
I'm not sure how to eddit that stuff
 honest lotus
someone please help me optimize my avatar
calm spade

Join my Discord for help or meeting like-minded people: https://discord[dot GG]/uSEvuVw or scan my QR Code: https://media.discordapp.net/attachments/626502922120724480/626522415794618399/qr-code-Shanie-Discord.png

I honestly had enough of hearing that basic optimization of your avatar takes too long.
So I did it in five minutes. Let's work to ...
manic depot
I don't recommend decimating unless it's a prop
Almost everytime I've decimated a rigged model I've regretted it
buoyant holly
yeah Edge Loop dissolving tends to be a lot cleaner
nova hornet
manic depot
Almost everytime I've decimated a rigged model I've regretted it
I feel as long as you pay close attention to stuff like the face and fingers it's fine
 opal stirrup
I haven't been having issues with my unity crashing when transferring to android but all of a sudden even if theres almost nothing in the world when I transfer it, it still crashes, what should I do?
 fluid sluice
manic depot
I don't recommend decimating unless it's a prop
fluid sluice
manic depot
I don't recommend decimating unless it's a prop
CATS does have a decimate tool that preserves shape keys as well. Kinda useful depending on what is being done and how much decimation is needed.
normal nova
Its also good for just having a throwaway Quest version. Ive been trying to make automatic edge loop dissolving work without much luck
What I came up with likes to just eat arms
manic depot
fluid sluice
CATS does have a decimate tool that preserves shape keys as well. Kinda useful d...
I manually do it
 warm cloud
help. there is this model that only has colors as textures meaning it had like 5 material slots, but i wanna put it into one. i tried combining the materials in cats blender plugin but i'm left with these weird spots, idk what to do

 buoyant holly
you would probably want to scale the UVS smaller in blender so you're not getting texture bleed ?
warm cloud
buoyant holly
you would probably want to scale the UVS smaller in blender so you're not gettin...
i have no idea how to do that.
buoyant holly
glad to be of help
warm cloud
:D
buoyant holly
if you're curious why that's happening as you get farther away from the model it uses smaller versions of the textures and if your uvs are too close to the edge they might start sampling from pixels you don't want it to do
buoyant holly
cool
unreal plover
disable mipmapping
and make it into a 4x4 texture :)
though at that point it might be more efficient to just use vertex colors instead of UV-coordinates
 dusk vigil
So I have joined all the meshes of a model and in Unity it says there are 7 submeshes
Are the submeshes related to the material slots? I noticed the amount is the same as the number of material slots I'm using
acoustic latch
Yes
dusk vigil
I see, I'm going to atlas the textures then thanks
 near kettle
I'm kind of clueless on where to even start on how to optimize this avatar I was provided. I'm new to unity but picked the bare bones basics up pretty fast but not exactly where to start with optimizing it. I doubt for stuff like this there is a 1 for all tool that I can use to solve all my issues. btw this is a 3.0 avatar
 calm spade
What's your goal ? Medium or below ?
near kettle
With the avatars contents yeah. Basically enough for quest users to see it
I doubt I will get it too good, but want to if possible
 vivid night
Take it into blender and turn the tris into quads, that should help a ton, also make an atlas of the textures, that would be great
vivid night
near kettle
I doubt I will get it too good, but want to if possible
should really only take 5 mins max to do
near kettle
Luckily the avatar creator provided a blender file. I launched it, and immediately got lost. I have used Maya for school but haven't touched Blender. I'll look into it
vivid night
I'll be happy to help you, if you need it 🙂
sick timber
vivid night
Take it into blender and turn the tris into quads, that should help a ton, also ...
That doesn’t help with the end tri count
It helps with topology and working with the model
But yes, make a texture atlas
calm spade
vivid night
Take it into blender and turn the tris into quads, that should help a ton, also ...
That does absolutely nothing lol
The atlas part is great, but triangles is not something that you can do manually, unity does it automatically
calm spade
near kettle
I doubt I will get it too good, but want to if possible
Look into the material combiner addon for blender, for polygon reducing i'd have to see what your model looks like
distant osprey
Does the size has any effects on how the game runs? When i duplicate a chair and scale this up to ... 500meters high but it has the exact same poly count / texture size. Does this affect anything?
remote vine
I feel like it probably shouldn't? Aside maybe from it having a larger bounding box, meaning it's just more likely to be on screen and rendered. At least, that's the case with avatars, IDK if bounding boxes are a thing for world objects.
I may be completely wrong though.
solid smelt
Bounding boxes exist for every mesh, a chair really should not have a mesh on an avatar so it wont effect the bounding box
 jovial tartan
Does anyone know what would be best? Separate skinned meshes that will be hidden, or 1 big skinned mesh and then assign different material parts that will have an invisible material/shader
onyx harness
jovial tartan
Does anyone know what would be best? Separate skinned meshes that will be hidden...
Separate the meshes but try not to use the same material across different meshes.
Each material is drawn individually. Using the same material on multiple meshes will cause unity to draw the same material multiple times, you can see how this is a waste of resources.
pure bridge
jovial tartan
Does anyone know what would be best? Separate skinned meshes that will be hidden...
read "How does a shader-based system compare to other methods?" in this article, explains it well https://gitlab.com/s-ilent/SCSS/-/wikis/Manual/Inventory-System
GitLab
A surface shader for Unity providing cel-shading. (Forward rendering only)
also each material is goign to be redrawn per unique mesh anyway, you really dont need to worry about that (not to mention that if theyre small meshes im pretty sure they can be batched)
onyx harness
The idea is starting from a mesh with, lets say, 8 materials. I say ‘don’t use the same material on multiple meshes’ so you don’t end up with 14 material slots after separating for toggles. You can see why this’d be bad for the performance. Having 8 meshes with 1 unique material each means that if you were to join your meshes you’d still have 8 materials.
Then in both cases you’d be looking for changing the toggle method by merging materials and using the mentioned shader or something similar.
If you’re starting from 1 mesh 1 material then using separate meshes or separate materials is not great. In that situation I’d 110% look into that shader rather than adding 3, 4, 5 draws.
Also, can skinned meshes be batched in unity? I was under the impression that you could only do this for non skinned meshes.
(I may need to read up on it a bit more. Still have a lot to learn about for unity)
pure bridge
skinned meshes do not batch, but mesh renderers can be batched sharing the same material if they are <300 triangles, im assuming this will work for objects that are children of avatars
onyx harness
I see, okay. I’m not sure if I can apply it to any previous project immediately but I’ll definitely keep it in mind. Who know when it could come in handy.
pure bridge
and yes, having more than one material per mesh would be an issue for toggles, but for game objects with only one material slot per the performance cost would scale 1:1 as expected. in cases where your base mesh has a number of materials but you only need one slot per toggle then i would make a separate texture atlas and material for those. but most of the time i plan around that anyway, and most of the time your base avatar should approach or reach 1 material, and if it doesnt, it should at least have only 1 texture atlas so setting up outfit toggles is easy enough. i say this because although in theory adding drawcalls is going to always incur more performance load, in practice you cant really get around it, its the most sane option compared to shape key or material swap toggles which can easily result in worse performance if you are not careful. game objects are just easier to manage and measure; the only other things as optimized would be bone shrinking and SCSS (linked above), though they have specific use cases
 odd mortar
So, I'm trying to cut down on the mesh renders of my avatar. I use the atlas material combiner thing that comes with CATS for blender and that works fine. The issue is when I put my avatar in unity I need to add accessories. adding these extra accessories adds on more mesh renders bringing my performance down fast. Does anyone know how I might go about combining all the mesh renders into one preventing this issue?
 acoustic latch
Go back to blender and do atlas with the accessories too?
odd mortar
I did
I have two accesories added to the model
That's why there's three
One for the main model, and two for both accesories
calm spade
Why do these accessories need to be their own skinned mesh ?
odd mortar
Because they have multiple color schemes on them
Is there some other way to apply colors to individual parts of models?
unreal plover
write your own shaders
odd mortar
I don't even know where to begin with something like that
 tribal ruin
odd mortar
Is there some other way to apply colors to individual parts of models?
tribal ruin
odd mortar
Is there some other way to apply colors to individual parts of models?
Or just have them be one mesh and multiple materials
acoustic latch
tribal ruin
Or just have them be one mesh and multiple materials
Unless you mean have a toggle to switch materials, you are suggesting the thing that gives them the 3 Skinned Mesh Renderers
tribal ruin
Nope, not at all
calm spade
meshes and materials aren't the same thing
tribal ruin
You can have a single skinned mesh and have multiple material slots
heady smelt
Yeah I reckon you can have multiple materials in one mesh
calm spade
It's all about UVs 
heady smelt
I dont see the problem with switching individual ones in the mesh render componenet where it has "size"
and lists the various materials
acoustic latch
I did not say what I meant, I was going for the multiple draw calls angle and not whatever it is I said
odd mortar
tribal ruin
Or just have them be one mesh and multiple materials
Well that's an idea, but do you have any resources that might help me figure out how to do that?
tribal ruin
Just add more materials in blender and then assign the faces.
heady smelt
I can film a demo in like 15-30 minutes ig
tribal ruin
This is perhaps one of the most basic things when it comes to modelling/texturing
odd mortar
tribal ruin
Just add more materials in blender and then assign the faces.
That's what I did though
heady smelt
The thing I worry about is if those materials you plan to switch with animations get into the vrchat build