#avatar-optimization
1 messages · Page 39 of 1
 amber hemlock
I’m worried about the network IK
It made a lot of bugs that are currently on local only so that everyone else could see them as well
 calm spade
The requirements for fingers are just for humanoid IK
 surreal topaz
The thing that I don't understand is why you need finger bones to have IK in your legs
Because without fingers you still have hands
And no hand gestures either, although that's probably just because they thought "gestures = needs fingers"
Which makes sense
calm spade
it's a whole system, can't just have humanoid and decide "i actually don't need a neck"
amber hemlock
Like going cross eyed in a mirror. Only you see it, but in the network IK update, everyone else saw you going cross eyed, too.
surreal topaz
Oof
I thought eye tracking was done via realistic eye and head movements
Eye tracking being synced sounds like a disaster, that would break eye tracking entirely
Unless it actually focused on a specific person
amber hemlock
I believe the client just broadcasts their look at target
surreal topaz
Yeah but the game doesn't use Look At IK for eye tracking I believe
It's a whole eye tracking package that also does blinking and random eye movements
amber hemlock
It’s well done though, asside from the interaction with mirrors. And that’s just because the IK targets on its own head instead of the reflections head
It’s well done though, asside from the interaction. And that’s just because the IK targets on its own head instead of the reflections head.
I wonder, does eye tracking currently lock onto reflections in mirrors
surreal topaz
What eye tracking does and how mirrors work
You have a local invisible mirror copy of your avatar that follows your exact movements
This only exists locally
Let's leave the mirror out of the consideration first
The eye tracking script looks at your camera, since your viewpoint is behind your eyes, the script will try to look at the camera point between your eyes
This all happens locally first
Then when a mirror is enabled, this mirror sees your mirror copy but not the real you
So you see yourself go cross-eyed
amber hemlock
Still your own local machine could put your look at inside the mirror so it would work correctly since that’s what your eyes are doing anyway you’re focusing at a point in space in back of the mirror
surreal topaz
Other players will look at you whenever possible, and then the mirror reflection will show them looking at you outside the mirror
Yeah, local eye tracking could use some tweaks
Target should perhaps be always forward
amber hemlock
I think the network IK can make this work much easier
surreal topaz
Network IK wouldn't work with eye tracking until you get a headset with real eye tracking, not the simulated one the game uses.
The network IK would just have to exclude the eyes for a sec
I mean, it could work over the network if your client can figure out the point it should be looking at
Accurately
But you can't just put it directly forward since that just removes eye tracking
It would have to select random people nearby to look at
amber hemlock
Really? But it sounds like the persons own client could best decide where their look at should be since mirrors are local
surreal topaz
Only once you have real eye tracking and actually know what the player is looking at
amber hemlock
I feel like right now the client is just saying “ I am looking at this player” instead of “ I am focusing on this point in space”
surreal topaz
I think the simulated eye tracking tries to look at the local player. If you have two people standing in front of you, each of them will see you looking at them. This is one reason why people talk over each other so often in this game.
It's a body language thing.
It's not fixable unless the game can accurately determine what you're looking at, which is not possible yet.
amber hemlock
I think each client just needs to properly calculate lookats based on head rotation and closest avatar the point at. if every client was doing the same calculation, there would be no situations like that. and once the network IK comes, each client would only need to broadcast it's own anyway
it really was broadcasting it's own because during the brief moment we had it people were commenting i was going crosseyed, exactly when i saw myself going crosseyed
 ancient crystal
how eye trackig work is very simple
it does one of the following randomly:
- looks straight ahead
- looks at the local players viewpoint
- fixates to look on a point the head was pointing at
if u move ur head around in VR u can notice all these
cuz u go crosseyed when looking at viewpoint (u can move the viewpoint down and up and notice how the eyes point toward it) and eyes stay still when fixed to look at point
bc the eye tracking only look at the viewpoint for the local player if ur another player it will look at urs
 amber ridge
Once I figure out what the weight painter was doing, I'll re-do the skirt optimization method. Until then, you can look at Bananers video here for the basic info. https://www.youtube.com/watch?v=8u1NBstIcy8

[[ENABLE CC ON THIS VIDEO]] Quick rundown of how I set up a skirt for VRchat that looks good and wont make everyone's frames rate tank. Currently there is a ...
ancient crystal
where that doggo gif from
 ivory night
Any reason why atlasing my textures makes it darker?
 vague hearth
@ivory night try to disable before atlasing for all materials Apply diffuse via MatCombiner panel, or something with shader in unity, or 🤷 you can use any image editor and change brightness
vague hearth
@ivory night in MatCombiner panel before you click Continue there's an option Apply diffuse than you need to uncheck, also that you need to do for all materials. to enable next material need to click on material preview and select another
if you are doing atlasing through my addon
vague hearth
@ivory night that's not MatCombiner panel : p where you change to CATS panel there's also MatCombiner, if you want i can also give you a little code that you can paste into Text Editor that will disable diffuse color for all materials
amber ridge
Okay, a legitimate video about how to create a skirt with 2 dynamic bones. https://www.youtube.com/watch?v=SimRLR_lRcA
Your skirt is awful, it has too many dynamic bones even after you trimmed some of them using CATS (good job trying though). It's crippling everyone else in V...
 distant forge
Cool, from skipping around a bit looks like a nice tutorial 😃 the dynamic bone settings look nice--with another method I tried, one of my avatar's skirts reveals all when I sit down in full body.
 storm ingot
they get converted
 polar bolt
Uhm, nope, topology remains as quads if keep is checked on model import
Quads tesselate differently than triangles and I've been using that to advantage. Still works in 2017
amber hemlock
After doing Cats Full body fix, can "Left Leg 2" be deleted? I notice it is no longer weighted to anything.
surreal topaz
@amber ridge nice video, but some legitimate criticism
That's like the umpteenth video I've seen with exactly that skirt.
Most skirts I've worked with are not anywhere near as perfectly suited to the method as that.
I realize it's easier to make a video with skirts like those, but just once I would like to see people tackle the more problematic examples. Such as this skirt, which is longer, has more distance from the legs, and has an apron over the top:
Or perhaps even this thing I had to deal with
Weight painting it to the legs or using two skirt bones (one per side) makes it look rather bad in both cases
surreal topaz
My point is that these clickbait videos always take the lazy and ideal scenario to showcase their cool and good methods
distant forge
Is it just when it goes beyond the knees
surreal topaz
As soon as it goes beyond the knees it becomes a lot harder to deal with for sure
distant forge
Yea that's true
 marsh trail
And that's why i avoid skirts like the plague whenever i can, even if i need to add pants myself
amber ridge
Thanks @surreal topaz. This skirt actually has volume in it so minimizing clipping is a part of this and of course it's extremely difficult. I'll see what can be done with longer skirts
As we know shorter skirts are the primary use case in VRC at the moment so surely breaking down 32 dynamic bones to 2 was the most important.
Feedback is valuable 😃
@amber hemlock I don't see why LL2 couldn't be deleted. If it's a twist bone I don't see it
 gleaming yacht
 gleaming yacht

Pastor Jim Bakker will help you survive the apocalypse. (Noticed that this video was deleted on the now-defunct Super Deluxe, so I'm uploading here.) For mor...
 sweet mason

 heady smelt
hey
 wicked panther
hey
storm ingot
for long skirts , remove the body mesh parts that are not visible under the skirt (the mesh not the bones)(what isn’t there cannot clip through basically,reduces tris alot too in the process)
marsh trail
I think the applications for that are very scarce, unless the skirt is specifically made to hide any sections of the legs there's not much else you can do
Although removing meshes that are not visible through any gaps is definitively a way to lower a model's polycount without resorting to decimation
ancient crystal
is there a way to project textures
cuz my model has these transparent decals that overlay their skin
and i wanted to project the textures directly onto the skin instead of having it as a floating panel
marsh trail
Best way to do so would be directly copying the texture in an image editing program and then assigning the exact location via UV mapping, other than that, i'm unsure of any particular way

 south condor
anyone know why when i atlas this model it ends up pink with a giant ass atlas?
ancient crystal
did u set the textures
also its big bc the mat combiner doesnt downsample
so all images are left at default resolution
south condor
Yea they were already set
ancient crystal
yea but did u like try 2 manually set them
or also try changing the shading type (to GLSL or Shadeless)
south condor
Still Pink :T and i set it to 2k lemme try again
ancient crystal
cuz usually pink means missing texture
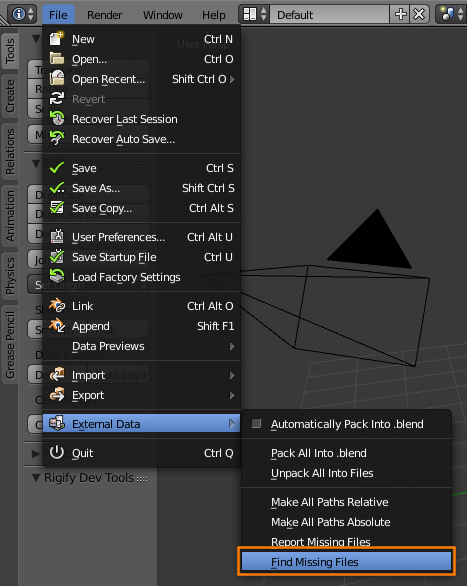 south condor
They're there before the atlas
ancient crystal
again it doesnt downscale so the atlas tool is terrible for detailed textures
distant forge
54k x 54k is rather insane so I might go with try reducing the size of the textures. Material Combiner has that menu where you click through all the materials and you can reduce the size of each
south condor
I'm just confused that none of the textures are even over like 700x700
distant forge
If you open your final atlas image you can usually find out what is causing the trouble
Like one huge image will be stretched across the whole things or it decided to make 100 copies of some texture. (Not sure how else it could get so large)
south condor
Truee
 lost stirrup
@amber ridge thanks for the vid, I legit came here to ask about exactly that because I had a skirt that even with merging bones had too many bones for dynamic bones. the 2 bones kinda leaves alot for clipping right in the crotch though, and mine has alot of extra parts that are seperate from the skirt but move with it so thats gunna be fun to weight paint.
amber ridge
Thanks for the support 😃
Yeah, you can fix some of the crotch clipping through more involved weight painting
lost stirrup
Is there a reason you didn't just merge all the bones into 2 by parenting all the middle ones to the side and then merging them upwards?
rather than creating new bones and weight painting from scratch (my nightmare)
@amber ridge
amber ridge
No, no reason. I just got rid of them because they weren't needed
However if you don't weightpaint from scratch you may find issues stemming from that process
marsh trail
Any particular reason for not using autonormalize?
 steel osprey
@ancient crystal i know its a bit late but to answer your question about the overlaying of the texture: Sort of. In theory you could do it via multiple UV channels and a custom shader setup to use the extra uv as an overlay via a lerp
 brave shoal
i'm having a problem, i didn't changed my avatar size but on the status its showing the bound size red, anyone know what it is and how to fix (i dont hava anything besides one collider and a marker on it)?
 karmic condor
go to the body portion of your model and check its bounds settings under the skinned mesh renderer component.
 patent leaf
And if it is not the bound size, then Its the marker. it's normally set like 100000000m away from the avatar and zip right down to where you have the marker draw when you call for it. Not sure of the workaround for that.
brave shoal
this is the bounds it has, i don't know if they are right or not, since i never messed with them before
karmic condor
It looks like your avatar may have a messed up shape key that is messing with your bounds.
brave shoal
theres any way to know what is the shape key exactly? because i dont see anything outside the normal in the shape keys, about the blender part i'm good just the unity that i dont know much
surreal topaz
@brave shoal test all the shape keys in Blender until you find the one that makes a part go way out
Actually nvm
It's the marker
Disable the marker in Unity and enable the marker on another gesture to fix that
brave shoal
@surreal topaz ok, thanks ❤
brave shoal
it worked, it was the Pen the problem, i was thinking i had to let always active like rigid bodys to work, but apperently not thanks for everyone that helped me ❤
heady smelt
@ancient crystal Believe you could bake the texture on to the other plane using a similar method to "High poly to Low poly baking" tutorials
Am not familiar enough with it to explain tho
 cunning fiber
yo anyone know how to reduce the bounding box size?
I have a Wolf O'Donnell model thats 1.85m tall but it says the bounding box is 7.0,7.0,10 or something, so it says its poorly optimized
cunning fiber
ah, thanks
 teal rain
need bit of help on trying to atlas the textures on my model
it goes through the process of creating it, and once its done it completely removes the texture image, and from what i checked the atlas file is nowhere to be found, not even in my recycle bin
 mossy solar
you have to save the image itself in blender
teal rain
i believe i did? like it told me to pick a location to save the atlas at and i did
 lean geode
Just to let everyone know who are trying to make a good rated avatar. When looking at your own ratings, when it comes to dynamic bones, a bone isnt taken into account, while it is for others. Causing the avatar to be seen as medium for others, and good for yourself. Aim at getting to 15 transforms to be safe. I dont know what bone it is, but guessing it's the head.
marsh trail
Any bone that is used as the root will account a transform, so anybody using a single root for multiple chains will be infact using 1 more bone as the root is accounted for
Unless you mean that a bone you don't see in blender is being accounted for, in which case it may be a leaf bone
ancient crystal
if u have leaf bone or end length same thing
amber hemlock
I’m also seeing my bounds as excellent and everyone else sees it as good
I see my correct setting 0.8 cubed
ancient crystal
anything else on it
 fiery yoke
do end bones affect dynamic bone transform?
 tired badger
New Tutorial on Getting started with VRChat Avatars, Installing Blender/Unity, Cat's/MaterialCombiner/Etc, Atlasing to Optimize, and Uploading to VRChat! https://www.youtube.com/watch?v=VBZu_wNzERw
This tutorial will go over installation of all needed plugins and the SDK. After that it will go over how to get a model ready in Blender, fix a few things t...
 half stratus
I'm trying to figure out if I can make my avatar a bit better than "medium" in terms of optimization, but I'm not sure what I'm seeing that's bogging it down in the first place

I'm seeing the bounding box is orange, but that's the only orange-level factor. Everything else is a green star or a green dot.
Is there a way I can reduce the bounding box load or whatever to make that green?
Or is that more just a warning saying my avatar is really large?
surreal topaz
How large is your avatar really?
half stratus
not sure where I'd see that in unity
heady smelt
https://www.youtube.com/watch?v=caGipKJDz_c&t=388s i hope its okay to post a link here, i was just wondering if adding the prop like how it was done in this video is better than doing it in unity?

Not really the best for absolute beginners but should help people that want to add props in a optimized way. Post your questions in the comments. UwU
half stratus
@heady smelt probably. I haven't checked the video but whatever can be done to reduce the number of materials and meshes is a really good thing to do.
I'm actually in a situation rn where I have three meshes and I dearly wish they could all be one but I only know how to do the above video the Unity way. Maybe I'll check that out xD
Thanks for posting that here lmao
half stratus
@surreal topaz Well I've updated some things and I discovered that bounding box error was because I broke the shape keys
surreal topaz
Oh yeah
half stratus
So it was exploding her when I tried to talk, thus stretching the vertexes way beyond the original shape
surreal topaz
Yeah that can happen if you delete vertices
tired badger
I planned to make a video where you add the props in blender and atlas them/merge meshes. I'd say adding them that way is a great idea. and how I do it.
heady smelt
the only thing with that way adding them in blender is what if you wanna have it attached to your body when not in use then would you maybe need a second one to pull out then that would increase the poly count? idk just talkin nonsense
 timber blaze
yeah that is an issue with this approach, but it's probably not a huge problem in most cases as long as the prop's poly count is reasonably small
also kareeda, why did you hide the mesh that way instead of just scaling the vertices to 0?
amber hemlock
You can merge the armatures using cats but that will end up with an excessive amount of bones (each with its own humanoid armature) if you want it down to one armature you may need to re-weight it which is a lot of work
Unless it’s all mmd props in which case it may just all work by magic without reweighting
tired badger
@timber blaze In regards to what? I wasn't the one that made the video Galactic posted if that's what you mean.
tired badger
4 skirt bones, 1 for each leg bone, Skirt physics and bends with knees.
Example of what the bone weight looks like for reference.
half stratus
I didn't realize there's so much that can be done to optimize a model
My quest for optimization is just about finished on my current project but damn, this was almost a rabbit hole
calm spade
For humanoid ?
The correct humanoid armature is in the pins of #avatar-rigging
Not part of optimization
amber hemlock
You can make the extra bones you do not want very tiny, but you will have trouble with arm IK if you have only one long bone and the rest are tiny
Also if you want to simulate a single bone torso, you can’t have both the shoulders AND the legs perfectly jointed at the same time... since the torso must either be chest or hips. I recommend actual weighting on the hips-spine-chest block so that all four limbs can stay visually connected.
 limber vale
Missing ummm a lot
calm spade
The pinned messages in the other channels are not helping ?
You need to Google things then
heady smelt
cmon ruby you know by now what people are like with pinned messages how many times have you said it urself despite what we get pinned its the same old story lols
 peak dove
Anyone here super good with Blender that would be able to work with my character?
 spring citrus
Quick question, is there a benefit to making a parent bone v.s. Adding exclusions on your dynamic bones or whatever? I’ve never used parent bones much but I see others doing it and wanted to make sure I wasn’t missing something important
 safe swift
keeps them in place
 trail spade
I'm not sure whether to post this here, or in world optimization, since it has to do with both, but my problem is I cannot publish my world because the avatar pedestals within it aren't optimized enough. Except I've been optimizing my avatars for a long time, and all these stats don't seem to coincide with what the files have.
For example, it says an avatar has 49 materials. But looking at it, the avatar only has 8. So I'm kind of just stuck. How do I fix something that doesn't reflect right?
safe swift
you probably have extra props or meshes that use different materials
use either snails avatar profiler or pumkins tool to see how many are active by default
trail spade
i have one prop per character that has 1-2 materials
which should make it 10-11 mats, not 49
safe swift
if it says 49 mats, then it's 49 active by default
when it comes to world model sheet
trail spade
what does active by default mean? just what is shown at all times?
safe swift
yes, no hidden props or anything
trail spade
That definitely doesn't seem right then, but I guess I could find other methods to check
safe swift
GitHub
VRChat avatar profiler plugin. Contribute to theepicsnail/AvatarProfiler development by creating an account on GitHub.
shows things at bottom of descriptor
 trail spade
I will try adding that, but I do not think I have a way of fixing it afterwards since these are all models before the 2017 unity update and are in old files..
karmic condor
What does the skinned mesh renderer component say in regards to the number of components
 grim kiln
Oh, how many skinned meshes does the avatar have?
It multiplies if you have more with the same material count
fiery yoke
@safe swift is using that good enough for avatar performance check for worlds?
safe swift
yes
 opal pecan
Have you restarted blender after installing it? Don't forget to save user settings with it enabled too
 still perch
do you have the right version?
 keen horizon
just now thought of end bones nvm
 oblique wind
What does material combiner do
heady smelt
@oblique wind Material combiner essentially takes the materials you've specified, and combines the UV Mapping, Textures and Materials into one Material.
oblique wind
So like atlasing?
heady smelt
Yeah, its the same concept
 jovial grail
It is exactly that but it does it automatically and much faster
 unique hazel
i still cant get it to work
i uninstalled blender
and installed it again
still no
i removed the whole addons folder and re installed material combiner
still no
 candid sedge
You added it when ot was zipped right?
unique hazel
yep
ancient crystal
yea but material combiner pretty crappy
distant forge
You're on windows? Blender 2.79? The material combiner does some weird stuff on import and tried to download some code and modify itself. If that fails it shows that message
ancient crystal
i mean it works but its not the best
typically outputs images that are way too large and have a lot of empty space
unique hazel
i think its good
ancient crystal
can do better if u just manually move every materials UV into its own corner and use standard texture sizes when baking
distant forge
It's nice because it is simple. I want a preview so I can set the sizes of textures to produce the output image I want. It's always from the 4k panties texture
ancient crystal
then atlas urself if it dont work
ancient crystal
its not impossible
yea but if u have that many materials and they all have their own textures
hope ur happy with a like 8000x8000 image
distant forge
You can still resize to 4k
ancient crystal
yea ik that but quality dropoff
and u cant remove the empty space unless u also move the UVs
distant forge
Vrchat doesn't even make texture size a factor in performance ranking
unique hazel
is there no way to fix my error tho?
distant forge
There is. I ran into it and managed to kludge things around to fix it. (Though I'm on mac) I can look later to see what I did
ancient crystal
u pley vrcat on a mac
distant forge
I play most of vrchat on mac, namely the blender and unity parts
ancient crystal
how u evn get good frame 0.o
distant forge
The last 20% with the vr and chat bits I play on a windows pc
 distant forge
I use my mac for content creation only. Was making a stupid joke, sorry.
distant forge
@unique hazel my suggestions are to try to open the console to see the loading errors. On mac I ran the executable directly from a terminal. No idea how to do this on windows. Check permissions. Your user must have permission to modify blender plugins
Where did you install blender from. Try blender.org website instead of steam
unique hazel
i dont have it on steam
this has been pissng me of for 3-4 days now
still havent found a fix
 gleaming notch
It's definitely not possible to have an excellent avatar if you have parts that needs hiding/unhiding (ie. equipping/unequipping weapons), right? (I mean, there's tricks like having a shape key literally mash all the vertices of whatever you want to hide into the model, but as far as I know, that's not possible with the current restrictions)
patent leaf
Why wouldn't it be possible?
gleaming notch
Multiple Skinned Meshes and also, the shape keys sometimes do not stay at whatever state it is at the end of your gesture.
distant forge
But you can just equip while holding thr gesture. Many avatars do this. You can have equipment either as bones and scale them to 0.0001 or I think you can so non skinned meshes and still be excellent.
gleaming notch
I didn't consider that... Thanks!
patent leaf
This would be a great video about it
https://www.youtube.com/watch?v=caGipKJDz_c
Not really the best for absolute beginners but should help people that want to add props in a optimized way. Post your questions in the comments. UwU
sweet mason
Only what appear on the idle(base) avatar are affected on the rating
I think
I have for example another fbx with it own animation hide . Only activate with a gesture. But the rathing still say one mesh etc
But you should make props like that video if there is no fanvy stuff going on
amber hemlock
Other people will rate your avatar by whatever you happened to be holding/doing when their client profiled you. If you had a laggy prop open at that exact instance, it will be reflected when they inspect your stats and gets cached that way.
sweet mason
Oh really
 lucid socket
Would anyone be able to help me reduce the polygons on my Avatar? I need to get it down to 70K But I'm not sure what to remove that wouldn't hurt it
 coarse summit
Edge loops :V
Specifically, edge loops that don't contribute much to the overall silhouette
amber hemlock
Whenever I try to bake my textures to my new atlased uvs blender errors and says circular reference
 radiant shadow
Gotten that a few times, usually end up finding the UV and unwrap it , then rebake it to another texture to fix that i got no clue what it means or another way to fix it, after that i can usually atlas it again
amber hemlock
Sadly mine is not an unwrap it’s heavily manually positioned
ancient crystal
u need a 2nd uv map with the repositioned stuff
and a new texture (and probably material) for the baking to apply to
coarse summit
yeah it'll give that error if you're e.g. trying to bake to the same image file you're pulling image data from
 mystic trout
Dude, it literally takes you like 5 minutes in Blender Cats. As long as you haven't broken the prefab instance in Unity, you're good to go.

i dont wanna sit down and do that
i love being able to just press one key
in #avatar-optimization
·
 misty jay
is anyone here good in unity and would be able to help a girl out with some issues regarding an avi ? quq i have everything prepared for upload and the dynamic bones, visemes and tracking is working perfectly but the issue lies within the attachment of the hair and a necklace if im not mistaken, if anyone could have a look or give me a call I would appreciate it a bunch ❤
misty jay
karmic condor
What does the rig menu look like?
 marble walrus
Is it hard too make outfits?
sweet mason
No
mystic trout
@amber hemlock quote plugin for betterdiscord
heady smelt
@misty jay If you're still in need of help regarding the rig of your avatar, feel free to either post a screenshot of the rig here in the chat (in the unity's import rig section) or just send a pm!
 harsh rose
Can you have multiple materials for a 1 Mesh avatar?
Or is it only 1?
Trying to have a fur shader on some parts of my Fur, its a really well optimized Shader that doesn't make people lag.
Just did a quick test o/
I can o/
Awesome.
 sullen nacelle
can someone pls send me a vid of working way to add costume blinking animation?
distant forge
Would check in #animation . Check the pins there for porting legacy animations. Should have most of what you need to know.
heady smelt
What am I meant to press or do to remove the middle seam after creating an Atlas?
ancient crystal
?
heady smelt

A seam that gets created because the texture doesn't expand past enough the UVs
Wondering if there is an easy fix I'm not thinking of
distant forge
Ah, it's because it went to the last pixel and that's now halfway interpolated with the next texture?I would just scale those middle points back like 1 pixel on the texture map manually, or scale the whole uv coordinates like .999 (when scaling uvs, best is to shift-S select 0,0 as cursor coordinates first and press the . Key to make the scaling go from the cursor)
heady smelt
Yeah it had started showing part of the next texture
Edited the texture a bit and moved the UVs some, both seem to have been enough to fix it
Thanks for the idea
 granite helm
hi can you help me why im can not take avatars from worlds ?
surreal topaz
Open a public instance instead
safe swift
is that a private world and you're on steam account?
granite helm
that is a Publick world and im in Steam Account
surreal topaz
It seems to be a private instance of the world, probably
Open up a public one and not friends or friends+
If you went through a portal it could be an Invite instance as well
safe swift
does having 4 render textures of 1 camera impact performance much compared to 1? making a boxing ring with a 4 displays on top and 1 animated camera
opal pecan
@granite helm the problem is not that the instance is private but rather that the world itself is private. That is, it doesn't appear in search. Avatars in worlds like that can only be used once you reach new user
If you're in a test version of the world, try going back to the main version
granite helm
ok thx men
polar bolt
@safe swift perf cost comes from the camera rendering which is done only once per frame, the rendertexture then acts like regular texture for any other draws
safe swift
oki ty, then all I have to do is make sure camera isn't costly
amber hemlock
Choose a greater margin value when baking the atlas
Or if it was cats atlas copy the other side of the skin texture and paste a little bit of it on the other side to get the same old uvwrap bleed that it had before the atlas
Many models have unnoticed UV bleed that gets shown up after an atlas
That’s actually improper bleed zones on the model rather than an issue with cats atlas
Many don’t bother with bleed zones around the edge of the texture since they figure it wraps
 fierce copper
So why doesnt my avatar show up?
surreal topaz
Not an optimization question
surreal topaz
Expand the avatar object and post another screenshot
 mental parcel
Hard to say. Tiny avatar? Broken fbx?
 zinc crown
Hello, got my model down to 53.3k but she's now lewd af. Any tips?
how do you decimate toes without screwing up the texture?
sweet mason
screenshot ?
zinc crown
am I allowed? it's nude
sweet mason
you talk about the feet
zinc crown
you know what toes look like
amber hemlock
Lewd is a dumb word. Gents and breasts aren’t allowed. If model is smooth it’s fine.
 amber hemlock
The decimation modifier accepts a vertex group so will only collapse those verts. So make a vert group that does not include your important edges
zinc crown
what are the important edges?
zinc crown
when I select the toes with the box tool and hit decimate I go back to object mode and the toes are no longer textured.
amber hemlock
Sounds like you are using cats decimate. Cats can’t decimate only part of a model
zinc crown
no I'm selecting it from the mesh menu, not used blender long enough to learn all the keyboard shortcuts
sweet mason
you can put vertex group that you dont want cats to touch i think
zinc crown
well good old fashioned select and delete verts got me another 1k
distant forge
@misty jay this conversation belongs in #avatars-2-general , especially seeing as your model has not even been optimized. It does look like you broke the prefab and have some of the meshes outside your avatar game object. Can you show the head section of rigging configuration And also legs? Maybe reply in #avatars-2-general
 sweet matrix
woops, I discovered that bone colliders drain performance
distant forge
Not that much. If used sparingly it's ok, just multiplies with the number of bones in the chain that use the collider. I've seen some good effects that have only 15 or so collision transforms
ancient crystal
total += chaintransforms * collidersused
but honestly i would only put them for like ears at most
bc ears are flimsy 1 transform per
amber hemlock
Manually animated stuff always looks better than dynamic bone. Even if you use dynamic bone.. manually animate it stuff too. Dynamic bone just feels like dead rag doll to me.
 verbal surge
is there a way to combine materials with albedo, specular, normal and emission map?
amber hemlock
Cats atlas unless I am misunderstanding the question
verbal surge
I tried that, but that doesn't seem to work with multiple maps (however I might just be doing it wrong)
karmic condor
It doesn't work with multiple maps but you can use the atlas as a reference to create the other maps manually
verbal surge
Thanks I'll give it a try
Do you know if the atlas packs the maps in the same order each time?
vague hearth
@verbal surge in matcombiner tab you can use multicombining to combine specular normal etc, but if your UV is out of bounds currently this textures will just be resized instead of copy-pasting )
and you can add extra textures only to materials with textures, so for solid colors you can create solid color image ) and it place textures (and resize) by main atlas
verbal surge
ok, I'll try that then
Just to make sure I'm doing this correctly; How do you normally add those maps in blender render?
vague hearth
@verbal surge you want to create atlas for the blender render? or you mean something else
if you are about how to, then something like this, numbers before images are important, that a number of atlas to which that image/color will be added (like layers in photoshop)
https://media.discordapp.net/attachments/378853202688344065/519268620677939230/unknown.png
https://media.discordapp.net/attachments/378853202688344065/519269089529561109/unknown.png

 verbal surge
I want to merge materials by creating an atlas in CATS
vague hearth
heh, cats just a "link" to the button on MatCombiner panel, for multicombining use main panel of this addon
verbal surge
So I go to MatCombiner and click multicombine?
With specular, emission and normal map applied?
vague hearth
you need to add layers for the each texture and add their extra textures as specular normal map, number before the name mean number of atlas to which it will be added
verbal surge
 vague hearth
after you click multicombining you have a texture selector that will be combined and box to add extra textures, it's not take existed textures from materials (at least currently)
verbal surge
oh, I see
and what do I do, if a material is missing the emission map (for example)?
vague hearth
keep it Empty and add next layer
verbal surge
ok
Should I check compress combined image?
Or does that reduce the quality of the textures?
vague hearth
in cats version that enabled by default
but 🤔 better to use crunch compression in unity instead i think, and yes its reduce but for me its usually no visible difference between compressed and not compressed just a size reduction
verbal surge
Ok, thanks for the warning
verbal surge
I've merged the texture but noticed that the textures are a bit less detailed. Is there any way to fix this?
amber hemlock
Max resolution might be set too low in unity
Also it may be resizing the texture down to a power of two. So change that to either “To Larger” or “Do not Scale”
(Inspect texture (not material) in unity)
ancient crystal
that or the bottom setting where compression is, set the size to the max (8190 or so)
ancient crystal
what does it say the size is
verbal surge
Crunch Compression: off
ancient crystal
in the bottom right it has a X x Y
ancient crystal
is it the same quality in blender
and making sure that its using the atlas as texture
amber hemlock
Yeah if it looks the same in blender the issue is parameters in unity
verbal surge
I just did it again with a different texture and that one like it should
amber hemlock
Also “normal” compression will still fuzz textures. Recommend high or none. Whatever you can get away with
vague hearth
after combining sometimes images a bit blurry in unity, and why 🤷 even with all stuff deselected and with power of 2 image, so @verbal surge
amber hemlock
Sounds to me like it’s still being forced to a power of two. Even “to larger” can be fuzzier than no scaling. No scaling is the sharpest.
verbal surge
How do I set it to "no scaling"?
amber hemlock
Same drop down as to smaller/larger
verbal surge
is it "non power of two"?
amber hemlock
Yes that just keeps the resolution as is
Then for compression instead of normal pick high or none, if you can’t get away with high
verbal surge
ok, thanks for the tip
karmic condor
Coming in late but it may be worth checking the original textures and how big they are. Sometimes textures (like skin or hair) is unnecessarily large so making a backup and reducing the size of less detailed but high res textures can greatly help reduce atlas sizes.
 rain leaf
question, does anyone know if there is another way of using locked animations without and animator as it is the only component keeping my avatar from a perfect rating?
???
distant forge
You mean like animator toggles? Not sure I know a way unless you are ok keeping a gesture active on one hand in addition. If the object with the extra animator is disabled, it won't count but it will also revert everything to disabled at the end of the gesture then, defeats the purpose
rain leaf
nope knew it was a long shot but had to try
cant really replace it with a gesture since im using gestures to toggles effects on top of the changes
distant forge
Well maybe somebody will stop by with a better approach, there's always putting the enable in idle, crouch, walkfwd, runfwd etc and every animator override slot. But that might still break for full body users and it's a lot of work
distant forge
If your change is disabling or destroying an object, that's doable with particle stop actions
But no equivalent I know for enabling
distant forge
For hiding stuff you can try stencil particles. No, scripts are not uploaded so you would waste your time doing that
distant forge
I used to use Stencil particles for emote toggles. Work decently. Other particle based menu systems are doable
distant forge
Not sure excellent allows particles tho
With shader blocking system makes that frustrating
rain leaf
yah
real quick have they patch the forced kick hack yet?
ive been offline after getting booted by that for a day
distant forge
Reopening vrchat should always work. It's just a form of crash from my understanding
rain leaf
dam then not patched
amber hemlock
What do you mean by locked animations?
amber hemlock
You can have custom animations by baking them into your idle animation on the AO, then disabling game objects to make them stop. This way you can stay excellent and still trigger animations that are longer than 2 frames
surreal topaz
If the animator is on a disabled object it isn't counted for performance anyway @amber hemlock
surreal topaz
Mine don't
amber hemlock
Weird. I think it’s inconsistent. I def see people seeing my hidden stuff reflected
I don’t see it, but other people do
Current avatar is excellent for me but good for everyone else
heady smelt
how the hell do i fix this need help
amber hemlock
it looks like at some point, you moved your thumb bones
Assuming the model file is actually correct, set the model import to Generic, then back to humanoid again, and fix all the binds.
heady smelt
@amber hemlock do i do this on unity to fix it??
amber hemlock
Yes
sweet mason
Nice
heady smelt
can someone help me with this problem?
karmic condor
Knee , leg , and ankle bones should share the same or similar x coordinates
safe swift
@heady smelt make a screenshot from side and front views in blender for bones
numpad 5 + numpad1/3
safe swift
blender
heady smelt
in blender i can't the model is a mess, even if i click on "fix model"
 grave steppe
Can somebody help me create a custom avatar from the start to the end in a video call!!!!!!!!!!!!!!!!!!
safe swift
lmao
grave steppe
I tryed and failed so much times
safe swift

Enjoy the videos and music you love, upload original content, and share it all with friends, family, and the world on YouTube.

Celebrating Sojourner Truth! #GoogleDoodle
and tutorials in channels
harsh rose
@heady smelt Use Female animation instead of Male in Avatar Desc o/ Thats liiterally it.
UNLESS. Thats you standing.
heady smelt
how many dynamic bones could i work with optimally?
patent leaf
@heady smelt Number one answer is none, but there is a guideline for optimized avatars which can be found here https://docs.vrchat.com/docs/avatar-performance-ranking-system#section-avatar-performance-ranks-value-maximums-per-rank
The Avatar Performance Ranking System allows you to see how much a user's avatar is affecting performance via analysis of the components on that user's avatar. You can also use it on yourself to see how performant your avatar is. **This system is purely informational at this...
 mild veldt

heady smelt
@harsh rose hope it works xD
 sudden jewel
 uncut yarrow
SDK does NOT like the bone map, that was naturally set for this model.
Any ideas to fix it?
surreal topaz
This does not appear to be an optimization question
surreal topaz
Yeah, it is
uncut yarrow
I tried inputting
surreal topaz
You will have to add one in Blender
heady smelt
how do i optimize my avatar
i downloaded it
so i have no fbx
finally someone is responding
amber hemlock
I am highly suspicious about unity packages that contain no FBX, it is typically a red flag that the content was stolen from another vrc user. Additionally, unless the rules have changed, we can’t talk about that website here. Finally, it is not possible, you need the FBX.
amber hemlock
It’s entirely possible it’s not there, if it is, it will be somewhere within the assets directory of your unity project after you have imported the unity package. Either in the assets folder directly, or one of the sub folders. If you printscreen your assets tray, I could point it out for you.
Locating the model file isn’t really an optimization question, though
amber hemlock
Open the FBX in a 3D editing program. Most commonly blender
amber hemlock
It will just be a picture of the model.
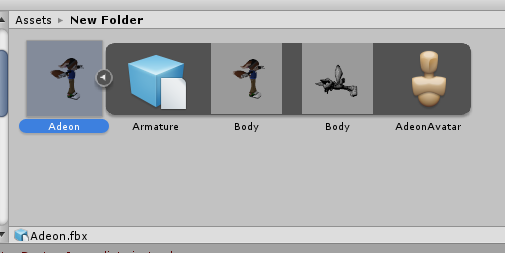 heady smelt
how do i open the assets tab
amber hemlock
The tab is actually called Project
vague hearth
rmb on any window Add tab>Project
marsh trail
Do you mean merge armatures or literally connect a bone to another?
uncut yarrow
yeah
marsh trail
It's one or the other
uncut yarrow
i can make a screen shot of what i am trying to do
marsh trail
Alright, go ahead
uncut yarrow
okay I have a bone with the skeleton.
Anyway or form, I don't know how to connect it.
 still matrix
you need to parent it to the root (spine) bone
marsh trail
Wait is that a SMD?
marsh trail
I see source bones
marsh trail
Well firstly, for your own sanity, click the wrench next to CATS tool's Fix button (if you don't have CATS i'd advise getting it for this case) and untick remove weightless bones or whatever it's called, then hit Fix, from there you'll be able to actually see the bones and their orientations, afterwards go into edit mode on the actual bone structure and add a bone, that bone will be part of the armature
Resize and position the bones properly from there, as they will appear very small
uncut yarrow
ok
heady smelt
still matrix
xD
still matrix
yeah
heady smelt
like i downloaded the avatar
so idk how it became like this
bcs i diddnt do anything to it
still matrix
aah
heady smelt
i just simply imorted it and then exported it to unity
still matrix
well it can happen when its translated
heady smelt
oh realy
still matrix
the import can get messed up due to it being a 3d model from a different program
heady smelt
how do i fix it then??
still matrix
by manually inspecting the thumb bones in blender
still matrix
i can take a quick look for ya if you link me the model
still matrix
just dm me the link when youve got it
heady smelt
oke i did
amber hemlock
@heady smelt If it looks normal in unity, set your rig to generic, save, then back to humanoid, save, then configure and make sure bindings are right.
you will also either need to drag a new copy of the avatar into the scene, or revert your gameobject positions to prefab positions, which is impoissible if you've broken your prefab, in which case you must just drag a new one in
still matrix
@amber hemlock already fixed it for him
the import messed up the thumb bones
https://cdn.discordapp.com/attachments/541332043590533156/541333649262510094/unknown.png this was his problem lol
 amber hemlock
Eyup, bone head at wrong location
sudden jewel
This looks like a conversation for #avatar-rigging and not #avatar-optimization .
still matrix
well the convo started thinking it was a optimization error but it turned out to be a bone problem
heady smelt
Question about Particle and limits currently in the client SDK
 hidden halo
Is it normal that it say that my avatar have 5693421 polygons?.. Cuz i uploaded the same one before with different colors and it was like 12k polygons so why does it say 5M all of a sudden
distant forge
You must have some mesh or particle system on it and enabled by default
Do you have something like gpu particles? Dunno what else would be 5.7mil polys
hidden halo
well there some tiny ribbons particles
distant forge
Tiny (size) doesn't mean efficient. What's the particle limit. If a mesh particle or trail it does max particles * polygons per particle
hidden halo
I removed them and its ok now
still matrix
@hidden halo 1 particle = 1 poly
distant forge
Hmm that's how it used to be but I think they now take into account the polygon count per particle. That, or your particle system actually was set to a 5600000 particle limit
distant forge
Or it's a separate metric from the normal polygon count
"Mesh Particle Active Polys" this one
heady smelt
Does an avatar need one skinned mesh shader? I have a robot avatar which is made from geometric shapes only which are not supposed to bend/flexible. When I replaced the skinned mesh shader with a mesh shader, the IK didn't work anymore in VRChat.
uncut yarrow
well
i found the animation packages for my avatar
but
theres a weird thing that it messed with the bones in Blender
ancient crystal
ik is based on bones and rig type only
whatever else ur avatar is made up of doesnt matter
uncut yarrow
yeah
well i found the animations BUT this happened
The neck and the hips are out of place when I inputted the animation[s]
the chest is flat on the top and puffed out
ancient crystal
lol
ancient crystal
is that for every anim
uncut yarrow
well
ancient crystal
and it might be bc of the bone u were messing w/ earlier
ancient crystal
animations are a bit buggy especially if bone hiearchy and names were messed up
uncut yarrow
The model I grabbed was from GMod
ancient crystal
u can decompile mdl and load the QC with all animations and meshes already there
also idk if u should make it bipedal / use dif avatar bc generic avatars are a bit of a hassle
uncut yarrow
kinda
ancient crystal
u cant sit on things, no eye tracking, no gestures, etc all u do is move around and jump and grab stuff
ancient crystal
yea but it doesnt matter generic avatars cant sit down xd
ancient crystal
its unfortunate that thers no manual full body ik yet
could do some magic where when u crouch it makes ur legs bend inward and u can move hands around
but no ik exporting yet i think
uncut yarrow
well
theres no bone to the hands
Im looking at the model in GMod
the animations look fine than the one in blender
heady smelt
https://cdn.discordapp.com/attachments/402349592244649996/541831802872922124/unknown.png so i have an avatar that had about 70k polys then decimated it in blender to 50k and added a staff in unity for animations and the staff has 4k polys but it still says im over 70k? anyone know what the problem is?
ive redone it twice and didnt work both times so its really bugging me
ancient crystal
i think max particles count
and also is this the decimated model thats in there or the undecimated one
and also have u tried refreshing the thing with the 🔽 button
also it counts triangles not polygons
so quads are 2x as many tris
safe swift
have u applied the modifier? cuz on export it discards unapplied modifiers from what i remember
heady smelt
i got it
sweet mason
More bone or more shape key 🤔
 potent mirage
yo, so ive got a zillion animators on my avatar because i have an inventory system with on/off toggles for my chairs, will those animators contribute to notable avatar lag? and will the chairs, for that matter
amber hemlock
Yes, animators are laggy but not as laggy as the other categories. VRC devs recommend you keep it under 5, with 16 being medium, 32 poor, and more than 32 is very poor
I don’t know how inventories work, but you typically don’t have a huge need for multiple animators due to a single one letting you have multiple layers
surreal topaz
Inventory systems usually use two animators per object
IMO that's unnecessary and with proper timing you can cut that into one
By just making the cycle emote last longer or shorter
amber hemlock
Inventories seem so convoluted and bug/desync prone that I’ve just never bothered figuring them out
Waiting out hoping we get something more official eventually
surreal topaz
Same
ancient crystal
u can always use cyclers and variable emote duration to toggle stuff
 golden nova
i want this unityPack
heady smelt
https://cdn.discordapp.com/attachments/402349592244649996/542093288962785288/unknown.png https://cdn.discordapp.com/attachments/402349592244649996/542093446052052993/unknown.png after i atlas this the textures become jumbled up, does anyone know why?


well after i put it in unity it turns out fine again so whatever i guess
vague hearth
¯_(ツ)_/¯
patent leaf
That's a good lookin model 😮
 strong vigil
Sorry for asking around here, but does anyone know where I can find this avatar in which world?
heady smelt
https://cdn.discordapp.com/attachments/402349592244649996/542106581370929155/unknown.png does anyone have an idea why there is no option to join all meshes? and when i try to join them all using ctrl + J it does not give me an option to export the mesh
 ancient crystal
?
heady smelt
idk why but when i add an armature and parent the mesh to it it works fine
patent leaf
Ye, needs armature. It's always been like that for me. Just going to File/Export will work just as fine if you just want the mesh
strong vigil
Can someone upload this avatar to my account please? because the vrchat sdk is not working on my pc, hence I can not put the aniumação to walk the model, since it has to move the files of vrchat sdk and wanted to leave with 10 meters, but can not see how much height has the model and lastly if someone knows how to put someone on top of this avatar I thank you
patent leaf
@strong vigil You need Unity version 2017.4.15f1 with the SDK. You're on 5.6.3
strong vigil
really ?
patent leaf
You can download it here https://download.unity3d.com/download_unity/5d485b4897a7/UnityDownloadAssistant-2017.4.15f1.exe It will ask you if you want to update, do not update.
heady smelt
If a section of an object is all one color, is it good practice/more efficient to just scale the UV wayy down and put it all on that one color?
Ex say I have a coat, and the body of the coat is all just blue. So for the body of the coat's UVs, i make a blue smudge on the texture, and just scale down the UVs to all fit on that blue smudge.
marsh trail
That is indeed good practice provided that it has no extra details on it (either shading on the texture itself or other maps like normal maps), also try to keep it within a power of 2 resolution on the texture itself (32/64/128/256/512/1024/2048/etc)
And keep the smudge the same consistent color without blur or blending colors for the best results
@heady smelt
heady smelt
Sounds good, I appreciate the reply and the ping : )
marsh trail
However if that section of the object is part of the UV of a larger map, it may end up increasing the texture size instead, unless you remove the extra section you removed from it and then properly realign the UV to it, so keep that in mind in said cases @heady smelt
You'd essentially just add, say, 32x32 to the total texture resolution and left a large chunk of unmapped texture on a 1024x1024 texture, so those cases can be tricky to solve, especially if the "dead" texture is occupying a large section in a corner (like the top left) instead of an entire side you can chop off
Although, this will happen more commonly on texture atlas' it can happen aswell on your everyday model
heady smelt
Ahh, I'm not sure I know enough to understand what you mean by that. In this case, I modeled another object to go with my character, and there was room on an existing texture to make a smudge and cram the UV on.
marsh trail
That is one of the best outcomes right there then
heady smelt
hey, can anyone help me with a Piranha Plant model I'm trying to rig up? I cant seem to get things with the neck and head right due to the way the skeleton is set up. (pm or @ me if u can, in case i miss your response)
 nimble belfry
That's more a question for #avatar-rigging instead of here
 upbeat lava
Well, I have the latest SDK and Latest Unity Version. Didn't the limit get upped to 70k?
distant forge
You also probably don't have the latest sdk. Make sure to delete it while unity is not open then import latest version in unity. See #vrchat-support
upbeat lava
Well I am on unity 2017, as shown in the photo, @vague hearth
I am probably on the wrong sdk
The reason for this: the website doesn't have the newest sdk.
Where do I get the correct SDK?
vague hearth
latest sdk is VRCSDK-2018.12.19.17.03_Public, that what downloads from the user page after log in
upbeat lava
okay that is the right one. I assumed it was out of date because it did not have 2019 in the name
Thank you!
Or perhaps I need the beta SDK?
surreal topaz
Just get the latest SDK from the website, yours is outdated
 barren obsidian
Hey, I'm trying to keep my avatar in the orange with dynamic bones. Does anyone know how many put you in poor so I can avoid that?
patent leaf
@barren obsidian there is a guideline for optimized avatars which can be found here https://docs.vrchat.com/docs/avatar-performance-ranking-system#section-avatar-performance-ranks-value-maximums-per-rank
The Avatar Performance Ranking System allows you to see how much a user's avatar is affecting performance via analysis of the components on that user's avatar. You can also use it on yourself to see how performant your avatar is. **This system is purely informational at this...
barren obsidian
Cheers mate
 mild dome
What is the maximum polygon that an avatar can have to upload it?
 versed stump
70k iirc
mild dome
ty
surreal topaz
In the past we've always been told to Combine Same Materials to save drawcalls
But now the performance ranking system doesn't even mind if you have 10 material slots with the same material in them?
Does Unity just batch it all together or something?
 hoary juniper
That's not possible, but it sounds like things are a little more resilient than before 👀
surreal topaz
It's weird though
If it still incurs 10 drawcalls then why does it only get counted as one?
Does that mean I can make 100 material slots and put the same material in there, and still be deemed "optimized"?
marsh trail
The same materials should be able to be batched afaik
But that's from something i read a really long time ago, unsure of what it was pertraining to exactly
Dynamic batching (Meshes)

Unity can automatically batch moving GameObjects into the same draw call if they share the same Material and fulfill other criteria. Dynamic batching is done automatically and does not require any additional effort on your side.

Batching dynamic GameObjects has certain overhead per vertex, so batching is applied only to Meshes containing no more than 900 vertex attributes, and no more than 300 vertices.

If your Shader
 is using Vertex Position, Normal and single UV, then you can batch up to 300 verts, while if your Shaderis using Vertex Position, Normal, UV0, UV1 and Tangent, then only 180 verts.

Note: attribute count limit might be changed in future.

GameObjects are not batched if they contain mirroring on the transform (for example GameObject A with +1 scale and GameObject B with –1 scale cannot be batched together).

Using different Material instances causes GameObjects not to batch together, even if they are essentially the same. The exception is shadow caster rendering.

GameObjects with lightmaps
 have additional renderer parameters: lightmap index and offset/scale into the lightmap. Generally, dynamic lightmapped GameObjects should point to exactly the same lightmap location to be batched.

Multi-pass Shaders break batching.

Almost all Unity Shaders support several Lights in forward rendering
, effectively doing additional passes for them. The draw calls for “additional per-pixel lights” are not batched.

The Legacy Deferred (light pre-pass) rendering pathThe technique Unity uses to render graphics. Choosing a different path affects the performance of your game, and how lighting and shading are calculated. Some paths are more suited to different platforms and hardware than others. More info
See in Glossary has dynamic batching disabled, because it has to draw GameObjects twice.
 ancient crystal
only 300 verts what
practically useless unless u purposefully segment parts of mesh
 woven merlin
Is it truly bad to have many materials? If I use vertex-only colour materials and just have, a handful of them, is that worse than 1? Seems to me the engine should be able to combine those draw calls but I guess we are at the mercy of Unity3D here.
surreal topaz
Every drawcall adds some CPU time while the CPU waits for the GPU to finish drawing
The CPU and GPU will probably be faster with pure colors than with textures, but still
woven merlin
@surreal topaz Thanks! Yeah I was worried about that. I guess it's faster to just make a texture with many flat colour regions and utilize clever UV mapping to achieve the same effect.
surreal topaz
Yeah, you can probably just texture atlas it too if you don't wanna create the image yourself
Same effect
 snow geyser
When VrChat requires less than 20k tris, is that total, or can some be disabled and be more than that?
 prisma niche
A weird qustion - my world update got rejected because a few of my avatars there had performance issues.
Thing is, I optiize my avatars - I don't use dynamic bones or shaders, absolutley minimal number of particles (this includes max counts and emissions which are also usualyl in singel digits) and avatars are mostly very low poly and simple. Even the most demanding of my avatars so far caused no slowdowns even when 2-3 are used spaming custom anims/emotes in a full world. I had no complaints.
Usually the complaint is materials, and even though the report stated an avatar has 50 materials, when I check in unity I have 7; 5 base colors nad 2 textures. So I'm not sure what to do.
 cloud crypt
How do I fix this problem?
 versed nest

cloud crypt
all I did was add a weapon to its back, made an animation for it and its like this ;-;
 grizzled arch
So it was working fine until you added the weapon?
cloud crypt
i guess. this is my first time doing an animation to spawn the weapon
grizzled arch
Ah. I don't really use animations to spawn stuff. Not sure what the problem could be.
cloud crypt
dang
amber hemlock
@cloud crypt SDK is out of date. Needs to be updated. Try with the newest and see what error is reported. It may go away.
surreal topaz
You probably have a fucked shape key somewhere
cloud crypt
i fixed it
 merry finch
so i imported a unity package for a character i like and upon it importing him i discovered he uses over 43 materials, would i be able to optimize him somehow to use less materials without having to put the model in blender? because he's already setup to use in vrchat and everything. this material thing is just a bit concerning
merry finch
i got this unity package back in like september so it was probably not as bad optimization wise at the time, but it makes sense sorta why he has so many
ancient crystal
yes it was
surreal topaz
@merry finch you have to put it into Blender to optimize the materials unfortunately
surreal topaz
And yeah, it was bad back then too, but nobody was able to notice who's laggy
ancient crystal
just a crappy import done by some noob who not care about peoples performance
no reason any1 would need like hundreds of mats
cx
merry finch
its not really because its a noob
the character model itself is quite detailed

i do have a much better model of the character but he sadly lacks a rig
ancient crystal
is dat even their own model tho
if so that fine they good at modelling but def not at actualy making avatar well and not laggy
merry finch
i mean i could just remove the thing on his back in blender
given it doesn't have animations or some shizzles tied to it
...he is somehow under 20k though
ancient crystal
his shadig looks rlly bad
surreal topaz
I disagree with that
ancient crystal
no like the legs at the bottom
that shading is pretty good
but the rest of the armor has this really weird shading
surreal topaz
Considering he's an armored robot his shading looks fine. The default unity scene isn't exactly flattering
Maybe he could do with a little more metallic but that's about it
ancient crystal
yea
surreal topaz
It's a toony game so I dunno. Maybe cibbi's toony standard shader would work best here?
merry finch
i would rather use the official version of his character model but as i said before that would require me to rig it myself
surreal topaz
43 materials is definitely a lot, you should look into combining same materials in Blender. If that gets you under 10 or so, it should be fine.
Cats has a button to combine same materials
If it's still more than 10 after that, you should texture atlas it or use the automatic material combiner
merry finch
ah, i was thinking about throwing his offical one into mixamo but idk if that would help. i mean if i wanted him to keep the things like his arm gun and mask i could always make those optional but the offical one uses very little materials https://gyazo.com/e0caa23656d435b8f24265ad7bdd2abc in comparison

but i might have to wait and see if i can get the current one down enough before i decide, i do have a version of the offical one i used for yandere simulator but the rig is quite shitty
merry finch
actually we have a problem https://gyazo.com/ea7e4d5c30f0442baa953281a409ea53



 merry finch
i will be removing the gun and stuff though so i can hopefully dock down some materials
hoary juniper
The most important thing for dealing with metallic characters is to have a proper metallic and smoothness map
For more details, please see my guide; https://gitlab.com/s-ilent/SCSS/wikis/Other/Standard

GitLab
A surface shader for Unity based off Cubed's Flat Lit Toon shader
merry finch
actually on the topic of this the really dark parts of his armor (the nearly pitch black parts near his hips and on his arms) actually are some sort of cloth
heady smelt
Does anybody make custom avatars
distant forge
Please don't post in multiple channels. You need to be more specific what you want. Reply in #avatars-2-general
 surreal egret
So I followed this quick tutorial on how to port a blend file to unity with texture and my model doesnt go into unity with texture for some reason
Why might that be? only the face is textured I think its because the face is the only material I actually changed the color of manually in blender
otherwise the model looks this way
distant forge
You should be atlasing to one or few materials using uv maps and textures, not solid color materials.
Unity in some cases may merge all materials that share the same texture name. You can fix the materials by using the extract materials button in fbx file -> Materials (tab next to Rig)
surreal egret
well I actually did do everything in textures
The face material as seen in the render is entirely handled with texture
but for some reason the file doesnt appear with any textures though the files are present in the unity test folder I imported with my Blender assets
@distant forge
admittedly though I have like 18 materials in this one character
Partly due to how the model comes out of the game I ripped it from, Im new to this model optimization thing
ancient crystal
haha "does anybody make custom avatars" like nobody makes them
surreal egret
I like the idea of making my own
using others are nice but its fun for me to try and import something like this
If I could only get past all this head scratching, new problems constantly emerge
as I progress with this
distant forge
You should be generating an atlas for that. Will make it so much easier to work with and solve some material issues. Also this is the optimization channel. We don't encourage avatars with 18 materials. That's way excessive
ancient crystal
just atlas the whole thing its just solid colors
surreal egret
I get that Im just saying that Im new to this and dont completely understand what any of this means for sure
Ive never worked with unity until today so the Texture atlas is new to me
ancient crystal
atlasing is a simple process
u basically just separating the UV maps of the models
so that they do not overlap each other
and ur gonna then bake the textures into them
so now instead of all those materials
surreal egret
I used CATS mod the other day and made an Atlas but idk for sure what an atlas is supposed to look like because it came out like this
ancient crystal
u have a single material and single texture
with all those textures built into it
surreal egret
is this tiny square what an atlas is supposed to be ?
ancient crystal
and its because of the fact those are probably diffuse colors
vague hearth
its tiny just because of solid colors, ill make solid colors bigger in future coz may cause bugs with mip maps )
ancient crystal
if there are only solid colors it will be small
doesnt need to be big
not storing any details
surreal egret
So is it only using the information of the colors to color the model later on when using the atlas?
because the model has more than just white blue and gray
vague hearth
is your model now looks not like before? in meaning of colors (not brightness contrast etc he)
marsh trail
An atlas is an assortment of textures that get packed into a single image and then read by 3d applications via the data on your model
Whereas normally you'd have multiple separate images per material, atlasing will reduce both material and texture count to most of the time, 1, improving in terms of drawcalls
surreal egret
Well if you mean what happened after I hit the Create Atlas button, When I did that it created a tiny atlas square like before and removed all the textures from my model in blender
marsh trail
Does your model have vertex colors perhaps?
surreal egret
this is what it looks like after I used Cats mod to make an atlas in blender
Vertex colors? as in like manually coloring the materials themselves or something?
the way I colored the model used the UV map with material nodes and a Color Palette I made
marsh trail
Essentially, it's basically drawing textures onto the model itself without a UV map or even materials
surreal egret
I made this palette and dropped the UVs for each material on each of the 9 meshes that make up the model to whichever color I wanted that part to be.
The chest and Legs though the parts with the linework are actual textures pre colored though
marsh trail
That in it of itself is already an atlas
marsh trail
A single texture with multiple meshes using it
Provided they all use the same material, that's an atlas
surreal egret
well theres one part that might be making it a bit confusing for me is that My model like I said Earlier has about 18 different materials that each individually link to certain UVs on the model like say the sole of a shoe or somehting
something*
marsh trail
Alright so a little bit of a misunderstanding there
surreal egret
so I just took the material for each thing and gave used nodes in blender to give it the Palette I made
marsh trail
Materials =/= UV's, materials use UV's but are not themselves
ancient crystal
uvs map the 3d coords to 2d texture
so if u have a cube for example
u could map each face to be its own spot
marsh trail
If you had all of the meshes merged, and removed every material that was a using the same texture, the UV map would align it properly regardless
ancient crystal
ye but idea of atlas is things that not same texture
surreal egret
Heres an example of the Materials on the "Bust" Mesh
ancient crystal
put in some place to not overlap another texture
surreal egret
it came with 3 materials when I imported the model rip
ancient crystal
the combine mats tool does this already
marsh trail
All you need is either bust A or B, as both are using the same texture
ancient crystal
but inefficiently
delete the first one
shouldnt chane anything other than maybe lighting
surreal egret
I have a question about the bust then
ancient crystal
do u not see it using same texture
surreal egret
Well if what we brought up means I can just ditch the other materials I dont need thats fine
but on the bust here there are 2 textures that need to be in use
surreal egret
the chest armor and shoulders are 2 separate textures
the blue is the palette and the white is the armor texture
ancient crystal
then atlas it if u care
surreal egret
in that case should I still use 2 materials?
marsh trail
Does it use the same texture map?
ancient crystal
again the idea of atlasing is to map textures to a single texture
by re arraging uv map
marsh trail
Then you can keep it or attempt to atlas it
ancient crystal
for example i could move all uv map of one to one corner
and uv map of other to another
and when i bake textures it will have all the colors i need
and in the right spot no overlap
and can use this new uvmap and texture instead
surreal egret
Maybe the Jargon and all of this coming at me at once is confusing me
ancient crystal
then look up how to bake textures
or use material combiner
not rlly gonna teach u step bystep
surreal egret
What im saying is I already have baked textures
ancient crystal
several utube vids on it
surreal egret
Please slow down
ancient crystal
no u don't cuz there are multiple textures and materials there
surreal egret
Im trying to explain it out so we can understand where Im coming from
marsh trail
Those are all baked .-.
surreal egret
Im not very adept on all of this
ancient crystal
ye but not baked to a single atlas
surreal egret
well see the chest and pants are baked
the palette is simply my "Color Atlas" I guess
so should I just compose an image that has all 3 images in one ?
surreal egret
well I tried to bake them all together but they put out separate files
ancient crystal
either works but will still need to adjust uv either way
marsh trail
Edit image in an image editor, increase resolution accordingly, open image in uv editor, reposition UV map accordingly, that should be the extent of it no?
ancient crystal
yea u would press bake button
surreal egret
Sounds like it, idk all the jargon made it more confusing. So Simply all Im doing here is taking 3 images making one image file and remapping my UVs so that it all plays nice ?
ancient crystal
I already said it several times
marsh trail
Eyup
ancient crystal
ur adjusting the uv map so things don't overlap
surreal egret
I know that part
ancient crystal
then ur using bake to bake the texures for the uv map
surreal egret
I gotcha
ancient crystal
and it will now have all the colors and whatever in that 1 texture
marsh trail
You can hold CTRL whilst dragging uv's to snap them along the grid btw
ancient crystal
u need to create a 2nd uv map tho
and a new image
so it has something to bake to and it has the original uv map
marsh trail
And holding shift slows it down
ancient crystal
typically u can do a messy bake
and just use the unwrap tool
u can do cleaner bake if u just select islands and put them in their own places with G and S and R
marsh trail
Wulfe, why bake and unwrap though?
ancient crystal
no unwrap then bake
marsh trail
But why
ancient crystal
it called a messy bake bc it puts things all over the place and out of order
but it a quick way to get rid of overlap
but neat bake is what i said after
marsh trail
You don't need to bake anything to make an atlas though, das what's confusing me, are you proposing an alternative perhaps?
ancient crystal
yea u do if u want to re align things
marsh trail
You really don't man
ancient crystal
otherwise u would need to put all inages together in one
and then put them in right spot
but i prefer to use less resolution
marsh trail
Yeah, that's how it works .-.
marsh trail
Ah there we go
ancient crystal
i use baking bc of how it looks
marsh trail
You mean the shaded look?
ancient crystal
no
if u adjust UVs
u can bake textures for it
and it will create a texture atlas
marsh trail
Yes i know
ancient crystal
and i prefer that
marsh trail
I've baked vertex colors before and it was hell untill i found out how to properly bake
ancient crystal
i can resize things based on the detail i need and unwrap them more logically
i like to organize them like the character is organized
body in middle head on top arms on sides etc
marsh trail
But the focal point here is that both realignment of the original UV to a new image and baking a new image both function properly, one has the upside of more control than the other is all
ancient crystal
ye
and i recommend for future bc it easier to manage detail with less resolution
surreal egret
So are you saying that I can Create an Atlas of all 3 files In Blender this way? Because when I positioned all the UVs over the appropriate pictures for Each UV I got a few things that happened. The color palette UV result is Above
and the Armor bits after I moved the Uvs of the chest and baked after moving them
But they didnt all make one file when I pressed bake on the whole model
they spat out these 2 separate images
marsh trail
You'd need to unwrap the whole model into a single UV before such iirc
Baking requires that atleast
surreal egret
so whenever I open a new image in the UV editor its a different UV or something ?
marsh trail
Essentially, unless you unwrap them all into one
In terms of baking that is
If you made a single image with all of the appropriate textures and then edited the UV of each into the right places, you can select everything, make a new material, assign that material and choose that texture
surreal egret
So in the future working with these particular models I should probably get the linework textures like the chest and legs and the palette ready in one image before I even work on the model. And only keep as many materials as I need while Im working
marsh trail
It is good practice to atlas whenever possible, it's a skillset that's useful in many mediums
surreal egret
ok I think I have the context to understand what an Atlas is now
marsh trail
Some materials require transparency however, in those cases it"s advised to have the transparent material separate from the opaque one
Since shaders won't be able to identify the transparency properly in said cases if they were all atlased
surreal egret
Would alot of the anime eyes you see in VR chat be a good example of a transparent material? Where there might be an Image in the socket like idk stars or something to make the eyes pop more or something