#avatar-optimization
1 messages · Page 21 of 1
 cold yarrow
not that I've seen
 vapid bluff
 somber notch
Yea they need to be quest compatible
somber notch
Yea they need to be quest compatible
https://assetstore.unity.com/packages/tools/modeling/mesh-baker-free-31895
maybe something like this?

Get the Mesh Baker Free package from Ian Deane and speed up your game development process. Find this & other Modeling options on the Unity Asset Store.
this is ig the free demo version
but if it works then its def looking into
looks like theres several kinds of atlasers and batch optimization tools in the unity asset store
cold yarrow
huh, does that in Unity, that's interesting
somber notch
vapid bluff
https://assetstore.unity.com/packages/tools/modeling/mesh-baker-free-31895
maybe...
Ill have to try this out
cold yarrow
I tend to do this in blender using SimpleBake (which is non-free but so worth the time it saves)
 unreal plover
SimpleBake is goat
 short matrix
Getting these errors when trying to upload, i really honestly don’t know what to do and this is around my second time trying to upload a avatar

 spare goblet
those aren't errors, they're performance warnings, your avatar is very unoptimized. You can atlas textures, limit physbone components used, delete some bones you don't need, delete physbone colliders you don't need,
short matrix
How do i do that
spare goblet
atlas textures - blender, there's an add on for that or you can do that manually
physbones - in unity, look at your physbone components and delete the ones you don't use
same with colliders
short matrix
Do i just untick these boxes
 spare goblet
better delete them, three dots on the right, delete component
 short matrix
Idunno are there some that I should definitely keep, as for each body part or something
short matrix
Could you quickly just explain what they even are for/do?
 crystal sonnet
short matrix
How do i do that
crystal sonnet
short matrix
How do i do that
go to components
crystal sonnet
short matrix
Could you quickly just explain what they even are for/do?
some of them prevent you from uploading
like ones u can uncheck are like toes
the jaw
etc
crystal sonnet
short matrix
Getting these errors when trying to upload, i really honestly don’t know what to...
also 200K+ triangles is a LOTT
try doing some optimization
and also just get rid of things you aren't using and unnecessary assets
also get d4rk for optimization in general
 proud urchin
short matrix
Could you quickly just explain what they even are for/do?
proud urchin
short matrix
Could you quickly just explain what they even are for/do?
Lets take hair for example. Normally if you have no limit or colliders the hair can go in any direction it wants. But we dont want that because then it will go inside our head, chest, etc. So with a combination of physbone limits (limit the movement of a physbone) and colliders (which collide with physbones) you can control their movement better.
You usually do not need very many physbone colliders because limiters should do the heavy lifting, but sometimes a collider is needed
 opaque fable
T.T I am removing things from my avatar but the size is not getting any smaller, what do?
 proper grail
size is normally 90% textures, mostly their resolution
spare goblet
combine materials and delete physbones and physbone colliders you don't need
you don't need colliders all over your body like that
 radiant shadow
vroid converted in unity is always a mess  if you did the blender route it would be 1 material/texture/mesh (+/- 1-2)
spare goblet
most tutorials go the easiest possible way (aka unity converter)
which isn't that good
you should take the vrm to blender and convert it there
export as fbx
and it'll be so much better
doing things only in unity is a mess and not good for performance
i'd recommend blender 3.6 or higher + cats unofficial plug in
someone made like a minute fast video with every step, if i find it i'll send it here again
or you can search for an updated vroid to vrchat tutorial with blender involved
radiant shadow
https://www.blender.org/download/lts/4-2/
https://github.com/teamneoneko/Cats-Blender-Plugin-Unofficial-/releases/tag/4.2.2.5
cats plugins
+ vrm importer
+ matcombiner
+ whatever other things cats want to install
The first long-term support release in the 4.x series. Supported until July 2026.

GitHub
This version is only for Blender 4.2 if you need another version of blender please go here and look for a version of Cats for your blender version.
DO NOT ASK FOR HELP IN THE OFFICIAL CATS DISCORD ...
spare goblet
radiant shadow
https://www.blender.org/download/lts/4-2/
https://github.com/teamneoneko/Cat...
this one yeah
radiant shadow
4.2 ui slightly different now but its in the same place
spare goblet
mh,
mhm
this is the way to go
after that you can add physbones and colliders where they'rre necessary, not everywhere like the unity converter suggests
radiant shadow
Id do that in blender, if its for pc and below 70k it doesnt matter
easy to get good rating
quest is 'fun' with vroids, you will run into cutout shaders wich quest cannot and need to use knife tool to fix eyebrows ect
can always fix it later , eyebrows will look like this without some work

after knife tool
 spare goblet
yeah, quest is annoying for vroid
radiant shadow
vroids atlas wont be the greatest either but its still better then having 10+ materials (another thing you can bake later)
spare goblet
do pc first, after that you can play around with the knife and quest
spare goblet
yeah. you can delete the ones you don't need
your shirt isn't long enough to need the bottom bones, cause they're for the skirt part
radiant shadow
mmd fix removes those useless ones not weighted
 cold yarrow
in armature edit mode, you simply click them, either in the 3D view or in the hierarchy in the outliner.
spare goblet
fix your model first
radiant shadow
cats also have these (mmd fix should do it all for you)
 spare goblet
cats > mmd options > fix model
radiant shadow
n - toggle sidebar thing (unless its something else blender loves to change shortcuts)
spare goblet
it's n
radiant shadow
blender likes to hide them
spare goblet
good

 spare goblet
a lot better!
you now need to generate visemes and rotate eye bones
depending on what bones they used. it should be fine
it's automatic
visemes
like in the video Thulen sent
just pick the correct stuff and press "generate"
just rotate eye bones
don't generate eye tracking
it's in unity now, no need to do it in blender
radiant shadow
rotates eye for you
 spare goblet
i'd atlas the materials
so you have one/two (if you use transparent textures, keep the, seperate)
oh that's gonna be fine
100%
you need to get the material combiner
it looks like you dont have it
GitHub
Blender addon for material combining, uv bounds fixing - Grim-es/material-combiner-addon
here

MatCombiner > Update Material List > select all materials you wanna combine (i keep transparent stuff seperate) > Save Atlas to...
ah you need to join your meshes
Cats > Quick access > join all meshes
bravo
you have now one mesh and one mateiral
you can export now
as fbx
cold yarrow
you'll be making materials in Unity anyway, what it looks like in Blender won't apply there
spare goblet
exactly
export settings i reccomend

you'll pick a shader in unity and it'll look good
like it did before
that's just how blender makes it look
radiant shadow
cats dont need to set any of that, it does it for you
spare goblet
yup
if you do it by cats it's set correctly automatically
i always recommend new one, cause multiple avatars in one can be messy
what's up?
you need to extract textures
and drag the fbx to the hierarchy
click your fbx in assets
in the inspector (on the right) go to materials
Extract textures first
Extract materials second
what were your export settings?
if you didn't do copy and the symbol next to it to be blue it won't let you
radiant shadow
if you want texture in the fbx , or just find where you put the atlas and drop it into unity

(doesnt always work since path can go hurgh)
spare goblet
if you atlas it you will have the texture in a folder
cold yarrow
but if you have the textures as files already, don't bother with this, just put them into the unity project
spare goblet
you can just drag it in
spare goblet
cold yarrow
but if you have the textures as files already, don't bother with this, just put ...
exactly
it should be the same place as your blender file
drag it in the assets
create a material
and set the texture of that material to be your atlas
and set that material to your body
cold yarrow
assets -> create -> material
spare goblet
i'd pick the shader first
whichever one you want
vroid creators after use vrm mtoon
i use mtoon
cause you need to set the texture in the material
and different materials uis look different
and the spot can sometimes differ
where the texture goes
if you send a screenshot of the material settings i can tell you where to put the texture
the material inspector
oh
yeah no
that's a quest shader
it's gonna look bad
with the black parts
like Thulen showed on the screenshot
get a normal shader that supports cut out
because you need cut out
any shaders from VRChat/Moblie will not work
no no
that's not for avatars
get mtoon or liltoon or poiyomi
or any other avatar shader from online
mtoon is here
GitHub
Toon Shader with Unity Global Illumination. Contribute to Santarh/MToon development by creating an account on GitHub.
but you may already have it if you still have the converter installed
many of them come with that shader included
it would be in VRM/MToon

here
and set the Rendering Type to cutout
and cull mode to Off
check mark?
you should be able to
can you not drag the texture in or anything?
cold yarrow
click onto a different object then back to the material, sometimes Unity gets stuck.
spare goblet
top

top right
cutout, off
instead of what you have now
does the avatar look good?
click on your fbx in the assets and check if the material is set to this one
?
my guess is you need to mess with the shade
oh
messed up with the colour or someway else?
set this to white if you want better colours

okay, set the top bar to white
and the shade one you need mess with till it looks good
i just set it to black/grey and set the A bar to 0%, cause i don't want shading on my avatar. and it looks like neither do you
in vrchat it should look good, unity lightnighting sometimes makes avis look weird, i'd play test it in vrchat
generally mess with the shader settings, or get a different shader and mess with their settings
it's all beauty stuff now
vapid bluff
u could export them and import them in or drag and drop from the file explorer
oh wait
this is vrm
ignore me nevermind, i know nothing about that or how it works lmao

 cosmic wave
Why does VRChat allow users to see their own avatars with a Very Poor performance rank on Android devices (Smart phones), while restricting visibility of others' avatars with the same rank?
cosmic wave
spare goblet
it doesn't
it does
radiant shadow
you can always see your own avatar no matter the rank , seeing everyone elses very poor on android is a terrible idea, there goes all your ram
think ive seen the same question asked years ago , im so not looking it up though
 zealous wigeon
radiant shadow
you can always see your own avatar no matter the rank , seeing everyone elses ve...
zealous wigeon
radiant shadow
you can always see your own avatar no matter the rank , seeing everyone elses ve...
Not on Android phones, there that was only possible for the first week before they patched that out.
(ignoring ongoing tests that is allowing a select amount of very poor avatars to be shown)
cosmic wave
Thats so weird to me, me and a friend were messing around on phones today and I got so confused when he told me he saw my fallback. Guess I gotta upload my quest fallback separately to test out
cold yarrow
dynamic lights are a huge performance problem, you really should not be using one to light up your own avatar
 narrow lake
hii maybe someone can help me i uploaded my avi and i dunno somehow ingame my left hand does not work and it just mirrors my righthand (pls dm me)
spare goblet
did you set the rig to humanoid?
in unity
No
do you have an avatar here?

that's okat
there doesnt need to be one
for the rig to work
did you try switching it to generic and back to humanoid?
yeah, you already said you're having those errors
image adds nothing new
take a screenshot
i can't see anything on that image
windows key + shift + s
and paste it to the discord chat
...
okay, number 1, delete the camera and light
number 2 check the configuration of your rig to see if the bones are mapped properly
set the jaw bone to none
cause you have a hair in there
hmm, still getting the error?
the only thing i can suggest is switch to generic and back (remember to delete the jaw after)
or reexport from blender without the light and camera, maybe that messed it up somehow
oh yea
android's gonna be bad
radiant shadow
another thing you can do is setting your texture to 4k since its 1 atlas , unity imports default at 2k , you are far below 99% avatars in vram use anyway
(vram checker)

https://github.com/Thryrallo/VRC-Avatar-Performance-Tools < easy to check them all
GitHub
Contribute to Thryrallo/VRC-Avatar-Performance-Tools development by creating an account on GitHub.
spare goblet
nice
radiant shadow
Thats not cutout shader, arms shouldnt have this
 radiant shadow
I dont use that shader but these should not exsist when using cutout

Got the same outfit on some avatar
spare goblet
show your material settings
and make sure that the material is assigne to the model
it's not assigned to the model
i can already see

nice 👍
yup
 spring sun
you dont have to but its a good practice cause incase you fuck something up you didnt fuck up the original
thats on the animation file itself
you would need the animation file to exist so ye
although you can make an animation file then toggle it before making the animation
entirely uneeded if the animation is just 1 frame
if you plan on making it have more than one frame
and if you dont want it to loop
radiant shadow
I avoid 1 frame they do work but they are much slower then 2 (notice 1 takes awhile to finish while 2 is instant)
spring sun
1 frame is usually instant for me
 muted ravine
Does anyone know if the server side performance ranking now includes the mesh size into the VRAM limits ?
I didn't see any changenote about that.
But I have an avatar that is 104MB < 110MB texture mem (Thry VRAM Calculator), but marked as poor by the server instead of medium now.
Mesh is 16MB , so total with mesh is 120MB > 110MB
if I trash a few material swaps / textures use and get around 90MB texture I go back to medium ..
But it used to not count the Mesh into the calculation before ?
radiant shadow
it doesnt care about fbx mesh sizes (for now)
muted ravine
ok , thanks for the confirmation.
Server side calculation is still / again buggy then.
 muted ravine
 radiant shadow
matswaps add up
muted ravine
Yeah but it's still under 110 MB ?
so should be medium , while server sees it as poor now.

and sdk sees it as medium too
I know sdk doesn't account for material swap, but Thry VRAM Calculator does normally ?
afaik Texture Memory in Thry VRAM Calculator is the worst case scenario if I was using all materials at the same time basically ? (and it goes through the fx controller / animation / material swap in that calculation)
which will never happen.
But even so in that worse case scenario it's still < 110MB. => medium.
radiant shadow
scroll up abit, first red ones
radiant shadow

doubt it
ok? nothing wrong here
you still not showing your red console errors, top ones matter
bike pose just reset it
radiant shadow
stop preview/recording or reset it pumkin tools, this is basic stuff

still not showing your errors, im guessing its complaining about being under ground cause of bike pose after creating animations
radiant shadow
you didnt show any top red console errors
spare goblet
and second of all
go take a walk outside and come back with a clear mind and willingness to listen
just because you think something isn't connected, doesn't mean it isn't
yes.
?
enable your main avi, and delete the copy
try uploading again
spare goblet
radiant shadow
stop preview/recording or reset it pumkin tools, this is basic stuff
like this.
muted ravine
Made a few more tests, slowly dropping things,
As as soon as I drop the total size texture + mesh < 110MB (medium limit) it's seen again as medium by the server side calculation
so it kinda seems that mesh size is now counted into the rank VRAM limit on the server side calculations
 spare goblet
how are your visemes set?
and animations
cold yarrow
spare goblet
i'm not a god
you're not? 🙂
spare goblet
I am not XD
cold yarrow
well one can always strive for greatness.
spare goblet
true true
radiant shadow
animations imported with fbx , shouldnt be there, nothing to do with visemes
spare goblet
that
that's not how that works at all
if your copy uses the same blendshapes as the og, which it doesm it should work
unless you didn't set it up
or set it up wrong
okay
stop screaming at me
don't want help, don't ask for it
i didn't tell you to make a copy
dude
cold yarrow
if you didn't make a backup, that's on you
spare goblet
i'm done
radiant shadow
if you generated them in blender, last time ill bother with you really
 cold yarrow
spare goblet
i'm done
cold yarrow
spare goblet
i'm done
Probably best.
spare goblet
if i explain to you what happened will you listen?
no you won't
it's a copy. most tutorials online tell you to make animations on copies and then deleting the copies so then the original avatar doesn't break
okay
good, so am i
cold yarrow
this is where we ask you to take your tantrum elsewhere probably.
makes popcorn
you're in a public channel
radiant shadow
 oh no
oh no
cold yarrow
I'm sure I'm quite worried.
radiant shadow
if you must learn from others instead of watching tutorials/reading/trying things self yelling here dont really do anything
spare goblet
cold yarrow
ahhh
spare goblet
you're stuck now
cold yarrow
that seems extremely unlikely
again, public channel, anyone can speak
you should feel free to ignore people if you don't want to see them
cold yarrow
yep
 runic slate
after starting a fight with someone over begging them for help??
uhhhh... maybe a mod should ban them.
boop, sent a report in on one of their worse messages with context ❤️
runic slate
I remember they joined before because of the username and icon, iirc they picked a fight with Kazin actually
spare goblet
xD
runic slate
the reason i even know they left is bc ppl commented on it after the fact, I have a feeling they're joining to start fights and then leaving thinking they can't be banned if they aren't in here
cold yarrow
yep, pretty much.
spare goblet
that's horrible behaviour
runic slate
yep
cold yarrow
not really, no. this right here is why I use git for my projects.
 obsidian lake
You could select them and edit them together in the inspector? You can also set presets for import settings
 mystic trout
is it possible to optimize booth avatars
if anything my main problem is the high amount of skinned meshes

everything else i could get down to medium


 wicked plume
mystic trout
if anything my main problem is the high amount of skinned meshes
wicked plume
mystic trout
if anything my main problem is the high amount of skinned meshes
simple answer be yes,
You may put it into blender to optimise yourself.
(depends on how much you want to reduce, if it only bit, can be use tool like AAO kind)
mystic trout
okay
gonna look into some guides for that
cuz if i want to optimize down to quest
2 skinned meshes at most. ☠️
wicked plume
yeap, some resource pinned on #1139216499123437668 for note
 viral knoll
this cant be good huh?
 wicked plume
red usually meant yeap
viral knoll
sad ill try to figure it out this is my first time doing this :v
 hardy hound
Were would one even put 43 physbone components?
spare goblet
new one on each hair bone i suppose
 urban wind
Which extension is this ?è
radiant shadow
GitHub
Contribute to Thryrallo/VRC-Avatar-Performance-Tools development by creating an account on GitHub.
vapid bluff
mystic trout
is it possible to optimize booth avatars
optimization is the greatest enemy of booth creators 
mmmm physbones on every hair strand
 molten adder
If I just want to do simple hand gestures = facial expressions, what's the optimized way to do that? Is the SDK examples a good place to start? I know how to make my own facial animations
For something barebones like that, should I be looking at fx layer or gesture layer?

 heavy knot
molten adder
If I just want to do simple hand gestures = facial expressions, what's the optim...
heavy knot
molten adder
If I just want to do simple hand gestures = facial expressions, what's the optim...
Hand gestures (Finger muscle animations) go into the Gesture layer, and the facial animations are dealt with in the FX layer
spare goblet
molten adder
If I just want to do simple hand gestures = facial expressions, what's the optim...
you can take vrc_Avatarv3HandLayer and repurpose it into an FX layer.
So you should use the FX layer
 orchid apex
Hello quick question regarding Direct Blend Trees, i am currently trying to combine some layers with them but i noticed there is no way in a blend tree to use the "motion time by parameter" settings i would have in a normal state, is that correct or am i missing something ?
radiant shadow
Its just really annoying then just having a layer with just state+motion time , here is one that requires a thing to be active first , tried to merge it with my other toggles and exploded
vs just
 orchid apex
i see, my main issue is that i have an animation curve like this, which to my knowledge i could only replicate by adding a bunch of intermediate states to the blend tree to somewhat get close to the shape, or using one of the math blend trees shown here https://vrc.school/docs/Other/Advanced-BlendTrees/#460ada1c048a4e618e8370a52b175634, but at that point i'm not sure if it's really more optimized anymore

Everything you need to know to make VRChat Avatar Systems
obsidian lake
orchid apex
i see, my main issue is that i have an animation curve like this, which to my kn...
yeah it's up to you what you'd prefer to do, if something is a total pita to do in a blendtree, i won't. It's okay to have a few layers on your avi, just as long as you're not adding a new layer for every single toggle then you're fine
i usually have between 3-8 layers depending on what i need the avi to do. It doesn't make a huge difference unless you have tens of layers
orchid apex
for this specific case i have five layers each with only a single state but each of those states/animations motion time is controlled by a different parameter and all use very specific curves to give a smooth logarithmic curve, it'd be really cool to compress them all into my already existing DBT layer but i'll have to see if it's worth it for the downsides, thank you for the input !
obsidian lake
orchid apex
for this specific case i have five layers each with only a single state but each...
i know vrc school has page that has test results for animator layer performance
Everything you need to know to make VRChat Avatar Systems
 gloomy wharf
ok so all these accessories i'm adding onto my avatar is really killing me, how can I trim down these abysmal numbers

i know the materials are probably caused by the accessories
i have those pins, plus a choker

and i still have to add a cellphone and eyeglasses
cold yarrow
is your goal to not be VeryPoor?
gloomy wharf
not entirely, but if there are some quick ways to lighten this avatar
cold yarrow
and "install fewer accessories" is not acceptable, I'm guessing? 🙂
gloomy wharf
correct XD
cold yarrow
well then delete parts of the body or something else
depends on which stat you want to work on
gloomy wharf
which one is the biggest culprit to get me blocked by performance ratings
cold yarrow
if it's polys, delete polys. If it's material slots, combine some. If it's skinned mesh renderers, merge mesh objects together. All of which mean blender (or similar)
none of those are really the first I'd work on, it's VRAM size, so texture sizes
though 17 always-on material slots is a lot
gloomy wharf
yeah...
cold yarrow
I aim for 2-3 🙂
gloomy wharf
maybe i can at least make all the pins one mesh?
cold yarrow
sure, that's a start
gloomy wharf
there's a lot of slot usage because i bashed 3 outfit sets together, plus pins, plus choker
cold yarrow
yep, that's usually how it happens
gloomy wharf
i'd still have to atlas the pins together right
cold yarrow
or something, yep
heavy knot
anything that can go into a texture slot (that utilizes UVs) can
cold yarrow
not speaking about any specific tools, of course, it's just a technique that can be applied to any image type you want
gloomy wharf
so this means i trimmed it down to six skinned meshes from 12, yeah?

maybe i can join the hair with the body too...
cold yarrow
I usually do - nice work so far!
I usually keep stuff separate in Blender but merge when I export. In my project the body would be named Body and the hair Body-Hair then it's really obvious what to do when exporting
it occurs to me I haven't asked anyone else how they organize theirs
obsidian lake
that's pretty much what I do, i keep everything as separate objects and I also organize them ito a collection. This way I can duplicate the collection before merging in case i need the objects separated or in their original state (if made using a generative method like modifiers, geometry nodes, curves, etc)
cold yarrow
yup, that's what I do for world stuff
for avatars usually it's one collection per avatar, in a single blender file for the base model
gloomy wharf
every time i'm about to start on a big step, i just save a separate copy of the .blend
treat them like super undo buttons
cold yarrow
I use git for mine. It's not the best for binary files, but it does work
gloomy wharf
should I merge body and body_main too? body is just the head and all the expressions, body_main is anything under the neck
cold yarrow
I don't see much reason not to from here, but it's up to you
gloomy wharf
i'm just scared lol
years ago when i tried atlasing without knowing what i was doing, it fucked up the avatar's facial expression system
the transparencies were gone so eyelashes looked blocky, the blushes were square, etc
proper grail
you can always separate as easily as joining, but if you arent used to being mindful of not being on a shapekey while editing and being very liberal with swapping edit/object mode bunches than things can break yeah. Also keeping atlased materials separated by opaque/cutout/transparent is nice to do
gloomy wharf
is there an easy way to like, cut out stuff from a UV?
Like for example, I'm only using the shoes from this one outfit ensemble, and the UV from that encompasses the entire thing
so i would like to delete the unnecessary components and leave the shoes part in
cold yarrow
not really, but you can just shrink it to nothing and stick it into a corner
it won't do anything useful there though
gloomy wharf
yeah that won't do anything towards optimizing the texture load, would it
proper grail
there is always baking diffuse color from one uv to another. Blender button that basically takes what your model looks like currently and applies the texture to a selected uvmap to a selected material texture sample
 cold yarrow
that's usually my method, if I'm not outright creating a new texture in Substance Painter
gloomy wharf
proper grail
there is always baking diffuse color from one uv to another. Blender button that...
that's a lot of words i don't understand @_@
cold yarrow
diffuse = albedo = "base color"
vapid bluff
proper grail
there is always baking diffuse color from one uv to another. Blender button that...
doing this in substance is also nice too

cold yarrow
sus
vapid bluff
requires at least 3 UVs tho to do, but its nice to have the atlased and original in the same spp project, able to edit either or if u ever need to
but i just go with marmoset instead 80% of the time
 fallow pendant
they killed keep quads chat, no longer counts 1 quad as 1 poly..
proper grail
Damn, now my model will say its 69420 polys like designed instead of 44ksomethin
 native ridge
Meshes with "Keep Quads" look like they count as 250% as many poly now instead of 70% so unchecking "Keep Quads" and letting Unity triangulate everything reduces poly count on avatar stats in-game by a lot
I wish we got a warning this was coming or some info explaining the change in patch notes
 round kelp
For arms under a shirt, is it more performant to use a blendshape to shrink the arms or use a uv tile discard?
proper grail
tile discard, but since its shader and many people have custom shaders off but not animations off its best to do both.
shrink for eh good enough, discard for yeet
round kelp
Thanks. Is there a reason why? Might be technical but does UV tile discard cause the mesh not to render or something?
cold yarrow
usually tile discard happens pretty early in the shader
round kelp
Noted, ty!
proper grail

Unity fbx details option 'keep quads' multiplies sdk triangles by 3. Reproduce by having a fully quads model, single submesh, and applying the keep quads
somber notch
is there cases where using gpu instancing on partles is a bad idea?
 woven steeple
Hello. JFYI I found a way to manually specify each and every fallback shader parameter but the process is a bit tricky.
- Download standard shaders as described here: https://docs.unity3d.com/Manual/StandardShaderMakeYourOwn.html
- Open Standard.shader file in text editor.
- Look at "Properties" section in the file and copy those lines that correspond to parameters that you want to specify for a fallback shader.
- Paste copied lines to the very end of Parameters section into file of a custom shader you use.
- The parameters will be shown in Unity shader parameters menu. Specify them to your taste and their values will fallback into standard VRC shader.
Some warnings: there's significant chance that your custom shader has some of these parameters already declared in it's Parameters section. There're two possible cases:
- You don't use this parameters in the custom shader and they're being excluded on locking the shader (you can check that by locking the shader and then opening generated shader file in text editor). Then everything is ok, the 5 steps above is all you need.
- You use some of these parameters. If so then these parameters will fallback into Standard shader as is and if you OK with their values for the Standard shader then no further actions required. But if you want different values for these parameters to be specified for the custom and standard fallback shader then the only valid option is to manually rename these parameters in the custom shader and also replace all of usages of the parameters in the shader code. It not as hard as it sounds, just use a lot of searches in the custom shader file and keep your brain active. After renaming the parameters you can use the 5 steps above to specify fallback shader parameters value.
I've just tested it with poiyomi toon shader to provide fallback shader with Metallic texture and specify Smoothness. Works like a charm.

 lethal magnet
would anyone here know the recomended polly count range for avatars? asking out of curosity on if i need to decrease it for my model
spare goblet
The Avatar Performance Ranking System allows you to see how much a user's avatar is affecting performance via analysis of the components on that user's avatar. You can also use it on yourself to see how performant your avatar is.
everything is here
obsidian lake
proper grail
https://feedback.vrchat.com/bug-reports/p/keep-quads-multiplies-estimated-tri-co...
is there a benefit to using "keep quads" ? just curious
proper grail
None for normal people, it subdivides/tessellates better for renders
As far as i can tell, vrc triangulates anyways
obsidian lake
ah alright thank you
still useful information, though not something I'd use right now
proper grail
And if your model has a non quad, its only downsides in terms of meshes and materials. Unity will split and render them as if they are separate meshes
 real heron
would anyone have a good video/website explaining skinned mesh renders and how to reduce them? somehow i have 9 ;-;
spare goblet
combine them in blender
but you'd need to think about what kind of toggles you want to have
 radiant pier
what is happening lol💀

 modern osprey
radiant pier
what is happening lol💀
modern osprey
radiant pier
what is happening lol💀
no textures for you.
 ivory sluice
Ah yes the avatar stats for arduino platforms
 exotic socket
the sheer agony of finding the single outfit you wanna add to your 30k polygon model and its a horror show of polycount

 hardy mist

 vapid bluff
oh god
cold yarrow
are they for hair that isn't present?
modern osprey
lots of bones for hair
ivory sluice
it's probably just the face rig
the model doesn't have hair and by default hair shouldn't have bones unless it's very long
 warm patio
can someone help me optimize my avatar till its green?
i already deleted most of his body and somehow hes still very poor
modern osprey
hi eli
spare goblet
hi michstan
 solemn owl
warm patio
i already deleted most of his body and somehow hes still very poor
solemn owl
warm patio
i already deleted most of his body and somehow hes still very poor
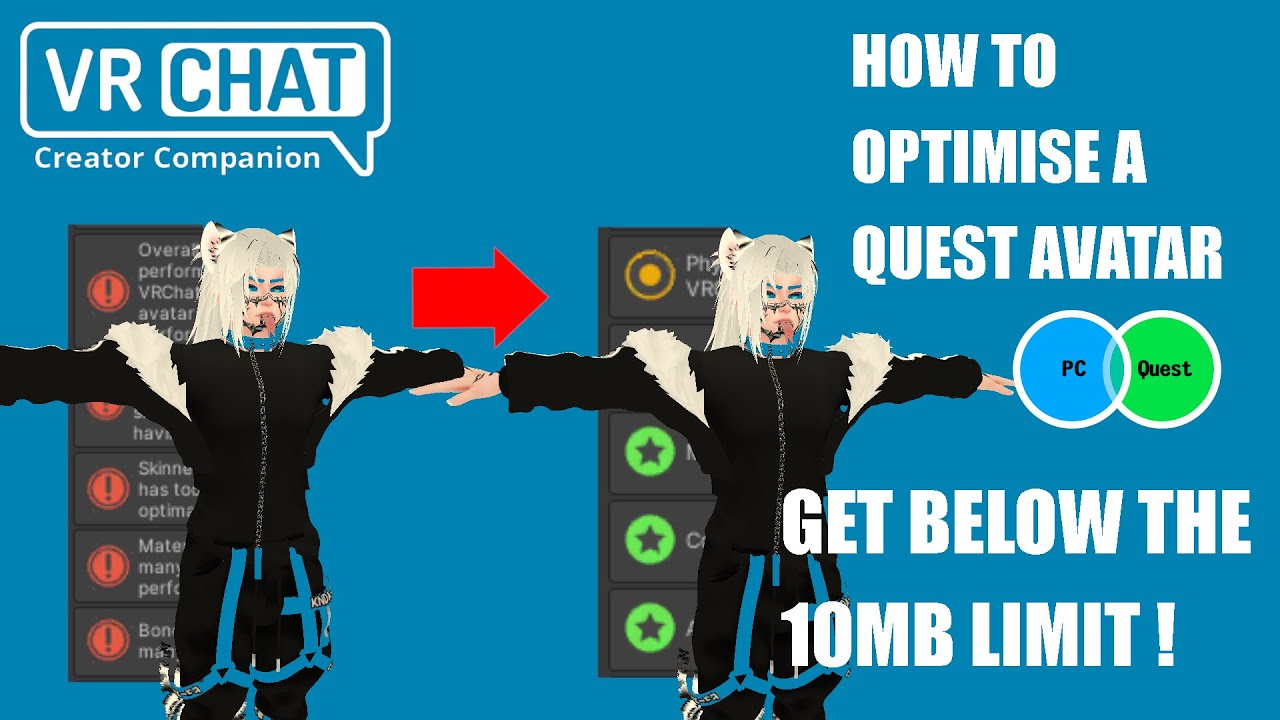
In this video you will learn how to optimise your avatar for Quest (but also for PC) using Unity and Blender.
0:00 Intro
0:17 Analysing the avatar using Asset Bundle Stat website
2:37 Dissolving edges loops
5:30 Decimating topology
5:58 Export settings and analysing the avatar with Asset Bundle Stat again
8:33 Analysing only the mesh with no te...
Works for PC too
real heron
question on optimization: im using the decimate modifier to reduce my tri's, but it wont let me apply the modifier if i have shapekeys on that mesh. complicating part is all my meshes have shapekeys so that i can make toggles with only one mesh (im planning on joining them into one before exporting). how would i reduce tri's if i cant use decimate on meshes with shapekeys?
spare goblet
bake the avatar with the tuxedo plug in?
it also changes your texture, so beware i you want to make texture changes
tuxedo also has a decimate thing that preserves shapekeys, but unfortunately it's broken right now
real heron
i have no idea what baking is or what it does, ill do some research on it
spare goblet
GitHub
A Blender plug-in to facilitate producing game models, namely by baking everything into one atlassed model with Blender's own rendering engine! - feilen/tuxedo-blender-plugin
cold yarrow
I would not do polygon reduction with the decimate modifier, but this can be useful:
https://github.com/przemir/ApplyModifierForObjectWithShapeKeys
GitHub
Blender script. Contribute to przemir/ApplyModifierForObjectWithShapeKeys development by creating an account on GitHub.
There's also decimation in blender without modifier now, if you want to try that.
real heron
cold yarrow
There's also decimation in blender without modifier now, if you want to try that...
is it in 4.1? bc thats what i run
real heron
cold yarrow
mesh -> cleanup -> decimate and such
it doesnt do anything 😭
cold yarrow
does for me?
make sure you've selected parts you want to decimate, then tweak the ratio in the popup that comes up in the bottom left
real heron
bruh
i click mesh -> cleanup -> decimate geometry and it says it decimated geometry but the tri count doesnt go down
cold yarrow
FYI if you convert .mkv to .mp4 it embeds.
And you have to select some mesh for it to work on
real heron
I HAVE TO SELECT THEM of course i do duh
cold yarrow
hehe yep
real heron
😭
cold yarrow
definitely not obvious
real heron
welp it still didnt go down and i selected them this time
cold yarrow
you should be able to visibly see it reshape the polygons in real time as you tweak the threshold value
real heron
i dont get an option for threshold value
it just gives me the little action completed prompt in the bottom left
cold yarrow
sorry, "ratio" it says
real heron
got it to work 👍
real heron
yeah im not gonna decimate the body or face, really all i was worried about was the shapekeys i made to hide the toggle-able stuff
shouldnt affect those to bad right? its just shrinking and a little moving
cold yarrow
maybe? It's easy to check though
real heron
oh yeah no they're fine
 west beacon
My hair asset has each strand of hair individually rigged. How can I merge the bones in blender for the hair to still work properly?
 radiant shadow
Create a root bone then put every strand you want under it
west beacon
honestly I am kind of confused
I dont need every strand to move individually
this asset just has a lot of bones
 spare goblet
if you don't want hair to have bones (or have only one) you can merge them using the cats plugin for example
west beacon
how do I do that (I already have cats)
spare goblet
select all hair bones > optimization > bones > merge weights > to parents
you can select multiple bones in edit mode with shift

and this will merge every hair bone to the head bone

 spare goblet
west beacon
I still need some separated I just dont need/want so many
spare goblet
west beacon
I still need some separated I just dont need/want so many
you can just merge the bottom bones, they will merge to the parent
you could for example have one bone per hair strand
same process, the bones you select will merge weights wit their parents
west beacon
Is it possible to join two bone "lines" together?
spare goblet
yes
spare goblet
spare goblet
click one, click the other with shift and select "to active" instead
btw this is unofficial cats for blender 4.2
idk if the one you're using has this function
like here for example
this shows fingers but hair bones will work the same
west beacon
yes makes sense my cats version doesnt have that function tho... I guess any newer one will work?
west beacon
okay
tbh I dont know which version I have it's been a while
west beacon
there
 west beacon
well then I will do that once I got time
 knotty cradle
need help with this

i have 259/256 bits
but i know many people who have 300+ of 256 and they can upload just fine, how is it possible
 cold yarrow
VRCFury has a thing to help compress these, but it has caveats. For you, I think I'd consider if you can make one int or float parameter non-synced
knotty cradle
cold yarrow
VRCFury has a thing to help compress these, but it has caveats. For you, I thin...
i put all of them
literally
even using d4rkAvatarOptimizer
cold yarrow
"put all of them" what?
knotty cradle
cold yarrow
"put all of them" what?
all of vrcfury optmizers
cold yarrow
Advanced Visemes
knotty cradle
cold yarrow
I meant this: https://vrcfury.com/components/other#parameter-compressor-beta
i look nto it thx
cosmic wave
how come when i have Very poor and poor avatars blocked it still shows avatars that are poor from time to time these are the stats that take it to poor

 grizzled shard
cosmic wave
how come when i have Very poor and poor avatars blocked it still shows avatars t...
grizzled shard
cosmic wave
how come when i have Very poor and poor avatars blocked it still shows avatars t...
in some cases VRChat can strip certain perf categories and still show the avatar
for example, if lights/particles cause the avatar to be above your maximum perf setting, on your client it will strip those elements and show the rest of the avatar
can read more here: https://creators.vrchat.com/avatars/avatar-performance-ranking-system/#minimum-displayed-performance-rank
The Avatar Performance Ranking System allows you to see how much a user's avatar is affecting performance via analysis of the components on that user's avatar. You can also use it on yourself to see how performant your avatar is.
cosmic wave
grizzled shard
in some cases VRChat can strip certain perf categories and still show the avatar...
Yeah I get that it strips the components from the avatar but it's still poor rated regardless and should be hidden. Seems overly complicated
cosmic wave
grizzled shard
in some cases VRChat can strip certain perf categories and still show the avatar...
Thank you tho for the detailed explanation, appreciate it
 mortal sphinx
cosmic wave
Yeah I get that it strips the components from the avatar but it's still poor rat...
mortal sphinx
cosmic wave
Yeah I get that it strips the components from the avatar but it's still poor rat...
well, it makes sense right? there's no need to hide the avatar entirely if vrc can just remove the component that causes performance issues. if the issue is inherent to the avatars model or textures, then the avatar is hidden entirely. i think it's quite simple
cosmic wave
mortal sphinx
well, it makes sense right? there's no need to hide the avatar entirely if vrc c...
If the components are removed they shouldn't be readable on the stats, the avatar had a ranking of poor (when it's actually medium because of the removal) and the stats says the avi has these components.
I fully understand what's going on but it don't make sense to remove the actual components on the avi but not adjust the stat page and overall ranking.
grizzled shard
They are only removed for you, on your client, for rendering purposes. The avatar bundle itself still has those components, and someone with less restrictive settings would see them because they wouldn't be stripped on their end.
cosmic wave
grizzled shard
They are only removed for you, on your client, for rendering purposes. The avata...
I'm aware, it should still update it tho. The ranking system should always be accurate
Otherwise what's the point.
If people have VP blocked they'll see my fallback which is good rated, so in this case it should say medium because that's what being shown for me
I get it's a small thing.
But it would be neat to know that you're seeing an avi with removed components, like a little logo like the fallback or something and then the correct rank
 grizzled heath
is reducing mat counts worth it?
obsidian lake
grizzled heath
is reducing mat counts worth it?
Absolutely, especially on quest. They eat up draw calls, which significantly contribute to frametime
heavy knot
Material slots and Animator Layers are the biggest performance killers
 late quiver
heavy knot
Material slots and Animator Layers are the biggest performance killers
late quiver
heavy knot
Material slots and Animator Layers are the biggest performance killers
Animator Layers really, is there a number to avoid?
 supple trout
late quiver
Animator Layers really, is there a number to avoid?
supple trout
late quiver
Animator Layers really, is there a number to avoid?
I think you cannot really put a "at this number its bad" on it, since its pretty much the general thing of "the less you have, the better" and it depends on what you are actually doing in them. There is some testing done where you can read in depth about it https://vrc.school/docs/Other/Benchmarks/#53522b80ca174b369736ba6ef73f63dd
That said, during some testing with friends I noticed that if one avatar clogs your cpu a lot, it almost doesnt matter if the other avatars are very high performant or not (in terms of animator performance), since you have to "wait" for that single avatars calculations anyways.
Everything you need to know to make VRChat Avatar Systems
vapid bluff
DBTs ❤️
 silver venture
Thanks for all the information you share 🫂
 civic totem
I tried searching and didn't see an answer. I've added Integral Camera to my Medium avatar which includes 1 dynamic light. When I go to full nightclubs does the dynamic light penalty always apply or is it only if I enable the camera/light in my menu?
 gritty terrace
always applies on the avatar's performance rank, it wont actually effect users if they have your model fully shown and you dont have it toggled on though
you should avoid using performance heavy stuff like that in public worlds though
civic totem
that's what I was hoping, I'd rather not maintain two copies of my avatar just for a camera add-on. I'll just avoid using it in crowded instances. (It would work very poorly anyway, it's a long-exposure camera that would blur heavily in a crowd)
narrow lake
does someone know what 2 do
 cold yarrow
narrow lake
does someone know what 2 do
cold yarrow
narrow lake
does someone know what 2 do
look in the console for error messages
 rocky gull
anyone know what shaders work with the new VRC update? As most avatars looks like pixels to me all of a sudden.
or is this a VRC issue?
 stable juniper
I think they are impostors which seems like pixelated.
If you don't want to see them and want to see old style fallback, set Use impostor as fallback false in settings menu in VRChat
 waxen maple
you can combine skinned meshes manually(that turn on/off together) with AAO avatar optimizer component "merge skinned meshes" further if you just care about fake optimization. having 100 or 40 skinned meshes with same number of materials made no fps difference when I last tested it.
if on the merge skinned meshes 2+ meshes use the same material(and there's no vrcfury material property toggle) or anything to make VRCF rename/duplicate it, it will get merged again
altho that is already a well enough performing avatar
waxen maple
supple trout
I think you cannot really put a "at this number its bad" on it, since its pretty...
In any lobby you'll run at the lowest performing avatar's fps due to their FX layer count, even if you see them or not.
FX layers run on your CPU whatever you do, as a fix for write default.
It's also why disabling custom animators in shield settings is so huge
waxen maple
grizzled heath
is reducing mat counts worth it?
As much as reducing FX/playable layer count and lowering textures from 4k to 2k/1k, biggest fps thing you can do.
 mortal glade
waxen maple
you can combine skinned meshes manually(that turn on/off together) with AAO avat...
mortal glade
waxen maple
you can combine skinned meshes manually(that turn on/off together) with AAO avat...
I don't have VRCF installed
waxen maple
orchid apex
Hello quick question regarding Direct Blend Trees, i am currently trying to comb...
Nope, never personally seen anyone figure out motion time in blend trees; I did try once with an empty and a float, the animation ran ONCE at the speed set in the blend tree
waxen maple
mortal glade
I don't have VRCF installed
Then AAO would be enough, but then you need NDMF installed; but you should probably add vrcf to your project, it has a bunch of built in tools for performance
Like automatically converting simple fx layers into blendtrees, baking unanimated blendshapes into the mesh
except when more animation bigger blendtree fps minus minus minus -- as it still runs on your CPU
cold yarrow
not really the point I was making, but sure, they can affect frame rate.
waxen maple
Did my best with AtlasTextureTool, couldnt figure it out.
Even if I did or did not combine stuff couldnt see a fps difference, in play mode whatever number of draw calls I see don't change and in game i was hitting 240 fps(desktop)
Took like 2 hours to even figure out what can and cannot be combined before losing quality...
And due to me modifying a lot on the avatar adding/removing stuff modularly, it was hard keeping track of which where was being used as 1 texture..
For some clothes animations would bug out or look like a quest avatar due to other addons or 2 different shaders being used so it wouldn't do actually anything
proper grail
If the skinnedmesh renderer doesnt hit its varies by cpu limit of around 500 draw calls between meshes and materials its not gonna be the fps bottleneck. Problem gets into a room of 80 people and a world that 500 can get stretched real thin to keep 8.3ms processing time
round kelp
Edit- Never mind? It looks like it isnt that big of a deal according to the documentation.
https://creators.vrchat.com/avatars/avatar-dynamics/physbones
Kinda quirky question but is it more performant to have one physbone component that controls 8 bones, for example on an ear root with 4 bones on each ear, or 2 components that control 4 bones each?
The only difference I've seen is that you can only grab one ear at a time since its one component and apparently the physics are slightly different but I haven't tested fully.
PhysBones is a set of components that lets you add secondary motion to avatars, permitting you to add motion to things like hair, tails, ears, clothing, and more! Using these well will make your avatar seem more dynamic and real.
supple trout
waxen maple
In any lobby you'll run at the lowest performing avatar's fps due to their FX la...
thats true, but didnt they mention in a patchnote within the last two months that culled avatars by their Avatar Culling System (the one where you can define range or count) stops the animators again as well?
waxen maple
real world is more painful
you still run their FX layers as long as their avatar is in the lobby
you dont lose 50 fps because of networking
what they did add is another attempt at this with the new bool "isAnimatorEnabled" that even turns off blendtrees for avatars you don't see but...
supple trout
i will keep that in mind, i personally arent loosing much due to a beasty 7950x3d xD
waxen maple
when i last went to a 70-people instance in the Pug, i had 11 avatars shown and was consistently 25-30 fps(and I am aware of the VR overhead, so probably like 50-90 desktop). I know with the same group of people if we went to a new instance it'd be on VR about 50-60 fps.
so in the lobby someone's FX layer was literally 140 fx layers to get me there;
(I'm running a 7900x)
supple trout
well uh.. ppl didnt know and avis are packed to the brim with functions x.X first thing i do is like yeet 50% and slap vrcfury blendtree optimizer on it when im too lazy to do it myself xD
somber notch
Is there a reason why big avatar sellers don't use blend trees?
cold yarrow
I think to keep things simple for the end user who hasn't watched a basic tutorial video at all, nevermind one on advanced topics
spare goblet
yeah, could be it
vapid bluff
somber notch
Is there a reason why big avatar sellers don't use blend trees?
from seeing the behind the scenes works on alot of avi creators stuff, most genuinely dont even know what blendtrees are, especially DBTs
the unfortunate #1 reason
solemn owl
Also lot of creators are not that technical to be into blendtrees
It can be quite intimidating for a lot of people
cold yarrow
vapid bluff
from seeing the behind the scenes works on alot of avi creators stuff, most genu...
Start here! https://vrc.school/docs/Other/DBT-Combining/
Everything you need to know to make VRChat Avatar Systems
solemn owl
I made two videos about blendtrees
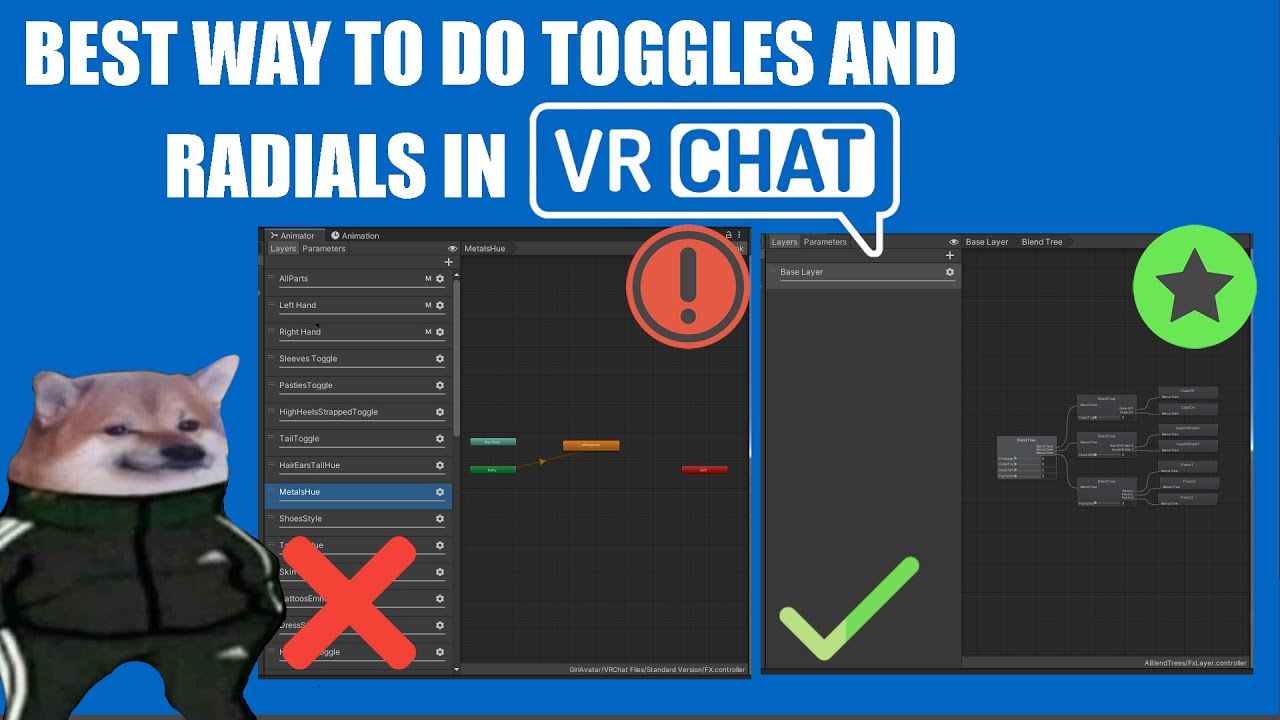
If this video helped you, consider supporting me on KoFi : https://ko-fi.com/fuuujin
Timestamps :
0:00 Intro
0:29 Creating the Avatar Parameters, Menu and the FX Layer
3:00 Creating the animations for the toggles and radials
5:05 Adding parameters to the FX Layer correctly
6:17 Creating the Blendtree for all the toggles
8:00 Avatar Emulator bu...

0:00 Intro
0:43 How to make a Direct Blendtree
2:49 Making a basic toggle
6:30 Making a toggle with one condition
10:39 Making a toggle that toggles when a hue shift is between 40 and 60%
15:15 Making a basic hue shift
18:07 Making a int toggle
21:53 Making a material swap between 5 materials
26:25 Making a hue shift with also swaps into black a...
 frozen grove
anyone know how to optimize stuff in blender?
 frozen grove
solemn owl
If it does not work, just remesh oof
frozen grove
solemn owl
If it does not work, just remesh oof
remeshing isn't the option I really want
since that will ruin the legs.
frozen grove
solemn owl
un-subdivide in the decimation modifier ?
how tf do I use it
it crashes blender for no reason
frozen grove
cold yarrow
I'd probably remesh
but that will ruin the legsssssssssssss
cold yarrow
how so?
frozen grove
cold yarrow
how so?

 cold yarrow
?
frozen grove
frozen grove
inbetween that thing happens
cold yarrow
I have no idea what you did here though
frozen grove
remesh??
cold yarrow
Exactly what does that mean in this case?
cold yarrow
I'm not sure how to help if you don't know what you did
frozen grove
cold yarrow
I'm not sure how to help if you don't know what you did
I remeshed bruh I just told you??
cold yarrow
what does that mean?
frozen grove
I went into scuplt mode clicked the remesh set to 0.05 and this happened
frozen grove
cold yarrow
what does that mean?
That I remeshed???
cold yarrow
ahh, now we're getting useful info. That's not at all what we meant.
frozen grove
what other thing could it mean???
cold yarrow
you want to retopologize it
frozen grove
how to do that
cold yarrow
you'll need to do that in order to make it flex nicely around joints and such.
There are lots of video tutorials. And lots of tools for it also.
retopoflow and polyquilt, for example
cold yarrow
I'm not going to say that's all, just that that's a thing typically done after sculpting
frozen grove
so to optimize it I need to retopologize it then what after
cold yarrow
probably rig & weight paint?
cold yarrow
oh boy
frozen grove
what do they do exactly
cold yarrow
you probably want to watch a tutorial on the whole process of building an avatar
the idea is to make an armature of bones that move the mesh parts like a body should work.
frozen grove
cold yarrow
you probably want to watch a tutorial on the whole process of building an avatar
I watched like 5 there were no mentions of these stuffs
cold yarrow
not good tutorials then
spare goblet
yeah
cold yarrow

Let’s be honest, most people take one look at weight painting and think “This looks like what happens when a drunk unicorn stands on a train track and an unfortunate passer-by happens to be a little too close after the resulting collision.”
I promise you once you get to understand certain repeated patters and recognise them. What was once a pot...
spare goblet
weight painting is necessary
cold yarrow
(you want this ^ one plus the next two in the series. But probably watch it all)
frozen grove
cold yarrow
rigging: https://www.youtube.com/watch?v=FzRLR8SGVK0
im currently watching it for 2 minutes now- like I found another video that sent me here
cold yarrow
FYI redo the topology before you do this though
having good topology around joints is critical for making them bend naturally
frozen grove
how do I extrude more bones???
cold yarrow
'e' to extrude
cold yarrow
are you in edit mode on the armature object?
frozen grove
nope, thanks
cold yarrow
blender keystrokes are all context-sensitive
frozen grove
bro shes so quiet I can't understand her
radiant shadow
 and blender LOVE to change shortcuts depending on version you use
cold yarrow
turn on captions.
cold yarrow
radiant shadow
<:vrcRat:1020097284379262976> and blender LOVE to change shortcuts depending on ...
ugh, yes
frozen grove
I can
cant
click connected in control p
why the hell can't I make it parent thing
spare goblet
radiant shadow
<:vrcRat:1020097284379262976> and blender LOVE to change shortcuts depending on ...
its so annoying
frozen grove
bro the head and spine rig bone thing doesn't want to fucking connect
cold yarrow
you can also edit a bone's parent in the bone properties box
 cold yarrow
I'm not sure what we're supposed to see here.
cold yarrow
move them where you want them?
frozen grove
I parented them together like the tutorial said
frozen grove
cold yarrow
move them where you want them?
the tutorial says to click on the headbone, ctrl click bone below
But I can't click the headbone.
cold yarrow
this works for me
cold yarrow
you have just one armature, and you're in edit mode, right?
frozen grove
I don't have just one
cold yarrow
why would you have more than one armature?
frozen grove
because the tutorial says to make the head armature ok I did that nicely
then I went below
to add more like she said to do
cold yarrow
oh weird, okay. Well you can't parent bones across armatures.
frozen grove
from the pelvis to the neck extrude it
frozen grove
frozen grove
from the pelvis to the neck extrude it
I extruded it
and NOW
i can't
Do
Nothing
click the head bone then ctrl click the bone below it
and I can't click the headbone like it tells me to
cold yarrow
if those bones are not in the same armature, that won't work
frozen grove
cold yarrow
if those bones are not in the same armature, that won't work
how the hell do I make em same armature???
spare goblet
ctrl j
cold yarrow
you could ctrl+j them in object mode, but I'm not sure why you'd have two here in the first place.
spare goblet
select both of the armatures in the outliner and click ctrl j
cold yarrow
I haven't watched this tutorial series though.
frozen grove
spare goblet
select both of the armatures in the outliner and click ctrl j
what
spare goblet
the outliner is blender hierarchy
spare goblet
connect the bones?
cold yarrow
IMO still retopologize 🙂
spare goblet
the thing that wouldn't work with multiple armatures?
cold yarrow
definitely do that before you try to weight paint.
cold yarrow
but yeah, pick back up to whatever bone parenting you were attempting.
frozen grove
cold yarrow
IMO still retopologize 🙂
a video abt that scared me away
and I couldn't do anything there too
cold yarrow
If you don't do it, this model is going to be really unoptimized and also flex badly at the joints, but it's certainly an option
spare goblet
if you upload that to VRChat it's gonna crash a lot and lag everyone out, because of the amount of polygons
frozen grove
spare goblet
if you upload that to VRChat it's gonna crash a lot and lag everyone out, becaus...
is there another way to optimize avatars better???
spare goblet
I'd highly recommend retopologize it first
frozen grove
spare goblet
I'd highly recommend retopologize it first
that seems time consuming in the video I watched
cold yarrow
it is
spare goblet
for yours currently topology is the only thing that needs fixing
cold yarrow
very much so 🙂
spare goblet
making avatars is time consuming
frozen grove
spare goblet
making avatars is time consuming
well yeah but this much???
spare goblet
that's why they're expensive to buy 😭
cold yarrow
yup
frozen grove
frozen grove
what now
back to this
they are connected into 1 rig thing
I click the headbone
and I can't ctrl click the bone below
cold yarrow
again you can also parent bones in the bone properties box, I usually find that easier.
Also you can select things in the outliner if you can't easily do that in the 3D view.
frozen grove
cold yarrow
again you can also parent bones in the bone properties box, I usually find that ...
okay
frozen grove
cold yarrow
Also you can select things in the outliner if you can't easily do that in the 3D...
wtf is the outlinerrrrrrrrrrrrrrr
 cold yarrow
you clipped that so much I have no idea what it is
frozen grove
I don't think thats it
cold yarrow
we mean the window with the the tree view list of all the objects in your scene
cold yarrow
I was saying you can select stuff in there, sometimes that's easier than trying to select in the 3D view.
 frozen grove
cold yarrow
I was saying you can select stuff in there, sometimes that's easier than trying ...
frozen grove
cold yarrow
I was saying you can select stuff in there, sometimes that's easier than trying ...
theres nothing
let me do the entire rig over again
cold yarrow
I'm really not sure what you're doing here, so I don't know what that means
cold yarrow
?
frozen grove
cold yarrow
?
like
how do I make head with spine bone thing be in the same thing without using ctrl j
cold yarrow
you make an armature and edit it?
frozen grove
cold yarrow
you make an armature and edit it?
now I can't move it
im pressing g and it doesn't wanna budge a bit it just rotates
it scales when I click g
bruh
what is wrong with this shit like bro
radiant shadow
can also throw it into mixamo, but its bound to glue the legs abit
frozen grove
I have this

I press shift a
it makes another one of these
I press g
and z for the axis
but nope it doesn't wanna go down it just scales itself big or small
cold yarrow
did you select the whole bone or just the head or tail?
frozen grove
never mind I fixed that issue
frozen grove
cold yarrow
did you select the whole bone or just the head or tail?
the head of it was selected Im stupid
now again this does not wanna ctrl click the bottom part
I might just remodel everything in the model rn
just open my torso save file
and start working on that
because this shit is lowkey annoying me with the rigging
frozen grove
cold yarrow
did you select the whole bone or just the head or tail?
sorry for ping but can u tell me do I need my body parts seperately? like in the tutorial head is dif than everything else?
cold yarrow
you don't. That's an outdated technique.
or good when you want to do head swaps like a lot of the asian/booth avatars do
frozen grove
okay I guess, so weight paint is like red = places that shouldn't bend and green is places there bones should bend?
cold yarrow
dark blue = no weight
frozen grove
cold yarrow
dark blue = no weight
and what is weight in blender mean exactly?
frozen grove
cold yarrow
more weight = more movement with that bone
so if I paint my character like this for example

the dark blue parts will make it able to bend?
cold yarrow
I don't know why you would paint all those parts to whatever bone that is.
which bone is it?
frozen grove
cold yarrow
I don't know why you would paint all those parts to whatever bone that is.
its just an example
cold yarrow
it's kind of meaningless without knowing the bone you want that to move with
frozen grove
cold yarrow
it's kind of meaningless without knowing the bone you want that to move with
just take for example the arm bones
cold yarrow
you would not paint all of that to move with the same bone
frozen grove
cold yarrow
you would not paint all of that to move with the same bone
I don't really understand u rn
spare goblet
there should be separate bones for the arms
3 bones per arm
upper arm, lower arm, wrist
cold yarrow
yeah you really need to watch basic tutorials on weight painting, you are asking questions that make no sense at all because you don't have the fundamental knowledge.
spare goblet
mirrored on both sides
frozen grove
well duh I know that seperate the bones ( waist - head ) ( arm - hand ) ( leg - toes )
but I wanna know how weight painting works
spare goblet
frozen grove
well duh I know that seperate the bones ( waist - head ) ( arm - hand ) ( leg -...
so why are you weight painting everything to one bone?
frozen grove
like what does the red colour mean what does the dark blue mean
frozen grove
spare goblet
so why are you weight painting everything to one bone?
wdym 1 bone
there are no bones shown
cold yarrow
blue -> red shows how much a given vertex moves along with the bone it's weighted to.
you can't weight paint without bones
it's meaningless without bones
frozen grove
cold yarrow
blue -> red shows how much a given vertex moves along with the bone it's weighte...
can u give me a more simple explanation?
spare goblet
vertex groups (green triangle) - you select one that represents a bone and weight paint stuff to it
cold yarrow
I can tell you again that there are lots of tutorials on this and you should read/watch one.
frozen grove
bruh
spare goblet
for example when selecting the right upper arm vertex group only the right upper arm should be weight painted (aka red)
cold yarrow
the visuals especially on a video will help here.
spare goblet
you should definitely research more and watch tutorials
cold yarrow
and I'm going to have lunch, bbl.
frozen grove
spare goblet
for example when selecting the right upper arm vertex group only the right upper...
I still don't understand shit
spare goblet
so watch a tutorial
frozen grove
cold yarrow
rigging: https://www.youtube.com/watch?v=FzRLR8SGVK0
im watching this
and it looks like red just means that it will move
bend
or whatever
and dark blue is stay

 spare goblet
I'm gonna go shopping now, bye bye
frozen grove
spare goblet
here are two examples of what weight painting and vertex groups look like
so vertex groups are just limb groups
spare goblet
basically
frozen grove
parts of fingers n stuf
Imma just quit blender for a week because this is just hurting my head already
spare goblet
that's what blender did to me at first too
 unborn isle
yes, red is the weight assigned to by this bone, blue is not affected
vertex group is just the red area of a bone
cold yarrow
remember that you're going to have to redo the weight painting entirely when you retopologize this 🙂
frozen grove
cold yarrow
remember that you're going to have to redo the weight painting entirely when you...
It was just a example, are u even reading what I text here???
cold yarrow
I guess I didn't read that, but also it's a good reminder for everyone.
frozen grove
cold yarrow
I guess I didn't read that, but also it's a good reminder for everyone.
im leaving blender for a week or less then coming back making new legs
new arms
because the arms look very weird
and legs are just stubs
frozen grove
this is how I feel blender is treating me:

This playful girl... :/
★Due to various issues, I plan to upload my Twitter videos here as well from now on.
Anyway, I hope you enjoy.
↓Original
My X(Twitter): https://x.com/kensyouen_Y
 cursive oyster
Is there a downside to using modular avatar in unity for performance of the avatar? I can't seem to make an avatar that isn't graded with low performance ; - ; !
cursive oyster
Is your last step then joining all meshes in blender? I always fear doing that because it feels so permanent. But I guess you can always seperate by material if need be.. \ . /
heavy knot
Modular Avatar doesn't do anything on it's own, it's just a non destructive tool
same goes with VRCFury
spare goblet
cursive oyster
Is your last step then joining all meshes in blender? I always fear doing that b...
I mean, if I need to switch between one shirt and a different shirt, I keep them separate. But if I'm just attaching one shirt to stay, I merge it. I also atlas my textures so it's only one XD
I also make back ups
if I ever need to edit something
backup before texture atlas
cursive oyster
heavy knot
Modular Avatar doesn't do anything on it's own, it's just a non destructive tool
But the armature it adds seems like its not the same in blender of where everything becomes one armature/set when I rig an outfit to my body, with modular avatar it seems like it adds additional sets of armatures / bones that are not needed? (( I am probably wrong))
cursive oyster
spare goblet
I mean, if I need to switch between one shirt and a different shirt, I keep them...
I should do that ;3; but then when everything is one uv map its so annoying to fix a texture / edit for me \ . /
spare goblet
cursive oyster
But the armature it adds seems like its not the same in blender of where everyth...
if you use stuff like modular or vrcf that's what it does. It takes your armature, the clothing armature and parents one to the other. If using those addons, both armatures are needed. If you don't want them, you will need to merge them in blender.
heavy knot
cursive oyster
But the armature it adds seems like its not the same in blender of where everyth...
It's the prefabs that use Modular Avatar, not the script itself
cursive oyster
Yea ;3; I've been using prefabs / modular avatar and unity-- before I would import FBX of outfits/hair and rig it in blender, but I guess I'm finding it easier to navigate unity especially when all the face expressions are already set up of the unity base I'm using. D:
spare goblet
if the clothing is made for your base there's no need to rig it in blender
and merging armatures is just one click using the cats plug in 🤷
heavy knot
it shouldn't dupe your armature, unless it's using an outdated mode
both MA and VRCFury have a reskin meshes feature and doesn't reparent
spare goblet
huh, I thought it worked differently. Oh well, don't listen to me
i can tell you blender xd
cold yarrow
cursive oyster
Is your last step then joining all meshes in blender? I always fear doing that b...
or you can just make backups of the source objects. This is what I do, I stick them in a collection called "source-whatever" and turn it off. Then later when I realize I do actually need to go back to that, there they are 🙂
cold yarrow
yeah my avatar projects are basically collections of separate objects which get merged together when I export, usually resulting in one body and one clothing mesh.
World projects tend to have collections of source objects which get merged (then merge overlapping vertices) and then I export the merged stuff.
for an avatar each base is its own project but each variant of that base (outfit, gadgets, whatever) is its own collection.
 granite needle
So what's the easiest way to reduce triangles on an avatar? Mine is perfect in all areas but has 110k triangles
granite needle
Well now I need to know what that means lol
Eh Im not worried about it. I see a lot of very poor avatars around, it just would be nice to be better in quality because a few groups that I run with doesn't allow very poor avatars in actual games
But I've always preferred just hanging out with other people
spare goblet
granite needle
Well now I need to know what that means lol
makes your avatar less poly whilst losing little quality
tuxedo changes your textures a bit too (putting it all on one atlas for example)
spare goblet
yeah, but it looks way better than decimating (another way to reduce poly count)
granite needle
Can I do this on unity or do I need blender for this kind of stuff
spare goblet
there's a unity tool, but it's paid
and I never used it, so I can't speak on how good it is
granite needle
That sucks
Looks like I'll eventually need to learn more about it
Im kinda too tired to tinker rn
But I am happy with how my avatar is turning out
spare goblet
that's what matters :)
 lavish pebble
What's the difference between having Empty animation clip and no animation?
Was told it's better for performance to not leave states with no animations but is that really true?

 radiant shadow
none = loops forever , empty animation run once
vrcfury like to remove any animation that doesnt do anything if it doesnt point to a gameobject/blend/whatever that doesnt exsist
 fallow oak
Does anyone know how to like...properly reduce the or even lower the [123]MB in the SDK on the both warnings on the VRCSDK UNITY?
spare goblet
lower texture size
fallow oak
how tho?
spring sun
fallow oak
how tho?
use smaller images
lavish pebble
fallow oak
how tho?
Go to where your textures are located, click on in and in Inspector window you'll see Max Size. Lower that.
If you want to go a bit deeper you can select PC icon and turn on Override For Windows. There you can lower your texture size and select texture format. It's recommended to use BC7 or DXT5 for textures with alpha or textures with a lot of detail (intricate patterns, gradients etc.) . And DXT1 for textures without alpha.
BC7 and DXT5 have the same vram size. BC7 is higher quality while DXT5 is smaller in download size.


 wise flare
Sup guys- I just imported the first avatar that I made from VRoid (quite new to this), and I'm noticing a bunch of issues.
While walking, the avatar sort of sinks to the ground haha. I don't know what's causing that.
The arms positioned in an unnatural way, and the eyes are looking around and I'd like to disable that

 spare goblet
- Sinking I don't know
- Are the arms like that while using a headset? Or desktop?
- For eyes just disable eye look the the inspector
and if you used a unity converter to convert the avatar to fbx, dont
do it with blender instead
unity causes a lot of issues
blender method tutorial
https://youtu.be/6ITTI5KwC3o?si=39Y5xxuHnv15dQJW
wise flare
The arms are like that with desktop.
Yes, I converted it using the VRM converter thing for Unity.
Downloading Blender rn, and will try your tutorial, thank you
spare goblet
let us if the problems are still there
we'll try to figure it out
wise flare
the tutorial worked perfectly. thank you so much
Fixing the shaders was a bit of a creative process but I managed to get a result I liked
Only issue I'm having now is that for some reason, whenever I set up this plugin, the guitar is super big.
When I did this with VRM converter, I wasn't having this issue. Maybe it has to do with the fact this is the Blender method?
Here's the tutorial video of the plugin I'm trying to install at around like 0:50, the guitar is normal sized when he clicks it:
https://www.youtube.com/watch?v=Wl9HNyNj0P0&feature=youtu.be

VRChatのアバター用ギターギミック。専用アプリでマイク入力の音を解析し、周波数に応じてアバターがギターを弾くモーションをします。また専用ワールドで描いた絵を演出として周囲に表示させる事ができます。絵の線は音の強弱で振動し、色の濃淡で表示タイミングが変わるので時間軸を持った演出を作ることができます。
When I click Start Setup, this is what it looks like:
 spare goblet
I've never used that guitar thing so idk what's going on with it.
im pretty sure you can just size it to fit though
i also don't understand Japanese so I have no idea what's going on in that tutorial
solemn owl
wise flare
Sup guys- I just imported the first avatar that I made from VRoid (quite new to ...
Did you upload while previewing an animation ? That causes the sinking
wise flare
solemn owl
Did you upload while previewing an animation ? That causes the sinking
Might be, but thanks to Eli I've fixed the issues, no more sinking now.
wise flare
spare goblet
im pretty sure you can just size it to fit though
Yup! and that worked
spare goblet
great!
wise flare
Only thing I'm wondering about now is this shader

Not sure why the back is the same
As the front
spare goblet
did you check UV maps in blender? maybe they overlap
wise flare
oh, it says here it's a unity package, and I can only open it there. I can't seem to import them in blender
Anyway I just decided to leave it as is
Thanks very much @spare goblet!
spare goblet
if it's a unity package it probably has an FBX you can import to blender. It should show up in unity assets
but if I'm being honest I like the sign better when it's on both sides
that way people from the back can see it as well
spare goblet
wise flare
Thanks very much <@565467755617452032>!
and no problem, I'm glad it worked out for you (almost)
 slender rover
first time trying to get an avatar down to green rank and I am struggling 😭 went down from 200k to 84k but that last stretch to below 70k is rough
obsidian lake
yeah the lower you try to get the poly count the harder it gets
my advice is:
- look for areas with low deformation
- look for edges that don't contribute heavily to the silhouette
- look for areas that aren't very visible
- don't be afraid of triangles, just use them wisely
- try zooming out in edit mode to find high-density geometry (it will look darker since there's more lines)
@slender rover
slender rover
Thank you! I managed to get it down!
 buoyant holly
I love weighting topology around areas that affect the silhouette.
694 tri's per ear.

 Bluesky
·
Bluesky
·

an example of how triangles are used to keep the silhouette nice but lower poly
 brave sail
Would having multiple FBXs, compared to putting all the meshes in one blend file, exporting that all as one FBX, help with performance at all?
Im assuming it would be less draw calls, so mildly better performance?
cold yarrow
more material slots = more draw calls = worse
so ideally combining things into the same mesh object and material is best
ivory sluice
brave sail
Would having multiple FBXs, compared to putting all the meshes in one blend file...
It won't have any difference, it will still be the same meshes and objects, just on a single file instead of various
 weary ice
brave sail
Would having multiple FBXs, compared to putting all the meshes in one blend file...
weary ice
brave sail
Would having multiple FBXs, compared to putting all the meshes in one blend file...
It’s more like it will have an affect but it should be negligible in the grand scheme
obsidian lake
weary ice
It’s more like it will have an affect but it should be negligible in the grand s...
not true, draw calls are really expensive, especially on mobile devices (which inclues quest standalone)
you want to reduce draw calls as much as possible on any platform
proper grail
yes but the question was oddly worded.
 livid tendon
Heya, I'm making an avatar base edit for a friend, optimizing the hell out of it.
Is it worse to have an extra material for a tiny blush mesh as the only transparent part of the avatar, or is it better to use an alpha map?
Idk, maybe a seperate material is better here so it doesn't have to consider transparency everywhere for that one small part?
radiant shadow
pc ? use a decal
 trail pilot
This is less about optimization, but transparent rendering sucks in general
I'd try to avoid making my entire body transparent
ivory sluice
livid tendon
Heya, I'm making an avatar base edit for a friend, optimizing the hell out of it...
Don't combine transparent materials with opaque materials unless you know what you're doing with its shader
Keep it separate