#3d-modeling
1 messages · Page 135 of 1
 devout scroll

YouTube
Want to make your own Anime style avatar? For Things like VRChat, Vtubing/streaming and game creation? Stick around, I'm going to let you in on all my secret...
 sterile oracle
devout scroll
Try looking at this
sterile oracle
devout scroll
Try looking at this
Thanks a bunch!

 ashen forge

 desert crown
anyone know how to fix this for specific addons for blender 2.8?

i dug more into it and its as if its reading older blender addon folder, but How do you change that
blender never taught me how to swap addon folders
google doesn't say anything as well so i'm lost
devout scroll
in appdata somewhere you have a blender foundation folder
there you'll have a folder for configs and addons for every version of blender you've had on the pc
desert crown
devout scroll
there you'll have a folder for configs and addons for every version of blender y...
yeah i know, but the issue is why is blender 2.8 reading older config/addon folder when its blender 2.8 itself already.
i'm in the process of just uninstalling blender completely and resinstalling blender 2.8 again, all makes it so blender 2.8 can read blender 2.8 configs and addons again....
devout scroll
i think the addon saying upgrade to 2.8 required means the addon is for 2.7
desert crown
yeah, but i don't know how to do that
i don't think i was ever taught on how to upgrade addon specifically, blender don't even have an automatic updater either
 lusty wadi
Hey I was wondering if anyone would mind helping me model clothes for an avatar its the botw 2 link from the new trailer the base model is down including the textures i have these to other pics to help me model it but i suck if anyone is down and has the time i would loves tips and tricks or help thank you


 quaint jasper
lusty wadi
Hey I was wondering if anyone would mind helping me model clothes for an avatar ...
quaint jasper
lusty wadi
Hey I was wondering if anyone would mind helping me model clothes for an avatar ...
For free ? I doubt anyone would
lusty wadi
yea if anyone would model it i would pay for that unless they just want to help
quaint jasper
Should look at https://ask.vrchat.com/c/commissions/avatar-commissions/35 in that case !

VRChat Ask
Post about commissions for avatars in this category. Requests are not permitted, we only permit posts from those providing services.
 quick thunder
quaint jasper
Should look at https://ask.vrchat.com/c/commissions/avatar-commissions/35 in tha...
quick thunder
quaint jasper
Should look at https://ask.vrchat.com/c/commissions/avatar-commissions/35 in tha...
finally someone fucking promoting the vrchat ask forums for commissions rather than vrctraders
please visit that site more often guys
 plucky totem
Can environment stuff go here? Cuz I've got a very dumb question about hard surface modelling - i have no idea bout the proper way to UV interiors / environments with tiling textures.
quaint jasper
Sure 
 harsh saddle
plucky totem
Can environment stuff go here? Cuz I've got a very dumb question about hard surf...
harsh saddle
plucky totem
Can environment stuff go here? Cuz I've got a very dumb question about hard surf...
If I understand what you're asking, the basics are fairly straightforward. If you extend the uvs past the bounds of the texture, it will treat it as though there are an infinite number of copies of that texture on each side, so if I want to have a 3x3 tile of my texture, I can just scale the UVs by 3 and treat it as though the texture extended outside of the bounds of the actual texture, if that makes sense.
 plucky totem
harsh saddle
If I understand what you're asking, the basics are fairly straightforward. If yo...
plucky totem
harsh saddle
If I understand what you're asking, the basics are fairly straightforward. If yo...
It's moreso how to do that across multiple surfaces sharing the same Material* and keep the tiling scale relatively standard
I'm assuming there's no like, standard or super easy way to do it.
Just gotta do it the tedious hard way
harsh saddle
You just kind of have to have some consistency in using the UV grid relative to your world space so if one square on the grid corresponds to 1 ft on your wall, you're lining that up consistently. I'm not sure if that clears much up or if there is a way to streamline that process. I think there are some tools in substance painter but I haven't used it myself.
plucky totem
Well it's ultimately all UV mapping but it's... again, like hard surface modeling, tedious and requires a lot of discipline
harsh saddle
It's all about making sure your islands have the right relative scale to start with and for that it helps if each of your polygons has a consistent scale so it's all kind of connected.

 tough plover
using "Average island scale" also helps to make sure everything is the right scale relative to other stuff
can also use ZenUV's texel density tools
plucky totem
A friend of mine suggested changing the material scale in unity also??
Whatever that means
harsh saddle
Yeah, I think you can get away with overlapping UVs if you generate lightmap UVs in Unity, it's just going to be a problem if you need to do any baking of occlusion or normals but I don't think those techniques are typically compatible with tiling in general.
tough plover
well typically wouldn't you have a separate UV for your lightmaps
harsh saddle
That's also an option but Unity can generate that for you.
But you can make your own, I've heard that can produce better results.
harsh saddle
plucky totem
A friend of mine suggested changing the material scale in unity also??
He might just be talking about increasing the tiling in the material settings which works but it isn't very tweakable, it just changes the scale in x or y of the whole texture.
plucky totem
I'm probably just planning to make a tiling painted drywall texture with the faintest normal map and schlapping it along the walls so being able to tweak it a whole lot doesn't necessarily... matter?
harsh saddle
I guess if it's seamless and you want it applied consistently across all of your tiles and your tiles are all a consistent scale then that could work fine.
plucky totem
Yeah, that exactly. I'm not making every part of this interior have a specific wall texture
ashen forge
Finished it!
 plucky totem
Just one generic one slapped along all of them, it just looks weird if this section is suddenly stretched out, or it doesn't match in another part of the world.
again. hate hard surface modelling. organic modelling and uv mapping my beloved... no rigidity.
harsh saddle
Not my favorite thing either but at least it looks like a bunch of 90 degree angles so that simplifies things.
harsh saddle
ashen forge
Finished it!
Pretty cute!
plucky totem
uv unwrapping for normal hard surface objects is fine, it's just for an environment it's very technical
quaint jasper
ashen forge
Finished it!
I love it !
 spiral sigil

 fallow osprey
Anyone know why the ears aren't moving as much as the rest of the head? The neck bone has zero influence while the head bone has 100% influence as you can see in the weight painting


 harsh saddle
Hmm, did you check the weights of all the other vertex groups? Maybe it's not just the neck. Otherwise, I'm not sure.

 harsh saddle
That'd do it, weird stuff can happen during painting.
 quaint jasper
Weight paint 
 simple yew
so i have to do that
omgg thanks
@quaint jasper can u send me a youtube vid on how to weight pant
quaint jasper
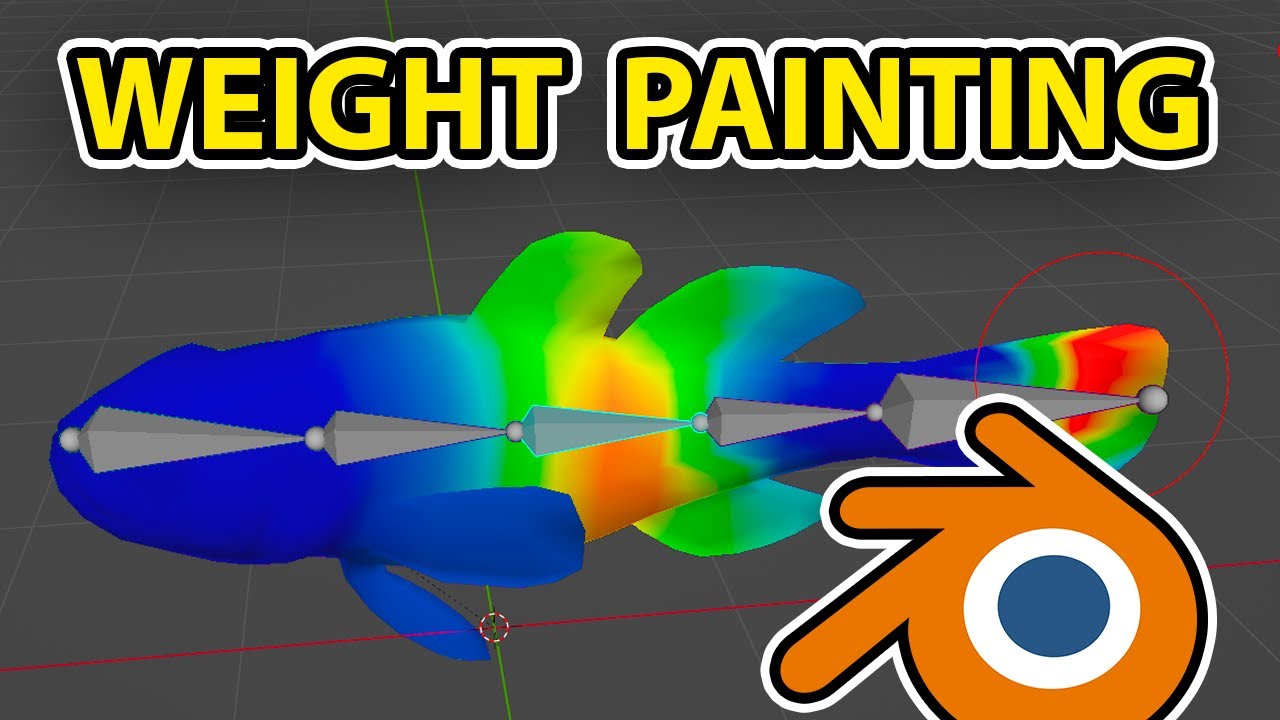
In this blender 3 tutorial you will learn weight painting for beginners. We have a fish model example and we will rig this and add it to the mesh. Then test it out in pose mode and do the correct weight painting setup
Subscribe: https://www.youtube.com/channel/UCQaeCs2hL2I7EK88fOZhWBw?sub_confirmation=1
#blender #weightpainting #Buvesa
✅ Next...
 vapid star
So i split my hands from my arms so that i can toggle on and off the sleeves of my outfit, but when i do this i get some weird shading on the part i split. Does anyone know a good way to fix of mitigate this weird shading?
 quaint jasper
vapid star
So i split my hands from my arms so that i can toggle on and off the sleeves of ...
quaint jasper
vapid star
So i split my hands from my arms so that i can toggle on and off the sleeves of ...
Recalculate normals ? I'm confused as to why your hands need to be a different mesh however
vapid star
if you show both the sleeve and the arms then the arms will tend to clip through the sleeves when bending. So to prevent that from happening i hide the arms when the sleeves show.
quaint jasper
That's something that should be fixed with weight painting, not creating additional skinned meshes
harsh saddle
It is really hard to avoid any clipping if the clothing is right over the skin, though. I don't suppose there's a way to hide certain vertex groups in Unity? That'd be pretty snazzy.
quaint jasper
If you use the data transfer modifier, there should be no issue
Assuming the topology is the same/similar
vapid star
i think we can agree to disagree on which method is better. To address Krampus's point though I think Silent's shader has a setting that lets you change the visibility of parts of the model by passing in a texture which contains the alphas of every preset you want in the form of a grid.
quaint jasper
Well, there are good methods, and bad methods, due to their inherent performance cost, creating an additional skinned mesh is a poor performance method, hence why I wanted to suggest fixing it correctly
vapid star
Im not sure if this is related, but when I set the mesh to flat shading it looks like this which I don't think is supposed to happen
 quaint jasper
It does look a bit odd, but thankfully you don't want to use flat shading in blender
vapid star
ok, i think i found the solution
one sec while i compile the info
So the weird shading is caused by the edge normals changing when you try to separate the meshes. To prevent this you have to rip the vertices before splitting the meshes

 devout scroll
harsh saddle
It is really hard to avoid any clipping if the clothing is right over the skin, ...
devout scroll
harsh saddle
It is really hard to avoid any clipping if the clothing is right over the skin, ...
You can with shaders.
Poiyomi shader has udim discard for example, but it lets you toggle rendering uv spaces rather than vertex groups, but it's easy to setup regardless
vapid star
recalculating normal doesn't seem to fix the edge normals for me
devout scroll
Or blendshapes but it's not recommended due to performance
regular recalculate only really fixes face normal direction
try settings normals from face
harsh saddle
Sounds useful but I need everything to work for Quest so I think I'm stuck with the VRChat shaders. Some people seem to be able to make avatars with other shaders but I guess that's illegal.
vapid star
oh i think setting normals from face fixed it thanks
devout scroll
harsh saddle
Sounds useful but I need everything to work for Quest so I think I'm stuck with ...
Yeah not much you can do for quest. You can do blendshapes I guess
But it's bad for performance so I'd guess a second mesh would be better (even if perf rank doesn't agree, don't trust it)
But even better is making the clothes a bit more loose and/or having better weight painting
If your topology matches then having similar weights should prevent clipping
You can also use twist bones to prevent some stuff from collapsing into itself when bending
 red glade
its morbin time 🕺

gotta texture the metal parts n stuff, then ill get to making the facial shape keys 🕺
spiral sigil
not really ontopic to the channel but will i have issues opening .blend files from older versions
 merry cedar
When i try to edit any part of my avatar with x axis mirroring and proportional editing part of the bottom teeth shoot up like this

 nimble island
is this blender?
merry cedar
yeah
nimble island
well as I said in the other channel, sometimes mirroring can cause issues where verts will merge. I'm assuming thats whats going on here
merry cedar
the problems affects the same verts from bottom and upper teeth
im trying to figure out how to fix it
nimble island
I guess there should be a way to adjust the threshold of when verts merge
I can't help much specifically since I don't use blender for my modelling
merry cedar
ok ty
devout scroll
spiral sigil
not really ontopic to the channel but will i have issues opening .blend files fr...
probably not, but if you save something in 3.0+ i'm pretty sure you won't be able to open in older versions
tho there are some quirks with opening 2.7 files, the ui's gonna be weirdly setup probably
 ashen stag
If I struggle to open a model from a different version I just open it with the correct version and export as an fbx
Usually if you try to open a 3.0 file in 2.7 it will just error out
 muted vector
Rough draft of my RP characters sword
 harsh saddle
The blade shape is nice but that's a lot of crossguard and pommel which makes the blade look pretty dinky in comparison.
muted vector
The blade is from an Infinity Blade sketch fab. I’m working on a custom handle. I might make stylistic changes to the blade as well. This my first work with blender
harsh saddle
It might be good to get some reference and model from that so you can get the proportions dialed in.
harsh saddle
Anyone know how to eliminate (or at least minimize) the appearance of flat shading using Shrinkwrap and multiresolution to bake normal maps? This is a comparison of my 1.4m level 4 shrinkwrapped model I'm trying to bake vs the original 30k model I'm using as the target. Every level I go up in my multires modifier just makes the flat faces more obvious but I need a fair amount of geometry to capture the detail cleanly.

 devout scroll
is your low poly mesh shaded smooth tho
harsh saddle
devout scroll
is your low poly mesh shaded smooth tho
It is, yes. I think the problem might be that the high poly mesh has been sculpted with dynamic topology so the areas where I've added detail are smooth but the areas where I haven't and the poy count is still low are not. I'm still not sure why this would be the case given that both models are using smooth shading but perhaps just having more dense geometry throughout will eliminate this issue.
I would just do the entire sculpting process on the model I intend to bake with multires, but even with the model subdivided to 5m polygons, I end up with jagged detail that can't be properly smoothed. Maybe I need to treat multires like the subdvision process in Zbrush where you need to progressively add detail at every subdivision level so the next level can properly build upon the lower levels.
devout scroll
Haven't used multires much
But I know blender baking isn't that great
Why not bake in something else?
I know that kinda defeats the purpose of multires
Or maybe lookup a tutorial and see, maybe you missed something simple like a setting
harsh saddle
I have looked up tutorials and this seems to be the process. The thing is the details aren't even baked, this is just a high resolution model created with multires and then shrinkwrapped to conform to a medium poly model which I would then bake onto my low poly model. I hear Blender isn't the best at baking normals but I've also seen it bake some pretty decent normals. I guess I should eventually start subscribing to Adobe's substance designer package in addition to the $40 a month I spend on their standard suite of apps but I'd just rather not have to learn a new program at the moment.
merry cedar
If anyone can help then please. these 2 verts merge when trying to move either when mirror is on x axis (not mirror modifier). I've been at this for like 6 hours but nothing works

I used symmetrize to make to object symmetrical and set origin to middle. Also mirroring doesnt affect this object for some reason
harsh saddle
Is it possible that X is your vertical axis and thus when you're moving on vert down, the other moves up and because of your merge distance, they get fused? Does this behavior only occur with those 2 vertices?
merry cedar
yes only those 2
and no its the correct axis : /
and they dont get fused they're stuck so close together they seem like a one vert
quaint jasper
I assume you tried deleting them
merry cedar
well yes but then the uv map doesnt work anymore and i dont know how to work around that
this type of symbol appears

and also it didnt changed anything they still get pulled together
quaint jasper
You can just manually readjust those vertices on your UVmap
New vertices get pulled together ?
merry cedar
yes
quaint jasper
Can you screenshot your entire screen ?
merry cedar
 quaint jasper
No modifiers ?
 quaint jasper
Yeah if new vertices are also doing it, I'm not sure
merry cedar
yesterday it worked just fine but today when i was creating shape keys for the mouth the problem appeared
harsh saddle
Is there any weird instancing going on maybe? Can you post the object properties? It's the square with the lines around it.
merry cedar
this one?
 harsh saddle
merry cedar
this one?
harsh saddle
merry cedar
this one?
That's the right window but just post the whole thing if you could.
 wanton drum
I cant find much on this but my armature wont pair with my mesh and i cant figure out why for the life of me, im a blender idiot and need some help
harsh saddle
wanton drum
I cant find much on this but my armature wont pair with my mesh and i cant figur...
If you've got a mesh and a rig, you can select the mesh, then select the rig, then press ctrl + p to parent with automatic weights. This will likely not be perfect as automatic weights are just a brute force guess at the weights but it will create the necessary vertex groups on the model and assign them some weight which is basically how the model interfaces and knows what to do with the rig.
wanton drum
harsh saddle
If you've got a mesh and a rig, you can select the mesh, then select the rig, th...
Thankyou!
 wary mantle
any one know how to work unity?
im trying to upload but its giving me an error i think it has to do with my vrc sdk but i dont know
harsh saddle
wary mantle
im trying to upload but its giving me an error i think it has to do with my vrc ...
Not like channel for that, try #world-development and post an image of the errors that you're getting so we can narrow down the issue.
 trail python
need to be more clear. if its for an avatar you need to go to #avatar-help if its for world, #world-development
harsh saddle
Got my normal baking situation solved, just had to apply a few levels of subdivision first before doing the rest of the sculpt with dynamic topology to ensure there was enough geometry across the entire sculpt. Seems like shrinkwrap just ignores smooth shading so you need enough geometry on the shrinkwrap target that the individual faces are no longer visible. I think the bake turned out pretty clean, despite many people saying that Blender doesn't do well with baking normals.

 atomic hamlet
Blender can do basically anything if you are willing to put in the effort to work around issues like that.
Nice model btw.
harsh saddle
Thanks but it's just ReadyPlayerMe with a normal map applied. I'm working on a show with aliens and while I can and have created avatars from scratch, I need something I can fill out the roster with that doesn't take so long so I do a lot of modification and kitbashing with RPM avatars to hasten the process.
atomic hamlet
Still looks good though, couldn't even tell it was a RPM avatar with how good those normals are.
trail python
ay nice, ive wanted to kitbash those but some of the female textures are broken or simply nonexistent like the cyberpunk outfits lol
harsh saddle
A lot of times I'll just take clothing from Sketchfab and use that, you can get a lot of stuff legally for only a few dollars but the complexity of the kitbashing varies depending on a lot of factors. Ideally, the clothing is in a t-post and already has weights so you can just rename the vertex groups and you're good to go but it's a bit more complicated if it's too high poly or in an A-pose, in that case, I'll usually just re-rig it using a plug-in for Blender called Auto Rig Pro. I prefer it to Mixamo and it can do a lot of other useful stuff like retargeting animations.
 lapis smelt
should i start doing topology or weightpainting or making seperate objects?
 trail python
topo
lapis smelt
alright
 pure dagger
i have pride pins for sale <3

 rustic pier
Idk where to put this but I’m helping my friend wit blender and she doesn’t have these buttons or whatever on the side?

 cinder cradle
rustic pier
Idk where to put this but I’m helping my friend wit blender and she doesn’t have...
cinder cradle
rustic pier
Idk where to put this but I’m helping my friend wit blender and she doesn’t have...
ctr+space
rustic pier
cinder cradle
ctr+space
Uhmmm it didn’t do anything 😭
harsh saddle
rustic pier
Uhmmm it didn’t do anything 😭
Is she using a different layout?

 merry cedar
Hey guys i need help!! I was trying to compress a supposed copy of my blender file but instead it destroyed my textures (which i managed to fix) but i also fked my shapekeys.. So my basis shapekey now became the right blink, can this be fix in any way?

Well basis is "fixed" now but left blink looks like this and right blink doesnt even work...

im losing my shit honestly this all started from a small problem with the teeth and escalated into this
harsh saddle
merry cedar
Hey guys i need help!! I was trying to compress a supposed copy of my blender fi...
I don't know what you did to fix it but my suggestion would be to change the Range Min of the right blink to some negative value (-1?) so that the shape key goes in the opposite direction and hopefully returns the eye to its default position and then apply the shape key to the basis using the dropdown menu
 harsh saddle
rustic pier
Nope!
harsh saddle
rustic pier
Nope!
Probably best to just redownload Blender.
merry cedar
I found the copy of the file i had and it seems to work just fine except that i cant save it anywhere
phew
can i somehow make this the default file?
 harsh saddle
Are you trying to save to Temp? You can't save anywhere else? Maybe export to FBX and re-import it?
merry cedar
i fixed it, just had to "save as"
i hope i dont come across any huge problems the compressing has done
harsh saddle
By compress you mean added it to a zip or a rar file? So long as you extract it, you should be fine.
merry cedar
well im not sure really
i made a copy of my file that i tried to zip
but it somehow messed with my real file destroying some stuff there
I just noticed something. This is a copy of my avatars teeth. There's this dotted line thats coming from to origin but the teeth are not in the middle on this dotted line even tho middle verticies coords are on x 0. Can i do something about this?
tough plover
merry cedar
I just noticed something. This is a copy of my avatars teeth. There's this dotte...
select the mesh, do ctrl + A > All transforms
merry cedar
i did its in the middle
could the origin not be in the middle?
When trying to move it from the middle this happens

any idea what causes this?
do you guys think i should just redo the whole teeth? These things are just causing me too much trouble. Also is it easy to get the same textures on the new teeth?
merry cedar
Also will it mess with shapekeys? Or does it only mess with them if the mess replaced is part of the shapekey?
 shadow zinc
 red glade
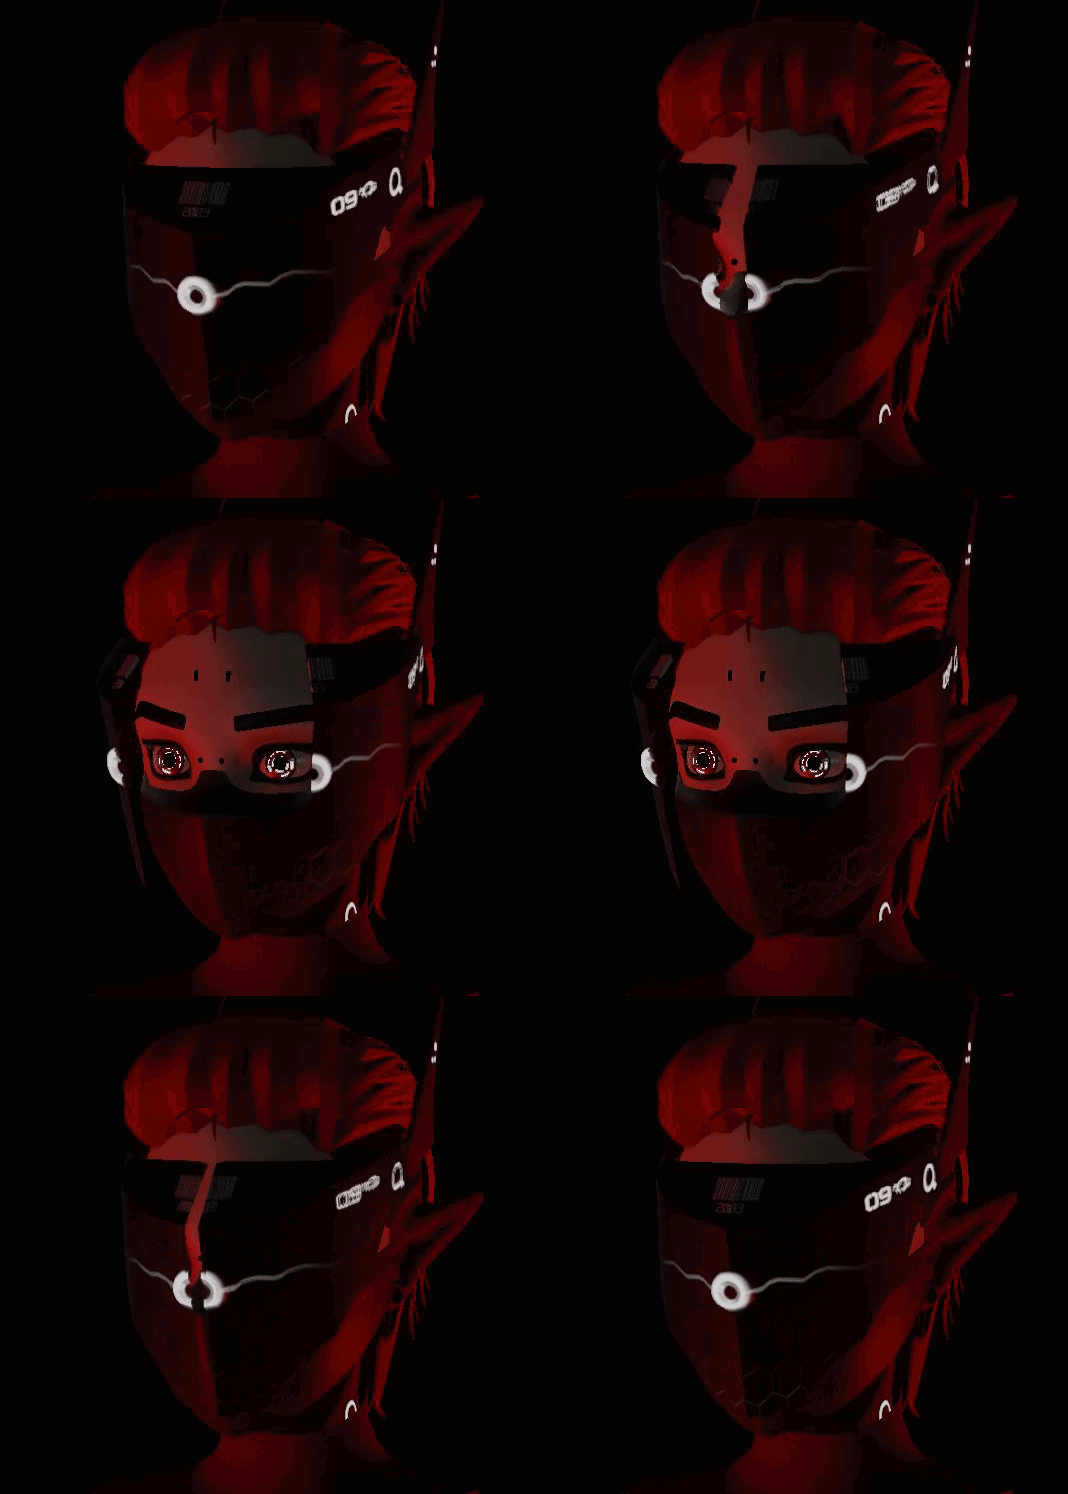
need some feedback on the ears, do i make them have armored skin like the neck/chest, or just the same skin tone as my face
 red glade
Silver ye?
im doin the armor rn btw very coole

lemme try silver

well i made something like this

What raiden wears
lemme see

i mean
yea
i still gotta texture the neck and the side of the skull so
yea true
still gotta texture that too
yea, that also
for now im just goin with generic red,
As you can prob see yellow is ma fav color tho so once i got that hue stuff figured out ill do funny yellow
wdym?
the red ears
Yea its ma personal avi,

yea
well the thing is im not really looking for that style.
i mean i could just make the ears darker around the edges
 past cloak
making a mini ice construct avatar with customization all using shape keys by hiding them inside their respective body parts


 silent sedge
Should i make him a avatar

 solemn river
Having a weird issue with textures in blender, when I import the model and either apply the texture manually or use fix model in cats, the texture appears to have a bunch of holes in it.

exporting the texture is fine and nothing is missing, but it's hard to look at in blender
Figured it out, I had show backfaces turned on somehow
fallow osprey
Does anyone have an explanation for why the skin texture I painted in blender doesn't port over to unity? Now my avi is grey-skinned lol

 harsh saddle
Are you using a texture map? Vertex colors? You have to save your texture to a file and then import it into Unity. If you're using vertex colors, I don't really know because I don't use those.
fallow osprey
harsh saddle
Are you using a texture map? Vertex colors? You have to save your texture to a f...
Ahh ty, it's a texture map. I'll save it as a separate file tomorrow then :^)
 median pike
@tulip condor yo. Out of sheer curiosity. Do you have a portfolio or any way to show off some of your 3D work? I am curious
fallow osprey
harsh saddle
Are you using a texture map? Vertex colors? You have to save your texture to a f...
Okidoke, so I saved the skin texture map and extracted the material from the .fbx file so I could place the texture map into the base slot. But when I did that, the material wasn't recognised anymore
 harsh saddle
fallow osprey
Okidoke, so I saved the skin texture map and extracted the material from the .fb...
harsh saddle
fallow osprey
Okidoke, so I saved the skin texture map and extracted the material from the .fb...
You should just create a standard (or standard lite if you want to have it cross compatible for quest) material and put the texture on there, I don't think it recognizes the material you extracted.
fallow osprey
harsh saddle
You should just create a standard (or standard lite if you want to have it cross...
Alright, thank you for the help! ^_^
I'm much more comfortable with blender heh
 tulip condor
@median pike
i did it but it was 3 years ago
and trust me 1st one is big crap
but 2nd one is little crap
so dont bother
it look's pretty bad 😦
 pale grail
when i click on build and test/publish it just gives me this
 pale grail
nvmd i just made a new project and it works fine
an the other hand
how do i prevent the 100% head lock on my models

id like the head to be somewhat parallel to the spine and not to crazy angles like this
 spare kiln


Almost done creating my fully from scratch model, quest compatible and sub 70k polys with medium optimization rank on pc
quaint jasper
Looks great 
spare kiln
quaint jasper
Looks great <a:clap:700827878484607027>
Thank you!!
 glad steeple
more goth skater girls lets go
 grim cargo
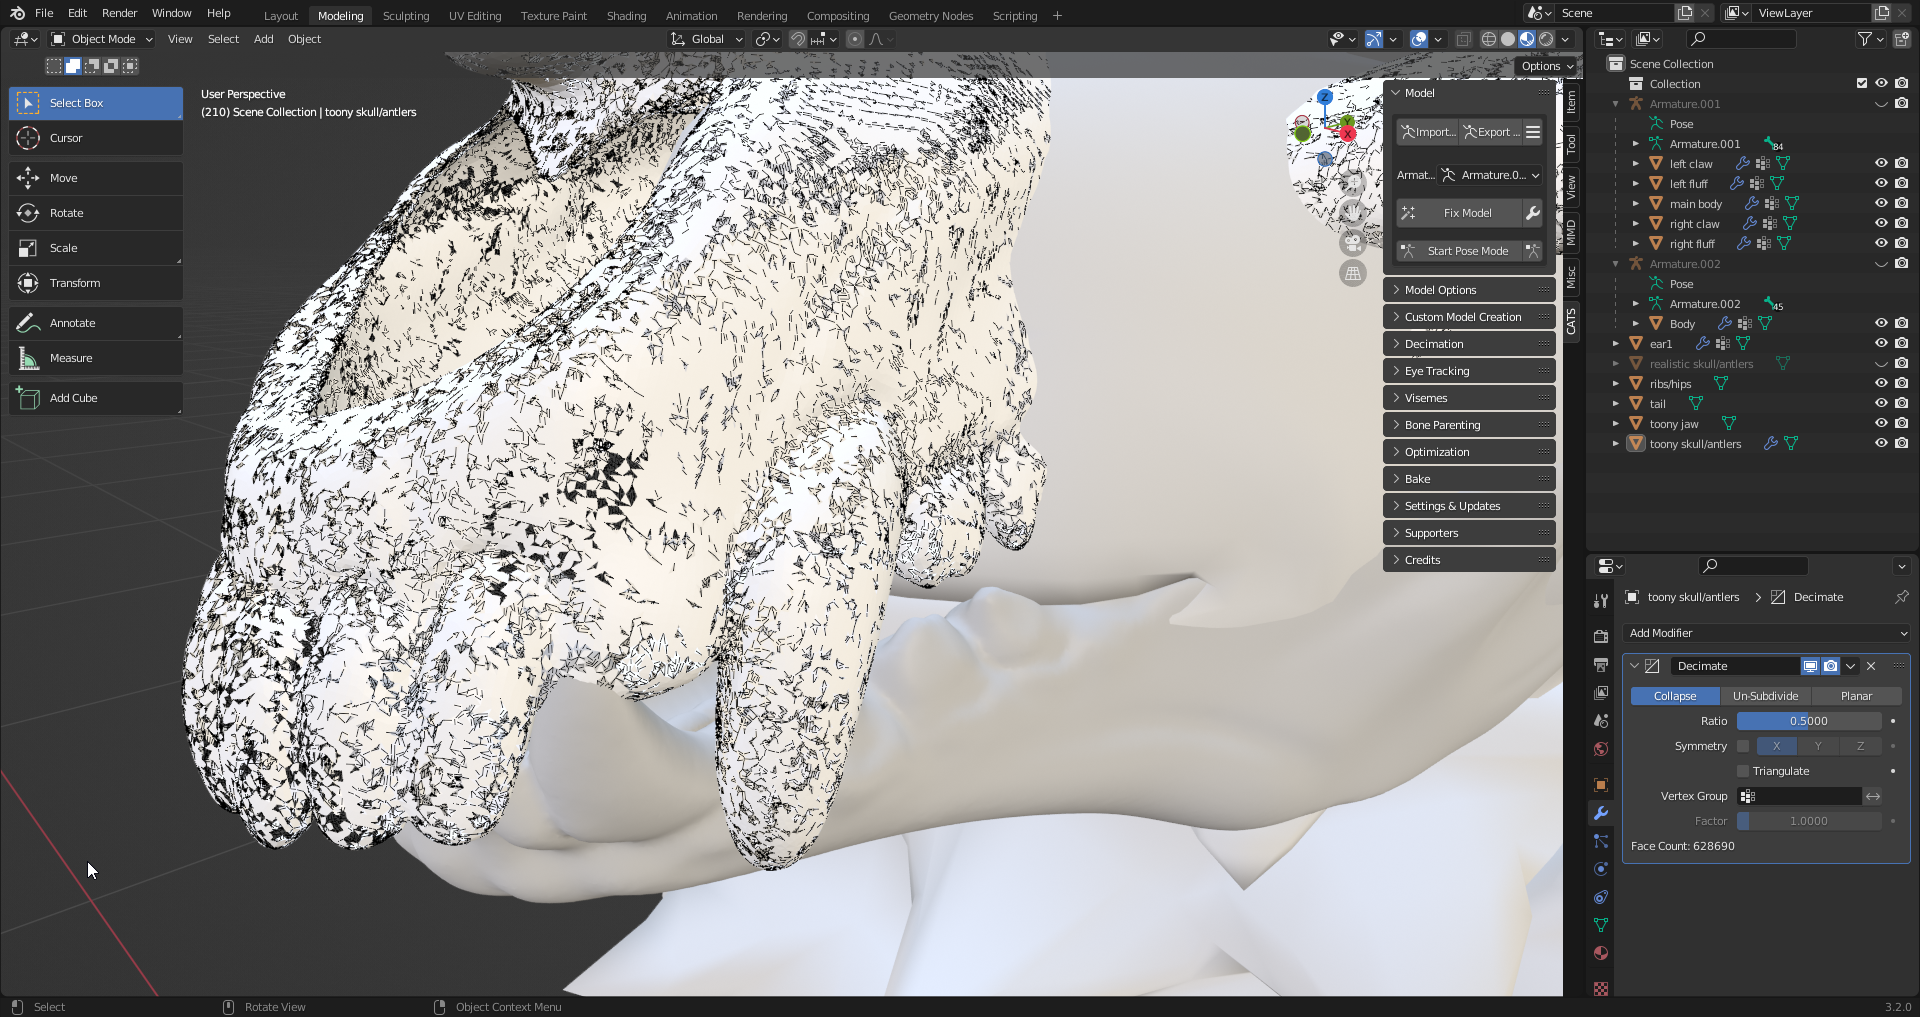
lol so what do I do when the model I'm trying to decimate is like 1.25 million faces and decimate won't work on it?
and when it stops locking up, it looks like... this https://i.imgur.com/4z1DXWG.png
 glad steeple
grim cargo
lol so what do I do when the model I'm trying to decimate is like 1.25 million f...
glad steeple
grim cargo
lol so what do I do when the model I'm trying to decimate is like 1.25 million f...
retopologize
grim cargo
once I figure out where that is, I'll give it a shot. I downloaded Blender yesterday or the day before and only know a couple things lol
glad steeple
Decimating a mesh is like a last resort. The mesh you are using is clearly not meant to be used in videogames (maybe a 3D scan) so it needs to be retopod
grim cargo
yeah it's a 3D printer model from Thingiverse because I can't find any free models that fit my needs built for VR
whenever I look up how to lower the poly/face count of a model, decimate was like that only thing that came up
glad steeple

Learn a full retopology workflow in Blender 3.0+, using only free tools and add-ons shipped with Blender by default.
⇨ Master 3D Sculpting in Blender course: https://bit.ly/b3d-sculpting-course-6
⇨ Project Files + Blender Shortcut PDF (email required): https://bit.ly/cgboost-resources-14
⇨ Blender Secrets E-book (affiliate): https://gumroad.com/...
grim cargo
I just opened that video, good timing lol

 quaint jasper
When you chew 5 gum
 heady apex
quaint jasper
When you chew 5 gum
heady apex
quaint jasper
When you chew 5 gum
lmaoooo
red glade
spare kiln
Good job on the texturing, mind if i ask you have any tips on doing stuff for denim pants?
spare kiln
red glade
Good job on the texturing, mind if i ask you have any tips on doing stuff for de...
do u use marvelous or zbrush?
red glade
I usually do everything either in blender or Photshop
I do have marvelous installed from the student license thingy
So i can still try it
any good brushes you recommend?
spare kiln
marvelous for cloth sim and id recommend zbrush for extra details like the little wrinkles between stitiches
as well as sculpting additional folds/ removing
i like zbrush cuz i got used to using alphas
quick way to add detail
then retopo in blender or maya, whatever suits u then bake ur high poly to ur new retopo in substance
thats how i did it
lol
red glade
spare kiln
marvelous for cloth sim and id recommend zbrush for extra details like the littl...
i use marvelous for the clothing, and uhhh zbrush for texturing
well id like to try now i should say
red glade
spare kiln
marvelous for cloth sim and id recommend zbrush for extra details like the littl...
ait bet, preciate it
spare kiln
i didn't even know texturing in zbrush was possible
spare kiln
sbstance?
red glade
Yes that
spare kiln
yes
red glade
i tried that before, and not a fan of it
i suppose i can try it like that also, i do retopo/sculpting in blender tho
red glade
this is what im workin on rn
 spare kiln
u made the body?
red glade
Did all of the texturin on it, its from vroid sadly. i made the arms tho
the head is my first time sculpting too. been using blender for vehicle modeling for 7 years now ish
So this is a whole new package for me
 red glade
Thx, i really like cyberpunk stuff
gotta texture the eyes n uhh skull/neck also
same for the facial cyberware/piercings
i suck at designing/picking clothes tho not sure what i wanna wear on my casual fit
 tardy elm
Wrong place, sorry.
red glade
thx
 thin lily
hey, so im trying to atlas a texture with cats and i hgave material combiner installed, but every time i try to use it it says install pillow, so i hit the button, and it says to restart blender. i close blender, reopen it, and the cycle repeats. what am i doing wrong? i know theres something about running as admin but im on a mac
red glade
I decided to make the arms like the other parts. not sure what to think about it looks better tho.
 grim cargo
Would it look odd to have a lower poly model? Like, I think it still looks good on its own, but will it look strange if everyone else is super high poly, or do the styles work together?
 solar fossil
considering how many styles and levels of quality vrc models come in i would say its fine
heady apex
grim cargo
Would it look odd to have a lower poly model? Like, I think it still looks good ...
Unless it’s optimized to the point it looks god awful, (idk why you would go that far) I think it will look fine. Cam in this channel has really optimized work and it looks amazing
I recommend taking a look at his work
 rancid ginkgo
what's the best way to fit something like say a piece of clothing from one character to another?
I'm currently trying with the grab tool in the sculpt section but wanted to know if there are other ways
 verbal steeple
rancid ginkgo
what's the best way to fit something like say a piece of clothing from one chara...
verbal steeple
rancid ginkgo
what's the best way to fit something like say a piece of clothing from one chara...
The Draw tool in the Sculpting section helped me with alot of the clipping issues
But IDK, I just resize it if its too small or big for an avatar, and draw over all the clipping
trail python
resize it in edit mode using the native scaling and then using the grab tool in sculpt with symmetry on is probably the easiest
rancid ginkgo
aight, I'll check it out, thanks.
 spring shell
What program is reamended for generating textures? Is there a way I can 'draw' on a model and have it generate a flat texture file?
 supple garnet
spring shell
What program is reamended for generating textures? Is there a way I can 'draw' o...
supple garnet
spring shell
What program is reamended for generating textures? Is there a way I can 'draw' o...
Blender gives you the ability to draw on textues.
Substance painter I believe is the reccomended one thouhg (I have never used it so can't comment any more)
Often it can be useful to outline your uv's in blender and then actually edit them in a program like krita
 jagged raft
someone knows how to fix these like idk light-shadow artifacts in unity?
 merry cedar
quaint jasper
Yeah if new vertices are also doing it, I'm not sure
merry cedar
quaint jasper
Yeah if new vertices are also doing it, I'm not sure
im back from summer cottage and i found the solution a while ago, i had a thing called topology mirror on in the mirror settings
turning it off seemed to fix the problem entirely
quaint jasper
Glad you found the fix


 subtle jackal
Nice, looks very clean. Only real error I can see is on the tang and it's very minor. I assume the hammer hasn't been done yet
 thin shadow
 steady zealot
do you have the real thing to use as reference? or just google search
 limpid stratus
Been working on this yesterday, i dunno how to make the fluff more fluff though and i probably need to make it less "stiff" since it does not look that good when attached to the head


Maybe i just need to rotate them differently to get a nice placement
mirrowed and angled differently

dunno how to make this better
steady zealot
thin shadow
do you have the real thing to use as reference? or just google search
Only reference images online sadly.
steady zealot
subtle jackal
Nice, looks very clean. Only real error I can see is on the tang and it's very m...
Error on the tang? Mind elaborating?
subtle jackal
steady zealot
Error on the tang? Mind elaborating?
Sure, you can see a very slight discoloration right here in the marked area. It's extremely subtle and only really noticeable since the rest is so clean. I figure it's probably just how the geometry is in that area.
 steady zealot
That's necessary because that line isn't marked sharp
or rather, not creased
because if I do, it sharpens the point on the right
one sec
 subtle jackal
ah, I see. My only advice (aside from just ignoring it) would be to maybe try other ways of building out that area to avoid it
steady zealot
I have an idea
subtle jackal
but really fantastic work anyway, definitely looking forward to seeing the finished piece
trail python
that'd probably be barely noticeable once diffuse is added, great model though
steady zealot
good enough
 subtle jackal
looks good!
tough plover
steady zealot
because if I do, it sharpens the point on the right
pretty sure newer blender versions adds vertex creasing
steady zealot
tough plover
pretty sure newer blender versions adds vertex creasing
How new? I'm on 3.0.0
Oh, 3.1
Nice, time to upgrade
red glade

Making progress on da boi

time to do the armor plating, not sure how ill approach this tho
 surreal yoke

 mellow cloud
can someone help me with the new blender
harsh saddle
That is a very open-ended question but maybe?
supple garnet
mellow cloud
can someone help me with the new blender
 mellow cloud
@supple garnet i been making a doughnut in blender
harsh saddle
Ok?
 obsidian jungle
Roblox sonic looks perfectly great and then oculus quest vrchat sonic looks terrible, roblox maximum polygons is 5k and quest is 10k, someone should explain that 🤔
harsh saddle
Sometimes it's the skill of the avatar maker that makes the difference and not the polygon count. I imagine there are a thousand different Sonic avatars from different creators in VRChat. Also, I'm pretty sure the polygon limit for Quest avatars is 15k these days.
obsidian jungle
Ah yes so even more polygons and they look like n64 characters lol that’s kinda sus
Naturally my main avatar uses more than 100k polygons and even at 20k it still looks “good”
Also i used just an automatic decimation from cats
harsh saddle
100k is a lot of polygons, even by PC avatar standards. Automatic decimation isn't the best method of decimation, that would be manually dissolving edge loops but sometimes it can be good enough and it's a lot faster.
atomic hamlet
harsh saddle
Sometimes it's the skill of the avatar maker that makes the difference and not t...
It's 10k for fallback compatibility.
15k for Medium IIRC.
harsh saddle
Yeah, 10k doesn't guarantee Good or Excellent quality depending on other factors but I don't think 10k+ can get above Medium. Still, being visible without having to manually display it or change your performance settings is good enough for me.
atomic hamlet
Being above 10k tris automatically makes you Medium on Quest.
It's a hard-cutoff point.
 safe marsh
i find 10k for good on quest kinda ridiculous because the only models that would really even fit that size would be from some super old game or something or a mobile game. unless you spend a ton of time lowering the poly count on your model which most of the time you cant even get it that low without it looking bad
i would say 25k would be pretty good for quest you can still get a decent model and if someone puts in the effort they can get it that low fairly easily
10k is just to hard to reach without having major compromises
 azure rain
the quest is functionally a cell phone so essentially mobile game Graphics would be the graphics Target
safe marsh
yes i am aware but i do feel people do underestimate it
quaint jasper
No one is underestimating the quest. We've done extensive performance tests over the years. It's already incredible what it supports in a public instance given the avatars people use
safe marsh
yeah i can understand that just wish my model did not get auto hidden its 25k poly
azure rain
have you tried to see if you can shave off 6000 triangles Ben10dom1
harsh saddle
It's all a matter of style, the RPM avatars look good and are under 7500 polygons, you just can't have a photorealistic character with 10 different outfits and accessories. I've made characters under 10k polygons that don't look that different from a 200k polygon sculpt just by baking normal maps, you can get a ton more detail that way.
azure rain
and considering most people are running around in Anime Avatar as they should be able to be converted pretty decently
 sturdy goblet
how do i make the lowerlashes transparent.... im not good with nodes
 harsh saddle
In Blender, you would need to have the alpha output plugged into the alpha input on the channel on the shader for Eevee and then go into the material settings and set the blend mode to something like alpha blend. I think for cycles, you still need to have the shader you're using going into a mix shader with a transparent shader and using the alpha output as the factor but Unity is different. In Unity, you would need to create a material, set the rendering mode to fade or cutout and then use a texture imported with "alpha is transparency" checked so it depends on where and how you're trying to do this.
sturdy goblet
instructions unclear due to my braincells i have created a monster

I GOT IT
i did it 
 sturdy goblet
i have another question
for some reason in edit mode ican move the shorts verts but not the tops verts... same for the entire body mesh. i looked online and ppl said it might be shape key stuff but the lock isnt on... i looked at the magnet thing its fine but im not seeing any other answers
harsh saddle
And it's all one object?
sturdy goblet
yes i cant even delete the verts on the untouchable parts
i tried deleting the head so i could replace it but it wont go anywhere
harsh saddle
Hmmm, not sure, I recall someone having a similar issue recently but I'm not sure if/how it got resolved. One option might be to try to export to OBJ or FBX and re-import to see if that fixes it.
 gritty veldt
https://gyazo.com/9758f164d507a5b0f0c040a72eab11d2 Is there a specific way to alt-click and intentionally auto-select different ways?
quaint jasper
Yeah, whichever edge you're pointing at
in this case, the larger edges point outward, it'll select that way, smaller edges are pointing around the circle, so you'll select the loop that way
quaint jasper
gritty veldt
https://gyazo.com/9758f164d507a5b0f0c040a72eab11d2 Is there a specific way to al...
And by pointing at I mean your cursor being closest to a specific edge when you click
gritty veldt
Ayy nice! Thanks again! :)
 azure harness
Hello! Blender noob here.
I'm currently developing a world and am having issues with subdivision. My goal here is to have a road (shown as the unselected bit) and ground/hill (as shown by the object currently in edit mode).
I guess what I'm not really understanding about subdivision is that most of the uses are shown where it doesn't clump up in dense areas. Even if it is not a 4 vertex poly, it manages to make large, even faces.
However, in my case, the areas where the hill object is lined up with the road object (where it has a lot more verticies), it ends up creating exponentially more veriticies than necessary.
Is there some way to limit the distance of verticies? The only solution I have is to select the verticies and then delete them. Or alternatively, manually create all the verticies that I want, but that seems excessively overkill. Unless there is an easier way?
Basically: I want to be able to select all the verticies of the road where the hill would connect, create a new object with those verticies, then make a few verticies to make a single larger face that I can then subdivide. Unless I am fundamentally doing something wrong?

This is a better view of what I start with and eventually subdivide
 quaint jasper
azure harness
Hello! Blender noob here.
I'm currently developing a world and am having issues...
quaint jasper
azure harness
Hello! Blender noob here.
I'm currently developing a world and am having issues...
You can easily do what you're describing at the bottom, road mesh in edit mode, extrude the vertices of the road's borders, select the faces you just created and press P to separate
azure harness
So would I just do P to extrude multiple times so I can make mostly-even square faces, and then I can cut off extra verticies and clean up the end?
Unless you're saying this? My only problem with that is that I'd need to still subdivide. Even if I did manually subdivide each edge, selecting all and pressing "F" to make faces would make a ton of overlapping faces, rather than just selecting the nearest faces and not overlapping.
 azure harness
So would I just do P to extrude multiple times so I can make mostly-even square ...
azure harness
azure harness
So would I just do P to extrude multiple times so I can make mostly-even square ...
and doing this would still be the same result. Faces would overlap, and I have clumps of verticies

manually subdividing these edges technically does work, but I'd still need to copy and manually create vertices and make faces from that. Unless that is my only option with a complex shape such as this?

I feel like subdividing the whole object would be easier if I could set a minimum distance between vertices, or if I could deselect certain edges from creating additional vertices. But I don't think that's an option. Every search I did for this just returned basic tutorials for subdivision, none of them using complex shapes like this. Which makes me think I am doing something fundamentally wrong.
My method of manually deleting vertices mostly worked for this shape, but you can see there are still excessive vertices, and the new shape I am working on has probably 4-5x the number of vertices that I'd need to dissolve/delete.

I'm mainly just seeing if there is a way to do this without resorting to manually creating vertices and then manually selecting vertices to create faces one-by-one.
quaint jasper
If they're uneven on opposite sides, there's not really a good way to do it
Grid fill might give you a good enough result though
azure harness
That seems perfect. Though another ask: Is there a way to "F" vertices, but to only create edges, and to only make edges between the nearest vertices? I have no idea why blender is choosing to randomly make edges between vertices that aren't near each other.

I can go through and select one vertex at a time, which is fine, but it takes time of course. Not sure of a faster way
azure harness
Okay, I think that worked for the most part. I was able to subdivide the straight edges to be approximately half the density of the complex edge, selected the opposing edges (top and bottom), and then did grid fill. Thanks for the help!

oh, and using "simple blending" makes it much more even, which is nice 😄
 azure harness
Ideally so I can sculpt it into a hill like this one was
 red glade
Ah roger that
azure harness
I guess simple blending causes it to have this weird overlap, so I'm actually not gonna do that, lol
 azure harness
Ideally so I can sculpt it into a hill like this one was
azure harness
azure harness
Ideally so I can sculpt it into a hill like this one was
Also once I get to the Unity part and checking poly count/performance, I'll consider how many polys I have and work on optimization, since ideally it would be a decent performing world for both PC and quest
 kind inlet
Jenny WIP

Gonna use some flat shading and eye tracking tricks to accomplish some neat perspective-based stuff
azure harness
red glade
Why does the model need to be so dense?
Not done, but here is the result of being able to have this shape with plenty of vertices. If needed, I can later decimate/dissolve vertices that don't really do anything.
 azure harness
Sorry for this silly question but I completely forgot. I know there is a way to scale/move vertices relative, like evenly, in such a way where in-between vertices will scale proportionately to the original. IDK if this makes sense

or maybe not. I was trying to make this a slope, but I forgot I tried this last time and ended up just rotating + moving
 azure harness
I'll try that next time, thanks. Just did rotate + move this time
 azure harness
Sorry for asking so many things, lol, but google is absolutely terrible for blender it seems.
It appears that the texture on one of my objects is the incorrect orientation, despite the normals being the right direction?
 spiral sigil
wip of my fursona

 spiral sigil
 kind inlet
 tough plover
azure harness
Sorry for asking so many things, lol, but google is absolutely terrible for blen...
tough plover
azure harness
Sorry for asking so many things, lol, but google is absolutely terrible for blen...
your UV's are probably wrong
 rain bay
Is there in here I can ask for commissions?
 white moth
OpenAI's GPT-3 is already allowing me to avoid learning Python. https://cdn.discordapp.com/attachments/230485899715018755/991716529148280862/unknown.png
 harsh saddle
rain bay
Is there in here I can ask for commissions?
harsh saddle
rain bay
Is there in here I can ask for commissions?
You have to scroll up a bit but you can find the VRCTraders server in #community-servers-old
tough plover
white moth
OpenAI's GPT-3 is already allowing me to avoid learning Python. https://cdn.disc...
what the fuck, wild
plucky totem
So... what's the proper way to do spec maps on the default unity shader?
Everything I do ends up looking a little metallic or slightly off, or just.. blue? for some reason
I'm exporting roughness textures from substance or making my own, and I understand the grayscale aspect, it just doesn't look good. does setting smoothness above .5 just ignore the blacked out spots?
harsh saddle
Well, you definitely don't want a specular map unless you're using the shader with the specular setup but assuming you're got that part right, I'm not sure. I would watch this video https://www.youtube.com/watch?v=X9RR7DdOwmY
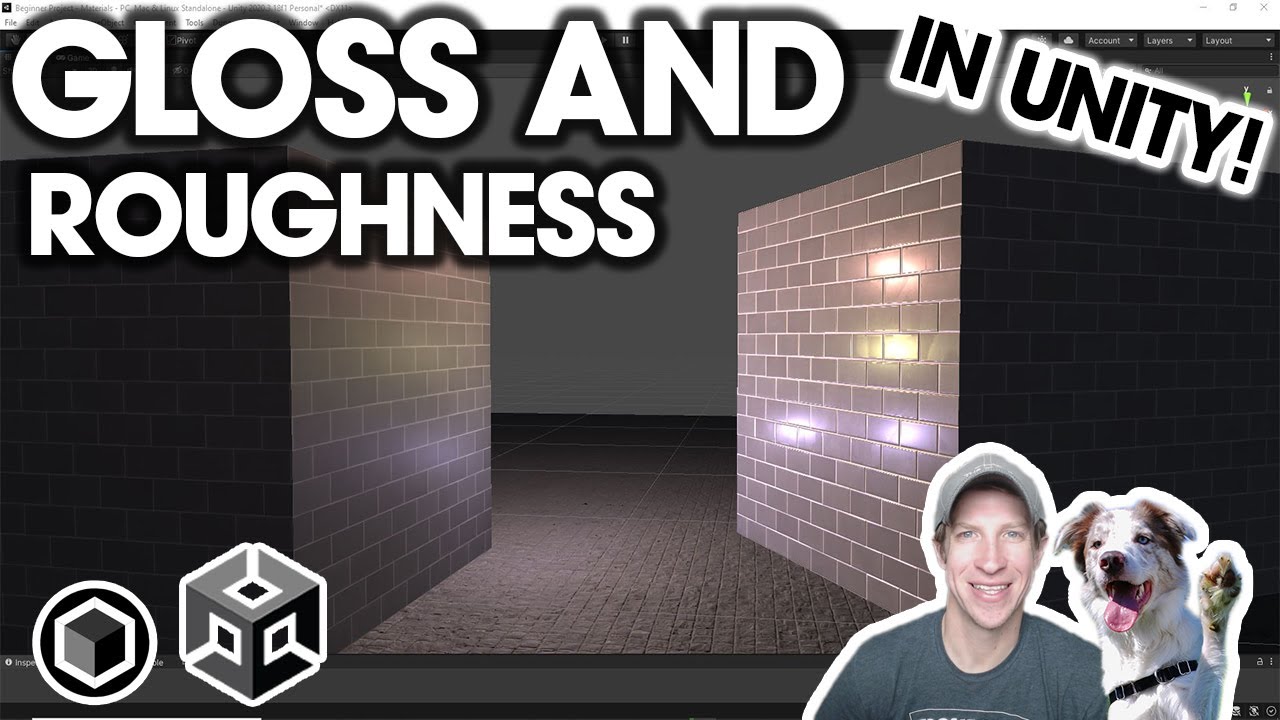
In this video, we talk about how to use gloss and roughness maps in order to create realistic shiny, reflective materials in Unity!
Learn how to add these maps to the alpha channel of a map so you can enable them in Unity!
DOWNLOAD GIMP
https://www.gimp.org/
POLIIGON TILE MATERIAL
https://www.poliigon.com/texture/tiles-rectangular-mirror-gray...
atomic hamlet
white moth
OpenAI's GPT-3 is already allowing me to avoid learning Python. https://cdn.disc...
Ok, I'm officially impressed, AI can do scripting now.
harsh saddle
It probably has most of Stack Overflow in its training data minus the passive aggression and snark. Alas, it's still not available to normies and it's hard to say if it ever will be without massive limitations to prevent us from doing anything they don't like with it.
plucky totem
harsh saddle
Well, you definitely don't want a specular map unless you're using the shader wi...
Awrite, thanks! I know about these sorts of things, i've made textures for source, and I tend to use poiyomi for my avatars cuz toon shading = the best, but spec... gloss? w/e work differently on that than they do on more realistic shaders
 zenith mason
how would i smooth this
 tough plover
zenith mason
how would i smooth this
tough plover
zenith mason
how would i smooth this
could be normals. select the whole mesh in edit mode and do alt + N > reset vectors
zenith mason
gonna have to wait for my computer to respond
its such shit that the app is not responding when im just trying to merge to verticals
 thorn gulch

 azure harness
tough plover
your UV's are probably wrong
azure harness
tough plover
your UV's are probably wrong
Are there any common ways the UV would be wrong? I just clicked UV unwrap and didn't touch it otherwise. I'm using a poligon plugin thing to scale and mosaic the textures, which is in the material and is the same for all three hills
glad steeple
azure harness
Sorry for asking so many things, lol, but google is absolutely terrible for blen...
Its not that google is bad for blender, it usually will give you twelve different ways you can do one thing 😅
its about knowing what to search, textures have almost nothing to do with normals. Its hard to understand your issue from this text.
Textures being wrong is usually a UV issue. but its hard to know what is actually happening here
 rich grove
How can I get rid of the black around the hair
 harsh saddle
Does the texture have transparency? If it does, you can import it with "alpha is transparency" checked and then set your standard material mode to fade. If it doesn't, you'll probably need to use a cutout shader and then adjust the threshold. Neither of these will work for Quest which doesn't support transparency on avatars so in that case, you'd have to have the shape of the bangs modeled using the geometry.
kind inlet

 unborn acorn
rich grove
How can I get rid of the black around the hair
unborn acorn
rich grove
How can I get rid of the black around the hair
Go to shading tab and connect the image alpha to the alphq in the mqin node
white moth
harsh saddle
It probably has most of Stack Overflow in its training data minus the passive ag...
It’s open access with no waiting list. beta.Openai.com/playground. They require a phone number though.
harsh saddle
Really? I hadn't heard about that. I will check it out.
rich grove
anyone know how to fix this issue
 harsh saddle
Are those bones connected to anything?
rich grove
theyre supposed to be connected tot he hair mesh but idk
harsh saddle
I'm not talking about connection to the mesh (weights), I'm talking about connections to other bones. You need for the bones to be parented to the bone that's getting moved in some way (either directly or as part of a chain) or else they won't move when you move other bones.
 plucky totem
Have a question about a technique to do something, does anyone know of an easy way to generate normal map divots around UV islands? I tend to unwrap my clothes similar to the actual panels that would be stitched together so i like to put deep norms there. My current method is selected-to-active baking where I take the seams and bevel them with a custom profile that sinks in the middle loops but it's kind of finnicky and unreliable
This is an example of what I mean. I can edit out artifacting but sometimes the mesh is too complex / bevels outwards for some reason it's just a pain to do correctly
 tough plover
plucky totem
Have a question about a technique to do something, does anyone know of an easy w...
tough plover
plucky totem
Have a question about a technique to do something, does anyone know of an easy w...
in substance painter, use the UV border distance generator
plucky totem
but for example like, here, the bevel doesn't always apply evenly. yeah I can do it manually but im kind of aiming for some technique that can approximate it well enough and doesn't require me drawing them on in substance painter lol

oops
plucky totem
tough plover
in substance painter, use the UV border distance generator
a WHAT now? 👁️ 👁️
tough plover
then add a blur filter, and make the layer have a height value of something like -0.5
plucky totem
that is absolutely insane and (probably) exactly what I need, wow
tough plover
example
 plucky totem
absolutely insane
tough plover
do you already use Substance painter?
plucky totem
Yeh!
tough plover
okay cool
so you know how to create fill layers with black masks and add generators to the mask?
plucky totem
I'm just annoying and don't like to draw along seams if I can generate it properly. yes i care about the texture being seemingly seamless around the seams
plucky totem
tough plover
so you know how to create fill layers with black masks and add generators to the...
not entirely sure about generators but google can prolly help
tough plover
yea if you've been using substance and don't know about generators then you've been doing it wrong kek
one of the most powerful things in that program
plucky totem
I don't assume I'd need to generate curve maps or anything if its just with UV islands
tough plover
nah, UV based
 plucky totem
tough plover
yea if you've been using substance and don't know about generators then you've b...
plucky totem
tough plover
yea if you've been using substance and don't know about generators then you've b...
that's like actually insane
 tough plover
:p
tough plover
if there's parts where you don't want the effect, just add a paint layer above your generator and black stuff out
(in the mask)
plucky totem
Well thank you so much! This is incredibly useful for when the funny blender bake doesn't wanna cooperate easily
azure rain
plucky totem
that's like actually insane
that looks very helpful
plucky totem
Yeh I know, I'll prolly bake an AO map from the normal maps after i combine them all
tough plover
another thing I recommend doing is setting the fill color of the layer to black, and setting it to Multiply
then fuck with the layer opacity
alternatively, add the AO channel to your texture set, and increase the AO
so that it'll be added to the AO map rather than baked into the diffuse texture
plucky totem
I tend to just do this set up once I combine the multires bakes with the seam bakes

then bake the AO in blender
plucky totem
am stupid and importing textures into substance makes me feel stupider so for this part i feel its easier for me
but thanks for yer help so far ✌️
azure harness
glad steeple
Its not that google is bad for blender, it usually will give you twelve differen...
Right, I get that. Me not knowing what to search may be the problem as far as google goes.
The problem is that all my faces are facing the correct direction, but for some reason the texture is flipped on the lower/right object. You can see that on the side it's supposed to be (blue faces), it's a lighter color, but on the bottom side (red faces), it is normal.
It's like the texture is opposite the face direction.
Here is a video of the problem. I guess more specifically, it seems like the object normals are facing the wrong direction.
 spiral sigil
W.I.P

 cobalt fractal
This was supposed to cute in a way but the more I modeled the more it turned into a spawn of satan

 kind inlet
 cobalt fractal
kind inlet
https://cdn.discordapp.com/attachments/837654667096752149/992410224377999470/unk...
cobalt fractal
kind inlet
https://cdn.discordapp.com/attachments/837654667096752149/992410224377999470/unk...
Love the shading!
kind inlet
Thank
glad steeple
azure harness
Right, I get that. Me not knowing what to search may be the problem as far as go...
Your description is still very hard to follow, but it just sounds like its unwrapped incorrectly? is the mesh just a plane? can you enable backface culling? is the mesh supposed to be two toned? can i see the material?
Its hard to know what its supposed to look like when i dont know what it is you are making 😋
 onyx juniper
I think my character might look better with thinner, straighter hair
https://cdn.discordapp.com/attachments/966887958068232244/992490432627998830/unknown.png

 trail python
would depend on her clothing for me, but it looks like you could easily include both options
the bottom looks like a piece you could just toggle off to make the sleek look, or toggle it back to the swoop over the eye look
 naive ibex
I have the model that i pulled from a unity game. I'm in the process of rigging and setting up vertex groups and all the other fun stuff that goes into making a vrchat model. however the models feet are meant to be wearing heals. I want to use shape keys so that I can wear both heals and flat shoes. issue is, every time I try to position them to look natural. it looks horribly deformed. I'm not much of a character modeler myself, could anybody help with this, or have any suggestions?
 red glade

Not really sure how to do the chest pieces, oh and also changed the color scheme like this more
quaint jasper
onyx juniper
I think my character might look better with thinner, straighter hair
https://cdn...
Closer to a Cleopatra too ! At least the Monica Belluci version
onyx juniper
quaint jasper
Closer to a Cleopatra too ! At least the Monica Belluci version
Oh she does look like her! And Might I add, Mmmmmmm
quaint jasper

quaint jasper
For my first #Artfight2022 submission, I decided to model @Zodieas_Nic 's Rae character. Took me a whole damn day but I'm super happy with the end result !
 pure lily
Hello, May I ask does anyone know how to add png clothing to an avatar
tough plover
pure lily
Hello, May I ask does anyone know how to add png clothing to an avatar
what does that even mean? could you be more specific?
pure lily
Got it sorted, but where is the pest place to get clothing for a VRM?
harsh saddle
It seems like you just make VRM avatars more or less the same way as any avatar so I assume Sketchfab would work. Unless you're using some special program that doesn't allow the importing of common file types
devout scroll
doubt they know how that works
if doing vrm you probably want to look at vroid
which is probably what you're already using. you can get clothes on booth.pm and maybe deviant art?
spiral sigil
W.I.P Jon Bon Jovi

 rough wing
why is this shading problem happening in my model. i've tried everything to fix it. it's not a normal map issue nor is it a normal direction issue
 quaint jasper
rough wing
why is this shading problem happening in my model. i've tried everything to fix ...
quaint jasper
rough wing
why is this shading problem happening in my model. i've tried everything to fix ...
Did you try resetting normals vectors or setting the normals by face orientation ?
rough wing
yes i did both of those
quaint jasper
tried deleting the face and recreating it ?
As well as the faces left and right of it
rough wing
didn't work
quaint jasper
Unsure in that case, hard to make more guesses without having the mesh myself
 uncut imp
rough wing
why is this shading problem happening in my model. i've tried everything to fix ...
uncut imp
rough wing
why is this shading problem happening in my model. i've tried everything to fix ...
What's it look like without the textures in the plain tender mode?
rich grove
I painted the texture from back to a light red as shown in the right texture. But when I saved it, the image shows it as white. anyone know whats going on
 quaint jasper
rich grove
I painted the texture from back to a light red as shown in the right texture. Bu...
quaint jasper
rich grove
I painted the texture from back to a light red as shown in the right texture. Bu...
Mind showing the rest of the screen ?
rich grove

its odd too cuz the whiting out only happens for the shirt and skirt. the pants and her nails are fine.
quaint jasper
Is the image opened in another program outside of blender ?
Are you doing a blendfile save or the image within the blend file save ? (Alt + S vs Alt + Shift + S)
rich grove

also when I import the model to unity, her right glove is wigging out like backfacing is on. But its a direct mirror (M + X) of the left glove. Is that probably the issue?
 quaint jasper
A modifier mirror ?
 lucid siren
ok im new to making vr chat avatars and im tryin to make a tails if any one would help i would be greatly appreation
quaint jasper
lucid siren
ok im new to making vr chat avatars and im tryin to make a tails if any one woul...

Rain sensei here, ask me as many questions as you need, we’re making a head out of a cube.
btw that cube was 2m by 2m I had a slip up don't fight me.
I'm using blender 2.9
I’m sure you’ve seen a lot of people who get perfect circles and start pulling here and pushing there, and in no time they’ve got a pretty face. That’s sculpting, if you want...
harsh saddle
Is that polygon modeling without a base sculpt? I'd rather drink a glass of nails but if that's what works for you then different strokes, I guess.
quaint jasper
Expecting beginners to sculpt is how you make people give up on the software instantly lol
 toxic tide
What's a good way of making neck/chest floof like this
 quaint jasper
probably just a lot of face extrusions and then merging the new vertices at their center to make spikes
 pine raft
toxic tide
What's a good way of making neck/chest floof like this
pine raft
toxic tide
What's a good way of making neck/chest floof like this
Okay so.
So you have a neck, then, add a torus. Use proportional editing to make it into the rough shape.

Add a displace, set it to noise, set direction to Z, play with the scale.

This'll give you the basis of the fur
Then, weightpaint rougher patches and for each weight paint have a dedicated displacement for it.
One for eacha xis and then a laplacian smooth


You'll get something rough like this, then, any touchups, use edit mode and sculpt mode to fix.
After you're done with that, use vertex paint and search for "dirty vertex colors"
Then play with the values until you get some color variation

This can work as ambient occlusion if you'd like it.
However my preferred method is simply baking it.
There are many ways but this one is quick as hell, if you're looking more precise, the best way is to just do it manually, in which, good luck
quaint jasper
I'd personally do it manually yeah, ends up giving a lot more control

 red glade
spare kiln
red glade
spare kiln
i still envy your texturing style very good 🕺
spare kiln
red glade
i still envy your texturing style very good 🕺
thank you!!
red glade
np
quaint jasper
spare kiln
Is that painted normals or an actual high to low ?
spare kiln
quaint jasper
Is that painted normals or an actual high to low ?
mixture of high to low and painted height maps
large folds are from the high poly bake and the memory folds u see throughout are a height map
quaint jasper
Looks great!
spare kiln
quaint jasper
Looks great!
thank you!! gonna be aiming to make this model "good" ranked
doing my part to make vrc run better

devout scroll
rich grove
also when I import the model to unity, her right glove is wigging out like backf...
mirroring stuff usually also requires you to recalculate normals with shift+N
rich grove
devout scroll
mirroring stuff usually also requires you to recalculate normals with shift+N
Did that and it continued to show up like that. Resorted to going with just one glove
devout scroll
could have ticked inside in the box that appeared
sometimes blender doesn't know which way is inside and which way is outside depending your topology
 hardy jolt
Does anyone know how to texture something like this?
 harsh saddle
hardy jolt
Does anyone know how to texture something like this?
harsh saddle
hardy jolt
Does anyone know how to texture something like this?
It's kind of hard to explain the entire process of texturing but you'll want to start by looking up tutorials on UV unwrapping. You'll need to do that before texturing
hardy jolt
harsh saddle
It's kind of hard to explain the entire process of texturing but you'll want to ...
Thank you, I'll try to start with that. May I refer to you for any questions on parts of the process? Sometimes it's not too clear and English isn't my first language
harsh saddle
You can post them here and I'll likely see them, I'm around here a lot. DMs don't really do anyone any good as they just limit who is able to see your question.
 prime obsidian
hello there, i'm not too good at modelling in blender but i wanna model little horns on an axolotl avatar
i used knife to make some more verticies so i can sculpt later, altho the knife wouldn't mirror
how can i mirror the new verticies over to the other side? i want it to be symmetrical
 quaint jasper
prime obsidian
hello there, i'm not too good at modelling in blender but i wanna model little h...
quaint jasper
prime obsidian
hello there, i'm not too good at modelling in blender but i wanna model little h...
You can delete the right horn, and use the symmetrize function on the left one, and then merging overlapping vertices
prime obsidian
thank you!
i completely forgot about that function
hmm i'm trying to merge them by distance and it's not working out
quaint jasper
You would have to select the head mesh as well !
 winter palm
Any idea on how I could make this type of hair?

 harsh saddle
There's no one technique I could point to but I would sculpt it from a sphere using dynotopo and using the flatten and pitch tools to get some nice stylized waves and then use that base to build my final topology on top of.
 harsh saddle
Looks like a nice color combo. Maybe some white accents on the skin here and there?
prime obsidian
quaint jasper
You would have to select the head mesh as well !
ah i see, i was only selecting the verticies around the horn, now that i selected everything it worked!
tough plover
prime obsidian
hello there, i'm not too good at modelling in blender but i wanna model little h...
tbh I would model the horns separately and just clip them into the head
to not fuck up your body's topology and UV's
if you're gonna be retexturing the entire body, then it doesn't really matter
prime obsidian
i considered that it might mess with the uv stuff butttttt
i believe it's an easy fix
it's much easier for me to do it this way
still a beginner after all
prime obsidian
@tough plover this is what it looks like with the horns now, how do i symmetrize the other horn on the uv map?
 tough plover
pin all of the UV's except the ones for the horns and unwrap
prime obsidian
tough plover
pin all of the UV's except the ones for the horns and unwrap
that messes up the original unwrap i think
tough plover
that's why you pin them
harsh saddle
You could probably also just select the faces and just unwrap those but I wasn't aware of pinning.
prime obsidian
oh wait i did the opposite of what u told me nvm lmao
mb
hmm i mean that makes a separate uv for them
harsh saddle
Then you just need to move it into place and weld the vertices at the borders
tough plover
prime obsidian
hmm i mean that makes a separate uv for them
when you unwrap, have everything selected
not just the horns
you should not need to manually weld the vertices
prime obsidian
tough plover
when you unwrap, have everything selected
the stuff ur suggesting isnt working out for me sadly
maybe i'm doing it wrong if anything
tough plover
definitely doing it wrong
prime obsidian
it just keeps messing up the original uv
tough plover
make sure all of those UV's are pinned
select them all and hit P
then select the whole head including the horns and do U > Unwrap
tough plover
everything except the horns
you are trying to unwrap the horns but not anything else
alt + P to unpin stuff
tough plover
the concept of unwrapping something to conform with what's already been unwrapped is very useful
prime obsidian
i suppose pinning is supposed to make the body mesh untouched when unwrapping? even when i have the rest of the body pinned it still unwraps everything
idk why it does it
i'll give u a clip in a moment
prime obsidian
tough plover
prime obsidian
OH
tough plover
also you need to pin the HEAD, not the horns
tough plover
okay
prime obsidian
give me a moment
winter palm
Thoughts on the hair?
 harsh saddle
It's not bad, a little lacking in flow and volume compared to the concept, a bit like an early-era dinosaur Beatle
winter palm
True. This is honestly my first legit hair style that I have made on a character
harsh saddle
It it's going to be that dark, then you don't really need to worry about detail, it will all get lost anyway, just focus on the silhouette.
There are certain areas of a character that require a lot of additional practice, faces, hands, feet, ears, and hair and you kind of learn most of them as part of the broad topic of anatomy so hair is very much its own beast that takes work. Luckily you can get away with chunky, broad shapes here and don't have to worry about layering planes with transparency.
prime obsidian
@tough plover so i managed to pin it, this is what it looks before and after

 harsh saddle
I don't know about pinning, seems useful but you could try just selecting the horn and unwrapping it, then moving and scaling it into place, that's the method I've always used.

 prime obsidian
harsh saddle
I don't know about pinning, seems useful but you could try just selecting the ho...
prime obsidian
harsh saddle
I don't know about pinning, seems useful but you could try just selecting the ho...
i think that's the only option i have left
harsh saddle
winter palm
How does this look?
Much better, I think. I would go with the dark blue over the white as I think it hides some of the imperfections in the flow of the hair which the white makes much more glaring. Where it's still lacking is just the elegance and balance of the curves, they just feel like they're wobbly without having the polish of a strong curve transitioning into a valley and that producing further ripples. There's a concept in sculpture called contrapposto where everything is designed with these complimentary curves to make the form dynamic and I think that's what you're going for, that flow just isn't quite refined enough and gives a sense of uneasiness.
winter palm
Yeah, I get that it aint as flowy or dynamic as I wanted ot to be. But for what its worth, it look as good as it can be lol
harsh saddle
I think it could look smoother by refining things with the grab tool but you also probably don't want to spend the rest of your life on this character so it's perfectly fine to call it good enough and try to refine your process over the course of multiple attempts.
prime obsidian
@harsh saddle could you show me a quick process of how to scale and move the uv of the horns and connect it to the rest of to body's uv?
i've never done any uv stuff before so i'm not sure if there like some sort of layer to this
harsh saddle
You select the horn in edit mode, press U to unwrap it, then it will be selected in the UV editor and you can move it using the G key and then x or y to constrain it to a particular axis and S to scale it. Once it's in place and the right size, you select the vertices on the edges of the new UVs and the vertices on the UVs you're trying to marge it into and press M and do a merge by distance.
This is all in the UV editor after you do the initial unwrap in edit mode.
rich grove
anyone know how to fix this?
 quaint jasper
rich grove
anyone know how to fix this?
quaint jasper
rich grove
anyone know how to fix this?
Weight paint your eye meshes to your eye bones
rich grove
ive fixed the issue but now I got this

moving the eye bone turns the eye instead of moving it naturally
 stoic glen
Why does stuff become invisible in Unity when trying to change the material on something I just imported from Blender
stoic glen
It seems to be a position related issue after exporting
quaint jasper
rich grove
ive fixed the issue but now I got this
For flat anime eyes, the bone isn't meant to be on the mesh itself afaik, it's supposed to be further back
harsh saddle
If you mean just extracting from the game, if that's even possible, it would be stealing and not allowed in the TOS.
 vale quartz
ok chief
 glass vigil
i have a issue
purchase a model... said it was vr chat ready... cant get the model to load prorperly in unity... its a .FBX file
harsh saddle
glass vigil
purchase a model... said it was vr chat ready... cant get the model to load pror...
What do you mean by it doesn't load properly? You drag it into your scene and nothing shows up?
harsh saddle
You'll generally need materials created in Unity, though sometimes you can use embedded materials. It just came with an FBX and no texture/material files?
glass vigil
came with material files
harsh saddle
Okay, did you bring those into Unity and try to apply them? You'll want to import all the of files in the download to the same folder in Unity, not just the FBX.
harsh saddle
The materials should have the textures attached but if not, you can create a standard material and add them in yourself.
glass vigil
they have stuff attached but its not loading in
harsh saddle
Then, you just drag them to the character
glass vigil
ive tried that aswell
harsh saddle
You created a new standard material, added the texture in the albedo channel, and dragged it on the character and it stayed white?
prime obsidian
harsh saddle
You select the horn in edit mode, press U to unwrap it, then it will be selected...
yeeaaa that won't work either (or at least it's gonna be much harder)
i need to do something else
i could just copy one portion to the other side, i'm just not sure how
 ashen stag
I am a "delete half the model and mirror everything for the smallest change" enjoyer 😔
harsh saddle
glass vigil
im new to unity

Watch this video in context on Unity's learning pages here -
http://unity3d.com/learn/tutorials/modules/beginner/graphics/materials
How to control the visual appearance of gameobjects by assigning materials to control shaders, colours and textures on a renderer.
Help us caption & translate this video!
harsh saddle
ashen stag
I am a "delete half the model and mirror everything for the smallest change" enj...
It's not a bad option prior to unwrapping and rigging but then it gets a bit less optimal.
glass vigil
someone may have to walk me t hrough this
harsh saddle
That's what tutorials are for.
glass vigil
tutorials aint helping
harsh saddle
You haven't had enough time since I posted that video to watch it.
glass vigil
aye, but the persons setup thing they posted with the models not working
should not be having to do anything to this avatar besides upload
In Unity 2019.4.31f1 > Import VRC SDK 3.0 then import the VRChat file
thats legit the instructions
never mind they had the wrong files as the main
prime obsidian
quaint jasper
What won't work ?
since i symmetrized the verticies of the horn on the other side i'm currently having a problem where i have the UVs of the horns on top of each other

(moved just to show that they're on top of each other)
quaint jasper
That should fix itself once you unwrap again with the pin method that was mentioned before
prime obsidian
prime obsidian
<@93092275638251520> so i managed to pin it, this is what it looks before and af...
this is what happened when i did it
so it doesn't work for me
a lot of it got messed up and i dont know why
harsh saddle
If the problem is that the verts aren't connected, it's because you haven't merged them, though I'm still not sure what problem you're running into with pinning
 harsh saddle
I said merge in the UV editor, not on the model.
harsh saddle
harsh saddle
You select the horn in edit mode, press U to unwrap it, then it will be selected...
,
prime obsidian
wanted to position them but there's some unwanted verticies, plus some unpinned stuff didn't get unwrapped and uhh yea i dont know man

i can't unselect it
when it's in place
 harsh saddle
Well my process doesn't use any pinning so it has nothing to do with that. It seems like you had everything and place and you just never merged the verts on the edges.
prime obsidian
okay i'll unpin everything and unwrap again
so now i have one full unwrap of the horn
so umm now i have these two

is there a way to delete the one on the left
to replace it and then uhh ya know mirror the other one
harsh saddle
Well, I don't know how you got that first one that was pretty much completely there other than the verts being merged but it looks like it's unwrapping this new horn differently so you'd have to line up the verts manually to make them the same. Might be your only option if you can't get pinning working.
 harsh saddle
prime obsidian
since i symmetrized the verticies of the horn on the other side i'm currently ha...
harsh saddle
prime obsidian
since i symmetrized the verticies of the horn on the other side i'm currently ha...
this one
That looked like the other one so what did you do to get that result?
Or are the verts on the left side not merged?
prime obsidian
i was trying some stuff with my friend but you know what
it doesn't really matter
it mirrors anyways
i just wanted to be organized
tough plover
prime obsidian
i was trying some stuff with my friend but you know what
are you still stuck on that issue?
with the UV's?
 surreal lance
Select all of your mesh then go to edit mode
Control a on you uv
Then select pack islands
Perhaps this will fixed it
devout scroll
(Just A not Ctrl+A)
 graceful iron
Hello! Can my UVs look like this if i want to use the substance painter?


 hollow radish
you can use any uvs, but you want to keep in mind the amount of uv space your using
and the padding between each island
you can always redo UVs since substance painter saves them physically
though sometimes its not 100% correct and you might want to paint on the uv physically
 atomic loom
anyone know how to make it so there's no crease when joining meshes? im kinda new to 3d modeling lol
 harsh saddle
Using Remesh to the right of DynTopo should do it but I'm not sure how it would be done without remeshing.
atomic loom
it worked though, so thank you
tough plover
atomic loom
anyone know how to make it so there's no crease when joining meshes? im kinda ne...
you should learn about topology and doing retopology on a mesh
you will get much better results
harsh saddle
Oh yeah, I couldn't just do a remesh on a sculpt and call it good enough for the final topology but some people like to sculpt using multiple merged objects and you're gonna want a clean sculpt for reprojecting any details onto your finalized topology with a normal map.
 urban vapor
Does anyone know if there's a quick, easy way to just fit two ends of vertices together? Like these, for example?
 harsh saddle
urban vapor
Does anyone know if there's a quick, easy way to just fit two ends of vertices t...
harsh saddle
urban vapor
Does anyone know if there's a quick, easy way to just fit two ends of vertices t...
You can select both edges and then in edit mode go to "bridge edge loops" which will create new faces between the edge loops but it will likely be kind of messy. The better way to do it is to use proper face splitting techniques to get an equal number of edges on each side

 next delta
i made a 3d model and i want to make it a avatar how do i do that
 covert rose
 tawny magnet
i'm sure you guys probably see this all the time for a question and in that regard I apologize, but what is the polygon limit for models in vrchat? I've been sculpting a model for quite some time and I see so many mixed answers online, so I wanna know how much I can work with so I can retain the form of the model as much as possible.
azure rain
VRChat
The Avatar Performance Ranking System allows you to see how much a user's avatar is affecting performance via analysis of the components on that user's avatar. You can also use it on yourself to see how performant your avatar is. This system is provided to inform users what is likely the most perfor...
harsh saddle
For PC, anyway. It's not going to show up for Quest.
tawny magnet
oh, ok i'll keep that in mind
spiral sigil
does the "MuteSelf" Parameter work for quest?
devout scroll
don't see why not
spiral sigil
oh, it does, i just messed up my animations xD
 near gale
Can someone help me remove or fix the thing round the eyes?
 harsh saddle
You can select the faces in edit mode and delete them or hover over them and hit L if they aren't connected and then delete the whole bit that way. I assume they're for the eyelashes and there's supposed to be a transparent texture there.
 untold elk
Found this nice lil' 3D asset converter that's free to use: https://www.echo3d.co/post/convert-2d-and-3d-assets-for-free-tutorial

echo3D
echo3D has created a converter for 3D and 2D assets! It is free to use for files up to 25MB (larger files can be converted here). Converting your asset types has never been easier. Just drag, click and download! Click this link https://go.echo3d.co/wVoZ or scan this QR code to see the same 3D bulldozer asset used from the examples. Video Registe...
unborn acorn
sum modelin of a concept art of midna
 winter palm
ANy idea on whats going on with this?

 shy meadow
how the hell do i get a .mesh file into blender
harsh saddle
winter palm
ANy idea on whats going on with this?
The dotted line seems to suggest there is some sort of relationship between the bone it's pointing to and that dot. If you click into the bone tab in edit mode, do you see anything relevant there?
harsh saddle
shy meadow
how the hell do i get a .mesh file into blender
There are a number of different programs that use and export .mesh files so it's hard to recommend anything without knowing the source but this might work. https://github.com/johnzero7/XNALaraMesh
GitHub
Blender addon Import/Export XPS Models, Poses. Contribute to johnzero7/XNALaraMesh development by creating an account on GitHub.
shy meadow
xnalara does not work, i have it already
harsh saddle
You could try this but it's just guesswork without knowing the program that created the file. .mesh isn't like .fbx or .obj that just refers to a single file type. http://niftools.sourceforge.net/wiki/NifSkope
winter palm
harsh saddle
The dotted line seems to suggest there is some sort of relationship between the ...
It looks like its pointing at the mouth, but I dont see why
 shy meadow
harsh saddle
You could try this but it's just guesswork without knowing the program that crea...
shy meadow
harsh saddle
You could try this but it's just guesswork without knowing the program that crea...
idk, i just downloaded it from a deviantart page. was looking for props for my life is strange avis and found em there so
harsh saddle
winter palm
It looks like its pointing at the mouth, but I dont see why
You might want to expand out the armature in the scene collection and check for any bones you don't recognize.
winter palm
harsh saddle
You might want to expand out the armature in the scene collection and check for ...
ALright. Seems to be connecting to the neck area
 winter palm
Also, just to add a further point, when I put it into Unity, the eyes moved to where the dot is
 harsh saddle
Interesting, it is possible to make an eye tracking constraint in Blender, though I've never done it myself and I don't know how you would end up with one without intending to unless it's a quirk of whatever you're using to rig.
winter palm
I have no idea
harsh saddle
Are you using Rigify? I feel like that might make an eye tracker with its rigging system.
 urban vapor
This is the third time I've tried working with this avatar and the menu does not function upon upload. Keep in mind, each time I start a new version with new animations, a new menu, new parameters, etc. etc. she functions fine. However, as soon as I upload her for some reason the weights change to -1. It ONLY switches to -1 in play mode, but when out of play mode the weights are a regular 1. What would make the weights switch to -1?
harsh saddle
@rugged walrus If you have the right geometry to create an edge loop (a line of quads), then you just have to put your cursor closer to horizonal edge of the face to make an edge loop in that direction.


If it's not giving you the option to make an edge loop in a given direction, you probably have some wonkiness in your geometry.
 harsh saddle
Basically anywhere on the face that is closer to the horizontal axis than the vertical axis.
 rugged walrus
I'd have to use ALT+U then right? So I can keep my cursor at the area
harsh saddle
I don't know what that shortcut does, is that for making edge loops? I just select the edge loop tool in the panel on the left in edit mode.
rugged walrus
Ye it's the shortcut, I just started playing around with unity today. Have no idea what I'm doing aside from making box rooms lol
Wanted to try and make a window with edge loops
harsh saddle
Oh, you're using probuilder, I figured you were using Blender. I have a tendency to assume that since most people use Blender. Yeah, I don't know with Probuilder.
I would suggest learning Blender but you can do some stuff with probuilder.
rugged walrus
Oh? I didn't even know you can build worlds on blender, thought it was just for art
harsh saddle
You can make models in any tool that will allow you to export to a major file type like OBJ, FBX, DAE
rugged walrus
I see
harsh saddle
Probuilder seems like it's only for making basic structures which is fine if that's what you want to do but Blender can take you a lot further.
rugged walrus
I definitely want to make cool worlds in the future, I'll find some YouTube tutorials on it tomorrow for sure
Thanks man!
 stray saffron
rugged walrus
I definitely want to make cool worlds in the future, I'll find some YouTube tuto...
stray saffron
rugged walrus
I definitely want to make cool worlds in the future, I'll find some YouTube tuto...
They don’t mean the blender cursor they mean your mouse cursor
Just put your mouse up to the shit in edit mode with the edge loop tool on and you can cut in different directions depending on where on the shape the mouse is
 dreamy oyster
can anyone tell me why the fuck this is happening? for some reason when I combine my meshes, my mesh's UV map compresses into a singularity. Which mesh compresses itself and disappears depends on which mesh is being combined into which...


(using Ctrl+J to combine)
I found it
these two UVs were not named the same

and combining them made it so that both mesh UVs could not be viewed (and thereby rendered in Unity) at the same time
winter palm
So I fixed my eye issue for my model. Now, I just need to fix these two issues and it should be good to go (Hopefully). Any ways on how I could these these two issues?

 queen silo

does anyone have any idea how to fix my unity?
i uninstalled and reinstalled it several times and its still not working
reseting my pc doesnt work either
if I open the unity hub its just all gray and then eventually I get the same pop up
shy meadow
how do i make this into some shit i can actually use
 devout scroll
it depend where it came from
 signal summit
Does anyone know how to set it in Blender to adjust the effect of the material view to the left one?
On the right is the preset effect displayed by the material view
 spiral sigil
I recently made a new sans model!!


 devout scroll
signal summit
Does anyone know how to set it in Blender to adjust the effect of the material v...
devout scroll
signal summit
Does anyone know how to set it in Blender to adjust the effect of the material v...
in solid view you can set it to flat textured top right.
in material preview go to your material and set emission to 1
or replace the shader with an emissive shader
it's in the shading tab
merry cedar
How do i extrude out equally on all sides so this doesnt happen?
 ashen stag
merry cedar
How do i extrude out equally on all sides so this doesnt happen?
ashen stag
merry cedar
How do i extrude out equally on all sides so this doesnt happen?
I usually set the cursor to the center (you've already got your origin there) and then extrude, don't move it, scale it outwards
merry cedar
yeah i do extrude and then scale
how do i set cursor to origin i forgot
is there a shortcut
ashen stag
Moving the cursor is shift+s IIRC
ashen stag
Select the object in object mode, shift+s -> cursor to selected
 ashen stag
When scaling, dont forget to set the Pivot center for rotation/scaling to 3D cursor
merry cedar
and i do that by pressing? uh
ashen stag
non numpad period
problem is that it isnt a 2d selection, so using scaling instead of transform may result in unwanted scaling in different axis
might be fine if you press shift+z during scaling so that it scales only on x and y
merry cedar
this is the pivot point selector?
 ashen stag
That looks like camera stuff, sorry I dont use the newer blenders
devout scroll
that's not camera stuff
that's the same as selecting here

selecting cursor will make it scale along cursor yeah
but you can also scale along normals with alt+S
you can also choose the type of extrude with alt+E
ashen stag
Forgot about alt+S 😭
winter palm
Hey everyone. I know that I have asked this before, but haven't gotten an answer. The SDK is telling me that my avatar is short and needs to be 20 cm shoulder height, Even though imported model is already big. How would be able to adjust it to solve the issue?

 brave vapor
urban vapor
This is the third time I've tried working with this avatar and the menu does not...
brave vapor
urban vapor
This is the third time I've tried working with this avatar and the menu does not...
ik how to do toggles if u wanna vc
harsh saddle
winter palm
Hey everyone. I know that I have asked this before, but haven't gotten an answer...
The problem is your avatar is large but it was created below the ground floor in Blender so it's only counting the part above the floor as the height. You'll need to bring the rig above the floor in Blender and then apply that as the new rest position or I think Pumkin's avatar tools can do that in Unity but I haven't tried those out yet. I've been told it can be fixed by moving the hip bone up in the rig configuration in Unity but I haven't been able to make that work. https://github.com/rurre/PumkinsAvatarTools

GitHub
A toolbox for easily setting up VRChat avatars in Unity. Adds functionality to the editor and automates some of the tedious tasks. - GitHub - rurre/PumkinsAvatarTools: A toolbox for easily setting ...
Ideally, you want to just make sure the model is above the ground plane before you rig it by making a plane at the origin and making sure the feet rest on the plane but you're a bit past that point now.
In Unity, there's a little white line you get when adding the avatar descriptor that shows where the bottom of the avatar is, so if that isn't where the actual feet are, you're gonna have problems.
winter palm
harsh saddle
In Unity, there's a little white line you get when adding the avatar descriptor ...
Now that you mention it, the white line is way high up on the avatar. Is there a way to adjust that down?
harsh saddle
Generally not in Unity, in my experience. Pumkins tools can apparently do it but otherwise you just need to make sure the feet are in the right spot when exporting. It would be nice if you could adjust that like you can adjust the eye height but for some reason that isn't a thing.
I'm not sure where exactly in pumkins tools you can find that functionality as none of the buttons seem to refer to it but I've been told it's possible. But I've also been told it can be fixed by moving the hips up in the rig configuration and that isn't true so who knows? The easiest option might be to remove the armature modifier from the model, move the armature up in object mode until the feet are on the ground, apply the transform, then move the model up by the same amount and then re-apply the modifier.
winter palm
Yo, I figured it out!
Turns out, I needed to change the origin of the model down to where the feet are, which moves the white bar down as well!
harsh saddle
In Blender? Yeah, that's what I was saying.
 cerulean shoal
my from scratch stitch model

 plain umbra
Nice
 dusky mountain
Hello, I am putting in IK's, bone drivers, and pivot bones into my model [Blender] and was wondering: do they transfer to Unity and VRChat and retain functionality? Also, is it alright to omit toe bones from configuration so that pivot\IK control? ...any tutorials?
tough plover
dusky mountain
Hello, I am putting in IK's, bone drivers, and pivot bones into my model [Blende...
no, none of that carries over
you do not need to set up any IK on your avatar in blender
you only need the basic humanoid rig
toe bones are not required
same for upperchest, and most fingers
however, upperchest is recommended to improve spine bending
dusky mountain
ah, okay! Yeah...I was trying to make it bend smoother, least for clothing around armpits
ok, which bones do the trackers control?
tough plover
depends which one they are closest to
if you put your trackers on your feet, your tracker will bind to the feet bones. if you put your trackers around your ankle/lower leg, the lower leg is what will bind
and the foot will be stiff
that doesn't apply to every tracking point though
hips will always be hips
dusky mountain
ah, so fingers and toes would not be tracked unless with control commands? ...like if want to go tip toe with toe bone compression
ok, so do the elbow and hand trackers decide how the shoulder, armpit, pectoral muscles move?
tough plover
every joint in between tracked points is guessed by vrchat's IK
fingers are only tracked if you have index controllers
toes are not tracked at all
if you are using elbow (upper arm) trackers, then that tracker will be used for both the elbow bend direction, aswell as shoulder motion
dusky mountain
ah, okay, so those cannot be added to, gotcha! I'll stop trying that.
I am trying to see how to fix a clothing issue: it is for a shirt that goes from chest to right above elbow, so it needs to stretch when arm raised but not look rubberbandy and also be able to compress without looking messy [had thought that bones might help, but now just weight paint maybe?]
harsh saddle
Yeah, think that would just be weighting. Not sure how you would handle cloth compression aside from a corrective shape key driven by the arm rotation but I don't think those are supported by VRChat.
dusky mountain
aight, guess just gotta do weight paint and simply deal with it. ...well, I'll be using physbones; not cloth though.
I have a problem with wanting it to look perfect
 hushed leaf
dusky mountain
I have a problem with wanting it to look perfect
hushed leaf
dusky mountain
I have a problem with wanting it to look perfect
I know this feeling. Probably not going to get there with VRChat 🙂
 tropic yoke
Would anyone be willing to teach me how to make vrchat avatars? I just want something simple that is of my own design
Is there a better spot to ask that?
shy meadow
mkay im tryna get a butterfly but it looks like this, how do i put the shit on it and make it look like an actual butterfly

 spiral ledge
If I throw a free asset someone's way, could I get some help with cleaning it up for VRC and generating a good UV map?
spiral ledge
shy meadow
mkay im tryna get a butterfly but it looks like this, how do i put the shit on i...
There should be something to make those planes a 2d transparent image basically.
thin shadow
shy meadow
import image of butterfly reference, cut the plane with knife tool tracing the image, that's one way of doing it
shy meadow
uh
merry cedar
I copied the skin layer to make a jacket for my avatar but now i cant apply mirror modifier because of the shapekeys
do i just delete them or??
devout scroll
depends
if if you need the shape keys or not
it could be that the shape keys are from the face or something so they don't actually affect the body
in which case you can delete them
otherwise you need an addon to apply modifiers and keep shape keys
(it's possible to do without but it takes a bunch of annoying steps)
you can try this one https://github.com/SAM-tak/ApplyModifiersWithShapeKeys
I don't remember which one actually worked well
merry cedar
ok thanks


 spiral ledge
So running into an issue with a free model; there isn't a UV map already, and the ones I unwrap are taking certain polies and grouping them in the center.
Would anyone be able to help fix it?
harsh saddle
spiral ledge
So running into an issue with a free model; there isn't a UV map already, and th...
Are you marking seams or just pressing the unwrap button?
spiral ledge
Both
I just ended up putting the loose polies where they needed to go or fit best like a puzzle
devout scroll
loose polies probably means the mesh is not joined there
spiral ledge
Well, if anyone can help fix it up, I'd appreciate it
Because I don't want to go through the entire process I just spent the past four hours on again because some polygons just went MIA on me
spiral ledge
It's a freebie from a 3d model site, I think it's initially designed for VTubers
I had some Decimates set up, as well as culling some polies that weren't visible
azure rain
trail python
100k polys for a backpack is insane?
yes that's like 150 percent the total Avatar budget to not be very poor
spiral ledge
I know, I had some Decimates to knock it down to 2500 polies
azure rain
yeah that's a more reasonable number 2500 triangles
spiral ledge
But I apparently deleted a few too many, and didn't realize until I had already done another two hours' of work on the material
azure rain
oh dear
trail python
im having uh
a strange time, we'll say
i actually found a backpack model thats about 7k, free, legal, can edit
spiral ledge
Might work better then
azure rain
trail python
i actually found a backpack model thats about 7k, free, legal, can edit
yeah sounds like a better idea
spiral ledge
Can you link me to it?
spiral sigil
nearly done with modeling this boy

 alpine venture
I'm just having fun spitballing ways to do things and have been curious. Does anyone happen to know why this happens when I click "Apply As Rest Pose" In CATS.
I'm 100 percent it's something I'm missing/don't know/forgetting but I was just wondering. Applying rest post successfully applies, but swaths of the face just... mangle.
It didn't happen previously, when I built my own Armature. Could it be some armature settings that I'm missing? Maybe some drivers/etc?

Again, I'm literally just breaking stuff for fun in this file, just wondering about some insight is all!
shy meadow
loona pez dispenser
red glade

 bold urchin
In a from scratch 3D model, I've reached the point where I've finished the base mesh and placeholder colors.
I'm wondering what people do next as their preference
Do they do rigging next, or do they do unwrapping and texturing?
quaint jasper
Down to preference tbh, neither block you from the other
bold urchin
Yeah, I’m deadlocked in my head on what I wanna start with. I’ve been at this junction so many times before haha
harsh saddle
It's kind of useful to have the eyes textured before rigging them to make sure they're ending up in the right spot so maybe give the slight edge to texturing? But it doesn't really matter.
quaint jasper
bold urchin
Yeah, I’m deadlocked in my head on what I wanna start with. I’ve been at this ju...
I guess if you're not texturing in Blender, I'd say go with rigging first, that way you won't have to come back once you're done UVing
bold urchin
That does make sense. Alrighty, I’ll see if my rigging time is any better from the past
thin shadow
before i reset blender to factory settings, is there some settings that i missed because when i try to bake diffuse color to a new texture, the ambient occlusion always got baked together, no matter what setting i find. world lighting, AO turned off. Renderer : cycles.
harsh saddle
Do you bake settings look like this?
 thin shadow
harsh saddle
Do you bake settings look like this?
thin shadow
harsh saddle
Do you bake settings look like this?
Yes
It doesn't happen before and there has to be some things that i accidentally adjust
harsh saddle
Is there ambient occlusion in your shader? Aside from reflections, Blender will generally try to bake anything it can from your shader into the texture.
thin shadow
I use diffuse bsdf
harsh saddle
Can you post your node setup? Is it just a texture plugged into the diffuse shader?
thin shadow
hmm it turns out ok this time.
I redo the steps from the last save file.
I think it's because when i try to use different settings, i just press bake without realizing that it doesnt clear the previous result, despite i checked the box "clear image". so i would just assume it would just gives me what i want
well, thank you anyway @harsh saddle
harsh saddle
🙏 Glad you got it sorted
harsh saddle
Does anyone have a guide for the best places to mark seams when unwrapping a body? I have my own process that works pretty well but I really want to minimize the visibility of seams in this most recent avatar so it would be good to have an established methodology.
hollow radish
the sides
under the arm
for the head some people do it under the jaw and the back
harsh saddle
Thanks, that's basically what I did and I think they're pretty well hidden. Not completely but good enough.
alpine venture
alpine venture
I'm just having fun spitballing ways to do things and have been curious. Does an...
If anyone saw this and thought "Wild" I found out what was causing it! Turns out, when I deleted all shape keys, the model would turn into that as well! I guess something was corrupt or just... borked? (HA).
Suffice to say, I made a new shape from mix (in this case, just basis), removed my old basis, moved my new one up and tada! No more bork.
I'm still not sure why I didn't run into this back when I did my previous ports. Considering what it is, I should have bumped into it...
Anyway, mystery solved. Lord knows I have no idea how that can happen, but sometimes it's just better to know how to not run into it in the first place.
ashen stag
alpine venture
If anyone saw this and thought "Wild" I found out what was causing it! Turns out...
Shape key corruption can happen for a lot of reasons. The most reliable way I got it was during manual atlasing, but it still felt random. Just another reason to save your model checkpoint style!
alpine venture
ashen stag
Shape key corruption can happen for a lot of reasons. The most reliable way I go...
Absolutely. It's why I was just spending my time breaking this one just to see. Narrow down places where it will just break and go "yeah no, you get ants face now".
Must have happened earlier on, at some point; deleting all keys but basis, and lastly basis, should leave it looking like that last key. Instead I got melted noodle face.
Blender living up to it's name and blending my models.
ashen stag
Are you sure that those deleted blendshapes didn't corrupt? Dragging them to 1 should show the same result as deleting all shapes
alpine venture
They all fired properly when I drug them to one. That was something I checked one at a time. Then I got grumpy and was like "well fine, I'll DELETE THEM ALL".
And then I saw it mess up again. A Eureka moment out of left field.
ashen stag
Could have been the basis key itself 🤔