#3d-modeling
1 messages · Page 132 of 1
 hushed gyro
I baked it using a cage and high poly object
If there's a better way of baking this kind of texture onto a sphere I'm open to trying it
 bitter sierra
yeah the islands aren't the issue, it still follows the same principle as my cube.. with a texture that has a different top/bottom/sides it's just not possible for them to link up when folded up into a cube (or your sphere)
I folded up two sides to create part of the cube
 hushed gyro
this is what i'm going for (high poly object)
 bitter sierra
while it it's seam with one side of the cube isn't interrupted, with the other side it doesn't work seamlessly
hushed gyro
I understand the issues with unwrapping a cube, but I'm not sure how I should go about unwrapping something like this for baking
bitter sierra
bitter sierra
I folded up two sides to create part of the cube
this is exactly what's happening to your thing, it's only less noticeable because while the hexagons do link up, the different colourgrading of the normal map makes those seams have weird colour changes
there is one thing you might be able to try.. but I'm not sure honestly
hushed gyro
I'm not even sure normal mapping is the right way of doing this, I'm open to anything at this point
...maybe there's a way I could use a height map as input for a normal map
bitter sierra
hmmm, any chance you'd be okay with DM'ing me the file so I can take a look and try something?
 haughty rock
Have you set up smoothing groups yet? Might help
hushed gyro
I found if I use a UV sphere the seam is a lot less noticeable. I'm going to continue messing with it. I might just hide the seam near the bottom of the sphere.
 hushed gyro
haughty rock
Have you set up smoothing groups yet? Might help
hushed gyro
haughty rock
Have you set up smoothing groups yet? Might help
I'll have to look up what those are
 loud turtle
i dont think this is normal

 safe marsh
loud turtle
i dont think this is normal
safe marsh
loud turtle
i dont think this is normal
you have to enable read/write also that belongs in #avatar-help
loud turtle
ok
hushed gyro
bitter sierra
hmmm, any chance you'd be okay with DM'ing me the file so I can take a look and ...
I would have sent it but I think I found a hack to make it work


23k poly to 900 poly
 uncut imp
hushed gyro
this is what i'm going for (high poly object)
uncut imp
hushed gyro
this is what i'm going for (high poly object)
Easiest way i'd do that is just to bake the high poly version's details down onto a low poly sphere
hushed gyro
uncut imp
Easiest way i'd do that is just to bake the high poly version's details down ont...
That is literally all of everything I've posted today. Seams in the bake is/was the problem.
uncut imp
hushed gyro
That is literally all of everything I've posted today. Seams in the bake is/was ...
What did you bake it with? i've never seen seams like that coming from them being baked out (in substance painter)
hushed gyro
I'm working in blender because substance costs $$$. I baked the normals detail to a sphere using a cage around the high detail object.
uncut imp
Ah ok. I've heard good things about the blender plugin 'TexTools' for baking lots of different maps. Although havent had a chance to test it out.
hushed gyro
Thanks, I'll look into it.
 real sphinx
how do i make avatars in vrchat
real sphinx
what?
uncut imp
For a dev i'd think youd be better at googling XD
uncut imp
thats a VERY broad question. Do you know how to 3d model? if so do you want to make it from scratch?
If not, do you just want to buy one to upload?
Do you want to take premade parts and put them together? (You'd need to learn blender if you haven't)
uncut imp
real sphinx
no i make computer games
Neither, but as a dev myself I find it a very important job skill to be able to google to find how to do stuff, hence the joking google comment
real sphinx
yeah i sometimes am cringy
hushed gyro
Reading up on the vrchat documentation regarding your question is a good place to start.
uncut imp
lol fair.
But those are your options
- Make something from scratch
- Take premade parts and put them togeather
- purchase one someone has made to upload yourself
or of course just find a public one in game if you are just looking for one to use
hushed gyro
Also the avatar stuff is two chat folders up.
real sphinx
no I'm trying to make my own avatars
uncut imp
Have you done 3d modeling before?
real sphinx
no
uncut imp
real sphinx
no
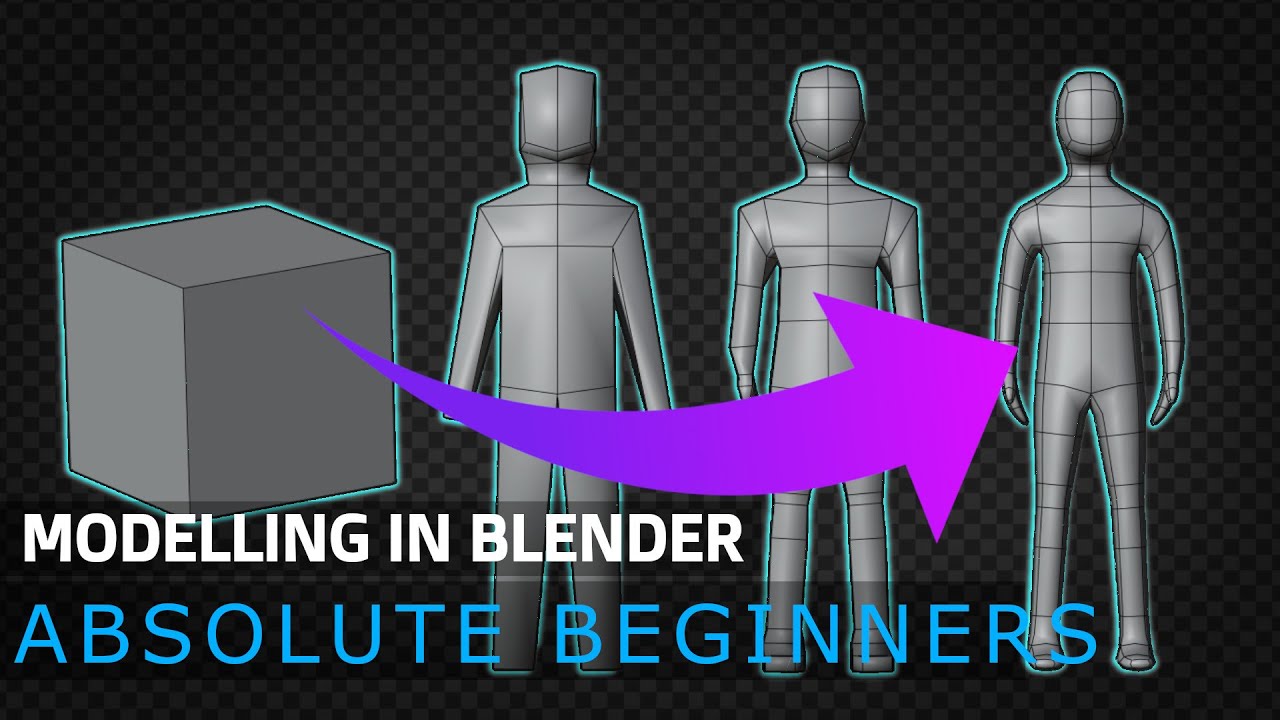
This is a Tutorial for ABSOLUTE BEGINNERS on MODELLING in Blender. You will learn how to model a super basic human model. This tutorial just covers the bare basics and does not even come close to scratching the surface of what Blender can do, but it’s a good starting point for a bigger.
Get More►
Patreon: https://www.patreon.com/PIXXO3D
Skills...
real sphinx
thx
uncut imp
time to start learning blender then, not much we can do for you until after that
but if you have any more specific modeling questions about how to do stuff lots of people will happily answer.
It's just a super broad question like 'How do i make an avatar' most people dont know where to start with answering.
 acoustic briar
dm me If you make avatars
 still wadi
no
 swift cypress
How do you move the clothes or base models in blender
 silent cargo
Hi! Im trying to learn more about texturung inside blender, and i saw that shonzo use layers inside blender, doees anyone has a tutorial on how to do that?
 frosty steeple
I want to make models like this guy(warning suggestive) https://twitter.com/ViewerMink in blender, I have some experience in modeling and I know this guy uses skin modifier, Can any one dm me so that they may guide me through how to model like this guy? his work is amazing!

Suggestive 3D artist. He/Him. Coms are closed. No NSFW DMs Please. VRChat name is ViewerMink
Followers
1031
Tweets
712
 Twitter
this is the dude I want to model any way
frosty steeple
frosty steeple
this is the dude I want to model any way
shit, jijf file bruh
silent cargo
frosty steeple
I want to make models like this guy(warning suggestive) https://twitter.com/View...
If skin mesh is used its only the base looks like sculpted geometry, and maybe retopologized
frosty steeple
silent cargo
If skin mesh is used its only the base looks like sculpted geometry, and maybe r...
my caveman brain doesn't understand
silent cargo
Look into "how to sculpt" and then "how to retopologize" (download retopoflow a free addon for blender) check put flipped normals for pro tutorials on those topics
 devout scroll
there's also regular box modelling with a subdivision modifier, it smooths things out a lot
frosty steeple
devout scroll
there's also regular box modelling with a subdivision modifier, it smooths thing...
okay I prefer that
 spiral sigil
I'm not exactly sure where to put this so I'll just ask in here.
So I'm in the middle of making my first avatar and I want to add some items I can toggle, like ears and a tail, would I attach them in blender and then port the model into unity to add the toggles or would I attach the models and make them toggleable in unity entirely. (the model is currently sitting in blender bc its being made from scratch).
any help is appreciated :)
hushed gyro
depends on how many polys the togglable items are and what they are. Example: on my robot model I have some items I toggle with shape keys that go from 'shrunken object hidden in my hand' to 'expanded object moved outside my hand'
spiral sigil
the avatar is abt 30k polys rn with no items attached
not sure how much the attachments are though
so what happens when an item is not toggled. it's inside the model?
hushed gyro
upon reading your question a second time I think you'd want to place the objects on your model in whichever program you're more comfortable working in. I'd personally place the items where you want them in blender
spiral sigil
gocha blender it is
hushed gyro
you can either keep the objects as separate meshes in blender then toggle their visibility in unity or for low poly models set up a shape key to hide the item inside the model until it's needed for optimization purposes.
spiral sigil
when you attach an accessory does it become part of the bass model or does it remain as seperate objects but just stuck together, I'm kinda new to blender too and following yt tutorials but they dont rly mention that part
spiral sigil
ok I think I've got the groove of things now :)
just added a few things, thanks for the help!
 foggy cape
Hey, is it okay if I ask for help on this model I'm working on? I want to lower the materials w/out affecting the textures if it's even possible
 quaint jasper

foggy cape
ah, alrighty, thanks
I want to try cutting down on materials by making a big UV map and creating a texture that appeases the UV map in every section. Is that a good idea, or is there a better way around that?
 tough plover
foggy cape
I want to try cutting down on materials by making a big UV map and creating a te...
tough plover
foggy cape
I want to try cutting down on materials by making a big UV map and creating a te...
you can, that's called an Atlas. alternatively, you can use the Bake feature in CATS's blender plugin to do an ever better job
it'll actually pack all of the UV islands, and bake the original textures onto a new texture
the result will be 1 material
foggy cape
ah thats amazing, thank you!
 dapper tinsel
If a blendshape moves also along with other blendshapes, but if I try to move this blendshape by itself, it doesn't move at all. What could be wrong?
The value on the blendshape is set to 1.0 on Blender 2.79 and I'm using 3.1

 zenith cloak
Alright, people of the chat, please. Honest criticism. Does this look good? I've wasted 2 weeks of my life on this and am still anxious about finishing it.
 still wadi
no
 untold schooner
it's definitely a look
 grim helm
I'm trying to fix this arm from bending weirdly when the bone lifts any suggestions?

I tried editing the vertex group and looking at the weights but they seemed fine
I figured it out lol there was a seperate bone for that part of the arm twist
zenith cloak
still wadi
no
That is exactly the answer I expected from you. Didn't expect you of all people to respond though.
Anyway, the reason this model looks so bad is because it's based on a poorly drawn ref sheet (because I just can't draw well on electronics, only trad art)
Any hope that I could fix this?
still wadi
it's very important to know what you're doing especially in 3d modeling
get a good ref
and excersize
zenith cloak
That's the thing, I don't know what to do without the program crashing on me. Thanks for being supportive anyway, @still wadi.
tough plover
@LegoKirbyMan#9086 you're literally on a bleeding edge version, crashes are to be expected
I would recommend using the latest LTS version, 2.93.8

Blender 2.93 is the second installment of the LTS program with official support until 2023.
zenith cloak
tough plover
@LegoKirbyMan#9086 you're literally on a bleeding edge version, crashes are to ...
Never expected "bleeding edge" to be used in that context.
tough plover
I mean like, 3.1 is still extremely new
there are all kinds of bugs and issues that still need to be worked out before it can be production ready
zenith cloak
The only reason I use the 3.1 version, and not the LTS version as I probably should, is that there is a certain glitch involving multiresolution modifier fixed. I feel kinda dumb.
As in it looks like a setup for a dumb joke.
 foggy granite
zenith cloak
Alright, people of the chat, please. Honest criticism. Does this look good? I've...
foggy granite
zenith cloak
Alright, people of the chat, please. Honest criticism. Does this look good? I've...
im gonna be honest with you if spent two weeks working on that you need to find a diffrenent method and guild i can recommend a few YouTube with tutorial series if you want
devout scroll
3.1 works okay for me despite some addons not supporting it yet
 ornate sluice
in blender, when combining meshes with the decimate modifier. is there a way to keep individual poly counts instead of it being applied to the whole thing?
 swift jolt
Making everything in blender feels alot easier than unity. Unity is stupid and i hate it
 hushed gyro
swift jolt
Making everything in blender feels alot easier than unity. Unity is stupid and i...
hushed gyro
swift jolt
Making everything in blender feels alot easier than unity. Unity is stupid and i...
couldn't agree more
also looks nice
 meager bolt
I've been pretty hard at work, this is what my model now looks like after around 6-7ish days of actually working on it (took 3-4 off to work on exams for school), with this model being my first time ever modeling a character (Second Ever Time Actually Using The Program) I honestly didn't expect it to come out as good as it has so far, the skin texture below the elbows and neck is a little half assed cuz you'll never see it in the final product (Same with the nubs that are currently substituting ears LMAO), all I gotta do now is model/texture the tail, hair, clothes, and glasses until i'll finally have a completed model and can move onto rigging! I'm really looking forward to seeing the fruits of my labor! Still have a lot of work ahead tho so I won't get too carried away


Here's the Reference I'm basing it off of also drawn by me, it's my OC/Persona Caffeine!
 zenith cloak
foggy granite
im gonna be honest with you if spent two weeks working on that you need to find ...
zenith cloak
foggy granite
im gonna be honest with you if spent two weeks working on that you need to find ...
Actually I have watched many good tutorials, that's not the problem. The problem is that I suck in every form of digital art in general.
It just so happens that my perfection sense is in the way of me and I can't make no changes to save me.
Wish I could make more and care less...
meager bolt
Well you gotta understand the basics before the advanced, kinda hypocritical of me to say but I highly recommend you start with some more basic tutorials to try and break ya outta that habit for making blender models at least
but a lot of knowledge from all forms of art can translate to other forms aswell
it just takes patience, time, and persistence!
zenith cloak
I'm already tired of making the damn doughnuts!
meager bolt
Oh no I mean watching some tutorials on making more basic characters or trying to find a more well fleshed out refsheet to use as a learning experience
zenith cloak
I've already made a very basic character a long time ago, but it was just a bunch of cubes on a humanoid rig.
meager bolt
well then, try doing it again, but adding to it, using the sculpting tools, some different kinds of modifiers, learning how to use parts of the programs to aid you, mesh the cube into something more head shaped or torso shaped, either using a ref you drew on paper and imported, or a ref sheet off the internet to use as a learning experience
zenith cloak
Thanks for trying to help me, but it doesn't seem that you can do much in my situation. Also your persona is pretty cute.
meager bolt
Thank you very much! and I try my best, hopefully you'll find the resources that help you understand the program and aid you in making a 3d model in the future if not the one you're currently working on!
zenith cloak
Thanks for the kind words. I know that not many people can understand my situation, because I intentionally left minimal footprint on the Internet.
No, seriously, there is so little data on me that I barely even exist.
Oh, tarnation, I wasn't supposed to say that out here...
meager bolt
Lmao well still, I wish you well in your future endeavors, may that be digital or traditional works, and goodluck keepin ur internet footprint as small as possible
 indigo sapphire
I can't seem to form a question what I want to accomplish to find on Google - as far as I understand, each polygon is assigned to a specific bone, and a bone can have many polygons.
How do I make it so Blender selects all polygons belonging to a specific bone?
meager bolt
Are you wanting to select all the verts the bone is moving?
(Verts being the corners of polygons)
indigo sapphire
yes, I probably meant verts, I am pretty new to this
maybe that was why my google searches were without proper results lmao
meager bolt
Ah nah ur good, from my own pretty hazy knowledge on blenders tools since i'm pretty new to this aswell you may just have to select it all manually by shift clicking them all
an easy way of doing that is by pressing 3 in edit mode
turns on face selecting
May take a little bit but it's a definitely a way to do it
Knowing blender there's definitely an easier way
indigo sapphire
come one, a 3d modelling program MilkShape 3D from 2007 had this option, and you are telling me it doesn't exist in blender?
 cinder cradle
indigo sapphire
I can't seem to form a question what I want to accomplish to find on Google - as...
cinder cradle
indigo sapphire
I can't seem to form a question what I want to accomplish to find on Google - as...
hmm each bone have vertex group so you select one vertices of the group and go to select - select similiar - vertex groups
in edit mode
indigo sapphire
OK thanks, I think I figured it out!
omg this is so good, I can remove polygons from useless parts to optimize further for my fallback
zenith cloak
After yesterday's conversation I feel kinda guilty for leaving my VRChat friends hanging in anticipation of my avatar, because I couldn't explain to them how it actually looks like, but I would need to train for another 100 years to actually make it. On what thread can I upload a photo of a pencil drawing I made of it?
cinder cradle
zenith cloak
After yesterday's conversation I feel kinda guilty for leaving my VRChat friends...
#vrchat-fan-art is the channel that kinda fits what you need.
zenith cloak
cinder cradle
<#389820710891159553> is the channel that kinda fits what you need.
Thanks, @cinder cradle. I already uploaded it there.
frosty steeple
I want to give my character a jumper, how am I meant to model it? I am new to blender
 devout scroll
copy the body parts that would be covered by it to get a general shape
then scale along normals using alt+s in edit mode
or use a solidify modifier on it
that will add thickness
and give you something to work modify further once you apply
frosty steeple
How to fix creases on my character?


 glossy belfry
https://twitter.com/LichVtuber/status/1512464470001475586 does anyone know how this person is able to have such fluid movements? im guessing they use full body tracking but even with full body this is impressive

 foggy granite
glossy belfry
https://twitter.com/LichVtuber/status/1512464470001475586 does anyone know how t...
foggy granite
glossy belfry
https://twitter.com/LichVtuber/status/1512464470001475586 does anyone know how t...
thats an very polish animation not just raw fbt motions
you can record you movements with fbt but have to clean up afterwards to smooth it out
But their also software that tranlate movement form videos and able to that into an animation
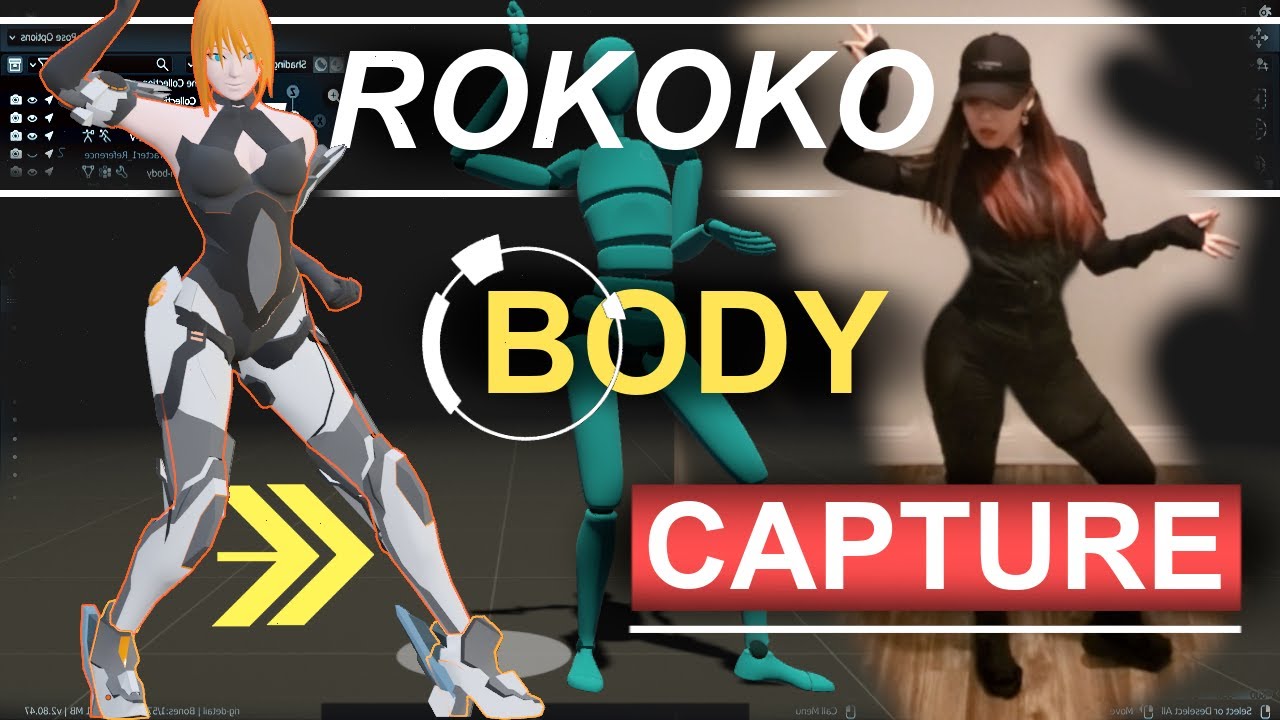
Now that you've seen cheap motion capture, let's take a look at the the opposite. If you're considering purchasing 'Full Body' MoCap, then this next series is for you-!!!
ROKOKO Studio Download:
https://www.rokoko.com/studio
Free Female Base Rig Download:
https://www.youtube.com/watch?v=_XfvLpLyulI
Animation Speed Tutorials:
https://www.yout...
i reccomd taking a look at his playlist on motion capture to learn more about it
glossy belfry
thank you! ive wanted to see if i can do something like this to make movements look a bit smoother but i shouldve figured it was just animation
she pumps them out so fast that i didnt think it could posisbly be animated
grim helm
Is their a way to get weight paint into hard to paint areas? I keep trying to get it onto some eyelashes and they wont paint.
Weight painting drives me crazy lol
tough plover
grim helm
Is their a way to get weight paint into hard to paint areas? I keep trying to ge...
eyelashes are supposed to be weighed 100% to the head, no?
select the eyelashes in edit mode, go to Weight painting mode, select the Head vertex group, and do Shift + K
Shift + K sets the weight of all selected vertices to whatever your weight slider is set to
tough plover
make sure your cursor is within the viewport
the location of your cursor is important in blender
hotkeys do different things depending on which panel you're hovering over
tough plover
all good
grim helm
thanks for the help
 worthy sparrow
(not sure where else to ask this but) I want to make a character that's just a sphere, how would I make that work with the required skeleton?
uncut imp
(Im assuming here) just have the sphere parented to a specific bone of a skeleton and the rest of the bones just exist with nothing on them.
 hollow blaze
I can't seem to be able to get the clothes I'm putting on my avatar to fit correctly, I might just be bad at sculpting but I could really use help
uncut imp
hollow blaze
I can't seem to be able to get the clothes I'm putting on my avatar to fit corre...
have you looked into using the shrinkwrap modifier?
hollow blaze
I have not, how would I use that?
spiral sigil

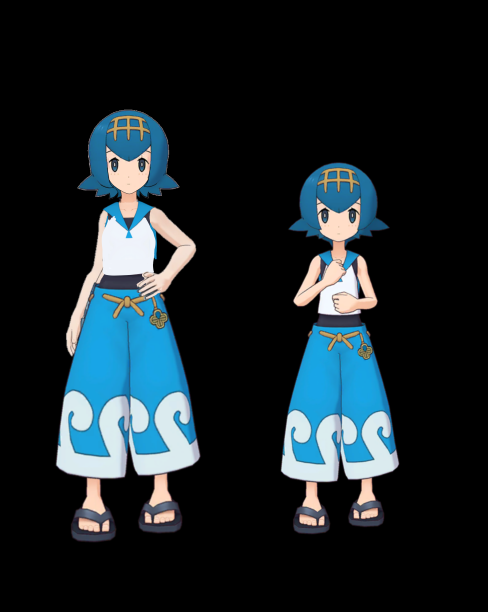
Project: Age Up. Going to make every underage Pokemon characters look older (at least 18+). Retweet for support and attention to be able to age up the characters
 Twitter
·
Twitter
·
I want to modify some pokemon characters to make them look older, can someone help me
uncut imp
hollow blaze
I have not, how would I use that?
I havent used it much, check it out on youtube, should give a good idea of how it works.
 humble thorn
hey i have question i need help
quaint jasper
Good luck 
 vagrant tulip
Blender Problem here. For some reason when I apply the subdivision surface modification it all works except one line of vertexes, it doesn't apply for that for some reason resulting in a spike to those points, if I delete them it just jumps to the next row

Das the corners
untold schooner
vagrant tulip
run a merge by distance real quick
vagrant tulip
Already did but didn't solve it
Kinda made it less visa le with smooth by now
But it's still there
 unborn acorn
vagrant tulip
Already did but didn't solve it
unborn acorn
vagrant tulip
Already did but didn't solve it
Theres prob a face in between the corner
indigo sapphire
ok I am having some avatar issues, that I think could be solved by making the bone scale 6 times smaller
NOT THE MODEL 6 times smaller, but only the bone structure 6 times smaller
how do I scale bones only in Blender?
 pliant sable
Can you buy Booth items made for specific characters (e.g. Rusk, Karin) and modify them to a different base?
devout scroll
yeah if you know what you're doing
grim helm
When I import my model with my lipsinc the lips look jagged in vrchat but in blender and unity they look fine. Any suggestions?
quaint jasper
jagged ?
grim helm
like pointy mouth, parts of the lips are pointed or joined wrong

I did the mouth with proportional editing in blender it looked okay there.
 thin shadow
could be "legacy blendshape normals" on fbx import setting turn off or normal itself on the mesh or both
quaint jasper
If the actual mesh is the issue, make sure you're not exporting with modifiers, as well as without/without the cats plugin export
grim helm
thin shadow
could be "legacy blendshape normals" on fbx import setting turn off or normal it...
Ill try to find out how to change those then. Is it a setting in cats?
thin shadow
not an expert on normals yet, but somewhere around edit mode > mesh > normals
grim helm
alright thanks ill try to fix the normals and see what happens
 spice pewter

 devout scroll
clean
 alpine merlin
frosty steeple
How to fix creases on my character?
alpine merlin
frosty steeple
How to fix creases on my character?
Did u manage to fix ur problem?. You can smooth it out via sculpt or.. vertex smooth or set the mirror mod to clipping and merge to 0.01/0.001.
 wicked hearth
Quick and possibly easy question. When I create a simple model in Blender and export it to Unity via FBX, then place it in a VRChat level, the model has no collision. Other than adding block collision in Unity itself, is there something I can do to export collision with the Blender model? (It's dirt simple, just a building).
tough plover
wicked hearth
Quick and possibly easy question. When I create a simple model in Blender and ex...
while you can add a Mesh collider component, you would most likely be better off using multiple box or plane colliders, as they are simpler objects and thus should make the physics calculations simpler
wicked hearth
That makes sense. I have used box colliders before and wasn't sure what was more efficient.
In Unity, when you add a mesh collider, it calculates collision based on the mesh, right? It's been awhile since I worked with Unity, but I recall that now.
 azure rain
wicked hearth
In Unity, when you add a mesh collider, it calculates collision based on the mes...
azure rain
wicked hearth
In Unity, when you add a mesh collider, it calculates collision based on the mes...
yes which is why it gets expensive very quickly as it has to check every single triangle
hushed gyro
spice pewter
any tips for modeling clothes like that?
frosty steeple
alpine merlin
Did u manage to fix ur problem?. You can smooth it out via sculpt or.. vertex sm...
yes I fixed it
 unreal gyro
ah yes, transformative sword 


 lofty canopy
No idea how I'm gonna fix this one, lol

Blender isn't my forte, so if anyone knows the best way to fill these gaps, please lmk
 plucky night
can someone send me a patrick bateman 3d model
 onyx shale
If you select the two blue highlighted verts and then select the two red highlighted ones and press F it should fill in the space
 onyx shale
lofty canopy
Blender isn't my forte, so if anyone knows the best way to fill these gaps, plea...
onyx shale
lofty canopy
Blender isn't my forte, so if anyone knows the best way to fill these gaps, plea...
^^
 pearl swan
Is there a way to render both back and front faces without a shader?
tough plover
you can duplicate the faces and flip the normals
pearl swan
Been looking it up but can only find stuff on hiding back faces.
tough plover
otherwise, only other way is to disable culling via the shader
pearl swan
tough plover
you can duplicate the faces and flip the normals
hmm ok. Dang well I guess I can do that. There's just so many faces I gotta dupe lol
@tough plover Thanks for the quick response btw!
tough plover
👍
 sterile mantle
One message removed from a suspended account.
One message removed from a suspended account.
One message removed from a suspended account.
 warped pond
 quaint jasper
Nice texturing !

 thin shadow
damn looks so nice. I gotta learn how to bake ambient occlusion.
tough plover
thin shadow
damn looks so nice. I gotta learn how to bake ambient occlusion.
Substance painter is your best friend for that imo
thin shadow
But i can still achieve the same result with blender right?
or is it just matter of different workflow
tough plover
thin shadow
But i can still achieve the same result with blender right?
you can bake AO with blender yes, but it's not nearly as easy
in substance it's actually insanely easy
thin shadow
1st i just learned that it's adobe, now i also learned that it's not part of the license that i subbed to. So blender it is then.
cinder cradle
you can buy it on steam too to have it forever but only 2022 version
that's what i did
thin shadow
i see . that's weird business model. I wish photoshop and illustrator can be bought on steam too.
tough plover
thin shadow
i see . that's weird business model. I wish photoshop and illustrator can be bou...
add me as a friend?
you're not accepting DM's + not accepting friend requests lol
thin shadow
tough plover
add me as a friend?
alright
haughty rock
Also unlike other Adobe products, Substance is free for students
untold schooner
haughty rock
Also unlike other Adobe products, Substance is free for students
didnt they shut that down?
 mystic bridge
Ughhh.... can someone please help me. I am trying to make just a very basic model for a friend but I have no clue what I am doing nor do I know any of the terms he is talking about.
He keeps saying to just import a model and see if I can edit it to his liking and I stupidly said yes. Now I am struggling to find out how blender and Unity work.
Any tips/tricks cause I am having a head throbbing hard time getting around all of this
 digital hound
silly question, are empties in blender the same as unity? Does it matter which empty I use? Just trying to organize stuff in blender as well as unity since collections don't transfer.
cinder cradle
digital hound
silly question, are empties in blender the same as unity? Does it matter which e...
they will be counted as empty yes.
 dry tendon


My strongest portfolio piece WIP
Model is actually done I just don’t have the picture of it yet, these are all the progress photos.
If you were to 3D print this (which I plan too) everything would work, including screws. So far have spent a total of 10ish hours on it
 raw egret
does anyone know how to fix the shading issues

 edgy pollen
Any help I try making the atlas for my new quest avatar and it breaks my textures
 tough plover
raw egret
does anyone know how to fix the shading issues
tough plover
raw egret
does anyone know how to fix the shading issues
select the area, alt + N > reset vectors
wicked hearth
I hope this is an easy question, but I've had a devil of a time finding a tutorial that mentions it (I'm new to Blender). Once you've unwrapped an area of a model and assigned a texture to those specific faces, it is possible to tile that texture? For instance, say I have a 1024 texture that has four tiles, each 512x512, and I apply one of the 512x512 sections to a large square face of my model - but it's way too big. Can I do something so that the unwrap continues to only display the 512x512 section of the 1024 texture, but tiles it as seen in other tools like Unity?
I apologize if I'm explaining this poorly.
My ideal end result would be that the 512x512 section I unwrap would be duplicated, say, 8 times on the square face to which I've unwrapped it, instead of once.
azure rain
yes you can use tiling Textures in unity
wicked hearth
Thanks! And yes, I've used tiled textures in Unity. I've curious if there's a way to do it in Blender... take 1/4 of a texture, map it to a surface, then tile that 1/4 the same way I would in Unity.
I also might be explaining it poorly. Imagine I have a building and I've created this 1024x1024 texture. I want to use the portion with the red square around it for the roof, but due to the building's size, when I unwrap the red section to the roof, it's too low res. So ideally I'd like to use just the red section on the roof quad, but tile it so it's a 4x4 grid instead of 1 big blown up texture.
I did this manually in Blender by splitting the single roof quad into 16 quads and then unwrapped each of those 16 with the red section, but that seems horribly inefficient.
 unborn acorn
wicked hearth
I also might be explaining it poorly. Imagine I have a building and I've created...
unborn acorn
wicked hearth
I also might be explaining it poorly. Imagine I have a building and I've created...

heres the node setup
just make sure to make every part you want to tile seperate
wicked hearth
You rock! I will try that, thank you.
unborn acorn
no problem
unborn acorn
wicked hearth
You rock! I will try that, thank you.

Blender Stack Exchange
I just recently got into the nodes system, my knowledge on the subject is limited.
I can't seem to find out how to tile textures using my current node setup, because it doesn't tile the them on its...
also heres the post on it if you have any issues
wicked hearth
I've never heard this called "tile in cycles" ha. Probably why my Google failed.
raw egret
tough plover
select the area, alt + N > reset vectors
Thanks so much
devout scroll
wicked hearth
I've never heard this called "tile in cycles" ha. Probably why my Google failed.
cycles is the name of one of the render engines blender uses
azure rain
wicked hearth
I also might be explaining it poorly. Imagine I have a building and I've created...
yes the 16 quads method is pretty much what you need to do in unity without a custom Shader if you wanting to utilize that Atlas
as any fancy blender graph setups don't transfer into unity
wicked hearth
In progress skyscraper interior!

Still very much learning Blender and this is a good project to do it on.
thin shadow
edgy pollen
Any help I try making the atlas for my new quest avatar and it breaks my textur...
check if the texture path is defined. if embedded, unpack to local folder
 azure rain
wicked hearth
In progress skyscraper interior!
azure rain
wicked hearth
In progress skyscraper interior!
cool
unreal gyro
im going to absolutely suffer with that colourful mess that she's got on her head, any advice to help out or do i accept fate 
 quaint jasper
unreal gyro
im going to absolutely suffer with that colourful mess that she's got on her hea...
quaint jasper
unreal gyro
im going to absolutely suffer with that colourful mess that she's got on her hea...
Once you've made all the strands, you can use the random selection function in blender, and then unwrap on top of your texture easily
unreal gyro

hushed gyro
finally... a seamless normal map

 gleaming quartz
I was just bored and made a new sculpt model... however when the "crease" tool reaches the front of the muzzle, it adds material instead of taking it away, but switching to "add" subtracts material... I only have a mirror applied to X coordinate and my normals are perfectly blue and fine.... I don't get it

the tools work perfectly fine on the sides of the face, just not the very front?
ok... so applying scale, flipping normals, reapplying scale and flipping normals back seems to have worked for some reason... weird... did I just run into some weird bug?
 atomic hamlet
Non-uniform scale generally causes various weird problems.
So that could have been your issue if applying scale fixed it.
gleaming quartz
hm, I see...
never had to play with it like that though, but I am sorta new to blender
devout scroll
either never scale stuff in object mode on one axis or apply it every time
scale is like a multiplier
if it's not the same on all 3 axis it will cause issues
sometimes recalculating normals can help too
 safe sapphire
25% done Creepy Half face reveal... For A VR Chat Avatar Race I'm working on.
Still can't find a 1 step menu to replace the eye texture with the real eye texture and simply realign and rescale the texture map>> In ether program.> couldn't replicate this model in Blenders menu system.
i found 13 million reviews stating blender's 3d Modeling program while great and highly advanced. its UI/ UX needs to be inclusive and more intuitive, its start-up menu system needs to be overhauled.. They only have 14 million downloads XD
 still wadi

 trail python
oh god not this guy again
"i am going to generalize the entire autistic and disabled community because ive learned 4 things in 15 years. every programmer hates autistic and disabled people. i can wave a magic wand and get legal immunity."
 brave furnace
This is an an array of 11 planes duplicated 10 times rotated at their base (x4). nothing is connected. it has 2 uv maps, the first having all overlapping squares on the same texture. the second uv map has each plane occupying a separate space. The problem happens when i look directly at the intersecting point my frames go from 72 to around 40 using a mobile toon lit shader down to 14 using an unlit shader with additive blending/backfaces enabled. sorry for the long question but I'm curious as to why this happens and how i can avoid it in the future while modeling. (all framerates were from quest standalone)


 hasty rock
@brave furnace there’s a technical reason this happens but it has to do with how mobile renderers are constructed
the Quest GPU’s rendering system, regardless of API, is tile-based, split up into 8x8 tiles, and is designed around the assumption that there won’t be an excessive amount of tris fitting into a single tile
(it’s also why MSAA is so cheap on Quest)
now, the reason why this setup in the image lags is because it’s packing way too much geometry into a single tile, instead of spreading it out
even if it’s the same number of tris on-screen, or perhaps more than that, they’re not spread out enough
even in something like Pavlov VR, you still wouldn’t be fitting that much geometry into each tile, but 1,760 tris is way too much
brave furnace
thanks allot! ill try redoing it spacing them out more.
 cerulean shoal
unreal gyro
im going to absolutely suffer with that colourful mess that she's got on her hea...
cerulean shoal
unreal gyro
im going to absolutely suffer with that colourful mess that she's got on her hea...
KIKUO 😭
unreal gyro
cerulean shoal
KIKUO 😭

 south bobcat


 ionic hare
can someone help me with a uv issue?
untold schooner
im sure someone can
grim helm
anyone have any guide vids or suggestions on decimation/baking to get less polys. I've found a few already but most do not help on models that are high poly to start like 50k to 100k polys. I want to have something on quest side as well.
Ive done things like individual part decimation but I can only guess at what I am doing.
I find vids going from 14k to 10k or something like that and most are kind of speculating on what to do as well.
 worthy rampart
there is no magic trick
look into learning resources on retopology/retopologise
those retopologised models then may serve as proper target to bake the higher poly version to
automatic decimation can work at the cost of the nearly uncontrolled loss of topology, which lends itself poorly for further edits and poorly for deformation
grim helm
alright I will try to find information for it thanks
 prisma yarrow
does someone know any good tutorials on how to create an avatar in blender? ive tried everyway to attach the body and the head or hair and every way that i got told failed and i feel like ive lost 10years of my lifespan ive tried it 6 times and every attempt failed ... (already watched the berryvee tutorial)
i need someone that would help me go through it step by step or i will lose my mind
azure rain
grim helm
anyone have any guide vids or suggestions on decimation/baking to get less polys...
something that can be a lot cleaner than the decimate modifier that's not retopology would be dissolving Edge loops https://www.youtube.com/watch?v=Z4OZfaPN69U

Here's how to delete every two edges in Blender.
A lot of times you want to quickly reduce the number of segments from a shape such as a cylinder, sphere or any other face. This is a quick way to do it.
Know any topology tricks like this? Make sure to share them in the comments, you never know when it can ma...
grim helm
Ill check this out thanks
azure rain
yeah it makes much less of a mess as you're still keeping everything a quad mesh
 mortal aurora
How do I add my blender avatar to unity?
azure rain

Part 2: https://www.youtube.com/watch?v=rRAnDMUbWt8
0:00 - Intro
0:23 - What You'll Need
1:26 - Installing Software
2:26 - Get the VRChat SDK
2:53 - Make a Unity 3D Project
3:26 - Import the SDK
Link [1]: (Example Avatar Files) https://assets.vrchat.com/misc/Tutorial_Avatar_Robot_v1.zip
Link [2]: (How to merge Steam / Oculus / Viveport accoun...
export the model as a fbx
 wispy cairn
Is there a way to delete blendshapes without resetting it to the default mesh? This model im working on has a bunch of blendshapes to change parts of the body and id like the values to just be the default, however i cant seem to find a way to delete them/apply them to the basis without them getting reset
tough plover
wispy cairn
Is there a way to delete blendshapes without resetting it to the default mesh? T...
set all of the customization shape keys to the desired values, then use "New shape from mix". then, apply this new key to the basis using "Apply selected shapekey to basis".
now your changes are reflected on the model without any shape keys actually being active
to revert the changes or do modify the values, simply apply the Reverted key to your basis to undo
wispy cairn
ty!
 pseudo knoll
happ proot ^^

 glacial ore
anyone know any good humanoid/felinid sculpting bases or anything i could use as a base to sculpt my oc? i already sculpted a head, but i would much rather use a body base than sculpt one myself.
mortal aurora
Are there any bodys that look like rilakkuma?
Can someone make a better version of this?

can someone make a better avatar then this

 vapid veldt
Ok genuine question
How do I make a flat polygon mesh
In blender
I'm specifically asking because I'm porting Simon Belmont from Castlevania Judgement and I want to add eye tracking
Therefore the most logical way would be to make a small mesh for each eye and it's texture
And blank out the normal eye texture
This is the absolute last thing I need to finish my rig
So that it looks decent in VRChat
Since I'm not adding blinking, nor mouth movements
Legit for the life of me can't figure out how to do them, and I don't want to when I've already tried to add mouth movements and failed
Miserably
Please
It's all I need for a decent final product
trail python
in discord, type what you need help with in one sentence
vapid veldt
Oh thanks I'm sorry I assumed it was technical blender stuff
Sounds like it too
I shall decimate a cylinder!
mystic bridge
Hey y'all so real simple question. I am trying to port a model into VR Chat and for some reason my mac decides to not let me port it. Unity has warped all my colors and assets and it has even taken away the SDK drop down menu.... Please, any help is needed.
thin shadow
that depends. that sounds too generic. could be anything. But sdk drop down missing can be diagnosed by checking the error console.
prisma yarrow
could someone help me and explain to me step by step how to attach a head to the body plus hair ,shorts and pants in blender? ive tried it 6 times with watching a tutorial and a lot of people trying to help me but something always goes wrong and i dont know what to do
devout scroll
depends if the hair and pants are made for that avatr
prisma yarrow
devout scroll
depends if the hair and pants are made for that avatr
on my first try the hair , shorts and shirts plus head were attached but the bones were messed up because i wasnt supposed to use fix model on that base
but now nothing works
devout scroll
Attaching hair is easy but pants entirely depends on if they were made for your avatar
prisma yarrow

 prisma yarrow
devout scroll
Attaching hair is easy but pants entirely depends on if they were made for your ...
prisma yarrow
devout scroll
Attaching hair is easy but pants entirely depends on if they were made for your ...
the first picture is my first try and the second one is what happened with all of the other ones
devout scroll

prisma yarrow
devout scroll
<:vrcTupStare:932396618475507842>
yeah a bit scary^^
devout scroll
can't really help now as I'm not home anyway
but it looks like the bones were not named the same when you merged stuff
prisma yarrow
devout scroll
but it looks like the bones were not named the same when you merged stuff
oh .. how can i make sure that they are named the same?
devout scroll
Go into edit mode when selecting the armature and look at each bone for the shirt
rename it if doesn't match the body's bone nme
f2 to rename or right click rename in the outliner list thing top right
prisma yarrow
so if the bases bones says for example "left arm" and the shirts says "left arm plus something else i have to change it? did i understand it correctly^^?
devout scroll
yep
you have your shirt armature and your avatar's armature
if the names match they will be merged like you expect
if they don't match they'll just both be there but one one will move while the other one will stay in place
like you have in your second screenshot
prisma yarrow
ohh okay got it thank you!
quick last question^^
somehow if i merge the hair after i merged the head and body the hair wont stay attached and im not sure why
devout scroll
can't say without seeing how it looks like
but
hair usually comes with some bones, there's a head bone and the rest of the hair bones
you need to merge the hair's armature to your avatar so that the hair bones are parented to the head bone as before
either the head bone of the hair gets merges into your avatar's head bone
or you delete it, join armatures then set parent of hair bones to be head again
then it should work fine
but why the hair doesn't stay attached could be a few reasons
one could be that the hair bones aren't parented to anything so they just stay there, moving with your hips instead of head
prisma yarrow
bones look like this^^
 devout scroll
names of shoulders, neck, chest, head and so on
not the hair bones only the shares ones
prisma yarrow
devout scroll
names of shoulders, neck, chest, head and so on
my head has a eye_ right and left but then also LeftEye and Righteye but my body only has the eye_right and left , can i still leave them?
prisma yarrow
devout scroll
i think
oh okay , there is now 2 heads in the armature , do i have to do "to active" or was it "to parent"?^^
prisma yarrow
devout scroll
it will merge selected to last selected
is it correct like this?
 devout scroll
yeah but why do you have so many eye bones
merge the eye_R together with the other eye_R
and same for left
again by selecting both and to active
prisma yarrow
the eyebone is here is that normal?
 prisma yarrow
devout scroll
can change that later
prisma yarrow
devout scroll
can change that later
tried uploading it with just hair head and base and it worked thank you so so much!!
devout scroll
yay
vapid veldt
hey so anybody have any idea on how to make a mesh for the pupil and iris that matches the mesh that currently has the eyes
here's a pic of the mesh Im trying to put an eye texture over
as well as my settings
 trail python
if you already have a mesh for the eyes why do you need another one
safe sapphire
vapid veldt
hey so anybody have any idea on how to make a mesh for the pupil and iris that m...
https://www.youtube.com/watch?v=b8UH_WU23Io
2 many steps, and a menu to navigate thru, and
way too complicated for me in both versions of blenders core program.
But you maybe can follow along and complete what you want with this tutorial.
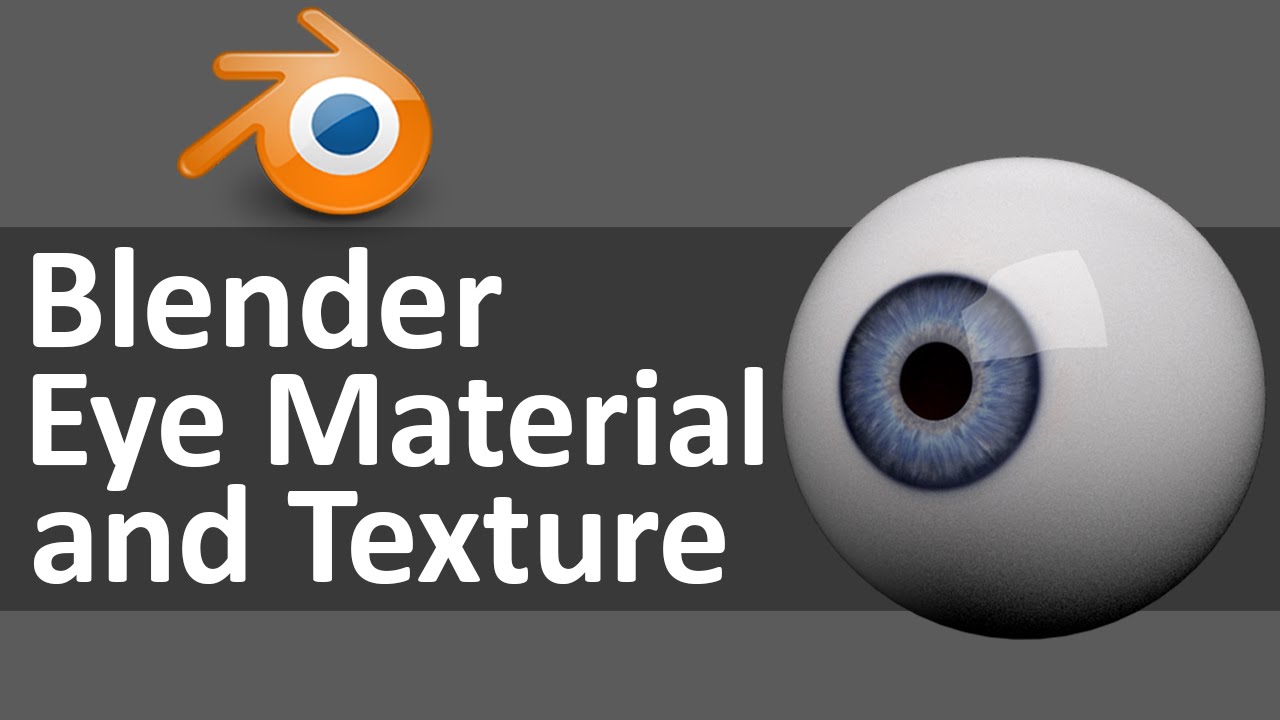
Create a Game Character Now at http://www.darrinlile.com
In this video we set-up the materials and texture for the character's eyes. We UV map the eye ball, apply the texture, and create the glass material for the outer eye.
Social Media Links:
Website: https://blender101.com
Google+: http://bit.ly/DarrinLileGooglePlus
Facebook Group: http:/...
trail python
i wonder why you have trouble with a 7 year old tutorial
literally all this guy does in this server is whine and moan about blender+unity being inaccessible but also groups every autistic and disabled person together as if we all have the same issues christ
vapid veldt
trail python
if you already have a mesh for the eyes why do you need another one
Oh it's because the current mesh doesn't have the pupil separated
Therefore if I were to move it you would be seeing inside the character's head
trail python
vapid veldt
Therefore if I were to move it you would be seeing inside the character's head
its kind of hard to see from the image but that sounds like the whole eye isn't modeled
vapid veldt
Yeah it's only the part that you see
Not the entire eye
This model was made for a 14 year old fighting game on the wii
trail python
ooo wii model
vapid veldt
Castlevania Judgement Simon Belmont is a trip
azure rain
so basically you want to convert from painted-on eye to a proper eyeball?
azure rain
you can reuse the original texture
vapid veldt
I was originally only gonna make a painted on pupil separate from the eye
That would move around
But... well... I'm not exactly sure how I would
Actually model the pupil and iris
azure rain
then yeah go with a eyeball
vapid veldt
Since I need them to match the mesh
So replacing it with an eyeball could work better
azure rain
so yeah you should be able to just take a uv sphere and unwrap it so it uses the original texture
vapid veldt
Yeah
Then I'll just make sure to line up the sphere with the original texture placement and boom
Eye bones 😎
trail python
dont forget smooth shade
trail python
you set up gloss etc in unity
blender is more of a preview of how you want materials to look in unity
vapid veldt
Gloss will probably ruin the original intent
I wanna keep it as close to the og as possible while also making a good eye rig
spiral sigil
How many blocks tall and wide should my doorway in unity be?
azure rain
spawn a capsule it the size of the collider in vrchat
azure rain
spiral sigil
How many blocks tall and wide should my doorway in unity be?
2 Unity cubes tall and 1 Unity Cube wide
spiral sigil
Alright thanks
azure rain
and for General sizing reference a Unity cube is 1 meter tall
spiral sigil
Alright thanks for sharing this I'm new to modeling in Unity
 hardy turret
anyone got a good resource how to properly texture and shade an avatar? even when i use realistic pyomi lighting, even in dark areas the nose is like barely visible
 surreal lance
azure rain
and for General sizing reference a Unity cube is 1 meter tall
surreal lance
azure rain
and for General sizing reference a Unity cube is 1 meter tall
thats so big
safe sapphire
hardy turret
anyone got a good resource how to properly texture and shade an avatar? even whe...
fair warning though
some of the tutorials are overly-complex, and have 1 to many steps.
(So you will get frustrated. and i recommend having a revert save file. and only saving your work if you are 100% sure you like the final product.)
But thats not the instructor's fault
blenders UI is 10 years (unity is 8years) out of date compared to modern 3D creation software which costs money. or other less comprehensive free 3d creation software,
Even free trial software UI's have surpassed their UI in simplicity, intuitiveness & inclusiveness.
Fact: Over, 40 million content creators are forced to use free software (or illegal download ripped software) because they simply do not have the funds to pay for suites and software
HAHA.
trail python
hardy turret
anyone got a good resource how to properly texture and shade an avatar? even whe...
play with poiyomi lighting or joining their discord might help. the guy above me is just rambling nonsense
trail python
hardy turret
anyone got a good resource how to properly texture and shade an avatar? even whe...
im not sure if the bot will delete the discord link, but https://github.com/poiyomi/PoiyomiToonShader - the discord invite is the 1st option
GitHub
A feature rich toon shader for unity and VR Chat. Contribute to poiyomi/PoiyomiToonShader development by creating an account on GitHub.
hardy turret
the lack of actual usable content and tutorials which doesnt suck is disturbing
trail python
they're out there. thats just the perspective from someone whos learned 4 things in 15 years then feels the need to shit on blender/unity programmers
it just depends on what you're trying to figure out
devout scroll
hardy turret
the lack of actual usable content and tutorials which doesnt suck is disturbing
you should ask in poiyomi discord
there are a few things you can do to influence shading (how your stuff is lit) including editing your normals
but it's hard to give a blanket recommendation
but in terms of texturing it's harder to say. depends on if you want realistic pbr stuff or stylized stuff. if you want stylized look up shonzo's streams
 sharp grove
Oddly specific question, has anyone here painted fur on a 3D model that they wouldn't mind sharing some pics of/telling me their process?
I have a model that I'm really happy with but I'm not great at texture painting, I've contacted a few people for a commission but no one is interested in doing it
Which is understandable, hence why I'm asking if anyone has any examples I could look at
I've googled stuff but Google insists on showing me sculpt painting which is not what I want
 obsidian nova
Do you mean painting, like, on the albedo map/normal map? You’re going to have to be more specific.
untold schooner
safe sapphire
https://www.youtube.com/results?search_query=how+to+properly+texture+and+shade+a...
bro still tryna complain about blenders ui
 open scarab
That guy? yeh he's on a rant about that
thin shadow
i guess bforartist still doesnt work out for him
the search for inclusive UI continues.....
azure rain
I'm not sure they're going to find a UI that satisfying for them because 3D modeling is quite complicated
thin shadow
Either that, or make your own 3D modelling software. Blender is open source anyway, so at least it's an opportunity to modify it at the source. Or perhaps continue talking about it instead.
tough plover
I mean, do you really need to do that if you can just have the eyes actually move?
increase the smoothness value on the material for the eyes
that's a shader thing, not a texturing thing
trail python
untold schooner
bro still tryna complain about blenders ui
if you look at his message history, theres not 1 message that doesnt have his copy pasted speech
safe sapphire
sharp grove
Oddly specific question, has anyone here painted fur on a 3D model that they wou...
https://www.youtube.com/results?search_query=hair+card+in+blender&sp=EgIIBQ%253D%253D
This is the best way to do it for Vr chat, a furry on twitch recommended this method since blenders particle system isn't the greatest.... and can create a very unoptimized avatar.
I personally can't follow the tutorials but i love the method...
also texture paint.
https://www.youtube.com/results?search_query=How+to+weight+paint+in+blender&sp=EgIIBQ%253D%253D
Basic- texture painting
https://www.youtube.com/watch?v=k4sMnJsVaxc

Here's a quick tutorial on just the basics of texture painting in Blender 3.0 Eevee! Hope you enjoy!
If you'd like to help support my channel, please consider making a donation! It helps more than you know : https://www.paypal.me/2kai
IMPORTANT LINKS :
💖 YouTube : https://youtube.com/tutsbykai
🐦 Twitter : https://twitter.com/tutsbykai
💸 Donati...
 languid fog
Wip

 median lantern
Wow, that's really good!
 drowsy goblet
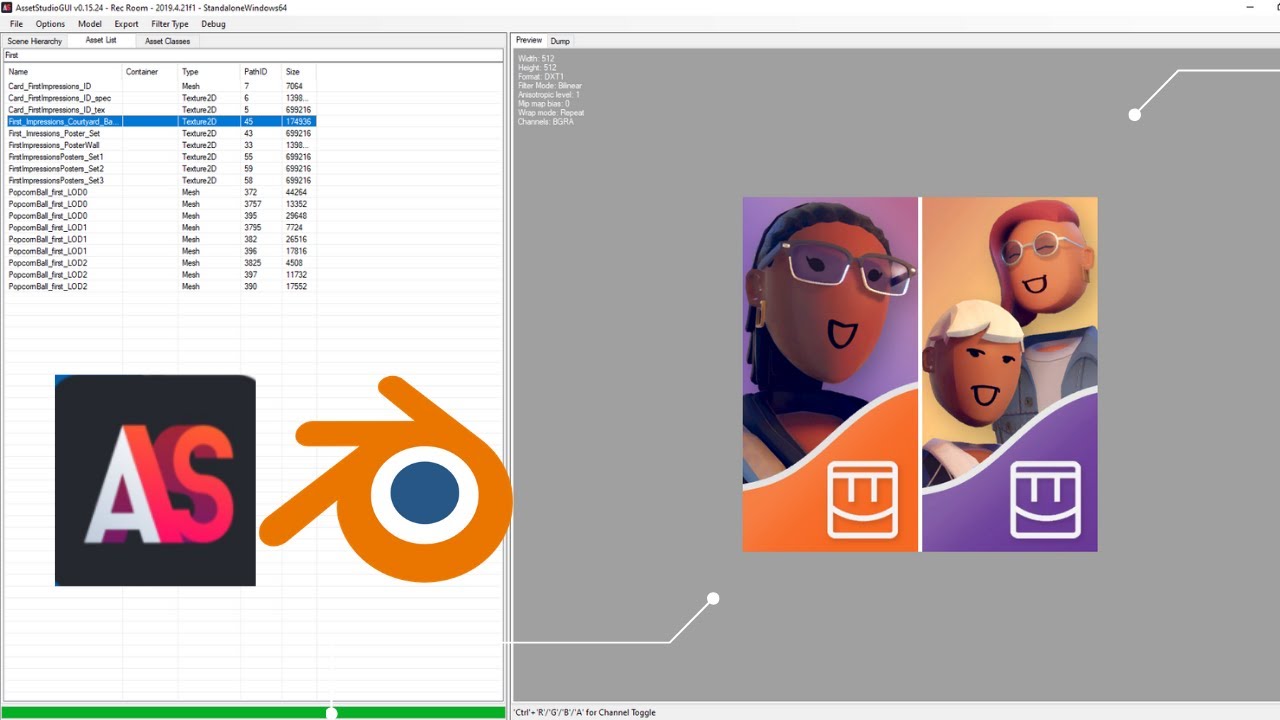
Thank you for watching the video! Hopefully it helped.
AssetStudioGUI Download: https://github.com/Perfare/AssetStudio
Blender Download: https://www.blender.org/download/
Would it work to use this to make my rec room avatar for VRchat?
I guess as a model base, then followed along by this tutorial?
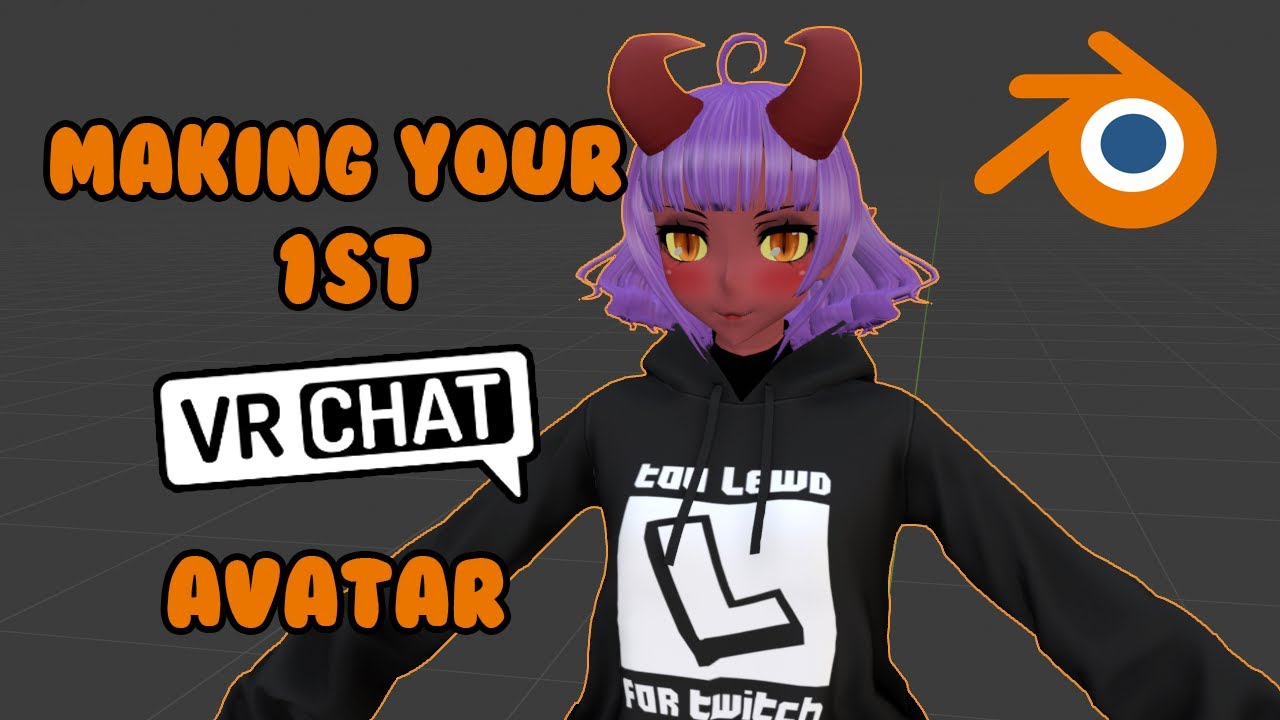
Don't feel like doing it yourself?
Hire avatar artists on Fiverr to create your own custom VRChat avatar: https://bit.ly/3nZyJhV
Part One of a tutorial series where i'll show you how to create your very own custom avatar for VRChat and VRM use for VTubers. In the First lesson we'll be focusing on Blender.
Leave a comment if you want to see a t...
Or would rec room files not cooperate with VRchat?
tough plover
drowsy goblet
https://www.youtube.com/watch?v=zvdmtVLEYnI
if you can get thje recroom model in blender, then it should definitely be possible to get it to work for VRChat. it's just a matter of how much work you'll need to do to make it work well
but honestly, I'm not sure why you would want to use recroom models in VRC
they are plain, cookie-cutter models that all look the same. they don't even have legs lol
drowsy goblet
thats the fun thing I like about lol
tough plover
¯_(ツ)_/¯
drowsy goblet
its just for the sake of messing around, I'm not really into the very humanoid looking avatars
tough plover
eh
you still need all of the leg bones
you don't need them to be used for anything, but Unity requires them to be there
drowsy goblet
I know ;_;
hasty rock
how do I fix this

 quaint jasper
"This" 
hushed gyro
Added some RCS thrusters to my backpack, thinking about adding a door to expose the RTG
 languid fog
quaint jasper
"This" <:whatthe:581188620409634826>
languid fog
quaint jasper
"This" <:whatthe:581188620409634826>
i think it is the clipping ???? i dunno 
 quaint jasper
Is the first image from Unity ?
grim helm
any easy ways to fix darkening spots from decimation?
quaint jasper
Any pictures ?
obsidian nova
1️⃣ It’s most likely that your normals got messed up during the retopology process. Try selecting the affected portions of your mesh, then to mesh>normals>average>face area.
2️⃣ If that doesn’t fix your problem, you might have inverted normals. Click the drop down arrow next to the overlays icon (the little icon with 2 overlapping circles top right); and check “face orientation”. Make sure you’re in viewport shading mode with X-Ray turned off. If you see any red, those are faces with flipped normals.
You can correct that by selecting the affected faces and then going to mesh>normals>flip.
3️⃣ If THAT still doesn’t solve your issue you might have fucked up your UV’s while decimating your mesh. Head over to your UV Editing panel and check to see if anything is stretched weirdly or sitting out of place. Reposition things accordingly if you find something wrong.
Good luck!
obsidian nova
grim helm
any easy ways to fix darkening spots from decimation?
@grim helm Good luck!
grim helm
obsidian nova
<@278639288722259978> Good luck!
thanks Ill try this out
 lean bridge
Hello~ Any ideas on how to fix that pixelated material?
I know that taking it like that to unity and applying some shaders does fix it, however I noticed that if someone sees my avatar with shaders off (safety mode) it will show pixelated version, which is not ideal since I had that in a shirt and avatar was basically naked when shaders were off.
 cinder cradle
lean bridge
Hello~ Any ideas on how to fix that pixelated material?
I know that taking it l...
cinder cradle
lean bridge
Hello~ Any ideas on how to fix that pixelated material?
I know that taking it l...
did you checked face orientations ?
lean bridge
sorry? I dont understand
lean bridge
cinder cradle
did you checked face orientations ?
not sure on how to do that
how would it cause lag
cinder cradle
lean bridge
not sure on how to do that
 lean bridge
you're focusing on the wrong part of the question. I just need help on how to fix the blender issue.
lean bridge
cinder cradle
when I click it, it selects everything as blue/red except the problematic mesh
cinder cradle
screenshot?
lean bridge
 lean bridge
how do I make it face outside? Cause it happened before with some pieces of clothing I added
I believe its a mesh problem, not material?
cinder cradle
you select faces and press shift + n
also check if you have opaque mode in viewpoint display when ur in materials tab
 grim helm
Is it a problem with inverted normals? Im still new so im only guessing
cinder cradle
also if it's pc only avatar use backface culling
lean bridge
none of that worked for this avatar specifically but I'll try it next time I have this problem y-y thank you~
cinder cradle
lean bridge
none of that worked for this avatar specifically but I'll try it next time I hav...
how many meterials do you have?
remember that you need to set it for each one of them
cinder cradle
really?
can you screenshot what you have there
since it's important to have that settings
lean bridge
 lean bridge
image. So, I changed the material to the same as the other avatar that is working fine and it fixed it. So it was something in the material after all (?)
cinder cradle
could be bcs of material settings
lean bridge
I found the settings tab, it was somewhere else in the materials tab.
unchecking "show backface" seems to have fixed the issue

although the good material didnt even have that option to begin with as I was comparing the two of them to find a solution

intriguing
lean bridge
ohhh you're right
cinder cradle
opaque is quest mode
lean bridge
that fixed the problem and got rid of the show backface box
cinder cradle
when you work on avatar turn it on
lean bridge
I always make avis with the intention of making it quest compatible so thats a good thing to know
thank you very much for your time really
cinder cradle
opaque also gonna show black spots on transparent things so it will be easy to cut out
that's useful for vroid creators
 upper canyon
I've hit a major roadblock trying to help someone, is there anyone here that knows someone that has autodesk maya? Issues with an avatar made in maya and I'm outsourcing help right now
 stray tulip
upper canyon
I've hit a major roadblock trying to help someone, is there anyone here that kno...
stray tulip
upper canyon
I've hit a major roadblock trying to help someone, is there anyone here that kno...
I do
uvu
 storm sentinel
hey (: im a bit new to vrchat & have found a lil passion for making avatars & wanna start making worlds and other 3d things as well. i was finally given the ability to test & upload them just last night so im very excited lol
so im curious if anyone has any good resources for me to start learning more about 3d modeling in blender? cus i know you can basically create your own items in there and add onto your model as well, so i wanna learn more about that. i get overwhelmed with all my options so i figured id ask in here to see if anyone knows of good resources to start out
azure rain
VRChat
Before getting started ensure you have a Unity project with the SDK set up. Step 0 - Create a model! Although most users choose to find a model instead (see step 1), it is TOTALLY possible to create an avatar model from scratch. You can use any 3D software you like, as long as it supports exporting ...
storm sentinel
azure rain
https://docs.vrchat.com/docs/creating-your-first-avatar
ive got my model made and working in vrchat, i mean more like creating things from scratch in blender & the more detailed aspects of it that can be used to edit models
azure rain
it also include links for blender modeling tutorials
obsidian nova
@storm sentinel You should check out this tutorial series: https://m.youtube.com/watch?v=nIoXOplUvAw It’s not specific to avatar making, but is by far one of the best introduction courses for modelling in blender.
Blender tutorial series showing you how to use the most common features, like modelling, lighting, materials, geometry nodes and rendering - whilst making a donut.
Download the Blender Shortcut Hotkey PDF: https://www.dropbox.com/s/jg4fs4i8zw5bxt7/Blender 3.0 Shortcuts v1.2.pdf?dl=0
Google Doc version: https://docs.google.com/document/d/1...
storm sentinel
ooo thank u very much
obsidian nova
This explains how to make hair from scratch if that’s something you’re interested in. https://m.youtube.com/watch?v=BqWYgrXw7Jk

A tutorial on how to make hair in Blender 2.8 with curves, a method that is very simple and effective that I have been using for my character sculpts.
▼ Sculpting Uraraka Ochako:
Re-Sculpting My Old Art | Uraraka Ochako in 3D [My Hero Academia] | Can You Improve In Only 1 Year?!: https://www.youtube.com/watch?v=iYNdfef1Uog
▼ My Gumroad Store (...
For clothing, I would highly, highly, highly recommend you get a free 1 month trial of marvellous designer instead of trying to do it in blender.
Marvellous designer’s one and only purpose is to make clothing & fabric simulations. Here’s a good tutorial to get you started.

This is a tutorial for getting you started with Marvlous Designer. I am using Marvelous Designer 6.5 and a simple example of creating a shirt to show the basics of the software for beginners.
See my social profiles here
G+: https://plus.google.com/+JayAnAm
Twitter: https://twitter.com/jayanamgames
Facebook: https://www.facebook.com/jayanamgames...
 next minnow
Guys I think I messed up just a hunch though

 nimble valve
v is for vrchat and ur just showing ur spirit <3
 maiden bane
Cant decide if i want to make this a world or not. Annotations are how i plan it to look

@storm sentinel I started 2 weeks ago and fell in love with 3d modeling. If you go to my youtube Milkman910 and check out my playlist blender tutorials, I put every video I have used so far to help me.
storm sentinel
maiden bane
<@689922171111473310> I started 2 weeks ago and fell in love with 3d modeling. I...
ooo thank you
 austere rune
For some reason my materials dont show up in unity- even though they do in blender?? its just all grey and selecting the "use embedded materials/ legacy materials hasnt been looking for some reason
Also aswell- the model doesnt show up with textures in the 3D viewer when double clicking the models file.
I followed tutorials though- did copy mode on the materials and embedded materials but it doesnt show up still
Is there any way too export materials from blender by themselves and put them into unity or?
 hexed wagon
help i cant make a neck in blender
pseudo knoll
hexed wagon
help i cant make a neck in blender
does spongebob have a neck?
 fresh isle
Just extrude up?
hexed wagon
pseudo knoll
does spongebob have a neck?
no .-.
pseudo knoll
what are you attempting to 3d model?
hexed wagon
fresh isle
Since I'm here btw, I make new model
amazing
fresh isle
(Discord thinks this image is explicit so I can't upload it directly to this channel)
hexed wagon
fresh isle
(Discord thinks this image is explicit so I can't upload it directly to this cha...
discord at its finest
fresh isle
Here's a different one

 fleet tinsel
Hey any help I can get to make an avatar with the model only on the hand?? This is my first time really rigging or making anything. Help would be appreciated
 trail python
parent the little creature to your armature and weight paint it onto the hands
hexed wagon
hexed wagon
and its mass pain bc its my first time making a avatar from scratch
this is what im working with btw 

 fresh isle
So you know what I'd say
I don't know what your intended art style is, but what I'd say is just say screw it to properly connecting the neck to the head
hexed wagon
mk ill try
fresh isle
And just shove a tube into the bottom of the head
spiral sigil
beginner modeler here ig. trying to figure out how to model a character. any help would be appreciated!
trying to model my sona if anyone is wondering
 quaint jasper
If you want to get started, having a front/side view of the design would help you out a lot
From there, you can watch any beginner modelling tutorial on youtube and learn the basics
spiral sigil
Ah
I was gonna used subdivided shapes and stuff but idk how to it properly?
Anyone with free time who could help?
cinder cradle
so you wanted to sculpt after? better do poly modelling
making avatar with subdivided shapes and sculpting them gonna give you very unoptimized avatar
cinder cradle
depends on video
quaint jasper
They can, just need to go with something you can do
cinder cradle
if you know nothing about blender and you have goal in mind and you do then start with donut tutorial to learn shortcuts
and logic
then find tutorial where someone does model from scratch
azure rain
people are unlikely to put in the labor to do a mentorship for free
spiral sigil
ah i thought so
fresh isle
I mean, I use subdivision while I work and my models come out fine
safe sapphire
spiral sigil
Ok
I use B for Artists Just because Blender is so not optimized for certain people.
And their developers seem to act very classist toward the 18 million
( file cloned from 1 Offical download) people who have tried it, love the core program,
but hate the UI and lack of intuitiveness
I'm More than willing to teach what I learned so far in that program.
But I do use modern methods of teaching.
with blender,
They have a policy, (note sarcastic comedy)
A) Create your own application UI, or code your own UI,
B) Manual optimize your workspace, memorize 200 keyboards shortcuts.
C) you have to program in display colors yourself & modify tool icons yourself.
D) our target audience is professionals only coders/ animators,
not you, not architects, engineers, not disabled content creators, not expert model engineers who can build an entire model IRL in 3 hours but want to go digital and 3d print instead.
and it's also a fact you will see that same classism on modeling forums about blender
and you can always delete sub-divides manually later,
sumtimes you have to subdivide to get sculpt to re-mesh properly.
 trail python
when is this guy gonna stop lmao
so insanely unhelpful
"i am law enforcement so instead of using that im going to whine in a discord"
haughty rock
trail python
when is this guy gonna stop lmao
Never it seems lol
untold schooner
every time he posts a new paragraph he adds more bad takes to it
obsidian nova
Trying to hammer out a good ArtBreeder to avatar workflow.
It's going pretty well so far, I've lost a few details, but that's fine. Here's the original AI generated reference.
 obsidian nova
spiral sigil
trying to model my sona if anyone is wondering
obsidian nova
spiral sigil
trying to model my sona if anyone is wondering
Follow along with this tutorial series, but instead of using his reference, just use your own. Its a little long, but super thourough. https://www.youtube.com/watch?v=Bnbkhf3QHew&list=PL5F48bE3OZbuaotqwyqWDI1UZvUTEiJSX&index=1

Making Link from Link's Awakening in Blender! Part one will cover modeling his body!
This is the model from this time lapse: https://youtu.be/uLjFNY5mLbg
We've updated a substantial quantity of the model and textures for this tutorial series! As well as updated the reference available! We will leave the old reference on the time lapse for now,...
austere rune
For some reasons my visemes arent showing up in unity?
I made them all in blender the different shape keys but when I go to unity they dont show up in the descriptor?

 trail python
ive had that happen before, i just fixed it by deleting every shapekey besides the 3 you need to generate, then regenerate all of them with cats
austere rune
trail python
ive had that happen before, i just fixed it by deleting every shapekey besides t...
Ahhh so go back into blender and regenerate them all and reexport everything?
trail python
yeah, unfortunately
austere rune
trail python
yeah, unfortunately
Is it alright if I message with any further questions- (I dont want to flood this channel)
 unborn pivot
Does anyone here love to weight paint? I'm not used to this blender version and im struggling just to select bones lol
was trying to see if i could hand this girl off for someone to fix the paint
trail python
austere rune
Is it alright if I message with any further questions- (I dont want to flood thi...
yeah go ahead, im not sure how i can help much but ill try lols
 dire cloak
anyone here good in blender that can help me with a few questions?

 pine raft
untold schooner
pine raft
untold schooner
really coming along isn’t it
pine raft
spice pewter
 devout scroll
austere rune
devout scroll
austere rune
are you sure the right object has the blendshapes
upper canyon
Quick question, where can I view polycount in Blender?
pine raft
 upper canyon
OH I don't have that turned on, can I find this in the menu?
devout scroll
or click overlays and statistics
overlays is the button top right of your 3d view
the two overlapping circles
upper canyon
Thanks pum, found it! take a cookie for helping me 🍪
devout scroll
 upper canyon
Nice topology
 urban bison
every time i see a cool model vrchat i feel even more stupid due to the fact i can't do anything to contribute to the wonder that is vrchat lol
azure rain
I suppose you could always try to learn how to model
upper canyon
I was saying I use cats and optimising models, I don't know what triggered the bot lol
 small valve

 arctic valve
I'm rebuilding my RC tank model in Blender 2.79 and I've made a shape key to get the treads moving but the shape keys don't show up in Unity. The treads are made with an array and curve modifier. I know I can't just make the shape keys and then Apply the modifier for obvious reasons (it won't let you apply a modifier on a mesh with shape keys) so is there something I'm missing here?
 devout scroll
you need an addon to apply modifiers to a mesh with shape keys
arctic valve
Can you recommend one?
devout scroll
can try this one but dunno about blender 2.7

GitHub
Blender script. Contribute to przemir/ApplyModifierForObjectWithShapeKeys development by creating an account on GitHub.
you could also do it manually but it takes some time
arctic valve
Looks like there's a branch for 2.79 surprisingly, so I'll give that a try. Thanks!
 shut mountain
made this, Free to use 

Hexagon Modern Shelf model
Package Includes:
Source- model (fbx)
Textures- 2D textures for the model
Free to use :3
Great for chill room renders or VRChat maps - Hexagon Shelf Modern - Download Free 3D model by Cup_Of_Tea (@trampiknunuka) [28fd51d]
spiral sigil
so I am using blender and I am never with the program, How would I make a finger perfectly symmetrical from both sides?
cinder cradle
spiral sigil
so I am using blender and I am never with the program, How would I make a finger...
use mirror modifier
spiral sigil
cinder cradle
use mirror modifier
So make it itself independent from the main body and mirror?
cinder cradle
you can also use these but they aren't perfect

you can try using just X
it will mirror all things you do on model on x axis
spiral sigil
alright
 solar fossil
The x/y/z mirror options require your model to already be symmetrical and won't guarantee that it will remain so.
Mirror modifier can be applied at any time as long as you don't have shape keys yet, so would recommend that
Also check bisect in the modifier should automagically remove half of the model so that the mesh does not overlap after applying
 abstract scroll
anyone know what tf is going on here?
the black areas arent supposed to be there and cause lighting and shading issues, I used a glass shader here to show where the problem is
no matter what texture or shader I use it looks like this

 tough plover
looks to be either bad normals or bad UV's
abstract scroll
screwed with both with no change
tough plover
abstract scroll
screwed with both with no change
what did you do for the normals exactly? did you reset vectors using Alt + N > Reset vectors? (in edit mode with mesh selected)
abstract scroll
just did that with no change
I honestly dont even know what I did, I just kept on resetting, recalculating, etc etc on everything
tough plover
could be disjoined vertices
abstract scroll
disjointed vertices?
I could send the blend file if it helps, I've been using blender for quite a while but gave up on tutorials as they've not once ever worked, theres a lot of things I dont know
tough plover
abstract scroll
disjointed vertices?
I could send the blend file if it helps, I've been using b...
select the body in edit mode, and do M > By distance
then Alt + N > Reset vectors
abstract scroll
M > By distance merged nothing
and ive already done alt + n
when showing mesh analysis for shading I see this, showing everywhere the mesh has the weird shading
the shading is almost metalic
 tough plover
can you show what the UV's look like in blender, with your texture in the background
abstract scroll
texture is just a black material
it doesnt even have UVs
or isnt unwrapped
ive never done that and have never had this issue
again, I can send the file so you can see for yourself
tough plover
UV's can still affect shading
abstract scroll
ive reset the uvs, deleted them, unwrapped it in multiple ways, and its always the same
now it isnt even unwrapped and it isnt working
the model is completely fine in blender
 jovial turret
So it looks bad in unity? Is recalculate the normals active on the fbx in unity?
safe marsh
abstract scroll
the model is completely fine in blender
You could have flipped normals
obsidian nova
New world coming out soonish. There’s a scrappy version in community labs currently.

Reference image (used for most of the textures
 untold schooner
looks good
is it just reference for the textures or actually used in the textures
 shrewd horizon
i have an issue .. im trying to merge duplicate vertices yet when i do, several of the faces are deleted and i cant add them back in, is there a solution or did i do something wrong?
 quaint jasper
Your UVs probably don't enjoy that process
spiral sigil
I am having an issue with attempting to mirror this half of the finger across its local center as when trying to mirror it ends up in the wrong places (blender)

how can I mirror it properly?
I separated the finger from the body and made it it's own collection
 limber bronze
 uncut imp
Does anyone ever have objects in blender disappear from certain angles?
It's not a camera clipping issue as the camera isnt even that close, and at the same distance from a different angle it shows up
limber bronze
check the scale of your object
uncut imp
The scale was fine. Centering on it with . didnt do anything, but apparently using muddle click on it reset the camera somehow and it stopped? Weird
alpine merlin
spiral sigil
I am having an issue with attempting to mirror this half of the finger across it...
Maybe the origin is placed elsewhere. Select model (not in edit mode) ctral+A or space bar set origin to geometry or origin point.
 fallow isle
There’s not a proper channel for this but I came across this yesterday. It’s multi-platform, open source, and free if you want to compile it yourself! It’s an alternative to Substance Painter and Designer. If you don’t want to compile it yourself, it’s very affordable. I’m probably going to buy it and give it a go once I’m out of the hospital!

ArmorPaint is a software designed for physically-based texture painting.
fallow isle
spice pewter
OOo very cute! Is this private or can it be purchased and used privately? Particularly her face and maybe the body? 😮
spiral sigil
alpine merlin
Maybe the origin is placed elsewhere. Select model (not in edit mode) ctral+A or...
got it
haughty rock
💀
hushed gyro
I think car paint is my new favorite matcap


 cinder cradle
 tough isle
(Inside)
tough isle
(Inside)
disable backface culling
hushed gyro
*enable backface culling
 tough isle
ok I tried that but i think it is modelled on both sides
i need people to be able to see out of it otherwise it blocks their entire view
cinder cradle
you need to edit it in blender then
so it only have one face
that points at one direction outside
pseudo knoll
hushed gyro
*enable backface culling
could try this one that i made

you can hue shift it using some image editing tools
tough isle
cinder cradle
so it only have one face
ok so how do i make it only have one face?
cinder cradle
remove faces other then those that you want to have
then have backface culling enabled in materials tab for it's texture
tough isle
ok i'm currently in face view mode what do i do?
cinder cradle
depends how it looks
tough isle
 cinder cradle
hide faces you want to be seen with h and remove others
tough isle
tried it but it just hid it on both sides
 cinder cradle
do you have texture for it?
tough isle
no i'm using materials in unity
 blissful current
Could you use unity with a macbook?-
cinder cradle
blissful current
Could you use unity with a macbook?-
depends if you have m1 processor or older intel
blissful current
scary
blissful current
okay thank you so much
 glad ember
i have no idea what's causing this, but everything i export from blender into unity is rotated 90 degrees. guessing it's coz blender uses Z for vertical and unity uses Y, but no clue how to work around that
dont want to make models pre-rotated, that feels stupid. and manually rotating in unity doesnt appear to do anything to the model in-game
 dapper cobalt
if you export with CATS it should auto-fix that
i think there is some other funkiness that happens if you don't use CATs export as well
cinder cradle
you can fix it with cats bcs it sets forward cord for unity
u can also do it in export settings
apply scale to fbx all and apply transforms is also good
cats does it for you
glad ember
not seeing an export option in cats
cinder cradle
hmm if you cant see it cats cant see your avi .. do you have only import button?
glad ember
yea.
cinder cradle
u use blender 2.93 or something close to it?
glad ember
2019.4.31f1
cinder cradle
blender i meant
glad ember
no idea. latest one.
dapper cobalt
cats doesn't work on the latest version of blender..3.01 is the latest i think
glad ember
figures
cinder cradle
install 2.93
uncut imp
dapper cobalt
cats doesn't work on the latest version of blender..3.01 is the latest i think
It does. I have it installed in the latest
cinder cradle
its buggy in latest
glad ember
okay so failing cats, it seems like changing export options for fwd/up dont have any effect in unity. there a workaround?
uncut imp
Hmm maybe I haven't used the feature that was buggy since it's been working fine
uncut imp
glad ember
okay so failing cats, it seems like changing export options for fwd/up dont have...
I believe you can try checking the apply transforms box in the fbx export dialogue
cinder cradle
glad ember
okay so failing cats, it seems like changing export options for fwd/up dont have...
select all with button a in blender and apply scale and all transforms
ctr+a
and then export
glad ember
uncut imp
I believe you can try checking the apply transforms box in the fbx export dialog...
that seems to have worked...doublechecking
cinder cradle
yes you had probably unapplied transforms
uncut imp
It seems there's also a forward and up selection in the fbx export dialogue which you can set the axis for those
glad ember
okay yea that definitely solved it woo 🥳
glad ember
uncut imp
It seems there's also a forward and up selection in the fbx export dialogue whic...
yea those do nothing lol
or at least, changing them didnt appear to have any effect at all. at a point i even threw random values in those boxes to see what's what, and the unity model was just like lolwhatever
uncut imp
Lol fair. Yea I used to have that issue but it hasn't been an issue for a while so maybe a newer version of blender fixed it, or I've just been better at making sure to apply my object rotations on things
cinder cradle
ye whatever now you need face unity gl
glad ember
unity i wasnt worried about, testing/importing models is the easy part lol
cinder cradle
ur making something from scratch or just reupload updated version?

 lone blaze
Making a 2.0 version of my avatar this time making the body from scratch instead of using VRoid Studio. I love vroid but I want to make it from complete scratch and I can have better shaders without having texture issues once it’s converted to quest

 lapis smelt
how the fuck can i make those big faces have lots of meshes?
 tough plover
you mean this? @lapis smelt
 tough plover
delete those faces, select the whole loop around it, and do ctrl + F > Grid fill
and tweak the options in the box that pops up
lapis smelt
might have to make a copy of this file
lapis smelt
tough plover
delete those faces, select the whole loop around it, and do ctrl + F > Grid fill
Like select the edges around it?
tough plover
the vertices around the hole after deleting the faces
lapis smelt
tough plover
the vertices around the hole after deleting the faces
It's gives me triangle meshes instead
safe sapphire
lapis smelt
how the fuck can i make those big faces have lots of meshes?
There is 2 ways to do it both involve a lot of extra work and memorizing alot of keystrokes.
The first way is using the vertices tool to manually connect.
then moving them around till they look the way you want.
The second is sacred's method
than going in manually and deleting edges. to make the square plains.
both of which is about 4 hours of work.
Blender hasn't fixed that in 15 years.
Also, note that some mesh types do need triangles and pivot type polygons to move correctly.
which you are going to have to put in manually>
I use b for artists now...
more intuitive user interface...
lapis smelt
safe sapphire
There is 2 ways to do it both involve a lot of extra work and memorizing alot o...
Is having triangle meshes necessary?
safe sapphire
lapis smelt
Is having triangle meshes necessary?
It depends on the model, id have to seen a full model picture to tell which needs triangly or poly joint mesh types. for example this type of model need several.
ps don't mind the notes those are for blenders core coding team
 lapis smelt
i did a method where i extruded edges and then merged the vertices.
 safe sapphire
lapis smelt
i did a method where i extruded edges and then merged the vertices.
safe sapphire
lapis smelt
i did a method where i extruded edges and then merged the vertices.
If the 1st method works for you do it, if you find another method then do it up.
There's a saying in the real sculpting world.
" keep it simple, you don't need a million tools to sculpt a beautifully detailed face. 6 at most"
lapis smelt
I'm just making a model, doesn't matter if I make it in weeks or months
I've been making this model since 2 weeks.
trail python
man he won't give up lmao
tough plover
lol
uncut imp
trail python
man he won't give up lmao
4 hours work to add a grid over that ngon face
🤣
thin shadow
if only the effort is channeled towards practice through trial and error instead of talking about it, it would've be easier to learn from that
mystic bridge
Ok so I messed up... is there a way to salvage this and all the colors without having to restart? I wanted to have this ported to Unity by tonight but that isn't happening. Any responses would be nice :3 I am wooped from meds so I am off to sleep.

To answer, yes I was using texture paint
lone blaze
Can someone help me out. I am having difficulty with the mouth. It doesn’t look right. I’m not really new to modeling but this is the first time modeling a person so bare with me
 uncut imp
Has anyone that uses the blender auto import feature of unity (just put the blend file in your project and it auto converts it to fbx so you can use it as is) had it just stop working randomly?
I'd been using it for ages, brand new fresh pc last month, it'd been working perfectly and yesterday it just stopped working and now it freezes unity when i try import with it
safe sapphire
mystic bridge
Ok so I messed up... is there a way to salvage this and all the colors without h...
Saving alot with any art program can be annoying:
With a blender, you have to have back constant backups.
You also have to set the undo to about 1000+ back steps.
(thats thanks to its nonintuitive mesh & texture build system,
Layers are a thing in the digital art world)
save when you love something if you don't love something 100% save it as a backup.
if you saved the color when you loved it, you can do a reverted file.
But if you didn't create a texture map or save files at 25%- 75% done or if you luv the work 100%
yes, you will have to start over...
 rigid hornet
Oh I seemed to have posted this in the wrong section, lemme delete and post it in the user support section
uncut imp
mystic bridge
Ok so I messed up... is there a way to salvage this and all the colors without h...
If you're refering to the fac that you uv layout is showing over an empty image? yea thats an easy fix, it looks like the material on the right is still on the right image so you just have to select the right image to display it on
You can click this little icon up the top and select the correct image

or go open and open it up if it isnt there
devout scroll
lone blaze
Can someone help me out. I am having difficulty with the mouth. It doesn’t look ...
you need to follow some references
look at some character modelling tutorials as well
lone blaze
I am watching a tutorial on how to make a model and I’ll look for some references. Thank you
 muted raven
Made a new face back in January and wasn't happy with how it came out

But then took a few month break and...

I think this looks sooooo much better
muted raven
Yay Ruuubick :3
hushed gyro
pseudo knoll
could try this one that i made
nice

 sand nimbus
does anyone have resorces for vr clothing? i wanta start messing with avi dynmaics on clothing
surreal lance
guys help
why is the bra is partially dissapearing
 uncut imp
surreal lance
guys help
why is the bra is partially dissapearing
uncut imp
surreal lance
guys help
why is the bra is partially dissapearing
Check the normal direction in blender, some might b backwards
surreal lance
uncut imp
Check the normal direction in blender, some might b backwards
that might doesnt explain why theres partially visible tho
uncut imp
surreal lance
that might doesnt explain why theres partially visible tho
You can easily have just a few faces facing the wrong way. Doesn't have to be all of them.
surreal lance
looks like all the normals are wrong
surreal lance
uncut imp
You can easily have just a few faces facing the wrong way. Doesn't have to be al...
thanks
uncut imp
👍no worries
surreal lance
I have to ask that do i have to scale my model to the unity cube?
I heard that 1 unity cube = 1 meter
uncut imp
surreal lance
I have to ask that do i have to scale my model to the unity cube?
I heard that 1...
That is true so it is a good reference. But you can make it whatever size you want within reason
trail python
surreal lance
I have to ask that do i have to scale my model to the unity cube?
I heard that 1...
imo i would use the capsule to scale down/up to. its the shape of the avatar collider
uncut imp
Pumpkin tools can also just add a height scale behind your Avi so you can make it however tall you want
 hidden aurora
Hey, I don't understand how this works. This didn't happen before.
But why does this doesn't show as the regular texture I assign it to and is overlayed with white? The model in the BG is what it looks like regularly. Then this happens to another similar model of it.

 gray narwhal
Are you able to create a new uv for a model? The uv I have for one really sucks
mystic bridge
uncut imp
If you're refering to the fac that you uv layout is showing over an empty image?...
Oh my goodness, I didn't see this! Thank you so much you saved me so much time!
 fickle nymph
Is there a blender equivalent to unity's "empty game object" for an armature? Something I can use as a parent for bones without being a bone itself.
 wild vortex
fickle nymph
Is there a blender equivalent to unity's "empty game object" for an armature? So...
wild vortex
fickle nymph
Is there a blender equivalent to unity's "empty game object" for an armature? So...
Add > Empty > (Empty of Choice)
fickle nymph
wild vortex
Add > Empty > (Empty of Choice)
Thanks!
tough plover
fickle nymph
Is there a blender equivalent to unity's "empty game object" for an armature? So...
as a parent for bones without being a bone itself? what are you trying to do exactly
mystic bridge
Good lord ok hi I am back
So when I am trying to upload this model into VR Chat there is a error message telling me to switch the shaders from standard to something VR Chat supported
I tried this on all my materials and it keeps saying I need to do so
tough plover
are you trying to upload for quest?
mystic bridge
Yes
tough plover
right, then yes all of your material must use one of the supported shader for quest avatars
mystic bridge
Correct which I am doing yet I am being met with this error message
tough plover
the only ones you should really consider using are:
- standard lite
- toon lit
- matcap lit
mystic bridge
Right, I use toon lit
tough plover
if a single material isn't changed, the error will still show up
is there a "Select" button in the SDK besides that warning?
mystic bridge
yes
tough plover
if so, click it and it should highlight every mesh whos materials are not using a supported shader
mystic bridge
Ok... what now? I don't see a problem.
tough plover
do you have any other avatars enabled in the scene?

 subtle axle
who is an avatar creator here? dm me
tough plover
mystic bridge
This is what I have
what is that "Cube.002" mesh?
check the material on that
and what is that light? why is it part of your avatar lol
mystic bridge
I have no clue man
I tried getting rid of it in blender and it just wouldn't go away
mystic bridge
tough plover
what is that "Cube.002" mesh?
That is the actual body
tough plover
okay, click on that mesh, and screenshot the inspector window
mystic bridge
Oh I think I found it
Wait no... sorry

I think it is reading these others as the actual part of the body for some reason
tough plover
those materials all exist on the mesh
you have 3 materials
if the other ones are unused, you should remove them from the mesh in blender
mystic bridge
Right but whenever I went to delete them it says i cannot
tough plover
you can't do that in Unity
need to go back to blender, and remove the materials from the material list on the mesh
while you're at it, should also delete that light
since lights do not work on quest
mystic bridge
Right
Ill BRB hopefully it works
Oh I know what happened
I ported the horns and it brought textures lmao
Smooth brain moment
muted raven
tough plover
Substance painter is your best friend for that imo
I would use Substance but whenever i make an avatar i usually model and rig it first in blender, So if i want to use the uv map made in Substance i have to redo all of the weight painting in blender. Unless there's some work around?
uncut imp
muted raven
I would use Substance but whenever i make an avatar i usually model and rig it f...
Substance shouldn't affect the weight painting at all?
azure rain
like uv unwrapping and weight painting. don't have much to do with each other
uncut imp
You model and weight paint the Avi, export the fbx and then texture it in substance, and export the texture for it, then take the fbx and textures to unity
muted raven
Usually when i reimport a fbx from substance it removes the armature and i don't know why
muted raven
but I usually use Substance to create a better Uv map
uncut imp
Ah. Well you gotta get the uv map laid out right first in blender
azure rain
your UV unwrapping happens in blender
muted raven
Yeah i wish i could use Substances uv's on my models, they seem to work alot better than any uv maps i've made myself
cinder cradle
you can always customize uv's if they suck at unwrap
always worth to spend some time on it
uncut imp
Yea. That and getting all your seams nicely laid out will always help a lot.
uncut imp
mystic bridge
Oh my goodness, I didn't see this! Thank you so much you saved me so much time!
No worries, glad it helped!
tough plover
@muted raven what? you don't make the UV map in substance, you do all of that in blender
Substance is purely for texturing
UV unwrapping, rigging and weight painting is all done in blender
muted raven
tough plover
<@349363808013123594> what? you don't make the UV map in substance, you do all o...
Substance has a Auto Unwrap feature, I was trying to find a way to use the Uv Map that substance creates on my model , however that is impossible if i dont want to have to re-rig the model if i exported it without an armature back into blender
tough plover
I wouldn't rely on the UVs substances creates, you're better off learning to properly unwrap things in Blender
it's possible to use the UV map substance makes, but it's such a roundabout way to go about things. it's one of those bad habits that will come back to bite you in the ass
azure rain
muted raven
Guess its about time to optimize my UV skills
yes that's an incredibly important scale so work on
tough plover
the way you unwrap things strongly affects how the texturing process goes
and how easy it is to achieve certain effects
spiral sigil
Could someone help test to see if my model is okay to import to a quest compatible avatar?
Ill send the info in DM only but it was made in gravity sketch, is only 5mb and might need adjustments for import
cinder cradle
spiral sigil
Could someone help test to see if my model is okay to import to a quest compatib...
test? you can know it by looking at stats = tris and materials and meshes
spiral sigil
cinder cradle
test? you can know it by looking at stats = tris and materials and meshes
im on quest rn, working on pc so cant do anything with my avi yet rn
mystic bridge
Back again for the third damn time today
So apparently just found out that models cannot be rigged unless they are in a T-pose
Is there a way around this to make it in A pose
I really don't feel like remaking another freaking model man


 uncut imp
mystic bridge
I really don't feel like remaking another freaking model man
uncut imp
mystic bridge
I really don't feel like remaking another freaking model man
There is a a force t pose button in the model config in unity
It's one of these two buttons. Don't remember which
 haughty rock
iirc it also automatically forces a t-pose once you set the models rig to humanoid and start configuring, hadn't had any issues with modelling/rigging in an a-pose so far
prefer it personally over a t-pose tbh
devout scroll
haughty rock
iirc it also automatically forces a t-pose once you set the models rig to humano...
only works if the bones map automatically but if you have weird bone nwmes it might not lock them up and tpose. in that case just manually do pose> force t pose
muted raven
Experiencing a rare issue, no matter if I flip Normals or recalculate from outside ( I don't do both at the same time I have just tried both separately ) my mesh is showing up incorrectly in unity.

Press Alt + H
to unhide it in edit mode
You might be in a shape key that has moved that patch of hair possibly?
uncut imp
muted raven
Experiencing a rare issue, no matter if I flip Normals or recalculate from outsi...
Could the mesh underneath just be clipping through it?
Doesn't look like a normals issue
muted raven
uncut imp
Could the mesh underneath just be clipping through it?
Not sure, looks fine in blender
 uncut imp
Do you have any shape keys or something changing the pose or shape of it that could be on in unity?
muted raven
I shouldn't but let me delete all the old shape keys and see
quaint jasper
Could just be unity precision, make sure the model is scaled correctly
muted raven
quaint jasper
Could just be unity precision, make sure the model is scaled correctly
Will do!
I tried Shape Keys and that didn't change anything, additionally this is all one mesh so im not sure how I would check for scale differences

I know the previous picture was from a distance so it might have been difficult to see, but from personal experience I would have thought this to be a normals issue
Oop i got it , I just tried flipping the normals again and this time it worked! yay me, but also yay you guys too
 uncut imp
You can turn on viewing the normal direction in unity to always be sure your faces are facing the right way
Yo looking smooth. Nice work.
 warm gyro
nice stuff
mystic bridge
Ugh
mystic bridge
uncut imp
There is a a force t pose button in the model config in unity
So I was talking about the actual model not the bones