#3d-modeling
1 messages · Page 127 of 1
 spiral sigil
 azure rain
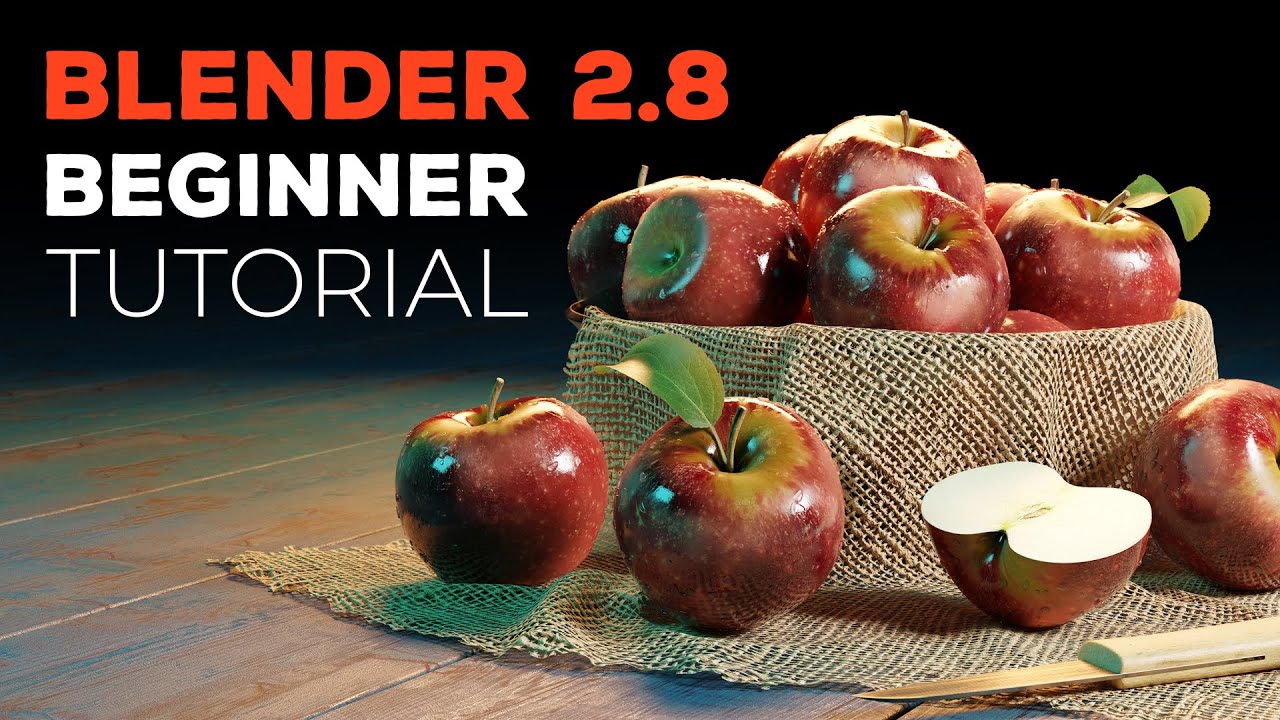
Welcome to the Blender 2.8 beginner tutorial series. In this video I give you a quick summery about Blender 2.8 and what we will create in this tutorial series.
⇨ Blender 2.8 Hotkey PDF and Project Files (email required): https://cgboost.com/resources/
⇨ Blender 2.8 Launch Pad course: https://bit.ly/blender-launch-pad-free-course-youtube
PLAYLI...
 craggy lintel
Question
When doing bases
boobs should be fully sculpted
and then you flatten them later with keys and then uno reverse card that key
right?
is this a good method I’m doing/made up or should I do something else
 quaint jasper
That's usually the method yes, but it should be bone scaling instead of shapekeys if you can, more performant
 vagrant current
Hiya!
so hey uhh this might be a tricky question
so how do you put a character's model head into another model?
quaint jasper
vagrant current
so how do you put a character's model head into another model?

Will add better description soon just wait! :)
vagrant current
Great for teaching how to add, but there not one for how to remove it from the original model
quaint jasper
vagrant current
Great for teaching how to add, but there not one for how to remove it from the o...
Select the edge where you can to cut in edit mode, press V, then select the part you want to remove and delete the rest, then in edit mode for the armature you can delete all other bones than the neck/head/eyes and hair
 lilac urchin

Oh cool!! I can post it without discord yelling at me
First model I’ve done!! So I was hoping I could show the whole thing
 naive garden
how does one usually do lipsync and blinking? using shape keys? or bone?
azure rain
shape keys
naive garden
does unity able to recognize the shape keys?
azure rain
yes
https://www.youtube.com/watch?v=IWKXbMQe3x4&list=PLRUlfYGZBxVeEAVXkaG1uydyzFZAMOuMd&index=3&t=9s official vrchat Avatar uploading tutorial which also shows setting up the lip sync

0:00 - Intro
0:16 - Unity
0:23 - Project
0:30 - Scene
0:44 - Hierarchy
1:07 - Inspector
1:16 - Armature
1:31 - Mesh
1:39 - Blend shapes / Shape keys
1:53 - Viseme
2:13 - Texture
2:24 - Shader
2:32 - Material
2:50 - SDK
3:10 - Wrap up
====
Thanks for Watching!
If you'd like to give feedback on our guides, visit our forums here: https://ask.vrch...
azure rain
the two terms can be used interchangeably blend shapes/shape keys
 carmine dove
blend keys/shape shapes
spiral sigil
just started. after editing the texture for 15 minutes or 20. i so far present. Danny Torrance

 oak sapphire
great job
spiral sigil
oak sapphire
great job
Thanks 👍
 quasi plover
i need help with this, i dont know what channel this falls under, so i'll put it here
basically exported a model from blender to unity, and applied the same texture, yet it ends up being off. It's not blurry, already fixed that, but the texture itself is off from where it's meant to be. does anyone know how to fix this?

 naive garden
quasi plover
i need help with this, i dont know what channel this falls under, so i'll put it...
naive garden
quasi plover
i need help with this, i dont know what channel this falls under, so i'll put it...
uhmm did you export it using fbx?
quasi plover
yup
 naive garden
oh right, i believe you need to apply the scale and the rotation first
i don't really know if it effect your exporting? but i always did that before exporting it into fbx
naive garden
huh, good to know :D
quasi plover
didn't fix it
 cinder cradle
check uv map
quasi plover
cinder cradle
when exporting you used this option?
yes i used this, and i've got no idea on how to do UVs or anything
cinder cradle
go to edit mode of object open new work window in blender press a to select all vertices and select in second window uv map editor
quasi plover
oh this, yeah it is fine in blender but not in unity

 cerulean cipher
does anyone happen to have a 3d model of the femboy hooters logo? or know what font to use in blender to make one
sorry not sure where to ask about this
quasi plover
what do i do?
oak sapphire
Not sure
craggy lintel
quasi plover
what do i do?
Can you change the viewport of the model you’re showing us?
 shrewd reef
Started working on a mech early this morning. This is the first of two "arm cannons".
The idea is that it acts like a mini gun, but instead of firing bullets, it fires a hyper focused beam.
The circular rods and rings spin just as a mini gun would, but instead of acting as ballistic barrels when they spin up, they act as a cooling system to prevent the mechanism from over heating.
Heat levels are indicated by the color of the rods and light strip
Will be adding more to this later.
Next update will be an animated example.

 spiral sigil
since i doont know which eye. i just made shapekeys for both of them ._. that was hard with the low poly eyes

 oak sapphire
it is left eye
 silk steppe
I check this segment and that's the first thing I see
spiral sigil
oak sapphire
it is left eye
just watched the movie. understand that now.
carmine dove
define organics
 ocean hamlet
human
just need someone to fix a commission i had done and the fix request being refused by the modeler, because he didn't want to do a 1x1 accuracy thing. (i had like tons of references)
i am willing to even pay what needs fixed
(all that needs fixing, is just a characters face)
carmine dove
wtf :I
i dont get people who dont complete their commissions 100%
someone comm'd me to add emotes and then i helped them fix materials even tho that wasnt what i was comm'd to do
send a picture
of the model
ocean hamlet
in dm's, or?
carmine dove
sure
ocean hamlet
okay! thank you ;;
carmine dove
i'll see if i can help, no promises tho bc i do anime style
ocean hamlet
GOOD actually
 calm goblet
carmine dove
i dont get people who dont complete their commissions 100%
calm goblet
carmine dove
i dont get people who dont complete their commissions 100%
as long as people say from the start that they're not gonna do a clone job i don't see a problem with it, people might want to keep their style intact or whatever
carmine dove
yes but then also don't take that commission if that's not what the person paying wants :/
calm goblet
that's why you make it known at the start
then the commissioner can decide if they want your work or if they want a clone
 amber perch
Curious on how long this would take a complete 0 (like me) to make a character like the one below, using Blender + Photoshop (for textures).
I'm gonna estimate about a month or two. (Ping me if you're responding.)

 potent glade
amber perch
Curious on how long this would take a complete 0 (like me) to make a character l...
potent glade
amber perch
Curious on how long this would take a complete 0 (like me) to make a character l...
I wanna say the base model can be thrown together real quick in VRoid, clothes can be modeled/textured over in Blender + [most 2d painting/image editing programs) or Substance Painter
azure rain
the shorts and the top you could probably also do in viroid
potent glade
👍
amber perch
Honestly the biggest thing I'd have to model is the hoodie and that's about it. For the base I can just use Mishe since I purchased the Booth model and last I checked it's okay to use parts from it in other projects.
potent glade
just at a glance, half the work can prob be done in VRoid
and if you really wanna cut down on the time, find clothing models that are free to be reused in other projects (remember to get permission from the artists/owners!!!)
azure rain
yeah the hat is definitely the most custom part of the model
azure rain
I probably recommend looking around booth.pm for kitbashing pieces as those have permission to use in vrchat
potent glade
I wanna say maybe the hoodie can be done in VRoid?
amber perch
azure rain
yeah the hat is definitely the most custom part of the model
Yup it's a pretty simple design, obviously I'm not going to copy it one for one. Just make something inspired by it... and hopefully it looks good!
The kitbashing idea is a pretty good one and probably worth looking into when it comes to designing the hoodie.
However I don't think it'd be that hard to make one from scratch either.
azure rain
and probably wouldn't be too hard to kitbash the regular VRoid hoodie and replacing the top of the hood with something custom that goes over the head
amber perch
The above image has enough information to sorta extrapolate a back view, front view, and side view. As well.
potent glade
Not sure about the glow in the hoodie, an emitter inside the hoodie?
amber perch
potent glade
Not sure about the glow in the hoodie, an emitter inside the hoodie?
Shader.
azure rain
also might be a good idea to get a couple of more images that are different to mix-and-match Inspirations so you end up with a bit more of original design
amber perch
But that's where I'm gonna take some creative liberties as well. Instead of the glow going to do a pair of red glowing eyes that emote based on gestures.
amber perch
Yeah I already have a more original design in my head, the image above is just what inspired it. Plus I don't wanna give it away.
Since this is a public server and you'll never know when someone can swoop in and steal an idea.
azure rain

Learn how to use Blender’s cloth sewing feature in Blender 2.92. We will be making a 60’s style dress in this tutorial.
Free Animated Model:
https://free3d.com/3d-model/rigged-and-animated-_-female-145763.html
Patreon► https://www.patreon.com/PIXXO3D
Discord ► https://discord.gg/PFn9YQqUmz
Thank you for watching my tutorials
_________________...
amber perch
That video was actually recently recommended to me. Proof that Google is watching. xD
azure rain
you probably have to do some retopology with this method but figured I'd give the link if you wanted to try to make it look cloth the hoodie top
amber perch
Honestly I was just going to make a bunch of sketches "until it looks good" and then take the best looking sketch and do a 9, 10, 12, 6. (Rotating based on clock face.)
Then trying to trace it in Blender or something.
azure rain
amber perch
Honestly I was just going to make a bunch of sketches "until it looks good" and ...
nice
potent glade
amber perch
Honestly I was just going to make a bunch of sketches "until it looks good" and ...
I recommend starting with just a character silhouette, if the silhouette reads well, then the rest should follow
silhouettes are super useful for make super quick adjustments without committing to any detail
amber perch
Thanks I'll try it out. Tbh I'm just musing still need to finish my other projects (not related at all).
calm goblet
amber perch
Curious on how long this would take a complete 0 (like me) to make a character l...
depends if you wanna do a good job of it or not, you could do it in a day or a week and it'd be shit, or you could spend a few months to a year learning how to do it properly and it'd be good
 mild bramble
are there any gud tutorials for hands, i haven't made a hand in a while and got a little rusty
 lean kindle
Hello ! Does anyone know why does this happen and how to fix it ? ;-;


 carmine dove
you have two planes that overlap
delete the selected one and remake the face by selecting the edges and hit f
 bold urchin
lean kindle
it won't work, haha :'))
bold urchin
lean kindle
it won't work, haha :'))
Select a vertex, hide it and see if there’s a vertex hiding under it
 warm moss
is this video allowed here?
I created a Pumpkin Hat in Maya and recorded the entire process. Some of you might find it interesting.
https://www.youtube.com/watch?v=Ob1hDQjJ51M&ab_channel=BananaBeans
Sound is coming soon, YouTube music library needs to be applied and it takes a while

Thanks for checking this out!
This is a timelaps of a pumpkin hat done in Maya and Substance Painter.
Check out this item on Gumroad and use it in your next project. It's perfect for VRChat or for the game dev out there who needs a cute and spooky Jack-O-Lantern.
Get it here:
https://zubbeans.gumroad.com/l/EduqX
Total time was about 4 and a...
shrewd reef


 cosmic merlin
Erased the legs for more low poly count. It's no longer necessary.

 harsh fable
Does anyone know why my character's texture turned out like this? With these flaws. In paint mode they don't appear, they only appear in observation mode. I use Blender 2.82.7


They only appear where I made the splits to open the mesh.
 obsidian nova
Those are seams
You need to have a “bleed/margin” around the UV map you’ve painted in or it’ll do this.
obsidian nova
shrewd reef
This is awesome.
Liminal vibes
I’d love to see someone paint these, on like giant canvasses
harsh fable
obsidian nova
You need to have a “bleed/margin” around the UV map you’ve painted in or it’ll d...
?

What do I do with it?
 languid fog
harsh fable
What do I do with it?
languid fog
harsh fable
What do I do with it?
Change the bleed to 4 or 6
cinder cradle
It's against the TOS
 north rapids
awww dang it
cinder cradle
could get you and someone banned
cinder cradle
Depends if it's pc specs problem or windows problem than reinstall windows
north rapids
my java broke
shrewd reef
obsidian nova
This is awesome.
Ty, planning on using it for a CTF map
naive garden
Question: Is this A pose viable for animation and other things? or i should make the hand horizontal instead?
 cinder cradle
naive garden
Question: Is this A pose viable for animation and other things? or i should make...
cinder cradle
naive garden
Question: Is this A pose viable for animation and other things? or i should make...
Better go with t-pose
naive garden
not yet
cinder cradle
rig it first
naive garden
wait... so i can't make it t pose without rigging it? xD
cinder cradle
i mean you can but why make it hard
naive garden
i see
spiral sigil
can someone help me? i just got a model from someone tho im not sure how to get dynamic bones working (unity)
naive garden
i think you need to have the asset for that?
https://www.youtube.com/watch?v=6AjpkOlRWPI&t=864s @spiral sigil i am not sure what is your detailed problem... so i will link a video that i watched

Ever wanted to make your VRChat avatar have flowy hair and jiggle's like in one of those animes? In this tutorial we'll be covering how to make that happen with Dynamic Bones in Unity.
#VRChat #avatar #tutorial #dynamicbones #unity #beginner #hairphysics #2020 #collider
If you found this helpful, please consider coming a Patron.
https://www.pa...
spiral sigil
naive garden
https://www.youtube.com/watch?v=6AjpkOlRWPI&t=864s <@456226577798135808> i am no...
tho i see how to do it now with the video but seems like im gunna uninstall unity and never touch it again and now i have thrown away 80$ :D
naive garden
spiral sigil
tho i see how to do it now with the video but seems like im gunna uninstall unit...
wait before doing that
ask the person that made the model
spiral sigil
its not their fault i blame unity
naive garden
does he have dynamic bone already attached in it?
spiral sigil
no
i installed all my versions of unity and they all gave errors, tried restarting my pc, redownloading, everything
nothing is working
and now i cant add dynamic bones etc bcc of this

i hate unity
naive garden
hmm, what ver are you using?
spiral sigil
2019 one bc thats the one i needed to use the person told me
naive garden
spiral sigil
and now i cant add dynamic bones etc bcc of this
try reinstalling the package
spiral sigil
naive garden
try reinstalling the package
i have tried multiple times.
naive garden
weird...
spiral sigil
i just cannot add dynamic bones bc of the fact i cant install the stupid unity thing without errors
and i have enough space i have like 2T available
naive garden
can you ask the person you commission to add the dynamic bones?
xD
if he/she is kind enough
or ask the person to guide you ;)
spiral sigil
their dms are closed and none in their server is helping me.
spiral sigil
what do u need me to stream?
naive garden
hmm the trouble you're dealing with currently
spiral sigil
this is the only trouble

the fact i cant do it bc of the errors i have with the installing unity.
 naive garden
can i see that yellow error?
spiral sigil
💀
 spiral sigil
idk how to get the 31FI one its not one of the options
naive garden

oh ok, please wait, i will get the link @spiral sigil
it's not in the hub for the reason that i don't know
cinder cradle
spiral sigil
idk how to get the 31FI one its not one of the options
direct link
don't use wrong unity
it will always give you problems
spiral sigil
cinder cradle
https://download.unity3d.com/download_unity/bd5abf232a62/Windows64EditorInstalle...
the facct that the file is way to big and my pc refuses to download it

😭
i give up
cinder cradle
how much of free space your disk have?
naive garden
ouch
cinder cradle
2tb?
cinder cradle
Lol 2tb is ton of space
naive garden
spiral sigil
the facct that the file is way to big and my pc refuses to download it
that's very odd? why won't your browser / pc download it
spiral sigil
i moved it to my other disk which has 1tb and now it works fine
wht
a disk with 2tb free doesnt work and a disk with 1tb does?
naive garden
🤔
spiral sigil
the patience
 spiral sigil
naive garden
your download speed is faster than mine xD
spiral sigil
naive garden
your download speed is faster than mine xD
its slower then usually

patience
almost there
 spiral sigil
ok its finished now what do i do
cinder cradle
spiral sigil
ok its finished now what do i do
Check if earlier opened project in 34f1 will work if not make new
naive garden
does the person who commission you give you the blend file? fbx? or unityPackage? @spiral sigil
cinder cradle
in 31f1
spiral sigil
naive garden
does the person who commission you give you the blend file? fbx? or unityPackage...
unity package
naive garden
ah ok
spiral sigil
okay so now i do everything over again right
cinder cradle
if you have unitypackage it won't take much time
spiral sigil
why is it
going on my
wrong disk

what is this
im getting braindamage trying to read it
cinder cradle
you might want to delete temporary files
search in windows "delete temporary files"
naive garden
%temp%?
cinder cradle
nope better do it through windows
cinder cradle
ok than
naive garden
spiral sigil
ill need to get my dad bc im actually scared i might do smth wrong
that's the best option :)
having someone to guide you through is better
cinder cradle
Congrats
naive garden
congrats :3
 ornate oxide
ttps://www.amazon.com/dp/B08Y5Z1T1F/ref=cm_sw_r_apan_glt_i_7D68H7VP45GMV6CZE10K?_encoding=UTF8&psc=1
would this be a worth investment
i deleted the h because idk if im allowed to post links
 desert crown
does anyone know how to get rid of this line? not too sure whats it called

 slow hound
desert crown
does anyone know how to get rid of this line? not too sure whats it called
slow hound
desert crown
does anyone know how to get rid of this line? not too sure whats it called
Relationship lines? You can hide them here. If you are using older Blender press "n" look for "display" and deselect "relationship lines"
 desert crown
slow hound
Relationship lines? You can hide them here. If you are using older Blender press...
desert crown
slow hound
Relationship lines? You can hide them here. If you are using older Blender press...
thank you squall! i was more of asking how to fix it, but got the answer elsewhere. Its something to do with origin point and geometry. Thank you though! I will take your help as future references too in case these relationship lines gets annoying in the future.
slow hound
ohh oops!
desert crown
nvm it only works when i change it to geometry and not to cursor
desert crown
Coming back just to say this, clicking fix model in cats plugin fixes the relationship lines/dotted lines. Although it shouldn't be like this, but i'll take it
 real bough
Can someone tell me why the head looks fine in solid mode but in material mode looks like this for the veiwport shading?

this is in solid mode where it looks normal :
 naive garden
real bough
naive garden
real bough
Try to go to material properties > viewport display > blend mode into opaque (if it's in alpha clip)
naive garden
lol
 thorny ivy
While not related to avatars, decided to revisit some old props an' update them to match my current renderin' style. Long-term plan's to make an interactable showcase + explore the original settin' it takes place in.


Still need to figure out what shader'd work best for a line art-style look though, haven't had much luck so far.
thorny ivy
Experimentin' with line rules. Ya'll think solid or partial lines look better for stuff like this?
 bold urchin
Partial is better for organic objects
Solid is better for hard objects
quaint jasper
I agree ^
carmine dove
real bough
this is in solid mode where it looks normal :
is this from scratch or a base? looks so cute
real bough
carmine dove
is this from scratch or a base? looks so cute
Noooo Creator is sweaty#1214 !!!!!
 unkempt bridge
i am unity dumb, i received a vrm from a seller on etsy. i usually get the vroid file also but they lost it. i managed to change the hair color and dress color, but i really want to change the clothes. i have a much sad that i cant do these things
 thorny ivy
You can still edit vrm files in blender
unkempt bridge
blender seems much harder to use. 😞
thorny ivy
Quite the easy one compared to unity
spiral sigil
for hopefully the last time. im making Another jack torrance. heres the jacket im texturing. looks pretty nice if i do say so my self.


 shut mountain
https://sketchfab.com/3d-models/decorative-shop-board-1b39273ef9fa4da290e8af0678e304b9 made this some days ago

Decorative chalk board i made for my vrchat world “Summer Nights,,
Feel free to use it :3 - Decorative shop board - Download Free 3D model by Cup_Of_Tea (@trampiknunuka) [1b39273]
spiral sigil

 craggy lintel
Can I use substance to bake normals into textures too?
I can’t figure it out rn
I keep on baking normal maps not normal’s shadows into my texture
 languid fog
 normal current
real bough
normal current
real bough
looks like smth out of a creepypasta lmao
 idle junco
thorny ivy
idle junco
thorny ivy
Bowl and cup
You'd put quite a bit more effort in that if you're going to sculpt it lol
 steady zealot
Commission for a friend


 quaint jasper
Clean 
spiral sigil
Hello is it here i ask for how i make glass matirial to work in vrchat?
steady zealot
spiral sigil
Hello is it here i ask for how i make glass matirial to work in vrchat?
spiral sigil
steady zealot
<#534472629013315606>
ok, thanks!
 clear phoenix
starting to work on a model for a world, its basicly a IC with a couple legs, if i want to colour each leg seperately (highlights and stuff) and add wirting to the body itself, should each leg have its own material assigned and the body get a texture added or should i make different models for each of the ICs? (i guess using just one and doing the text stuff at "runtime" would keep the world size lower?)
quaint jasper
Each leg doesn't need its own material to be able to do that
you can do texture scrolling to get different colors/text
clear phoenix
ty, off to tutorials i go
 onyx radish
so i kind of understanding UV editing but any good links about doing it to a 3d object so it fits all the pieces? IE. a DJ controller or midi controller

this is what i have but the texture is only on the square piece not any of the buttons or the slider
thorny ivy
onyx radish
so i kind of understanding UV editing but any good links about doing it to a 3d ...
Unity-wise, not sure what kind of UV stuff can be done exactly but UV maps tell where textures go on an object.
In 3D modelin' programs like Blender, UVs can be made/edited based on object geometry.
So the UV maps for the buttons either don't exist for that particular texture or are messed up.
 night trout
Hi, I have a question, can I have parts of my avatar as separate objects?
as ive tried joining them all together and fixing parts together, but i can't apply the finger claws to the fingers without having to completely redo my hand's topology
 onyx radish
thorny ivy
Unity-wise, not sure what kind of UV stuff can be done exactly but UV maps tell ...
onyx radish
thorny ivy
Unity-wise, not sure what kind of UV stuff can be done exactly but UV maps tell ...
i mostly figure it out thanks!
 quaint jasper
night trout
Hi, I have a question, can I have parts of my avatar as separate objects?
as ive...
quaint jasper
night trout
Hi, I have a question, can I have parts of my avatar as separate objects?
as ive...
What's preventing you from doing that ?
night trout
quaint jasper
What's preventing you from doing that ?
mostly from what ive heard its prefered if you have everything in one object?
quaint jasper
One object doesn't mean connecting topology
night trout
ah ok
that
genuinely has saved me from just
imploding cause ive been working on my avatar for about a year now lol
 heady tusk
im looking for a bath robe for this model. anyone got any ideas?
 naive garden
red bath robe
also, i'm confused?
it's pink (mising texture) in the solid shading, but it's fully textured in material preview?

🤔
oh wait maybe it's pink because of the line art material that i make
 spice storm
who here can design/create vr worlds? i have a tiktok with over 130,000 followers and want to create a nice hang out spot! lets work
 lofty onyx
downloaded some stuff to make an Octoling OC, anyone got the patience to teach me Blender?

I have it in Maya controls
 prime zenith
Guys, how do I fix these creases on my mesh ?

 foggy granite
prime zenith
Guys, how do I fix these creases on my mesh ?
foggy granite
prime zenith
Guys, how do I fix these creases on my mesh ?
select all the faces causing the issue then use alt+n then click recalculate
prime zenith
foggy granite
select all the faces causing the issue then use alt+n then click recalculate
Did not do anything
 prime zenith
Faces are on the same side
foggy granite
cheack if they any overlapping vertex
prime zenith
I did merge by distance, removed 30 vertices but still no change
foggy granite
hmm no clue then
prime zenith
👀
spiral sigil
u could delete the bad ones. then fill it in
prime zenith
I tried that
thorny ivy
prime zenith
Guys, how do I fix these creases on my mesh ?
Is that with your normal map plugged in?
naive garden
oh god, does anyone know how to rig something that has solidify modifier already applied?
i wanted to weight paint it but it only added the weight on the outside and not the inside part 😂
 spiral sigil
R u making that urself
quaint jasper
naive garden
oh god, does anyone know how to rig something that has solidify modifier already...
Does it not copy the weight paint inside when applying the modifier ?
naive garden
quaint jasper
Does it not copy the weight paint inside when applying the modifier ?
well... i apply the modifier first before even putting the weight >.<
naive garden
spiral sigil
R u making that urself
the weight?, no that was the automatic one, currently i'm filling the weight manually
quaint jasper
Why did you put another solidifier modifier on it then ?
quaint jasper
In that case you probably will have to redo the weight paint, unless you can delete the faces generated by the first solidify modifier and then reapply a new one
naive garden
i think weight paint it manually is better than deleting the generated faces xD less painful
but thanks tho
quaint jasper
Gradients are your friends 
 wise jewel
So, I'm trying to make loop cuts and they aren't playing nice, and are only trying to cut one vert at a tip in a UV sphere.
 spare mauve
Hey, if I export my avatar from the unity project into blender, change some things and then put it back will things break like animations and such?
quaint jasper
spare mauve
Hey, if I export my avatar from the unity project into blender, change some thin...
If you change anything regarding the armature, yes
spare mauve
I didn't touch the armature no
I also checked if it changed any names and such
I just did some sculpting on one of the clothing items and didn't touch the rest.
spare mauve
quaint jasper
If you change anything regarding the armature, yes
Oh I see what you mean now. I got my answer thanks
naive garden
nope, if you're only sculpting, shouldn't broke anything
unless you're generating more geometry or vertex, that new vertex must be adjusted
spiral sigil
I asked if you were making the model LOL
 cloud chasm
Anyone know how to fix separations in a model
 quaint jasper
Merge by distance in edit mode, increase range if you need to
wise jewel
I have an outfit with biiiiig dangly sleeves I've resized to fit a model. However, when merging the armatures through CATS, the weights of the bottom of the sleeves disappears. Is there a better way to resolve this when this happens?
quaint jasper
wise jewel
I have an outfit with biiiiig dangly sleeves I've resized to fit a model. Howeve...
Any screenshot ?
 dusty heron
 spare current
how long does it take u guys to create one avatar
spare current
how long does it take u guys to create one avatar
It depends on what you use and are trying to accomplish, a simple vroid avatar could be done and uploaded in a few minutes, but an avatar made completely from scratch could take multiple days, and even months in some cases
spare current
Nice
Thanks guuys im hoping to grt a drawing tablet soon so i can do stuff like that
carmine dove
drawing tablet not required tbh!
carmine dove
spiral sigil
30 minutes
what's your process?
spiral sigil
carmine dove
what's your process?
Generating the Head. Editing the texture giving it more skin etc. Finding clothes, fitting the head onto the clothes. Cutting out unnecessary vertices. Adding those teeth. Shape keys. Rigging. And boom
spiral sigil
carmine dove
in 30 minutes? that's super impressive
thanks:)
naive garden
spiral sigil
I asked if you were making the model LOL
oh yes i am xD

i'm not sure how to make the shader looks like anime-like with texture images
cause i need to have the texture images
 devout scroll
naive garden
i'm not sure how to make the shader looks like anime-like with texture images
devout scroll
naive garden
i'm not sure how to make the shader looks like anime-like with texture images
go into solid view mode and set it to flat then pick texture below it
the top right balls, solid is the second one and the rest of the options are in the dropdown
wise jewel
I... fell asleep before then. I found out how to do it manually, and it wasn't even as much effort as I'd expected.
cosmic merlin
My model is transparent again! Recalculate doesn't work, I requre help from anyone
 devout scroll
what shading mode are you on (top right balls)

 cosmic merlin
Uhm
obsidian nova
We need more info
Click on the drop down arrow next to those little balls and check “show back faces” or “show face orientation”; I’m away from my desk atm, and forget what they call it.
Your normals might be flipped. Blue is good, red is flipped.
 thin shadow
cosmic merlin
My model is transparent again! Recalculate doesn't work, I requre help from anyo...
thin shadow
cosmic merlin
My model is transparent again! Recalculate doesn't work, I requre help from anyo...
sometimes, checking the face orientation will help
cosmic merlin
Ight
night trout
used the metarig in the rigify addon
dunno if thats a good basis to go off from
or what else i need to add in terms of bones
 quaint jasper
night trout
used the metarig in the rigify addon
dunno if thats a good basis to go off from
...
night trout
quaint jasper
night trout
used the metarig in the rigify addon
dunno if thats a good basis to go off from
...
night trout
well fuck
cause my model definitely aint in that position at all
calm goblet
you don't actually have to rig it in t-pose
but you do have to build the rig so it'll t-pose that way, otherwise it ruins your model as soon as it goes vr mode
as i found out not too long ago lol
 quaint jasper
night trout
so something along the lines of this?
quaint jasper
night trout
so something along the lines of this?
Yep that's correct
night trout
quaint jasper
Yep that's correct
same with the legs?
cause i had to angle it a tad bit to fit the body
 quaint jasper
That's completely fine
night trout
nice, guess its time to weight pain
yknow i forgot the t there but honestly its way better that way lmao
 untold schooner
made this over the past few hours, thoughts?

supposed to be a combination of an axe and a gun
quaint jasper
Is the axe head meant to have those very sharp edges ? Other than that it looks great
untold schooner
i just forgot to bevel those
night trout
that is such a dope design ngl
foggy granite
untold schooner
made this over the past few hours, thoughts?
Looks great
spiral sigil
for my next trick I will make an avatar
 wise jewel
Hah... I'm running into more transfer issues with CATS.
I wonder if it's a 3.0 issue. I'll try reupdating the dev version.
It's nice when it works because of how hectic certain armatures can be.
thin shadow
wise jewel
I wonder if it's a 3.0 issue. I'll try reupdating the dev version.
cats doesnt work with 3.0 yet
wise jewel
Yeah. Some things do, but not all of it.
It's a good time to learn to manually do a lot of this.
devout scroll
wise jewel
It's a good time to learn to manually do a lot of this.
are you still having issues with the long sleeves?
wise jewel
Nah, I got that figured out by...
1: Renaming every common bone to be the same between the two.
2: Deleting them.
3: Merging the armatures with Control J, and manually parenting the orphaned bones to their new homes.
It sucks that it doesn't work, 3.0 is really slick and fast.
I especially like the fact that my blend files (one of which is over 600 megs on 2.9) are half the size or less.
I actually used this method to fix avatars I had problems with... for a while. Even before switching.
It helps that I shift+D duplicate the armature and hide it, so I have a hierarchy reference when I rebuild it.
 visual vigil

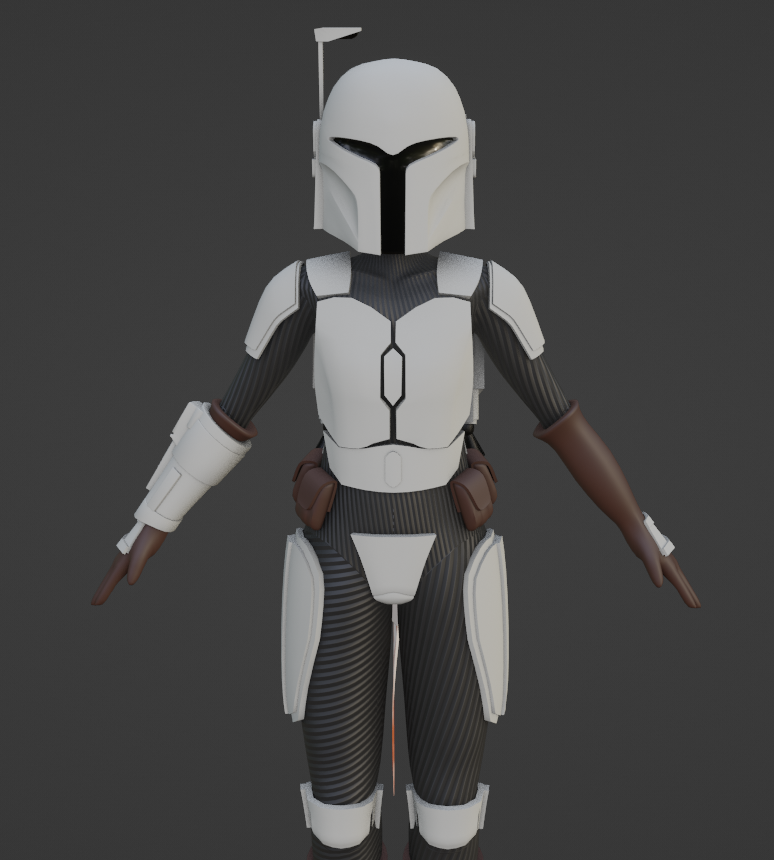
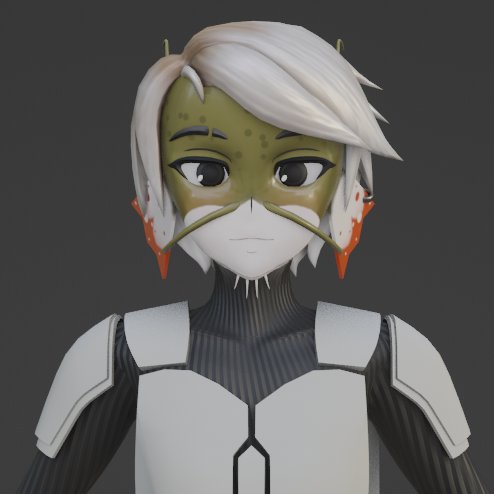
#StarWars #Mandalorian armor wip! very happy I finally get to have something of my own
 Twitter
·
Twitter
·

 quaint jasper

ArtStation
Darth Vader Rogue One scene fan art ! Model was modelled, textured and slightly animated in two days, environment took a day.
thorny ivy
quaint jasper
https://www.artstation.com/artwork/b5Vg5G
You modeled everything in a day?
quaint jasper
3 days total
thorny ivy
Just pure poly modeling?
quaint jasper
Yeah, I find it easier
thorny ivy
Dang that looks pretty nice
quaint jasper
Thanks 
untold schooner
looks great, you got the shininess on the helmet just right
is this all in blender?
quaint jasper
Thanks, helmet was hard to get right, had to test a ton of HDRIs and ended up using a screencap from the movie
texturing in substance and render in marmoset
untold schooner
couldve used a hdri of the same scene from the battlefront games but still for 2 days its really well done
 naive garden
hmm.... how does one usually rig faces?
shape keys? or bones
i'm not sure which one should i do
naive garden
oh... i mean like which technique should i use? to rigging a face
cinder cradle
i would recommend rigging face with bones bcs you can add as many bones for everything you want
 calm sandal
I have a model made
but I just need to merge all the parts into a single mesh
I got some sections to do it by using the boolean tool with the union option
but trying to do this to some sections removes parts in their entirety
two images, 1st is main body, 2nd is the hands at the end of the limbs


the main body has all the parts unified into a single mesh
but the hands are still made of individual parts that have some vertices overlapping and inside the parts
which from what I have heard really messes up UV mapping for texture painting
if anyone knows how I can fix this or where I might be able to find out then please let me know
 pseudo knoll
quaint jasper
Thanks, helmet was hard to get right, had to test a ton of HDRIs and ended up us...
pseudo knoll
quaint jasper
Thanks, helmet was hard to get right, had to test a ton of HDRIs and ended up us...
is there a place for HDRI's other than HDRI heaven?
at this rate I've found better success with making my own matcaps than using other people's hdri's
calm sandal
hdri?
pseudo knoll
basically imagine cubemaps but instead its two spheres instead of six squares from what I can remember
calm sandal
ah
still you wouldn't happen to know anything about my current predicament would you
mostly I am trying to make the model better so I can make a UV map and paint it
when I tried before random sections seem to get painted over while I was trying to do others
from what I can tell this is because sections of the UV map overlap
I manualy fixed the head's UV map and it fixed the problem
but I may be better off making a new one with all the parts unified into a single mesh
pseudo knoll
if you're trying to preserve color layouts or base color maps while changing UV's, you'll find it quite tough.
You can make UV unwrapping easier by marking seams to unwrap everything into managable regions, but that takes a bit of practice to perfect
calm sandal
heck
I don't need it to be that good
I just need things not to overlap
and make other parts get colored randomly
pseudo knoll
oh just select everything and do smart UV unwrap if you're impatient, but it will cause issues with normal seams with specific shaders in Unity.
wherever there is a UV seam certain shaders will have seams in the normals, just takes some fixing
night trout
ngl
the blendshapes are gonna be pain to make on my model
cause i didnt rig it to make it easier
night trout
also
fuck upper leg bones in terms of autoweight and weight painting in general
 pseudo knoll
turn on mirror weights and tinker the weight paints while its in a pose for the desired result
quaint jasper
pseudo knoll
is there a place for HDRI's other than HDRI heaven?
Google images can be surprisingly good lol
pseudo knoll
tysm
night trout
been trying to fix what's in the pic above
and ngl it is
kinda impossible to fix
spiral sigil
making vanoss
 naive garden
ay banoss
naive garden
looks fine in Eevee, but suddenly it looks weird in cycles, why?? (top one is eevee, bottom is cycle)


oh wait... is it because cycles doesn't ignore invis texture from flipped normal?
 fallow geyser
quaint jasper
https://www.artstation.com/artwork/b5Vg5G
fallow geyser
quaint jasper
https://www.artstation.com/artwork/b5Vg5G
nice odokawa too homie
 weary shadow
Heya, i have never attempted adding clothing in blender before, and am pretty intimidated by the process. Cause I know the process differs depending on if clothing is already weiggt painted, rigged, etc. Been watching tutorials but feel overwhelmed and unsure what tutorial to follow. For reference, I want to add clothing rigged for panda female base, to a panda female base. Since they are for same base, do i just plop it on and call it a day? Or how is the process different?
quaint jasper
weary shadow
Heya, i have never attempted adding clothing in blender before, and am pretty in...
One of the cats dev made a one click feature for that
weary shadow
Oh yah!? Thank you! I will repost my question in that channel ^-^
calm goblet
 jagged sail
can someone help me start my vcr character model journey?
jagged sail
can someone help me start my vcr character model journey?
start out with grant abbitt's character art tutorials
weary shadow
quaint jasper
One of the cats dev made a one click feature for that
I asked in the other channel but my question got lost in a sea of other messages. Could you potentially link me? ^-^
quaint jasper
You just need to rely on the development version of the cats addon for blender
@spare crater Do you happen to have a direct link to your latest version ?
spiral sigil
i made whiteface from imscared

 spare crater
quaint jasper
<@!196839584263438336> Do you happen to have a direct link to your latest versio...
spare crater
quaint jasper
<@!196839584263438336> Do you happen to have a direct link to your latest versio...
 urban wing
Hey does anyone know how to like connect things so it doesn't do this?

 cinder cradle
spiral sigil
how do i make them point all upright?
cinder cradle
spiral sigil
how do i make them point all upright?
you mean like make them do 180? just type in rotation on X 180
 spiral sigil
can i set a camera to spawn in my viewpoint?
night trout

suffering
legit im tempted just to ask around and see if anyone wants to help me with the weight paints
cause god this shit is janky af rn
carmine dove
fuck weight painting all my homies hate weight painting
@night trout is it from scratch?
night trout
yeah!
carmine dove
what are u tryna weight paint rn? just the body?
night trout
yeah, doing clothes once ive gotten it all textured and ready
though i still need my new user rank tbf
carmine dove
can i see ur progress :0
im way too lazy to make bodies from scratch tbh
i use vroid bodies then edit them a bunch
night trout
had to Clyde-Protect it
but yeah, here's what ive done so far

 night trout
nice!
carmine dove
but on the bright side once u get the body weight painted u can transfer it to the clothes
night trout
and yeah, thats true
thorny ivy
carmine dove
but on the bright side once u get the body weight painted u can transfer it to t...
And then there's some parts where the vertex normals are totally different or are far away from the source mesh lol
calm goblet
thorny ivy
And then there's some parts where the vertex normals are totally different or ar...
that's why you make template clothing that's already weighted and wrap it onto your high poly
 atomic hamlet
night trout
had to Clyde-Protect it
but yeah, here's what ive done so far
atomic hamlet
night trout
had to Clyde-Protect it
but yeah, here's what ive done so far
Discord's filter is a little TOO sensitive lol.
quaint jasper

ArtStation
Wanted to make Courage for a Unity project, modelled, rigged and textured over two days. Environment took a day since it was relatively simple, toon shader is definitely doing most of the work !
calm sandal
quaint jasper
https://www.artstation.com/artwork/Ark2zW
that is awsome
quaint jasper
Thanks !
 cobalt onyx
ik this is an old message but how can i do this
spiral sigil
hi
I am thinking about making ve chat avatars as a part time job,, do you guys think its doable?
I just mean do the people of this awsome community want to buy models, or do they just get free ones?
 thorny ivy
lots of baking to do lol
untold schooner
quaint jasper
https://www.artstation.com/artwork/Ark2zW
really well done, great job on the shading. i especially like how the animation is a an actual blendshape
calm sandal
question
how the fuck do I texture paint


Because I have the model done but just need to color it.
this is the character I am trying to make

I think the model is good enough but for some reason texture painting seems way harder than modelling from scratch
any texture painting tips?
potent glade
calm sandal
any texture painting tips?
could try the free trial of Substance Painter
 round niche
you could try https://quixel.com/mixer its free~

Quixel
Simple and quick creation of anything you can imagine. Create photorealistic, tileable, materials in seconds with powerful mixing and painting.
calm sandal
actually I think long term I might be better off keeping the model to just blender
pluss it seems I fixed the UV mapping
devout scroll
texture painting support is pretty bad in blender
cinder cradle
it's tragic
spiral sigil
not the worst
spiral sigil
the only thing i use in tex painting is just smear. cuz the normal stuff is just laggy and bad
cinder cradle
hope blender gonna improve texturing
spiral sigil
maybe one day.
devout scroll
apparently texturing improvements are on the roadmap for this year but no specifics
cinder cradle
yes i heard that too
 celest thistle
Hello there! I am still looking for a blender artist to assist in creating the base for my club. I have unity knowledge but I know nothing about blender! I am willing to pay! Please contact me if you or someone you know may be able to assist me in this project! ❤️ Thank you! ❤️
quaint jasper
celest thistle
Hello there! I am still looking for a blender artist to assist in creating the b...

VRChat Ask
Post about commissions for worlds in this category. Requests are not permitted, we only permit posts from those providing services.
spiral sigil
tried adding real hair. again. looks a bit weird but it shall do.
 cinder cradle
it doesn't fit the face lol but looks pretty good
calm goblet
spiral sigil
It turned out that the model is 2 GB big is 💀
that's what happens when you forget to make a low poly
spiral sigil
calm goblet
that's what happens when you forget to make a low poly
yep
potent glade
I'm curious how you manage to do that
 grave aurora

 sonic storm
First piece of Clothes iv made for Vrchat 
I do commissions to 🦋
 potent glade
So, for Blender, what are some absolutely essential addons?
 proven plinth
potent glade
So, for Blender, what are some absolutely essential addons?
proven plinth
potent glade
So, for Blender, what are some absolutely essential addons?
CATS is a big one
calm goblet
potent glade
I'm curious how you manage to do that
do what?
potent glade
calm goblet
do what?
end up with a 2GB avatar 👀
calm goblet
easy
too many high res textures, too many bones, never learning how to use normal maps to get their details so instead they make a 1mil polygon model with every single detail in actual geo with 50 outfits all in the same model all with way too many polygons cause no one knows what a normal map is
potent glade
wew
calm goblet
what's also fun is loading your high poly into unity, when your high poly is like 200mil polys cause you have a whole bunch of duplicated objects from when you were still settling on the design and wanted to have a backup there
spoiler alert, unity dies
devout scroll
that works take 10 hours to import
calm goblet
you get bored afte a few mins though lol
dusty heron
The meshes probably also get split up multiple times at that point
at least in Unity 2017.2 and earlier
devout scroll
yeh not anymore tho there could be a new limit
dusty heron
The new limit is >4 billion
But there's more two settings for it, 16 bit and 32, and if it surpasses the 16 bit limit it just switches to 32, which is more than enough
dusty heron
The sky computer hardware's the limit!
thorny ivy
potent glade
end up with a 2GB avatar 👀
Separating into parts and retopology would be a good next step

 novel estuary
Working on my first vrchat model
 spiral sigil
aint made a monster in a while. so heres a new one!
 spiral sigil
lookin nice imo

 spiral sigil

 night trout
awww yeah we UVing
 atomic hamlet
night trout
awww yeah we UVing
atomic hamlet
night trout
awww yeah we UVing
Ah yes, the second most annoying part right after rigging.
thorny ivy
The fun part lol
spiral sigil
haha funny let me in guy

 alpine tusk
hello, im trying to use a motion in VMD type, how do i use it?
alpine tusk
why does this happen?

 still wadi
lack of knowledge
thin shadow
alpine tusk
why does this happen?
Perhaps the uv map name is mismatched when joining meshes
alpine tusk
thin shadow
Perhaps the uv map name is mismatched when joining meshes
wdym by uv map?
my friend did the same thing with the same model and he doesnt get any errors x3 but if i uncheck "combine same materials" i get that weird thing
thin shadow
alpine tusk
wdym by uv map?
this part
 thin shadow
alpine tusk
my friend did the same thing with the same model and he doesnt get any errors x3...
thin shadow
alpine tusk
my friend did the same thing with the same model and he doesnt get any errors x3...
wait a minute, this happens when combining materials? then check for each texture to have its path defined.
night trout
man
getting the uvs to look right is gonna be a pain

 sturdy lichen
quaint jasper
https://www.artstation.com/artwork/Ark2zW
sturdy lichen
quaint jasper
https://www.artstation.com/artwork/Ark2zW
epic
devout scroll
night trout
man
getting the uvs to look right is gonna be a pain
just add some more cuts
if you're painting in substance it doesn't even matter that much
that you have more seams
night trout
devout scroll
if you're painting in substance it doesn't even matter that much
i dont have substance painter
but i'd assume that blender's built in texture painter is fine?
devout scroll
It's actually pretty bad
cinder cradle
night trout
i dont have substance painter
but i'd assume that blender's built in texture pai...
it has built in texture painter yes but it's not as good as in substance painter
devout scroll
But there are other options too
cinder cradle
without graphic tablet texturing in blender is hell
devout scroll
Not necessarily, it's more like it's hell because of flat projection
You draw around a corner and you get an awful smudge
azure rain
https://quixel.com/mixer apparently this one is free to download
Quixel
Simple and quick creation of anything you can imagine. Create photorealistic, tileable, materials in seconds with powerful mixing and painting.
devout scroll
No layers either without node fuckery
Mixer is fine but it's better for procedural stuff
cinder cradle
yes that's true layers are super important
devout scroll
Last I checked you couldn't have masks on paint layers in mixer
Which is kind of a deal breaker
Or maybe you couldn't have hand painted masks
It's shaping up to be great but isn't quite there yet
night trout
i mean tbf my sona does not need much in terms of detail lol
 cinder cradle
oh yeah than blender is fine
devout scroll
well if you want flat colors sure but eh
azure rain
probably wouldn't be too much of a pain in the butt to bake some ambient occlusion to overlay on top of the flat color
cinder cradle
when i was doing textures in blender i always was ending up remaking them in 2d program
night trout
still, i'll give that Mixer program a try tbh
night trout
gave it a try and
it kinda feels clunky to use ngl
also
anyone know what the best texture sheet size is?
 primal beacon
a bigger texture sheet is going to give you more detail but will also require more graphical memory. for that character you can probably get away with 1024x1024
night trout
this a good eye UV?
 quaint jasper
I'd personally scale it on the X axis so that the shape is the same, but it depends on your texturing process
night trout
aight
night trout
mouth UVs
 night trout
think this might be good for UVs
 cinder cradle
already everything mapped?
there are some spots left
you can make something bigger
night trout
i guess i could make the torso bigger
night trout
cinder cradle
you can make something bigger
this better?
 cinder cradle
yeah better
night trout
managed to make it alot better

so thoughts
is this good enough for me to get started with my textures?
azure rain
yeah it looks decent
cinder cradle
hmm yes it's fine
night trout
coolio
azure rain
like if you were making a model to sell it could potentially be better organized for ease of two-dimensional painting but just a personal Avatar that you're going to 3d paint that's fine
night trout
yeah, this is just for personal stuff
azure rain
then yeah you're good to go as everything looks evenly scaled and uses up most of the the space
night trout
i feel like i should go for 2k textures
just because it looks a bit too pixel-ly
 azure rain
yeah a single 2K color would be fine for pc
 mild thicket
Hey guys there's this spider bot I'm trying to rig up. I just recently started and what I learned was thanks to YouTube XD
night trout
got the base colours set up
just gotta line out the markings

nvm because texture paint is just
buggy
night trout
fuck me i am
struggling
primal beacon
that's good, you are only learning when it hurts
night trout
 atomic hamlet
You're almost there!
night trout
yee!!
atomic hamlet
Only thing that'll be left to do after that is making shapekeys for expressions and lip-sync. But that is entirely optional if you don't mind the eyes not blinking and jaw-flap looks decent enough to you.
night trout
yeah!
plus i have the jaw bone rigged up so making expressions and what not should be easier
also are emmissive textures fine to have on an avatar?
calm goblet
devout scroll
Last I checked you couldn't have masks on paint layers in mixer
you can have paint masks in mixer, you have been able to for ages
the thing i'm not keen on with mixer is the brush engine, it's not good
atomic hamlet
night trout
also are emmissive textures fine to have on an avatar?
Yes. Just be careful with the HDR values, you can easily blind someone in worlds that have bloom.
night trout
oh trust me, i have it set to 1
 atomic hamlet
You might need to have the eyes be emissive as well depending on what shader you are going to use in-game, or your fake eyetracking might become obvious under certain lighting conditions.
night trout
im probably gonna use a toon shader, but yeah i'll keep that in mind
calm goblet
night trout
im probably gonna use a toon shader, but yeah i'll keep that in mind
this meant to be for vrc?
wrong server lol thought this was blender
if you're going for that flatshade thing and using poiyomi to do all the shading you probably should use some emission so you don't get natural shadows trhough

 spiral sigil
i just realized the lines was going down. well fuck my life
potent glade
👀 Is Grease Pencil a viable approach to making avatars? (since you can convert it to mesh)
quaint jasper
Not really, if you have 2d skills you'd much rather make proper tracing sheet for the model
spiral sigil
 devout scroll
Not the right channel for this, try #user-support-old
spiral sigil
Oh Sorry...
calm goblet
potent glade
👀 Is Grease Pencil a viable approach to making avatars? (since you can convert ...
it's a very viable tool for making some parts, like if you wanna make belts, hair, sashes, things like that you can draw it on with grease pencil, convert to curve, give it some thickness and convert to geo
makes it almost work like an IMM curve brush in zbrush
spiral sigil
spiral sigil
aint made a monster in a while. so heres a new one!
I hope you decimate that 😄
night trout
decided to change the eyes a bit, mostly making them a bit smoother

also
dunno if i should keep the current eye UV's since i smoothed them a bit
 night trout
actually
unsubdivved it to keep the model consistant
some other changes
eyes are now emmissive
 night trout
also made the model alot less shiny
languid fog
calm goblet
too many high res textures, too many bones, never learning how to use normal map...
80% of the avatars in vrc be like:
atomic hamlet
night trout
decided to change the eyes a bit, mostly making them a bit smoother
I'd also make the eye sockets a bit smoother as well if you can, they look too low-poly compared to the eyes now.
night trout
atomic hamlet
I'd also make the eye sockets a bit smoother as well if you can, they look too l...
oh, thats why i unsubdivided the eyes
atomic hamlet
Oh, I didn't see that message lol.
thorny ivy
languid fog
80% of the avatars in vrc be like:
You forgot boolean spam
spiral sigil
tried to texture my own jacket
 languid fog

 spiral sigil
the sussy man him self.
 calm goblet
languid fog
oh no pls
calm goblet
languid fog
oh no pls
oh don't forget all the people thinking it's fine to decimate a character model
languid fog
calm goblet
oh don't forget all the people thinking it's fine to decimate a character model
Tris goes brrrr
 nimble lotus
Did any one make a phottogramatry thing of their own head for use on an avatar?
untold schooner
calm goblet
oh don't forget all the people thinking it's fine to decimate a character model
the only time i decimated a full on character is for the halloween contest because i couldnt be bothered retopping it just to be excellent on quest
calm goblet
untold schooner
the only time i decimated a full on character is for the halloween contest becau...
lol i did the retopo for my one
when you're doing a full character in 5k tris you just can't let RNG place your edgeflow, how the fuck are you gonna get good deformations without doing it properly
for higher polygon limits i've used zremesher on simple bits, cause i wasn't being paid enough to spend the extra hours on retopo though lol
untold schooner
calm goblet
when you're doing a full character in 5k tris you just can't let RNG place your ...
i simply didnt care because back then nobody played on quest
now i either use the multires modifier before i even add detail or i just use quad remesher
calm goblet
you don't retopo properly at all? lol
untold schooner
well if i use multires i have no need to
calm goblet
quad remesher though 😛
untold schooner
i use quad remesher for static objects that wont bend in any way
it sometimes can get it right but usually doesnt
calm goblet
usually it does a pretty good job as long as you're using the controls properly lol
but even with it being very good, it isn't final topo
great for mid-flow cleanup so you can work easier, and good for when someone juist isn't paying you enough to do a proper job
untold schooner
i havent done a hand retop in months since i usually make one-offs in a few hours and dont care enough/dont have time
calm goblet
a few hours?
untold schooner
and/or also hard surface stuff that isnt sculpted and isnt high poly
untold schooner
calm goblet
a few hours?
not a lot to show for but this is the last character model i made which was around 5/6 hours
 thorny ivy
If you're doing retopo with core blender tools then its understandable lol
spiral sigil
yeah dunno which channel to post this in. but my dumbass accidently clicked X on the thing that lets you change everything. anyone know how to reopen it?

in substance painter
spiral sigil
alright
spiral sigil
 vivid crater
should be at the top under window > views > properties
vivid crater
should be at the top under window > views > properties
yeah uh where is that? im pretty new to substance
vivid crater
uh at the very top like next to file and edit and stuff, theres a window one
spiral sigil
damn thanks!
vivid crater
i close that damn thing on accident all the time
night trout
this a good blink?

 cinder cradle
it looks ok but you could make a eyelid so it shows in shapekey
would look even more natural
but that blink is ok so you don't have to
night trout
i mean i can try and make an eye lid
although idk what the best way to go about that would be since ive already done the model and all
cinder cradle
like i said if you don't want to bother with it than don't
night trout
aight
night trout
decided to add an extra loop to kind of help create the effect of an eyelid
 cinder cradle
yes that looks more natural
thorny ivy
2 more loops would help a bit with transitions
night trout
thorny ivy
2 more loops would help a bit with transitions
where would i put those?
thorny ivy
Around the eyes
So like above the loop that represents the edge of the eyelid
Then when it moves you'll retain curvature of the eyeball a bit
 thorny ivy
Even out the spacing a bit of those loops
Select an edgeloop then use edge slide to evenly space them
Double press G for that
 thorny ivy
Ah much cleaner
night trout
wtf
for some reason my shape keys just decided to fuck up alot of things on my model


anyone know how to fix it?
cinder cradle
check if something on uv isn't inside something else
night trout
nope, nothin
ok, managed to fix it
and i guess it might be because i added loops for the eyes
 thorny ivy
@night trout yeah if you edit the mesh shapekeys break
Making shapekeys should be the very last thing to do
 spare hound
Imma ask here,
How can i convert .fbx to .vrm ive done the whole unity proccess multipule times never worked, also the kitsune vrm export addon for blender is broken so yeah.
 dense granite
Making my first model, all was well until after I finished the ears, then I turned the model and found a massive spike going through her head 😭😭 I see that the points are messed up but it won’t let me move them when I select, any way to solve this or will she just have some holes?
 spiral sigil
dense granite
Making my first model, all was well until after I finished the ears, then I turn...
spiral sigil
dense granite
Making my first model, all was well until after I finished the ears, then I turn...
thats an F
thats why i sculpt
devout scroll
dense granite
Making my first model, all was well until after I finished the ears, then I turn...
depends on what's going on. you should be able to move it but it looks like you might have joined some verts.
your model is simple enough that you could just delete that vertex and fill up the new holes
after deleting use E to extrude and move the new vertex into the mirror point in the center so it gets joined
spiral sigil
or just fill
 rain fjord
in blender some faces of my object are showing up in the render, how do i fix that?
devout scroll
spiral sigil
or just fill
you need to select two edges to fill and if you select perpendicular edges it will fill a triangle between them
devout scroll
rain fjord
in blender some faces of my object are showing up in the render, how do i fix th...
can you post a screenshot
rain fjord
devout scroll
can you post a screenshot
 devout scroll
you mean the sharp edge look?
right click and shade smooth
then go to mesh tab (upside down triangle) and under normals enable auto smooth
rain fjord
devout scroll
right click and shade smooth
it is shaded smooth
devout scroll
do it again
might help
altho the way you can only see half makes me think there's maybe double geometry in there or something
can you post an edit mode screenshot
 devout scroll
yeh should be good once you enable auto smooth and play with the angle value
rain fjord
devout scroll
yeh should be good once you enable auto smooth and play with the angle value
nope, faces still showing
devout scroll
try to select everything, M and merge by distance with a really low value in case you have overpaying geometry
it might also just be bad normals
try recalculating normals
rain fjord
what would u choose for the merge by distance value?
devout scroll
if that doesn't work try selecting the parts that look sharp and normals > set from faces
just type 0
it will set to lowest value
rain fjord
devout scroll
if that doesn't work try selecting the parts that look sharp and normals > set f...
didn't work
devout scroll
i might be missing something simple then, i dunno
 valid adder
first time 3d modeling
 spiral sigil
attempting to make a human head

tryna to improve my skills by modelling a human head. using ZERO references
 calm goblet
spiral sigil
tryna to improve my skills by modelling a human head. using ZERO references
calm goblet
spiral sigil
tryna to improve my skills by modelling a human head. using ZERO references
you'll not improve at all if you don't use refs
spiral sigil
calm goblet
you'll not improve at all if you don't use refs
well. i dont like using refs if its something like this. or those monsters. i only use refs if its something like snotty boy. and im not going to post it cause its embarrassing. but i have improved alot from my last human model.
calm goblet
spiral sigil
well. i dont like using refs if its something like this. or those monsters. i on...
if you don't use refs how are you gonna know what you fucked up?
you have nothing to compare to
and as a beginner you don't have the visual library built up to compare to anything in your own head (which is likely to be a bit off anyway)
the fact that you don't have any of the structure of the skull there, the mouth and nose look drawn on, and you're only showing an ortho view instead of showing the whole thing in a few angles so you're probably missing a whole load of other things that're just hidden
spiral sigil
calm goblet
and as a beginner you don't have the visual library built up to compare to anyth...
wdym drawn on
primal beacon
Gotta use refs my dude
calm goblet
spiral sigil
wdym drawn on
i mean you took the clay brush and just drew a mouth on
you didn't build the forms of the mouth, you don't have any of the base structures that make up the head, nothing you actually need to build to make a good looking human head
spiral sigil
calm goblet
i mean you took the clay brush and just drew a mouth on
thats incorrect but
calm goblet
that's how it looks
 eternal mica
Hey, I am 3D student, not using references is doing nothing for you, this video by two industry veterans will explain why.

In this video tutorial, we talk about the real reason you use reference. Using reference when doing any form of art is essential - and we cover the theory behind it.
Make sure to follow us social media to stay up to date with what we're up up!
Subscribe now!
https://www.youtube.com/c/FlippedNormals?sub_confirmation=1
Website - https://flipped...
thorny ivy
Basically you can't know the ins and outs of a shape all the time
calm goblet
eternal mica
Hey, I am 3D student, not using references is doing nothing for you, this video ...
any good artist can tell you why not using refernces is a dumb idea lol
quaint jasper
Yeah, all it does is literally making you a worse artist
thorny ivy
No reference is fine if you've made the exact same thing for 20 years
untold schooner
i mean if you’re freestyling something off the top of your head i guess it’s fine!
but for something that is supposed to look like something specific yeah you need reference if you want to be accurate
calm goblet
untold schooner
i mean if you’re freestyling something off the top of your head i guess it’s fin...
why would you not want references to give you ideas?
calm goblet
there is one time i can agree with not using refs though
2 times actually
if you're trying to test yourself, see where you're really weakest and just wanna sculpt/draw/paint something from memory
or if you just wanna come up with a bit of a freeform base to then refine into something proper with refs later
night trout
tbh i only use refs if im 3d modelling characters and if i actually wanna draw something cool
otherwise i just freeform stuff
calm goblet
night trout
tbh i only use refs if im 3d modelling characters and if i actually wanna draw s...
then you're not gonna improve much, but if that's not a problem for you go ahead lol
night trout
Oh well, it works for me tbh ¯_(ツ)_/¯
primal beacon
btw pureref is real handy for managing/arranging reference boards, especially on projects that take days/weeks - https://www.pureref.com/
PureRef, the simple reference image viewer.
potent glade
Even the great Kim Jung Gi uses reference, using references isn't cheating, plagiarism is cheating.
spare hound
spare hound
Imma ask here,
How can i convert .fbx to .vrm ive done the whole unity proccess ...
I have a question that hasnt been answered yet. a.
rain fjord
how do stop faces from showing in the render, shade smooth isn't working
 night trout
im not too sure how imma make mouth shapekeys with the jaw bone i made
valid adder
 spiral sigil
makning some weird angry old guy
 night trout
managed to figure it out
 night trout
nvm because it just
breaks my weight painting
cinder cradle
it breaks it bcs probably you have headbone weightpainted to jaw
and it fights with jaw bone
make jaw bone parented to head and weightpaint jaw to it only
night trout
i mean like
it breaks all the weight paints
cinder cradle
wdym 😮
night trout
what was happening was that when i rotated a bone slightly, more mesh would move when the weight paint should be allowing?
but somehow its now fixed?
now its happening again???
 cinder cradle
it happens when you add jaw bone?
night trout
nope, making shapekeys using the rig
atomic hamlet
Disable all your shapekeys to make sure none of them are causing that. And next time ensure that all bones are in the rest position before making shapekeys from bone deformations (select all bones with A, then Alt + R, Alt + G, and Alt + S to reset all of the transforms).
rain fjord
rain fjord
how do stop faces from showing in the render, shade smooth isn't working
any help?
spiral sigil
rain fjord
any help?
is there blue lines when u go in edit mode?
rain fjord
spiral sigil
is there blue lines when u go in edit mode?
nope
quaint jasper
rain fjord
any help?
Do you have auto smooth enabled ?
rain fjord
quaint jasper
Do you have auto smooth enabled ?
yes
quaint jasper
what is it set to
rain fjord
quaint jasper
what is it set to
50
 rain fjord
quaint jasper
rain fjord
quaint jasper
didn't work
quaint jasper
No idea then, probably worth duplicating the tube in your image that doesn't have the issue and use that instead
spiral sigil

 rain fjord
quaint jasper
No idea then, probably worth duplicating the tube in your image that doesn't hav...
rain fjord
quaint jasper
No idea then, probably worth duplicating the tube in your image that doesn't hav...
i created a new one and got the same problem
night trout
man my shoulder weight paints kinda suck ass lmao
 spiral sigil
haha funny squid game guy

 eternal jetty
In Blender, is there a way to copy a mesh's vertex coordinates to paste into another project? Basically, I used the CATS addon and it scrambled all my faces when importing to unity. I have no idea how to fix it but one submesh in it I want to note the dimensions to paste to a clean copy. Basically, I moved around faces and vertices on this piece of clothing and i cant do it again the same lol.
so i need to basically copy the coordinates of the verticies to apply it to the unedited version on the other project
devout scroll
eternal jetty
In Blender, is there a way to copy a mesh's vertex coordinates to paste into ano...
if it's messed up in unity your export settings are likely just different
if you're replacing the fbx of your old mesh in unity
 hexed ivy
if anyone might have some idea... i'm trying to export a rigged mesh and it's giving me this error. please ping
 craggy lintel

not sure what to do here
so
bascially
I did everthing to fix ghost weights
but somehow there are verts still tracking even though ive normalized, normalized all, deleted, renamed, did everthing to the groups
wtf
I think my blender is broke
im on 2.83 so it's old now
 still wadi
It isn't great
rain fjord
any help with faces showing? shade and auto smooth isn't working

 subtle scroll
Rawdog, you probably have to add more seams
To make it look smoother
Even if you use the smooth shade option, it might look like that if you don’t have a lot of seams
You can also add a subdivision modifier
And increase it
It will however increase your polygon count I think
subtle scroll
still wadi
It isn't great
Can you tell me more what specifically
I know it sucks dude Lmao
rain fjord
@subtle scroll yeah i don't want any more poly's, and why seams if it isn't textured yet?
subtle scroll
Not those kinda of seams
Like more seams of vertices
That’s going to be challenging making it smooth
Try the smooth tool ? Did you try that
Out of curiosity
spiral sigil
rain fjord
any help with faces showing? shade and auto smooth isn't working
make sure you remove custom split normals if it's coming from an internet models
rain fjord
spiral sigil
make sure you remove custom split normals if it's coming from an internet models
i did
spiral sigil
also try right click shade smooth and uncheck auto smooth, if not working then it's custom split normal or hard edges
to remove any sharp edges go edit mode click a then CTRL+E then hit clear sharp
rain fjord
spiral sigil
also try right click shade smooth and uncheck auto smooth, if not working then i...
by hard edges do u mean marked sharp edges? if so there isn't any
spiral sigil
make sure nothing is in here, if there is click clear
 rain fjord
spiral sigil
make sure nothing is in here, if there is click clear
rain fjord
spiral sigil
make sure nothing is in here, if there is click clear
dude i just said i already did that
craggy lintel
still wadi
It isn't great
what can you do
rain fjord
@spiral sigil i also have autosmooth off too
spiral sigil
it just looks like a cylinder, just recreate a new one?
spiral sigil
o - o
rain fjord
spiral sigil
it just looks like a cylinder, just recreate a new one?
tried that too, same problem
spiral sigil
which shading mode are you in?
try to restart blender too, this isn't an ormal behaviour
a freshly created cylinder should be able to be smoothed
rain fjord
spiral sigil
which shading mode are you in?
the pic i showed is in render
 spiral sigil
craggy lintel
ppl talk shit and they themselves are garbage
spiral sigil
craggy lintel
ppl talk shit and they themselves are garbage
people can critique the work of other people even if they can't do better ? what matters is improving in the end, not the ego
if you can't detach yourself from what you create as an artist you're fooked basically
craggy lintel
spiral sigil
if you can't detach yourself from what you create as an artist you're fooked bas...
this isnt what im talking about
everyone thinks they're a genius. everyone thinks they're the best and everyone else is shit.
then they go critique to talk down to others.
i have everything anyone could wish for.
I never never NEVER talk down to people. it sickens me.
spiral sigil
you should just take a break dood and let it flow honestly
subtle scroll
I am okay with honest criticism but I need more specifics lmao
I supposed in a way you have to take the good and the bad together
I’m not mad I am going to ignore the trolls
craggy lintel
criticism doesnt = talking down
subtle scroll
As one should
craggy lintel
criticism = help
craggy lintel
subtle scroll
here's a great tip, just scale on X axis and make buttons larger
Scale down
craggy lintel
this will fix the look 100%
spiral sigil
subtle scroll
okay i'll give the feedback
the geometry is too apparent , it would need more poly!
I think it is very flat, you maybe modeled it in front view mostly ? The shading looks incorrect so my guess would be that the curves aren't very smooth
you would need to learn about smoothing group in addition to subdivide your geometry properly to get a nice end render !
however IMO this isn't a terrible try, you're probably beginning i'd say! just do some more and you'll get it better and better each time! 😄
subtle scroll
Thank you good
craggy lintel
Try sculpting with dyntopo, make it perfect with a ref, and then remesh via quad remesh
okay smartass


 craggy lintel
were they asking for a joke?
still wadi
it isn't great
craggy lintel
no
still wadi
funny
craggy lintel
so stfu
spiral sigil
please get out of this channel you two it's about getting better not debating for your egos
craggy lintel
troll
spiral sigil
sheesh