#3d-modeling
1 messages · Page 125 of 1
 spiral sigil
some of the beveled *sides dont follow the flow of the metal adjacent to it
okok tell me this
wait nvm
spiral sigil
where would I even start moddeling that... hilt?? My brain is at a total loss on how I would begin to make those shapes

it seems to kinda flow like vroid diamond hair
im thinking something with curves possibly
 devout scroll
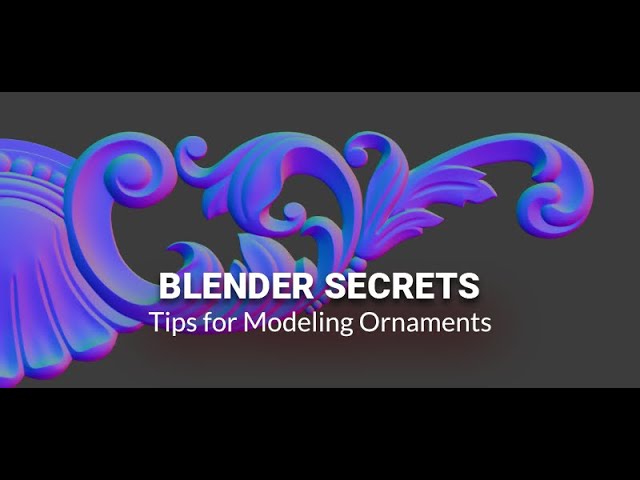
#b3d #blender #secrets #tutorial
Get the FREE Blender Secrets sample PDF: https://mailchimp.blendersecrets.org/freesample
Get the 1000+ page Blender e-book with free updates: https://store.blendersecrets.org/l/IxofeY

#b3d #blender #secrets #tutorial
Get the FREE Blender Secrets sample PDF: https://mailchimp.blendersecrets.org/freesample
Get the 1000+ page Blender e-book with free updates: https://store.blendersecrets.org/l/IxofeY
I would try curves myself
sometimes curves really carry the weight

In part 1 we had a detailed look at the new custom curve bevel feature to understand how it works. It this part Karim Joseph demonstrates a fast way of modeling the ornaments. You can download the demo scene to follow along here: https://www.blender.org/download/demo-files/ (The file is at the bottom of the page).
Demo file credit: Daniel Byste...
spiral sigil
curves are defintely the way to go for what ive been trying
thanks for videos imma watch em
devout scroll
you convert them into meshes later anyway
spiral sigil
bruh ive been making a cynlider follow my curves but all i had to do was use bevel depth
omg now this is exactly like vroid hair with the settings i got its great
or wait no it isnt wha
 azure rain
same basic concept as vroid hair as vroid hair is just a bunch of Curves
 devout scroll
try twisting the curve
it will rotate it
maybe the profile is changing in a different direction
spiral sigil
doesnt seem to do anything
roating x y or z
and im not just previewing the rotation I set it in and then control z back if it doesnt work
its defintely related to me having 0 Resolution
in edit mode and object
it edit mode it does some weird morphing looking movement but the width of the mesh/curve I see never follows the profile I put
ill show you what i mean one moment
it doesnt seem to work even with more res
id just skip to the last 15 seconds when i used more resolution
its frickin doing it that way

then i rotate it 90 deg in edit mode and then seperately rotate the ref 90 deg it STILL insists on deforming the curve mesh that way

when you said twist you literally meant there was a command for it
oml
spiral sigil
a profiling object is much easier for my brain to comprehend so im going to just use that
 sly trout
I kinda want to try make avatars and such in 3d, but I only have a laptop
Would that work
spiral sigil
sly trout
I kinda want to try make avatars and such in 3d, but I only have a laptop
your computer might struggle a bit with any detailed character or sculpting and stuff like that if its lower end but its 100% possible
spiral sigil
i madea weird head
 spiral sigil
you could probably make a horrifically bad but terrifiying character with cursed visemies that would be dope
finally got this bastard,, and thats just one of the many swirlies

 quaint jasper
@spiral sigil https://www.artstation.com/artwork/286q0J

ArtStation
These sword models are based off the beautiful Nature Inspired Swordtember drawings from Moniek Schilder.
https://www.artstation.com/artwork/xJqZ9r
Please go check out her amazing concept art! I fell in love with a lot of the weapons she drew for Swordtember and decided to try my hand at making some of them 3D. I aimed to keep all the sword mo...
spiral sigil
OMG they already made 3d version of this
quaint jasper
Yeah they are extremely skilled
spiral sigil
YEAH
i was pretty close to the part i made im so proud
idk how they so perfectly made the clusterfrick of swirlies
time to experiment
i cant believe im looking at 3d
spiral sigil
probably was by hand
maybe instance a log swirl and then adjust something like that
and lots of extruding and manual work
devout scroll
convert curve to mesh and dissolve some edge loops and you got a start of a hand modelled thing
spiral sigil
thats what I did because either side of the swirly is NOT even
so being limited to only alt scaling and transforming the curve handles was not enough
even though I could of used the spline type that gave me handles but whenever I used them it created SOO much geometry so it wasnt worth bothering with it
 lament pond
My first ever animated model reveal for the wonderful Misfit Waferton.
spiral sigil
The physics in the animation and the animation itself are absolutely incredible
so much good work today O.O
 gritty gull
good work you say?
well take a look at this monstrosity

the best part is that vrchat let me UPLOAD IT

it shoots me into 3rd person view and has an awful, blinding light
 dusty heron
There's no reason it'd stop you
You can upload a cube
you can upload an empty gameobject
gritty gull
yes i know, just saying with how broken it is, im surprised there weren't any extreme errors
spiral sigil
i dont see the problem
gritty gull
I've never seen an avatar that was so broken that it put me into 3rd person mode. This is a first for me
 dire bramble
Someone tell about the cp avatars
devout scroll
gritty gull
I've never seen an avatar that was so broken that it put me into 3rd person mode...
you exported the default light and camera with it
the reason it's third person is because that camera becomes your view
lament pond
gritty gull
Beautiful
 bold urchin
dire bramble
Someone tell about the cp avatars
bold urchin
dire bramble
Someone tell about the cp avatars
Every single once in a while I see someone ask for this.
What do you mean by that acronym.
Please, I have to know - even though I know I don't want the answer.
spiral sigil
bold urchin
Every single once in a while I see someone ask for this.
What do you mean by tha...
sussy question 
finally blocked out the swirlies - my topo for them isnt as good as the original creator but i dont want to just copy what they did whats the fun in that
 bold urchin
I looked into the history.
It's: CLUB PENGUIN
I.... My brain struggles so much with this.
Why would the Club Penguin fandom decide to abbreviate.
azure rain
spiral sigil
finally blocked out the swirlies - my topo for them isnt as good as the original...
still a pretty good first attempt
quaint jasper
spiral sigil
finally blocked out the swirlies - my topo for them isnt as good as the original...
Big difference is that they likely did a high to low bake, which helped the low poly a lot
goal is to prevent as many hard edges as possible for the round parts as possible
spiral sigil
your probbaly right
and if they texturepainted on the high, things would look alot smoother on the low than if you just painted the low I think because of how things to things yeah
Ive made very few weapons so I hope this stuff starts coming naturally to me, but I geniunely think I want to master bringing 2d references of melee weapons to life
they are just so cool to look at in 2d and even more in 3d
and then I can learn how to make cool particles in unity that give the swords more life
my rainbow sparkly trail render will be my saving grace for my medocre rainbow cleaver
 cursive minnow
Do you download the Unity hub v3 Beta?
spiral sigil
you dont need the beta but if you want it go at it
 calm goblet
bold urchin
I looked into the history.
It's: CLUB PENGUIN
I.... My brain struggles so much ...
calm goblet
bold urchin
I looked into the history.
It's: CLUB PENGUIN
I.... My brain struggles so much ...
i was thinking cyberpunk lol
azure rain
but cyberpunk is one word
bold urchin
You- You've thrown me another curveball.
wh-what the bwack
spiral sigil
bold urchin
I looked into the history.
It's: CLUB PENGUIN
I.... My brain struggles so much ...
well the age demographic of club pengiun is young and they arent smart enough to realise that abreviation as a dark meaning
calm goblet
azure rain
but cyberpunk is one word
cp2077 is a common abbreviation
calm goblet
spiral sigil
and if they texturepainted on the high, things would look alot smoother on the l...
you don't paint the high poly and bake that usually, you bake normals, AO, curvature, maybe bent normals and world space normals from your high to your low then paint your low
spiral sigil
so you do paint your low while low hm
ahh the workflow is complicateddd
i dont even know how you would bake curvature yet
or what that means lol
azure rain
spiral sigil
or what that means lol
a texture map that says how curved something is
spiral sigil
thats a THING
calm goblet
but yeah for curvature black is max concavity, mid grey is flat, white is max convexity
spiral sigil
I never understand those 2 words yet but ig there is no better time than the present
calm goblet
concave = valley
convex = peak
think of it like displacement, black goes in, white comes out
mid-grey is flat
calm goblet
never heard of a pit or fall map
height maps are just displacemnt maps though
they tell the engine how far to push the polygons
spiral sigil
so a curvature map is a more curvy version of that then
calm goblet
no
curvature map is just telling you how curved something is
lemme grab an example real quick
spiral sigil
okay
calm goblet
i shold still have a texturing project saved somewhere
spiral sigil
I hope you organize then heh

 spiral sigil
ive seen that hunk before!
calm goblet
yeah i still need to do a higher res version of that badboy for PC instead of quest
but i have other plans for now
spiral sigil
in time in time
calm goblet
 spiral sigil
i think i get it now but of course ill have to actually make the maps myself
calm goblet
but you can see how i used the curvature map to make the wood look more natural with just generators
spiral sigil
oh that looks nicer
calm goblet
yeah this is showing the actual paint lol
spiral sigil
wait its on the wood not the metal lining?
calm goblet
i was just showing the curvature before
spiral sigil
frick
calm goblet
it's on the wood as well
spiral sigil
oh both okay
calm goblet
i used it everywhere
spiral sigil
the light parts of the wood pop more
and dark dip
and that IS the curve?
did you just grayscale textures and adjust levels to make your curveature maps
calm goblet
no
i baked the curvature in marmoset
then used the curvature map to adjust the textures
spiral sigil
oh ok
calm goblet
actually, is there a voice channel in here i can show you how it works in coat/
azure rain
calm goblet
actually, is there a voice channel in here i can show you how it works in coat/
no voice channels on this Discord because we are chat service that function
spiral sigil
I would but my wifi is out at 11/23:00 and im left with just my phone
calm goblet
in 3d coat you have a lot of options for where to put your material, i'm showing you the ones most relevant to curvature maps

blue is just the base fill
white is on covex, so the white parts of a curvature map
red is on concave, the black parts of the curvature map
 calm goblet
you can do more with it, like add in noise to break up the generated look, use the generators to create clip masks that you can then paint on to refine
fingers are tubes, tubes are round, round things are convex
calm goblet
most of these layers i never actually used lmao
spiral sigil
thats reassuring
calm goblet
6 layers actually used

and that's 5 more layers than i normally use
usually i just paint on a single layer and caveman it lol
but i was a little short on time so i went with the smart material generators and effects layers
the blood splatters were manually painted
but that's all i painted by hand on this piece lol
calm goblet
there's more than just the curvature map at work there though lol
azure rain
yep as whenever I make a substance painter project it generates a whole bunch of maps
spiral sigil
at least 4 it makes last time i used substsnce
calm goblet
like i said, adding noise to break up the generated look, using the "more on top" and "more on bottom" to add in some highlights and shadows, directional fill gradients combined with the more on top to get directional lighting
spiral sigil
yea i love baked lighting
calm goblet
still doesn't look as good as properly handpainted
just looks like every other mass produced asset
the stempunk chick i'm working on atm will be properly painted, much more painterly look to it
spiral sigil
yeah Iave to learn the traditional way to texture things i dont want to cheat completely with procedurals but they are cool
STEAMPUNK
i want to see when its done
calm goblet
got part of the blockout here
 spiral sigil
ooOooou
calm goblet
still need to add a gun and some ammo to her belt, remove the left forearm of the jacket and put a nice techy bracer on it, buckles and straps on the boots, and a belt on the back of the coat
spiral sigil
do you sculpt the hands and head but poly model the rest of the body?
calm goblet
all sculpted
spiral sigil
ohh okay
calm goblet
i just finished the retopo on the clothing already and imported that for detailing
usually with clothes i'll do a really rough sculpt to get the shape then retopo it early
goggles also fit the eyes
 spiral sigil
id hope so lol
one thing that i dont get
how do people make belts perfectly fit models
calm goblet
i use a curve brush
draw a curve on the model and it creates the belt on it
then i just position the buckles and we good
spiral sigil
okok that was a big problem for me awhile ago lol
calm goblet
you can use retopo tools in blender to make a ring of polys and add thickness with a solidify as well
spiral sigil
I use retopoflow inside of blender for retopo
calm goblet
did you buy it?
spiral sigil
frick
well it just means i dont get support
which idk what id need support with
for the free version
calm goblet
if you pay you can email them for anything going wrong with it
but if you're gonna pay for a retopo tool you should pay for topogun
spiral sigil
okay
calm goblet
or you could buy 3d coat and get a full upgrade to blender for everything that isn't rigging and rendering lol
sculpting, retopo, UVing, painting, all better in coat
polymodelling not so good
but with sculpting tools like coat has you don't need to polymodel
calm goblet
yeah i'd definitely suggest giving sculpting a good few months to get a feel for it
spiral sigil
i just cant rebind my movement keys in coat to my blender ones
calm goblet
just gotta get used to it lol
i've had to learn 4 navigation setups for the 7 programs i use lmao
spiral sigil
geEz
calm goblet
the more time you're spending learning new things the better you get at learning
so picking up new skills gets easier
spiral sigil
that is true
i can learn alot quickly if i try but if i stop applying that knowledge i lose it super quick
this christmas break ive thought none of school and i worry i will forget everything ever
calm goblet
nah school is easy lol
spiral sigil
Yea its just the exams at the end of the year I am concerned on
spiral sigil
english exam is almost no content
i have to conjure a like 700 word commentary or something like that on an imaginary coffee shop, which now that i think about it is super easy i just need to remember the conventions of certain types of writing
whatever school lame
calm goblet
yup, glad i got done with it a long time ago
spiral sigil
also youd probably have a strong opinion on this
how do you feel about people going to school to learn more about 3d moddeling instead of pursuing other types of jobs that are more certain ig you would say
not that someone would only practicing 3d in school but also on their own because school isnt everything
calm goblet
i'd say going to school for it is a waste of time, learn on your own
and a waste of money
spiral sigil
okay
calm goblet
there's only 1 thing that's gonna get you hired for art, and that's skill
get good, make good portfolio, profit
i know people who're in school for 3d and they don't have time to develop their skills cause they're doing too many different things without enough time to dedicate to anything
spiral sigil
I would hate to have to feel like I have no time for anything so ok nevermind thennn
I am not sure if I should still pursue my other carrer and go to college for getting a degree in that carrer, I mean more people apparently are getting hired without degrees so what does it even matter much if i get one
Maybe I just need a carrer while im working on art that basically keeps me alive while I slowly get better at art because I certainly want to live off of 3d work
calm goblet
what is it you actually wanna do?
spiral sigil
3DDDD
calm goblet
get a part time job, something you can get by on and gives you enough time to focus on your art
spiral sigil
okay
calm goblet
build your portfolio, do some comms for people, sell some stuff on gumroad, build up
spiral sigil
I will have to start paying taxes soon from the commission money ive made hehehhe
calm goblet
if you're already making enough to pay taxes you're not doing too bad
spiral sigil
its supposed to be like 400 usd or something if you work for yourself
or what the law classifies as
most of the money was fixing or making technical unity stuff like toggles or whatever ironically not actual art
or optimizing which is lacking in art
but i was only focusing on unity and optimization then so
calm goblet
ahh, and US taxes start earlier than UK apparently lol
i don't pay taxes on anything under 9k/yr
spiral sigil
of course they do lol
WHAT
9k
sheesh
i mean i hope no one only makes 9k to avoid taxes but yea thats high
calm goblet
but as soon as you go over that 9k the lowest tax bracket is 20%
spiral sigil
geez
why not tax gradients not brackets
seems like a bit of a jump
nvm why am i questioning a governments tax system
dire bramble
Clubpenguin vr
bold urchin
So, how does the baking normals/ao process work. Do I have to manually unwrap the UVs of both the high and low poly meshes and match the islands so they bake onto each other?
It’s one of the few things I’ve avoided since I never could get a clear picture of what it really meant and how it worked.
devout scroll
bold urchin
So, how does the baking normals/ao process work. Do I have to manually unwrap th...
Only the low poly needs and unwrap
Then you place the high and the low in the same place as they overlap
Then your software casts rays from every face outwards and based on what it hits on the high poly it bakes that detail to your lowpolys texture
So high poly doesn't need uvs
bold urchin
Ohhh, okay!
I should use that haha
Is it worth baking a already low or mid poly mesh?
spiral sigil
I know understand why blender painting is absolute dog
and why people unwrap their models in a way that they can just paint on their texture like its a 2d drawin
frick
devout scroll
square unwraps are also better for resolution
straight lines don't get aliased as much
but i wouldn't say people unwrap to be painted in 2d
nobody really cares if you're gonna paint it in 3d
so uvs can be very ugly
spiral sigil
yeah but its probably much more efficient to unwrap it for painting entirely in another software
like im looking at how this is unwrapped and its PERFECT for just painting in like adobe or something https://www.artstation.com/artwork/286q0J
ArtStation
These sword models are based off the beautiful Nature Inspired Swordtember drawings from Moniek Schilder.
https://www.artstation.com/artwork/xJqZ9r
Please go check out her amazing concept art! I fell in love with a lot of the weapons she drew for Swordtember and decided to try my hand at making some of them 3D. I aimed to keep all the sword mo...
devout scroll
substance painter is also owned by adobe
devout scroll
i can't imagine painting stuff in 2d alone
the only good way to not have visible seams is to paint over them
and only in 3d you can do that properly imo
spiral sigil
It says on art station they only used Maya, Marmoset, Paintool SAI and adobe photoshop
idk about maya but marmoset is like for unwrapping or uvs or whatever and the other 2 are 2d
devout scroll
marmoset is for rendering
but it can also do procedural materials now
and probably somr painting
spiral sigil
this is supposed to be 100% hand painted
azure rain

Texturing in Toolbag
Real-Time 3D Material Creation
3D Painting in Action Real-time 3D painting and direct editing of materials inside the 3D viewport have never felt this breezy. Paint gradients and perfectly straight lines, swiftly rotate
spiral sigil
oh wow it does have stuff
maybe I can email them or something and ask how much they painted in 2d compared to 3d if they remember lol
I dont see why they couldnt do the majority in 2d though I think it would work and then they just fix up the seem issues in 3d
 halcyon onyx
heyy there dose somone know if there is a Zoichi discord?
i am searching for Zoichi clothes
or where i can get Zoichi clothes
devout scroll
halcyon onyx
heyy there dose somone know if there is a Zoichi discord?
i am searching for Zoi...
Please ask in the appropriate channel #avatar-search-old
spiral sigil
i have commited a crime
 spiral sigil
so have i
 spiral sigil
it will be perfectly fine just slap some toon shading on it and you wont be able to see a thing
problem solved
 primal wraith
Family [expunged]
spiral sigil
spiral sigil
it will be perfectly fine just slap some toon shading on it and you wont be able...
r u sure about that

oh hey look the teeth are griffin sized

looks kinda like the teeth that staircase-to-hell scp was

peter griffin cursed?!??
peter griffin.exe confirmed?!?!?
cant wait to absolutely disgrace this spear (that has a disconecting knive end that has rocket propultion) with my texturing skills

 foggy granite
spiral sigil
cant wait to absolutely disgrace this spear (that has a disconecting knive end t...
foggy granite
spiral sigil
cant wait to absolutely disgrace this spear (that has a disconecting knive end t...
an rocket propultion?
foggy granite
that an interesting spear
foggy granite
i do
spiral sigil
get ready to be in awe
lol

i wasnt even planning on a spear and i also am very new to 2d
foggy granite
well just how it goes sometimes
foggy granite
yeah i agree
spiral sigil
decided to add an orbiter and ill probably do 3 because 3 prong
 spiral sigil
bible fight!
 spiral sigil
i dont get the reference but its still funny
spiral sigil
spiral sigil
i dont get the reference but its still funny

Subscribe me for more episodes of family guy.
Subscribe my other channel - 'The All Time Headliner' for gaming related videos
In this episode,
Peter becomes so convinced that he is a genius that Brian challenges him to prove it. Peter takes the MacArthur Fellows Program, which reveals that Peter is ...no one does that, no one sane anyway lmao
spiral sigil
apparently there are people who do it sometimes but im not going to try it on this model anyway
probably a practice when 2d artists come to 3d but im not a 2d artist so
you saw what horrific thing i drew lol
devout scroll
well if it's something flat you can draw then project onto your mesh
but you'd still need to touch it up in 3d
spiral sigil
spiral sigil
i have commited a crime
for this i projected UVs from view and used an img on google of a sword i moddled quickly
I never want to do it again
spiral sigil
for the prob 5th time. im remaking cory kenshin. but with some ultra hd clothes


the clothes look very nice
 spiral sigil
 ripe latch
umm
ripe latch
umm
try to re rig it
ripe latch
with cats?
or mixamo?
neither are working
im a beginner, not really sure how to 're rig' it
spiral sigil
hm
devout scroll
it just looks like wrong bones are assigned
spiral sigil
do you know how to use blender?
ripe latch
barely
spiral sigil
it looks like there is 2 rigs tbh
ripe latch
there were originally 4 pieces to this
devout scroll
look on the right side and make sure the right bones are assigned (chest is assigned to chest, spine to spine, arms to arms etc)
not the right channel for it tho, try #avatar-help or #avatar-rigging
spiral sigil
I feel like this futureistic theme i was trying to workout aint going to work i just cant envision it being good, i think it would be better if it were like a mossy wooden spear, and at the bottom base that can be like the glowing red ruby of the forest or smth idk it really seems like something jungly for some reason. and then add like leafs somehow and make the blade wooden and connect the floating gaps, and make the spear a little less straight and more squiggly. and I have too many moving parts on the staff the center of attention should be the top not the middle

just dumping thoughts here
foggy granite
spiral sigil
I feel like this futureistic theme i was trying to workout aint going to work i ...
I agree it seem tribal
spiral sigil
i can envision wooden blade with voronol like shape cutouts around the knife, and the wood color getting a little lighter where that cut meets the blade
or maybe not cutouts but it makes divots in that shape
foggy granite
Yeah
I think the cut out cause it look less sci fi and more tribal
And also the width with the blade too
spiral sigil
Im worried about how the topo is going to be after cutting into the knife so much
 cosmic owl
how should i connect this tail to the body for optimal topology?
 spiral sigil
cosmic owl
how should i connect this tail to the body for optimal topology?
spiral sigil
cosmic owl
how should i connect this tail to the body for optimal topology?
are you just now making the tail or is the rest of the tail just hidden from that screenshot
cosmic owl
i just started with the initial few rings, the tail isnt actually done
but seeing as it doesnt just straight end at a point, maybe i should do that first in case i need more loops
er
not
loops
idk the term
spiral sigil
I dont know if this is exactly the best way but you could just extrude geometry in

and shape it to that tail you got
does anyone know what this purple weight is? ive selected the hip bone but its supposed to be weighted to the leg but its like it has no weight, and when i try and weight it it does nothing
 cosmic owl
spiral sigil
I dont know if this is exactly the best way but you could just extrude geometry ...
cosmic owl
spiral sigil
I dont know if this is exactly the best way but you could just extrude geometry ...
i mean, i can bridge it for the most part, but then i have to do some awkward triangle quads for it to line up
lemme show u one sec
cosmic owl
o
spiral sigil
just delete that tail you were making and extrude in the ring of geometry from that hole u got
and shape that into the tail
and boom quads
i will make a video one moment
cosmic owl
yeah i dont need a video dw haha
spiral sigil
okay
cosmic owl
i was getting so worried about using too many polys than needed that i was overlooking how to do it in general
cosmic owl
nah but preferably it'll be visible for both
so sort of
its easier to add polys than remove em
spiral sigil
could always just make a geometrically dense PC one and then retopo for quest
but saves u time just making one that works for both automatically
spiral sigil
mayb u could just subdivision
cosmic owl
if i think it could look smoother ill do that later
yeah
thats what i plan on doing
cosmic owl
aye thats what im trying to do
spiral sigil
do you happen to have knowledge on creating jungle or nature themed weapons or props
or incorporating plants into things that arent plants
cosmic owl
...kiiiiind of?
spiral sigil
oh so like drawing a concept?
cosmic owl
usually thats how i start my ideas yes
spiral sigil
maybe you would be interested in a banana tree fishing rod heh
cosmic owl
but if youre wondering just in general how to do it, id consider what materials would be available/fitting to the theme
like using crudely chiseled bone for a spear tip
spiral sigil
plan that all out so yknow when its put toegehter the theme is consisnt and not taky yea
cosmic owl
mhm
spiral sigil
i have something good in my head but since im very new to 2d it doesnt translate well
cosmic owl
you also want to consider practicality or what you absolutely must have
spiral sigil
thats true hm
cosmic owl
like maybe golden embellishments arent really practical, but if it's a ceremonial weapon, you might wanna keep them anyway
spiral sigil
yea because it still has purpose its not just a thing you ploped on there for no reason
cosmic owl
mhm
but admittedly human beings also like their stuff pretty just cuz
case in point: some of the basket-type hand guards on some swords
real intricate, no real function
just preddy.
cosmic owl
yeah but say its also stylized to look like vines in a flower-like configuration
spiral sigil
or slimy serpents
 languid fog
spiral sigil
does anyone know what this purple weight is? ive selected the hip bone but its s...
languid fog
spiral sigil
does anyone know what this purple weight is? ive selected the hip bone but its s...
that means that part of the mesh don't have a armature or smth like that, the bone don't have anything related to that part

Blender Stack Exchange
When I click on my rigged character(mhx rig) from Makehuman in Blender's weight paint mode, it's all shown in purple. I can't see weights of any of my bones.
I am not sure what's happening here. ...

reddit
10 votes and 4 comments so far on Reddit
spiral sigil
got something that im satisfied with finally but it has no real texturing its just solid colors and gradients

that background is too green so just gray
 spiral sigil
modelled some creepy ass head in 5 minutes


 spiral sigil

 quaint jasper


Final one for the road, Void Gal Friend from the amazing character concepts by @benmce_art ! This time around most work went into UV to save the original texture, because there was no way I could reproduce that🤣#b3d https://t.co/9sNf7mw0NM
 Twitter
·
azure rain
Twitter
·
azure rain
very nice Avatar Ruuubick
spiral sigil
ay nice I was wondering if you would ever get to the main character on the ref sheet
seems like you got it pretty good
quaint jasper
Thanks !
spiral sigil
commission work

 zinc belfry
can i get a commission
 shrewd void
hello, is this the right place to ask a Blender to Unity question?
spiral sigil
shrewd void
hello, is this the right place to ask a Blender to Unity question?
close enough ye
languid fog
shrewd void
hello, is this the right place to ask a Blender to Unity question?
If it is related to 3d
Yes
 waxen hound
So I've been following multiple guides on blender character creation and I've gotten to a pretty decent point for my first time. However, I am having problems with the model having "spasms" to the point where the model is completely deformed. For reference, I am using this video primarily for my character creation

Patreon, Gumroad, Discord, and other stuff:
https://linktr.ee/Joeycarlino
Intro 0:00
Summary 0:41
Setup / Skin Modifier Basics 1:12
Character Start / Root 4:25
Adding Mass 6:22
Hands 8:27
Muscles 10:23
Proportional Editing 12:04
Asymmetry / Roundness 13:41
Armature 14:30
Sculpting / Applying Modifiers 15:38
Eyes 16:44
Better Armature 17:41
Pa...
I shall grab a quick screenshot of my current progress in a few
Essentially, I am trying to make an otter
But the question also is, "is this a good guide to make high quality characters?"
waxen hound
this is my first attempt
 shrewd void
languid fog
If it is related to 3d
shrewd void
languid fog
If it is related to 3d
i think i figured out my issue, thanks for being available to help 🙂
spiral sigil
decided to make my favorite actor zach galifianakis with some more hd stuff


 jovial sorrel

Masterpiece Studio Pro is FREE for Non-Commercial Use
https://www.masterpiecestudio.com/app-stores
Be part of the community that is building the metaverse - the future of immersive 3D creation can be - literally - in your hands!
We believe anyone can make 3D content if the tools are made easy to use! So this is our mission - to simplify 3D cre...
spiral sigil
not done yet. but jack torrance remake


 spiral sigil
shirt is properly unwrapped! woo

 runic mesa
Hello @calm goblet, you can edit and model your world without leaving Unity. Using less software to make your world will save your time and effort a lot. And you wouldn't need to learn difficult 3d modeling software like blender, 3ds max etc.
 supple vale
Hey all, so I decided to make my own clothing for my VRoid avatar in Blender since I thought it'd be easier to do. However, I have run into this issue where the shirt I made is now not binding to the model when I'm attempting to do rigging with it. Am I skipping a step somewhere? I joined the shirt to the mesh.
 calm goblet
runic mesa
Hello <@!184415967223349248>, you can edit and model your world without leaving ...
calm goblet
runic mesa
Hello <@!184415967223349248>, you can edit and model your world without leaving ...
if using less software saved me time i wouldn't have 7 programs that're specialized for just 1 job each
languid fog
supple vale
Hey all, so I decided to make my own clothing for my VRoid avatar in Blender sin...
Did you weight paint the cloth?
 thin shadow
runic mesa
Hello <@!184415967223349248>, you can edit and model your world without leaving ...
thin shadow
runic mesa
Hello <@!184415967223349248>, you can edit and model your world without leaving ...
according to the video promo, the texture painting is made by using substance painter, not within unity itself
still using other software to do the texturing then back to square one
it looks intuitive enough at least, although, blender can do this exact style of mesh building
calm goblet
thin shadow
it looks intuitive enough at least, although, blender can do this exact style of...
blender can do a lot more, and a lot more efficiently
devout scroll
You would still need to learn to do it in unity lol
You're not learning a new software but you're learning new tools in the same software
Not much different
calm goblet
devout scroll
You would still need to learn to do it in unity lol
no, you don't still need to learn to do it in unity, you never need to use unity's modelling tools, that's my entire point
the modelling tools are poor, no UV tools, no texturing, no baking from high poly, none of the things that you'd use to make a half decent looking scene that isn't in an extreme low poly style
and even if you're going for a super low poly style you're probably going for flat shading, which means if you use proper tools you can have an entire game on a single miniscule texture lol
where's the actual benefit?
calm goblet
you clearly do
devout scroll
but you need to learn new tools within the same software
which is basically the same thing
calm goblet
no it isn't
why would you learn how to use an inferior tool?
if you have blender why would you learn polymodelling in something that lacks most of the functionality?
if a set of tools exists that covers a full workflow why would you ever go to a piece of software that doesn't even have 1/3 of the capabilities?
devout scroll
I think you're misunderstanding my point
I agree with you
I'm just specifically saying that their claim that doing everything in one software is better than learning other software isn't a good one
Because you still need to learn new tools so you might as well spend that time learning blender instead
calm goblet
if you're getting even slightly serious you shouldn't limit yourself to blender either lol
devout scroll
I could be using probuilder to make some level geometry but it would take me way longer than just doing it blender and exporting to unity because probuilder is clunky as heck
calm goblet
the UVing, texturing, baking, and retopo tools aren't the best
calm goblet
devout scroll
I could be using probuilder to make some level geometry but it would take me way...
and that's exactly my point, it's faster for me to sculpt in zbrush, retopo in topogun, unwrap in rizom, bake in marmoset, then paint in 3d coat than it would be to do all that in blender, even though blender has the tools to do it
it isn't just unity though, unreal has the same useless set of modelling tools lol
devout scroll
I'd prefer that blender was better at those things so I didn't in fact have to rely on other software but that's kinda the reality of generalist vs specialized software
calm goblet
if blender could get to 70% of the capabilities of those specialist programs it'd be viable for extremely lazy people
blender alone isn't a great option for a full workflow, it'll never be a great option for a full workflow
it'll stay as a decent polymodelling tool with some usable enough sculpting and texturing tools for some minor tweaks if needed
geonodes is looking like they might actually get it to a usable state for some procedural modelling compared to houdini, if they add in loops and script nodes, extrusions, and improve performance
 shrewd horizon
im not sure why the limbs textures are not appearing? the UV mapping shows that the textures are in place but they are only appearing black in every window .. the limbs are duplicated but 🤨
 devout scroll
what shading mode are you in
shrewd horizon
viewport
er. material preview, sorry
im not very good with the terms of blender 💔
devout scroll
that's fine, the reason i'm asking is because in some cases in the solid shading view it can show the selected texture not the one assigned to the material
if it doesn't show up in material preview tho, hmm
do you have multiple uv maps/
 shrewd horizon
only 1
devout scroll
hmm, alright, how many materials
shrewd horizon
one 😭
shrewd horizon
where do i find the meshes 😅
shrewd horizon
these?
 devout scroll
o damn you have many
devout scroll
join your meshes
shrewd horizon
joined it is still like that
 surreal flame
You said you have one material, but is it one material across all the meshes shared or does every mesh have its own?
shrewd horizon
one material across all the meshes
surreal flame
UVs are correct?
shrewd horizon
yup
surreal flame
Are the mesh's vertices actually assigned to the material?
shrewd horizon
ah so .. shows up in unity which is what im most concerned about, just have to fix the culling
sorry im kinda dense with all this 😭
surreal flame
So in Unity it's fine?
shrewd horizon
yea
seems like it was the culling fsr i did solidify and now its fixed what da hell 😭
 shrewd horizon
are you having an issue installing it or actually getting it into unity?
 brave cedar
getting it to work in unity
surreal flame
brave cedar
but it just dosen't work
That's a bit too vague.
brave cedar
 spiral sigil
i hate your mother
brave cedar
I have tried on different projects
shrewd horizon
brave cedar
I have tried on different projects
reinstall the SDK, what version of unity are you running?
brave cedar
2020.3.25f1
brave cedar
shrewd horizon
reinstall the SDK, what version of unity are you running?
2020.3.25f1
shrewd horizon
i think something just may have happened while downloading it because it does say it may be corrupted
brave cedar
i have also tried on 2018
shrewd horizon
yes but did you try with the same sdk you originally downloaded?
spiral sigil
you need 2019.4.31 my guy
brave cedar
yes
surreal flame
From VRC Docs: The current Unity version in use by VRChat is Unity 2019.4.31f1
spiral sigil
^^
brave cedar
spiral sigil
you need 2019.4.31 my guy
ok now im downloading 2019 and 2021
spiral sigil
any other version but the hyper speciifc one vrchat one will NOT work
even if you dont get any errors and upload your avatar on say 2021 your content wont show up ingame
any content uploaded in unity versions not currently supported will essentially be ignored or whatever vrchat does so that it doesnt show up ingame
brave cedar
ok
quaint jasper
I'd personally suggest Marmoset Toolbag for baking, so much better than substance
spiral sigil
brave cedar
VRM dosent wanna work
make sure to get the most recent dl off the git
and make sure that you are opening your unity project in the correct version, since you have multiple installed
getting somewhere with sclupting finally


still very flat
in general
 dire summit

 odd gyro
can someone help me get a sculpt out of zbrush? its textured aswell so i need help exporting it all and possibly retopology it in the software


 spiral sigil
yep
 spiral sigil
 calm goblet
odd gyro
can someone help me get a sculpt out of zbrush? its textured aswell so i need he...
calm goblet
odd gyro
can someone help me get a sculpt out of zbrush? its textured aswell so i need he...
you don't retopo in zbrush, you retopo in topogun, maya, 3d coat, blender etc.
well, you can retopo in zbrush, but zmodeller retopo is painful on anything that isn't pretty simple
 molten zephyr
man, i'm so thankful to vrchat for being the push i needed to learn 3d

 vivid crater
molten zephyr
man, i'm so thankful to vrchat for being the push i needed to learn 3d
vivid crater
molten zephyr
man, i'm so thankful to vrchat for being the push i needed to learn 3d
Love it
molten zephyr
thank you!
spiral sigil
sheeeesh its better than the reference
azure rain
wow that's very nice
brave cedar
hi um, can i get help
 serene epoch
mask ive been working on going to give it cool audio link stuff for music events

and not to bad on topo
 azure rain
nice


 spiral sigil

 tulip condor
i have a issue in blender 3 when i spawn a cube
it align not correctly to the grid floor
anyone knows what i need to do
spiral sigil
tulip condor
i have a issue in blender 3 when i spawn a cube
it align not correctly to the gr...
if you do alt+R that should clear roation but its weird that its spawning on you facing towards you
tulip condor
yeah and it's kinda annoying
especially when i want to make a house or something 😦
tulip condor
i did alt+r and it corrects object position
but when i delete the old and add the new one
it spawn on wrong position again 😦
spiral sigil
shift+C
tulip condor
reseting 3d cursor by holding shift+c only bring the 3d cursor on the center
but it will not fix the object spawning point position
 sleek steeple
so I'm trying to import an fbx avatar model from unity into blender and I first tried to use the CATS plugin but for some reason the imported model is all curled up and looks weird and if I try to click the Fix Model button it makes the model massive and all the bones was mirrored on to the other side of the model. if I manually import the fbx into blender the model looks correct in scaling and not all curled up but the bones are not orientated correctly
spiral sigil
 spiral sigil
spiral sigil
spiral sigil
its all coming together
quaint jasper
Side view ?
spiral sigil
 quaint jasper
Yeah, probably should use more references
lament pond

Year end summary of modeling (had some downtime due to computer issues so filled in those with multiple of the same month)
spiral sigil
that is perfect portfolio material
spiral sigil
michael rosen

 crude trail
spiral sigil
michael rosen
crude trail
spiral sigil
michael rosen
blessed 3d model
I would 3D print this and have it on the end of a cane
thin shadow
spiral sigil
michael rosen
*click* Noice


 tame nymph
@patent elk Is it okay if I DM you? I've been trying to get ahold of you
 fierce idol
So i could use some help with an issue ive been having to parent a clothing made for an avatar into blender, but i just dont find any way to actually parent the mesh into an armature even if it has the weights and it works, i just dont know how it is actually done on blender, i understand if this isnt the right channel (or server) to ask this
devout scroll
do you have two armatures
 devout scroll
you can use cats to join your armatures

 cinder cradle
Click jacket than armature and ctr+j
fierce idol
Didnt work
cinder cradle
you shift clicked on armature?
cinder cradle
hmm than you probably should try separate and parent it again
fierce idol
I will give it a go later, i am about to break rn...
cinder cradle
you just need to try different things
it probably was parented wrongly at first try
fierce idol
I've tried
Literally every thing, even parenting bones to the original, joining them to no avail, even deleting the second armature and slapping it in... I have no clue what's preventing this from working honestly
devout scroll
if your bones are named the same you can just delete the second armature and ctrl + P your mesh to the armature
select mesh first armature second
fierce idol
Maybe that's the issue
They added a "_J" to the end of them
devout scroll
then rename the bones to match
that will rename the vertex groups for those bones as well
which is what actually holds the weight data
fierce idol
I'll try it, this is actually about to break me
devout scroll
it's actually not that complicated to join if they match in armatures
fierce idol
I know, the problem is how hard to initially to figure out it is...
devout scroll
yeah
that's why i said use cats, but if that didn't work you'll have to do a bit more manual work
fierce idol
I appreciate the help
 rain fjord
hello, i'm having a shading problem in this area where i tried to remove an ngon, notice where it's a little bit darker?
 spiral sigil
Bruh I wanna make custom gorou avatar but cant find a gorou download
spiral sigil
rain fjord
hello, i'm having a shading problem in this area where i tried to remove an ngon...
recalc normals for shading probs
shift+N
devout scroll
spiral sigil
recalc normals for shading probs
not gonna help because that's an awkward quad
split it into two triangles
might look better
rain fjord
@spiral sigil didn't work, all it did was flip the normal, which messes up something else i'm trying to do
spiral sigil
oh
 cinder cradle
be sure you have most recent version of sdk and try reimporting
 naive vortex
cinder cradle
be sure you have most recent version of sdk and try reimporting
naive vortex
cinder cradle
be sure you have most recent version of sdk and try reimporting
yeah ive installed the sdk from the website vrc website again
and its still not working
cinder cradle
when you open fresh project and import only sdk it works or not? test it
maybe it's something within project
naive vortex
ill try that
 cinder cradle
yes this seems fine
naive vortex
alright and where would i go to export stuff?
cinder cradle
if you have file with avatar just drag it into assets
naive vortex
yeah
cinder cradle
and check if sdk still works
naive vortex
yeah its loading in now
the avatar
then i can check the sdk
i imported a prefab
and its says its missing a vrc script
 cinder cradle
hmm dk what this script could be maybe it's dynamic bones
naive vortex
 cinder cradle
or maybe it's outdated sdk inside prefab
naive vortex
it says i need aVRCavatardescriptor
naive vortex
how do i do that?
naive vortex
did that
cinder cradle
it is probably not calibrated well so you need to watch on youtube how to set avatar descriptor
naive vortex
alright
cinder cradle
it's pretty straight forward
rain fjord
@spiral sigil still know what to do?
surreal flame
Have you tried converting the ngon to triangles?
spiral sigil
triangulate!!!
yknow something i dont get
why is a blender cube 2x2x2 but unity is 1x1x1
frickin annoying
rain fjord
triangulate just the face where it's darker right?
spiral sigil
yee
its probably tweaking out on where the trianges go
u may have to manually make the face in triangles or quads and triangles
surreal flame
Show the result.
rain fjord
@surreal flame the geometry or just how it looks?
surreal flame
What it looks like when triangulated. You say it didn't work but it must've changed at least.
 surreal flame
Show it in edit mode, rather.
rain fjord
 cinder cradle
you should try moving verticies
surreal flame
If the normals are correct I believe the middle vertex is just slightly offset from the plane it is part of, creating a slight shade to the surface.
rain fjord
middle?, you mean the one between the bevel segments or the one it's connected to?
 rain fjord
how should i move it?
surreal flame
If the plane is parallel to a global axis then just snap the vertex to another on the plane while limiting movement to that axis.
If there is no axis to use, well, perhaps someone has a neat trick to it but I'd just slide it along the edge it is on.
rain fjord
didn't work, should i send blend file?
surreal flame
I suppose you could.
rain fjord
the problem area is between the lower piece and the bars, in the front corner
surreal flame
Ah yes, I see it. The faces in the top left and bottom right corners are ngons too. Triangulating them gets rid of the shade.
rain fjord
on the other side of the bevel where the problem area is?
surreal flame
It's on both sides.
rain fjord
screenshot?
surreal flame

Personally I would disconnect the geometry and keep two separate meshes with clean topology rather than one which is kind of a mess due to complexity.
rain fjord
triangulating only moved the shade to a different close area
surreal flame
Then you have other geometry issues elsewhere. Clean your geometry, get rid of ngons and you should have clean shading.
naive vortex
cinder cradle
it's pretty straight forward
sorry for disturbing you but it worked for a while and then it just stopped
cinder cradle
sdk again broke?
spiral sigil
if your talking about unity sdk then ud have better luck in like avatar or world support channels
languid fog
fierce idol
Change the bones names to be the same, use cats to merge the both armatures.
You can also do it manually, select the two bones you want to merge and select the second option in Cats "active" this will merge the bones you have select no matter the name.
 somber urchin
does anybody know an easy alternative to blender for making 3d models or avatars? i see one floating around a lot that people use for vrchat but i can't ever seem to find the name of it (pls @ me)
azure rain
somber urchin
does anybody know an easy alternative to blender for making 3d models or avatars...
https://store.steampowered.com/app/1486350/VRoid_Studio_v120/ this is a pretty easy-to-use tool but it's for making anime avatars not really a general-purpose modeling tool

VRoid Studio is a 3D character maker that lets you use your imagination to easily create your own original characters. By making your 2D characters able to move in a 3D space and usable in anime and game production, your creative range will greatly expand. The VRoid Project has started with the hope that many creators will have fun exploring the...
but yeah you're probably going to have to learn blender if you wanted to make a fox
somber urchin
hmm i think i've used that, not really what i'm looking for
somber urchin
azure rain
but yeah you're probably going to have to learn blender if you wanted to make ...
yeah i am learning blender, just curious about other software i've seen used around
cinder cradle
tbh there are no easy free alts of blender
cinder cradle
zbrush is easy when you learn basics but money
azure rain
like honestly the fact that blender exist at all is kind of surprising
azure rain
cinder cradle
zbrush is easy when you learn basics but money
and you still required blender to do the rest of the pipeline for making a avatar
azure rain
which is why commissions for from scratch avatars go for like hundreds or thousands of dollars
somber urchin
azure rain
which is why commissions for from scratch avatars go for like hundreds or thousa...
well yeah it takes quite a bit of knowledge to know how to do that stuff
azure rain
yup a slightly more easier to learn option would be to modify a premade base to match your character
cinder cradle
tbh don't ever have mindset of i can make avatar in 2 day ez it is really wrong to think that
azure rain
a VRoid could be a two-day project but that probably takes some time to learn the tools to make nice results
cinder cradle
it can take weeks minimum if it's from scratch and u want it perfect
somber urchin
azure rain
yup a slightly more easier to learn option would be to modify a premade base to...
i'm trying to do that i just got stuck and i gave up cause youtube tutorials are bad
azure rain
what aspect of it are you currently stuck on
somber urchin
rigging i guess
cinder cradle
what type of avatar is better question to ask you want
somber urchin
like setting up a skeleton and weight painting all that
cinder cradle
rigging isn't harderst to do
somber urchin
yeah just, like i said youtube is ass, and i'm bad at teaching myself
somber urchin
like yeah a youtube tutorial can walk you through most of it but what if i run into an issue
cinder cradle
saves ton of time
somber urchin
cinder cradle
there is addon rigify
i think i tried that
broke everything
i may be thinking of the wrong model tho
still even so
i have no clue how to weight paint
cinder cradle
there is full skeleton in rigify which you can easly fix if auto weightpaint is bad
somber urchin
yyeaaah
cinder cradle
and it is in standard of vrchat humanoid rig
somber urchin
mhm
cinder cradle
i think there are good tutorials to weight paint
but you say you have model but it isn't rigged?
somber urchin
not at the moment, if i remember to later i can
 north swift
Is the auto rig pro a splendid thing to get instead of rigify?
spiral sigil
is it wrong to prefer a all polymoddeling workflow or all sclupt and retopo workflow for making avatars or its mainly a preference thing
cinder cradle
if you use zbrush than doing retopo in blender or maya is good if you hate zbrush polymoddeling is for you
that is standard
spiral sigil
ok so preference
cinder cradle
it's my humble opinion
spiral sigil
got bored and sculpted another "monster"


didnt realise polymoddeling in maya was a mainstream thing i am curious now
spiral sigil
spiral sigil
got bored and sculpted another "monster"
you should think of a concept for a horrific monster and sculpt the entire body and rig it into vrchat, mayb even think of the idea as your sculpt goes on
cinder cradle
new lolathon avatar kek?
spiral sigil
a finished product would be cool to see from your cursed sculpts
spiral sigil
cinder cradle
new lolathon avatar kek?
cursed 
hmm i wonder if i could be the 3D trevor henderson one day
cinder cradle
Oh so that is your goal
you are close
3.0 has good optimization updates so you should give it a try
spiral sigil
some addons/plugins havent been updated to 3.0 so that may be a problem in your scenario
oh well you dont need them, usually they just make doing something you can already do easier
spiral sigil
cant wait to texture this thing


 spiral sigil
cant wait to texture this thing
spiral sigil
spiral sigil
cant wait to texture this thing
make sure to remesh that since some of those faces are stretched bigtime
also makes it easier to texture when you dont have some faces having like x10 the space of some others
mmmm
 spiral sigil
i remember trying to remesh once and i crashed my whole pc
spiral sigil
i did make the voxel size 100 or something so ._.
cinder cradle
yup that is insta crash
cinder cradle
learning it is pain but when you know all shortcuts it's so smooth
spiral sigil
its for sculpting after all
spiral sigil
when the imposter is sus
 cinder cradle
add teeth lol
spiral sigil
cinder cradle
add teeth lol

remember use references
im sure there is a reddit rabbithole or somethin with cursed imagery
more inspiration
 spiral sigil
remember use references
spiral sigil
spiral sigil
remember use references
i dont really like using refrences. i like just making it how i like to
i wont question ya then da Vinci
ima try to make a fullbody model from scratch. cause im bored wish me luck
spiral sigil
spiral sigil
ima try to make a fullbody model from scratch. cause im bored wish me luck
ayy thats the spirit
dont let yourself bin the project, make yourself finish it
even if it comes out not as youd like
took 15 minutes pretty flat but i think i did good


 drifting river
I made some clothing and its just ignoreing world lighting in game, why is this happening? how can i solve it lol
azure rain
what kind of shaders are you using for the clothing as shaders determine how it reacts to lighting
drifting river
Poiyomi, but it has the same settings as everything else on me, even duplicated a different material that I knew was fine and put it on this and its still not lighting properly
its like its not interacting with light probes properly
azure rain
try putting the standard Shader on the clothing so that we can eliminate whether or not it's the Shaded causing problems ?
drifting river
still does it with standard
azure rain
could you share a screenshot of what it does
drifting river
Body is Poi, Leggings are Standard, Underwear is Standard

I intentionally went to a world with terrible baked lighting
so its more obvious
they all have the same anchor overides
in bright worlds they are to dark, in dark worlds they are to bright
they just stay that bright at all times
azure rain
not too familiar myself with anchor overides?
drifting river
It just tells something where its centre should be considered for light probes
so you dont have different items reading different light probes
azure rain
yeah I could see why that would be helpful
drifting river
im assuming there is some caviat with making clothing from scratch in blender that im not aware of to make it not do this
azure rain
it seems to be showing specular highlights so it's not like completely ignoring lighting looks more like you accidentally did something to make the material black
drifting river
the underwear is the issue xD
this worlds baked lighting is really dark for no reason
which is why i chose it, so you can see the underwear is ignoring it
azure rain
question does the underwear having a emissive texture
azure rain
and I'm not aware of any checkboxes you could accidentally click in blender that would make the model not reactive lighting as that's all part of the material properties
maybe try making a brand new material and putting it on the underwear?
drifting river
even with a new standard shader it does it
it doesnt even react to changing lighting in unity
azure rain
did it react to Lighting in blender
drifting river
infact its reacting exactly the opposite of how it should to real time lighting
if i shine a point light at it, it makes it darker
azure rain
that is really weird
drifting river
ah thats not quite right, it just looked like that, its not making it darker, its making the parts thats not supposed to be lit brighter
azure rain
have you checked the normals of the model to make sure they're not messed up?
drifting river
well standard doesnt have backface rendering so they are atleast poiting the right way
azure rain
okay just grasping at straws to find things that might be different
 azure rain
I'm kind of out of suggestions to suggest sorry I couldn't be more of help
drifting river
they are lighting properly in blender
spiral sigil
heres another sculpt that looks like green golbin

 quaint jasper
I don't think we've seen the same green goblin movie
spiral sigil
quaint jasper
I don't think we've seen the same green goblin movie
the shape of the head and eyes just reminded me

 drifting river
azure rain
I'm kind of out of suggestions to suggest sorry I couldn't be more of help
drifting river
azure rain
I'm kind of out of suggestions to suggest sorry I couldn't be more of help
Found the issue, it had a tiny ammount of negative scaling in blender, which was messing up the normals
spiral sigil
here it is so far had to completely redraw the top half of the hair in blender long story but it looks good to me 🙂

 unborn acorn
 spiral sigil
you have a competition critical
rain fjord
should i get rid of ngons created where the end of a bevel connects to a flat surface?
spiral sigil
mmm
modelled some creepy ass head in like 17 minutes? 20

may of beat them in time but not quality
sems like you should use clay strips more heh
also your head has no definition like its still a stretched sphere blob
not that it has to though
welp everything i make is original and on the spot so its not perfect
i plan nothing
of course I dont expect you to know everything
I just expect you to note what you missed and try experimenting with it in a future creation
still think you should try to use references too so you can learn new facial expressions and expand your cursed library
your work is p much equally original as long as you arent trying to copy the refs
you shouldnt be forcing yourself to make 100% original works anyway thats just disabling your learning
spiral sigil
spiral sigil
you shouldnt be forcing yourself to make 100% original works anyway thats just d...
what do i do then?
im not certain of what you SHOULD do since im no pro at all
just its defintely not good how your approaching learning atm
go make a gorilla head bro
i tried
get some monke images off of google
TRY AGAINN
bonzi buddy
mk
ill try
got to keep tryin
there is one video thay i found recently that ended up sculpting gorilla
i will find and forward to you
so u have better idea of the gorrila

Wild Life Alliance: https://www.wildlifealliance.org
Gumroad: https://gumroad.com/northgoingzak
Art Station: https://zaknelson.artstation.com/
Email: zaknelson64@gmail.com
This video is an exercise in observation while sculpting in Blender 2.91. I hope...
your first attempts will not look like his product and its fine
your not a houdini not yet
yet.
yess YET
always YET
Until u make it
tried to follow a reference and it looks like a goddamn pig


but this is it so far
idk what itll be like when im done
hey at least it resembles an animal pretty well
thats a good start
most people make a clusterfuck of a creature
quaint jasper
Might wanna look up some tutorials on how to use references/sculpting in blender, I don't think you'll go very far by just doing 15 minute things with no goal
spiral sigil
i have trouble learning from people. thats why i dont really watch tutorials
then youll have to set your own goals then heh
quaint jasper
Kinda have to if you want to make progress
spiral sigil
there is always the slow and painful way
 echo bear
Any recommendations on YT channels to watch for begginers
regarding 3D modeling
within VR. not just desktop
spiral sigil
idk of vr moddeling stuff but ik there is a thing for vr weightpainting
spiral sigil
echo bear
regarding 3D modeling
you have something specific in mind or just want to get familar with a software that most people start off with here (Blender)?
tried to redo it

ooo better the eye sockets and nose mouth
top of head noice
echo bear
spiral sigil
you have something specific in mind or just want to get familar with a software ...
i want to take some of my paintings and make them a VR experience
echo bear
spiral sigil
tried to redo it
why is he sad? 😦


