#3d-modeling
1 messages · Page 121 of 1
 calm goblet
 thin shadow
As long as it works
 median pike
well why arent you using it?
 solemn ruin
median pike
well why arent you using it?
solemn ruin
median pike
well why arent you using it?
I use this ONLY for modeling the character, then I go to blender to add up maps, then procreate to color it, and lastly everything else is blender and unity
My models are normal, it’s just a different way, I made a avatar before and know what I’m doing
median pike
yeah but
why mention blender if you dont use blender for sculpting?
I am just confused
solemn ruin
Ah sorry, I was being sarcastic because I would like to use it one day to model
median pike
so why dont you use it?
solemn ruin
I would, but I don’t have the time for it right now
I struggled enough with buying the programs on my iPad, so why not put it to good use?
median pike
because you said you wanna use blender? I mean, the only way to learn it is to use it
solemn ruin
Sorry if I’m being unclear, I’m not sure if you’re understanding me
median pike
¯_(ツ)_/¯
thin shadow
solemn ruin
I struggled enough with buying the programs on my iPad, so why not put it to goo...
Blender is free though
solemn ruin
thin shadow
Blender is free though
i know, read this "I use this ONLY for modeling the character, then I go to blender to add up maps, then procreate to color it, and lastly everything else is blender and unity"
 spiral sigil
They were jus makin a funni
solemn ruin
thank you
 long hatch
@quaint jasper so i got it but for some strange reason its not work idk if maybe i got the wrong one or what. i got the fbx coverter 2013.3 cause its whe first one that popped up. for some reason tho when i click and drag the file into the coverter nothing happens
 quaint jasper
You tried manually importing instead of dragging the file ?
long hatch
it doesnt pop up in there for some reason
quaint jasper
long hatch
it doesnt pop up in there for some reason
I can do it for you if you still haven't managed to do it
long hatch
yeah could i pm u?
 cyan plover
i feel you lmao
spiral sigil
hey i feel like i've been running around in circle on trying to fix this, i've been a bit nervous about using blend shapes because this happens any time the character bends over and alot of the videos that talk about using blendshapes say you need to go to the keyframe where the clipping is happening or turn it one when the key frame needs to be used

(also i'm not the best at weight painting i did it was a complete failure)
quaint jasper
Not worth using blendshapes for that, either weight paint more gradually, or delete the under mesh
spiral sigil
quaint jasper
Not worth using blendshapes for that, either weight paint more gradually, or del...
Thanks I’ll try it out next time I’m at my computer
cyan plover
where do you find the converter?
solemn ruin
so, im gonna remake my stickmen model now, and damn this is looking nicer in blender!

plus now i can add expressions

 foggy granite
Mainly look at the eyes
 solemn ruin
ah
solemn ruin
any tips for making bodies not look blocky
other than subdivision

 dusty heron
solemn ruin
any tips for making bodies not look blocky
other than subdivision
dusty heron
solemn ruin
any tips for making bodies not look blocky
other than subdivision
Right click > Shade Smooth
solemn ruin
no, i meant the body shape, sorry i wasnt clear
dusty heron
Oh, sorry, no then.
 icy jungle
its more about topology also, make the loops around the body. as is now i can tell this is from a cube

3dtotal
One of a wide range of 3D and CG art tutorials on this and other creative tools on 3dtotal.com.
i know its a maya guide, but the idea is still the same in terms of block out and topology loops
 signal summit
Does anyone know how to make a layer painting effect in blender?
solemn ruin
icy jungle
i know its a maya guide, but the idea is still the same in terms of block out an...
thank you!
icy jungle
👍
solemn ruin
yeah my topology sucks but ill get better along the way
 quaint jasper
looks pretty good tbh
 supple lake
working on the eyes finally...
 solemn ruin
stayed up the whole night because im not going to take a break on this vr model
solemn ruin
supple lake
working on the eyes finally...
it looks nice! i love the style you have
solemn ruin
scary

 thorny ivy
solemn ruin
scary
thorny ivy
solemn ruin
scary
Do ya plan to use shaders that emulate the classic white outline some of the old stick figures have?
 radiant harness
oh wow my goodness
is this where a place where i can ask for help for my avatar model, for vr chat
 languid fog
radiant harness
is this where a place where i can ask for help for my avatar model, for vr chat
languid fog
radiant harness
is this where a place where i can ask for help for my avatar model, for vr chat
Yes
radiant harness
ahhh yessssss ive come to the right place
well mainly if i find that im stuck on a certain step ill post it in here for anyones opinion and advice on this plan
 full ice
Unless your having issues with the 3d modeling part, you should take your help questions to #avatar-help for SDK3
radiant harness
full ice
Unless your having issues with the 3d modeling part, you should take your help q...
gotcha buddy , thank you
solemn ruin
thorny ivy
Do ya plan to use shaders that emulate the classic white outline some of the old...
oh like shuriken the animator?
 merry cedar
Oh god.. ive now officially spent three times more time on making my character rather than actually playing the game
spiral sigil
only 3? heh
thorny ivy
solemn ruin
oh like shuriken the animator?
Correct. It'd also help the avatar stand out against darker environments and have a clear outline against most surroundings as well.
 rare falcon
hello, i have a question regarding testing a world i made? im practicing in blender and i get a popup for microsoft store to look for an app to open it with... i have vr chat downloaded but it doesn't seem to be recognized for some reason.
 drowsy cloud
Hey guys, I’m currently in planning to start building my own avatars and as much as I will use YouTube, you cannot ask questions to YouTube, so I was wondering if someone with decent knowledge of the avatar business could dm me so I could plan a little time to ask questions and build a quick avatar with them just to help me start off! Thanks a lot guys and I hope not to be asking too much
 sweet jacinth
Hello. I wanted to ask if someone can tell me why this happens or what it means. For some reason i can't join meshes anymore because of that. I am kinda new in blender and don't even know how i would need to look this up. Thank you!

 surreal flame
sweet jacinth
Hello. I wanted to ask if someone can tell me why this happens or what it means....
surreal flame
sweet jacinth
Hello. I wanted to ask if someone can tell me why this happens or what it means....
What exactly is the problem?
sweet jacinth
surreal flame
What exactly is the problem?
Well The mesh is shown outside and inside the armature. Like on the picture. This causes me not being able to join these meshes with the ones inside the armature.
surreal flame
sweet jacinth
Well The mesh is shown outside and inside the armature. Like on the picture. Thi...
I think you can't join them because one of the meshes is hidden.
sweet jacinth
surreal flame
I think you can't join them because one of the meshes is hidden.
Well that the issue here.... Kinda. I was always able to easily attach a mesh to a new armature but then this started happening. It's hard to describe. It just stays outside the armature now but still kinda shows in hidden inside of it.
supple lake
Thanks guys! As some of u may know from reading my many previous whinings regards to really slooow cellular broadband, I'm happy to report these have become at least somewhat trivialized (as long as I am able to schedule downloads in advance of my available freetime). In the process of getting there also updated Python and PIP as well as Homebrew (the missing package manager for Mac). These in addition to Xcode tools for Command Line (installed with Visual Basic for mac) I downloaded and installed last week. Handy things to have ready (for Unity) when the time comes...
For the moment with Blender I'm now able follow the tutorial (downloaded for offline work) without any lag or interuption.
I'm celebrating with Starbucks Christmas Coffee! 🎄 ☕
https://twitter.com/CreditAnalytica/status/1460006773985796102?s=20

My #Tutorial stream was insanely slow due to poor mobile connectivity so... yt-dlp and IINA from #Github for offline work, Solved! Multitasking now, an eye study for adding #Blender image reference while installing #Homebrew from terminal. #CharacterDesign #GameDev #3DCGデザイナ

 Twitter
·
surreal flame
sweet jacinth
Well that the issue here.... Kinda. I was always able to easily attach a mesh to...
Twitter
·
surreal flame
sweet jacinth
Well that the issue here.... Kinda. I was always able to easily attach a mesh to...
Have you tried renaming the meshes so they aren't duplicates?
foggy granite
sweet jacinth
Hello. I wanted to ask if someone can tell me why this happens or what it means....
That because the mesh is parented to the armature you can clear the parent with ctr+p, I'm pretty sure if not it's shift+p or just p
sweet jacinth
Thanks for the help! Tho this wasn't the issue apparently? I realized the new mesh was just outside the collection. I didn't notice until a few minutes ago. Just dragging it it solved it.
languid fog
First time doing a chibi model, i just hate the face part ;-;
 quaint jasper
clean !
foggy granite
languid fog
First time doing a chibi model, i just hate the face part ;-;
i love that the face looks mildly disturb by something who know what it could be probably a cringe moment of its past
languid fog
deep...


 quaint jasper
Is the model symmetrical ?
 pine raft
Nop
For clothin, not worth it
The proportions of said cloth are.
I spent 4 hours working making sure it looked nice.
quaint jasper
alright, asked since it looked like the folds and bumps seemed to be on the same spot on each side, but it looks nice nonetheless !
 maiden charm
Anyone got a good tip for this beginner about how to remove parts of a model in blender? I got two models and only need the hat from them, but everything's connected.
Also, how best to add bones to one of the hats once I get it separated?
 obsidian jungle
Easiest way to put blendshapes on very low poly avatars?
Talking wise, its looking terrible lol because
quaint jasper
maiden charm
Anyone got a good tip for this beginner about how to remove parts of a model in ...
Put your cursor on a hat vertex in edit mode and press L
or select a vertex and ctrl + L
quaint jasper
obsidian jungle
Easiest way to put blendshapes on very low poly avatars?
2D blendshapes usually
obsidian jungle
hmm
maiden charm
Alrighty. Any good ways to add bones to it? I've never added bones to anything before.
quaint jasper
There's lots of very simple tutorials on how to rig something in blender
it's like three steps
maiden charm
Ok, thank you.
 timid heath
Anyone wanna show a plebian how to get a skeleton to move the model in a normal looking way?
quaint jasper
Plenty of very good tutorials on youtube for the first steps
feel free to ask in #avatar-rigging for help on specific steps though
spiral sigil
I need help with something, I use bases, modeling its out of my league yet, but for some reason in blender this asset dont show even with the show Icon enabled, in unity it does, but on blender dont, any idea on how to force show? cus I cant even edit nor sculp the asset

 visual vigil


 past vale
Pregnant? 😳
thin shadow
completely normal phenomenon
spiral sigil
I dont think I understand what im looking at
visual vigil
past vale
Pregnant? 😳
No
visual vigil
spiral sigil
I dont think I understand what im looking at
I made a stylized mech that's catfish themed 
spiral sigil
is the chest the face??
median pike
having fun with expressions
 visual vigil
spiral sigil
is the chest the face??
visual vigil
spiral sigil
is the chest the face??
The face of the "catfish". The hatch area with the tiny arms is the pilot controls. The "head" is an AI control package
spiral sigil
breuh
 devout scroll
does look kinda pregnant ngl
spiral sigil
thats where all the turret shells are stored
obsidian jungle
quaint jasper
2D blendshapes usually
Wait how btw? Like with images?
I also have eyes but not only they are low poly
They are attached together
quaint jasper
faces that go in and out of the head for shapekeys
quaint jasper
there are tutorials on youtube for that, vrchat specific ones
obsidian jungle
i'm guessing you have different keywords because i can't find any videos that are "on topic"
quaint jasper

EDIT: If you are using an MMD model please read below!
In this video I will show you how to make your 2D eyes/mouth type avatar have a blinking animation and mouth movements for VRChat!
The process is different for MMD models. You will not be exporting the model as an .fbx file. This can lead ...
merry cedar
Is this already too many for vrchat?? Im only at the base model
 spiral sigil
merry cedar
Is this already too many for vrchat?? Im only at the base model
spiral sigil
merry cedar
Is this already too many for vrchat?? Im only at the base model
Hard to gauge how well you did for the detail you have on your model, but it generally is pretty/really good to have 28k tris with just the entire base model done
As long as you keep it under 70k Tris for PC you are doing GREAT
quaint jasper
merry cedar
Is this already too many for vrchat?? Im only at the base model
For quest yes, but for PC no, very poor limit is 70k
 merry cedar
well i guess they wont see me then xd
spiral sigil
15k is medium which is at the top of the default autoshow setting for quest (Excellent to Medium). Most Quest users set it up to Poor (sub 20k Tris), which is the highest wich they can go (Excellent to Poor). If its over 20k, which is very poor, then they have to show it manually either way
surreal flame
I find there are lots of Quest users so taking the effort to make a slimmed down version for them is worth it I think.
merry cedar
well i hope im not gonna go over 70k... this is my first model after all. i dont want to spend weeks making this and then find out it has too many polys
spiral sigil
You can just make a decimated version in post for Quest
surreal flame
I'd suggest making use of normal mapping.
spiral sigil
Remember, the avatars you upload to the PC pipeline for a given avatar can be completely DIFFERENT than the avatar on the Quest pipeline
meannning you can just upload a decimated, generally more optimized version of it to Quest/Android, and upload the normal one on PC
but if you can optimize anything without losing quality then do that whenever you can
spiral sigil
np
 azure rain
and for reference dissolving Edge Loops tend to make much more clean results than using the decimate modifier as making the lower poly version for the quest
 oak hatch
Y'all, I'm adding bone constraints for my avatars abs and it's hilarious how much of a difference it makes.
thin shadow
It looks like it’s already being made
spiral sigil
I'm working on a quest optimised Carlos from re3 I've rigged it and then when combining materials it went like this

Anyone know a fix?
thin shadow
spiral sigil
I'm working on a quest optimised Carlos from re3 I've rigged it and then when co...
could be missing texture because of undefined path, or UVMap name conflict
spiral sigil
merry cedar
Is this already too many for vrchat?? Im only at the base model
No but it is definitely good practice to always reduce edge loops wherever you don't need it to hold the shape. It feels good keeping it down
quaint jasper
spiral sigil
I'm working on a quest optimised Carlos from re3 I've rigged it and then when co...
Make sure the alpha on material settings isn't maxed, sometimes happen
spiral sigil
I believe the texture file was something like .dds
surreal flame
Looks like the hair was done using transparent cards and merging the materials made everything else transparent too. The other materials didn't have transparency or even alpha perhaps.
spiral sigil
it looks like someone used CATS and has no idea how it works so they r confusion
surreal flame
To be honest I find CATS a bit too unreliable for any serious work. But maybe I'm just an idiot.
spiral sigil
same
manual is the way to go
it causes issues on p much every model i worked with
when it worked it left so much empty space on the atlas
surreal flame
Yes I had the same exact experience recently.
CATS also makes the armature transparent in object mode and I have no clue how to revert it.
thin shadow
it depends, cats can be useful if everything is according to plan. But if not, then manual intervention is needed.
surreal flame
I believe I've never actually found a use case for it so far. Either the result was not as expected or it just threw an error and messed things up.
Except for the "Apply as rest pose" button. That's practical. But I'm too lazy to look up how it's done outside of CATS so eh.
thin shadow
spiral sigil
I believe the texture file was something like .dds
convert those texture to png
spiral sigil
Its for beginners mainly ig
but then they have to work with problems they wouldnt have if they learned to manually atlas
oak hatch
CATS is such a absolute jackhammer of a tool sometimes.
Useful, but don't try to make crown molding with it.
spiral sigil
I use it when I feel like it, it makes pose mode simpler sometimes
But I started using the pie menu too recently so yeah tab for pie menu is better than tab for edit
merry cedar
Do hanging ropes work in vrchat? Like when an object hangs on a rope
oak hatch
@merry cedar depends on a lot of factors and what you're willing to do.
spiral sigil
thin shadow
convert those texture to png
Done that but I got the same result
surreal flame
spiral sigil
Done that but I got the same result
Try looking into your material settings -> Blend Mode and Alpha parameter of the Principled shader. Assuming Cycles.
spiral sigil
merry cedar
Do hanging ropes work in vrchat? Like when an object hangs on a rope
Short answer, no, long answer, yes?
spiral sigil
You can easily dynamic bones on a mesh or other animating methods to make your hoodie strings dynamic yes and soonTM vrchat itself will have its own physbones solution
merry cedar
ah ok thanks
spiral sigil
The key word to google here would be "Dynamic Bones" to purchase the unity asset, it is white listed in VRChat.
spiral sigil
spiral sigil
I use it when I feel like it, it makes pose mode simpler sometimes
I end up using that feature alot
merry cedar
spiral sigil
The key word to google here would be "Dynamic Bones" to purchase the unity asset...
Cant i just use the dymanic bone system in blender? Or does the unity one work better
spiral sigil
It's a different system
foggy granite
merry cedar
Cant i just use the dymanic bone system in blender? Or does the unity one work b...
You can’t import blender physics into unity
Same as the other way around
spiral sigil
Im sure somebody invented a way to port blender physics you can import blender animations
The vr game I used to work on used blender for the animations and unity was the game engine.
 thorny ivy
Physics are part of the engine the model is in
 ashen stag
When you export an fbx from blender you can include animations. You could do something with physics in blender, record it into an animation, export the fbx with the animation, apply the animation to an identical fbx in unity
This obviously is only for hardcoded animations, cant do it for something that has to be reactive or procedural
thorny ivy
Fbx can store alembic?
quaint jasper
alembic stores alembic
ashen stag
Alembic is its own thing isnt it? Fbx just stores animations
spiral sigil
I have no clue what an alembic is
visual vigil
What would be better for a chain rope performance wise. Unity rigid body or dynamic bones? Dynamic bones you can have everything as one mesh while IIRC for unity rigidbody, each chain link needs to be its own seperate object
 unkempt torrent
I'm not sure, but do you really need each link in the chain to have its own physics? Both are bad, generally speaking
 naive bolt
help i've textured the whole thing but it's not showing up when i do shading
does anyone have a solution or a video i can watch?

oh i figured it out
 rose wedge
 devout scroll
neat
unkempt torrent
How can I move vertices symmetrically around an axis at the same time?
surreal flame
Could you elaborate a bit?
spiral sigil
unkempt torrent
How can I move vertices symmetrically around an axis at the same time?
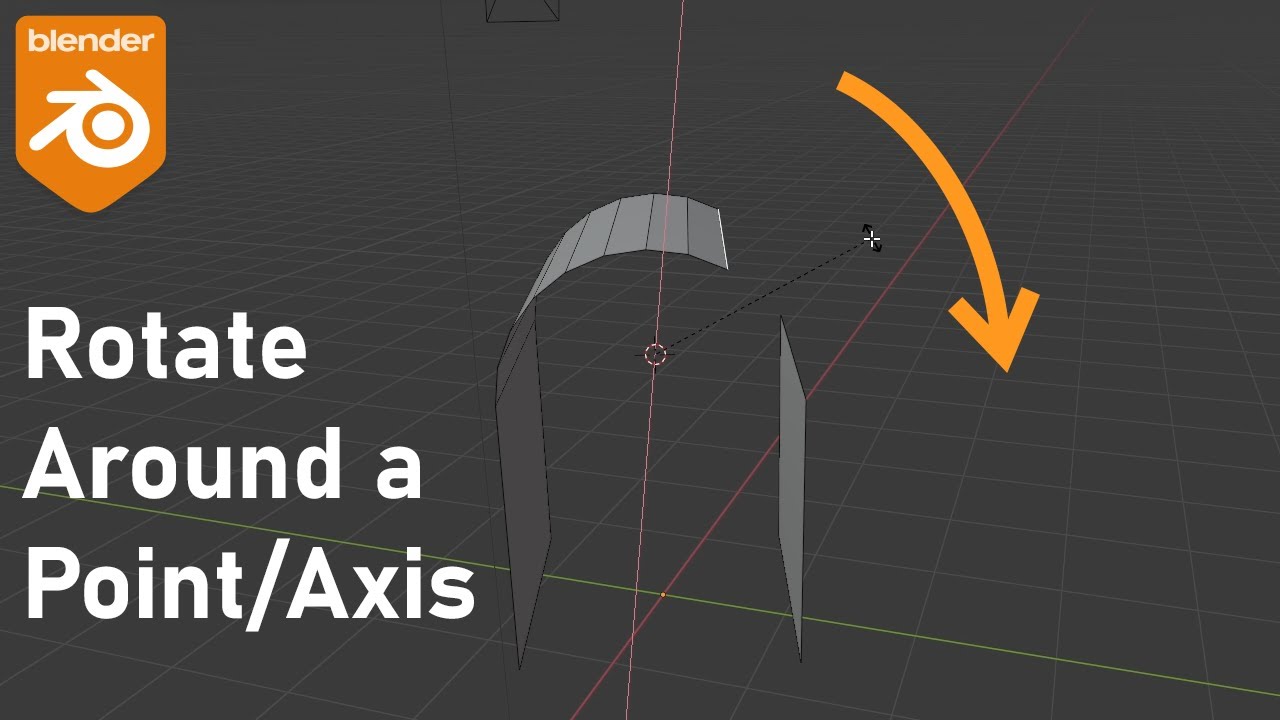
Learn how to use the 3D cursor as a pivot point for rotation in Blender. Do more advanced rotations, around the cursor, an object, axis, edge, face, or vertex. This is useful if you're working at a strange angle or if you're later in a project and need to rotate relative to objects that have already been built.
Join us over on the Immersive Lim...
Alternatively https://youtu.be/IVHoVRy-f9Y

Hey guys, in today's tutorial I'm going to be showing you how to quickly and easily create a symmetrical object around a point/circle using the array modifier.
Unreal Engine 4 Tutorials Playlist: https://www.youtube.com/playlist?list=PLQN3U_-lMANOnnjfvEEVeAPE8mfrGr_VH
Blender Tutorials Playlist: https://www.youtube.com/playlist?list=PLQN3U_-lM...
Depending on what you actually mean
calm goblet
naive bolt
help i've textured the whole thing but it's not showing up when i do shading
do...
plug it into a principled bsdf
not straight into the output
naive bolt
Oh nvm
I just had diff objects i had to apply to
It worked with and without the principled bsdf
So much to learn 😅
Only issue i have is with clothes rn. I have to learn how to make it move with the character bones
supple lake
I’m really interested in some kind of Mocap to use with Unity and/or Blender but they’re so expensive, Perception Neuron etc.,
I wonder if there’s any open source software that could be used with an array of inexpensive accelerometer sensors?
Another question related is there any type of software, mobile app or add-on that can capture motion from video?
quaint jasper
If you have full body tracking, you can mocap in vrchat
supple lake
iPi Soft with Xbox depth sensors or GoPro RGB cameras is what I find but it’s not working on MacOS
What about copying motion from a video recording or live stream, seems that should be all software no external sensors needed.
I think iPi has a record software for saving live mocap that can then be used to animate characters but I’m wondering if it’s possible to interpret the motion from recorded video like a music video or movie scene? It has to exist I just don’t know what it is?
languid fog
supple lake
What about copying motion from a video recording or live stream, seems that shou...
you can try apriltags or mediapipepose
supple lake
languid fog
you can try apriltags or mediapipepose
Thank u 🙏 I’ll look into those!
I see Rigimap is an add-on to apply Mocap data to Rigify in Blender, I suppose it could be paired with the outputs from Mediapipe…
 tulip condor
i found an solution 🙂
 bold urchin
Beyond laggy Blender project that you've spent a lot of time putting together?
Your blender getting stuck switching between Wire Mesh vs Textured view?
Well, Blender might not be using your GPU to help with rendering your viewport shading.
Why don't you mosey on over to the System settings and change your Window draw method off of Automatic.
See if that helps :)


 tight quartz
These are only visible behind this view as you can see on the 2nd picture. How can I fix this? I know that I can flip the normals or what it is. But wont that just make so from under its invisible?

 devout scroll
tight quartz
These are only visible behind this view as you can see on the 2nd picture. How c...
devout scroll
tight quartz
These are only visible behind this view as you can see on the 2nd picture. How c...
that just means they're one sided. You'll have to geometry on the other side. Go into edit mode, select everything you want press F3 and search for solidify, then mess with the values to make it thin

 lapis smelt
I got a question
Should I download blender
It's gonna be my first moments 3d modeling
languid fog
lapis smelt
It's gonna be my first moments 3d modeling
you want to learn 3D? that's your main question m8
 obsidian nova
Then download blender and check out the donut tutorial series on YouTube by the Blender Guru. It’s the best beginner guide.
lapis smelt
Ok then
foggy granite
lapis smelt
Ok then

YouTube
Get up to speed with Blender 2.8 in this updated official video series!
 granite hornet
Anyone here have solidworks that could help me convert a file to stl?
languid fog

 scenic cipher
Hi everyone! I have a bit of a question in concern of animating my avatar. I want to have a belt that has text that goes around it, can anyone assist me with this or link me to a tutorial?
spiral sigil
Is anyone good with unity??
 fresh isle
languid fog
scenic cipher
Hi everyone! I have a bit of a question in concern of animating my avatar. I wan...
fresh isle
languid fog
scenic cipher
Hi everyone! I have a bit of a question in concern of animating my avatar. I wan...
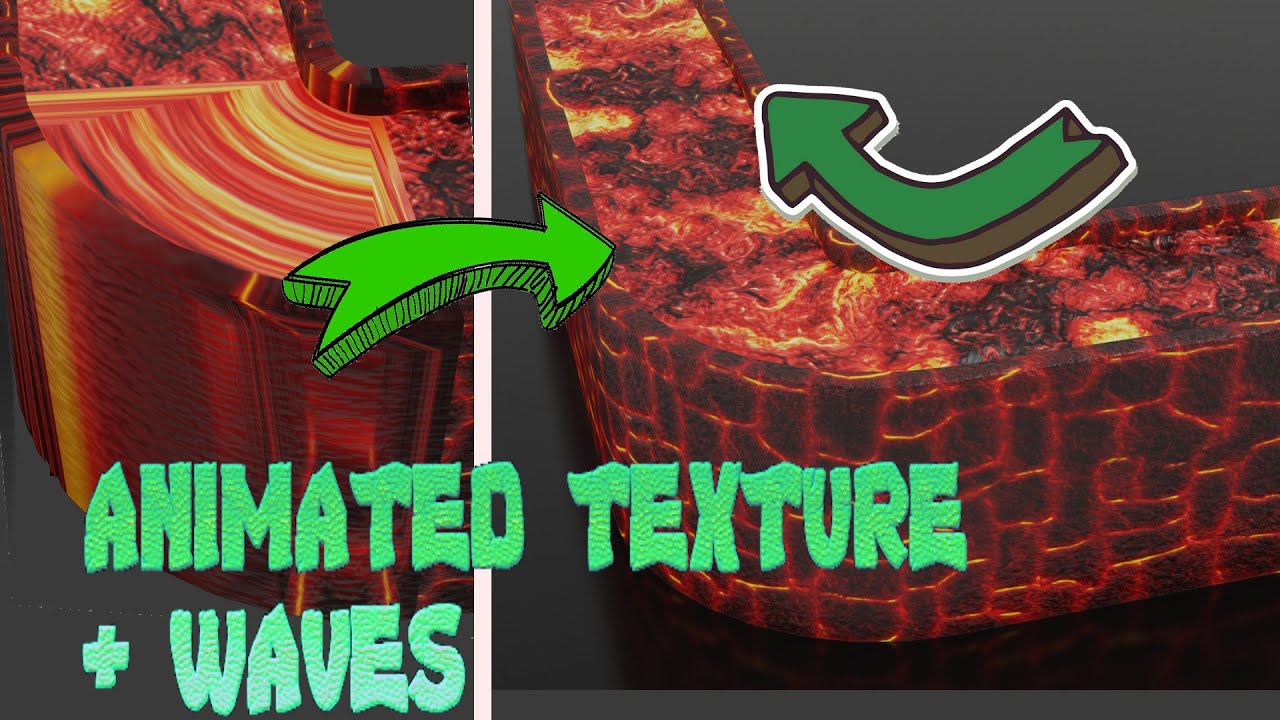
In this Blender 2.8 tutorial you will learn advanced techniques for UV Unwrapping or UV mapping, bump mapping and displacement modifier, and also to fix uvs. Learn to use the Lightmap pack and follow active quads, to fix uvs in the corner, adjust uv maps, animate textures and UVs and more advanced tricks.
#blender #uvs #displacement

This video shows you how to animate textures in Blender using two methods, panning UVs or flipbook style animations using spritesheets. This technique makes use of the preinstalled AnimAll addon that allows you to animate UVs along with other things you couldn't animate before.
Twitter: https://twitter.com/MrTriPie
spiral sigil
languid fog
https://youtu.be/wenVpxYzd_g
This is cool I'm definitely gonna brush up on this, can never have too little UV tricks
 severe frigate
can someone help me importa model of blender into vr chat? a friend and I are trying to get the models from a game into vr chat the only problem is that the expresions are textures
devout scroll
languid fog
https://youtu.be/wenVpxYzd_g
That's not gonna work with unity and i'm pretty sure that'd be what they want
languid fog
devout scroll
That's not gonna work with unity and i'm pretty sure that'd be what they want
UV Animation don't work if you export it to unity?
devout scroll
I guess it does depend on the uvs
but there are specialized shaders that just scroll their texture
languid fog
devout scroll
but there are specialized shaders that just scroll their texture
ik you can do it with a simple C# script
devout scroll
which are not allowed in vrchat
languid fog
well, yt saves lives yk

We are back with another video. In today's video, we gonna learn how to make animated billboard or texture animation shaders in unity 3D for mobile games.
There are lots of games that are using the same effects and you can find out most of the similar effects on unity assets store. That effect makes the game more lively and emerging. So here ...
devout scroll
Depends on the shader you're using but like if you're using poiyomi you can just pan or use a decal and pan that
 crisp barn
a friend is getting this error, what does it mean?
 surreal flame
crisp barn
a friend is getting this error, what does it mean?
surreal flame
crisp barn
a friend is getting this error, what does it mean?
That's a CATS error and if it does this when they try to test eye tracking that's what I get too and have no idea how to fix it. On top of that it messes up my mesh sometimes.
 zinc jolt
this is Freddy

I got him today but the post of the latest model came out almost 12 hours ago
He'll be a public avatar
foggy granite
hmm i didnt expect hmm being that many tris
spiral sigil
Anyone know of any twitch streamers who commonly stream themselves 3d moddeling anime models
its surprisingly hard to find any on twitch but i must be searching the wrong things
spiral sigil
On it then,
devout scroll
yea it's hard to find outside vrc otherwise
spiral sigil
I think most just don't feel confident in their own skills to show them
 spice pewter

 wicked iris
Added some hair normalmap texturing
 oak hatch
Note: I am aware of the neck and head issues. They're being fixed, tomorrow.
That said, some nice cute fancy clothes.
Goal is sub 20k Tris for the whole outfit.

 cosmic merlin
Uhm, I need a help, how do i fix this thingy? Everytime i put my textures on it does this ON Unity

 oak hatch
Wat
cosmic merlin
 cosmic merlin
oak hatch
UV fuckery maybe
cosmic merlin
oak hatch
UV fuckery maybe
Wait, how?
naive bolt
learning 3d modeling and this is a more organized way i came up with to color meshes
good idea or no? xD

putting all the meshes in one seems complicated, and causes issues with coloring, like when they are too close to each other on the texture map
gotta separate them in lil sections, i just hope this causes no issues in the future
quaint jasper
naive bolt
learning 3d modeling and this is a more organized way i came up with to color me...
Those UV islands in the skin part don't seem good at all, which is why you may be having issues in the first place

Speed up your UV unwrapping workflow in Blender with these tips from CG Cookie's Pothead character creation course!
You can watch the full course on CG Cookie: https://rb.gy/t2d1e2 (lesson 1 and 2 are unlocked)
The course is also available on the Blender Market: https://rb.gy/bkjvzg
Addons mentioned (not affiliates):
UV Packmaster 2: https...
naive bolt
yea i used the smart uv unwrap but i'll try that video, ty!
quaint jasper
Definitely don't smart uv unwrap anything organic 
 oak cairn
gonna be putting this cool solar powered e-bike into VRC to educate people on solar powered e-bikes and micro-mobility as i have a collection of 6 of these in real life.


 wary scarab
@oak cairn love it!
spiral sigil
quaint jasper
Definitely don't smart uv unwrap anything organic <:sweat:668314662059638784>
Yeah use UV project and then throw it into substance painter and larp as if your UV's are good 😂
triplanar projection is magic
devout scroll
might as well let substance unwrap it for you at that point
but getting some basic uvs isn't that hard so I generally want to unwrap myself
spiral sigil
Ive never used substance to unwrap and i usually end up manually unwrapping problematic parts anyway
but if i can avoid manually seaming an unwrapping at any stage i will avoid doing it its a waste of time if i can get it to just werk another way
spiral sigil
I  seems
seems
thorny ivy
Speakin' of UVs, finessed three complete knives into just one. Minor overlap for the larger blades but since I ain't sure about resolution scale yet, I can adjust later.

 humble badge
anyone know the 3d model of rusk 3.0?
azure rain

…………………………………………………………………………………………………………………………… ◆サンプルアバターの試着はこちら◆ https://vrchat.com/home/world/wrld_48ba3030-bc47-4a12-a95d-ca3cc7f3039e ◆公式衣装SHOP◆ https://sugary-boutique.booth.pm/ …………………………………………………………………………………………………………………………… 本モデルはUnityのHumanoid形式に対応した オリジナルモデル『ラスク』です。 主にVRChatでの使用を想定したモデルです。
thorny ivy
Been experimentin' with the Line Art modifier, seems like a faster an' more simple alternative to creatin' a whole Toon Shader but ain't sure if I'm 100% satisfied with the results so far.
 spiral sigil
thorny ivy
Been experimentin' with the Line Art modifier, seems like a faster an' more simp...
spiral sigil
thorny ivy
Been experimentin' with the Line Art modifier, seems like a faster an' more simp...
I like the effect, its like you beveled every edge and then made those new faces black
unless, is that exactly waht that modifier does?
 exotic parrot
Trying to use an older version of blender to modify an asset but it keeps giving me "file written by newer blender binary (290.0) expect loss of data"
And the model doesnt show up
spiral sigil
exotic parrot
Trying to use an older version of blender to modify an asset but it keeps giving...
Well im going to guess that its telling you to use a more recent version of Blender
since it says the model was 'written'/made in a newer version, so you should go to a newer version to modify it
learning the new 2.8 UI is a pain but pfff you gotta do it one of these days
oak hatch
Awww ye. Outfit is 15ktri right now, likely to be around 20k finished, with 40k for body+hair.
 spiral sigil
nya
oak hatch
yeye
languid fog

is there a way to join my mesh with the armature without needing to delete my shape keys?
I tried using the "Join Modifiers & Shapes" addon but the adon make the shape keys as a different object
 devout scroll
just parent your mesh to the armature
thorny ivy
spiral sigil
I like the effect, its like you beveled every edge and then made those new faces...
It actually utilizes the grease pencil tool, essentially paintin' over certain geo an' usin' em as a guide.
Bit finnicky though an' camera angle/position can greatly influence the visuals.
devout scroll
devout scroll
just parent your mesh to the armature
drag it on top of the armature while holding shift or alt or ctrl (i forgot)
in the outliner
then add an armature modifier to your meshes and select the armature in the modifier
that's the long way
the short way is select all meshes, select the armature and then ctrl+P > armature deform (that just does all those steps automatically)
you aren't actually joining anything, you're just telling your meshes to use that armature for deformations and you're parenting them so that they move together as well
languid fog
devout scroll
you aren't actually joining anything, you're just telling your meshes to use tha...
thx
devout scroll
Nice model by the way 
quaint jasper
29k for the quest version ?
azure rain
that would be a very poor Avatar so you might want to see if you can dissolve some Edge loops
languid fog
azure rain
that would be a very poor Avatar so you might want to see if you can dissolve s...
noted
languid fog
quaint jasper
29k for the quest version ?
y
spiral sigil
languid fog
y
anything above 20k Tris/polys is marked Very Poor by the VRCSDK for Quest
so if you plan on having things autoshown shoot for sub-20k
(Context: Quest Autoblocks Very Poor avatars, and Users have to manually unhide them one-by-one)
Most Quest Users up their automatically shown setting to Excellent-Poor (on default its Excellent-Medium), meaning if you can get it between 15k-20k tris and Poor ur gud
if you really want to shoot for the stars and get Medium, go sub 15k tris
azure rain
and there's no maxcap on very poor avatars so a quest user might show in Avatar and have them like instantly lag out because you have like two million triangles and 100 materials for all they know
spiral sigil
true
why should they believe your avatar isnt that when they get crash targeted relatively often
languid fog
Noted
 small valve
thorny ivy
Been experimentin' with the Line Art modifier, seems like a faster an' more simp...
small valve
thorny ivy
Been experimentin' with the Line Art modifier, seems like a faster an' more simp...
thanks for reminding me that i need to sharpen my chef's knife
and line art mod is cool
id add toon specular to toon knives but thats just me
thorny ivy
small valve
id add toon specular to toon knives but thats just me
I'm usin' the default Toon Shader, looked into custom ones but most seem outdated (pre-2.9) at this point.
spiral sigil
how does this look? i need some feedback
 azure rain
there's some black splotches and the lighting looks kind of weird on the left arm

 spiral sigil
azure rain
https://i.gyazo.com/052fbf8b1bbf2d9265c08cc34bf05024.png
spiral sigil
azure rain
https://i.gyazo.com/052fbf8b1bbf2d9265c08cc34bf05024.png
the black spots might be the angle or the mesh just clipping thru its self
tryna see whats with the arm rn
azure rain
question could you take a screenshot with the texture turned off to see what's your texturing and what's the model having some weird normals
spiral sigil
whats the equavalent of Recalc Normals in Substance heh
devout scroll
i don't think you can do that
either there's some import setting or you gotta handle it in blender
spiral sigil
the black spots are the dirt
 azure rain
spiral sigil
the black spots are the dirt
azure rain
spiral sigil
the black spots are the dirt
probably don't want a dirty shirt
 mystic kernel
i know it must be something with the normals but i cant figure out what
azure rain
I'm not sure how that's particularly realistic for somebody to be wearing a dirty shirt
and the way you have it at the moment it looks like you have baking errors
spiral sigil
azure rain
I'm not sure how that's particularly realistic for somebody to be wearing a dirt...
its hard to explain. i just like it like that
thorny ivy
I believe "well-worn" may be more apt then dirty.
mystic kernel
damn, normals are odd
devout scroll
pretty sure i told you what to do at some point
mystic kernel
ik
devout scroll
you could also try and transfer normals from a sphere
both to the head and to the mouth
sphere roughly covering the head
mystic kernel
ok so i tried to do what you said the first time but fell short considering i had no idea what you were talking about
ive been looking into this data transfer thing
devout scroll
alright let's see
mystic kernel
so you're saying i can transfer the normals of a common blender sphere to possibly fix my issue?

so something similar to this i would suppose?
devout scroll
scale it to just cover the head
mystic kernel
ah ok

so what do i do from here? is this the part where i use the data transfer modifier on the sphere?
 devout scroll
so your meshes are joined?
mystic kernel
oh ok
devout scroll
ok let's see if this explains anything
what I was meant to say is that if you have a part of your mesh that's detached the normals will make it look detached
but if you transfer the normals from a copy of the object where everything is joined, it should look joined
you can also transfer normals from a sphere that just about covers your mesh
devout scroll
but as you see if i transfer from a sphere that's on the side, it looks weird so it has to be in the same position as the object
and you need to select the mesh you're transfering from last
you're saying too many things without saying what your problem is
wrong channel, post there ^
mystic kernel
btw why does the mesh become oddly colored upon transferring normals?
better question is will that affect my avatar in unity?
devout scroll
shading depends on normals
if it looks odd you might want to play with the settings
in the first example when i transferred from a sphere that was next to the first it looked bad
so i moved it back and scale it up a little bit

 devout scroll
normals looking a bit weird still in places
spiral sigil
which one looks better? i need sum feedback
devout scroll
do you have split verticies or something?
spiral sigil
its not the normal map its the AO
devout scroll
ah right
spiral sigil
i think
devout scroll
first is too dirty second is a bit too flat imo you could play with the opacity to make the dirt stuff less noticeable
you want some color variation without being too obvious
but i'm really not sure about texturing clothes
kinda hard
quaint jasper
it helps having proper UVs
spiral sigil
quaint jasper
it helps having proper UVs
the clothes are from max payne
i just took em from sketchfab
azure rain
like the fabric is Flowing really weirdly
spiral sigil
and attempted a retex
quaint jasper
doesn't mean the UVs are good
azure rain
and also the originals might have been hand-painted in a way that worked with the UVs
quaint jasper
Speed up your UV unwrapping workflow in Blender with these tips from CG Cookie's Pothead character creation course!
You can watch the full course on CG Cookie: https://rb.gy/t2d1e2 (lesson 1 and 2 are unlocked)
The course is also available on the Blender Market: https://rb.gy/bkjvzg
Addons mentioned (not affiliates):
UV Packmaster 2: https...
azure rain
inside of triplanar projection or UV project your material
 high badge
hey does anyone know how to make vroid avatars quest compatible?
azure rain

Wanna learn how to make an avatar for VR Chat using VRoid Studio that works decent on both PC and Quest?
0:00 General info
2:12 Fixing eye issues
4:13 Fixing face issues
6:04 Exporting
high badge
azure rain
https://www.youtube.com/watch?v=OA733GlRwF8
ty
azure rain
and something I didn't notice in the tutorial but there's a checkbox to delete transparent triangles so if you erase all the texture under your clothing those triangles will get deleted so you will have less polygons so you can fit the Avatar in a rank better than very poor
high badge
i think vroid updated their stuff
azure rain
yes they have a new UI now
but like the tips in the tutorial are still quite helpful even if the buttons are in different places
azure rain
https://www.youtube.com/watch?v=JFoAKjmO4Q4 here's a tutorial that covers where the buttons are in Old tutorials in the new program

My tutorials still work for the new vroid, there are just a bit of different way to get to the customizable menus.
☽☽Wanna Support Argama?☾☾
✩ Become a Channel Member: https://www.youtube.com/channel/UCRHgyuhghUjuZnKo6dTU4hg/join
✩ Become a Patreon: Patreon.com/ArgamaWitch
✩ Donate: https://streamlabs.com/argamawitch/tip
✩ Merch: https://argam...
 vast canyon
hello anyone have any idea's how long would this take?
 thin shadow
vast canyon
hello anyone have any idea's how long would this take?
thin shadow
vast canyon
hello anyone have any idea's how long would this take?
depends, it's like social credits system. You behave good, spend time in vrchat, you'll get it soon enough.
vast canyon
I sometime play vrchat 😦
high badge
azure rain
https://www.youtube.com/watch?v=JFoAKjmO4Q4 here's a tutorial that covers where ...
ooh coool
ty


 drowsy hound
is there a place that turns pictures into avatars? because i have never created a 3d model before
azure rain
are you wanting like just your IRL self as an avatar or like a particular character

Make custom full-body VRChat avatars from a photo with Ready Player Me avatar maker. Easy upload to VRChat – no Unity or Blender needed.
drowsy hound
i want to make a gilbert gottfried avatar because i do the voice pretty well
azure rain
I suppose you could try a photo of him on that?

 short sigil
Youtube tutorials. There are hundreds
thin shadow
Exit import mode first
oak hatch
Anyone know of a way to change the blend mode of viewport matcaps in blender?
 fallen orbit
absolute pain
pls tell me theres a way to make big changes to ur avatar without redoing shape keys over and over again
 still wadi
shape propagate is what you want
spiral sigil
Hi. I'm looking for someone to retopologize a rough 3D model I made for a furry artist I know and love. It's supposed to be for a free VRChat avatar for him, but it needs to be retopologized, so can someone please contact me in case you're interested?
devout scroll
fallen orbit
absolute pain
select basis, select all the verts you want to be like basis, f3, propagate to shapes
 proud pawn
can someone help me my rusk cat is not blinking his eyes it just dead fish eye look
spiral sigil
proud pawn
can someone help me my rusk cat is not blinking his eyes it just dead fish eye l...
In your unity project click the rusk avatar and go to inspector, under the VRC avatar descriptor put the blink shape keys where they belong I'll take a pic 1 sec

Like so, do note that this blink shapekey is now "posessessed" by the sdk animators and you should clone it for the blinking purposes so you can still animate blinking on your FX layer for gestures
thorny ivy
 spring condor
im new to modelmaking and have no clue what im doing
spring condor
im new to modelmaking and have no clue what im doing
Look up basic tutorials for your modelin' program of choice. VRoid offers pretty quick an' easy customization but you're stuck within a certain style + limited variety.
mystic kernel
would there be a way to make a blendshape show at a specific time? ex. instead of the shape key showing at 1.0 it shows at 0.7 or 0.6 but doesnt change past that point
oh nvm i just found out what absolute shape keys are
proud pawn
spiral sigil
In your unity project click the rusk avatar and go to inspector, under the VRC a...
i went to the rusk family discord
 violet hinge
I'm having issues with new vroid models lip sync/visemes. As in the visemes are differwnt and do not seem to pop up properly. I am using the vroid > blender > unity method
 full ice
violet hinge
I'm having issues with new vroid models lip sync/visemes. As in the visemes are ...
full ice
violet hinge
I'm having issues with new vroid models lip sync/visemes. As in the visemes are ...
You need to use cats like it seems you are doing to build the visemes out of what is available, which are the single letters, line those up with the sound that Cats is expecting
violet hinge
full ice
You need to use cats like it seems you are doing to build the visemes out of wha...
So Basis or A E U I O?
full ice
Expand the side panel that cats is using to see the whole name of what cats wants
full ice
Well, you can test the blendshape in blender to see what the mouth looks like, and take best guess.
violet hinge
Okay, still confused on what CH is. Think i got A and O down
full ice
I think mouth angry would work? It's been a while since I did vroid
Just test all mouth blendshapes
 quaint jasper
Make a ch sound with your mouth ^
violet hinge
I think its MTH U???
full ice
You can also build the visemes and test if they all look normal, if not just build again
violet hinge
i think its correct
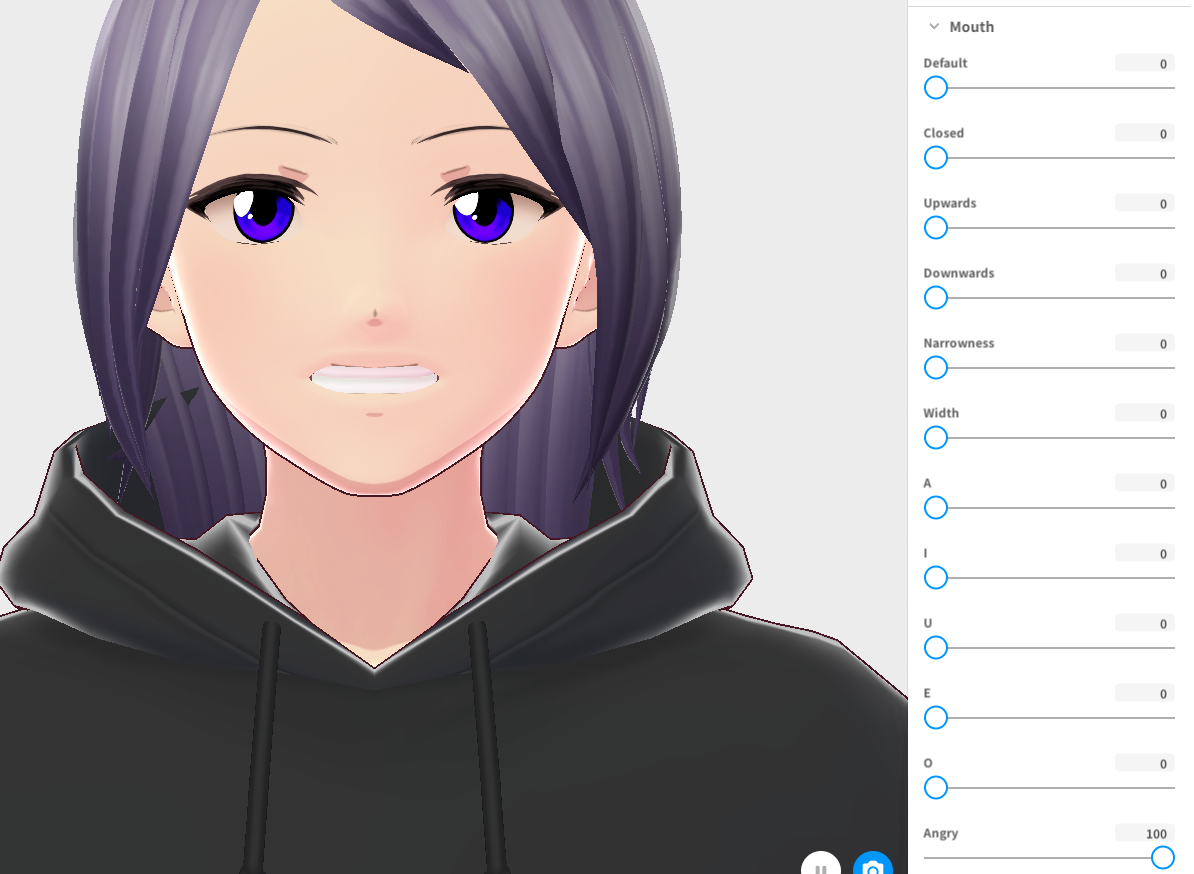
 violet hinge
I used U and then tested em. seems okay
azure rain
cool
violet hinge
time to test in unity ;u;
azure rain
hopefully it goes okay
violet hinge
can't make eye tracking in blender so welp
spiral sigil
where can I find someone to commission a new custom avatar?
violet hinge
Fivver, Various Discords. It's pretty broad
Just gonna look through vroid and do the visemes in unity with what i got from vroid
full ice
spiral sigil
where can I find someone to commission a new custom avatar?
#community-servers-old look for VRC Traders is a good one supposedly
violet hinge
Would i need to fill in ALL the viseme slots or leave some empty?
azure rain
you would want to fill all the slots
as it would look weird if your mouth randomly stopped moving with some sounds
full ice
If you don't fill all then they won't work at all from other people saying they don't have all filed and mouth doesn't work at all
 gray mirage
D
spiral sigil
How would I bake this onto a texture? Its a solid blue emission color material applied to faces that I beveled and inserted around the mesh. It is difficult to decimate with this as its completely dependent on the topo.
 quaint jasper
If it's a material, then it's a texture, and if it's a texture, it's an emission map
spiral sigil
Emission map thats a good idea
How would I go about baking that though?
So I don't have to deal with this soup

cuzz its just a solid colorrrr

 young vault
Bake it into an emission map if you want it to work like an emissive
azure rain

How to bake your procedural shaders to image textures that can be exported to game engines.
https://blendermarket.com/products/procedural-texturing-blender - The course on Blender Market
https://gum.co/Procedural-Texturing-Blender - The course on Gumroad
Luca Rood: https://twitter.com/LucaRood
Gleb Alexandrov: https://twitter.com/gleb_alexandr...
spiral sigil
I think im just dumb I think it worked
azure rain
a solid color material setup would also be a procedural material
spiral sigil
I just needed to make a image texture for it to bake on
i mean an image
and an image texture node
spiral sigil
it still completely jumbles my patterns reguardless hm
on decimating
I want those patterns to still be there even if the beveled/inserted geometry isnt there, because it won't be after decimating
azure rain
you would need to have your pattern be displayed by a texture not material colors
spiral sigil
The bake works, but its very blurry and has a streak because I messed up a few verticies on the UV

not sure whats causing it to be blurry
This mesh is the mesh before I beveled it to shreds
ah to hell with it, ill probably be costing more performance by having a fat texture than just a 32x16 solid color atlas
quaint jasper
By beveled do you mean subdivided ?
 oak hatch
DAY THREE
 spiral sigil
heh meow
oak hatch
It do be like nya
quaint jasper
Why do you use cavity 
spiral sigil
imagine even using a matcap
oak hatch
counterpoint,
 quaint jasper
it's great for seeing distorted normals 
quaint jasper
nice frills tho
oak hatch
I used my gem matcap
Ye, I love the frills
but
that's where like 20% of the polys are
12k triangles in frills
huuuuueeeee
actually not horrible
but that's -half- the clothing budget
spiral sigil
you'll be fineeee
oak hatch
I plan for 30k for the body/face, 20 for clothes, then 10k for other stuff
hair etc
the frills are all modifier controlled, to
so of I have to massage some extra tris, I can save around 4k
spiral sigil
what modifier(s) do you use for the frills?
oak hatch
moment
oak hatch
 spiral sigil
oh you meant one moment
heh
that is fancy thinking
can I see the path of the curve?

 spiral sigil
my head hurts
oak hatch
LMAO
oak hatch
So, array makes them long, curve wraps the longboi on the curvbe
you can do it with tank treads, too
or chainsaws
You can even animate them moving if you're clever
oak hatch
Next time I stream, I'll do a breakdown of it.
You can cheat, using a polygon as a curve
that's what I did for all of it
Made the cloth parts, duped the polygon out, use that to control the curve
oak hatch
yuh
spiral sigil
thats gud
oak hatch
You think I made all those beizers? LMAO
spiral sigil
who knows man
oak hatch
I'm crazy, not insane.
spiral sigil
healthy scheudle
oak hatch
normally, yes, but I streamed for 2 hours longer than I planned so I'm burnt
spiral sigil
I'm making my first avatar and I was wondering if someone could show me the basics of making a model. I want to make my own model instead of finding one online. Also, I don't have any money to spare, if anyone could help for free I'd be grateful.
oak hatch
spiral sigil
I'm making my first avatar and I was wondering if someone could show me the basi...
Swing by next time I'm streaming, I'll be doing retopology/sculpting a model.
spiral sigil
Uhh.. so. I have unity installed with everything, I'm currently trying to import my first ever free model in so that I can recolor it and import it. Problem is, I have absoloutely NO CLUE what I'm doing.
I have.. no clue how to import things.
 acoustic halo
is there some simple way to create a separate backface in blender?
quaint jasper
Shift + D, Alt + N > Flip
devout scroll
or solidify if you want to offset them but that will also create connecting faces
obsidian jungle
So in 3ds max its possible to increase the geometry, or increasing pixels on models, using a plugin for blender its possible to decrease polygons on a model, but what I want to know is it possible to increase the polygons/geometry of a model on blender? And what tutorials show that?
tight quartz
Is there a way so I can just see this part so I can weight paint easier?
 thin shadow
tight quartz
Is there a way so I can just see this part so I can weight paint easier?
thin shadow
tight quartz
Is there a way so I can just see this part so I can weight paint easier?
select mesh, separate, hide the other mesh, start weight painting
surreal flame
tight quartz
Is there a way so I can just see this part so I can weight paint easier?
You can use 'M' during weight painting, then you can Shift or L-select meshes you want or even hide selected geometry using H. But you can't select bones in this mode, you have to turn it off first.
wicked iris


Obviously gonna reduce the polycount for multiplayer use.
Full detail will be for solo use
spiral sigil
You really made yourself a model set for at least a few years mate heh
once it comes the time tech has advanced where standalone headsets are equvalent to computers now, you can start using your high poly version in public

Cavity is so sexy omg I wish I knew this existed earlier
 spiral sigil
spot the stubborn bastard
 dusty heron
My eyes
foggy granite
spiral sigil
spot the stubborn bastard
I see it but what are you making
Sense that pretty dense unless your sculpting something
spiral sigil
foggy granite
I see it but what are you making
If u see my reference its the wooden blobby bulge
I am making a high poly thing generally yeah
the entire blade atm is 15k tris
azure rain
wow that sounds unnecessarily High poly because Normal Maps exist
spiral sigil
yeah of course its not the final product kek
Im not that insane
I am going to use this to learn some substance
Right now my computer has been unresonsive for the last 10 minutes because I voxel remeshed at 0.001
azure rain
I am not surprised
like that's probably several million maybe even a billion triangles doing it that smell
foggy granite
Jeez hope you saved
spiral sigil
I did I subcoinsiously control+s
foggy granite
Okay that’s good
 foggy granite
Not to sure
spiral sigil
I am on Blender 3.0.0 but it was a release canadate
foggy granite
Probably a bug then
 thick ocean
anyone can help me with an issue im having
full ice
thick ocean
anyone can help me with an issue im having
If you say what it is, someone might.
devout scroll
spiral sigil
why does this happen
mesh is messed up
i think it's intersecting itself or there's two layers
don't sculpt it if that's what you're trying
it looks like a shape that you can do fairly easily with a subdivided cube
spiral sigil
That was originally a cylander that I loopcutted until everything was quads and then sculpted yeah
and then I quad remeshed it to a lower face amount so that I could connect it to the lower part
but yeah ill just proportional edit next time with a cube then
 midnight valley
does anybody know why my normals are all out of wack in blender. its like a part of them are on the correct side but others are flipped. trying to recalculate them doesnt do anything for some reason :/
 quaint jasper
reset custom normals ?
midnight valley
didnt seem to fix it. used cats blender plugin, most recent update. model was imported as an fbx too
quaint jasper
Check your UVs
midnight valley
UVs are good as well. very weird glitch. no normal setting seems to change it. it mostly affects the skin and hair. everything else seems to be fine. weird
quaint jasper
So it's actually correct with normal orientation display enabled ?
midnight valley
says so yeah. its no problem when i turn culling off in unity but i dont know why its doing this in blender. never had it happen before
spiral sigil
midnight valley
says so yeah. its no problem when i turn culling off in unity but i dont know wh...
You arent in an experimental build of Blender right?
It doesn't look like it but to make sure
midnight valley
nope. its 2.93 stable
spiral sigil
what happens if you go to a face that is broken, dupe and flip normals
try that n see if it looks normal again
midnight valley
strange. so when i decided to ignore it and import it to unity normally its fine. but the normals are only messed up in blender
i guess i can make this work. might just need to reinstall blender or something
spiral sigil
wha de fook
yeah maybe it got corrupted
insert technical explanation here
make sure you run the installer with admin perms
midnight valley
will do. thanks for the help. much appreciated!
 quaint pewter
Tried to make a shape key to make the eye close in a cartoonish way, and it's ended up like this (using blender 2.9)

Anyone know what may be going on? I've tried snapping, no snapping, and it seems to not want to shape itself how I need it to be
quaint jasper
quaint pewter
Tried to make a shape key to make the eye close in a cartoonish way, and it's en...
You tried just scaling on the z axis maybe ? What shape are you going for exactly ?
quaint pewter
quaint jasper
You tried just scaling on the z axis maybe ? What shape are you going for exactl...
I'm going for an N shape and U shape for emotions, sorta like this ( I couldn't find the N variant)
 quaint jasper
well you won't be able to bend that face outside properly because it's missing edges
make sure to delete it first and then extrude the edge outside and then merge at center
then you can try proportional editing from the top most vertex and bring the rest down
quaint pewter
Hmmm, one moment, let me try that
quaint pewter
Okay, after a while, I think I've misunderstood what you meant here. Are you able to explain more in detail?
quaint jasper
Which part did you misunderstand ?
quaint pewter
Mainly the part with what to delete and where I'm extruding the edge to. I understand the proportional editing stuff!
quaint jasper
spiral sigil
tuuub
thin shadow
are there any consequences of converting triangles to quads? blenshape problem maybe? normals? I've checked the blendshapes, since I'm using toonlit shader, the shadows and highlights doesnt matter

i did it because i want to decimate manually, using the method of dissolve edges
what are the pros and cons of quads and triangles
 tacit gorge
thin shadow
what are the pros and cons of quads and triangles
tacit gorge
thin shadow
what are the pros and cons of quads and triangles
triangles if im correct, they are better for games. unity will auto convert from quads to tris
surreal flame
thin shadow
what are the pros and cons of quads and triangles
Quads are superior for editing of any kind. Triangles break edge loops.
thin shadow
tacit gorge
triangles if im correct, they are better for games. unity will auto convert from...
hmm I noticed the import settings on unity "keep quads"
surreal flame
I believe most common formats convert to tris on export anyway.
Personally I would use quads as often as possible because it's not likely to cause any problems.
tacit gorge
its so much easier, and it also kind of doubles the faces
quaint jasper
thin shadow
are there any consequences of converting triangles to quads? blenshape problem m...
Potentially messing up the topology and ending up with worse normals yeah
tacit gorge
also, where can i find good assets for my avatar, i litteraly cant find a hoodie
quaint pewter
quaint jasper
Oh! You know what? I am stupid, the solidify modifier made the eyes 3D, they were flat circles
 craggy lintel
tacit gorge
triangles if im correct, they are better for games. unity will auto convert from...
craggy lintel
tacit gorge
triangles if im correct, they are better for games. unity will auto convert from...
Triangles suckkkkkk lolol
calm goblet
craggy lintel
Triangles suckkkkkk lolol
triangles are fine
tacit gorge
craggy lintel
Triangles suckkkkkk lolol
hard to edit
spiral sigil
too bad you couldn't just quad remesh it
proud pawn
can someone help me colour my model before the 30?
its been sdk and edit and its on vrm model
because the colour i wanted is not the one i asked
spiral sigil
proud pawn
because the colour i wanted is not the one i asked
If you dont like the color scheme you can run the textures through photoshop and Hue shift them to something you like
is that what you mean?
proud pawn
i never done unity or any of those i was wondering if someone can help me if i toss them my vrm model to them
spiral sigil
around here we have ye learn
calm goblet
spiral sigil
too bad you couldn't just quad remesh it
there's no auto-retopo tool out there that does a good enough job for deforming meshes
much as i'd love to never have to do retopo again, same with UVs lol
azure rain
if there was such a tool it would be common practice
 stable spindle
I did a headswap in blender and the neck pivots from like the center of it, what shall i do?
Guessing bone issue?
 dim slate
who pinged
 wheat delta
a bot
 strong spindle
 lapis smelt
doing donut tutorial on blender, im trying to know how can i duplicate two vertices to make the icing drippier
 foggy granite
lapis smelt
doing donut tutorial on blender, im trying to know how can i duplicate two verti...
foggy granite
lapis smelt
doing donut tutorial on blender, im trying to know how can i duplicate two verti...
Shift+d to duplicate select or just extrude an edge with e
lapis smelt
im just following a tutorial on yt by blender guru, but thank you for the info
foggy granite
Yeah I done the same one
lapis smelt
just doing this to become better at modeling and dedicating myself.
hopefully my parents will be proud of my talent
im also thinking of making an avatar world
foggy granite
https://youtube.com/playlist?list=PLa1F2ddGya_-UvuAqHAksYnB0qL9yWDO6 this help for general knowledge

YouTube
Get up to speed with Blender 2.8 in this updated official video series!
lapis smelt
thanks, might watch it when i finish the donut tutorial
wicked iris
Before: 20,576 Polygons

After (Removed unneeded/unseen polygons and some cleaning): 11,434 Polygons

Little Visual Difference, but lots of optimization
Before

After

9142 polygons removed
azure rain
impressive
craggy lintel
Yea that’s sorta a thing ya do when making hair
It helps lots
I optimize my hairs after i sculpt em
too, and yee it’s lit

 devout scroll
robot paws
azure rain
very nice design
visual vigil
Wont redistribute out of respect to tupper
 latent schooner
Aww
visual vigil
original version
 craggy lintel
Metaverse
visual vigil
this was before facebook changed their name
devout scroll
facebook's metaverse is not the same anyway
ashen stag
Imagine conflating the word metaverse with some random company
 devout scroll
as long as people don't go "you don't say meta's metaverse"
and just say facebook's metaverse, i think we'll be fine
ashen stag
I cant think about facebooks new name without thinking about being a metagamer
visual vigil
im still gonna call facebook facebook
languid fog
but facebook still facebook, the company behind the facebook is Meta
 sudden bear
full ice
sudden bear
full ice
This conversation really shouldn't continue here, move to #general-media
wicked iris
Blender Render of my model so far, hoping to get it working in VRC soon

 pure plinth
is there a way to draw with shapes or lines in the texture paint tab
 quick egret
So i have a issue here. when i give my avatar on blender eye tracking, everything works. Then when i have it in unity.. i check in configure if everything is correct linked .. But once i upload the avatar on VRC, the eyes won't move or blink unless i use the gestures. Does maybe anyone else know what could be the issue?
devout scroll
pure plinth
is there a way to draw with shapes or lines in the texture paint tab
you can have a brush texture yes
devout scroll
quick egret
So i have a issue here. when i give my avatar on blender eye tracking, everythi...
languid fog
pure plinth
is there a way to draw with shapes or lines in the texture paint tab
Change the settings of your brush, you have like line, circle and etc
spiral sigil
i got an odd question because i'm trying to do something for someone, does anyone know how to use and or convert a .vol and or in my case a .pvol file format into something blender and unity can see? a friend of mine gave me a character i can rig for them but it's in this format i never even heard of until yesterday.
full ice
spiral sigil
i got an odd question because i'm trying to do something for someone, does anyon...
Your going to need to do research, if it's for a game, look up if converters for the game exists, although it's against VRChat TOS to use other games content, even if people still do it. If it's something else, your friend needs to tell you were they got it and you need to convert still. Just having an extension isn't enough to go off of here
 celest rover
Anyone have a Christmas hat Modell?
calm goblet
it'd take like 2mins to make one lol
 mighty frost
How can I merge clothes with base model?
calm goblet
what do you mean merge?
put them all into the same object? make them a single piece of mesh?
mighty frost
Into the same object
calm goblet
select the clothed, then select the base, then hit ctrl+j
mighty frost
I try but don't do anything 😦
calm goblet
no idea then
celest rover
calm goblet
it'd take like 2mins to make one lol
I can Not make one..im too Bad at doing anything. U Know what some good Asset Websites are too get that sorta stuff? Preferably With textures
calm goblet
celest rover
I can Not make one..im too Bad at doing anything. U Know what some good Asset We...
well i know someone who'll upload one later, but dunno anyone with one ready made
celest rover
calm goblet
well i know someone who'll upload one later, but dunno anyone with one ready mad...
Ah ok! Will it be free? And If yes where can i find it?
Want to make my Avatar a Bit more christmasy
mighty frost
calm goblet
no idea then
I couldnt using cntrl + j but it let me manually from object section and join, thx you ^^
celest rover
calm goblet
yeah it's a freebie
Ok and where?
calm goblet
celest rover
Ok and where?
they'll probably put it on gumroad or booth, i'll dm you the link whne they upload if you want
or if you want something faster i just started making some reindeer antlers on a headband lol
then you can grab the hat as well later
supple lake
It's been a while since I last posted an update on my progress, so here's the latest, added eyelid folds and a lot of tweaking shapes toggling back and forth with subdivide on and off. Maybe it's starting to look a bit less scary now more like a character than some evil robot lol
 celest rover
calm goblet
they'll probably put it on gumroad or booth, i'll dm you the link whne they uplo...
celest rover
calm goblet
they'll probably put it on gumroad or booth, i'll dm you the link whne they uplo...
That would be pog!
celest rover
calm goblet
or if you want something faster i just started making some reindeer antlers on a...
Naaa thx i don't think that works With avalis well
calm goblet
celest rover
Naaa thx i don't think that works With avalis well
no idea what an avalis is
celest rover
calm goblet
no idea what an avalis is
Best Pic i have rn to Show u
 calm goblet
ahh, yeah you're gonna have a hard time making anything really work with that hair
celest rover
calm goblet
ahh, yeah you're gonna have a hard time making anything really work with that ha...
Maby Just fina make it small and Put it on one of the ears tbh
calm goblet
yeah that could work
still wadi
 devout scroll
spooky
 burnt lake

 wispy salmon
Ever wished there was a simpler way create assets to load into your projects but hated the path through Blender or Maya? You can do that whole process in VR now. 👀
If you've never tried the Masterpiece Studio suite of VR creation tools? The whole suite is now FREE for non-commercial use! Give it a go from today via Steam: https://store.steampowered.com/app/1694700/Masterpiece_Studio_Pro/

FREE IS ABOUT BUILDING COMMUNITYWith the Free version, you can create with the full 3D pipeline for as long as you want, for non-commercial use! All that we ask is that you pay it forward by sharing your content with the community. All content exported with the Free version is shared on our Public Gallery. Anyone in the community can download, r...
azure rain
but that also comes with the caveat of anything you upload can be commercially used by folks with the commercial license
merry cedar
Do you guys think he looks a bit weird?? I think so but i cant really think what

maybe hes too wide???
and also hes missing eyes, but dont worry about that
devout scroll
yeah proportions look off somehow
are you looking at references from different angles?
merry cedar
The reference had clothes on so i used another one
Well i can always sculpt him more
Besides im bad at drawing so the ref sheets are maybe a little off… he should be around 8 heads tall
foggy granite
merry cedar
Do you guys think he looks a bit weird?? I think so but i cant really think what
Dude face is small, no calf’s on the legs , body looks block from a die view instead of rounded, wist and arms muscles need some work
foggy granite
merry cedar
Do you guys think he looks a bit weird?? I think so but i cant really think what
Though body types and style are different try using this a simple guideline for understanding anatomy and proportions
 oak hatch
^^^ references are god tier.
azure rain
yes artists use reference
wicked iris
Ok, model is currently at 72K Polygons, there's a chance it'll be much lower while keeping the general detail

Last time, this hair had 11,434 polygons.
It's now at 9,904

Still more potential in lowering
Dissolving vertices in the more hidden areas are the key
spiral sigil
I'm guessing its not letting me Bevel this because I have a weird mix of quads and tris where I patched in a circle yeah? How would I go about making it all quads?


(Yes I know I have many unesseccary edge loops in the model I will get that sorted in post)
quaint jasper
you can still bevel that to make it smooth
spiral sigil
Its not letting me at all, just kinda does nothing and looks like it deselects when I bevel
I can record it one second
LOL Discord thinks my windmill is explicit
ok well uh hm techical difficulties
Ive had this problem before on other random edge loops that make circles
quaint jasper
create more loops above and slide down to adjust i guess
spiral sigil
I guess that half works heh
thankfully its a very small prop so I don't count on anyone noticing
 past cloak
winter touch up
 past cloak
yeah
spiral sigil
very smol foots
spiral sigil
how does this look? its mutahar, yknow. ordinarygamers


 prime scarab
So I was messing around in blender with some asset I got from other world and I went across this sofa, I couldn't understand how he manage to make this soft looking object?

Could anyone help me out here
How do I make something like this?
quaint jasper
Press tab, you can see the geometry
 quaint jasper
Looks like it was decimated
azure rain
and how it was generated before that probably with cloth simulation
prime scarab
azure rain
and how it was generated before that probably with cloth simulation
So you mean it used cloth simulation to get the texture like that?
azure rain
technically there are no Textures in the screenshots but yes that's how it got to be that soft fabric shape
prime scarab
sorry English isn't my first language, thats what I mean, the shape
so what about those pit looking shape on it?
azure rain
https://www.youtube.com/watch?v=_T2kEi9L86A not quite sure but here's an example the cloth simulation stuff in action
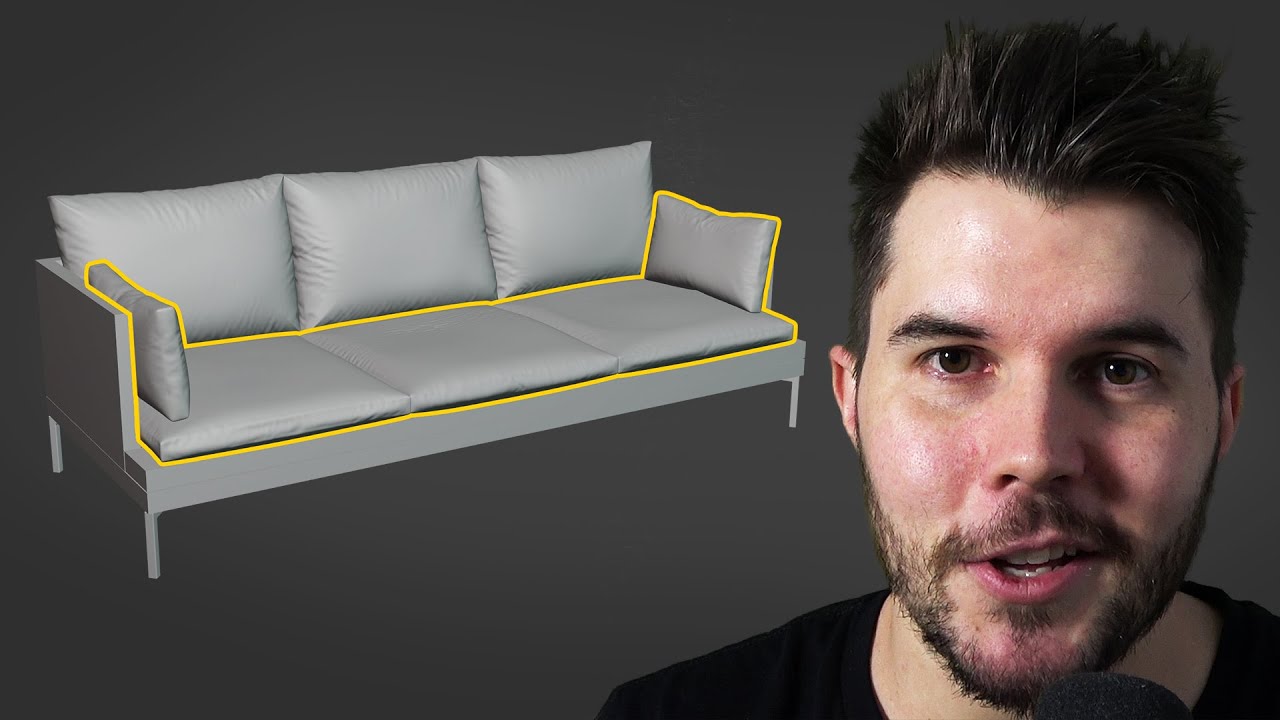
The seat and armrests are created the exact same way as Parts 2 and 3, so we're gonna do a montage.
Join the free newsletter to get a Blender Keyboard Shortcut PDF: https://mailchi.mp/ef5b15a32043/subscribe-to-the-newsletter
Music credit:
Big Rock by Kevin MacLeod
Link: https://incompetech.filmmusic.io/song/3436-big-rock
License: http://creati...
prime scarab
Oh, nice, thanks for the help. I gonna watch them now and see what I can find
 mint orchid
prime scarab
So I was messing around in blender with some asset I got from other world and I ...
mint orchid
prime scarab
So I was messing around in blender with some asset I got from other world and I ...
Just make a cube
Shape it roughly
Then use the sculpt tool
And shape the sides and make the divots
devout scroll
#b3d #blender #secrets #tutorial
Get the FREE Blender Secrets sample PDF: https://mailchimp.blendersecrets.org/freesample
Get the 1000+ page Blender e-book with free updates: https://store.blendersecrets.org/l/IxofeY
merry cedar
foggy granite
Though body types and style are different try using this a simple guideline for ...
Yeah i used different ref :/ ill mane his body smol then
lapis smelt
azure rain
https://www.youtube.com/watch?v=_T2kEi9L86A not quite sure but here's an exampl...
So he has more blender tutorials? Nice!
devout scroll
He has a lot but keep in mind he makes stuff for renders and not games
Making stuff optimized for games is a little different

 prime scarab
mint orchid
Just make a cube
prime scarab
mint orchid
Just make a cube
Thanks, I'm start to understand how it works now.
prime scarab
devout scroll
https://youtu.be/entPWOmoUcs
Nice tutorial, I will watch it today, Thanks for the help.
surreal flame
wicked iris
Managed to get under 70K polygons.
Still aiming in reducing more
I think much of that detail could be offloaded to a normal map for better performance with nearly no loss in visual quality.
wicked iris
surreal flame
I think much of that detail could be offloaded to a normal map for better perfor...
I know, just pushing it to see how good it'll go
before applying baked maps
 twilit condor
I want to add some clothe I got online that have no bones onto my avatar. what are the steps?
surreal flame
twilit condor
I want to add some clothe I got online that have no bones onto my avatar. what a...
Parent to the avatar's armature, weight paint, enjoy. Maybe remove avatar mesh covered by the clothes.
twilit condor
surreal flame
Parent to the avatar's armature, weight paint, enjoy. Maybe remove avatar mesh c...
ok so a few questions. when parenting I just select the clothe and drag it into the armature? and where can i learn about weight painting?
calm goblet
wicked iris
Managed to get under 70K polygons.
Still aiming in reducing more
you could get that easily below 50k if you used a normal map instead of having everything as geo
wicked iris
Am thinking of that. Thx
Since this is my first time doing this sort of thing, it's all experimental
calm goblet
subdivide what you have so it's all nice and smooth, retopo it so that all you have in the low poly is the silhouette, bake a normal map
won't even have to be all that high res of an image either, you'd be amazed what you can fit into a 1k image
azure rain
some spots that I noticed could probably be baked on to the normal map
 calm goblet
everything that isn't part of the silhouette can go in the normal map
azure rain
yep just figured it might help to highlight some spots that don't contribute to silhouette
calm goblet
wicked iris
Since this is my first time doing this sort of thing, it's all experimental
little example of the magic you can pull with decent UVs and a normal map, this entire character is 5k triangles and 1 1k texture
 wicked iris
sounds like the plan, about the silhouette part
azure rain
is there a wireframe of the character
calm goblet
 azure rain

 calm goblet
someone else who doesn't know what a normal map is lol
azure rain
well they learned what a normal map was to make the quest build
but yeah the PC version could probably be even more low-poly while keeping the same silhouette
azure rain
yup
 upbeat bay

I'm learning
But when it's done I will make the thingy public so anyone can use the asset for their worlds
 tawny pond
 quaint pewter
I've been having issues with my texturing, specifically these white lines/cracks that pop up in blender and unity. Any way to fix this?
 spiral sigil
idk, but I think that might just be the lighting, or the shader. Not sure tho
quaint pewter
I thought so too, but it comes up in VRchat as well, which is harrowing, since my last model didn't have that issue
If I change the texture node from Linear to Closest, it works, but I don't think unity supports it
spiral sigil
It doesn't hurt to try! but I'm no expert. You could make a copy of the model, and test it out with Closest to see if it works with unity!


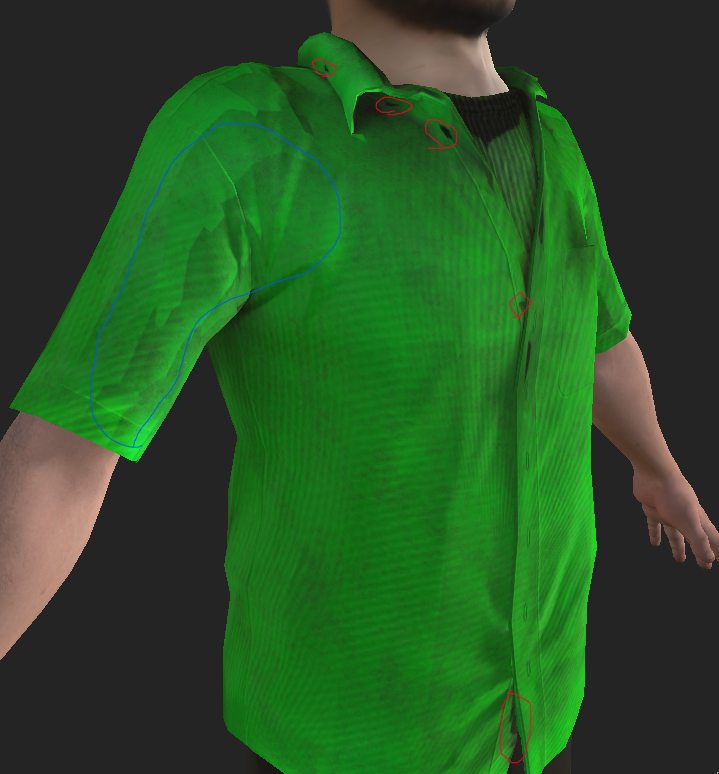

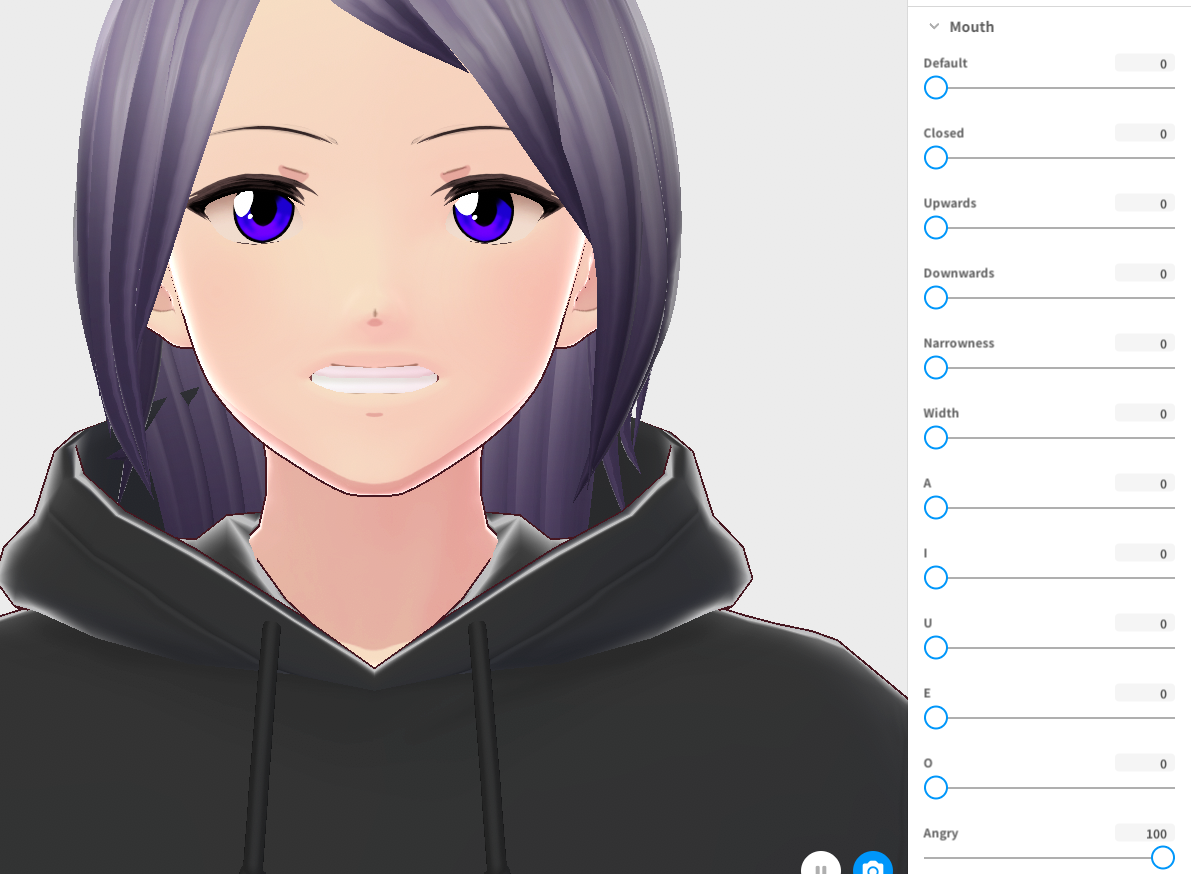
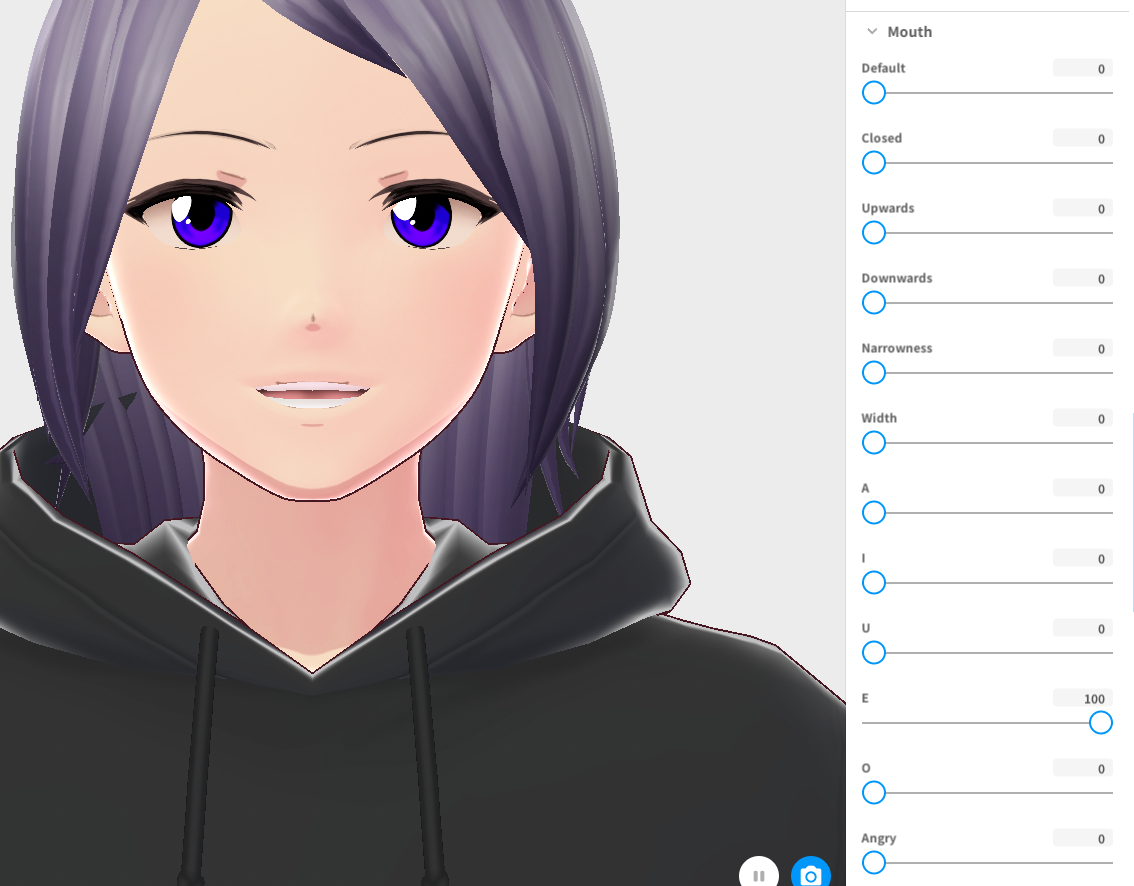

 umbral crystal
quaint pewter
I've been having issues with my texturing, specifically these white lines/cracks...
umbral crystal
quaint pewter
I've been having issues with my texturing, specifically these white lines/cracks...
looks like a uv problem
just add more texture bleed around the edges of your uv map
or shrink the uv islands so it has more buffer room at the edges
although honestly
u really shouldnt even need any uv mapping for this
just make a texture that is 2 colors, one black, one white
and put all of the black parts on one side
all of the white on the other
quaint pewter
The reason I needed to have UV mapping was because material toggles broke uncontrollably for me, and it was because of the materials I had
The only solution I found was to texture properly
umbral crystal
well yea but this can be your entire texture:

u can even make it 2 pixels large and turn off mipmapping, sampling type to Point
tiny file size
the grey stuff is just the uvmap i am way too lazy to draw everything
i recommend this for avatars that are just solid colors with no complex texturing at all
quaint pewter
Hmm, I see. And I'm guessing I could just edit the texture image in cases where I want material toggles and such?
umbral crystal
no u would swap materials
u cant just change a texture
but the texture can be as big as u want
so if u wanted to have a neat design on the chest
u still have a uv map
u just make the texture big enough so that u can actually draw on the model
i will show an example
quaint pewter
Okay, you're going a little fast here, I can't keep up with what you're saying atm. Like, I'm not sure how texture bleeding works (or how to find it), and shrinking the UV map islands would misalign the texture I have for it already, and then you went on to say I only need to make it 2 pixels large in order to get it right and turn off the mipmapping and sampling (which I've never seen before) to get it all right?
umbral crystal
your entire texture

and this would be for the base material
if u then wanted to make a more complicated texture
u just make the texture size large enough
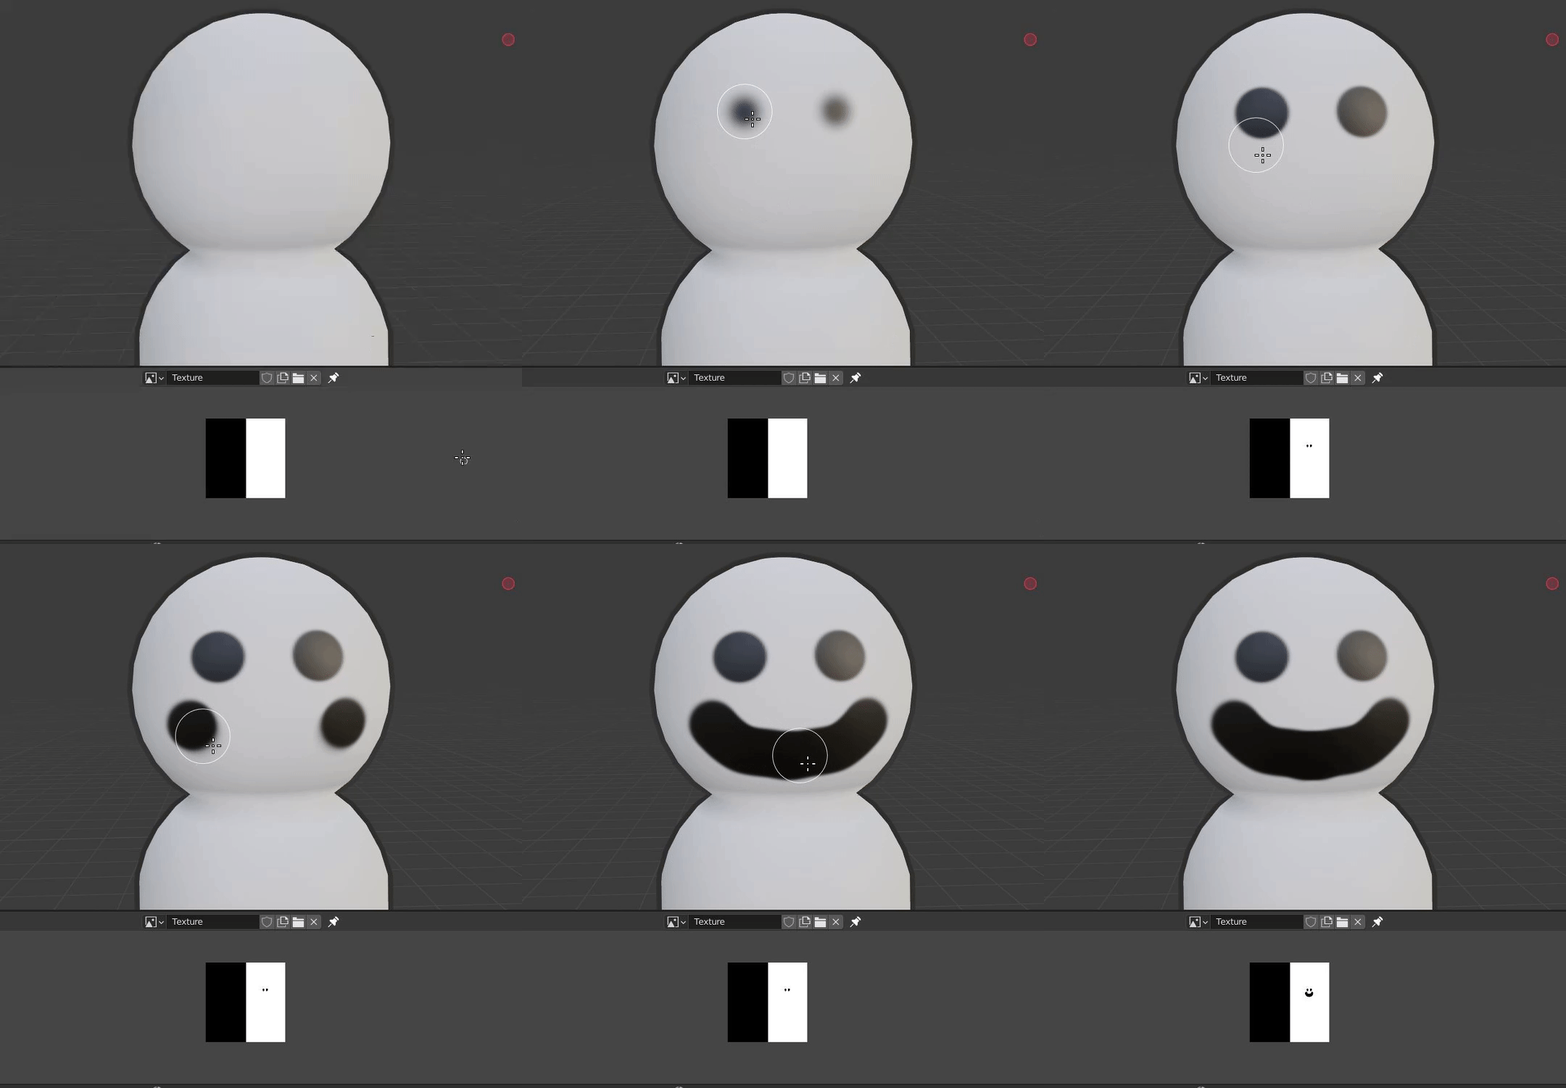
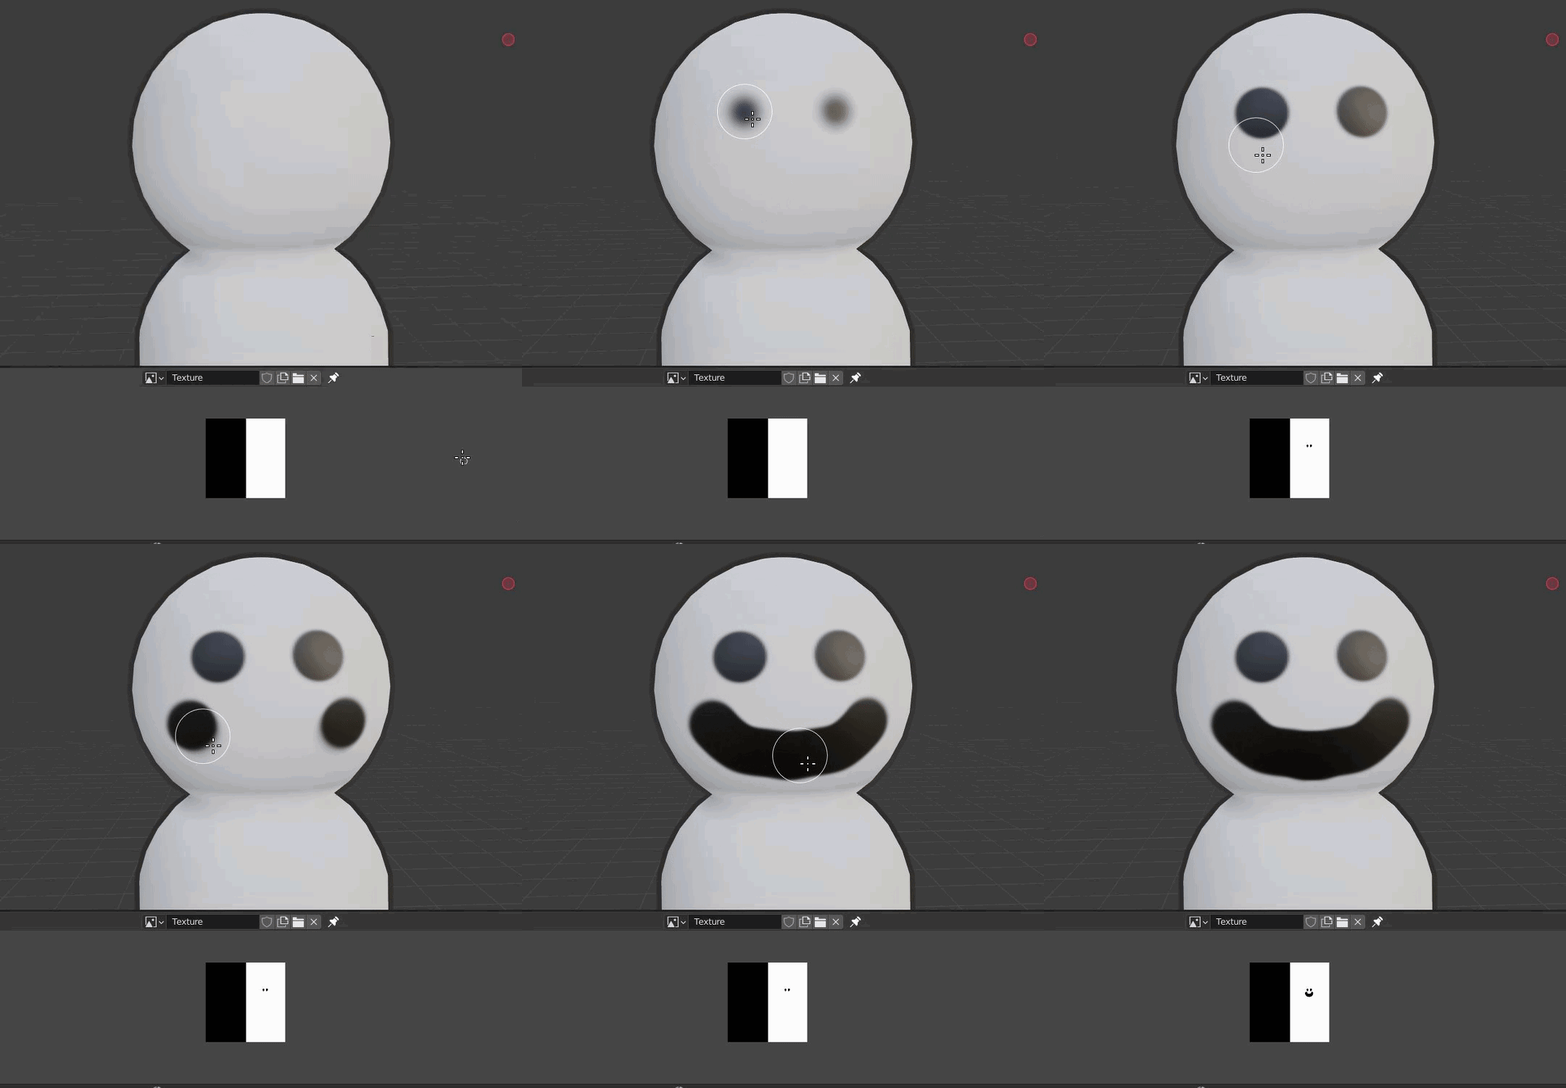 umbral crystal
quaint pewter
Okay, you're going a little fast here, I can't keep up with what you're saying a...
umbral crystal
quaint pewter
Okay, you're going a little fast here, I can't keep up with what you're saying a...
yea if the texture is small enough, otherwise its gonna constantly blur the color to dark grey because it will sample between the pixels rather than at the pixel
quaint pewter
I think they're might be a problem. I decided to put 2 pixel thing like you shows, and I think UV unwrap isn't having it
 umbral crystal
quaint pewter
I think they're might be a problem. I decided to put 2 pixel thing like you show...
umbral crystal
quaint pewter
I think they're might be a problem. I decided to put 2 pixel thing like you show...
just manually create a uv map
i would honestly recommend make the model from scratch though
it really isnt a complicated thing to model
but u should never use something with topology like that

although some of the uv isnt perfect like the excessive warping in the middle
quaint pewter
So if I'm understanding correctly, start over again and redo the model?
Like, I know it isn't hard to model, and I tried using a solidy tool to get an outline I wanted (since unity doesn't have any options like that), but I'm guessing because I have all the tries instead of quads, it's basically easier to just remake it?
umbral crystal
quaint pewter
Like, I know it isn't hard to model, and I tried using a solidy tool to get an o...
u dont need any complex tool at all
just duplicate the parts of the mesh that belong to the body
press alt+s (shrink/fatten)
and then flip the normals
quaint pewter
Alright, let me see how it goes
quaint pewter
Alright, after re-reading what I had to do, and getting it done, it's officially fixed! Thank you @umbral crystal !
 tall solstice
Hi, I am a 3d modeler
Can anyone give me some information about modeling for vr-chat?
I just got acquainted with VR chat
azure rain
what aspect of it are you wondering about
tall solstice
Characters need bone to move
I want to know how to characterize the characters and the related formats
Information about formats and sizes
azure rain
typically focus export their avatars as fbx files
https://www.youtube.com/playlist?list=PLRUlfYGZBxVeEAVXkaG1uydyzFZAMOuMd and if it helps a recent tutorial series vrchat put out about uploading avatars

YouTube
that has a demo Avatar you could poke
azure rain
yes users can upload worlds
tall solstice
a lot of thanks