#3d-modeling
1 messages · Page 118 of 1
 spiral sigil
 oak hatch
It's a Mac10, with a 3D printed receiver, that takes AR triggers and Glock mags
There's a folding stock version, too.
spiral sigil
busted
oak hatch
 spiral sigil
HOW THE hell do those bullets go through the end of the barrel
it looks like its half the diameter
oak hatch
Gonna build out something like this as a PDW for my OielBot public model
Mac barrels are weird
Thin as hell
Really cool gun tho
oak hatch
There's like fourty iterations of the body, all are 3D printed
spiral sigil
are bullets expensive
oak hatch
Yes
spiral sigil
fuck
spiral sigil
wait that doesnt seem that bad
oak hatch
But yeah, next model will be inspired by that and the stribog
With a dash of GHM9
Telescoping stock, roller delayed blowback 10mm PDW, since the handgun is also in 10mm, for the memes.
 forest garden
trying all shaders rn but no one sems to give proper transparency.. 😦
 tough plover
forest garden
trying all shaders rn but no one sems to give proper transparency.. 😦
tough plover
forest garden
trying all shaders rn but no one sems to give proper transparency.. 😦
Standard can do transparency
for worlds, you should try to stick to standard if you can
Poiyomi is another very commonly used shader
forest garden
ok thanks, well i'll keep on trying every option/alpha transparent, etc stuff
tough plover
@forest garden I can call a bit later to look into your issue
spiral sigil
img fail


 languid fog
Dam, this head took me more than it should, a big thx to Ruuubick for the tips

 foggy granite
Oh dam that looks great NJ on the hair
 brazen depot
Anyone remembers how to see what is affected by weightpaint…? It looks like heat camera
languid fog
brazen depot
Anyone remembers how to see what is affected by weightpaint…? It looks like heat...
Select the Armature + Shift + the mesh/object -> change to Weight Paint tab -> click on each none with ctrl
brazen depot
Thanks
languid fog
np!
brazen depot
while weight painting, what does the pink color mean
 fickle violet
who can teach me some English
 thorny ivy
Here's somethin' ya'll don't see much in here: dishware. Figured I'd see I could translate design elements from the knives + equipment into somethin' more mundane largely as an experiment, though a matchin' set does look mighty nice when laid out.


 drowsy rune
wow sorry for late response but yes every single one
 quaint jasper
Did you edit the mesh at all before exporting ?
If the head is fine, you can select all vertices of the body while on the Basis shapekey and do "Shape Propagate"
drowsy rune
quaint jasper
Did you edit the mesh at all before exporting ?
I added clothes to a model and joined the meshes to the armature is all
drowsy rune
quaint jasper
If the head is fine, you can select all vertices of the body while on the Basis ...
I did that and now I can't export it. It says "Eyes not named Body"
Okay, I fixed that problem and the shape propagate thing fixed my issue, but now I don't know how to make the blink blendshape work again
 wicked iris
Just to showcase what the hair is like when subdivided by 2x
Definitely not gonna use 2x for VRC lol

 rain fjord
how do i round off the ends of my monitor stand like this?
 quaint jasper
ctrl + B
rain fjord
it's not rounding how i want it, notice what's wrong?
 quaint jasper
you're selecting the whole loop, you just want to select 2 or three edges
rain fjord
@quaint jasper what 2 or three edges? think i tried that before but not the rght way i guess
quaint jasper
try left and right edges of the square end
rain fjord
@quaint jasper it worked!, now how do i make it perfectly round and choose how many faces i want it to have?
quaint jasper
scroll wheel after ctrl + B
rain fjord
@quaint jasper it's not working, it's adding more faces but not making it rounder
 rain fjord
quaint jasper
rain fjord
quaint jasper
i am not too sure why that's happening to you tbh

 spiral sigil
rain fjord
spiral sigil
rain fjord
im 100% certain its this

 oak hatch
Anyone have tips on UV unwrapping?
I'm trying to stack some UVs and keep them grouped on top of each other in blender, but when I do something like merge them, they shatter into parts.
My process was, uv unwrap by seams, then layer the similar geometry over each other, then merge by distance to get them aligned precisely.
I was then planning to group them (somehow, don't know how) and average scale and pack.
But I'm unable to.
If you can help, many thanks.
 quick egret
Hello, i have a question. So i know true 3.0 SDK it would be easier, but i wanted to try this true 2.0 SDK. To see if this actually works... : I am working on a avatar that has 2 bodies. One for example in a regular human skin and the other is a demon skin version, with horns. I used the toggle tool where i Unable the Demon body and disable the human body, so the unable button will be on the control panel. Which workt! Now, if i use the vrc- descriptor, i need to link one body. Wich i used the human body for. The body of the human mouth moves when i speak, but when the Demon is being toggled to reveal, it doesn't move the mouth when i speak. I tough of adding another vrc-descriptor but it doesn't seem to work.. Is it true tough that we can only use the vrc-descriptor just once? ( it might sound like a stupid question but just wanted to be sure ) If where able to use it twice, is there another way? Thankyou ^^ ❤️
spiral sigil
I will fucking murder omega bot for deleting my long responses
quick egret
spiral sigil
I will fucking murder omega bot for deleting my long responses
You replied to my message? cause i saw a tag but it removed it when i checked
spiral sigil
yeah omega bot deleted it
quick egret
-z-
spiral sigil
basically id just have them be 2 seperate avatars
OR
if you can switch from the normal to human and back with material/texture swaps and gameobject toggles do that
quick egret
spiral sigil
if you can switch from the normal to human and back with material/texture swaps ...
Hmm.. But it might make the avatar a bigger file to and harder to upload right?
spiral sigil
quick egret
Hmm.. But it might make the avatar a bigger file to and harder to upload right?
you literally have 2 seperate avatars in one
thats more filesize
quaint jasper
oak hatch
My process was, uv unwrap by seams, then layer the similar geometry over each ot...
Oh god you're really not supposed to do that
If you want to stack similar but not exact copies of the same island then you need to U square them and even then it's not ideal
Why do you need to have them be the same on the uvmap if their geometry is different ?
quick egret
spiral sigil
thats more filesize
Yeah ... i am just going to make 2 separate avatars. just making it otherwise to diffecault for myself lols
spiral sigil
quick egret
Yeah ... i am just going to make 2 separate avatars. just making it otherwise to...
maybe someday we will have the abiltiy to switch between different avatars in a radical menu, for avatars with like a million outfits but yknow not all on one avatar
for your own avatars rather not public
 pine plaza
Hey im looking for a pocky stick 3d model anyone know a good one
wicked iris

 obsidian nova
Absolutely insane.
quick egret
spiral sigil
for your own avatars rather not public
i hope so
quick egret
wicked iris
really nice 😮
spiral sigil
WIP for Spookality, i am currently trying to think of better clothing for him
 rain fjord
@spiral sigil still not working
spiral sigil
noo? then i got no leads
spiral sigil
so here's a question
how do I mirror a weight paint I've already done?
I forgot to check X-mirror on bender, and now I have one side of the model that has good weightpaints, and another that doesn't
 random oriole
how do i rig and export the model into vrchat
spiral sigil
random oriole
how do i rig and export the model into vrchat
make skeleton, parent skeleton to mesh, fix weight paints because that's gonna fuck up, make the materials if you haven't already, export as an FBX, open Unity 2019.4.31f1, add VRChat SDK 3.0 avatar package, log in, import fbx, correct the materials, set up the blendshapes, hope you don't have a mental breakdown when it all fucks up eventually, keep saving, finish everything you need to finish, go to builder, build for windows and you have it uploaded in VRChat
I skipped a lot of steps because there's just too much
look up tutorials online, it helps a lot
 small valve
spiral sigil
how do I mirror a weight paint I've already done?
small valve
spiral sigil
how do I mirror a weight paint I've already done?
i dont know if there is a way to do that natively, but someone has probably written a script for it
languid fog
spiral sigil
how do I mirror a weight paint I've already done?
name the bones properly, if it is at the left side of your model named it with a ".l" at the end EX: (Feet.l)
after that use the Symmetrize option
 quaint jasper
You can duplicate and mirror vertex groups
or use a mirror modifier on your body mesh

 serene nebula
@wicked iris dang what shader is that?
wicked iris
serene nebula
<@334892116599898113> dang what shader is that?
This isn't previewed on VRC btw, it's just the regular Principled BSDF shaders in Blender.
serene nebula
Ah, fair
The toon shader that people seem to favor washes out the colors on my avatar.
Will have to dig around for others
wicked iris
yep, it really hides out the mass polycounts imo.
Thinking of going for the more normal shading type, going for the semi real look
languid fog
you have 2 options for anime shader:
1 - Use Poiyomi, Cubeds or some shader who do the job automatically (for vrc in unity).
2 - hand paint the texture.
wicked iris
might be doing the hand painting method mixed with a slight toon shader, then again, I'll be experimenting around with what's best
languid fog

how can i solve this?
I already did the AA, OH and CH
but for some reason CATS don't recognise the mesh
quaint jasper
Did you join your meshes ?
spiral sigil
Does anyone have any good viseme picture references I can use ?
I'm making visemes
languid fog
quaint jasper
Did you join your meshes ?
i need to join all the meshes in one?
quaint jasper
That might help cats for finding those shapekeys, i think it looks for the mesh called Body
quaint jasper
spiral sigil
Does anyone have any good viseme picture references I can use ?
I'm making visem...
spiral sigil
spooky default unity man
quaint jasper
His name is Fred !
spiral sigil
 solar fossil
quaint jasper
solar fossil
quaint jasper
This channel is for 3d-modelling discussions, please move to #general-media for other discussions  /s
/s
serene nebula
@languid fog in my experience you also have to make the armature first and pair it to the mesh
languid fog
quaint jasper
https://docs.google.com/document/u/1/d/1W5KFa_aszCMrJaFD8mb9a-GHYO4X4S9M63GjM4Uw...
well, still the same
languid fog
serene nebula
<@305389850104954890> in my experience you also have to make the armature first ...
^^
did the 20 Shape keys and named it properly
did the shape of AA, OH and CH
to do the visemes
but still "No meshes found"
quaint jasper
languid fog
well, still the same
Are you sure your shapekeys are named correctly and you have a Basis at the top ?
Are the meshes weight painted to the main armature ?
languid fog
quaint jasper
Are you sure your shapekeys are named correctly and you have a Basis at the top ...
yes
 languid fog
quaint jasper
Are the meshes weight painted to the main armature ?
languid fog
quaint jasper
Are the meshes weight painted to the main armature ?
yes
 quaint jasper
where's the rest of your armature 
quaint jasper
tbf it might be a Cats bug i'm unaware of https://discord.gg/zRd4m2Ev
languid fog
it would be weird needing a entire Armature just for visemes
languid fog
quaint jasper
tbf it might be a Cats bug i'm unaware of https://discord.gg/zRd4m2Ev
ok idk how i did it
but it worked
aosndoiadnoiand

idk what is happening, but the visemes worked
so yeah

 bright steppe
Been a while since I've done any real renders in Blender but I was curious
Does Blender have multi-GPU rendering?
If so, how fast could I render with

4 RTX 2080 TIs
bright steppe
 dusty heron
Yes, <https://docs.blender.org/manual/en/latest/render/cycles/gpu_rendering.html...
dusty heron
Yes, <https://docs.blender.org/manual/en/latest/render/cycles/gpu_rendering.html...
Nice!! Thank you!!
Are those cards good? I assume they are, but it's mostly used like a TPU so I'm not sure about its graphics capabilities.
dusty heron
2080 TIs are very good cards
bright steppe
dusty heron
2080 TIs are very good cards
Ooooh
I have no scale lol I've been rendering mostly on my gaming laptop which is on a single GTX 1060 (6GB)
And it takes a good like... ten minutes to do the renders I tend to do in Cycles
How much faster could I expect 4 2080 TIs to render that same kind of image?
this question is probably making the resident Gaming Rig builders and 3d modeling nerds scream lol but I am somewhat new to this
dusty heron
bright steppe
How much faster could I expect 4 2080 TIs to render that same kind of image?
I don't actually know, but pretty much, a lot faster.
Because you're not only taking a much better card, but also 4 of them
bright steppe
interesting
I'll have to see if I have permission to use it for that
I'm using a server from own of my professors to do some PyTorch machine learning model training

The program is using over 40gb of VRAM lol
That machine do be learnin
Actually I misread that table, apparently that's the total avail memory and it's only using about 10gb of it which is weird
honestly I bet lol
I hope he'll give me permission to do it
He's doing VR research as well
so maybe if I ask for permission to "do my 3D and VRchat renders on your server" he'll give me permission lol
LOL
honestly I bet he will
he's doing VR security research
and I'm considering applying to him for grad school
so I don't really want to get in his bad graces
and honestly with 4 2080s sitting idle, I can't imagine it would be a burden
but I should definitely ask first
this ML experiment is actually somewhat VR related
I accidentally ran the model on only one GPU but it's still training at 2hz lol
so
so I can just let it run, it'll be trained mostly in like 12 hours enough to see if this is actually feasible
bright steppe
Essentially his research in the past has been significantly on like
physical device security
Some research he's discussed involves how it's possible to use smartwatch accelerometers or cell phone accelerometers to accurately predict users' typing using ML
which means that essentially with no permissions, you can snoop passwords
He's going to research that for VR next
 dawn fern
So I have this Vrchat model that I made on a site
And I have no idea how to export it to unity, and get it into Vrchat
 devout scroll
depends on where you made it
solar fossil
bright steppe
How much faster could I expect 4 2080 TIs to render that same kind of image?
built myself a server with 3 5700xt cards in it and ran some blender rendering on it, sadly the speed increase wasn't as high as i was hoping for, so its either not scaling linearly by adding more gpus or i had something configured incorrectly, this was also dont on the old version of cycles since cycles X does not yet support amd cards. Do keep us updated with your results tho, pretty curios on how things are on nvidia side 👀
dawn fern

Yeah I’ve been trying to get this VRM file in, and it just won’t work (it’s labeled Cake2)
I even got a converter
 final mortar
Hey so is there an easy(er) way to put an existing texture on a mesh? I've got this so far in Unity, and right now I'm relying on Blender's UV editing feature. It's close to what I want to do but not quite; I'm trying to make these scales seamless and I'd like them to flow across the body nicely, and I'm trying to have it so that e.g. the main body has larger scales and the tip of the nose eases into smaller scales. For the record I'm using a texture that's been listed as completely free to use on the person's website
 spiral sigil
hey ! can someone please help me out with making a avatar please i got all the texture's ! but i have problem's with the program
 elfin crystal
is anyone willing to make a dog model from scratch for me? i'll dm you a referance and some things i do and dont want in the model! give me a little bit of time to put together the money.
oh yeah, please make it SFW [SAFE FOR WORK]
quaint jasper
elfin crystal
is anyone willing to make a dog model from scratch for me? i'll dm you a referan...

VRChat Ask
Post about commissions for avatars in this category. Requests are not permitted, we only permit posts from those providing services.
elfin crystal
quaint jasper
https://ask.vrchat.com/c/commissions/avatar-commissions/35
i cant acsess my vrchat account is broken at the moment.
quaint jasper

 devout scroll
final mortar
Hey so is there an easy(er) way to put an existing texture on a mesh? I've got t...
devout scroll
final mortar
Hey so is there an easy(er) way to put an existing texture on a mesh? I've got t...
gotta do it manually i guess. you could paint them onto your mesh if you have proper uvs but I don't know if there's a easier way to do it
 tough lintel
Done making @miyuki_05290's OC into a model
https://twitter.com/nikkytae/status/1447165120778407939?s=20
https://skfb.ly/o7ONQ


Finally done making model of @miyuki_05290's OC >__<
It’s my first time making variants of Japanese traditional clothing. It was pretty fun. https://t.co/WauMt4l8YA
 Twitter
·
final mortar
devout scroll
gotta do it manually i guess. you could paint them onto your mesh if you have pr...
Twitter
·
final mortar
devout scroll
gotta do it manually i guess. you could paint them onto your mesh if you have pr...
Yeah. After a little research, apparently what I need to do is paint directly on the mesh indeed. Manually aligning the UVs to match definitely feels like it's going to take far too long
Doing it in Blender feels like it's going to be complicated so I've taken to finding another software to help with texturing. So far I've got Armorpaint to try out - if all else fails, I might consider Substance Painter but I'd love to use free software instead
devout scroll
quixel mixer is also free and pretty good
not so much for painting just yet i think, but it's good for procedural stuff
final mortar
Tried using the github version of armorpaint since I can't buy anything right now while they offered the source code for free. Things... didn't go as planned lol

And these are actual glitches, i.e. I couldn't just paint over them
I just wanted to put on some naturally-flowing scales lol
quaint jasper
You can try substance for 30 days
final mortar
As far as I've seen, it's actually 7 days
At least according to the search results
They've apparently recently changed it from 30 days to 7
quaint jasper

final mortar
I mean I can definitely try it out still, lol. I might actually, considering that I haven't found another free or affordable alternative yet and 7 days is still better than nothing
Also thinking of seeing about blender add-ons too
devout scroll
You can get a student license for a year
Then another one next year
It doesn't matter what kind of student you are or if you are one
final mortar
I actually am a student, the only question is how do I go about getting the student license and/or if my college is even qualified? (I'm not based in the US)
Also just installed the trial version and this is the first thing that shows up when it's opened. Rip lol

Oh hey, looks like it does actually give me 30 days
Seems the 7 day thing doesn't actually apply, at least not to substance painter
devout scroll
I don't think that info is being checked at all
You get a license emailed to you the second you click submit, and the picture of your student id doesn't matter either
final mortar
Hmm. Suppose I'll need to see where I can access this sort of webpage, and I'll also need to wait a little anyway as I just recently re-enrolled college and I've to receive a new student id card
Seems I've found it, and it does appear that I'll actually be eligible for it. Sweet

 azure rain
cool
small valve
 plush ridge
your style is immaculate
plush ridge
thanks
 patent lantern
Damn that's sick!
 cinder venture
plush ridge
cinder venture
plush ridge
In love with that design

 weary jungle
plush ridge
weary jungle
plush ridge
That looks really good
Now I want a computer to make models like theses
 astral shard
So on the other end of the spectrum; I'm looking to make models look kind of... scuffed. Like near-intentionally bad. I think it's something that's done within Blender as some kind of optimization, but I'm not sure the entire process.
 dusty heron
astral shard
So on the other end of the spectrum; I'm looking to make models look kind of... ...
dusty heron
astral shard
So on the other end of the spectrum; I'm looking to make models look kind of... ...
Step 1: Decimate
There is no step 2.
astral shard
Excellent, that's the option I was looking for
 quaint bronze
Simplygon can get you a very similar look and you can choose to have it atlas all of the materials on your avatar while its doing the reduction. Blender integration is in preview mode but it’s still available on the free version. It has native Unity support available too
astral shard
I'm honestly not looking for full perfecetion, but instead just looking for scuffed
spiral sigil
flamungo
 azure rain
plush ridge
azure rain
plush ridge
so cool
 hushed acorn
astral shard
I'm honestly not looking for full perfecetion, but instead just looking for *scu...
hushed acorn
astral shard
I'm honestly not looking for full perfecetion, but instead just looking for *scu...
Just decimate the model alot
You can also mess with making cursed shapekeys for talking
But the most I've done with that is make a plush's head stretch a little when talking
 night hamlet
can someone help me comprehend weight painting, no matter what i do it turns into this hot mess and I don't get what I am doing wrong

 devout scroll
perhaps another bone is interfering
check the other vertex groups or go into edit mode and select one vertex of the knee and in the weight table see what affects it
 devout scroll
Well, any modelling software has alternatives to these tools
 wispy iris
Hey guys! I'm new to the community and I work in Blender and Unity, I wanted to start making VRchat worlds, where should I start?
About getting a vrc world up and running
Optimization
Scripts and stuff
Looking for some guideline ^^
azure rain
found this one to be a decent text guide https://steamcommunity.com/sharedfiles/filedetails/?id=2507157026

Video version: https://youtube.com/playlist?list=PLPdWkxUSZ65Fp6ICrU7mIq1znAfPwMhNZ
This is the script of a work in progress video tutorial series about how to create your first VRChat World using
wispy iris
Thank you so much
azure rain
and definitely ask around on the Discord if you have any questions
wispy iris
Yessss I sure will!
 teal token
final mortar
Also just installed the trial version and this is the first thing that shows up ...
teal token
final mortar
Also just installed the trial version and this is the first thing that shows up ...
do you have some kind of identification card that you got when you started ur education?
you can use that to verify that you are a student
otherwise you can purchase a perpetual licence trough steam, its gonna set you back about 150 euro but its very much worth it for that price
final mortar
teal token
do you have some kind of identification card that you got when you started ur ed...
I do but it's outdated, unless that doesn't matter
teal token
you can try it anyway
final mortar
Actually now that I look at it, it doesn't actually show my current year on the front at all. Just the issue date on the back
teal token
i believe its being checked by AI so you might be able to fool it
it has been a while tho when i have had to get a student lisence, things might have changed since adobe is in charge now
final mortar
Maybe. Think I'll wait for my new ID first just to be safe
For now I got the 30 days trial, and I can also see about getting the perpetual license depending on what happens
Would be cool if I got the students license so I wouldn't need to worry about the perpetual one immediately, considering my budget is pretty limited
teal token
tru, just see if you like it or not and give it a good spin. if you are serious about getting into 3D art its a BIG reccomendation to learn. fairly easy to pick up and speeds up workflow 10fold compared to photoshop texturing
alternatevely you can check out this, its a free substance alternative. a bit less in fatures tho but it will do the trick https://armorpaint.org/

ArmorPaint is a software designed for physically-based texture painting.
final mortar
Actually I did check that one. Had some difficulties unfortunately
Used the source code version (after compiling of course) so I could give it a try. Was a bit tough to get around and I also experienced some glitches
teal token
understandeble, i gave up after the compiling of source code part lmo
final mortar
For me the compiling part was pretty easy, particularly since they had instructions and it went by smoothly. But they also left out a step which I had to find via a youtube video lol
After which I finally had a program that would successfully run
teal token
aye chill
if you can follow all that then you should be able to learn substance painter just fine
that is if you understand UV unwrapping ofc
but it has an auto uv unwrapping feature nowadays
final mortar
Ya. UV unwrapping seemed pretty simple, at least as far as I was concerned lol
But something I've tried to do was attempt to adjust the UV islands to create scales that flowed nicely. Needless to say, I eventually gave up because it was far too difficult to actually make it look good lol
(for context - was using an existing, free texture)
teal token
aye i see
if you have trouble with UV unwrapping check out RizomUV, i have been personally using if for the last 2 years and have not used any other UV unwrapper since
languid fog
I really like her Vtuber concept, so nice
 devout scroll


 split sable
I'm moving to the current version of the panda base, but I'd like to keep the current body texture I've been using. The new base has different UV mapping from the older style. Does anyone know a quick tool or tutorial to change either the UV mapping or the textures themselves without doing it all by hand.


Is there like a quick and easy way to map the UV from the first pic to the second?
I know I can do it by re-adding seams and unwrapping things front to back, but I'd rather just like quick and dirty copy past the textures from the first image onto the second image.
 spice pewter
 foggy granite
split sable
I'm moving to the current version of the panda base, but I'd like to keep the cu...
foggy granite
split sable
I'm moving to the current version of the panda base, but I'd like to keep the cu...
I would say no. Since the setup looks completely different between the two. Just take the time and remark the UV seems.
oak hatch
NPR gun. Planning to release as a full unity package, including anims and the like.

around 2k tris, 2k texture. will include working RDS.
oak hatch
I still have to smack it with a planar decimate to clear any extra Tris, and figure out how to get outlines on poi with split normals, but the animations are mostly done, and the textures only need some tweaking to look more "cartoon"
spiral sigil
Any tips for avatar modeling? I haven't made humanoids before
spiral sigil
Alright
Kinda wondering if starting out with the basic shape then subdividing a few times followed by sculpt smooth tool will work...
Might at least give me something to work with
spiral sigil
How do most models look so smooth
Like is there a specific program that people use?
azure rain
basically most folks on here use blender to do their modeling
spiral sigil
Ok I already use Blender so I got that checked off
azure rain
cool
spiral sigil
But all these models are so smooth it's kinda impressive
azure rain
mostly it's folks having a better grasp on how to use the tools
spiral sigil
Yeah
I'm sure
Could be the shader
You're probably right that it's the shader
But shade smooth never looks good when I enable it
Maybe it's cause my models are never complex enough?
Ok
Yeah
So that is done without shader?
I guess the tools alone are good enough...
I'll get it all figured out
Yeah shade smooth I think
Unless that's not a shader
I'm basically self taught in blender so idk
Ah
azure rain
like are you referring to the specular highlights if you're talking about Princibled BSDF
spiral sigil
No just that the models surfaces always look like very smooth. No jagged edges or anything
No noticable verts
Usually low vert count
I'd have to dig up some images
Yeah
Well I'll see what I can do
Pushing my limits a bit
 near sedge
 spiral sigil
Proffesional
near sedge
thanks, I'm really happy that I got into this hobby
spiral sigil
Not bad
 spiral sigil
Beginner question: (I'm trying to learn everything I can) how is it curved without having a ton of pollies?
azure rain
that has a subdivide modifier on it
spiral sigil
Ok...
Don't exactly know what that means cause I'm guessing it's not the same as normal subdivide
azure rain
basically that just means it's not permanently on the model until you tell it so
spiral sigil
Ok
But it curves without making a ton of verts?
I really need to learn how to use it
azure rain
it actually makes more vertices it's just not rendering them in editor mode
azure rain
yes
azure rain
yep as it's literally using like four times the amount of vertices so it's definitely smoother
 quaint jasper
I hope you're looking at tutorials and references !

 brazen depot
idk
spiral sigil
maybe try checking the the face orientations?
brazen depot
 brazen depot
how do i do that?
spiral sigil
they show fine in the render but not the solid
that's actually pretty weird
is this a model that you grabbed off the internet? just curious...
brazen depot
all the parts are mhm
spiral sigil
need an idea of how much experience you have
spiral sigil
oh so you're taking parts and dragging em in?
brazen depot
mhm
spiral sigil
ok...
brazen depot
but i checked a couple videos and tutorial and got help in the past
quaint jasper
alt + N > recalculate outside
brazen depot
so idk how experienced i can call myself but i know the hoodie isnt supposed to be called head
spiral sigil
quaint jasper
alt + N > recalculate outside
yeah try that
spiral sigil
brazen depot
so idk how experienced i can call myself but i know the hoodie isnt supposed to ...
lol
do know that if there are internal faces, the recalculation could get messed up
brazen depot
it works!
wdym?
luckily its only the skirt
that skirts has so many problems
anyway, tysm!
brazen depot
rq how do i select all the bones attached to a specific bone?
oak hatch
No worries
 dusty spoke
So I’m on quest 2 is it possible to make my own avatars
 open scarab
Yes but you need a pc to upload
thorny ivy
Speaking of, ran into trouble with Blender after porting my files over to my new rig.

Blender's showing the proper icons for the materials and everything else seems intact but the model itself is purple.
dusty spoke
open scarab
Yes but you need a pc to upload
Ok I got that but where would I do the actual making of the avatar at
azure rain
combination of blender and unity
dusty spoke
Ok
azure rain
VRChat
Before getting started ensure you have a Unity project with the SDK set up. Step 1 - Find a model Arguably the most important part, you must find a 3D model to be used as your avatar. As this is your first avatar we recommend getting one from the Unity Asset Store as they usually come fully rigged m...
quaint jasper
thorny ivy
You can use the File > External Data> Find Missing Files
thorny ivy
quaint jasper
You can use the File > External Data> Find Missing Files
Many thanks, just saved me a lot of headache.
quaint jasper
Double click on the name or in the bone panel directly
 lament pond
 brazen depot
anyone knows how to add texture to something that has no texture?... I dont know how to explain but im basically trying to draw the nails

i use blender and CATS plugin
quaint jasper
Make a new material, UV unwrap those nails, assign the new material to those nails, use an existing texture or paint them yourself
 spiral sigil
hey anyone elses sdk not showing up at the top if unity?
brazen depot
spiral sigil
hey anyone elses sdk not showing up at the top if unity?
I remember when it happened to me i was using the wrong version of unity, maybe thats what it is?
 granite hornet
Could be. They did update the version of unity it uses now. The current build of unity should be 2019.4.31
spice pewter
 spiral sigil
o cause i use 5.6.3p1 what should i use
dusty heron
spiral sigil
o cause i use 5.6.3p1 what should i use
You should use 2019.4.31f1, Unity 5 is over 4 years old now.
spiral sigil
Modeling feet in class
This is a power move
Honestly this isn't going half bad
I have the calves planned out
spiral sigil
Anyone know where I can learn modeling for non-humanoid avatars?
Want to make this guy

Anyone know why the modifier isn't applying symmetrically?
 wicked iris
spiral sigil
Anyone know why the modifier isn't applying symmetrically?
wicked iris
spiral sigil
Anyone know why the modifier isn't applying symmetrically?
is your object's origin in between?
the mirror modifier gets applied from the origin point

here's the different ways of setting the origin
wicked iris
make sure the mesh is near the origin point
 wicked iris
Understandable
wicked iris
nice 👍
 near sedge
DAX is coming along,
 near sedge
yeah I didn't consider just how sexy this would be when I came up with this idea
spiral sigil
So ive been having Alot of problems trying to unhide the Gray Mesh shown in the scene here however it says its not hidden and its invisable either way.. how do i fix this???

 full ice
spiral sigil
So ive been having Alot of problems trying to unhide the Gray Mesh shown in the ...
full ice
spiral sigil
So ive been having Alot of problems trying to unhide the Gray Mesh shown in the ...
enable more of the filter toggle restriction things
 spiral sigil
thanks 
thorny ivy
Any of ya'll got tips for makin' monster-style teeth or just teeth/mouths as a whole?
Don't like what most anime-esque models use an' figured it'd just be easier to create some from scratch then hunt down a model with a decent set.
Goal's somethin' like this.

 frank vine
okay loosing my mind here... i feel like ive tried ALL vertex groups like 3 or 4 times... (theres ALOT) but i still cant get rid of these "dents" in both of her thighs.. As you can see this avatar never had actual legs past the thigh, (white thigh leg is where that cuts off) it only does this when the leg is raised forward or backwards.. im ON the "leg" layer and its ALL red.. so what gives?

 devout scroll
thorny ivy
Goal's somethin' like this.
devout scroll
thorny ivy
Goal's somethin' like this.
I think anime's usually flat, sometimes a long and bent cube with fangs sticking out.
I'd look at sculpting animal teeth but you may also get away with just find simple box modelling with subdivisions
 native slate
spiral sigil
native slate
spiral sigil
I'd get the basic principles of modelling a humanoid avatar done first so you learn about topology, weight painting, and using the least amount of polygons possible. You're still modelling an anthro character, so most of those tips will carry over. The main difference would just be the proportions.
Your answer: Modeling humanoid avatars on youtube
spiral sigil
Okay thank you so much!
 past cloak

 azure rain
cool
hushed acorn
Here's an early version of a model I'm working on

I plan to improve and replace some textures at some point but I think I did pretty good for just like 4 hours of working on it
obsidian nova
Cloth clothing simulation is so cool, but so jank. Random topology everywhere around the seams. Ughhhh 💀
obsidian nova
hushed acorn
Here's an early version of a model I'm working on
Hell yeah!
obsidian nova
thorny ivy
Any of ya'll got tips for makin' monster-style teeth or just teeth/mouths as a w...
You could always rip from a furry base; or try to find a vampire base, or model yourself using animal skulls/teeth as reference. I love this look though. Good luck!
 brisk bobcat
Hey guys ^^ i was just wondering, does anyone have 3d model ready for use - bracelets for couples? Perhaps something like black leather or pearls like accesories which can have some space of silver metal to have name written on it later on?
Im not sure if this is the group chat to ask, as im not looking for an avi either.. though
foggy granite
brisk bobcat
Hey guys ^^ i was just wondering, does anyone have 3d model ready for use - brac...
Go check out websites like gumroad, booth, sketchfab, etc
Just in general 3d assets stores would help you out
brisk bobcat
Okay i will try and have a look :). Thank you!
 thorny ivy
Stoplight Head lives again.
foggy granite
With more enforcing power
 vivid crater
stopping traffic with his bare hands
thorny ivy
I feel like a stop sign made into a battle ax would be a suitable weapon for him.
 hollow ermine
Not a bad idea
spiral sigil
working on swatchling from deltarune :0

 plush mulch
spiral sigil
plush mulch
spiral sigil
making already
 worldly tangle
What I finished yesterday
 spiral sigil
@plush mulch I'm trying but 3d modeling harder than people like this ^ make it look
plush mulch
um, the character i'm using and you want to do is a literal humanoid, i dont see why you cant do it
also
non-humanoids characters are not compatable
i think
 zealous pond
frank vine
zealous pond
frank vine
Check your other bones, sounds like you have the legs also weighted to the hips or spine
thorny ivy
plush mulch
non-humanoids characters are not compatable
They are, just gotta be bit more creative an' do some trickery.
languid fog

(the bot is not allowing me to post the other view bc it is "sexually explicit content" lmao)
 thorny ivy
Real nice work on the clothin'.
How complicated was it to make? Some bits look complex to pull off.
quaint jasper
Looks like a lot of self intersecting geometry
Also maybe wrong, but i'd assume starting with shrinkwrap and extruding from there
languid fog
quaint jasper
Looks like a lot of self intersecting geometry
some yeah, i tried to use less faces possible and the belt at the upper part of the boobs would need a lot of faces to look decent, so i just did it on a way to enter the mesh without looking that bad
ik that's not the better way to do it, but yk, still learning haha
foggy granite
Looks good mind telling me the tri count
languid fog
with the body or just the cloth?
foggy granite
Both
languid fog
Cloth = 14.932
Both = 44.312
quaint jasper
languid fog
some yeah, i tried to use less faces possible and the belt at the upper part of ...
Intersecting geometry is totally legit, i wish i did it when i started instead of trying to make everything part of the same topology...
foggy granite
Yeah having things separate is great for a modeling standpoint and also help thing be a bit more optimized
languid fog
foggy granite
Yeah having things separate is great for a modeling standpoint and also help thi...
44k is quite much tbh, i think i could do some optimization with it
spiral sigil
i like how this is going
 foggy granite
languid fog
44k is quite much tbh, i think i could do some optimization with it
foggy granite
languid fog
44k is quite much tbh, i think i could do some optimization with it
True but what subdivision level do you have on the mesh
spiral sigil
even though they aren't even full feet
foggy granite
Oh good I like to work with 1 as well
languid fog
spiral sigil
i like how this is going
i dont recommend using sub lvl 3 at the viewport
languid fog
foggy granite
Oh good I like to work with 1 as well
i like to do the most optimized possible
spiral sigil
languid fog
i dont recommend using sub lvl 3 at the viewport
ok :/
it looks too angular at 1
foggy granite
But I haven't work on any base mesh in a while mainly props
And also this

Still got a lot of work
quaint jasper
spiral sigil
ok :/
You need proper topology in the first place, otherwise it will be hell for you
foggy granite
 quaint jasper
Highly suggest looking at any modelling body tutorial, you're pushing yourself into a corner here
spiral sigil
ok...
languid fog
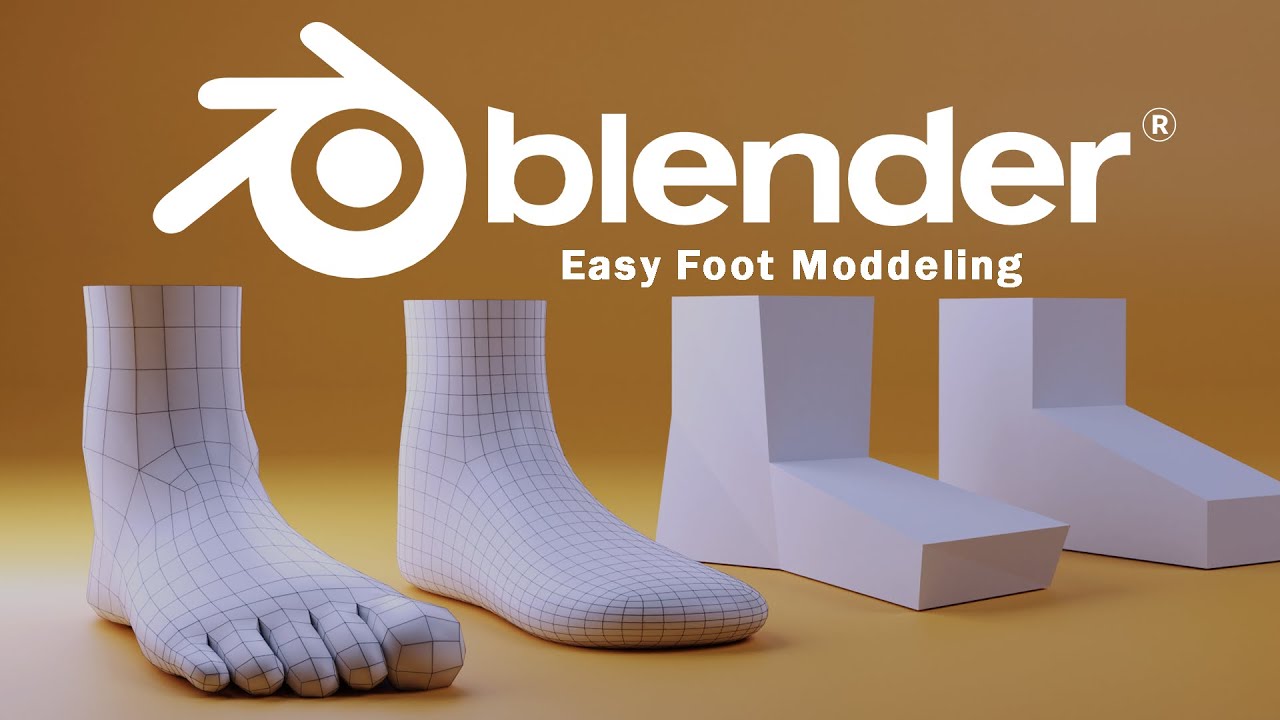
Easy way to model a foot In blender 2.9 and blender 2.8 to get both realistic and stylized foot without sculpting .This is my very simple foot modelling workflow using just box modelling and simple polygon tools in blender 2.8. This tutorial is for beginners, intermediates and even pro users inspired by maya tutorials.
languid fog
foggy granite
yo i cant do mech stuff
quaint jasper
That's alright, you picked up skills on the way, just want to make sure you're making something usable in the end
spiral sigil
alright
foggy granite
languid fog
yo i cant do mech stuff
Well this is my closest finish one compare to all the human projects I start then stop
spiral sigil
i'll make another project i guess
foggy granite
Yeah i know how you feel sometime it just batter to stop the project and retry
Jesus I just remembered how horrific the first face I made
foggy granite
I got to find a photo
spiral sigil
yall've stopped me in my tracks lol
so i might avoid that
previous to this i'm basically self taught
made these kamas for example
 foggy granite
Oh weapons
 foggy granite
 languid fog
look like a bird
spiral sigil
languid fog
19 jun of 2020
honestly looks like a bird mask of some sort
languid fog
ikr
spiral sigil
it's a smooth model and you could probably repurpose it
 languid fog
foggy granite
languid fog
foggy granite
thats a nice spear
spiral sigil
foggy granite
niice
languid fog
sub 1?
 languid fog
thats cool
 foggy granite
The big toe
spiral sigil
ok that's weird. why are there 2 edges here?

it seems like the extruded faces got copied...
fixed it by merging them
hopefully that is the recommended solution
foggy granite
I say yes because sometime blender make the overlapping vertex
spiral sigil
yeh
i got a ripped model from WipEout HD/Fury once. it had a horrendous amount of overlapped vertexes
is talking about having ripped models allowed here?
foggy granite
Hmm I haven’t seen anyone ban for it
foggy granite
Yeah but ripped models are generally very diverse in quality wise
spiral sigil
yeah
anyways back to my model...
i think that the feet and hands are probably gonna be the most difficult part of this
foggy granite
Yeah I generally agree
But usually I don’t try to model feet because you can just cover them with shoes
spiral sigil
i have a plan for the calves, should only use like 8 manually placed verts at most
spiral sigil
foggy granite
But usually I don’t try to model feet because you can just cover them with shoes
that's true
foggy granite
If you just practicing it good to model the feet for who know why
Maybe you want sandals
brazen depot
what should the eyebrows be attached to?
dusty heron
spiral sigil
checked the rules and it's not mentioned
It's mentioned in rule 9.
quaint jasper
brazen depot
what should the eyebrows be attached to?
in what ? bones ?
brazen depot
mhm It was previously attached to my eyes bone, so it would disappear if i looked arround
but now its not attached to anything and it doesnt work
well the eyebrows still have animations working, but it doesnt follow the head correctly
quaint jasper
That should be the head bone
if they're not following it means they're weight painted to something else
brazen depot
thanks!
yeah i figured it out when they disappeared in my head XD
How can I weight paint the eyebrows only?
found it
spiral sigil
neat
thorny ivy
spiral sigil
is talking about having ripped models allowed here?
If you're using ripped models to any degree, I would only recommend doing so as a reference/template for more original content.
Depending on their complexity/age, there's a good chance you could also recreate them almost entirely or even make something of higher quality.
spiral sigil
thorny ivy
If you're using ripped models to any degree, I would only recommend doing so as ...
yep
thorny ivy
On top of that, many models experience some level of optimization/decimation to make them more computation-friendly but there's plenty which were questionably-made in the first place. Plus, the software used for making them was likely not on-par with current ones today and/or made with certain hardware limitations in mind.
spiral sigil
yeah that's true
hushed acorn


boyo im working on. any tips?
(I am still working on the textures for the shoes and pants)
quaint jasper
Tips to do what ?
brazen depot
Ayyy my model is finally getting somewhere 😄

just gonna have to fix the white eyes but i think i know where the problem comes from
eh nope idk why my eyes are weird
XD
is it possible to give a different atlas to my unity texture?

 sage brook
Would anyone be able to tell me the best way I can add new shoes to my avatar? I have used blender before, trying to add skates to my current avatar for the new skating world coming out tmrw and no matter what I do when I try walking with it or testing a animation in unity the shoes just go off the feet
quaint jasper
how are they weight painted ?
sage brook
quaint jasper
how are they weight painted ?
well that's the thing, I have changed clothes before but never shoes, these skates also don't have a armature so what would be my best bet?
quaint jasper
to weight paint them to your feet bones
sage brook
quaint jasper
to weight paint them to your feet bones
is there something with cats to do that?
quaint jasper
not really, join your meshes, in edit mode select the left roller skate, assign 1 to the left foot vertex group, repeat for the other side
 sage brook
quaint jasper
not really, join your meshes, in edit mode select the left roller skate, assign ...
sage brook
quaint jasper
not really, join your meshes, in edit mode select the left roller skate, assign ...
how do I assign it?
quaint jasper
By clicking on Assign
sage brook
quaint jasper
By clicking on Assign
did that, double check it assigned it and still
this

me just testing a dance emote and the white part is the legs
quaint jasper
make sure they're not assigned to any other vertex group
sage brook
quaint jasper
make sure they're not assigned to any other vertex group
yeah idk still does the same thing

 spiral sigil
Perhaps
spiral sigil
Knee
 spiral sigil
How do I merge 2 objects?
Make them into 1
I've done it before
But can't figure it out now
Oh got it
thorny ivy
Finished the rough draft of the upper jaw, haven't applied the subsurface modifiers yet but I'll wait to do that until after I get the bottom done + into position.
 sage brook
so if I have my current avatar with a armature and I am trying to add shoes that don't come with a armature what would be the easiest way to do so?
foggy granite
sage brook
so if I have my current avatar with a armature and I am trying to add shoes that...
parent the shoes to the feet bone and transfer the weight
sage brook
foggy granite
parent the shoes to the feet bone and transfer the weight
how do I transfer the weight?
and parent it
languid fog
idk if this question can be make here, but do I need to export my model on a specific way to come with my visemes?

 quaint jasper
Make sure it's targeting the correct body mesh
 languid fog
yep, still the same
languid fog
Fresh import
brazen depot
if i want my ears to be interactive, should they have bone collider?
quaint jasper
languid fog
Fresh import
Are the shapekeys not visible in the blendshape dropdown list on the skinned mesh renderer component ?
quaint jasper
brazen depot
if i want my ears to be interactive, should they have bone collider?
interactive for yourself yes
languid fog
quaint jasper
Are the shapekeys not visible in the blendshape dropdown list on the skinned mes...
just say "none"
 quaint jasper
Click on the skinned mesh above
brazen depot
oh, what about if someone else touch them? ive seen on public avatar the ears were "touchable" (sorry for my english), i wonder if i have to do something special for that
quaint jasper
top of the component has a lit
quaint jasper
brazen depot
oh, what about if someone else touch them? ive seen on public avatar the ears we...
No that would be a modified client, which is against vrchat's TOS
Avatar interactivity across player is coming soon
brazen depot
thanks for the clarification
languid fog
quaint jasper
top of the component has a lit
 quaint jasper
yeah then they definitely are not getting exported
are you using blender's export or cats ?
languid fog
Blender Export
quaint jasper
Mind giving cats a try ?
quaint jasper
Save, close blender and restart, could just be fucky
languid fog
quaint jasper
Save, close blender and restart, could just be fucky
Same...
oh, when i try to "import" the model on a another blender project the Shape keys arent there 2
so it is smth with blender
quaint jasper
what about any other model ?
Could also be unity import settings
Or you need to run the auto fix for legacy blendshapes ?
languid fog
quaint jasper
Or you need to run the auto fix for legacy blendshapes ?
like, at the main project the shape keys are there and working, but after exporting the model and importing it on a New Project in blender the shape keys are gone
i dont think it is smth with unity


 languid fog
yes
like, do i need to aply every modifier before doing shape keys?
bc i think thats the issue
quaint jasper
what modifiers do you have ?
languid fog
Sub and Armature
quaint jasper
Can't apply modified to meshes with shapekeys
quaint jasper
It should tell you when trying to apply manually ?
quaint jasper
GitHub
Join blender objects that contain modifiers and shape keys into a single object - GitHub - llealloo/blender-join-modifiers-and-shapes: Join blender objects that contain modifiers and shape keys int...
Nah no need
If your shapekeys are good, this addon should work perfectly
quaint jasper

languid fog
second time you saved me, thx m8 haha
quaint jasper
no worries, make sure to save a version before applying modifiers though, since the addon is destructive
languid fog
ok 
thorny ivy
thorny ivy
Finished the rough draft of the upper jaw, haven't applied the subsurface modifi...
4ish hours of tweaking and polishing later, this is how the teeth look now.

Smooth shaded + an outline "shader" done with solidify, something I learned just to make them look a li'l better.
brazen depot
so, will colliders keep my hair from entering my body?
thorny ivy
If set up in conjunction with dynamic bones, I believe so.
brazen depot
do i add a collider component or does the dynamic bone work?
thorny ivy
You need to have both.
brazen depot
so do i put the collider component on both the hair bone and body bones?
thorny ivy
Dynamic bones allows interactions + gravity, colliders are the interaction point.
If I'm rememberin' correctly.
thorny ivy
Most people just have the colliders on hands with dynamic bones on anything that they want interactable or movable. IE: hair, accessories, etc.
brazen depot
if i put a collider on the spine, will it keep the hair from going there?
like an invisible wall
thorny ivy
I haven't touched that part of Unity in a while so you'll have to do some searchin' for definite answers.
This may help though.
https://www.reddit.com/r/VRchat/comments/7n0jsu/any_tips_on_making_it_so_my_avatars_skirt_cant/
reddit
6 votes and 5 comments so far on Reddit
brazen depot
oh thanks!!!!
 cosmic merlin
Do you guys have any idea of How I enable the black outlines? Something like this
 quaint jasper
Wireframe ?
cosmic merlin
I'm new at blender so yeah.
quaint jasper
You have display options at the top right corner of the viewport, you can enable that there
wicked iris
if you mean the selection modes, shortcut keys 1, 2 and 3 for vertex, edge, face selection modes @cosmic merlin
actual selection buttons on the top left corner of the viewport in edit mode
spiral sigil
how do i fix this chin area (retopology)

i'm trying so many things but it just looks awful
 tall phoenix
So I found this model from vrmodels and I noticed that there's a blend file but when I open it in Blender the model looks like this?
Is there a fix for this?
 quaint jasper
spiral sigil
how do i fix this chin area (retopology)
quaint jasper
spiral sigil
how do i fix this chin area (retopology)
Are you looking at topology guides already ? Unsure if your question is technical or visual
spiral sigil
quaint jasper
Are you looking at topology guides already ? Unsure if your question is technica...
yes, i am browsing through multiple guides
it's more visual than technical
quaint jasper
how does it look in object mode ?
quaint jasper
Probably only worth worrying after you can see it then
spiral sigil
quaint jasper
Probably only worth worrying after you can see it then <:thumbsup:70082391632261...
Isn't good topology important for optimization, though?
I want the avatar to be rated at least Good (or Medium at worst) whilst having support for Quest users.
quaint jasper
No, topology is irrelevant for optimization, topology is for good deformation with bends
polycount is what matters for optimization, but the topology doesn't matter
devout scroll
good topology is also easier to work with and decimate
dissolving a handfull of edgeloops to reduce polycount is quite easy if you have good quad topology
spiral sigil
devout scroll
dissolving a handfull of edgeloops to reduce polycount is quite easy if you have...
That's why I wanna get that bottom chin fixed up in a way it doesn't have problems later on.
I'm in bed now and will wake up in approx. 9h to find more reference pictures and whatnot, or look at the way the OG model did it to somewhat impove on it.
devout scroll
one triangle is probably not gonna be a big deal
but if you want to fix it, go ahead. either lookup more topology reference or add another cut towards the neck
 white moth
does anyone know how to avoid updating FBX files where it suddenly makes all the dynamic bone radius huge by a factor of 100?
spiral sigil
devout scroll
one triangle is probably not gonna be a big deal
For me it is
I always hear the golden rule; don't mix Tris with Quads.
 dreamy epoch
white moth
does anyone know how to avoid updating FBX files where it suddenly makes all the...
dreamy epoch
white moth
does anyone know how to avoid updating FBX files where it suddenly makes all the...
I always ensure to export from Blender with this setting set:
 devout scroll
spiral sigil
I always hear the golden rule; don't mix Tris with Quads.
devout scroll
spiral sigil
I always hear the golden rule; don't mix Tris with Quads.
It all gets converted to tris in the end anyway
You want stuff to triangulate well
 devout bison
I need help please!
I have been playing with shape keys, and for some reason when I use the rotate tool it "scales" the object on that same axis during the movement.
I thought it was maybe something else in my project file causing it, but it even does it when I make a new file and simply apply a shape key to a simple sphere. I took a screen recording to show what I'm talking about.
https://drive.google.com/file/d/1mRTgJPwtdiYOYJDk3UIvxL5d8D4laFAx/view?usp=sharing
Google Drive
spiral sigil
devout scroll
It all gets converted to tris in the end anyway
i played around an hour ago and figured out my way
devout scroll
devout bison
I need help please!
I have been playing with shape keys, and for some reason whe...
Shape keys store verticies and their offsets from the basis shape key
Then their position is interpolated from 0 - 1 (basis - key)
Nothing in between is stored
So it kinda makes sense you're getting this result
devout bison
then how would I rotate the object without it distorting?
devout scroll
I don't think you should use a shape key for that
Use a bone and animate that rotating in unity
spiral sigil
devout bison
then how would I rotate the object without it distorting?
also tip u can just rename a .mkv file to .mp4 in windows explorer and it will convert fine
useful if you want it to embt in discord so ppl dont need to dl it
devout bison
thank you
spiral sigil
np
devout bison
Im trying to set sliders to his eyelids. But even though I only use a simple rotate motion for the shape key, it changes the size of the object in the middle. so I can't do half shut eyes and such because it pulls behind the eye.
can someone please give me some insight?
What am I doing wrong?
spiral sigil
tall phoenix
So I found this model from vrmodels and I noticed that there's a blend file but ...
VRModels is a website where stolen/leaked/ripped avatars or assets are uploaded
Probably shouldn't use it 🤷♂️
But the reason it looks like that in blender is because there are things overlapping on your avatar, either separate meshes or unmerged doubles.
You might also have to setup your materials again.
it looks like it is so high poly lol
The eyelids?
no like
it looks like if I subdivided something amillion times and all the dots just become a black coat
Ahh, sometimes shaders look like that in Blender too when there's nothing in the output
interesting
spiral sigil
devout bison
Im trying to set sliders to his eyelids. But even though I only use a simple ro...
You would probably have to figure out some Unity stuff to make it work, shapekeys will just take the fastest route to get to where you set them to be and won't take the route that you edited it as
devout scroll
devout bison
Im trying to set sliders to his eyelids. But even though I only use a simple ro...
I'm not sure, but you can use bones as I mentioned earlier. Both for eye movements and blinking
obsidian nova
@devout bison Bone rotations will physically rotate the mesh around the center axis; shape-key transforms will just hop from state A to state B in a straight line, which is why it's cutting through in weird ways.
devout bison
okay, thank you.
what steps do you need to get it to work with vrchat then?
obsidian nova
Like Pumpkin said. Bone rotations are your best bet.
You can weight paint the eyelid to its own bone & then animate in Unity.
quick egret
So a friend of mine is trying to upload a avatar true unity, but the moment he uploads it..he should get the panel for giving the avatar a name and a profile pic. For him everything becomes black. does annyone know why?
spiral sigil
quick egret
So a friend of mine is trying to upload a avatar true unity, but the moment he u...
not sure what you mean by 'true' but the Unity version rn is 2019.4.31, also when that happens look at the bottom of unity for a red black error bar, click it to open the console and fix the errors its mentioning
quick egret
He is using 2019 unity, And i mean a simple upload of a avatar he found, it was already unity
There is no error
Just a black screen
spiral sigil
ok, i was in a wrong channel, so i have to repost
is it possible to somehow 'correct' roundness on a rounded loop ?

or am i to manually adjust by hand in hopes to get it right?
NVM
found the solution: Mesh > Transform > To sphere
obsidian nova
Is there any way to quickly stack these UV quads on top of eachother without having to do it manually? So that they fill the whole UV map (as squares). It's been hell to do this manually.

Super confused. I feel like this should be simpler.
quaint jasper
UVPackmaster has tools to do that, but paid add-on
obsidian nova
Thanks! Its only 12$, that's super affordable.
solar fossil
he do be a long boy

 cerulean shoal
wig
 languid fog
I don't want to weight paint this...
 quaint jasper
You can weight paint transfer from a cage mesh tbh

Hi guys, this is a character from my first Blender tutorial.
This tutorial is only for people who already have a basic knowledge of Blender. Through this tutorial, I will try to provide you the most basic knowledge I have to create a character like this. Maybe the character I make isn't perfect, but I believe that the knowledge and tips that I ...
languid fog
Thats nice to know
 cerulean shoal
really considering switching Anne's face to use 2d textures instead of 3d eyes and mouth
 brittle nacelle
Still gotta make the low-poly version so Quest users can see them, but...

 fresh isle
cerulean shoal
among us
fresh isle
cerulean shoal
among us
Bru how
I hate making hair so much, a lot of modeling projects I've started ended on me giving up on the hair bc I just can never do it
 wild tinsel
solar fossil
he do be a long boy
wild tinsel
solar fossil
he do be a long boy
yooo thatd be nice to scare people
solar fossil
hopefully will be able to finish him before spooky month ends
wild tinsel
share it once you make it public please
solar fossil
wild tinsel
share it once you make it public please
dont think ill make it public since its not my character, its from a show i like that just ended
wild tinsel
ahh damn
spiral sigil
brittle nacelle
Still gotta make the low-poly version so Quest users can see them, but...
time to retopologise
solar fossil
wild tinsel
ahh damn
but anyway, i do recommend the show, its called "interface" by umami
hushed acorn
epic

(Old screenshot, his pants and shoes have a little bit more detail now.)
I spent awhile trying to make the freckles look good but you can't really see them tbh

Found a picture of the updated shoes

 tight quartz


Why is it that in Edit mode this bone move to the correct position but in pose or object mode it goes back?
First photo is object mode
You can also see that the clothing also seems kinda scuffed
 dapper herald
In edit mode you'd be looking at the current Rest Pose. In Object or Pose mode, you'll be seeing the current "active" pose.
 languid surge
Never bothered much with scaling my proportions for FBT but i was bored and finally decided to. Any way to scale the bones in post mode in blender, then apply the armature? Blender doesn't want to allow it because I have shape keys on my mesh
quaint jasper
I'd suggest using https://github.com/triazo/immersive_scaler
GitHub
VRChat correct proportions, made easy in blender. Contribute to triazo/immersive_scaler development by creating an account on GitHub.
obsidian nova
@languid surge What's the purpose of scaling your proportions? Just curious.
Also, Ruuubick, I'm not going to ping you, but christ, thanks for the tip. UVPackMaster is a real gem. Well worth the 12.50$
quaint jasper
It really is !
obsidian nova
I was spending hours, literally like 5+ hours manually aligning UV quads by hand. 💀 In hindsight, it's insane.
azure rain
obsidian nova
<@!123057867086364675> What's the purpose of scaling your proportions? Just curi...
so that it matches your IRL body proportions better so it's more immersive
quaint jasper
obsidian nova
I was spending hours, literally like 5+ hours manually aligning UV quads by hand...
If you're doing anything manually for more than 10 minutes, there's likely a tool someone already made that does it for you
obsidian nova
Good to know.
azure rain

VRoid Studio is an application to create 3D models of humanoid avatars (characters). The app runs on Windows and Mac and can be used for free by anyone. 3D models created with VRoid Studio can be used as avatars on various VR/AR contents, both for commercial and non-commercial use.
some tools of that description
foggy granite
There are also plenty of free assets in 3d model shops which you can slap together
frank vine
Anyone know how to fix a cursed tongue? it has 3 bones, NO CLUE how to select "tongue" to check for weight paint ... uuuh halp? Also it stretches out of my body like nightmare fuel if i crouch or especially when i go prone... (neck is stretched on purpose)

in game test.. its stretched out D:
 obsidian nova
@sharp sorrel If VRoid isn’t your style, you could try ReadyPlayerMe or Tafi. They’re character creators (albeit stylized) that allow you to download your model & customize further in blender or the 3D modelling app of your choice.
lol, yeahhhhh
It looks like this…
 frank vine
obsidian nova
frank vine
obsidian nova
yes, ive done weight painting, but im starting to think the dynamic bones are parented incorrectly.. what SHOULD the tongue bones be parented to?
obsidian nova
Oh, cool, well that makes things easier.
I mean, shouldn’t it just be like hair bones? You parent them to an arbitrary “root” bone that’s then patented to the head.
frank vine
lol nooo clue .. this is my first avatar edit lol ive been learning as i go
obsidian nova
I mean, check your layers. It should show what bones are parented to which. If there’s no obvious problem, I would un-parent all of your tongue bones & then re-parent them again.
Can you take a screenshot where we can see which bones are parented to which (in the layers panel)?
frank vine
its a M E S S
obsidian nova
So were my first Avis. No stress.
frank vine
no really im having issues FINDING said parent bone D:
 obsidian nova
Can you unfold this (Armature 001) and all subsequent groups.

And then take a screenshot of just that?
Damn
frank vine
Ooooh okay, im looking at those drop downs now, thank ya
obsidian nova
I just noticed, it looks like someone stretched the neck, but didn’t adjust the tongue bone accordingly. The tongue bone should be in or near the tongue. Right now it’s in your collarbone. That’s going to cause issues.
Like, everything can be weighted correctly, but if your bones are in the wrong places, it’ll still whack out.
frank vine
i stretched the neck up so i could actually SEE the tongue lol i needed to see what it was doing
obsidian nova
If you click on your armature & go into edit mode, there should be a little black line that runs from the tongue bone to it’s parent.
frank vine
obsidian nova
I just noticed, it looks like someone stretched the neck, but didn’t adjust the ...
Its actually not though??
 obsidian nova
Omg, those layers…😅
Umm, honestly, it’ll be hard for me to offer any meaningful advice via Discord. I feel like I’d be able to fix this quickly by myself, but like, I suck at explaining things.
The fact that your tongue stretches like that makes me think that it’s partially weighed to those 3 bones there & partially weighted to something else (a root bone, or something in the head).
 obsidian nova
What on earth is that parented to though, like where does the line go?


 obsidian nova
Yeah, unparent that…
frank vine
so what SHOULD i parent it to? .. she looks cursed but im desperate to fix her! shes sooo pretty, ive dumped over a full week of ALL my waking hours into her.. im nearly mentally DEAD
 obsidian nova
And then re-parent to the head bone (or whatever bone your hair/ears is parented to).
I mean, have you tried the CATS fix avatar button? Save another version of your file first before doing it, but it can be a lifesaver sometimes…
frank vine
i ABSOLUTELY ABUSE that button lmao
she purrty tho hehe im dying to finally use her ❤️
 obsidian nova
I’d guess either of these.
Or whatever all of your other dynamic bones are parented to (hair, ears etc).
 frank vine
uuuuh H O W do i do that exactly? im going full potato over here .. pretty sure its not working
obsidian nova
In edit mode, right click on your tongue bone (the tiny one furthest back). In the drop-down menu, select “parent” & then “unparent”.
I think. Honestly, I’m not at a computer, so this is all from memory. 😂
frank vine
wait i think... hmm i donno i might have. oh i unparented it yeah
obsidian nova
Great!
frank vine
all three now have the small black lines to that "parent" but should it be just the root one?
obsidian nova
Yeah, the tongue bones should be parented to each other (like a chain).
The bots killing me. 💀🤣 Damn sassy.
frank vine
lol i "yelled" no more stretchy tongue! chatbot got angy
soo it should look like this then?
 obsidian nova
Looks better! Try rotating the head/spine in pose mode. See what happens.
You might still have weight painting issues.
frank vine
does this look right?
 obsidian nova
That looks great. The order of Tongue 1, 2 & then tongue seems sus though…Click on them to make sure that they’re not parented in the wrong order.
If it’s parented properly, Tongue1 should be the furthest back, followed by tongue 2 in the middle & tongue at the tip.
frank vine
obsidian nova
That looks great. The order of Tongue 1, 2 & then tongue seems sus though…Click ...
Lol im pretty sure thats how it always was though
 obsidian nova
Tongue 2 is the middle one?
It’s probably fine, it’s just the names that are messing with me.
frank vine
obsidian nova
Tongue 2 is the middle one?
yesh it is ^.^
I DO have another issue thats bad too.. maybe you could help ? D,:
obsidian nova
Sure. The tongue should be good! Just test it in pose mode by wiggling things around.
What’s the other thing?
frank vine
"Normal face" shhh ignore the constant derp blep and the split face is another issue entirely lol

her emotes (all black, yet another issue im getting to..) BUT her eye is following the emotes that come out of her face..
 frank vine
its SO cursed halp cries
 obsidian nova
Do you know where to find your shape keys?