#3d-modeling
1 messages · Page 113 of 1
 urban valve
 azure rain
yes you're good to go
azure rain
you should be able to just double click it now that you got Unity open
azure rain
put the cursor over it and literally click twice
 silent bane
LOL
yeah u don’t need to drag unity packs
or unzip them
just open the folder if there is a zip
and double click when ur on the unity project page
urban valve
i lost that file the arrow is pointing to it wont show up again
 quaint jasper

silent bane
what
urban valve
no i didnt
silent bane
so grab another sdk
urban valve
its just not showing up
urban valve
how do i do that
urban valve
i just download it from where i bought the model again?
urban valve
ok
azure rain

VRChat lets you create, publish, and explore virtual worlds with other people from around the world.
silent bane
and download the sdk that’s compatible with ur avatar
 silent bane
click import
urban valve
now im here and i clicked import
 silent bane
click the x
urban valve
ok and yes there is
silent bane
click on it
urban valve
i clicked on it
urban valve
splash screen?
silent bane
what
urban valve
show utilites
silent bane
what the fuck are you saying
urban valve
on unity??
silent bane
no on the sdk tab
urban valve
no there is no loging option on unity
urban valve
ok im at the login i keep signing in but
it wont sign me in
the password box is blue
silent bane
well then that means you are either typing in the wrong email or the wrong password
just wait a bit if you just changed it
urban valve
yes i made my account yesterday
i wrote the password on my computer
its not working
azure rain
then you probably wouldn't be able to upload avatars if your account is one day old?
urban valve
i did the 10 hour thing
azure rain
what does your current user rank say because it's not 10 hours
that's the upload requirement
urban valve
omfg.
azure rain
VRChat
The VRChat Trust and Safety system is a new extension of the currently-implemented VRChat Trust system. It is designed to keep users safe from nuisance users using things like screen-space shaders, loud sounds or microphones, visually noisy or malicious particle effects, and other methods that some...
urban valve
i just reset the password and its still not working
silent bane
did you merge your account
urban valve
merge?
silent bane
what’s your rank
silent bane
go to the socials tab
or your profile
either or
what does it say? visitor, new user, user, etc
urban valve
on vr chat?
silent bane
…?
urban valve
 silent bane
click profile
urban valve
i am on profile
urban valve
let me open the game then..
just a min
i csnt find it

my pc is freaking out
ok so im trying to sign into unity still
its not working
ok so
my whole computer just shut the fuck down
and everything is gone
azure rain
oh dear
azure rain
I might suggest taking a break
urban valve
a break from what?? i never got anywhere :/
azure rain
yeah but it can be hard to work if you're like super frustrated
azure rain
yes you could but given what you described that would be pretty simple and wouldn't help that much as you would still need to upload yourself
urban valve
im legit crying lol
ive spent since 8 am trying to do this
and got nowhereeee
i feel like i spent $40 for nothing
the youtube tutorials made it look so easy
azure rain
the $40 haven't gone to waste as you'll still have the stuff later when you do figure out uploading
urban valve
how can i ever figure it out if i dont understand it
and even when people walk me through like you i still dont know what the fuck im doing
ill stay up all night if i have to
im gonna figure this out
azure rain
not sure if make you feel better but most of the folks watching the tutorials have a lot more computer experience
urban valve
i opened unity again
azure rain
urban valve
i opened unity again
cool
urban valve
and now im trying to log in'
azure rain
you can skip the unity login as you just need that to download stuff off the asset store
which isn't relevant for what we're doing
urban valve
the other person said i needed to log in once impored the sdk in there
it keeps saying my password is wrong
and i know it isnt i just reset it a few minutes ago
 azure rain
cool
urban valve
it says i cant upload avatars
yet
so can i still color mine in the meantime or do i wait
azure rain
yes you could but you've mentioned you've been at this for a while so I might suggest taking a break
since we don't have any big rush
azure rain
glad to be of help
your avatar will still be there when you hit the upload rank hope you have a good rest of your day
 south inlet
did it work?
 cyan plover
south inlet
did it work?
cyan plover
south inlet
did it work?
no clue-
I've been trying to do another thing to try and parent the bones to the model, srry
 small valve
wip

there is nothing more satisfying than watching something come together for once
im trying to be as on-model as possible
and so far im doing a somewhat decent job i think

the buns are somewhat larger than normal to account for 3d perspective
 foggy granite
are you gonna use curves to wrap around bun to give t a bit more detail
small valve
foggy granite
are you gonna use curves to wrap around bun to give t a bit more detail
perhaps
wait
god DAMMIT i cannot escape the ftd discord lol hi
foggy granite
yeah i saw you in the other 3d modeling server too but i didnt know if i wanted to make a comment or not
small valve
foggy granite
yeah i saw you in the other 3d modeling server too but i didnt know if i wanted ...
then you should know, the udon plane prefab is free. and i plan on using it in the future for "project"
foggy granite
wait dont tell me it gonna be about the ship girls
silent bane
urban valve
why does it have to be so fucking hard
its not hard you're just overthinking
silent bane
small valve
this is so hot omg
 dull gull
last attempt was too complicated for me, so imma try a simpler setup with a chibi this time
 small valve
silent bane
this is so hot omg
small valve
silent bane
this is so hot omg
me when satou matsuzaka vrchat
 dense pollen
Does anyone know a good explanation for how to get a really clean gradient across an area while weight painting. I have seen it on models before, but can't seem to replicate it myself.
 tough plover
@dense pollen there's literally a gradient tool
pretty sure you can also do alt + click drag
 thorny ivy
Trying to figure out the weight painting for this spine spike, any suggestions?

I want it to move some with the neck but not a whole lot sense its just below the actual neck.
Fully weighted to the spine, partially to the chest.

Well, figured it out. Just drastically lowered the neck weight painting and works like a charm.
 devout scroll
Projecting body weights usually works well
thorny ivy
I knew that was an option but couldn't figure out how to without searching it up and didn't feel like opening my browser at the time.
tough plover
thorny ivy
I knew that was an option but couldn't figure out how to without searching it up...
in object mode, click the body mesh, shift click the target mesh, then switch to weight painting mode
then, do Weights >Transfer weights
set the mode to "Nearest Face Interpolated"
set Source layers to "By name"
set destination layers to "All layers"
then if you have CATS installed, hit "Delete: Zero weight groups"
thorny ivy
Bonzer, thanks for explaining that.
tough plover
np
useful for getting anything to be weighed the same as the body
clothes, etc
some other modes like "Nearest vertex" can also be useful
for example, fishnets
using a duplicate of the legs mesh
due to how close it is to the body, you want the weights to be exactly the same
thorny ivy
Speaking of, do need to model clothes still. Fine-tuning the body mesh + adjusting weight painting though, shoulder and thigh joints have some odd-looking deformations right now.
 dense sluice
Can you use the sculpting side of blender and still make a good/working avatar?
devout scroll
You can but you'd need to retopolgize it to work ingame
There's tools that do it automatically, with mixed results
But generally sculpting alone isn't enough
thorny ivy
If you don't wanna make a body/mesh from scratch, using a base and modifying it to your tastes w/ sculpting is an option.
You'll have to adjust various aspects accordingly and unlikely to be as-good as a body/mesh custom-made for the asset but it's a start at least.
thorny ivy
So, suddenly having a weird spike in the time it takes for updates to be reflected.
thorny ivy
Backtracking some, appears that Blender didn't like that I replaced part of the body mesh with an older version due to botching the thighs (again) by accident.
I don't know why since I've done similar retrofitting multiple times already, might've been the execution this time around.
thorny ivy
...might have something to do with the hierarchy? Not sure why but the torso was in another collection and trying to add it back where it originally was causes Blender to suddenly start lagging.
Solution found: delete collections. Was doing that weird ghost-link thing we talked about the other day, just happened to lagging Blender this time as well.
Collections deleted, runs smooth as butter and no ghost-links.
 thorny ivy
 topaz reef
learning how to make armour
topaz reef
learning how to make armour
Going for aesthetic armor or actual armor? The former gives the illusion of protection while the later genuinely provides it.
thorny ivy
If you're just going off refs though, actual armor wouldn't be that much different; just less cloth and more rigid pieces.
Though the sexiness of it tends to be drastically lower.
topaz reef
thorny ivy
Though the sexiness of it tends to be drastically lower.
true true
thorny ivy
So I suppose it depends on what your end-goal is + who the outfit is actually for (if you're gonna use it).
 dusty heron
thorny ivy
Though the sexiness of it tends to be drastically lower.
dusty heron
thorny ivy
Though the sexiness of it tends to be drastically lower.
the only important part
thorny ivy
Okay, super-confused on what Blender is doing but basically, one vertex group seems to be influencing another.

I match the weight paint in one group, it changes it in another so it's still sticking out like that.

 trail relic
I'm optomizing one of my worlds, I took these 3 buckets, put them into one object, one material, and then decimated them, after I decimated the buckets, they are extra smooth and have this weird light / shinny to them, I ran into this problem before after decimatign an object, is there an explenation to why this happens? The shinny goes away if I shade flat the objects but I would still like them to be shade smooth, just not weird shinny on them
 tough plover
@thorny ivy under Options in the top right
you should typically have it on
makes it so that if you add weights to a group, it subtracts from the other ones affecting those vertices
@trail relic try maybe resetting the normals
select all vertices in edit mode, Alt + N > Reset vectors
trail relic
Reset vectors did not work
thorny ivy
tough plover
you should typically have it on
I've had it off until now I think
tough plover
turn it on and use "Normalize all"
thorny ivy
Do I go over the problematic area or the whole thing?
...
I had x-mirror editing on.
Not the XYZ mirroring, the dedicated one at the bottom of Options for Tools.
Man I feel dumb.
Good 30 minutes of my life I'll never get back.
tough plover
kek
foggy granite
dense sluice
Can you use the sculpting side of blender and still make a good/working avatar?
Sculpting is great if use it to refine your models after you get a decent block out with poly modeling but I use a mixture of both sculpting for big adjustments and use box modeling to change small areas
thorny ivy
Fine-tuning weight-paints now, any suggestions for making this look more organic?

Arm up (t-pose)
Clyde I swear.

Arm down (a-pose)
 craggy lintel
Is there a way to do knife tool proportional with the mirror
Like
My inputs
Can I use the mirror to get same inputs on other side
Would I be using the mirror modifer?
devout scroll
depends on what you're doing
you could just trace out a shape with vertices, mirror those and then use knife project to cut out that shape on your object
i'm not sure if you can use the mirror button to do it, you can try
 formal trail
what do yall use (that is free preferably)
 full ice
Blender is common for free
formal trail
okie ty
thorny ivy
More model-bashing fun tonight. Tonight's piece: torso section repurposed as a... tail base? Not the tail itself, just where it comes out of.

I'd provide a better view but Clyde probably wouldn't be happy about it due to the lack of clothes still.
thorny ivy

Made some adjustments, gave more room for the tail to actually be. It'll probably be decently big due to my avatar being considerably larger then most in both stature and body shape.

 craggy lintel
Try utilizing more strokes with the hair
Meaning
Play with the bevel, you can actually simulate more strands while still maintaining low poly
Otherwise really nice job ❤️
 compact mulch


 topaz reef

 spiral sigil
spent 6 hours in blender with no breaks, program crashed and lost everything
Smoge
gonna start setting a timer on my phone to save every 15 minutes
topaz reef
spiral sigil
spent 6 hours in blender with no breaks, program crashed and lost everything
autosave ?
topaz reef
yes
spiral sigil
i am stupid as hell to say the least

 languid fog


 white moth
compact mulch
https://gyazo.com/726a78ed68da3c7d55dafba237b046d9 wip avatar
white moth
compact mulch
https://gyazo.com/726a78ed68da3c7d55dafba237b046d9 wip avatar
hey paisanos!
 last yoke
what should I do from here?

 visual vigil


 dry vector
Anyone have any ideas for making the top part of this mesh and bottom part the same color? Yes I know the sides look like shit and need to be sculpted slightly, that's super easy. The avi creator sold it like that, I'll sculpt it later. Just talking about the conflicting color of the two separate meshes (upper thigh/body mesh, and the leg mesh) despite having the same color. They are separate for toggles so I can't really join and blend them

Slightly noticeable there but extremely noticeable in game

The normals are fine, they're all how they should be and both the meshes are quads and low poly
and here's the view in blender with the same mat..... ??
 quaint jasper
Join the meshes, then blend the textures in an image editing software
as in connect the vertices
tough plover
dry vector
Anyone have any ideas for making the top part of this mesh and bottom part the s...
rather than having it be a separate mesh, just join the meshes and use a shape key to shrink the parts of the body that are clipping through the clothes
quaint jasper
eww never use shapekeys for that, if you have clipping mesh, either delete it or get better weight paint
tough plover
it really depends on what you're doing
typically I would go for the perfect weight paint solution
but in some cases you just have to do that
you can't always just delete it because toggles are a thing
separating it to its own mesh would have the downside of adding draw calls and material slots
quaint jasper
Constantly active shapekey seems worse than all the other suggestions
In this case it's frankenstein modelling, so fixing it properly is necessary
 dreamy epoch
I think they may want to also set anchor overrides for all the meshes on that avatar to the same object, preferably an empty gameobject put outside of the armature at around the height of the neck.
dry vector
quaint jasper
In this case it's frankenstein modelling, so fixing it properly is necessary

Since theres no pixel depth offset in blender we can usethis technique.
Inspiration for this vid:
https://devtalk.blender.org/t/pixel-depth-offset-and-layered-material-painting-crazy-useful-unreal-features-blender-needs/10563/17
So this is super cool
I'm using nodes in my UV editor right now to blend them
Separate meshes
brb store need energy drink
🥵
quaint jasper
For avatars there's no way this is necessary 
dry vector
LULW indeed but it is working
quaint jasper
No surprise, terrain blending is super important everywhere
dry vector
The toggles would be all messed up that the creator made and I might as well learn
quaint jasper
I hope you're learning useful things though
dry vector
This is one of the coolest things I've learned so far outside of retopology
 devout osprey
 dire drum

Medium
Google Poly was shut down on June 30, 2021, making its 3D assets search and storage service and associated APIs no longer accessible.
white moth
dry vector
and here's the view in blender with the same mat..... ??
Blender has a texture paint mode with a smudge brush. I use that to blur over color seams and fade them into each other. Works over disconnected UV islands so it’s easier than doing it in photoshop
But they will need to be part of the same texture first before that tool works
dry vector
white moth
Blender has a texture paint mode with a smudge brush. I use that to blur over co...
Thankfully when I merged the vertices together by center there was no line. I just have one single mesh for the body now. Although there were/are some “dark” spots? (Does that make sense?) on the material which I believe may be due to non-manifold geometry as the root issue. And once that’s fixed recalculating the outside/inside may work. But idk
That’s what I could find online but the googling provided surprisingly sparse results
tough plover
dry vector
Thankfully when I merged the vertices together by center there was no line. I ju...
the dark spots can just be fucky normals
try selecting the area and doing alt + n > reset vectors
and/or alt + n > smooth vectors
dry vector
Aren’t funky normals a symptom of non-manifold geometry?
white moth
Merging the verts can skip over parts of the texture. I believe merging verts has a “fix UVs” checkbox so that the new vert’s UVs are also the midpoint of the ones it replaced
dry vector
white moth
Merging the verts can skip over parts of the texture. I believe merging verts ha...
Ah, okay. Let me check out that
 lavish bough
can someone help me i wanna make my gacha club oc into a 3d avatar because i like my gacha club oc
quaint jasper
What do you need help with ?
foggy granite
if you trying to make a avatar check out vroid its pretty easy to figure out
or if you have some blender you can download a base and accessorize and work from there
craggy lintel
Constantly active shape-keys aren’t bad.
How else can users have variations and change their facial features of the avi with 3.0?
Most bases have a few shapekeys that are at 100 for default
craggy lintel
quaint jasper
Constantly active shapekey seems worse than all the other suggestions
so idk what you meant by this
quaint jasper
It's continuous skinned mesh deformation, it's bad
No one should be using shapekeys to fix something on their avatars
If bases do that, they're bad
 oak hatch
Nearly done with the base body. Next is the clothes and UV maps. Hoo boyo.

 quaint jasper
That a matcap ?
oak hatch
Edit, wait, yes, it's using the toonshader mat cap, lmao
I'm going to lose my mind trying to set up these UVs, I can feel it.
craggy lintel
quaint jasper
If bases do that, they're bad
Sorry but thats not true at all..
I know who you are and right now; that doesn't matter. The fact is that countless people are indeed more than able to get flawless performance using shapekeys/blendshapes at 100% value. I disagree with your proposition negating the usage of shape keys for body shapes, emotes, etc
If it were to be an performance issue, then I would not see any bases use such forms.
I think what you are trying to say is, fixing a broken feature using a shapekey is bad, and that I can see most, if not everyone, agreeing on.
oak hatch
If skinned meshes were a bit more forgiving, using shape key tricks wouldn't be necessary.
Which is a bummer, but hey, it be how it do.
[Stares at several outfits that need to be shapekeyed or dissolved]
quaint jasper
craggy lintel
If it were to be an performance issue, then I would not see any bases use such f...
Performance issues aren't always instantly visible  The common fallacy of "Well i'm not seeing a performance impact" is an ongoing issue with people's content, and will always be
That's why it's heavily suggested to separate your head from your body mesh, because the more vertices are affected by your shapekey, the worse the performance, so if your entire body is a single mesh, and you're constantly activating shapekeys, then yeah, it's not good
craggy lintel
so thats why most devs n stuff dont have expressions
i swear i watch videos of them and their models never make faces
quaint jasper
Expressions are fine, because they're not always on
We're talking about constantly active shapekeys
I have facial gestures, i barely use them
craggy lintel
How are you going to have facial tracking in your game lol
If you cant use shapekeys at 100% or any percentage
the human face is constantly moving
oak hatch
There's likely a misunderstanding.
craggy lintel
Probably
oak hatch
The issue is the amount of verts effected by a shapekey, not it's level. Shape keys address all verts in a mesh, not just the ones you move.
quaint jasper
"Expressions are fine, because they're not always on
We're talking about constantly active shapekeys"
 ashen stag
Whats bad is when you have a "thigh squish" blendshape that is always at 100 or the like
Instead of just applying it
craggy lintel
Facial tracking is 100% active..
oak hatch
Or have any level of mic noise
Best practice is to separate the head mesh, and leave no shape keys on the body, but that isn't always possible, or preferred for various reasons. While having shapekey on a VPoor (70k tris or more) model can cause issues, I haven't seen much performance change on models that fall below the 70k threshold, in my personal experience.
craggy lintel
oak hatch
Best practice is to separate the head mesh, and leave no shape keys on the body,...
Lol have fun having diff colored head in certain worlds if youre using a toon shader
ashen stag
Just set a new anchor point
oak hatch
That's only an issue if you also have two materials and the materials are different, generally.
oak hatch
I'm tempted to test this, because I can't think of a reason that would do that.
I've never had that issue cause I merge everything, shapekeys be damned.
craggy lintel
No wait I think it happens with two meshes parented together in unity
nvm my bad
like ears on a head at the same color will not be same color in some worlds
ashen stag
With toon lighting, the mesh grabs the closest lightprobe and just applies the lighting to the whole mesh, you should be able to set the meshes anchor point to the same spot to avoid this but I havent tested that thoroughly
craggy lintel
one mesh > better
ashen stag
It depends, just like everything with optimization
oak hatch
That said, the issue with shapekeys is the amount of verts being effected by a shapekey. Since unity is kinda...dumb, it will apply a shapekey to all verts in a mesh, it doesn't perform a relative transform IIRC.
So, it will list any vert not moved by the shapekey in question as (move 0,0,0) per frame.
ashen stag
80k poly model with 100 blendshapes is like 20-30mb Where without the shapes is like 5-10
oak hatch
Lmao
craggy lintel
or blender to "blendshape"
oak hatch
It'll never happen
craggy lintel
blendshape would make so much more sense lol
oak hatch
But you could maybe mod Blender
craggy lintel
becasue blender and blendshape
craggy lintel
But btw guys i do have one last thing to say
i have a friend who is playing vrc without a graphics card
craggy lintel
idk but she always sets her model's face to be at 100% on one of my public models
and she never has issues
idk how she is playing anything without one but she isnt lying when she says she doesnt have one lol
oak hatch
Weird.
But again, it's not the the "level" that's the optimization crunch, it's the verts included.
If you have 2 verts on a model at 100, it doesn't do hardly anything. But 120k verts, even on 0.01 causes non-negligible issues, if it's being rendered.
It's not as bad as other stuff (DYNAMIC BONES) but it's still going to cause a small dent.
craggy lintel
it seems most ppl on this game have crazy computers anyways
oak hatch
IMHO, if you're below 70k Tris and not doing weird stuff like a shattered avatar that has 3x the verts as a standard one, generally should be fine. Not the best idea, but fine.
craggy lintel
all my latest stuff under 65K
oak hatch
Mood.
craggy lintel
Yeee but i keep having to retopo or deal with stuff that i make being low poly
oak hatch
My base body looks to be hitting 46k, so I still have 20 for clothes.
Abusing non manifold meshes and other horrible tricks, lmao.
I'm terrified of having to UV map this thing, especially when it comes to adding details and trying to reduce the filesize.
Anything I can do to drive down the load time and make it a better experience for others, within reason, yanno?
[Laughs in using the same particle for 4 different effects]
 still wadi
Poly count is not as important then lets say amount of materials and tex sizes
white moth
There’s nothing wrong with non-manifold meshes in videogames. It’s actually preferable.
Non-manifold is only a problem for 3D printing or hard surface modeling. Air-tight models are wasteful in games
oak hatch
Ye, I'm just so used to solid modelling that it's breaking my brain.
small valve
 small valve
i shipped these UVs onto an actual world
dusty heron
No. Please don't.
small valve
:> its FINE
 cerulean shoal
😳
small valve
the best part is that my UVs are usually immaculate
i just had a deadline of 0 hours
azure rain
from the looks of it you could probably fit that you in like 1/4 the space if it was stacked
tough plover
@small valve pro tip, if you are using UVPackmaster2, you can make it keep stacked UV's together as one
small valve
noted 0u0
craggy lintel
Now that ruubic told me about shapekey stuff
im combining keys and applying to basis
Is there any penalty that I don’t know about for applying keys to basis?
quaint jasper
Aside from losing them, not really, but your default model should be the basis
 worldly tangle
PKP Pecheneg (9th avatar project)
w/ mirror modifier
 quaint jasper
Now triangulate 
 agile plank
does anyone know how to save edit paint texture of avatar in blender
after i edit or recolor texture of hair in blender i dont find anyway to save it
 white moth
agile plank
after i edit or recolor texture of hair in blender i dont find anyway to save it
white moth
agile plank
after i edit or recolor texture of hair in blender i dont find anyway to save it

 zinc jolt
Hey you guys got any ideas for an accurate Aang from Avatar the Last Airbender?
The TV show not the movie
 gaunt abyss
zinc jolt
Hey you guys got any ideas for an accurate Aang from Avatar the Last Airbender?
gaunt abyss
zinc jolt
Hey you guys got any ideas for an accurate Aang from Avatar the Last Airbender?
Make a bald kid and put a blue arrow on his head.
thorny ivy
quaint jasper
Now triangulate <:zucc:558836095429771284>
What does triangular do exactly?
Besides make things into triangles.
quaint jasper
Ngons into triangles
In the screenshot of the weapon, it looks like it's been limited dissolved, which makes the poly count very low, but it's also missing a lot of geometry you'd expect
 mellow cloud
hi
craggy lintel
Would using knife tool break shapekeys or do the new Verts just behave?
Would like to know rq- I feel like it’s fine but would like second opinion rq before I get home and find out
tough plover
craggy lintel
Would using knife tool break shapekeys or do the new Verts just behave?
when you do edits to a mesh with shape keys, you should create a new shape key and do those changes with that shape key active and selected
you can apply the key to basis later on
craggy lintel
tough plover
when you do edits to a mesh with shape keys, you should create a new shape key a...
I’m way past you there lol.. @tough plover
way way way past you
Thank you though haha
I’m bout to release a base
I just asked that earlier because I didn’t ever hear about the shapekey 100% value optimization problem
Nor did lots of ppl I told
craggy lintel
Yeaaaa thanks for you info though
I’m changing some things up a bit
Ever ask questions to ppl you know the answers to?
quaint jasper
I don't, why ?
craggy lintel
Just wondering lol because I end up doing it so much to get other opinions
quaint jasper
Good thing to do if you're unsure definitely, i only consider knowing something after i've learned it from multiple sources
 wintry cape
Not quite sure if this is the right place, but I have a normal map that seems to be in the wrong format
instead of the usual purple-blue colour, it's red and transparent
I read somewhere that it's a result of compression, but I'm not sure how to undo it.
quaint jasper
Where was it before the compression ?
wintry cape
It's a model from models-resource, so I assume it was compressed when the game was published
wintry cape
quaint jasper
Where was it before the compression ?
This is what it looks like as-is

I could've sworn there's a way to convert these by moving a bunch of channels around, but I can't remember
quaint jasper
Looks like it has the alpha channel with it ?
wintry cape
I found it
Had to follow a tutorial in chinese
but I found it
there

for anyone else with this issue:
Make a new photoshop project with 32 bit RGBA
Copy the green channel into the green channel of the new project
Copy the alpha channel into the red channel of the new project
Make the blue channel in the new project white
tough plover
you sure it should be white?
wintry cape
yeah
 wintry cape
Let me see what it's like with mid grey
the guide I was following said to go with full white
wintry cape
tough plover
so it should be mid gray
This is what blue set to mid gray looks like

whoops, copied the layer itself
tough plover
kek
wintry cape
 tough plover
hm
perhaps I was mistaken
or maybe there's something up with the other channels, idk
maybe they're inverted?
wintry cape
If I apply a brightness filter to the whole thing, I get this

Which looks more like it
wintry cape
That looks like a normal normal map to me
tough plover
normal normals
wintry cape
yeah, that's just a 50% brightness adjustment on the whole thing
tough plover
yea that makes sense
small valve

 unborn acorn
wintry cape
yeah, that's just a 50% brightness adjustment on the whole thing
unborn acorn
wintry cape
yeah, that's just a 50% brightness adjustment on the whole thing
Online NormalMap Generator FREE! Create a Normalmap directly inside your browser! No Uploads required, completely client-based
could use this
wintry cape
unborn acorn
https://cpetry.github.io/NormalMap-Online/
that just makes normal maps from the grayscale
unity has that feature built in
unborn acorn
welp worth a try
craggy lintel
quaint jasper
Good thing to do if you're unsure definitely, i only consider knowing something ...
YESSS
Same
Literally me lol
 granite mural
sorry if this isn't the right channel
why do you need to install blender 2.8 for vrc, why can't you use 2.9 or 3.0 beta?
aren't you just going to be importing meshing from blender to unity
quaint jasper
Who said you couldn't ?
foggy granite
granite mural
sorry if this isn't the right channel
why do you need to install blender 2.8 for...
Who told you that
 thin shadow
as long as the version of blender support the desired plugins
foggy granite
Exactly
Even then you can't download multiple version of blender
For free
Like some people prefer 2.79 or older for weight painting
thin shadow
or use steam to switch to any version you want using the beta function
granite mural
every single vrchat avatar tutorial I've ever seen says to use blender 2.8 and I was always really confused about that
foggy granite
2.8x have plenty of tutorials but you can still follow them with different blender version since much hasn't changed to the tool or interface so don't worry about your blender version
Heck I still use the tutorials from 2014
granite mural
okay thank you :)
foggy granite
Np
quaint jasper
2.83 is stable and is still the most popular, makes sense to use it, but not necessary
foggy granite
Yeap
small valve
id personally use 2.93 especially the more you get into 3d
its so good
has all the fun stuff
even if it isnt stable stable
visual vigil
Yeah, I stayed up super late getting the armor weighted, UV'd and topology fixed up.
Its HAPPENING, the last thing left is some weight painting tweaks and then Substance Painter Texturing! (or do I need ammo pouches)
#Halo Catfish is finally becoming a reality😭

 Twitter
·
Twitter
·


 raw hearth
small valve
raw hearth
small valve
Oh i watched this anime it was great also your job is great too!
 limpid wren
does anyone here use zbrush?
 north mortar
if i use subdivide modifier in blender, is there a way to permanently set my model to that shape and later modify each polygon by hand or is there no way to do that? if i google it, it tells me that you can modify it but only in sculpt mode, which isnt really what im looking for.
tough plover
north mortar
if i use subdivide modifier in blender, is there a way to permanently set my mod...
you can just apply the modifier
but typically you should keep your model fairly low poly
so if you're modeling with subsurf, the base mesh should be very low poly
you can also adjust the Mean crease if you want a specific bend to be tighter
north mortar
im just starting out iwth my fdirst fully modelled char and i just want to make sure im doing it right and not delete it all later on since some very specific option isnt possible 😄
i guess i'll try the subdivision method then, thanks
doing it all manually would destroy my mental health more likely
tough plover
north mortar
doing it all manually would destroy my mental health more likely
don't forget that things such as proportional editing and mirror modifiers exist
if you're making the model from scratch by box modeling rather than sculpting, then it would be helpful to have subsurf + mirror (with Clipping checked to join vertices at the seam)
and like I said earlier, when using subsurf, you can adjust the "crease" amount to make bends tighter
like an armpit for example
or under buttcheeks lol
north mortar
one thing i noticed is that if i use the mirror modifier, it doesnt let me actually select the mirrored part, rather its just... there, unclickable. so say i want to edit only one hand later on, i couldnt do that, right?
tough plover
you would do that after applying the mirror modifier
you could also just have the hand on a separate mesh while you're still working on it
north mortar
i was thinking about just making one side of my body (arm+leg that is) and use symmetrize on x axis
tough plover
for most of the model you can do it on one side using mirror yes
tough plover
north mortar
i was thinking about just making one side of my body (arm+leg that is) and use s...
also pro tip, if you want to be able to select stuff in the mirror half, you can do so by enabling edit mode view in the mirror modifier
one of the square buttons at the top of it
north mortar
oh, ty
foggy granite
north mortar
if i use subdivide modifier in blender, is there a way to permanently set my mod...
Duplicate the models and then apply the subdivision on duplicate character
 vital drift
limpid wren
does anyone here use zbrush?
vital drift
limpid wren
does anyone here use zbrush?
i hate zbrush, my zbrush uninstall broke so im stuck with zbrush on my pc forever


 tough plover
very nice 👍
topaz reef
quaint jasper
You got a portfolio of your stuff ?
i dont xD but i guess my gumroad/server is my portfolio
also i dont want one since im still a noob to blender only 800h in xD
quaint jasper
You should really put your stuff up on artstation 
Time spent is irrelevant, your result look great
tough plover
topaz reef
also i dont want one since im still a noob to blender only 800h in xD
that's news to me, I assumed you had prior 3D work background
considering how good your stuff comes out
at first I thought of you as some mysterious, barely talkative 3D design master
tough plover
I see
you have ~70 total messages in this server
the first few were images of your beautiful work, with no comments
quaint jasper
You should be on artstation
topaz reef
idk xD ppl on artstation are completely on a different levels
quaint jasper
That's just those you see at the top
There are a ton of hobbyists
They just don't pay to show up on the front pages 
And it's not just for others, it's for you to have all your work in context and to see your progress over time
Highly recommend it
topaz reef
noted
foggy granite
I agree with ruuubrick you're got a great style and the armor/clothes look clean
craggy lintel
base making do be harddd
Lol broke my mirror earlier and had to redo lots of stuff
Shapekeys are so interesting to work with- after months of doing them i notice there is a very complex mathematic algorithm
quaint jasper
It's literally linear interpolation
tough plover
pretty much
every vertex just moves from its basis position in a straight line to the target position
overdriving the shape key just makes it go further than the target, again in a straight line
craggy lintel
It’s dominoes really
But like each domino likes to add up to diff values when multiple applied
Whoever invented them is pretty awesome ngl
devout scroll
Shape keys can also use other shape keys as base
But yeah, just linear vertex offsets
oak hatch
Wait, that works for Unity?
devout scroll
Shape keys/blendshapes yes. Other interpolation methods/other base shapes not sure
white moth
topaz reef
im just a 3d hobbits
make no mistake you look like a professional already, I'd very much recommend putting stuff up on a portfolio
craggy lintel
but have y’all ever had to do shapekey surgery
So imagine having to have eyelashes work for 295 different facial combinations
And only two left to fix and one of them is literally impossible to fix meaning the topology isn’t showing the error but there’s an error in unity
So what I’m doing is trying to find that ghost vertex and figuring out wtf happened
I think the vertex is from the eye so when I get home I’m going to try edge selecting each line in the eye to check
still wadi
Or just .... delete
craggy lintel
I’m not deleting
Thats comprising I would never
I’m just bewildered because the topo is 100% fine for that specific shapekey blend but in unity it’s breaking
X doubt anyone here can simply figure it out
They’d have to dig deep into it like I am rn lol
tough plover
so you're saying that one random vertex is shooting away?
craggy lintel
not at all lol
It’s hard to explain
I’ll send screenshots later
It’s way more complex than you think
God I wish it was just that tho lol
white moth
craggy lintel
And only two left to fix and one of them is literally impossible to fix meaning ...
Add a triangulate modifier
It could be a result of splitting quads differently, if you have quads
craggy lintel
Tried that, not the problem
The problem literally is that there isn’t a problem
It only shows in unity and no everything is set up right before anyone asks
quaint jasper
Errors don't appear out of nowhere
craggy lintel
Then why is everything correct across the board
quaint jasper
Can't tell until i've seen videos/screenshot
craggy lintel
I’ll just send it later
white moth
Unity will also discard part of shape keys if it determines the vert movement is too subtle
For tiny avatars, This can be made more lenient if needed by increasing the import size and then scaling root back down
oak hatch
Does anyone know how to bake sharp edges? Pictured here in white. I need that as texture data.
 quaint jasper
Substance painter > Edge generator
quaint jasper
oak hatch
Does anyone know how to bake sharp edges? Pictured here in white. I need that as...
https://youtu.be/9ojVYZVqiU8 Actually this might be doable in blender ?

Baking Edge Map for Wear Edges in Blender Tutorial
download: https://github.com/cgvirus/Shader_bank_Blender_evee/blob/master/edge mask.blend
devout scroll
Should just be curvature
craggy lintel
white moth
For tiny avatars, This can be made more lenient if needed by increasing the impo...
Not this
I know what the problem is but the problem is the problem isn’t showing up in blender
 granite nest
does anybody know why my upper chest and regular chest bones dont appear in unity?
(in the humanoid rig's config screen)
 lone forge
ok so how would i go about adding and replacing assets on a model, I want to add glasses and change the shoes of a model
lone forge
well yeah i got that much
 covert rose
Along with the textures
lone forge
do i just import the models for the shoes and glasses into the models blender project and link them to a spot or is there a process for replacing already existing assets
craggy lintel
Sooo
if you look here
perfectly fine topo, no hole

And when I hop into unity

Hole
Thats why im lost
(and yes the topo pic, right corner is off due to camera angle)
quaint jasper
is the white part supposed to be the hole ?
quaint jasper
what's behind it ? Feels like it could be another face showing up on top
Dunno if you have backface culling or not
Could be texture too
craggy lintel
Nope and nope hahaa
I wish it was those
The problem is that it seems like it’s a vertex that’s just flying
But I don’t see any strays anywhere
or see any missing back down on the eye itself
quaint jasper
You enabled legacy blendshape normal ?
 obsidian nova
@craggy lintel Delete Loose? You've probably already tried this though. Best of luck. I hate when stuff like this happens.
quaint jasper
I'd personally use mesh analysis in blender on the model to look for odd stuff
craggy lintel
quaint jasper
You enabled legacy blendshape normal ?
You know what I should try that rq
I mean I did before I uploaded the previous version
For each update into unity does that reset? I haven’t check the legacy blendshape normals because I did the that for prior testing on the same FBX
craggy lintel
obsidian nova
<@!585235961772769312> Delete Loose? You've probably already tried this though. ...
Thanks hun for the condolences ;0;

 quaint jasper
Is that a piece of geometry you can see in wireframe in blender ?
craggy lintel
nope!
quaint jasper
Does it only happen on a specific shapekey ?
craggy lintel
Ive tried finding it and Yes only one
It's the final issue with the base before release hahaha
quaint jasper
If it can't be seen in blender then i don't have many ideas
craggy lintel
Me neither haha
Thanks for the help though everyone, I'll probably just get rid of this key or just leave the glitch
craggy lintel
Okay so after about an hour of nonstop vertex poking, i think i fixed it by pulling other verts to cover up the area where i saw the issue
spiral sigil
another weird wakidate for my helmet, blender noob here
 north mortar
What could be causing my test avatar to show up as completely invisible in vrchat? i can see it fine in unity and i even tried adding 2 basic cubes to see if any of them show up if i move them around in the hierarchy but i still end up with nothing in-game. I havent added any custom shaders or such to the avatar, just the basic unity material/coloring.
ooook and now it magically fixed itself, nevermind.
 grizzled timber
hello everyone 😄
thorny ivy
Sounds pretty neat, I'm interested in checking it out.
still wadi
Sus
 worldly tangle
Landfall Base model (Totally Accurate Base Model)
Started with a few vertices, and applied the magic of the skin modifier

 torn ember
So I'm having an issue where this part of the boot wont move with the leg while posing. Any ideas?
 quaint jasper
weight paint it ?
torn ember
Yeah, I tried that. Didn’t do anything.
It’s like it was connected to the wrong bone but I’m not exactly sure what I should do here.
quaint jasper
In edit mode you can select a vertex and in the intem or view menu you can see the vertex group it's assigned to
 lament pond
 torn ember
quaint jasper
In edit mode you can select a vertex and in the intem or view menu you can see t...
torn ember
quaint jasper
In edit mode you can select a vertex and in the intem or view menu you can see t...
Where is the view menu?
quaint jasper
Top right corner, it's the N tab
torn ember
Thanks!
worldly tangle
Rigged TABM Base model

 limber anvil
Anyone have any experience making a balaclava / ninja mask by deforming an existing face?
I can't really see how I need to change the topology, and I'm too afraid to just delete a bunch and fill it back in

pretty happy with how I got the eye hole, but that's because it almost perfectly lined up with the existing loops in that region
making a smooth but organic cover for the mouth, though, is a different story
 limber anvil
looks pretty good for something that's giving you trouble 🙂
azure rain
like what exactly is the problem as it looks fine to me
 spiral sigil
is there a way to scale a mesh like for Kadachii's mask for example up from not just a point but every vertex outward so it maintains shape perfectly?? Having a hard time explaining it
not that it wasnt maintaining shape before exactly but if you used the base mesh and duplicated a part of it and scaled it up sometimes things still clip
tough plover
spiral sigil
is there a way to scale a mesh like for Kadachii's mask for example up from not ...
yes, it's called Alt + S


 hollow ermine
That’s pretty cool, I’d say
 split aspen
😄
craggy lintel
Is there a server for blender stuff only
I keep on encountering issues with my blender
For example; vertex groups not showing in modifiers, ghost vertices, etc
My issue is I’m beginning to need help from like higher sources and it’s beginning to be hard to find answers on the web
quaint jasper
Nope, you'd have to ask in the public discussion channels
 late rock
ahh okay, ty
 solid echo
 devout scroll
The bigger blender discords I tried were much worse than this channel
 outer saddle
devout scroll
The bigger blender discords I tried were much worse than this channel
outer saddle
devout scroll
The bigger blender discords I tried were much worse than this channel
Indeed.
 keen quarry
Can someone give me a good header where to begin for 3d modeling and world creation. I want to use this skill and take it forth into my study next year for designing stuff.
full ice
keen quarry
Can someone give me a good header where to begin for 3d modeling and world creat...
craggy lintel
Does anyone here know normal transfer techniques
 cerulean kiln
umm...... i occasionally get this stuff in blender once i "fix model" and then switch to solid viewport. doesnt do it for every pmx/pmd model but some of them. what is this? why is it there? and how fix?

 copper parcel
Heyo everyone, would anyone be able to help me with this issue? When applying the normal map to this model in Substance, I have this weird split down the middle. What might be causing this?

Not showing the full model since this is part of an NSFW comm
quaint jasper
You sure that's not caused by something else ?
any invisible mesh when doing your bake ?
is the line still there in normal map view mode
copper parcel
Yes.
quaint jasper
how big is the split
copper parcel
This is normal view mode, dunno why things are like that

Pretty much all the way down the middle on one side.
quaint jasper
Did you bake your texture maps ?
copper parcel
Well, I've tried baking them, but for some reason it completely removes the other normal map I have.
quaint jasper
why do you have another normal map ?
copper parcel
It came with the model asset
quaint jasper
alright, then why do you care what the normal map generated in substance looks like 
copper parcel
Because it's completely removing depth from the model.
It's replacing it with an empty normal map.
quaint jasper
maybe that's the issue ?
copper parcel
What do you mean?
quaint jasper
if it's not using the normal map that came with the model, maybe that's why it has those issues
copper parcel
I don't get what you're trying to say, but alright. Thanks for trying to help, at least.
azure rain
substance painter doesn't know about your normal map
copper parcel
I'm still trying to figure out how this is creating that split though.
Or how I can make Substance "know" about my normal map.
I've imported it, it's there, it just has that insane split down the middle.
quaint jasper
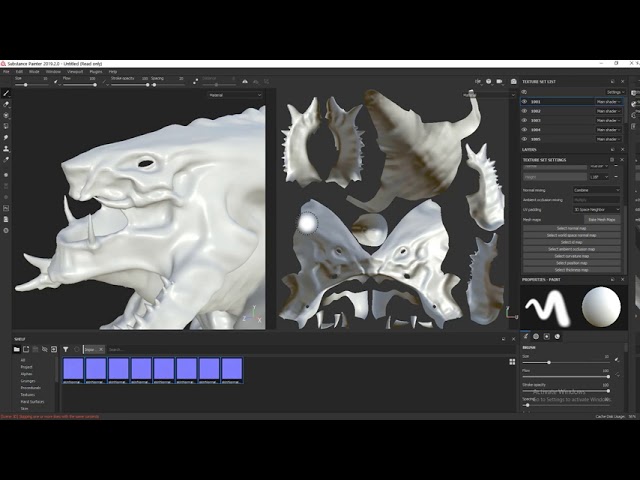
Learn very quickly the basics tools of Substance Painter.
Check the complete course here:
https://www.udemy.com/course/substance-painter-express-course/?referralCode=CCAA1F79F5752C761543
quaint jasper
Hard to know what else you may have changed or missed without knowing all the things you did since import
Might want to try contacting the base maker
copper parcel
I've done literally nothing other than import the fbx, and import the normal.
That's all I've done.
quaint jasper
definitely ask the base maker then
copper parcel
Unfortunately that's out of the question considering it's a company lol
quaint jasper
Companies are ran by real people
copper parcel
Yes, real people that are unlikely to offer me advice when it comes to things completely unrelated to what the company does, unfortunately for me lol
It's a "toy" company. Not likely the kind to help me with an issue like this.
quaint jasper
They're the one who care most about their product, but up to you
azure rain
so is the problem is the model is not intended for real-time game usage so they're unlikely to provide support questions for using it that way Nixyro?
copper parcel
Exactly.
It's meant for the production of real-life products.
I would imagine there is definitely a way to fix this.
Just gotta find the right person to help, I suppose.
Because doing what Ruuubick is saying is, and I don't mean to sound rude when I say this, is like asking EA how to make a football because they make Madden.
quaint jasper
They made the fbx no ?
tough plover
hm, had a similar issue at one point
make sure your texture set resolution matches the normal map resolution
tough plover
under Texture set settings
and when baking mesh maps, also make sure that the resolution is the same
default for that is 512
quaint jasper
 welp, i assumed they checked at least that before asking, hopefully that's the issue
copper parcel
I'll take a look when I get home after my shift :P
lament pond
 copper parcel
Alrighty, I'm back home. I made sure that the project was at the correct resolution (1024) however I still get this crazy seam down the middle of the mesh.
Baked the mesh maps again, and once more it deletes the old normal map I had to make a completely empty one which erases all of the depth I had.
It doesn't have the seam, but that's not exactly an acceptable outcome when the model just looks like clay.
For anyone who might be able to help. my model has this odd issue where it doesn't correctly uhh... wrap? And I end up getting this seam straight down the middle of my mesh.

It has something to do with my normal map, but I have no idea as to what is causing this.
 vivid crater
is your model mirrored or symmetrized
copper parcel
I don't know, it's a model I received from a friend, is there any way I can find out if it is?
vivid crater
just check if one sides uvs is perfectly overlapping the other, substance doesnt like perfect overlap like that, if that even is the problem
if it is tho you can just move them over by 1
copper parcel
How would I go about doing that? Or checking for that matter
vivid crater
in blender or another 3d program
copper parcel
Haven't had to mess with UVs much
Ahh, in that case, the uvs don't overlap.
The reason I believe that it has something to do with the normal map is because, if I just place an empty normal map it looks fine.
But when I use the one that comes with the model, it gets all screwy.
quaint jasper
Could also be that the other side oft he mesh has inverted normals
copper parcel
Nope, just checked.
lament pond
Headless wip


 tough plover
fancy


 tough plover
some nice looking topology there
tad high poly on the palm but not bad
is it 2x subdivided or 1x?
split aspen
111
grizzled timber
Is there anyone that could help me out with an assignment regarding 3D modeling? I need feedbacks about it.
tough plover
grizzled timber
Is there anyone that could help me out with an assignment regarding 3D modeling?...
sure
craggy lintel
Wait is it true some people can wiggle toes in vrc
If it is- should the feet I’m making have toes?
ashen stag
The only way to fake it is to animate them or use constraints, there is no tracking for that kind of thing
tough plover
probably puppet control
I have that on my model
fairly convincing
2 axis puppet, up down for pointing up and curled, and left right for spread and together
craggy lintel
@tough plover wym you just use a coppouchi, no?
tough plover
not anymore
craggy lintel
those toes are legos lol
tough plover
kitabunny
craggy lintel
oh good good
coppouchi was poopoo base tbh
I never liked the concept
poor Lexi
craggy lintel
oh god that too yea
tough plover
the eye sockets don't need their own mat
craggy lintel
that was euGh
tough plover
also surprised you remembered me lol
lancer introduced me to you like once
and then mentioned you a few times after
craggy lintel
Ohhh so you know my work?
craggy lintel
Oh my publics are not to judge Hahahaha
tough plover
na you were wearing them
craggy lintel
those are usually just fast ones until recent
tough plover
it was in like that one barbie doll looking world
tough plover
yep
craggy lintel
yeeee since then I make my own stuff lol
craggy lintel
I like hate seeing previously used assets
I stopped using premade stuff in October lol
tough plover
nice
I was always one to make stuff myself when I needed it
apart from model bases
though I have an idea for one and will get working on that once other stuff is out of the way
craggy lintel
I mean I understand ppl not making hairs tho- it is pretty tough for avg ppl to do it
 tough plover
fancy
craggy lintel
I’ve been making/drawing hair for years though so that’s why I was able to get good fast
craggy lintel
tough plover
fancy
Thx 🥺
tough plover
the hair on my model is something I've been wanting to redo for a long time
never got around to it
craggy lintel
tbh tutorials for making hair don’t help, best way is to study real life hair and have an artist friend to critique at first
imo at least lol
craggy lintel
I’d def suggest that yes yes
just know like
Roots
really
And how roots work on ppl
tough plover
will note that
craggy lintel
Yeee
It’s fun once you get good at it
they do take a while tho
The one I sent was my fastest one and it took me one and a half days

 craggy lintel
Marvelous?
thorny ivy
worldly tangle
Landfall Base model (Totally Accurate Base Model)
Started with a few vertices, ...
For some reason, I read that as Godfall and went "oh no, this is gonna be super-cursed"



 radiant ridge
so im having an issue in Unity where i cant see my Blender Materials. anyone got any idea why?


 dense eagle
I'm having a similar problem where some of my materials exported from blender aren't showing up

the body's materials are just straight up missing
 coarse zodiac
@dense eagle this is a constant issue for me too - sometimes they dont come over , sometimes reimporting the individual material works... in other cases, I have to create a new material and plug in the textures like @craggy lintel said
radiant ridge
the thing is for me im not making a avatar for VRchat. its a vrm meant for VSeeFace
worldly tangle
Skin modifier boogaloo (wip, and yes, one of the methods I used as a major component for base models)
Jellal but TABG

 atomic hamlet
radiant ridge
so im having an issue in Unity where i cant see my Blender Materials. anyone got...
atomic hamlet
radiant ridge
so im having an issue in Unity where i cant see my Blender Materials. anyone got...
Unity can't import material setups from Blender. You have to manually re-create it in Unity, which may or may not require a custom shader depending on your setup.
radiant ridge
Damn Alright. 😢@atomic hamlet well thanks for the info. I’m just gonna have to try to find a way to get my model out of Blender and into VSeeFace another way.
lament pond
 craggy lintel
Thicccc
zinc jolt
 zinc jolt
thanks
coarse zodiac
lament pond
thicccc
ashen stag
radiant ridge
so im having an issue in Unity where i cant see my Blender Materials. anyone got...
Blender materials aren't exported. You need to convert whatever you've done in blender into its necessary texture maps and recreate the material in unity