#3d-modeling
1 messages · Page 112 of 1
 still wadi
 candid latch
Thanos
 tardy rapids
I pray you aren't planning on bringing that in-game
 copper parcel
Anyone know what might be causing these polygons to appear on this texture in material view? The base that I purchased has a uhh, pretty cobbled together ssp file lol

 quaint jasper
Did disabling any of the folders remove it ?
copper parcel
It appears to be something tied to the body folder.
quaint jasper
Make sure to check the generators on the black masks as well
copper parcel
Looks like an empty fill layer in the body folder was the main cause.
I do have one more question, how do I apply random seeds to something like a height map?
Like here, for instance.
 quaint jasper
If the pattern already exists i'm not sure you can ?
copper parcel
Hmm, I'm just wondering how it was done here is all.
quaint jasper
You can maybe do the height per a different alpha
copper parcel
Hmm..
tardy rapids
copper parcel
Anyone know what might be causing these polygons to appear on this texture in ma...
might be baked lighting
quaint jasper
Not a thing in substance 
 thorny ivy
tardy rapids
might be baked lighting
thorny ivy
tardy rapids
might be baked lighting
Wouldn't that just be flourecent bulbs filled with weed gas?
tardy rapids
I mean, if it's a pre-made base it could've been made in blender and been baked
 wild forge
hello all im am new to modeling is there a video i should watch before i search youtube ? thanks all ?
you may have answered befor but i fell sleep as i posted at 2 am
 zinc jolt
what does this look like to you, guys?

I can guarantee this is at least a million polys
 azure rain
stop subdividing so much
zinc jolt
but it's so good to see it this detailed XD
of course I'm not going to get into "much" detail yet
azure rain
like that's even too much for like sculpting for the high-poly
 azure rain
sure if you're doing rendering do whatever but that's not terribly relevant to vrchat
zinc jolt
good point
azure rain
like what does it look like with no subdivides
 azure rain
okay that looks more reasonable for a pc vrchat avatar
zinc jolt
ye
azure rain
and honestly you weren't gaining any more detail with those subdivides
zinc jolt
you're not the first person to tell me that
azure rain
so stop wasting triangles
zinc jolt
alright
azure rain
like at any distance that's not like inspecting the nose hairs of your character you're not going to notice the difference but your graphics card has to do more work
azure rain
yeah but if you have like a whole map you need to render for something that's going to add up if all of your characters have like subdivide 3 on
 ionic kettle
i need some help i guess with the sdk platform i might be doing it wrong or importing it wrong if someone wants to help me out


im using version 2021.1.15 of unity
 dusty heron
ionic kettle
im using version 2021.1.15 of unity
dusty heron
ionic kettle
im using version 2021.1.15 of unity
You need 2018.4.20f1
 foggy granite
ionic kettle
i need some help i guess with the sdk platform i might be doing it wrong or impo...
foggy granite
ionic kettle
i need some help i guess with the sdk platform i might be doing it wrong or impo...
You have the wrong version of unity 18.4.20 is currently support
dusty heron
The devs are moving to 2019, but that is in beta.
foggy granite

Unity
Unity is the ultimate game development platform. Use Unity to build high-quality 3D and 2D games, deploy them across mobile, desktop, VR/AR, consoles or the Web, and connect with loyal and enthusiastic players and customers.
dusty heron
And that also doesn't look like a unitypackage, rather an exe.
Make sure you download it straight from: https://vrchat.com/home/download
Unless you just haven't set that as a default.
You should just be able to drag it into unity an double-click to extract.
 thin shadow
https://media.discordapp.net/attachments/546021020537192480/865860972920176660/unknown.png
what is the best practice of exporting fbx in unity and importing them in blender in order to not have this problem

 peak narwhal
im really new so take what i say with a grain of salt, my only thought is taking the fbx file without the rig or maybe fixing the armerture
im very new so i have no idea but thats my guess
 devout scroll
I think people usually use the betterfbx addon to import from unity
 spiral sigil
dunno where to put this so ill put it here
how do i export blender models with textures and materials attached to unity
Export the model in a format that supports it aka export it in FBX
Plus make sure to pack the external data into the blend file
spiral sigil
thank you
 tough plover
@thin shadow you typically don't need to "export" anything from Unity.
assets in your unity project are literally just normal files in a folder
just locate where your model is and import that
thin shadow
i wanted to have all the 48 materials to be cohesive with the fbx
when i use the fbx file by itself without exporting, the materials and texture are missing because textures and materials are messed up and all over the place
tough plover
48 
foggy granite
Why do you have 48 materials
thin shadow
i didnt make it, i'm just trying to fix someone else's mistake
my friend paid for this avatar, he got the unity package, but it's all messed up
thin shadow
yeah that's the problem, everything is everywhere. there are 2 materials folder. there are also materials in the fbx folder.
importing fbx from the asset folder fixes the bone and armature problem but the material assignments are all messed up
foggy granite
Yeah you gonna have to manual set up the material in a blender once you figure out where they are all at but it shouldn't take too long once you know the location
thin shadow
Well i have to think about alternatives solution. This is like trying to dig a grave with a spoon.
foggy granite
Honestly, the best solution should come from contacting the modeler to fix it but I'm guessing your friend already tried that
devout scroll
Anyone got any good courses to recommend? I'm considering getting the stylized station's 3d artist coloring book because i'm really bad at textures
There's lots of neat courses I see around but not quite fitting for vrchat stuff, be it character or world stuff
 velvet magnet
slowly tryina learn how to make avatars in blender ^^`
still wadi
@devout scrolldo u want this type of textures ?https://i.imgur.com/Vor4OV2.png
devout scroll
😳
m-maybe
I've seen your vods a bunch of times shonzo, I'd definitely check it out for characters
still wadi
lmao
devout scroll
You do good work but watching streams is really long 
devout scroll
I can't really model characters so I'm thinking more world stuff atm
still wadi
gotcha
devout scroll
Since I can model alright
But characters are really spooky to me. Something I'm probably not gonna get into just yet
Besides, I'm way more likely to actually finish something smaller
foggy granite
i learn alot of tools and features by modeling props like weapons
its nice to simple props then work you way to more complex shapes as you learn
devout scroll
Yeah
I know my way around blender just fine but I struggle wrapping my head around some shapes sometimes then get stuck
foggy granite
it get better cause i understand where you coming from on that
but i found have a folder full of different refrence images help with that so you can see similarly areas in form
devout scroll
I think I just need some structured content to follow along and complete to build confidence
foggy granite
then really some of techniques can carry on to different parts on modeling an avatar
Theres alot tutorials you can watch i can drop some that show you general over of character creation thats can work for vrchat
devout scroll
I know a bunch myself like reinhet's but I really don't trust myself with following through with them
I'd be more interested in clothes for existing models and world props
foggy granite
why not post progession photos when you get certain part of avatar done here
and show off you slowly working you way to making a full fledge avatar
devout scroll
I guess I'm just not too confident in what I make
I've posted a bunch of things I made before, when I was satisfied with them, but even so most remained unfinished
And I kinda don't like posting things and then abandoning them
foggy granite
i honestly extremly relate to that
but it just a mental hurdle that you got to jump over since it just a self made blockade
https://youtube.com/playlist?list=PLL3OEv6vd5VA4owAPOI0QdCcEmvl1f3BT and also i like this dude playlist mainly because of the timestamps and he has some nice techniques that work in general for alot of characters

YouTube
foggy granite
alright the only thing i dont like head sculpting part
 tame sinew
I’m trying to make a model for an avatar in blender but whenever I create a new face the polygons in the UV editor go crazy. Is there a way to align them to already existing polygons?
foggy granite
Yeah
 glacial estuary
anyone I can commission a full custom avatar from? I'm looking for someone who can use blender and is good with textures and unity. Am obviously willing to pay you for your work. Please DM me if you have an offer
 uneven dagger
So, I'm importing a model from a game, but I'm not sure what to do with the failed mess of bones it comes with ot make it compatible in VRChat, or at least recognizable as humaoid. I tried deleting the existing bones and starting from scratch, but I dont know what parts of the model are which in order to bind the bones to the mesh. Soooo... Kinda stuck, any suggestions? (new to the blender shpiel)
 thorny ivy
zinc jolt
hey guys, realism advice please
thorny ivy
zinc jolt
hey guys, realism advice please
- Squids have a membrane of some sort to keep all their internal stuff where it should be but for actual details, do some research; scientists love delving into this kind of stuff.
- I think squids may be slippery due to some mucus that covers them - that could cause light scattering but again, research's your friend.
zinc jolt
makes sense
thorny ivy
On a semi-related note, looking into retractable claws + monster girls as my avatar sports some. However, trying to strike a balance between unique look, functional, and having them not cause people to go "wow, how does she do anything with those?"
 zinc jolt
that's actually very impressive
thorny ivy
Thanks, the claws are scratch-made while the hand's a modified mesh. Unfortunately, I messed with the original version way back and none of the properly-sized ones were unaltered.
I spent a good bit just trying to un-ugly the hands since initially, I didn't know what to shape to go for so they ended up looking weird more then anything else.
thorny ivy
Two hours later (shy of just 4 minutes) and this is what I have to show

Fingers have a more natural shape now and the claws actually meld with the mesh, making the two look cohesive rather then just stuck-together like before.

And last angle shot, found some more wonky geo so I took a few mins to fix it up.
 thin shadow
i found an alternative, but different problem this time.
What is the best practice on how to solve this? this is an mmd model.

the problem is when using the mat combiner, uv wrap does not match with the texture
quaint jasper
Did the parts have the same UVMap name ?
spiral sigil
Hey my main avatar has been floating which I have only noticed and I think the person who made it they just moved the whole avatar up a little bit can somebody help with this?
 lament pond

 devout scroll
thin shadow
i found an alternative, but different problem this time.
What is the best practi...
devout scroll
thin shadow
i found an alternative, but different problem this time.
What is the best practi...
In practice it doesn't matter, uvs repeat forever unless told to clamp
thin shadow
devout scroll
In practice it doesn't matter, uvs repeat forever unless told to clamp
so, the thing is, when using the mat combiner, the cloth becomes white, and the i looked up to the uv and it's not where it's supposed to be

oh wait, the uv's not even there
 devout scroll
maybe cats ignores uvs outside the first uv space?
thin shadow
the option "crop outside uv" already turned off. But i found where the uv is here in this few pixels.
 devout scroll
This is what you basically have

if your uvs are on top of the main uv
then your uvs are basically starting at x0, y1
you need to move them down by 1 uv space on the Y
so for that just select everything that's on top
untick pixel coordinates

and then g, y -1
thin shadow
i see, alright. i'll try.
in the meantime, i take it that this uv before combine confirms your theory?
 devout scroll
Basically you just want everything in first uv space
Also that's some bad packing
You should consider doing it manually, or at least edit the results
And don't pack everything together, pack normals together, pack base colors together and so on
 vocal stirrup
im trying to work on an avatar and it has 2 sets of arms, one being hideable in the collection and one just attached to the body mesh, i wanna get rid of the arms attached to the mesh how would i do that
 indigo stirrup
Currently building another funny booth kitbash. And I was wondering, what's the recommended way of implementing toggleable clothes? I don't wanna have like 7 skinned meshes.
devout scroll
Well you can use mesh renderers for things that don't deform, other than that I think you gotta use skinned meshes
indigo stirrup
I mean, I was thinking about having a blendshape that makes a piece of clothing turn into the size of an ant inside the avatar
devout scroll
Tho perf ranks will not complain, actual performance will probably be worse
indigo stirrup
I put each piece of clothing on a different material
indigo stirrup
and I give them a completely transparent material
devout scroll
vocal stirrup
man nobody ever answers my fuggin questions in here
just delete them? i dunno
You could use an empty shader yeah, but then you're still dealing with lots of polygons
vocal stirrup
devout scroll
just delete them? i dunno
suck an egg
indigo stirrup
it really wont be "lots of polygons"
devout scroll
So I guess it depends on what you're looking to optimize
indigo stirrup
with all pieces of clothing, the entire thing will probably be under 40k
devout scroll
people respond to questions they know answers to
 craggy lintel
indigo stirrup
with all pieces of clothing, the entire thing will probably be under 40k
craggy lintel
indigo stirrup
with all pieces of clothing, the entire thing will probably be under 40k
why don’t you just put them all on same mesh and then have them on separate materials and do invisible material swaps for each one you want gone
so keep them all on invisible materials and then just use toggles to enable one material per cloth
@devout scroll why didn’t you suggest this hun
devout scroll
devout scroll
You could use an empty shader yeah, but then you're still dealing with lots of p...
They mentioned it, and so did I
devout scroll
Just considering the options
devout scroll
Optimized according to performance ranks
Unoptimized according to real performance
craggy lintel
They’re not terrible
lots of ppl use em
but doing a biiiiig shapekey like a whole outfit shapekey could cost yes
but try it, why not haha
thin shadow
wait, so vrchat's avatar performance rank are not actually realistically applicable? is it kind of a low-key placebo effect?
 tight quartz
Can I seperate this? This stand and ball is one object but I wanna cut from the ball and make the ball seperated from the stand.
 thin shadow
devout scroll
Also that's some bad packing
thin shadow
devout scroll
Also that's some bad packing
exactly, the person who made this has really bad workflow and practice. That's why im trying to fix this.
devout scroll
tight quartz
Can I seperate this? This stand and ball is one object but I wanna cut from the ...
select the ball in edit mode, mouse over it and press L to select linked, then press P and selection
Also you might want to right click in object mode and shade smooth, then in the mesh tab on the right normals > auto smooth
tight quartz
👍
tight quartz
devout scroll
select the ball in edit mode, mouse over it and press L to select linked, then p...
I built them to the same. becuse I merged them.
I wanna be able to cut them and make then 2 seperate objects.
devout scroll
and i told you how to do it
devout scroll
you just have to do 2 steps
select the ball in edit mode, all the faces of it, then press P > selection to separate to a different object
devout scroll
👍
tight quartz
I got another question. In avatar there is like ARMATURE -> Spine -> Leg etc. How do these "folders" or whatever
 tight quartz
Oh I need one first?
devout scroll
Yeah
tight quartz
Ah makes sense.
zinc jolt
I'm going to make Miss Minutes
tight quartz
Can I remove this
 tough plover
@tight quartz no, that is the object's origin point
tight quartz
But that is making so all of the arms are moving if I move one of them.

I want them all to move with this.

But if I select them and rotate them seperately they will not follow with the others.
If you understand what I mean
tough plover
tight quartz
I want them all to move with this.
if you want different parts of it to move, you should probably use bones
bones are simply a way to move parts of a mesh
tight quartz
Ik but it doesnt move. Or I am doing it wrong
I am probably doing it wrong since I am new to doing stuff with bones
 tough plover
yea that's fine
so if i understand this correctly
the big cube should be static, while everything else moves?
tight quartz
So mostly I want this to rotate and have the arms attached to it. BUT the arms should be able to rotate by themselves.

I am making a ride that is a Jumping Frog
So these arms are suppose to be able to go up and down
tight quartz
tough plover
the big cube should be static, while everything else moves?
And yes this block is there just for the model

Wait... @tough plover I finally found out how to do the bones.
It works as I want it to now.
tough plover
👍
lament pond
still wadi
https://i.imgur.com/klirtFI.png
I think the straps at the hottom should be tighter, at the moment they don't look like they are actually tying the end of the hair
lament pond
As it is at the moment especially with the gaps it looks like it's just on top
Realism with that kind of stuff is something I'm always eyeing xD
lament pond
Yes we are
lament pond
Now that the mesh is about done I can start the texturing on her.
 indigo stirrup
how would I find out which vertices aren't weighted? I cant really select while in pose mode
 quaint jasper
Select the vertex groups in edit mode and you'll see it
indigo stirrup
oh, right
actually, no
I, uhh
dont get it
everything looks assigned just fine on hip and spine
I might also just leave it
since I didnt notice it while in VR
so it must only happen under conditions that would never be met by IK
thorny ivy
So I linked a mesh in one collection to another's armature but not sure how to fix the "ghost" effect

Storage is the original mesh, the one above has the "ghost" copy.
tough plover
it's not a copy, it's the same object
the "ghost" one is where the object is actually parented to
but you currently have it as part of a collection
so it's organized in that collection, but actually belongs to something else
thorny ivy
How do I make it so they're only in the other collection?
tough plover
thorny ivy
How do I make it so they're only in the other collection?
shift + click and drag
thorny ivy
Ain't workin', just makes another copy.
And disabling/deleting one gets rid of the other.
quaint jasper
If you figure it out please ping me, i've tried everything to no avail
thorny ivy
So its a reoccurring problem, huh.
quaint jasper
Never happened to me before 2.92, i feel like it's a bug/feature of their new hierarchy nesting and stuff
tough plover
2.91 and 2.92 are not super stable
recommend using 2.93.1 LTS instead
@quaint jasper@thorny ivy
you could also just delete the collection
deleting a collection does not delete what is inside of it
if you really want the organization, you could re-make it afterwards
thorny ivy
tough plover
you could also just delete the collection
That seems to have done the trick, appreciate it.
tough plover
np
thorny ivy
Much easier to re-make them then finagling with hierarchy stuff.
 vivid crater
it does that in 2.93 too, it shows the child under the parent even if its in another collection
 merry vault
Anyone here happen to have zbrush? I need someone to open some files and export whatever's inside as .objs.
tough plover
vivid crater
it does that in 2.93 too, it shows the child under the parent even if its in ano...
that's perfectly normal
moving it into a collection doesn't remove it from what it was parented under before
you could for example have a bunch of different meshes under one armature
and organize those meshes into collections while still having them be part of the same armature
vivid crater
ok yea, we still want it to be parented like normal, no we dont want it to appear in both collections if we specifically move it to another one
tough plover
after messing around a bit I think I see the bug you're referring to
@quaint jasper @thorny ivy to fix it just right click on the object and hit Unlink
quaint jasper
Yeah if i did that the object would just get deleted
Not sure how any of that ended up happening in the first place
tough plover
if you do it to both yea
quaint jasper
mmh
tough plover
doing it to only one of the "copies" fixes it
quaint jasper
i'll have to try again next time, i redid stuff from scratch twice
tough plover
you can also see the number of users for that object changing to 2
thorny ivy
F for the time spent doing that.
tough plover
this should also be a reminder to crank up your Undo steps to 256 under Edit > Preferences > System
thorny ivy
Definitely helpful when making a lot of fine-tuning moves.
 unborn acorn
making me own shoebill
 uneven dagger
Is it possible to unpack just a prefab from Unity into Blender? The base model has a thingy I can't get rid of without screwing up the model's blendshapes 😦
tough plover
uneven dagger
Is it possible to unpack just a prefab from Unity into Blender? The base model h...
alongside the prefab you should have the actual FBX file it's referencing
right click on it and click Select prefab asset
uneven dagger
So, I have a stupid long list of vertex groups that prevents a single material texture from being applied to everything as a whole. Is there a way to clump these together as one vertex group?
 quaint jasper
Your question doesn't really make sense, these either are attached to a bone, or they're not, if they're not then they can be automatically cleared. materials don't have anything to do with weight paint
tough plover
uneven dagger
So, I have a stupid long list of vertex groups that prevents a single material ...
Vertex groups are how you make parts of the mesh deform with bones.
a bone will have an influence on the mesh if vertices in the mesh belong to a vertex group which shares the same name as the bone
uneven dagger
Ooooh...
tough plover
this has NOTHING to do with materials
uneven dagger
Goooot it.
tough plover
if you want a texture to be used as the base color for a specific material, click on the particular material in the list of materials on your mesh. go to Base color, click the circle next to it, set it to Image texture, and then specify your texture
uneven dagger
I have MUCH to learn about Blender x.x
tough plover
definitely has a learning curve to it lol
uneven dagger
At least it feels more cohesive than unity >.> which I am shamefully better at by now.
tough plover
@uneven dagger
 uneven dagger
gotcha. ive still gotta go in and play around with it, but at least now I know why the model has an obscene amount of vertex groups (to match the stupid amount of facial bones)
tough plover
@uneven dagger the facial bones can be used to pose the face to then create shape keys for facial expressions
the CATS plugin has this handy button for that
 uneven dagger
which can then be set as visemes...?
uneven dagger
Handy!
tough plover
having X mirror enabled when posing the face bones is probably wise
craggy lintel
okay
OKAY
No cap
Ready
Don’t get mad but hear me out
Shapekey organization alphabetical and numerical is LAMEEEEEEE
tough plover
i'd rather have them organized by what they are for
thorny ivy
Likewise.
thin shadow
So in blender, i have already set to CUDA and GPU compute in the cycles rendering option.
But when it's baking, it's using 100% cpu usage and 5% gpu.
Are there any way to minimize cpu usage and fully utilize gpu?
i have ryzen 2700 and a gtx 1080 by the way
 still wadi
baking
tame sinew
Something weird is happening to blender. Whenever I go select the third sphere to see the textures, the mesh gets messed up and I can see through the polygons. This is the first time I’ve seen it…
 gray hornet
thin shadow
So in blender, i have already set to CUDA and GPU compute in the cycles renderin...
gray hornet
thin shadow
So in blender, i have already set to CUDA and GPU compute in the cycles renderin...
You could try chaning in performance the tile size to something larger like there maybe, it might reduce time it takes Blender to bake textures
 tough plover
@thin shadow try setting the tile size to the same size as the image
as for it not using your GPU, make sure you set it to GPU compute
on top of just selecting CUDA in your settings

might also want to enable denoising
 gray hornet
I don't think that denoising works for baking though
quaint jasper
it does in the compositor
spiral sigil
when you hit L on some complex geometry in a model and it selects a given portion of it in edit mode, is it selecting everything that waspart of that vertex group?
quaint jasper
it selects what is connected
 cyan plover
guess here's a better place to ask, so anyone know if I can do an avatar rigging in Maya or does it have to be done in blender?
tough plover
cyan plover
guess here's a better place to ask, so anyone know if I can do an avatar riggin...
can be done in anything really, blender is what most people use
mainly since it's free
cyan plover
ah ok ok ty!
tough plover
and the workflow from blender to unity is nice

as long as your rig is standard enough you'll be fine
cyan plover
tysm!!!
 molten zephyr
not looking forward to the hair, but i'm really happy with how the face turned out.
 spiral sigil
Is there a way to prevent CATS from squishing your UVs down to a wayy smaller square than it should be on an atlas?
quaint jasper
Wdym by should be
spiral sigil
its so small that you can see the pixels
and there is way more free space on the atlas visibly
having a hard time explaining it
quaint jasper
What was the original texture size vs what it is on your atlas ?
spiral sigil
yea
it crunches some down incredibly small that its making the quality of the textures pixly
tough plover
@spiral sigil try using the actual Matcombiner rather than the version of it built into CATS
 safe marsh
hey i found a model of lelouchs burai from code geass and i was wondering how much it would cost to have someone texture/rig it

this is how it should look

 hollow ermine
molten zephyr
not looking forward to the hair, but i'm really happy with how the face turned o...
hollow ermine
molten zephyr
not looking forward to the hair, but i'm really happy with how the face turned o...
Keep us updated! I wanna see this as it develops
molten zephyr
hollow ermine
Keep us updated! I wanna see this as it develops
thanks man, can do!
unborn acorn
boober
 thorny ivy
That got past VRC filters? Wow.
foggy granite
he is the choosen one
 foggy granite
I looks pretty food mind showing different angles
 broken whale
 foggy granite
broken whale
foggy granite
broken whale
Looks good just a bit basic do you have a reference that you use
 compact mulch
 gray hornet
How would you go about projecting multiple shapes with transparency on them onto a single plane? Baking it with diffuse leaves black borders art transparent areas
 spiral sigil
I would just put an orthographic camera that renders it from the desired perspective and then use the render output as texture for a plane there
gray hornet
Oke, what about bent surfaces?
spiral sigil
just set is a texture for whatever and use global coordinates for texture projection
if you have an orthographic render it can be put onto mostly anything
gray hornet
I see
tight quartz
I uh... Need to flip the normals in blender right?

Since they are invisible in Unity
And how do I do that exactly?
 glad hornet
If you want to flip them in blender, iirc you open the viewport dropdown and there will be an option to make them visible
Then you can select all the flipped normals and use the mesh>normals>flip normals option to flip them the right way round again
spiral sigil
also you can mark those spheres as "smooth shade" and they will not look that polygon-y anymore
glad hornet
Also, some shaders in Unity have the option of making faces visible from both sides
If you want a shortcut at the expense of rendering more faces
spiral sigil
glad hornet
Also, some shaders in Unity have the option of making faces visible from both si...
you can easily edit that into every shader by opening the code in an editor and adding "Cull Off" before the CGPROGAM
glad hornet
spiral sigil
you can easily edit that into every shader by opening the code in an editor and ...
That's extremely useful, I never knew that!
Shader magic remains magic to me
spiral sigil
I do that on quest so my hair doesnt need double the polygons
its a great way to actually optimize if you know what you are doing
 hardy agate
spiral sigil
I do that on quest so my hair doesnt need double the polygons
hardy agate
spiral sigil
I do that on quest so my hair doesnt need double the polygons
bit sussy
spiral sigil
why?
hardy agate
you edit the quest shaders?
spiral sigil
jep, they dont check for the file hash of the official shaders haha
so i can just write whatever in ther
just needs to be something the Android Unity can handle in terms of instructions
glad hornet
If it uploads and it doesn't break TOS it's fair game baybeeeeee
spiral sigil
I actually just reused parts of my Beat Saber Anime shader haha
thats one I wrote from scratch, because Beat Saber doesnt work with Poiyomi
 spiral sigil
shader language isnt that hard if you get your head around it
its quite a nice language in terms of programming languages tbh
I have seen worse, far worse
hardy agate
#shaders message hmm
glad hornet
I've never looked into it tbh, unity gives me enough hassle as it is that I sort of just assumed shader language would be a pain
spiral sigil
hardy agate
https://discord.com/channels/189511567539306508/534472629013315606/8518468016223...
well ngl dont care that much, because im not using it to crash or lower performance
mines more about optimizing the quest version to run better and not look like shite
still wadi
@gray hornet literally render it with a camera in orthographic view
with transparency enabled in render
 glad hornet
I haven't done this personally, but wouldn't the process be to render it to texture orthographically and then curve the mesh using it as a texture however you like?
 white moth
glad hornet
I know some c++
white moth
glad hornet
I know some c++
C# is easy compared to C++
C# is just C++ except it doesn’t feel like they made everything up as they created different parts of it, it’s all self-consistent and easier to follow. No random legacy C thrown it
Shader scripting isnt C# either but it’s perfectly readable if you know it
glad hornet
Sweet, I'll give it a try
gray hornet
glad hornet
I haven't done this personally, but wouldn't the process be to render it to text...
That was my wild guess about doing it but result is not greatest


I guess I just need to give myself time with it, maybe I'll come up with something I like eventually
gray hornet
Ok, I'll try a bunch of things, thanks!
craggy lintel
hey guys whats the most common reason behind a normal map coming out blank? My friend is trying to bake one and I can't figure out what they are doing wrong lol
spiral sigil
So I'm trying to add goggles to my avatar cuz I know headgear/hair is the easiers to add cuz you just drag it onto the head bone but like... I wanna take the goggle model from another fbx file, how so I do that
tough plover
spiral sigil
So I'm trying to add goggles to my avatar cuz I know headgear/hair is the easier...
do that in blender
spiral sigil
Yeah but like... how?
tough plover
open the model with the goggles in blender first,
if the goggles are already a separate mesh, then you can just copy paste that into your avatar project
if not, then you need to switch to edit mode, select them (you can use ctrl + L to select all connected vertices after selecting just one, makes it way easier)
then, hit P > Selection to separate the selection to its own mesh
then you can copy paste that into your project
spiral sigil
Thank you, Sacred
tough plover
you'll also need to make sure that the goggles are properly weighed to the head bone, otherwise they will not move
(just to be clear, I'm saying you should add the goggles to your avatar through blender, not through unity)
 topaz reef
low poly shuriken
 tough plover
neato
topaz reef

 whole comet
That doesn't look low poly that just looks optimized
topaz reef
 spiral sigil
I forgot what those are called
thorny ivy
Shurikens I think.
thorny ivy
topaz reef
Looks good but the center piece's edges don't match with the top/bottom color, gives it an odd look.
topaz reef
i dont know either how to make it look better
 quaint jasper
You're asking someone to try and spend dozens of hours in blender to recreate this for no reason ?
tough plover
^
spiral sigil
zinc jolt
Can someone try to make this?
Sure, after you pay me.
Actually, no. its a hefty order and I'm not there yet (skill wise). Sorry.
white moth
zinc jolt
Can someone try to make this?
Good, fast, cheap, pick two.
unborn acorn
boobers have been covered

 fringe thicket
Anyone have any suggestions for how to recreate a body mesh? The model I have has a chest plate I want to remove to make way for other outfits but there's no skin under it. Wondering I'm willing to bet the chest plate was the base mesh extruded. Wondering if there's an easier method to undo that instead of eyeballing it
 unborn acorn
fringe thicket
Anyone have any suggestions for how to recreate a body mesh? The model I have ha...
unborn acorn
fringe thicket
Anyone have any suggestions for how to recreate a body mesh? The model I have ha...
you can select the chest plat and press Alt+S to scale it down a bit, then just select it move its uvs to where the chest would be on the base texture
fringe thicket
unborn acorn
you can select the chest plat and press Alt+S to scale it down a bit, then just ...
When scaling, by the time one edge lines up, the rest are off. So maybe it wasnt just a simple base mesh extrude when it was made? Or maybe I need to change the location to cursor and set the cursor at the center of the chest
unborn acorn
fringe thicket
When scaling, by the time one edge lines up, the rest are off. So maybe it wasnt...
you have to go into edit mode select the plate and then press ALT+S
it shouldnt miss align
fringe thicket
Oh, my bad. Alt+S isn't scale. I was trying to scale on y and x. Thanks! There's a lot of tools I've still got to learn
unborn acorn
fringe thicket
Oh, my bad. Alt+S isn't scale. I was trying to scale on y and x. Thanks! There's...
No problem blender has alot of cool tricks
devout scroll
You can also smooth in sculpt mode
 languid fog
Another study day, i need tips and critiques pls
 quaint jasper
What's your ref ?
gray hornet
languid fog
Another study day, i need tips and critiques pls
Looks good so far but I think that the mouth might be a bit too low?
languid fog
quaint jasper
What's your ref ?

 languid fog
gray hornet
Looks good so far but I think that the mouth might be a bit too low?
languid fog
gray hornet
Looks good so far but I think that the mouth might be a bit too low?
Yeah, i thinking about that 2 tbh
quaint jasper
Are you taking the side view into consideration for the face shape ?
Seems like that's the issue
languid fog
quaint jasper
Seems like that's the issue
I not considering 100% of the side view bc it dont follow the topoly, i mean the nose part

Thats was 4 days ago
But still the same shape
merry vault
I shall once again ask if anyone here has zbrush.
gray hornet
In the end I ended up with this

 obsidian nova
That’s incredible; god damn…
thorny ivy
Blender is a full-featured (and completely free) suite of 3d rendering, modeling, sculpting, video editing, animation, VFX, etc etc. tools all wrapped up in a single piece of software.
this video is based on an inside joke among blender users where seemingly every single blender tutorial on youtube starts with delet...
Joking aside, that is quite a nice model.
cyan plover
Hey guys, so if I have a model with only three fingers, Do I have to do the rig with all 5 fingers and just leave 2 of teh fingers not skinned, or can I just make the rig with 2 fingers?

 tough plover
cyan plover
Hey guys, so if I have a model with only three fingers, Do I have to do the rig ...
tough plover
cyan plover
Hey guys, so if I have a model with only three fingers, Do I have to do the rig ...
a humanoid vrchat rig only requires thumb, index and middle fingers
cyan plover
tough plover
a humanoid vrchat rig only requires thumb, index and middle fingers
oh ok ty!
gray hornet
Personally I'd keep all 5 fingers because some UDON worlds might require more but I wouldn't weight anything to them. So they just exist.
as an example what I mean
 tardy rapids
zinc jolt
Can someone try to make this?
tardy rapids
zinc jolt
Can someone try to make this?
If you want that made, you'll probably be looking at a couple thousand dollars and a professional 3D artist.
zinc jolt
I'm trying to get there to become the best of the best
tardy rapids
It'll take a while if you're aiming to make that. Focus on what you can do first.
Comparing yourself to something like that, which appears to be a movie-quality model, which requires multiple professional artists working on the model, materials, and rigging is not only unrealistic, but also demoralizing
tardy rapids
Professional? I make money off of it, so legally, sure. But I could never even start to make something at that level
quaint jasper
Do that every day for a couple years and you'll get it i'm sure
zinc jolt
That's the idea
thorny ivy
So, not sure what's going on but my model's doing some where ghosting with posing

Basically, it seems like there's another mesh which moves inversely to the direction I go with the armature.
quaint jasper
Is the body duplicate painted to the same armature ?
thorny ivy
I mean, there's no vertice tearing or anything
...I had a mirror modifer on the body itself for some reason.
Think I selected the wrong object just before and that's why I suddenly had this issue.
tame sinew
In blender 2.9, how do I make a polygon two sided? I downloaded a space ship from sketchfab and I want to use it so I can walk inside of it, but you can’t see any of the polygons from inside
tough plover
tame sinew
In blender 2.9, how do I make a polygon two sided? I downloaded a space ship fro...
if you want to render both sides of a polygon, you need to tell the shader to turn off backface Culling
there is typically no need to render the backside of a polygon (in other terms, the side opposite to the face's normal direction)
if this is not an option however, or you want people with custom shaders disabled to still be able to see it, then you can use the Solidify modifier to give "thickness" to everything
which will essentially just duplicate all of the faces and connect them at the edges
a more "controlled" version of this is using the "Extrude along normals" tool
tame sinew
Um. In blender I can see the inside of the ship just fine. In unity, it’s disappeared…
tough plover
tame sinew
Um. In blender I can see the inside of the ship just fine. In unity, it’s disapp...
because blender has its own Backface culling setting
in unity, the default is to have backface culling enabled
that's also the default for like, everything
you don't want to render both sides of each face if you don't have to
you should actually just enable backface culling in blender so you can see where you need to make the inside visible
to avoid adding unnecessary geometry
don't forget that "culling" means "to remove"
tame sinew
It is enabled. I literally just said that
tough plover
culling enabled > can see through backfaces
tame sinew
In blender I can see inside perfectly fine.
 tame sinew
I want to be able to look inside in unity, so I can use the inside of the ship as a place for people to walk though.
tough plover
yes, I know that
like I said, the Solidify modifier can help with that. but that would also extrude every face on the model
which you may not want to do
you only really want the areas that people will walk through to be rendered on the inside
for that reason, it's preferable to enable backface culling to see which parts of the ship need to be visible from the inside, and which don't matter
 hazy valley
wa
tough plover
from there, there are multiple ways you could do the inside
one of those ways would be to select all of the surfaces which should be made visible, using Shift + D to duplicate them, Alt + N > Flip to flip the normals, and then Alt + S to shrink the selection down a bit (optional)
that is probably the way I would go about it
it gives you the most control
glad hornet
Or you could just find a shader that lets you turn off backface culling in unity
If you want to do it the fast way
 median pike
I made a thing. 10k polys. Not sure if that's considered good for this sort of thing


 glad hornet

You could probably lower the poly count quite a bit with a normal map but that looks really good
quaint jasper
Looks great ! Dark wood is an odd choice though, but it works
quaint jasper
AH, customer is king !
tough plover
dang, now I want to model a guitar/bass lol
already made a shit drumset in like 20 mins before
median pike
It was quite fun
tough plover
is the wood texture just a material in substance?
median pike
It was made in substance but it's not like a premade material
I think like 3 layers in total I used
tough plover
hm alright
so many things I want to model but so many other things I need to finish first
median pike
Same
- commissions
I feel like I never have time for anything
But I only have willingness to make something when I have shit to do already
tough plover
lmao right
tough plover
xD
devout scroll
I also made a lot of progress on my projects when I was at work and had other stuff to do
Procrastination can good
thorny ivy
So I've got a rigging question: I've got bones for a specific asset of my avatar but they're not moving anything despite the mesh having vertex group + weight painting for said bones.
Everything seems to be named right too.
unborn acorn
 tough plover
thorny ivy
Also, turns out said bones are twist ones. Might be why.
tough plover
thorny ivy
Also, turns out said bones are twist ones. Might be why.
is it a separate mesh?
if so, go to the modifiers tab and make sure it has an unapplied Armature modifier, with Object set to your armature
cyan plover
another question! Do I need to have a single mesh for my avatar? Or for example scince I'm doing a robot can I have a bunch of separete meshes?
tough plover
cyan plover
another question! Do I need to have a single mesh for my avatar? Or for example ...
you should really reduce the amount of total meshes you have
every mesh will have its own material slot(s)
azure rain
it's better as far as what actually goes into the engine to have it be as few meshes as possible as basically each one is a draw call
tough plover
each material slot is a draw call, aka a whole pass your GPU has to do to render your model
cyan plover
oh shot, ok ty ty
tough plover
20 meshes = 20 draw calls
20 meshes with 2 materials each = 40 draw calls
joining meshes has no impact on the weight painting
azure rain
real-time Shadow casting light pointing at it 80 draw calls
lament pond


 thorny ivy
Decided to try something out just because for my avatar, think the results are pretty decent.

Wood spine spikes!
Since my avatar already has branch horns, which are bone growths in most cases, thought I'd extend that to her spine. Know the spacing and number are way-off, adult humans have 24 or so, but this was mostly an experiment to see how it'd turn out fist.
devout scroll
neat


 topaz reef
tough plover
mildly terrified to know how many polys the handle is
topaz reef
tough plover
mildly terrified to know how many polys the handle is
is for baking
tough plover
figured
foggy granite
That's amazing
tough plover
also
 topaz reef
😅
foggy granite
What are you gonna do with that cheese
 cedar steppe
Anyone know where i can learn to model outfits for a base?
instead of videos where the model is created all together with clothes etc
 worldly tangle
👀
thorny ivy
cedar steppe
Anyone know where i can learn to model outfits for a base?

Modeling cloth for blender 2.8 is out. LINKS BELOW!!! Discord: https://discord.gg/h98XtJv
My addons are supported by donation so If you want to help me keep making them please donate: https://www.patreon.com/The_3D_Advantage
https://www.paypal.com/cgi-bin/webscr?cmd=_s-xclick&hosted_button_id=4T4WNFQXGS99A
We have lots of new features and ongoi...
cedar steppe
thorny ivy
https://www.youtube.com/watch?v=jNXBYI-WPU4
Not so much cloth but a suit , I’m trying to make a HEV suit
Not clothing
thorny ivy
In that case, you could get away with having most of it being relatively rigid (100% red) for the hard parts and then lighter for the webbing (the cloth parts that cover the joints).
 spiral sigil
tell us what the poly count goes down 2 after its all done
median pike
thats already the low poly
unwrapping a high poly would be suicide lol
looks fucking sick
assuming the poly count is somewhere around 500 or lower
thorny ivy
Tried my hand at adding some freckles to my custom avatar, found some online and been messing around with positioning + color to make something suitable.

There's some obvious UV stretching around the nose area but done my best to minimize that.
Any thoughts/suggestions?
foggy granite
looks great some lipstick would look good
 brittle sinew
Okay, so I'm completely new to unity in general. Could someone please explain to me the difference between textures and materials. I would also like to know how to make textures. Can I make textures out of materials?
foggy granite
okay one thing meterials are textures, and texture are images you can use
and also you dont use unity to make textures
frist explain what you want to do
@brittle sinew
brittle sinew
Okay, I want to simply recolor an avatar, but also make it quest compatible.
Problem is, when I use the shaders that the quest allows they usually turned white (except for standard lite).
So I'm not really sure how to use any of the other ones.
@foggy granite
foggy granite
you can bring the avatar into blender to recolor it
and do you know the name or owner of shaders being use
glad hornet
brittle sinew
Okay, I want to simply recolor an avatar, but also make it quest compatible.
Materials determine the look of a mesh depending on the shader you use with them, and shaders hold textures
If you want a recolor, then all you have to edit is the texture
You can do that in blender, where the texture editor is pretty bad but you can see your changes in real time
Or you can do it in something like photoshop or krita, where the image editing tools are great but you can't see your results until after you finish
foggy granite
Depend on the type of texture
glad hornet
The best of both worlds is substance painter, but depending on your situation that can be expensive
foggy granite
Quiver mixer is nice because it's free but you can draw in it to get certain details
glad hornet
brittle sinew
Problem is, when I use the shaders that the quest allows they usually turned whi...
As far as this issue goes, just make sure your chosen shader/material has your texture applied
There should be a slot where you can apply it, iirc in most shaders it'll be labeled 'albedo', 'base', or maybe just 'texture'
brittle sinew
Thank you both very much! @foggy granite @glad hornet
Oh! One last question if you have the time.
How do I make certain images transparent on quest?
The model I'm working with has wings, that are just flat images. They have large white boxes around them.
How would I remove those?
foggy granite
im pretty sure quest dont allow transparency sharers
thorny ivy
foggy granite
looks great some lipstick would look good
Added some but due to my minimal digital art skills, feel like they're kinda flat/lackluster.

Doesn't help the model's lips are practically non-existent but don't wanna mess with the shape keys either.
foggy granite
Yeah that's understandable
thorny ivy
So should I keep the lipstick or remove it for now?
This is suppose to be a prototype though, a way to test out how everything may look + what I might wanna change/ditch, so not really worried about more minute stuff.
foggy granite
I would shy remove it or try a brown ish color to match the skin more
thorny ivy
Well, to delve into character design for a moment, her lips are bright like that due to her insides being magic. The lip membrane is thin which is why its color varies in people + is influenced by body temp.
However, I'm no digital artist and wouldn't mind waiting until the lips actually look decent to include them and/or their proper coloration.
foggy granite
That's some interesting lore but remove the lipstick for how until you get the lips more developed
thorny ivy
Glad ya think so, she's actually got a lot + her actual design shows it, but yeah, was thinking the same.
Face/head mesh is actually the most troublesome part so far due to shapekeys + my inexperience with them.
That and the custom head I was working on wasn't turning out too well.
foggy granite
Heads are hard
But I found a nice reference to use that show the topology of the head to use
thorny ivy
Oh?
foggy granite
 thorny ivy
Always forget just how massive anime foreheads are.
thorny ivy
They look absurd without hair.
craggy lintel
Yea no just make it normal looking
That’s what I do
Any base I would use or use I make the forehead smaller
glad hornet
Yeah if you have any concern for normal human proportions that reference is kind of a nightmare lol
foggy granite
depends on charcter larger foreheads help with hair
foggy granite
only thing is the ears
thorny ivy
Pro-tip: if importing stuff, be it as reference material or kit-bashing, make sure to remove animations from it if the new use is static.
I'm having to redo an element for the second time because the original model came with an animation part despite being a statue.
All transformations (including scaling) were reverted back as well as their positioning upon loading the file again.
foggy granite
Probably for posing the statue
thorny ivy
Prob'ly.
But yeah, not fun having to redo something twice.
Here's redo #2 by the way

Made them smaller and less pronounced this time around, bit more realistic that way.
cedar steppe
Anyone know how i can move the model to 0,0,0
 quaint jasper
cedar steppe
Anyone know how i can move the model to 0,0,0
quaint jasper
cedar steppe
Anyone know how i can move the model to 0,0,0
Select the most bottom of your vertex on either side of your feet (symmetrical), then Shift + S > Cursor to Selected then Open the search menu > Set origin to 3D cursor with your model selected then Shift + S again > Cursor to world Origin, another Ctrl + S > Selection to cursor
foggy granite
thorny ivy
Here's redo #2 by the way
are you gonna have some clothes where the back espose to show the spikes
thorny ivy
foggy granite
are you gonna have some clothes where the back espose to show the spikes
Something like that or have a reinforced area for the spine area. I do want them to have some visible influence on the clothes, just not sure what I'll actually go with yet.
cedar steppe
quaint jasper
Select the most bottom of your vertex on either side of your feet (symmetrical),...
im not sure if im doing it wrong but nothing of the sort is working
quaint jasper
Which step ?
cedar steppe
none of it brings the model to the centre
quaint jasper
So the last step ?
cedar steppe
the dot and the 3d cursor is centred but the model just wont go
quaint jasper
Did you select the model before doing the last step ?
quaint jasper
Can you record your screen while doing the steps ?
cedar steppe
i just end up with this

ill send you a video if of me doing the steps if you like
oh wait it while doing it to record it , it moved but it didnt centre it

its like this now
centered on the vertice rather than centering the whole piece
quaint jasper
yeah. that's because you didn't select a vertex on the other side
You need a vertex on each foot, so that the 3D cursor is halfway in between
the same vertex on both side if possible
cedar steppe
ohhhh i missed that , my bad
quaint jasper
no worries, lmk if it ends up working
cedar steppe
yeah i think it worked , thanks alot
quaint jasper
cedar steppe
yeah i think it worked , thanks alot
Make sure to ctrl + A afterwards to apply all transforms
On everything
or whichever key combo does that for you
 onyx juniper
thorny ivy
Always forget just how _massive_ anime foreheads are.
onyx juniper
thorny ivy
Always forget just how _massive_ anime foreheads are.
Late but they're basically children, but with big tits and thicc thighs
languid fog
First time doing smth like this
 obsidian nova
That’s actually really good!
obsidian nova
They be sculptin’ 👋 chill. 👍🥳
white moth
languid fog
First time doing smth like this
No I refuse. how do people just pop up in blender and start making organics like it’s nothing the first time
thorny ivy
Speaking of sculpted bodies, here's a sweet one.


Added the same sugar + cinnamon "freckles" from the face to her shoulders.
I'd provide a front view but she's lacking any clothes atm.
foggy granite
can you show the whole body right now
foggy granite
Mind dm a pic I just want to see the over of it
thorny ivy
Sure thing
vivid crater
😳
craggy lintel
Uhhhh
blender now doesnt want to export vertex groups
any idea why?
been using blender for about a year now and never had this weird shit happen and forums arent sayin much lolol
ghh i have to export the object with an armature on it to get it to work

Blender Stack Exchange
Is there any way to export a mesh that contains weights and vertex groups? I tried exporting a mesh that contains such properties as an .obj but it didn't keep the weights and groups. So is there any
Nothing LOL
X doubt my procedure for this is right lol
languid fog
obsidian nova
They be sculptin’ 👋 chill. 👍🥳
100% poly modeling m8
languid fog
white moth
No I refuse. how do people just pop up in blender and start making organics like...
I watched a video and used a image reference to help
And btw i using blender for almost a 1 year now hahaha

 verbal palm
 dreamy epoch

GitLab
A surface shader for Unity providing cel-shading. (Forward rendering only)
languid fog
craggy lintel
I wanna get better at poly modeling
for diy, see:
check out these for more reference:
https://www.models-resource.com/xbox_360/marvelvscapcom3/model/9406/
https://www.models-resource.com/xbox_360/marvelvscapcom3/model/2682/
you can also accomplish the abs in the texture if you're on the lower mid-poly range
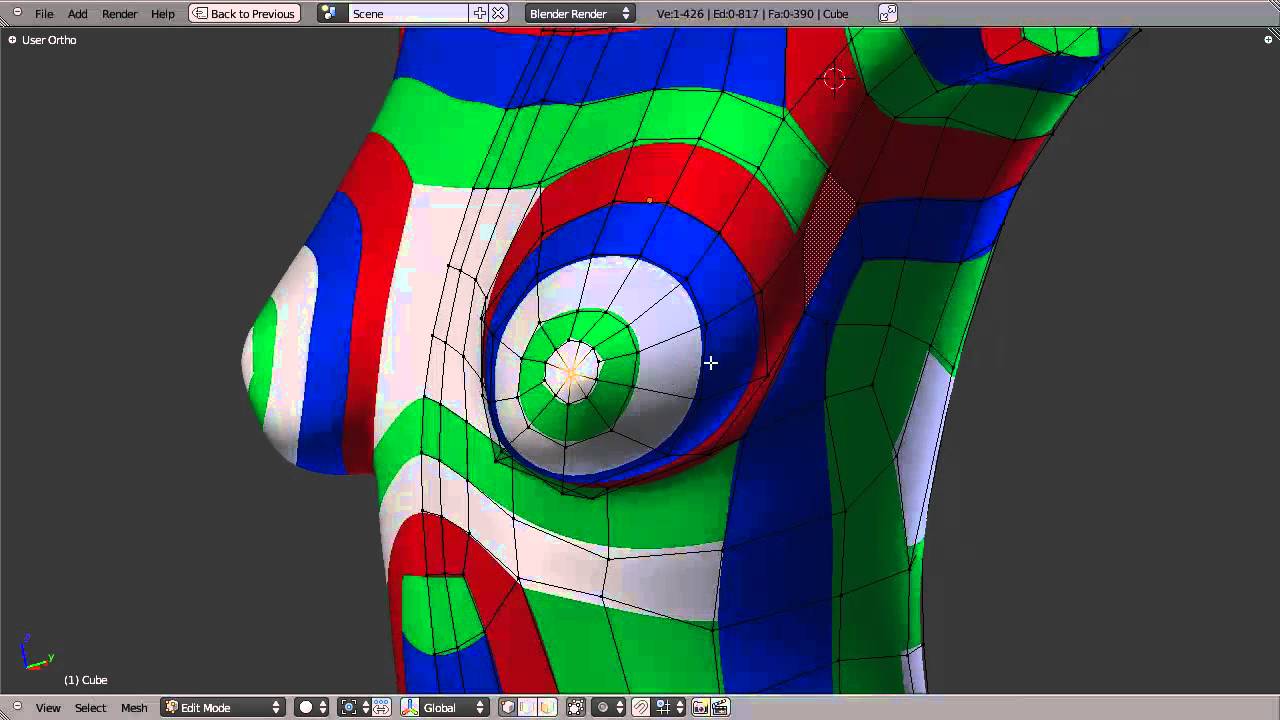
Xbox 360 - Marvel vs. Capcom 3 - Spider-Man - The #1 source for video game models on the internet!
Xbox 360 - Marvel vs. Capcom 3 - Deadpool - The #1 source for video game models on the internet!
 thorny ivy
Damn that looks nice.
white moth
languid fog
And btw i using blender for almost a 1 year now hahaha
Doesn’t really help, since I’ve been using it for three. Could you send me the video you were using?
craggy lintel
white moth
Doesn’t really help, since I’ve been using it for three. Could you send me the v...
I mean I’m making hairs better than most ppl and I’ve been doing blender for 10 months
but I guess hair just comes with art experience so it doesn’t count
molten zephyr
hair's still one of the hardest parts for me, haha
craggy lintel
@white moth do you know a good fire shader
languid fog
white moth
Doesn’t really help, since I’ve been using it for three. Could you send me the v...
 ashen stag
Reject organics, embrace robotics
cyan plover
ashen stag
Reject organics, embrace robotics
Actually to know how to draw or model robotics you really gotta understand anatomy
But ye robotics > Organics
ashen stag
Oh yeah anatomy is always important regardless of what you are creating, hell I have tons of references of arthropodal anatomy for spiders and millipedes
white moth
ashen stag
Reject organics, embrace robotics
Laughs in rigging via “assign to vert group”
ashen stag
Yeah the boolean variant of weightpainting is so easy lol
 urban valve
can someone PLEASE help me, im willing to pay someone to walk me through it, none of the tutorials im watching are helping me

i cant figure out how to color and import this into vr, i DO NOT want it this color, its the base color, please dm if you can help me
white moth
You don’t need a 3D editor to edit textures you need a 2D editor.
azure rain
if it has a Photoshop file you would open it up and image editing software and paint on the fur pattern after disabling a couple of layers
foggy granite
krita
 south inlet
how to add a bone for a duck that can be toggled?
 foggy granite
wireframe mode
urban valve
so i cant color it in blender?
foggy granite
hold z and select material preview
 azure rain
even if you did paint in blender you'd probably want to use image editing software to Overlay the colors on top of the model shading so the colors don't look flat
foggy granite
you can color it in blender but for more complex texturing swap to a drawing program
azure rain
yes
foggy granite
but frist explain what you trying to do and also you in the wrong mode
you in soild mode you need to select material preview by holding z and move your mouse down to select material preview
urban valve
im trying to color
a model
for vr chat
okau
i downloaded kirta @azure rain now what
azure rain
kirta would be for later after you paint in blender
foggy granite
so lets start from the beginning your trying to change the color of the fur right
azure rain
any pattern to the fur or just solid white
foggy granite
okay thats because you painted over the original fur pattern
azure rain
then in that case we'd probably don't need blender
urban valve
oh okay
azure rain
as you can probably just turn off layers and use the change Hue tool in krita
cyan plover
hey guys question, if I wanna add ears that wiggle with dynamic bones to an already rigged avatar, do I have to add the bones separetly to the ear models and then parent them in unity? Or must I rig it before inserting it into unity?
 urban valve
ive never used krita
azure rain
how much experience do you have with image editing software in general
urban valve
none
foggy granite
cyan plover
hey guys question, if I wanna add ears that wiggle with dynamic bones to an alre...
add bones and parent them before unity
urban valve
i do digital art
foggy granite
then that will help
cyan plover
foggy granite
add bones and parent them before unity
thanks!
azure rain
you just need to find where the layers is
urban valve
how do i import the model tho?
azure rain
you don't you just open a Photoshop file with the texture
urban valve
how do i do that
im so sorry im really dumb at this

im here
how to i open the photo shop fie
file
i dont own photoshop
azure rain
I just noticed looking at the page for it it has a blank white version with shading

basically you would just go open file and click on the Photoshop file as you can open that in more than just Photoshop
south inlet
how do i add bones
urban valve
i seriously am so confused
ok how do i get the white one?
it always loads in as the dark gray
foggy granite
urban valve
go to texture templates and select the correct resultion scale
foggy granite
yeah
urban valve
please if anyone can voice or watch my screen to direct me i have no clue what im doing im freaking out
ill pay anyone who can
azure rain
you might want to take a break then if it's stressing you out that much
urban valve
everything stresses me out this much
like i said im really slow
everything doesnt make sense to me
im at the files in krita
how do i find the photo shop file
azure rain
you would like click open the file and go to the directory where you have your stuff stored
azure rain
PSD is the file extension
azure rain
well you probably unzip the cat somewhere given that you were able to open it in blender
urban valve
the only other place i have it is in unity
azure rain
okay then go look in those folders
 azure rain
that's a zip file for a blender plugin
azure rain
then maybe go download the cat again if you have no clue where it is
urban valve
okay but when i do that it just says zip file
azure rain
then unzip it
azure rain
you should be able to right click it in file explorer to unzip
urban valve
 azure rain
that looks to be the blender plugin
 cyan plover
south inlet
how do i add bones
cyan plover
south inlet
how do i add bones
it can't really be awnsered in a aquestion, nut my advice is go to a page called mixamino or something like that, there an AI can generate a Rig for you
azure rain
urban valve
click download
urban valve
okay
azure rain
and then click on the file at the bottom of your browser when it's done downloading
south inlet
cyan plover
it can't really be awnsered in a aquestion, nut my advice is go to a page called...
oh its not for the whole avatar its just for a prop that can be toggled.
 azure rain
double-click on it
urban valve
okay
cyan plover
south inlet
oh its not for the whole avatar its just for a prop that can be toggled.
ohhh, hm
I'd love to tell you but I use maya and I guess you're on blender so it's a bit different
 azure rain
drag the unity package out and then double-click it
urban valve
drag it to where
azure rain
anywhere will do
urban valve
ok i did it didnt do anyhting
azure rain
I suppose you would you need Unity open first
south inlet
cyan plover
ohhh, hm
I'd love to tell you but I use maya and I guess you're on blender so it...
oh alright if I attach the rubber duck to a bone and then make a toggle for the bone in unity would that work?
urban valve
 cyan plover
south inlet
oh alright if I attach the rubber duck to a bone and then make a toggle for the ...
cyan plover
south inlet
oh alright if I attach the rubber duck to a bone and then make a toggle for the ...
yknow I'm actually on the process of figuring that out with some ears I made XD
But I think so yeah
south inlet
cyan plover
yknow I'm actually on the process of figuring that out with some ears I made XD
...
alirght tell me if it works
cyan plover
south inlet
alirght tell me if it works
will do
urban valve
i forgot my fucking password aint i bright.
azure rain
you can click skip for now as you don't need to sign into Unity just to open up a Unity package
 azure rain
drag the unity file into the bottom
azure rain
you need to drag it out of the zip file first on to like your desktop
urban valve
like a bookmark on my home screen?
azure rain
yes
 azure rain
you'd probably want to import the vrchat SDK before you bring in the Avatar
urban valve
what the hell is that-
and i havent colored it yet
or done anythign yet
to it
where do i get the SDK
 silent bane
download the sdk
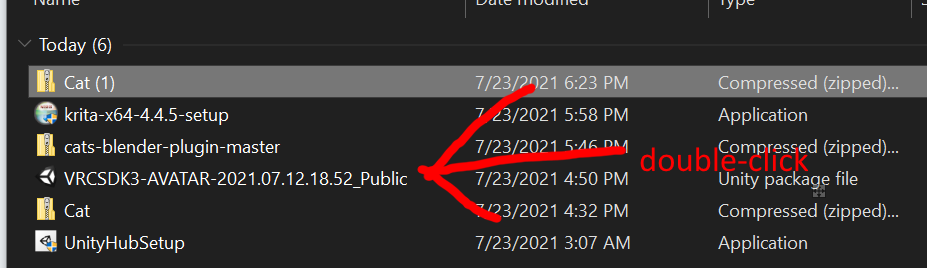


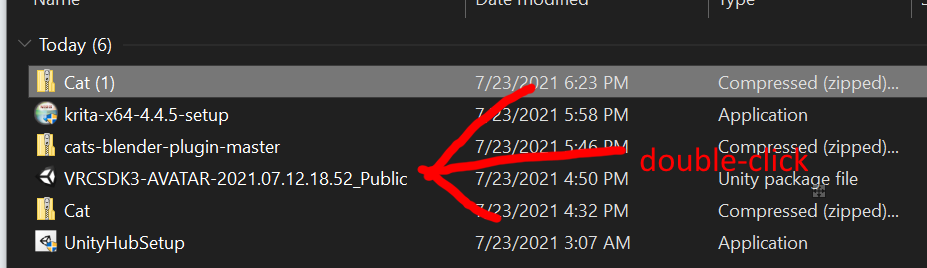 urban valve
ye
silent bane
nvm
azure rain
and you want to import it first so that the vrchat file for the Avatar doesn't break
urban valve
its the uh