#3d-modeling
1 messages · Page 111 of 1
 tough plover
 thorny ivy
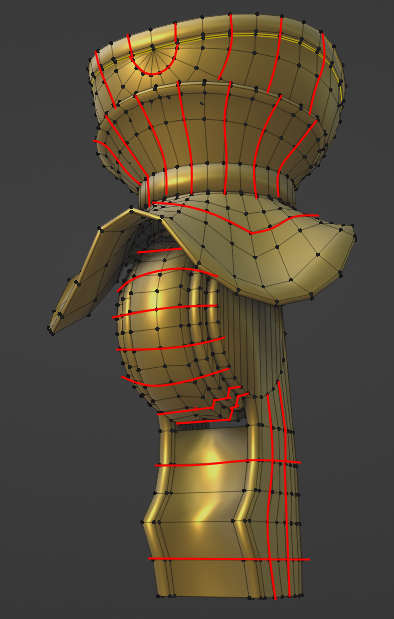
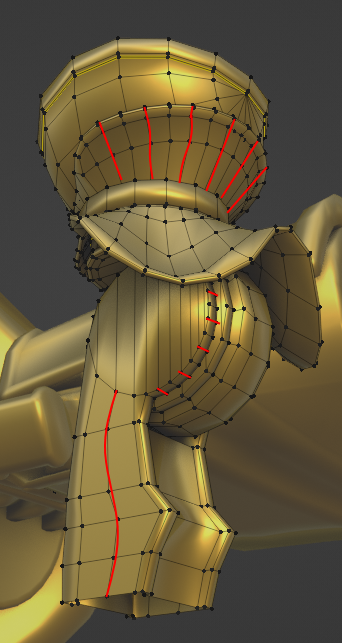
Maybe? If there's any differences, they're probably pretty minor but enough to make Blender freak.
Manually lined up the two parts, perfect copy in structure at least.
So zero idea what's going on, honestly.
Guess I'll just copy the original and try to align things as best as possible.
thorny ivy
 mellow cloud
i need help making my cloths attach to my body of my base
mellow cloud
i need help making my cloths attach to my body of my base
You can copy weight-painting of the body to the clothes but they need to be relatively centered over the model first
mellow cloud
they are cinna
thorny ivy
Alright, then should be easy to transfer the weight-paiting.
mellow cloud
where do i get weight painting
thorny ivy
Is the model pre-made or are you making it from scratch?
mellow cloud
pre-made
thorny ivy
Alright, then follow this tutorial.
https://www.youtube.com/watch?v=bR_Vke__voU
Never waste your time re-painting a new character ever again. In the next 60 seconds, you'll learn everything you need to transfer your Rig's weight painting from one character to another under a minute!!! Hope it helps :)
Free Female Base Rig Download:
https://www.youtube.com/watch?v=_XfvLpLyulI
Sayuri Artsy Weight Paint Transfer Video:
http...
mellow cloud
pre-made base
thorny ivy
It'll show you how to transfer weight from a rigged body to clothing even if it's from a different one.
mellow cloud
how do i goto paint
thorny ivy
Click on the body and in the upper-left corner of the interface window, there should be something that says "Object View". Click on that little box and go down to Weight Paint.

Unrelated, have no idea how to UV a saw and not liking anything Blender spits out for it.

Lots of small faces and edges.
tough plover
thorny ivy
Unrelated, have no idea how to UV a saw and not liking anything Blender spits ou...
use Projected From View
may want to only have a single side selected at a time
with a seam around the edge of the blade
thorny ivy
Yeah, figured that'd be my best bet.
It's just a l o n g boi and trying to keep the UVs relatively same for dupe parts so might have to fiddle with the layout some.
mellow cloud
i still need to attach it
 spiral sigil
why do the planes I make in blender cull on both sides but when imported into unity it only culls on one side?
or how do I make it so it culls on both sides in unity is a better question
tough plover
spiral sigil
why do the planes I make in blender cull on both sides but when imported into un...
culling means to remove
culling the back faces means not rendering the back faces
if you want both sides of something to be rendered in unity/vrchat, you need to use a shader that gives you that option, like Poiyomi

setting Cull to "off" will do the trick
do keep in mind that people with custom shaders disabled will only see one side
so it may be best to simply duplicate the faces and flip the normals using Alt + N > Flip in edit mode
spiral sigil
I will have to do the method of the latter since I can't use custom shaders
Thank you
tough plover
thorny ivy
Click on the body and in the upper-left corner of the interface window, there sh...
may I recommend UVPackmaster2 to pack your UV's as densely as possible
 thorny ivy
Oooh, does look pretty useful.
thorny ivy
tough plover
use Projected From View
What would you recommend for a mesh like this?

It's a saw-type design so there's 90-angles.
tough plover
thorny ivy
What would you recommend for a mesh like this?
I would put a seam down the very edge in the center
all the way around the blade
and split it in two halves
you could also do it another way
one sec

that way you would have each side + a long strip for everything in between
which you could then straighten out
thorny ivy
Might do a combo, see how that looks.
thorny ivy
Well, after a lot of fiddling, this is what I came up with.


The handle loops and pins have uniform UVs across all three models, meaning none of them have to be altered for the individual textures, while the larger knives share the same UV for their handles + blade caps.
That wasn't really necessary but figured it'd make things easier when it comes time to give them proper textures.
tough plover
@thorny ivy very nice 👌
thorny ivy
Thanks! I'm learning a lot through these mini-projects and I'm actually having fun doing them.
Speaking of, did a quick revisit of those shoes I shared a while back; slapped some shaders on, did some minor mesh tweaks, and added crease edges instead of using sharp ones.


Besides the shaders, decided to give the boot-shoes hybrid some proper rubber soles vs instead of just having them be metal like the toe cap.
Makes them much lighter and far more pratical to wear since metal isn't really known for its grip.
 winged jewel


 oblique gull
Getting closer, guys! If theres any animaiton-Based Modelling Tips, feel free to DM it to me, im trying to honor the original character design from 2004
 oblique gull
I am, thank you for wishing on me
 sand trout
I was having too much fun with that chimp avatar in game, started wondering what other animals i could find. doesn't seem like there's many options, and I specifically wanted to be a raccoon-- so I've been modeling and texturing this lil dude!!

pulled the model into mixamo to see how he looks in motion, i'm happy so far with it! i'll keep yall posted

 quaint jasper
You did a great job !
 hazy falcon
oblique gull
Getting closer, guys! If theres any animaiton-Based Modelling Tips, feel free to...
hazy falcon
oblique gull
Getting closer, guys! If theres any animaiton-Based Modelling Tips, feel free to...
The weapons animations and all are gonna be whack XD
hazy falcon
sand trout
I was having too much fun with that chimp avatar in game, started wondering what...
Nice one!
sand trout
Thanks y'all! Are there any good tutorials for getting the tail working once i've got it rigged? i assume i'll need to do some minor animations, but i'm not sure. i've never done an avatar for vr chat before
hazy falcon
oblique gull
Getting closer, guys! If theres any animaiton-Based Modelling Tips, feel free to...
I'm wondering how you did the little nudge thingy or whatever it's called near her mouth as her head isn't completely round... in 3D...
Must look weird from an angle XD
 vital rune
Can someone make me a kon model for vrchat
oblique gull
What nudge?
@hazy falcon
The bottom half of her head being extended outward?
Thats to match her character sheet, front facing has no impact, but from the sides, it is extended outwards in depth
vital rune
Hello
hazy falcon
oblique gull
The bottom half of her head being extended outward?
yeah that XD
hazy falcon
oblique gull
Thats to match her character sheet, front facing has no impact, but from the sid...
oooh cool!
Yeah, forgot characters in 2D are seen from the side most of the time, and that's for the better sometimes XD
 onyx juniper
hazy falcon
Yeah, forgot characters in 2D are seen from the side most of the time, and that'...
onyx juniper
hazy falcon
Yeah, forgot characters in 2D are seen from the side most of the time, and that'...
Like the Simpsons for example
I'm pretty sure that "nudge" is a highly stylized cheek.
hazy falcon
onyx juniper
I'm pretty sure that "nudge" is a highly stylized cheek.
Yeah it is I think
spiral sigil
sand trout
pulled the model into mixamo to see how he looks in motion, i'm happy so far wit...
make an emote where he fights a baby and loop the incredibles theme on it 0-0
sand trout
i don't think i'm doing anything too wacky like that but whenever it's done i'm just gonna release it free so you can make that if you want it 🙂
spiral sigil
sand trout
i don't think i'm doing anything too wacky like that but whenever it's done i'm ...
bet
 lapis pond
so, I have an object that has three separate UV maps on the same item, the item is in three pieces and every time I try to join the items with ALT J, I still have the three UV maps attached to the item but it throws my textures all out of order. Is there a way to join the three UV maps into one?
 gritty zinc

 quaint jasper
lapis pond
so, I have an object that has three separate UV maps on the same item, the item ...
quaint jasper
lapis pond
so, I have an object that has three separate UV maps on the same item, the item ...
They need to have the same name
lapis pond
quaint jasper
They need to have the same name
thank you soooo much
quaint jasper
You're welcome !
 hollow siren
Hello. I tried to follow some blender avatar creation tutorials on youtube, but I got stuck and not a single one helped me to resolve my specific issue so far. Of course, I can ask someone to help me, but I got a feeling I will get stuck many times in the future.
Can you please recommend me a good course for character modeling and rigging in blender? So I will get stuck much less afterwards. It doesn't have to be related to vrchat.
 foggy granite
gritty zinc
foggy granite
gritty zinc
Looking good so far what's the poly count
 merry vault
Is anyone here familiar with 3DS Max rigging/animation? I'm unable to extend bones beyond their original resting length and it's holding back progress on something I'm working on.
 hollow ermine
Been working on this guy since morning
 quaint jasper
Damn, dope design
 azure rain
cool
hollow ermine
He's supposed to have a messenger bag, but that's a lot of potentially frustrating hours I can foresee
quaint jasper
If you manage to weight paint it all to the hip and the strap to the rest, that should hopefully not be too bad
hollow ermine
Now there's a thought. Alrighty, I'll give it a shot later
azure rain
https://www.patreon.com/posts/53226884 Weight Painting and Weight Transfer tips
quaint jasper

Gumroad
Addon for Blender 2.83 and 2.9 containing tools for simplifying workflow in blender weight paint mode. Useful for riggers, animators and character artist but not only.easy menu for applying weights to vertices - with properly working symmetry and auto normalizationcustom weights mirroring for all tools, works even if topology is not symmetrical....
This is also the best weight paint addon
The project weight feature makes stuff like this seamless
sand trout
finding good tutorials for vrchat is such a crapshoot, i think i like the chaotic energy of this one though https://youtu.be/p0QCDc7vqA8

Mixamo to VRchat tutorial
I was ill while making this for the record
orignally made in 2018, just was unlisted
Websites:
https://www.models-resource.com/
https://www.mixamo.com/
Sponsored By:
http://www.hiricegrill.au
thanks
 quaint jasper
Keeping it flat shaded for now ?
hollow ermine
Yeah, I was just gonna use the stock toon shader.
hollow ermine
Ah- I forgot about that. It has been an all-day project.
Let me look at the smooth
Looks weird, to be honest.

Smooth, for sure
On the other hand, seeing every polgyon caaaan get unfun to look at
spiral sigil
Is anyone here for hire for sculpting an Avatar using blender custom made for my use that can put bones and face expressions for vrchat use
tough plover
@hollow ermine you can mark edges as sharp while still having the shading set to smooth
thorny ivy
tough plover
<@!186001987580592129> you can mark edges as sharp while still having the shadin...
Although not perfect, you can go select -> select sharp edges and Blender will high-light them for you.
Recommend adjusting them accordingly from there but can be a real time-saver as a whole.
 zinc jolt
guys, I need help please
everytime I go into auto smooth, the shading appears flat

what should I do

any ideas?
 white moth
hollow ermine
On the other hand, _seeing every polgyon caaaan get unfun to look at_
white moth
hollow ermine
On the other hand, _seeing every polgyon caaaan get unfun to look at_
You can do both, you can have smooth shading and choose which lines to have a flat edge. Usually on where you want a crease to be noticeable
zinc jolt
zinc jolt
turns out it was faces that have been overlaying everything
meaning there's another set of faces on top of the original mesh which for some reason are on the model
 zinc jolt
 edgy fog
Play around with this number, mate.
edgy fog
Play around with this number, mate.
I figured it out already
spiral sigil
Almost done , just gotta do the neck.
and Yes i am the one working on this model. I gave Anomitra10 permit to post Atlas W.I.P images here. Lmao

 tough plover
that's very cool, nice work
 twin mortar
Hey, is there any tool in blender that functions like fill in texture paint, but only for the singular polygon that I click on? for example, I only want to click the individual squares in the center part with yellow so I can get a good straight line along the models pants so its like a lining
so paint bucket fill only singular faces
 tough plover
twin mortar
Hey, is there any tool in blender that functions like fill in texture paint, but...
tough plover
twin mortar
Hey, is there any tool in blender that functions like fill in texture paint, but...
for texturing I highly recommend using Substance
free if you grab a student license
but if for some reason you want to stick to blender, you could just make a new material to assign to those specific polygons
then bake everything into one texture at the end
gritty zinc
 tough plover
@gritty zinc scroll up lol
twin mortar
@tough plover I have substance, i just figured it would be something included so I figured i'd ask
tough plover
I feel like it may be possible but I have 0 idea
twin mortar
I don't actually know how to use substance though :'}
tough plover
@twin mortar figured it out in blender though

do that in the right side of the Texture paint workspace
twin mortar
alright
tough plover
 tough plover
twin mortar
is there a way to do it in the image editor?
tough plover
twin mortar
is there a way to do it in the image editor?
you have to be in Texture paint mode
you can just switch to the Texture paint workspace
 twin mortar
I just manually create the layout, though its the same thing.

like so
I want to be able to apply the paint mask in the image editor if possible

@tough plover
tough plover

enable the face masking
switch to edit mode in the left panel
select the faces you want to edit
then switch back to Texture paint mode
twin mortar
No i understand how you are describing it, just the jacket and pants are a part of the same material, so it makes it difficult to actually select the faces
regardless, I figured it out
thanks though @tough plover , big help
quaint jasper
Blender texture painting is kinda neat tbh
Just wish it'd adapt to UV changes better 
 tardy rapids
Pushing off my procrastination to get started on these arms
 foggy granite
neet
 tardy rapids
Added detailing to the upper arm
 foggy granite
looking good so far
but you should download quixer mixer to make the texture a bit more complex for the arms
 gloomy moat
I've made a piece of clothing for an avatar and I want to send it to my friend who has the same avatar. I've seen that most of the time when you download or buy avatar clothing for a specific base it comes with only the clothes and part of the armature for you to merge.
How do I do this? I guess just delete the body and unneeded bones?
tardy rapids
foggy granite
but you should download quixer mixer to make the texture a bit more complex for ...
Just doing the modeling right now. Textures come later
tough plover
gloomy moat
I've made a piece of clothing for an avatar and I want to send it to my friend w...
if it was made for the same model, then the process is very simple
1 - import clothes into main project
2 - delete armature that came with clothes
3 - parent clothes to main armature (hold shift and drag the clothes mesh to the armature in the hierarchy)
4 - click on clothes mesh, go to Modifiers tab, and select the main armature under Object
then test it out using Pose mode
as for how to prevent clipping with the body if it happens, simply make a new shape key on the body to shrink the parts that are clipping
gloomy moat
I made the clothing and want to set it up so I can send him just the clothing with an armature which he can merge. Because it's the same body, I can just use the existing armature, right? Maybe remove the legs and head from it because they're not used in the weight painting
@tough plover
tough plover
@gloomy moat vertex groups is what stores vertex weights. those are on the mesh, not the armature
you don't even need to include the armature
the reason why a mesh is able to follow bones at all is because of 3 things
1: mesh is parented to armature
gloomy moat
Ah ok. The clothing is weighted so I can just delete the armature, body and everything and send him just the clothing and, because his armature bones are named the same, it should just work?
tough plover
2: mesh has armature modifier on it unapplied
3: vertex group names match bone namew
since it's the same base model for you and your friend, the group names will match
the only reason you would need to include an armature would be if the clothes have extra bones for dynamics or if you plan on using it on other bases
gloomy moat
Thanks a ton!
 ocean hatch
hi could anyone give me tips to not have a short skirt clip throught my legs i tried to put many colliders but the skin still pass
on unity
 tough plover
ocean hatch
hi could anyone give me tips to not have a short skirt clip throught my legs i t...
tough plover
ocean hatch
hi could anyone give me tips to not have a short skirt clip throught my legs i t...
have the skirt properly weight painted to the legs

Join my Discord for help or meeting like-minded people: https://discord[dot GG]/uSEvuVw or scan my QR Code: https://media.discordapp.net/attachments/626502922120724480/626522415794618399/qr-code-Shanie-Discord.png
This is a Bob Ross-style video where you work alongside me to make your skirt better.
Your skirt is awful, it has too many dynamic b...
ocean hatch
im rly not used to blender but ill look for it
 still wadi
no matter how many colliders you put there if the weight painting is done incorectly nothing will help
it's not about colliders but rather what the bone does there
tardy rapids
Additional detailing, material colorization changes, starting the hands
 tardy rapids
Redoing the hand connector. Going well

 uneven canyon
question? for those of you who rig the models is there any recommendations for videos to watch for facial rigging?
tough plover
uneven canyon
question? for those of you who rig the models is there any recommendations for v...
the only bones you need in the face are the eyes
rest is done using blendshapes
called Shape keys in blender
tardy rapids
 uneven canyon
tough plover
the only bones you need in the face are the eyes
uneven canyon
tough plover
the only bones you need in the face are the eyes
I want to fully rig it for a wide range of emotions
 worldly tangle
VRC-QBZ-95, part of my 5th avatar project (529 vertices)
Edit: Version 002 of QBZ 95 has less vertices, bringing the vertices count down to 463 (removed 66 redundant vertices)
(Low-Poly but, effective)
 spiral sigil
looks great i cant manage to make a simple 1950's juke box
quaint jasper
Did you model any of it ? If not you might want to pose in #avatar-showcase instead
 pallid gust
ah
 radiant ridge
Hey I’m trying to make a ring. And I’m not sure how to give it two separate materials one for metal. One for the Gem. Can anyone help?

Picture is just to show what the ring I’m making looks like.
tough plover
radiant ridge
Hey I’m trying to make a ring. And I’m not sure how to give it two separate mate...
you can use one material
that's what metallic maps are for
for specifying which parts are metallic and which aren't
radiant ridge
I was wanting to add the metal and transparency to the ring in unity after I imported. But when I did. It just becomes one pieces.
tough plover
you could use an alpha map to tell the shader which parts are transparent and which are not
radiant ridge
Like I wanna be able to texture them individual though
quaint jasper
You don't need to though
Like sacred mentioned, there's masks for all those things
tough plover
do you have Substance painter?
if so, this is dead easy
you can add an Opacity channel to make some parts transparent
for example, these fishnets
 radiant ridge
I’m pretty new to blender so most my experience with the 3D modeling department has been fairly limited
radiant ridge
Sorry if I’m confusing.
 manic comet
do you know where i can request avatars
tough plover
manic comet
do you know where i can request avatars
if you're trying to find an existing avatar, #avatar-search-old
if you're trying to commission an avatar, VRC Traders in #community-servers-old
radiant ridge
like how do i do this the goggles are all one object. but i can select certain parts like "Sub-Objects"
 tardy rapids
How far we've come
 tough plover
radiant ridge
like how do i do this the goggles are all one object. but i can select certain p...
tough plover
radiant ridge
like how do i do this the goggles are all one object. but i can select certain p...
those are just separate meshes
you should really combine all of those
radiant ridge
I downloaded it and it came like that
tardy rapids
Then whoever made the avatar needs to be sit down and have it carefully explained to them what optimization is
quaint jasper
Anime 
azure rain
you can have an Anime Avatar and still be optimized
radiant ridge
the avatar is mine. the goggles are an object on there own
quaint jasper
azure rain
you can have an Anime Avatar and still be optimized
Yeah, but the vast majority of the stuff that people get from random websites is usually trash fire
azure rain
of course just noting the art style doesn't prevent optimized more everybody rating mmds closet without permission causing trouble
or people doing Marvelous Designer without retopology
 azure rain
yeah you're less likely to bump into a completely dumpster fire furry avatar as they're all modeled for vrchat not a non real-time rendering app
and also less likely to have Dynamic Bones on individual hair strands
or poorly done Dynamic bones skirt
 obsidian nova
I mean, I’ve found some absolutely stunning re-topo’ed MMD bases on Deviant Art. It’s not even that difficult. I think a lot of people just don’t know what to look for; or don’t care.
azure rain
that would require the person's be literate enough in 3d modeling to know what a good one looks like to download
obsidian nova
100%
azure rain
even I would probably would just take a look at the vrchat content ranking system to get a ballpark idea of what's too much
and honestly if you're looking for like anime stuff that's not going to be dumpster fire performance looking around booth. P.m. is probably a better idea as that stuff is actually modeled for vrchat
and doesn't involve so much flagrant disregard for terms of service
tardy rapids
Speaking of anime styled avatars being unoptimized
azure rain
finish the rest of your train of thought
 quaint jasper
Why is it 92k
azure rain
show us the wire frame
 quaint jasper
can already tell your body has a ton of unnecessary loops
azure rain
yes don't apply subdivide modifier
quaint jasper
You can unsubdivide
azure rain
and if your face looks like a completely solid color in the wireframe you have too much
 azure rain
you probably could have the boobs just look as good with like half the loops
tough plover
^
azure rain
like even with jiggle bones that's not going to deform enough to make that necessary the amount of loops
tardy rapids
Thing is, if I did that I'd need to 1: redo the UVs, and two, it would be like, a 2k difference at best
tardy rapids
both
azure rain
still a lot for a pair of boobs but I guess it must be elsewhere the lots of triangles are hiding
tardy rapids
Okay wow so
I dissolved and
it was only like
600 tris
correction, 900

vs the original
 azure rain
and I cannot tell the difference between them in the silhouette so yeah those were unnecessary
foggy granite
What’s the total poly of the hair
 azure rain
yeah that's an entire Avatar in your hair
quaint jasper
lots of loops that can be dissolved here too
azure rain
especially on the top where it looks like a solid Mass
tardy rapids
To be fair
I haven't changed it from path to mesh yet
So I'll have the chance to mess with them later
quaint jasper
You can reduce path resolution no ?
azure rain
that'll be easy to change the settings
something that might be handy is looking at your avatar every once in awhile at like the distance you would be in during a average conversation to check for Loops that aren't doing anything
like with the boobs earlier you're likely to hit the Avatar clipping before you would even notice the difference between the two
tardy rapids
Path resolution, yeah, but lowering it any further makes it visibly blocky
which is why I'm gonna do that manually
and yeah, I'll check for loops that aren't needed
tardy rapids
Okay, last update of the night. Progress on the hand, and some pieces I made that I haven't added to the mesh yet
 foggy granite
thats a good bit of progress
still wadi
still tracing ?
tardy rapids
Nope. For the very, very basic shape that the 10 polygon hands gave me, sure, but aside from the EXTREMELY basic shape, most of it has been judged by eye based off of a statue of the character
The original model was super outdated in comparison to current designs anyways, there's a lot I've needed to eyeball
tardy rapids
For reference, this is what I'm working with

Been a while since the last update, huh? Well, here's one. Boom.
Passionlip's arms have been both frustrating as hell to model thanks to the lack of a good reference, but also fun as hell. Bless you, Passionlip statues on Google images, your reference value has been top tier.

 Twitter
·
Twitter
·

(Slightly outdated wip in this tweet)
But yeah, outside of the extremely basic shape
All the detailing is done without using the original model
tardy rapids
radiant ridge
Hey I’m trying to make a ring. And I’m not sure how to give it two separate mate...
Super late saying this, but yeah, this is what masks and uvs are for
Metalness, specular, roughness, alpha, all those masks are used to make one material have a number of different properties
white moth
tardy rapids
Path resolution, yeah, but lowering it any further makes it visibly blocky
Not path resolution. The circle one.
Too many points around the circle
 wanton umbra
is there a way to do the same thing as the boolean modifier in blender, ( to carve out a chunk of a mesh) but to turn that into a shapekey action instead
white moth
I don’t think that could be automated, Shapekeys can’t change the topology, they can only move it around. I’m assuming taking a chunk out of the model as a bunch of new verts that would somehow need to be mapped onto the original thing that doesn’t have a dent/hole in it. It’s not really a 1:1 thing, the UV has changed
I mean if what you’re doing is really simple or the object isn’t UV textured then yeah sure. But it couldn’t work in the general case
wanton umbra
well i mean "move it around" is fine, so long as the end result is the same, the object looking like a chunk was taken out of it.
guess ill just try sculpt tools and see what i can get going
white moth
The thing is when you move verts around you’re stretching the textures, so there’s no real way to move the verts around to look like the original undeformed thing, if it’s textured
Because when you Booleancut some thing you’re actually removing part of the image
You don’t get that back by moving verts around
tough plover
@wanton umbra if two objects share the same vertex count, you can use the "Join as shape" option
to join one mesh into another as a shape key
you could try cutting a hole in a copy of the mesh, and then adding cuts into the main one to keep the vertex count the same
tardy rapids
Overly complicated finger joint is overly complicated

By the way, before someone comments on the poly count for a finger joint
keep in mind

these things are nearly the same size as the head
bigger, even
Will optimizations be made? Yes
but the poly count will be BRUTAL on these fingers
azure rain
thanks for the clarification so you're probably not in danger of sub-pixel triangles
tardy rapids
This is how it looks on the hand
 quaint jasper
That's a low poly version of it right ?
The further from the head an object is, the likelier it is that it doesn't need to be high res
azure rain
forward the finger versions you would probably want to make have less Edge loops for the circles
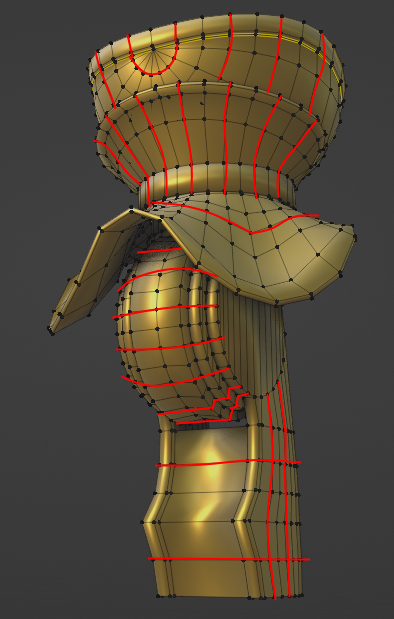
some spots where you can probably reduce Loop
tardy rapids
low poly dupe

 tardy rapids
These red lines are attached to the flaring part on the bottom

It'd just become a jagged mess down there
azure rain
from you screenshots I can't see the point where they connect so it probably won't be noticeable?
as that just a funny cylinder

 tardy rapids
All that work for a single joint to cause me that much trouble
 thorny ivy
Okay, now show it being duplicated.
 craggy lintel
Hello guys, im an intermediate blender user and I just keep having issues with mirroring.. how does one force the .L (or.R) vertex groups to be on the mirrored mesh?
Meaning
which is best deform option?? For some reason no matter how many times and diff options I try, it just doesnt work.. I've done this so many times in the past and figure it out without a clear solution.
I hate asking questions because usually my level is alot higher than ppl expect based on my questions.. its like being a black diamond skiier with an issue putting on boots
tardy rapids
thorny ivy
Okay, now show it being duplicated.
Fixing some stuff, then I'll get on that. Mostly related to UVs
tardy rapids
craggy lintel
which is best deform option?? For some reason no matter how many times and diff ...
The mirror modifier. As you weight paint it will automatically mirror the weight to the bone of the same name with the opposite prefix on the other side of the mesh
 devout scroll
craggy lintel
which is best deform option?? For some reason no matter how many times and diff ...
devout scroll
craggy lintel
which is best deform option?? For some reason no matter how many times and diff ...
I think I've seen issues with this where you needed to create the mirrored vgroups yourself in order for them to copy data into them
I'm not sure if it's entirely that but it's worth a try
when using mirrors and stuff
 compact dock
how the flip do you make a cylinder???
 hardy agate
Shift+a, cylinder
spiral sigil
ugh. does anyone know how to put a vrm into blender?
or just
turn a vrm into an fbx
craggy lintel
spiral sigil
ugh. does anyone know how to put a vrm into blender?
Plug in
foggy granite
spiral sigil
ugh. does anyone know how to put a vrm into blender?

GitHub
VRM importer, exporter and utilities for Blender 2.82+ - saturday06/VRM_Addon_for_Blender
white moth
tough plover
<@!216648273719459842> if two objects share the same vertex count, you can use t...
It’s actually far more strict than that. They must have the same topology meaning same vert count and identical edge connection layout, but also the vert order of both must be consistent; otherwise it will say that topology doesn’t match anyway, as it checks the wrong verts/edges with each other.
Little things like being triangulated separately and having quad diagonals split differently between the two versions will prevent join as shape from working, even if the vert order is consistent, which it really is.
spiral sigil
Is there anyway to export models as FBXs with materials that let you change settings like the shader when its in unity instead of being just greyed out until you drag another texture on it? Asking in 3d modelling since its probably a setting in blender on export
white moth
spiral sigil
Is there anyway to export models as FBXs with materials that let you change sett...
I’m pretty sure you’re describing a unity prefab
But no an FBX alone can’t do it. Unity meta-data can’t be saved into a FBX file
spiral sigil
Alright thanks yeah I guess I was describing that lol
 silent musk
I'm having a lot of trouble with the 3D modeling phase of making an avatar... Any recommendations for where to go to learn how to model characters?
white moth
Skillshare and Udemy both have excellent character creation video courses. They’re both paid though. But that’s how I got into it
 clear geyser
spiral sigil
Is there anyway to export models as FBXs with materials that let you change sett...
clear geyser
spiral sigil
Is there anyway to export models as FBXs with materials that let you change sett...
Change your Location to "Use external materials (legacy)" and it'll un-grey everything
 foggy granite
silent musk
I'm having a lot of trouble with the 3D modeling phase of making an avatar... An...
foggy granite
silent musk
I'm having a lot of trouble with the 3D modeling phase of making an avatar... An...
frist of do you have a proper modeling sheet because that help the process out alot they a lot of different YouTube creators you can use to help you i also recommend downloading some free character base mesh and study on how the faces flow and are connect
spiral sigil
clear geyser
perfect thank you
silent musk
foggy granite
frist of do you have a proper modeling sheet because that help the process out a...
Modeling sheet?
foggy granite
basicly where you can cleanly see detail of the character with both front and silde view
this a good example of one
 silent musk
No I was using one for a different project and for this project I'd have to make one
foggy granite
alright
thats good
https://youtube.com/playlist?list=PL2EEbgwoJzdt5kFVDyY2lliNqf7cWJeD3 this a pretty popular playlist you can use

YouTube
Want to make your own Anime style avatar? For Things like VRChat, Vtubing/streaming and game creation? Stick around, I'm going to let you in on all my secret...
silent musk
foggy granite
https://youtube.com/playlist?list=PL2EEbgwoJzdt5kFVDyY2lliNqf7cWJeD3 this a pret...
I've seen it in search results before. Maybe I'll give that a try.
foggy granite
okay i hope it can help
merry vault
<@&397642795457970181>
white moth
That looks so broken on mobile
 ashen stag
Why would the bot pick #3d-modeling instead of a more popular channel lmao
 dapper cobalt
dang....you can download nitro now? lol
 mellow violet
how do I select vertices in UV mode?
like I have all my vertices selected, but I'm trying to select the vertices in a particular part of my atlas
quaint jasper
You switch to vertex selection in the UV window
mellow violet
(how do I do that?)
quaint jasper
 mellow violet
I have done it
I was on that mode already, but I turned on Sync Selection
good riddance, shape keys
thank you
for you, Ruuubick
 quaint jasper

tardy rapids
Massif
 radiant ridge
anyone have advice on how i combine the Vertex's? to me it looks really unnecessary to have so many
 quaint jasper
You can dissolve horizontal loops on the round parts like the tubes and circles you have
radiant ridge
do you have a youtube vid you could link? maybe? i think id understand that better if i knew what i was looking at
foggy granite
its a simple as select all of the edges you want gone and click x and look for dissolve edge
for merge you can click on 2 or more vertex the click m and click on one of ther methods
radiant ridge
Ok so I think I figured out another way to do it. On flat surfaces I didn’t know this. But i was able to delete edges. So instead of two long triangles making one rectangle. It’s not just one rectangle
thorny ivy
radiant ridge
anyone have advice on how i combine the Vertex's? to me it looks really unnecess...
Is that a robot/mecha weapon? Doesn't look like something that could be conventionally carried.
radiant ridge
Sorta. I thought about it like a weapon that hovers above the shoulder of its user. Like how they use the gravity defying weapons in Hundred or Infinite stratos. One of my favorite anime.
 tight quartz
Im getting this whenever I am trying to import a PMX file.
 radiant ridge
Dissolving a ton of the unnecessary edges really helps. itll be way easier to texture this thing soon. ....I Hope.

cause even as it is. the uv map is a nightmare to look at.

 ember scaffold
Hey, does anyone here know how to make blush that I can toggle for VRChat? I made a seperate blush objects that hover above the face, but I don't really know how to fade it out to be transparent with the Blender nodes properly. I was hoping maybe I could make it with an image texture then fade that, but I haven't gotten that far yet. I feel like I almost have it, but my knowledge of Blender and Unity are so limited. No clue if I'm doing this right?


This is the furthest I've gotten. Also do texture keyframe animations transfer over to Unity? I haven't tried that strategy cause I feel like they won't. I hope this is the right channel for this.
tough plover
@radiant ridge you definitely want to re-unwrap that
add as many seams as you need
@ember scaffold you would typically just have it on a texture with a transparent background
materials do not carry over to unity
so if you can bake it to a texture, you're good
radiant ridge
how do i Re-unwrap it?
tough plover
@radiant ridge you should probably watch some videos on how to UV unwrap stuff
the gist of it is that you add seams in key places so that you can cut up the model into different UV islands
ember scaffold
tough plover
<@240252626082463744> you would typically just have it on a texture with a trans...
And how would I do this? I've tried just having textures with transparent backgrounds in the past, but blender would just turn the backgrounds black, if I'm remembering correctly. I've taken a break for quite a while on this model.
tough plover
@ember scaffold it really doesnt matter how it looks in Blender, none of that carries over to Unity
in blender, you need to reduce the Alpha and set the material setting to Alpha blend
in unity, just use a shader like Poiyomi and set it to Transparent
or Fade
ember scaffold
oh hmm
I was also hoping to use this model for animation or other things... is there a way I can make it work in both blender and unity though?
oh wait... nevermind, you may have just explained that and I'm being dumb. Okay, I'll try what you say. Could maybe describe more of how I'd do the alpha blend thing? I'm not sure if that would have it more opague in the middle and fade out.
 celest glade
Um, I have this happening to my model in blender after I separated the materials with cats, how do I get it to go back to the way it was?

I clicked to join meshes and it still did this
tardy rapids
Got my model down from 108k tris to 98k tris
not gonna get any lower than that, sadly
thorny ivy
radiant ridge
cause even as it is. the uv map is a nightmare to look at.
You need to unwrap it again + use seams to mark areas.


 dusky dirge
Prototyping some ideas, should be pretty cool if they actually work.

 unborn acorn
celest glade
Um, I have this happening to my model in blender after I separated the materials...
unborn acorn
celest glade
Um, I have this happening to my model in blender after I separated the materials...
you gotta merge the vertices too, just select the body and merge by distance
worldly tangle
Burgundy purple FMP-9 [Folded-Machine-Pistol] (part of my 6th project)
722 verts (with solidify)
 spiral sigil
is there a way to set origin to geometry in unity or something that does something similar?
annoying when the move thingy is not at all where its supposed to be
tough plover
@spiral sigil you could just do it in blender
otherwise, just create an empty object and put your object as a child of it
then move the object in question
tough plover
@spiral sigil also, mess with these to control where the transform gizmo is

top left of unity
spiral sigil
pivot is much more accurate yeah
foggy granite
worldly tangle
Burgundy purple FMP-9 [Folded-Machine-Pistol] (part of my 6th project)
722 vert...
Are you gonna make the bullets and also mag a separate object so you can reload it
worldly tangle
Eh, I didn't do any of that, and I made the FMP-9 one single object for the sake of performance
I did the same thing for the QBZ-95 for the same reason
 carmine bloom
does anyone here know how to grab that one white axis on the bust and delete it in unity, I want it gone, and i cannot find it in the heigharchy
 thorny ivy
Since reg avatar chat doesn't seem to be of any real help, ya'll have experience with emissions/glowing textures?
Want the inside of my custom ava's mouth to glow like this https://wbdsculpture.files.wordpress.com/2010/01/inside-the-forge.jpg
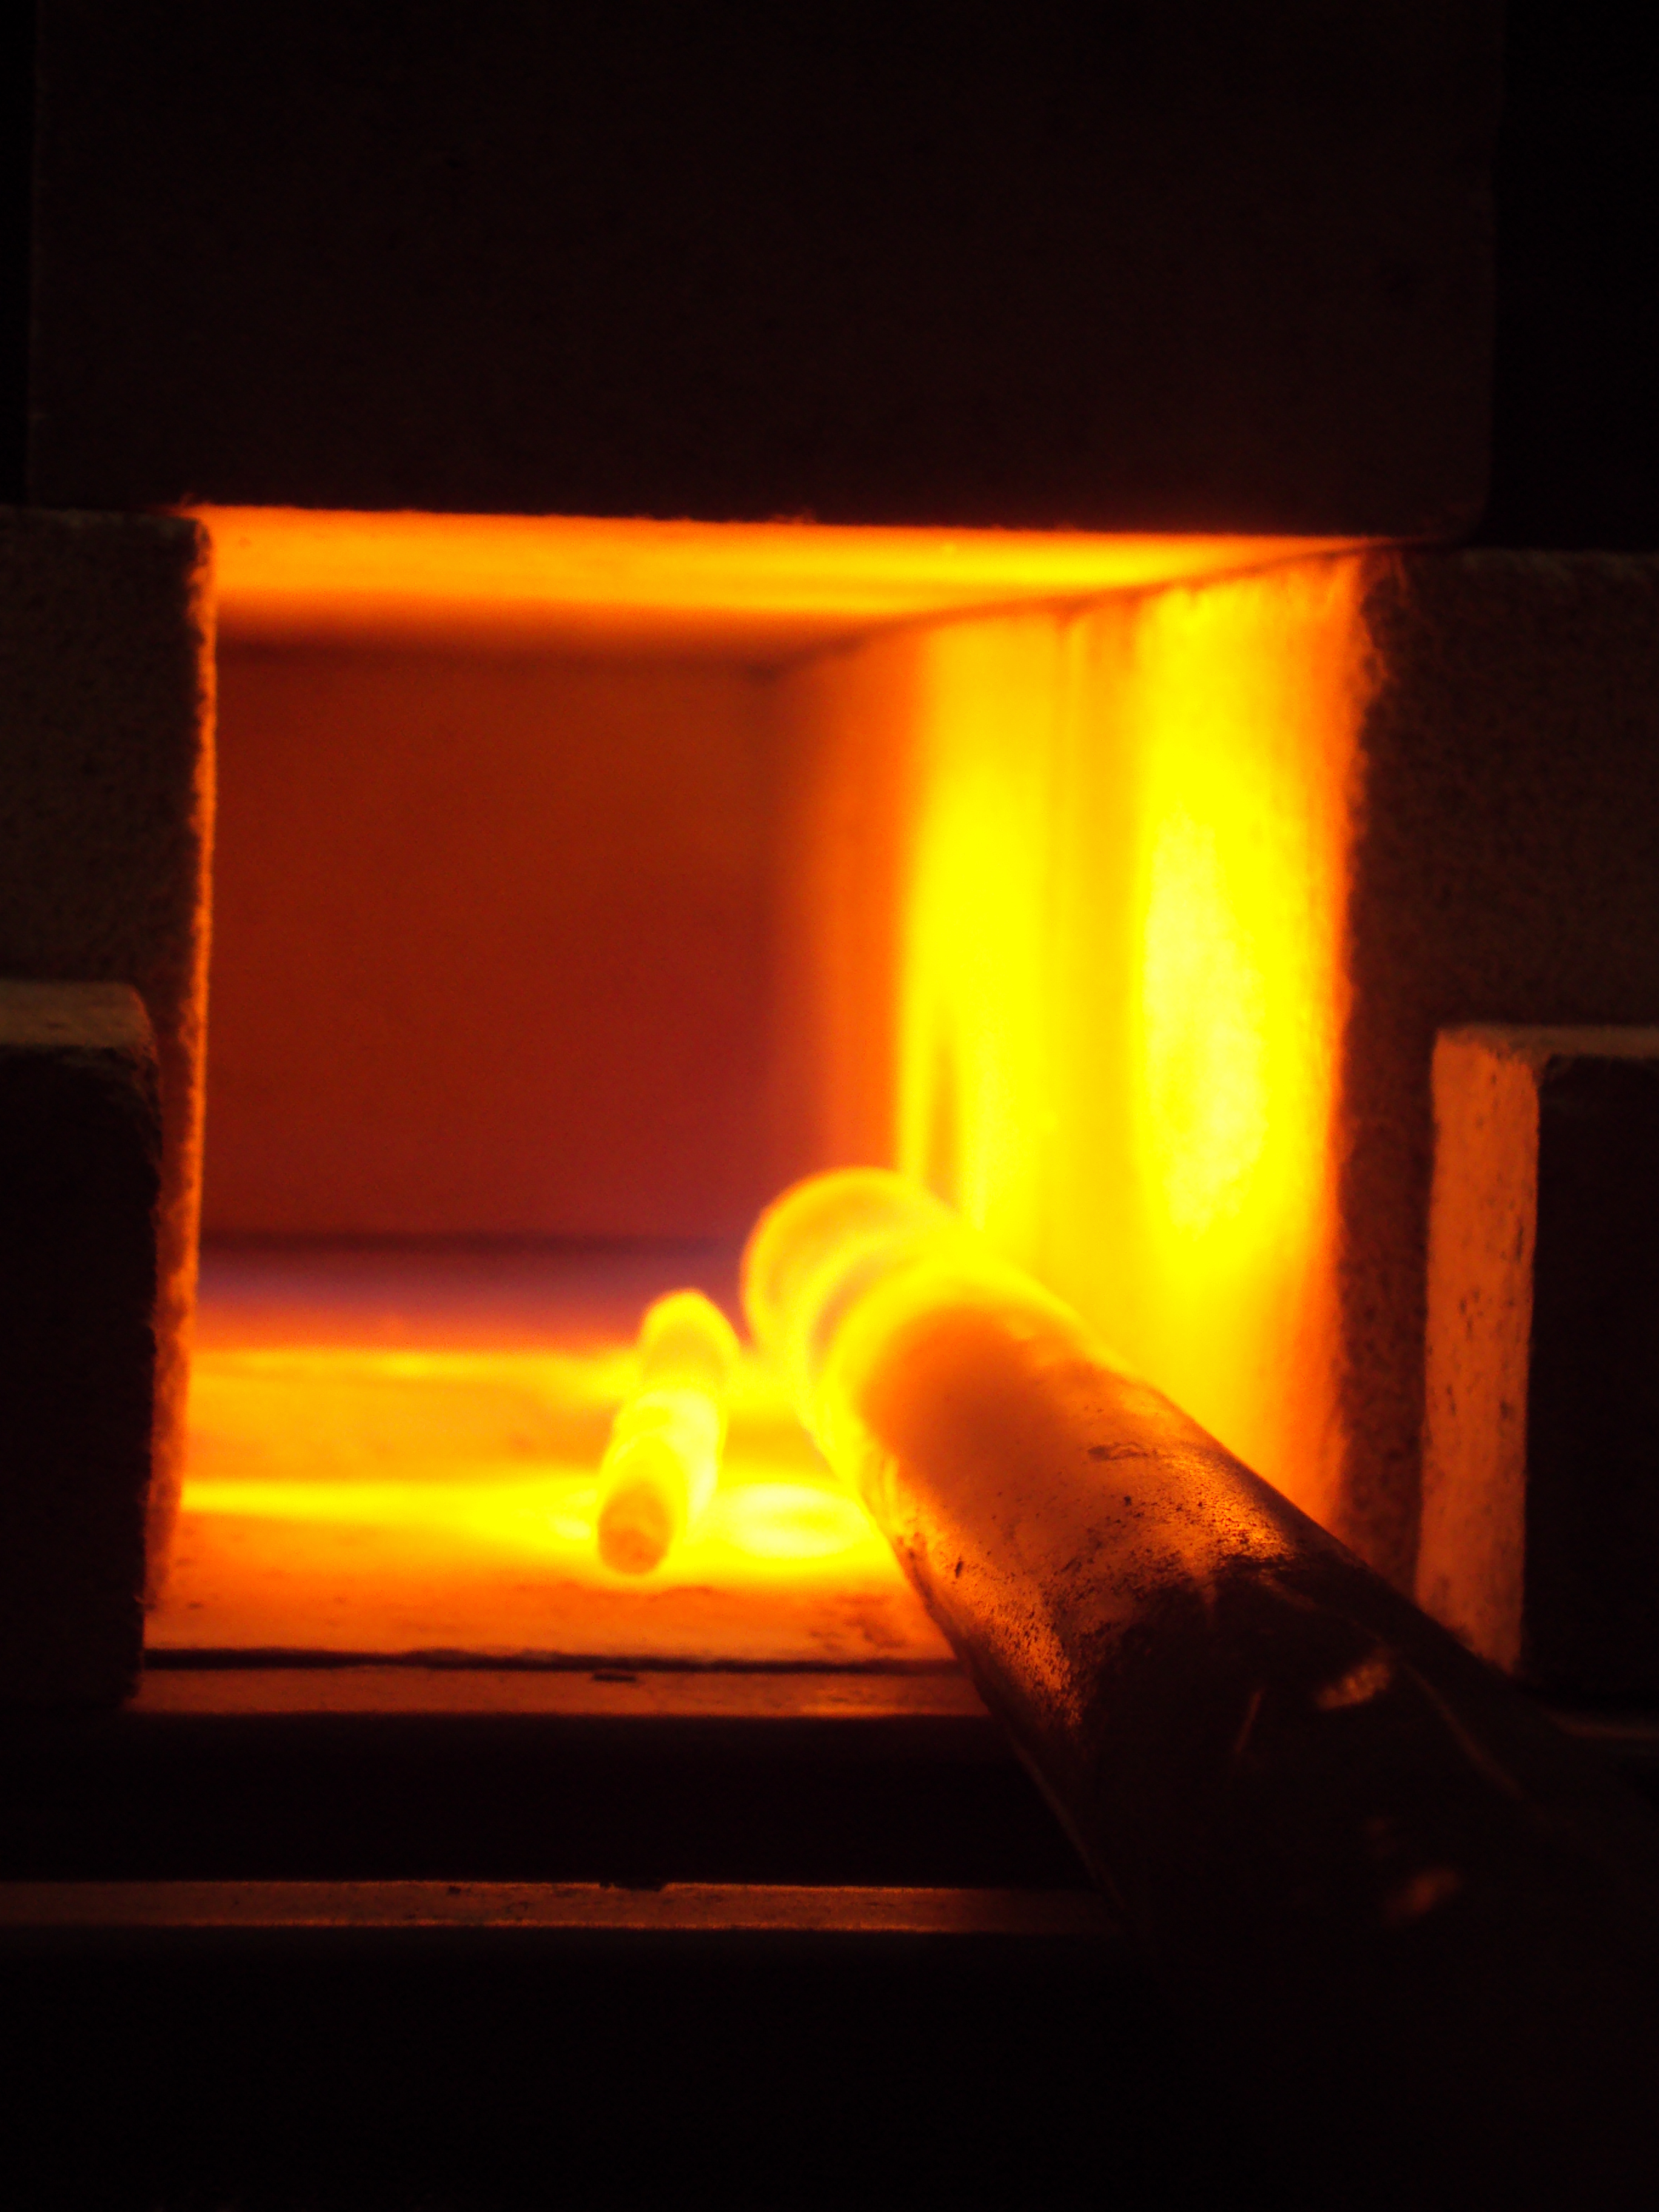
The mouth itself more warm-red while the tongue is almost molten in color.
 atomic hamlet
worldly tangle
Burgundy purple FMP-9 [Folded-Machine-Pistol] (part of my 6th project)
722 vert...
atomic hamlet
worldly tangle
Burgundy purple FMP-9 [Folded-Machine-Pistol] (part of my 6th project)
722 vert...
Dang, that's a lotta detail for such a low-vert mesh.
tough plover
@thorny ivy that is the dynamic bone for the boob. all of those yellow spheres are dynamic bone colliders
if you're deleting the dynamic bones, you should also delete the colliders
thorny ivy
tough plover
<@781969501297049640> that is the dynamic bone for the boob. all of those yellow...
Wrong person. :b
carmine bloom
tough plover
<@323683829883600898>
Thing is I can't find the bone in the heigharchy, it's like, literally not there
carmine bloom
Okay, I'm gonna be home soon, do you mind keeping in touch and showing me? I literally started doing this yesterday
@tough plover
tough plover
I'm at work, can't do that lol
carmine bloom
Fair
tough plover
@carmine bloom use the SDK window
there is a Select button where it says dynamic bones
make sure to have "show all avatar performance stats" enabled under the SDK settings tab
carmine bloom
Okay I'll be home soon and I'll post updates
 copper parcel
Anyone here use substance painter? My symmetry refuses to work.
carmine bloom
@tough plover are you still on? im home and have it open
tough plover
@carmine bloom at work still
 untold arrow
so this is kinda my first time i been watching tutorials on how to add vrm models to vrchat and tbh i am kinda new to this
 copper parcel
So, I tried joining two armatures, one of the models associated with one of the armature kinda turned huge, any reason for that?
tough plover
@copper parcel you didn't apply all transforms before you did that
Ctrl a > all transforms
 lament pond
You should un-parent it first
Otherwise when it's separate from the other armature it could still try to change scale.
copper parcel
This is my first time messing with blender, so I'm still figuring this stuff out really.
I've messed with it before, but only when it comes to posing pre-made models for store art x.x
lament pond
Select the mesh and do alt-p, clear and keep transformation, then ctrl-a to the scale
copper parcel
That worked out, thank you.
Also, assuming anyone here works with Substance Painter, does symmetry not working have to do with UV maps?
tough plover
@copper parcel should not
lament pond
Wip
 copper parcel
Hmm... ;'cause I can't figure it out at all. It works on another model just fine, but for some reason it just refuses to work properly on a new one.
tough plover
@copper parcel are you drawing on the UV or the model
copper parcel
I've tried both.
tough plover
also make sure that the wrap mode is set to Tangent wrap or planar wrap
copper parcel
Yup, x-axis
tough plover
and that your model is oriented the correct way
Y forward
Z up
check in blender
tardy rapids
rigged
 thorny ivy
tardy rapids
rigged
thorny ivy
tardy rapids
rigged
Just like The Game ™️ was from the start.
copper parcel
Got the symmetry issue fixed. Apparently the program was just being dumb and needed me to re-open it. :v
Take out the plug and plug it back in fix kek
thorny ivy
Noice


As part of my avatar mock-up, finagled a pair of horns into something that at least partially resembles a trio of trees merging together.
Original textures are unchanged but passable for the time-being.
hollow ermine
Yes.
 vital drift
tardy rapids
rigged
vital drift
tardy rapids
rigged
giving me Gold Joe vibes :0
copper parcel
Does anyone know why this might be happening to my armature? Anything that might end up breaking if I keep going?

For some reason the icon has turned into a lock of hair that is a completely separate model, and I have no clue as to why.
 lime vector
How do you separate materials individually with the cats plugin? For some reason I can't have them all separate, and instead it makes me click on 2 materials before saving as an atlas. It gives me this message error.

 sacred field
anyone ever have a weird issue where you cant select the mesh in edit mode?
devout scroll
sacred field
anyone ever have a weird issue where you cant select the mesh in edit mode?
Try unhiding everything with alt+H, there was some issue with an older version of blender that kinda hid stuff without actually hiding it..
zinc jolt
okay so good news guys, Freddy's going to be at least 50 to 70k polygons for his release next month
is that appropriate for you guys?
 mellow prairie
How do I flip the texture without moving the mesh? Forgot how to do it lol
 thorny ivy
Any advice for making the left horn's texture (tree) look less-faded compared to the original (scales)?
 spiral sigil
hmm i guess open the texture in an image-editing software and play around with contrast and brightness until it looks more like what you want
copper parcel
I put some armor on an avatar and when I tested it in vrc, the armor was very... bendy. It kept contorting along with my arms and such. Is there a reason for this?
devout scroll
That means 2 or more bones have 100% influence on your mesh
So it does a weird mix between them and averages them
copper parcel
So am I supposed to parent each piece to a specific bone or something?
devout scroll
Yeah
copper parcel
Ahhh okay, that
That makes sense.
I only started this stuff yesterday, I figured that's what the issue was but I wanted to be sure.
And just so I remember... first object selected is the parent, second object is the child?
I always forget that bit, my brain is clumsy.
tough plover
@copper parcel typically armor plating is made of metal, and should not be bendy. weight painting wise, that means that pieces should be uniformly weighed to specifc bones
without gradients or anything
copper parcel
Yeah, this is my first time using Blender to actually make an avatar rather than importing a premade one to unity. So I'm figuring a lot of this out through trial and error
craggy lintel
You know whats sad?
LIKE
really sad
the amount of users here who dont understand that their knowledge goes WAY outside of VRC if youre a fluent blender user
rn im using my knowledge in the field and like im way ahead
thorny ivy
spiral sigil
hmm i guess open the texture in an image-editing software and play around with c...
The thing is, the original texture + model doesn't seem to have this issue. Think it might be my inexperience with nodes + materials as a whole in Blender.
copper parcel
Well yeah, I've used Blender before, but only when it came to posing pre-made models I made for store art in an online game XD
Even that small amount of experience helped a lot when it came to me working on this model in particular.
thorny ivy
I added in the normal maps + played around with the settings some, this is what the results look like

Not as dark but at least they don't look faded anymore.
craggy lintel
It's funny because I bet over half the users in here who know how to model dont know that they could get a job doing it
@copper parcel
copper parcel
XD
tough plover
@craggy lintel I've thought about that yea
but not exactly sure what to look for lol
copper parcel
Also another question, I bound a piece of armor to a bone but now it's even more bendy. I saw something mentioning gradients, where do I find this so I can see if that's the issue?
tough plover
are you in Weight painting mode?
tough plover
Weight painting is how you determine which parts of the mesh move with which bone
copper parcel
Alright, how do I go into this mode then?
tough plover
you should probably look up some tutorials about weight painting lol
spiral sigil
thorny ivy
The thing is, the original texture + model doesn't seem to have this issue. Thin...
could be, you can try changing the material properties :3 maybe remove the BSDF node and just put the texture into the output directly, like so:

that gives you the most accurate look of just the texture itself with no shaders or other maps applied
tardy rapids
craggy lintel
It's funny because I bet over half the users in here who know how to model dont ...
I WANT to make a job of it tbh
spiral sigil
craggy lintel
It's funny because I bet over half the users in here who know how to model dont ...
i work freelance rigging 3D models, but when it comes to modelling i need to have inspiration to do it or i won't finish it xD that's why i prefer to model what i like instead of modelling for someone else
craggy lintel
try to look into the film field, largest corporation for this 👍
Sacred and Nini, The film field is the largest industry for anything animation, 3d, etc
Film is much larger than gaming
Because just almost literally every human right now sees images and videos from this industry lol
spiral sigil
oh yea i know, but i dont want to work in that field for the same reasons, unless its something i have personal interest in i cant see myself modelling for someone else, and if i want to do it this way the closest thing would be working as an independent contractor or freelancer on specific commissions or projects
craggy lintel
Contracting is probably best
I was seeing how many things were animated using blender
And then I see the breakdowns and i understand all of and I can do all of it so it’s sorta eye opening
I work film and media- not much 3D other than as a big hobby- so I may actually add this into my professions
@tough plover but yea Sacred try looking into film industry
tough plover
will do
spiral sigil
yea i feel like contracting would work best too~ tho for now i still have a lot to learn before i can actually do this as my career, but that is the ultimate goal if possible :3
tough plover
if you have any links in particular that'd be cool
craggy lintel
Hmm I mean, what do you specialize in?

So using keyframe knowledge rn i am doing something for a real estate company for example
Like little parts of what you do everyday go a long way, it's almost like the process from poly modeling to final rendering, each step to making an avi can actually turn into it's own job- LOL forget going to school for this
vrc avi creation = School itself
Idk i just wanted to share my opinion because I feel like it's a shame for people 'wanting to look cool/better in game' missing out on their own opportunities
spiral sigil
craggy lintel
Hmm I mean, what do you specialize in?
rn i specialise in game-optimised modelling, especially compatibility for games and stuff, which is why making avatars for vrchat is pretty helpful since it uses unity
spiral sigil
craggy lintel
Like little parts of what you do everyday go a long way, it's almost like the pr...
oh yea i know, i guess the part thats the most fun to me is modelling itself, so creating mesh, and rigging, im not so fond of the texturing and rendering parts xD but thats cause of how im learning it, i first learned how to make really optimised mesh, then learned how to rig and also create more complex animation rigs and now i'm focusing on textures and i guess materials overall
copper parcel
Figured out weight painting, looks like the armor is no longer bendy. Thanks :)
spiral sigil
i started my journey into 3D modelling by learning 3D animation first, i like the aspect of making models come to life, it gives them personality and character
craggy lintel
Oh awesome :3
I mean I’m just about the same
Except I like texturing the most lol
I do stuff like this lol
spiral sigil
aww :3 may i ask what you use for texturing or how your process for it is? blender texturing does seem a bit limited xD
craggy lintel
Dang discord marking stuff as nsfw -.-
I use substance
My process is a secret because I have a method of texturing that is very revolutionary and I’m not ready to give it out just yet
I had to leave a certain server because people started to try to copy my techniques (but they failed at it lol)
I basically use 3 programs to texture and one of them is over 10 years old
spiral sigil
oh damn xD sounds like me with animation, i use MMD for it cause i learned to animate in it as a teen and i'm too used to it, but i'm now realising how limited it is and want to also learn blender animation, it's just hard getting used to blender, the entry into the different areas of it is probably the biggest hurdle of it
spiral sigil
craggy lintel
I use substance
i get substance recommended a lot, i think i should really give it a try
thanks for answering btw :3 and dw, its okay if you want to keep your process secret
craggy lintel
It's allll abbout them keyframes
Right now i'm best at animating 2D mesh but i can do unity anims no problem
tough plover
@craggy lintel I specialize in making assets in blender and can texture using substance
but I can also do rigging, shape keys, and unity work
spiral sigil
craggy lintel
Right now i'm best at animating 2D mesh but i can do unity anims no problem
ohh unity anims are also something i would like to learn, unity is a big mystery to me still xD
quaint jasper
There is honestly no reason to animate in Unity unless you can't export something out of it
craggy lintel
yeaaaa unless you’re doing VRC stuff
but like the creation of those anims carries over platforms for sure
 fair scarab
Im having a problem rn with an avatar, can someone help me?
quaint jasper
If it's a modelling issue yeah
quaint jasper
craggy lintel
but like the creation of those anims carries over platforms for sure
That's why you should be starting in Blender 
craggy lintel
Oh for anim yea
fair scarab
more like upgrading unitys version issue
quaint jasper
fair scarab
more like upgrading unitys version issue
then that's the wrong channel, you can ask in #avatars-2-general
craggy lintel
I may pick up C4D though when I get to the point to where I want to animate 3D film stuff
Maxon unfortunately is way superior
fair scarab
ok thanks!
white moth
after getting familiar with blender I’m straining to think what paying a subscription for paid modeling software gives that blender doesn’t give for free. Admittedly, Ive never used any because it’s all too rich for my blood
white moth
It’s about $3500.00 usd if you don’t want to pay a subscription. That gets you the current version without any updates
Maybe i have bad info
Subscription is more affordable - but it’s never paid off
Or just download blender for free lol
white moth
Blender is the industry standard in the circles I’ve seen
craggy lintel
Maya or C4D would be the question
white moth
craggy lintel
Maya or C4D would be the question
Oh Maya or c4D is an easy choice. Blender.
craggy lintel
Nahhh blender isn’t unfortunately for big studios, etc
quaint jasper
If you're a hobbyist then Blender is the only option
Studios are trying to move to Blender, but they rely way too much on specific Maya addons that Blender doesn't have
craggy lintel
Yea
quaint jasper
It also means hiring new people entirely, and dropping the ones you had
craggy lintel
Maya and C4D sorta seem to compete with eachother
Lots of the big Instagram people follow using C4D
Like beeple
Beeple crap is amazing at what he does
white moth
I see see learning expensive paid 3D software as a waste at this point, places are trying to get rid of it
quaint jasper
Zbrush is the only thing that i find compelling, but i still think they'd benefit a lot from better/cheaper subscription models
white moth
I feel like most people who use it as a hobby just have a license from their company
or pirated it
craggy lintel
white moth
I see see learning expensive paid 3D software as a waste at this point, places a...
Well actually adobe out here trying to buy everything up
They ate substance and all of it’s programs
white moth
craggy lintel
Well actually adobe out here trying to buy everything up
Yes they turned substance painter into terrible
quaint jasper
imagine disabling backface culling or disabling xray painting 
white moth
Yeah I’ve been chopping up models just to make them easier to paint in substance which is ridiculous
I really need to learn how to paint in blender
It’s defaults are just so empty
They really make you do everything yourself
tough plover
just make a version of your model with a duplicate above it which you then explode to paint more easily
white moth
tough plover
just make a version of your model with a duplicate above it which you then explo...
🤔
quaint jasper
Well that's just a bit insane
white moth
Insane is me thinking oh my god that’s genius
tough plover
both share a UV map, so you can paint on either one
you can also make as many copies as you want exploded in different ways
craggy lintel
white moth
Yeah I’ve been chopping up models just to make them easier to paint in substance...
just do 143852485748 materials on the same uv and then use photoshop ;3
if youre in substance
white moth
I only use substance to paint directly on the model
That’s my only use for it. I should just be in blender, but it’s default brushes suck
I need to learn it better. So far I only manage to use a really blurry brush

 thorny ivy
Looks mighty nice.
lime vector
why is outlining objects so hard on unity😭
 thorny ivy
I probably should look into normals, I've barely touched them.
tough plover
thorny ivy
I probably should look into normals, I've barely touched them.
baking normals from higher poly versions of your mesh is a very good way to add detail
thorny ivy
Good to know, thanks.
tough plover
thorny ivy
Good to know, thanks.
for example: say you wanted to add creases in some fabric
make a copy of the mesh, subdivide it 3x
use sculpt mode to carve in the details
then, bake a normal map from the high poly one to the original
and those details will now be faked with the normal map in the original
tardy rapids
alternatively, if you just need engravings or some light details that can be grabbed from the texture you made
Photoshop's 3D Normal map generator filter works VERY well
 thorny ivy
Noice.
 sacred field
devout scroll
Try unhiding everything with alt+H, there was some issue with an older version o...
sacred field
devout scroll
Try unhiding everything with alt+H, there was some issue with an older version o...
This was probably exactly it. Because the thing that caused this to happen was right after I was trying to hide the skirt bones and they wouldnt hide at all (and this is on 2.93 so I guess the bug is back?)
clear geyser
MIB Worm
 onyx juniper
I remember their vestigial hands being bigger though
clear geyser
Nah
 craggy lintel
Now I got a reaaaallll question
one I haven’t seen an answer to yet
So has anyone ever managed to make things look really good without showing that they are trying make things look good
Clothing wise
Cause I always see/use subsurface scattering/normals/etc type stuff and like
It always looks like it’s trying too hard lol- I think I’ve seen something like this oneeeee time but the person works serious business with 3D IRL so he was perfect at what he did
quaint jasper
The rest is with complex shaders
And then it's Unity's render pipeline, and then there's vrchat's world lighting quality
It's hard to look good consistently
craggy lintel
https://youtu.be/IqhXDb69wl4 check THISSS out
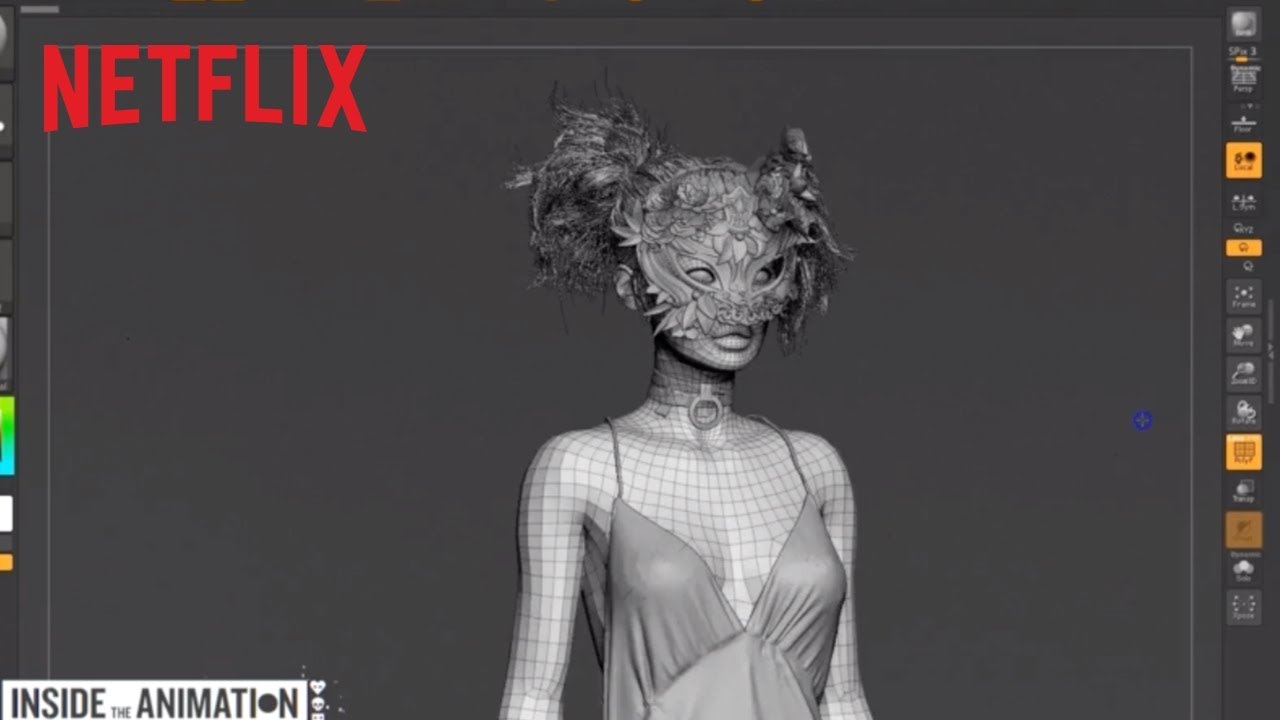
How to make sci fi surrealism.
Watch Love, Death & Robots on Netflix:
https://www.netflix.com/title/80174608
SUBSCRIBE: http://bit.ly/29qBUt7
About Netflix:
Netflix is the world's leading internet entertainment service with 130 million memberships in over 190 countries enjoying TV series, documentaries and feature films across a wide variety ...
This is sorta what I mean
the clothing in this from marvelous is marvelous
quaint jasper
Making the clothing is easy, it's controlling is that isn't
dynamic bones and constraints don't cut it
craggy lintel
Yeaaa
My friend and I came up with a very decent solution for dresses though
Come to think of it
thorny ivy
Speaking of models...

I made a custom ear for my avatar. Mix of goblin, elf, and just some creativity.
 obsidian nova
That’s really lovely.
thorny ivy
Thanks! No proper texture/material for it yet though, even putting a placeholder on just makes it hard to tell the inner shape.

Size comparison for the rest of the head (which is a prototype atm).
Gave her ear-lobes since that was something many ear designs for fantasy-esque races seem to lack as a whole.
copper parcel
Hmm... I tried importing my avatar to vrchat but for some reason the body texture is missing... looks fine in unity x.x
 polar marlin
Well that sucks
obsidian nova
@thorny ivy Do you usually hand-paint the skin textures or do it procedurally with a material bake?
thorny ivy
obsidian nova
<@781969501297049640> Do you usually hand-paint the skin textures or do it proce...
No idea how to do either, honestly.
Actual texturing is new territory for me.
obsidian nova
Ohhhhh, if you want, I’ll give you a crash course sometime. I’m no pro, but I’ve picked up a few really helpful tricks.
Just add me.
spiral sigil
Completed the Alternate Arm.
Sksksksksksk-
 thorny ivy
spiral sigil
Completed the Alternate Arm.
Sksksksksksk-
thorny ivy
spiral sigil
Completed the Alternate Arm.
Sksksksksksk-
Build-a-Jaeger when?
spiral sigil
thorny ivy
Build-a-Jaeger when?
xD
thorny ivy
Pacific Rim VR
 fallow isle
tough plover
<@!781969501297049640>
fallow isle
tough plover
<@!781969501297049640>
May consider checking out Substance Painter. It's pretty much the centerpiece of my texture workflow. Sculpt details in ZBrush, ship out high poly to bake normals/AO/curvature/thickness to low poly in Substance Painter, do texturing in Substance Painter, export material maps for Poiyomi. Get the workflow down and you can have your materials looking more or less identical across SP, Blender, and Unity.

 digital hound
If I have 1 floor object and 1 wall object. Is there a way to merge the 2 where the wall faces cutout into the floor faces?
thorny ivy
digital hound
If I have 1 floor object and 1 wall object. Is there a way to merge the 2 where ...
Flip normals would do the trick there I think.
digital hound
how would that cut the wall shape into the floor
thorny ivy
Oh, you want the wall to cut into the floor.
digital hound
yeah
thorny ivy
Edit Mode -> Face - > Insersect (Knife)
Not sure if both parts have to be in the same object though.
digital hound
I assume that after I make it I can ctrl+join them
thorny ivy
Make sure to have one of the objects highlighted, dunno if it's the cutter or the cuttee though.
thorny ivy
I've been in avatar-creation mode so haven't messed around with any actual things in a while.
foggy granite
spiral sigil
Completed the Alternate Arm.
Sksksksksksk-
Looks great what’s the poly count
spiral sigil
foggy granite
Looks great what’s the poly count
Well before without that alter arm it was 135,000.
when it was just the two similar arms.
and Edge split kinda made it higher.
foggy granite
Alright
azure rain
spiral sigil
200,000k Vertices.
that is terrifyingly large hopefully that's just the high poly for a normal map bake
foggy granite
Go to it before me
azure rain
like that exceeding the triangle budget for the entire frame of a AAA video game by like an order of magnitude
spiral sigil
azure rain
like that exceeding the triangle budget for the entire frame of a AAA video game...
yep.
foggy granite
But honestly that’s fine for animation or show piece
azure rain
yeah but probably wouldn't show well on a profolio for gamedev
foggy granite
Your right about that
spiral sigil
azure rain
yeah but probably wouldn't show well on a profolio for gamedev
Kinda put too much detail.. Actually not kinda.
foggy granite
But i can see a lot of detail can be replace by norm maps if it need to be lower
azure rain
yes it definitely needs to be lower as a VR Avatar
like that triangle count probably exceeds like how much someone is rendering in a given frame of vrchat on PC
spiral sigil
Sadly i think the lowest i can do is 120,000.
or else its just a bunch of ungodly weird shapes.
foggy granite
Can you show the wireframe
spiral sigil
As Much as the Chest says it looks like a lot , its not , its 1,090 Vertices.
 azure rain
if it's helpful you can use triangles for that to deal with the shapes
spiral sigil
I'll try.
azure rain
and probably a lot of that could be on the normal map
as far as the loops that are mostly for like Edge highlights
spiral sigil
I see.
thorny ivy
thorny ivy
This ear used to have a lot more polys before I decimated it but made sure the overall shape/structure remained the same.
I set it to around .20 or so I think? Definitely on the lower end but went as low as I could go before it had any real impact on the mesh profile.
If an ear can turn out that well, sure the program can work its make and really reduce the overall vertices count for a mesh like that.
I know ear =/= giant robot but still, programs tend to be pretty good at simplifying things when we don't they can be much further.
radiant ridge
Alright after fixing it up for about two days. This giant cannon is nearly ready for all its little detailed bits
 tardy rapids
It's amazing how much eye shines can change the feel of a picture
Ayyy, cute

oh shit

Y'all better get running cause those claws ain't just for show
quaint jasper
the space between the mouth/nose is still very odd to me
spiral sigil
i had an issue that was caused by something being connected to the armature but the issue is... how do i connect stuff to the model? i usually just do retextures so adding stuff to models is new to me
spiral sigil
spiral sigil
i had an issue that was caused by something being connected to the armature but ...
figured it out. i join the meshes in blender but give them different material slots
spiral sigil
ok, question
let's say I have this here vine on the arm of my avatar

I only want to have the vine active with a toggle
is there any preparations I should make when rigging?
Should I not have the vine there when rigging?
Like, should the vine be a separate object?
devout scroll
There are different ways
You can make it a separate object then toggle it with an animation
spiral sigil
devout scroll
You can make it a separate object then toggle it with an animation
but how do I make it bend with the arm, then?
devout scroll
You can make it the the same object and use a shape key to show and hide it
You can make it the same object but a different object and hide it by toggling it's material between the real one and an empty one
You still have to weight paint it to the same bones the arm has
spiral sigil
devout scroll
You can make it the same object but a different object and hide it by toggling i...
not an option, I want to make this quest friendly
devout scroll
That's why I gave you 3 options
spiral sigil
devout scroll
You can make it the the same object and use a shape key to show and hide it
but doesn't the shape key make it gradually transition?
devout scroll
If you make it gradual then yes, if you make it snap to 100% then not
devout scroll
You create an animation that sets the shape key to whatever value you want
In unity
spiral sigil
I see
How do I make a shape key that changes its UV map?
I want to make the skin be able to be toggled between two different colours, both in the same material
Is there a way to tell unity to shift the UV for the face from one part of the texture to another?
devout scroll
You can pan the texture in some shaders
But you could also just make a new material and make an animation that swaps them
@spiral sigil
mellow violet
my obj looks like this is Metasqeuoia

but it looks like this once converted to mmd
 spiral sigil
devout scroll
You can pan the texture in some shaders
spiral sigil
devout scroll
You can pan the texture in some shaders
Does that work with any Quest shaders?
mellow violet
my guess is that the invisible texture is doing an oopsie
devout scroll
spiral sigil
Does that work with any Quest shaders?
I don't know, you gotta check
spiral sigil
Alright, thanks ;w;


 craggy lintel
Hey guys
I have a weird issue
my armature disappeared
but it's still there
and when I try unhiding it with the hotkeys, and with every other normal option it does not reappear
but it's still there
devout scroll
Screenshot?
spiral sigil
what's the best way of rigging a skirt/dress for VRChat?
should I make a separate bone for it? Should I use the regular body bones?
I don't want to mess with dynamic bones, though, since they are not supported for quest
thorny ivy
I've learned ya can rig a skirt with about two-four bones, depending on the actual length, with half on each side.
Weight-paint accordingly though.
spiral sigil
thorny ivy
I've learned ya can rig a skirt with about two-four bones, depending on the actu...
I see
so like... where should I put them, in this case?
thorny ivy
But clothing physics is an option supported by VRC's Unity engine. Don't know how to really use it though.
spiral sigil
spiral sigil
I see
 spiral sigil
thorny ivy
But clothing physics _is_ an option supported by VRC's Unity engine. Don't know ...
spiral sigil
thorny ivy
But clothing physics _is_ an option supported by VRC's Unity engine. Don't know ...
it is an option for PC only (which I'll rarely use) and I don't really know how to work with it so...
thorny ivy
I'd say for that particular model, between the dress' outter edges and the actual skeleton.
So sandwiched between the two.
 visual vigil

Been making #Halo inspired armor for my catfish sona, its suppose to look like Covenant / Elite themed armor smithing.
Still WIP, I've redone the armor like 3 times already, satisfied with what I developed
 Twitter
·
Twitter
·


 spiral sigil
 mellow violet
pretty
foggy granite
looks cool what poly count and how the wireframe looks
 worldly tangle
lots of polygons
tardy rapids
worldly tangle
lots of polygons
She is at exactly 70k. Like 40k of those polygons are JUST hands.

 worldly tangle
My FX-05 Xiucoatl (🇲🇽)
 tardy rapids
Now that is optimization
worldly tangle
yep
foggy granite
how many is that now
quaint jasper
Yeah, that's before the triangulation
white moth
I fear non-coplanar n-gons
foggy granite
tardy rapids
it says on the image
i ment like how many guns did they make so far
worldly tangle
foggy granite
i ment like how many guns did they make so far
I made three guns so far (Including FX-05 Xiuhcoatl)
foggy granite
nice
worldly tangle
I finally finished UV editing the model so. . . . that's one hurdle over with
thorny ivy
Decided to finally model somethin' I've been kickin' 'round for a while now: a "modernized" pavise with extendable energy projectors. Very rough concept still but got the general shape worked out at least.


Blue = body (likely metal)
Grey = metal (sharpened at the bottom)
Yellow = energy (may change to red)
On a related note, I'd like the center (the diamond shape) to have a pattern like this. However, actually figuring out the geo for it has led to some mixed results.

The spacing isn't uniform so it ends up looking wonky.
craggy lintel
Hey guys
Is there a way to edit existing mesh in blender with curves
I heard there’s a plug-in for it but idk which one
 paper idol
i need some help uploading my Avatar i made to Vr chat from unity i have the trusted role and stuff
devout scroll
craggy lintel
Is there a way to edit **existing** mesh in blender with curves
Can you explain what you mean by that
spiral sigil
 craggy lintel
devout scroll
Can you explain what you mean by that
craggy lintel
devout scroll
Can you explain what you mean by that
edit mesh as if you could edit a curve
with beziers
devout scroll
You can try using a lattice
tardy rapids
still wadi
https://i.imgur.com/sqXR6Zq.png
booba
Jokes aside though, looks good
Should probably do more sculpting with my work
spiral sigil
 foggy granite
craggy lintel
Is there a way to edit **existing** mesh in blender with curves
foggy granite
craggy lintel
Is there a way to edit **existing** mesh in blender with curves
First, explain what you trying to make
You can have a mesh follow curves using an array and curve modifiers
craggy lintel
I want to edit existing mesh with a curve
I’m a veteran with curves I’ve been working with them for 10 years
It’s my job.
I just want to edit existing weighted, shapekeyed mesh with a curve
devout scroll
Still doesn't explain what you want, move verticies around?
Deform the whole thing with a curve?
Give a practical example
And weighted or shapekeyed doesn't matter as you can still apply modifiers to them with some work
tough plover
@craggy lintel add this modifier
 craggy lintel
Yeaaaa not what im looking for
the curve modifer doesnt do what im wanting
lmao
Yeaa i dont think what i want is possible without the plugin
devout scroll
Yeah well it would be helpful if you actually explained what you want..
tough plover
devout scroll
Yeah well it would be helpful if you actually explained what you want..
I think they want something that can add X amount of curves on the surface of an object to be able to manipulate the shape of it
but I think that proportional editing or the grab sculpting tool could get you most of the way there
and the modifier I showed too
devout scroll
There's ways but you need a bit more info
You can use verticies with hooks
You can use a lattice
You can use deform
craggy lintel
devout scroll
You can use a lattice
Nope don’t want ittt
craggy lintel
devout scroll
You can use deform
Nope
Lattice probably closest to what I’m talking about
but lattice isn’t necessarily what it is
craggy lintel
tough plover
but I think that proportional editing or the grab sculpting tool could get you m...
I use those tools everyday
Literally everyday lol
If I could get a lattice to behave the way I want it, I’m set but there isn’t a way
quaint jasper
i've never heard of a plugin to do that, did you really not find anything ?
craggy lintel
Unfortunately not haha
you know how beziers work? Basically like
I want to draw a bezier around an object
Be able to edit it as you would edit a bezier
and manipulate the selected areas
just would be more efficient to me using the O tool
Would be epic
white moth
That’s curves/nurbs . Yes you can model that way, though at some point you will need to convert it into triangles.
craggy lintel
white moth
That’s curves/nurbs . Yes you can model that way, though at some point you will ...
hun I have made countless assets using curves, I’m talking about existing mesh, I wanted to edit existing mesh in the same exact fashion (other than the loop controls etc)
white moth
I mean proportional editing is close to what you describe
you may be able to get something closer to your defintion but i'm not the master of all things blender
quaint jasper
Yeah that'd be proportional editing
craggy lintel
Yea I mean I’ve been okay with doing proportional editing
I just wish I had curves to edit with sometimes because curves behavior is a bonus in any program
I have a cool plugin on substance for curves on mesh for designs
thorny ivy
Starting sometime yesterday, I began working on a custom shield and more-or-less finished just a bit ago. Going in, I had a rudimentary idea of how it'd work from a technical aspect but was pleasantly surprised to find it was relatively easy to implement.

Still need to do some clean-up and the UVs but it's properly rigged! Deployment is controlled via shapekeys though still have bones for controlling the moving parts, not sure if I need to keep those.
tough plover
thorny ivy
Still need to do some clean-up and the UVs **but** it's properly rigged! Deploym...
bones would be a more performance friendly option
thorny ivy
tough plover
bones would be a more performance friendly option
Good to know, I'll look into getting rid of the shapekeys as I optimize the model.
 cerulean shoal
forgot to post here lol
 hollow ermine
thorny ivy
hollow ermine
thorny ivy
🤌
thorny ivy
hollow ermine
🤌
❤️
 wild forge
Hello i am looking to make my own avatar i am a beginner befor i look up videos on youtube is there any specific ones you think i should watch first thanks 🙂
 azure musk
Does anyone know, any good blender course? I make avatars, but mostly kitbash.. usually I can scratch for example hair and small stuff, but I would like to learn how to make clothing and stuff.. :)
still wadi
you should check my stream 🙂