#3d-modeling
1 messages · Page 101 of 1
 quaint jasper


 weary slate
first time trying to make something similar to a human head :P. Looking bad, but it's my 3rd model and sculpt mode won't work so I am just moving shapes. Gonna make it better in sculpt mode when i get it working
just keep doing it til it works. it's what im doing. also, sorry for the ping
put a stream on in the background too
 spiral sigil
weary slate
first time trying to make something similar to a human head :P. Looking bad, but...
spiral sigil
weary slate
first time trying to make something similar to a human head :P. Looking bad, but...
is a mask?
weary slate
spiral sigil
is a mask?
im trying to make a low-poly face D:
I'll finish this one then try again at making a better one
 median harness
My number one advice when learning is to explicitly ask yourself "why did I fail" when you fail. 'cause you will fail, and you will make stuff that is not what you were hoping for.
Targeting that pain point that caused the entire mesh to spiral into an unworkable mess you have to wholesale abandon is the way to go. That way, on your next project or attempt, you can keep that one thing at the forefront of your mind, and try a different approach. Even if the project falls apart again, it'll be in a different way and you can move forward from there. Incremental progress is key -- learning everything at once is too much for almost anyone!
weary slate
ok ty
spiral sigil
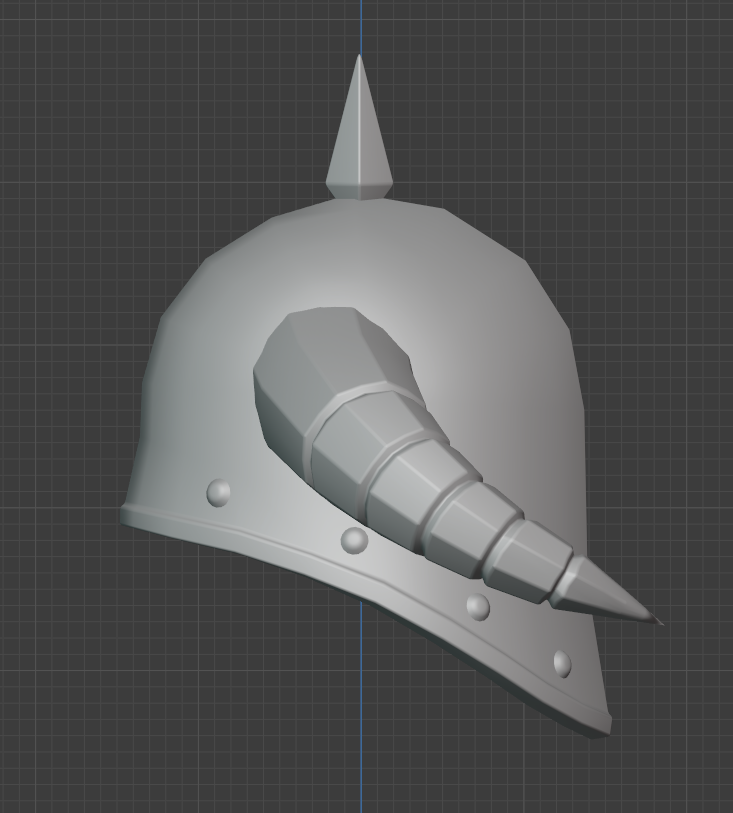
 median harness
I have a burning desire to put that on and run headfirst full-tilt in a direction until I hit a wall
In a really good way
weary slate
median harness
I have a burning desire to put that on and run headfirst full-tilt in a directio...
yessss
this is about an hour's progress... a face. I'm gonna follow a tutorial of how to do nurbs curves or whatever tommorow for the chin beneath the creepy mouth side parts and hopefully it'll make the right shape. I'm gonna scrap this once i've done that and go make another, better one
 odd meadow
im making a donut. 😛
no
i dont lik that face
i like this 😛
: P
there
my account still won't work
so i send in a support ticket
weary slate
odd meadow
im making a donut. 😛
you can do that by adding one shape
weary slate
odd meadow
so i send in a support ticket
wdym?
odd meadow
it kept saying that i was reusing captcha
even though i had done it repeatedly
using chrome
and edge
and the donut
im making it with frosting
odd meadow
spiral sigil
https://i.gyazo.com/b59e82dc0cd29295e960bf1aa5e18172.png
https://i.gyazo.com/10b...
: O
 mild nimbus
So I been asking around which face variant do you like best Old or New one?
Should of took a perspective shot tbh
but were just worrying about proportions rn
Fullscreen to see all the details
Modeling and Texturing of this really draining me rn
😫
Obviously clothing is still WIP
 runic nymph
I like the old face more.
mild nimbus
One without ortho
In bed rn so can't get the true perspective looks side by side
😩
Only time I work in ortho is when I'm modeling tbh and switch back to perspective make sure it's looking good in the only important perspective
Which is perspective
XD
 white moth
I’m having a very hard time telling what the differences are, but I like the one labeled new more. Couldn’t tell you why.
spiral sigil
less aliasing
it's more smooth
the "blush" is slightly more red, same for lips
nose and the gap between eyes seems smaller too
 wide cove
I really want the motivation to model, can anyone help me sometime soon?
 devout scroll
None here
wide cove
Ok
 desert whale
Most people here are probably not qualified to be a psychotherapist or something like that tho...
mild nimbus
The problem with most people when they want to get into modeling
They don't start small
They go and make a character on there which is way out of there skill sets in the beginning
The user should be modeling basic things for starters to understand rule sets and fundamentals
Making something as simple as headphones a chair
Pot or a pan
Making basic shapes
If you want too get into this and seek motivation go find some 3D artist that do this line of work especially in a prefer style you want.
Im going to assume it's anime
Go look at Yoolie's work
Or Rukikuri
Shonzo
AversionOfReality
Royal Skies LLC great guy to watch on YouTube btw If you want to get into 3D in general
Modeling is like drawing you suck untill you practice more and more
It's not something you can learn over night or within a month
2 or 4 months
It's a constant practice it's a craft.
@wide cove
When you understand basic modeling rules you are going to realize there so many other avenues now you need to explore to achieve your desired end goal looks
 winter plinth
blender donut
mild nimbus
I need to say it cause most people can't seem to realize it
It's for the others who don't understand what I mean
Lol
They wonder why they not improving cause they are to focused making a complex character
devout scroll
donut bad
mild nimbus
And not learning anything from it cause there to busy trying to solve issues then doing basics
devout scroll
do something more substantial
mild nimbus
I'd say tackle some headphones
Find reference
And make it
Choose whatever brand you love
And ONLY worry about modeling it
No texturing no uv unwrapping
The donut teaches you some pretty good fundamentals btw
But it's meh imo
I learned differently
quaint jasper
it also teaches you a lot of unnecessary things, but it's still a staple
mild nimbus
True
quaint jasper
It's not like there's a shortage of tutorials
mild nimbus
😩
I was thinking of making one
But then I got royal skies
To fix that for me
All good proper tutorials
Are behind payment walls
After you do those courses that's when you seek for the free information on Google YouTube blog post Twitter etc
To polish your new skill sets you recently learned
Once fundamentals are learned you can do anything and can find ways to do things differently for the sake of your style in modeling and quality
But ofc everyone learns differently
Just saying how I did it
Daniel kruter has good character creation tutorial but aged so bad now but still can learn some stuff in there
devout scroll
There's good free ones too
Just don't do the donut
It's full of rambling and is too long
winter plinth
blender table?
devout scroll
do a few short playlists and decide which creator you resonate with the most
i like grant abbitt for beginner stuff but there's a few more
it's just that a lot don't focus on blender for games
they focus on blender for renders
mild nimbus
Cg cookie or Flipped Normals
Are good free sources to
But I think most people will resonate with royal Skies
Or Danial Kruter
Maybe Yan Sculpts and DannyMac 3D
Flipped Normals is prob your go to place
It's every students go to place for industry knowledge for this line of work
Even though they are in the industry doesent mean you should not learn from them either.
That's prob the best knowledge you can get
For free
Blender for renders are also fine and what's er is learned in that can be applied to games also

YouTube
This man explains everything
Even blender guru's donut tutorial flaws
spiral sigil

 cobalt night
wide cove
cobalt night
wide cove
Really good!
quaint jasper
spiral sigil
https://i.gyazo.com/83f700a571a2a124e983b256f9de9523.png
https://i.gyazo.com/ef7...
No roughness mask ?
 acoustic kite
anyone have time to help me with a bit of a blender issue?
 knotty hawk
Does anyone know how to mirror fingers without the mirroring being fucked?
 dire tinsel
can anyone help me with hair in vroid studio
 muted raven
 crude rose
@dire tinsel I followed this when I was figuring out vroid :)
https://youtu.be/pKIuymaOVs8

VRoid Hair Tutorial has been a video that I’ve been highly requested to make. In this video, I go in depth through all the tools and functions to walk you through what is possible for making hair. I also show off some of my own models’ hair to better demonstrate the techniques of which I describe. I hope this video is helpful to you!! I’m going ...
 latent mesa
mild nimbus
Making something as simple as headphones a chair
latent mesa
mild nimbus
Making something as simple as headphones a chair
That's pretty much what I did. I started in unity and worked my way backwards into blender until I created a new model from scratch
latent mesa
acoustic kite
anyone have time to help me with a bit of a blender issue?
Possibly.
latent mesa
knotty hawk
Does anyone know how to mirror fingers without the mirroring being fucked?
You can reset origin to fix the mirror (unless you're not 100% symmetrical)
You can also delete half of your model then add a mirror modifier later. Not 100% how good of an idea that is considering weight paint and uv map
When I have problems with the symmetry being off, I just do each side individually
mild nimbus
vroid doesent really teach you anything but learning how UV maps are
tbh
its just there for people who dont want to learn the craft
its good for concepting though for sure
 broken rapids
is there a way to make a vroid model work as a quest avatar? When i use my model, the transparency messes up my textures on the face.
latent mesa
I'm sure it's possible. I don't use vroid or make quest models. Check out "askamber" tutorial on uploading quest avatars @broken rapids
 steady merlin
would anyone willing to help me learn how to make a model from scratch plz?
 spice pewter
@mild nimbus if they want to use Vroid then let them use it
latent mesa
steady merlin
would anyone willing to help me learn how to make a model from scratch plz?
Give me the url and timestamp you're following and I'll help whenever you get stuck
steady merlin
?
latent mesa
I forgot to say the word tutorial
latent mesa
I'm most familiar with aggrotard tutorials, but I follow everyone. Askamber, greyhoundvrc, and more
latent mesa
May I ask why did you have to restart?
steady merlin
no i have the donut i was working on but i have forgoten almost everything
from the titorial
latent mesa
You want a vrc model/avatar upload tutorial
Donuts are a little out of scope with how in depth it goes. Better watch that after you've uploaded a few avatars and want to make one from scratch
steady merlin
i did
latent mesa
Oh! You're like 100% making one. Gotcha.
steady merlin
yeah i have uploaed avatars
latent mesa
I've made one, but didn't bother adding textures or do uv mapping. I might not be helpful enough depending on the complexity
steady merlin
i see
latent mesa
I've only seen one youtuber make a video on model creation
steady merlin
ah
latent mesa
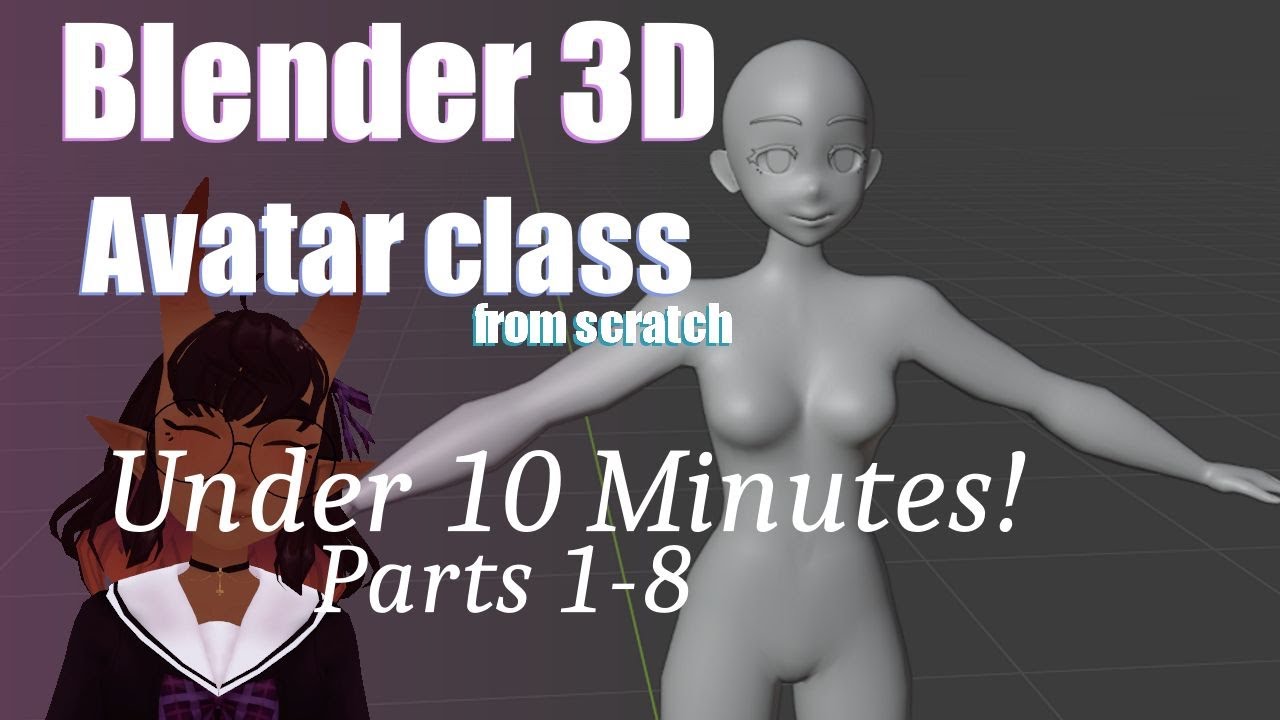
This video is a recap of my 3D avatar modelling series parts 1 to 8, if at any point you feel as if you need a more thorough explaination, seek out the relevant episode and scrub through it to find what you are looking for, I will slowly explain things in those videos, so please check the original video’s first before asking questions about some...
The only f'n youtuber I could find who shows how to do this
devout scroll
Shonzo also has stream vods and timelapses
latent mesa
Good to know. I only saw https://youtu.be/da9V4pq27jg . I was too disappointed to subscribe. Perhaps I lost faith too soon
 mild nimbus
@spice pewter I dident say not to use it but what I say stands true
 devout vault
mild nimbus
devout vault
mild nimbus
Shonzo has gone a long way
soo
still going a long way
tbh the video of shonzo roasting that model should be the staple of what people really produce for VRC content for money sometimes
and its disgusting and pratically a scam
spiral sigil
people using gullible people to make easy money, not a surprise there tbh
mild nimbus
if they want a model
custom one in specific
go to the actual creators they are all over twitter
cg trader
fiver
art station
quaint jasper
slightly more expensive
devout scroll
most people don't care
and will just take the cheaper price
standards are very low with people buying mmd models
just look at those awful fishnets most of them have
devout scroll
pixelated and full of seams
mild nimbus
literally vrc is like a side thing for me tbh
standards are to low
so i just do game asset creation for studios
devout scroll
I feel like it's slowly changing as people move away from mmd and more to booth
devout scroll
It's never gonna shift completely, as models are expensive
People don't realize/don't care about how much time it takes to make them
devout scroll
100$ for a ready model is very expensive
devout scroll
obviously not for a custom commission
latent mesa
mild nimbus
<@!369424407224909824> I dident say not to use it but what I say stands true
That's what I understood, but felt inappropriate to speak in your behalf
mild nimbus
oh well
its the reality
idk what this has to do with anything
why is this about you?
Im talking from a general standpoint of the reality of this community lol
latent mesa
Who, me?
latent mesa
Dude, what?
spiral sigil
anyone can help me finding not a low poly cherry model 🤔
 weary slate
https://www.youtube.com/watch?v=1zNfh_g8jXM when i press F whilst following this, nothing happens and nothing is joined together. Do you know what i'm doing worng?
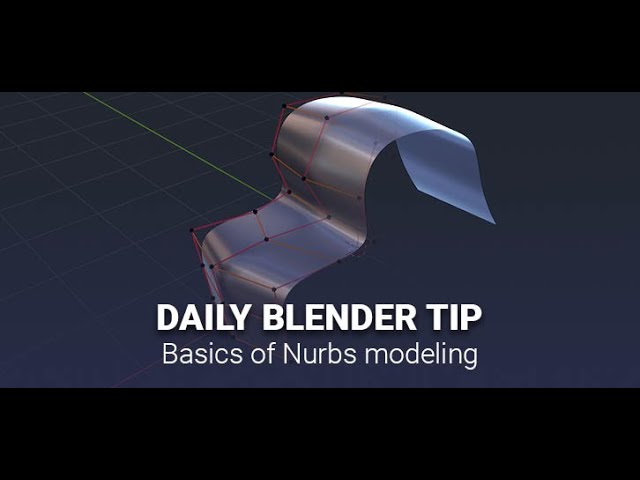
#b3d #blender #secrets #tutorial
Visit the Blender Secrets website: https://www.blendersecrets.org/book
e-Book bundle (20% Discount) : https://gumroad.com/l/IxofeY
pls ping me so i see if you reply
devout scroll
weary slate
pls ping me so i see if you reply
post a screenshot of what you have
runic nymph
weary slate
https://www.youtube.com/watch?v=1zNfh_g8jXM when i press F whilst following this...
It only works on surface nurbs curves.
weary slate
runic nymph
Selecting the verts and pressing F works for me, and I'm on 2.91, so nothing changed since that tutorial was made.
 cinder cradle
@weary slate press a and after that f
 tough plover
yea you need to have both curves actually selected
F will fill the area between two selected objects
weary slate
when i select all the vertices, it says this
runic nymph

tough plover
did you make sure to hit shift before clicking on the 2nd curve
weary slate
i did
is this what two selected nurbs curves should look like?
im gonna uninstall and reinstall blender just in case. even though it wont do anything
actually nah its definetely me doing something wrong
i already installed so plugins and dont wanna install them again
tough plover
what if you do this
weary slate
weary slate
when i select all the vertices, it says this
still nothing. i still get this error thingy
weary slate
 sick owl
Time to make this
sick owl
Time to make this
gl
 topaz copper
In Blender, I'm using the NKD_Protogen model by Nukude. It has shapekey modifiers to adjust body proportions, but how do I apply them to the model?
Blender v2.91.2
spiral sigil
A model i made in vroid
acoustic kite
latent mesa
Possibly.
so i got a hair asset from deviant art and one of my friends said that the uv map on it is fubar.
 neat viper
If it's only supposed to be one color it's fine, but otherwise yeah that's interesting lol
acoustic kite
i was trying to at least get it to look like hair but since this is how it came out in blender i have no idea what to do now other than having to scrap the whole idea
latent mesa
it's not fubar. the it just hasn't gone through uv unwrapping. it's not beyond repair, it's just not complete if you're using a texture in your material. you can save yourself a whole bunch of work by lowering your standards and assigning a base color to the material @acoustic kite
acoustic kite
the uv unwrap only works for the portion of the hair that was already done. is there any way that i can send the files over to you to see if you can fix it? i am very VERY inexperienced in blender.
@latent mesa
latent mesa
nope. i never done uv unwrapping. i just know about it and the general idea on how to do it based off a tutorial that used a cube
acoustic kite
oof
latent mesa
I have 5 people in line in my server's helpdesk, or else i might be more willing to pick this up
acoustic kite
well i appreciate the feedback
 vestal vector
will someone help me to learn how to use blender? i just installed it, and i have no clue what to do
please help
cinder cradle
better watch tutorials
vestal vector
i want someone in real time to teach me tho
cinder cradle
well i think it's not easy to get someone to teach you in real time
vestal vector
hmmm
cinder cradle
especially for free
vestal vector
idk who tho
neat viper
@acoustic kite If you want to commission someone else to do it, check #community-servers-old or VRCtraders o:
acoustic kite
i have already started posting on servers to have it commissioned
neat viper
kk! c:
latent mesa
vestal vector
hmmm
if the price is right, i can help you as if i'm a tutor helping you with homework
latent mesa
you know how you have to pay for tutors for their time and expertise?
latent mesa
oh nvm. i can't ask money from a kid. ummm. find a tutorial and i wall spoon feed you every step you get stuck on. just give me the url to the tutorial you're following and a time stamp
vestal vector
ok thanks!
latent mesa
I could teach you everything i know about blender, but it will take at least 2 full days
that's why i don't want to do it for free
spice pewter
pfft
 bleak raven

 still wadi
@latent mesa how much for tutoring /h?
latent mesa
and i haven't officially started yet, but there's enough demand for me to start
still wadi
how much is your knowledge worth
latent mesa
i dunno. i expect 10 hrs of work to = $50 or something. I'm not guru and don't know all the answers, so it feels unethical to charge more
still wadi
i can respect the hussle i guess
latent mesa
I just don't want to dig myself into a grave again by telling someone "yeah, I'll help" then end up spending an entire day focused on one person when i can help many with smaller things. if you pay for my time, meh, i can't say no
DM if you want to negotiate price, times, dates, end goal, etc
still wadi
sure man
keep up the good hustle tho
as they say if you can do something good, don't do it for free
being a good teacher is hard
not everyone can do it
mild nimbus
Hi how are you that's me
👀
They can be good at what they do but are they good at laying out the information like a curriculum
for it to be processed properly for them to understand
latent mesa
still wadi
keep up the good hustle tho
not really hustling. I'm still giving out free help for things that take less than 2 or so hours
true. the ability to effectively pass down knowledge is a skill of it's own
I'm the area trainer at my last 3 jobs and always got people certified in in 2 weeks less than required
so might as well keep doing what I'm good at. Teaching and humanoid avatars
weary slate
why am i doing everything wrong in blender
all the tools wont worrrk
i'm gonna sort all my stuff out tommorow
latent mesa
weary slate
i'm gonna sort all my stuff out tommorow
feel free to dm if you want help tomorrow
weary slate
ok ty
latent mesa
weary slate
ok ty
aye, prior to DM, make sure you are running blender 2.83
 thorny oar
So question. I rigged my avatar but the bones aren't affecting it. Nothing moves when I import it into unity and try posing it.
Am I missing something important with rigging?
quaint jasper
Did you weight paint it ?
thorny oar
quaint jasper
Did you weight paint it ?
Ok, might be an awkward answer but what's that? 😅
And yes then I didn't do it
quaint jasper
That's the process of attaching the geometry to the bone
Lots of youtube tutorials for it
 stray tulip
Made this from scratch after wanting a model of Bumblebee from Cyberverse uvu I love how it looks
This is one reference :>
 hexed minnow
Made it myself, second attempt at 3D modelling
now, if I had played enough VRC to abe able to upload it, that'd be great
 proper wyvern
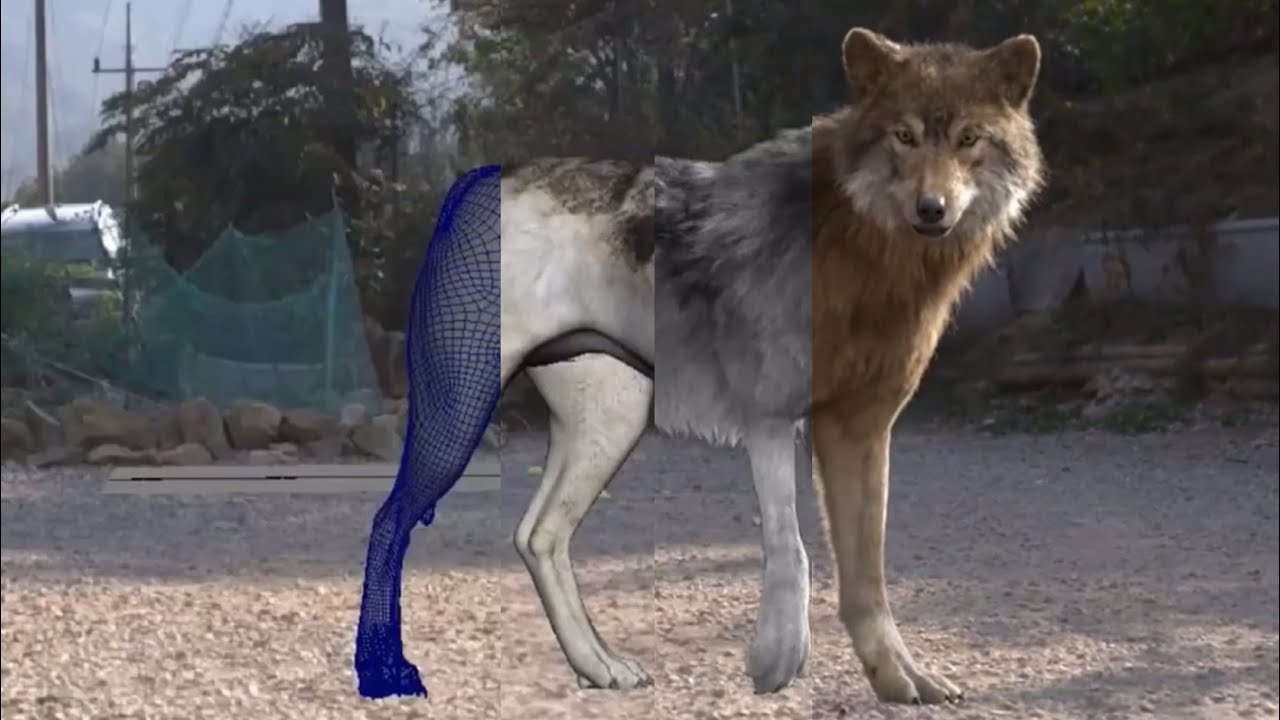
Something for us all to look upto: https://www.youtube.com/watch?v=2-WzU2OKKTI

 cinder cradle
that is good looking blitz.
 west river
he's a little blitz plush
 chrome hare
first model that isn't just a geometric hammer
 fading bough
I hope this is okay here but heres my vroid I made today
neat viper
@spiral sigil Would recommend #shameless-self-promotion instead, if it's VRChat related c: (edit to clarify: I mean the stream, not the model itself o: )
devout scroll
Nah, I think any 3d modelling in here is fine
People post plenty of non vrchat related models
that is if you're talking about their models being posted here
might have misread
neat viper
cool! o:
spiral sigil
@spiral sigil i like the gune over all but for some reason i have an issue with the magazine being put behind the trigger and so far back like that
surely itd cause jamming issues, right?
 tender moth
spiral sigil
neat viper
spiral sigil
<@456226577798135808> i like the gune over all but for some reason i have an iss...
tender moth
spiral sigil
neat viper
spiral sigil
<@456226577798135808> i like the gune over all but for some reason i have an iss...
That's a bullpup design (IRL examples include the AUG, Famas, WA-2000, etc), though the bolt position might be too far forward for the rounds to chamber
depends on how it's fed though o:
spiral sigil
seems more extreme than those, but i dont know gun designs
neat viper
lmao same, and yeah - still cool though! o:
 warped hatch
Can someone tell me why arm jelly? I'm kinda new to modeling and whatnot so I tried experimenting on this Gwyn model I found online to see what all would be involved. Only the arms seem to be affected by this and weighting them has a bit of an effect but not much. I thought maybe someone here could give me an idea for what is up. Hope I am posting this in the right place
quaint jasper
it means that there is weight paint from another bone on that mesh
warped hatch
I feel like a clown right now
I swore I double checked that but there was a bone just behind the join that was weighting it
Didn't fix it completely which means something else is also affecting it but thanks for that
 kindred ermine
hey I need help with something please dm me
warped hatch
Yup you were completely right. Several arm bones had weight paint on the affected bones which caused the jelly arms
Thanks a lot
neat viper
kindred ermine
hey I need help with something please dm me
ask here in the channel! c:
kindred ermine
never mind
 feral yoke
does auto shading just not work with joined meshes? im joining all of the different parts of my avatar together, but it just nullifies the auto shading, which wouldnt be a problem if it didnt make the model's face look freaking stupid
its pretty important considering its the difference between this
and this
 wicked storm
did u try adding sharps around the eyes?
feral yoke
i was hoping there might be an easier way that didnt require manually adding sharps to edges, but if thats the only way then ill do it
wicked storm
There may be some other solution, but that's the best I could come up with at least
feral yoke
i just assumed there may be considering its just auto smoothing being disabled the moment it becomes a joined mesh
wicked storm
feral yoke
i was hoping there might be an easier way that didnt require manually adding sha...
Just in case if you didn't know this already: you can select edge loops with alt click
wicked storm
Sure thing! 😉
 atomic field
im temped to make this an avatar
 balmy root
That would be cool ngl
feral yoke
boat
spiral sigil
be careful with big avatars
atomic field
exporting to unity
spiral sigil
most people will block you
atomic field
ik
im only doing this as a test
not going to any worlds with any people in em
hmm
maybe one on my cursed designs could work
i think im gonna continue this tormorrow
feral yoke
wicked storm
did u try adding sharps around the eyes?
even that doesnt seem to fix the issue
wicked storm
feral yoke
even that doesnt seem to fix the issue
did u check the normals?
could be there are flipped normals next to each-other (yes I'm kinda reaching now)
feral yoke
already recalculated everything to out
its honestly not that unbearable, i just really dont like the way the lighting reflects off of it
which shouldnt be a problem since ill use a toon shader
 cunning crescent
what materials work with inverted spheres?
devout scroll
any as long as you don't have double sided enabled
cunning crescent
its not working for me
devout scroll
then it's probably not inverted
turn on backface culling in blender and see if it's inverted
or in overlays tick face orientation
cunning crescent
i don't use blender a lot, how do i do that?
 cunning crescent
its not inverted
cunning crescent
i flipped it again, didn't work
devout scroll
are you in face select mode
cunning crescent
@devout scroll do you know of any textures that make screen go like black and white instead of a sphere surrounding you with a color on it
devout scroll
nop
devout scroll
for what
spiral sigil
Making a custom-ish Yoshi model
I took a low poly Yoshi model from the sprites resource
I've managed to take out the saddle on the back and cleaned up the model
spiral sigil
Also I have a question. If I making this for Vr chat
Do I have to make the hand, arms, legs and head all seperate?
spiral sigil
Becuase I believe I would have to.
latent mesa
spiral sigil
Becuase I believe I would have to.
not persay. it's an art
spiral sigil
latent mesa
not persay. it's an art
ah right
latent mesa
spiral sigil
ah right
With my first custom model, I started with the legs then moved onto the skirt, top, chest, arms, head, hair, then eyes last.
spiral sigil
right
spiral sigil
latent mesa
With my first custom model, I started with the legs then moved onto the skirt, t...
This is what I made of mine so far, I got it from the spriters resource n such
But the eyes n stuff are completely separate mesh from the rest
The legs arms and head etc are all apart of the same mesh
latent mesa
you will eventually have it all in one mesh
eventually it should look similar to this
spiral sigil
oh no, the arms are all still apart of the same model like if you select them they would select the whole model
latent mesa
spiral sigil
oh no, the arms are all still apart of the same model like if you select them th...
object mode> select mesh
Edit mode> highlight everything you want seperated then click p.
object mode> click on the new mesh
spiral sigil
latent mesa
object mode> select mesh
Edit mode> highlight everything you want seperated then...
is this maya or Blender?
spiral sigil
oh right. I might open this up in blender afterwards
latent mesa
I think i recall hearing a youtuber talk about blender and maya in comparison and said blender is better in their opinion. I personally have only used blender
spiral sigil
Blender looks great honestly I want to learn how to use and model in that
chrome hare
the scariest part of modeling to me is honestly less the modeling and more the rigging and setting up stuff like eyes and mouth
latent mesa
spiral sigil
Blender looks great honestly I want to learn how to use and model in that
if you want, remember me for later, and I will help you spit out your first model on Blender. make sure it's 2.83 tho, or else it might not go as smoothly as planned
latent mesa
chrome hare
the scariest part of modeling to me is honestly less the modeling and more the r...
for me, it's the uv unwrapping and generating a texture from scratch
spiral sigil
Honeslty for me I don't really need to model the eyes and mouth since I'm going for a ps1/n64 model
and also the reason is that I just want to go with a simple modelling technique
latent mesa
spiral sigil
Honeslty for me I don't really need to model the eyes and mouth since I'm going ...
is all good 🙂 I offer you my services
spiral sigil
latent mesa
is all good 🙂 I offer you my services
Thank you so much.
also Does anyone know in blender I can move parts to coordinates? I forgot or can't find it
nvm I found it
Here's the Dino man
latent mesa
spiral sigil
Here's the Dino man
lookin good 🙂
spiral sigil
Headphones WIP
 copper gull
question, does anyone here have experience in weight painting?
im currently working on a jacket for my hobbkin avatar, my friend was helping me get weight paints set up on it by transfering the weights of the body to the jacket and for the most part it works fine, but when i toss it into vrchat, I get little spikes coming from the sides of my jackets, i've went into blender to check if there was any weight data on the affected parts, but i find no information. so im not sure whats going on with it.
These three verts in particular are giving me a migraine
spiral sigil
Making headphones dunno if they look alright or not
spiral sigil
is somebody doing commisions here ?
neat viper
spiral sigil
is somebody doing commisions here ?
See #community-servers-old or look for an offer in VRCTraders c:
 bold gorge

Meet my newest from scratch #VRChat model, Katalina Lovejoy, an intergalactic fighter coming soon to a toy store near you!!! 🌟🌟🌟

 Twitter
·
Twitter
·


new personal model from scratch to experiment with weight painting armor
spiral sigil
 restive hull
copper gull
im currently working on a jacket for my hobbkin avatar, my friend was helping me...
restive hull
copper gull
im currently working on a jacket for my hobbkin avatar, my friend was helping me...
A few things: in weight painting, one of the tools is the blur brush. it helps to blur out those sharp transitions. the spikes are due to the sudden change in weight paint. Also, in weight painting, go to the weights menu, then "limit total" and maybe go to like 3 or 4. it looks like you selected one vertex and it is being influenced by allllll the bones in the body. if you're just learning about weight painting and you wish to fix that avatar, that might be a bit of a tall order. there's a lot of prerequisite knowledge needed to do it decently. I'd look up youtube tutorials about weight painting in blender, anything made in 2.8 and up.
latent mesa
spiral sigil
look at you go. pog champ in training
 visual vigil
https://cdn.discordapp.com/attachments/545707771589296138/811140068621680650/unknown.png https://cdn.discordapp.com/attachments/545707771589296138/811140169612525578/unknown.png https://cdn.discordapp.com/attachments/545707771589296138/811140328097579038/unknown.png
https://cdn.discordapp.com/attachments/613129770833805312/811136653456441384/unknown.png


 latent mesa
visual vigil
https://cdn.discordapp.com/attachments/545707771589296138/811140068621680650/unk...
latent mesa
visual vigil
https://cdn.discordapp.com/attachments/545707771589296138/811140068621680650/unk...
/drool
How long did it take you to do all that? you aspire me btw
visual vigil
i did this all today
i did the blockout idea of what i wanted yesteray

as you can see, its evolved quite a bit in the nonblockout revision aka finalproduct akin
latent mesa
wow, so 2 days from blank canvas to this?
visual vigil
yeah basically like, yesterday i was chatting some people up
latent mesa
visual vigil
as you can see, its evolved quite a bit in the nonblockout revision aka finalpro...
i don't understand that jargon
visual vigil
started doing some sketches while watching a movie during dinner

modelled it into something
then used this blockout to template something more detailed
so yeah basically 2 days
latent mesa
I can't wait to get to that level. It's the next thing I have to do. base models from scratch
visual vigil
its fun
latent mesa
it's beautiful
visual vigil
i started scratch modelling because:
- the stuff i wanted costed money
- the stuff i wanted didnt exist
- editing models to try and make what I wanted wasnt working anymore
latent mesa
you make stuff like that and I make stuff like this
visual vigil
hardsurface is easiest way to start
organics are more difficult
most of my work is hardsurfaces
latent mesa
yeah, i've worked with uv maps, but never uv unwrapping
visual vigil
uvunwrapping, the nessessary tedious
right next to weightpainting
two things that are invisible to show off to other people, because theyre underappreciated, but both allow your model to look great
latent mesa
i don't mind weight painting. i think i am starting to get a feel for it
latent mesa
visual vigil
two things that are invisible to show off to other people, because theyre undera...
deffinitly. it's the hidden skills that you can easily tell if someone lacks
do you uv unwrap often or do you use base colors and textures? I'm asking cuz I can see you going both ways for a hard surface avatar
visual vigil
i always uvwrap
anime textures i bake in blender, anything realistic, i do in substance
visual vigil
i learned from Vrchat and youtube lol
been doing this for 3 years now
my first 3d project ever was porting a mmd model to vrchat in 2017 november
latent mesa
visual vigil
been doing this for 3 years now
ah, ok. I picked up blender when I got the Q2 in October
visual vigil
took me 6 hours, watching that 1 hour tupper tutorial
latent mesa
mind if i send a friend request?
visual vigil
shure
latent mesa
cool. I'm self taught via yt tutorials as well. I kinda dipped my toes in content that isn't tagged for VRC just to understand the program better
i completely understand the "turning a 1 hr tutorial into a 6 hr follow along"
visual vigil
i used unity and blender in highschool but that wasnt really anything compared to anything im doing now
back then it was just "take stuff from asset store, make basic game"
nothing about character creation, or any of that
I WAS going to go to college this year for 3d
but coof-19 fucked me from that
latent mesa
The closest thing I did to 3D modeling was AUTO CAD in highschool. The closest thing I did to Unity was a C++ course in college
do you make money off this hobbie?
visual vigil
i do commissions occasionally
i just opened a store to sell the misc model time to time
latent mesa
okay. so when you create an asset, you're able to post it in a store and sell it like merch?
visual vigil
well
short story: you can make a mario 3d, and sell it, which means your profiting off of someone elses copyrighted character, which is infringement and illegal, giving the company grounds to sue you
but because everyone does it, companies dont care, also models could fall under "parody" or "inspired by" which allows individuals to get under that
latent mesa
oh, gotcha.
so it's not like you ripped the character from the asset files of a different game
visual vigil
theres another looparound that allows you to model anything and sell it, reguardless of what it is, because you put skill and time into it, so its not so much your paying for the copyrighted product, your paying for the product XYZ PERSON made
ripping and selling is a nono
modelling and selling is a yesyes
visual vigil
another loophole that people get around, is selling "Mario" but its for private use only, since its copyrighted, it cant be sold to be used in monetary promotional values
latent mesa
makes sense
 jade wing
what
 stark radish
 obsidian nova
@stark radish You might have other shape keys applied. Go through your menu and make sure that they’re all off.
The edit mode will show only your one shape key whereas the object mode will show any and all that are applied with the sliders
spiral sigil
Cleaned up the headphones a bit
Now I just needto combaine the headphones with this model and now I can UV Map
Oh boy.
latent mesa
at least it's low poly so it wouldn't be a nightmare or a nightmare
spiral sigil
Pull em apart like this so it's easier
I think I have to make it so it's T-posing aswell right?
spiral sigil
I know the hands look a bit messy but I didn't think it would mind being it a ps1 model and I'm just gonna make it one colour anyways
 clear silo
desert whale
clear silo
desert whale
ting
spiral sigil
devout scroll
can't see anything with that background
spiral sigil
Luckily I did put this into photoshop
spiral sigil
Noiw I've already made a test texture and i forgot how to put the textures on now
Does anyone know how to put on a Uv texture in Maya?
 toxic gate
spiral sigil
knotty hawk
toxic gate
spiral sigil
knotty hawk
I don't know why there are parts on my mesh which can't be edited, I'm try to merge the arms of my sculpt to the torso.
Could somebody help me please?
proper wyvern
knotty hawk
I don't know why there are parts on my mesh which can't be edited, I'm try to me...
Remember when I told you to mirror the arms and then I forgot about it and told you to merge the torso and the arms so you can merge by distance before smoothing the surface? 😏 You still have that mirror modifier up boi and youve been smoothing that one arm for how many hours now? 🤭 💖
knotty hawk
Thank you absolute beaut Gothic! Just imagine if it wasn't noticed till way later on >.<
proper wyvern
knotty hawk
Thank you absolute beaut Gothic! Just imagine if it wasn't noticed till way late...
And now youre making me regret telling you 😫 💔
knotty hawk
Somehow deep down, I knew you'd be thinking something like that  🤣
🤣
chrome hare
so i'm making my first character model from scratch
it's going pretty well all things considered but i dread the rigging and shapekey-ing
spiral sigil
Where do I get models
latent mesa
spiral sigil
Where do I get models
for a specific model, #avatar-search-old
latent mesa
spiral sigil
Where do I get models
for avatars in general, here's a pic of my bookmarks. I don't use all site. mostly booth, bowlroll, and deviantart Edit: nvm. no pics allowed i guess
latent mesa
chrome hare
so i'm making my first character model from scratch
it's going pretty well all t...
rigging isn't too terrible in my opinion. Shapekeys... I wish i could set shapes in sculpt mode
quaint jasper
You can tho ?
chrome hare
i have more important things to worry about at the present time
like this octahedral pyramid not working the way i want it to lol
latent mesa
chrome hare
like this octahedral pyramid not working the way i want it to lol
science
chrome hare
this probably isn't gonna warp well when it's rigged will it
quaint jasper
it won't
latent mesa
no. don't give up. how will you get poggers?
latent mesa
quaint jasper
You can tho ?
wait? whaaaa... 🤯
quaint jasper
you just gotta set it to 100 when you enable sculpting
latent mesa
ok. 100, not 1.00? also, thank yooooou :3
quaint jasper
sure, 1.000
chrome hare
me after weight painting
latent mesa
chrome hare
me after weight painting
nice, it works. just gotta add the hair to the head vertice group
chrome hare
yeah
i'm not even finished with the model that was just me messing around on a dupe
latent mesa
is still cool to see your progress 🙂 keep it up!
chrome hare
the hair has been the most painful bit so far even though it's as simple as the rest of the model
 wild parcel
what are y'all using for anime-like hair? i've been using really thick bezier curves but i was wondering if i could get away with just extruding some planes and texturing them well
quaint jasper
hair cards are usually for more realistic characters, it's difficult to do toon shading on flat hair afaik, worth a try maybe, but all i've seen is generally full meshes
wild parcel
hmm yeah
I was thinking less hair cards and more like really continuous planes or something
im trying to work with this kinda hair so it's weird working with bezier curves imo
i mean i've worked with bezier on models plenty before, but i was wondering if there's a different approach i could take, or even a new workflow for bezier that looks better
latent mesa
wild parcel
I was thinking less hair cards and more like really continuous planes or somethi...
I heard Vroid is amazing at creating quick and easy hair
wild parcel
Alright
quaint jasper
If you want to make the hair a whole single piece then yeah that'd work well too
wild parcel
looking at vroid's hair drawing tool, looks really cool! i'll have to give that a try
wild parcel
This is what i managed to get done just using bezier curves. Vroid doesnt support external models unfortunately
 young trench
how do you make a avatar
spiral sigil
You'll have to be more specific.
 flat fossil
Well, making an "avatar" is something else than making a model.
young trench
oh
flat fossil
The question is very vague, if you're asking "how do you make an avatar" you could be talking about modeling it, rigging it, animating it or even just uploading it.
young trench
i didnt know
flat fossil
That's why the question is very vague. Mind you that this does seem to be the 3D modeling channel.
(I'm new here so I don't know where everything belongs yet either.)
spiral sigil
yeah this is for 3d models not avatar making
avatars would be things you do in unity for vrchat
flat fossil
@spiral sigil Might want to refer to the appropriate channel, I don't think this is relevant to modeling.
spiral sigil
@flat fossil
flat fossil
I mean, could you send the channel where @young trench could ask his question?
spiral sigil
again, it depend what he needs
he got either #avatar-help or #avatars-2-general
it's not hard to check channel names and read their descriptions
young trench
no need to be so rude
spiral sigil
No need to be so sensitive
flat fossil
It's fine @young trench, you got a place where you can ask your question now. Thanks @spiral sigil for helping out.~
spiral sigil
i got bored and decided to do some time lapse of wings i am working on for a friend of mine in vrc and i thought screw it why not share it here xp https://youtu.be/h987AtRAjqo

a friend of mine wanted wings made for them so here am i working on it ;3
quaint jasper
@spiral sigil You should really look for SVGs in blender, you'd save yourself so much time
flat fossil
quaint jasper
<@456226577798135808> You should really look for SVGs in blender, you'd save you...
That's honestly such good advice right there.
chrome hare
well that's it i think
flat fossil
chrome hare
well that's it i think
Neat. When you get to the rigging I hope the arms will be able to stretch naturally. I kind of get flashbacks of some of my old avatars when I look at how long those arms are in comparison to the rest of the body. 😨
quaint jasper
you can rig anything tbh
you just need the required geometry for it to bend nicely
chrome hare
weight painting is scary and the automatic stuff isn't really doin it
quaint jasper
You can try Mixamo, but with how low poly it is, i'm not surprised you're not getting good results
flat fossil
chrome hare
weight painting is scary and the automatic stuff isn't really doin it
Try using the gradient weight painting tool and make sure to normalize properly.
quaint jasper
Automatic weight paint is also just a base, you're suppose to work on it afterward
flat fossil
If this is your first model/avatar then don't worry about it being perfect. Just try it, see what happens and learn from it. My first avatar was an absolute disaster, but at least I learned a lot about what I should and shouldn't do. :P
chrome hare
this is actually not that scary
flat fossil
chrome hare
this is actually not that scary
Awesome, good luck with it!
chrome hare
spoke too soon the lower arm doesn't want to cooperate
flat fossil
Look up "blender pose mode" in your search engine.
Change the bones a little when you're in it and make sure you view it in pose mode so you can have an idea of what's happening in-between editing your weight map.
There's a bunch of factors included and I'd love to help more, but I'm about to get off for the night. Good luck with it!~ ^^
chrome hare
i'm not really sure where to ask this but
i'm aware vrchat does some black magic to hide the head from the player's pov, but the head portion of my model is made of several objects
how do i ensure they all get hidden when I put it in game?
chrome hare
hm
aren't you supposed to combine the entire thing into one mesh though?
forgive me, i'm as new as can be to thise
 azure rain
yes that's generally better for performance as that's less draw calls if you're not having the object being planned to be toggled on and off
chrome hare
so how do i parent things to the head specifically?
azure rain
going to weight painting mode in blender and add it to the head bone or you parent the objects to the headbone in unity in the object hierarchy
muted raven
Heres my new face for Yam Yam
All i gotta do now is decide what i want to do for hair
quaint jasper
I know the tiny imperfections are randomized, but if you could make your own mask and have them more condensed to get robot freckles that could be nice 
wild parcel
finally done with the model, now i have to learn how to import it into vrc 😅
cinder cradle
@wild parcel use unity converter for vroid avatars and you should be fine
wild parcel
i didnt make this in vroid :V
cinder cradle
oh sorry
wild parcel
haha its alright
cinder cradle
what format is this
wild parcel
its all from scratch, blender
cinder cradle
it's rigged?
wild parcel
Not yet, was planning to at least use mixamo as a base since it's rigging had worked out fine for the base mesh, although that was before I added clothes. I know I'll have to do some weight paint work regardless
cinder cradle
well before vrc rig it ofc.
wild parcel
ofc
cinder cradle
remember about bone schematic
wild parcel
the what now?
cinder cradle
to fit this
wild parcel
ah, isn't that the unity avatar system thing? I've actually never used that, i'm now guessing that's what VRC uses...?
cinder cradle
if you want perfect rig follow it
wild parcel
lol ok
devout scroll
standard unity humanoid rig
check pins in #avatar-rigging for hierarchy you need
that plus fingers
proper wyvern
For once im gonna ask for help. How to make the snap to tool to work with a sculpt? Its not listening to me and I REALLY dont want to decimate, merge by distance and manually move each vert like I have done before since that took like 2-3 weeks on a simple clothing piece... 😅
Like ill do it if I have to but I know theres an easier way to do this.
Just need to somehow make it work.... 🤨
 muted raven
Ok now texture time lol
 spiral sigil
how the fuck do i do this or get someone to do this for the bones https://sketchfab.com/3d-models/harrison-boyd-0f2ccc0ec15649e78bba58e0579c8dd3

A character I made for VRchat - Harrison Boyd - Download Free 3D model by JingleJosh (@JingleJosh) [0f2ccc0]
it looks good
i just can't rig the bones by myself because it's not in a t pose
 slow hound
@spiral sigil The model is in T pose. It just has a loaded pose. You can select "rest position" instead of "pose position" in blender to see it better.
 quaint jasper
Big fix button at the top
spiral sigil

uhhhh
i am confused
i do not see it
i dont use blender
nvm i found it
it was hidden
aand my blender crashed
my blender crashes when i click the fix model button
just instantly
the hell
:(
 delicate surge
anyone? can help me find the ear parts source

Like this girl - Mouse ear
I wanna find that ear source
desert whale
the vrctraders discord is for that kind of paid work
flat fossil
That's a fun looking model @spiral sigil
spiral sigil
yes
but i cant get it working because i dont know anything about bone rigging and stuff
so i want to get someone to help me or do it for me
lol
i like it
chrome hare
i have finished another model
and i will never texture it because uvs are a disaster
chrome hare
 flat fossil
chrome hare
i have finished another model
and i will never texture it because uvs are a di...
flat fossil
chrome hare
i have finished another model
and i will never texture it because uvs are a di...
UVs are really not that bad. You just have to make proper seams. It's like drawing the edges on a cardboard box, if you've ever done that.
devout scroll
proper wyvern
For once im gonna ask for help. How to make the snap to tool to work with a scul...
what are you trying to do
 fervent light
No, it's an issue with the weighting. Whether you like it or not.
 halcyon nexus
it feels like every day i get close to having the motivation to work on my avatar, someone has to go and do something that makes me not want to release it, either public, or otherwise
obsidian nova
Release it
halcyon nexus
i don't want anyone to mistake me for being a "rich artist" when i'm just a miserable disabled vet barely scraping by
desert whale
whatcha talkin bout willis, I mean what is this about being "mistaken for a rich artist"
is your avatar Rihanna or Kanye West or someone famous
halcyon nexus
one of my friends released their first avatar, and one of the first people who bought it, they uploaded it onto google drive so that they could give it to their friends for free, told my friend that they were "robin hooding" from a rich artist to give to people who couldnt afford the 20 dollar avatar
desert whale
ah, piracy
halcyon nexus
but this is what i'm working on https://cdn.discordapp.com/attachments/788250094293876766/793370758834814976/unknown.png
 desert whale
that's not being "miskaten for a rich artist" it's just a supper shitty customer being an asshole (and opening himself up to lawsuits and DMCA takedowns I guess)
halcyon nexus
something that is good for people without full body
desert whale
so are you a vet...erinarian?
proper wyvern
devout scroll
what are you trying to do
Retopology. Kinda wanna learn that but the tutorials ive watched dont really tell me why the snap to tool doesnt listen to me. Like I make that one face and then im supposed to snap it to the mesh but it just doesnt snap.
devout scroll
there's a few things to it
i forget
you either enable snapping or hold ctrl
you can also try shrink wrap modifier with it
alternatively you can look into the poly build tool, i never used it
but it seems to be good for retopo
 lusty geyser
First retexture, I say it looks pretty okay. Would like some opinions on it and ways I could possibly make it better.
 spiral sigil
@lusty geyser Is that part of the chest clipping through? If so you might want to delete the body thats being covered by the hoodie so it doesn't clip
spiral sigil
Take it into blender, use xray mode to see the vertices thats being covered and simply delete them.
lusty geyser
Ah aight
spiral sigil
😄
lusty geyser
So how does one import the model in the unity project to blender..?
I tried looking up guides but they didnt help
 narrow cosmos
lusty geyser
So how does one import the model in the unity project to blender..?
narrow cosmos
lusty geyser
So how does one import the model in the unity project to blender..?
Not sure on blender but for Maya I just use File Explorer, find the FBX/OBJ, and drop it in Maya
spiral sigil
Okay so redoing the model a little bit.
Made the arms longer and hands smaller aswell as the legs and feet

Also I'm going to redo the UV Map since the Last one was Shoddy
chrome hare
good luck with that
modeling is fun but i'm afraid i'm not going to bother with it anymore solely because of uvs
flat fossil
chrome hare
modeling is fun but i'm afraid i'm not going to bother with it anymore solely be...
That's too bad. :v
chrome hare
it is
even with seams it just doesn't wanna play nice
tbh my models are just a bunch of solid colors anyways but the sdk screams if you have more than 4 materials
flat fossil
If you want to I could show you the basics of uv unwrapping.
flat fossil
chrome hare
even with seams it just doesn't wanna play nice
I honestly.. Like.. My first guess would be that you didn't apply the scale on your mesh(es).
That's something that screws with almost everything if you don't watch out.
chrome hare
scale?
flat fossil
Yeah. If you don't apply scale then the scaling applies to everything you do, stretching from uv unwrapping to sculpting.
It's awful.
flat fossil
chrome hare
scale?
Here, I made a simple lolipop model as an example.

The scaling is way off because before I started editing the mesh in edit mode, I used scaling to get it in a favorable shape to start off with.
The height in particular really stands out in the uv unwrap. Note that of course, depending on however it's scaled in your project will have the uv map deformed differently.
 spiral sigil
I've screwed this up big time now and I don't want to redo all of it
flat fossil
Go to object mode in your 3D view, select your mesh and apply rotation and scale and try unwrapping it again.
 chrome hare
oh huh
flat fossil
 flat fossil
spiral sigil
I've screwed this up big time now and I don't want to redo all of it
flat fossil
spiral sigil
I've screwed this up big time now and I don't want to redo all of it
Sorry, was in the middle of explaining this, what went wrong exactly?
flat fossil
chrome hare
oh huh
Speaking of, rotation can also cause it to be weird, that's why you apply rotation and scale.
chrome hare
would my model being made out of several objects joined together also be screwing with things
flat fossil
You mean you joined the meshes into one mesh?
chrome hare
yeah
flat fossil
Doesn't matter as long as the mesh' scale is 1.
neat viper
I tend to unwrap the individual parts first, then join them and re-unwrap it afterwards (though how well that'll work depends on what your model is probably?)
flat fossil
neat viper
I tend to unwrap the individual parts first, then join them and re-unwrap it aft...
This is the proper way to do it if you want to join meshes together btw.
chrome hare
i see
flat fossil
That way you can have all the parts in a proper position and rotation to do the unwrap.
Once you got everything right you can join the objects together.
Very important to know especially if you're creating props.
spiral sigil
flat fossil
Sorry, was in the middle of explaining this, what went wrong exactly?
I put the headphones on the head and I've messed it up since I can't select them to remove em

If I try to select them.
They drag the face with it
I can't seem to fix it
If not I might have to redo the headphones
flat fossil
spiral sigil
I put the headphones on the head and I've messed it up since I can't select them...
Go into edit mode in your 3d view with that character selected (I'm assuming it's one mesh).
spiral sigil
flat fossil
Go into edit mode in your 3d view with that character selected (I'm assuming it'...
Yeah I've been trying that, It's like trying to find a needle in a hay stack
flat fossil
Then press L while hovering over the headphones with your mouse and in the little window select "normal" on the Delimit setting like in the picture.

Selection mode to faces and x-ray mode off is the easiest to do this with btw.
Then once, the headphones are selected (which they should), press P on your keyboard and Separate by selection.
 spiral sigil
Oh I'm not on uh Blender im on Maya
flat fossil
Oohhh,
spiral sigil
Also.
Belnder as a X-ray mode
flat fossil
I don't know anything about Maya.
Should be similar, just different terminology, shortcuts and practices etc. x .x
chrome hare
:D
 flat fossil
spiral sigil
Also.
Belnder as a X-ray mode
flat fossil
spiral sigil
Also.
Belnder as a X-ray mode
Yeah, of course, have it in the picture right there.~
spiral sigil
hang on lemmie google maya x-ray mode
flat fossil
chrome hare
:D
Heyyy, I assume it was a success then?~
chrome hare
yeah
neat viper
@spiral sigil this might help? o: http://forums.cgsociety.org/t/how-to-select-linked-geometry-in-maya/1574791/3
neat viper
chrome hare
:D
cool! c:
flat fossil
chrome hare
yeah
Awesome!~
Make sure to make as much use of the texture as possible of course, want to have certain parts of the mesh have more detail? Scale them up a bit in the uv editor if you have some space left!~
spiral sigil
neat viper
<@456226577798135808> this might help? o: <http://forums.cgsociety.org/t/how-to-...
ayyy!

It worked
latent mesa
I need help. I extruded in parts and everything was looking good until I started sculpting . everything turns to ribbons. help
 neat viper
spiral sigil
ayyy!
neat viper
spiral sigil
ayyy!
cool! c:
latent mesa
neat viper
cool! c:
I'm watching a tutorial instead of teaching myself... I might have to restart completely unless I get some help /cry
neat viper
sorry, my comment was meant for another user - not super sure how to help in this case o:
latent mesa
neat viper
sorry, my comment was meant for another user - not super sure how to help in thi...
The tutorial I'm watching seems to be a lot less of a headache, and will greatly expand my skills as a VRC content creator, so no biggie ❤️ Still difficult to walk away from hours of progress
neat viper
cool! c:
chrome hare
i'm guessing it's better to weight paint meshes before merging them too
chrome hare
well regardless of whether it melts ingame here's this

the skirt doesn't move with the leg well but what can ya do
latent mesa
chrome hare
the skirt doesn't move with the leg well but what can ya do
add a subdivision modifier and improve the weight paint after
quaint jasper
Is it smooth shaded ?
 chrome hare
oh also the eye bones don't work but that's a minor issue
dunno how i'm supposed to orient those
chrome hare
ah, i just have them rotated 90 degrees
whoopsie
proper wyvern
@devout scroll When you mentioned that modifier I came up with something and now im just like.... O_O


It was this easy from the start??
 grand shuttle
Does anyone know why I can't see any colour when I import a FBX file form blender into unity?
latent mesa
grand shuttle
Does anyone know why I can't see any colour when I import a FBX file form blende...
Make sure your file path is set from auto to copy after clicking export on CATS and before clicking export on the pop-up
spiral sigil
Gonna have to redo the body since some of the polygons and completely messed up

well alot of it
latent mesa
spiral sigil
Gonna have to redo the body since some of the polygons and completely messed up
/cry I ran into the issue
spiral sigil
latent mesa
/cry I ran into the issue
It's complictaed this is low poly it should be quite easy
latent mesa
you can try the snap to vertice function, but sculpting will undo it
grand shuttle
latent mesa
Make sure your file path is set from auto to copy after clicking export on CATS ...
ooh ok I didn't know you had to export through cats, so I tried and I also chose copy on path mode like you said but it stil doesnt work?
all the textures just show up grey
latent mesa
grand shuttle
all the textures just show up grey
i noticed this becoming a common problem. switch the matrial look up back so it's no longer legacy. manually import your textures and assign them to the correct materials
grand shuttle
Btw this is a model I downloaded and it has all the materials already on it, could that be a reason?
spiral sigil
Yeah I'm gonna have to find the model so i can redo the body
latent mesa
grand shuttle
Btw this is a model I downloaded and it has all the materials already on it, cou...
 latent mesa
grand shuttle
Btw this is a model I downloaded and it has all the materials already on it, cou...
latent mesa
grand shuttle
Btw this is a model I downloaded and it has all the materials already on it, cou...
i dunno. just noticed an uptick in how often I need to assist with this
grand shuttle
Do i need to do anything in blender to the materials before doing this? I basically just downloaded the model through CAT and exported it to unity.
latent mesa
grand shuttle
Do i need to do anything in blender to the materials before doing this? I basica...
if your file path is set to copy, and you didn't move any of the locations of the textures, you should be fine
grand shuttle
hmm, weird
latent mesa
if you move the textures, the program loses the file path and will no longer be able to access the image
grand shuttle
Do you mean like if i moved the texture files around?
Cause I didn't mess with any of the files or anything like that
latent mesa
grand shuttle
Do you mean like if i moved the texture files around?
yeah. like you added it to your project with it in "downloads" then move it to "Blender files" for example. this will typically make you pink
grand shuttle
idk I cant tell what im doing wrong
It is my first time importing any model into unity form blender btw
latent mesa
voice chat/ screen share
latent mesa
k
grand shuttle
so unfortunately
latent mesa
dm if you wanna later
grand shuttle
i am still thinking what I could be doing wrong tho
latent mesa
i also have a server
grand shuttle
ooh nice
wait so ok, this are my steps that I just did: In blender i pressed export model on CAT and exported it into my unity project assets. Literally all i did
so idk of there is an extra step i missed or?
proper wyvern
The difference! 😫 💖

 prime zenith
Hello, i'm trying to figure out what this texture is, and how to use it.

it's marked as "abo" so i presumed it was meant to be an ambient occlusion texture
latent mesa
proper wyvern
The difference! 😫 💖
are you doing a re-topology?
chrome hare
octarian moment
prime zenith
octarian moment indeed
i'm trying to use the octotrooper and am flipping out over trying to get all the textures up
latent mesa
prime zenith
Hello, i'm trying to figure out what this texture is, and how to use it.
looks like a tenticle. i dunno how you'd use it. have you tried doing the uv wrap and map?
chrome hare
ambient occlusion may not be the worst guess
prime zenith
yeah just the game usually uses "ao" for ambient occlusion
and besides i have no idea how to hook it up
latent mesa
I'll probably have a better idea about your octo-arm, in a month. working on my second model rn
but waiting for help
proper wyvern
latent mesa
are you doing a re-topology?
Kiiiiinda... 😅 The actual way of doing it isnt working so im coming up with a new way of doing it. Gonna have a lot of merging etc to do at the end of this but hey if it works it works! 🤷♀️
prime zenith
Here's all the included textures
 latent mesa
prime zenith
yeah just the game usually uses "ao" for ambient occlusion
latent mesa
prime zenith
yeah just the game usually uses "ao" for ambient occlusion
assign it to your material in blender or unity. the mesh needs to be UV wrapped and map to it the texture

 latent mesa
proper wyvern
Kiiiiinda... 😅 The actual way of doing it isnt working so im coming up with a ...
latent mesa
proper wyvern
Kiiiiinda... 😅 The actual way of doing it isnt working so im coming up with a ...
best of luck. make sure to come back and flex when it's done. I like seeing stuff like that
prime zenith
i'm in blender rn but i'm not sure where to assign the ambient occluosion
proper wyvern
latent mesa
best of luck. make sure to come back and flex when it's done. I like seeing stuf...
I mean this definitely is faster than the actual way of doing it... Im pretty sure im going to regret doing it this way at some point but so far so good! 😅
 latent mesa
prime zenith
i'm in blender rn but i'm not sure where to assign the ambient occluosion
latent mesa
prime zenith
i'm in blender rn but i'm not sure where to assign the ambient occluosion
have you tried changing the texture of the material?
 prime zenith
uuh
no
sorry i'm a total beginner at this
i have a node for the image texture
but i don't know what to attatch it to
latent mesa
prime zenith
sorry i'm a total beginner at this
it's why I'm here. to make the process less painful than it was for me
proper wyvern
Im not the type to flex though ❤️



 latent mesa
prime zenith
but i don't know what to attatch it to
latent mesa
prime zenith
but i don't know what to attatch it to
click this and choose desired texture. do not move the file location after
 latent mesa
proper wyvern
Im not the type to flex though ❤️
latent mesa
proper wyvern
Im not the type to flex though ❤️
flex in private then? my dm's are always open
chrome hare
in one corner we have me making n64 tier models, in the other we have derev porting literal n64 models
latent mesa
@chrome hare then you have me in the corner eating paste
 prime zenith
latent mesa
click this and choose desired texture. do not move the file location after
prime zenith
latent mesa
click this and choose desired texture. do not move the file location after
where's that?
proper wyvern
latent mesa
flex in private then? my dm's are always open
Ehh... I feel like I shouldnt since this do be my first 3D model that ive made from scratch... I was thinking of making it public though once im actually happy with it... 😅 💖
latent mesa
proper wyvern
Ehh... I feel like I shouldnt since this do be my first 3D model that ive made f...
do eeeeet
latent mesa
prime zenith
where's that?
look at the first pic
proper wyvern
latent mesa
do eeeeet
I dont wanna flex... 😅 Its nothing special anyway..
chrome hare
i might public the bee, she was more of a learning model anyway, and quest users might appreciate it
latent mesa
proper wyvern
I dont wanna flex... 😅 Its nothing special anyway..
i meant share as public once you're happy with it. silly 😛
proper wyvern
latent mesa
i meant share as public once you're happy with it. silly 😛
Ah! Well that I was thinking of doing. :3 Leaving a part of me in VR Chat feels almost romantic... 😉
slow hound
prime zenith
but i don't know what to attatch it to
Have you tried using a "mix" node? Apparently, that is how you mix both the albedo and the AO, you then add the mix to the base color ref: https://www.youtube.com/watch?v=ReO5cezg2ig
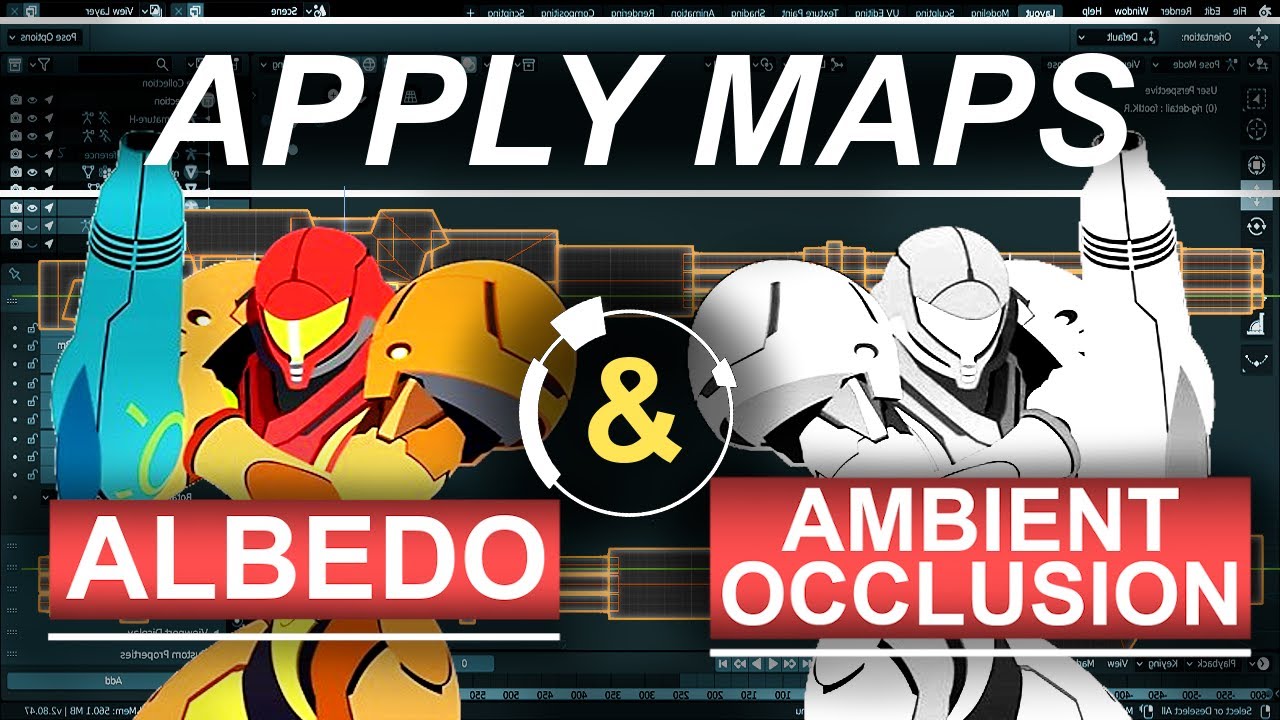
Learn everything you need to plug your Albedo and Ambient Occlusion maps into the Principled BSDF in UNDER 15 seconds! Hope it helps, and thanks for watching!
If you enjoyed this video, please don't forget to like and subscribe!
You can find my entire Blender 2.8 Speed Tutorial series here:
https://www.youtube.com/watch?v=f6vgICNCVxQ&list=PLZp...
latent mesa
slow hound
Have you tried using a "mix" node? Apparently, that is how you mix both the albe...
what is this sorcery? /cry
slow hound
They are nodes for the shaders, Titanic was using nodes and didnt know where tu connect the AO to, so this might help :0
prime zenith
slow hound
Have you tried using a "mix" node? Apparently, that is how you mix both the albe...
it made everything go super pale
slow hound
Have you tried changing the settings like the video suggested?
latent mesa
slow hound
They are nodes for the shaders, Titanic was using nodes and didnt know where tu ...
i've never seen that screen before. i feel intimidated
slow hound
That is usually for rendering in blender, not really needed for importing models to vrchat
slow hound
hmm I am not sure then. Not familiar with AO, sorry just found this quick way to mix it. If you are planning to put it in Unity, im sure there are many shaders that have a AO slot
prime zenith
thing is i don't even know if it is an ao anyway
the file is called "abo"
i know it probably won't matter but i just want to make sure i have every texture mapped correctly
latent mesa
slow hound
That is usually for rendering in blender, not really needed for importing models...
I gotta go check out this "rendering" you speak of. sounds like it will be handy some day
grand shuttle
so i am trying to export from unity to VRM using univrm but for some reaosnwhen I press theVRM menu I can't press export humanoid? like its grayed out
nvm
fixed
spiral sigil
Okay questtion.
When making an avatar for VR chat does all arms and legs n stuff have to be on a seperate mesh?
cinder cradle
no lol
latent mesa
spiral sigil
Okay questtion.
When making an avatar for VR chat does all arms and legs n stuf...
no. ideally it will be a single mesh in the end unless it's a toggle
spiral sigil
Ah right
cinder cradle
where did you got that idea.