#3d-modeling
1 messages · Page 99 of 1
 neat viper
kk, deselect the mesh on the left, then go to the Material tab on the right and click "Select", with the pants material selected
neat viper
one more thing, sorry lol - deselect the mesh again, just so I can see what the actual texture looks like?
neat viper
oh well lol
At the top again, click the image icon next to "Moonman_hands.bmp"
in that dropdown, find the pants texture
neat viper
if you want lol
neat viper
The UVS look like they're properly applied, so that's weird
sorry lol, can't really think of much else to help in that case
 cedar steppe
yeah i understand, its mind boggling
 spiral sigil
Can someone help me with that ? Please and thank you. It does it on every fingers of both hands
 bright barn
how do you fix this?
 tepid wagon
Looks like you have it weight painted not only to the leg bones but also to something else that your legs mesh shouldn't be weighted to so you have to remove those weights @bright barn
bright barn
okay
 fossil rampart
 winter night
hi guys! i plan on making a simple model involving mostly circle like shapes
you guys know how i can add circles?
winter night
ty
 unborn acorn
making my own xbot
 devout scroll
spooky
 gaunt abyss
Awesome, reminds me of the old "Elite Metrocop" models from Garry's Mod back in the day
spiral sigil
tuskan raider
 quaint jasper
Isn't it one of the masks from HL ? Looks neat
devout scroll
looks like a modified metrocop
neat viper
pick up that can
gaunt abyss
Yeah the elite ones I was referencing were modified metrocop player models for Garry's mod
 median pike
@gaunt abyss it is exactly the Elite metrocop
gaunt abyss
:D
median pike
gaunt abyss
It looks great
median pike
thank you
gaunt abyss
Cool to see something like that modernized too
devout scroll
never seen that metrocop type
neat viper
Was a heckin' old model in GMod, nostalgic tho o:
 thin bison
That mask looks pretty cool, I really like the detailing on the fabric.
median pike
@devout scroll to my knowledge it was cut content
 fervent light
Unsure where else this question fits. I'm trying to texture paint a sort of bruising effect on a model, but the only two approaches I'm familiar with are failing.
Overlaying the texture itself in a pretty rudimentary way as a detail texture leads to a lot of hard lines since the texturing for the body is disconnected into chunks (pic 1). Makes sense, but it's annoying to deal with.
The alternative would be to texture paint in blender, but that leads to hard lines when the mesh normals are perpendicular to the view (pic 2), and I can't figure out a way to paint through (or soften around) a mesh. I'm using blender 2.79 for reference.
Is there a better way to approach this? Or maybe a step in the same direction that I'm missing? Any help would be great.
unborn acorn
fervent light
Unsure where else this question fits. I'm trying to texture paint a sort of brui...
take the model into blender and go into edit mode, lect the area of the arm and right click and merge the vertices by distance and then press shift n to make sure the normals are good.
fervent light
unborn acorn
take the model into blender and go into edit mode, lect the area of the arm and ...
The normals are fine, and vertices are already merged by distance. It's just texture painting specifics at this point. Note again that I'm using 2.79
unborn acorn
fervent light
The normals are fine, and vertices are already merged by distance. It's just tex...
can you share the texture you're using?
fervent light
It's the code vein base
unborn acorn
fervent light
It's the code vein base
go into blender and go to where you have your shapekeys and vertex groups and find geometry data and try clearing custom split normals data
fervent light
unborn acorn
go into blender and go to where you have your shapekeys and vertex groups and fi...
Uhhh why are you having me mess with my normals? I'm asking for ways to better blend texture overlays. My normals are fine
unborn acorn
fervent light
Uhhh why are you having me mess with my normals? I'm asking for ways to better b...
because this is normals problem and not a texture problem since the textures are clean, I believe the uv map to be the problem since textures dont cause that type of issues, also check doubled faces
quaint jasper
export the uv layout and paint in a proper software ?
fervent light
quaint jasper
export the uv layout and paint in a proper software ?
Now there's a real suggestion. I haven't used anything like substance painter, any recommendations for free or open source stuff?
quaint jasper
I wouldn't recommend substance painter for painting over an existing texture, Gimp/Paint.net are free though
Substance has trial version though
fervent light
I've got krita for direct texture edits, but I'm not good at dealing with the sharp edges on seams (see example 1)
devout scroll
you can also do https://www.photopea.com/ as an online photoshop alternative
quaint jasper
krita is great
fervent light
It would be way better to have a direct alternative to blender texture painting
quaint jasper
You're not really expected to do that once a model has been UVd and textured, so i'm not aware of good direct alternatives
There might be blender addons that help with the painting process itself however
fervent light
Blender texture painting alone is so close besides my inability to paint through and around the mesh from the viewpoint. Ah well
Another question though, if I'm atlasing my materials, how do I indicate in the corresponding normal texture that a shader should use the vertex normals? I only have normals for some of my materials, but not all
unborn acorn
fervent light
Another question though, if I'm atlasing my materials, how do I indicate in the ...
make the atlas and take into and image editing program and place the normal maps over the atlas corresponding textures and then for textures that you want to use vertex normals just leave them as a blank background
also i just realised what you wanted to do before and I just realised you wanted to texture
fervent light
unborn acorn
make the atlas and take into and image editing program and place the normal maps...
Alright so just straight 0 alpha, got it
unborn acorn
yep
if that doesnt work then just fill the background as the light blue of the normal map
fervent light
Yep, not quite working. It filled in the remainder with dark blue, looks like perpendicular normals or something
That light is right in front of his face by the way
unborn acorn
did you fill the background with this exact blue?
unborn acorn
fervent light
Yep, not quite working. It filled in the remainder with dark blue, looks like pe...
it should be this blue and not any other
fervent light
I just looked it up now. rgb(127, 127, 255) a.k.a. #7F7FFF, got that as the background, we'll see how it works
Yep, that worked. Crazy how unity transfers alpha transparency to dark blue. Maybe it doesn't take alpha into account?
 merry vault
devout scroll
never seen that metrocop type
merry vault
devout scroll
never seen that metrocop type
It's a model removed from HL2.
It wasn't leaked until 2016. 👀
 vocal anvil
got borde and this happened lol
 twilit tapir
i tried to merge the hair in the body but it doesnt work
 lament pond
vocal anvil
spiral sigil
lament pond
vocal anvil
spiral sigil
Can someone help me with that ? Please and thank you. It does it on every fingers of both hands
https://cdn.discordapp.com/attachments/390924397726138370/796882074258767872/unknown.png

 obsidian nova
@spiral sigil Could you be more specific about the problem?
 marsh crypt
Hello! can someone help me with a little problem( don't know if that's the right Chan for that),i have problem getting transparent material to unity i think,and when i left them out of the Atlas they won't appear on the fbx model (i'm quite new to uploading models)
thanks in advance !
neat viper
Does it have transparency in Blender, but not in Unity? o:
if so, check to make sure that the shader you're using in Unity supports transparency (and also in the texture, make sure you're using Alpha as transparency, rather than black)
marsh crypt
in the texture,the background is transparent (i suppose ?)
it is transparent,will look for the shader solution
 ashen forge
marsh crypt
in the texture,the background is transparent (i suppose ?)
ashen forge
marsh crypt
in the texture,the background is transparent (i suppose ?)
You need to use shader transparency, many shaders have options for it, sometimes may be referred to as "alpha"
 visual vigil
https://cdn.discordapp.com/attachments/689952023210360921/797578999881531412/unknown.png https://cdn.discordapp.com/attachments/689952023210360921/797579093251457072/unknown.png https://cdn.discordapp.com/attachments/689952023210360921/797579152626548766/unknown.png


 neat viper
marsh crypt
in the texture,the background is transparent (i suppose ?)
neat viper
marsh crypt
in the texture,the background is transparent (i suppose ?)
In the texture in Unity, there should be an "Alpha as Transparency" checkbox o:
after that, select a shader with transparency (alpha) support
marsh crypt
i saw the checkbox,but cheking it give me this result,i'm looking for a good shader t the moment
marsh crypt
if its not to much asking,what shaders are you people using?
spiral sigil
generic stuff > usually standard unity shader
cartoonish / anime style > poiyomi
 young vault
For what you're doing you're looking for a cutout shader.
spiral sigil
poiyomi got a cutout version if you need one
young vault
I use Poiyomi for almost all my stuff personally, unless I'm porting something with color channel textures, then I do shaderforge.
marsh crypt
thanks for the recomandation !
young vault
Unity Chan is also a popular shader, mochie's, silent's shaders.
marsh crypt
i'll look for these shaders and keep them ,in case i might need them
and it worked !
almost done ,thanks all
spiral sigil
 onyx crane
idk if i'll ever actually set this up to be a quad avatar but eyyy (made from scratch)
design done by a friend
lament pond
And fully done
onyx crane
lament pond
And fully done
omg your render style is really cool, how do you get it to look so 2D? freestyle outlines and emission shader or?
spiral sigil
marsh crypt
it is transparent,will look for the shader solution
Use Mochie's Uber Shader.
lament pond
onyx crane
omg your render style is really cool, how do you get it to look so 2D? freestyle...
Blender internal and reversed solidify for outlines
onyx crane
lament pond
Blender internal and reversed solidify for outlines
Oh wow, have never tried blender internal just eevee and cycles. You got really nice results with the inverse hull technique, I'm still not great at it yet because it's so finicky. So clean 😄 great work
 midnight ledge
Does any one have an idea what would be causing the mouth to be so cursed?
I've tried setting the edges to smooth, but it appears they already are set to that.
It's an issue this model has always had that I've worked around by basically turning off all shadows and lighting in VRC.. but I sort of want to fix it properly now so that I can add shadows and outlines to the avatar and make it a look a bit nicer overall.
Disclaimer: I'm pleb at 3D modelling and I'm sort of just learning small things as I go. This is an imported MMD model.
onyx crane
@midnight ledge Give Edit Mode -> Mesh -> Clean Up -> Merge by Distance a go and see if getting those vertices to merge together fixes it. It might bonk your shapekeys though so check on them after and see if your avatar explodes. If they explode undo it
midnight ledge
Oooh that seems to have tidied it up a lot! I'll check out how it looks in VRC. Thank you!
onyx crane
you're welcome, good luck!
 twilit thistle
trying to make this .pmd usable for the unity SDK how can I do that? simply converting it to an .obj is fucking it up
spiral sigil
@twilit thistle neverexpott as obj unless u havea good reason. Use fbx instead
twilit thistle
Okay thank you! By chance do you know anyone who is taking commission for avatars? I don't really know what I'm doing @spiral sigil
 wispy orbit
visual vigil
wispy orbit
visual vigil
https://cdn.discordapp.com/attachments/709210012123398194/797893052991012874/unknown.png https://cdn.discordapp.com/attachments/709210012123398194/797893788336390174/unknown.png


 silent cloud
its done and im gonna retoscopy over it anyway but ive seen this happen before and im really confused to what this is because i didnt do anything
 maiden imp
does anybody have any good resources for someone brand new to 3d-modeling? I started working in blender/unity about a week ago in an attempt to make my own custom avatar. I have been learning every day but I've been struggling with modeling a lot lately, especially when it comes to clothing. Watched plenty of tutorials etc but I wonder if there is a https://www.w3schools.com/ equivalent for blender and avatar creation. (sorry if this is in the wrong channel)
 dense orchid
maiden imp
does anybody have any good resources for someone brand new to 3d-modeling? I sta...
dense orchid
maiden imp
does anybody have any good resources for someone brand new to 3d-modeling? I sta...
yeah same
quaint jasper
There's a lot of tutorials everywhere on youtube for that, but you need to know what you want to make because the process isn't the same for all types of models
maiden imp
ok, i have a really solid idea of what im trying to make, just really struggling with pulling it off. Do you have any recommendations for methods for making clothing from scratch that you would recommend? I have mainly been trying to work with cloth simulation but theres probably a better way i could be going about this. also for reference its fairly easy what im trying to finish (pullover hoodie and some joggers)
or at least i assume its fairly easy compared to some of the incredible work ive seen other players do
quaint jasper
Most people duplicate the body mesh and then alt + S to scale it outward, then modify that mesh piece for whatever they need to make
 steady turtle

im using this as an exampale for my model
this will take me awile
bc im gonna make modded emotes
ill chack in, in about a week
 clear geyser
Good luck gamer
spiral sigil
 lethal trout
Can anyone make me a custom avatar? My pc sucks and I don't have the skill to do so. I was also gonna pay for it as well
 dusty heron
lethal trout
Can anyone make me a custom avatar? My pc sucks and I don't have the skill to do...
dusty heron
lethal trout
Can anyone make me a custom avatar? My pc sucks and I don't have the skill to do...
- A bad PC is not an excuse, blender can run on anything, but no skill is an excuse.
- Top of #community-servers-old is a server named "VRCTraders". People do commissions there.
dusty heron
It's one of the largest servers in there, and it's there so most likely.
clear geyser
lethal trout
Are the commissions safe?
People must be verified by the server owner or mod to take commissions in that server. So as long as you make sure the person contacting you is verified it should be safe
 latent garden
Hey! I'm not sure which channel is best for this, but I want to create a shape key that changes the eye colour when I speak so I can use it as a viseme ingame. Is this possible? If so, am I going about it the right way?
I presume making an animation would be the latter but I can't use my mic that way... right?
 devout vault
gosh everyone is so smart in here
devout scroll
shape keys can only move vertices
 gusty shard
how do I make glass that you can see through please?
 solar fossil
use a transparent shader, or if you feel fancy find a glass shader
 deep dirge
latent garden
Hey! I'm not sure which channel is best for this, but I want to create a shape k...
deep dirge
latent garden
Hey! I'm not sure which channel is best for this, but I want to create a shape k...
Shapekeys can only move vertices. Something you can do is create 2 eyes with different colors, say red and blue and you start with red, on the basis shapekey the blue eye is inside the red one and scaled down, and you make a shapekey to scale the blue one up and red down. This will only give you two color states though, and will look stupid if the shapekey is animated in any way but totally on or totally off. For making it change when you talk, you want to edit the FX animation layer, add a parameter named viseme (check vrchat docs for name to be sure), create a layer, add states that transition to the different eye animation when a viseme is set to a number other than 0 or 1, you can change that too so like only viseme 5 changes eyes. You could also do something with shaders, meshes, hue changing, blend trees and stuff to get better looking more dynamic results. This is more suited for #avatar-help though.
latent garden
deep dirge
Shapekeys can only move vertices. Something you can do is create 2 eyes with dif...
Thank you so much! I thought I was right about shape keys only being for vertices, I was totally lost on how to get this effect but your advice will be really helpful!!
Thanks again ❤️
gusty shard
solar fossil
use a transparent shader, or if you feel fancy find a glass shader
thank you!
deep dirge
ia that from starwar?
neat viper
cool!
also nerp, that's a model based on a beta Metrocop model from Half-Life 2
 lofty crag
thats nice af
quaint jasper
Very clean, do you also plan on baking a bit of the emissive of the eye ?
median pike
@quaint jasper I tried doing it, but it looked very fake, its probably my approach being at fault though, So I can attempt again
 floral raven
What is the application I use for custom avatars
 jagged eagle
Sigh. Is there any particular reason lip sync would be "doubling" my default (silent) viseme/neutral face so that it's pursing my lips wayyy too much? It's like my character's making a warped kissy face.
Been trying to troubleshoot it for a bit now with no luck.
quaint jasper
What's your blendshape list ?
jagged eagle
too long because it's an MMD i'm polishing for a friend, but yeah
marked the ones i'm actually using for anything
I can see the lip sync working in-game, but it's working from a basis that's "doubled" like I said, so the dumb kissy/pouty face is messing everything
i've also tried disabling the eyelids moving with looking up/down in case those were accidentally affecting the mouth, but nope
though i hate to bother you again rubick lmao, you helped me enough in sdk2 x_x;
quaint jasper
wdym basis is doubled
jagged eagle
i presume the kissy face she's making okay, you're right, doubling the basis wouldn't result in kissy face
i guess something's affecting the basis and making it do that
sooo i guess dig through animations
quaint jasper
Nothing should be able to affect Basis
jagged eagle
yeah, as soon as you asked that i realized what i was saying didn't make sense lol
and sure enough proxy_stand_still is smushing her lips
this was one of those "really confusing until i'm forced to spell it out for someone" problems, thank you lol
median pike
@merry vault no, its just based off of it and the beta elite cp. I didnt use the original model at all
 spring crescent
I started 3D model maybe not to long ago like 3 or 4 months ago and this is what Im working on
 vernal lion
OKAY GUYS how do you go around making shoulder vertex groups the just dont feel natural when making them i can do ar and legs and everything else but shoulders are like HARD ..... HELP
 green ember
okay
 fiery dune
Can someone help me with making a head in blender I'm slowly dieing because of it
I'm trying to make this ahhhh
quaint jasper
Are you watching any tutorial ?
fiery dune
Yea :( I don't get it
quaint jasper
What do you not get
fiery dune
Everything but mainly how is it smooth and mirrored perfectly
 zenith aspen
hmm
@fiery dune for the basic head shape you can use a mirror modifyer and apply it so thast you have both sides are seperate so they are perfectly the same and use knife cuts for the mouth if its unequal on the face
and make the hair fit on the head
I don't know much about character modelling, thats just all ive learned from making cars in blender for like a year
ive made this model of an acura a few weeks ago and i'm wondering if I can make a driving car in vrchat using the model
quaint jasper
fiery dune
Everything but mainly how is it smooth and mirrored perfectly
You have plenty options for smoothing, mirror modifier is what you want for symmetry
zenith aspen
oh yeah
neat viper
zenith aspen
ive made this model of an acura a few weeks ago and i'm wondering if I can make ...
You could, but you'd have to use the Generic animator and make your own animations for it
neat viper
also, would recommend applying the modifer to properly mirror the vertices for exporting
zenith aspen
actually
try sculpt mode
instead of moving vertexes like when you are hard surface modelling
which is like
non-living things
 desert crown
does anyone know how to change the Shift hold key for rotating scene in blender to Alt? can't find it in the preference input
zenith aspen
i just press down my middle mouse button
isnt that ho your supposed to move your camera with
idk i use blender 2.8
 daring trail
Hey, so I'm currently working with a team, and we're making a horror map for VRChat. We are looking for an experienced World maker. If anyone is interested, DM me. If this is not the right place to post, I understand and will move it.
zenith aspen
what kind of horror map? i am good at world making but i make car racetracks
and roads in general
daring trail
It all takes place in a mansion
gaunt abyss
Haunted racetrack let's gooooo
daring trail
Lol
twilit thistle
@desert crown in blender go to move an object with the transform tool then click an object and right click to rotate around that object
desert crown
yeah i know how to do that, its just i prefer to hold alt while doing so. Currently Shift key is doing that in blender 2.8 and i need to swap both Alt and Shift key.
my middle mouse is currently used to move horizontally and vertically
twilit thistle
Oh I use 2.9 and I'm n00b as hell can't help you 😬
desert crown
rip
desert crown
thank you svel <3
uh...we don't talk about ripping game models in this discord sadly
ashen forge
working on a model of an OC.
Spoiler'd for some body horror/teeth
visual vigil
@desert crown why not, the entire game is pirated content
visual vigil
so its a "we do it, but dont talk about it" rule
neat viper
more of a heavily discouraged thing that people still do
ashen forge
Copyright and whatnot
 tame sinew
Would anybody be willing to help me with a small bit for a shield I’m making? I already have the base and the edges done, but there is one part that I’m struggling with. In this image, you can see the shield and the raised part in the middle for the arm to rest in.
And this is what I have so far. If somebody would be willing to help me, I would greatly appreciate it.
 verbal pebble
Okay I could bother the model author but this is more of a general blender question so I'd prefer to not do that
But I'm thinking of separating part of this mesh out onto it's own UV map but I'm terrible at Blender and dunno what I'm doing


I wanna display things behind the visor as if it were a screen, and with my limited knowledge I figure that making the mesh of the "screen" it's own texture would let me put whatever I want there and easily swap between them without having a bunch of 4k textures
verbal pebble
Kind of went down a rabbit hole, didn't work like I wanted
so.. back to square one, kinda
God Blender is such an unintuitive mess
quaint jasper
It needs its own material
verbal pebble
I figured that much, I'm just not sure if I can make a section of the main mesh use a diff UV map or if it has to be its own mesh. I'm basically a blender noob and the redesign of the UI is not helping matters lol
quaint jasper
I'm a bit confused by what you're trying to do here
If you want to make the visor transparent then you don't really need UVs, just a material with a transparent shader
verbal pebble
The visor glass is already semi-transparent, but I want to be able to display a variety of expressions behind it on the black surface. The current eyes are a separate mesh and basically only really set up for a single eye shape and texture, and only support blinking. I want to be able to use the entire surface as a "screen" that I can apply various textures to using expressions
This is a model I purchased, so I didn't create the meshes, I just redid the textures and such
 barren meadow
@verbal pebble You could duplicate some of the mesh of the face and transforming it just a bit above the original face. Then assign a different material in blender so that you could more efficiently handle material changes for animations with that small space. You could also just edit the part of the main texture where the face is for each expression you wanted and then just animating material changes with that.
It depends on how in-depth you want to get. You could even use a flip-book like effect with a particle system.
A lot of ways to accomplish that.
verbal pebble
would duplicated a section of the mesh be superior to something like separating the section?
barren meadow
Either works. Duplicating the section may look better. Just my opinion. You'd either use transparency or cutout for whatever expression you were using. A bit of emission.
Up to you,
¯_(ツ)_/¯
verbal pebble
I'll see what I can manage
I can't seem to get any edits to actually carry over properly
Like.. the mesh is a diff size in object mode and edit mode
neat viper
press ctrl + a, then apply all transforms in Object Mode? o:
sorry, forgot combination for a sec lmao
verbal pebble
yeah that didn't solve it
must be something about the modifier attached to the mesh
neat viper
Ah, right
Either apply the modifier (using image as ref) or click the Display in Edit Mode button, which is the non-blue button to the right of Remesh in my image
should carry over to Edit Mode then o:
probably™
verbal pebble
https://gyazo.com/2f0ded6850a74d98aab70eaaac7693b8.png yeah uh, this is probably what's up
 neat viper
huh
Try applying it, maybe? o:
verbal pebble
It doesn't apply
neat viper
"Modifier is disabled, skipping apply"?
also note, I don't know what the Armature modifier is properly supposed to do, but you could try adding a vertex group to that empty field, then applying
have ctrl Z ready though lol
verbal pebble
okay now it's behaving properly..
Just a matter of getting it to display through the glass like the eyes do
we are officially in business
maybe
oh god it gets weirder
there's a separate armature that's for importing to unity
So now I somehow have to get my new mesh onto that armature
@wispy kelp
I didn't wanna bother ya but like.. I don't understand what the workflow even is for making any sort of modifications to this
Besides the body textures, that was simple
verbal pebble

So uh.. trying to figure out how to get this mesh duplicated to the rig that goes into unity, then i'll be at least somewhat further towards my goal
Yeah I'm like.. super confused now
Hopefully Lux can shed some light on what to do
 vestal bloom
Pun intended?
 gray cave
2nd day trying to do this, so I have this issue where my custom atlasing has a bunch of black textures. The model on the left is what it looks like once it's been imported and fixed by CATS, and the one on the right is when I turn shaderless on. As you can see, even with shaderless on my atlas still ends up mostly black, the only parts that are black are the parts that are black on the left model. Can anyone help me here? I'm really stumped and I'm trying to get my materials down
quaint jasper
Question, why does it matter what it looks like in Blender
gray cave
because when I make an atlas the textures end up black, which also is the same in unity
if I don't make an atlas it works fine but then I have like 14 materials
desert crown
think that has to do with the textures separately itself
might want to convert each textures Before the atlas into png's rather than what file types they are currently whether they are bmp or some other stuff
in other cases, you may or may not have multiple Materials here, uncheck all of them and use Only 1 before the atlas
@quaint jasper oh yeah ruuubick i am finally starting to use blender 2.8, good bye 2.79!
though the reason that forced me was because i reset my pc and everything got deleted
so here i am starting fresh new, new stuff
gray cave
thing is, there are 13 materials but only 7 textures are provided in the folder with the model, so I'm not sure how to access the rest
desert crown
you gotta click on the black ones and apply the textures to it
so for example
Shirt and Skirt = clothes.png ?
when you think about it = Yes it is clothes
boots would also be clothes as well because there are no boots textures
same with cape and probably vest, leather straps
gray cave
I tried setting the texture to an image file but it still ends up black
desert crown
click on "shadeless" to update the preview in the scene
gray cave
it all works anyways when I click shadeless, the problem is that once I create the atlas manually, the textures end up black anyway
which is why I'm so confused
desert crown
try it again, but this time go through every black Materials as you saw there and apply the textures
hair to hair
gray cave
alright, I'll try thanks!
desert crown
yep just be sure to click on shadeless and then do the Atlas
this is shadeless just to remind you
and always Ctrl + S, always save
you never know when you'll crash unexpectedly or make a mistake
gray cave
ok so I did that, and everything that was black before has just vanished in the atlas now, I took a look and all the materials that are black don't actually seem to have a texture and are just assigned a solid colour could that be messing something up?
the parts that use actual textures work but the ones that use flat colours seem not to work
desert crown
you need to make sure its check marked in the atlas generated materials
but to use atlas properly You also have to combine all mesh in the scene
so press A and then Ctrl + J
gray cave
it's already in one body mesh I think
desert crown
try again just to be sure
gray cave
I did, nothing changed
again it's only the solid colour materials that turn out black or invisible
desert crown
Okay then in your atlas feature thing, once you click on update generated materials you'll see what can be thrown together in an atlas
If its the solid colours that turns out to be black or invisible
then you simply need to remove and then make a new material and apply the textures
it doesn't even have to be separate materials
for example Clothes are used for skirt and shirt right? Remove the black materials from both skirt and shirt and make a new Material on either one, name it something like Outfit and apply the Clothes textures to Material Outfit
forgot to mention that make sure you click on Seperate all materials before doing this in Cats plugin so that all of your mesh are separated
gray cave
I'm atlasing it manually cause CATS messes it up worse, also, only shirt uses at texture, and it uses it's own "shirt.png" skirt seems to just be a red colour material
desert crown
As a decently expert blender user, never ever use blank material solid colours for atlasing
so make sure you give Skirt Clothes texture and then UV map it into the red parts from what i am seeing
clothes.png does have some red parts
its complicated i know
gray cave
ah, I'm completely new to this, this is what came with the model >.< I gave skirt and the rest of the clothing clothes texture last time which is when it ended up invisible after I baked it manually
I clicked the separate by material and now my hierarchy looks like this, am I getting somewhere?
desert crown
yes so
this means that every parts of the model are now separated by materials in Your material folder or having their own materials of course
you can click each parts in the blender scene
anyway, What you wanna do is click on Each of those parts and Click the small X to delete the Black Materials
once that is done Your black meshes or model parts Should be gray, this is good
Now go through every gray mesh parts again and click the + sign on the top right in the Materials tab of course you know this.
rename it something like Outfit or Clothes
then apply the clothes textures
Once that is done, click on each of the parts that Relates to clothes for example...Shirt and Skirt
then choose Outfit material for both shirt and skirt
gray cave
Alright I'll give this a shot thanks so much
gray cave
ok, I did all of that to the letter, deleted all the black, made my own materials with the textures and it still ends up invisible
I think that the textures just don't apply right
 crude basin
Anyone know how to make the text not so "blurry"? I want crisp text
does the mesh need to be subdivided?
desert crown
@gray cave correct, which implies that there is something wrong with the textures
which i assumed it in the first place, to fix it you have to convert them into other transparent image file type and back to png
@crude basin click on the textures image files in unity and then to your right side you'll see something that says quality along with crunch or something
just change it to 4kx4k instead of 2kx2k
i highly recommended atlasing your textures though
gray cave
so I should convert the clothes and other textures to another format and then back? any specific format?
desert crown
i am unsure, but maybe bmp
you will have to find Which image file type that Supports transparent
png-32, png-24, png-8, webp
gray cave
so any of them and then back to png?
desert crown
yes
but png-32, png-24, png-8 are already png's, high chances are 1 of these three will work
its not .png to .png-32, the numbers behind it implies that there are certain type format for them like 32bit, 24bit or 8bit
usually programs like paint.net will allow you to "save as" to multiple types of format
desert crown
anyone know how to disable this in blender UV mapping? when i select a vertex, it keeps on selecting an extra vertex
 ember prairie
Does anyone know how to create nodes that allow for paintable layers like PS in blender?
@desert crown do you see a button that has two arrows pointing diagonally in opposite directions turned off/on? It's in the upper left corner of the UV editor
desert crown
oh is it because of that? yeah i have that turned on
ember prairie
it allows you to view which vertex is selected in the scene and the UV at the same time
turn that off and then select your whole model and try whatever you're doing again
desert crown
thank you both ♥️
 prime zenith
opened up my blend file, all limbs are stuck snapped upwards
brand new to blender so i don't know how to move them back or anything
can anyone help?
quaint jasper
desert crown
<@!97980768323633152> oh yeah ruuubick i am finally starting to use blender 2.8,...
Proud of you 
desert crown

 fallen current
I'm having trouble with textures. Trying to make a transparent window. It's transparent in Blender, but when it goes to Unity, it's opaque. Tried creating a transparent material in Unity, and it's see-through in the preview, but not VRChat.
 winter plinth
@fallen current thats still opaque. you need to go to the color and change the alpha to a lower value
zenith aspen
help
first time character modelling
the hand looks like its detached from the body
its subsurf btw
obsidian nova
Not bad at all for your first time...
zenith aspen
Ive been doing cars for a year in blender
so I know basics
but i don't know characters or animals for that matter
obsidian nova
Oh well, you should probably combine the hand & the wrist...
zenith aspen
uhh
its a skin modifier for the body
i don't think i can
actually
might just make the arms seperate
but then that wil just happen for the arm to the body
obsidian nova
It’a a cool look ✨
zenith aspen
this is funny because my mom needed character models in 3d for a cartoon or something and she told me to do them and she would pay me so im trying to build a character
obsidian nova
I would just modify a sketch fab model if I I were you, but I applaud your bravery, trying to model it all from scratch. 💫
zenith aspen
lol
she said it would be a high pay and i desperately need a better pc for vr and more graphically intense games
so
but its not that high
she said it would be like 50 bucks if it's good and she likes it
and if I know how to make these i can make a ton of money
lol
so thats why i want to build it from scratch
because its also a personal challenge that i did that was to do it all from scratch
 slim tundra
Hey guys
I'm making a 3D Model of a character for VRchat
But I have an issue. Should I model in the inside of the eye sockets or not?
zenith aspen
you probably don't need to
you can just make the eyeball a sphere and make it rotate
or
slim tundra
huh.
I've been noticing that in VRchat a lot of avatars use some standard green eyeballs
Is it possible to use some custom eyeballs?
slim tundra
Sorry if my questions are a bit... silly
zenith aspen
hmm
 umbral niche
is there a way to lock a shape key's position? i'm trying to get a smooth transition between two states, but tired of having to readjust the shape key if i alter the basis
desert crown
basis is always blank and must not be touch, with that said. In order to lock a shapekey's position, simply enter the value 1 for That shapekey and then click on the drop down arrow somewhere on the right hand corner then click to "Add shape key mix" or something like that
prime zenith
slim tundra
But I have an issue. Should I model in the inside of the eye sockets or not?
inside is not nescessary, you can have pupils as a model and have them move. Or you can cave out the inside and make actual eyeballs. Up to you.
prime zenith
ashen forge
Nearly done
is my video player broken or is the video a still image?
ashen forge
prime zenith
is my video player broken or is the video a still image?
Should be a video? Works fine on mobile.
I dunno, my video editor has been on the fritz lately
spiral sigil
how do I fix a model being shaded like this
or moreso the mesh being built up out of squares
dusty heron
spiral sigil
how do I fix a model being shaded like this
Right click > shade smooth
As for the quads, in edit mode, right click > triangulate faces
You should do both because unity doesn’t like quads that much.
spiral sigil
dusty heron
Right click > shade smooth
As for the quads, in edit mode, right click > triangu...
Once I hit crtl+T it does pop up with triangulate, however I can't figure out how to apply the modifier and the quads remain cubed / visible.
dusty heron
spiral sigil
Once I hit crtl+T it does pop up with triangulate, however I can't figure out ho...
Are verticies merged?
spiral sigil
That may be the issue, there are a lot of blue lines over the faces
 hallow bough
Those might be sharpened edges
spiral sigil
devout scroll
why are all your edges marked as sharp (cyan)
spiral sigil
because the model was pulled from unreal engine w/ umodel
devout scroll
select everything and clear sharp then
hallow bough
Clear sharp edges, ditto.
devout scroll
you wouldn't really need to triangulate it as it does that on export anyway
triangulating just makes it more annoying to select things
hallow bough
The more you know :)
spiral sigil
@hallow bough @devout scroll thank you very much lmfao I feel so dumb
devout scroll
blender is a big toolbox
spiral sigil
i didn't know where to rummage but hey that worked and it's all merged nicely
hallow bough
Not dumb just a beginner XD You learn as you go!
devout scroll
stuff's fairly straightforward if you know what to use and you learn that with time
when in doubt, F3 and search
spiral sigil
still weird that it extracts everything all marked as sharp but hey it works
so thank you again for your time and your help
devout scroll
👍
hallow bough

 ashen sequoia
ok, so apparently unity doesn't want to work with me, can i get some help?
devout scroll
slim tundra
prime zenith
inside is not nescessary, you can have pupils as a model and have them move. Or ...
Huh. Thanks
hallow bough
Is there other techniques to doing 2D Visemes? I have done the usual shapekey method of pulling the shape forward from inside the head, however there is always too much of a delay of the shape coming out of the face. Any links/advice are appreciated 🤗
quaint jasper
You can do material swapping or animate the UVs in 3.0
hallow bough
Ah great! I'll be looking into 3.0 further then! Thank you Ruuubick 👍
slim tundra
WIP... this is really fun ngl
 sonic frost
prime zenith
sonic frost
prime zenith
gecks
spiral sigil
gusty shard
l eg
 unreal bramble
i made a lilo and stitch stitch model if anyone wants it
merry vault
The Pussy Hunter.
Had to give myself a constraint of only using cubes and then this happened.
unborn acorn
making myself a robo avatar
 gritty turtle
Can someone make this into a 3D model for $30
neat viper
@gritty turtle I'd recommend going to #community-servers-old or VRCTraders for commissions, though do note that prices easily start in the hundreds
gritty turtle
Oh ok
unreal bramble
@gritty turtle usually for a 3d model like that i doubt you will get it for under 100$ tbh
but vr chat has a commissions page on their site
check pinned
 echo anvil
i'm probably doing something horrendously wrong here 😓 how do you apply textures to models?
gusty shard
echo anvil
i'm probably doing something horrendously wrong here 😓 how do you apply texture...
I'm not sure in blender, but is there different viewing options? In maya if you click 4/5/6 you get wireframe, normal and shaded views, and pressing 6 usually gets the textures to show up
visual vigil
Node editor!
gusty shard
Also is the model uved?
visual vigil
https://cdn.discordapp.com/attachments/752998896950706307/799936582840221706/unknown.png https://cdn.discordapp.com/attachments/669760923321499678/799935360913637376/unknown.png https://cdn.discordapp.com/attachments/669760923321499678/799935808353468436/unknown.png https://cdn.discordapp.com/attachments/709210012123398194/799931751932887080/unknown.png


 regal flicker
Interesting
 spiral wind
phishe
regal flicker
Cats like fish)
spiral wind
yes
 white moth
gritty turtle
Oh ok
white moth
gritty turtle
Oh ok
I doubt you’d find someone willing to do it for that cheap, but you might get lucky and find someone who places no value in their time or work - good luck!
unborn acorn
solar fossil
eyyy noice
spiral sigil


 slim pawn
So when I export this from 3dsmax
I get this in Unity
Anyone know what may be going on here
neat viper
Are the green materials imported into the project? o:
you can also go to the mesh in the Asset Browser, into the material tab and use custom materials there
which should dump the materials into the asset browser
slim pawn
I have it set to export the Materials from 3DSMax
When I export the textures, they all have the wrong Albedo
Looking at the materials in 3DSMax, they all have the wrong albedo, tiling, and offset
If I correct those the model looks fine
 unborn cedar
if i have multiple UV maps in blender and i want to copy the position of some vertices on one map to another, how would i do that?
spiral sigil
https://i.gyazo.com/f0e401f51ef6f01a87d7925265d4c5b3.png
https://i.gyazo.com/172de15f1bff70c5601119571176faed.png


 latent mesa
unborn cedar
if i have multiple UV maps in blender and i want to copy the position of some ve...
latent mesa
unborn cedar
if i have multiple UV maps in blender and i want to copy the position of some ve...
are you wanting to change the texture?
unborn cedar
i have 1 main mesh and i added something to it and i wanted to include that on the main texture for my model
latent mesa
Possibly change the texture from within the material and move the vertices in UV map to where you want them on the new texture
unborn cedar
ill try around
latent mesa
unborn cedar
ill try around
lemme know if it works. I don't want to facilitate crappy advice lol
unborn cedar
i got it working
i had to split the mesh again
and then rename the uvmap of the thing i wanted to join to be the same as my main mesh
and then i was able to just merge it
but thanks for checking in
unborn acorn
spiral sigil


My frog army grows with this new addition! 🐸✨
Introducing - Froggy Bomber! A poison dart frog with an explosive personality and a nasty trigger finger.
#blender3d #blenderart #frog #froggy #guns #ArtistOnTwitter #3dart #3dmodels #commissionsopen #Commission https://t.co/pJ7QCIAtNL
 Twitter
·
Twitter
·
 warm mango
Hey can anyone help me? i have this model i made and i cant get him out of zbrush in a useable way. Its my first time with zbrush so im certain hes got mistakes but im trying to make it work. Hes about 3mil poly and he literally wont unwrap in one piece without crashing or ruining the textures. I've tried unwrapping the parts separately but then im lost as how to compile them for baking in marmoset later.
this is my guy
hes like all done and perfect in zbrush and im happy with him and yet i cannot free him from this prison
i managed so far to get him from 8mil polys but any further and he loses things like his glasses and shirt buttons
quaint jasper
Time to learn retopology !
The vrchat "limit" to be under very poor and not be hidden by default is 70.000
So yeah, buttons will have to go down in quality
as well as the rest
also learn about normal baking
 meager trail
quaint jasper
The vrchat "limit" to be under very poor and not be hidden by default is 70.000
meager trail
quaint jasper
The vrchat "limit" to be under very poor and not be hidden by default is 70.000
You're hidden by default if you're over 70k tris? The documentation says "On PC, the default Minimum Displayed Performance Rank level is set to "Very Poor". Currently, no avatars will be blocked by default due to performance ranking on PC, unless you've enabled the Minimum Displayed Performance Rank system." I thought if you're over 70k you're just automatically marked very poor but not hidden? Am I misinterpreting this?
 coral current
meager trail
You're hidden by default if you're over 70k tris? The documentation says "On PC...
coral current
meager trail
You're hidden by default if you're over 70k tris? The documentation says "On PC...
You're right
spiral sigil
most people that use the safety settings
are blocking "very poor" avatars by default
warm mango
i thought the limit was 7k wait hold up
i planned on baking but i cant get him to export right aaa
meager trail
coral current
You're right
Thanks
VRChat
The Avatar Performance Ranking System allows you to see how much a user's avatar is affecting performance via analysis of the components on that user's avatar. You can also use it on yourself to see how performant your avatar is. This system is provided to inform users what is likely the most perfor...
warm mango
gotcha
warm mango
quaint jasper
Time to learn retopology !
i actually did a little retopology on him to get him down from 8mil to 3mil, but the buttons literally disappear when i remove any more. maybe im doing it wrong idk. but the plan was to get the high poly out so i could bake it onto a low poly one i have which i already settled for not having any buttons. but i cannot get him to unwrap or export right.
idk man my head is fried at this point
quaint jasper
Yeah definitely can still retopo a ton and key glasses/buttons
devout scroll
If you're doing it automatically, details might disappear
If you do it manually or find a way to optimize your settings or whatever, you can easily go down to around 20k with a model like that
warm mango
Manually like with the remesher guides brush? or is there a better system? because at this point ill take the time to work on it, ive already sunk days into this and im too stubborn to leave emptyhanded
warm mango
quaint jasper
Yeah definitely can still retopo a ton and key glasses/buttons
I ACTUALLY JUST PROCESSED THIS jdkbnvakj, keying them is such a big brain move sorry im stupid
quaint jasper
you should be using zremesher and guides yes, manually will always be better though obviously
warm mango
my one concern with doing it manually is i have no clue what im doing and im worried ill end up making the topology worse if it all relies on me lmfao
but yeah manually doing it ill try, i found a tutorial and ill do my best. Thanks
spiral sigil
Does anyone have tips on something like making socks into the shape of the model’s legs? I’ve downloaded some thigh highs from MMD and put them into blender. I’ve been trying to shape them for a while manually and it’s driving me insane  if it’s not possible, that’s fine. But I’d REALLY love to not have to do this manually lol
devout scroll
try the shrink wrap modifer
or use snap to face with project individual toggled
and move vertices manually
but the best way is just copy the legs and scale them out a bit, then unwrap them onto your sock texture
it's a bit harder tho
 warped merlin
I got this new avatar idea. Basically there's this basic e-girl except shes got huge boobs. I mean some serious honkers. A real set of badonkers. Packin some dobonhonkeros. Massive dohoonkabhankoloos. Big old tonhongerekoogers
 azure rain
that's probably already been trying a kajillion times
warped merlin
nah, it's brand new
azure rain
you just haven't seen the big booby avatars because they're against terms of service to wander around public rooms like that
devout scroll
still happens
azure rain
& easily googleable
spiral sigil
Some of the big booby avatars I see in public are so cursed
spiral sigil
devout scroll
but the best way is just copy the legs and scale them out a bit, then unwrap the...
I’ve tried the other two methods and they didn’t work. can you explain this one a little? I know how to select portions of mesh,, but what about the unwrapping bit???
devout scroll
cuts up the mesh and makes it flat so you can tell it where it is on the texture
but if you don't know what that means it's probably a bit advanced
spiral sigil
Very much so I’m still very new to this
Maybe I’ll find a guide on it. I’ll see what I can do
devout scroll
you could try, it can get a little complicated but you already have the sock texture so you know where you want stuff to go on it
spiral sigil
yeah. I have exactly where I want it. It’s just the.. doing it part lol
gusty shard
@warm mango have you tried decimating the mesh? And tbh it might be easier to make lowpoly buttons and glasses on the low poly of the model, since baking high to low will just make things that stick out on the high poly go flat on the low. That's how baking works
warped merlin
azure rain
you just haven't seen the big booby avatars because they're against terms of ser...
I guess that you just not recognize this meme
warm mango
Yeah i tried decimating as much as I could without destroying in zbrush, and blender won't even work once he's imported
I'm gonna try like manually making it lower poly. But I really don't know how to keep the hi res textures. Even in the 3mil version the textures are starting to tank and get real pixilated.
 still wadi
U can defo get him low enough just need to manualy retopo
warm mango
still wadi
U can defo get him low enough just need to manualy retopo
Thats the plan aa
Its just ugghh
Its like you get the model exactly how you want it to be and then you find you did everything wrong and basically now have to work backwards and do everything 8 times it sucks so bad.
I've never used zbrush before tho. Maybe next time I won't be so clownlike. But damn I also cannot be bothered with this again lmfao
gusty shard
you're meant to texture separately. in zbrush, maya, blender ect you should only really be concerning yourself with the model itself
then you UV it, and you put the texture on the UVs
also might be coming out pixellated because your edges are hard, you need to pop it in maya or blender and make the edges soft, otherwise you'll see all the squares and triangles
 high ferry
warm mango
gusty shard
also might be coming out pixellated because your edges are hard, you need to pop...
high ferry
warm mango
gusty shard
also might be coming out pixellated because your edges are hard, you need to pop...
I get you, ill def keep in mind
if yall want an update i managed to decimate it down to only a few 160k polys without much loss and im gonna try and bake it onto something lower for vrchat? i assume thats the move, but any idea what sort of poly count the lower poly should be aiming for for decent performance and not a shitty looking result?
gusty shard
warm mango
if yall want an update i managed to decimate it down to only a few 160k polys wi...
nice work! I've seen people say you should aim for 70k and under, and that's a fairly good shout. you could port your high poly into maya or blender, make the high poly 'live' (unsure if this is a thing for blender. basically makes the high poly unselectable, so you can draw the lowpoly on top), then you quad draw your lowpoly mesh over the high poly. export both out (make sure the pivot point for both models are the same, its a huge help) then bring them into whatever baking tool you're using- popular ones I can think of off the top of my head are marmoset and substance painter, unsure if blender does it natively tho. and voila! high poly to low poly c:
here's an example sculpt I did in zbrush
then here's the lowpoly baked version with textures ( bad UVs just ignore those xD)
warm mango
i have marmoset that i plan to use omg, ill take it into blender, this is a lot of help thank you!
gusty shard
np! marmoset baking is pretty neat!
warm mango
any idea why marmo cant write the file?
i keep getting this issue, its previewing fine but no matter where i tell it to save the file it fails
(its not just albedo its the normals too)
it just will not save anything lmfao
google has literally nothing on this so im lost again. hhrn things were so much more simple when i just used blender fbadjskbf
gusty shard
idk maybe you can bake in blender?
is there space?
and have you baked? I don't have marmoset on my pc to check a bake process for ya ;3;
warm mango
there should be plenty of space hh
gusty shard
have you UVd the low poly mesh?
warm mango
i click bake and get that error but everything else working fine, like it gives a preview and it looks exactly how i want, but it just wont save it
i might be able to do it in blender actually let me try
gusty shard
do you have the bake set up?
and or show me the left bit of marmoset with the lights and such cx
warm mango
i just closed it sbcjkadsn sorry
im gonna try blender and if that doesnt work ill be back with marmo
gusty shard
np! probably google if you can do it in blender haha
warm mango
i did already thats why im trying it aaa
gusty shard
ah good!
median pike
@gusty shard yes, blender can do retopology and baking
I would even argue that the results are better than in substance
nowhere near marmoset though
gusty shard
fair enough!
coral current
Manual Retopology is a pain lol
Pays off though. Looks way better than to decimate it
A lot of times not all though
 worn grail

what do you think guys
trying to make an alien with muscles
btw I have a question
How can I get here

I never knew how to get that mode
like how may I get that color
neat viper
That image is taken in ZBrush, it looks like
which is a vastly different modelling program lol
either that or the material looks very, very similar to ZBrush's default material
worn grail
I see and what do you think about my alien
worn grail
worn grail
https://cdn.discordapp.com/attachments/800207073693925427/800830424116494346/unk...
^^^
neat viper
pretty cool! I don't personally do much sculpt-mode stuff so pfft
 calm hatch
Is ther anyone who could lend a hand with cloth simulations in blender? im having an issue with some clothing i want to make
 latent charm
worn grail
I never knew how to get that mode
latent charm
worn grail
I never knew how to get that mode
Look for this menu, mine's at the bottom but in the default blender setup it's at the top
silent cloud
can someone help with this? it doesnt seem to show texture paint on the face specifically
the face also appears to be slightly shiny for some reason but all shader settings are at 0
unborn acorn
silent cloud
the face also appears to be slightly shiny for some reason but all shader settin...
is the material assigned to the face?
 snow silo
hello everyone!
i'm requesting aid from people who have more knowledge onto 3d modeling about editing models themselves
i have some base knowledge onto 3d modeling and i'm briefly a programmer of various types of languages
tho, i'm having a really REALLY annoying problem with the head-elbows-waist-knees connection when applied from the Mixamo site, which is the one that gave me a great help onto making my model being "alive"
the problem stands from a tiny and brief part of the scarfs of the shoes being collided from the file itself, making believe from Mixamo that they are connected, so that part becomes stretched
second problem is that when the file is put into unity instead, it becomes a litteral megazord size from the power rangers (if not bigger) and i can't really help but use Mixamo to resize it (somehow it manages to resize it in whatever way it can)
my point is: any editor program that can fix that scarf colliding with the other and then i'm all good
lemme put a prenote here:
i can send the zip file with the model in because the model comes from a very old ps2 game, it has it's stuff that works on, it just need to be connected, plus among the errors i've seen in unity is that it missed it's waist
if anybody is willing to edit this thing and make it work i'd be litterally praising you from that day on and ever, i tried making this model work properly before, but i didn't wanted to bang my head like i did now.
thanks everyone for reading this.
unborn acorn
snow silo
hello everyone!
i'm requesting aid from people who have more knowledge onto 3d m...
you can dm me the zip and I can check it out and tell you how to fix it
worn grail
latent charm
Look for this menu, mine's at the bottom but in the default blender setup it's a...
thanks
spiral sigil
how long do I need to play to be allowed to upload my own avatars?
tepid wagon
@spiral sigil Till you get to New User rank, gotta hang out with other ppl though and visit different worlds, just having game open won't get you anywhere. Usually it will take 5-20 hours of gameplay and you need to be sign in with your vrc account
spiral sigil
I already posted this in another chat sorry but my VRM won't work like- I try to import it but it won't show up and says it's already there??
I made my own models in Vroid and I'm following a guide to make models rn but they don't discuss this problem..
devout scroll
post a screenshot
spiral sigil
When you wanna make an avatar but you use quest and are too scared and confused
unborn acorn
rendering is nice
thin bison
Truly majestic, though it looks like it's been caught in a press 😆 @worn grail
worn grail
thin bison
Truly majestic, though it looks like it's been caught in a press 😆 <@!295665222...
JAJAJAJAJA
🤣
Before was better
but
I didn't want to kill someones pc with all those treases
🤣
This is the base

 wintry vector
how come I can't select verticies on the face of my avatar anymore in sculpt mode? xD Its the same mesh, but I can only select certrain verts and not all of them
damnit blender
okay I noticed in solid view mode it only displays like this square area of the avatar
quaint jasper
Alt + H ?
wintry vector
doesn't do anything
quaint jasper
Do you need that camera for something ?
wintry vector
I don't see the camera in the heirarchy
quaint jasper

wintry vector
I don't even remember creating a camera or enabling this
quaint jasper
alt + B ?
wintry vector
okay
I can create a new one with Alt + B
but how do I just get rid of the camera entirely
as a workaround I can create one in view of the entire avatar, but I'd rather just turn it off
quaint jasper
if it's not alt + h i have no idea
spiral sigil
@quaint jasper Hey, can I dm you? It'll only be a minute
quaint jasper
If it's about modelling you can post here
spiral sigil
quaint jasper
If it's about modelling you can post here
Not exactly. It's more of a personal inquiry, community level.
quaint jasper
Ah then it'd go to the support/moderation inbox
spiral sigil
quaint jasper
Ah then it'd go to the support/moderation inbox
For something based on the outreach of creator platforms?
fervent light
Definitely seems like an appropriate thing to discuss in a development channel for 3d modeling
 near crown
verbal pebble
near crown
verbal pebble
I'm a dumb idiot when it comes to blender but I have a texture I'd like to select the alpha channel from to use as roughness, is that possible?
I know there's separate RGB, but that doesn't include the alpha channel
spiral sigil
I was wondering if anyone had any video recommendations on avatar modeling
Or if there were any "classes" covering the basics
@ me if you have any recommendations please
If that's not against any rules I missed
silent cloud
unborn acorn
is the material assigned to the face?
sorry for the late reply, yes i think it is
 misty tapir
verbal pebble
I know there's separate RGB, but that doesn't include the alpha channel
misty tapir
verbal pebble
I know there's separate RGB, but that doesn't include the alpha channel
Roughness is between black and white color, you can put the missing color in the texture to make it into roughness map
verbal pebble
It was just to test out my textures in blender
Unity standard shader handles the textures just fine
Well, Standard Lite cuz I was optimizing for quest
Also in this case, roughness was not the color channels
The metalness was the RGB channels and the roughness was on the alpha channel
verbal pebble
I uh.. think we're talking about different formats
misty tapir
Hmmm
verbal pebble
I'm referring to the Unity Univeral Render Pipeline format for metallic standard
which has an albedo texture, a combined metalic and smoothness texture, and then normal and emission textures
Both metallic and smoothness are grayscale but the former is on the RGB channels and the latter on the alpha channel
comes out looking like this, basically
 maiden folio
im doing an avatar and i just need to set up a blink for my avatar. Can i do this using only maya and unity?
devout scroll
yes
maiden folio
do i have to do a blendshape where both eyes are closed or a shape for each eye?
devout scroll
depends on if you're doing avatar 3.0
or 2.0
2.0 you need 4 blendshapes and they need to be the first 4 blendshapes in your list
devout scroll
blink left, blink right, lower lid left, lowerlid right
lowerlids can be empty but they have to be there
maiden folio
ok
devout scroll
or your avatar will use speaking blendshapes when blinking
i kinda forget the order but I think that's it
maiden folio
thanks! i wish there was some guide around for maya users but it's always super bad
maiden folio
there's also the eye blendshapes, i think you're meant to do one for the eyes looking left and right now?
devout scroll
nah
just blinking left and blinking right
or you can also have one that blinks both eyes and an empty one for the other eye
lower lid is a viseme that plays when you look down
it's supposed to be a light squint type thing?
i dunno, i've never seen anyone use it and it only caused trouble because av2 uses the first 4 blendshapes no matter what they are. clunky
maiden folio
i just wonder how you can have your character look around
not just a straight dead look all the time
i should look at a list of the visemes you can assign to your avatar
maybe the one im looking for is in there
devout scroll
you'd need a custom animation controller, which you can only do with av3
maiden folio
oof
alright, ill keep that for later
thanks so much for clearing up the eye thing
;-; now i need a user account to actually upload and test my thing
devout scroll
good luck!
 zinc jolt
so basically I've been working on realism

here's the idea; realistic human flesh for an uncanny character
 proper wyvern
Umm... Can someone explain why im able to see green trees with leaves on them and a pale blue sky with a few lines of airplane mist in my hair when I added a simple hair texture?
Like wtf?
I dont know what im even looking at...
Theres a fence too! T _ T
devout scroll
That's a hdri texture, it's like the skybox that gets reflected onto shiny things
You can choose a different one or ignore it as it's just a preview
It's not gonna carry over to unity
proper wyvern
Why is it working on half of the hair but not the other half? It makes no sense...
devout scroll
no idea, maybe normals are flipped or something
what happens if you go inside the head
or it's just a different material
proper wyvern
Smart. Smart, smart Pumkin... 🙂
Should I flip it the blue or the red way? I like the red side but if its then going to be see through...
devout scroll
o, good thing you know about overlays because i didn't want to explain on phone 
you always want blue
proper wyvern
I have a good teacher 🙂
devout scroll
red means inside out
slide down the metallic of the material to 0
it will stop being shiny
proper wyvern
One more question... How to flip this? XD
devout scroll
select it then recalculate normals
if it doesn't work then flip them
f3 to search for either
in edit mode
proper wyvern
It gives me the handles option but not normals
proper wyvern
yes
devout scroll
i dunno how to flip curves ;w;
proper wyvern
Damn it... I guess I must go cry to my senpai XD
devout scroll
check the curve options
but in the end when you convert to mesh you'll be able to flip anyway
proper wyvern
Ah... I see. Thanks again Pumkin :3 ❤️
There we go! That wasnt so hard when you said I needed to convert it ^_^
devout scroll
but be careful because once you convert, you can't go back
devout scroll
just make a backup of the curve before converting
proper wyvern
devout scroll
but be careful because once you convert, you can't go back
Why would I need to go back? :3
devout scroll
if you wanna change it dunno
proper wyvern
Well in that case no worries. ^_^ Its already good enough. I wouldnt be trying to add textures if I didnt think it was good enough :3
devout scroll
okie!
zinc jolt
proper wyvern
Umm... Can someone explain why im able to see green trees with leaves on them an...
That's actually because of the reflections of the hdri
Like this
white moth
proper wyvern
Umm... Can someone explain why im able to see green trees with leaves on them an...
You are seeing the current scene lightning. It is a textured light source so that you can see that you have made a surface reflective.
It is not part of your model. Your model just has super reflective, polished hair. If that were set up in VRChat, you'd reflect the world's skybox (or nearest reflection probe)
deep dirge
How can I save the scale of a bone, or make it the normal scale or whatever?
devout scroll
What are you trying to do
deep dirge
scale a bone to change proportions of an avatar
devout scroll
Do it in pose mode
deep dirge
I know that
devout scroll
You can select child bones and set inherit scale to none as well
devout scroll
Then use cats to apply pose as rest pose
devout scroll
You can do it without cats as well but it's a few steps
deep dirge
How without?
devout scroll
You can just try selecting all bones and f3 for apply pose as rest pose
but if it doesn't work right then
deep dirge
That resets the scale
devout scroll
I don't remember but it's quite annoying because you have to apply the Armature modifier, then set rest pose then add the modifier again, but you can't apply modifiers if you have shape keys so you have to apply it as a shape key I think, then set that as your basis and replace the reference viseme to be your new basis on all other visemes
basically, get cats
deep dirge
do you have a 2.9 or 2.8 version you can send me
wait I might be able to get it off github
devout scroll

GitHub
:smiley_cat: A tool designed to shorten steps needed to import and optimize models into VRChat. Compatible models are: MMD, XNALara, Mixamo, DAZ/Poser, Blender Rigify, Sims 2, Motion Builder, 3DS M...
yeah it's on github
then you can update from inside cats
if you need to
devout scroll
👍
visual vigil
https://cdn.discordapp.com/attachments/669760923321499678/801736547984211998/unknown.png https://cdn.discordapp.com/attachments/669760923321499678/801736478568218634/unknown.png

 maiden folio
nice, i can already hear the dubstep
fiery dune
i need help getting this to unity
quaint jasper
drop it in your assets
fiery dune
?
 west snow
actually i should ask this in worlds
lament pond
 gray peak
quick question, is it possible to turn a GLB avatar (from readyplayerme) into a functional vrchat avatar? if so is there any tutorial? im trying to pass it trought cats on blender, but im not sure if im doing things right
 weary slate
I imported a .pmx with mmd editor to have as an avatar but the textures are gone
what do i do
warped merlin
try to import it with blander and cats plugin
weary slate
ok thankss
i already installed cats but i'm not sure if i imported with it
wlso what's blander
warped merlin
weary slate
thanks
gray peak
another dumb question, at some poitn in the whole handling of my avatar, for some reason it is lying down on the floor, instead of standing up, is there any way of spinning it to stand up on unity? or do i have to go back to blender to see what happened there?
nvm , added 90 to x rotation and it seems to have worked
ok, so it animates fine in vrchat, but even thought i added in materials its all grey, does anyone have experience using GLB avatars?
 foggy stratus
mk so, i have a problem, and my dum brain is new to blender
Edit Mode:
Object Mode:
desert crown
you have to explain what the issue is
from what i am guessing you are wondering why the arms suddenly folded in right? use cats plugin to fix that via "a" rest pose.
maiden folio
fiery dune
i need help getting this to unity
convert to obj, drag and drop the file into unity
if you want it to be a vr chat avatar i assume, you need to rig it
off you go google the tutorials man
i used mixamo and it's usually enough to make it a basic avatar that can move its hands plus some tweaks you have to do in unity. you find the tutorials for that
 plush gate
Hello,
I have been trying to avoid using "Fix model" after importing an .fbx that is already rigged and functional on Unity because I feel like it messed up some of my stuff in the past;
but if I don't use it my model stays in this gray-state (pic related), I've been using Visibility and Viewport Display to get the bones to show through and wired but if I try to apply a texture it doesn't change the "gray".
Any advices?
clear geyser
plush gate
Hello,
I have been trying to avoid using "Fix model" after importing an .fbx tha...
You can either press z and go into material preview mode or change the viewport shading to "Texture" and can also make it flat lit
plush gate
clear geyser
You can either press z and go into material preview mode or change the viewport ...
Thanks a lot this worked perfectly 😁🎉
foggy stratus
desert crown
from what i am guessing you are wondering why the arms suddenly folded in right?...
just now saw this, but where can i find this?
desert crown
cats plugin is an addon, you can find it from github
foggy stratus
right, why did u do "a"
spiral sigil
For some reason my weight painting is weird on one hand? I successfully painted one hand and it doesn’t break at all. But on the other hand, it’s a bit wonky. Lets say the ok hand is A and the broken is B. When I move A, B breaks?
So I went through each bone to check if I may have accidentally drew on the other side, but there’s no painting that could make this the case


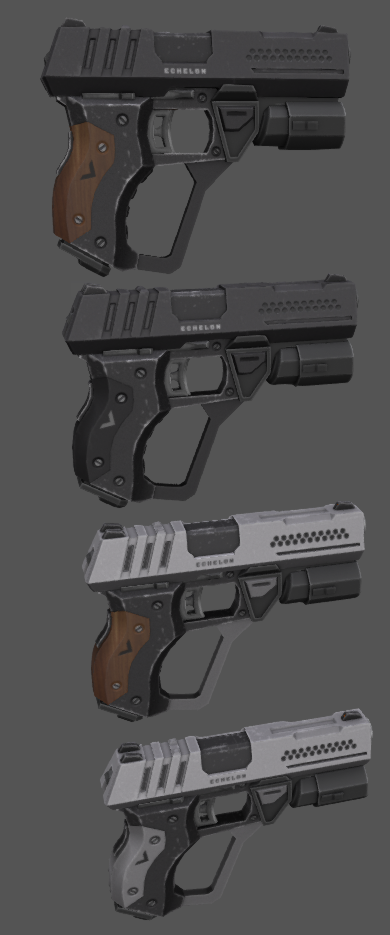
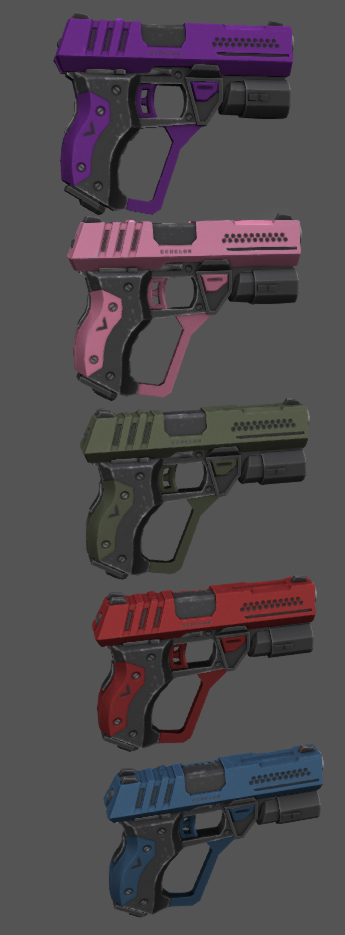


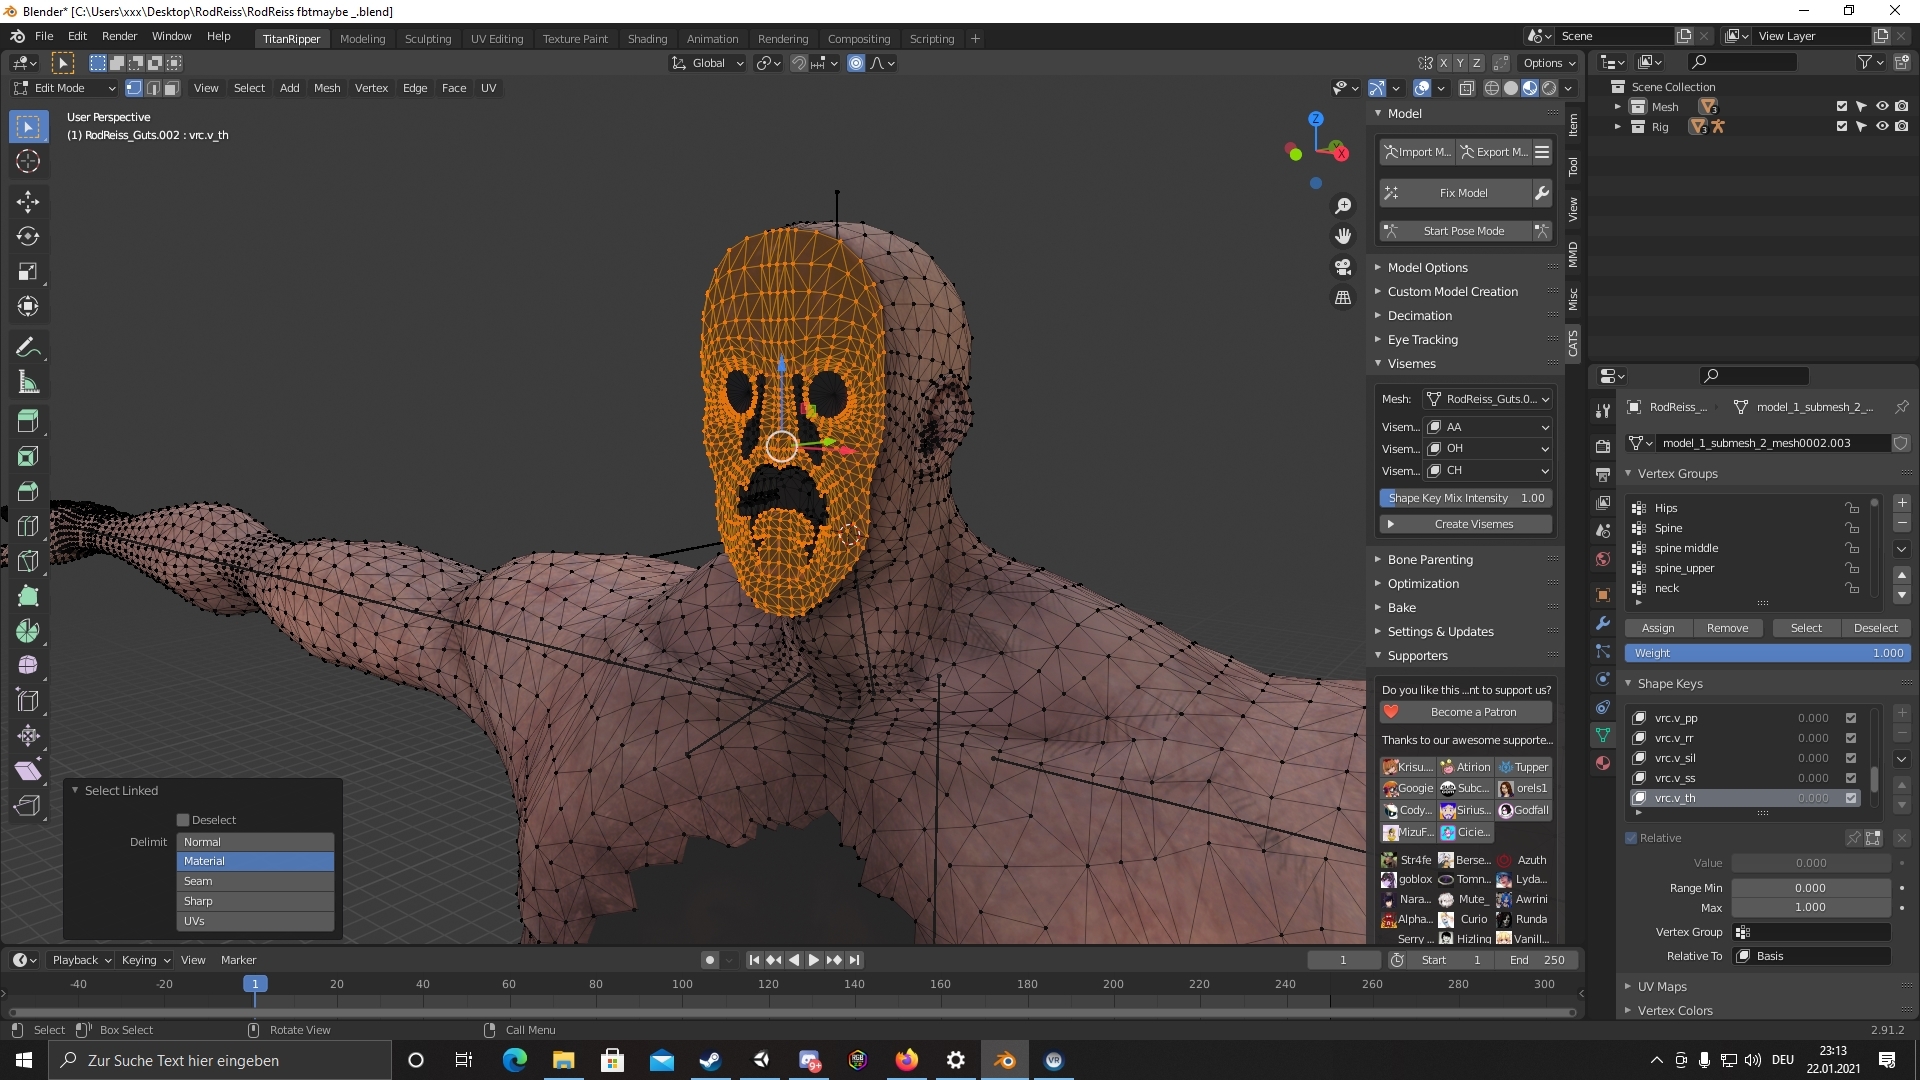
 delicate rover
Create another material, in the bottom Material Tab, then click "assign" with all verts selected on that material.
 tiny garnet
does anyone have an eren yeager 3d model from season 4? ive made blade and sorcery mods before so i think i might be able to make a vrchat skin using unity again
vernal lion
sadly no attack on titan 3 game so no season 4 eren to be ripped
i just google it and well there is one on devianrt
 eternal slate
hey there, I'm fairly new to vrchat and blender and unity in general, and i've run into a bit of a road-bump in trying to more deeply edit an avatar, whenever I try to import it into blender, the textures/materials come out black, I'm unsure if this is due to the strange way the model is packed, but it does have multiple of the same mesh, which I've deleted all but one of them in unity, and it was able to assemble fine with the materials, but not in blender I suppose?
eternal slate
I've been looking up possible solutions but the model is just way different from something more standard than mmd or even one that doesnt have 6 different meshes initially for some reason, most i can tell is that the different meshes are just for optimization, as they get more simple and blockier as they go on, it'd even be good if I could find a way to manually insert the materials/textures after importing it back into unity, if thats possible.
devout scroll
those are LODs
lower detail models that are used when the model is a distance
the higher the distance the higher the lod model and the lower the res
keep lod0 and delete the rest
eternal slate
yeah, thats what i've been doing mostly, problem is the textures still dont import correctly or something, thats the major problem.
when done on unity the materials apply without any issue
i've been trying to use cats if that helps, but i believe it loads the materials even before it does any, "fixing"
not entirely sure if i should be using it since i think its mainly only for mmd based avatars?
 warm trout
does anyone how i can disconnect the hair from the hoodie on blender?
eternal slate
i dont know much but i gotta assume theres a bone over-extending from the hair or something
probably not the best way of going about it but you could seperate by mesh and remove the hair and put it back on, just so its not connecting?
seperate by material i mean
bleh
warm trout
yeah i tried that it didnt work at all :c
eternal slate
you checked to see if its connected to the head not the hair?
 frozen grail
I need some assistance for a world related modeling question. If anyone knows anything about Substance Painter pls hmu ❤️
eternal slate
okay I may have an idea of why the model is all block even with the materials being in, I don't think the textures are importing into blender? The package I got them in had them buried away in a directory 5 files down, so I brought them to the surface, it didnt work even when it was buried either, do I have to copy the contents of the texture folder to the material folder?
I've checked the node texture editor and noticed that there were no nodes or anything, and I'm just wrapping it up and calling it a day for now, any help would be appreciated!
devout scroll
you can assign textures yourself
in the node editor add a image texture, plug it into a shader, principled bsdf by default but you can also use diffuse bsdf as it's easier, then plug that into material output
if either of those is missing just shift+a and search for it
plush gate
Hello!
I have a little problem the piercings on my avatar are considered visemes so if I don't put them into the FaceMesh under LipSync they're completely frozen.
Which I can't do because my ACTUAL FACE is already there.
What would be the best thing to do to fix that?
||Sorry if I'm posting in the wrong section but if I need to do any merging or re-exporting I'll have to use Blender so this felt like the right place 👀||
 echo plume
i want to dissolve a bone using CTRL+C or DEL -> Dissolve bones
It doesn't do absolutely anything though and it is driving me mad
no matter what i choose, choose the end of the bone, choose both ends, choose both bones
quaint jasper
You're not selecting the entirety of the bone
also it's not connected to is parent
so it can't dissolve into nothing afaik
echo plume
"connected"?
they're in a hierarchy at least
oh that actually was the key hint
i had to define them as connected
thank you
egh the result is not what i want though, it doesnt seem to paint what the outer bone had to the inner bone
neat viper
This might help? o: https://devtalk.blender.org/t/merge-bones-and-their-weights-vertex-groups/11256
don't know if it's the exact issue you're facing, but it sounds like it to me
echo plume
hmm now i am really curious how CATS is doing it
because it has a bone merging technique, but you need to give it some chain that it actually detects
which it doesnt in my case
time to read source code
okay, CATS actually applies the VertexWeightMix modifier like the guide that you posted
neat viper
interesting o:
echo plume
ive made a script that probably only works if theres only one mesh inside an armature
it merges the selected bone into the direct parent
i dont know if it works if the selected bone also has children
it does work
Pastebin
Pastebin.com is the number one paste tool since 2002. Pastebin is a website where you can store text online for a set period of time.
 onyx juniper
How can I scale the position of a group of bones and objects instead of the size in Blender?
echo plume
of you select points scaling them will move them towards or away from their center
anyway, i have a script now that can merge adjacent bones into each other
Pastebin
Pastebin.com is the number one paste tool since 2002. Pastebin is a website where you can store text online for a set period of time.
good for skirts with too many adjacent parts
onyx juniper
echo plume
of you select points scaling them will move them towards or away from their cent...
What?
echo plume
Uh
worn grail
Guys does someone have a tutorial or something to can rig and avatar?
eternal slate
hollly, shoot. I'm an idiot.
the problem i've been having was with the texture being unassigned, and the shader not linking the alpha not being linked to it
eternal slate
@devout scroll sorry for the late reply, thanks for the explanation!
 indigo stirrup
is there a way to make a model that's got two UV maps laying out the same vertices differently? say have a map that's a normal unwrap, and one that's a projection from view for crazy shader effects
neat viper
Apparently yes, at least in Blender? https://blender.stackexchange.com/questions/23093/can-i-have-two-different-uv-unwrappings-of-the-same-object
tldr: in the Object Data Properties tab, you can make another UV Map on the same mesh, thus having two maps with the same verts
I don't know how you'd handle that in Unity for shaders and such but still o:
quaint jasper
@indigo stirrup Sure, but it's up to the shader whether or not it can use another UV map for specific effects
devout scroll
Yeah, in poi you can select which uv to use for certain effects
indigo stirrup
cool, good to know
visual vigil

ArtStation
The DT-Series Sentry Droid, also called the Imperial Sentry droid was featured in the Animated Series, 'STAR WARS: REBELS'.
This droid was unique, compared to other types of battle droids used in the ages before. It was created and operated by the Galactic Empire, seen defending VIPs, or precious cargo ships.
Those who are familiar with STARW...