#3d-modeling
1 messages · Page 98 of 1
 obsidian nova
I’m of no help I’m afraid. Best of luck!
 visual vigil
https://pbs.twimg.com/media/EqUuP3OWMAALXKv?format=png&name=900x900 https://pbs.twimg.com/media/EqUulZRXEAMNror?format=png&name=900x900


 young vault
@white moth you can use emission or diffuse shader and bake the normal map RGB, and then take the alpha channel and get that baked onto a separate file and merge em. Should work fine?
And you could split the model in half and flip the other side's uv on the x axis.
 royal gale
getting this in blender after fixing model, anyone know how to fix full black textures?
 random agate
Hello all! I could use some help. I'm brand new to modeling and every tutorial I encounter for blender is doing sculpt mode, which is nice I'll def be doing that when modeling the face and such of my avatar, but right now I want to model my avatar based on the A-Pose reference sheet I have of her from scratch. Basically get her body done relatively quickly.
From what it looks like to me in speed sculpts, people seem to model via a wireframe? I think when looking into this it was modeling in object mode using vertex points then filling them, but I'm struggling and the tutorials I find for it are all for old blender, not 2.9+ so a lot of the shortcuts and things have changed. ^^;
obsidian nova
@random agate I would check out Blender Guru’s donut tutorial on YouTube. It will teach you how to do pretty much everything in blender and you can run through it in roughly 2 days.
After you finish, you can go back to some of the avatar tutorials with a better understanding of the basics and the Ui.
 tight quartz
But there is almost no vertex modeling tutorial.

Hello guys! Welcome to my channel. In this devlog video, I talk about the process of how I model a base female body anime-styled on Blender 3D. I cover all the processes in this speed modeling video from modeling face, body, and character hair. This model is based on the previous concept art I have done in devlog #1 so be sure to check it out at...
This is 2.8 if that helps.
Tho its Speed Modeling.
obsidian nova
I mean, if you’re trying to sculpt an anime base, just use VRoid. It’s free and it’ll take you way less time to customize an existing VRoid base than to build your avatar from scratch in blender.
That’s my 2 cents...
tight quartz
The only thing I can't with Blender and models about it. It's putting on custom clothes. .-.
obsidian nova
That’s rough for sure. Weight painting is hell. If you’re model is simple, you can just duplicate the vertices from your body; scale them slightly and add a solidify modifier (applied). The weight painting from the body will transfer. You have to do some tweaking, but I think it works pretty well.
tight quartz
For custom clothes?
obsidian nova
Yeah. That’s what I do.
tight quartz
Do you have time to find a good video tutorial on it maybe?
obsidian nova
I’ll look.
tight quartz
ty
obsidian nova
@tight quartz First 1.5m of this video.

IMaking clothing for your characters can be very difficult, so here are a few different methods you can use.
If this helps you out, link to your render in the comments!
Download the completed blend file for this project here: https://drive.google.com/open?id=1MCIsqrq_hYbkfSw48SK6DkvRtThlXFg5
My social pages:
Instagram: https://www.instagram...
What's nice about this method is that the parenting and weight-painting stay the same. It's great if you already have a rigged character with good topo.
Watch the rest of this video too, because he has lots of good advice.
 white moth
random agate
Hello all! I could use some help. I'm brand new to modeling and every tutorial I...
white moth
random agate
Hello all! I could use some help. I'm brand new to modeling and every tutorial I...
Skill shaaaaare character box modeling
Or just anything that teaches box modeling 101
Rigging is a different independent concept
You can learn one phase at a time
 forest mantle
Is there a way to get started on modeling from scratch?
 winter plinth
youtube
white moth
forest mantle
Is there a way to get started on modeling from scratch?
I started by opening up other people's models and editing them. starting from scratch is far more difficult. mod other people's stuff until you reach a point where you can do from scratch is how i went about it
 latent charm
Or even better, model from scratch. It'll suck. Talk to people for feedback.
Do it again.
Repeat until it doesn't suck.
forest mantle
i mean i wanted to model a specific artwork someone made, even though its not a t pose or anything
winter plinth
that should be slightly easier
forest mantle
How?
winter plinth
human geometry or whatever its called in english, is a lot harder imo than normal or matrix geometry
random agate
@obsidian nova Ty for the advice! But I'm not sure how I can take a base and build on it, as the model I'm making is my fursona, so while I could tweak a vroid body to what I need, I wouldn't be sure how to edit the head and neck and such to be basically a floppy bunny eared fox haha, as when I tried editing a free to use base blender just was refusing to edit it, maybe because it already had all the armature and such on it?
obsidian nova
@random agate If you can import it into blender you should be able to edit it. Make sure you're in the right mode (edit mode, not object mode). You can toggle between modes using the tab button.
 wispy kelp
Synth wip; got most of the textures in. Now all that’s needed is a rig and it should be good to go
winter plinth
very epic
 smoky void
how to applied a texture from image
 spiral sigil
cant fucking get the sdk to work, whenever im importing it crashes unity
any advice?
 sullen blaze
When you move head in vr, is it neck bone or head bone that pivots ?
 fiery tinsel
If I wanted to start making avatars would someone be nice enough to show me how to start?
I was thinking about starting off with something simple like a brush
 tepid wagon
You could start from https://youtu.be/TPrnSACiTJ4 to familiarize yourself with the UI first @fiery tinsel
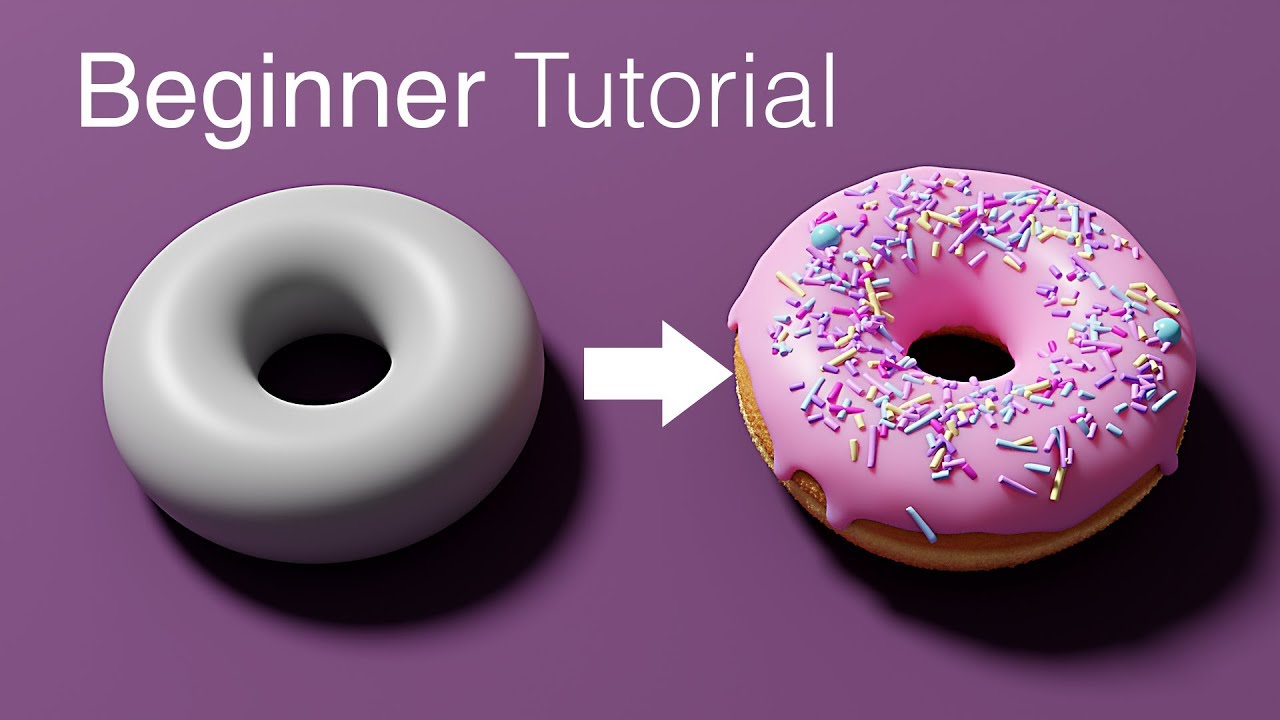
Blender tutorial for beginners! The long awaited reboot of the popular donut tutorial, completely remade for Blender 2.8x. New videos will be uploaded every other day to this channel.
Get the shortcut pdf: https://mailchi.mp/ef5b15a32043/subscribe-to-the-newsletter
Follow me:
Twitter: https://...
The same person has a chair and couch tutorial for hardsurface and sclupting tutorials, haven't seen them but they are most likely good introductions as well
After that it would depend what exacly is your goal and what you wanna make
 split aspen
 tight socket
can anyone tell me what these lines mean in blender? cleaning up someone elses project and these are everywhere and dont go away after applying all transforms
spiral sigil
Where can I find someone that's good at making avatars? Like, giving them a picture and money and receiving the files to the avatar?
winter plinth
@spiral sigil at the very back of the #community-servers-old , theres a place called “vrc traders”, there might be someone there for you
 primal void
Does anyone know what sort of program was used to create the avatar that code miko uses? It's incredibly detailed and unlike anything I've ever seen before! I'm just trying to find a lead as far as who made it, what was used, how it runs, etc.
 next jungle
I mean almost any 3d modeling program could be used to create that model
 median pike
yeah the materials are well done but everything can be done even in blender.
Hey guys, all my friends that know how to do this turned me down so I would like to know if anyone here can help me out with making an anthro character. I started pretty okay Id like to say, but I cant get some parts looking right, I cant share pictures of it in servers for some reason, I think discord thinks its nsfw and blocks me from uploading it. So if anyone is willing to help please dm me..
 devout scroll
Yeah it's the nsfw filter, I've seen it happen before to furry models
 quaint jasper
Add some black squares
 deep dirge
If its using the google ai shit, its probably anything round
Fuckers wouldn't let me upload an image of Isabelle because the hair on top of her head
quaint jasper
median pike
its not nsfw
Yeah, but add black bars
median pike
I am just gonna give up, its not looking good anyways
its not about technical help anyways, I know whats incorrect. I just dont know how to make it correct
obsidian nova
@tight socket Those are pointing to the central axis (I think). Basically, the center is way off.
spiral sigil
has anyone else had this problem where in solid view mode your object looks normal but when you switch to render view mode it's gray and blends in with the background
and yes I am doing the tutorial doughnut
following the tutorial and immediately noticed that there was an issue
^^^
This is what it's meant to look like
also if I don't have the setting scene world checked I get the gray object but if I check it I get this instead
 nocturne tiger
im new and still pretty shit at 3d modeling, but looks like maybe there's no lighting in the world? Render mode calculates the light so if there's no light it'll be hella dark. (Sorry in advanced if I used the wrong terminologies)
spiral sigil
I was thinking that too
but I do in fact have a light
it could be it's not working correctly? that's a possibility
nocturne tiger
hmm, I can't promise I can help but if you send me the .blend file I'll toss it into my blender and poke at it to see if I can make it not be broke
nocturne tiger
dope, might take a minute. potato internet
spiral sigil
no problem
nocturne tiger
Weird, works fine on my end. wish I could've helped but might have to wait on someone with more experience to help ;_;
spiral sigil
hm
winter plinth
uhhh, are you in shaded mode?
winter plinth
i believe its under view? im a 2.4 blenderer and the button for shading is usually right there lol
spiral sigil
nocturne tiger
Weird, works fine on my end. wish I could've helped but might have to wait on s...
what version are you using
cause you might have a setting that I don't as well
nocturne tiger
2.90.1
winter plinth
hmm, well im sure theres a shading option, cus this happens when you change views in 2.4
nocturne tiger
I can send you a blend file of mine to see if you can get it to work right in render mode if you'd like
spiral sigil
sure
nocturne tiger
spiral sigil
ty
nocturne tiger
did that one render right?
nocturne tiger
try changing from Eevee to Cycles(or vice versa) and see if that helps
(Disclaimer I'm throwing poop at a wall to see what sticks and fixes it, sorry in advance)
spiral sigil
yup
nocturne tiger
do you by chance have an AMD GPU?
spiral sigil
yup
nocturne tiger
I dunno if this post is still relevant since it's from 2017 but might help
Glad it's rendering right for you though! Wish I knew why Eevee didn't work for you tho
spiral sigil
also I'm guessing if it looks pixelated that's not normal
does anyone here make vrchat skins, and is willing to craft a specialty one?
nocturne tiger
You mean pixelated like this?
spiral sigil
yo know what apparently eevee doesn't like this AMD version
the fix it to switch driver version
so I'll do that
nocturne tiger
dope!
 hot scaffold
oh dude that neon sign looks so cool\
 ebon crater
ran into a weird error I can't find explained anywhere
I was re-constructing part of a model and noticed the shading was off- when I checked it in flat shading, every new polygon has a strange gradient over it
vertex & face normals are all fine, that's not the issue; merge by distance did nothing, so it's not overlapping vertices; the error persists even after subdividing
quaint jasper
Clear normal split data ?
ebon crater
quaint jasper
Clear normal split data ?
never heard of that before  that worked, thank you
quaint jasper

spiral sigil
Okay UPDATE, this is important for anyone using and AMD GPU
if you have AMD then Eevee shits itself and the solution is to switch to the AMD Radeon Pro driver which you can download for free from AMD's website
white moth
I’d look into detail maps on secondary UV layers. Instead of actual geometry shells.
But for what you are asking
I think the shrink wrap modifier would help
But it would need to be subdivided, or at least a subsurf modifier added temporarily to generate it and then remove it
obsidian nova
Art?
 misty scarab
you wot mate
spiral sigil


A secret santa for my friend!! based off of @Uzucake's furry sora design!! https://t.co/z3caIgXyb8
 Twitter
·
Twitter
·
just finished this
 serene epoch
serene epoch
serene epoch
 muted raven
I made a nice thicc robot, the face was inspired by the proto gen however everything is from scratch,
Its got some thicc to it ya know ya know
Also Works phenomenally with FBT, Closest thing to my body proportions irl and when i say those hips can move, i MEAN THOSE HIPS CAN MOVE
I might add a tail tonight
There are some OTHER features to this avatar existent that i of course did not show here lol
 midnight ledge
Has anyone got a tutorial that may be able to help me out with 'closing up' female genitals on a model? Trying to make clothes for a model but the base is NSFW.
quaint jasper
I don't think there's any tutorial for that, it's just some basic mesh editing
midnight ledge
Yeah I didn't mean a tutorial specifically centered around that purpose, but more so any tutorials that would point me in the right direction for it.
quaint jasper
Look up any blender tutorial for the edit mode i guess
spiral sigil
uh, I just installed a new GPU to my system and now blender won't render anything?
even the new project cube's invisible at all
spiral sigil
I installed the older AMD driver provided by Windows Update to get it working.. is anyone else facing this with the latest AMD driver? I'm either stuck with no Radeon Software or keep facing this invisible rendering problem
https://community.amd.com/t5/drivers-software/blender-issue-with-drivers-after-20-5-2/td-p/299748
AMD.com
Whenever I try to render something in blender through cycle render engine, it crashes. Happens with all the drivers after 20.5.2. AMD radeon pro works fine but I also do gaming so it is important for me to use adrenaline.
young vault
spiral sigil
I installed the older AMD driver provided by Windows Update to get it working.. ...
spiral sigil
thanks, will try that
spiral sigil
either that or using Blender 2.83 LTS fixes it
nope, I can see the new project's cube just fine but as soon as I load up the models it does the same thing again
Using AMD 20.4.2 driver fixes the problem
spiral sigil
I might need some help apparently I got this model and the sides aren't filled with other faces, how would I auto fill each side
spiral sigil
devout scroll
play animation
which is pretty useless for vrchat, but on first startup (or in keymap settings) you can choose between play animation, search or tools
each has an alternative keybind either way
spiral sigil
I found the problem
but how would I combine all these
how do I connect every single one of these
quaint jasper
ctrl + j
spiral sigil
no like in edit mode like I dont want it to flap around in VRChat because here was I found with this model
spiral sigil
how would I select both sides easier because both sides are inside of each other
 placid abyss
any Idea when i use the CATs feature to merge armatures all of the meshes come outside of the hierarchy like that?
ignore, just fixed it
🙂
 latent mesa
Anyone else experience problems with blender 2.9?
 lament pond
nocturne tiger
lament pond
nocturne tiger
cuuuute
spiral sigil
My First Model 😄
serene epoch
done with the upper part of my outfit
quaint jasper
Is that all on a single UV ?
 wind birch
this may sound weird but does anyone here know how to rip models and stuff from tf2 to blender
i cant wrap my head around crowbar but i really want models of the buildables and their little construction animations
winter plinth
im sure if yoy search online, someone would have them
wind birch
ive been looking for a few days now, tried ripping them myself but that didnt work either
winter plinth
hmm, well i cant help there, id assume someone had already done it for tf2
wind birch
ill keep looking and give an update when i can
winter plinth
oh shoot sorry
winter plinth
looking good
serene epoch
@quaint jasper its 2 im working on the lower half and i have all the straps on a separate uv
quaint jasper
clean !
placid abyss
is this how i should do it?
never worked with heels on boots
but i assume the bones should stay where the feet would normaly be and the bottom of the mesh still on ground
quaint jasper
The feet bones should touch the ground
 coarse citrus
Not sure if completely right channel, but I'm trying to make some shapekeys for visemes, but I don't actually want them to deform-I just want it to rotate/change location. How would I go about this, if its possible?
(Note: the specific circumstance is basically moving an object like its on a hinge, the problem being it changes size whilst going through the motion)
quaint jasper
avatar 3.0
 echo anvil
felt this the most appropriate channel to share. before starting to learn blender, ive got a rough design for my avatar! : )
winter plinth
very epic, cant wait to see this in game
 onyx juniper
That's a shame, Irishman. Custom bone visemes are very cool
echo anvil
gonna post varios pictures to show my progress. finalised sketch to go into blender!
winter plinth
wow
 spring crescent
for the human models do people use the base or a orginol for cube
winter plinth
i mean if youre new to ananomy, id find a base
spring crescent
just asking becuase it will be very inperive if people can do it from cube for each of there human models
winter plinth
i mean, you could do the cube, or build off of normals (nct), but it would most likely be easier from a base or a stick figure model
spring crescent
ya ik becuase I look at my models and other peoples and Im like dam that cool that they can model that good
 onyx crane
a full custom of claire from a short hike!! finally done
onyx crane
if you wanna learn how to do them from a cube, check out grant abbitt's tutorials on youtube, i learned like everything from him
and thank you 😄
 thin bison
Demofrog huh
onyx crane
 next cloak
just finished the legendary donut tutorials with the coffee cup
next cloak
just finished the legendary donut tutorials with the coffee cup
your donut dough looks so good!!!
winter plinth
thats acc pretty epic
next cloak
onyx crane
your donut dough looks so good!!!
Thank you
a full day in blender destroyed my smooth brain
I can tell now how much work has been done to avatars to make them look good and be optimised at the same time (a lot), hopfully will do something good.
onyx crane
next cloak
Thank you
a full day in blender destroyed my smooth brain
I can tell now how mu...
The more you do it, the easier it gets. Eventually it goes from being a headache to something you can do to honestly relax. I totally recommend checking out Grant Abbitt's beginner blender 2.8 series (I personally struggled with how "in the details" blender guru gets sometimes and liked his teaching style more). I actually hated 3D for the longest time, and somehow his videos unlocked something in my smooth brain 🧠
 vestal bloom
Bruh, I've just watched a bunch of Royal Skies LLC videoes. Damn thats my kind of tutorial.
onyx crane
vestal bloom
Bruh, I've just watched a bunch of Royal Skies LLC videoes. Damn thats my kind o...
He is great!!!! I love how to the point he is
vestal bloom
Yeah
spiral sigil
hey, i would love to have my own VRCHAT Avatar.. it doesnt have to be amazing, i just want a all black guy with a tophat and a suit, with shoes and a mask
how would i be best making it, im new at everything and i dont wanna model from scratch
onyx crane
spiral sigil
how would i be best making it, im new at everything and i dont wanna model from ...
You're looking to learn how to kitbash-- the MMD channel in this server can help you more than us c:
vestal bloom

I present the final and most important 3D modeling technique all Artists NEED to be aware of, KitBashing - This information would have saved me years of wasted time back then. I hope it will spare you of the same fate :)
If you enjoyed this video, I have a small 1$ Patreon perk available for anyone who would like to help us save up for Facial ...
onyx crane
https://www.youtube.com/watch?v=o34v2leOlkw&t=442s how about this?
Part One of a tutorial series where i'll show you how to create your very own custom avatar for VRChat and VRM use for VTubers. In the First lesson we'll be focusing on Blender.
Leave a comment if you want to see a tutorial on something specific related to avatar creation.
#vrchat #avatar #blender
If you found this helpful, please consider co...
spiral sigil
that only shows how to import clothes ect and not how to do the model textures ect
onyx crane
hmm, it sounds like there might be specific parts of the process you feel like you're missing knowledge on?
if you give a list of the things you feel like you don't know but want to know, i can help you better
spiral sigil
yeah i just want a simple character, i want him only to have custom clothes, black skin, and a tophat n shoes
thats it
ill ask if i need any help
onyx crane
https://www.youtube.com/watch?v=x3BJslXcDks here ya go, this is about how to edit the textures

Today I show an easy way to edit or change any existing (textures) colors or designs in VRChat. It's super simple to do if you know what you're looking for. Hope this helps out. Enjoy!
spiral sigil
even skin?
i was thinking of making something like this, but then with a suit and pointy shoes

been tryina do this for 2 hours w no result LOL
onyx crane
yeah it works for any part of the avatar! you just need to find where the 'skin' texture is located and repaint it
spiral sigil
well if i import model with CATS plugin the model doesnt have any textures
spiral sigil
wait i did fix model and its good now 🙂
im just wondering how to add custom hair ect, are there tuts for that on YT?
onyx crane
it's all done the exact same way as clothes 🙂
now if you're wanting to create your own hair from scratch thats another story
spiral sigil
aah okay okay 😄
no no i am a world builder
not a character
im not eh
good
xd
serene epoch
done texturing on the outfit time to make a rig for it
onyx crane
damn, really excellent work
onyx crane
really lovely, the textured part of the fabric is esp excellent
serene epoch
yee i made all the textures in substance painter the whole outfit is 40k pollys trying to keep the model at green stats for vrc
serene epoch
it really dose
i think before i rig it im going to try to lower the polly count a bit more
onyx crane
i think i've been able to stay in green stats as long as it's under 70k?
serene epoch
yee it is
spiral sigil
how do i freelook in blender
serene epoch
i still have to add the head and hands and the hair i made for it is a lil high poly
onyx crane
spiral sigil
how do i freelook in blender
i think middle mouse button
onyx crane
serene epoch
i still have to add the head and hands and the hair i made for it is a lil high ...
hair is a pain in the ass to optimiz
spiral sigil
im in a locked view with my model
onyx crane
spiral sigil
im in a locked view with my model
weird, try clicking something to select it and then press . on the numpad (make sure numpad is on) ?
i haven't heard of a bug like that so i'm not sure what's going on
serene epoch
yee my hair alone is 35k XD
onyx crane
its so smooth and nice!!!!
serene epoch
i made it with curves
onyx crane
thats the method ive started to use too!
i used to do it with vroid studio but you get way more flexibility and clean topology if you do it from scratch like that
serene epoch
yee i took me forever to get it the way i wanted hair is hard
onyx crane
it is, the most time consuming part for me is trying to hide the root bits
serene epoch
it made me never want to do hair again XD
quaint jasper
Good luck on the retopo !
onyx crane
i swear by the Quad Remesher add-on for retopo https://www.youtube.com/watch?v=lGtrImjJ7RIhttps://www.youtube.com/watch?v=lGtrImjJ7RI
i haven't had to do manual retopo in ages because of it and it gets excellent results super fast
spiral sigil
how do i merge objects
serene epoch
there is a lot of places i can optimize on the outfit i can get rid of most of the under shirt he is wearing because it will never be seen
spiral sigil
i did a tutorial and i am at the point where i need to merge
serene epoch
ctr j
serene epoch
shift click both objects and then do it
spiral sigil
nothing
serene epoch
make sure your curser is in the 3d view if its not it wont do it
spiral sigil
how do i do that
 reef mantle
Hey does anyone know where I can get an anime head model?
serene epoch
idk what else to tell you imnotfez XD
spiral sigil
i want this character so bad
i customized him
D:
:/
its 4am been working on this since 12
serene epoch
you hold shift click on the 2 objects make sure your curser is hovering over the model and then press ctrl j
 pale owl
Hello! Im new, and Im currently modeling my first VR chat avatar for a test. I read online that the avatar has to be around 7k polys to be able to work. Is this true? Because this is my boy at 6k and it's very choppy looking.
quaint jasper
For quest the limit is 10k, pc is 70k, anything beyond that will be hidden by default
pale owl
Gotcha, thank you! I'm a quest 2 user so I wanna make sure everyone can see my little fella. If I have it plugged into my gaming PC, will that up the limit of how many polys it can render?
 frozen dust
if you're plugging your quest into your pc via link or virtual desktop then yes, because you are at that point just using your quest 2 as a PCVR headset.
pale owl
Awesome. Thank you!
 dapper ferry
hay can somone make a mode for this
devout scroll
sure, that's gonna be 300$
 pastel heath
Dose anyone know were you can Commission a 3D Vtuber model???
 clear geyser
pastel heath
Dose anyone know were you can Commission a 3D Vtuber model???
clear geyser
pastel heath
Dose anyone know were you can Commission a 3D Vtuber model???
The VRCTraders discord at the top of #community-servers-old
serene epoch
got him under 70k 👀
pale owl
Isnt the max for an avatar 10K?
Because if not then ooo wee my model is about to get an upgrade lol I got him down to 6k
winter plinth
its 10k for quest @pale owl mas duro
pale owl
Ah! but if the quest is plugged into the PC, does that matter? I have a Quest 2 coming soon Thats why I ask
Ill mostly be using it plugged into my gaming PC, but I got it so that way I can share it with my boyfriend who doesnt have a gaming PC.
winter plinth
@pale owl pc's max i blieve is 70k, but i hae seen avatars hit 25mil before
pale owl
winter plinth
<@!199596812250775552> pc's max i blieve is 70k, but i hae seen avatars hit 25mi...
goodness. Well, looks like I can go and upscale my little dude. Poor fella was suffering in the 6k range haha
winter plinth
dang
pale owl
this is him NOT 6k. This i think is about 20 k.
And uh, this is him in 6k. haha the drop in quality is real
winter plinth
thats pretty good at 6k
pale owl
yeah, hes ok, but hes defintely not perfect lol. He also has a tail but you cant see it. Doing a chibi for my first Avatar has proven difficult. But I will prevail!!
 clear niche
pale owl
Hello! Im new, and Im currently modeling my first VR chat avatar for a test. I r...
clear niche
pale owl
Hello! Im new, and Im currently modeling my first VR chat avatar for a test. I r...
pretty cool
pale owl
My goal is to finish him before my VR headset gets here on the 25th
pale owl
clear niche
pretty cool
Thank you!
clear niche
yw
vestal bloom
Fuck, I wanna make a Caim model from Drakengard. But I'm bad.
median pike
@pale owl why not shade it smooth and control the normals a bit? that can help a lot with making it look smoother
echo anvil
hi all! making a low poly model for my first try, and do i need to have modelled eyelids that open/close, or can i animate eyes as flat textures?
thin bison
You can do either, there are ways to have multiple eye shapes on one texture and then have the shader move between them
pale owl
wispy kelp
Almost done with this one
nice!! poly count?
 cobalt prism
hey hey nice ppl i have no idea in what channel this should go so i put it here. is there someone who has experience with full body avatar fitting to real Hight ?
clear geyser
cobalt prism
hey hey nice ppl i have no idea in what channel this should go so i put it here....
wispy kelp
pale owl
nice!! poly count?
Around 50k
But I can make a lower poly version around 20k
 ornate yacht
wispy kelp
ornate yacht
wispy kelp
I sculpt first then retopo it
Much easier for me to get a feel for the shape
Like this
 boreal coyote
is anyone taking comissions for models
devout scroll

VRChat Ask Forum
Post about commissions for avatars in this category. Requests are not permitted, we only permit posts from those providing services.
pale owl
Any opinions on what color to make his little sweatshirt? At first it was black but Im maybe thinking a baby yellow.
devout scroll
setup a shader where you can just use a slider to change the color
will make it easier to decide when you can quickly change it
winter plinth
@pale owl do like the addidas stripes
 pastel fox
im here
 neat viper
yo
pastel fox
heres the print
neat viper
anyway, click the arrow next to Armature, and select the mesh in there
pastel fox
mesh?
neat viper
In that case, Body
pastel fox
neat viper
just select Body lol, that should make the material properties tab come up
pastel fox
its here
neat viper
I'd recommend enabling Diffuse, Normal and Transparency lol
you could, though it may be faster to delete the model and re-import it
pastel fox
im back ot the start, what do i do first
do i delete the cats bake and then bake again?
neat viper
yup
After that, select the mesh in Object mode, go to Edit mode, then click Desktop under Auto-Detect in the Bake panel
neat viper
shouldn't have to if you haven't moved anything, but go for it
Select Diffuse, Normal and Transparency before you bake, then bake it
pastel fox
bake in edit mode right?
neat viper
yup!
pastel fox
this time it didnt close :)
neat viper
ayy, nice
As before, delete the armature that isn't the "CATS Bake" one too o:
pastel fox
deleted
neat viper
there's another body at the top though? o:
pastel fox
yes
neat viper
delete that lol
pastel fox
i deleted but the body disappears
neat viper
huh, you might've had the CATS bake body selected when you deleted?
would recommend a CRTL-Z for a bit lol
pastel fox
oh
neat viper
after that, delete everything that isn't under the "CATS Bake" collection
neat viper
whoop, in that case follow through the baking process again, then delete the unoptimized model
baking instructions from here onward: #3d-modeling message
neat viper
expand the CATS bake collection? the one in the picture still has 300k+ triangles
might'a accidentally deleted the wrong one, if you deleted anything yet
pastel fox
i need to bake it again
because it had the same body error thing
it still has the same error idk why
neat viper
huh
When you're baking it, make sure that only the model you're trying to bake is in the project (no other collections/armatures) and make sure it's selected in Object mode, before you go to Edit mode to bake
aka, model should have an orange halo around it while you're moving to Edit mode
spiral sigil
 pastel fox
see?
neat viper
Select the visual mesh in the Viewport in object mode, then move to edit mode? o:
neat viper
the model in the viewport lol
pastel fox
wait wot
neat viper
model in the panel in the center of the screen, which is called the viewport lmao
pastel fox
oh
neat viper
rather than selecting the model through the hierarchy, try selecting it through there and then doing the whole edit mode > bake thing?
neat viper
Selecting the mesh in Object mode should make an orange halo around it, then moving to Edit mode should show you the vertices/edges, though the whole model should still be orange
pastel fox
but it didnt show a orange halo there
neat viper
shouldn't be an orange halo in Edit mode
pastel fox
only on object mode
neat viper
If you move to edit mode and it is still selected (selection should be blue in the hierarchy) , then just press A to select everything on the model
for example here the cube is selected in the hierarchy, but the verts aren't - pressing A will select them, turning the model orange
pastel fox
press a on edit or object?
neat viper
in Edit
neat viper
yup! should hopefully work o:
pastel fox
I hope it does
neat viper
after that, right-click the unoptimized (non-CATS bake) armature and delete it c:
pastel fox
it didnt work :(
neat viper
not sure then lol
pastel fox
cries in cry language
neat viper
delete everything in the scene, re-import the model and try again?
Select in Object, go to Edit, Desktop in the bake panel, then select Diffuse, Normal and Transparency, then Copy and Bake
From there, right-click the non CATS Bake armature and delete it
pastel fox
i forgot how to import
neat viper
File, Import, MMD Model
neat viper
Edit, Preferences, Add-Ons, then enable CATS again lol
pastel fox
and now
neat viper
File, Import, MMD model
neat viper
and CATS is enabled as such?
Try restarting Blender, then o:
neat viper
yup
neat viper
in what way?
pastel fox
because when i put the model it shows as grey and then when i fix the model it goes back to normal
it doesnt work
Why dont i simply move the body of the unbaked one to the baked one?
neat viper
because the point of baking is to drastically lower the polygon count - the baked one had somewhere around 30 thousand, wheras the unbaked one has over 350 thousand
which would murder framerates lmao
pastel fox
but if i bake i get no body
neat viper
tell ya what, DM me the model in a zip file lmao
can't exactly think of the problem, so I could try baking it on my end and sending it back to ya?
pastel fox
dm'ed
pastel fox
hi everyone, ive been wondering for some time and for some reason my avatar goes into a bad quality when baking it in blender, what could be the problem?
Here you can see how it stays
the right one is the baked and the left one is the unbaked, whivh has over 300 thousand triangles
quaint jasper
Why are you choosing 32000 for btw ?
@spare crater Would have some insights surely
pastel fox
quaint jasper
Why are you choosing 32000 for btw ?
what do i choose then?
quaint jasper
You can go up to 69999 for PC below very poor, so i guess use that ?
 queen elbow
Does anyone know how to fix texture seams?
devout scroll
post a screenshot
 fringe rock
smear it manually or use or use build in feature like in 3D-Coat
it can be that you dont have enough padding
in that case increase it
if you don't understand those therm, I won't help further
pastel fox
pastel fox
for some reason, the eyes arent correct and the quality is still bad
Somebody knows why this is happening?
ive tried some ways but or it git worser or it got the same
The unbaked model has details but when i bake it they go away
And the eyes stay dumb
like the white eyeball part covers the iris and the iris turns reddish instead of the original blue
pastel fox
devout scroll
will likely get more help there with this
can you dm me the server?
devout scroll
 spare crater
quaint jasper
You can go up to 69999 for PC below very poor, so i guess use that ?
spare crater
quaint jasper
You can go up to 69999 for PC below very poor, so i guess use that ?
When baking normals, most people can get down to 32k with no noticable quality difference, so we target that by default (vrchat's 'excellent' rating)
Could probably be even lower, but I figured I'd stick to what's outlined
@pastel fox it looks like some part of your model is making Blender pack the UVs ineffectively, this can happen when it has one bizarrely long UV island
Blender isn't super good at packing UVs by default
But if you can find what's doing that (look at baked result in the UV editor) it should be fixed
Also, just a sanity check, do you have more than one UV map on any meshes?
white moth
quaint jasper
You can go up to 69999 for PC below very poor, so i guess use that ?
70000 is Good rated as well! 70001 though, that’s just ridiculous. Very Poor
spare crater
Honestly like. Most should be fined with 20k or less :p
white moth
20K was the limit when I joined. I stick with it and use the increased limit of 32k for props
spiral sigil
Think I'll turn this into a vrchat avatar later 
white moth
spiral sigil
Think I'll turn this into a vrchat avatar later <:vrcSkull:585749770442899466>
Spooky Month Eve Eve Eve Eve Eve Eve Eve Eve Eve
pastel fox
spare crater
<@!455621294533378048> it looks like some part of your model is making Blender p...
Can you say it easier so i csn understand? Im new to 3d modeling so whats UV?
 azure rain

Nothing better than christmas chocolates to explain #UVmapping to your kids #CGI #3D #material #texture
Retweets
3526
Likes
8231
 Twitter
·
spiral sigil
Twitter
·
spiral sigil
fixed
azure rain
lol
quaint jasper
that's a lot of wasted UV space smh
white moth
pastel fox
Can you say it easier so i csn understand? Im new to 3d modeling so whats UV?
UV doesn’t stand for anything, it’s just a continuation of the XYZ coordinates. U is horizontal texture space and V is vertical texture space.
UV mapping is telling a model what part of the texture each vertex should use
It usually looks like a flattened 2D version of the model
devout scroll
fixed
quaint jasper
Why is this so accurate lmao
azure rain
oh dear that's horrifying
neat viper
8k.png
azure rain
that's so much vram wasted
 median lantern
its optimized
clear geyser
It keeps getting better and better
 edgy musk
lmfao
azure rain
deep dirge
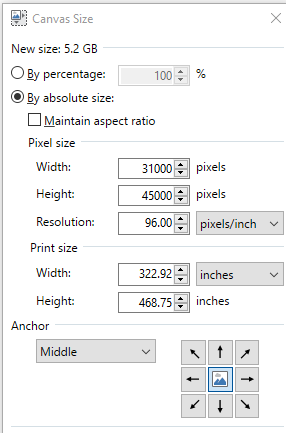
Guy do think you is 31k x 45k is good size enough to vchat.????//
that probably exceeds the vram budget of the entire map and avatars
 clear geyser
azure rain
that probably exceeds the vram budget of the entire map and avatars
clear geyser
azure rain
that probably exceeds the vram budget of the entire map and avatars
Nah that can't be it. VRChat is just unoptimized 
azure rain
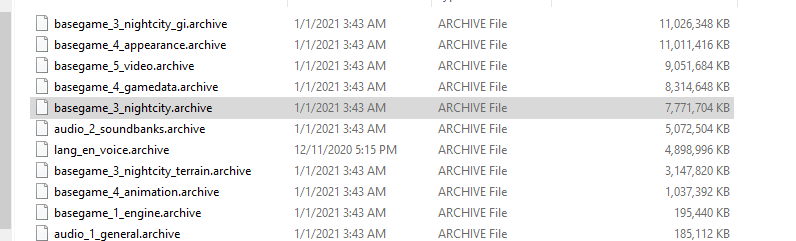
if you did that resolution PBR it would probably be more Graphics data than cyberpunk 2077 https://i.gyazo.com/fe7053963dfcc32f068772bb4395f063.png
 thin bison
5.2 GB, that's more than what a lot of gpus has
azure rain
and you could probably achieve that for a fraction of the data just using detailed map
thin bison
I was referring to your canvas example
azure rain
I know
now I'm curious how much data a cyberpunk 2077 character takes up but probably less than that
considering it uses lots of material blending

CD PROJEKT RED integrated Substance Painter and Substance Designer to create a material library and fully texture the futuristic world of Cyberpunk 2077.
deep dirge
It will be fine, I have a 1060 6gb
azure rain
but you still have to render the rest of the avatars and the map
white moth
clear geyser
Nah that can't be it. VRChat is just unoptimized <:vrcHappy:585749770363076618>
VRChat devs need to stop making so avatars laggy, SMH my head.
deep dirge
No, they have to render their own avatars, I'm not sharing my gpu with those poor boys
azure rain
also given this person may probably use a gig of vertex data
white moth
deep dirge
No, they have to render their own avatars, I'm not sharing my gpu with those poo...
Avatars as locally rendered and streamed light field streams
azure rain
yikes that would be a lot of data
white moth
At 144 hz
azure rain
incoherent screaming noise
white moth
Just get John Carmack to find some compression algorithm or something. slaps top of car
azure rain
and don't forget the light Fields have to contribute lighting to the world
thin bison
Just get Carmack to do anything and you'll have that field advanced years into the future really 
azure rain
isn't that kind of why we have vr at all at this point
thin bison
Pretty much
Well more complicated really, but the memes about his galaxy brain is too good
azure rain
31k x 45k Avatar could probably fit my avatar texture in one of their fingernails
actually wouldn't surprise me if there's a second life Avatar with a 1k texture just for fingernails
white moth
azure rain
isn't that kind of why we have vr at all at this point
It’s why we have non-trash inside out tracking, and have the latency issue in PCVR totally solved
spiral sigil
 outer ginkgo

 knotty mesa
 karmic cove
does anyone know how to turn a blend file into fbx?
 rugged dust
If you go to your blender preferences, go to add ons, there's an add on called "Import-Export: FBX format" that can be turned on. Then it should show up in your export settings under File > Export.
rugged dust
karmic cove
What version of blender are you using?
And you also need to click "Official" next to community as it is an official blender add on.
rugged dust
Hmm...that's strange. It should be there then. Try searching "fbx" instead of Import.
rugged dust
Huzzah~
karmic cove
but arent i supposed to export the blend file or sum?
im still deadly confused
sorry i rarely use blender ^-^'
rugged dust
Mmm...its just saving your blend file in the fbx format (for whatever you needed it for) that should be it? All it is is exporting the mesh in a different file format that other programs can read. Like saving it as a .obj or .dae
rugged dust
I'm sorry I'm not sure what the question is anymore. <w >;
rugged dust
Alrighty! Have fun~
karmic cove
Thx so much!
 versed glacier
so people who make avatars with screen on the head instead of actual face how do they make the eyes and mouth is it mesh or texture
quaint jasper
They do both, whichever they find easier to do
 south turtle
anyone know how to import an fbx to blender and apply the texture files it comes with? I can't figure it out for the life of me
deep dirge
If you already have the model in blender, to get textures you'll need to assign images to the materials
spiral sigil
Hey, I don't really know what I'm doing here
just how horribly am I doing this wrong?
 drifting river
How come blender sculpt in subtract mode doesn't behave like actual subtraction,
like say I take the basic sphere, I expect to be able to put a hole through the middle with it, but it doesn't.
It'll be fine till the last bit, where it will just start deforming the other side outwards instead of removing it
white moth
I don’t believe that’s how sculpting works
Sculpting won’t change topology
Not in the manifold way. You can’t sculpt a sphere into a Donut
obsidian nova
👆👆👆
 cedar steppe
anyone know how to test if a weight paint is good?
first time and dont know if its good or not
young vault
Depends on if it's humanoid or an animal
cedar steppe
humanoid
young vault
I'd recommend going to a MMD dance world, then. Or if you have VR or a friend with fullbody, let them give it a test and see how it works.
cedar steppe
right
how do i get into a t pose on blender well? for some reason the shoulders and arms kinda dont work on t pose
unless i dont have it placed right
young vault
picture?
young vault
Looks like it's either the topology or the blend between arm to shoulder is very tight towards shoulder, but, not so much against the arm.
cedar steppe
is that bone issue or paint?
young vault
Well, it's not a bone issue. It's either a paint issue when you posed it, where the vertices were too strongly weighted to the shoulders or a topology issue where the arms were too far down from the shoulders when creating it.
It might also just be the style of the model.
young vault
Then, yes, it's a blend issue between shoulder and arm.
young vault
The armpit area needs to be a mix between arm and shoulder weight
think of it like wherever the muscles attach in the human body, you have two sides influencing it. One above, one below. So, you weight the joints to both sides as that area is influenced by both.
cedar steppe
right , i really suck at it so ill just leave it for now . it looks like in an A pose tho
young vault
https://www.youtube.com/watch?v=4fICQmBEt4Y this is a great tutorial
https://www.youtube.com/watch?v=rG82fogtuCg&t=5s so is this.

I've been meaning to update this video for a very VERY long time. But, we're finally here. Everything you need to know in order to start painting weight layers onto your character!!! Hope it helps :)
Female Body Model Link:
https://www.youtube.com/watch?v=_XfvLpLyulI
If you enjoyed this video, please don't forget to like and subscribe!
You ca...
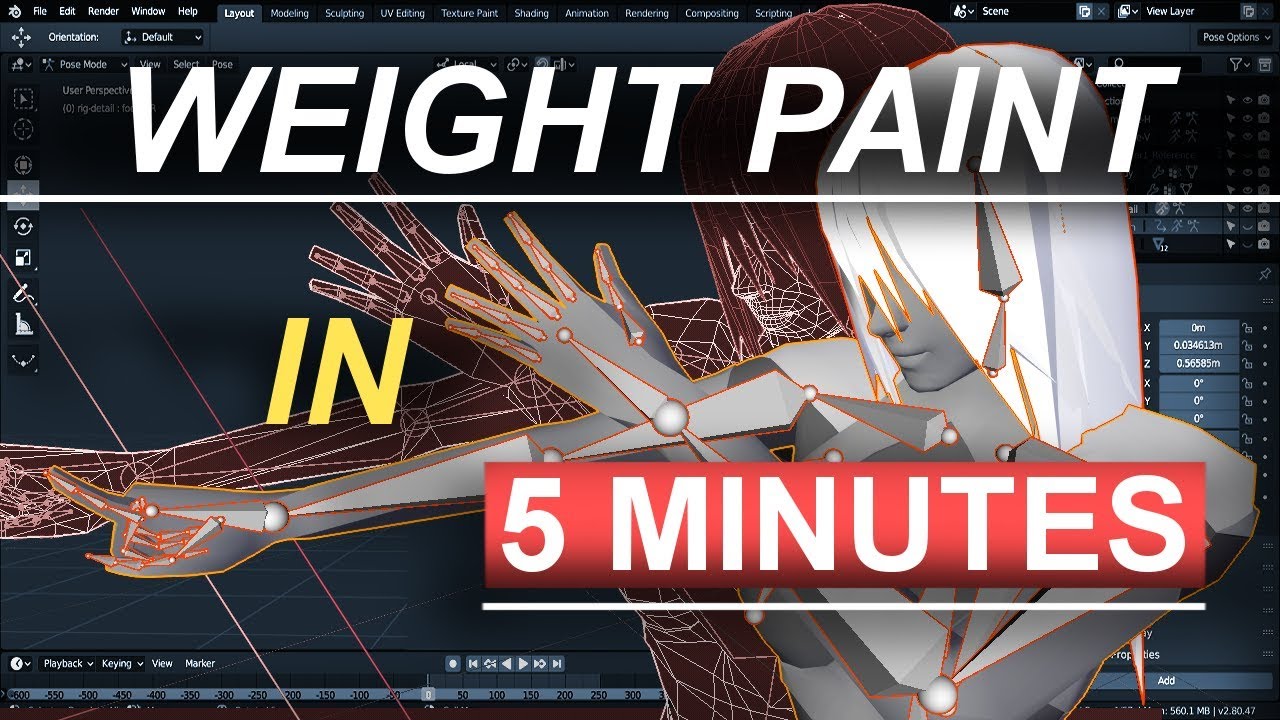
Hey everyone new Blender 2.8 tutorial! In the 5 minutes you'll never have to wonder how to weight paint ever again! Hope it helps you guys and don't be afraid to leave comments and questions below if you have them!
Song: [Chill]aKu - Love Shine
https://soundcloud.com/akuofficial
If you enjoy...
cedar steppe
yeah mean issue i have is that my brush no matter what strenght i had it on or weight it would paint hard red
also this model is a low poly count
young vault
Change strength of brush, or weight.
Strength = how much of weight is applied. Weight = what weight % is applied.
cedar steppe
tried both
cedar steppe
2.91.0
also do you know why when i export the model and reimport it , it gets really big?
young vault
2.9 shenanigans is my guess
cedar steppe
maybe , anyways thanks for clearing some stuff up for me
devout scroll
set scale units to fbx all in export settings
cedar steppe
anyone know what this bone is meant to be ? https://cdn.discordapp.com/attachments/556805269842165778/796244094329946132/unknown.png
 clear geyser
cedar steppe
anyone know what this bone is meant to be ? https://cdn.discordapp.com/attachmen...
clear geyser
cedar steppe
anyone know what this bone is meant to be ? https://cdn.discordapp.com/attachmen...
Move it in pose mode and see what it moves. Its name might also tell you what it is too
cedar steppe
it didnt move at all with any of the model so i can probably ignore irt
devout scroll
cool!
 wheat delta
So I have this annoyance that keeps occurring in Blender where materials with normal maps get this diagonal edge running across it either in reflection or via the lighting as in the picture. I have been playing around with flipping Green channels in the normal maps, different space modes (world space, object space etc) and so on. Scale and rotation is applied on the model. Normals on the mesh have been recalculated as well. It happens in both Eevee and Cycles.
Edit, found the flaw, color mode for the image node was "sRGB" and not "RAW"
wheat delta
Check pinned posts for commission options
spiral sigil
Is there a software that utilizes a camera to create a scanned 3d model of someone?
latent charm
spiral sigil
Is there a software that utilizes a camera to create a scanned 3d model of someo...
Meshroom is a free & Open Source tool that can be used to reconstruct 3D models of objects from multiple photos
https://alicevision.org/#meshroom
AliceVision is a Photogrammetric Computer Vision framework for 3D Reconstruction and Camera Tracking.
spiral sigil
@latent charm thanks
spiral sigil
cedar steppe
anyone know how to test if a weight paint is good?
Play some animations or use pose mode and rotate the bones and judge by yourself if it looks fine or not.
pastel fox
The model i downloaded has 300 thousand triangles and even if i bake it in every way it stays bugged, like the quality drops a lot, or it goes blocky
i've tried every bake but it was worthless
quaint jasper
Start with a less high poly base ? Or do it manually
pastel fox
this is the best i can get
 open scarab
Its the ~~red ~~hair strands on it, they are pretty insane
model itself is very low
reminds me of vrm hair
well there's your problem, its nearly all hair
quaint jasper
Lmao


 clear geyser
cedar steppe
anyone know how to fix this? blender wont let me inport mdl file using an addon
 spare vector
How do you weight paint precisely? I want to attach the orange to the head bone because it's originally on the neck but in weight painting all the hair unhides and gets in the way
 wispy orbit
you can also select the vertex in edit, switch to weight paint, enable vertex mode, and do shift-k

Blender Stack Exchange
I was wondering that in the weight painting mode, how can I set a specific weight for a certain group of vertices instead of painting it over them?
lament pond
cedar steppe
anyone know how i can add materials well?
in blender i added materials and i have to asign areas to each material but it wont let me asign
when i highlight the area and then click asign, when i come back its gone
yeah i am
i cant really screenshot it it would be a vid
material one is always full and second one has nothing
 long grove

Timelapse from Tuesday's stream featuring Octavia!
If you want to see more of my models you can find them at
https://twitter.com/CGs_Models
Timestamps:
0:00 Sculpting
7:07 Texturing
8:29 Final
Music:
Ghosts - Envoi
Intentions - Envoi
cedar steppe
im not making my own model, im using an existing one
spiral sigil
pastel fox
The model i downloaded has 300 thousand triangles and even if i bake it in every...
Hand me over your model and I will see what I can do for you.
pastel fox
spiral sigil
Hand me over your model and I will see what I can do for you.
Wait a little, i need to start my pc
 final coyote
Made some Crocs for my character - Learned that geometry in blender is not 2 sided so had to flip normals
cedar steppe
anyone know how i can add textures to this now ?
https://cdn.discordapp.com/attachments/534472629013315606/796828265406005268/unknown.png

 final coyote
@cedar steppe wanna stream it and we can get in voice chat and I can look at it with ya
is there a voice chat in this discord ?
cedar steppe
eh rather not talk to be honest
cedar steppe
not sure what that means
final coyote
change your view to show it as solid instead of just the wire frame
Then you may want to check the UV editor
cedar steppe
this ?
havent touched it if thats it
i only did the material things recently because i only had one material but needed to apply multiple
neat viper
@cedar steppeSelect one of those vertex groups on the right, then press the "Select" button (right next to Assign and Remove) to select those vertices, then go to the material tab and make a new material, then click Assign (with the vertices still selected!)
That'll make a new material, assigned to those materials only - once you have a material for each of those vertex groups, then go to the Shader editor, add an Image texture and link that to the Color node of the material
cedar steppe
i already did the assigning thing by hand
neat viper
for example, in the head materials, add head.png (image texture) > Color (of Principled material) > material output
do you have materials for each of those vertex groups then? o:
If so, just the shader editor step'd be what you need
neat viper
In that case, go to the Shader editor and apply the respective textures to the Base Color input of the Principled BSDF node
Like this, but with "Image Texture" instead of noise texture
cedar steppe
yeah im having a look, theres alot
neat viper
a lot of what? o:
neat viper
Here's how to add an image texture
After that, click "Open" on the resulting node and find whatever texture you need for that material
cedar steppe
how did you open the orange tab?
neat viper
above image
cedar steppe
i think im being a monkey
neat viper
sorry, here's a better image of what I'm talking about
cedar steppe
click the yellow?
neat viper
click and drag the Color output from the image texture node to the Base Color input of the Principled BSDF (green) node
cedar steppe
i dont have the orange tab to connect them
cedar steppe
cedar steppe
right got it sorry
neat viper
you're fine! c:
cedar steppe
ok connected
neat viper
cool! You can move on to the next material using the Material drop-down at the top
there should be multiple materials in there in your case, only one in my example lol
cedar steppe
wait i missed a step i think
i connected the nodes
how do i put in the texture?
the head is just black right now
neat viper
Click Open on the image texture node, then find your texture from there
cedar steppe
ok worked
neat viper
cool! After that, repeat the process for the rest of the textures
cedar steppe
when i switch to a different section the one i just did disapears is that fine?
neat viper
yup! You're just editing a different material lol
alternatively, you can do it directly in the material tab in the viewport, by switching to Image texture through here, whichever is easier
neat viper
which view are you in? o:
neat viper
i mean in the 3d viewport lol, are you in Material Preview or solid? o:
cedar steppe
yeah even now im in layout and hes completely blackk
neat viper
and you can exit the shader editor and it'll apply lol
Did you add the textures to the image texture nodes? o:
cedar steppe
yeah i believe i did, ill make sure
when i select the head in the shader editor i see the right texture
but not with the others
neat viper
image?
cedar steppe
neat viper
could I see an image of one of the all-black materials in the shader editor? lol
neat viper
you don't have a texture in the pants node, it still says Open by itself
neat viper
you're fine! c:
If the filename isn't shown there, the image texture node doesn't have an image in it
cedar steppe
not there for the shirt tho
or any other shader
would it work if i applied them in unity?
neat viper
huh - would you mind going into the 3D Viewport in Edit mode, then to the materials tab, selecting the Shirt material and then clicking the "Select" button?
neat viper
i know, just choosing shirt just to see lol
I don't know, I might just be smoothbraining but that should work
neat viper
Can you send one of the texture images directly? o:
-preferably one that isn't working
neat viper
that's...weird
I mean if it works in Unity, it'll probably work in VRChat but still lol
You could also try saving Blender, then closing and reopening the .blend project, just in case it's a quirk with Blender or something
cedar steppe
ok ill try
re opening didnt do anything
ill try appying in unity
how do i apply here? when i drag it on it resets the materials to one
neat viper
just wondering, open that Materials folder in the asset browser?
cedar steppe
neat viper
sstrange o:
I'm assuming that's a fresh export from Blender, right? o:
as in, exported after the vertex group/material application stuff
neat viper
Try clicking on the "TEXTTEST" mesh asset in the main folder, then go to the Material tab in the inspector (top-right)
There should be an option to use custom materials instead of imported in there, I think?
cedar steppe
oh yeah
it gives me preset options tho
like random shaders
oh damn i got it
finally
neat viper
ayy
cedar steppe
as soon as i switched to custom it self applied everthing
thanks man, ive been slaving on this for ages and you made that time alot shorter
hopefull i dont get any other issues
neat viper
nice, and yw! I still can't explain what Blender's problem is lmao, but woot
cedar steppe
thanks so much
nvm i got tricked
the textures are mostly black
and not the right ones
for some reason the shaders are still black
neat viper
that Materials folder sHoUlD have more stuff in it, with the custom materials setting enabled?
the wrong textures very well might be applied in there
neat viper
try manually applying the suit texture to the respective material in there? o:
cedar steppe
how
neat viper
Drag the texture (bmp) to the tiny box to the left of the "Albedo" text in the material, in the Inspector
cedar steppe
theyre the right ones
well i dont think theyre the material ones
but theyre the ones i added in
if i delete the bmps it deletes the shaders
how can i add these ?
neat viper
drag the materials to the respective part of the model (head material to head, etc)
neat viper
huh
Click one of the materials, so it shows up in the inspector?
cedar steppe
neat viper
huh
neat viper
as a test, make a new material in Unity, then drag one of the BMPs to the Albedo checkbox
then apply that to whatever respective part that texture applies to
neat viper
not the materials, the actual texture
Right-click in the Asset browser at the bottom, then make a new material from there, then drag one of the .bmp image files to the Albedo checkbox
neat viper
yup
cedar steppe
what do i do with tit
neat viper
Then import one of the textures into the Unity project (assuming they're not in already), then drag that to the box to the left of Albedo
as in, .BMP image files, not the material balls
neat viper
..wot
cedar steppe
yeah the head looks fine
neat viper
as in, when you drag-and-drop the .bmp image into Unity, it makes a material and applies it?
neat viper
that's really weird lmao
nonetheless, import something besides the head, like the suit/pants, then apply that texture to your newly made material
-then, drag the resulting material onto the pants of the model
neat viper
Click and hold on the image file in the Asset browser, then drag that up to the little checkbox next to the Albedo text in the material (top-right)
select the material first if the material isn't in the inspector, then drag the texture (image) to the box on the left of Albedo
cedar steppe
when i drag the new material into inspector all the others dissapear
neat viper
don't drag the material into inspector lol, just select it
as in, click on the material in the asset browser
material, as in the ball
neat viper
cool! then apply your new material to the pants of the mesh
neat viper
materials likely aren't applied to the right vertex groups in blender, then?
cedar steppe
i am certain that they were seperate
i sent you a pic of the shirt vertex
and it was just shirt
neat viper
could check that in the uv editor, potentially
cedar steppe
maybe i should redo the entire vortex using that thing you showed me instead of by hand
also those textures look alot different from the origianl model
neat viper
they're default unity materials likely, so they're probably really reflective/weirdly shiny looking
cedar steppe
right can i change that in setting or such?
neat viper
In the material yes, that'd be the roughness/smoothness slider
neat viper
select the vertex groups on the shirt?
cedar steppe
for some reason when i change the name of the shirt vortex the pants vortex changes also
i should probably re do them and see
neat viper
oh wait
were those vertex groups supplied by the model, or did you make them manually? o:
cedar steppe
manually
neat viper
that's the cause of your issue, then
cedar steppe
yeah ik
neat viper
Those textures are layed out for a certain UV layout, and so making a new one will break it
neat viper
you'll have to use the original UVS that came with the model
cedar steppe
these ones?
i only made materials
i made materials and assigned them specific areas
but in this vortex tab i didnt touch
neat viper
ah, should be fine then I think lol
cedar steppe
so where do i go with this
the mats are fine i think
but the vertexes here are preset i think
neat viper
tell 'ya what, open a new workspace and switch it to the UV editor
click here and drag to the left to do that
neat viper
Your cursor should turn into a + - click there, and drag to the left to make a new workspace, then set it to be the UV editor
refer to the above image lol
neat viper
cedar steppe
ok got it
neat viper
now, select the mesh in Object mode, then go to Edit mode and select all (press A)
cedar steppe
ye
neat viper
It should show you the UVs of the model, in whatever panel you have set to UV Editor
cedar steppe
yes
neat viper
In the top-right, you should be able to switch to one of your materials - switch to the pants, as an example
from there, go to the Materials tab in the lower-right, select the pants material, then click "Select"
that should show how that texture is being wrapped to those verts
neat viper
sorry, was wrong - hold on
neat viper
right - next to the Open icon and + New text, there should be an icon of an image - click that
from that dropdown, find the pants texture
cedar steppe
im lost , whats the open icon
neat viper
neat viper
that's..weird
cedar steppe
neat viper
that's different lol
Find the boxes at the top of the UV editor workspace that says "+ New | Open"
cedar steppe
cedar steppe
ok
neat viper
from there, find the pants texture and click it
cedar steppe
it just shows the bmp texture files
neat viper
select all vertices on the mesh again, then press A in the uv editor