#3d-modeling
1 messages · Page 56 of 1
 umbral crystal
lol
 ripe lotus
I love how you modeled just the butt
Some people start modeling the face or body first but Wulfe?
the ass
umbral crystal
no it was just test
make low poly booty and make into supa smooth wit modifier only
ripe lotus
oh xD haha nice job OwO
 fossil inlet
Finished the hair; just need to model and texture a couple of accessories and then I can get rigging
 mint prawn
looks amazing rome!
 void narwhal
perhaps you should consider adjusting the whites of the eye looks yellow to me
umbral crystal
i call hax
fossil inlet
The whites of the eye irl aren't actually white, they tend to get a bit yellow/orange/red as you get further from the iris
void narwhal
yeah realistically but art isn't always realistic
fossil inlet
@mint prawn Thanks Jerome 😄 That means a lot
umbral crystal
sometime it look more visualy appealing
2 hav thing 'so realistic' that it not realistic
like hollywood explosion for exampl
fossil inlet
I'll keep that in mind
 strong thistle
so please remind me when i export a tree or some model from blender what the export setting to force it to stand up strait in Unity as its changing the x axis ?
umbral crystal
change the up axis
or use a transform
that rotates it by -90 on X after making it applied when at 90 X
or try applying transforms
 bronze bridge
strange i dont see a import to unity from blender :T
 urban gust
fossil inlet
urban gust
fossil inlet
Oh they disabled adding images to the channel?
Oh well. For some reason importing the VRC SDK improved my materials so here's the finalized model next to the concept I was given:
https://cdn.discordapp.com/attachments/532570393169625098/555630900625276940/unknown.png

And a quick animation test using VRC's walk animation: https://gfycat.com/barrenelderlygrackle

 hallow bough
Woah looks awesome!
 dull canyon
dat butt 👌
 spare goblet
is anyone had vergil yamato model?
dull canyon
you might wanna watch the Unity beginners tutorials then
 crimson mist
@plush token what software did you use for texturing? Except for the eyes
spare goblet
Help my vrc sdk menu says clear chache and PlayerPrefs
The method is not founded
Seriously
spare goblet
@fringe rock yea i just add free katana
so what do i do
@spiral sigil sorry to interrupt but i would like to ask because my vrcsdk cant clean the cache so do i have to delete the add ons or just the sdk file?
Hello i need help
Seriously
@rigid moat sorry to interrupt but i need help
 zinc furnace
Importing the SDK makes your stuff look better because it automatically adjusts some quality settings, including the world light color's influence on the model. It also adds stuff like Light Temperature Mode to lights
And a lot of other stuff
I had the same thing happen when I was working on shaders in a separate project, I couldn't figure out why it looked so off until I imported the SDK
@spare goblet #rules
spare goblet
Oh sorry
But i just new to unity
Well its because the cache could not load
Okay i will find my own way sorry to interrupt your night time
@fringe rock and its still not works
Should i redownload the Unity engine?
 fringe rock
you have the good unity version and the last sdk ?
spare goblet
@fringe rock yes
The lastest one
With the number 5 on it
The right version for vr chat
fringe rock
make another project i guess with only the sdk
spare goblet
@fringe rock i did
I delete all the old one
And its not working
Because the console told me that its not work
fringe rock
project
spare goblet
I did
Maybe i gotta have to take the picture
Because its jpeg file so let me put it in your dm
fringe rock
your unity is Unity 2017.4.15f1 ?
spare goblet
No the 2018
The lastest
Or the compatible with vr chat
And yeah i gotta have to redownload tommorow
fringe rock
you need to use Unity 2017.4.15f1
 onyx juniper
@fossil inlet I'd never seen the reference for your project before. I think the source has much more rounded, girlish mouth or low cheeks compared to the indented mouth or higher cheeks in your model
fossil inlet
🤷 If someone wants a 1:1 recreation exactly as the concept shows maybe they should pay more
 plush token
@crimson mist the whole thing was textured in substance painter and modeled in blender
fossil inlet
At some point you have to move onto the next stage and if it's not exactly like the concept, oh well - @onyx juniper
onyx juniper
I agree with the latter sentiment, but not the former
I half expected my critique to be too late
fossil inlet
That too; nothing I can do about it now. As long as the client is happy I'm not concerned.
Not to mention that I'm already taking about 1/3 - 1/5 of what I'd be making if this was a character for a studio, so I can't just spend dozens of hours trying to exactly emulate a likeness from concept art (which never has perfect proportions anyway and might not translate well to 3D) is a waste of my time when I'm already not being paid enough as it is, but people aren't willing to spend $5k for an avatar, so compromise is the name of the game.
And if this was a hero character for a studio I'm making about 1/50th of the cost for the work put in - 1/3 is the very lowest end of the spectrum for a small studio who can't quite achieve AAA quality.
dull canyon
"At some point you have to move onto the next stage and if it's not exactly like the concept, oh well"
yep, that's also what I'm currently trying to do while re-learning to draw and learning to 3d model. don't spend several weeks on one piece/stage, set deadlines and just see how far I can get and move on after the deadline is met
I guess especially when learning stuff you wanna get mileage, not masterpieces
crimson mist
There's a cool rule for a similar channel in a gamedev discord I'm in
If someone doesn't ask for criticism of their work then don't give it
I could say a thing or few about each avatar that is shown here but I stay quiet because otherwise it would look like a roast subreddit :x
onyx juniper
I've never thought that rule was cool
 latent charm
There's this even better thing where whenever you criticise their work you also offer a solution or advice to help fixing it and generally phrase the whole thing in a helpful way.
Example:
Your topology is shit, what the fuck are you even doing. ❌
The topology around the eyes is a bit funky and might make blinking weird, here's a site that has some face topology link goes here ✅
fringe rock
the Rome character look like Alita for some reason to me. I think the lower cheek are maybe not chobby(more round) enough and the higher cheek not high enough I would say. should be easy to move the vertex around
fossil inlet
Please stop trying to fix my character. Moving verts would distort the texture. She was baked with how she currently is in mind.
fringe rock

dull canyon
pats @fossil inlet
I think it looks great 👍
@latent charm out of curiousity, do you have experience with drawing/character design?
latent charm
The extent of my drawing skill is the time I drew a penis on the inside cover of someone's textbook at school.
dull canyon
haha alright
 small cloud
You're hired as our senior artist.
latent charm
Sweet, I charge 12 yellow an hour, but it goes up to fuschia on weekends and overtime.
dull canyon
I only have green tho
onyx juniper
I haven't been roasting anyone
ripe lotus
I'm having an issue i've never run into before, a couple verts on my model i'm making that are not being influenced when I skin them. I've never had this problem before so I'm unsure how to fix it. I've tried unweighting it completely and removing all the vert groups from it but no results. Any ideas?
Oh nevermind I got it!
 dull canyon
tell us how you fixed it >_<
other people might run into this issue and would appreciate the solution
ripe lotus
I seperated the part from the rest of the model and cleared all of the vertex groups instead of just the ones near it
 gentle forum
How would you go about using subdivision without creating more tri's?
gentle forum
Does it not
umbral crystal
point of subdivide is to subdivide
sub divide
aka to cut and split
dividing faces
oof
gentle forum
?
umbral crystal
plain smoothing is different but then u prob not have enough faces for it 2 actually do a good job
 umbral crystal
the whole point of subdivide
is 2 cut ur faces in halves or fourths etc
and also apply smoothing if thats what u chose
gentle forum
how do i make it look more like that though
gentle forum
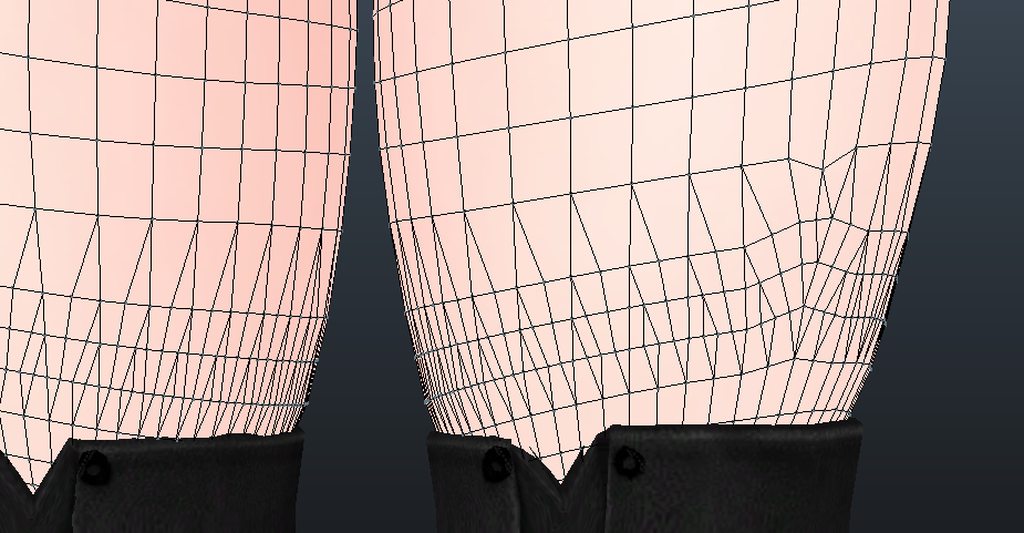
all my stuff just looks like this http://imgur.com/a/NfLeuNb
 umbral crystal
well again
thats just crappy topology
u can try the tris->quads thing
but it might not work bc of the shapes
gentle forum
:/
umbral crystal
typically good topology means always using quads if it can follow the quad pattern
there 0 reason 2 have triangles on those legs
gentle forum
yeah well that's what im trying to fix but nobody's giving me any direction
umbral crystal
well u can try using edge dissolve or tris->quads tool
ripe lotus
Are dynamic bone box colliders a thing?
umbral crystal
u can make ur own collider scripts but afaik those won't be used in vrchat
cuz theres a colliderbase
ripe lotus
Ah okay, thanks Wulfe
umbral crystal
also u should prob not try make into box by putting corners
each collider script u attach means every bone in ur dynamic bone needs to check for it
so if u have 6 dif dynamic bone collider on the box
and it for example hair with 20 bones
ripe lotus
I was just curious if there was a better way to keep hair from clipping through the back of a model
I'm expeirmenting with two inside colliders to try and constrain them to the back
fringe rock
put a giant collider
ripe lotus
and its kinda working but not to the perfectly desired result
 bronze jasper
hey guys, would anyone be willing to give me some work? I need the money and I've missed the modelling community in this game
bronze bridge
for some reason everytime i open up blender it cannot read the previous files I saved
gentle forum
After subdividing and smoothing out the mesh, how do I eliminate any stretching from the UV's? Or how would I unwrap this specifically? https://cdn.discordapp.com/attachments/474595660264505345/555954226359042059/unknown.png
 umbral crystal
u can try unwrapping by marking seams and also re baking textures to the new uv map
it should more evenly spread out the uvmap
if thats a mirrored uv map u can also use project from view
 subtle jackal
There's no real automatic way to remove stretching. You can try pinning the borders and re-unwrapping but that only does so much
the best way is to apply a test texture to your model and move verts around in your UV islands until you remove the stretching
small cloud
@gentle forum alt+J and in operator bottom left change degrees to 180 and checkmark compare UVs
might not get rid of all tris, but rest can be done by dissolving diagonals with selecting them with edge selection and then ctrl+X
spare goblet
Help i cant upload my avatars when im finished with my avatar i cant upload it once i finished it the menu for naming avatar is not shown up
Hello
I dont wanna ping anyone so pls help me
onyx juniper
@spare goblet #avatars-2-general
 weak venture
where do i even go to make an avatar?
umbral crystal
whatever tool u make characters with
and then unity
pretty self explanatory
if u dont know anything at all then a completely from scratch one is prob not the best idea
dull canyon
I mean
I basically didn't know anything at all either 😄
granted I still don't know much but it's not impossible to just start from scratch if you have the devotion and motivation
and time
crimson mist
Importing MMD models is a good start
onyx juniper
If I could just stop creating spirals in the hands and feet that would be great
 zealous mountain
there a way to get cinema 4d stuff into vrc?
idk how to get what i make to go anywhere... i sound so dumb. can u export ur c4d model u made into a fbx or obj file? idk what to do
 dense kelp
@zealous mountain as far as i could find from researching, you can export from c4d to .DAE or .FBX, both of which can be opened in blender or imported into unity
zealous mountain
ok, well now i know that now lets hope i can figure how to do that
also do u now how to get a animation to be exported with a model from c4d to unity
 thorny fractal
pretty much finished the diffuse textures time to make the rough/ metallic maps, but those wont really matter in the vrchat port version of it
her arms look kinda short in this i think but its cuz of the angle and fov of the camera
 vast elk
i think its perfect
subtle jackal
Arms look fine to me
thorny fractal
i was just saying but usually your hands go down to the center area of the thigh it just dosnt really seem like it would in this shot
subtle jackal
seems like they'd reach to about the stockings or so by my eye
thorny fractal
maybe im just too tired to tell then
subtle jackal
Probably been looking at it too long 😛
onyx juniper
Can I just ignore these spiral loops?
void narwhal
make sure you apply location/scale/rotation
unless you're having an issue with something else in regards to mirroring
🤷
 keen karma
No I figured it out
void narwhal
good
umbral crystal
oof
void narwhal
beating up* my family
 sick skiff
Anyone know how I could fix this? Tried re-UV Mapping my avatar, can't figure out how to get the area around the cross on the arm to not screw up. https://gfycat.com/CheeryPrestigiousGoa
 umbral crystal
thats a shading issue
usually bc of topology problems
make sure the cross is not part of that arm
as in it floats above
 maiden lagoon
Can anyone recommend a good weight painting tutorial (specific to VRChat would be amazing)
umbral crystal
either that or mark edges around the cross as sharp
i mean weight painting isnt related to vrchat at all
its just a way 2 rig the mesh to the character rig
proper weight painting is a standard in all areas
maiden lagoon
oh ok I was told that doing it for VRChat was somehow different or made more difficult - guess I was misinformed
umbral crystal
no its the same process
Its just that vrchat requires specific bone arrangements (for humanoid avatars)
and in some cases specific bone names
maiden lagoon
got it - so general knowledge of rigging for VRC should cover that I imagine?
maiden lagoon
thanks for always being around to help.
umbral crystal
woof
sick skiff
The cross seems to be part of the arm, like it kinda separates one edge into several
https://gfycat.com/SpanishHarmlessAnt
 sick skiff
If I mark the edges there as sharp that should help right?
umbral crystal
yea
sick skiff
Yeah this model isn't really the most well made
sick skiff
Only one I could find though, beggars can't be choosers I suppose
umbral crystal
so it won't do smooth shading
u can also try to use autosmooth
removing any custom normal data
it should make the cross have sharp edges automatically by angle
sick skiff
These are what the vertex normals look like if it helps any
sick skiff
Aight
umbral crystal
if an edge is marked as smooth
it will blend normals to the edge
so it will look like it is smooth
hence smooth shading
flat shading doesnt rlly do that
it doesnt blend normals so it looks flat
bc the normals change drastically instead of smoothly
so it would get rid of the shading problem
but yea typically it would make much more sense 2 just
put the cross on top of the model
unless the model had enough quads to already extrude a cross
cuz that is just bad topology
u see some nice "quads" (tris actually but)
and all of a sudden
boom extra polygons that mess up the flow and also add unnecessary connections
umbral crystal
yea whatever connecting edges
sick skiff
Like this, or just the perimeter of the cross and square?
Or including the edges connected to the perimeter?
Also the thing I'm trying to fix isn't specifically the shading, more the issue of the offending faces kind of stretching where they shouldn't be on the UV map
The other arm here unwraps fine since there isn't a cross or anything on it
umbral crystal
try marking seams to help the unwrapper
like under the arm and around the shoulder for example
so it can expand into a cylinder
sick skiff
Did that already
It's under the arms, around the back of the shoulders, and on the sides
umbral crystal
o
also would recommend tris -> quads tool with compare UVs on and then fix some of the topology
sick skiff
Before this I just had a seam on the front-center and it was not great
umbral crystal
oof
also that unwrapping is a bit dangerous
theres a lot of places were textures may accidentally bleed into others
sick skiff
This is what the whole thing looks like, it's not exactly great but I'm too lazy to actually redo it, and considering it's single colors I could rearrange it easily
The biggest issue is that I unwrapped the coat rather lazily
fossil inlet
In Maya so no lighting, ignore the materials - just testing pose design. She's going to be carrying a big railgun and I'm not sure which of these two I like better:
umbral crystal
lol the line at the bottom
 fossil inlet
I think I like it better too, thanks ^^
onyx juniper
Fun shapes Katt
bronze bridge
im done with blender everytime i save it the textures just dont want to save even if i put it in a same folder
maybe blender only works with computers that are office working based?
 river gazelle
@bronze bridge If you do any blender edits to an image you need to save the image before you quit, I think it's F3 to save it
onyx juniper
 ripe lotus
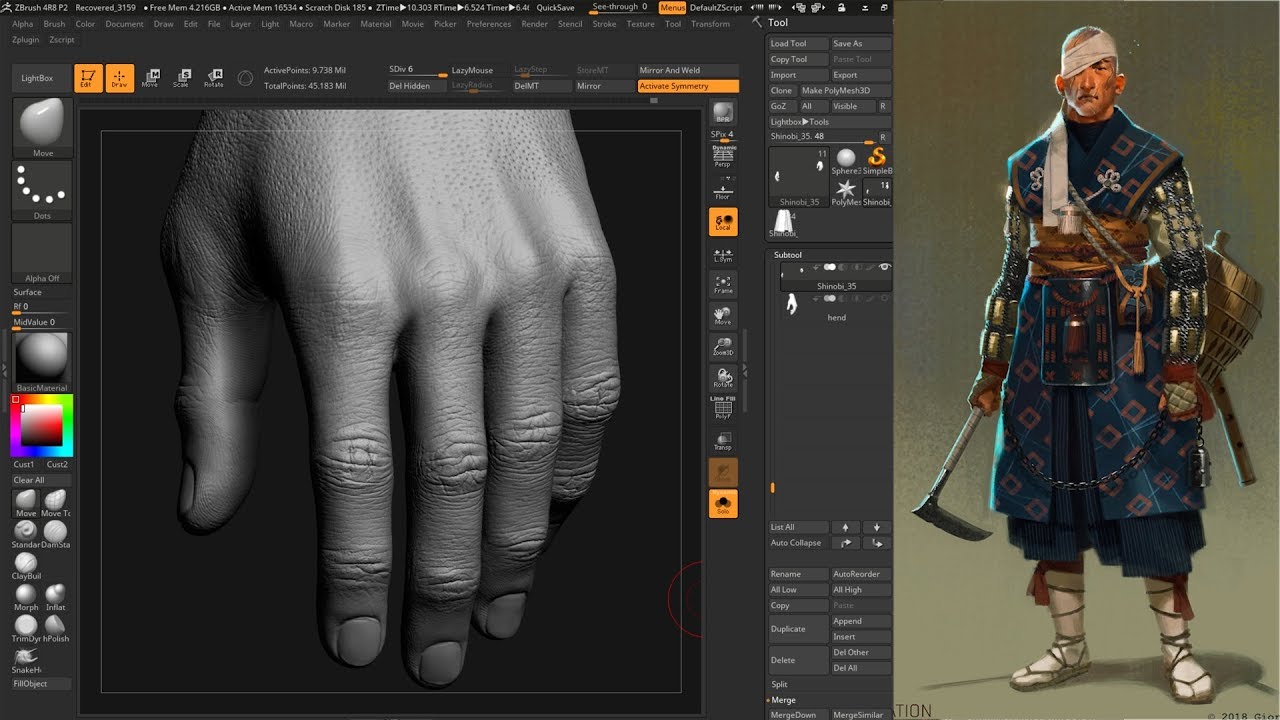
I made this character for a challenge on artstation https://www.artstation.com/contests/feudal-japan/challenges/53/submissions/37873?sorting=latest Artist - ...
this guy is insane
 autumn coyote
ЖЮ
 tender tendon
Who knew making a cat look fat is hard
umbral crystal
y is it so creepy
tender tendon
its just a sad chubby cat
 tender tendon
Its the generic sad cat face that people photoshop on everything
Was kind annoying making it fit the UVmap
Since i had to stretch it to the flayed uv face lol
 glossy tangle
are ngons bad for VRC?
i have a plush pillow im making and wondering how detailed/careful do i have to be
latent charm
Ngons are more of a pain in the arse than not. At least try to get decent quad-based topology
zinc furnace
They're essentially converted to tris anyway, I heavily recommend not using them
Quads are converted too but that doesn't really matter
I think you can turn that into quads without too many issues
glossy tangle
i will make them like bottom left...
latent charm
Yeah that's how I'd do it too
And everything above tris gets converted down to tris, sometimes you'll have to do it manually in certain cases as autotriangulation can cause smoothing problems in extreme cases.
glossy tangle
hmm.. is this the correct way to smooth the edges? Or is there a better way without adding so much geometry?
i beveled the outter edges...
subtle jackal
turn on AutoSmooth and either use the angular sharpening or set it to 180 degrees and mark the edges you want sharp.
glossy tangle
is auto smooth the same as smooth shading?
subtle jackal
also when you're doing hard-surface low poly modeling tris and n-gons really don't mean much of anything
sort of
auto-smooth is more a prerequisite for custom normals
glossy tangle
Well, its supposed to be a plush pillow wrench...
subtle jackal
ah
well then you might want to make that a little more obvious
but even so, it's still not super important since it won't be deforming like a character and won't be subdivided
hell a lot of pillows and cloth in games use the sort of triangle soup things like Marvelous Designer spit out
glossy tangle
Hm not sure i follow with autos smooth
subtle jackal
It's hard to explain without getting super technical but basically you use it in combination with marking edges as sharp manually to get the surface normals you want on your low poly
You could think of it sort of like smoothing groups in 3DS Max, or if you're familiar with the Edge Split modifier it's basically a better version of that since it works on a vertex normal level instead of actually splitting the edges.
glossy tangle
ok. Im going to have to read up on that then. Thanks.
onyx juniper
triangle soup I love this. I'm naming my band after this
glossy tangle
well thats what i have so far... not the prettiest but its a wip.
latent charm
Since it came up, if you do have some triangle soup you need de-souping, Instant Meshes https://github.com/wjakob/instant-meshes is a pretty damn good auto-retopologizing program.
Sometimes the face flow it outputs can be a bit weird, but noting a little manual fixing can't solve.

GitHub
Interactive field-aligned mesh generator. Contribute to wjakob/instant-meshes development by creating an account on GitHub.
glossy tangle
Thanks. Looking at it now.
subtle jackal
Alternatively, if you're a giant nerd like me who cares about things normal people don't (like supporting free and open source software), there are a couple addons on the Blender market which do similar things and are GPL licensed, too: https://blendermarket.com/products/tesselator https://blendermarket.com/products/dynremesh-2

Blender Market
Tesselator is an remeshing addon for blender that helps create good quality meshes out of sculptures

 spiral sigil
just wounding, what pose for a model is best? a post or t pose?
zinc furnace
Personal preference. A-pose seems to be more popular among certain groups because it's a slightly more natural resting pose
T-pose is probably easier when starting out
spiral sigil
thanks!
zinc furnace
And I see a lot of games that have a weird hunched over rest pose with their arms forward
onyx juniper
I think a-pose lends to or is easier for creating shoulder topology that follows and deforms like a real tricep
ripe lotus
 fossil inlet
@onyx juniper Deltoid*
Triceps are on the backside of the upper arm, wrapping under the Deltoid and down the side of the Bicep
 left scroll
Doing a little light reading on the subjects, and I'm currently under the impression that "retopology" and "decimation" are somehow quite different despite them both having the same goal of reducing poly count. Is there an easy way to explain how they're different, or would it be one of those things you'd only understand after working with them directly?
hallow bough
Please correct me because I'm learning as well but it seems like decimation is reducing polycount and retopology is turning a sculpt into a mesh? I'm a bit confused as well though.
subtle jackal
Decimation is pretty aptly named honestly. It reduces poly count, while basically destroying the mesh you use it on 😛
retopology is mostly used for turning a sculpt or high-poly mesh into a low poly but essentially it's the practice of reconstructing a mesh with new topology, regardless of what the underlying mesh is
just that 99% of the time when you do it it's from a higher-poly to a lower-poly mesh
dull canyon
decimation is also usually an automated procress, there's even a modifier for it in Blender
retopology is usually done manually, either the hard way by going into edit mode and drawing the new topology, or using something like retopoflow
left scroll
Ah, thank you guys for the responses. I've been toying with the idea (and haven't started at all on) of trying to increase the polys and detailing on a lower poly model, but I was wondering if retopology was unsuited for a model which had extra polys added through subdivision, rather than being sculpted from scratch.
Looks like it's one of those things I should just dive in and try to actually wrap my head around, rather than just reading up on 😛
was just an odd point that stuck out to me when i noticed "decimation" mentioned a lot over in #avatars-2-general , but "retopology" is mentioned much more frequently on this side
dull canyon
yeah, like asami said. there are generally speaking 2 approaches. either you model something from scratch where you already pay close attention to the topology, then later on you add details by sculpting and then you can just bake the high poly sculpt onto the existing low poly model.
or you basically start with sculpting, then retopologize and bake the high poly onto the low poly
from what I've learned it's mostly a matter of preference
at least for stuff like characters
subtle jackal
The reason you see Decimation a lot in the #avatars-2-general side is because some of them are working with existing models which are too high-poly for VRChat, and properly going in and reducing poly count is often difficult, and certainly tedious. Especially if the mesh is triangulated. So they use the decimation modifier instead. Sadly this is also why there are a LOT of really janky looking avatars in VRChat with things like holes at seams and really bad deforms when animating.
latent charm
The worst part about decimation is when I see people use planar decimation on deforming joints
😱
Just
no
fossil inlet
Finilized my latest character and ready to go onto ArtStation ^^
dull canyon
looks very nice @fossil inlet 👌
@latent charm or decimation on hands or face 😄
(which everyone at least says is bad because shapekeys or something)
latent charm
Decimation on the face with blender is generally difficult, since anything that alters the vertex order will destroy shape keys and usually blender won't let you do that.
The hands are because they deform so much in so many places. There is a way around this (to a degree) by using vertex groups to guide the decimation away from the areas that need to keep their structure.
That and Not using planar decimation on a deforming mesh
fossil inlet
Why decimate when you can retopologize like a normal, rational person >_>
Should never use decimate in general
dull canyon
yeah
just saying, that's what I learned so far
haven't done it myself
gonna start my second attempt at modeling my avatar this week
latent charm
Sarcastic answer: Lazy weebs
Real answer: A lot of people have just got into 3D because of vrchat and can only just manage importing files and the absolute basics, retopo alone is beyond their skill level. Not to mention transfering the original mesh's attributes to the retopo'd one.
dull canyon
yeah, obviously
but at least it gets people into 3d modeling
so if people keep making good tutorials for newbies on how to actually create their own avatars from scratch, that'd be a real good thing imo
maybe someday I'll try to do something like that, putting together my learning experience in a format for new people 😄
once I get confident and good enough at it
fossil inlet
Shit Minecraft got me into 3D modelling back in 2010 😅
VRChat teaches people way more than doing things for that ever did
dull canyon
yea
latent charm
I don't even know what got me into doing it but I have such fond memories of 2006 blender
dull canyon
now only the tools (mostly the SDK) needs to be a bit less "hacky" imo
or, more streamlined
but that's probably not that easy to do
latent charm
Yeah, definitely streamlined. For me once my stuff leaves blender that's where it all tends to slow down because of things like the SDK being a mess.
dull canyon
yeah
I can see that
like, even just little things like having to manually assign each viseme...
you'd think it'd be somehow possible to automate that when the visemes already follow a standardized format from Cats
fossil inlet
For me 80% of my workflow is zBrush and the last 20% is everywhere else ._. I spent way too much time sculpting
dull canyon
heh
latent charm
Yeah, if it had a vaguely standardized naming for them (which I think it actually does) any shape key that matches should be autofilled into it
If I cared enough about C# I could probably throw together an editor script to do that
dull canyon
I'm trying to get into daily speed sketching and sculpting to build some mileage
fossil inlet
If you get serious about sculpting, get zBrush. No other program comes close. Not even Houdini.
dull canyon
like, 30 minutes of 5 minute face or fullbody or whatever sketches, 1 hour sculpts, something like that
I ain't got the money for that
latent charm
ZBrush is amazing sculpting hiding behind an interface not even blender 2.4x could hope to be worse than.
fossil inlet
I actually like zBrush's interface, but yeah it's different to say the least 😅
dull canyon
I ain't got almost 1000$ to drop on a piece of software
I don't plan on doing this for a living, at least for now
latent charm
I just hate how pixologic are going the autodesk route of buying out any realistic competition instead of making sure they're better.
dull canyon
yeah
that's the easy route
competitors can't be better than you if there are no competitors
(I can english)
fossil inlet
Hard to improve things at this point. zBrush 2019's biggest feature was folders for subtools, but they couldn't market that so they're just marketing their Instagram filters for Non-Photorealistic Rendering because they can show off pretty stylized sculpts that way
4r7 brought a lot with Arraymesh, zModeler, and IMM instancing, that was probably the last release to really give us anything huge
dull canyon
I feel like if more software like this was cheaper a lot more people would get into it and they'd sell more copies...
instead of charging a small fortune which nobody who's just getting into the field would be willing to spend
fossil inlet
well now you can pay like $30 a month for it
fossil inlet
The $900 version is just the perpetual license, so you have it forever
I've had free zBrush upgrades for like 6 years now
Even though before 4r7 they acted like you had to pay for upgrades
they still gave us free ones, we just had to go through support to get a new key
and download link
dull canyon
I paid like 25€ for Clip Studio Paint a few years ago. constant free updates and it does literally all I need for drawing
no need to pay 30 or so bucks per month for Photoshop
so, it definitely is possible to sell good software for cheap
anyways
to each their own
I always see it as a challenge to prove people wrong when they tell me "you need super expensive software X to achieve Y" 😄
fossil inlet
But really though zBrush is considered the only sculpting program in the industry for a reason. Autodesk is phasing out Mudbox because it just can’t do what zBrush can, and Mudbox used to be the standard.
crimson mist
That's why I'll just stick to stylized modeling
Simple meshes and painted textures 
Competition in realistic 3D is strong but there is little demand for it outside the professional industry
I'm not going to pay $1000 for that :P
 foggy maple
@latent charm @dull canyon I actually made a auto viseme filler for the vrcsdk: https://vrcat.club/threads/vrcsdk-patch-visemefix-v3-2-autofill-visemes-in-unity.76/

VRCat: Community-Run VRChat Forums
VisemeFix
A patch for the VRCSDK to fix the automatic detection of visemes.
Compatible with Unity 2017
Overview:
The current automatic viseme...
dull canyon
nice
 open terrace
does they work without vrc. wulfe? as i remember by vrc's docs not, but btw you can just rename them in the script to whatever you want i think
zinc furnace
You can name them literally anything and it'll work
But you may have to manually assign each slot as always
fossil inlet
Unless you want the MMD dances to make your lips move, then there's specific names for those
But it's not a big deal for most people
ripe lotus
zBrush is amazing
i second it
or 3rd it, whatever order im in xD
there is a trial i believe if you're curious about it
 hollow radish
zbrush has a high learning curve but its worth it if your willing to put the time and effort
ripe lotus
absolutely
hollow radish
I only really use if for clothing for now but plan to use it for more stuff if need be
ripe lotus
though, i would go back again to something rome mentioned and thats learning the human anatomy
hollow radish
ooof
if I had all the free time, I would learn more, but I need to finish models in a timely manner
ripe lotus
that is if you're using it for human stuff
hollow radish
so I'm doing shortcuts
👀 anatomy is a pain and I was forced to improved
fingers and feet are still hard
ripe lotus
i find making clothes probably the most fun of any thing i build owo
hollow radish
yeah
ripe lotus
and armor
hollow radish
except when you do the hood
hollow radish
or anything kinda weird cause I'm minding weightpainting
hollow radish
Right now I'm trying out marvelous designer but I'll likely touch up the mesh in zbrush
though it has problems.... like uhhh
 ripe lotus
Oh i hate when you roll up your sleeve and your shoulder fall into the void
hollow radish
yeah

but I would say it does a lot better job at doing realistic folds
but has problems....
easy to set up things and learn quickly
ripe lotus
oh hecc
fossil inlet
@hollow radish if you’re keen on realistic clothing, try Marvelous Designer. You can export from there to zBrush to force some deformations and whatnot and up-res it to sculpt more detail
hollow radish
yeah, that's me using marvelous designer
ripe lotus
@fossil inlet How long have you been modeling? You're very good at it
fossil inlet
Thanks! I’ve been modeling for over 8 years and working professionally for 6, though I went back to college 2 years ago and have had less time to work on modeling since.
@hollow radish oh I totally missed the latter half of the convo, I just saw where you said you used zBrush for clothes 💀 knowing how to sculpt cloth is super important too, though.
thorny fractal
a lot of people dont want to put in the money for zbrush and dont liek cracking software so ive heard pretty good things about 3d coat. although if you want to go into the industry you kinda need to know zbrush
fossil inlet
@hollow radish adding pins and freezing areas is key to getting Marvelous to work right. It’s got its own order of operations “-.-
fossil inlet
It can be VERY frustrating at times. I used it in version 3 for the longest time and then next thing I knew it was on like, version 5 or 6 or something, and they totally changed it
Very frustrating having to relearn it or buttons, keybinds, and menus not being the same or in the same place as they were 2 versions ago
FlippedNormals has a good guide on creating a punching bag, should give you a good idea of the basics if you haven’t already seen it
thorny fractal
i hate marvelous designer because it just takes away so much control. but i like to use it as a base before sculpting over it in zbrush
thorny fractal
thats what its made for but people have found a lot of creative uses for it
ive seen somone make like a semi smashed soda can in it
i haerd with the current version too that you can import your own meshes into it now and simulate those instead of going through the whole process of cutting pieces and stiching them together
spiral sigil
Can I mirror an object after I do the change? Or do I need to do it before? I have an arm on one side and no matter what I try to do to mirror it it mirrors everything and I get overlapping verts/edges/faces and my tris go up like crazy
I'm really new to modelling so any help would be appreciated
fossil inlet
It was initially made for the fashion industry but no one in the fashion industry is a 3D artist so they didn't use it, and it was quickly co-opted by 3D artists everywhere for non-fashion industry use, lol.
ripe lotus
oh interesting
ripe lotus
@fossil inlet Do you do commissions?
fossil inlet
Yep the one I posted a bit above was a commission
ripe lotus
May I DM you and ask you a question?
fossil inlet
Sure thing
 solid glen
hey, got a quick blender question. working on a mesh and I realized that I have a few bits missing for vertices. I tried to use grid fill, but I'm trying to mimic the existing edges rather than create a flat plane. help? selected vertices are what's being an issue
hollow radish
remove doubles
hollow radish
its possible you have multiple vertices in one spot
select the ring properly
press space
type "remove doubles"
and enter
solid glen
okay, got it. done
 vapid obsidian
I've been trying to rename some bones so they appear correctly in Unity, but even if I just import the model into Blender and immediately export it without changing anything, the position and rotation values are different than before I imported the model.
Is there a way to export a model without modifying any of those values?
 stuck patio
anyone know how to decompile a VRCA file 🙃
umbral crystal
???????????
stuck patio
Someone sent me their avatar in a VRCA format wondering if anyone here know how to decompile it into something Unity workable
umbral crystal
tell them 2 not do that then..?
plenty of other formats..
also wym 'sent me' cuz i was 100% sure u only got .vrca from hacked client.........
stuck patio
nvm he sent me the unity file
 jagged gale
Could i get some help on texturing? Im trying the put the body texture onto the body of my avatar but when I do the hands texture disappears so Im stuck with only editing the body.
umbral crystal
extract ur materials
before u do anything to them
also u should be using less materials and also joining ur meshes together...
extract material is button on ur import in material tab
u just pick a folder 2 put the materials and then it extract there
jagged gale
@umbral crystal Got it, thanks!
spiral sigil
does anyone have a beard for avatars that i can have?
...
dull canyon
why is drawing faces so hard ;_;
really wish I had a mentor to point out what I'm doing wrong 😐
umbral crystal
what ur prob doing wrong is starting out detailing
usually if u didnt figure out good topology yet
u just make a quad sphere for head
and then delete some part 4 eye and etc
extrude other part
and move vert around wit proportional edit
dull canyon
well, I'm not even talking 3d, but 2d drawing
umbral crystal
y #3d-modeling ?
dull canyon
yeah, hence why I didn't elaborate further
 iron schooner

This is Model Princess Dragon No Clothing For Create you clothing and custom model creature fantasy You can modify the model and do not distribute it is not allowed to make "NFSW" and specifi...
Relase My Model 3D Free
You lIke?
subtle jackal
Honest opinion? It needs a lot of work. You have a very weird indentation around the ankles, the topology overall looks very lumpy and not well-defined, and there are some surface normal issues on the wings. Keep at it, though.
 static portal
Man I wish more people gave honest and constructive feedback like that.
subtle jackal
It can be hard to find good sources of critique yea. Usually you can get some decent feedback on 3D modeling forums and such
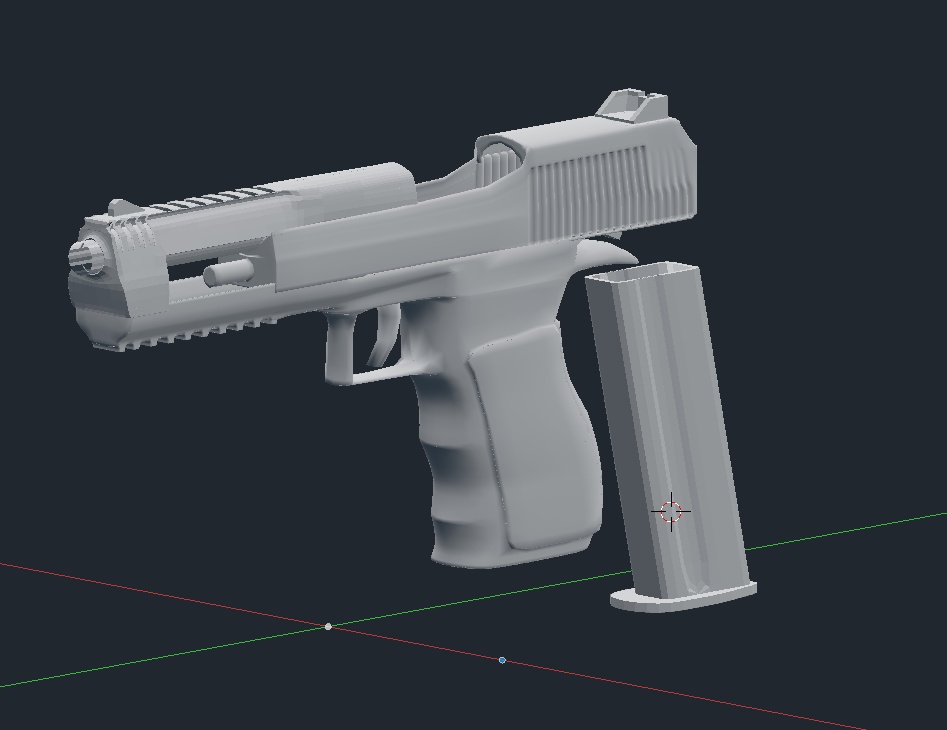
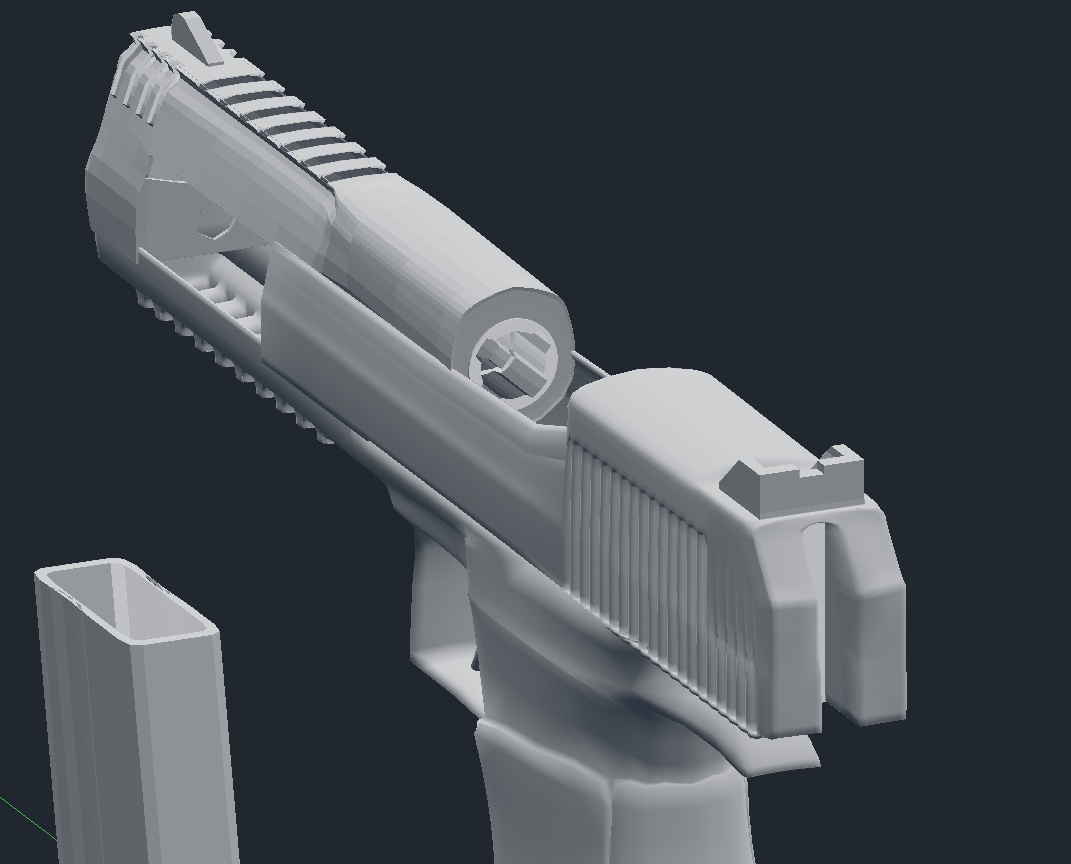
I've been working on a model of my favorite shootybang. I don't do much hard-surface stuff but it's been going mostly ok.
dull canyon
yeah, best I can usually say is "it looks off but I can't tell you exactly what looks off" which is usually not very helpful so I just say quiet 😄
subtle jackal
there are some anatomical things I could critique as well but I figured I'd stick with mostly technical ones because being a dragon it's hard to determine exactly what they were going for
vapid obsidian
Can somebody help me? Every time I import this model into Blender, it always exports with different transform values for the bones.
These are the values for this bone when the model is directly imported into Unity: https://gyazo.com/794cd26747fbdb868f7622fee0a56f16
These are the values for the same bone after the model was exported from Blender: https://gyazo.com/b0772a9d720ae3a9dfb9b50ab7b893d0


 rapid gull
Are you using the Cats plugin my best guess would be to use the "fix model" button in blender
vapid obsidian
Yes, it's causing my animations to not work correctly afterward.
zinc furnace
Depends on import/export settings in both Blender and Unity, the root bone setting, etc.
It should be consistent on every import as long as you stick to the same import method
Additionally
Ohh, I get it
Check the scale of the "Armature" object. Is it 1 or 100?
vapid obsidian
It was 2.54.
zinc furnace
When exporting an FBX from Blender, you need to do two things
You have to CTRL+A apply the location, rotation and scale on both the mesh and the armature
And you need to export the FBX from Blender with "Apply Scalings" set to "FBX All" in the lower left, in the export settings.
onyx juniper
Why not just save a .blend file directly into your unity project folder? It can read those
vapid obsidian
It sort of worked, @zinc furnace.
All except the X axes.
Apart from that, the animations work flawlessly like they did before! Thank you!
zinc furnace
That might be due to some rotation that is applied on the X axis
I don't think you can fix that on armatures
Only fix is importing blend directly or export as DAE
On meshes without armature you can fix it with "!EXPERIMENTAL! Apply Transforms"
On the export options
That may also work with armature, I never tried it.
zinc furnace
That won't help, FBX exports are always rotated 90 degrees on the X axis from Blender->Unity.
Unless you tick the option I mentioned
Yes, even if you apply all the transforms beforehand.
The "experimental" option doesn't just apply the transforms for you, it does something else that makes it work with Unity's different coordinate system (where Y is up/down rather than forward/backward).
You don't notice this generally, but the Body and Armature objects are actually rotated -90 degrees on the X axis when you're dealing with an FBX exported from Blender
 swift heart
i do it with armature stuff all the time, never had any issues
thorny fractal
if i enable to eperimental option then it breaks cloth physics and makes anything set as cloth basicly explode
but bringing in the .blend file is fine. this is a pain in the ass
i cant remember what i did that worked with my last model

 iron schooner
Okay Thanks
 gritty kiln
@ripe lotus Nice! Going to bake it onto a low poly version?
dull canyon
so, what are your guys' approaches to modeling/sculpting hands?
subtle jackal
lots of reference, both for the anatomy and edge flow
a few examples I've saved
fossil inlet
Hopefully this isn't against the rules, just published my character to ArtStation if you guys want to check it out, hit me up with a like if you have an ArtStation, I'd super appreciate it c:
https://www.artstation.com/artwork/1nBb4L

ArtStation
Game-ready character asset, inspired by "Space Bunnies" by Wenjuinn Png https://www.artstation.com/artwork/L24Xq0
 marble valley
does someone have a 3D model of kanye west ?
 keen delta

Selecting a single mesh point in the UV editor only to find out it gets more than one mesh point on the model
zinc furnace
Disable "keep edit mode in sync" might fix that
As well as if it's the other way around, 1 vertex having multiple points on the UV map
What's the issue though? It seems all of those use the same texture
You can select those parts and press U to unwrap them again, making them occupy different parts instead.
keen delta
It looks like the upper and lower teeth here share the same texture.
zinc furnace
Oh, they're teeth. Well if you're atlasing or baking, you can fix that by just unwrapping them again and they'll stop sharing textures
keen delta
I'm trying to make shape keys for lip syncing.
Just trying to move em around with the mouth, kind of annoying to have that problem but I guess there isn't much of a way around
zinc furnace
Oh, I see. Well in that case
Use border select with B or circle select with C and just unselect one of them.
With middle mouse
keen delta
Thanks
maiden lagoon
@fossil inlet You're super talented! Well done.
umbral crystal
i mean u dont need 2 do all that...
just select the teeth islands (by selecting a face in the UV and then select linked)
and make sure u have sync on
 pseudo parcel
so......unity hates me apparently and decided to do this
how the fack do i fix it?
iron schooner
you like?

This is Package Model 3d Fairy Dragon Create with zbrush and use base model create by user @rolneeq and Edit Base mesh for create Fairy Dragon Base Mesh for base my model Download&...
relase model 3d
thorny fractal
this is liek the 3rd time youve done this mate
ripe lotus
onyx juniper
Nice
Going back to hand topology, What's a common cause of spiral edge loops in hands?
subtle jackal
lack of planning probably. make sure you have loops at the wrist, around the thumb, and around the base of the fingers, should prevent them from getting too out of hand.
onyx juniper
It's just the face loops on the thumb not lining up through the thumb tip
onyx juniper
I think my problem is that 12 is a bad vert ring count for fingers
fossil inlet
You're thinking too hard about it. You shouldn't have spirals if you're manually retopping.
Create your main loops, then fill the in betweens
dull canyon
@subtle jackal I see what you did there 😛
subtle jackal
was actually unintentional, but I'll take it
dull canyon
sure 😛
crimson mist
@thorny fractal nice profile pic
iron schooner
onyx juniper
It looks like your armpits are digging into your chest there
keen delta
I don't know what I did but it looks like a single vertex was moved and now the shaders flicker whenever it's being moved. https://i.gyazo.com/ddf0c2789113ead25b37dad7325ed7c2.mp4
I think It must have been moved on the Basis shape key, because this noticeable on all of my shape keys.
hallow bough
Normal issue?
keen delta
It's not Z-fighting. From what I know this model has meshes laid on top of each other.
I wish I could reset this, but I've done far too many valuable steps before noticing this
keen delta
I selected that one vertex and deleted doubles, buttery smooth now.
 brave dune
im surprised i havent run into one in vrc yet so i decided to start recreating an old classic
brave dune
umbral crystal
u shuld make a dogo
keen delta
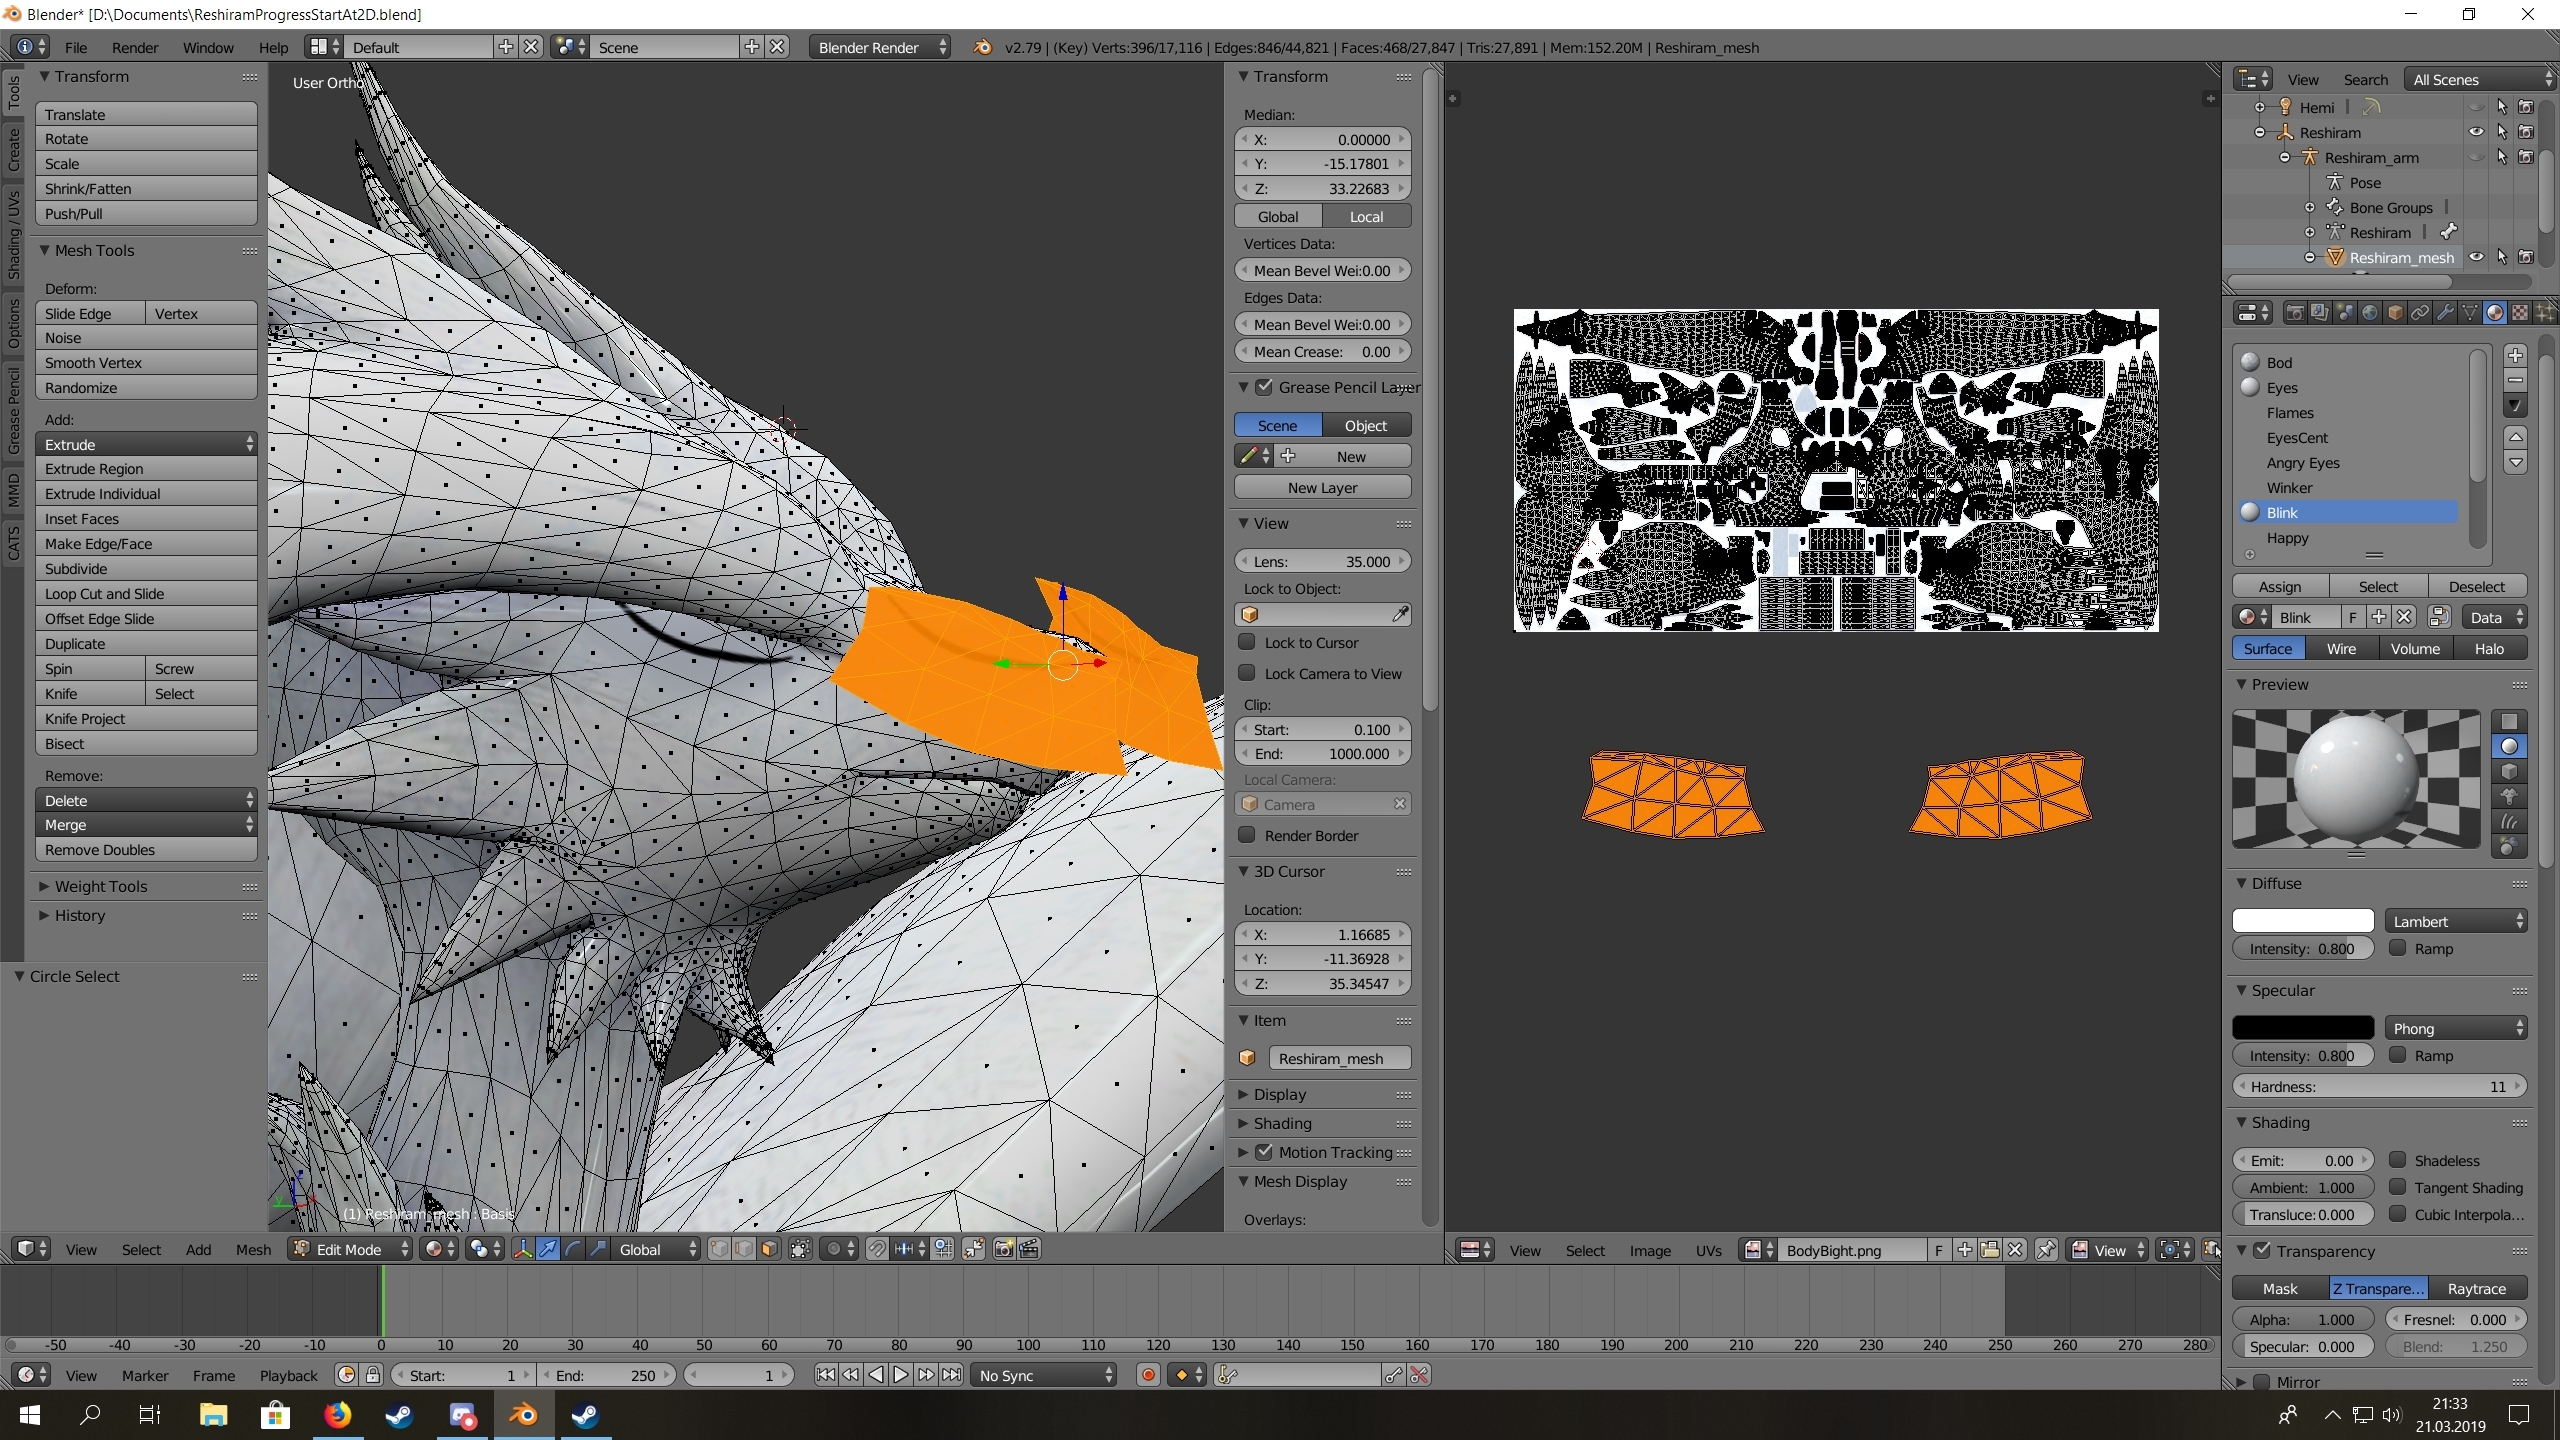
How do I make a duplicate mesh not show the same textures and materials as the original mesh? I want to duplicate the eyes and hide them inside the model until they're ready to be pulled out via shape keys, blinking for example. The model seems to have all textures included already. Though when I change the alpha to hide/ unhide the different textures like "Blink" or "Angry Eyes" both duplicate and original change https://i.gyazo.com/a0eb015fcd387ace192a120124a7599a.jpg
 umbral crystal
y would u change alpha??? use blend shapes for all
also u dont need that many materials at all, at most like 3 or 4 for something like that
keen delta
I'm new to Blender. That's how it's been since I imported the model.
umbral crystal
theres already tutorials on '2d visemes' anyways
that are basically the same process just different shape keys
keen delta
The one you're talking about is 55 minutes long and has no structure at all. It's difficult to follow and most of the time the guy just rambles.
umbral crystal
well the process is pretty simple
most models have just some plane or something with a bunch of different expressions on it
and u basically just make it move slightly in front of the mesh for the shape key
and when no shape key is applied it just hides inside the mesh
keen delta
That I figured out.
umbral crystal
u dont need any alpha stuff
keen delta
So how do I make the different meshes have different textures on them?
keen delta
I know I need to make duplicate meshes but they all share the same material https://i.gyazo.com/c3ffa53d216f47bf4a47470aa621a8c7.jpg

My goal is to have the original eye mesh stay open and the duplicate mesh to have the closed eyes so I can get going and make the shape keys for blinking
umbral crystal
u just use the atlas provided
usually there an image with like several eyes
and u just put each with their spot on the atlas
that or make it move the eye meshes inward
keen delta
No such thing as an atlas for this model, all eyes have a different file.
Solved it, made the duplicate mesh single user. Now I can edit the alpha independently.
The materials now have .001 at the end of the names
 silent acorn
@brave dune What shaders are those? They seem really close to the janky old PSX-ish ones
brave dune
default blender material while making the model
spiral sigil
Can some one possibly make a pink panther avatar like the animated one I’m a big fan of the pink panther and I can’t fined a avatar for it anywhere
 neon tree
has anyone thought of makin like a Freelance website for Vrchat? like u contact the freelancers and they make the models ect.
 celest crag
that kinda sounds dope and i wanna do that
 celest dust
I have a low poly model and need to sub division on it but what was task I needed to do before so it wouldn’t leave holes in my mesh
So it can be smoother and look less like low poly
celest crag
i mean i guess the task is look over your mesh and try to see if there is any holes or anything. Have you unwrapped your UVs yet?
celest dust
I don’t think I did but with lighting it looks odd
celest crag
Can you provide a screenshot?
celest dust
Can’t I’m at work
celest crag
ah ok, actually, you might wanna UV unwrap after subdividing, but thats really annoying to do, so if you want to not off yourself with UVs, you might wanna not subdivide and instead bake a highpoly mesh into the lowpoly to fake a higher res model
celest dust
Never heard of baking a high poly how that work on a mesh?
brave dune
the basic idea is that you have a normal version of the model and a high quality version of the model with modeled details and stuff like that. You put the two in the same exact spot and tell the renderer to bake a normal map by basicly looking at the differences in distance from the normal mesh to the high quality mesh
celest crag
basically you take the normals of the high poly and layer it onto the low poly
celest dust
But I don’t have a high poly version
celest crag
yeah thats what sub div will give you
but instead of just sticking with the high poly, and having a low optimized model, you can bake it instead which would save on a lot of performance (and pain when uv unwrapping)
celest dust
I don’t care if it’s optimized as much just to get the model higher poly and smoothed but using just sub division would leave holes in the mesh
I never baked in blender didn’t even really bake In unity
celest crag
well you cant bake in unity so you dont have to worry about that one XD, but alright then, what do you mean by holes specifically?
celest dust
Like how the sub division works it curves and cuts the edges so like the squares on the shoulder they get cut on the edge so it leaves a hole in random spots from the corner of a each box
I am at work for like a hour or two so if you could DM and I’ll be able to talk more on it
And send pics
celest crag
yes i am currently setting up a lil demo gif to try and understand your problem fully
void narwhal
Don't subdivide meshes without knowing what you're actually doing
cases you should commonly use it for for VRChat would be baking for curvature for shadows or detail for models that require it
celest dust
that was what i was missing
void narwhal
besides that make sure your model is comprised mostly of quads if not entirely
poles are something you need to pay attention to if you're modeling
celest dust
will keep it in mind
onyx juniper
Downloaded this hand example, and it has some face loops like this. Is this bad hand topology or to be expected?
latent charm
I personally wouldn't do some bits quite like that (mainly the one that causes it to loop around and cut across itself) but otherwise looks like fairly decent topology for a hand
onyx juniper
So you're saying that looping around and cutting across itself is avoidable?
latent charm
Shitty redline but I think you get the idea
onyx juniper
There's one of those diamonds on each side
hallow bough
What causes these weird lines on ambient occlusion bakes?
void narwhal
probably split edges/seams
aka try checking for doubles on top of the seams/lines
sharp edges on normals would probably cause the same issue
small cloud
@hallow bough screenshot of what you mean
 smoky laurel
Maybe not the best place to ask this, but does anyone know where I could find a decent quality free Nintendo 64 model? I really don't want to deal with making one myself with the weird-ass Nintendo 64 shape.
celest crag
you can probably find one on artstation, turbosquid, or sketchfab
smoky laurel
I've looked on sketchfab and turbosquid, I'll check artstation.
Though, I have absolutely no idea how artstation works.
Are there even downloadable models on artstation? It looks like everything is just photos to show off your work.
fossil inlet
That’s exactly what it is
Using sketchfab is stupid. People can just steal your shit.
smoky laurel
Well, it's not stealing when you make them downloadable.
fossil inlet
I posted my model on VRChat’s Reddit (it’s an ArtStation post) and I had people messaging me in screenshots about people from other discords talking about trying to rip it or find it in game and steal it
I just don’t understand why people are so shitty
That’s why I don’t provide 3D viewers
thorny fractal
if you provide a 3d view of it just like destroy it in some way so its unusable to the people who steal it while still being visually appealing
at least thats what i do
fossil inlet
That doesn’t stop VRChat people from stealing your stuff though. They generally don’t care about topology.
Or clipping
Or they’ll replace a destroyed part with a piece of another mesh
subtle jackal
Alternatively it's the internet, anything you put there can and will be stolen. It's just part of the territory.
fossil inlet
Which is why you don't use 3D viewers :p
don't put your model up, won't be stolen.
My client stays in private worlds with only 2 close friends, the avatar is 100% safe, still doesn't stop people from talking about trying to steal it
left scroll
There's a bit of a paradoxical element there when people are shown something they like and want, but aren't actually allowed to obtain. I'm more of the mindset that if you want your own digital creations to remain only yours without being circulated or distributed, then "out of sight/out of mind" to the public will upset the least people -- but at the same time, I get the idea of wanting to show off things that you've put time and effort into.
There's a rather skewed perception of ownership and what's considered "theft" when you compare tangible goods to digital or intellectual property
Off-topic stuff aside -- does the smooth/flat shading setting in blender have any effect in VRChat, or just outside of blender in general once you've exported something? Don't think I've encountered any lighting conditions which really makes me see a difference
void narwhal
yes it does effect normals in general but you have to make sure you're importing the normals within unity
you won't notice normals on flat shaded avatars without shadows/light influencing it
thorny fractal
if the topology is awful and you apply the armature so the character is posed but dosnt have a rig most of the time they might just give up because its a lot of work to fix
 terse meadow
anyone know where i can get a base model of mr game and watch?
i tried 3 on the models resource
they auto equip all items when i load it in
 slow zealot
open the model in blender and remove the items would be my solution
terse meadow
ok
celest dust
so i wanna make my models thighs thicker but some how my hotkeys for my shift Z is set to toggling yhe 3D render view
what should i fix it too?
 runic salmon
I downloaded this model and for some reason it looks like this when I import it to unity.
The sides are transparent if you can't tell.
zinc furnace
Extract the materials if you haven't already, then set the material to opaque. @runic salmon
If you already did that, you have to flip the normals on the parts that are "transparent". Select the transparent parts in edit mode in Blender, press space and type "Flip Normals"
runic salmon
well I imported the textures to blender, mapped em and this happens?
@zinc furnace
any easy fix for this?
when going into edit mode it looks like this?
void narwhal
i don't see any issue @runic salmon
looks like intended wear&tear the blue lines are marked sharp edges
runic salmon
nope that's not how it's supposed to look
void narwhal
give a reference image otherwise i can't really tell
runic salmon
I may just use it like that to give the wear n tear feel but it looks kinda scrappy that way idk
kinda looks like the textures are stretched
void narwhal
it looks like the reference image you gave me doesn't show the opposite side of the red pistol which you are showing
so it could very well be intended
given how the geometry topology is setup i'm inclined to believe it is intended
runic salmon
hmm maybe
hallow bough
@dull canyon Thank you! Working on rigging wich is going to be interesting. I hope I can get something decent as it is quite low poly.
runic salmon
@void narwhal fixed it, it was because I added a sub surface mod
removed that and it looks like this now!
void narwhal
great
glossy tangle
hey guys/girls i'm struggling a bit here trying to learn blender render (internal) and im wondering if it is possible to use cycles instead to texture models for VRchat or does it have to be internal? I'm more familiar with cycles. current wip:
void narwhal

I have several videos for beginners about how to UV unwrap and texture paint in Blender (with the Cycles render engine). This is the shortest video (16 minut...
but you should try blender 2.8
just keep in mind blend files saved in 2.8 can't be opened in older versions
fossil inlet
the topology on that Zapper is atrocious o_o
subtle jackal
That's because they subdivided it
fossil inlet
Subdivisions don't make your edge flow ass though
zinc furnace
Perhaps it's been sculpted and decimated, the lazy way lol
void narwhal
if they did retopo edge flow shouldn't be a concern for a prop like a gun
subtle jackal
well when it comes to hard-surface stuff you inevitably have a lot of fanned edges and so forth, unless you're working super high-poly from the start
void narwhal
generally you're always working high poly in mind* from the start if you're doing high poly at all
sculpting details is a different story
subtle jackal
well what I mean is if you're for example, insetting a circle into a flat plane you're not gonna add a bunch of unnecessary edges to the plane in a low poly mesh, you're just gonna create edges to each corner of the plane from the inset circle
which is basically what's going on in that screenshot
void narwhal
for good normals you're always gonna be concerned about edge flow even with hard surface modeling when you're working with a subsurf modifier
subtle jackal
when you're working with a subsurf, yes, but in that case they were adding a subsurf to a model that wasn't made for it.
void narwhal
my response was in regard to your high-poly comment
most normal baked geometry is going to be done with high poly unless you're going super lazy with substance painter
which create results lacking curvature for things like bevel edges
but you can fake bevel edges in substance painter to be fair
for circumstance like that
void narwhal
i'm kinda running my brain in zombie mode atm so excuse me
but basically my issue was with how you phrase it initially being potentially mistaken as though you could be working low poly for the majority and then all of a sudden start with subsurf when everything was basically all said and
done (which you could with sufficient experience and simple objects)
generally you will always wanna work with subsurf modifier if planned at all in order to view the result
as you're working on it
subtle jackal
You absolutely could do that though, if you create e.g. full edge loops for each little feature you're putting on the mesh, or weren't using booleans, etc.
void narwhal
you could but that doesn't mean you should
unless within the context of very simple objects in which you can easily predict the outcome
no harm in slapping a modifier and working on it with the ability to see the end result
subtle jackal
yes but that's beside the point. which was that it's not uncommon to see edge flow like was depicted, on a model not made for subdivision surface
void narwhal
yes but in this circumstance it is more likely to be retopo given the normals unless it was done within substance painter without a high poly
i already addressed that basically
aight i'm slowly losing my mind due to various reasons so don't mind me
subtle jackal
well if you'd read, you'd see it was a model he downloaded, so it probably already had normals and such baked for it
void narwhal
aight so i said why not i went to and it seems like it was done entirely within substance painter without high poly
so i lose
time to blow out my brains

Pew pew! - NES Zapper (PBR) - Download Free 3D model by Yogensia (@yogensia)
subtle jackal
judging by the normal map it looks like it was baked from a high poly to me
void narwhal
nah i can see the artifacts from some loops from the low poly
subtle jackal
you can see the gradienting you get from doing a bake from a high poly
especially in the handle and the panels on the receiver
void narwhal
you can use the low poly normals as base just gonna look worse than an actual high poly
along with artifacts etc..
subtle jackal
if you used the low poly for a bake you'd just get a flat normal color tho
void narwhal
the ridges for the grip can be painted
subtle jackal
yes just because a high poly was used doesn't mean it was used for everything
void narwhal
Yes
subtle jackal
doesn't appear to be a high poly used for the barrel, for example
void narwhal
you can see the artifacts from the low poly normals in the backside of the grip
compare in wireframe mode
subtle jackal
those are from the differences between low and high poly tho
 copper gull
https://i.imgur.com/0KEzh8L.png
been working on a low poly version of Yattarou (Speedy Cheviche) but i feel like i may have fucked up somewhere on the chest peice.
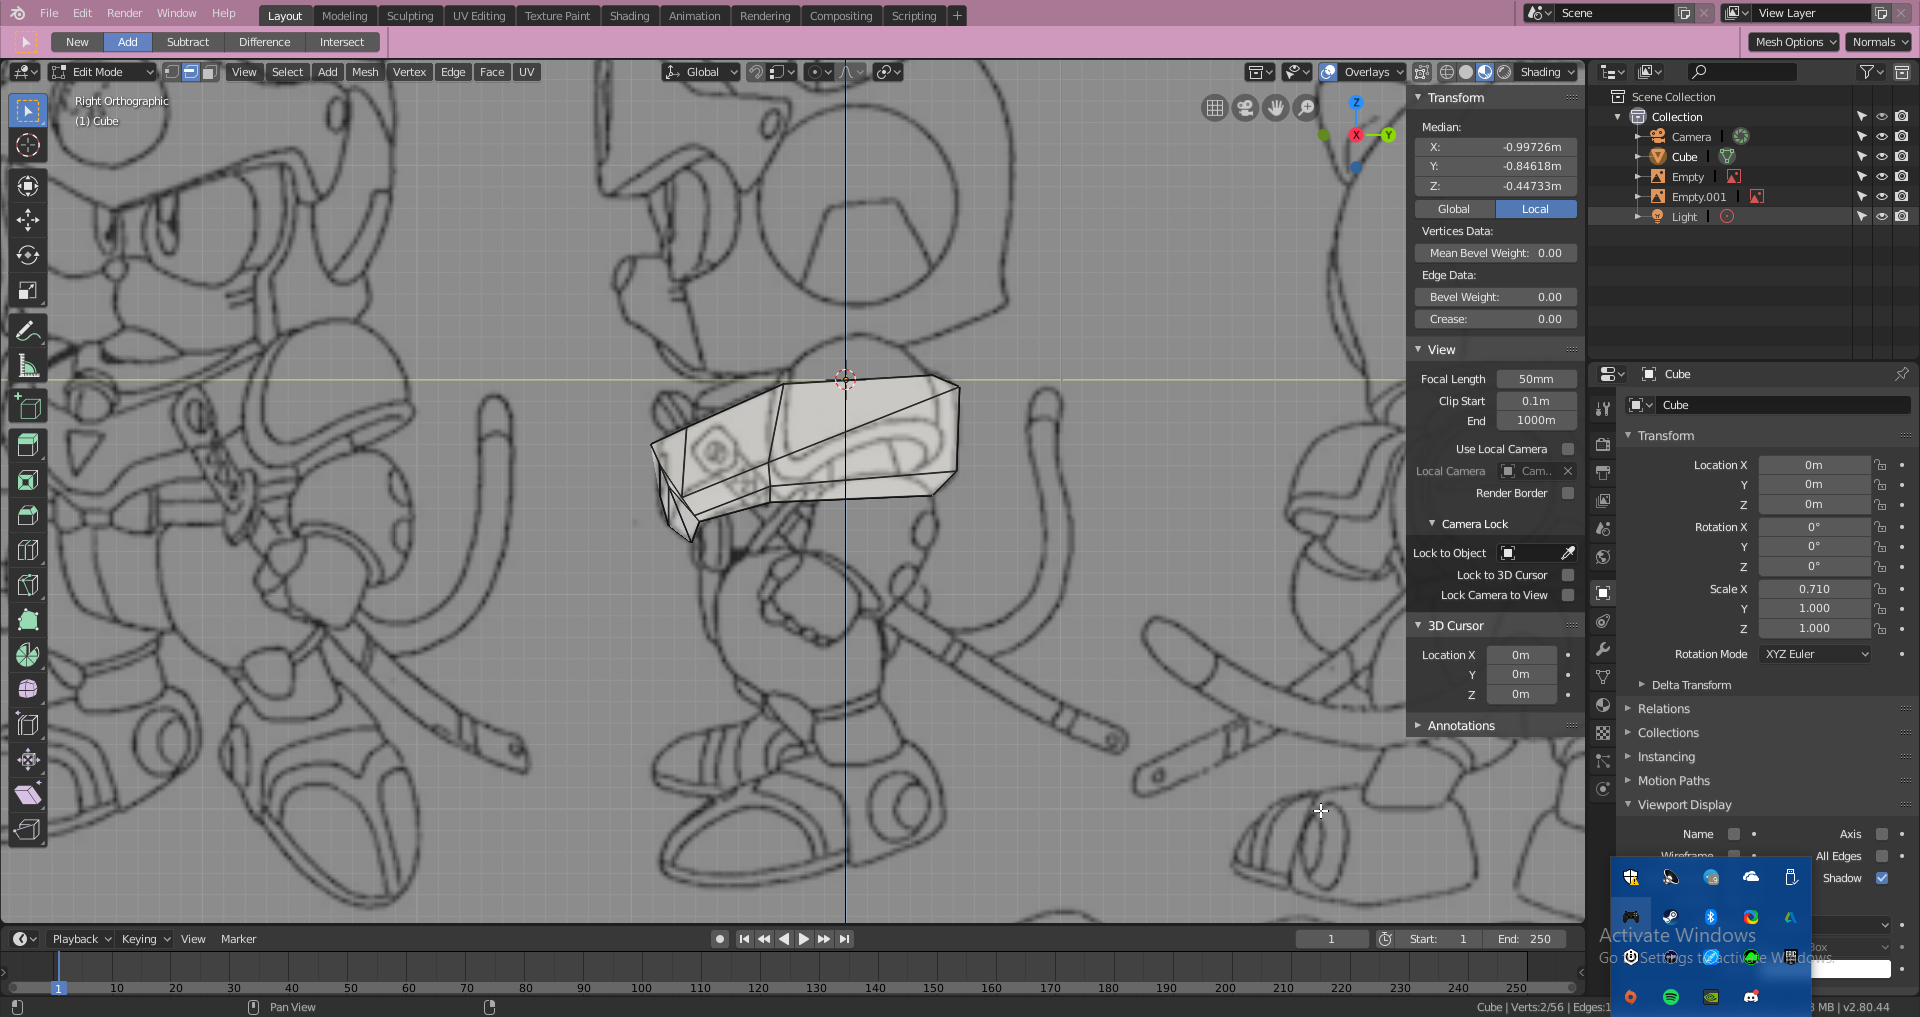
my modeling skills are still kinnda new tier so idk if my vertecies are off or not
https://i.imgur.com/lFZlSg4.png
and the front ref is doing me no favors saddly
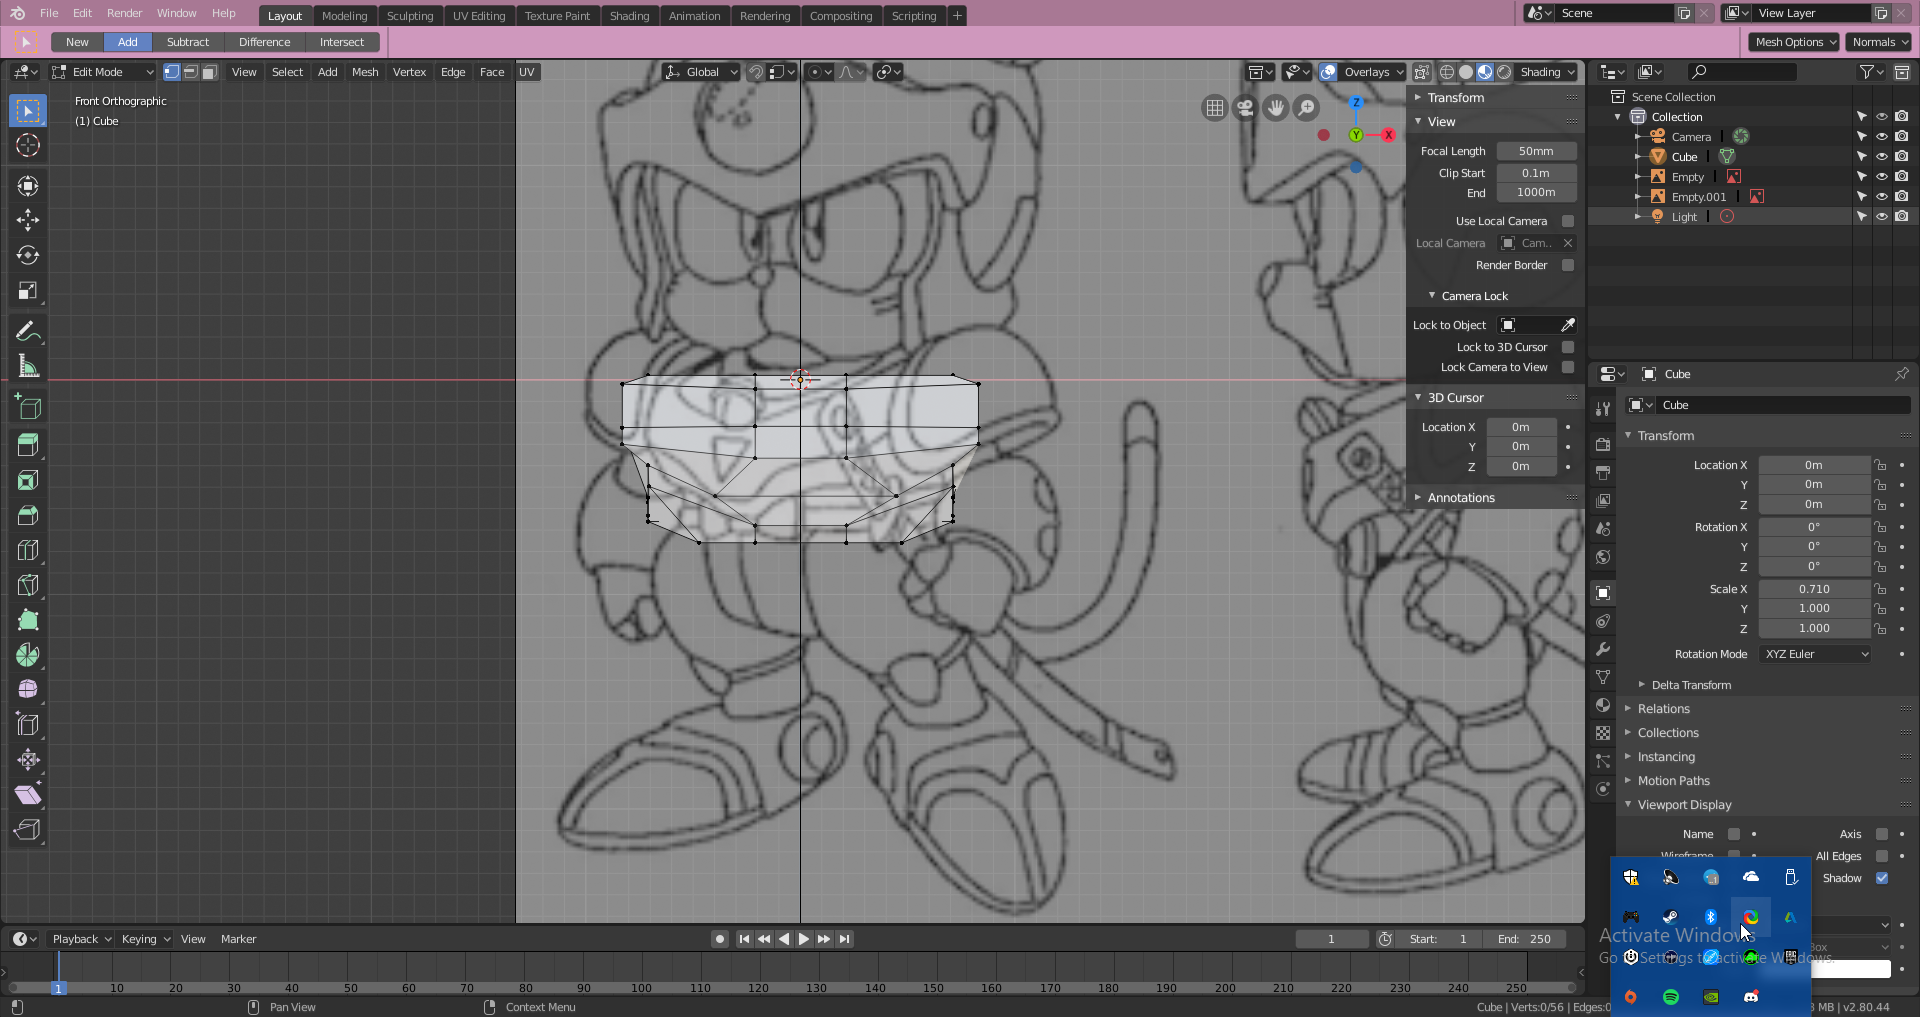



 subtle jackal
not really far enough along to tell yet honestly, but I don't see any real glaring issues
onyx juniper
@copper gull On your model the horizontal-ish edge running through the armor is broken up or skewered at the front where the dip is
copper gull
i've redone the base model so far. just trying to drill away as best as i can :3
onyx juniper
That's better, but I don't think you're following the shapes in the reference. Think of his chest piece more like a cylinder with a small part pulled down
onyx juniper
Maybe not literally what you should do, I'm just trying to help you visualize shapes and approaches
@copper gull
copper gull
I appreciate these.
Other people just started to use cubes and go low poly seeing how I'm just a beginner
onyx juniper
It's sequence, sorry if I misspoke
copper gull
i guess an issue i have is figuring out when i should transform my verts, edges and faces
copper gull
also please keep in mind, these refs im using are from an old 80's anime that only has a profile ref, a 3/4th view for the front and back
there are no heads on refs or top refs. that i could find that came from the show's concept phase
hallow bough
Do you guys have any advice on decent low poly elbow topology?
 thin bison
@hallow bough http://wiki.polycount.com/wiki/Limb_Topology
dull canyon
so especially for joints it's actually okay/good to have tris?
void narwhal
for low poly yeah but if you're dealing with a subsurf modifier it is generally advised against
dull canyon
well assuming I'm doing a high poly model and then retopologize
dull canyon
okay
copper gull
im having this issue where i cant seem to select all the faces for both halves of this helmet. idk whats going on.
void narwhal
really can't say much given how little is shown
perhaps you started pressed a key and started some sort of operation preventing you from doing actions
make sure you're using face select
if you get stumped/bugged or make a mistake resort to autosave if you can't Undo
small cloud
I'd personally suggest deleting one side and using mirror modifier
and not apply it till you need to
copper gull
oh wow that actually helped
silent acorn
"Mom says it's my turn on the xbox"
 visual vigil

ArtStation
"Armed with a single 120mm cannon and short range machine gun, this armored vehicle has excellent mobility and can be transported by T-Copters. However it is vulnerable to Bazooka ambushes."
Self made recreation of the 'Herman Mk-5 Light Tank' from the game 'Battalion Wars'....
onyx juniper
Should have been called "Wii Wars"
visual vigil
the game was on Gamecube before it was on Wii@onyx juniper
but they did do a wii reference

 onyx juniper
2
visual vigil
2
onyx juniper
BT was on the gamecube. That one should have been called Gamecube Wars
Western Frontier was introduced in 2, right?
onyx juniper
I thought it was just in 2, so I only referred to that one
 dire socket
I'm making a little chibi monkey man for my avatar. Any constructive criticism on him yet? I'm working on his feet ATM.
spiral sigil
It's detailed that's for certain
thorny fractal
i mean usually chibi stuff is pretty simple in terms of shapes
either your using the wrong word to describe how you want i to look or you strayed off coarse. at least in my opinion
dire socket
Yeye. Gonna define it much less in the topography.
 hardy marsh


so um i have no idea how to use this program i only use blender
but i was told that if i wanted to use the model parts you see in the screen shots that i would have to combine them in 3ds max and then export as fbx into blender
but i have no idea how to do this in 3ds max
hardy marsh
Okay guys
it turns out
3ds max is legendary
and it did it for me
after i imported all the meshs and there respective rigs
and exported as a fbx
it just did it for me
 lament pond
 ripe fox
Hello all! are there any tools in blender that people would love to have, or even do have? I'm creating a series of tools for newer users to blender to help make creating avatars easier/more enjoyable. I'm not trying to compete with say CATS etc. This is for a dissertation project. I have ideas from my experiences with modelling, just felt this community are the exact people I'm trying to reach, Thanks!
dull canyon
@hallow bough nice!
hallow bough
@dull canyon Thanks :)
dull canyon
mind showing some screenshots of the 3d model?
like, in blender or whatever you used
latent charm
@ripe fox A tool blender is completely lacking in is a manual bone & weight merge. Being able to select two bones and hitting some keyboard shortcut that would merge one bone & its weights into the other.
CATS has some ability to merge bones but it's fully automatic and completely useless for my needs.
zinc furnace
You have some modifiers for vertex weight mixing but it's very slow
Cats can merge bones though, what do you mean?
You can select two bones and hit "Merge to active", it will merge all selected bones into the last selected one.
You can also select a bone and hit Merge to parent
ripe fox
yeah I'm seeing this tool as a "merge to active" tool
zinc furnace
That already exists in Cats
But it does delete the merged bone altogether after merging the weights
latent charm
Where is this mysterious merge to active button?
ripe fox
in "model options"
zinc furnace
Yep
ripe fox
highlight the two bones, they will light up
then select either to parent or to active depending on the needs
latent charm
Huh
zinc furnace
I do a lot of manual merging for dynamic bones that way. Especially handy for merging columns of skirt bones into each other
latent charm
See I'd have thought something to do with bone merging would have been under the bone merging section of optimization
ripe fox
you'd think eh 😛
but yeah, that tool is there 😃 thanks for the recommendation though! I might make something similar
Things that people currently use are also valued, just looking for all the 'best of' tools for people
latent charm
just that feature, maybe even accessable via alt+m while in pose mode would be very valuable to the entire blender community I'd think.
Other than this I have absolutely no use for the CATS plugin and having my tools tab row filled with yet another item is getting silly.
ripe fox
alt + m to connect vertices? you saying how the bone that the vertex belongs to can be transferred to the target vertex
or "averaged"
not sure if bone management in the mesh edit view would be too great
latent charm
Like how you can use alt m to bring up the vertex merge menu in mesh edit mode, but in pose mode for bones.
You select bone bone.001 and then bone.002 and press alt+m and bone.001 and the weights of any child meshes get merged into bone.002 and its associated vertex group.
ripe fox
Oh i see! so treat bones like vertices in that respect
just a handy shortcut to merge bone x to bone y
latent charm
Yeah, or in blender terms selected to active (which would allow multiple bones to be merged into one)
ripe fox
I feel that is what cats does, you just select all the bones involved and the target as the last bone, then just merge weights to active. Ultimately you just asking for that tool but within the alt+m shortcut?
however I am unsure if it caries across the vertex groups into one? that could be an enhancement of the feature if i'm correct
hallow bough
@dull canyon https://sketchfab.com/3d-models/symphogear-miku-kohinata-bffb14ff06b54799a3618208176728cd

Miku Kohinata from Senki Zesshou Symphogear. - Symphogear Miku Kohinata - 3D model by Mmari (@martine.r)
hallow bough
Yes in blender 😃 @dull canyon
thorny fractal
what did you use to make the textures
hallow bough
@thorny fractal I just used blenders texture painting function as i am still quite unfamilair with it and i wanted to try it out 😃 Next time i want to do something more elaborate so i can take it further.
thorny fractal
ah. i kinda like how texture painting in blender feels but it just lacks the functionality imo. 3d coat is nice but its also $$$ and another program on the list to learn
hallow bough
It's decent for stuff that's not so detailed i guess!
fossil inlet
3DCoat is more for retop honestly
it can do more, but nobody uses it for anything but retop
and at that point you might as well just cough up the $100 for a real retop program like Topogun, which is what most industry professionals use.
hallow bough
I wanna start learning about retopology, where do you think i should start? Sculpting a human body?
 tropic bear
I wanna start learning about retopology, where do you think i should start? Sculpting a human body?
Yes! There's lots of things you can look up that can teach you topology
for me it was looking up human faces in 3d, then finding some decent human head refs and working with the same flow
Once I got that down consistently, just looking at other people's models can help a TON when learning loop placement, etc
I actually use topogun, even if it is a bit dated at this point. WAY better than blender's retopology toolset.
fossil inlet
Topogun? Dated? pls, I use World Machine for environment generation
tbh I think 3DCoat looks way more dated than Topogun
tropic bear
Topogun is great but it feels a bit old
There's definitely some things that I think would be nice to have
 mental blaze
Downloads away
 quaint jasper
Retopoflow on Blender is probably the best
And don't shy away from trying the automatic retopo tool in Zbrush
latent charm
And don't forget that Retopoflow is also free (there is a paid version that just gives you support & stuff)
Just head over to the github releases page https://github.com/CGCookie/retopoflow/releases
Download a .zip of the latest release and install via blender's addon preference panel

GitHub
A suite of retopology tools for Blender. Contribute to CGCookie/retopoflow development by creating an account on GitHub.
zinc furnace
Retopoflow often failed to close loops properly for me, it would just generate really weird quads overlapping. Of course when I tried showing someone else that, it instantly worked again lmao
When installing retopoflow from Github, you may have to go to the Blender addons folder and rename the folder to remove any weird characters
The periods in the folder name break it
latent charm
Never had that problem, could be a windows specific issue.
 stable edge
Probably.
fossil inlet
@mental blaze Honestly just buy Topogun. You can’t save or export with the free version 💀