#3d-modeling
1 messages · Page 17 of 1
 tough plover
 edgy finch
how am I gonna merge the hair? I understand merging the hands and arms and the f...
edgy finch
how am I gonna merge the hair? I understand merging the hands and arms and the f...
don't "weld" it to the head, just combine the meshes with Ctrl + J at the end
edgy finch
Oh ok cool

 snow linden
Don't know if this is the best place to ask but I'm looking to get something made in blender, It shouldn't be to much work (I think at least) I just need something to be resized in a way to fit my avatar
 hushed leaf
oh
go to the VRC Traders discord if you want to commission people, you'll get scammers around here.
Link is in #1204490664637890580
snow linden
Bros thowing me around xD
hushed leaf
sorry, didn't realize this was what you were after 🙂
 noble bough
well better that, than getting scammed
edgy finch
hey question, how do I go about modeling the teeth
 heavy sonnet
edgy finch
hey question, how do I go about modeling the teeth
heavy sonnet
edgy finch
hey question, how do I go about modeling the teeth
honestly up to you, but i usually just make a rounded cone shape. If you're using a subdiv workflow, just add a cube, then you can make the bottom face smaller, extrude it down, and then merge the vertices at the center and add a vertex crease (increase this until it's sufficiently sharp per your liking). Then you can kinda just duplicate this and move it around, scale it, to make all your teeth
edgy finch
Oh ok!
 snow wyvern
work in progress


 edgy finch
how do I make a good armature for this and how do I put it in unity?

I'll probably color it first but I do wish to have some advice before jumping in the deep end
hushed leaf
re: Put it in unity, export it as FBX.
 gray mica
the mesh doesn't seem to be symmetrical, as Kazin said export it as FBX. you can use https://www.mixamo.com/ to rig your models
hushed leaf
Otherwise, standard rigging concepts apply, see #avatar-rigging for sample of what a VRChat compatible armature should look like - and yeah tools like that might work.
you don't need it symmetrical though, people aren't exactly, but it'll definitely make it easier

 faint bronze
started a new project
 edgy finch
do I join everything together before or after the weight painting?
I'm really having a hard time
hushed leaf
depends what it is - I would probably do it before, so you don't have issues trying to match vertices at edges. you can always setup dummy materials or vertex groups to make it easy to re-split later for things you want separate.
edgy finch
true true
I set up the bones and got excited and joined everything together and forgot about weight painting and instantly started having a hard time
edgy finch
what would I do for the hair here? do I just add a bone for each tuft?
 tough plover
edgy finch
what would I do for the hair here? do I just add a bone for each tuft?
tough plover
edgy finch
what would I do for the hair here? do I just add a bone for each tuft?
you could, or you could have some bonees that affect multiple to save on bones
edgy finch
oh ok cool!
edgy finch
I put four bones for the back of the hair, two for the front, and one called the root
hushed leaf
<@&397642795457970181> spammer
faint bronze
faint bronze
started a new project


 meager lotus
Yo
heavy sonnet
meager lotus
Yo
yo makoto naegi from danganronpa trigger happy havoc!
faint bronze
faint bronze

 primal oasis
Anyone know camera settings for Blender that might better match VRChat's player cameras? Just wanna be able to check things in perspective in Blender to have a better idea of how they'll appear once in Unity/VRC
 waxen ivy
You tiled the normal map under color and normals correct? What value did you use? 1000? May I see your Matcap-0/Values as well?
waxen ivy
I'm also curious if you might have some recomendations for the lighting/anisotropics, the lighting isn't looking good in its current state

 viscid birch
waxen ivy
You tiled the normal map under color and normals correct? What value did you use...
viscid birch
waxen ivy
You tiled the normal map under color and normals correct? What value did you use...
I used 300 and 600 for the normal map.
And I somehow lost the matcap from before. So these settings aren't exactly the same. But basically the right side is opaque black. Left side is skin tone and more transparent. Another option would be to make the whole thing black and use a different "blending" mode for the matcap.

 waxen ivy
viscid birch
I used 300 and 600 for the normal map.
And I somehow lost the matcap from befor...
waxen ivy
viscid birch
I used 300 and 600 for the normal map.
And I somehow lost the matcap from befor...
Is your shading flat?
viscid birch
waxen ivy
Is your shading flat?
Yes, it's flat
And anisotropics depend on the "tangents" of your model. So in FBX import settings I changed Tangents to "Import" instead of "Calculate Mikktspace"
waxen ivy
viscid birch
Yes, it's flat
How did you manage to make the skin tone transparent? Im going to check my tangents now
 viscid birch
Alpha isn't in the color picker. Instead you click on top side of the gradient and add marks there to control alpha separately.
waxen ivy
Oh I see, let me do that now, I can't tell but I think this looks a lot better now, I'm going to adjust the transparency, something I would have never found in a YouTube Video or ever think to try/play around with is calc to import
 viscid birch
waxen ivy
Oh I see, let me do that now, I can't tell but I think this looks a lot better n...
viscid birch
waxen ivy
Oh I see, let me do that now, I can't tell but I think this looks a lot better n...
Yeah, I'm not 100% sure whether "import" or "calculate mikktspace" is correct for all models. I just know it's involved because anisotropics are shaped like a line and tangents affect which direction the line is flowing. Also "switch direction" turns the line 90 degrees
waxen ivy
I'm going to keep playing with the effect, ill probably never get it to be perfect but I think you've helped me enough to get it to where itll be decent eventually, thank you
 nocturne pelican
What is the best way to model a small building with an interior and exterior?
hushed leaf
one part at a time?
heavy sonnet
nocturne pelican
What is the best way to model a small building with an interior and exterior?
up to, you, but most people find it easier to model the inside and outside (and sometimes even each room) separately, but it really depends on if you want to be able to see through windows and doors
what i mean is that each "area" will be in a different place in the scene and have teleports where the doors line up
edgy finch
hey when I'm weight painting it keeps dping this when I move one hand. what is going on?
 hushed leaf
ideally don't move the hand bone, rotate it.
but it does seem like you have some unfinished painting too
edgy finch
I’m really struggling with this I wish I could just pay someone to do it but I’m broke and therefore I must torture myself with this nonsense
No matter what I do the same stuff keeps happening and I’m just getting more frustrated with this stupid program
Nothing is working
edgy finch
hushed leaf
ideally don't *move* the hand bone, *rotate* it.
Even when I do that it drags the other wrist with it too
Please help me
hushed leaf
you mean the other side wrist? If you don't have armature mirroring on (so the other side rotates along with it), then you may have that mesh weighted to the wrong bone then.
edgy finch
I have it mirrored
Or well I don’t have the weight paint mirrored because it doesn’t work for me
hushed leaf
then that should be expected behavior
edgy finch
hushed leaf
then that should be expected behavior
I don't have the armature mirrored, I thought you meant that it was symmetrical
hushed leaf
no, there's a mode where if you move one side, it'll also move/rotate/etc the other side the same way.
If that's not on, and when you move the right wrist bone, the left wrist mesh moves, then you'll have to fix that weight paint. You can simply just remove the vertices from the vertex group to clear weights.
hushed leaf
okay... but remember weight painting is relative, and that you can't actually see small differences in value by looking at color alone
edgy finch
hushed leaf
yeah you have that vertex on the other side weight painted to the bone you moved
select that whole arm and remove those vertices from the other side's vertex groups
edgy finch
also very sorry I sound a little rude I have a hard time with tone
hushed leaf
no worries, this is really frustrating when you're starting out 🙂
.... and then often later too.
edgy finch
hushed leaf
select that whole arm and remove those vertices from the other side's vertex gro...
how would I do this btw? this sounds like a really stupid question but I've mostly been selecting the bones and have been painting them slowly from the arm to the finger
hushed leaf
You change vertex groups in edit mode. Tab usually goes from weight paint to mesh edit, but you may have to select that specifically.
Anyway - go to edit mode, select vertices, find the vertex group, and click "remove" under it.
Best way to remove weight paint since the weight values are stored in the vertex group.
(and if you didn't notice, vertex group names match bone names)
edgy finch
yeah I notice the vertex group names match the bones for them, I'm just having a hard time isolating them
hushed leaf
it helps a LOT to have reasonable names for bones
rather than spine.003, spine.004, spine.078....
hushed leaf
which part?
hushed leaf
nice
edgy finch
okay so how do I do the eyes/eyelashes n eyebrows n stuff?
hushed leaf
?
edgy finch
like how am I supposed to weight paint it/bone it/etc.
because I remember someone saying that you're supposed to only have one mesh unless you want to disable it
and I keep finding tutorials that are like "keep the eyes, eyebrows, and anything you wanna track separate"
and I don't know what to do
hushed leaf
I'd paint those 100% to the head bone and move them via shape keys
And yes, merge them with the head mesh when exporting.
I keep a lot of things in separate parts (clothing especially) in Blender, but merge down to usually two meshes for export: body & clothing
 timber bay
i want to place belt loops along a curve with an array modfier, but my plane thingy looks like this.. what do i do wrong
 heavy sonnet
kinda old but here's a low poly model i made for my friend's omori world based off of the last resort casino from the game :]


 edgy finch
Yall should I go back and actually model a tongue
edgy finch
I ended up doing so
faint bronze


 faint bronze
heavy sonnet
kinda old but here's a low poly model i made for my friend's omori world based o...
faint bronze
heavy sonnet
kinda old but here's a low poly model i made for my friend's omori world based o...
I LOVE the colors. It's so cute
Lovely model
 flat kelp
Mesh fused
 edgy finch
makin a new project
 edgy finch
flat kelp
Mesh fused
edgy finch
flat kelp
Mesh fused
this looks so good!!!
flat kelp
edgy finch
this looks so good!!!
Thank chu :÷3 your project looks good too! I like the concept
edgy finch
thanks so much!!! I just saw it and it looked really good so I thought I'd drop a compliment :)
 winter iron
edgy finch
makin a new project
winter iron
edgy finch
makin a new project
big headed goober
edgy finch
goober!!!
winter iron
Im currently working on funny skeleton and I just finished fitting the clothing to its proportions

which the scarf I had on my model fell into the ribcage
 edgy finch
love the trans scarf it's so cute
winter iron
old photo cause old hair texture but

Im particularly proud on how the model turned out for both of the versions
edgy finch
it looks really good!!
I've been seeing a variety of ways to model and honestly I wanna explore sculpting something and then retopologizing but the box model is looking really good so far
winter iron
usually I just polygon model something then subdivide surface once and then sculpt that after
edgy finch
hands are such a struggle oml
 winter iron
hmmm
 toxic cradle
Hello guys, small question here.
I'm new to anything related to 3D and decided to learn a bit creating a simple collar for an avatar. I have spent a shameful amount of time doing the simpliest thing in the world but I unable to understand why this is hapening.
As you can see in the images I have a simple tag and 2 bones and the idea is that the lower bone (same name as the vertex group of the tag) wiggles the tag and the upper bone moves the tag along side the torus.
But when I rotate the bones, they deform the tag in that weird way and when it goes beyond 180º it flips
Could anyone help me a bit understanding what's going on? 

 winter iron
did you weight paint it to both bones or only one?
cause you should only weight paint it to the lower bone in the chain
toxic cradle
Just one, the upper one is the parent of the lower one
winter iron
doesnt look like it with how thats shrinking when you rotate the one bone
make sure its not weight painted to multiple
winter iron
edgy finch
hands are such a struggle oml
squish the index closer to the middle finger
and stretch the middle and ring a tiny bit so they are just tad longer than index and pinkie like an actual hand
edgy finch
it looks so much better thank you so much
 winter iron
its helpful to just look at your hand and fan out your fingers to see how they sit
edgy finch
yeah true, it's just tricky because I do want them to be chunky paws
 winter iron
ye
funnily enough
because of how you are stylizing it
might I recommend alex the lion
 edgy finch
that's actually a perfect reccommendation and I'm mad I didn't think of that
winter iron
although alex's thumb is a bit short
edgy finch
y'all ever stop to look at your model and feel really proud of what you've made? like idk this guy is so stinkin cute
winter iron
I mean people should feel proud of what they made
you went from nothing to having something with real progress behind it
edgy finch
true but like sometimes I'll just take a little break and go "this is so stinkin cute I wanna squeeze it in my hands"
toxic cradle
winter iron
make sure its not weight painted to multiple
AHHHHHH, I spent 3 hours trying to understand was going on and now it works!!!!
I'm using vertex groups instead of weight painting and the neck bone had the tag vertex assigned too
Thank you so much, o my god!!!💖
winter iron
edgy finch
:0!!
winter iron
assuming talking to me yes
hushed leaf
yep
hushed leaf
yeah - you can do so much with that. Grommit is a great example
hushed leaf
oh true
winter iron
his eyes dont change shape
hushed leaf
hmm been a while since I looked, but yeah that sounds right
either way - you can do a lot without using a mouth
winter iron
ye
edgy finch
yo would y'all say this face looks like a capuchin monkey or similar or nah

 hushed leaf
haha, very nice
noble bough
working on gloves


 noble bough
edgy finch
noble bough
edgy finch
Dont know what to tell you. Just retopo like you always did just without symmetry. Loops along the strands of hair ending in a Single point (or quad) in the tip of the hair.
Dont really see the problem tbh
noble bough
any zbrush users got an idea why the upper and lower straight lines have different sharpness and strength, despite the fact that I used the exact same amount of pen pressure? upper one is right side of model, lower the left side. this also happens to me, when I do the underside of shoes and feet
 noble bough
made some huge progress again

 faint bronze
noble bough
made some huge progress again
faint bronze
noble bough
made some huge progress again
Amazing work!
edgy finch
realizing that the eyes look kinda off from the side so I come to y'all and humbly ask if I should just try and model ball eyes or should I stick with 2d


 old hamlet
edgy finch
realizing that the eyes look kinda off from the side so I come to y'all and humb...
old hamlet
edgy finch
realizing that the eyes look kinda off from the side so I come to y'all and humb...
in my humble opinion, 2D looks great with cartoonish characters like this one, also it looks amazing!
edgy finch
Thank you so much!!!
edgy finch
 edgy finch

 noble bough
retopology my beloved


 jagged moat
🫦 Lookin gooood!
edgy finch
which one looks better

 noble bough
edgy finch
which one looks better
noble bough
edgy finch
which one looks better
2nd one, hair has better shape
edgy finch
noble bough
2nd one, hair has better shape
Oh ok thank you
 swift jolt
edgy finch
which one looks better
swift jolt
edgy finch
which one looks better
2 looks best! 1 looks like he going bald
noble bough


 primal oasis
ima lose it
for so long I've thought I'm just bad at baking/making cages as my normal maps I'd bake in substance would have such ugly seams
but it turns out
as a default
Blender marks all edges sharp of any object that's set to Shade Flat when exporting to FBX
you know, Shade Flat, the default shading mode for any mesh made in Blender, and the one you'd want to have on for a low poly object that hasn't had a normal map from a high poly baked for it yet
:)))))))))))))))))))))))))))))))))))
anybody happen to know if any of these FBX export options change that behavior? I don't want Blender to mark ANY edges sharp for me when exporting lol
 heavy sonnet
primal oasis
ima lose it
for so long I've thought I'm just bad at baking/making cages as my ...
heavy sonnet
primal oasis
ima lose it
for so long I've thought I'm just bad at baking/making cages as my ...
you could just set it to shade smooth?? why do you need it set to shade flat?
ofc it's going to export the normals how they are, shade flat literally creates split normals on your model
shade smooth vs shade flat

 primal oasis
heavy sonnet
you could just set it to shade smooth?? why do you need it set to shade flat?
primal oasis
heavy sonnet
you could just set it to shade smooth?? why do you need it set to shade flat?
I have now been setting it to Shade Smooth before export. But the reasons I'd prefer to keep it as Shade Flat & simply have the exporter not mark anything sharp are:
- Shade Flat is blender's default; it's one less thing to worry about changing
- The lowpoly geometry is MMO/mobile-game style topology where as little geometry as possible is used- it does not subdivide/shade smooth properly, as reinforcing loops are intentionally left out, and so it will not look right set to Shade Smooth until a normal map baked from the high poly is applied
heavy sonnet
primal oasis
I have now been setting it to Shade Smooth before export. But the reasons I'd pr...
yeah it doesn't look right, but it doesn't have any impact on the bake, correct?
even if there was a solution in the FBX export settings, then you have to worry about it there
primal oasis
sure- but in the FBX export settings I always have to choose my export preset regardless, and could simply add the "don't mark sharp" setting to said preset
I'd much rather work on the lopol looking at this first image rather than the latter, but I ain't wanna toggle back and forth between shade flat / smooth as it's one more thing to potentially forget

 hushed leaf
primal oasis
anybody happen to know if any of these FBX export options change that behavior? ...
hushed leaf
primal oasis
anybody happen to know if any of these FBX export options change that behavior? ...
I use Face there, and then Import normals in Unity (rather than calculate or legacy), seems to be working well
flat kelp
 edgy finch
so I messed up here. I have NO idea how I'm gonna model the head tbh

I started with the body like a usually do but I was following a different video than I usually do (was human ofc but I was trying to make an anthro) and they made the head separate and I have no idea how to tackle it
I feel really stupid
edgy finch
I feel so powerful y'all

idk if the head looks any good but I made it entirely with polyquilt
edgy finch
here's an extra picture but yeah idk how I feel
 noble bough
What am I doing wrong here with the baking ? I created several baking groups to avoid intersecting errors of the plates, but they still occur.
 hushed leaf
It sounds like a pain, but have you considered separating the plates and baking them separate, then joining later?
noble bough
hushed leaf
It sounds like a pain, but have you considered separating the plates and baking ...
The plates are actually separate parts, but I want the plates to also cast AO shadows onto each other. I already made one bake where I created entirely different texture sets for the plates, but that is inefficient
hushed leaf
ahh
noble bough
you see my pickle here
hushed leaf
I do, yep
noble bough
normally doing bakes like this should work, cause you split objects up into differnt group to avoid afore mentioned intersecting errors, but for some reason, they still occur
And I WANT them on just a singular texture set
plus I dont want the hassle to later on combine the pngs into one png, cause they still share the same uv map
edgy finch
does this look like a cat or nah?

I keep looking at it and thinking it looks rat like
nevermind I think I fixed it
 flat kelp
 edgy finch
There needs to be like 500 handpaw tutorials because I am so sick of wanting chunky paws and not having furry anatomy represented much in tutorials
edgy finch
flat kelp
Heyyo i really like this model! It looks so stylized and it’s so good. How did you make the hair if I may ask? It looks so good
flat kelp
edgy finch
Heyyo i really like this model! It looks so stylized and it’s so good. How did y...
Two curve objects
Start with a path object.
-
Shift + A > In the new object menu go to curves
-
Add each a path and circle curve object
-
On the path curve, select it in object mode. When highlighted orange on the right sub-menu explorer, navigate to the curve sub-menu (green squares connected by a line)
-
Scroll down the sub-menu to the bevel of the path curve. Instead of extrusion, use an object bevel by clicking on the option (it's one of three options).
-
Select the object to point the reference to via the eye dropper on the select object input box
-
You now should be looking at a high poly horizontal cylinder shape. You can control the resolution (smoothness via triangle count) on both the path and the circle curve.
-
I recommend a resolution of 2-3 on the path curve and a resolution of 1-2 on the circle. Each path is a section of hair you can manipulate and extend. The circle is the original shape that defines the shape of every path tied to it (do not move or change it without applying transformations to it prior to modeling the hair, otherwise the hair will move and act funny)
-
Simply Shift+D to duplicate the hair or a single segment vertex and press E to elongate the hair. Curves move differently than normal objects in blender so it takes time to get used to. An option at the top right view menu allows you to view a curves direction as one end of the curve will manipulate the rotation of the entire length while the other end will simply cooperate and drape where you want it.
-
To shrink a segment vertex or multiple, press Alt+S to scale the segment. To rotate, manipulate the curve segments or press Ctrl+T to rotate a segment or segments.
-
Tip: Keep the curve resolution very low and add a subdivision modifier with 2 or more resolution. This let's you easily shape hair while keeping it smooth. Once ready to apply, select the curve and right click to open a sub-menu tooling. There is an option named 'convert to ->', select this then mesh. The modifier for subdivision is destroyed, not applied. Simply readd the modifier to the new mesh you converted from a path curve to the same resolution or whatever is desired, and apply.
edgy finch
Thank you so much!!!!
 steady zealot
https://media.discordapp.net/attachments/1353182612046348382/1380527093997109330/HMD_better_way.gif?ex=6844338c&is=6842e20c&hm=297873a8ebbb44e69a62f633885aa847e228e48a310fab8ef8c5c056f16e29a4& I was trying to make a strap for some HMD thing I made for my avatar but my HAIR...

 primal oasis
topology enjoyers: is having a tri like this truly bad for the low poly
I realize it disrupts edge flow and subdivides poorly etc etc but it's also the way to cap this off with the least amount of geometry & all of the normal detail will be coming from the high poly bake anyways

I feel like this is what MMO/mobile devs do? but I also have no formal gamedev experience, just hobbyist playing around
jagged moat
primal oasis
topology enjoyers: is having a tri like this truly bad for the low poly
I reali...
If you're not gonna be subdividing I wouldn't worry about weather it will subdivide well.
It doesn't like you're using excessive tris so you're probably fine
primal oasis
alright, thank you
 gray current
Question in Blender, what would be the best way to hide/shrink clothing into the avatar using a shapekey? Finding issues where sometimes it is too much or too little and it clip like hell.
hushed leaf
I use UV tile discard for this, but if you must do it via shrinking, try as hard as you can to shrink along the bone that the mesh is along. I.e. don't shrink to a point, shrink to a line.
gray current
hushed leaf
I use UV tile discard for this, but if you must do it via shrinking, try as hard...
Isn't UV tile discard heavy as fuck tho, its why I was avoiding it
hushed leaf
depends on your shader, but generally no that I can tell, it basically returns before a lot of the processing
gray current
hushed leaf
depends on your shader, but generally no that I can tell, it basically returns b...
I use poi
hushed leaf
same, mostly
 obsidian vigil
gray current
Isn't UV tile discard heavy as fuck tho, its why I was avoiding it
obsidian vigil
gray current
Isn't UV tile discard heavy as fuck tho, its why I was avoiding it
The actual process is extremely cheap
It's very similar to what an alpha-clipped shader is already doing
The main issue is that you're still rendering those pixels
So if you have many overlapping faces covering a big chunk of your screen, you can start to chug
I have an effect that spawns in a very large spiderweb-like mesh. It's alpha-clipped and kind of expensive per pixel (expensive noise calculations).
It's fine when it has fully spawned in, but you can feel your gpu screaming a bit when it's appearing
Both shrinking and discarding the mesh would be great
This would prevent the fragment shader from being run unnecessarily
hushed leaf
Seems like Poiyomi does indeed discard in the vertex shader, which is what you ought to do.
edgy finch
how y'all likin the model

 tepid cedar
Pomni what the hell
noble bough
edgy finch
how y'all likin the model
Coming along great
steady zealot
Anybody know how to reduce these artifacts when baking in Substance Painter?
 noble bough
steady zealot
Anybody know how to reduce these artifacts when baking in Substance Painter?
noble bough
steady zealot
Anybody know how to reduce these artifacts when baking in Substance Painter?
which artifacts ?
I only see blocky edges of a model
steady zealot
The smoothed high poly bakes these weird edges onto the low poly model
flat kelp
-# Outfit 1 * Prog ~ 2


 stone cipher
Working on improving topology and anatomy skills
 swift jolt
primal oasis
topology enjoyers: is having a tri like this truly bad for the low poly
I reali...
swift jolt
primal oasis
topology enjoyers: is having a tri like this truly bad for the low poly
I reali...
Tris are alot less evil than you think it is. It only matters for highpoly when using subdivision. Or bendy rigged stuff… if its neither. Use as many tris as youd like. The lower poly you go. The more you need to use them
edgy finch
texture painting

 peak lantern

Deltarune Spoilers #DELTARUNE
︀︀#deltarunespoilers
︀︀Here is my Roaring Knight 3D Model, available for $15 that you can freely use!!
︀︀It has a bat and a sword included with it, and it's kinda awesomeee
︀︀
︀︀Check it out!
︀︀
︀︀eliascoptere.gumroad.com/l/RKDR
**❤️ 2 👁️ 67 **

 FixupX
·
FixupX
·
 keen sierra
 hushed leaf
keen sierra
hushed leaf
keen sierra
your work?
keen sierra
ye
hushed leaf
keen sierra
ye
It looks really great!
jagged moat
Rare sighting of a blender cloth sim working first time
 hushed leaf
wow how the....
jagged moat
🤤
 hushed leaf
This looks great! I'm impressed, usually it takes me like an hour of fiddling before I get something ok
jagged moat
I'm using a paid addon called simply cloth pro which is kinda just like a better UI for blender's cloth sim engine, it makes getting set up each time a lot faster. Though it still is the same cloth sim tool at the end of the day
 hushed leaf
oh cool, I'll have to look at that
jagged moat
But instead of messing with settings you can just hit a preset and go, you still have to set up collisions and stuff but it's useful

I think I went with the Lite version which is $9
flat kelp


 jagged moat
Why is my normal map looking at me like that 😭

 velvet bronze

 earnest cypress
jagged moat
🤤
earnest cypress
jagged moat
🤤
Wow thats rly good
winter iron
semipone

 cyan pawn
help???
 hushed leaf
I don't use the tool but at a guess, wrong object selected?
 edgy finch
hey what would be anyone's advice for modeling a muscular/buff furry? I'm currently making a model sheet for a buffer character and I cannot get the anatomy down pat
edgy finch
I can't find any good tutorials, if anyone could help me that'd be appreciated
 dusk musk


 carmine pagoda
One of my first real Blender projects. Im following a tutorial and my gosh y'all who do this for fun are just built different.
 winter iron
carmine pagoda
One of my first real Blender projects. Im following a tutorial and my gosh y'all...
winter iron
carmine pagoda
One of my first real Blender projects. Im following a tutorial and my gosh y'all...
tis a process
edgy finch
hey can someone help me with this model rq? I'm trying to find tutorials for like heavier set muscular bodies but I simply cannot. I'm like really having trouble
I just need some advice
edgy finch
stone cipher
Working on improving topology and anatomy skills
hey sorry to tag you on such an old post but how did you do the muscles here? I've been asking for help everywhere and I cannot find any sort of advice or help
I asked yesterday but I only got scammers in my dms from it
flat kelp
carmine pagoda
One of my first real Blender projects. Im following a tutorial and my gosh y'all...
It took about two years for me to start enjoying blender lol
On and off tho, since a lot of the beginning learning had breaks from either frustration or burn out, you get there eventually u3u
-# Blocking done for outfit 1

 edgy finch
flat kelp
It took about two years for me to start enjoying blender lol
edgy finch
flat kelp
It took about two years for me to start enjoying blender lol
hey brixen could you give me some advice on my anatomy struggles?
I'm really having trouble and I've been asking around since like yesterday with no results
flat kelp
edgy finch
I'm really having trouble and I've been asking around since like yesterday with ...
Sure! What in particular about muscle anatomy?
edgy finch
I'm trying to model it and I'm having a really hard time because I can't draw it and I'm so frustrated because there's hardly any good tutorials for like bara body types
flat kelp
edgy finch
I'm trying to model it and I'm having a really hard time because I can't draw it...
For 3d modeling I recommend searching for preexisting models or multi image references that are in a style you enjoy, or searching through bikini / anatomical models specifically "sport body" or "athletic" body types of real people to refer to muscle locations.
Usually I use real models and images for accuracy of muscle volumes location (clumps or individual muscles) and the placement of joints in relation to each other.
I then use references of images like drawings I find online, and images of 3d models I like the stylized proportions of
.
The type of pre reference you are looking for if you want a front and side view is called a "turnaround reference" or "orthographic reference" like one you'd see on a character sheet 2d artists make
Example
 carmine pagoda
flat kelp
On and off tho, since a lot of the beginning learning had breaks from either fru...
carmine pagoda
flat kelp
On and off tho, since a lot of the beginning learning had breaks from either fru...
You just described my exact state of mind for the past three months
edgy finch
does this look any good or nah
 carmine pagoda
edgy finch
does this look any good or nah
carmine pagoda
edgy finch
does this look any good or nah
It looks good, but I saw it in the first thing I thought of was the thumb people from spy kids
Way better than I could do though
flat kelp
edgy finch
does this look any good or nah
torso looks good 👍
 dusty turtle
flat kelp
-# Blocking done for outfit 1
dusty turtle
flat kelp
-# Blocking done for outfit 1
I only know you through your various preview posts on various servers, but you really make some fun stuff. Looking forward to this one.
flat kelp
dusty turtle
I only know you through your various preview posts on various servers, but you r...
I see ya around on Liindy's server too u3u thank you for the kind words :0
 atomic wigeon
Vaguely cat shaped creature :3 (dont mind the extra bones in the hand theyre not there you're seeing things)

 royal flower
atomic wigeon
Vaguely cat shaped creature :3 (dont mind the extra bones in the hand theyre not...
royal flower
atomic wigeon
Vaguely cat shaped creature :3 (dont mind the extra bones in the hand theyre not...
 flat kelp
Working on hair variant


 edgy finch
flat kelp
-# Blocking done for outfit 1
edgy finch
flat kelp
-# Blocking done for outfit 1
I really like your style for models!
 exotic jasper
flat kelp
Working on hair variant
exotic jasper
flat kelp
Working on hair variant
It looking good already
flat kelp
Thank chu so much u3u
flat kelp


 stable rapids
howdy
 flat kelp
-# Variant 3


 edgy finch
ugh I still am having trouble making a model sheet
literally nothing is helping and I keep watching tutorial after tutorial
flat kelp
edgy finch
ugh I still am having trouble making a model sheet
If it helps, I don't make a model sheet unless I'd plan for someone else to do work for me.
You can use a mood board or a wall of multiple references to get a better idea and model around the ideas of items / parts of an avatar one at a time to form it into being 
edgy finch
Oh true true
edgy finch
flat kelp
If it helps, I don't make a model sheet unless I'd plan for someone else to do w...
how do you start modeling it then if you don't mind me asking? you've been the only person willing to actually help me in this situation so I'm like really just trying to get some sort of help with this
heavy sonnet
edgy finch
how do you start modeling it then if you don't mind me asking? you've been the o...
i honestly would make one. At the very least, get a sketch for the proportions, then you can use the annotate tool to iterate sketches inside blender on top of your model
edgy finch
heavy sonnet
i honestly would make one. At the very least, get a sketch for the proportions, ...
I'm legitimately having so much trouble trying to sketch a model sheet and every time I ask for help I get a shit ton of scammers in my dms
heavy sonnet
edgy finch
I'm legitimately having so much trouble trying to sketch a model sheet and every...
do you have any other images of the design you're trying to model?
edgy finch
just a headshot. I wanna make a model of this guy with a bara body type

which is causing me so many issues because I legitimately don't have a good grasp on anatomy I feel
heavy sonnet
edgy finch
just a headshot. I wanna make a model of this guy with a bara body type
ah okay, so you could always try finding images of characters with the body type you are looking for. If it's not entirely accurate, you can always draw on top of it or use tools like the liquify tools to modify the image
since you're just referencing anatomy and it's for a totally different art form i think you're fine using other artists as reference - It's like using photos for a drawing reference
flat kelp
edgy finch
just a headshot. I wanna make a model of this guy with a bara body type
An example of what I would do just with this single reference:
As you the creator I'd break down the image into sections and key concepts. It sounds redundant, boring and silly but it helps. It can even get you passed using a direct sketch which is useful since a lot of situations don't have perfect references.
-
Lion type, bear type, or hybrid head shape (find references of bear / tiger furries and similar head shots of drawings from multiple characters and angles. To break it down further you could even select references for the ears alone, the eyes alone, the muzzle alone, and the fur alone.
-
Bara body type, which there are a lot of 3d models, images and animations of bara shaped characters (it even has its name as a style of body :P)
-
Small details you might not need references for but simply the foundations to build like the gold tooth, the horns (depending on horn type and many horn references exist), the fur, and muscle anatomy.
-
Find avatars with a similar body type and others with similar style to your target idea. Study them with world pens or the avatar test worlds to view it up close and personal to understand how something you like is made, and also why wearing that style of avatar feels "right" to you.
For the process of making the body, I recommend low poly sculpting the volumes. Surprisingly the first 1-3 layers of a sculpt that progressively has polys added to it define most of the work for shaping things like a body. Proportions carry the structure of the body (how far each joint is from the others in its bone chain), and volume carries the shape and presence as form and muscle definition.
edgy finch
honestly I sculpted something and posted it here and the first thing I was told was that it reminded someone of the thumb guys from spy kids and it actually made me break down
flat kelp
edgy finch
honestly I sculpted something and posted it here and the first thing I was told ...
I saw that 💔
edgy finch
people just talk to me like I know them and it upsets me greatly
flat kelp
edgy finch
people just talk to me like I know them and it upsets me greatly
Ah don't take it too bad, my first models didn't even look like thumbs, just blobs.
edgy finch
true I just wish I could get like actual constructive feedback other than a very creative "it looks like shit"
flat kelp
edgy finch
true I just wish I could get like actual constructive feedback other than a very...
I wont recommend anything to the last model directly, but I will mention that you could try modeling it from a much lower poly first
Getting the volume right first make the details buttery smooth to implement
edgy finch
oh I usually start with box modeling instead of sculpting, I just did sculpt this time because there's no tutorials on bara bodies without it
flat kelp
edgy finch
oh I usually start with box modeling instead of sculpting, I just did sculpt thi...


Box sculpting is useful, it does take a lot longer to make a model box sculpting, and is generally slower
edgy finch
ooooooooo ok ok
flat kelp
I started with box sculpting until I was tired for spending time on it allll the time, sculpting speeds organic meshing up
 edgy finch
flat kelp
An example of what I would do just with this single reference:
As you the creat...
edgy finch
flat kelp
An example of what I would do just with this single reference:
As you the creat...
I keep finding avatars but they cost money :(
flat kelp
edgy finch
There are free asets you can find around with enough digging to get what you are looking for in terms of references. Being able to view an image or series of images as references will be an important skill to practice with :3
If you can afford the jumpstart, you can get this pack for like $5 online

Its a wonderful blocking tool to jumpstart model making
flat kelp
edgy finch
hmmmmm
I'm like considering it
I only have like 12 dollars to my name
and I do not have a job
probably not now
I can't comfortably buy it
I hate when things cost money
nothing works
everything I make looks like shit
I'm gonna take a depression nap.
steady zealot
edgy finch
everything I make looks like shit
I want to jump in here for a second and tell you that you shouldn't give up. You can't make stuff that's "good" without first making stuff that's "bad". Good and bad are in quotations because I don't think it's fair to really separate them into these categories. You can't have experience without gaining experience. Though it may be easy to lose motivation, just remember, nobody is great right out the gate. Some have a head start (natural talent) but you can and will improve with effort and time.
And more to the point, if you're having trouble with anatomy, remember that putting photos in your scene and directly "copying" what you see (in terms of the anatomy of course) is perfectly normal for people learning about it. So don't ever feel bad for still being in the learning stage
carmine pagoda
edgy finch
I'm gonna take a depression nap.
Sleep helps dont give up
edgy finch
steady zealot
I want to jump in here for a second and tell you that you shouldn't give up. You...
how am I supposed to gain experience if there's NOTHING to help me?
there's no tutorials
no free shit I could use
nothing
steady zealot
edgy finch
how am I supposed to gain experience if there's NOTHING to help me?
There ARE anatomy tutorials, but also, there are endless photos of various different body types.
edgy finch
not for the body type I'm trying to model. there's photos yeah but no tutorials
steady zealot
You need to learn how to sculpt separately from the anatomy. Then, its all reference images from there
winter iron
edgy finch
not for the body type I'm trying to model. there's photos yeah but no tutorials
Dont expect tutorials for every specific thing
edgy finch
winter iron
Dont expect tutorials for every specific thing
I just wish there were tutorials for any other body type than “skinny anime girl” or “generic man”
winter iron
The tutorials are teaching you how to use the tools not how to make insert specific body type
edgy finch
I guess
edgy finch
does this head look like a cat at all?

 winter iron
looks like big cat
edgy finch
exactly my intention! thank you so much

 flat kelp
 stone cipher
edgy finch
hey sorry to tag you on such an old post but how did you do the muscles here? I'...
stone cipher
edgy finch
hey sorry to tag you on such an old post but how did you do the muscles here? I'...
Sorry, I only saw your message now. Look, to make the musculature, I first studied musculature anatomy, and I made the mesh poly-by-poly. I chose to do it without sculpting or doing retopology, but I believe that is more advanced. In short, I built the mesh and cut it with the knife tool or with edge loops. Then I shaped it as I liked. I'm not very good at explaining, but that was basically it
Obviously I have years of practice too, keep practicing!
Close view from left arm and back (this back design was inspired from yujiro hanma demon back)

 edgy finch
edgy finch
edgy finch
Circled back around to not liking this model and I might just scrap it. Nothing I make looks good
flat kelp
edgy finch
Circled back around to not liking this model and I might just scrap it. Nothing ...
Takes time to work up to stuff. For a base model for my first time making one ever it took a few months of learning each part
The next one took a couple of months, then one month, now I can make a base in a week for a good one and a quick base in a day. Blender is persistence to the max
edgy finch
Nothing I make looks any good
flat kelp
edgy finch
Nothing I make looks any good


This was my first vrchat model top to bottom, but was the eighth attempt at making one
The first image and second image are six months apart (on and off blender work since I took a lot of breaks when starting out due to frustration and burn out)
It took two months for me to figure out with tutorials and videos on how hands were properly made.
Everyone starts somewhere 
edgy finch
Better than what I’m doing
edgy finch
ok new day new me, I gotta lock in
carmine pagoda
edgy finch
Nothing I make looks any good
Are you kidding me? It would take me months to make that thing you made. You’re crushing it.
edgy finch
I just have a really bad mindset and I gotta break out of that I feel
carmine pagoda
edgy finch
I just have a really bad mindset and I gotta break out of that I feel
Fellow suffer here I’ve spent months working on my model. Trust me, it will be worth it in the end.
And you got everybody here to root for you
edgy finch
started to make this alternate version of the character I'm trying to make and while it's not muscle bara I feel really proud of it so far

which one looks better?


I'm trying not to cover up any mistakes with a subdiv but it's so tempting
flat kelp
edgy finch
I'm trying not to cover up any mistakes with a subdiv but it's so tempting
Subdivision will enhance issues more times than not, the right looks great 👍, even at a lower poly you could uv map and texture that to make something nice
The thing with 3d modeling is, unlike drawing, it doesn't usually look nice or "pretty" for 80-90% of the process. The magic comes out during texturing and rigging. The modeling part makes that last 10% easier and worthwhile as the foundation.
A modeler I enjoy for their use of low poly techniques is Slipdash
They lean hard into textures and keep their models super optimized and simple to work with 👌


I bring them up as an example because for your low poly work sometimes we get lost looking at a gray mesh and stop before getting to the fun part of texturing the model to bring the whole look together
 minor snow
I've never thought about commissioning someone until today, so if i were to do that where would i go for that?
flat kelp
minor snow
I've never thought about commissioning someone until today, so if i were to do t...
Vrctraders
They are linked in #1204490664637890580 I believe
edgy finch
flat kelp
Subdivision will enhance issues more times than not, the right looks great 👍, e...
I tried going back and it looked really messed up q o q. I worked for a while with the subdiv modifier and I couldn't undo it sadly. it's only one level though, I doubt it'll be too bad
edgy finch
minor snow
I've never thought about commissioning someone until today, so if i were to do t...
not here. scammers run amok here. block your dms from here while you can as well because they will FLOCK to you
like Brixen said, go to VRC traders
minor snow
edgy finch
not here. scammers run amok here. block your dms from here while you can as well...
i believe it
thanks
edgy finch
they literally screenshot shit I said while I was breaking down about blender and went "I can make you a better model" like fuck you dude get away from me
flat kelp
xP
flat kelp

 dim tiger
Hat I made for Practice

 edgy finch
flat kelp
edgy finch
flat kelp
these look amazing!
how do y'all make the lipsync stuff with blendshapes? mine always look weird and I was wondering if there was anyway I could make them look any better
do y'all make a jaw bone?
 worthy sorrel
anyone know how to smooth out something with a topology like this without messing up the squished edge loop?

ie: im shaping a body suit to my avi and it has those, and i want to smooth out my work but if i do then itll mess up the UVs there
flat kelp
worthy sorrel
anyone know how to smooth out something with a topology like this without messin...
If you provide some more info in the form of arrows pointing or highlights it would help diagnose the issue :3
Rigged 1/6

 onyx oriole
heyy guys
worthy sorrel
flat kelp
If you provide some more info in the form of arrows pointing or highlights it wo...
here is what i mean.. if i use the smooth tool, it messes with the topology in areas like this

 tough plover
worthy sorrel
here is what i mean.. if i use the smooth tool, it messes with the topology in a...
tough plover
worthy sorrel
here is what i mean.. if i use the smooth tool, it messes with the topology in a...
so you want to make the lines less wavy, but keep the spacing between them?
I don't really see why you would need those extra loops in the first place, you could probably just dissolve them
worthy sorrel
erm, sorta. Moreso the mesh itself is bumpy in this region, but a smoothing tool destroys the spacing between the verts
i dunno, not an asset i created. the uvs in this area are pretty important since its a threaded seam on the texture
tough plover
dissolving loops won't mess with the UVs
worthy sorrel
is that the only method of smoothing out the verts? ill dissolve them if i need to, but i want to try to learn how to non destructively smooth stuff out rn bc its applicable to other meshes i work on anyways. Use case is adapting mesh from one base to another
tough plover
with the LoopTools addon enabled, you could use Relax Loops
flat kelp
tough plover
with the LoopTools addon enabled, you could use Relax Loops
This, sometimes flatten as well.
If you really want to do it by hand, mask the verts you don't want to affect and then paint a smoothing brush set to a low strength across the area. If you want perfect smoothness the relax method will work better @worthy sorrel
tough plover
worthy sorrel
okay ill look into that
flat kelp
 edgy finch
This looks so good oml
flat kelp
Thank chu

 edgy finch


 torn frost
U guys are mad talented I've had so much trouble with blender
 sterile owl
i just joined here (hi!) to get some avatar rigging help

specifically this vertex does not wanna move

same happens here too

something that does not happen on the other side...
 keen sierra
Its likely already weighted to another bone
sterile owl
keen sierra
Its likely already weighted to another bone
hmm?
it isn't weighted to the wrist
 sterile owl
keen sierra
It could literally be any bone
sterile owl
keen sierra
It could literally be any bone
i tried to erase it by clicking very bone
except ones that does this

but i think you are right
keen sierra
Very often, it is the same bone on the other side
That happens when mirror is turned on but not topology mirror and the mesh is not perfectly symmetrical (being off by 0.0000001 is enough)
sterile owl
OH

nope still does that

i can't just give up too because i spent way too much time
keen sierra
It being weighted to another bone is the only possibility i see
sterile owl

so i tried its mirror
(as you can see) left is fine but the right is not fine
i used CATS too but it did absolutely nothing
keen sierra
mirroring the arm group will not remove other bones' influence
sterile owl
i don't see anything

i think i have to re think this tmr because its almost 22:00 tokyo
keen sierra
the issue is that blue could also be 0.0001 weight. thats why i also like to set 0 to black
 sterile owl
i found it!
 keen sierra
yep


 flat kelp
And from which European country do you hail from Mr Scammer?
Hm.
I like that model you're making, I'm curious about the weapon he has on his back it's got a ✨️ neat ✨️ design
Mind showing a wire frame view of just the weapon with a front and side profile?
-# Prikažite svoj 3D model u različitim prikazima. Inače prestanite pokušavati prevariti ljude.
edgy finch

 silver notch
Hello,
Im working on a new sculpt that I hope to eventually distribute as an avatar base. Im having some trouble determining whether Im ready to move onto retopology. Id like some feedback on the appeal and anatomy if possible. Thanks!


 flat kelp
silver notch
Hello,
Im working on a new sculpt that I hope to eventually distribute as an ava...
flat kelp
silver notch
Hello,
Im working on a new sculpt that I hope to eventually distribute as an ava...
Other than thicker thighs on the inner thigh direction and a slightly higher hip, looks good for the style you're going for. A lot of problem solving will happen at the retopo stage when you can adjust those proportions later
tough plover
silver notch
Hello,
Im working on a new sculpt that I hope to eventually distribute as an ava...
-
I think that the proportions are overall a little bit too skinny, but parts that stand out specifically are the hands, hips, buttocks and legs. would recommend looking at other furry/anthro characters for reference.
-
you may want to give some parts some smoothing and set your mesh to Smooth shading. after doing the retopo, you're probably gonna want to bake detail from your sculpt, so you need to make sure it's smooth enough for that.
-
you may want to raise the ankle a bit, so that the shin is a little bit shorter, and so the foot is at a steeper angle
silver notch
@flat kelp @tough plover thanks, I'll take these into consideration.
 plain cairn
Not my models but I started messing around with some on my phone


 frosty oyster
i'm trying to delete part of a mesh inside an fbx, so i imported it into blender, deleted the faces then tried to export it, but there's usually an issue like: when i swap the original mesh with the edited mesh, it's either invisible or shrunk. what am i missing?
tough plover
frosty oyster
i'm trying to delete part of a mesh inside an fbx, so i imported it into blender...
don't just swap the mesh. ideally, override the FBX by exporting to the same location.
however, if you were not the one who originally export it, and you don't know the export settings, that may just break things. instead, what you can do (as long as you did not unpack your avatar) is duplicate the FBX in unity, override the copy, then duplicate your avatar in the hiearchy, and then on that one, drag the new FBX into the prefab slot in the top of the inspector and select "Replace and keep overrides". now, you essentially have a copy of the original avatar with the new FBX, keeping your old one intact
then you can try overriding that new copy by exporting from blender
frosty oyster
i'll give it a try
also, is there a better way to import an fbx from unity to blender other than just dragging and dropping the file? i noticed the materials assigned to the fbx dont carry over so i have to manually assign the materials again in unity
tough plover
frosty oyster
also, is there a better way to import an fbx from unity to blender other than ju...
no, and you should also only ever have to do that once. keep a persistent blender project for working on that avatar.
likewise, don't expect materials to carry over from blender to unity. totally different material systems. again, you only ever need to assign materials once
because after that, just overriding the FBX will keep those material assignments. if you ever split/recombine the mesh, the order can get shuffled, but you can fix that in blender using Sort Elements
and if you ever need to import as a new FBX and doing the "replace prefab" thing doesn't work, you can just use Pumkin's avatar tools to copy stuff from one model to another, it can also copy materials (need to check a box)
frosty oyster
@tough plover how do i override the fbx? is that the same as deleting the copy and then renaming the new fbx the same as the old fbx?
tough plover
frosty oyster
<@93092275638251520> how do i override the fbx? is that the same as deleting the...
don't delete it, just export from blender in the same location, and double click the fbx in the folder
frosty oyster
got it
tough plover
frosty oyster
got it
and as always, don't forget to set "apply scalings" to FBX All and uncheck Add Leaf Bones when exporting
frosty oyster
managed to finally get my changes done, thanks for the help!
cyan pawn
how would i rig this to work as a avatar? (yes i know to use rotation constraints for the back legs) i mean in general where/how would i build the humanoid armature?
 tough plover
cyan pawn
how would i rig this to work as a avatar? (yes i know to use rotation constraint...
tough plover
cyan pawn
how would i rig this to work as a avatar? (yes i know to use rotation constraint...
this is going to be quite complex, you'll probably want to join the VirtualLimbs discord for advice
cyan pawn
oh could i get an invite?
 vapid panther
cyan pawn
how would i rig this to work as a avatar? (yes i know to use rotation constraint...
vapid panther
cyan pawn
how would i rig this to work as a avatar? (yes i know to use rotation constraint...
Oh there are some better models out there, and they should be pre rigged too
cyan pawn
vapid panther
Oh there are some better models out there, and they should be pre rigged too
I made this model. That's why I'm rigging it.
cyan pawn
and yes i did manage to rig it.
 winter iron
Ayo honse
 cyan pawn
im making a customizable avatar. ill make my pony sona after i have this one all set up :)
but i CANT WAIT to make them! itll be so pretty
 vapid panther
cyan pawn
I made this model. That's why I'm rigging it.
vapid panther
cyan pawn
I made this model. That's why I'm rigging it.
Ooooh that's awesome! Nice job
 dense shuttle
noble bough
retopology my beloved <:vrcTupCry:826890325313454100>
dense shuttle
noble bough
retopology my beloved <:vrcTupCry:826890325313454100>
my brother how do you retopologize so clean?
a 4k baked map in substance painter 2 is having blocky artifacts
flat kelp
They still have artifacts in their model, but it's just the nature of balancing mesh tri counts with the baked details not getting warped

 dense shuttle
flat kelp
They still have artifacts in their model, but it's just the nature of balancing ...
dense shuttle
flat kelp
They still have artifacts in their model, but it's just the nature of balancing ...
ngl, i get so anxious with retopo
flat kelp
Looks like a great start thus far 👌
 dense shuttle
 thin shadow
reminds me of Shooting Stars - Bag Raiders
thin shadow
reminds me of Shooting Stars - Bag Raiders
XDD i see it
i mean, it's not even too shabby

and just under 4k tris
noble bough
dense shuttle
i mean, it's not even too shabby
looking clean
dense shuttle
noble bough
looking clean
if you're saying it then i'm happy
your work is sick dude!
 coarse lynx
currently a work in progress, planning on doing a tiny bit more work this morning & rigging
dense shuttle
retopology done for my new head sculpt, finally can get to making shapekeys

 faint bronze
dense shuttle
retopology done for my new head sculpt, finally can get to making shapekeys
faint bronze
dense shuttle
retopology done for my new head sculpt, finally can get to making shapekeys
Can we see the topo? Looks great :0
dense shuttle
dense shuttle
i mean, it's not even too shabby
@faint bronze i just finished it XD

 main moon

 hybrid oar
I'm getting these importing a blender file. How can I fix it?

I'm also getting this alongside it.. this avatar was uploadable before.


I've made a lot of avatars and never came across this.
If I do "auto fix" then I get an infinite waiting for "MouseDown" window
And the rig and humanoid is literally defined
If I drop the base model in and add a VRC descriptor, it will work. But how can I fix my existing one? Even copying the components doesn't do it
Theres no child animators either
It's going to be a heap of work if I have to translate it over to a new avatar model because I have so many prefabs that rely on the main one.
hushed leaf
for much of that, don't have self-intersecting polys. Often you find those in hair and tails and fur.
the rest of the avatar setup stuff, probably come into #avatar-help
hybrid oar
How do I fix it? I import using .blend directly instead of FBX. Literally never have problems except for those kind of warnings occasionally.
hushed leaf
oh, I never use the .blend. It ultimately uses blender to turn that into an fbx behind the scenes anyway.
as for fixing, you reshape those faces, if you want to fix them
hybrid oar
Theres no automatic cleanup I can use to fix them?
hybrid oar
Blender has a lot of automatic tools, I ran through what I could, but not sure what I'm missing
Either way, I don't think that matters. I can't upload and it works fine if I drag the default model in and add a vrc avi descriptor on it
hushed leaf
there's an available plugin, "3d print toolbox" - it's for 3d printing of course but has a feature to find self-intersecting faces.
hybrid oar
hushed leaf
there's an available plugin, "3d print toolbox" - it's for 3d printing of course...
noted
hushed leaf
yeah it's a warning, not a blocker. If it looks right, great.
hybrid oar
hybrid oar
Either way, I don't think that matters. I can't upload and it works fine if I dr...
I'll move channels then for the bigger issue.
hushed leaf
the Rex's tail is quite a thing anyway, I bet you won't miss a few missing polys there
hybrid oar
I'm using a tail replacer as well, this model is very modified
It was working before and uploaded fine the other day, then I opened it up and SDK was giving me random errors saying it doesnt have an armature when it quite literally does
And the "auto fix" will hard freeze unity because its not doing the right thing
 orchid phoenix
hybrid oar
How do I fix it? I import using .blend directly instead of FBX. Literally never...
orchid phoenix
hybrid oar
How do I fix it? I import using .blend directly instead of FBX. Literally never...
i really dont recommend doing that. it ends up as fbx anyway but you lose control over export settings like scaling.
 cobalt roost
Does anyone know about making clothes fit avatars using blender? I've tried looking at tutorials and stuff but for some reason the model im trying to make fit onto my avi doesn't change at all when im trying to edit it with the sculpt feature. Is there maybe something i need to select, or perhaps some setting i need to have turned on before im able to sculpt something???
hushed leaf
possibly you're trying to sculpt a low-poly area? you kinda need a lot of polys for sculpting, you can do a bunch of subdividing, then retopo after you're done. It's a bunch of work though.
I don't usually do sculpting, I usually push and pull verts and faces and such using proportional editing.
cobalt roost
Found out the reason. It was because i imported the clothing as another fbx instead of a wavefront TvT
swift jolt
coarse lynx
Make it the windows 7 or xp logo instead of the squre win8-10 one. Thank :)
Think it would work better with the rest of the vibes of the pants
swift jolt
cobalt roost
Found out the reason. It was because i imported the clothing as another fbx inst...
Shouldnt ve a diffrence
cobalt roost
Anyone know how to add transparency onto an item for an avi?
Like would i have to do it in blender, unity, or substance painter???
flat kelp
cobalt roost
Like would i have to do it in blender, unity, or substance painter???
Transparency needs a UV map if you want it to be mapped to the mesh.
Otherwise you can do a transparency on the entire object but it wouldn't be variable unless you made an image that follows the UV map (black and white image, gray values are between 0 and 1, this is your image mask used in a transparency parameter in a material in unity).
tough plover
cobalt roost
Anyone know how to add transparency onto an item for an avi?
not enough details, you should explain what you're actually trying to do, with screenshots
cobalt roost
Its all good, i gave up on what i was trying to do
 tough plover

 near venture
How do I make an animated wire for when I move the head and neck (rigging later)
 faint bronze
You're gonna need to rig it if you want it to bend
 sweet holly
near venture
How do I make an animated wire for when I move the head and neck (rigging later)
sweet holly
near venture
How do I make an animated wire for when I move the head and neck (rigging later)
You're🥰 gonna need to rig it
 stark radish
Hey, is there a way in blender to limit one mesh by the extent of another?
I know there's boolean
but that helps remove mesh when it intersects with another
I want the inverse?
Kind of like limiting it based on a bounding box/convex hull but I want it to be constrained by the shape not the bounds
I don't think I'm explaining this well
hushed leaf
yeah I'm not quite sure I get what you mean, but I'd be trying to boolean too
stark radish
hushed leaf
yeah I'm not quite sure I get what you mean, but I'd be trying to boolean too
For example shrinkwrapping hair results in this
If I were to use a boolean it'd get rid of the parts that match the hair
I want to get rid of mesh where there isn't the hair like in the middle/bottom where the head goes
And yes I've tried using a boolean on the head but it doesn't work well
 flat kelp

 lament umbra
before i go ahead an try to create the topology to connect both of these meshes, is there a way to seamlessly blend the normals of the two? I tried doing a vertex proximity modifier and a data transfer (you can see the settings on the side) and im not getting great results. I also tried Set Mesh Normals node in Blender 4.5. I got slightly better results than the one shown in the 2nd gif but the edge is still harsh and there's this unwanted shading behavior in some spots. The head mesh not being fully closed causes issues or what not but eh . Any help appreciated :3c


note: textures making the edge look sharper, just obj color it looks cleaner but still not the result i want
hushed leaf
I've done this with data transfer, but honestly, I'd just join the meshes unless you reallyreally need them separate
 plush bone
you could extrude the top of the neck into a smoother edge, shrinkwrap to the head, and then data transfer, but yeah unless you have a really good reason it'd be better to just link them normally with topology
lament umbra
ahh oki, yeah wasnt gonna keep them separate (at least in terms of merging) but oki.. seems like got some topology work to do ;~;
ty tho you two! ❤️
coarse lynx
swift jolt
Make it the windows 7 or xp logo instead of the squre win8-10 one. Thank :)
i ended up changing it to the DVD logo in the end
planning to add a wii controller hanging from the belts,
Some other stuff i wanted to send here anyways - keyboard jacket im working on for a set & public model , Finally swapped to the amelia head bc im scared of it, and started a new hair WIP for my custom that i will sell on my shop >o<


 swift jolt
coarse lynx
planning to add a wii controller hanging from the belts,
Some other stuff i wan...
swift jolt
coarse lynx
planning to add a wii controller hanging from the belts,
Some other stuff i wan...
Wii remote with the strap thing as a necklace :)))
coarse lynx
coarse lynx
planning to add a wii controller hanging from the belts,
Some other stuff i wan...
update on yesterdays hair, and todays shenanigans


 swift jolt
swift jolt
swift jolt
Im gonna suffer when i get to the clothes and body. I have 0 experience modeling that kind of stuff
coarse lynx
coarse lynx
update on yesterdays hair, and todays shenanigans
sum more progress pics from this project


 safe needle
Avatar commission progress

 safe needle

 visual wren
Ever just let the autism take over and remake your entire personal home world by hand.
Made in Gravity Sketch
 safe needle
Final render of new pants model with textures. Coming to jinxxy soon $7
 swift jolt
visual wren
Ever just let the autism take over and remake your entire personal home world *b...
swift jolt
visual wren
Ever just let the autism take over and remake your entire personal home world *b...
this looks very neverhood coded XD
visual wren
swift jolt
this looks very neverhood coded XD
this was the OG version which i quickly did in a week
 visual wren
swift jolt
i dig the big crystal at the top! (both with a pickaxe and not :P)
visual wren
swift jolt
i dig the big crystal at the top! (both with a pickaxe and not :P)
it has an effect where you can see the sky above it, but distorted and tinted via tricks with panosphere
 late aspen
swift jolt
late aspen
swift jolt
Is that a charger? Or a challenger? Or a Pontiac?😍😍😍
swift jolt
late aspen
Is that a charger? Or a challenger? Or a Pontiac?😍😍😍
Started out as a roadrunner. But then i kinda lost the plot halfways through
 pine shore
Does anyone do anime models?
carmine pagoda
pine shore
Does anyone do anime models?
You’re gonna get a lot of scammers asking here go to VRC traders if you’re looking to commission
pine shore
carmine pagoda
You’re gonna get a lot of scammers asking here go to VRC traders if you’re looki...
Okay thank you
 solid minnow
Newest creation on the works. Yall know what this is.
 heavy sonnet
Labubu 🥺
safe needle
hehehehehehe

 left stream
safe needle
hehehehehehe
left stream
safe needle
hehehehehehe
Cruel and Unusual Bone Structure
safe needle
left stream
Cruel and Unusual Bone Structure
gotta get that toe tracking
left stream
safe needle
gotta get that toe tracking
toe trackings a thing?
safe needle
left stream
toe trackings a thing?
just physbones on the toes, and some gestures
 jaunty zealot
 safe needle
 safe needle
 safe needle
Teaser!
 safe needle
safe needle
safe needle
The final render of the first pair of pants for this commision

 fathom jolt
meee

 marsh geyser
hihi- im super new to blender and all and this could just be a user issue. i have the unoffical cats plugin and it matches my blender, but everytime i try and add it in, it dissapears. any help?
hushed leaf
make sure you have the right one for your blender version, available from here: https://catsblenderplugin.xyz/
A tool designed to shorten steps needed to import and optimize models into VRChat and other platforms.
marsh geyser
i do! 4.5 blender and 4.5 unoccical cats plugin. no matter what i do, nothing works
hushed leaf
what does "nothing works" mean though?
hushed leaf
ok I don't understand what's happening so not sure what to suggest.
hushed leaf
why are you trying to add that as a theme? it's not a theme, it's an add-on
marsh geyser
if i import it from the disk as well- it doesnt work either- do you know a different way of importing it?
hushed leaf
if you import the add on from disk, that should work. It does for me anyway, not that I use cats.
marsh geyser
like this im assuming? its ineffctive this way too
marsh geyser
there we go. THANK YOU- ugh im stupid 😭
safe needle
The first outfit is finally done after weeks of work. Only two more to go!


 fathom jolt

 swift jolt
kill me
 steady zealot
WIP Desert Eagle (with WIP custom attachments)


 graceful knoll
Does anyone here know how i can permenetly set the scaling changes i made to my avi in unity? So instead of 0.9 1.1 0.9, it'll show 1 1 1? I have scaled multiple things on my avi to different things and I want them all to stay that same size but I want them all to show as 1 1 1 in the inspector.
steady zealot
graceful knoll
Does anyone here know how i can permenetly set the scaling changes i made to my ...
I think the only real way to do this is to change the scale in Blender and apply it
hushed leaf
graceful knoll
Does anyone here know how i can permenetly set the scaling changes i made to my ...
you can scale in the FBX import settings also, first tab in the inspector for an FBX file. This is my preferred method - I don't do it in Blender because I want to keep my avatars to the standard size for compatibility with add-on assets and such.
well one-offs I'll just do in Blender
 wind laurel
making things and stuff
 safe needle
graceful knoll
Does anyone here know how i can permenetly set the scaling changes i made to my ...
safe needle
graceful knoll
Does anyone here know how i can permenetly set the scaling changes i made to my ...
Turn off combined scaling. It’s that little chain link next to the scale option
 tight scarab
Can I post WIP or completed project here also
steady zealot
tight scarab
Can I post WIP or completed project here also
You can post anything about 3D modelling (within the rules and TOS of course!) So yes! WIP and finished models are okay!
 cosmic mortar
I haven't made an avatar from scratch in a while... (Fixing the clipping later)

 shut mason
ben 10
 fast zodiac
cool little stylized gatling gun


 orchid nexus
Hi, does anyone know if there is a version of Cat's Blender Plugin that's still supported or a spiritual successor to it? Current version is too old for newer versions of blender and it becomes a real pain
oh ok nvm just scrolled up a bit and my question is answered lol
hushed leaf
orchid nexus
Hi, does anyone know if there is a version of Cat's Blender Plugin that's still ...
yup, answered lots 🙂
orchid nexus
i think these links should be pinned somewhere
 languid flume
does anybody here have good substance painter knowledge
 gritty junco
languid flume
does anybody here have good substance painter knowledge
gritty junco
languid flume
does anybody here have good substance painter knowledge
about?
languid flume
so im very new to this so bare with me plz, idk the correct phrasings for this process at all, a friend of mine has kinda been helping me thus far but im back to working on it myself and ive kinda sorta got some basics down i believe, but im trying to figure out how to fix the face here


the first image is old, second is new
im trying to fix the dots revolving around it
i have a really difficult time explaining the process
the layers are very confusing to me, i don't know how to dissect them 😭
but like do you see how the dots kind of cut off ?
they are a result of the first image

actually nevermind trying to talk about it over text is a waste of time because i cant explain it, i feel like showing via screen share would help explaining but im not sure who would give me their time
faint bronze
languid flume
actually nevermind trying to talk about it over text is a waste of time because ...
They're cut off because they do not extend to the UV island that the face is on, assuming this is all one texture map.
Hope that makes sense. I could be wrong, but that's the most likely reason imo
It could also be that you accidentally offset the dots up a bit. Maybe you could find that layer in Substance and try moving it down if that's the case
 open jay
Hi I’m not sure if anyone one would be willing or have the time to help me make propour lightmap uvs for my model in blender for unity im making cause it’s just not working I’ve followed tutorials and I’m just having a hard time wrapping my head around it it would help to share my screen and have someone walk me through it
 lost light
 hushed leaf
'e' the edge, but then you'd need to make the triangle faces by selecting 2 of the edges and hitting 'f'
 compact yew
I have a question for people that make clothes how would you make the all the folds in the clothing I haven’t figured out how to do it yet ?
hushed leaf
many options: cloth simulation, sculpting by hand, reshaping in layout mode, software designed for this such as marvelous designer....
 old sierra
need a hand with blendshapes, when i set them from 0 to 100 in unity, it does not show any change, but in blender it does? i am unsure as to what is causing this. this is only affected by custom blendshapes it seems.
 devout orchid
in blender you have unapplied modifiers other than armature. that deletes shapekeys.
old sierra
devout orchid
in blender you have unapplied modifiers other than armature. that deletes shapek...
any giveaways on what some could be? i would love to call if possible
i've also just looked through and there seems to be no modifiers apart from armature
tough plover
old sierra
need a hand with blendshapes, when i set them from 0 to 100 in unity, it does no...
this is because your basis is messed up
these are the steps to fix it
 austere ridge
Random fundumental question...
Why don't we use splines and 3d curves via mathematical functions to render curves on a single polygon?
austere ridge
I just discovered what nurbs are :o
 azure rain
austere ridge
Why don't we use splines and 3d curves via mathematical functions to render curv...
azure rain
austere ridge
Why don't we use splines and 3d curves via mathematical functions to render curv...
because in the end the graphics card only speaks triangles so the nurbs wouldn't provide any optimization
austere ridge
azure rain
because in the end the graphics card only speaks triangles so the nurbs wouldn'...
Makes sense.
steady zealot
Is there a simpler way to turn this collar down (the mesh has thickness and I'm struggling with it immensely)

(I need it as a shapekey so I can put on/take off a tie)
winter iron
why not just grab the edge vertices and move it?
steady zealot
that's what I've been doing but its extremely untidy and time consuming

And I'm losing my mind dealing with the thickness of the cloth
winter iron
why are you moving them individually
steady zealot
winter iron
why are you moving them individually
As opposed to what?
I have to make it drape neatly over the shoulders. I need to do that using individual vertices otherwise it won't look good
If you're saying I should alt select the entire edge and drag it down, Sure, but that a) doesn't account for the rotation of the rim, and b) doesn't conform to the shoulders at all
steady zealot
Also the thickness is not a solidify modifier
steady zealot
winter iron
move it down then adjust to fit shoulder
Yeah that's what I've been doing 🤦♂️
steady zealot
winter iron
and this overlap?

Do you see how simply moving down the rim doesn't rotate it
steady zealot
Has anybody ever told you you're an obnoxious piece of work
winter iron
you are acting like you just cant take the next couple seconds to select and drag down slightly
 coral merlin
steady zealot
Has anybody ever told you you're an obnoxious piece of work
coral merlin
steady zealot
Has anybody ever told you you're an obnoxious piece of work
well this is not the way to talk to someone who is tryin g to help you
steady zealot
coral merlin
well this is not the way to talk to someone who is tryin g to help you
No, you're right
But also, she could do without being so patronizing
coral merlin
everyone has their own way of speaking, but since it's help then you should not take it as personal
steady zealot
coral merlin
everyone has their own way of speaking, but since it's help then you should not ...
Sure, and not everybody is receptive to help when it's being given in a bitchy way
winter iron
I was only bitchy in 1 message after you cherry picked my quick 1 minute video made as an example
like in the same video you saw me fix that exact issue on the outer edge of the collar
steady zealot
winter iron
I was only bitchy in 1 message after you cherry picked my quick 1 minute video m...
I was asking a simple question. There was no need to be so condescending. Anyway I will not be discussing this further as it is not a conversation fit for this discord.
hushed leaf
if you aren't trying to move the edge with proportional editing on, try that, I find it very useful for stuff like this.
steady zealot
hushed leaf
if you aren't trying to move the edge with proportional editing on, try that, I ...
Yeah proportional editing is helping a lot
swift jolt
steady zealot
Has anybody ever told you you're an obnoxious piece of work
tbh diven makes a goodpoint. you are just kinda overcomplicating it
stuff does not need to be perfect. cause nobody will notice if it is or not.
steady zealot
swift jolt
stuff does not need to be perfect. cause nobody will notice if it is or not.
Yeah of course. I was just looking for a slightly more elegant solution than "do it the old fashioned way" delivered in a very patronizing way
coral merlin
just leave it guy, why to complicate things
steady zealot
swift jolt
there is no elegant way
I'm not convinced a better way doesn't exist, but assuming it doesn't, how would I know this without asking? Should I never ask for simpler ways to do menial tasks?
swift jolt
steady zealot
I'm not convinced a better way doesn't exist, but assuming it doesn't, how would...
look at blenders documentation to see all its features and what you are able to do with it? what else?
steady zealot
swift jolt
look at blenders documentation to see all its features and what you are able to ...
Blender's documentation will not teach you out of the box methods or plugins.
swift jolt
you dont ever really need to use any plugins for vrchat avatars
steady zealot
swift jolt
you dont ever really need to use any plugins for vrchat avatars
This is subjective. Anyway stop acting like I was in the wrong seeking a better solution.
swift jolt
steady zealot
This is subjective. Anyway stop acting like I was in the wrong seeking a better ...
if you can make a full avatar without plugins. it infact is not subjective.. its objectivly possible.
hushed leaf
Some of them sure do make things nicer though
steady zealot
swift jolt
if you can make a full avatar without plugins. it infact is not subjective.. its...
You don't "need" anything. That's not really ever a helpful statement. Stop being obtuse.
This whole channel's existence is to ask for help solving problems when 3D modeling.
swift jolt
this place is infact not only for asking for help. it just says its for discussing 3d modeling in blender, maya and other programs. this is still a relevant conversation
usualy you never see ppl asking for help here infact. usualy just people showcasing their 3d modeling progress
steady zealot
"Hey how can I do this?" "Have you considered not?" Lmfao
swift jolt
sometimes simply not doing it more worth it.
steady zealot
I'm not arguing that this isn't a relevant conversation. I'm saying that you are trying to make it seem like what I asked is some crazy thing and that I'm stupid for seeking a different solution than the one you would have used.
steady zealot
You misread that sentence
steady zealot
@swift jolt @winter iron I indeed did find a more elegant solution to the problem. So much for there not being a way, huh
 swift jolt
my service provider is making my internet shit itself. the gif wont move but sure! 👍
steady zealot
Good cop out lmfao
swift jolt
steady zealot
Good cop out lmfao
genuinly tho. i live in bunfuck nowere and my service provider was good. untill last time they did maintenance on their mast. think they fucked something up
winter iron
steady zealot
<@280434417875419136> <@318593948081848320> I indeed did find a more elegant sol...
I mean good for you but was this meant to be some gotcha moment? no one said there werent other ways to do it
I just said how I would do it
steady zealot
winter iron
I mean good for you but was this meant to be some gotcha moment? no one said the...
Lol. Lmao even.
thin shadow
it is because of "the x and y problem"
https://xyproblem.info/
 unique galleon
What an emotional rollercoaster that all was
 stable island
Guys I want a app I can do my textures on the 3d model, but I can’t pay 60$+ monthly for substance painter 3d.
I looked to see if there maybe was an alternative and I just cannot find one.
And people suggested ripping it, but I don’t even know how to or what files I’d have to delete after
Does anyone know anyway to 3d paint bc I just can’t w this 2d
It’s so icky
winter iron
stable island
Does anyone know anyway to 3d paint bc I just can’t w this 2d
blender
stable island
Does blender have the option to texture in 3d?
azure rain
stable island
Does blender have the option to texture in 3d?
yes and this free add-on can make it more substance painter like https://extensions.blender.org/add-ons/ucupaint/
 stable island
azure rain
yes and this free add-on can make it more substance painter like https://extens...
stable island
azure rain
yes and this free add-on can make it more substance painter like https://extens...
THANK YOU! Il check it out!
winter iron
stable island
Does blender have the option to texture in 3d?
theres an entire texture paint tab
azure rain
stable island
THANK YOU! Il check it out!

Learn how to use Blender and the free addon Ucupaint to create Stylized PBR assets! No sculpting required!
LINKS
Blender: https://www.blender.org/download/
Krita: https://krita.org/en/download/
Ucupaint: https://github.com/ucupumar/ucupaint/releases
Stylized Canister Blend File (to follow along):
https://drive.google.com/file/d/1lF8qCaKmoBBBK...
winter iron
azure rain
https://www.youtube.com/watch?v=8_apXIn0g5w&pp=ygUIVWN1cGFpbnTYBsUH
time to model and texture paint shrek cause blender now has layers
hushed leaf
stable island
Guys I want a app I can do my textures on the 3d model, but I can’t pay 60$+ mon...
you can also buy it one-time on Steam, you get updates for a year and beyond that can keep using that version forever. Even has linux versions.
stable island
Really?
stable island
winter iron
time to model and texture paint shrek cause blender now has layers
Really?
stable island
azure rain
https://www.youtube.com/watch?v=8_apXIn0g5w&pp=ygUIVWN1cGFpbnTYBsUH
Omg
Layersssss
azure rain
stable island
Layersssss
yup so definitely recommend that add-on
stable island
XD
winter iron
stable island
Really?
 hushed leaf
When making stairs, do you just extrude out and down repeatedly or do some array magic?
ah I guess this is easier with an array
jagged moat
hushed leaf
When making stairs, do you just extrude out and down repeatedly or do some array...
I find using a bevel with the profile set to 'steps' in blender works pretty well
steady zealot
hushed leaf
When making stairs, do you just extrude out and down repeatedly or do some array...
I typically do array if I need each step to be more than just 2 sides. Like with overhang and whatnot.
hushed leaf
Yeah when it's like 4 or 5 I just extrude, but this time did an array.
steady zealot
hushed leaf
Yeah when it's like 4 or 5 I just extrude, but this time did an array.
also with array and a weld modifier and the right measurements, you can have them be a singular piece at the end which is nice
hushed leaf
yup, that's the intent!
 hot sundial
?tag scam
 split graniteBOT
Hey ho 👋 I see you're looking for commissions.
You will probably receive DM's or friend requests from scammers now (or later) that will try to offer you their services. 😖
🚫 Absolutely DO NOT engage with those, regardless of how competent they might seem or their excuse to why they contact you.
This is unsafe practice used by scammers, and also breaks this Discord's rules. 👮
If you seek a creator, check out VRCTraders and follow their protocols strictly 🥺
(You will get DM from bot to verify your account upon join.)
🌠 It's extremely important to always DEEPLY investigate the account and social media of the person you plan to commission.
Is their social media linked in Discord? Is it legitimate? Are the references stolen? (Try to reverse image search posts to check.) 👀
The quality of fake profiles out there can be crazy good, be aware of that and NEVER engage with DM or friend requests that originate from the artist.
When in the slightest doubt, do not commission them and contact the moderators of the involved communities. 😱
hot sundial
you seems take it wrong, not says you are scammer, you get scammer by asking here. Go to place mentioned and ask instead.
coral merlin
definitely took wrong lol
 restive shuttle
Does anyone have a Gilgamesh model?
 plush venture
restive shuttle
Does anyone have a Gilgamesh model?
plush venture
restive shuttle
Does anyone have a Gilgamesh model?
I think you should try in avatar search
 dusk pulsar
Anyone who happens to know a bit about setting up VRCFury for props? Trying to set up a pretty basic prop, and it has me stumped.
 fair mason
 rapid spade
WIP femboy

 hallow igloo
having an issue with my avatar descriptor, im trying to set the blink blendshapes and it keeps reverting to what it was before. i am unable to set those to anything new, it just WONT apply. hopefully this clip explains what its doing.
 zealous pilot
hallow igloo
having an issue with my avatar descriptor, im trying to set the blink blendshape...
zealous pilot
hallow igloo
having an issue with my avatar descriptor, im trying to set the blink blendshape...
remove the avatar discriptor and put a new one in
plush venture
hallow igloo
having an issue with my avatar descriptor, im trying to set the blink blendshape...
you have to unpack prefab completely and then set theblink blendshape again
hallow igloo
neither of those worked for me unfortunately :(
but I did try like 4 other things too but I can't tell which actually fixed it lmao, thank you for your suggestions C:
hushed leaf
it's almost never a good idea to unpack your prefab
And you should question anyone who suggests it
fair mason
Trickory Toby!


 dim fable
hey guys stupid question probably, but if i wanted to make the ends of the petals of the big flower (selected) a bit wider and i used scale to do that, and i copied the numbers in the corner and used them to also make the smaller flower petals wider, would both flowers petals be equally resized? sorry im not sure how to word this properly LOL
 devout orchid
blender donut🤷♂️
hushed leaf
When you're working with a free model off sketchfab and you do a mesh -> cleanup -> merge by distance, and it removes forty-six thousand vertices..... yeah...
hushed leaf
...another part, 292k vertices.
 tribal monolith
Dumb question, how do I make the walls and similar terrain of my world unable to be looked through or clipped through using a seat? Do i just have to thicken them, or is there another method?
winter iron
tribal monolith
Dumb question, how do I make the walls and similar terrain of my world unable to...
there isnt exactly a method other than forced culling so even if they clip through the world wont be loaded
or teleporting them back into bounds if they try and go outside and fly etc
otherwise it isnt exactly possible considering how open ended that is
cause like you make the walls thicker and the person just moves the seat out further
steady zealot
maybe make it so every room you're in has a trigger volume that if your head bone leaves it, it blacks out your screen unless you leave through specified doors. That might work somewhat
swift jolt
Just put the rooms in black boxes and far away. Make the sky also the same black with no shadows or light on any of the black. So they cant see were the rest of the map is.
swift jolt
tribal monolith
Dumb question, how do I make the walls and similar terrain of my world unable to...
Or a screenspace shader that applies black to your view when outside of the area you are allowed to be


 cobalt tiger
On body too

 gritty junco
dim fable
hey guys stupid question probably, but if i wanted to make the ends of the petal...
gritty junco
dim fable
hey guys stupid question probably, but if i wanted to make the ends of the petal...
yes
gritty junco
cobalt tiger
On body too
woah so pretty!!! awesome
dim fable
gritty junco
yes
thank you :)
 woeful cave
 wispy kelp
I love this so much
wispy kelp
woeful cave
I love this so much
It's close to complete, just need weight painting


 slate fox

 wispy kelp
faint bronze
Probably a model from zbrush lol
wispy kelp
faint bronze
Probably a model from zbrush lol
I have Z brush but this one was fully done in blender then baked in substance


Also deformation looking alright. Just needs a bit more and I can prepare the body for toggles
faint bronze
wispy kelp
I have Z brush but this one was fully done in blender then baked in substance
oh sorry i was replying to an older post and forgot to actually hit the reply button
but it does look very good, yes
 white sonnet

 untold jasper
Im looking to start 3d modelling avatars, any tips and suggestions/knowledge yall learnt later on which is helpful now?
hushed leaf
symmetry is your friend
untold jasper
I learnt that from modelling for mc in blockbench
I forgot to mention that, i have experience in voxel modelling
unique galleon
In terms of optimizing build size and complexity without trading off quality, is it better to design your assets to work with tileable textures or is it better to pack and bake a texture for each model?
azure rain
unique galleon
In terms of optimizing build size and complexity without trading off quality, is...
increase in texture reuse would be very helpful in reducing file size as a unique bake requires 3 texture per asset whereas like building all of your wood assets out of like one wood trim sheet would be using the same 3 textures for everything
Learn all about Trimsheets in this deep dive into the topic.
https://images.squarespace-cdn.com/content/v1/5d4b249616f93e000149aebd/1588274207041-O18GZVPADDP6NPQ5SXFX/EXP_KeeganKeene_Thumbnail_1920x1080.jpg?format=2500w example of a asset made in a trim sheet that would require a very big texture to uniquely bake to match the same texture density

 analog fiber
si-fi chair i made

 unkempt gale
azure rain
https://images.squarespace-cdn.com/content/v1/5d4b249616f93e000149aebd/158827420...
unkempt gale
azure rain
https://images.squarespace-cdn.com/content/v1/5d4b249616f93e000149aebd/158827420...
 azure rain
unkempt gale
https://tenor.com/view/cat-dance-cat-cat-dancing-dancing-cat-daily-cat-dance-gif...
azure rain
unkempt gale
https://tenor.com/view/cat-dance-cat-cat-dancing-dancing-cat-daily-cat-dance-gif...
hi?
 umbral schooner
Ts tuff?

 limpid widget
Can someone help me
hushed leaf
limpid widget
Can someone help me
with what
limpid widget
hushed leaf
with what
i wanna make my own avatar
hushed leaf
okay
limpid widget
hushed leaf
okay
do you know how
limpid widget
hushed leaf
yes
i wanna make a curious george avatar that can toggle on the Yellow man's hat from the show, and that can go invis
hushed leaf
oh so you're multiple scammers, got it
limpid widget
 hushed leaf
@limpid widget FYI I don't help in DM
limpid widget
hushed leaf
<@1228534722011861002> FYI I don't help in DM
ok
i thought we just call and you help me
but ima go eat dinner rq
hushed leaf
yeah no, that's not something I do for free
If you don't already know blender, go learn blender.
what?
ok so also a broken record. Cool.
 magic perch
hushed leaf
If you don't already know blender, go learn blender.
magic perch
hushed leaf
If you don't already know blender, go learn blender.
Don't waste your time with these scammers just ignore them, they'll take your whole day arguing.

 carmine pagoda
limpid widget
carmine pagoda
limpid widget
Your gonna get a bunch of scammers here, if you want an Avatar you should head over to VRC traders
limpid widget
carmine pagoda
Your gonna get a bunch of scammers here, if you want an Avatar you should head o...
where is that, and rn im just watching a yt vid how to make it myself...
carmine pagoda
limpid widget
where is that, and rn im just watching a yt vid how to make it myself...
Should be in community servers just a few down.
If you think you can, you should make it yourself though, its a good step to do more if you want eventually
limpid widget
carmine pagoda
If you think you can, you should make it yourself though, its a good step to do ...
but thank you very much, i appericate your info
carmine pagoda
limpid widget
but thank you very much, i appericate your info
Of course im just passing along the help that was given to me when i was new. Good luck!
steady zealot
limpid widget
omg so scrunkly 🥰
 sour swan
oh look, a wild Scam has apeared
 lone fable
yay its removed
fair mason
fair mason
 flat kelp


 flat kelp
unique galleon
What a cute lil guy!! What’s his species? He gives me sea slug vibes!!
flat kelp
unique galleon
What a cute lil guy!! What’s his species? He gives me sea slug vibes!!
A Mox
 sour notch
To the parts that are highlighted, red are warped and weird when I put textures on them. If there's no texture on them, they're normal. I've been trying to figure this out for a while and I just can't get my head around it. I almost want to say every time I extrude something can blender is what causes it. I just don't know what I'm doing wrong. I don't know if anyone's willing to help me. I'm fairly new to blender

Feel free to add me if you're up helping
 stone pine
looks like it might be a uv issue
keen sierra
sour notch
To the parts that are highlighted, red are warped and weird when I put textures ...
 steep oar
Anyone from this chat wants to help me with learning? All I need to learn are basics, like how to change shapes etc (preferably blender)
hushed leaf
steep oar
Anyone from this chat wants to help me with learning? All I need to learn are ba...
Select mesh object. make a new shape key and select it. Go into edit mode. move vertices however you want. Go back to object mode and slide the weight's shape key on and off, now you know how to change shapes.
 supple harness
anyone know how to fix this problem with the leg??

i think its a UV bug
cause the leg was inverted when i ported it to Unity then i fixed it in blender and now the legs like that
i had the same issue with the arm but its fine so idk why the leg is doing that
silver notch
I’m looking for some feedback on my topology. I try to follow general muscular patterns, but someone recently pointed out that I tend to place the navel and abs a bit lower than average.
This model is already pretty far along, so I wanted to ask. Does this fall within a reasonable range stylistically, or does it read as noticeably off to you?

Ive considered creating a shape key to nudge it upwards, but im not sure if it ought to be higher outright.
faint bronze
supple harness
i had the same issue with the arm but its fine so idk why the leg is doing that
Flip the normals
faint bronze
silver notch
Ive considered creating a shape key to nudge it upwards, but im not sure if it o...
Just looks like a long torso to me. I think you're ok
supple harness
faint bronze
Flip the normals
ya i did that
thats what caused it to begin with
if i flip them back it reverts back to being inverted
silver notch
supple harness
thats what caused it to begin with
what software are you using?
supple harness
silver notch
what software are you using?
blender id assume?
faint bronze
What do you mean inverted
supple harness
hang on
silver notch
supple harness
blender id assume?
ok, are you just flipping normals or recalculating them?
supple harness
let me get a few pictures to help understand
supple harness
silver notch
ok, are you just flipping normals or recalculating them?
i tried both
supple harness
i did 2 edits to the model with recalculating then flipping
picture this model as the leg
if i invert the normals it will do this

but i flipped them like this and the models normals were inverted in unity
 supple harness
supple harness
supple harness
so i had to flip the normals to that
for it to work
and not be inverted
silver notch
supple harness
i tried both
does the model have weird custom splits?
supple harness
??
explain??
i dont really understand alot of blender/unity terms im super slow
silver notch
blender has an option "clear custom split normal data" it can break the surface appearance a bit but it might tell you whether the issue youre seeing is baked into the model
silver notch
supple harness
il do some digging
you can see it at the bottom here

select the model and use that option
if it has custom split normals, it will give you the option to clear instead of add them
 livid pine
Hi, I'm looking to make my first 3D avatar in blender and I have a few questions
Every model I've seen has its palms pointed downwards, is there a reason for that? Will issues come up if I don't so it like that?
I'm almost done with my reference images
Will I be able to use a humanoid rig with legs like these?
Is there anything I should look out for or change the position of to make modeling easier for myself?
 hushed leaf
livid pine
Hi, I'm looking to make my first 3D avatar in blender and I have a few questions...
hushed leaf
livid pine
Hi, I'm looking to make my first 3D avatar in blender and I have a few questions...
there's an ideal VRChat armature diagram pinned in #avatar-rigging - the default for that is palms down.
Yes you'll be able to use humanoid rigging, you just treat the part from knee to toes as the lower leg, unless you want to setup a plantigrade->digitgrade conversion thing, which is complicated.
Otherwise, your choice of "A Pose" or "T Pose" is up to you.
rapid spade
Femboy Wip 2 (I made a mistake in the queue topology xD)


 left lava
rapid spade
Femboy Wip 2 (I made a mistake in the queue topology xD)
left lava
rapid spade
Femboy Wip 2 (I made a mistake in the queue topology xD)
It looks amazing in it's very own unique ways.
 thin mesa
https://gyazo.com/bab5bc7992b66e7fb3041eaf5e4e3dda deer avatar I'm working on trying to get it under 10k with clothing and hair included
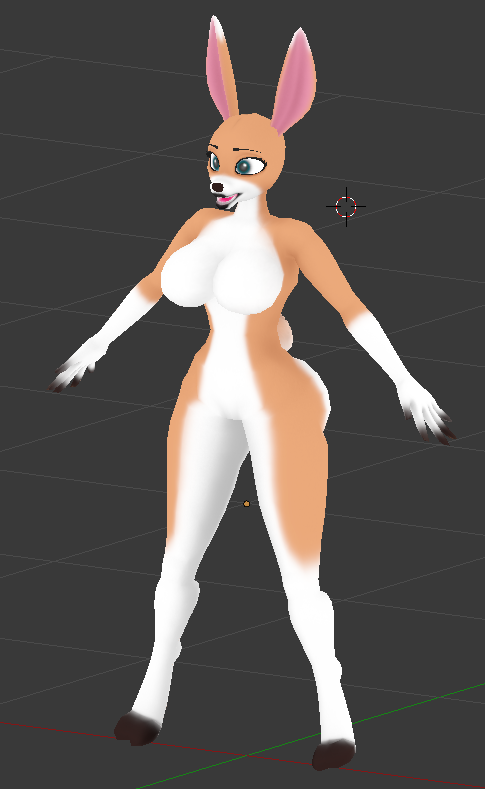
 green fox
I'm working on a render and I'm new to seeing uv tile discarding. I see how to get toggles to show in unity through poiyomi but how do I make it hide certain parts in blender? The tile discarding is applied to a hair and is used to toggle between different hair style options on this avi.
tough plover
green fox
I'm working on a render and I'm new to seeing uv tile discarding. I see how to g...
because it's a render, I'd recommend just separating the meshes. if you enable UV Sync in the UV editor window, you can just select the UVs for the hair in that tile, then separate it
green fox
tough plover
because it's a render, I'd recommend just separating the meshes. if you enable U...
Oh ok thanks that worked
 shrewd ermine


 hushed leaf
I wrote a little blender plugin the other day to add a "zero all" option to the shape keys popup menu and I'm surprised how many times I've already used it.
(Been doing a bunch of modeling and remodeling related to a new avatar)
hushed leaf
yep
Also vertex groups, it has some decent ones, but not everything. I also wrote one to remove all empty groups.
tough plover
hushed leaf
I wrote a little blender plugin the other day to add a "zero all" option to the ...
wym to the shape key "popup menu"? isn't there already a button to set all shape key weights to 0
hushed leaf
I don't see one
tough plover
it's the little X in the bottom right

oh wait a second
that might not be native
ah I see, it's part of Gret
GitHub
Blender addons. Contribute to greisane/gret development by creating an account on GitHub.
extremely useful addon
it adds some stuff that really should be native in blender, like that ^, but another example is buttons to re-order UV maps
if you get it, make sure to click the green Code button and do Download Zip
to get the latest ver
hushed leaf
ahhh
yeah that makes sense, I didn't see that there
huh I had gret in the past, but don't currently, looks like there's more cool things than I realized.
Also since i don't have gret, but DO have this little 'x' button that I never clicked because it didn't seem like it would apply to the list above it.... then it's not from gret but native
well it was fun to learn how to script that part of blender anyway.
hushed leaf
wow.... no idea what weird thing I've done but I'm trying to weight paint and setting specific weight values, which the brush is totally ignoring.
faint bronze
hushed leaf
wow.... no idea what weird thing I've done but I'm trying to weight paint and se...
What is the brush set to? Is it add or replace?
hushed leaf
mix, I usually use - I actually restarted blender and it became sane again, no idea what the heck I'd done there.
I was trying to match paint in another place but it kept painting 1 instead of the fractional value I had set.
faint bronze
Probably just blender glitching out then
hushed leaf
Yeah I really couldn't explain it, it was very strange
hushed leaf
amazing... I've been doing this for quite a while now and I only just today realized that when weight painting with a "Paint" brush, using shift will switch to the "Blur" brush
 fair vigil
hi all. ive been trying to make a model of this helmet for a while now, opting to work on seperate parts. currently, im on the horns but i dont know what to do. what i have currently is just a basic outline

 fair vigil
progress update

 autumn token
hey guys anyone havee like a bank of 3d models for avatars ? favorite website or sum
i wanna start with a base model then add 3d models of acccesories and add effects
 magic thistle
hushed leaf
magic thistle
magic thistle
hushed leaf
what exactly do you need help with here?
 stuck ledge
Anyone have any xenoverse 2 cac base models that I could use? Preferably unreal engine 4
fair vigil
early d-day knight helmet model that I plan to use for a vrchat avatar

 tranquil tide
Is there someone I could ask that would maybe be okay with helping me model something?
winter iron
Dont ask to ask just state your issue