#3d-modeling
1 messages · Page 12 of 1
 spiral sigil
Ego as in identity
Shonzo is ballin so I think their opinion at default has merit when we talk about creating maximum improvement and output
 onyx jewel
Is it wrong to enjoy compliments & others getting use out of your work? All I'm getting from you is that I need to keep to myself and spend another year learning before I should even consider publishing anything
 tough plover
Shonzo is definitely good at avatar creation and putting out quality content, but both your and their initial responses didn't even answer his question, and seemed more mocking than anything
what I responded here #3d-modeling message is all that was required
after that, it would have been fine to elaborate on the ethics of it, and akin it to tracing art, but only doing the latter and not the former is not very helpful
spiral sigil
I operate under the assumption that you will burnout if your ultimate goal is to share art with the world and do not yet have the skill, nor have a friend group who is interested (you would then need to find approval from random people on the internet and I'd be hard pressed to see that happening without quality work already)
 ionic skiff
my one question is why are you so concerned with their drive to learn? should that not be up to them? i think its nice seeing people take interest in 3d art, too, but just telling them that theyre not driven enough will get nobody anywhere
spiral sigil
They get nowhere by trace retopo-ing a par model
 orchid phoenix
spiral sigil
They get nowhere by trace retopo-ing a par model
orchid phoenix
spiral sigil
They get nowhere by trace retopo-ing a par model
is retopology not a valuable skill?
tough plover
now, to be fair to you too, it's a bit unreasonable to think that your first retopo job will be great and be better than the original model
but if it is lower poly than the original, it's not unreasonable to want to put it out there for other people to use. (as long as it's permitted, that is.)
spiral sigil
orchid phoenix
is retopology not a valuable skill?
What
ionic skiff
theres no correct order in which to learn the skills associated with 3d art. i didnt start out with sculpting either. i downloaded lots of free available sculpts and retopo'd them. i didnt share them, but its still a valid way to learn
onyx jewel
oh yeah I know it won't be better than the original, I just know I might not be the only one struggling to get a low poly avi and others could realistically benefit from that work, it's not like it's a retopo made for no reason that I'm just trying to post to get my name out or whatever
current plan is just send to the original creator when I'm done and let them do whatever / sell it, and if they delete my email or whatever that's fine too
spiral sigil
I have been calling to attention that their focus is extremely not effective for learning, as they have said before they just want to save themselves time and save a 3d model to use as a base yet they have not yet an understanding of the human features they want to make a base for
That is not studying and they are going steps ahead
They will inevitably have to redo this later
ionic skiff
and why is that an issue
tough plover
spiral sigil
They will inevitably have to redo this later
so what? if you do something long enough, you will get better at it, and you'll look back at your old work and think it was shit. with the experience you've gained, you'll be able to make something better
but you have. to start. from somewhere.
spiral sigil
ionic skiff
and why is that an issue
You can model for the purposes of study with subject(s) that are a good example
So that when you make bases to save time they are actually good enough
onyx jewel
Just modeling for purposes of study is poor motivation for me
I don't just write programs that I know will be terrible because I want to learn something
spiral sigil
Well you gotta say that since that is a condition in my function
onyx jewel
They have to be useful to me or others
ionic skiff
if you look at it as "good enough" itll never be good enough, because theres no such thing. hate to break it to you but youll never be entirely satisfied with your older work as long as youre improving
tough plover
^ same, if I make something I want to be able to use it. I don't care if I'll need to redo it later, that is a problem for future me
being able to use it is motivation to make it in the first place. later on, you will get additional motivation from wanting to improve it
spiral sigil
tough plover
^ same, if I make something I want to be able to use it. I don't care if I'll ne...
That doesn't improve your understanding of how the body is shaped lmao
ionic skiff
theyre not trying to figure out how the body is shaped, theyre trying to retopologize a humanoid figure
tough plover
spiral sigil
That doesn't improve your understanding of how the body is shaped lmao
you're assuming it needs to be perfectly anatomically correct from the start
where that literally doesn't matter
onyx jewel
I could make the argument that hand placing individual verticies and faces to match the contours of the body underneath is helping me
spiral sigil
That would if it's on a good subject of the body
You just reworded what retopo is if you only had painstaking tools to do it
onyx jewel
how do you think I'm doing it? I'm not just clicking the remesh button in blender
I am hand placing every single face
I am making the topology
spiral sigil
And the example you are using is quite limiting to say the least
onyx jewel
I am following the contours of the foot and legs and body
ionic skiff
theyre not copying the existing topology
theyre not looking at the topology of the original mesh
it is just used as a base to retoplogize on, same way as you would use a sculpt
so it quite literally cannot be limiting because the shape does not matter long as it is humanoid
the shape can always be adjusted after retopology is done
spiral sigil
Assuming your retopology or example retopo has flow that is designed to accomodate those changes
onyx jewel
it's not even the exact shape either, it's been smoothed down quite a bit because the old one was too muscular and bulky imo
spiral sigil
So they are making their own constructed polymodel/sculpt?
onyx jewel
 ionic skiff
spiral sigil
Assuming your retopology or example retopo has flow that is designed to accomoda...
ionic skiff
spiral sigil
Assuming your retopology or example retopo has flow that is designed to accomoda...
unless you make very extreme changes, this is barely necessary
onyx jewel
these are all hand placed on the smoothed base, every single one of these faces was considered
this is the original (I believe those weird loops in the middle got deleted by me at some point)
 ionic skiff
im not sure what youre getting at
they have the original model and then projected a plane onto it, then started retoplogizing from scratch
theyre not just editing the original model and changes to the shape can, as i said, always be made after retopology is done. this is just teaching them how to follow the contours of the human body
because thats largely the same across all humanoid models. sure theres a million ways to go about it but lowpoly will always be quite similar
spiral sigil
Oh I'm not sure either I don't remember then besides that the example still looks like a dampened inflated balloon
ionic skiff
the original base is fine. it works for what they need out of their avatar, so i see no issue with it
spiral sigil
 onyx jewel
retopo vs original smooth shaded -- it's not perfect but it's also like 1/3 or less of the triangles


 still wadi

 calm marten
is it smarter to make a tail and hair before or after retopo stuff?
tough plover
hm depends, I'd say don't worry about retopo'ing stuff right now, and just focus on getting the shapes of everything right
at least make the tail, hair you can do whatever you want, but you can likely make it separately from the rest
like, you don't really need to worry about when you do the hair
you'd at least want the shape of the head first lol
calm marten
sounds good! probably wait on the tail till after retopo because i saw that i could choose some points on the back and extrude them to make the tail easier
i also fixed the legs like you guys said. Hope this is better
tough plover
yea, the legs are definitely better. still not perfect, but a lot better
calm marten
which part do i need to fix?
calm marten
the knee idk how much sharper i can make it due to the method i used to make the legs but i can fix the ankle 100%
im starting to think i may just need to recreate the legs with uv spheres since i cant make sharp angles with this skin modifier
calm marten
tough plover
oh, you're using the Skin modifier?
yeahhh it sucks lol. Dumb question though, how the heck do i make hands ITS SO HARD
 harsh saddle
calm marten
yeahhh it sucks lol. Dumb question though, how the heck do i make hands ITS SO H...
harsh saddle
calm marten
yeahhh it sucks lol. Dumb question though, how the heck do i make hands ITS SO H...
Are the hands particularly unique? You can buy base meshes that you can use for any purpose so I don't generally prefer to reinvent the wheel. If you really just want to say you've done it, at least do it just once and then reuse your work. If the rest of the arms will be visible, you need to make sure the edge count works out for the surgery but still easier than making them from scratch.
If they're wearing clothing and everything doesn't need to be connected, you can just slice them off and stick them in the right spot.
calm marten
im tempted to at this point. The only clothing my character will have is a cape modeled after Amicus's from Adastra, maybe pants and then a crown so gonna have to make it look decent
harsh saddle
If you're going to make your own hands, I'd still download a base mesh as reference. You can use reference images but I'd much rather work from 3D reference. Personally, I sculpt all my models first and then retopologize because I can't wrap my head around how to plan these things out without a structure to build from.
calm marten
agreed, thats what im trying to do first so i have most of the detail and shape done
calm marten
tough plover
the knee and ankle need to be sharper
Is the sharpness where it should be? I feel like uv spheres were a better choice here

Oh wait I forgot to line the knee and feet up🤦♂️
tough plover
calm marten
Is the sharpness where it should be? I feel like uv spheres were a better choice...
I'd personally recommend using subdivided cubes instead of UV spheres. you can modify them very easily by adding loop cuts
calm marten
ah ok. Back to the sculpting board
tough plover
calm marten
Is the sharpness where it should be? I feel like uv spheres were a better choice...
also, shape looks a little odd. try something like this
 calm marten
i was wondering that too, i zoomed out and noticed how off balance it would be if the character walked
He seems like hes sitting pretty natural now instead of bending backwards
 tough plover
getting somewhere, although the legs are back to looking a little short. try moving the toes/foot only downwards, then rotating the shin to match
remember:
1 - thigh
2 - shin
3 - foot
4 - toes
 calm marten
i forget thats how it is, im so used to human stuff.
i can rotate the shin but might lose that sharpness you were looking for
 calm marten
Is this ok or did I move it too far?
 calm marten
I think i got all of the shaping done for the body finally. Tried remeshing with 10kbut noticed the torso had some gaps in it, did i do something wrong or do i just need a different sample size?
harsh saddle
Remeshing isn't going to be sufficient for quality character retopology. It's a job that still needs to be done manually.
calm marten
Makes sense, Sacred made it sound really easy last night.
tough plover
remeshing isn't to get a final mesh. it's to take the multiple separate shapes and make it into one solid mesh that you can sculpt more easily on
calm marten
i dont like the sound of whats up next then
tough plover
blockout -> remesh -> sculpt -> retopo -> everything else
calm marten
Whats a good way to start retopo? Seems kinda overwhelming knowing how much character there is to cover
ionic skiff
uv unwrap / texturing  sculpting is the good part
youre ways from needing to retopo but when the time comes theres plenty of tutorials on yt that cover it
tough plover
calm marten
Whats a good way to start retopo? Seems kinda overwhelming knowing how much char...
after you have your nicely sculpted mesh with all of the major details you want, retopo doesn't take too long if you know how to do it profficiently
calm marten
sculpting was at least fun🥲
tough plover
there are addons that can help, but I normally do it manually with the help of modifiers
calm marten
tough plover
after you have your nicely sculpted mesh with all of the major details you want,...
in that case i'll be there forever lol
tough plover
I do:
- mirror (clipping on)
- shrinkwrap (offset 0)
- subdivision (one level, Catmull clark)
- shrinkwrap (small offset)
every face you add will result in 4 faces in the final mesh
so it really doesn't take long to cover the body
ionic skiff
calm marten
in that case i'll be there forever lol
well u need to sculpt first
if all you wanted was something along the lines of a blockout you couldve poly-modeled it and then added detail via textures
calm marten
I'll be very honest from what everyone says I need to do I'm kinda lost on if I'm even in the right spot for what I'm working on. I mean I have this mess, shaped and such but heck IDK if I have to do more shaping or move on to the next step😅

 jovial seal
the normal map bakin aint working out for me ima be honest

did i screw something up?
ionic skiff
calm marten
I'll be very honest from what everyone says I need to do I'm kinda lost on if I'...
yeah so now you take that, join it, remesh it (remeshing is NOT retopology) and then you start to sculpt details
calm marten
ok easy enough. Do i have to remesh everything together or just do it in groups and im guessing use Quad with the 10k sample again?
ionic skiff
everything joined as one object
im not sure if quad remesh actually joins by vertices, sacred would have to confirm
calm marten
oh boy lol. I'll have to figure some of that out because some things didnt like being merged while having a mirror modifier
when i tried the quad if left a few medium sized holes so idk if thats normal

 harsh saddle
tough plover
remeshing isn't to get a final mesh. it's to take the multiple separate shapes a...
harsh saddle
tough plover
remeshing isn't to get a final mesh. it's to take the multiple separate shapes a...
Ah, that makes sense. I don't usually sculpt with different meshes but I've seen that workflow. If I need an arm, I use the snakehook to extrude out a noodle and then work on it from there.
The different object sculpting workflow seems particularly useful for complex anatomical stuff where you're shaping individual muscles.
jovial seal
can anyone help with my nromal map situation
harsh saddle
jovial seal
can anyone help with my nromal map situation
I don't generally use selected to activate for normal maps, I use multi-res and shrinkwrap and then bake from multires. That might work here but I think selected to active should as well, I'm just not sure what might be off in your setup.
tough plover
jovial seal
your meshes might be scaled quite high, thus your Max ray distance isn't enough
try setting the max ray distance to 2
and extrusion to 0.1
jovial seal
how much does my UV matter here?
calm marten
ionic skiff
im not sure if quad remesh actually joins by vertices, sacred would have to conf...
i tried to remesh and it left me with a torso and a head for some reason lol
jovial seal
do i need a good UV for it to work properly?
and would i need it on the basic object or the complex object
harsh saddle
A normal map is a map so if the map is bad, the normal map will be bad as well. Particularly for baking, you can't have things overlapping or tiled. It shouldn't matter on the high-poly object since the bake is just accounting for distances between vertices.
jovial seal
alright ima remap it manually then

it appears to have owrks
im getting some wierd artifacting
tho
like i expected the square too look kinda bad but like its overlapping with the centre point somehow
harsh saddle
jovial seal
like i expected the square too look kinda bad but like its overlapping with the ...
Do you have UV padding?
jovial seal
what that
i never screw witht extures
ima be completely honest
i just do project from view a few times and it typically works out
harsh saddle

Also is there space between the islands themselves or are they right on top of each other?
Resolution is also a consideration. I generally bake at 4k and set the max size in Unity
harsh saddle
Well you see where Selected to Active is so...
harsh saddle
No, that should probably be fine. Can you post an image of the UV editor with all of the faces selected in edit mode?
jovial seal
ye
harsh saddle
Do you know what resolution you're baking at?
jovial seal

this is the complex one

this is the simple one

this is just
like
super wierd
could i just like delete it on the complex model and leave it in as actual depth on the basic one?
harsh saddle
All that should matter is the simple one. It's hard to see if there is any overlapping but check on that. The islands look like they all have some space to me but some of the faces around the window are reall shin, probably because you're projecting from view and those faces are perpendicular to the camera. You'll get better mapping using seams but that takes a bit of practice to do well.
jovial seal
oki ima retry in abit
jovial seal
is there a way i can manually edit the normal map?
to tweak it n stuff

like here
it seems kinda inverted
like the depth is now extruding outwards instead of inwards

i have no idea what happened

i deleted the indent cause i wanted it to be normal on the basic object as it has the depth there already
 jovial seal
ok

so this is the result

so uh
the column is pointing inwards when it should be outwards
and that there on the left i have no idea how it happened its a giant artifact
and the cube on the right looks like its trying to poke outwards too
jovial seal
heyo i still need help on the above situation if anyones willing to give me tips on editing normal maps n stuff :P
 mental hazel
why is it when i try to loop cut it does this instead of cutting the whole row
 orchid phoenix
mental hazel
why is it when i try to loop cut it does this instead of cutting the whole row
orchid phoenix
mental hazel
why is it when i try to loop cut it does this instead of cutting the whole row
right click on knife tool and use the other tool there
hold shift i believe to make straight lines
mental hazel
it cancels when i right click
orchid phoenix
mental hazel
it cancels when i right click
nono, on the tool icon on the left, and select the other tool that pops up
mental hazel
it says "set tool by name" when i right click that
orchid phoenix
mental hazel
it says "set tool by name" when i right click that
its shift, not ctrl, sorry fuckkkkk i should have checked beforehand. left click and hold, select bisect, start drawing then hold down ctrl for a straight line
im so sorry lol
onyx jewel
blender moment
orchid phoenix
onyx jewel
blender moment
oh god
onyx jewel
(its all good now I got it btw, needed to turn off project individual elements but it was snapping and being weird and I don't exactly know what I did but it stopped snapping)
this could probably be better

need to more evenly space some loops
I have no idea what to do for the wrists and it seems most others don't either because it rotates in all directions so just making geometry more dense there
orchid phoenix
onyx jewel
this could probably be better
is that the elbow?
onyx jewel
yes
onyx jewel
will in a few here, covering the hands up then I'm gonna test all the poses and make sure they look right
orchid phoenix
mk
tough plover
onyx jewel
this could probably be better
that's not where the extra elbow skin should be
it should be in the back
 onyx jewel
feeling like I've got a better routine for making the fingers now, debating redoing the toes

 calm marten
Question, what sculpt tool is usually helpful for carving the eye sockets and which is useful for shaping the face?
onyx jewel
calm marten
Question, what sculpt tool is usually helpful for carving the eye sockets and wh...
I wanna say make a circle loop around on the solid face and then add an inset in
well, for part of it at least
subdivide that inner region a bunch then push it back with grab maybe?
I have no idea what I'm doing so take me with a grain of salt
 acoustic cave
hey guys I commissioned an artist to work on my model and apparently they sent me this and the eye meshes look white in unity but cinema 4k is apparently a paid software so how would i do this in unity/blender??
calm marten
onyx jewel
I wanna say make a circle loop around on the solid face and then add an inset in
Might help honestly, It would give me more points to shape. i'll have to figure out what to use to shape the rest though lol
harsh saddle
calm marten
Question, what sculpt tool is usually helpful for carving the eye sockets and wh...
I do pretty much all the foundational stuff with grab and inflate. Crease is good for lines and wrinkles and pinch can help sharpen up areas. Otherwise, I use snake hook for building out the torso and limbs. You can get a solid skull shape with just the grab tool.
As for the vertices, if you're going to retopologize anyway, just use dynotopo.
calm marten
thats about what ive done as well and it seems elastic deform with various radius inputs helps a ton on the face if you're using a mouse instead of a drawing pad
whats dynotopo? havent learned that part yet
harsh saddle
calm marten
whats dynotopo? havent learned that part yet
I use a mouse as well, i think it's fine. Elastic deform is better at not causing distortion but the falloff can be a bit extreme. I prefer grab for sculpting and elastic deform for adjusting proportions. Dynotopo is an option to can select in the upper right while in sculpt mode that gives you vertices where you need vertices. The topology will be a mess but why think about topology during sculpting?
onyx jewel
thinking about topology during sculpting is good if oyu don't wanna retopo it later like I'm currently learning how to do
too many polygons
calm marten
That'll be helpful, thanks for the tips on that. Im mainly thinking about that because remesh messed up my hands to look like pixel blocks so have to create some new points for it to shape it
harsh saddle
I just accept retopo as part of life. I find it more challenging to try to model something with topology in mind vs figuring out the form during sculpting and then I just need to place down faces where the mesh is.
onyx jewel
fair enough
orchid phoenix
calm marten
Question, what sculpt tool is usually helpful for carving the eye sockets and wh...
if you wanna carve out eye sockets I usually invert the inflate tool by holding ctrl
makes a nice round hole
calm marten
i didnt realize that was possible...
orchid phoenix
orchid phoenix
makes a nice round hole
don't take that out of context
orchid phoenix
calm marten
i didnt realize that was possible...
you can do it with most if not all sculpt tools ;3
calm marten
its me your talking to and unfortunately my head always does lol but im happy you told me i can invert that
orchid phoenix
 harsh saddle
Also I think you smooth if you hold shift. I don't have Blender open and there's a lot of muscle memory there but I think that's it. That's essential.
A lot of sculpting is building up and then smoothing down to polish off rough spots.
calm marten
ah i gotcha
tough plover
onyx jewel
this will need some work
onyx jewel
yeah I'm figuring that out in pose mode right now :p
looking pretty stupid
ah well, might make it tomorrow me problem
wrist, elbow, shoulder and knee all look correct, hips/legs and fingers all need work done 😦


 quaint jasper
You'll have to look into twist bones if you want to have proper deformation for elbows and knees
For fingers it's about topology and weight painting
onyx jewel
I think my rig's already got twist bones, just need to figure out how to set up constraints and actually use them
quaint jasper
Twist bones don't need constraints iirc
quaint jasper

Reddit
Explore this post and more from the VRchat community
I could be wrong! I knew about it years ago but never used them myself
ionic skiff
twist bones definitely need rotation constraints
otherwise youre not telling the bone to behave any differently than your already wp'ed wrist/elbow/etc
knees also usually do not need twist bones
rotation constraints can also be used to make the hips move a lot nicer but thats a bit more complicated
sorry for the poor wording i am very tired atm
onyx jewel
what if the twist bones get weight painted?
ionic skiff
twist bones are supposed to have something weight painted to them

I accidently put the elbow as the source in the second rotation constraint. That is wrong. It should be the arm.
Playlist with more tutorials: https://www.youtube.com/playlist?list=PLtyZOFyiveKq9Co2bpkrX3-qXO01CNJHY
this is a very straightforward 2 minute video
its for setup in unity

Today we tackle one of the most requested rigging problems. I'll show you another way to fix this later, but for now I give you the infamous "Arm Twist Fix".
Hope it helps :)
Female Body Model Link:
https://www.youtube.com/watch?v=_XfvLpLyulI
If you enjoyed this video, please don't forget to like and subscribe!
You can find my entire Blender ...
heres one for rot constraint setup in blender
id recommend watching both
 thorn moth
quaint jasper
https://www.reddit.com/r/VRchat/comments/ybpm48/ive_made_twisted_bones_tutorial_...
thorn moth
quaint jasper
https://www.reddit.com/r/VRchat/comments/ybpm48/ive_made_twisted_bones_tutorial_...
Doesn't vrc do it's own kind of bootleg twist bone though by having the forearm twist with the hand?
 cobalt tiger
WIP (Head and Hair scratch, Body by Zinpia, and no clothes yet)

I feel the nose might be a bit... off
quaint jasper
The highlight could maybe use some adjusting, but the shape seems good! Very pretty!
calm marten
Wanting to work on the eyes and get it out of the way but curious how everyone does the glowing eyes. Is anyone able to tell me or have a video i can use, or would this be more of a shader question?
calm marten
Yeah. Let me find a pic real fast
orchid phoenix
calm marten
Wanting to work on the eyes and get it out of the way but curious how everyone d...
glowing eyes are done with emissions in unity
calm marten
Thank you! I'll have to figure that part out in a bit then
calm marten
orchid phoenix
glowing eyes are done with emissions in unity
I did find a way to do it in blender but I am guessing its better for the overall performance of the avatar if its done in unity?
orchid phoenix
p sure u have to do it in unity
since ull b using different shaders and whatnot, it wont carry over from blender
calm marten
Ohh that makes sense. Here's what I meant just to show you what I did. The sun/light is off so it's definitely glowing

sorry for bad quality, rather take pic then fill my pc with screenshots
onyx jewel
alright, fixing my weird hand lol
I feel like I'm doing a decent job at making the shape and following contours now, just looks awful when animated 😆
found a decent looking topology reference that I'm gonna try and match
 calm marten
That setup looks amazing. If thats the ref pic then good choice but if thats your own model then awesome job!
 stark sand
Hi! I'm about to start modeling a low poly character, but I have a question regarding clothing. Should clothing be modeled separately or built as a part of the character's body? What are the pros and cons of both approaches? Appreciate any help from anyone who's familiar ^^
calm marten
In my personal opinion id probably choose to model them separately so you have more freedom when designing both the clothes and character and i think it makes it easier if you want the clothes have some movement to them instead of sticking to the body ( I could be wrong, someone else may have better info lol) How low poly are we talking i guess would be the factor as well
orchid phoenix
stark sand
Hi! I'm about to start modeling a low poly character, but I have a question rega...
if youre making clothing as part of the body, there won't be any clipping and youll have a lower polycount (depends on how low poly youre going, like ren said) but you won't really know what the body looks like underneath.
if youre making it separately, youll have a better understanding of the shape of the body which will allow you to make the clothes look better and you can have more detail but there might be clipping if you don't hide or delete the bits of the body under the clothes
stark sand
I see, I'll consider both approaches for a bit with that in mind. Thanks!
tough plover
stark sand
I see, I'll consider both approaches for a bit with that in mind. Thanks!
I personally do a lot of tight fitting clothing, and the best way to prevent clipping is to make sure the topology of the clothes lines up with the topology of the body. in a lot of cases, you can just duplicate faces from the body and use that for parts of the clothes
calm marten
tough plover
I personally do a lot of tight fitting clothing, and the best way to prevent cli...
That is the smartest thing i've ever heard. I'll have to do that for my pants and cape later
tough plover
if you're not duplicating the faces from the body and instead you're just creating the faces in such a way that it still lines up, you can do a weight transfer from the body to the clothes when rigging
stark sand
Sounds good! Rigging clothes has always seemed a bit daunting to me so this is really helpful, thanks ^^
tough plover
I'd also recommend making sure the body is as low poly as can be, because the higher poly it is, the higher poly the clothes will be too
calm marten
Need some honest opinions and advice on this. Had a perfect head before I applied a remesh modifier to the model but afterwards it became kinda jagged and sharp making it harder for me to sculpt how I want it. You can kinda see how bad it is where I tried doing the eyes sockets. Is there any way to salvage this head or should I count my losses and delete the head to remake another?

 azure rain
question is there a particular reason you're using the remesh modifier in the first place?
@calm marten
tough plover
calm marten
Need some honest opinions and advice on this. Had a perfect head before I applie...
for proper sculpting you want a lot more geometry
you can Remesh the Remesh if you want
calm marten
Someone told me that was what I needed to do. Yeah I wish I had a bit more of the geometry as well but that remesh took a lot, especially from the hands
calm marten
tough plover
for proper sculpting you want a *lot* more geometry
Definitely doing that so I can fix the issue. Unfortunately I saved after sculpting the eye sockets so it's gonna be chaotic lol
calm marten
tough plover
for proper sculpting you want a *lot* more geometry
I added a bit more but I have a feeling you mean even more than this, correct?
 calm marten
nm zey helped me figure it out real fast
harsh saddle
calm marten
Someone told me that was what I needed to do. Yeah I wish I had a bit more of th...
Pretty sure the remesh was just to turn all of your separate meshes into a single mesh but yeah, you can adjust the settings to get the remesh closer to the original at the expense of having more triangles.
tough plover
onyx jewel
found a decent looking topology reference that I'm gonna try and match

一方方向に曲がる関節の分割方法をシンプルな円筒形で検証。
参考として膝や手の分割例。
おまけとして足を抱え込む姿勢。
牛山雅博 Masahiro Ushiyama
https://usms.ws/
calm marten
How would I handle making hair like this for my model? I love the fluffy Mohawk style of sorts but unsure how to create it, and make it look good enough to blend in
 quaint jasper
calm marten
How would I handle making hair like this for my model? I love the fluffy Mohawk ...
quaint jasper
calm marten
How would I handle making hair like this for my model? I love the fluffy Mohawk ...

A super quick tutorial on how to blend your fur, feathers or other sticky out bits into a mesh without spending hours blending your topology. This has pained me for a while now so I hope this offers you the help it did for me!
calm marten
quaint jasper
https://youtu.be/jgVEdS6sZsk?
Exactly what I was looking for. Thank you so much!
calm marten
Is there any downsides to using an object with skin modifier to create the hair/fur since its easily shapeable?
 snow estuary
Why would there be downside
calm marten
Not sure. I've never used it before so didn't know if it had any drawbacks, but i do have to say it worked perfectly for the hair lol
calm marten
Not gonna lie I was overthinking the hair a bit but my main question now is how do you guys usually carve out the nose/nostrils and the mouth so it can open?
 snow estuary
calm marten
Not gonna lie I was overthinking the hair a bit but my main question now is how ...
snow estuary
calm marten
Not gonna lie I was overthinking the hair a bit but my main question now is how ...
Usually I make the mouth a seperate mesh
The top and lower part
calm marten
I'll definitely do that. Might take some time with how many vertices that are bunched together. Is the nose easier? I tried a few different tools but it just looked off
snow estuary
The nose also as a separate part
stark sand
Hi, does anyone have tips on how I can join the legs with the body cleanly?

 calm marten
snow estuary
The nose also as a separate part
calm marten
snow estuary
The nose also as a separate part
kinda wishing i did that earlier as well. is it still possible to separate the nose and mouth into separate parts without messing up the main mesh?
calm marten
snow estuary
Mask the mouth
gotcha
actually that just kinda confused me more, I might just put the model off for a while.
snow estuary
Aww rip
calm marten
ah its ok, i really should have planned it out better before starting my first model lol
spiral sigil
stark sand
Hi, does anyone have tips on how I can join the legs with the body cleanly?
Polymodeling it separately is pretty rough if you don't already know by memory the topology of each body part
watch some random YouTubers or twitch streamers polymodel a model like yours and observe if they do their human in pieces or as one piece, and if they do seperate parts how it is done and why
Everyone does it differently so you will see what u want to do for your own needs
stark sand
Gotcha, I ended up adding loopcuts to the torso to match the verts and joined them together. Will see if this is a workflow I'm happy with if I get favorable results
I'm working with low poly so I do know the topology count
 red glade
Workin on a exo setup for ma character, Cyberpunk really done reignited how much i love cyberbodymodification

 fair mason
a stupid model by me lmao
https://sketchfab.com/3d-models/spongebob-mac-and-cheese-noodle-14-051827a0dc424ad6bbd643401ff4f3b2

I was bored, and with the upcoming return of Spongebob mac and cheese, I thought this would be a little goofy thing to make. - Spongebob Mac and Cheese noodle (1/4) - 3D model by ghostbusterman7
 valid needle
stark sand
Hi, does anyone have tips on how I can join the legs with the body cleanly?
valid needle
stark sand
Hi, does anyone have tips on how I can join the legs with the body cleanly?
I use this https://github.com/greisane/gret

GitHub
Blender addons. Contribute to greisane/gret development by creating an account on GitHub.
 solar fossil
stark sand
I'm working with low poly so I do know the topology count
solar fossil
stark sand
I'm working with low poly so I do know the topology count
If you are poly modeling it's better to make everything in one piece, minus the head, and sometimes hands (if you want to add already existing hands to save you some headache)
If you are sculpting then you can have them separate for an easy block out and then remesh them together
stark sand
Hmm I see
I figured it'd be easier to visualize the parts by blocking them in pieces
but yea I'm having a bit of a headache with the flow of everything haha
currently trying to get a good arm/shoulder link, but it's not very flattering as you can see

 solar fossil
That's can be fine too if you plan out your loop count from the beginning, I usually do 8 for each loop on every part, so they can be easily merged to the main body when done
stark sand
the hands is where everything went wrong so I should probably do that next time
solar fossil
Would recommend modelling in tpose, keeping the arms stretched out makes it quite a bit easier to work with without having to mess with normal/local space, can do everything on the global xyz axis
stark sand
Oh yea that was what I was doing, just moved them into the A pose to join them together so I could visualize the shoulders better
not sure if that's an effective strat
snow estuary
theres a loop for the shoulder
 solar fossil
https://youtu.be/F1CTfis1TEg?si=wBuawcyNUWhtWba-
Got classes so gtg, but here Is a great tutorial series

This video is the 1st part of 40 in this very detailed tutorial series about modeling. I'll take you through all the steps of anime style character creation in the 3d software called 'Blender' and without any time lapse.
If you haven't watched it already make sure to go through part 0! In that video I'll show you the final result and tell you a...
stark sand
Thanks to both of you ^^ guess I have a 40 part series to watch 😝
mental hazel
when i fill something in, it generates bad faces
how do i fix that?
ive tried using the knife tool but when i make a cut on two verts it just cancels
 quaint jasper
mental hazel
when i fill something in, it generates bad faces
how do i fix that?
ive tried us...
quaint jasper
mental hazel
when i fill something in, it generates bad faces
how do i fix that?
ive tried us...
Triangulate
and then Tris to Quads
mental hazel
quaint jasper
Triangulate
thank you

 alpine merlin

to improve myself I stop relying on subdivision and focus on smoothing the topology itself... this model is 24k poly.
red glade
alpine merlin
Looks great keep it up!
calm marten
Looking for some advice on whether the hands are too small or whatever changes they need to make them look proportional to the body.
 quaint jasper
You'll only really know how they feel once you test the model in VR
You can just scale the hand bone once you've finished the model if you need to adjust proportions so don't worry
calm marten
Very true, I meant more of do they look too small compared to the body. I don't want a semi-muscular avatar with baby hands🤣
quaint jasper
They look correct to me size wise 
calm marten
perfect! thank you for the feedback on that
 calm marten
Sorry for the grainy picture but do the eyelids look ok or do they need some fixing. I'm open to any advice on how to fix the weird look lol
 quaint jasper
calm marten
Sorry for the grainy picture but do the eyelids look ok or do they need some fix...
quaint jasper
calm marten
Sorry for the grainy picture but do the eyelids look ok or do they need some fix...
Eyelids are usually part of the head mesh rather than separate pieces
calm marten
That makes sense. The video I was learning from wasn't very clear on that detail
snow estuary
quaint jasper
Eyelids are usually part of the head mesh rather than separate pieces
They can be seperated
Is also way easier to animate later on
quaint jasper
They can be, but I rarely see it done. Shapeykeys are trivial
snow estuary
Is pretty hard pull them for shape keys
red glade
Decided to take a break and start on the legs, still feel a bit iffy but the rough idea is there

 spiral sigil
worth a quick read to appreciate some of the work behind your render

even if you were never taught matrices and vectors
snow estuary
spiral sigil
worth a quick read to appreciate some of the work behind your render
Vector math huh
Are u writing your very own rendering engine
snow estuary
spiral sigil
math is cool
Math is only cool when u need to use it
I never bother learning math until I need it lol
Instant regert
spiral sigil
oh yeah i dont suggest actually learning it unless u need it for your shader logic
or you are making your own render engine
doing operations with vectors is like weird

 mental hazel
what else should i add to this guy?
 orchid phoenix
mental hazel
what else should i add to this guy?
orchid phoenix
mental hazel
what else should i add to this guy?
a smiley face :3
cobalt tiger
How do people go hi poly and merge sculpt pieces together? I've seen this done in a walk-through for blender, It'd help a lot if I knew how it worked

Hey its bran! And fall is finally here! So to say farewell to summer, we're sculpting this Beachy Peachy. This was illustrated by MaxDei_00 on twitter https://twitter.com/MaxDei_00 . In this beach episode of Bran Sculpts, I'm going to try and match Max's shapes, style, and colors to try and make the ultimate 3d/2d fake out!
Check out @CraftRea...
 verbal creek
cobalt tiger
How do people go hi poly and merge sculpt pieces together? I've seen this done i...
verbal creek
cobalt tiger
How do people go hi poly and merge sculpt pieces together? I've seen this done i...
he's joining all the pieces and then using a remesh modifier
cobalt tiger
I found the video on it as well, ty! It can be found on his channel on how to do it
verbal creek
otherwise you can also use a boolean modifier, but i think that's kinda dated by now
spiral sigil
I just realized that making a reference board is just like a storyboard except the images are not rendered into a final image yet
Like references for a project shouldn't just be generally whats in the project but have photos of every detail possible in some form
The references must already the artwork before you ever got there for it to come out the best. Or if you are already very experiencrf artist you have absorbed reference material from previous project
The conglomerate of the references IS the artwork
Almost in a literal sense
verbal creek
yeah, i started using microsoft whiteboard recently to plan out projects and it's been amazing. feels wonderful to actually have a plan, and it does make for much more cohesive models and art pieces
spiral sigil
The leeway is the original innovation that occurs
mental hazel
how do i make it so when i move the hand bone, the first bone of the thumb moves as well?

the first thumb bone is weighted, while the hand bone isnt
 proud wadi
mental hazel
how do i make it so when i move the hand bone, the first bone of the thumb moves...
proud wadi
mental hazel
how do i make it so when i move the hand bone, the first bone of the thumb moves...
parent the root thumb bone to the root hand bone. (with keep offset)
mental hazel
 mental hazel
proud wadi
parent the root thumb bone to the root hand bone. (with keep offset)
mental hazel
proud wadi
parent the root thumb bone to the root hand bone. (with keep offset)
like that?
wait nvm i fixed it
mental hazel
dangit now this is happening
 stark sand
mental hazel
dangit now this is happening
stark sand
mental hazel
dangit now this is happening
are you using rigify? Using it along with deleting the extra bones should be easier if the rest of your model is humanoid
mental hazel
no
what im trying to do is reconnect the arm bones

fixed it
had to connect them
stark sand
mental hazel
what im trying to do is reconnect the arm bones
That's alright if you'd like to understand rigging for the first time better. But most people just use rigify since it speeds up the repetitive parts of the process a lot
 autumn gust
So like, I have a head that on blender looks to be using the correct shape key as the default look, but somehow in unity and vrchat it's using the sad one 100% of the time instead for some reason when it should be using the one that displays in blender? What can I do to fix this?
tough plover
autumn gust
So like, I have a head that on blender looks to be using the correct shape key a...
first, check something for me. in blender, make a new shape key, set its value to 1, and see if anything changes on the model
autumn gust
tough plover
first, check something for me. in blender, make a new shape key, set its value t...
hmm, it could be that when I separate the head into it's loose parts, delete a few parts then remerge them that it basically at the bottom of it generates a Basis.1 at the end of the shape keys list that I then delete as it is a duplicate?
autumn gust
ah I see now
wanting to use the last shape key when I did it, however I deleted the duplicated basis key when that happened.
snow estuary
tough plover
first, check something for me. in blender, make a new shape key, set its value t...
How much do u think I should price this avatar for? Everything is from scratch

 winter iron
snow estuary
How much do u think I should price this avatar for? Everything is from scratch
winter iron
snow estuary
How much do u think I should price this avatar for? Everything is from scratch
something funny would be if it had a toggle for you to just hold a small old man prismo
 proud wadi
mental hazel
wait nvm i fixed it
proud wadi
mental hazel
wait nvm i fixed it
Sry just saw. I'd reccomend using your heirarchy to more easily see what is parented to what. "parenting" kinda looks like nesting within expandable folders. Both the root thumb, and root "fingers" bone should be parented to the same hand bone. Might be good to look at a beginner rigging tutorial? either way lmk if you're still strugglin/need help :)
proud wadi
snow estuary
How much do u think I should price this avatar for? Everything is from scratch
haha I love it!
How much time did you spend on it btw? That can help me decide pricing for my own things
snow estuary
proud wadi
haha I love it!
How much time did you spend on it btw? That can help me decide...
2 week
Mind u, I only work on it during my free time, so each day around 1-2 hour

 spiral sigil
snow estuary
Mind u, I only work on it during my free time, so each day around 1-2 hour
spiral sigil
snow estuary
Mind u, I only work on it during my free time, so each day around 1-2 hour
Probably can list it at like 25 dollars with a 40% discount so end up at actually 15 dollars.
People who are adventure time fans also include the kids who are still in school so perhaps 15 is a reasonable affordable middle ground... 15 feels pretty economic too me, 9.99 feels super economic. Also if the discount is too steep then the physcological effect of discount probably wont work on most adults, so probably dont do more than 50% off
spiral sigil
@snow estuary food for thought, have your avatar have some kind of shader that can project Prismo onto a wall just like in the show. That really will set it apart and be very true to the character.

There are particles in unity that can stick to the wall, there is def ways unity can figure out where walls and floor is. so something is very possible here
snow estuary
Huh
spiral sigil
snow estuary
Huh
a way to improve ur idea so it can be cooler and listed for a higher price
 steady zealot
snow estuary
I don't think is even possible
steady zealot
snow estuary
I don't think is even possible
it is, using decal shaders or spotlight cookies
not on quest though.


 ionic beacon
Random question: Within VRChat purposes, when or why do I need Ambient Oclusion in my avatar?
tough plover
ionic beacon
Random question: Within VRChat purposes, when or why do I need Ambient Oclusion ...
same purpose AO usually serves, to block indirect light but not direct light. how much of a difference it makes depends on your shader, the material settings, and world lighting
avatars are obviously a lot more dynamic than static objects that typically benefit most from AO, but it still does help achieve more realistic results regardless
spiral sigil
snow estuary
Aw man, I gotta spend time learning to write shader
In the end you get something completely unique, worth
ionic beacon
tough plover
same purpose AO usually serves, to block indirect light but not direct light. ho...
Nice, thank you!
spiral sigil
 loud pivot
Straight cookin
loud pivot
Straight cookin
One way to study humanoid anatomy
What's going on with the feet tho
It looks like a loafer but made out of flesh
Flesh shoes
spiral sigil
snow estuary
Aw man, I gotta spend time learning to write shader
Also this shader alone could probably be something you can sell seperately depending on how the projection occurs.
steady zealot
snow estuary
Aw man, I gotta spend time learning to write shader

ENG:VRChat particle decal shader with world compliant lighting and PBR texture support. JP(translated):ワールド照明とPBRテクスチャを備えたVRChatパーティクル・デカール・シェーダ。
It's not a perfect solution
but it might be worth taking a look
spiral sigil
The issue I forsee is like, it will project on a wall fine, but the floor... The projection may not be able to pick up something with no depth if it is perfectly in line with the world axies
So in that event just like tilt the shader's axis of things down a bit so the floor isnt dividing by zero or whatever
The real fix that would keep it all proportionate probably would be a pain in the ass, not sure though im just thinking of the one way of many this could be executed
I forget there are all these shafer packages online i can look at to study how to code my own its such a good opportunity
The code comments probably in Japanese rho
loud pivot
spiral sigil
It looks like a loafer but made out of flesh
That's part of her design. Look up "Blood Devil Chainsawman Manga" and you'll see some images of her
spiral sigil
Ohghh ok
onyx jewel
is there a way to get this hand to match a topology guide when it's pre subdivided? should I just go ahead and finish this off and make the geometry manually? been staring at this for like 30 minutes and just can't wrap my head around it 😆

 verbal creek
you could turn off optimal display on the subdiv modifier so you can see the outlines of faces more clearly and see if that helps figure it out. would definitely make screenshots easier
onyx jewel
I mean I can see the outlines clearly, just not sure how to make them follow the pattern without applying the subdivide modifier and then sketching manually
verbal creek
i'm kind of having a hard time seeing the edges properly, but this part right here can be made by using tris, unless thats not what you're referring to?
 onyx jewel
oh sorry I see what you're saying

this is what I just reverted to, I just can't figure out how to make it do the thing
I tried drawing that shape in my screenshot above and it didn't make the stuff right
sec

ohh hey I see what you're saying
verbal creek
i'm sorry if it wasn't quite clear. hand topology is complicated for sure
onyx jewel
 quaint jasper
That's a lot of loops  You're making it harder on yourself imo
verbal creek
that's just the subdiv modifier. i asked them to turn off optimal display so i could see better
quaint jasper
Phew ok
onyx jewel
honestly I'm not even sure why these loops specifically exist
verbal creek
it's not where i would personally place them either. i tend to have two circular loops on each finger, but the hand is mostly quad grids
especially since vrchat doesn't have splay or skeletal hand input cough cough
wish valve would get on with that
onyx jewel
is there a way to make these just work? if I can avoid adding polygons I'd love to


it looks all weird when I bend it, sec
verbal creek
i think they could certainly work with proper weight painting, which shouldn't be too difficult since the topology is quite simple. the blue loops in the pictures you sent initially would probably help, though
onyx jewel
actually I guess now that I look at it here I probably just need a couple more loops in the main hand area

or maybe move the loops / joint a little bit
verbal creek
that seems.. off. what do your bones look like? is the geometry actually moving with the bones as it should?
snow estuary
It looks like a twig
verbal creek
the knuckles look like they almost slid forward and the way the finger is segmented is quite disproportional
snow estuary
I think is more of a weight paint thing
verbal creek
yeah, certainly. bone placement too
the knuckles should not be moving like that and this part right here looks far too long i feel
 onyx jewel
I'm not sure if that part feels too long because the other part of the hand is deforming with it or it's just actually too long
but yeah the knuckle is too far forward

I thought I put them in the right place but I guess not
actually lemme add more loops before arriving to any conclusions
verbal creek
it looks a liiittle long but it's not too bad. part of the hand deforming with it definitely exaggerates the issue
onyx jewel
ugh yeah more loops does basically nothing
sounds like manual weight painting time or need to move joints😭

looking at my hand irl I'm like 99% sure the joint is in the right place but let me try moving it vertically and over a bit
steady zealot
onyx jewel
sounds like manual weight painting time or need to move joints😭
"Arrrrrrg, that me hook"
onyx jewel
man I just wanna be done with these fingers
I'm like so tempted to just copy the geometry from the body underneath
been holding up my avatar
onyx jewel
okay got em good enough

 snow estuary
Look like some anime opening
spiral sigil
 spice pewter
https://media.discordapp.net/attachments/742808129636401336/1161825867446620271/...
spice pewter
https://media.discordapp.net/attachments/742808129636401336/1161825867446620271/...
 spice pewter
spiral sigil
https://media.discordapp.net/attachments/845738853146689537/1154838179732533371/...
spice pewter
spiral sigil
https://media.discordapp.net/attachments/845738853146689537/1154838179732533371/...
 winter iron
I would love those animations
still wadi

■ ダウンロード ■
https://vrsuya.booth.pm/items/5157852
■ 原曲 ■
しぐれうい - 粛聖!! ロリ神レクイエム☆
https://www.youtube.com/watch?v=Ci_zad39Uhw
■ 紹介 ■
- せーの?
- AFKやEmoteに入れてアピールしよう!
- 構成品はAnim単一ファイルで、自由に活用してください。
- 表情はMMD専用シェイプキーとして使用し、MMD表情が対応していないアバターは表情が正常に出力されない場合があります。
■ クレジット ■
- アニメーター : Levin ( https://twitter.com/bunny_64479 )
- アバター : JINGO 先生のアバター ...
it's from this guy
it's free to dl
spiral sigil
Portfolio deez
still wadi
no please
 tough plover
lol
 open scarab
today we will learn about reverse image search
 spiral sigil
DAnggg shes seggs
autumn gust
still wadi
https://www.youtube.com/watch?v=Z7qNNypI248
is it a motion or?
cobalt tiger
Model I made for game group


 lost bobcat
does anyone know someone with blender modeling experience or if any of you are willing to help me a little bit so i can ask for guidance in starting my first steps for modeling? if any replies please @ me in it so i see it
 stark sand
lost bobcat
does anyone know someone with blender modeling experience or if any of you are w...
stark sand
lost bobcat
does anyone know someone with blender modeling experience or if any of you are w...
This tutorial I recall has a similar looking character: https://www.youtube.com/watch?v=rEBwBrRzyhw

Make this simple frog all in Blender 2.92!
🐸 Froggo sketchy concept: https://imgur.com/a/ertvDDM
Timestamps
0:00 Blender setup
0:48 Modeling
13:02 Uv mapping
15:03 Texture painting
23:20 Adding a backdrop
23:36 Setting the camera
25:33 Render settings
25:51 Light setup
26:41 World settings
27:20 Bloom baby!
✖️ DONT CLICK HERE: https://bit.ly/...
lost bobcat
im trying to make my pet frog as an asset
im going to look at that right now, most od the cideos ive seen so far werent too too helpful but thank youu
stark sand
If you've never modeled before I recommend starting with an absolute basics tutorial first, but otherwise that video should hopefully help
if you come across specific issues or questions feel free to ask
lost bobcat
ive done some stuff with editing avatars for semi heavy edits but not any modeling yet. ive got maybe almost a year on that topic
thank youu i will
lost bobcat
this is where i ended up at but at some parts this was so confusing; lol almost made me wanna cry. @stark sand
i think i got the idea of it now so im going to try my frog image. thank you lots pun 😅

 rustic dagger
snow estuary
spiral sigil
https://media.tenor.com/nCgmtZBZ31UAAAAM/jotaro-kujo-jojo-bizarre-adventure.gif
rustic dagger
snow estuary
spiral sigil
https://media.tenor.com/nCgmtZBZ31UAAAAM/jotaro-kujo-jojo-bizarre-adventure.gif
Ngl, this look Pretty cool
snow estuary
spiral sigil
Is that a spotlight
No, is a special shader
spiral sigil
Ohb okay
 spiral sigil
 mint marten
What are you trying to do?
mint marten
Try to select vertex but it’s error
spiral sigil
Hit A to select all then try again
mint marten
Why?
spiral sigil
Because Blender can do weird stuff sometimes
Might also try exiting edit mode and going back in


 mental hazel
is there a way i can have the camera only show the square? im making textures in blender
 spiral sigil
mental hazel
is there a way i can have the camera only show the square? im making textures in...
spiral sigil
mental hazel
is there a way i can have the camera only show the square? im making textures in...
Use the orthographic camera, set the canvas size to a square size (1024, 2048, 4096), and adjust the orthographic scale until the square fills the frame. Make sure you turn the filter size down (under render properties and film).
mental hazel
"canvas"?
spiral sigil
Render resolution
mental hazel
oh
spiral sigil
Sets the actual size and shape of the camera

Definitely works for making textures, it's how I made the atlas for mine.
mental hazel
where's the render resolution?
spiral sigil
mental hazel
where's the render resolution?

Try to use numbers that make sense with memory sizes
512x512, 1024x1024, 2048x2048, 4096x4096, etc.
If you have any other probs, feel free to ping me.
mental hazel
spiral sigil
If you have any other probs, feel free to ping me.
one more question, its about turning it into a ps1 texture
i scale it without anti aliasing
and now im considering dithering it as well
(im using gimp)
spiral sigil
Not sure about PS1 textures, but can certainly resize the textures in outside software once you have them made.
That low resolution look is just low resolution, no fancy tricks 
mental hazel
even at 175x175, it still doesn't look like its from the ps1
 devout orchid
unity will force texture sizes to be some power of 2 so avoid weird values and interpolation that comes with it
 mental hazel
it looks like there is a line from one corner to the other thats deforming it
snow estuary
cobalt tiger
New face im modeling
I felt like you went high poly too quick and didn't get the form right
cobalt tiger
Fair in comparison to reference
 dense shuttle
okay tho, but why did my side bar and only the sidebar got scaled up suddenly XD how do i undo this
 spiral sigil
dense shuttle
okay tho, but why did my side bar and only the sidebar got scaled up suddenly XD...
spiral sigil
dense shuttle
okay tho, but why did my side bar and only the sidebar got scaled up suddenly XD...
press N
spiral sigil
Just grab and move the side then
dense shuttle
 dense shuttle
spiral sigil
Just grab and move the side then
dense shuttle
spiral sigil
Just grab and move the side then
its only cropping it

it wasn't like this a few mins ago
spiral sigil
Yup, but it's smaller now. I don't think I understand what you are looking for.
spiral sigil
dense shuttle
its only cropping it
Hover over it, hold down control and your middle mouse button and move it up/down
dense shuttle
spiral sigil
Hover over it, hold down control and your middle mouse button and move it up/dow...
that only scrolls through menus
and UI scale is already at 1
idk what the fuck happened lmao
spiral sigil
Don't scroll the mouse button, you have to hold down CTRl + MMB and then move the mouse up/down while holding them.
spiral sigil
It's a weird combo, I had to look it up
dense shuttle
ikr, why would you want to scale just this menu in specific lmao
welp
thanks, that solved XD
spiral sigil

 echo ether
Can I use a metarig like this for a avatar?

Or can I only use the basic or something.
devout orchid
@echo ether technically youre free to use Viseme parameter only and animate the bones however you like for lipsync/expressions, eyebrows also can be bones. So as long as you can get/make proper animations its doable.
tough plover
echo ether
Can I use a metarig like this for a avatar?
the blender metarig will have a ton of useless bones and will still need fixing to behave properly in VRChat
this should be a decent start
harsh saddle
I'd recommend just using something automatic like Mixamo and clean up the weights. Automatic weighting in Blender is trash and otherwise you have to do all the weights manually
 orchid isle
Modling jax from the amazing digital circus

 manic wharf
I did not realize how bad my OBS settings were (sorry about that)
mental hazel
how come i can't assign a material to this cube? when i try to assign the hair material it wont work
im using the color attribute for that ps1 feel

 digital hound
how do you change the texture filtering mode in blender
tough plover
digital hound
how do you change the texture filtering mode in blender
on the Image Texture node itself
digital hound
ty ty
 thorn tusk
do yall know what i do next

 tight island
hey i was wondering how u guys deal with finger toes, idk if i should put the edges together which is bad or have some distance between them, i wont be animating them anyway so, what is better ?
harsh saddle
tight island
hey i was wondering how u guys deal with finger toes, idk if i should put the ed...
Not quite sure what you mean by putting the edges together but for fingers, you want to think about how they'll deform so you want extra edge loops at the joints. Toes aren't tracked individually like that so it's more of an aesthetic choice there.
tight island
harsh saddle
Not quite sure what you mean by putting the edges together but for fingers, you ...
ah i see yes, what i meant by that is basically the clipping issue if for example 2 fingers are too near each other, right now the avatars fingers are a bit distant and looks a bit unnatural, i wanted to bring them closer but i wasnt sure if that could have some problems later
harsh saddle
I think you should be fine with standard human finger spacing. I've never experiences clipping between fingers and it would likely be hard to see if it was occurring.
tight island
harsh saddle
I think you should be fine with standard human finger spacing. I've never experi...
i see, thank you 💪🏻
 crude heron
Hey so I'm working on fitting an outfit onto my model and i'm getting this clipping on this posing, is this a weightpaint issue? or just a case of sculpting the clothes a little too close to the body
 harsh saddle
crude heron
Hey so I'm working on fitting an outfit onto my model and i'm getting this clipp...
harsh saddle
crude heron
Hey so I'm working on fitting an outfit onto my model and i'm getting this clipp...
Probably a little bit of both. Unless the topology is identical, it's hard to avoid clipping with tight-fitting clothing. Is this a toggle where you need the skin underneath? Is it supposed to be quest-compatible?
crude heron
harsh saddle
Probably a little bit of both. Unless the topology is identical, it's hard to av...
I would like to make it a toggle, just in case. Quest compat not necessary but it'd be nice to have
harsh saddle
crude heron
I would like to make it a toggle, just in case. Quest compat not necessary but i...
Ok, I just ask because if you don't need it to be be a toggle, you should just delete the faces and if it didn't need to be Quest-compatible, there are shaders that can mask certain geometry but if neither of those are options, I think all you're left with is refining the weights as much as you can and perhaps shape keys? Never used them for this application but in theory you could shrink the legs as part of the pants toggle to reduce clipping using a shape key
crude heron
oh yeah i could do that
spice pewter


 mighty quail
Why is this object rendering in the viewport like this? It shows like this in the material preview and the shaded preview. But not in solid mode


nevermind, I figured it out
There was a setting called "show Backface" in the material that I at some point turned on

 summer rune
I'm not super sure where to ask this it was either here or avatar help but since my issue includes blender I thought here would be best?
I put the fbx of a avatar I'm working on into blender to do some of my own personal modifications but when importing it back into unity I have this strange shadow blendshape issue. All the blendshapes causes a weird shadow around the mouth, nose, eyes, and some parts of the face. I'm really confused why this happened since I didn't do anything to crazy with the mesh just adjusting the eyes. but this shadow issue is only shown in unity not blender. does anyone know what I could do to fix this?

 summer rune
Got it fixed! There was an error and the vrcsdk fixed it for me.
 ocean salmon

Let's imagine what The Neverhood has created completely in 3D!
Давайте представим, что The Neverhood сделали полностью в 3D!
#the neverhood#theneverhood #youtube #games2020 #3dmax
I'm creating a 3D model of the world of The Neverhood.
mental hazel
ocean salmon
I'm creating a 3D model of the world of The Neverhood.
Everybody way-oh
 delicate raven
Mr. Game & Watch's alternate appearances from SSBU, converted from in-game screenshots to SVGs to 3D models and edited/optimized from there
 onyx jewel
how do y'all go about making creases in clothing? like making em look natural and stuff on a person?
onyx jewel
also, don't know how many people are aware but I discovered today blender has Quadriflow remeshing built in and it works reasonably well for simple stuff
one click.. not perfect at all but not unusable either, saved me a reasonable amount of time


 primal oasis
onyx jewel
how do y'all go about making creases in clothing? like making em look natural an...
primal oasis
onyx jewel
how do y'all go about making creases in clothing? like making em look natural an...
You could try placing some relatively low poly clothing over your model, running a cloth physics simulation to generate some creases, sculpting in some stylization or accentuation of these creases with a remeshed hires, then retopologizing + baking the hires sculpt normals to it
onyx jewel
I thought about that, the problem I'm running into with cloth simulation is it just doesn't really make any creases lol it all falls to the ground like a flag in no wind
actually, I guess I probably need to pose the avi don't I
primal oasis
you need it to be able to collide with the model
and yes if your clothing & model are perfectly placed the simulation won't really do much
when trying to make a natural looking blanket on a mattress for example I'll usually drop the blanket from a height, at an angle, with the mattress angled somewhat as well
quaint jasper
onyx jewel
also, don't know how many people are aware but I discovered today blender has Qu...
QuadRemesh is an incredible add-on that actually works well!
primal oasis
It's $60, or a 3 month sub for $16, but there's a 30 day trial
It's pretty nifty, it can automatically change levels of detail as needed or you can vertex paint in where you want more/less detail
verbal creek
primal oasis
It's $60, or a 3 month sub for $16, but there's a 30 day trial
It's pretty nifty...
$50 or so for a personal license, yeah. if you wanna use it for commercial stuff it's like $100
worth it tho. i use it in every project since it makes working with sculpts a breeze. i can just mask out clothing and then quadremesh it so i can actually use a multires modifier
 onyx shale
golb wip
 quaint jasper
Looks fucking sick!

 wild briar
quaint jasper
QuadRemesh is an incredible add-on that actually works well!
wild briar
quaint jasper
QuadRemesh is an incredible add-on that actually works well!
Ive heard vrchat will turn quads into tris? What about in this case or did i hear wrong?
Like what if all the quads are already tris will it just skip doing the auto quad to tri?
Just a silly question for optimization sake
azure rain
all 3D engines turn a quad into triangles as quads don't exist as far as the graphics card is concerned
stark sand
@wild briar ^ this. Quads are simply used as they are easier to work with while 3D modeling. In the end the quads are split into tris to be rendered
digital hound
trying to mesh armatures together and can't figure out how to make the mesh appear under the model instead of linked
 quaint jasper
digital hound
trying to mesh armatures together and can't figure out how to make the mesh appe...
quaint jasper
digital hound
trying to mesh armatures together and can't figure out how to make the mesh appe...
Hold shift while moving it back onto the armature iirc
Or Unlinking it, that hierarchy issue is a real bane
digital hound
I don't know where I'd unlink it
digital hound
its so difficult to figure out. Sure it moves correctly with the bones, I just want it displayed below the armature
devout orchid
@digital hound
 digital hound
I figured it out, it wasn't in the collection. thank you though
devout orchid
ah, true, linked sounds more like a different collection
 gray hornet
onyx jewel
also, don't know how many people are aware but I discovered today blender has Qu...
gray hornet
onyx jewel
also, don't know how many people are aware but I discovered today blender has Qu...
There are also sculpting brushes that utilise cloth simulation (pose brush has a setting you can change in it for example)
Blender secrets vid that shows it https://youtu.be/0ccPL4e7K3g?si=kxDv4l8eNPPZN3SY
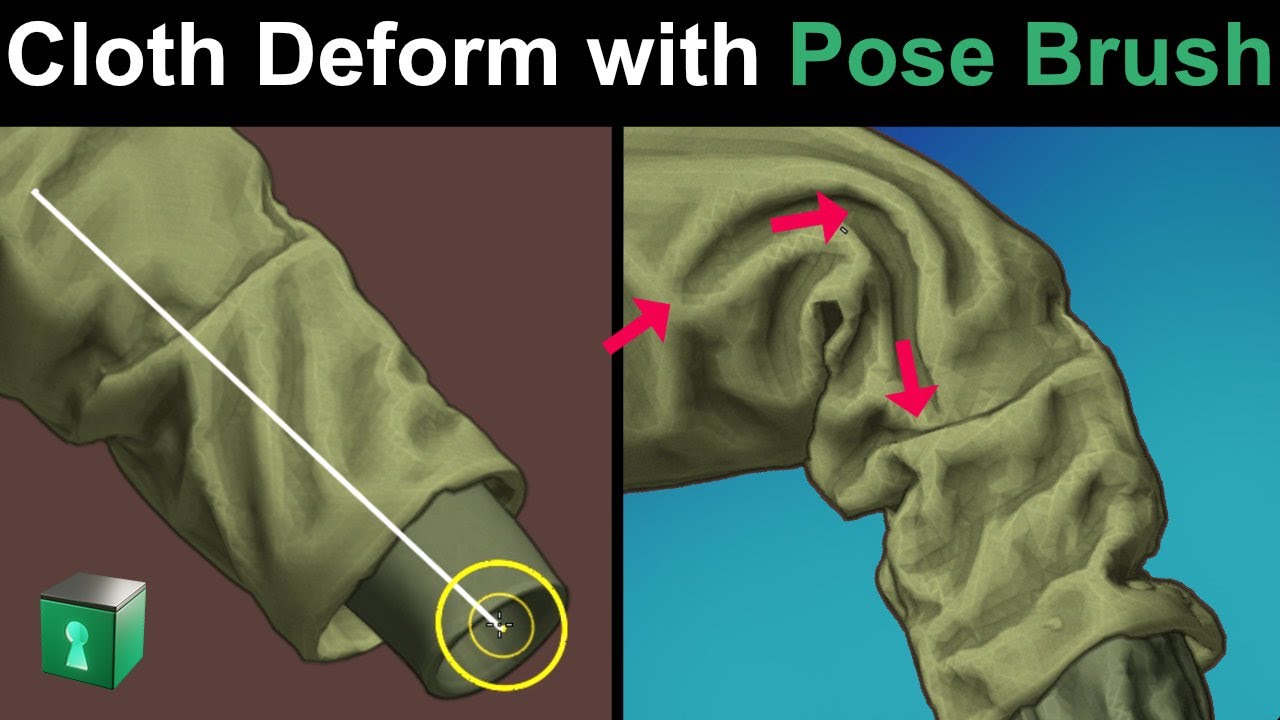
#blender
Using some hidden but powerful functionality in the Pose Brush in Sculpt Mode, we can create amazing looking folds in our sculpt with almost no effort.
⇨ Blender Secrets free e-book: www.BlenderSecrets.org
⇨ Full e-book on Gumroad: https://blendersecrets.gumroad.com/l/IxofeY
⇨ Full e-book on Blender Market: https://blendermarket.com...
discord is confusing be, are like links embeded in text blocked or am I missing something
 hushed leaf
Hmm any suggestion to easily merge two bones in Blender 3+? dissolve isn't doing what I'd like.
no wait, if I do it via ctrl-x rather than selecting it from the x menu it is
huh.
ah nope, just on that one
oh I see, if I click the tail of the parent it does what I want
 cursive summit
I was having an issue where the textures look fine in Blender but are broken in Unity
harsh saddle
cursive summit
I was having an issue where the textures look fine in Blender but are broken in ...
Are you setting up the materials in Unity? Are you using a UV map for your textures or some other coordinate system like generated?
cursive summit
The model has the right UVs, in Blende they're fine but in Unity they are rotated 90 degrees and smaller then the should be
harsh saddle
You can alter the tiling in the material but I don't believe any shaders in Unity have the ability to control texture map rotation. If you know it's 90 degrees and in which direction, one option is to just alter the texture.
 jagged moat
It's been way too long since I last did a satisfying cloth sim

 gray hornet
Squeeeesh! Neat way of making buttoned fabrics and stuff
 rustic pecan
yes there is but you would need to subdivide it alot for the render
 blazing ice
A use a multiresulution modifier, sculpt my details, then bake from multiresulution. Works well for cloth and such and gives a really nice result
hushed leaf
jagged moat
https://media.discordapp.net/attachments/1054576602962472980/1169381220883382312...
wow these are great
 tight dune
why when I right click the key frame menu comes up instead of the normal one that allows me to delete stuff etc
in blender
mental hazel
how can i vertex color the plane and have the color transfer to the sphere?

 waxen ivy
Does anyone know how to apply two material slots to an object info node in Blender? Or even how that would/could be specified?
 pure dagger
Remade this ||https://skfb.ly/6TY8t|| For my world so it has a lower poly count.
Original 124k Tris
Mine-14k Tris

 dusty heron
The original model’s topology 

 reef tusk
Looks fine, but a little high poly, it seems they went into skulpt mode, turned dynatopo on at a high setting and pulled that out of it for some reason
dusty heron
reef tusk
Looks fine, but a little high poly, it seems they went into skulpt mode, turned ...
It’s for a tail, and that’s probably exactly what happened.
But still
solar fossil
 pure dagger
dusty heron
It’s for a tail, and that’s probably exactly what happened.
But still
pure dagger
dusty heron
It’s for a tail, and that’s probably exactly what happened.
But still
Im not tos ure what happend but i saw it and died inside. I was thinking why the heck is this over 100k poly's
jagged moat
If you just subdivide a million times and use vertex colours exclusively you won't need to bother with an albedo map!
solar fossil
Yes officer, this comment here ^
wild briar

Can someone help me pretty please
Im not sure why but it keeps deforming so much when i move the tail i made after rigging it 😦
quaint jasper
wild briar
Im not sure why but it keeps deforming so much when i move the tail i made after...
Make sure that part of the mesh is not weight painted to other bones in the body
wild briar
Ok ill try that and report back 🙂 thankyou for the quick reply
You were spot on ❤️ Thankyou for your help I owe ya one

 visual citrus
How can I remove bones from a model in Blender (to reduce the bone count for avatar optimization) without messing up vertexes/polygons' ability to move?
eg. I removed some bones from the end of the shark tail and several vertices at the end do not move with the rest of the tail. I also can't publish the avatar, but I'm assuming that's caused by the same issue that causes what the image shows

or would it be better to just combine the bones in each section and reduce the count that way?
quaint jasper
visual citrus
How can I remove bones from a model in Blender (to reduce the bone count for ava...
Dissolving bones is better, because the weight paint will be transfered down to the bone down the chain
But it'll definitely "move" worse
 mellow crag
hiya, Pretty noobish question but I'm only just getting into modelling in Unity for world development.
I'm following a decent set of tutorials on youtube by Iconoclass, and I'm trying to extrude a face backwards.
The problem is that when I extrude it, it takes the face back inside the shell of the wall.
Any advice on why it's doing that?

I've gotten around it for now by selecting all four corner vertices and moving those so it's not a big deal, I'm just confused about why it did that in face selection and extrusion
wild briar
I believe the uv's of the mesh are facing the wrong way after you extrude
But i may be confused about what is being asked
So in unity. When i use the mobile shader for my model it has part of the mesh blacked out :c
wild briar
mellow crag
hiya, Pretty noobish question but I'm only just getting into modelling in Unity ...
If its the face that extruding backwards you may be able to set a value to -1 instead of 1 to get the face to go the opposite direction on a specific axis
devout orchid
wild briar
So in unity. When i use the mobile shader for my model it has part of the mesh b...
vertex colors or metallic map
tho i believe metallic map one you may see only on real hardware, it looks fine in unity
wild briar
Thankyou for the reply! I just decided to make a whole new mesh for the tail again but from a cube instead of just extruding the mesh and now its showing properly.
wild briar
I thought it was. I switched to vrchat mobile shader and a similar thing is happening. Ahhhh
 devout orchid
its not black
wild briar
It is not black 🙂 but even after recreating a new tail and retexturing it, it seems to still show a different shade. Maybe ill look over some things and report back
devout orchid
vertex colors? you sure theres none?
wild briar
Im not sure how to check that
devout orchid
vrc quest tools can erase them, otherwise its blender thingie
digital hound
first time modelling from scratch and I'm liking it so far.
Now I wanna ask if anyone knows a good video for mouth modelling??
 quaint jasper
digital hound
first time modelling from scratch and I'm liking it so far.
Now I wanna ask if a...
quaint jasper
digital hound
first time modelling from scratch and I'm liking it so far.
Now I wanna ask if a...
What does your topology currently look like?
digital hound
quaint jasper
What does your topology currently look like?

 quaint jasper
I think that might be a bit too many loops, which would make it more difficult to get something of the right shape more easily
If you dissolve a bunch, you might be able to edit what you've got left to look like your reference
digital hound
well I'm looking for how to model the inside of the mouth. tongue and teeth. I might dissolve some edge loops later if it'll still look good
digital hound
I managed to find one in this video. timestamped https://youtu.be/mWvRv1DW3qA?t=832

Blender Character Modeling Series
Welcome to PART-04 of this Character Modeling Series, In this video we are going to combine our previous head to the Base Mesh then move on to the Eyes, Eyelashes, Eyebrows, and other details.
Let's briefly recap what we've covered so far in this incredible series:
- Introduction Video ✅
- Blocking out our b...
digital hound
😁
 digital hound
my next conundrum, is it possible to select just the sphere for snap to face with a curve?
 quaint jasper
digital hound
my next conundrum, is it possible to select just the sphere for snap to face wit...
quaint jasper
digital hound
my next conundrum, is it possible to select just the sphere for snap to face wit...
You mean the shrinkwrap modifier?
digital hound
I mean like a way of using this, but only snapping to sphere.

I'ma just come back to it another time. maybe continue on face by unwrapping
quaint jasper
You're trying to shape the head into more of a sphere ?
digital hound
its for the hair, and I'm just come back to it another time. friends are getting on vr.
stark sand
digital hound
its for the hair, and I'm just come back to it another time. friends are getting...
You should explain what you're trying to do better if you need help. Are you trying to make the sphere more into the shape of the head?
One of the tricks used to do that is group selecting faces from the head in the shape of where the hair would come out from and then just duplicating it with Shift + D. Then you can scale up the duplicate and you'll have "hair" that's the same shape as the head that you can manipulate how you please. This is just one way of making hair though
 lilac escarp
anyone got any clue what could be causing this all i did was try to merge the armatures (blender 3.6.1 with cats 0.19.0 dev ver)

 normal geode
lilac escarp
anyone got any clue what could be causing this all i did was try to merge the ar...
normal geode
lilac escarp
anyone got any clue what could be causing this all i did was try to merge the ar...
The latest version that cats works with is Blender 2.93, But it is still recommended to install 2.8+
 empty fox
lilac escarp
anyone got any clue what could be causing this all i did was try to merge the ar...
empty fox
lilac escarp
anyone got any clue what could be causing this all i did was try to merge the ar...
Because I answer this all too often and can't be bothered to be proper about it, the only version of CATS that work on Blender versions above 3.0 is the hidden developer version that is linked through their Discord.
It is this one.
https://github.com/absolute-quantum/cats-blender-plugin/archive/refs/heads/development.zip
It can only be found through joining their Discord and scrolling to the top of the short faq channel. #703190726447595581 message
normal geode
empty fox
*Because I answer this all too often and can't be bothered to be proper about it...
On 3.x, half of the functions work there with errors.
empty fox
normal geode
On 3.x, half of the functions work there with errors.
Generally not any of the ones you'd want to use CATS for though, merging armatures is really handy.
In any case, the version on the github is broken, but that hidden developer version does work (below 3.6).
normal geode
empty fox
Generally not any of the ones you'd want to use CATS for though, merging armatur...
I really don’t know what kind of nonsense you are talking about.
Instead of downloading Portable 2.93 of Blender and installing Cats, you sit and advertise to everyone a broken version, which obviously no one will improve.
visual citrus
is there any way to reduce the polygon count of an existing model in blender without screwing up the UV and shapekeys/blendshapes?
decimated one and then when I tried to publish it's been giving a ton of errors
empty fox
normal geode
I really don’t know what kind of nonsense you are talking about.
Instead of down...
That specific dev version is the one that is still actually worked on.
Sure, they did split out baking into its own addon, but the rest is still there and working, so I have to assume you are talking about the "developer version" that you can get from inside CATS, which isn't the same one as I am talking about, otherwise I don't get what you mean.
empty fox
visual citrus
is there any way to reduce the polygon count of an existing model in blender wit...
CATS can automate it somewhat #3d-modeling message
Still far better if you do it manually and use dissolve edges.
visual citrus
got cats earlier, actually; still getting issues when trying to publish so I think I'm done trying to make a quest version for now
digital hound
my progress so far. first time making a normal model from scratch

 vernal pine
digital hound
my progress so far. first time making a normal model from scratch
vernal pine
digital hound
my progress so far. first time making a normal model from scratch
nice work
 trail patio
hey guys I'm trying to export one of my old model (it's 3.0) fbx from unity to blender. But all the bones are acting up and misplaced, does anyone know how to fix that?
quaint jasper
trail patio
hey guys I'm trying to export one of my old model (it's 3.0) fbx from unity to b...
Export how?
trail patio
quaint jasper
Export how?
through fbx exporter, I factory resetted my PC and lost all my files, had to ask my friend for it and it works just fine for them
devout orchid
what stops you from just grabbing fbx from assets folder
 heavy sonnet
visual citrus
is there any way to reduce the polygon count of an existing model in blender wit...
heavy sonnet
visual citrus
is there any way to reduce the polygon count of an existing model in blender wit...
- don't touch anything that is affected by blendshapes. 2) dissolve edge loops
 karmic reef
I have a question if I’m converting an avi to quest and it says the avi is to big and I already delete most of the physbones to make it quest and it’s still to large what do I do?
harsh saddle
karmic reef
I have a question if I’m converting an avi to quest and it says the avi is to bi...
Is it complaining about memory usage? That tends to have more to do with texture compression settings than it does with physbones. The builder should tell you where the problem is. If you had too many physbones, it would say that.
karmic reef
It’s the textures but all of them are 256 would I have to go lower?
harsh saddle
karmic reef
It’s the textures but all of them are 256 would I have to go lower?
256 x 256? Those shouldn't use up hardly any memory unless you have 100 of them, what does the builder show, exactly?
karmic reef
When I get home I’ll show you
harsh saddle
Okay
 muted pelican
I'm trying to make an original model of a kitsune

 digital hound
Can having a lot of blendshapes decrease performance? Thinking around 150 to 200
quaint jasper
Active yes, inactive, no. Why do yoûneed that many?
devout orchid
will increase model size/vram usage significantly tho.
muted pelican
I suppose the shape key could go from 150 to 200, considering the changes in body shape to facial shape and hair besides facial expressions.
I feel like I'm seeing this a lot in Booth these days
 open yoke
Hello
 modern atlas
okay so im a total noob at this and im trying to model
im trying to figure out how to get more of the dots so i can edit more precisely
 devout orchid
you can apply subdiv (lower it to 1 first) or just add edge loop wherever you need more detail
solar fossil
modern atlas
okay so im a total noob at this and im trying to model
im trying to figure out h...
You should watch some tutorials to familiarize yourself with the controls and terminology first
 torpid anvil
anyone else 3d modeling in blender for the first time? I just modeled stuff for minecraft a lot in Blockbench, so this is new and different for me. Anyway, Have a small screenshot of what I am working on. Never knew faces could be this hard to do.
 azure rain
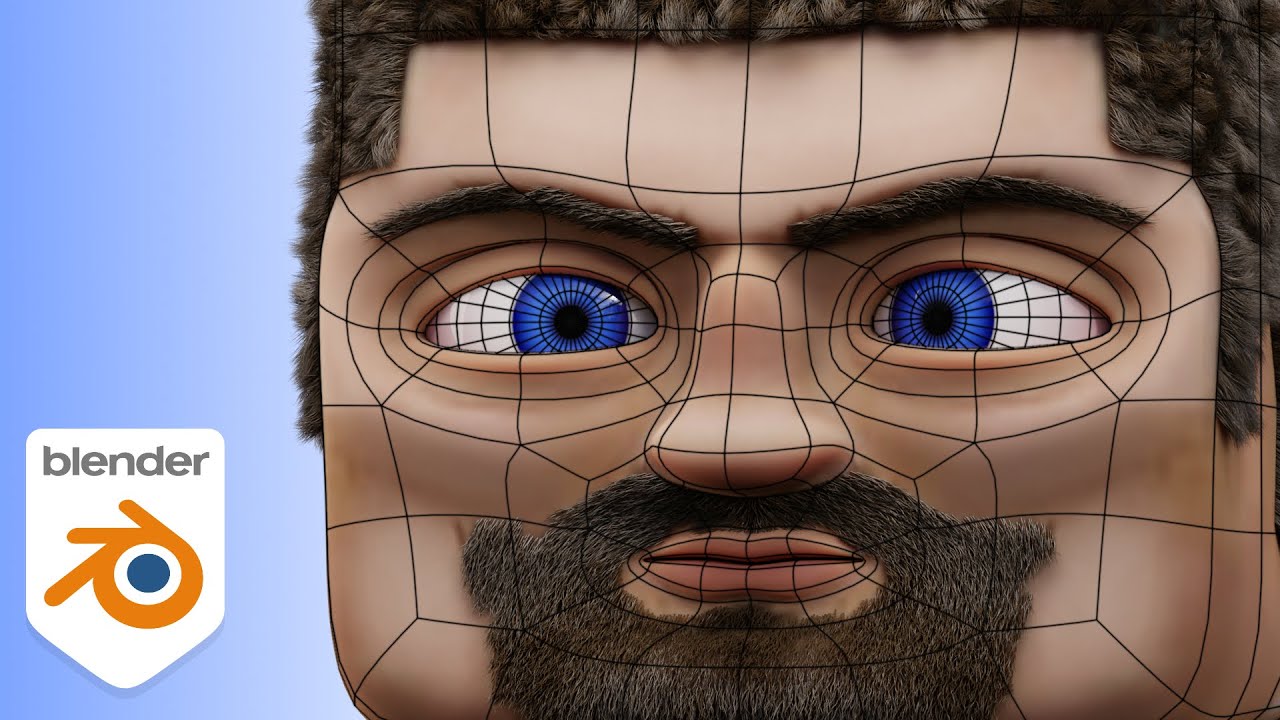
Face and head modeling in Blender is easy when you use this topology trick. You can make a wide variety of faces when you use it with proportional editing, multiresolution sculpting, and the shrinkwrap modifier. Rigging works well without retopology too.
🗿Character modeling playlist: https://www.youtube.com/playlist?list=PLzg4_2BrWAVyf8LKdr2XtEw...
 spare kiln
 pure dagger
Just finished modeling my tempad from loki, what do you guys think
 quaint jasper
Could use some bevelling, but looks great already!
pure dagger
quaint jasper
Could use some bevelling, but looks great already!
Perhaps however in the show it's very boxy from what I see
azure rain
do you have a picture of the version from the show
quaint jasper
Most things seem rounded to me, but edges might not need bevels yah


 static vapor
Oooooh
Time pad
From loki
Noice
Maybe put the TVA logo on it or something
On the back
Give it some normal map texturing in unity and apply shaders it should look good
pure dagger
static vapor
Give it some normal map texturing in unity and apply shaders it should look good
It has a normal map and stuff, Juts had it in material preview in blneder for those screenshots
Did the prune stick aswell
 pure dagger
static vapor
Maybe put the TVA logo on it or something
pure dagger
static vapor
Maybe put the TVA logo on it or something
also i would but the tempad from the show doesnt have the tva on it anywhere accept the menu
 pallid cove
trying to fit a sweater from one avatar to another, it looks like it fits pretty good but for some reason when i actually go and put it onto my avatar, it doesn't work too good


 quaint jasper
Weight paint it gooder
 scarlet comet
What book would yall recommend someone to learn how to create characters for a video game with blender?
I'm looking for a book that covers how to use blender (shortcuts and stuff), how to make the model (for absolute beginners), and how to texture the model (for beginners)
I'm also fine with separate books for making the model and then texturing.
I already know how to weight paint, how to do basic sculpting like for clothing swaps and just basic general blender usage.
Goal: I want to be able to easily create a model that looks like it came from GTA SA (PS2)
stark sand
scarlet comet
What book would yall recommend someone to learn how to create characters for a v...
I strongly recommend against books for learning a program like blender. It's a lot of visual (and technical) work, and visual work is best learned with videos/images. Additionally no couple books will be even close to covering all the concepts you'll need to know. You can start off by looking up "How to model PS2 character" and looking around for a good tutorial, though chances are it might not cover everything you need to know if you're a beginner, so work towards that goal by taking other tutorials on concepts you're struggling with.
A tip is to make your first attempt early instead of delaying it until you're "better". I learned so much from modeling my first character, my next one turned out miles better.
 flat jay
also shortcuts and quick and easy things that aren’t immediately obvious, such as setting a pose as a rest pose, have a bunch of succinct sub-2-minute tutorials out there that don’t take long to find online
There’s also the blender documentation if you really want to read through everything
If you need babysteps for getting a feel for the program without simultaneously worrying about building your first models, try finding some free ones online and modifying them instead. The modelers resource has a bunch of low poly ones from old console games, if you need a place to start
spare kiln
 static vapor
pallid cove
trying to fit a sweater from one avatar to another, it looks like it fits pretty...
static vapor
pallid cove
trying to fit a sweater from one avatar to another, it looks like it fits pretty...
Just hide the base underneath
static vapor
scarlet comet
What book would yall recommend someone to learn how to create characters for a v...
I suggest start looking up tutorials about what each tool does
Also short cuts to get those tools
Then start looking up tutorials how to use those tools to make a simple 3d model.
From there just go wild and let your imagination go free
After your done learn how to do texture especially UV mapping
 dull willow
After I added bevelling to the rim spokes, the low poly topology was evident


So either I set sharp for edges where the bevel ends or I copy normals from another flat'ish object. Went with the latter
 spiral sigil
still workin on this armor king edit
 fair mason
always wanted to make a movie version of him, thats why i started blender lmao

 spiral sigil
legs are done
it will kill your ocd lmao


 karmic reef
I have a question so I have the body finished in blender how would I sculpt the head and tail on my protogens body?
With out messing it up
 thin shadow
press home
karmic reef
Thanks
I want the tail to look like this but I’m nervous how would I do this

Just the tail nothing else yet
quaint jasper
Start with a cylinder and then sculpt the rest
karmic reef
How do I resize the cylinder
quaint jasper
S key to scale
 mystic void
how do i do this im so new
karmic reef
Does this look like a good size for starting to sculpt the tail?

 pliant thorn
dull willow
After I added bevelling to the rim spokes, the low poly topology was evident
pliant thorn
dull willow
After I added bevelling to the rim spokes, the low poly topology was evident

I have these
dull willow
Wow nice. I only have 2d images to go by
Made this for the e92 last night. 3 more rims designs to go for my fleet

The lugs are NOT evenly spaced to save some topology headache
quaint jasper
karmic reef
Does this look like a good size for starting to sculpt the tail?
Too small, also, Windows logo key + Shift + S or get ShareX or any program to screenshot your screen please! Pictures of your screen will make people not want to help you
karmic reef
Ok I’m sorry I will
 vernal storm
I am having trouble with Weight painting Which is A broad Ask. But I have been painting it many of times and there is just constant trouble with it. I applied an Eyelash onto the eyelid of this avatar, and it simply will not paint correctly. The added Eyelash is apart of the body which I thought was the correct order to do things I am unsure if there is another way I was meant to do this.
 thin shadow
vernal storm
I am having trouble with Weight painting Which is A broad Ask. But I have been p...
thin shadow
vernal storm
I am having trouble with Weight painting Which is A broad Ask. But I have been p...
separate the eyelash mesh first, then weight paint
vernal storm
It has a separate material could I select the Vertices of that and Remove it that way Or just separate the whole in full?
Like the whole EyeLash
thin shadow
it's weight painting routine that avoid that annoyance.
-select the mesh
-separate
-select armature, shift select the separated mesh
-start weight paint
so that you don't paint the unwanted mesh
vernal storm
Thank yoouuu Finallyy I have been stuck on that for a few days nooww
 swift jolt
thin shadow
separate the eyelash mesh first, then weight paint
swift jolt
thin shadow
separate the eyelash mesh first, then weight paint
No. Select the eyelash in edit mode. Go to weights on the side. And just press assign. And then it assigns the amount you selected to the bone you want on the verts you are currently selecting
swift jolt
vernal storm
Thank yoouuu Finallyy I have been stuck on that for a few days nooww
^
No need for painting. Also concidering that looks like animatronic and they are usualy ridgid, then just painting the weights in edit mode is the easiest
thin shadow
correct, depending on workflow. there are several ways to achieve the goal
spiral sigil
time to weight paint
 mental hazel
is there a way i can change every material to not be glossy? instead of changing the spectacular of each individually?
 azure rain
you can shift select multiple materials
mental hazel
doesnt work for me
azure rain
are you doing that in the file explorer area at the bottom of unity
mental hazel
no, im in blender
 inner quarry
hey, if I export a model with multiple meshes will it get screwed up in unity
does it need to be only one
 azure sluice
I commissioned my friend to re-design a robot i made a year ago, Im almost done modeling him :D


 ancient herald
So I don’t know how to set up blender and I’m currently using steam and the thing that I see is saying “ A graphics card and driver with support for openGL 4.3 or higher is required” and I really need help
 weak forge
ancient herald
So I don’t know how to set up blender and I’m currently using steam and the thin...
weak forge
ancient herald
So I don’t know how to set up blender and I’m currently using steam and the thin...
opengl 4.3 released 11 years ago your should be fine with... any graphics card made in the last 10 years
 tame oak
just finished this, gonna make him an avatar soon

 plush musk
anyone able to help me/make me a really big & scary open mouth version of the grey fallback robot? (Blendshape editing)
I already have the model in blender, just wondering if anyone had a video or spare time and could help me out?
quaint jasper
What do you not understand about the shapeykey process in blender?
plush musk
quaint jasper
What do you not understand about the shapeykey process in blender?
Pretty much everything, literally just got blender last night
quaint jasper
Have you looked up any tutorial for it yet?
plush musk
Ive tried looking up stuff related to blendshapes, but nothings been too helpful unless im just dumb
stark sand
plush musk
Ive tried looking up stuff related to blendshapes, but nothings been too helpful...
We're only really able to help where you have a particular problem or question. Asking how to work blendshapes in general is something you need to look at tutorials for. But if there's a specific part in a tutorial you don't understand, first look it up, and then ask here if you couldn't find the answer
 south saddle
eye material WIP finally swapping my eyes

 sacred crescent
karmic reef
sacred crescent
karmic reef
it very simple are u new to blender
sacred crescent
south saddle
eye material WIP finally swapping my eyes
this coo
karmic reef
sacred crescent
it very simple are u new to blender
@sacred crescent yes I am I’m learning still 😅
sacred crescent
karmic reef
<@1154065083736018964> yes I am I’m learning still 😅
okay but if u need help u can messageme
karmic reef
sacred crescent
okay but if u need help u can messageme
Okay thank you so much
sacred crescent
ancient herald
So I don’t know how to set up blender and I’m currently using steam and the thin...
what your graphic card and your pc ram
sacred crescent
mental hazel
is there a way i can change every material to not be glossy? instead of changing...
go to the shader option
 trim bobcat
the mesh wont parent to the armeture with vertex groups

ive tried and it just. wont
valid needle
Made a Building for one of my worlds
 valid needle
Ambitious building shapes go brrrr

 versed glacier
any good way to add leaves and vines pouring out of the terrarium? optimized for world
 quaint jasper
Place them randomly with the particule system, then transform to mesh and then use gravity to make them fall, then bake that into an animation and keep the frame you want
versed glacier
i havent really played with particles before
thin shadow
versed glacier
any good way to add leaves and vines pouring out of the terrarium? optimized for...
https://youtu.be/YU_blvKVNTM
Similiar concept, but change the snow to leaves

I'll show you how to create a very simple, but elegant gentle snowfall effect using just Unity's own "Shuriken" particle system and the default particle texture. We can use the parameters to create various effects, whether this be gentle, ferocious or even in a snow blizzard!
🔥 INSANE UNITY SAVINGS 🔥
🕹️Ukraine Unity MEGABUNDLE: https://bit.ly/U...
versed glacier
thin shadow
https://youtu.be/YU_blvKVNTM
Similiar concept, but change the snow to leaves
ah thanks, what if i wanted to add vines like weeping willows on the tree?
would i model like 1 plane for it and use particles or something to distribute it around the tree or something?
thin shadow
That part, i dont know yet
quaint jasper
There are many add-ons specifically for vines in blender
versed glacier
quaint jasper
There are many add-ons specifically for vines in blender
okay so.. i uh didnt find weeping willow textures so i generated them with AI image generator. then i aligned it properly in photoshop and made it transparent.. uh then in blender i made the tree and um select the top edges as reference point for the particle system, then i made planes and uv'd them to the leaves texture i had created and distributed it along the tree did some rotations and other magic and there we go. weeping willow thats really low poly and good for vrchat XD
 quaint jasper
versed glacier
okay so.. i uh didnt find weeping willow textures so i generated them with AI im...
quaint jasper
versed glacier
okay so.. i uh didnt find weeping willow textures so i generated them with AI im...
Yeah that actually looks pretty good, congrats on the workflow!
versed glacier
and the overflown terrarium mesh is done thanks for the help! https://gyazo.com/84550bdb3634e318be178dd75ac70af2

 winter minnow

 quaint moss
working on my first avatar from scratch, threw in the base that I’ve been using for my current avatar next to him and omg he’s so big

 solid shale
Is it just me, or does blender's sub-d seem a bit unwieldly?

I notice it curving edges weird, lately
jagged moat
solid shale
Is it just me, or does blender's sub-d seem a bit unwieldly?
Using creases will affect the standard "sub-d look" compared to adding edge loops to support edges
solid shale
Yeah, it's just that even with creases, it looks to bow edges out. Like here, I want the cuts between the hair to end straight.
 verbal creek
solid shale
I notice it curving edges weird, lately
verbal creek
solid shale
I notice it curving edges weird, lately
it's always done this. the definition of catmull clark is to create curved surfaces with subdiv. it tries to smooth the whole mesh
to me that hair looks fine, but if you want it to look sharper just fix it after you apply the subdiv
 jagged bronze
does anyone know a good cat plushie model i can buy or download for free?
if you do then ping me or dm me
azure rain
jagged bronze
does anyone know a good cat plushie model i can buy or download for free?

Gumroad
If you enjoy the free daily assets and want to help support their creation, consider donating at https://kofi.com/mobubblerThis is a game ready, optimized, free Shiba Kibby Plushie, just drag and drop the prefab into your scene for ease of use.Uses Sunao Shader which can be found at https://booth.pm/ja/items/1723985INCLUDES LODSSTATS:Tris: 1266M...
azure rain
jagged bronze
does anyone know a good cat plushie model i can buy or download for free?

Give a VRChat Cat a home. Includes a badly made Texture and a fbx. And to make life easier, it includes a Unitypackage. YEY Terms of Service. By Downloading this item, you agree to these terms of service. Under every circumstance may you redistribute this item for free using this booth's link.
jagged bronze
thanks
azure rain
glad to be of help
dull willow
Without normal map vs with normal maps


This uses the concept of baking AO within the normal map itself and an additional AO map can be used to fine tune
mental hazel
is there a way i can turn off an animation to edit easier?

 chrome scaffold
Is there anybody that can help me out with this issue? I run Blender 2.7.9 and for some reason, whenever I go to mask something in sculpt mode, nothing shows up. I've tried everything that I searched up online, but most of the stuff is for newer versions and I don't really know what the issue is despite all the troubleshooting I've been doing. I tried it on a new project to see if it was the program at fault, but the mask actually works on the new project. Is the old project what's causing the issue? Did I accidentally disable something? I'm not quite sure what else I'm supposed to check because I'm out of ideas...
quaint jasper
Try not running outdated programs
verbal creek
bad advice, lots of people use older blender versions. still perfectly usable
verbal creek
chrome scaffold
Is there anybody that can help me out with this issue? I run Blender 2.7.9 and f...
if it's fixed in the new project and you can't figure out why it won't work, maybe you can just export the stuff you need and carry it over to the new save? also make sure your overlay isn't just off. might also be modifiers breaking stuff
chrome scaffold
verbal creek
if it's fixed in the new project and you can't figure out why it won't work, may...
I’ve disabled/removed modifiers, but nothing changes. I can’t quite find this overlay option that I saw was mentioned when I searched up the issue on Google though. I think it’s on the mask brush, right? If that’s the case, then it doesn’t show up for me for some reason.
verbal creek
only thing i've found is that the hotkey should be alt + m but that might be in newer versions
i'm not sure
chrome scaffold
I’ve tried the alt+m thing. No dice. 😔
I could try transferring it to a new project though. I’ll do it tomorrow and lyk if anything happens
jagged moat
I've not baked in blender since downloading substance but the built in baker does have it's uses, I was able to bake a subsurface scatter material into a texture to have a performant and cool looking monkey! I think I might use this method more in the future when making lights and such

The original subsurface for reference:
 cobalt tiger
hmm... might not make a popular base, just practicing my realistic heads
 pure dagger
@quaint jasperOpen ur dms to me aaaaa :D
Wanna share my new model/ideas but dont wanna post em here to get stolen XD
quaint jasper
Make the model first and then post it here 
pure dagger
quaint jasper
Make the model first and then post it here <a:smart:453865176249401346>
I have
but dont wanan post it here XD
If only youw as in vrc traders smh
jagged moat
make it 90% watermark with a few glimpses of the model
azure sluice


 pure dagger
jagged moat
make it 90% watermark with a few glimpses of the model
pure dagger
jagged moat
make it 90% watermark with a few glimpses of the model
Thats not what i meant its for a project so i dont wanan show emt o thousands XD
jagged moat
Aaah gotcha xd
azure sluice
azure sluice
"You can not kill what is not alive..."
#teaser #vrchatavatar #3dart #3DModel
 vale fractal
Got an issue I’ve been trying to figure out in blender for quite some time now.
When I go into edit mode, some parts just straight up vanish on me?
This does the same for sculpting, and UV editing.


 harsh wadi
oldest
old
newest
i feel like ive been getting pretty good at modealing yeah


 desert crown
is anyone else using the new blender with cats plugin? i'm on Blender 3.5.1 with beta cats plugin and everytime i import a model into blender, it will always come with baked texture. How do i get rid of this feature?
 valid needle
vale fractal
Got an issue I’ve been trying to figure out in blender for quite some time now.
...
valid needle
vale fractal
Got an issue I’ve been trying to figure out in blender for quite some time now.
...
try pressing alt H



 valid needle
lol
orchid phoenix
bogos binted lookin ass 😭
 orchid phoenix
no longer bogos binted..

 prime timber
nois
 simple flame
can someone help figure this out at all? in blender, it all looks fine, but then theres whole sections of faces missing in unity


 somber frost
simple flame
can someone help figure this out at all? in blender, it all looks fine, but then...
somber frost
simple flame
can someone help figure this out at all? in blender, it all looks fine, but then...
Some of the mesh normals are inside out
simple flame
How would I go about identifying those in blender? Or should I just look at unity and guess?
I’ve never really had this issue before
somber frost
It's a blender issue
Try to recalculate normals and see if that fixes it with the mesh
thin shadow
simple flame
How would I go about identifying those in blender? Or should I just look at unit...
enable "face orientation"
devout orchid
Can't "unwrap" curve to mesh in nodes. As you see I have some values in UVMap (gibberish for now but whatever, it should show smth), UVMap attribute is manually linked in the material. What am I missing?

