#3d-modeling
1 messages · Page 10 of 1
 lusty void
 spiral sigil
Maybe the light saber extends into a body with arms and legs
And the hilt is the head
Nothing will ever be as cool as the Gonk droid though


 tawny pollen
 slow socket
when i eddit something in blender and import the mesh brakes like spaghetti
 harsh saddle
slow socket
when i eddit something in blender and import the mesh brakes like spaghetti
harsh saddle
slow socket
when i eddit something in blender and import the mesh brakes like spaghetti
Anything that changes vertex order can be problematic. I know there are FBX importer add-ons you can buy that might work better but I tend to just re-import the object into my scene when making changes like that.
slow socket
harsh saddle
Anything that changes vertex order can be problematic. I know there are FBX impo...
howd i reimport it?
harsh saddle
slow socket
howd i reimport it?
Just export it as a different name and drag it back in the same way you did the first time. If you didn't mess with the transforms, you should just be able to copy the transform component and the new object will be exactly where the old one was and then you can either copy over the mesh renderer as well or just drag the material on to the new object.
slow socket
harsh saddle
Just export it as a different name and drag it back in the same way you did the ...
how do i recombain it with the prefab? do i have to manualy redo everything? i got like 10 objects on the mesh, and things attached to the armature
 lost panther
Hi there! New to blender and I assumed if I weight painted vertex groups with the same names as the bones in the higherarchy that when I rot=ated bones it would apply those weights but it doesn't seem to have done so. Any ideas on what I did wrong?
 quaint jasper
Are those meshes actually parented to the armature and those meshes have an armature modifier ?
 marsh timber
is it possible to transfer vertices from one object to anoother im trying to add breasts to a rex from the fara rex to original rex i used mesh data transfer but because they both have different vertices i cant provide a pic as it looks nsfw in vertice mode but isnt
lost panther
quaint jasper
Are those meshes actually parented to the armature and those meshes have an arma...
It wasn't but I just parented it and also added the modfier but it still doesn't work

 mental hazel
im trying to add IK to my model, but when i move the foot IK it does this
how do i fix it?

 glacial ore
what's the ideal version of blender to use for modelling worlds?
i keep getting this error when i try to add cats blender plugin to blender 3.5. is there a fix for this?

 trail python
need to use the dev version of cats
https://github.com/absolute-quantum/cats-blender-plugin/archive/refs/heads/development.zip (this is a direct download link to the development version on their github)
for blender versions 3.0+ and up, you use the development vers of cats
anything lower than blender vers 2.93x can use the regular non-dev cats
glacial ore
i got it to work :3
anywaysss. i'm pretty new to blender and modelling in general so this is probably really obvious. i have this star shaped mesh and want to make a little pentagonal sunken-in section of it (it's going to be the floor of a building). how do i do that? i feel like i remember there being a modifier or something that lets you use meshes to like, take chunks out of other meshes but i'm not sure.
 quaint jasper
glacial ore
anywaysss. i'm pretty new to blender and modelling in general so this is probabl...
quaint jasper
glacial ore
anywaysss. i'm pretty new to blender and modelling in general so this is probabl...
Boolean
mental hazel
how's the hand? do i need to change it?
 lost panther
OH GOD SOMEONE HELP 😭 I am new to blender and have no clue what I did, the hoodie just disapeared! A menu came up saying something about a shader and now it's gone but still there and I can't undo the change
 harsh saddle
lost panther
OH GOD SOMEONE HELP 😭 I am new to blender and have no clue what I did, the hood...
harsh saddle
lost panther
OH GOD SOMEONE HELP 😭 I am new to blender and have no clue what I did, the hood...
This is when you restore a previous version that you absolutely saved in the last 15 minutes. If for some reason you don't have a recent backup, try File->recover then auto-save and hope you have something recent in there.
mental hazel
harsh saddle
This is when you restore a previous version that you absolutely saved in the las...
not to sound odd, but
hows the hand ive made?
its for a ps1 model and i was wondering if it'll work
 harsh saddle
mental hazel
not to sound odd, but
hows the hand ive made?
its for a ps1 model and i was won...
harsh saddle
mental hazel
not to sound odd, but
hows the hand ive made?
its for a ps1 model and i was won...
The hand bone should ideally be straight as should that last digit of the thumb but otherwise yeah, it should probably work. You'll need to manually assign the fingers how you want them for stuff like gestures.
 ebon anvil
 spiral sigil
ebon anvil
thank you thank you, i know im great B)
spiral sigil
ebon anvil
thank you thank you, i know im great B)
No problem
spiral sigil
ebon anvil
thank you thank you, i know im great B)
I'm imagining what it would look like if a swarm of these came to vrchat server
ebon anvil
it would be amazing
 fast bluff
glacial ore
i got it to work :3
fast bluff
glacial ore
i got it to work :3
Hey, how did you do it?
Did you just install the dev version?
Thank you!
glacial ore
fast bluff
Hey, how did you do it?
Did you just install the dev version?
Thank you!
i reverted my blender back to 3.4, but installing the dev version would probably work too
fast bluff
I downloaded the dev one.
It looks a tiny bit different but oh well, here goes nothing.
I already have quite some experience with Blenders - definitely above beginner level.
But I never touched character modeling.
Any advice is welcome :D
lost panther
Hihi! For some reason I can't transfer weights, any ideas? (new to blender)
 solar fossil
@spiral sigil Saw this blender plugin and remembered you were making some wraps for your avatar, might come in handy some other time
https://blendermarket.com/products/wrap-master?ref=110

Blender Market
A tool for wrapping bandages, ropes or what have you around your model. Fast, versatile and easy to use.
spiral sigil
solar fossil
<@456226577798135808> Saw this blender plugin and remembered you were making so...
Awesome, thank you ❤️
I love niche little blender addons like these
Cablerator is great too
Easy way to add cables and stuff for those that might be interested
https://blendermarket.com/products/cbl

Blender Market
Cablerator is a Blender addon for creating hanging cables between geometry faces, by drawing, from edges or objects. Easily add curve profiles, segments and end connectors, split multi-profile curves and more!
solar fossil
oh ye, got that one, been using it on my latest world 
harsh saddle
lost panther
Hihi! For some reason I can't transfer weights, any ideas? (new to blender)
It's really hard to tell what's going on as you're enabling and disabling a bunch of different models but for weight transfer there should just be 2, the source and the target mesh. You enable just those 2, you can keep the armatures off if they get in the way, they aren't relevant. Then, you select the source mesh, shift select the target and then transfer the weights.
lost panther
So the two hoodies I enabled are the same object duplicated but one was skulpted
lost panther
harsh saddle
It's really hard to tell what's going on as you're enabling and disabling a bunc...
So the target mesh is the one that wants the weights put onto it and the source mesh it the one it takes the weight from right?
On an unrelated note, also despite having no weights painted this mesh is not following the bone correctly


 harsh saddle
lost panther
So the target mesh is the one that wants the weights put onto it and the source ...
harsh saddle
lost panther
So the target mesh is the one that wants the weights put onto it and the source ...
Yes. Typically body first, then clothing. It just seems like you might be trying to do too much at once.
 arctic sparrow
How would you start making a skin tight suit for an avatar? I was thinking of duplicating the base body and using "Fatten" to offset it a little bit
spiral sigil
arctic sparrow
How would you start making a skin tight suit for an avatar? I was thinking of du...
Duplicate the part of the body you want and use a solidify modifier with rim only option and adjust the thickness and offset. Then manually fix any ugly spots.
Works well for quick gloves, thigh highs, and stuff
arctic sparrow
Awesome! Thank you I will take a look at that 🥰
lost panther
harsh saddle
Yes. Typically body first, then clothing. It just seems like you might be trying...
I was actually doing it from one copy of the mesh to another


 azure sluice
azure sluice
azure sluice

 mental hazel
so the armature is ok in edit mode but when i go to object mode one side is flipped


1 is normal
2 is in obj mode
 jovial turret
mental hazel
so the armature is ok in edit mode but when i go to object mode one side is flip...
jovial turret
mental hazel
so the armature is ok in edit mode but when i go to object mode one side is flip...
go into pose mode, select all bones, then do alt-r (remove rotations), alt-g (remove translations), alt-s (remove scales)
You can reset pose with a singal menu option but its good to know the hot keys
That or I just noticed you have a bone for the elbow pole target, make sure the elbow is slightly bent the correct way and its not flipping it around because the initally bend was backwards
Since you are setting up IK, its a good idea to make sure one of your bonedrivers doesn't have an inverted parameter or that you rolled a bone in edit mode
mental hazel
one more thing, if i apply textures in blender then import the fbx into unity, will it keep the uv changes?
 tardy badger
I want to start taking courses in learning how to use blender, What places or websites do you guys recommend, and what are some tips i might need to know?
harsh saddle
tardy badger
I want to start taking courses in learning how to use blender, What places or we...
I don't think many people have taken proper courses and it's not really necessary. If you just look up Blender donut on Youtube, that's a whole into series that covers a huge variety of topics at a very introductory level and then you can kind of branch off and look for beginner tutorials relating to what you want to learn first, whether that's hard surface modeling (mechanical things, robots, etc.), organic environment modeling (terrain, rocks, caves, trees) or character modeling. You can get a lot more specific in there if you want to model cartoons or anime. I don't have specific recommendations beyond the donut tutorial but doing that should give you the foundations to branch out to most other focused beginner tutorials. If you really want to do a proper course, you might want to think about Udemy or Skillshare, sometimes you can find affordable courses there.
 pale mica
Don't do the blender donut
It's a very long intro to blender guru's personality brand with a lot of "just do this based on the settings onscreen, don't worry about it we'll cover it in a later video". It's a very glancing tour of a lot of features but not a learning series, it's more an advertisement for his many long winded videos and purchaseable courses
https://youtu.be/At9qW8ivJ4Q
This video is very to the point from the ground up, no fluff. The hour in this one vid here will save you the (17 videos last I remember?)that it takes to get through the donut

#Tutorial #Blender #Beginner #3d #Basic #Introduction
Download project files
https://crossmindstudio.gumroad.com/l/lZHjb
https://www.patreon.com/CROSSMIND
Links to download Tutorial Files, Textures, and Other Resources:
https://www.crossmind.com/introduction-to-blender/
Intro: (00:00)
Interface to Blender Interface: (00:15)
how to Move/Rota...
trail python
oldest donut tutorial is 17
harsh saddle
It's been 15+ years since I first started learning Blender so I'll admit I don't have first-hand experience with that series, I just know it's popular and covers a broad range of topics. If anything, probably too many. A beginner doesn't really need to know how to use geometry nodes. I don't know how to use geometry nodes and I get by alright.
trail python
https://www.youtube.com/watch?v=bpvh-9H8S1g&ab_channel=CGFastTrack ive done this one too

Your journey awaits in this new Blender Beginner tutorial series. Dive into Blender 2.9 with CG professional Robby Branham!
Join CG Fast Track PREMIUM MEMBERSHIP: https://www.cgfasttrack.com/subscribe?utm_source=youtube&utm_medium=link&utm_campaign=BFT2&el=BFT2-youtube
FREE Download files: http://cgfasttrack.com/blender-fast-track2?utm_source=...
it helps to have a tiny bit of pre cursor knowledge but
even a low poly tutorial would be ok too i feel
spiral sigil
I've never made the blender donut, but I've made donut shaped objects

Still think the best way to learn Blender is to jump in and look at tutorials when you get stuck on something.
harsh saddle
Not sure if that's the best way but it's certainly easier than it used to be. When I got started, Blender used right mouse select by default, it was a bizarre mess inscrutable to normal humans.
pale mica
yeah my first experience was "left click places the 3D cursor and right click selects". Infuriating
2.79ish and onward was after the blender foundation got the massive donation from EPIC and they started pushing real hard on making it a modern system, probably got a lot of new talent in from epic specifically to work together on tools they wanted, etc
harsh saddle
I'm sure there are other uses for it but I only use the 3D cursor for "set origin to 3D cursor" so devoting the left mouse button of all things to it seems insane.
pale mica
it's pretty handy once you get used to it. Don't remember if it's a part of machin3tools (great, free QOL addon, get it) but the radial behind shift-S is wonderful for quick common things regarding object origins
the 3D cursor can also respect snapping and be used as a translation origin, so it comes in handy as a hinge
spiral sigil
harsh saddle
I'm sure there are other uses for it but I only use the 3D cursor for "set origi...
If you set the transform point to the 3D cursor, there is a lot you can do with it.
Especially if you use proportional editing, you can use rotate and bend things easier.
Creative use of scaling too sometimes
harsh saddle
Oh yeah, using it as an origin is very useful but that's kind of it and most of the time you either want the 3D cursor at the world origin for stuff like mirroring or you're using median or individual origins. It's useful but not enough to be worth devoting a mouse button to it.
spiral sigil
Definitely not enough for a whole button
I feel like old blender was made to appeal to one specific persons autism 🤣
New blender is more universal
 red glade


Decided to make a furry version of my avi
It can be a toggle only thing I gotta figure out is how to setup the feet toggle. as it would be clippin otherwise
Im not really known with anything furry so if ive made anymistakes dont hesitate say so
 sullen falcon
look at the size difference with vr equipment
 red glade
sullen falcon
look at the size difference with vr equipment
red glade
sullen falcon
look at the size difference with vr equipment
yeez are the index controllers that big?
Ill stay with my qeust controllers for sure lmao
sullen falcon
red glade
yeez are the index controllers that big?
its not that bad
red glade
sullen falcon
its not that bad
Maybe cuz im not used to it lol
lost panther
Can I please have some help? I'm so dumb with Blender but for some reason I can't specify what bone this is weight painted to and its drivin me mad, Ctrl + click doesnt work, Shift + click doesnt work
 quaint jasper
You have a lot of bones selected in that image
 opaque rose
This is my first attempt at a proper model using blender (intended for vrc use  ), does anyone know why subdivisions are acting so weird?
Also, how do I fully merge layout geometry? I tried doing it once but the meshes haven't been connected.
 harsh saddle
opaque rose
This is my first attempt at a proper model using blender (intended for vrc use <...
harsh saddle
opaque rose
This is my first attempt at a proper model using blender (intended for vrc use <...
What subdivisions? There is no subdivision modifier unless you applied it but subdivision does its best to split faces into 4 spaces of the same aspect ratio of the original face which appears to be what it's doing here. When you say merge geometry, do you mean making it one object or merging the vertices so everything is welded together?
opaque rose
harsh saddle
What subdivisions? There is no subdivision modifier unless you applied it but su...
Whenever I attempt to subdivide some faces, blender decides to instead subdivide the edges, which makes very odd artifacts when using any form of smoothing (shown below)
Also, I used the 'layout' menu to block out the general shape of my model, and I am looking to merge these separate meshes into one (preferably getting rid of the overlapping geometry inside of the model)
(sorry if these are obvious problems, I am very new to blender)

(I subdivide using the right-click menu, not sure if I'm supposed to be doing that...)
harsh saddle
opaque rose
Whenever I attempt to subdivide some faces, blender decides to instead subdivide...
No worries. Subdivision is only going to give you clean results if your mesh is mostly made of quads (faces with 4 edges and 4 vertices). You've got a lot of ngons (faces with >4 faces and vertices) so it's not going to give you a clean result. To combine meshes, just select them and use Ctrl+J, though I'm not aware of an easy way to clean up overlapping geometry, might just have to do some manual clean up there.
opaque rose
harsh saddle
No worries. Subdivision is only going to give you clean results if your mesh is ...
Thank you!
 barren bridge
Does anyone have that old Image which showed the recommened setup for avatar bones for humanoid models? I remember seeing it in the past, and I would like to reference that again. As a secondary question do people still use CATS for vrc models in blender?
trail python
barren bridge
Does anyone have that old Image which showed the recommened setup for avatar bon...
its in the pinned section of #avatar-rigging
and ive sent the default template skeleton like 80 million times in that channel
personally ive only seen cats being used for the visemes, everything else it did was for mmd models iirc
barren bridge
Ah well thank you for pointing me in the right direction for it
spiral sigil
I am trying to export a vroid model, and im doing some fixing in blender however i keep running into this issue where there is this invisble texture/mesh and i dont know how to remove it. its invisible in blender but its very visible in unity and it looks awful, it effect the eye liner, eye brows and certain clothing
this is what it looks like

the jagged part

you can see it doesnt match the top

it ends up appearing like this
same thing with the face

it gets all weird
 thin shadow
spiral sigil
thin shadow
spiral sigil
#avatar-general message
the usual routine
spiral sigil
thin shadow
https://discord.com/channels/189511567539306508/730948141196509297/1087883972622...
my bad, thought i was in the right place
thin shadow
or use a shader with transparency enabled
lost panther
quaint jasper
You have a lot of bones selected in that image
Thats cause I selected the armature then the mesh and entereed weight paint mode but couldn't select a specific bone
red glade
spiral sigil
I am trying to export a vroid model, and im doing some fixing in blender however...
Long story short, this has to do with the materials in unity,
Some of them support transparency. and some dont
opaque rose
opaque rose
This is my first attempt at a proper model using blender (intended for vrc use <...
Attempt 2 has been a significant improvement imo

 jagged moat
looking good 👀
red glade
opaque rose
Attempt 2 has been a significant improvement imo
What are you trying to make brother! Looks like a truck?


New project im workin on btw,
spiral sigil
 spiral sigil
spiral sigil
spiral sigil
Beautiful. Can't wait to see it textured.
 swift jolt
opaque rose
Whenever I attempt to subdivide some faces, blender decides to instead subdivide...
swift jolt
opaque rose
Whenever I attempt to subdivide some faces, blender decides to instead subdivide...
it subdivied endges and smooth surfaces. it subdivied everything... select an edge you want to be sharp. press shift e i belive and then drag untill the edge is purple... but subdivite is really not needed for a model of this polygon count... id say, get rid of the Ngons and then unwrap it and smooth shade it, then textures.... textures are like half the detail on most models
swift jolt
barren bridge
Does anyone have that old Image which showed the recommened setup for avatar bon...
cats is only usefull to merge gones
swift jolt
spiral sigil
same thing with the face
make your materials tansparent in unity. thats it
swift jolt
lost panther
Thats cause I selected the armature then the mesh and entereed weight paint mode...
you dont... you give the model a vertex group named the same as the bone you want it to be attatched to :)
spiral sigil
swift jolt
make your materials tansparent in unity. thats it
quest doesn't support transparency though?
spiral sigil
thats okay, iv just been doing the knife method
swift jolt
yea that works
spiral sigil
i havent checked if it worked yet but im very confident it will
swift jolt
aslong as you didnt add any extra verts it should be fine
spiral sigil
swift jolt
aslong as you didnt add any extra verts it should be fine
hmm.. that seems concerning how could i not add new verts? isnt that exactly what the knife tool does?
swift jolt
spiral sigil
hmm.. that seems concerning how could i not add new verts? isnt that exactly wha...
nope. aslong as you are cutting along allready existing verts its fine... all the tool does is split polygons.. you can cut a quad into two tris without adding or removing verts.... and then just removing the excess from the cut


 cursive summit
So I'm trying to get the files of a smash bros mod converted to a compatible file type with blender so i can upload it, does anyone know how to convert files like that?
spiral sigil
 opaque rose
Hi again, does anyone know why only some of my geometry has accepted my assigned test material (the dark purple...ish color) and the rest (light gray) has rejected it despite also being selected when the material in question was assigned?
(edit) and, by extension, how do I force the straggling geometry to accept said material?

I'm infantile with blender and everything I've tried thus far to get the material to these regions hasn't worked
oh
nevermind there's an 'Assign' button
disregard 😅
opaque rose
Alright here's a tiny update, and also: does anyone know a good way to 'paint' a texture onto a model like this directly (As if you were painting a clay sculpture or something)?
 opaque rose
I don't know whether or not Blender has a feature where if you painted directly onto the model, it would still save as an 'unwrapped' image to be applied (i.e. when being transferred to Unity)
to be more specific, I'm not looking to get 'rid' of UV maps, I was just wondering if there was a more 'hands-on' way to create them
trail python
you're missing a lot of tabs at the top from that image
these come by default and a few of them are important for making models

you mess with all of the UVs in uv editing, and then you make your texture to paint on in "shading"
then paint in texture paint
 meager tartan
doe girl

 compact oar
i see... not bad
opaque rose
trail python
you're missing a lot of tabs at the top from that image
I used [CTRL+WIN+S] to get the screenshot so the tabs are there, just cropped out.
opaque rose
trail python
you mess with all of the UVs in uv editing, and then you make your texture to pa...
Thanks!
opaque rose
Although I haven't gotten around to arranging the UV map, I have implemented some barebone colors by assigning materials to the quads.
(I'm actually 100% satisfied with how it looks rn, will I face any consequences in the future if I just use this method? (i.e. unity doesn't interpret blender materials or something))

 azure rain
using multiple materials would increase the amount to draw calls so it would make your object more expensive to render compared to using a texture that just has the the solid colors
harsh saddle
Yeah, its' not going to be catastrophic to have a model with 5 materials on it, you just need to create and assign those material in Unity after exporting but it adds up. 100 objects with 5 materials will perform notably worse than 100 objects with 1 material. If you can atlas UVs together to bring multiple objects together with a single material, even better.
UV mapping is a bit of an advanced topic but you could probably UV pretty much everything there well using "project from view" with the appropriate faces selected or just select everything and "smart UV project" for something quick and dirty. Might be fine for this object.
opaque rose
I see
I was actually just about to ask how to arrange UVs because the map for this project is total spaghetti and tbh it scares me
azure rain
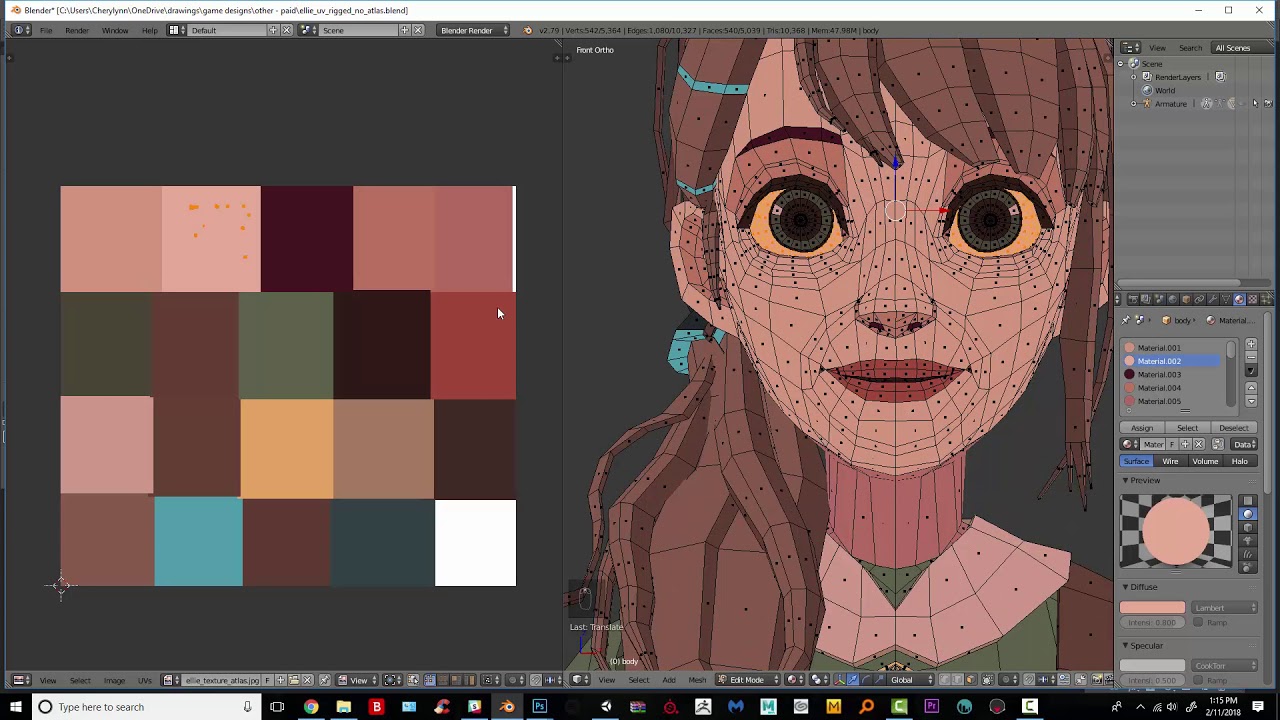
Hello!
Today I thought I'd share one of my new favorite ways to deal with UV maps of low poly characters. One of the things that always frustrated me about texturing low poly is that I would lose that flat, shadeless look. I also find UV unwrapping a chore. I used to have a method similar to this, but I've found that selecting by material makes...
basically you just shove all the islands you want to be one color into a part of the color Atlas and make them really small
harsh saddle
Project from view does what it says, it takes what it can see and creates UVs as a 2D projection of what's in the viewport. So, if you were to select the front of the vehicle and then go into the front camera view ad then do project from view and it will set up the UVs as they appear in the 3D view.
Doing like what Rainwolf said can work well for low-poly stuff where there are a lot of flat colors. It won't work well for lightmaps but you can just have Unity generate lightmap UVs for the object automatically.
azure rain
and if you put everything on one texture at list like that static batching can go to town making everything a very low number of draw calls
opaque rose
I see, also I presume using the 'unwrap' command from the UV window is something that shouldn't be done?
I got this 'thing' when I attempted a normal unwrap (I have a more telligible map now though)
 azure rain
honestly it doesn't matter your UV unwrapped kind of looking bad as all you're doing is just assigning which faces go to each color

Some time ago I built a small add-on which allows you to generate a simple texture atlas for multi material objects. I figured, why not creating a simple tutorial? I hope you like it :)
Also please excuse the bad quality, next time I'll set up OBS correctly :D
Texture Atlas Generator (Github): https://github.com/LuFlo/texture_atlas_generator
T...
opaque rose
Here's what I got from arranging the islands by material
 azure rain
well wouldn't you need a texture with the colors as well
azure rain
opaque rose
Here's what I got from arranging the islands by material
but yes that is the general idea
opaque rose
azure rain
well wouldn't you need a texture with the colors as well
had to make the atlas
I presume this will get the job done, I've lined everything up and am currently figuring out how to apply it
 azure rain
basically you make a new material and assign everything to that material
harsh saddle
opaque rose
I got this 'thing' when I attempted a normal unwrap (I have a more telligible ma...
Unwrap should generally only be used if you're using seams to manually organize your islands. If you're going to do the method of having really small single color islands you aren't worried about making a texture map that can easily be understood or edited in other programs, it's just a matter of arranging all the faces on top of the right color.
azure rain
but I might suggest making the atlas have some more white space at the moment so you can add more colors as you make more objects
like each individual color blob doesn't need to be terribly big so you can fit a lot of those in one texture
harsh saddle
Or just use one that already exists
 opaque rose
The atlas is barebones because its a bit of a placeholder currently, I plan to re-arrange stuff in the future (and I want to maintain a very simple visual style for performance reasons)
azure rain
nothing wrong with being placeholder I'm just saying you're not giving yourself enough room for expansion
AS hypothetically in the end you would want to use like one material for the entire VR chat map if you're going this kind of art style
opaque rose
azure rain
AS hypothetically in the end you would want to use like one material for the en...
that's actually really smart
I didn't think that could be done tbh
azure rain

version expanded out to a size that will give you plenty of room to work with and is still a small amount of vram compared to excellent ranking Avatar
opaque rose
Odd question, but the image I'm using is a 64x64 grid - which would technically allow me to have a huge amount of colors just through individual pixels - is there any real benefit/deficit made by doing that?
harsh saddle
You would need to scale down each of your islands essentially infinitely to fit them on a single pixel and it would be hard to work with inf you needed to move things around in the future. On any sort of modern hardware, the difference between using 1 64x64 texture vs 512 or 1024 will be nonexistant.
Most assets I've seen textured like this (particularly the Synty Low-Poly stuff) use a 1k color chart so you have access to pretty much any color you might need.
azure rain
also you don't want texture bleed to occur from Mipmap With Faraway objects
and honestly the VR chat menu probably uses more vram than a 512 or 1024
and you have to consider is you're only using like one texture for the entire map
opaque rose
So I presume the 1-texture-for-world concept is done by making one big 'master' atlas, using it for every prop, structure, and vehicle (to arrange the UVs) and then re-applying it to everything in the unity project?
azure rain
yes
opaque rose
Basically like a modern spritesheet
azure rain
yes
harsh saddle
Sprite sheets can be a lot more complex than this. A sort of expanded concept from this is using what are called trim sheets which are distinct blocks of a certain design which can be tiled which is more like how spreadsheets tend to be used but it should be as simple as making one material with the texture on it and dragging it into the one texture slot the FBX will have on import.

 harsh saddle
Yeah, like that. If you wanted to make a Mario game, for example, you wouldn't be assigning individual colors but placing blocks of tileable terrain side by side so that's kind of like the retro equivalent of a trim sheet. Those can obviously be used for some pretty complex stuff if you look at those images whereas this technique is really only for solid flat color low-poly stuff.
azure rain
like one difference to consider with vrchat compared to like a video game with asset streaming is like a VR chat world is a discreet chunk of data that's always going to be loaded into memory so we might as well take advantage of the fact that this stuff is always going to be loaded together and give the CPU less work to do having to process different materials
where is something like Spider-Man loading the assets for the bookstore and the hot dog stand together in the same texture would be silly because you're not always going to be next to both of those at the same time and it uses asset streaming so it's only loaded what's relevant at the moment not the entirety of New York
harsh saddle
I imagine setting that up is quite complicated and might not even be possible in VRChat but you can do something similar using an LOD group component. Probably overkill if you're going to be using a single material unless you plan on having a massive number of objects.
You'll have plenty of space in terms of performance to not have to stress about that stuff too much if your materials are that optimized.
opaque rose
I was actually about to move to #world-development to ask about stuff like that because the scale of the project in question is a bit larger than most worlds
opaque rose
So for the 'movey' bits of my model (tires, steering wheel, headlights(?), etc), would it be okay to build them in the same blender file, or should I make a new one?
azure rain
it should be fine being in the same blend file as long as they're separate meshes
harsh saddle
Yeah, if you wanted to use one mesh, you would need to rig the model which may not be any better for performance depending on how many objects you're going to need. 1 skinned mesh renderer is probably better than 5 regular mesh renderers but I don't know the specific overhead on that.
spiral sigil
Use collections. Organize early so you don't have to figure out what cube 368 is later.
 glad bronze
spiral sigil
Use collections. Organize early so you don't have to figure out what cube 368 is...
glad bronze
spiral sigil
Use collections. Organize early so you don't have to figure out what cube 368 is...
i dont know what you are talking about
 opaque rose
I can't believe you guys don't name your meshes
harsh saddle
The trick is to do everything as quickly and sloppily as possible and then get around to cleaning it up later...maybe
spiral sigil
We all pay for our bad habits sooner or later
quaint jasper
Only use a single mesh 
pale mica
spiral sigil
Use collections. Organize early so you don't have to figure out what cube 368 is...
This was such a problem with me and my mom trying to manage files for 3d projects back in the day that I started intentionally making folders named "box 05"
 golden grove
Can anyone help me with converting a VRchat character to a VRM?
azure rain
golden grove
Can anyone help me with converting a VRchat character to a VRM?

#vtuber #tutorial
This tutorial is a basic walkthrough of how to turn a working vrchat character into a vrm format avatar for usage in a variety of apps
My intention was to create a careful step by step walkthrough all in one take that is super easy to follow. It does not explore every single aspect of the VRM format or of avatars in unity but...
golden grove
I have tried al lthat but i need help. There are error codes that i dont understand
azure rain
then post the error code in here
harsh saddle
I looked it up and there are VRM servers so you might try asking there. There really is no such thing as a "VRChat character" at least not outside of the context of the VRChat app, they're just standard models with rigs so you're not likely to get any particular insight here unless one of us has happened to work with VRM in the past.
 ruby rose
blender says that .blend is not suported i open the file and it opens a new project
glad bronze
ruby rose
blender says that .blend is not suported i open the file and it opens a new proj...
Do you have a .blend file and a .blend1 file (as seen in the image)? I'm not positive but its the first thing I thought of
 ruby rose
Well, I opened my last, save without blend one
To be fair, it might be because I gave it to another person to edit. Don’t know though.
quaint jasper
Did they use the same version of blender ?
Iirc blender doesn't like opening blend files from versions above ita current one
lost panther
Ummmm... so I'm new to blender and I tried merging vertisies manually and subdeviding then skulpting, did I do wrong? The first picture is what it was and the second is after I tried...

 quaint jasper
lost panther
Ummmm... so I'm new to blender and I tried merging vertisies manually and subdev...
quaint jasper
lost panther
Ummmm... so I'm new to blender and I tried merging vertisies manually and subdev...
What were you trying to do ? Sculpting on a flat surface like that is not ideal
lost panther
I connected the meshes then decimated a load of times to allow for more acurate skulpting, or so I thought
 quaint jasper
lost panther
quaint jasper
lost panther
You're supposed to enable Dyntopo to achieve this

In this video, I will show you how I set up Blender for Sculpting.
Make your own Matcaps: https://youtu.be/ruEb9mJuQpw
Sculpting Beginner Tutorial: https://youtu.be/VYuUlQO-kYE
My Patreon: https://www.patreon.com/ryankingart
My Gumroad: https://gumroad.com/ryankingart
Amazon Drawing Tablet Links:
As an Amazon Associate I earn from qualifying pu...
Make sure to follow tutorials!
 sick vine
Trying to learn modeling and rigging and avatar creation all at once


 bitter jungle
little WIP i'm making all from scratch 💕


 quaint jasper
Cute design 
 deep verge
Anyone got a good tutorial for makin an avatar?
harsh saddle
deep verge
Anyone got a good tutorial for makin an avatar?
There's a lot to that, modeling, rigging, mapping, texturing, and then the publish process inside of Unity. If you want to make something from scratch, you'll need to start with some beginner modeling tutorials. Making a decent-looking avatar is going to take a fiar amount of time developing several different skills.
deep verge
harsh saddle
There's a lot to that, modeling, rigging, mapping, texturing, and then the publi...
I'm trying to get into modeling first then rigging
harsh saddle
deep verge
I'm trying to get into modeling first then rigging
Maybe try this series, I've seen it recommended. I'd do a fair amount of modeling before worrying about rigging. https://www.youtube.com/watch?v=bpvh-9H8S1g&ab_channel=CGFastTrack
Your journey awaits in this new Blender Beginner tutorial series. Dive into Blender 2.9 with CG professional Robby Branham!
Join CG Fast Track PREMIUM MEMBERSHIP: https://www.cgfasttrack.com/subscribe?utm_source=youtube&utm_medium=link&utm_campaign=BFT2&el=BFT2-youtube
FREE Download files: http://cgfasttrack.com/blender-fast-track2?utm_source=...
sick vine
so i discovered mixamo and
lost panther
quaint jasper
You're supposed to enable Dyntopo to achieve this
Thank you for the help 😊
 topaz phoenix
he will be unleashed
 opaque rose
So, when you buy and download Rusk from booth, it gives you 3 files. One, I presume, is for PC (Rusk_v1.21), one is for Quest (Rusk_Quest_v1.00), what's the other one for? It's marked with a number of some kind, is it a date?
opaque rose
nvm I think I got it
 devout olive
I need some help, i’m trying to get a 2D image Texture to float off from the face to represent his eyes, But I don’t know how you would go about doing that

 valid needle
devout olive
I need some help, i’m trying to get a 2D image Texture to float off from the fac...
valid needle
devout olive
I need some help, i’m trying to get a 2D image Texture to float off from the fac...
A plane with the image on it
devout olive
How do I properly fit the clothing I sculpted to my model?
lost panther
Hey... umm can I have some help? Very new to blender and I'm following a tutorial to transfer verticies from one object to another but I can't seem to get it working. Does anyone know any better tutorials?
https://www.youtube.com/watch?v=Nirh_Pv8jEY
 spiral sigil
Welp, I finally figured out how to turn a goldsrc MDL into a Maya OBJ but I have no friggin idea how I'm gonna UV map this or get the textures looking anything like they're supposed to

How would I go about UV unwrapping this sucker?
And even then the textures I got are kinda like puzzle pieces.
harsh saddle
devout olive
How do I properly fit the clothing I sculpted to my model?
I like using the grab brush in sculpt mode, make sure symmetry is enabled. You can also use edit mode but I prefer sculpt mode.
devout olive
Now that I’m done with my full model, I’m not exactly sure how to import this to unity and make it look the same, Toon-shading and all
 harsh saddle
devout olive
Now that I’m done with my full model, I’m not exactly sure how to import this to...
harsh saddle
devout olive
Now that I’m done with my full model, I’m not exactly sure how to import this to...
You can export it as an FBX but materials don't transfer from Blender to Unity so you'll need to recreate those in Unity. Most people use Poiyomi shaders for toon stuff but those are not supported on Quest.
glad bronze
devout olive
Now that I’m done with my full model, I’m not exactly sure how to import this to...
bake any texture maps (albedo, rough, etc.), export and import model and textures, download poyomi (or any other unity shader just preference), use your textures and fine tune to get the look you want.
 magic gulch
You guys are so good at this modeling stuff
 lost panther
Yoo quick question I have assigned certain verticies to a vertex group on one object, I know it's possible to transfer the vertex group to another object but will this copy the vertices over? Asking because thats what I need to do. The object I'm transfering to doesn't have the verticies I need
 steady zealot
lost panther
Yoo quick question I have assigned certain verticies to a vertex group on one ob...
steady zealot
lost panther
Yoo quick question I have assigned certain verticies to a vertex group on one ob...
No it will not copy the vertices unless you manually copy those over. The vertex group also won't be properly transferred unless you copy the require vertices first.
lost panther
I figured it out, duplicated then seperated and joined with the mesh but now the polys won't fill right, nothing but problems ey 😭 lmao
 silver fiber
Would anyone know how to combine all meshes with the same material together in blender automatically? I've been sitting here hitting ctrl+j for the past 30 minutes and im exhausted lmao
harsh saddle
silver fiber
Would anyone know how to combine all meshes with the same material together in b...

Blender Stack Exchange
Is it possible to select all objects that have a particular material assigned to them?
E.g. if I have many objects that use the same material and I want to select them for Copy to Selected, how ca...
spiral sigil
devout olive
Now that I’m done with my full model, I’m not exactly sure how to import this to...
Nice unique boi
silver fiber
harsh saddle
https://blender.stackexchange.com/questions/3390/how-to-select-objects-based-on-...
thank you so much!!
devout olive
Oh no, The Poly Count
 harsh saddle
devout olive
Oh no, The Poly Count
harsh saddle
devout olive
Oh no, The Poly Count
Yeah, that's just a quirk. There should be something you can autofix to fix that. Unless it is real in which case you need to go to confession.
devout olive
Yeah no I’m pretty sure this is real
What do I do? I don’t think I can use this without my, or someone else’s PC Blowing up
harsh saddle
devout olive
Yeah no I’m pretty sure this is real
If you scroll up, there should be a button to autofix. I don't think characters for Hollywood films typically have over 200m triangles.
devout olive
All I see are select buttons
quaint jasper
It's just a read/write issue, enable it on your model settings in your assets
but there should be an auto fix yeah
devout olive
We went from 200m to 1m
harsh saddle
Well, that's still horrible but less.
Please don't use that model, for the children.
devout olive
Aw, alright
harsh saddle
Even for PC, 200k is a lot but if you really need the 10 different outfits then okay but going above that is really pushing it
devout olive
That means I have to do the retopoly, texturing, and rigging all over
harsh saddle
devout olive
That means I have to do the retopoly, texturing, and rigging all over
This is retopologized and it's 1m tris? Did you turn on like 4 levels of subdivision?
devout olive
No, I think I just gave Quad Remesher too high of a Quad Count to work with
harsh saddle
devout olive
No, I think I just gave Quad Remesher too high of a Quad Count to work with
Ah, well, quad remesher won't give you very good character topology anyway. It's not the worst and you can make it better by adding some edgeloops and fixing up the loops around the face but retoplogizing characters still isn't something that can be done well with the push of a button.
Hopefully in the next year or two with the help of AI we'll get there. I certainly wouldn't mind never having to retopologize again but doing it properly is a long, boring process. It's arguably not that difficult but there is an art to it and there are people that are much better at it than I am.
devout olive
I’ll note that for next time, I’m still a little bummed that I can’t use this character in VR chat, but I’m glad it looks good at least.
devout olive
harsh saddle
Even for PC, 200k is a lot but if you really need the 10 different outfits then ...
Just so I know for next time when I make another model, When Retopologizing my character, how many Tris/Quads should I aim for Maximum for an Optimized Avatar?
trail python
70k pc
glad bronze
devout olive
Just so I know for next time when I make another model, When Retopologizing my c...
The Avatar Performance Ranking System allows you to see how much a user's avatar is affecting performance via analysis of the components on that user's avatar. You can also use it on yourself to see how performant your avatar is.
trail python
beat me to it lmfao
harsh saddle
A lot of people on PC use more than 70k tris but if you want the party line, then sure. I don't think 200k is heinous, people can manage their shield levels and minimum performance rank if they like. Before the optimization gang comes for me, I develop for cross-platform so all my stuff is below 20k, just saying we need to compromise with people to give them some room while still discouraging 500k-1m+ madness.
devout olive
Plus with me realizing this, it can actually give me the opportunity to add some things to the model while optimizing it so my PC doesn’t explode
harsh saddle
Try to make it under 70k ||but if it's 100k, I won't tell anyone.||
spiral sigil
But you told me
harsh saddle
You saw nothing. 👀
spiral sigil
I seem something
 golden grove
i need some help with 3d models
harsh saddle
golden grove
i need some help with 3d models
That's what this channel is for
 flint patrol
Some renders i made with my worm and bazooka models

 golden grove
harsh saddle
That's what this channel is for
golden grove
harsh saddle
That's what this channel is for
@azure rain well see i need some 1 on 1 help. So i can explain what is going on. Its a long story or can someone tell me where to go to learn the basics for someone who needs to finish a model for VR chat and to change it to VRM
azure rain
golden grove
<@216145046347448320> well see i need some 1 on 1 help. So i can explain what is...
#vtuber #tutorial
This tutorial is a basic walkthrough of how to turn a working vrchat character into a vrm format avatar for usage in a variety of apps
My intention was to create a careful step by step walkthrough all in one take that is super easy to follow. It does not explore every single aspect of the VRM format or of avatars in unity but...
golden grove
I did watch that and it doesnt help th issues im having many error codes come up saying im missing script
azure rain
question does the Avatar successfully upload when you try to do it in vrchat
just wondering as far as what scripts might be missing
did you install all the prerequisites for any workflow showed off in the video
golden grove
I made sure to do exactly what the video said. And the model was created for VR originally but i will not be one VR for a long time. So i wanted to see about converting it, but no i havent uploaded it because i wont be on VR for a really long time
harsh saddle
golden grove
I made sure to do exactly what the video said. And the model was created for VR ...
There's really no connection between VRChat and VRM, at least none that I can tell. You might use the same model for both, you might play VRChat with your character overlaid but if you want to know how to use VRM, I'd try a VRM server.
golden grove
Ahh dang ok lol thank you
azure rain
harsh saddle
There's really no connection between VRChat and VRM, at least none that I can te...
if their problems is some sort of empty script starting from a fbx files might not change where the empty script problem is coming from
harsh saddle
You might get some help here but a much larger percentage of the community will have experience with VRM on a VRM server
azure rain
and honestly probably most of the folks around here just use a vrm converter tool
golden grove
I wasnt sure because it was originally meant for Vr chat well let me ask this as 3D modelers do yall keep like 8 different models in the same file to send to a client?
golden grove
azure rain
and honestly probably most of the folks around here just use a vrm converter too...
Wait there is a VRM converter tool?
azure rain

Vket Store
- For Windows, please use the Community Repository version from "About installation" below. This is the Unity Editor extension. This includes the following three tools • Convert VRM prefab to VRChat avatar • Convert VRChat avatar to VRM • Merge...
harsh saddle
golden grove
I wasnt sure because it was originally meant for Vr chat well let me ask this as...
Most tools use a common file type as a starting point. For models, it might be obj but for rigged characters, it's typically FBX. So if you make a 3D model and export it as an FBX, it can be used in many different programs. You'll also tend to keep a working file that is the format your modeling software works with internally which is a .blend file for Blender from which you can export to pretty much any other format with the help of add-ons.
azure rain
yeah there's an fbx file for the Avatar somewhere in your Unity project for your vrchat avatar
golden grove
Ok ill look for that because the file has about 8 different models that have nothing to do with my model. And i know nothing out this so im flying blind for the most part. And alot of what in the file i want nothing to do with
azure rain
then I wonder if the vrm converter I linked might be easier for you?
then trying to clean up the mess with your fbx
and that does not sound like a good Avatar maker if they're stuffing eight avatars in the same file
harsh saddle
They could be accessories?
golden grove
I thought so but my avatar is a red dragon and the others are like a whole new dragon. Like color, hair, clothes, accessories, animations ect
harsh saddle
If you are serious about doing this sort of thing, you should get Blender so you can open all this stuff up and check it out properly. It might be a modular dragon builder thing and those are some different variants.
golden grove
The are a few accessories but there are other models too
harsh saddle
Sounds like a good deal if you only expected to get the one.
golden grove
True i don't wanna use the others tho lol and they had sent me apic of one and told me that they had made that model for someone else that was a dragon
So i doubt im supposed to have it
harsh saddle
Ah, so this was a commission and they just sent you a bunch of other commissions? That doesn't sound like the best practice.
golden grove
No it doesn't. That's why i need help it was super cheap, and i thought i could do the conversion but i can't and i think this is why
harsh saddle
You should be able to safely delete all the other ones you don't want. There are some VRChat publishing tutorials we can point you to if that's of interest but for VRM I don't know any more than what has already been shared.
golden grove
Ok ill look into that i want sure if it would work because of the missing script. Ill definitely try this thank you all for helping the best you can
azure rain
hopefully you can figure out something sorry I can't be more help just don't have any data to work off of with no pictures
golden grove
I completely understand
harsh saddle
You should also be able to delete any scripts when it comes to VRChat since they probably won't work anyway but no idea if VRM needs them.
golden grove
Ok sounds good i can try a few things and save them separately to see which would work
trail python
hopefully it wasn't a scam or something
been quietly following the convo, that seems a bit weird
golden grove
I dont think it was.... a freind had a model created for her and refered me. I mean they did ask for my VR chat log in
trail python
then again i assume everything is a scam until proven xd
azure rain
yeah this does not sound like a good commissioner if they're including their other customers work in the file
harsh saddle
Seems like they got a dragon but I wouldn't be surprised if it was put together with off the shelf dragon parts since it seems like they do a lot of these. Not that there's anything wrong with that.
golden grove
I think thats what they did
harsh saddle
It's the people that had their commissions shared who would be getting the raw end of the bargain.
golden grove
And yeah well there website has a "My models" section when i seen one i recognized i asked about it and they said its used as a base
harsh saddle
They may have made the parts but it only makes sense to not reinvent the wheel if you've already made 100 dragons with 100 different colors and horns.
golden grove
True, just weird that they sent me all these models and i hate knowing i have them honestly..... i just hope i wasnt scammed and wont get in trouble for using mine
harsh saddle
The only people that might come for you are the faux pas police if someone else has a similar dragon unless it's pulled from established IP. We would never allow IP characters in VRChat. Not here.
golden grove
Ok lol
 hushed canyon
need some help rq, so there is no shape key i can find for the hood to go up and down, but when in edit mode in blender the hood goes up, any ideas?


 golden grove
So i looked into the file and found 9 total 2 i think may have been the same 4 were FBX files. I will be looking into how to make my model in the FBX form because i dont understand the converter lol.
steady zealot
hushed canyon
need some help rq, so there is no shape key i can find for the hood to go up and...
My guess is there are bones, and in object mode the hoodie is in its posed position (in edit mode, poses do not show)
hushed canyon
steady zealot
My guess is there are bones, and in object mode the hoodie is in its posed posit...
i fixed it, i dont even know what i did but it worked lol
steady zealot
hushed canyon
i fixed it, i dont even know what i did but it worked lol
Love/Hate it when that happens. On one hand, "nice it's working now" and on the other "How do I fix it in the future????"
hushed canyon
yeah lmao, i think its from merging the old armature to it while in edit so it made the blendshape stick as default lol

 hushed canyon
nvm got it, just edit the spine length in blender by a milimeter
harsh saddle
golden grove
So i looked into the file and found 9 total 2 i think may have been the same 4 w...
What format is the one you want in?
golden grove
Vrm, but i think i know where to go from here is just wont know for sure till tonight
harsh saddle
I'd generally go through Blender, I imagine it has a VRM importer plug in. If you're trying to use it in VRM, that seems like a good thing
devout olive
I want to make very flow-y robes for a character, how exactly what I translate that into VRChat?
devout olive
Ah ok
devout olive
Wait, how exactly would I use Physbones with my clothing?
Would I need a whole new set of bones just for the clothing on my avatar?
trail python
no, your bones should all be in 1 armature
swift jolt
devout olive
Would I need a whole new set of bones just for the clothing on my avatar?
Yes. Add bones to your armature
devout olive
I need to make liquid for a potion on my model, how would I go about making that?
harsh saddle
devout olive
I need to make liquid for a potion on my model, how would I go about making that...
You need some sort of liquid shader, I think this should include one even if you don't want to mess with the pouring mechanics. https://github.com/Dastmann/UDON-Liquid-Pouring-for-VRChat
GitHub
UDON Liquid Pouring system for VRChat by Dastmann. Contribute to Dastmann/UDON-Liquid-Pouring-for-VRChat development by creating an account on GitHub.
devout olive
harsh saddle
You need some sort of liquid shader, I think this should include one even if you...
Is there any type of Saliva or Slime Shader as well? I’ve been meaning to add that to my models tongue
harsh saddle
devout olive
Is there any type of Saliva or Slime Shader as well? I’ve been meaning to add th...
Booth and Gumroad have a fair amount of shaders as does the prefabs database, not sure about slime but probably somewhere. Pretty much any shader that works in Unity's built-in renderer works for PC VRChat. Quest has more limitations and Quest avatars can't use any custom shaders.
devout olive
Since I want to add Physbones to the sleeves of a robe to make them flow better, how would I do that?
swift jolt
Weightpaint
devout olive
Can you explain this in a bit more depth?
devout olive
I want to make a VRChat avatar, how many polygons is good enough to be compatible and still have decent details with retopology?
That’s under 70k
devout olive
Like, 10k or 20k?
 midnight valley
can anyone help me figure out why my eye tracking isn't working on this model. this is what cats is giving me every time i try to test
 glad bronze
devout olive
I want to make a VRChat avatar, how many polygons is good enough to be compatibl...
glad bronze
devout olive
I want to make a VRChat avatar, how many polygons is good enough to be compatibl...
https://creators.vrchat.com/avatars/avatar-performance-ranking-system/ depends on your avatar but as a rough guide when retopologizing, only add polygons to places where it contributes to the silhouette. So enough where at a certain distance the silhouette appears smooth (unless you want it to appear sharp of course) but not so many where you have 100+ polygons just to smooth out one edge. It's all about finding balance between resolution and performance. If you are new my best advice is just to try to work as non destructive-ly as possible so you can add more / less geometry as you get a better understanding of how many polys you should use and where.
The Avatar Performance Ranking System allows you to see how much a user's avatar is affecting performance via analysis of the components on that user's avatar. You can also use it on yourself to see how performant your avatar is.
harsh saddle
That sums it up pretty well. There's no polygon target that is going to work for a simple chibi anime character and a Dark Souls boss with 10 arms and 100 eyes so you just have to be conscious of not adding more detail than is needed and optimizing what you've got. if it's on Quest, it needs to be under 20k to not need to be manually displayed so that's a hard limit but it's not unheard of for a well-designed PC avatar to be 100k. A lot are just poorly-optimized because you can get away with that on PC but some justify that complexity through details you can actually see and just just needless density and excessive subdivision.
devout olive
Even though I’ve Remeched my model again, it still says I have over 200,000 Polys, though I have 10,510 Quads, I feel like I’m missing something, do Quads not equal Polys?
azure rain
devout olive
Even though I’ve Remeched my model again, it still says I have over 200,000 Poly...
the VRchat stats counts triangles not quads
harsh saddle
10,000 quads != 200,000 tris, though. Maybe you have a bunch of ngons?
Or one massive ngon.
spiral sigil
wow
Subdivide modifier still on?
That's a disturbing disparity between quads and tris
harsh saddle
Are you using quad remesher? Instant meshes? Either of those would likely better than Blender's built in remesher, though neither is going to get you very good character topology because they aren't that intelligent.
devout olive
harsh saddle
10,000 quads != 200,000 tris, though. Maybe you have a bunch of ngons?
Alright, after some more editing, I managed to whittle it down to just under 90,000 Tris. Am I able to work with this?
harsh saddle
devout olive
Alright, after some more editing, I managed to whittle it down to just under 90,...
So long as it's just for PC, you could have used the 200k one but 90 is better.
Now just just need to upload to MIxamo.com and the results should hopefully be not horrible.
devout olive
Alright
That’ll be a whole bunch of rigging stuff I’ll do later, for now, I’m just glad that unity will no longer yell at me saying that I have 1 billion tris in my project
 silk temple

I revisit my old early 90's 3D modeling and animation software. These are some of the programs I used to lean the art from 1990 to as late as around 1995 in some cases.
===== Attributions =====
Software:
AutoCAD R10
AutoShade
Animator
Openshot
Ubunutu
Sound:
1989-a-number.mod (n/a)
1993.mod (gustaf grefberg)
486.xm (ExcelioN)
amegas.mod (n...
gotta love the 90s

 flat vault
Is there a way to get glTF / GLB files into Unity yet? Every time I try converting them first the textures get scrambled.
 hushed leaf
silk temple
https://youtu.be/5EyaMYUw-qU
hushed leaf
silk temple
https://youtu.be/5EyaMYUw-qU
I remember using 3D Studio. Not MAX, the DOS one.
oh yeah, Autodesk Animator, I totally forgot about that

 waxen dune
nvm i fixed it
sick vine
All that’s left is to rig it https://cdn.discordapp.com/attachments/1042639086021783602/1135007788700024852/image.png
 quaint jasper
And to put its feet above the origin

 mental hazel
how can i have it so i can turn this vertex into that diamond?
 harsh saddle
mental hazel
how can i have it so i can turn this vertex into that diamond?
harsh saddle
mental hazel
how can i have it so i can turn this vertex into that diamond?
You can make new edges with the knife tool, but that will give you a 5-sides face. To make that nicer, you could connect the diagonal verts to the exterior edge of the diamond, making the tris you created in the first step into quads and avoiding ngons.
mental hazel
i remember there being a way to bevel vertexes
i might be wrong
glad bronze
mental hazel
i remember there being a way to bevel vertexes
i might be wrong
Ctrl + b then press v
mental hazel
ahh
thanks
 modern socket
im a content creator and serching for help im lookign for someone to rigg my model its a quadaped model 4 legs
needs to work for vrchat unity side of work is the 4 face expressions happy sad evil tierd and default bugget 100 CAD
dm me asap thanks your help you will also get a shoutout in my next tiktok video
trail python
modern socket
im a content creator and serching for help im lookign for someone to rigg my mod...
any DMs you get in here will be scammers trying to take advantage of you, do not listen to them. go to the link ive included in this message to find VRC Traders where people are verified 3d artists
harsh saddle
mental hazel
i remember there being a way to bevel vertexes
i might be wrong
You can do that but it won't necessarily match the profile of the diamond in the texture and it will still create ngons you would need to deal with but it's another way to do the same thing.
devout olive
I want to make something like this, though how would I make walk cycle?

 versed granite

anyone good at blender that could tell me why im getting weird shading?
its unusable in unity since the lightmapping breaks
 spiral sigil
versed granite
anyone good at blender that could tell me why im getting weird shading?
spiral sigil
versed granite
anyone good at blender that could tell me why im getting weird shading?
overlapping unmerged verticies that are creating faces that have wrong normals and overlap with the correct faces
or its just incorrect normals
rarely it can be a blender display bug or actual bug that fucks a face but i think ive only had that happen once
versed granite

i mean something is weird about it
i dont really know a lot about blender but its not a display bug
glad bronze
versed granite
Wireframe view would be nice
spiral sigil
and a view for normals
 versed granite
 glad bronze
Can you show normals?


 versed granite
ah

i think unticking auto smooth fixed it?
okay so this did solve it. im just curious now about what auto smooth is used for
i dont think unticking that did any visual compromise to model
glad bronze
versed granite
okay so this did solve it. im just curious now about what auto smooth is used fo...
what does it look like now?
because if you want the same look, all that would have done is sharpen that edge
versed granite
versed granite
 glad bronze
versed granite
glad bronze
versed granite
I thought you didn't want the edge sharpened mb. At least it worked out though
versed granite
I'm not sure what i wanted. i just didn't want that specific part "sharpened"
like im not really sure what sharpen implies but yeah it did work out as far as i can tell rn
thanks for the help regardless
would have taken me wayyy longer to find the issue myself
glad bronze
versed granite
I'm not sure what i wanted. i just didn't want that specific part "sharpened"
The auto smooth automatically sharpens angles above a certain amount. Sharpening is that blue thing you have on the edges (image). It makes the edge appear completely sharp as apposed to smoothed from smooth shading.
 azure sluice
A little fella im working on

 mental hazel
so im following a tut for ps1 models (https://www.youtube.com/watch?v=puwu9hZmQYI)
and when i apply aut. weights then delete the unlocked vertex groups, it turns into the 2nd image. is there an easy way to fix this?


In this one I go over Modeling, UV Mapping, Texturing and Rigging of a PS1 Style character! In the video I use only free and open source tools like Blender and Gimp
Buy me a coffee: ko-fi.com/binbun3d
Music by sagrada1400
Link: https://www.youtube.com/watch?v=DYUrOMWVfP0
0:00 Modeling
0:59 UVs
1:48 Texture
3:13 Rigging
5:05 Outro
quaint jasper
If you're rigging for VRChat, you should follow a dedicated VRChat tutorial, as the rig you're using will not work for a humanoid model
mental hazel
its not for vrc
 wicked hull
I'm going to need some help to make these three Incarnations of ZALGO


Problem is that I need to make them from scratch all over again
 devout olive
I want to make a model that doesn’t have any legs, but still needs and animation for moving, how would I do that?
 harsh saddle
devout olive
I want to make a model that doesn’t have any legs, but still needs and animation...
harsh saddle
devout olive
I want to make a model that doesn’t have any legs, but still needs and animation...
Just don't weight the legs to anything.
quaint jasper
You create a custom animation 
harsh saddle
Yeah if you need a custom animation then you need to make that but if the legs have no weights, then leg animations just won't do anything.
But they won't make that wheel roll.
lost panther
help :sobs:
For context, the UV map did look like it does in SPP but I edited it and changed it
azure sluice
azure sluice
A little fella im working on

 trail python
lost panther
help :sobs:
trail python
lost panther
help :sobs:
only thing i could think of is when you're making a new substance project, make sure "auto unwrap" is off and "use udim tiles" is off
 tulip topaz
lost panther
help :sobs:
tulip topaz
lost panther
help :sobs:
Make sure there is only one uv map

 humble void
Hai there so need some blender help.
I've been working on a avi edit that I bought,
but beneath the tail it was a mess,
So I've been trying different way of fixing that, but now I decidede to get rid of the mess and sculp it myself
But having some issues with the vertices and face, any way of fixing this, ?

 rancid magnet
Hey there! when you guys come across overlapping limbs (like these), how do u go about them? do you just overlap them anyways? im having a really hard time with spiderman because of his physique lol
 mental hazel
is there a way to fuse these edges into one to make this hatchet look sharp?
 jagged moat
mental hazel
is there a way to fuse these edges into one to make this hatchet look sharp?
jagged moat
mental hazel
is there a way to fuse these edges into one to make this hatchet look sharp?
s -> x -> 0 should push them together, then with them still selected you can do m -> by distance to join them together
lost panther
Hey guys is this mesh optomised per haps? 


I also can't help but see the sad faces in @humble void's legs
 humble void
lost panther
I also can't help but see the sad faces in <@163628425167241217>'s legs
humble void
lost panther
I also can't help but see the sad faces in <@163628425167241217>'s legs
haha atleast that part looks decent xD
 covert galleon
Earlier this week, I worked this out.
What do you think?
 ashen forge
Working on a new model


Don't worry about the high poly wings I'm gonna be doing a retopo on them
It's about 15k tris total without wings, 29k with, and I'm gonna air on the side of 18k~ when I retopo them
(Art/Design by HowlingWizard)
This is the character, it's an adopt a friend got me for my birthday. Name is Kuriam.

Closeup on the neck frathers while I'm at it
 harsh saddle
rancid magnet
Hey there! when you guys come across overlapping limbs (like these), how do u go...
harsh saddle
rancid magnet
Hey there! when you guys come across overlapping limbs (like these), how do u go...
It's generally going to work better for rigging and for importing to Unity's humanoid animation system to model your characters in a T-Pose. How exactly things move and intersect is something you can control with weights and constraints/correct shape keys if you want to get more advanced. Though note that constraints are only supported on PC avatars and I'm not sure how corrective shape keys work in VRChat so most of that is just done with weights.
rancid magnet
harsh saddle
It's generally going to work better for rigging and for importing to Unity's hum...
modified it a bit, would this work?
 harsh saddle
rancid magnet
modified it a bit, would this work?
harsh saddle
rancid magnet
modified it a bit, would this work?
You generally want the arms to be parallel with the shoulders but that would work, you can make some small adjustments in Unity configuration.
rancid magnet
alright, thanks
mental hazel
is there a way i can add a transparent blood texture on the blade?
 harsh saddle
mental hazel
is there a way i can add a transparent blood texture on the blade?
harsh saddle
mental hazel
is there a way i can add a transparent blood texture on the blade?
Is it already UV mapped? If you have a blood texture with alpha, you can bring it into the texture tab in Blender and there should be an option to calculate the alpha in there. Then, you can use stencil mode to project it in texture paint mode.

Learn projection painting in Blender 2.90. This is just a basic overview to get you started.
Pixabay image:
https://pixabay.com/photos/monkey-baby-barbary-macaque-look-2790452/
Patreon► https://www.patreon.com/PIXXO3D
Thanks for watching, you are awesome!
#Blender #3D #CGI
mental hazel
harsh saddle
Is it already UV mapped? If you have a blood texture with alpha, you can bring i...
what do you mean "With alpha" for the blood texture? i have the blood texture like this in the shading tab
 harsh saddle
mental hazel
what do you mean "With alpha" for the blood texture? i have the blood texture li...
harsh saddle
mental hazel
what do you mean "With alpha" for the blood texture? i have the blood texture li...
You don't need to do anything with the shader if you want to paint the texture on. This is the texture tab you want to use https://docs.blender.org/manual/en/2.79/render/blender_render/textures/texture_panel.html I think the tutorial should cover using it.
Actually, nevermind, it's not quite the process I would use in the video. Let me see what I can find
Here, use this one https://www.youtube.com/watch?v=urUdMbO4E2c
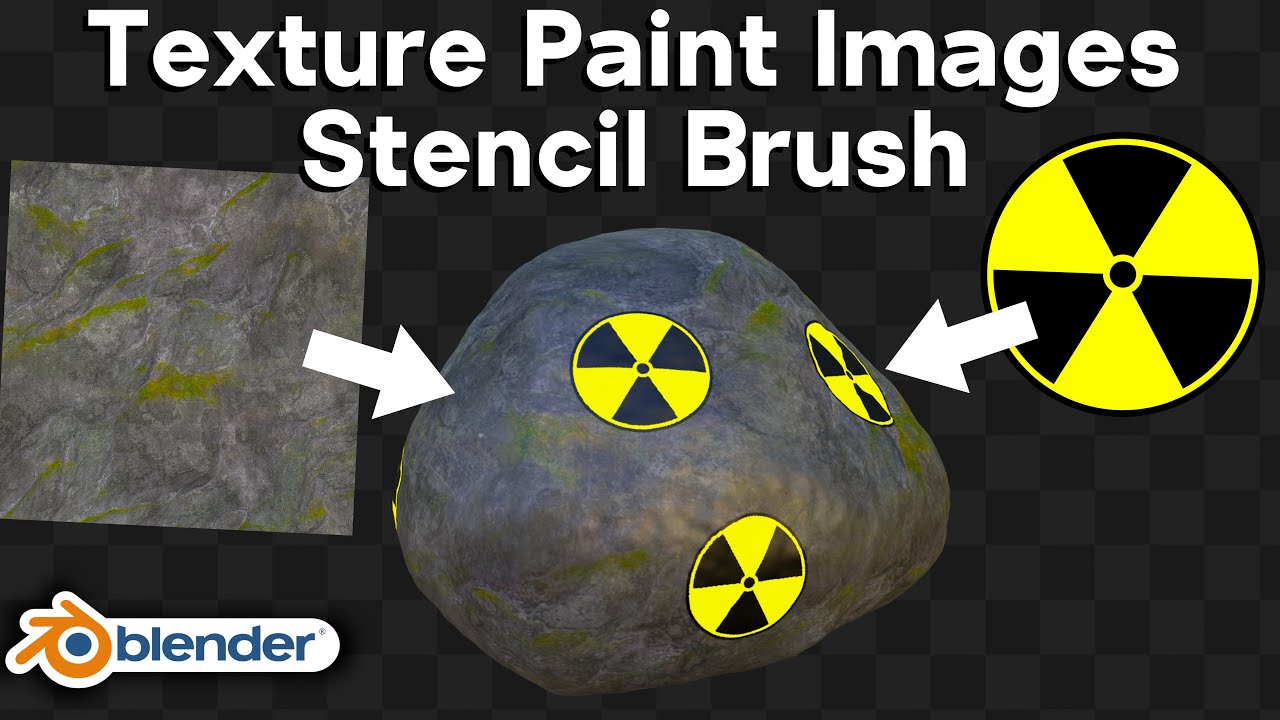
Check out Blendergrid: (Affiliated Link) ➡️ https://blendergrid.com/start/ryankingart
In this Blender tutorial I will show you how to texture paint using images with the stencil brush in Blender. I will also show you how to paint icons or stickers onto your object.
● Amazon Tablet Links:
As an Amazon Associate I earn from qualifying purchases.
...
mental hazel
it looks like this when i draw it on the axe head
 harsh saddle
mental hazel
it looks like this when i draw it on the axe head
harsh saddle
mental hazel
it looks like this when i draw it on the axe head
Did you follow the whole tutorial? It looks like your texture is tiling so either you're not using a stencil or there's an issue with your texture mapping.
 glad bronze
mental hazel
it works, but now it looks like this
glad bronze
mental hazel
it works, but now it looks like this
Is it supposed to look different?
mental hazel
the blood should be on the blade and not the bottom
harsh saddle
mental hazel
the blood should be on the blade and not the bottom
If you weren't painting over that area, it's probably an issue with your UVs. You need properly laid out (and not tiled) UVs to do this sort of thing.
Somewhat old tutorial but the process hasn't changed that much for 20+ years. https://www.youtube.com/watch?v=Y7M-B6xnaEM
Blender is Free and Open Source Software
Download: https://blender.org/download
Support core Blender development - https://fund.blender.org
--
This tutorial is part of the Blender Fundamentals series, produced by Dillon Gu.
Find more free tutorials on: https://blender.org/tutorials
Follow Blender on social media:
- Twitter: https://twitter.c...
mental hazel
got it to work
 mental hazel
i also have another problem with rigging something thats not for Vrchat
https://youtu.be/puwu9hZmQYI
im following this tut and when i do the rigging part to model is messed up
yet in the video the model is perfectly fine
In this one I go over Modeling, UV Mapping, Texturing and Rigging of a PS1 Style character! In the video I use only free and open source tools like Blender and Gimp
Buy me a coffee: ko-fi.com/binbun3d
Music by sagrada1400
Link: https://www.youtube.com/watch?v=DYUrOMWVfP0
0:00 Modeling
0:59 UVs
1:48 Texture
3:13 Rigging
5:05 Outro
harsh saddle
mental hazel
https://youtu.be/puwu9hZmQYI
im following this tut and when i do the rigging par...
Just use Mixamo.com and clean up the weights. It gives you a decent starting point and the rig is fully compatible with the Unity humanoid system VRChat uses.
Even if it's not for VRChat, it works perfectly fine for Blender as well.
mental hazel
is there a way to have it so if i edit one weight on one side it affects the other?
like if i change the left arm bone itll change the right?
glad bronze
mental hazel
is there a way to have it so if i edit one weight on one side it affects the oth...
These buttons are probably what you are looking for
 mental hazel
glad bronze
These buttons are probably what you are looking for
mental hazel
glad bronze
These buttons are probably what you are looking for
doesnt work
 mental hazel
i found out that i can paint the right side, but not the left
spiral sigil
You need to like symmetrize the bones or something I don't remember
Like there is a button
mental hazel
i did
 lunar stone
Hello all, im interrsted in learning how to create basic 3d models anyobe be kind enough to point me in a good direction?
 gaunt flame
I love making tutorials. If anyone needs help just ask. https://youtu.be/OLyk6JlRV5U

I'll show you step-by-step how to make your own fully functional character
making 3D characters since 2014 I love creating characters
I make fully functional characters for Unity program that includes
VRM models vtuber models vrchat models and film
more than happy to answer any questions you may have vowclarity@gmail.com
https://youtube.com/pla...

 obsidian nova
azure sluice
obsidian nova
azure sluice
So cute!!!
 lean latch
I Made My First Reference Sheet If Anyone Wants to Model And Rig It!

(This Is An Alien BTW)
mental hazel
is there a way to mirror what i weight paint on the other side? it doesnt do so when i apply the mirror
 trail python
sometimes the mirroring just
doesnt work
your model is so simple you couldve gotten done with rigging it in the time between your last message about symmetry
mental hazel
darn
mental hazel
should the first bone of the finger be like this
 harsh saddle
mental hazel
should the first bone of the finger be like this
harsh saddle
mental hazel
should the first bone of the finger be like this
No, it should only go up to the first joint, the second to the second joint, the third to the third.
And you want to minimize any weights bleeding over to other fingers while ensuring you get enough of the base of the finger.
mental hazel
when i decrease it, it just deletes a part of it.
i want it so i can just erase any extra
mental hazel
like
it snaps to edges and paints on them
when i want it so i can just draw on the hand
harsh saddle
mental hazel
like
it snaps to edges and paints on them
when i want it so i can just draw on t...
Weights can only act on vertices so you're just painting the weights on the vertices and then it's interpolating between vertices so if you have a big flat plane with just 4 vertices, you're only going to be able to weight the edges, not the space in between.

 harsh saddle
mental hazel
how do i add 2 edges to one
like this
harsh saddle
mental hazel
how do i add 2 edges to one
like this
You can bevel the edge but it won't work quite like that. You could do it with the knife tool but that will create ngons which might not shade nicely.
quaint jasper
mental hazel
is there a way to mirror what i weight paint on the other side? it doesnt do so ...
Your weights will be mirrored with the modifier if your bones are named correctly, with .L or .R at the end of their name
harsh saddle
There's also edge loops but they don't work with tris like you have going up to the thumb and will give you an edge loop going around the entire finger.
Oh, I guess that is a quad with one tiny side so an edge loop might work there but you ideally want your faces to be as close to squares as possible for subdivision and to make things like edge loops produce clean results.
mental hazel
i mean how do i make the knuckles like this
 harsh saddle
mental hazel
i mean how do i make the knuckles like this
harsh saddle
mental hazel
i mean how do i make the knuckles like this
Add edge loops and then I think you adjust the factor in the pop-up box when you make the loop cut to adjust its position.
mental hazel
ive done it, now each finger looks like this

but when i rotate it it looks like this
 harsh saddle
mental hazel
ive done it, now each finger looks like this
harsh saddle
mental hazel
ive done it, now each finger looks like this
It seems like some faces are just not getting weighted, you might want to average/blur the weights of your edges a bit.

 quaint jasper
That means those vertices are painted to something else
Most likely the hand bone or another finger
mental hazel
its the hand bone
spiral sigil
Always good to turn off auto normalize if you are doing the first weight paints.
Blender can make some wild decisions about what to normalize with
mental hazel
if i do it like this itll only move the palm
 spiral sigil
Yeah, it's weighted to some other bone too. You can look at the list of vertex groups and look through them all real quick to see what it is.
The finger bones are parented to the hand right
mental hazel
yes
that image is the weight paint for the hand bone
it isnt painted anywhere else
but when i rotate the hand bone it looks like this
but if i weight the fingers they'll bend weird
 spiral sigil
Other thought, you have mirroring turned on, but the option to mirror vertex groups is selected, correct?
Otherwise, it will mirror the same group to both sides
If you move the other hand, does the opposite one move
mental hazel
no
mental hazel
spiral sigil
If you move the other hand, does the opposite one move
it doesnt
spiral sigil
Yeah, no clue just looking at the pictures what's going on
I'll defer to other that may have thoughts
quaint jasper
Then it might not be the hand bone
You can select vertices in edit mode and open the "View" side panel to see which vertex groups they're part of
 spiral sigil
No matter how long you have been learning Blender, there is always something to learn
mental hazel
everything seems in check
what i want to know is how do i make it so the whole hand moves when i move the hand bone
instead of when i move the hand bone only the palm moves
however when i paint the whole hand for the hand bone
when i paint the fingers they bend slower than the actual bone
quaint jasper
mental hazel
everything seems in check
what i want to know is how do i make it so the whole h...
The whole hand will move when every finger bone is weight painted
if the fingers move slower than the bone, then it means the mesh is weight painted to something else
mental hazel
he is now rigged

 spring onyx
I'm wanting to retopologize my sculpted base, I was wondering how many vertices should a limb loop be?
glad bronze
spring onyx
I'm wanting to retopologize my sculpted base, I was wondering how many vertices ...
I would just recommend finding a model you like with a similar style and poly count and count how many they have.
or give more details about what type of model you are making like high / low poly, subdiv or not, etc.
azure rain
spring onyx
I'm wanting to retopologize my sculpted base, I was wondering how many vertices ...
it helps if the loops are dividable by 4
lean latch
I Did This Reference All By Myself Today!

If anyone wants to model it and make it into a vrc avatar
I will give them full permission to do edits and sell it!
quaint jasper
lean latch
If anyone wants to model it and make it into a vrc avatar
Have you tried making yourself?
spring onyx
azure rain
it helps if the loops are dividable by 4
I'm curious, why exactly is it better if it's divisible by 4?
azure rain
easier to subdivide things
like if you need some more Loops at the wrist to start to build the hands
 lean latch
quaint jasper
Have you tried making yourself?
lean latch
quaint jasper
Have you tried making yourself?
I make avatars but not models
This is my first reference sheet
spring onyx
azure rain
https://topologyguides.com/assets/img/163679954765_0.png
Ohhhh I've seen this diagram before okay 👍
azure rain
also makes it easier if you're using like the mirror modifier
glad bronze
I only make my loops prime numbers
spiral sigil
azure rain
https://topologyguides.com/assets/img/163679954765_0.png
This isn't a terribly good guide, the 4-1 has a 5 vertex n-gon in it, and the 2-1 has a tri.
2-1 has to redirect loops.
 azure rain
spiral sigil
This isn't a terribly good guide, the 4-1 has a 5 vertex n-gon in it, and the 2-...
azure rain
spiral sigil
This isn't a terribly good guide, the 4-1 has a 5 vertex n-gon in it, and the 2-...
subdivision modifiers aren't used for vrchat avatars for the final topology so what's the problem with the triangles?
azure rain
 spiral sigil
Better
harsh saddle
Pretty sure some people subdivide after retopo.
spiral sigil
Good topology will give you much less of a headache later when you decide to add a loop cut here or there and don't want it to snake around the whole model like a zoomer who hasn't had their adhd meds refilled in a while 🤣
On the previous 5 to 3, having the collapsing edge connected towards the outside will make loops along the outside to make a U whereas on the 5 to 3 I posted, the outside edges will flow top to bottom, unless you cut along the 2nd and 4th loop on the top, then it will U.
It's all really a matter of what you are trying to do though
solar fossil
Meanwhile, me an intellectual that doesn't change loop count through the whole model

spiral sigil
It should be relatively rare
harsh saddle
I think it depends on the art style. Especially if you want to keep the model within quest limitations and you aren't using a simple anime or cartoon aesthetic, I find there's often a need to trim down the number of loops from the face to the back of the head and going down to the body.
azure rain
like there's probably no need of the back of the head as an example to have the same number of Loops as the front?
quaint jasper
Ngons are also irrelevant since they get triangulated anyway
harsh saddle
azure rain
like there's probably no need of the back of the head as an example to have the ...
Yeah, I start eliminating loops as soon as I can once I get past the face since all the head needs to be is vaguely round, particularly if there is hair.
Ngons are fine once exported, they just aren't great to work with during the modeling process and the automatic triangulation sometimes doesn't look as good as triangulating quads or importing tris directly so shading can be questionable. I tend to only export ngons if its flat geometry.
 tough plover
the triangulation can happen differently based on the engine. it can also make normals go in different directions, which can cause shading issues with or without normal maps. there are some exceptions, for example if you have a perfectly flat ngon with marked sharp edges around it, or if you're doing subdivision, in which case the ngon will turn into many quads, the amount of which depends on the amount of sides the ngon had.
quaint jasper
Triangulate modifier 
harsh saddle
Triangulate modifier -> apply -> Alt + J -> instant quad remesher they don't want you to know about.
quaint jasper
I personally just had the triangulate modifier on my model so that when exporting from Blender, I had a consistent Blender > Substance > Unity pipeline with consistent triangulation
 maiden rose
need some help with something
so i'm making this avatar
it's a slime creature
looks like this

in order to make the arms i made 2 smaller meshes under the surface of the body that were deformed by the wrist bone
later i applied the armature and set that to the default pose because i thought it would be better that way
now i have just realised this causes issues with the rigging and am undoing this
BUT, between applying the armature and undoing this, i had figured out how to use data transfer modifier to smooth the normals between arm and body when extended
but i'm not sure how to do that now that the arm meshes are flattened
because in edit mode in blender it just resets to being flat because that's the undeformed mesh (as it should be)
quaint jasper
You can't really do that on a skinned mesh that will deform as far as I know
maiden rose
quaint jasper
You can't really do that on a skinned mesh that will deform as far as I know
i know i can't do it dynamically but i don't need it to be dynamic
i just want to get the same normals i had with the armature-applied and then data-transferred arms on the armature unapplied "arm" flat mesh things
quaint jasper
But your mesh is skinned, so that effect will immediately get broken as soon as you move your arms
maiden rose
i guess that's true
i'll try to just improve the weight painting and subdivision so it actually merges smoothly then
quaint jasper
Yeah, if you weight paint the vertices that overlap the same way, then there should be no visual distinction
 glossy bobcat
do anyone know how to import a mod model into blender?
 safe marsh
glossy bobcat
do anyone know how to import a mod model into blender?
safe marsh
glossy bobcat
do anyone know how to import a mod model into blender?
You need to explain more than that.
glossy bobcat
safe marsh
You need to explain more than that.
Well i hav this model that is meant to be in the spiderman game but i want it in vrchat
safe marsh
What spiderman game, what file format?
Not every game is the same and especially with mods it might not even be possible depending on what file format it is
glossy bobcat
Oh spiderman ps4 but 4 pc
safe marsh
Yeah sorry I don't know anything about getting those models I know there are some PS4 spiderman models on deviantart but that's about it
glossy bobcat
Ah thats Ok 🙂
quaint jasper
That still doesn't tell us about the format
 manic hatch
Trying to use Substance painter, but it apparently doesn't like mirroed UVs, which I needed to save space for textures by making things symetrical, and mirrored so Normal maps would display properly, but I can't get substance painter to use them, so I can't paint on my model and view how it'd look on the mirrored half. Is there a way to get it mirrored?
 solar fossil
You can move the overlapping uv islands one tile over, that way substance won't try to paint on them but it will still look/work normal
manic hatch
solar fossil
You can move the overlapping uv islands one tile over, that way substance won't ...
you can move UVs while in Substance painter? I know I already have UVs a whole tile over, technically off the screen, but that's part of the mirroring aspect I mentioned
I'm still new to Substance painter, and it's rather confusing.
solar fossil
You would move them in blender, but if you already have them like that it should work, that's kinda weird 
 weak forge
one walk cycle down ... 4 more to go (neutral fast left right back) and then another 5 (all directions id mode) jumping in both and 5 for id flight
 nimble condor
So I've been trying to solve this issue for quite some time and I even tried looking up why it's happening and how to fix it and didn't find any answer to my specific issue, I'm still learning what I can with blender and unity so I'm still not savvy with 3D modeling lol.
I exported the avatar I have been working with to an fbx file from unity, I imported it into blender and the bones and such are showing up smaller and the model is bigger and rotated improperly!
Was it the way I exported it from unity? Is there a way to easily snap everything in place? aaaaaaaaa
quaint jasper
What do you mean you exported from Unity ?
nimble condor
I exported the avatar I was working with unity to an fbx file
quaint jasper
Was it not an fbx file before ?
nimble condor
Yeah, and then I put on addidional items from other sources to the model and exported everything together as an fbx
manic hatch
solar fossil
You would move them in blender, but if you already have them like that it should...
because I can't get the texture to do a mirror tiling
 inner rampart
I'm creating a mesh for the first time in blender, and I'm not sure what is going on here

its keeping subdivision from working unfortunately

these are panes, but they are transparent ???

 static vapor
inner rampart
these are panes, but they are transparent ???
static vapor
inner rampart
these are panes, but they are transparent ???
face
i dont rember the exact way to do it
but there is a function in blender to makes or planes forward facing
the panel is backwards
inner rampart
static vapor
face
I'm getting there I think
these faces are the wrong way lol
 inner rampart
static vapor
yep
inner rampart
static vapor
yep
do you know if there is an easy way to flip the panes?
inner rampart
static vapor
which blender u using?
3.3.1
this is my first original blender model
I did the donut tutorial like 2 years ago lol

 static vapor
yeah that one
inner rampart
blender is weird
like where did this come from /s

 lean niche
When uploading a avatar that is both pc and quest compatible should there be 2 versions of the avatar? if so how do i upload the avatar?
inner rampart
lean niche
When uploading a avatar that is both pc and quest compatible should there be 2 v...
there is a great tool for conversion
you can make an avatar for pc and have this tool convert it to quest with a few clicks
here is the unity package download link: https://github.com/kurotu/VRCQuestTools/releases/tag/v1.12.1

GitHub
What's Changed
Fixed
Fixed import error of NewtonSoft Json.
変更点
修正
NewtonSoft Json のインポートエラーを修正
inner rampart
lean niche
When uploading a avatar that is both pc and quest compatible should there be 2 v...
its all done in unity
to upload you will need the vrchatsdk package you can find on the official page
there are instructions here https://creators.vrchat.com/sdk/
Requirements & Downloads
glad bronze
inner rampart
I'm creating a mesh for the first time in blender, and I'm not sure what is goin...
shift+n
 lilac escarp
anyone know why this 1 set of bones isnt a outline like the rest of them afaik all the settings are the same
 lilac escarp
anyone know why this 1 set of bones isnt a outline like the rest of them afaik a...
lilac escarp
lilac escarp
anyone know why this 1 set of bones isnt a outline like the rest of them afaik a...
(different mode so its easier to see)
 spiral sigil
lilac escarp
(different mode so its easier to see)
spiral sigil
lilac escarp
(different mode so its easier to see)
In the object property of your armature, you can change the Viewport Display to Wire. That said, you may want to merge that hairs armature with the other armature rather than keeping it separated. Also (not related to the question) but this is number of bones is insane.
 tough plover
inner rampart
blender is weird
like where did this come from /s
tough plover
inner rampart
blender is weird
like where did this come from /s
you probably shouldn't be subdividing that if it's going to be a VRC avatar
it's going to end up really high poly for no reason
you can still subdivide to make getting the shape and topo right more easily, but you should dissolve a lot of geometry beforehand
manic hatch
static vapor
face
Flip Normals
manic hatch
looking up, I see others also more or less said the same. but yeah, looks like normals are flipped. There's another way to check normals too. one moment.
quaint jasper
Display mode > Face orientation
manic hatch
inner rampart
tough plover
you probably shouldn't be subdividing that if it's going to be a VRC avatar
Gotcha
I'll play around with it
 timber bay
i have a question how do fill this
without creating more then one new face

this horrible i dont want that
 quaint jasper
timber bay
this horrible i dont want that
quaint jasper
timber bay
this horrible i dont want that
you need to merge some vertices
weak forge
i love animating in blender i only need to make two more entire systems of movement animations
lilac escarp
back at it again with another problem ʸᵃʸ anyone know why the hair mesh wont move with its armature (weight painted it and parented it but it still wont move) everything else'll move except this one part with the hair
 solar fossil
Make sure you have the armature modifier on the hair
 tidal pawn
I've been a Blender user for some time now but I'm just now learning that Unity doesn't like the way I create materials.
I'm unable to bring Image Texture materials into Unity for my models. Is it really a complex process to translate node based materials under the shading section of Blender into something that Unity can understand?
I'm exporting as a .fbx and importing a new asset from within Unity but the material containing the texture only has the albedo color value and not the texture itself.
solar fossil
You can't use blender node shaders in unity, and fbx files only contain the model and it's material slots and not any shaders, you would need to either find a Unity shader that can do what you want and set it up that way, or make your own using amplify shader editor for example
As for the textures you can save them from blender to a known folder and than import everything into unity, should assign them automatically, if not you can also assign the textures manually
tidal pawn
solar fossil
You can't use blender node shaders in unity, and fbx files only contain the mode...
I'm not doing any shading or anything complex. Maybe I'm just approaching this from the wrong angle.
What is the typical process of exporting the texture for your model for use in Unity? I only use node based shading because it's how I learned to apply textures to meshes tbh 😓
solar fossil
Oh wait, so your texture is generated procedurally using nodes or you have the texture files in like png/jpg/psd format?
tidal pawn
solar fossil
Oh wait, so your texture is generated procedurally using nodes or you have the t...
I'm simply using an image file and modifying the UV coordinates of my model's faces. Old school style texturing using new school methods I would assume.
But what I do is apply an empty material to the mesh, go to Shading, create an "Image Texture" node, then load up the image I want to use, then attach the Color and Alpha channels to a Principled BSDF node.
solar fossil
ok, than you just import the image file that you use in blender into unity
just make a new folder called Textures and drag and drop the image into unity (not necessary to make the folder but things get messy pretty fast otherwise)
tidal pawn
Ah, it's still loading as a white blank material even with the reference texture in the project folder. I'm testing a few other things.
solar fossil
Yeah, that happens, just unity things, but thats normal
weak forge
tidal pawn
I'm not doing any shading or anything complex. Maybe I'm just approaching this f...
put a blank image file on every single one of your materials with the same image attached and bake them
lemme find the tutorial on this

𝗪𝗮𝘁𝗰𝗵 𝘁𝗵𝗲 𝗡𝗲𝘄 𝗨𝗽𝗱𝗮𝘁𝗲𝗱 𝗧𝘂𝘁𝗼𝗿𝗶𝗮𝗹: ➡️ https://youtu.be/B2kFeMBBBjc
In this Blender tutorial, I will show you how to texture bake Procedural Materials.
I forgot to mention in the tutorial: Before baking any texture maps that are not contributing to the base color, (Roughness, Metallic, Normal) You should set the image's color space to Non Color dat...
this is essentially how i make all my textures my uvs tend to be kinda awful
solar fossil
You need to click on your imported model and go to the inspector tab, under materials there is a extract materials button, after you click on that unity will ask you which folder to make the materials in, after its done you can directly edit those materials however you want
 devout olive
Can I still configure my avatar as a humanoid in unity even if it has no thumb bones?
 empty fox
devout olive
Can I still configure my avatar as a humanoid in unity even if it has no thumb b...
empty fox
devout olive
Can I still configure my avatar as a humanoid in unity even if it has no thumb b...
https://creators.vrchat.com/avatars/rig-requirements/#finger-mappings You can skip them, but very much not recommended.
Just better if you put in fake thumb bones, that have nothing weight painted to them.
This page is significantly out of date, but should still be mostly accurate.
devout olive
Noted, thanks!
glad bronze
This part of my high poly (first image) isn't being baked onto my low poly (second image). Also, this problem is fixed whenever I use cage bake but it ends up warping it despite the normals being fine (third image).


Things I have tried, different max ray distances, different extrusion distances, checked for weird geometry, made sure the normals are correct. There are more things I tried but can't remember them off the top of my head.
harsh saddle
glad bronze
This part of my high poly (first image) isn't being baked onto my low poly (seco...
Are the UVs set up properly?
glad bronze
harsh saddle
Are the UVs set up properly?
Yes
I've tried rewrapping it several times as well to be sure
rancid magnet
hey guys, how can i get better at topology?
devout olive
My character has a cartoonishly large nose, will that show up on the first person view in VR and obscure my view?
 azure rain
devout olive
My character has a cartoonishly large nose, will that show up on the first perso...
azure rain
devout olive
My character has a cartoonishly large nose, will that show up on the first perso...
the first person Viewpoint model that renders on your screen has the head completely removed so the nose is not going to get in the way


 solar fossil
glad bronze
Things I have tried, different max ray distances, different extrusion distances,...
solar fossil
glad bronze
Things I have tried, different max ray distances, different extrusion distances,...
Hmm, that's pretty weird, check again to see if the face orientation is right I suppose, if that's not it than maybe triangulate the area, I know blender can warp some textures in weird ways in some cases on quads/ngons.
solar fossil
rancid magnet
hey guys, how can i get better at topology?
Get some reference models with good topo and study them, try to understand why they did it the way the did, how to merge and split loops and make, how they make loop flow for stylized shadows, all that goos stuff
devout olive
I have a hat on my character, is there a way to make that hat bounce up and down when moving with Physbones?
tough plover
glad bronze
This part of my high poly (first image) isn't being baked onto my low poly (seco...
remember that normal maps store the angle of the surface. imagine a ray shooting shooting from the surface of the low poly towards the high poly tangent to the low polys surface, and look at where it hits the high poly. if for every point it hits an area that is flat, you're not going to see anything in your normal map. you're probably going to want to slide the edges of the ridges so that the angled surface is more exposed, if that makes sense
devout olive
Also, is there a way I can scale my avatar to about 3 1/2 ft exactly in Unity?
harsh saddle
devout olive
Also, is there a way I can scale my avatar to about 3 1/2 ft exactly in Unity?
A Unity cube is 1 square meter. Convert that to your desired height and scale your avatar accordingly.
tough plover
devout olive
Also, is there a way I can scale my avatar to about 3 1/2 ft exactly in Unity?
get Pumkin's avatar tools from GitHub, and use the Edit Scale option
it'll give you a slider to change the scale of the avatar, while also adjusting the viewpoint for you
it gives you a height chart too
azure sluice
azure sluice

 devout olive
harsh saddle
A Unity cube is 1 square meter. Convert that to your desired height and scale yo...
devout olive
harsh saddle
A Unity cube is 1 square meter. Convert that to your desired height and scale yo...
So it would be this, right?

 harsh saddle
Yeah, it's pretty close to just a default Unity cube but not quite if you want to be exact. It's probably not a bad idea to pick up Pumkin's avatar tools, not really necessary for this but it's got a bunch of other helpful stuff.
devout olive
Ok, I've finished texturing everything and Weight painting the main body, now what is the best way to attach the clothes to the body?

because there are quite a few ways to do it but I just need something simple that will work in my situation
azure sluice
I'm back again with another commissioned robot!
Here's Lilith.03!
OC by @Ash_Goat
Model by me :)
#VRChat #Robots
 Twitter
·
spiral sigil
devout olive
because there are quite a few ways to do it but I just need something simple tha...
Twitter
·
spiral sigil
devout olive
because there are quite a few ways to do it but I just need something simple tha...
Do a data transfer for the weight paints from the body to the clothes, then fix any mistakes basically.
-Makes sure you have an armature on the clothes already.
-Add a data transfer modifier like is setup here.
-Click "generate data layers" to make the vertex groups on the clothes.
-Apply transfer modifier.

The closer the clothes are to the body, the better it works usually
Usually end up having to fix weights a little bit regardless.
harsh saddle
Once everything is weighted, you can delete any parts of the body completely covered by the clothing, which will minimize clipping. The ideal way to avoid clipping is to just make an airtight mesh where the vertices of the clothing are welded to the vertices of the body and there is no overlapping geometry but that isn't always feasible.
devout olive
How exactly do I import my model and all of my textures to unity?
harsh saddle
devout olive
How exactly do I import my model and all of my textures to unity?
Export the rig and model as an FBX by selecting them both and having "selected objects only" checked in the export options or leave it unchecked to export the whole scene. Materials need to be recreated in Unity so you just create a new standard material and then drag in your textures to the appropriate slots or you can duplicate an existing material and then change up the textures in there.
devout olive
harsh saddle
Once everything is weighted, you can delete any parts of the body completely cov...
How do I properly do this? Because when I do it some parts of the clothing become white for some reason
harsh saddle
devout olive
How do I properly do this? Because when I do it some parts of the clothing becom...
That's why you don't depend on it exporting your materials. Do you know how to make a material in Unity? If not, you can just duplicate one and add in your own textures, just copy and paste.
devout olive
In Unity? This is happening in Blender
harsh saddle
devout olive
In Unity? This is happening in Blender
Okay, good to specify those things. You'd have to go into your material in Blender to inspect that. Are you perhaps doing some texture painting and not saving the result?
In any case, it doesn't really matter how it looks in Blender if the ultimate goal is Unity but we can try and resolve that if you like anyway.
 late bluff


 versed mesa
does anyone know hwere i can get a 3d model for this goober?
 harsh saddle
versed mesa
does anyone know hwere i can get a 3d model for this goober?
harsh saddle
versed mesa
does anyone know hwere i can get a 3d model for this goober?
You can google VRC Traders but options will be limited based on your budget. Very limited if that budget is zero. Or you could learn.
versed mesa
idk why but it keeps sayign unable to accept invite
i think my brother got banned from that server and discord ip bans ppl from servers so 😭
 normal geode
versed mesa
does anyone know hwere i can get a 3d model for this goober?
normal geode
versed mesa
does anyone know hwere i can get a 3d model for this goober?
Sketchfab
Use Sketchfab to publish, share and embed interactive 3D files. Discover and download thousands of 3D models from games, cultural heritage, architecture, design and more.
 dark valve
Ello I tried searching in youtube, but only found Gumroad to VRChat, but does anyone have Tutorial or Video on Unity setup and export for models to Gumroad?
OMGness after going very deep into the Youtube Blackhole and around some very not similiar things to the search here we go. . .
https://www.youtube.com/watch?v=hC6F5A5Z5jw

In this video, I show you how to make and export a prefab so that you can otherwise send it to different people or add it to a different avatar.
pale mica
anybody know if there's an easy way to rotate a polygon's fold line? I know I can manually use the knife tool to just draw a line, but that completely breaks my ability to work on topology

a large number of polygons are folding the wrong way at the inguinal crease on my character, resulting in the whole hip area looking like a crumpled piece of tinfoil unless I manually redirect these
 dark valve
Blender Edit mode - Edge - Edge Crease
quaint jasper
pale mica
a large number of polygons are folding the wrong way at the inguinal crease on m...
Tris to quads > Make your own edges or try the Triangulate modifier
pale mica
dark valve
Blender Edit mode - Edge - Edge Crease
wasn't right but it did lead me in the correct direction- turns out it's face > face data > Flip Quad Tessellation
its wording is correct but complete rubbish when you don't know what you're looking for

and yeah tris to quads will undo all my cutting but I'll probably go back and manually dissolve so I can inspect and do the flips where I needed them before
mental hazel
is there a way to transform edges into faces?
or how do i make it so theres a border around this building?
 quaint jasper
Ctrl + B you mean ?
quaint jasper
mental hazel
is there a way to transform edges into faces?
or how do i make it so theres a b...
That won't work on flat surfaces though, it's meant for edges specifically
mental hazel
quaint jasper
Ctrl + B you mean ?
no, like a border around each side
quaint jasper
Yeah that's called beveling
mental hazel
like this but without the sections inside
 quaint jasper
Oh, that's not the kind of corner I was thinking of at all
I don't think there is a way to do that automatically
mental hazel
i try to but it only does the faces
i want it so its here and not like the clock tower
 tough plover
mental hazel
i want it so its here and not like the clock tower
tough plover
mental hazel
i want it so its here and not like the clock tower
you can make a vertex group to mask only the areas you want affect by the wireframe modifier
mental hazel
tough plover
you can make a vertex group to mask only the areas you want affect by the wirefr...
not working
i assign the edges to a vertex group
then i add the wireframe modifier
change the vertex group in the modifier
and move the values of the wireframe
nothing
mental hazel
nothing
 past drum
so im trying to attach my clothes to my armature? i cannot remember how to
harsh saddle
past drum
so im trying to attach my clothes to my armature? i cannot remember how to
Did you weight the body to the armature? It's the same process.
Though you might want to start by transferring over those existing weights.
 dense lodge
mental hazel
i want it so its here and not like the clock tower
dense lodge
mental hazel
i want it so its here and not like the clock tower
You can duplicate the object and dissolve all the edges you don't want effected then use the wireframe on that.
 rough turtle
I've bee modeling this revolver for a day now, i've got it rigged, and the shape of it done, however It feels blocky... I have no idea where to do from here

any tips, advice, and critiques welcome
timber bay
Maybe the side plate in the front needs more details
rough turtle
timber bay
Maybe the side plate in the front needs more details
What's a detail that a magic luck based revolver have on it?
 steep vortex
Hello! Can anyone give me some advice with making hair from scratch in Blender?
I've been working on my avatar omw so far and I ended up at this huge hiccup where I got 0 clue what I'm doing and feels like it a huge mess..
This is what I got so far. (Also I got 0 clue how to do twin tails)
Please dm me if you have any advice or comment so that I may improve my model.


 timber bay
rough turtle
What's a detail that a magic luck based revolver have on it?
timber bay
rough turtle
What's a detail that a magic luck based revolver have on it?
arcanestuff, dice that show pentagrams instead of numbers, norse runes like the bluetooth symbol etc; gemstones; it only feel blocky because you dont have texture on it and didnt fill in details ;D
rough turtle
timber bay
arcanestuff, dice that show pentagrams instead of numbers, norse runes like the ...
LIfe saver thx for the idea!
 rapid jasper
So I've got a mesh here with custom normals, but adding a loop cut breaks them
Is there any way to avoid that?

 quaint jasper
rapid jasper
So I've got a mesh here with custom normals, but adding a loop cut breaks them
I...
quaint jasper
rapid jasper
So I've got a mesh here with custom normals, but adding a loop cut breaks them
I...
How are you doing your custom normals ? And what is the wireframe before and after the cut
rapid jasper
I'm using data transfer from a proxy to the mesh.

It wasn't exactly like this, but it's too late now
quaint jasper
Why do you need that additional loop ?
rapid jasper
Because it's a hair strand that gets deformed a lot, and it was severely lacking in polygons
A simple solution would be to apply the data transfer from the proxy again, but I was wondering if it was possible to somehow retain custom normals when adding loop cuts 🤔
quaint jasper
Have you tried adding that loop cut to the original mesh as well ?
 supple lake
I've modeled this character entirely from scratch (well, starting from a rounded cube anyway), over the past 14 months, yes that long but I work 6 days a week so only a few days out of every week in actuality it might be compressed to a few months, but still a LOT of work, mostly because I'm so finicky I want everything perfect... just now I'm about 60% done with the hair. I paused last month after being distracted with the issue I had with Blender 4.0 daily builds not opening on my older Mac, it turns out they dropped support for OpenGL on July 15, 2023. So after setting up with MacPorts, Subversion and Cmake I'm now able to compile daily builds from source, which still won't open so my next thing to do is update to Ventura with OpenCore Legacy Patcher... I think then I'll be able to then run the latest 4.0 alpha, but I'll still need a hardware upgrade within the next 18 - 24 months as Metal support below version 2.2 is non-existent. Anyway Blender 3.6.3 still runs fine so I'll get back to the hair soon and worry about the rest later.
 quaint jasper
What makes you require Blender 4.0 for this model ?
supple lake
quaint jasper
What makes you require Blender 4.0 for this model ?
Nothing really, though I am using geometry nodes for the hair shader, and 4.0 has more advanced geometry nodes features, mostly for more efficiently organizing large node groups I think (like the one I'm using), just that I like to keep up with whatever's happening over at Blender I guess.
rapid jasper
quaint jasper
Have you tried adding that loop cut to the original mesh as well ?
I know it would work fine without the custom normals, I'm just wondering if there's a way to apply some kind of average of the surrounding custom normals when applying a loop cut
quaint jasper
You can always manually tweak the normal orientation of each vertex of the low poly version of the model, and you might end up solving those visual artifacts
rapid jasper
I guess so, although I've always had trouble with the manual controls of normal rotation
rapid jasper
Yeah, could definitely be a thing to improve in future versions of Blender
 coarse tangle
can I post here the problem that I've encountered while making a texture for a world in blender with nodes?
tough plover
supple lake
I've modeled this character entirely from scratch (well, starting from a rounded...
model looks great! I'd be careful about poly count though, did you plan on doing a retopo and baking?
spiral sigil
If you derive the declination of the sun from a plane tangent from the ray between the center of the earth and the sun you can approximately calculate the perfect ratio of decimation
Except use the blender default light source with default config and transforms and for the center of your mesh just duplicate it all and convert it into a point cloud and merge all those vertices to one average position in the Euclidean dimension
mental hazel
how do i remove these edges on this face?
when i dissolve the edges, nothing happens
 spiral sigil
Your computer wants to game end trying to resolve that geometry
Doesn't it just make a solid face if you delete the faces (with the unwanted edges cut into them), and then select all the edges on the inside-around and outside-around perimeter and hit f in mode 3
Select the edges where if you dipped a 2 dimensional wireframe representation of that wall into a bowl of bubble solution youd have a bubble film representing the face
The edges of those 3 windows but only the edges planar to the rest of the wall
And also at the same time select the (4?)sides of your rectangle wall
inner rampart
when I go into texture draw, I notice some of the mesh is red like this
how can I fix this? what does it mean?

textures are set to white pngs

red mesh ??
 quaint jasper
inner rampart
textures are set to white pngs
quaint jasper
inner rampart
textures are set to white pngs
Are you sure you don't have multiple UVs or another texture somewhere ? That definitely looks like a texture
inner rampart
quaint jasper
Are you sure you don't have multiple UVs or another texture somewhere ? That def...
I just started the texturing process, and yeah, I agree
the body has just one material
I haven't got to uv mapping it yet
 quaint jasper
I would suggest going into the Blender File section of the hierarchy and manually deleting any other image that exists there if there are any
 inner rampart
there aren't any images, I checked
quaint jasper

inner rampart
thats quite the uv map

maybe the red shading applies to the data outside of the texture
yeah, it seems to have gone away
quaint jasper

spiral sigil
Damn why crucify your guy
inner rampart
spiral sigil
Damn why crucify your guy
💀 blame blender
the happy neurons are active

I'm proud of it considering its my first model
 hushed gyro
inner rampart
the happy neurons are active
hushed gyro
inner rampart
the happy neurons are active
You should be, unwrapping is an art and it looks really well done.
quaint jasper
inner rampart
the happy neurons are active
Is your texturing going to be asymmetrical ?
tough plover
inner rampart
the happy neurons are active
this is a decent unwrap for ease of texturing, but it is not very efficient and will lead to you needing to use higher resolution textures to get the same level of detail you would get if you had packed the islands more efficiently
azure rain
I guess a question would be is the model going to be a personal model or released as a base as far as does the ease of 2D painting matter
inner rampart
azure rain
I guess a question would be is the model going to be a personal model or release...
It's going to be released as a base yes
inner rampart
quaint jasper
Is your texturing going to be asymmetrical ?
No..
quaint jasper
If not then you're wasting at least half of the UV map bu unwrapping both sides
Oh, just read the comment above, if you're releasing as a base then I guess that's necessary
Could still save a lot of UV space though
azure rain
Yeah there's still probably more efficient layouts that could be packed that are symmetrical
spiral sigil
If it's not symmetrical then whatever u made should be god tier
Soon enough I will make god tier
spiral sigil
Could always include UV maps for both
Especially if it's intended for people to use to build their own stuff, it gives more options.
pale mica
an option I've seen done with ffxiv modding on bodies that originally just have a symmetrical UV unwrap, is just having two material slots, one for the left and one for the right half of the body. Apply the same material to both for symmetry, or split it into two to edit some asymmetry in.
this sucks for editing in substance though, as you can only work in one material at a time and it'll be near impossible to work along the central seam
mental hazel
is there any way in blender i can make borders like this?
the white edges on the corners of the house, i mean.
 harsh saddle
mental hazel
is there any way in blender i can make borders like this?
the white edges on the...
harsh saddle
mental hazel
is there any way in blender i can make borders like this?
the white edges on the...
Just looks like extrusions to me.
supple lake
mental hazel
is there any way in blender i can make borders like this?
the white edges on the...
you can make anything in Blender from the roof tiles to the cedar chips and everything in between.
supple lake
tough plover
model looks great! I'd be careful about poly count though, did you plan on doing...
Thanks! oh it's actually very low poly, I just have subdivide turned on, I modeled it such that I could also use it for animation sequences for my show reel, meaning a lot of toggling back and forth with and without subd to try and make it look good either way, the geometry is very well organized too, a lot of time all around but I think it's worth it in the end.
No retopo, it wasn't a sculpt but modeled from a rounded cube, extrusions, shaping, adding loop cuts, shaping, shaping... yes will be texturing with UVs
rough turtle
I added a bit more details and started on texturing but I don't have much more ideas for texturing could use any advice

 winter iron
rough turtle
I added a bit more details and started on texturing but I don't have much more i...
winter iron
rough turtle
I added a bit more details and started on texturing but I don't have much more i...
Think of how it would be put together
Like paneling and screws
spiral sigil
If you had insight into gun manufacturing and assembly you can design more realistic looking shapes with the gun
Realistic shapes doesn't mean it cannot have any fanatical elements or style but it means it looks less impractical and you can see how the object would do what it's design to do if it was in front of you in real life
harsh saddle
It also depends on what it's actually shooting. Revolvers have certain forms and parts necessary for their structure but the structure of a laser gun is much more up to interpretation which is more how I would interpret this gun. You just need to make sure the "bullets" and and other sound effects/muzzle particles fit the aesthetic.
spiral sigil
Back in my day I remember when blender 2.8 came out
solar fossil
Make it shoot square bullets 
 shrewd crane
This may be more than I manage but I guess I need a challenge. I'd like to import an avatar (ready player me for example) into my world. Not to act as an avatar but rather as just another decoration in the world. I've tried but the avatar stands in a t-pose. So is this something I should edit in Blender perhaps? Adjust the pose there and then import? Should it be an .fbx in my Unity project? And can I add an animation to this model that would move the arms or can it be manipulated with UdonSharp?
Any pointers to videos/tutorials would be appreciated as well as general advice.
harsh saddle
shrewd crane
This may be more than I manage but I guess I need a challenge. I'd like to impor...
Posing inside of Unity isn't great but it's doable, you just have to expand the parent object in the hierarchy and there you'll see the mesh and the armature if both were properly exported. If you then expand the armature, you can find all the bones and if you have your transforms set to pivot and local, you can pose the bones like you would in Blender. You can animate them this way inside of Unity or you can make the animations in Blender and they'll be there when you export your FBX. Simple animations can be done in Unity but I'd recommend sticking with Blender for anything complex. You might be able to do some of this directly with Udon but I'm not sure what that would accomplish, I'd just use Udon to set bools for your animator to trigger animations.
rough turtle
spiral sigil
Realistic shapes doesn't mean it cannot have any fanatical elements or style but...
Thank y'all I'll take that into consideration
spiral sigil
Np designing is very hard don't sweat it
spiral sigil
An L-system or Lindenmayer system is a parallel rewriting system and a type of formal grammar. An L-system consists of an alphabet of symbols that can be used to make strings, a collection of production rules that expand each symbol into some larger string of symbols, an initial "axiom" string from which to begin construction, and a mechanism fo...
Anyone who is interested in organic shapes represented with math needs to read this
harsh saddle
I'm interested in people dumbing down complex mathematical systems so people like me can just type in some numbers and hit the run button if that counts.
spiral sigil
lol
I'm interested in understanding it so I can understand on another level how organic shapes are and can be
Because my brain can do math
Bit slow to art
It's still technically learning art it's just that you have a framework of understanding that is something you can write down and share
Whatever is actually actually understood in the brain I'm not quite sure since it seems to be different for a lot of people
 versed kettle
Goku lamp
 spiral sigil
Brrrr
 lofty river
Does anyone know why every time I paint a texture it bleeds to the other side, I don't have mirroring on except for the Z axis so I dont know what the issue is
spiral sigil
WIP Fully from scratch, i m still thinking about name for her. Any ideas?


 spiral sigil
lofty river
Does anyone know why every time I paint a texture it bleeds to the other side, I...
spiral sigil
lofty river
Does anyone know why every time I paint a texture it bleeds to the other side, I...
well it might be a lot of stuff but usually its bc of:
1 islands are on top of each other.
2 it happens when u paint textures on 3d view its better do it on UV viewport.
3 Blender tool for texturing is not that amazing, i recommand use Substance painter. Drawing textures in blender is good when u doing a sketch of your idea.
Blender texturing and substance painter texturing u can compare to paint and photoshop possibilites.
spiral sigil
Vampire Spiderman
 lost panther
Having a weight painting issue where no matter the paint level, it treats it as 100% weight. Any ideas?
lofty river
Anyone got tips on how I can just add like stripes or smth to my model so i can seperate 2 textures?... ( i'm slow and suck at modelling )
tough plover
lofty river
Anyone got tips on how I can just add like stripes or smth to my model so i can ...
can you elaborate a bit?
lofty river
So in between the colours I wanna add a separate kind of strip in between to give more detail, and I'm just not sure how to start out
 tough plover
lofty river
So in between the colours I wanna add a separate kind of strip in between to giv...
tough plover
lofty river
So in between the colours I wanna add a separate kind of strip in between to giv...
are you doing your texturing in blender?
lofty river
Yea, Just as a base though
tough plover
yikes, yea blender is not really well suited for texturing lol. you could use shader nodes and some procedural stuff to make it work, but for any kind of more detailed texturing I recommend something like Substance painter. you can get it for free as a student
there's other free alternatives like Armor paint and Quixel mixer, but the userbase is lower
lofty river
No I don't mean as in a texture, I'm trying to make a seperate mesh that goes over it for more detail
harsh saddle
lofty river
No I don't mean as in a texture, I'm trying to make a seperate mesh that goes ov...
Making another mesh will just add more geometry and create clipping issues so I wouldn't recommend it. Blender isn't ideal for texturing but it's perfectly sufficient for cartoony stuff using stabilize stroke and for more realistic stuff using masks and a pen tablet. It's somewhat more challenging to use layers so there are limitations but it also all of the standard painting tools aside from that (brush size, opacity, falloff, masking, different brush types, etc.)
You can even do layers using mix nodes in your shader, it just takes a bit more work.
 stone olive
lost panther
Having a weight painting issue where no matter the paint level, it treats it as ...
stone olive
lost panther
Having a weight painting issue where no matter the paint level, it treats it as ...
does your body mesh have any weight painting in that area for the chest vertex group?
i would try and replicate whatever the body mesh weight painting looks like
lost panther
stone olive
does your body mesh have any weight painting in that area for the chest vertex g...
It didn't, no but changing that fixed it
weak forge
tough plover
there's other free alternatives like Armor paint and Quixel mixer, but the userb...
armorpaint isnt free
 atomic hamlet
weak forge
armorpaint isnt free
atomic hamlet
weak forge
armorpaint isnt free
It is if you compile it from the source code.
You only have to pay for pre-compiled builds.
weak forge
good point
 azure rain
 jovial seal
most of the vertices on the door itself don't seem to be doing anything?
jovial seal
they will eventually
its an oven
well
will be
im just curious if the handle merges well with the actual mesh itself
 karmic reef
Could someone help me figure out how to make a certain avi I have In mind she’s a wicker beast and I’m lost on where to start 😅

These are the color schemes I want to use
azure rain
karmic reef
you could purchase a wickerbeast base and retexture it https://jinapark.gumroad.com/l/JinsWickerbeast

Gumroad
A Wickerbeast King avatar designed for VRChat.Wickerbeasts are an ancient monster race with a humanoid like appearance, and that at one time shared territories with all other inhabitants of Osova. You can find all info regarding the species on their official website : https://www.wickercave.net/ ./!\ Updated to Physbones system! /!\Features :Uni...
azure rain
jovial seal
im just curious if the handle merges well with the actual mesh itself
yeah that should work okay
karmic reef
Would that just be easier?
azure rain
karmic reef
Would that just be easier?
yes that's considerably easier to retexture a model than to make one from scratch
karmic reef
Thanks I’ll look into it as soon as home
Last question would I put it in blender or Unity to retexture it?
azure rain
you would be using image editing software so just the imaging software and unity would be fine
karmic reef
Okay thank you
tough plover
jovial seal
the handle itself yes, how it connects to door is okay, and the door itself needs some work
in low poly modeling, every vertex should have a purpose
it should affect the shape in some way, or allow for a certain deformation
don't be afraid to have the handle geometry be disconnected from the door
this is totally ok to do


it means the door part is only a single quad
jovial seal
tough plover
the handle itself yes, how it connects to door is okay, and the door itself need...
yeh i wanted it to mesh tho cause i wanted a rounder seam, doors currently high poly because its still being extruded and manipulated for the shape i want
karmic reef
azure rain
yeah that should work okay
Sorry to bother you again if I wanted to add clothing to the model as well can you do that in Unity to or somewhere else?
azure rain
clothing would be more of a blender activity
karmic reef
Okay gotcha that’s all I needed to know thank again
harsh saddle
Yeah, clothing tends to need to be weighted to a rig which is something you do in Blender.
karmic reef
Thanks I’ll update you guys on it soon thanks again for the help
azure rain
ended up 3d modeling a dog bed for myself
 steady zealot
Can't get over how good these turned out.
 tough plover
steady zealot
Can't get over how good these turned out.
tough plover
steady zealot
Can't get over how good these turned out.
looks great, and also looks fairly low poly
steady zealot
tough plover
looks great, and also looks fairly low poly
Thanks! And yep, doing a lot of lower-poly models with heavy use of trimsheet/reusable textures that I made
Bar progress~
 tough plover
steady zealot
Bar progress~
tough plover
steady zealot
Bar progress~
looks great, and I'm sure it'll run great too
although that curved countertop looks a little weird on top
steady zealot
 steady zealot
tough plover
although that curved countertop looks a little weird on top
steady zealot
tough plover
although that curved countertop looks a little weird on top
Weird because the grain of the wood follows the curve?
tough plover
I suppose I just find it odd how a solid piece of wood could be curved like that
steady zealot
True. It is kind of hard to do that IRL, though it is technically possible
but I may straighten out the grain
tough plover
like I understand it for the walls, because the curve is in the same direction as the wood
steady zealot
because it seemed a bit odd to me too
tough plover
but the top of the counter is like, bending it sideways