#3d-modeling
1 messages · Page 8 of 1
 azure rain
 devout orchid
@cunning veldt thats too subdivided, even for pc 70k, watch any tutorial on modelling, like Rainhet
 latent lily
But that zipper is the issue
 harsh saddle
latent lily
But that zipper is the issue
harsh saddle
latent lily
But that zipper is the issue
The weights on that last image could probably be reduced towards the center, that might reduce the texture stretching a bit.
What is your modeling process for this? Are you using subdivide? A model with that little detail shouldn't need to have that much geometry.
latent lily
harsh saddle
The weights on that last image could probably be reduced towards the center, tha...
Just resend the image so i know which one... I am currently running on no sleep and energy drinks.
azure rain
an example of what a low poly version of the tail feathers might look like
 harsh saddle
latent lily
Just resend the image so i know which one... I am currently running on no sleep ...
harsh saddle
latent lily
Just resend the image so i know which one... I am currently running on no sleep ...
Basically any weights that go all the way to the center but mainly this one.
 latent lily
so on both breast.R.001 and breast.L.001, make it lighter on both sides?
harsh saddle
Not the entire weight, just where the stretching occurs.
You've got weights on both sides of the zipper pulling it in opposite directions so that will tend to cause stretch. If they don't share that space and are instead controlling just their side, that should produce a better result.
latent lily
The tear is along the zipper. so lighten up the weight along the Zipper.

 harsh saddle
It's not really a tear if I recall correctly, just the faces getting stretched but yeah, lighten it or remove it entirely, it should just be the chest controlling that part, there is no such thing as strenum jiggle. Well, generally speaking.
A tear would imply it's creating holes in the mesh.
latent lily
It's making a Missing texture as they pull apart.
harsh saddle
If you're missing a texture, that's not a weighting issue, that's a texture issue.
latent lily
It's fine when you stand still, but when you walk forward, the breast pull apart and stretch the area around the zipper.

 harsh saddle
Yeah, like I said, it's stretching the faces. If you had a missing texture, it would be a bright magenta, not the color of the zipper.
If there was tearing, you would either see the background behind the model or the body mesh underneath if those faces were still present.
 cunning veldt
harsh saddle
What is your modeling process for this? Are you using subdivide? A model with th...
cunning veldt
harsh saddle
What is your modeling process for this? Are you using subdivide? A model with th...
I'm still new to this, also I'm not using subdivide?
How do I make it pow poly whole making it still look nice?
harsh saddle
cunning veldt
How do I make it pow poly whole making it still look nice?
Put the detail where it needs to be and not everywhere. Lower poly models just aren't going to be microscopically smooth, you need to make sacrifices. I'm curious how your model looks in edit mode, can you post that?
cunning veldt
I'm not at home at the moment but I will show it once I do get back, give me about 45 minutes
azure rain
also helpful to be looking at your model at a reasonable distance you're going to be seen it not sticking your nose 2 ft away from it so you're not obsessing about little details nobody else is going to notice
harsh saddle
This is how good low poly geometry should look. These are all the faces you need with a couple extra edge loops where the model needs to deform like the elbows and knees and ultimately you'll likely want more geometry for the detail of the face but there's an art to gradually adding more and fewer details to a mesh so you build up complexity only where you need it.

It doesn't need to be quite this basic but you could subdivide this mesh and it would be under 5k tris and look quite smooth.
 cunning veldt
ooh okay, I'll see what more I can do when I get home. I still need to do the arms as well
azure rain
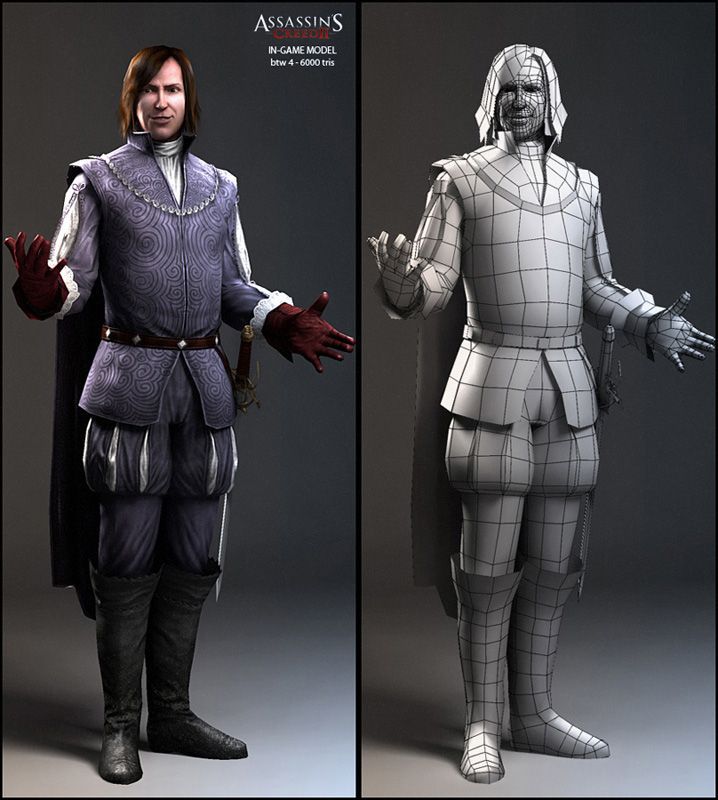

and definitely more games that could work as an examples than just Assassin's Creed these ones were nice because it showed the wire frame and the fully rendered model right next to each other
harsh saddle
Not everyone likes using the sculpt tools and you don't have to but my recommended way to do it, especially for organic forms, is to use primarily the sculpting tools to make a very detailed version of the mesh, then through a process you can look up called retopology, I overlay a simpler mesh on top of it, making sure to only add detail where I need it now that the form is figured out, then there's a process where you can essentially suction the low poly model to the high-poly sculpt and create what's called a normal map to add those details back in. It's a bit of an involved process, it's some people's job just to do one part of that process but it's a common workflow and you can look up any of those steps and find videos about them.
 spice pewter
 harsh saddle
You can also go the anime route and paint on a lot of the detail like those knees.
 uneven quest
I like to think this is turning out well so far.
 latent lily
harsh saddle
If there was tearing, you would either see the background behind the model or th...
latent lily
harsh saddle
If there was tearing, you would either see the background behind the model or th...
So removing the weight paint worked, but I lost all the Phys bone stuff.
is there a way to keep it from FBX to Blender and back to FBX? Or am I going to have to do all the inputs myself.
harsh saddle
I'd think you could take the physbones component from the existing avatar and copy those components to the new one
latent lily
I tried, they didn't match up right
harsh saddle
You might try #avatar-dynamics . I don't usually work with physbones but from working with Dynamic Bone, I think you just specify the root of the chain and the physics settings so if the proper bone is referenced, it should work.
cunning veldt
Its just the leg right now thats getting back into that large triangle territory


 quaint jasper
Yeah that's gonna need retopo
cunning veldt
and how do i do that?
quaint jasper
You do that when the model is done being modelled
harsh saddle
It looks like you are doing this in sculpt mode which is what I like to do but yeah, that's never going to give you a model you'll want to use as an avatar directly.
cunning veldt
ive been using the sculpt mode yeah
harsh saddle
You can just look up Blender retopology on Youtube. There are a number of good videos if you just look at the top results. It's a time-consuming and kind of complicated process if you want to do it very well but it's not that bad if you just have patience and take your time.
As for sculpt mode, don't worry about triangle count at that point so long as your machine can handle it. If it's slowing down, you can use the remesh button in the upper right side of the screen to rein in the geometry a bit but that's still not going to get you an avatar that will work well for animation. It might work in a pinch with a few extra loop cuts but you won't get a great result.
cunning veldt
so just, make the model and worry about remeshing everything after so it works?
harsh saddle
Yup. The more detail, the better in sculpt mode so you can get a high quality normal map out of it. Not every avatar needs a ton of detail but don't hold back in putting in as much as you need. Of course, you'll also need to UV the model to get a good normal map which is related to topology in some ways. Making avatars is kind of a complicated process but it's rewarding.
cunning veldt
okay, i'll keep showing some snippets of what i got so far as i keep going ^^
uneven quest
So I'm gonna be completely candid with you and say that modeling the back hair is one of the hardest things I've done.
 cunning veldt
i just want to figure out how to fix the legs, sense its nothing like the body and head

i used ther boolean to cut it flesh to the torso body, how do i make the rest of the leg look like this exactly?
 azure rain

Learn a full retopology workflow in Blender 3.0+, using only free tools and add-ons shipped with Blender by default.
⇨ Master 3D Sculpting in Blender course: https://bit.ly/b3d-sculpting-course-6
⇨ Project Files + Blender Shortcut PDF (email required): https://bit.ly/cgboost-resources-14
⇨ Blender Secrets E-book (affiliate): https://gumroad.com/...
uneven quest
Update: It's looking a lot better now, but evidently there is still a few things wrong, I won't deny that. What do you think?
 uneven quest
Update: It's looking a lot better now, but evidently there is still a few things...
uneven quest
uneven quest
Update: It's looking a lot better now, but evidently there is still a few things...
there is still a few things wrong.
The lighting(?) here is particularly poor in this regard.

This may just be the fault of the polygon end placement..
uneven quest
Shade Smooth looks pretty good..
 cunning veldt
how do you stop this from happening when you remesh it??

 azure rain
question why you trying to use remesh in the first place?
 trail python
youll end up retopping manually so i wouldn't waste the time
get your shapes, features etc down in the sculpt
azure rain
and given the art style the original artwork I doubt you're going to be doing much normal map baking
cunning veldt
what do you mean?
azure rain
basically the artwork is nothing but solid colors with like no intricate line detail
cunning veldt
yeah, i drew it so it was simple but enough to work with, cuz i know how i want it to look
azure rain
so as an example sculpting in realistic fabric detail wouldn't match the art style?
cunning veldt
no it wont
trail python
toon/flat shaded
azure rain
like the character design looks like it's straight out of HAZBIN HOTEL
cunning veldt
i did draw it! :D yeah, i'm making Octavia from Helluvaboss

just more so in my style
cunning veldt
I cant do this, i cant even fix the stupid hole in the face and the triangle count is too high.
 uneven quest
I'm getting to the separations in the back hair now; wish me luck.
 azure rain
cunning veldt
I cant do this, i cant even fix the stupid hole in the face and the triangle cou...
azure rain
cunning veldt
I cant do this, i cant even fix the stupid hole in the face and the triangle cou...
basically this model is only used for shape reference not the final game model with retopology https://www.youtube.com/watch?v=X2GNyEUvpD4
Learn a full retopology workflow in Blender 3.0+, using only free tools and add-ons shipped with Blender by default.
⇨ Master 3D Sculpting in Blender course: https://bit.ly/b3d-sculpting-course-6
⇨ Project Files + Blender Shortcut PDF (email required): https://bit.ly/cgboost-resources-14
⇨ Blender Secrets E-book (affiliate): https://gumroad.com/...
devout orchid
@azure rainwho tf retopologizes an anime. retopo is usefull when youre going realistic and sculpting.
azure rain
the current topology is unusable
cunning veldt
this is the third time ive restarted, it'll only be the same if i do it again
devout orchid
@cunning veldt just, do it right?
cunning veldt
i cant just do it right!!
devout orchid
by following some lowpoly anime tutorials
azure rain
that would require them to know what good topology looks like instead of just going with sculpting workflow @devout orchid
cunning veldt
i'm still new to this, and my style isnt anime
azure rain
still close enough to anime for those tutorials to be helpful
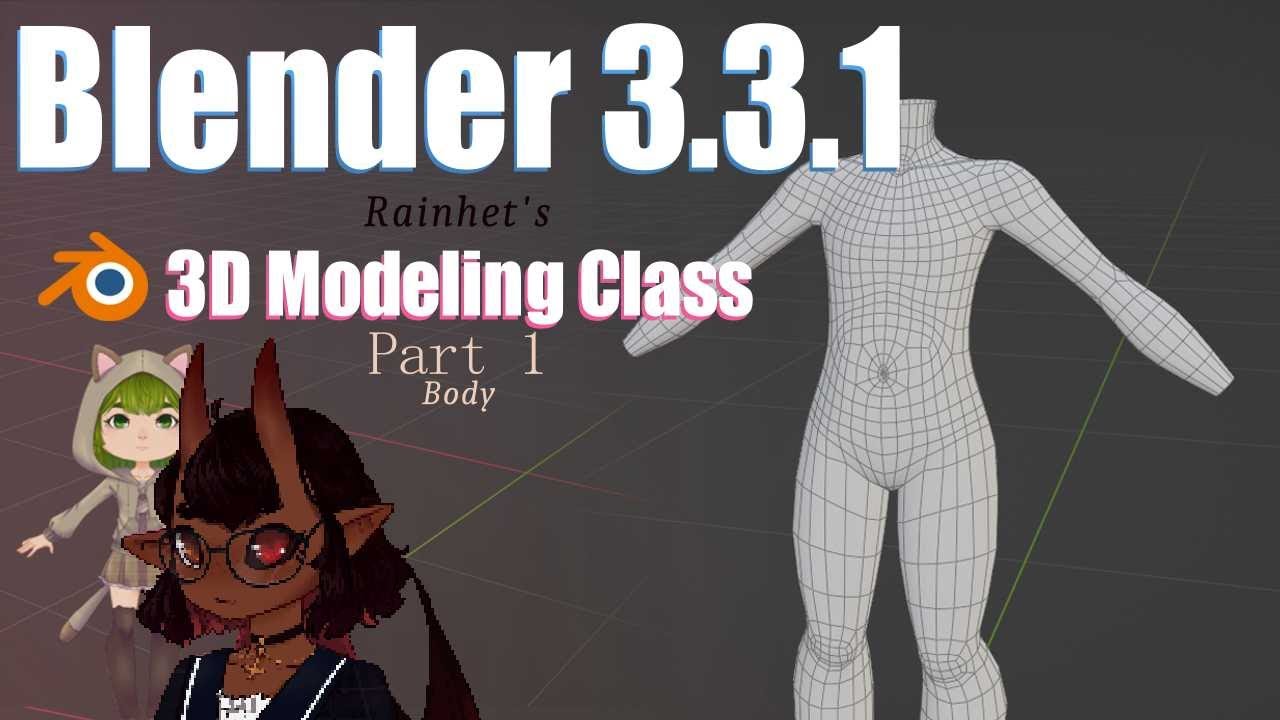
I like starting with the Body these days :)
Timestamps:
0:00 - Intro
0:28 - Animation Intro Sequence
1:00 - Quads Tris and Ngons
1:54 - Setting up the scene and Blender basics
4:05 - How to Add a reference image to Blender
9:20 - How to make the Neck & Torso
23:42 - How to make the Legs
26:34 - How to make simple Chibi feet
32:12 - How to make ...
harsh saddle
I'd still sculpt to have a better idea of the shape of the body I'm trying to achieve but it isn't a requirement and normal maps certainly aren't either.
devout orchid
@azure rain i wouldnt call "going with sculptng workflow" an alternative, i cant imagine myself retopoing shit, thats way too much work and pain. While making anime using best practices is easy and fun. Maybe the problem is in tryng to make a character as a first step, but its not mine, cant relate.
harsh saddle
You could also import an existing model as reference.
I find sculpting enjoyable, a traditional modeling workflow isn't. Granted, retopology isn't fun either but I enjoy the sculpting process up to that point and then I have a really clear idea of how to proceed on the form rather than having to figure that out while having to consider proper edgeflow.
azure rain
devout orchid
<@216145046347448320> i wouldnt call "going with sculptng workflow" an alternati...
then maybe post some tutorials for box modeling then instead of just saying radicalrainbow is bad at it
devout orchid
@azure rain i told them to check rainhet few hours ago
tho my choice is Nhij Quang. But theres not much of coherent explanation going on in his videos
uneven quest
uneven quest
I'm getting to the separations in the back hair now; wish me luck.
So what I want to do here is separate the selected polygons so I can make the separate back hair parts or whatnot

I imagine it's a lot easier than I'm making it sound..
trail python
hit 3
1 is vertex select, 2 is edge select, 3 is face select
then youll hit C to circle select
harsh saddle
uneven quest
So what I want to do here is separate the selected polygons so I can make the se...
You'll ultimately want to join the meshes together but once you have your selection, you can hit P to separate
trail python
P > by selection
azure rain
devout orchid
tho my choice is Nhij Quang. But theres not much of coherent explanation going o...
a non-english-language video series is not going to be helpful for learning why one wants to do the stuff when does when modeling
devout orchid
azure rain
a non-english-language video series is not going to be helpful for learning why ...
thats why i metioned rainhet first. and thats why having some common sense in blender is required when tackling somethin as hard as orginal character. ESPECIALLY if its 20k (10k edited ok 15 in fact, since noones knows how to use safety settings) quest avatar.
but whatever, keep tslking this person about retopoing their spheres, it would work out way better. mind sending me a retopo in 5 min guide as well?
harsh saddle
Medium performance on Quest is below 15k tris so that will show at default settings. Retopology isn't always necessary, it's a choice but I find box modeling without a reference to be more difficult so I would at least import a reference model.
Retopology isn't fast but you get predictable results where you can easily plan our your topology without ending up having to move and stretch your faces.
azure rain
and honestly either way they would have to learn what good topology looks like in the first place
so does it really make that much difference if they're trying to freehand Box model it or use the Spheres as a volume reference?
trail python
no
bc people learn different things to get similar results
i dont disagree that a character model as the first choice isnt the best idea but we start somewhere
devout orchid
retopo is cool and stuff but thats way beyond subdiv in difficulty. especially if youre going for clean anime looks.
trail python
theyre bound to retop anyways
devout orchid
in the bin
trail python
its inevitable if you're making a character model
harsh saddle
I would say it's harder to get things like facial proportions right and then if they're wrong, you have to mesh with your actual topology and then adjust all the surrounding topology to get good edgeflow. With sculpting, if you find the head is too small or the eyes are too big, you don't have to worry about messing up your edges by adjusting that. You can use soft select in edit mode to smooth those things out but I'd much rather use the grab tool and worry about edgeflow once the form is figured out.
If it's simplified to the point where it's just a completely flat face with a small nose protrusion, it's probably fine but if you want detailed lips or contouring of the face, then I'd struggle with box modeling
You can also just make the head and solder that on to an existing body. There's probably something similar that exists already so why not kitbash?
trail python
sculpting high details first then retoping/normal baking crap is a common workflow, not sure why its sooOOOo bad
devout orchid
@harsh saddle well id like to see your workflow when it comes to visemes because that's what i find cool, moving 2-3 verticies and it moves whole lip, no shitty scuplting, no shitty proportional editing
same eyes, expressions etc
harsh saddle
Detailed lips are going to require more geometry than that so I'm not sure what the alternative is to using the grab tool or proportional editing unless a super simple mouth works for the style you're going for. Or just throw on a facial rig and apply them as shape keys, ez 😌
That's a joke, don't do that. But I don't think using the sculpt tools makes visemes more difficult.
harsh saddle
It's also not an either or sort of thing, sometimes I'll go into Edit mode and if you're box modeling, you might have moments where going into sculpt mode is a better option.
devout orchid
enjoy other 80
harsh saddle
I think a lot of it comes down to how you feel about sculpting. If I could get away with it, I would just make sculptures and never have to go into edit mode but if you don't enjoy that workflow it won't be as appealing. You also don't have to retopology 1 face at a time, you can subdivide a cube and then shrinkwrap it to your sculpt as a starting point and shape from there. I don't tend to do that, I start by creating individual loops but there are many ways to skin a cat.
The more minimalist you want to go, the less you need sculpting. You'd have to be an idiot to retopologize a sculpt to make a Minecraft character.
devout orchid
yeah. so as i see it, sculpt mode is redundant when it comes to 20-70k polys. literally no place for error. only painfull retopo.
 analog frost
When I export my model to FBX, unity seems to delete some faces. I assume this is because of how Unity renders geometry, so is there a way I can fix this from happening?

 azure rain
analog frost
When I export my model to FBX, unity seems to delete some faces. I assume this i...
azure rain
analog frost
When I export my model to FBX, unity seems to delete some faces. I assume this i...
Unity shaders display with backface calling so if you're normals are the wrong way around it's going to not render correctly in unity
harsh saddle
devout orchid
yeah. so as i see it, sculpt mode is redundant when it comes to 20-70k polys. li...
20k tris is not minimalist. If you're careful with how you use it, you can make a fairly realistic human form with 20k tris, especially if you add maps that more or less require sculpting. Have you tried to box model a realistic ear? It's not easy with retopology but it's way harder to do it without any sort of 3D reference with box modeling and 20k tris is enough to be able to get a sculpted ear if you use your geometry well.
analog frost
azure rain
Unity shaders display with backface calling so if you're normals are the wrong w...
is there a way to fix this? or do i need to start my model from scratch with backface culling in mind?
azure rain
analog frost
is there a way to fix this? or do i need to start my model from scratch with bac...

In this quick tip I explain how to avoid having flipped normals on your meshes with backface culling
Follow me on twitter: https://twitter.com/passivestar_
Join our Discord: https://discord.gg/pPHQ5HQ
harsh saddle
If you can get a face like that with that edgeflow using box modeling, you're much better at it than I am and some people are, before sculpting workflows, people did amazing things but it is not easy.
analog frost
thanks for the help
azure rain
analog frost
thanks for the help
glad to be of help
devout orchid
i've never claimed im good at anything. just subdiv is an easy way in and you literally giving an advice of "oh mate juzt retopo your stuff" to a person who clearly even worse at it than i am.
analog frost
was able to open blender, select everything, and press shift + n to calculate normals or something.
 azure rain
hopefully it works better in unity now
analog frost
absolutely!
harsh saddle
devout orchid
i've never claimed im good at anything. just subdiv is an easy way in and you li...
I'm simply suggesting that I consider the best way to get a good result. I find box modeling more difficult beyond very simple models so if their model isn't very simple, I think coming up with a sculpt is a good way to start so they have a solid concept of how the form should be in 3D space that they don't need to worry about messing up if they stretch things out to fix the form. Once you've got that if you want to box model on top of it to conform to that shape that you've sculpted then that's fine. Sculpting is a very fast way of sketching out the model once you get ab it of familiarity with how it works and that's the workflow they were already using. That's the part that I think is essential, go about the actual topology however you like, you're still going to need to have an awareness of edgeflow and topology to make a model that moves well. I'd rather spend another hour, 90 minutes roughing out a shape in sculpt mode them screw up the proprtions using body modeling.
devout orchid
@harsh saddle but, youve seen the reference pics, its very simple, way simpler than typical anime oc, and all of those are a perfect fit for subdiv. so as i said at the very beginning, realistic = sculpt+retopo(+skill), anime shit = subdiv (no skill). ofc i expect for experienced artist to get better result even when making an anime with sculpting/retopo (not necesseraly lookwise but less polys/better flow/spread) but is it worth it? is it realted to the original question and most of us?
harsh saddle
Anime can mean a lot of things. The first image I would say absolutely box model, all of the detail is in the texture and it's primitive shapes that have no complex contouring. Something like the second image on the other hand, I would use a sculpt as a base because you have things like more complex lips, shape to the chin, contouring of the cheeks, all things which are going to be easier to do well in a sculpt. Sculpting is not a fundamentally complex thing, you can do pretty much anything with the grab, snake hook, smooth, and clay tools and it's just a matter of moving your mouse over your model and dragging. You need to have an understanding of form and volume and proportion but if you don't have a grasp of those things, nothing you do is going to look good.
Not sculpting as a basis for a reasonably complex humanoid model because it's another step to me is like not doing a sketch with construction lines and primitive shapes because that's another step. It's a step you take not to add complexity, the most skilled artists don't need to do that sort of planning and can just conjure good form and proportion out of thin air. It's most important for the upper beginner - intermediate modeler that needs to plan things out or they're going to end up with a finished product that is bulky and out of proportion. It might not be for the very beginner that needs to learn about primitives and the fundamental tools but things like those eyelashes and that hair in my opinion would very much benefit from having a sculpted blueprint as a basis.


Box modeling also really benefits from having concept images which that model has for the front but not the side. If you don't have an image to work from, you're really going to be going in blind unless you draw it yourself which requires an entirely different set of skills.
devout orchid
so we went from retopo to 'roughly bash your shit and then use it as a reference if you have none'? i see. i dont want to be one total ass here and youre saying straight facts that make me inspired for future project tho, so much to learn, thanks. hope the second pic represents some good subdiv model, thats wha its for indeed, not great, not terrible. cheers.
uneven quest
This is easily the most difficult texture-related thing I've tried to do thus far: Lining up the stripe in her hair..
 devout orchid
@uneven quest if you dont want the gradinets just select zones, separate them in uv view and move to desired colours
harsh saddle
devout orchid
so we went from retopo to 'roughly bash your shit and then use it as a reference...
Retopology is just that, it's taking a sculpt that looks how you want it to look but has bad topology and using that as a basis for good topology. Retopology will generally start with laying out individual loops but will then start extruding whole edge loops for things like the neck and arms and may start to approach a box modeling workflow but however you get there if you're starting with a sculpt as a basis for your model and building around it, that's retopology and everyone goes about it a bit differently. That second image may have used as a sculpt as a basis and retopologized, it may have started as a sculpt and used a subdivision workflow building off of that or it may have been a pure subdivision workflow. Some people are very good at that and don't need a sculpt, it's just not what I would recommend to a new modeler from what worked for me.
devout orchid
still pain in ass but doable
 next aurora
Hey, I have a question about textures
I want to apply this effect to my avatar as a custom shader that I made

lines across the body with a custom shader that will pulse a custom color
How can I cut a line and assign it a material?
for this I just assigned tris in the face to the material

but obviously where the tris get less dense this becomes an issue

the knife tool completely breaks weights, though I guess it's a last resort
though I feel like I'm definitely going about this incorrectly
devout orchid
@next aurora use texture mask?
devout orchid
uhhh, youre the one who made the shader
next aurora
I'll fully admit I needed a quick and dirty emissive pulsing shader and Used chat gpt to make one, it was quicker to say I made it for simplicity
regardless, I have a shader in mind for the main body of the avatar that I didn't make
even if I was a shader wiz I wouldn't be able to apply this on top of that
devout orchid
use poi, its optimised and very powerfull. writing shaders is fun but if it comes to chatgpt i dont see any reason
next aurora
Chat GPT only made a shader for the lines to use, I'm using cycles cell shader but i might switch to POI im not too set on one yet
the lines need to be a separate shader to have the pulsing effect I presume
trail python
cycles doesnt translate into unity if im understanding you correctly
you could export the uv map, make it thicker in an image editor and then invert it to make an emission map
next aurora
 trail python
and then poi can handle it from there
next aurora
this is unity, using the custom shader
not sure if POI can do that as a mask
I use masks on other parts of the avatar
trail python
oh just that bit
next aurora
yeah
azure rain
next aurora
not sure if POI can do that as a mask
that would be stupid if it couldn't
next aurora
the effect above it can do as a mask?
trail python
yea
next aurora
wait since when what?
azure rain
yes the mask would just tell it where to using the effect
next aurora
So I can assign a texture to do the pulse effect?
devout orchid
@next aurora i never checked but im ready to eat my hat if poi does not support texture mask for emission
next aurora
pulsing emission?
next aurora
holy guacamole
devout orchid
ofc
azure rain

Audio Link Tester: https://github.com/llealloo/vrc-udon-audio-link/releases
Setup Instructions: https://www.vrcarena.com/assets/272c6c2c-d83c-4568-ba14-fd15d2c1ddde
PoiyomiToonShader: https://github.com/poiyomi/PoiyomiToonShader/releases
next aurora
loading it into the project now
trail python
you just need the black and white image, your mask, to tell the shader where you want the emission to be
devout orchid
i mean every single eboy avatar has one, you think they write custom shaders for this?
next aurora
I legit don't know
trail python
and i think youll need a gradient
next aurora
I was going to use a slider to change the color of the whole avatar, including the pulsing lines
trail python
less than 512x512 gradient
next aurora
got it
so it's called audiolink?
Pretty sure Silent's cell shading has it as well
 azure rain
yes it would have the pulse emission in time to music
next aurora
could I do that without music?
azure rain
probably
next aurora
hrm, another issue is since I'll be using a slider to change the colors of the entire avatar....
how would I change all 3 RGB values at once?
devout orchid
poi has hue shift

 lilac escarp
so i tried reassigning a material just for the bow and i selected all the vertices but when i pressed assign it only did half of the bow with some of the texture missing on the other half along with some of the middle. anyone know how i can fix it
 harsh saddle
lilac escarp
so i tried reassigning a material just for the bow and i selected all the vertic...
harsh saddle
lilac escarp
so i tried reassigning a material just for the bow and i selected all the vertic...
You're using an image texture for the bow, how do the UVs of the bow line up with the texture?
lilac escarp
harsh saddle
You're using an image texture for the bow, how do the UVs of the bow line up wit...
its basically a copy of the main head texture so the UVs are lined up the same. the bow one is just gonna be the bow texture instead of the full head

 harsh saddle
lilac escarp
its basically a copy of the main head texture so the UVs are lined up the same. ...
harsh saddle
lilac escarp
its basically a copy of the main head texture so the UVs are lined up the same. ...
Hmm, maybe try selecting the faces in wireframe mode to make sure you're selecting everything and not missing part of it? Is it just a singe UV map?
uneven quest
Super proud of this model!! ❤️
 trail python
hell yeah man lets go
 flint patrol
Oh hey that looks great!
I like it
Not very knowlagable on ppg but it looks pretty good
Low póly pizza head i modeled today


 spiral sigil
I've placed bones onto my meshes but it seems the physbones doesnt work well. The jacket seems to be immobile.
 quaint jasper
spiral sigil
I've placed bones onto my meshes but it seems the physbones doesnt work well. Th...
quaint jasper
spiral sigil
I've placed bones onto my meshes but it seems the physbones doesnt work well. Th...
What does the weight paint look like ?
spiral sigil
I copied the weight paint using data transfer
So all is good as it seems
But the problem still happens afterwards
So honestly, no idea what could be the cause of it.
quaint jasper
Does the mesh move in Unity with those bones ?
spiral sigil
Nope
harsh saddle
You copied the weights of the body over to the jacket? But the body isn't rigged to any physbones, I assume.
spiral sigil
harsh saddle
You copied the weights of the body over to the jacket? But the body isn't rigged...
How can i?
harsh saddle
spiral sigil
How can i?
You go into weight paint, select the appropriate vertex group, and paint the weights https://www.youtube.com/watch?v=4fICQmBEt4Y

I've been meaning to update this video for a very VERY long time. But, we're finally here. Everything you need to know in order to start painting weight layers onto your character!!! Hope it helps :)
Female Body Model Link:
https://www.youtube.com/watch?v=_XfvLpLyulI
If you enjoyed this video, please don't forget to like and subscribe!
You ca...
 tiny quail
I am running into an issue with my twist bone looking pretty bad when I bend my arm. I tried adjusting the weights on relevant bones but they all look pretty bad no matter how I move the weights around. Can someone suggest a fix?


 nova saddle
hey im trying to recreate this fluffy part from an avi on something im modelling, any ideas how it was done because its hard to tell looking at the geometry of it
 harsh saddle
Hard to say for sure the exact workflow but it looks like maybe some basic spikes were modeled and then subdivided. It looks a bit too regular to be sculpted.
 echo ether
So can someone explain to me how to put DDS’s on models in Blender
I have Mehrunesrazor.dds, mehrunesrazor_m.dds, and mehrunesrazor_n.dds
trail python
skyrim is so old your first result on how to edit skyrim models should give you the answer
echo ether
trail python
skyrim is so old your first result on how to edit skyrim models should give you ...
Let me rephrase this.

How do I put those top three things onto a model in blender.
harsh saddle
echo ether
Let me rephrase this.
From what I can find, Unity can work with dds files so just import them and put them in the relevant slots of the object's material
echo ether
harsh saddle
From what I can find, Unity can work with dds files so just import them and put ...
Oh so I don’t need to put them in blender. Noice.
spiral sigil
Nice video https://youtu.be/irWAjPQyYzg

The Absolute Beginner Blender course promo video :https://youtu.be/4hveJFWZMew
The real 3D game character in Blender course promo: https://youtu.be/KxHXbhTW0Ts
All my courses in Artstation: https://www.artstation.com/nikoto/store
All my courses on Udemy: https://www.udemy.com/user/nikolay-naydenov-4/
My Artstation: https://www.artstation.com/n...
Y'know I was just wondering how do you pay your taxes if you make a relatively significant income from commissions
Is each sale taxed too in the same way as a physical good
 left stone
spiral sigil
Nice video https://youtu.be/irWAjPQyYzg
left stone
spiral sigil
Nice video https://youtu.be/irWAjPQyYzg
i need this
LMAO
i suck at blender
 jagged moat
spiral sigil
Y'know I was just wondering how do you pay your taxes if you make a relatively s...
jagged moat
spiral sigil
Y'know I was just wondering how do you pay your taxes if you make a relatively s...
 spiral sigil
 tranquil sierra
What is the best way to do anime hair
tranquil sierra
What is the best way to do anime hair
Have u watched any tutorials yet to see what people do
tranquil sierra
spiral sigil
Have u watched any tutorials yet to see what people do
Yeah but there so many. I'm following this one https://www.youtube.com/watch?v=LU0BFThJIco&t=166s
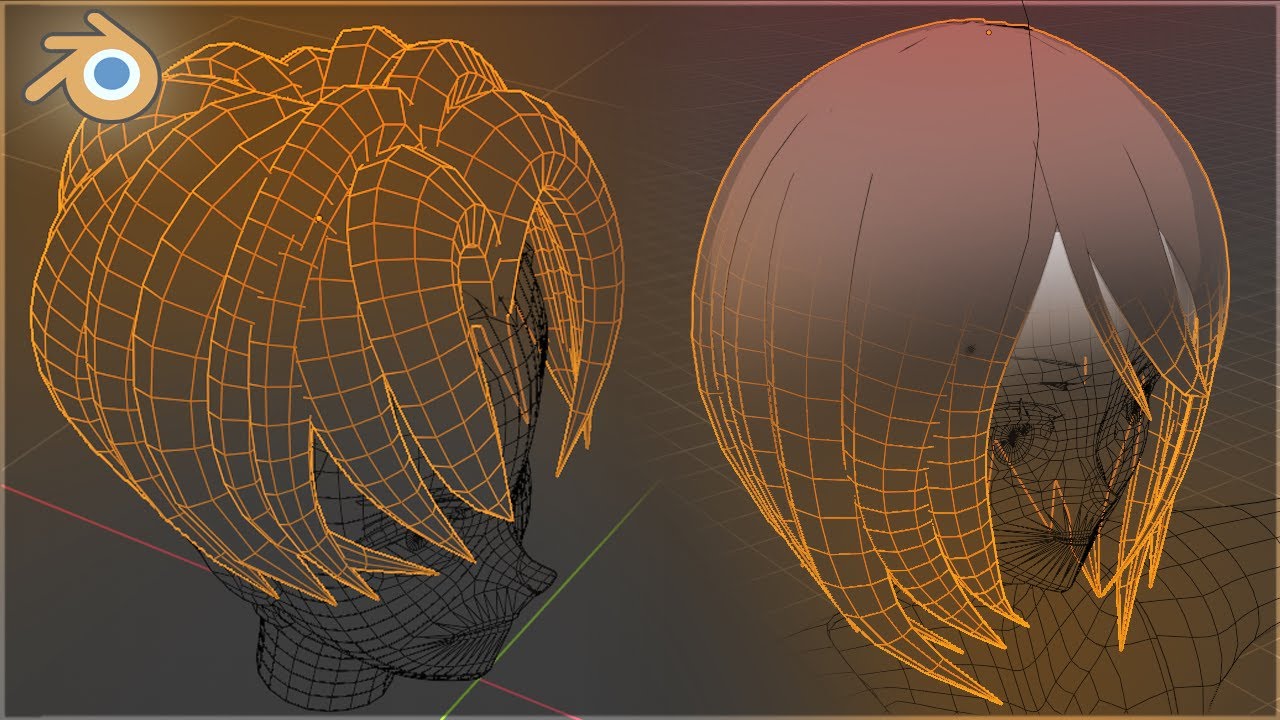
✨ Patreon ($2 for various assets created in my videos, updated regularly, have a look):
https://www.patreon.com/2amgoodnight
Here is my current workflow for creating anime styled eyes in Blender. This is part of a full character creation in Blender, see the playlist for the other parts.
0:15 - Overview
0:30 - Hair Base
2:25 - Hair Strands (Cur...
But I'm not sure if it would work for this
 spiral sigil
tranquil sierra
Yeah but there so many. I'm following this one https://www.youtube.com/watch?v=L...
spiral sigil
tranquil sierra
Yeah but there so many. I'm following this one https://www.youtube.com/watch?v=L...
Best to watch a variety of different methods
Because ideally you don't just copy someone's method forever, you at least always have something you do a little differently because everyone thinks and understands volumes differently
spiral sigil
tranquil sierra
But I'm not sure if it would work for this
That hair looks more like it would be modeled easier from a block shape at first as opposed to individual strands
It will be easier to figure out what is needed if you have more references too
 pseudo knoll
best looking cheese slice I've seen in a long time
 dusty heron
jagged moat
https://tenor.com/view/thats-the-neat-part-you-dont-invincible-gif-27194608
dusty heron
jagged moat
https://tenor.com/view/thats-the-neat-part-you-dont-invincible-gif-27194608
(I’m pretty sure you have to)
(But that’s irrelevant to this channel)
spiral sigil
i think they were incinuating tax evasion
spiral sigil
spiral sigil
Y'know I was just wondering how do you pay your taxes if you make a relatively s...
It’s taxed as self employment in the US. If you make a lot you have to pay taxes quarterly.
Sales tax is for physical goods
Basically just report it as self earned when you file your normal taxes and pay what you owe.
Oh neat
Get that bag 
spiral sigil
spiral sigil
Get that bag <:vrcAevSip:567580842822467585>
I'm getting that bag in notime I'm already a professional


Better at sculpting than me for sure 😆
Sculpting is the answer to everything
I put it off and regret
Don't put it off for any longer :x
I mostly do box/poly modeling, and a little sculpting tools at the end.
How much detail u get into
Not really after high detail, they are stylized genshin/mmd style models mostly.
Used more sculpting on clothes when I do

Still needs textures
Such a floofy little default cube 😆
Oh I see
At that point for this sculpting would be inefficient
If I was better at it, doing high poly sculpts and retopo seems to be what most prefer now.
The benefit to the other way is I feel like I have better control over how optimized it is, and I can throw a multires on it and sculpt surface detail to bake directly.
I'd love to have some formal education on all this
Ive heard dissatisfaction with multires in Blender from experienced artists but I never looked into it or tried it myself
spiral sigil
spiral sigil
I'd love to have some formal education on all this
Yeah I would also like to pay for course material soon
The only benefit to multires is you can bake normals directly from it.
Sub-D is better otherwise
Or if you like the feel of sub-d but without the subdivisions, a smooth modifier set to 1 is the same.
What's smooth modifier
Am I blind or is this new
Under deform
 ashen nacelle
pseudo knoll
best looking cheese slice I've seen in a long time
ashen nacelle
pseudo knoll
best looking cheese slice I've seen in a long time
💚
spiral sigil
Just called "Smooth" and there is also a "Smooth Correct" and "Laplacian smooth" I believe
ashen nacelle
I've been updating him and stuff
spiral sigil
Hjmmmbiidd
If you take off a sub-D modifier and put on a smooth set to 1, and have good topo, you have a basically quest optimized copy 😆
ashen nacelle
Careful with the sub D mod..
spiral sigil
I'm rcklss
Sub-D 4 should be enough
😆
I have been voxel remeshing
Trying many approaches to sculpting
harsh saddle
I feel like the resident sculpting apologist but I think sculpting is useful in 90% of cases if you don't mind spending a bit of extra time doing it. You don't need every last detail in the sculpt but if you're trying to box model without some sort of reference, whether that's a picture or a sculpt, it's going to be a lot more challenging to get the proportions right and for me sculpting is both easier (since I have more experience with it) and more useful than drawing since you're basing a 3D design on something that's already 3D rather than just having a front and maybe a side view and having to imagine how all the other angles should look from that.
Sculpting isn't as scary as it seems, I know there are like 50 sculpting tools but you can get by with 4 or 5 of them for most applications.
 indigo birch
I'm making some Eddsworld models (WIP most of them are done) but having a weird time setting up 2D visemes properly. I'm using planes to just make them move in/out. But I'm liking how they look so far. Here's Edd as an example
 pseudo knoll
indigo birch
I'm making some Eddsworld models (WIP most of them are done) but having a weird ...
pseudo knoll
indigo birch
I'm making some Eddsworld models (WIP most of them are done) but having a weird ...
long live edd, may he rest in peace
spiral sigil
harsh saddle
I feel like the resident sculpting apologist but I think sculpting is useful in ...
I think you are correct that sculpting is better most of the time, but in a few specific cases less so. Also, can't model without at least a front character reference to go off of.
Sculpting is challenging for me because of my own limitations. For the same reason that I can do charcoal drawings and box modeling but can't draw lineart or do sculpting. Aphantasia makes it impossible for me to visualize the end result, so it kind of slowly takes shape over time as I do detail passes.
Having a reference I can work in 1/3 of the time as no reference for modeling and texturing.
Also, hard surface modeling is nice too

Anything with dimensions I can do
harsh saddle
Lots of people work from 2D reference, especially in film and game production where you have 2D artists doing that so it's certainly a valid option but I feel like you can also play with a sculpt and see where it goes. A lot of times, I won't quite know where a sculpt is going but I'll see a line or a form and just develop it and see where it goes. I'll even sometimes sculpt concepts for hard surface models but that isn't really where sculpting shines so I imagine most people don't in that case.
spiral sigil
For me, at some point if I want to keep adding detail, then sculpting becomes a thing, but I couldn't sculpt a nose right now to save my life.
I could probably model one though
More like, I need to add some chips, or roughness, or things like scales
Part of why I love using the multires when I do stuff like that because it won't let me drift too far off base 😆
If there are any good tutorials or something you think might help me with I'd love to expand my horizons
harsh saddle
I could probably draw a decent nose faster than I could sculpt it but once you add in any sort of perspective, it's going to get a lot harder for me. But I also have a background in physical sculpting so it's just something I'm familiar with whereas I was never very good at drawing. I can't really recommend any specific tutorials as I didn't really use any, just lots of practice. I guess my best advice would be turning on dynotopo and doing the majority of your foundational work with the grab tool. You could completely sculpt a nose, nostrils and all with just grab and smooth. Multires is a good tool if you've already got good topology to work from but I prefer to just use dynotopo and worry about topology later. Many years ago I used to use Zbrush and it has a similar system to multires where you build up layers of detail over time but I like the freedom of being able to put as much detail as I want where I want it and letting Blender figure out where to add more geometry.
spiral sigil
Duly noted on all that
I'll probably start practicing with it a bit more at some point, but I have built up a comfy workflow so far.
Definitely don't want to be limited to only doing anime girls forever though 😆
Also, I really admire all those amazing sculpts I see
harsh saddle
I just find it enjoyable. I can just sculpt in Blender with no end goal in mind because I find joy in the process. That won't be true for everyone, part of it comes down to things that you're more experienced with being less stressful but I just find being able to make things without any regard for topology with theoretically infinite detail to be the most artistically satisfying way to work. The only bummer is when you need to fix up the topology to make it usable.
 unreal gyro
can anyone give me a quick general rundown of the recommended export settings (Blender) for exporting an avatar FBX file so its fully compatible and properly set up with Unity?
i think im not ticking quite the right things on/off when exporting, i dont really fully know what the transform scaling options do either...
spiral sigil
unreal gyro
can anyone give me a quick general rundown of the recommended export settings (B...
These are the settings I use, and I make sure to select the armature and all model parts for export.

Apply scaling "FBX Unit Scale" should fix any issues with the armature scaling into Unity.
The actual position I model in with Blender is with Z up and -Y forward, but that's not what Unity likes, so they should be set as such in the export settings to correct that difference between them.
unreal gyro
spiral sigil
These are the settings I use, and I make sure to select the armature and all mod...
thank you thank you! i'll keep this for future reference haha
spiral sigil
unreal gyro
thank you thank you! i'll keep this for future reference haha
I saved it as an operator preset so I had to look at them
I just have it saved as "Unity Export"
Once you have them right, it's easy to never think again about it
 devout olive
Just starting to rig my lil guy

 hushed leaf
ah I always do FBX All. And I tend to turn off leaf bones under Armature there as I don't use them. Interesting to know there's some variation 🙂
 onyx shale
Kappa from Japanese folklore, wip
 dry tendon
My first character model.
Normally I do weapons and props so this was a big leap to see what I can do and I’m very happy with how it turned out.


 quick thunder
onyx shale
Kappa from Japanese folklore, wip
quick thunder
onyx shale
Kappa from Japanese folklore, wip
what a cute dog
 arctic obsidian
new avatar!
 tranquil sierra
is there a way I could make the 2nd pic look like the 1st one?

 trail python
make a back up before just in case it doesn't end up as your result but go into edit mode and hit alt J
tranquil sierra
trail python
make a back up before just in case it doesn't end up as your result but go into ...
 spiral sigil
arctic obsidian
new avatar!
spiral sigil
arctic obsidian
new avatar!
 arctic obsidian
🤣
 misty compass
Can someone plz explain how to make a custom object like a triangle
quaint jasper
You make a plane, select two vertices and merge them at the center 
misty compass
quaint jasper
You make a plane, select two vertices and merge them at the center <:catthumbsup...
Thank you
misty compass
How would I select a vertices
misty compass
quaint jasper
You make a plane, select two vertices and merge them at the center <:catthumbsup...
How would I select one of the vertices
trail python

Blender Tutorial series for 100% absolute beginners, teaching how to use the most common tools. Learn the fundamentals while building a Minecraft and Fantasy Sword project.
Join CG Fast Track PREMIUM MEMBERSHIP: https://www.cgfasttrack.com/subscribe?utm_source=youtube&utm_medium=link&utm_campaign=BFT3&el=BFT3-youtube
FREE Download files: http...
misty compass
trail python
https://www.youtube.com/watch?v=3QAGpxV36wM&
I am using unity, blender tutorials wouldn’t work
trail python
unity is not modeling software
misty compass
Unity 2019.4.31f1 is used to do most VRchat worlds
trail python
yes it is
its the engine
https://www.youtube.com/watch?v=ofzw6hKhI3k&ab_channel=Iconoclass probuilder is rudimentary but that still doesn't change what i said lol
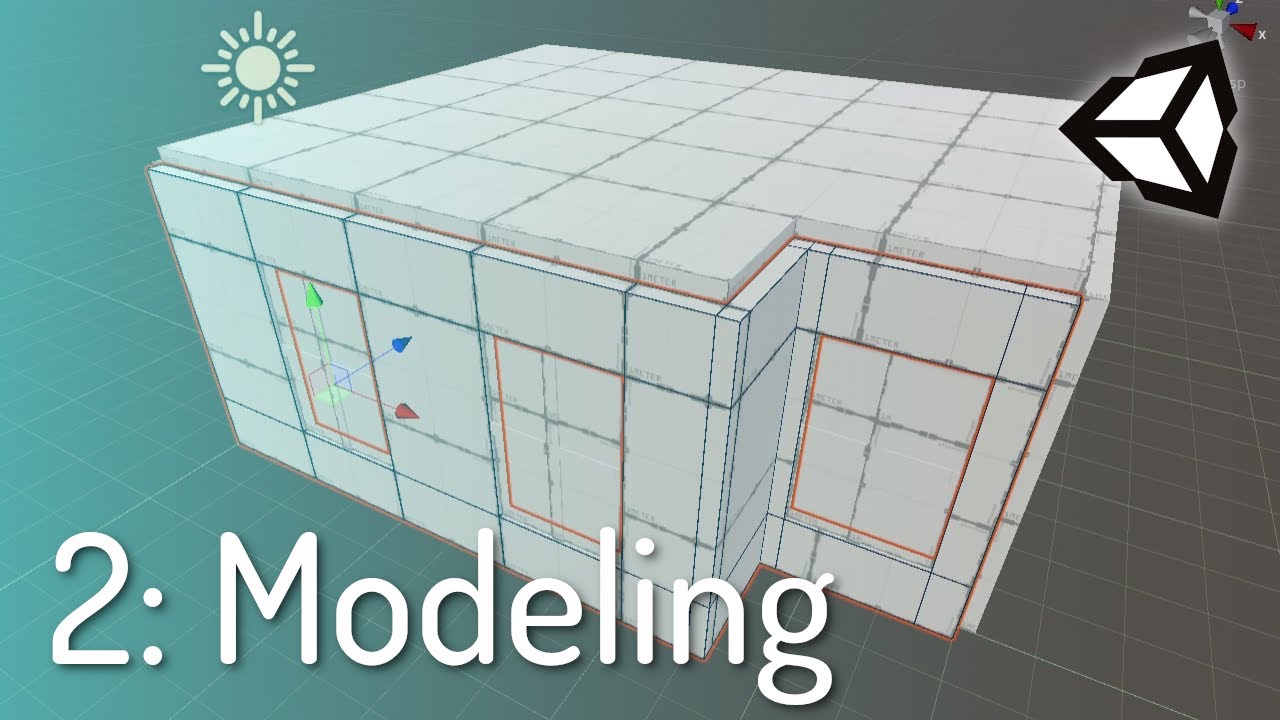
How to install Probuilder - watch the previous video in the series!!!!!!!
To place an edge loop, you have to click an edge PERPENDICULAR to the edge loop you want to create! If you want to create a HORIZONTAL edge loop, then you have to first click a VERTICAL edge!
VRChat Discord - https://discord.com/invite/vrchat
Written Guides - https://vr...
anything complicated needs to b done in modeling software
dry tendon
misty compass
I am using unity, blender tutorials wouldn’t work
Yea I would use blender. It’s almost on par with professional programs.
Technically there’s stuff like Maya and 3DS Max, but unless you plan to do 3D modeling professionally, then it’s not worth the money, and even then, wait to go to college so you can use it for free.
But, as of right now, it doesn’t seem like that’s what you want to do, so blender will be more than fine, it’s a great program
 woven bramble
Hi i have a question does anyone know if i can export my painted textures to be transparent? Like no background? Its kinda annoying when i have to send the image to an art program to magic wand the background
I texture in blender btw
 devout scroll
if you already have a background (black or whatever) you can't just remove it
you can erase alpha which will leave transparency behind but it will also erase what you're painting
what you should do if you really want to paint in blender is set the transparency to 100% when creating a new texture. tick transparency, select color and slide the alpha to 0
or just use the paint bucket with max strength and erase alpha as the blending mode on an empty texture
@woven bramble
woven bramble
Ok ty!!
misty compass
dry tendon
Yea I would use blender. It’s almost on par with professional programs.
Techni...
O ok, i have done blender before but I didn’t think you could make worlds with thank you
 waxen flicker
sorry, i'm verrry new to blender (and i'm not even sure this is the right place to ask), but is there a way to smooth these faces out? i'm trying to make some clothing for my avatar.
 harsh saddle
waxen flicker
sorry, i'm verrry new to blender (and i'm not even sure this is the right place ...
harsh saddle
waxen flicker
sorry, i'm verrry new to blender (and i'm not even sure this is the right place ...
I don't know what the original mesh looks like but it doesn't look like a very clean extraction unless you want something with frayed edges. That could just be the topology of the model but making clothing from the body is easiest when the body itself has clean, smooth topology. The best bet I could think of for smoothing out what you have is to either move the points at the bottom out on the normal axis to smooth out those sharp bits or go into sculpt mode and hold down shift and click to use the smooth tool (or just select the smooth tool)
trail python
the way id do that is by selecting the model, and then ill hit the ~ (tilde) key and go to the right view
then i go into edit mode via tab key, circle select by hitting C and holding my left mouse button to select vertexes
once they're all selected, ill hit S > Z > 0

and it zeros the vertexes on the z axis

does anyone have that super good flow chart of topology on hand by any chance
harsh saddle
Yeah, scaling everything to the same point is a good strategy. You'll still have to do some manual adjustment to refine the form but it's probably a better starting point than what you have.
This is the one I use
 trail python
ohh thats a good one, thanks
quaint jasper
LoopTools also has a relax function
 trail python
saw it for a sec before disc got it lol
funny how it thinks everything from a dog to a bowl of spaghetti is nsfw xd
waxen flicker
ye lol
harsh saddle
The topology is a bit peculiar but I guess it's okay given the placement so long as it doesn't have too many triangles.
spiral sigil
Hmm I wonder how much steps it takes to use blender as a calculator/simulator of volume of irregular shapes
Y'know the whole put something in water and tell how much water it displaced to figure out the volume
spiral sigil
spiral sigil
Hmm I wonder how much steps it takes to use blender as a calculator/simulator of...
3d print toolbox has a utility for calculating the volume of a mesh
Ooh thank you
 hollow iris
I was a bit disappointed about not seeing any mega bracelet models, so I just made my own. Probably could've made it a bit better but it works.


 versed echo
i'm doing a full avatar for the first time and my blend file is almost 2 gigabytes and some things in blender are starting to slow down. i do have a bunch high poly and low poly meshes in there but nothing unreasonable. do people usually split up large projects to multiple files or any other tips to manage this file size?
spiral sigil
versed echo
i'm doing a full avatar for the first time and my blend file is almost 2 gigabyt...
Did you happen to click the button to bake indirect light. If so click the delete lighting cache button.
Or set the cube maps smaller
versed echo
i don't think so. i was googling before and found that suggestion about lighting cache before but let me try to find the delete button again to try
spiral sigil
Baking the lighting cache stores a lot of info to the file
Saves time rendering but costs space
Back at computer so took a picture for those following along 😆
 versed echo
thanks, delete is inactive
 spiral sigil
Other than that, having lots of textures or lots of HDRI environments that you've loaded into the file maybe.
You can click on the dropdown menu next to the outliner and change it from "View Layer" to "Blender File" to see what all is stored inside it.
 versed echo
hmm it probably is the textures
spiral sigil
Especially if you have it set to pack all of them into the blend file, they can add up.
versed echo
ok, there is no reason for them to be saved there if there's an option just to reference them directly from ssd so i'll look in to that
spiral sigil
File > External Data > Automatically Pack Resources...if that's checked, everything is actually saved in the blend file itself not just external to it.
versed echo
i have been doing all the textures in 4k just to be safe since i'll do another round of baking when i atlas a lot of stuff so some of the normal maps are 70 megabytes each and there's a few
spiral sigil
It's great when you are finished and want to send it to someone, because they can unpack the files later.
Yeah, you can unlink and remove some of the old ones and it will reduce that size.
spiral sigil
spiral sigil
You can click on the dropdown menu next to the outliner and change it from "View...
Just right clicking on that and clicking delete on the ones you don't want. It won't delete them from your hard drive if they are saved external.
versed echo
i did just realise that all my blend file backups and substance projects are 60 gigabytes in total
spiral sigil
Fun thing is the day I deleted all of my Blender autosaves and freed around 120 GB of space
versed echo
but hey that's why you have 6 terabytes of ssds
spiral sigil
All of the ones where I baked light cache, the whole thing gets saved as a copy in appdata
versed echo
from 2 gigabytes to 300 megabytes. thanks a lot!
spiral sigil
👍
quaint jasper
Adjust the curve resolution before converting them into meshes, but they're the same right now on your screen as they will be once turned into geometry
spiral sigil
You can adjust the resolution of the path curve and also the bevel object curve too if you find you have too many loops in any one direction, you can adjust them both until you have pretty close to quads and not too small.
Awesome, hope you have a great time finishing up the avi
 sour breach
Is it possible to rig a avatar to have 4 arms but the 2nd set of arms follow the primary arms?
trail python
no you dont need final IK for 4 arms
you use constraints
final IK is more for 4+ legs
devout orchid
@sour breach on pc
 versed echo
 tight quartz
Why does It already collision even tho It's a big gap between them?
tight quartz
Why does It already collision even tho It's a big gap between them?
at least with cloth simulation the default collision distance is way too high so look for a setting like that
 tight quartz
versed echo
at least with cloth simulation the default collision distance is way too high so...
tight quartz
versed echo
at least with cloth simulation the default collision distance is way too high so...
Im using Rigid Body tho, shouldn't do that?
sour breach
devout orchid
<@433646775199596557> on pc
Both quest and PC if possible
devout orchid
@sour breach on pc.
harsh saddle
No constraints on Quest and no final IK so you aren't getting any multi-limb setups that look very good.
 digital hound
do vertex groups have to be assigned to bones or can they be used to easily define vertices say for the mouth to make blendshapes?
harsh saddle
digital hound
do vertex groups have to be assigned to bones or can they be used to easily defi...
No, they can be for whatever you need them for, they'll just be controlled by bones if they're on a model rigged to a bone with the same name.
 thorn gulch
 spiral sigil
Nice
pseudo knoll
a
 ashen forge

A nice render of a model I've been working on for awhile now
Finally got around to finishing it up
spiral sigil
Cuuute
 steady frigate
ashen forge
https://media.discordapp.net/attachments/1061841854196359268/1101062652295380992...
steady frigate
ashen forge
https://media.discordapp.net/attachments/1061841854196359268/1101062652295380992...
The lighting looks really nice! It even doesn't stop it from looking stylised
also the design is very lovely
 toxic nexus
Still WIP, still needs weightpaint, textureatlasing and -editing, majority of blendshapes and some final edits on the scythe hilt


 toxic nexus
oh, it's fully from scratch. aside from the legs (which I did on a sunday), I've streamed my process of doing it over the last 3 weeks, the first 2 of which was only modelling this.

 harsh saddle
I think you might need to have the extra objects add-on added in the preferences to access that which I would recommend unless the newest versions have that included by default. You could also take a plane and cut it along the diagonal.
misty compass
Yes thank you
Hey in blender 3.5 is it possible to add a mirror effect like if I place down a plane on one side it’ll put one on the other side of a one a axis or do I just build one side and mirror it?
trail python
mirror modifier
Blender Tutorial series for 100% absolute beginners, teaching how to use the most common tools. Learn the fundamentals while building a Minecraft and Fantasy Sword project.
Join CG Fast Track PREMIUM MEMBERSHIP: https://www.cgfasttrack.com/subscribe?utm_source=youtube&utm_medium=link&utm_campaign=BFT3&el=BFT3-youtube
FREE Download files: http...
cunning veldt
So I'm making a head and its kind of wacked up now that its mirrored, the shape changed and now 8 have this weird seam I can't fix.
The second image is before I cut it and mirrored it. Does anyone know how to fix the seam? Or would know how to make the first stage symmetrical?

 quaint jasper
cunning veldt
So I'm making a head and its kind of wacked up now that its mirrored, the shape ...
quaint jasper
cunning veldt
So I'm making a head and its kind of wacked up now that its mirrored, the shape ...
Pretty sure that seam is just the hardness of the edge
devout orchid
@cunning veldt uhhh, you tryin to tell us theyre the same? no they re not, theres more verticies on the left
trail python
they're not asking about vertice count lol, they're asking how to make the 1st image look like the second*
but yeah like ruuubick said, looks like the edge
spiral sigil
cunning veldt
So I'm making a head and its kind of wacked up now that its mirrored, the shape ...
It's mirrored, but those verts aren't actually merging. Either turn up the merge distance, or turn on clipping and move those sharp verts along the X axis until they merge. Also, make sure you have mirror before subdivide.
cunning veldt
how do you use the subdivition surface modifier and make it symmetrical?
spiral sigil
cunning veldt
how do you use the subdivition surface modifier and make it symmetrical?
By having the mesh with a mirror modifier first, then putting the sub-d modifier on after that.
You can delete half the mesh then put on the mirror modifier
cunning veldt
oki
spiral sigil
cunning veldt
oki
Make sure you have at least one loop that goes right down the middle though. Like, if you were mirroring a cube, you'd have to cut it in half first, then delete all the verts on one side.
devout orchid
theres usefull builtin but deactivated plugin auto mirror
digital hound
character I made based on videos by pleasentries. just finished rigging and now to add a cursed texture
 cunning veldt
spiral sigil
Make sure you have at least one loop that goes right down the middle though. Lik...
cunning veldt
spiral sigil
Make sure you have at least one loop that goes right down the middle though. Lik...
i did that! Thank you! also how do you change it so you can edit the mesh instead of shaping the outside?
spiral sigil
cunning veldt
i did that! Thank you! also how do you change it so you can edit the mesh instea...
I'm not sure I understand the question, but you can make both halves of the mesh show up in edit mode by clicking this button.

 faint tulip
when uploading a fbx to unity how to i get the phys bones to not freak out
 still wadi
@cunning veldt Mirror has to be first in modifier tab
hushed leaf
faint tulip
when uploading a fbx to unity how to i get the phys bones to not freak out
do you mean they increase in size? Export from Blender with scaling set to FBX ALL
cunning veldt
you see the vertexs? i want to be able to change it so i can cut out the eyes
 spiral sigil
cunning veldt
you see the vertexs? i want to be able to change it so i can cut out the eyes
spiral sigil
cunning veldt
you see the vertexs? i want to be able to change it so i can cut out the eyes
Looks like you are in edit mode, so you should be able to edit it however you like right now.
If you are unsure what to do next, tutorials and familiarity with the basic operations like extrude, rip, bevel, subdivide, inset, and most of the tools available in the Loop tools and Mesh tools addons that are included with Blender help a lot.
cunning veldt
is there a way to add a modifier to something than remove it without having what it did disappear?
spiral sigil
You can apply modifiers which make their effects permanent
But if you leave the modifiers on, they can be turned on and off
Making an avatar is a pretty big project that tests your ability to do a little bit of everything in Blender, so starting out with something basic for some practice and familiarity is good.
cunning veldt
how do you make a modifer's effects permanent?
spiral sigil
There is a little drop down arrow, and if you click it, you will see "apply"
cunning veldt
thank you!
spiral sigil
Happy to help, hope it goes well.
cunning veldt
:D
 woven bramble
anyone know how to use array and curves well to help me get the ruffules right onto the curve? its getting really hard for me so i really dont know why they wont actually stick and follow the curve
 cunning veldt
how do you flip the canvas? i want to flip it so the eyelashes and such are on the otherside instead
 cunning veldt
when i go to use the mesh tool and make it symmetrical it only uses the otherside for some reason so i wanna flip it
nvm
 red glade
 woven bramble
devout orchid
<@907837099905007647> check geometry origin
woven bramble
devout orchid
<@907837099905007647> check geometry origin
Where do you think it should be?
unreal gyro
Is there any way to "draw" or "paint" normal maps onto a texture?
I'd find it difficult to go into Blender, make a high-res duplicate of an object and do precisely what i'd want that way so I'm looking for more drawing-based alternatives to create normal maps.
 atomic hamlet
unreal gyro
Is there any way to "draw" or "paint" normal maps onto a texture?
I'd find it di...
atomic hamlet
unreal gyro
Is there any way to "draw" or "paint" normal maps onto a texture?
I'd find it di...
Blender doesn't have a way of authoring Normal Map's natively AFAIK. What I do is make a 50% grey texture and then punch that into a bump node (you will need to adjust the strength), then you can paint white or black on it for heighten/lowering, then either bake the texture into a normal map.
 clear geyser
unreal gyro
Is there any way to "draw" or "paint" normal maps onto a texture?
I'd find it di...
clear geyser
unreal gyro
Is there any way to "draw" or "paint" normal maps onto a texture?
I'd find it di...
Exactly what Subsonic said. Here's a video on it https://youtu.be/WizT4jakNBs

In this Blender tutorial I will show you how to paint bump maps. 🖌️
● Texture Painting for Beginners: https://youtu.be/6jT4K0JpGNs
● Texture Painting Tutorial Playlist: https://www.youtube.com/playlist?list=PLsGl9GczcgBsVJWWIEWDBhRtDOA1mUF3i
● UV Unwrapping for Beginners: https://youtu.be/qa_1LjeWsJg
● Texture Baking Tutorial Playlist: https://w...
 shrewd pulsar
A little test I’m not done with him

 steady zealot
https://media.discordapp.net/attachments/1101555682827849808/1102727400049086524/Low_Poly_Walkman.gif made a low poly walkman and cassette! Texture is an 8x8 pixel grid with UVs unwrapped into individual pixels for solid colors, and a 4x4 texture for metallic/smoothness. 1x4 for alpha
 shrewd pulsar
Been modeling for two years and this is all I could come up with. I suck. At humans.
 quaint jasper
shrewd pulsar
Been modeling for two years and this is all I could come up with. I suck. At hum...
quaint jasper
shrewd pulsar
Been modeling for two years and this is all I could come up with. I suck. At hum...
W-what have you been making for the past two years ?
 thin shadow
shrewd pulsar
Been modeling for two years and this is all I could come up with. I suck. At hum...
thin shadow
shrewd pulsar
Been modeling for two years and this is all I could come up with. I suck. At hum...
you could have at least ⊞+Shift+S to take better screenshot
 cobalt fractal
Been a while since I made a spider
Hehehe

 latent mirage
spiral sigil
latent mirage
spiral sigil
Cute charater
spiral sigil
latent mirage
Cute charater
Thank you. 2D design and artist is CoffeeCaaaaT on Deviant Art, an I highly recommend them for reference and design sheets.
Will definitely use them in the future for commissioning references.
spiral sigil
shrewd pulsar
Been modeling for two years and this is all I could come up with. I suck. At hum...
I guarantee you dont put the hours in
That's why I dislike people saying they do art for years but over those years they only put an hour or two a day if they even did
And then get frustrated because they expect more
 jagged bronze
does anyone know how i could make something like quickly in blender? like is there some sort of generation plugin that can make this style, or something like that? its just basic cubes and it would be nice to be able to generate something like it quickly

 sturdy oak
Can anyone help me make a blend shape key for my base models thighs in blender please? (I'm semi new to using blender)
 bold oar
has anyone ever used koikatsu/ v-katsu to make vrchat model before?
cause blender is givin me a hard time with the blendshapes n shit
 solar fossil
jagged bronze
does anyone know how i could make something like quickly in blender? like is the...
solar fossil
jagged bronze
does anyone know how i could make something like quickly in blender? like is the...
I think there was a addon called discombobulator or something along the lines, maybe that can help you
solar fossil
shrewd pulsar
Been modeling for two years and this is all I could come up with. I suck. At hum...
Been modelling for like 5y, still suck at it, won't stop me from modelling more shid tho, just need to put even more effort in
thin shadow
i wonder if there's blender setting or workspace setting that can make this top header have warp around or double line instead of scrolling
 quaint jasper
thin shadow
i wonder if there's blender setting or workspace setting that can make this top ...
quaint jasper
thin shadow
i wonder if there's blender setting or workspace setting that can make this top ...
If I were you, I'd disable the tools under the header, and split the window horizontally so that you can display everything for the same vertical space

Might actually be less space
jagged bronze
solar fossil
I think there was a addon called discombobulator or something along the lines, m...
ok thanks
 blazing sandal
Hi, im doing an avatar for a friend. My first time. I’ve been modeling on and off for less than a year. Please reassure me and tell me this isn’t that bad 🥲😂
 spiral sigil
blazing sandal
Hi, im doing an avatar for a friend. My first time. I’ve been modeling on and of...
spiral sigil
blazing sandal
Hi, im doing an avatar for a friend. My first time. I’ve been modeling on and of...
Why expect to be good if your practice is so inconsistent and you don't take much time even when you do practice
blazing sandal
I just wanted advices and reassurance bro, caus its his birthday gift. Come on dont be like that
spiral sigil
blazing sandal
I just wanted advices and reassurance bro, caus its his birthday gift. Come on d...
I'm being honest you should do that with yourself
blazing sandal
U saying im lying to myself ? Huh ?
 glad steeple
blazing sandal
Hi, im doing an avatar for a friend. My first time. I’ve been modeling on and of...
glad steeple
blazing sandal
Hi, im doing an avatar for a friend. My first time. I’ve been modeling on and of...
what is "less than a year" how long have you spent on this?
I dont know your proficiency in modelling but this looks like a few minutes of work, maybe an hour maximum.
Its a great start, i think its important to practice like the other person was saying. Maybe start smaller if its your first time modelling
blazing sandal
glad steeple
what is "less than a year" how long have you spent on this?
I meant ive spent less than a year on blender, the avatar I’ve spent like an hour on when i finished it
glad steeple
what
blazing sandal
Nevermind
solar fossil
blazing sandal
Hi, im doing an avatar for a friend. My first time. I’ve been modeling on and of...
Here, this is like the tutorial when it comes to making humanoid bodies, or at least the one tutorial series I found super helpful when I started modelling.
https://youtu.be/F1CTfis1TEg

This video is the 1st part of 40 in this very detailed tutorial series about modeling. I'll take you through all the steps of anime style character creation in the 3d software called 'Blender' and without any time lapse.
If you haven't watched it already make sure to go through part 0! In that video I'll show you the final result and tell you a...
It's not the same body type but the methods of making it still apply
blazing sandal
Thank you
solar fossil
Also pro tip, use the mirror modifier for as long as you can on pretty much everything, saves you a ton of work
Feel free to ping if you got other questions btw
 jagged hare
I am making a squishy button. I want both the local player and remote players to be able to press the button with any contacts of their body.
I need help with the bone configuration for it. The prop I made is setup like the screenshot below. Questions I have are:
- Do I need a leaf bone at the end of it for the physbones to work?
- Is the bone properly positioned for this prop, or would a different bone placement be better?
- Is it possible to do this with only one bone? Or do the Physbone squishs need to interact with 2 non-zero length bones?

(pls ping for reply 🥺 )
quaint jasper
jagged hare
I am making a squishy button. I want both the local player and remote players to...
For your first and third question since I'm actually not sure (but leaf bones should be generated on export ?):
https://discord.com/channels/189511567539306508/967154358888308786
For your second question, I would suggest snapping the base of that bone at the bottom edge height of the red part itself, otherwise the button will probably sink into the grey part
quaint jasper
jagged hare
it's a squishy button, it's supposed to go down x3
I get that, but you don't want it to go below its bottom line
 mint latch
blazing sandal
Hi, im doing an avatar for a friend. My first time. I’ve been modeling on and of...
mint latch
blazing sandal
Hi, im doing an avatar for a friend. My first time. I’ve been modeling on and of...
try mirroring so it’s not uneven ^
harsh saddle
blazing sandal
Hi, im doing an avatar for a friend. My first time. I’ve been modeling on and of...
I don't generally sculpt like that in chunks but I guess it's an option. The form looks decent from the front. Head might be a bit big unless he's intended to be pretty broad and stocky but we'd need to see how it looks from multiple angles.
flint patrol
Something i've been cooking
 spiral sigil
i wOUUULD turn this into an avatar but my stupid freaking pc stopped working so i made this on my laptop

 dull siren
is there a way to texture for free without aubstance painter on mac?
harsh saddle
dull siren
is there a way to texture for free without aubstance painter on mac?
Reports of it being a replacement for Photoshop may be exaggerated but GIMP works well enough for basic painting. https://www.gimp.org/downloads/

The official download page for all things GIMP! Please only use the official binaries provided here unless you really, really know what you’re doing (it’s the only way to be safe). We try to provide binaries in-time with regular releases, but may occasionally be delayed as the packagers …
dull siren
can i make like weathering and crap?
harsh saddle
dull siren
can i make like weathering and crap?
Weathering can mean a lot of different things depending on the context. Some effects and filters will be different compared to something like Photoshop but there are a lot of tutorials for GIMP out there. You may need some painting ability but many things you might call weathering should be possible just search for relevant tutorials
dull siren
oh ok thanks
 harsh wadi
Lol the little junker (Must learn how to rig and freaking color)

 steady frigate
dull siren
is there a way to texture for free without aubstance painter on mac?
steady frigate
dull siren
is there a way to texture for free without aubstance painter on mac?
Blender has some decent texture painting tools, and together with another photo editing/painting program you can do a lot with it
Also, Blender's material editor gives you lots of options already with regards to procedural texturing, and you can bake that stuff into textures
quaint jasper
Blender's texture painting tools are very rudimentary, you're most likely going to rely on another software for texturing unless you're doing very simple things
spiral sigil
Just git good at handpainting and don't need layers
Nah use layers
Go use 10 year old copy of 3d coat it's better
spiral sigil
spiral sigil
Just git good at handpainting and don't need layers
Layers...
 spiral sigil
Layers...
spiral sigil
spiral sigil
Layers...
 pulsar pelican
I have a feeling this is either gonna be surprisingly easy or incredibly annoying to rig

The basic rig is done I just gotta do the extras 👍
I've always tied the skirts to the leg bones but I wanna try making them physbones instead, I think that'll make it look a little nicer when she's doing sitting animations :)
 hexed wagon
rate
 harsh saddle
Looks like the original has a bit more of a hip taper and I think the arms are a bit rounder. Otherwise, looks about right.
spiral sigil
The bottom is flattened out too quickly
It's reducing its bulbous volume
The face in general isn't high enough as the reference has it on the top hemisphere
Yours is looking straight on the Y axis when the reference is looking up towards a larger being towering over it
The whites of the eyes are a little smaller and don't touch the boundary of the black circle
The sides of your one's mouth aren't going through the curling stroke inward as far
harsh saddle
The actual plush looks like it's tilted back with its arms up but I assumed this was intended for an avatar so it was being modeled in a t pose but yeah, if you want the actual plush then you'd need to adjust that.
azure rain
and it's currently lacking any like material definition to make it look plush
hushed leaf
re: Blender texture painting, there are a few decent add-ons too, ucupaint comes to mind, but there are several
steady frigate
quaint jasper
Blender's texture painting tools are very rudimentary, you're most likely going ...
like I said, together with another program
use Blender to do most of the painting, use a program more geared towards image editing for the rest
quaint jasper
I wouldn't categorize their default tools as "decent" personally, but that's very subjective!
devout orchid
@quaint jasper bring the alternatives.
quaint jasper
There's this tiny barely relevant software called Substance Painter, I heard it's good
devout orchid
@quaint jasper sadly it costs about $50/mo more than im ready to spend on it
and original question was about free tools
quaint jasper
Yeah it's really unfortunate that there isn't a way around that, oh well...
devout orchid
@quaint jasper oh, i totally forgot
 quaint jasper

trail python
devout orchid
<@97980768323633152> sadly it costs about $50/mo more than im ready to spend on ...
150 usd perpetual license on steam but yeah its ethically better for adobe
not to mention the special version runs better anyways and doesn't require a constant internet connection
spiral sigil
Blender does great for texturing, just have to do more work than installing and go. Brushes help...
https://www.artstation.com/marketplace/game-dev/brushes/3d/blender
ArtStation
200+ stunning Brushes for Blender. Find Cloth and Skin Alphas, Hard Surface Brushes and much more. Made by pros.
I would argue better in some ways, because Adobe doesn't have the ability to do layer mixing like Blender does, as far as I am aware.
quaint jasper
Was not aware Blender allowed you to manage layers by default, TIL
spiral sigil
spiral sigil
Layers...
Kindof
quaint jasper
Ew
spiral sigil
But there is nothing equivalent to the "mix" node in Blender.
Having access to more control often comes at the cost of more setup and less user friendliness
quaint jasper
Pretty sure there's addons for that
spiral sigil
Surely, but I haven't really felt the need to look for one yet.
And I dumped by Substance subscription a while ago.
Only major addon I use I think is the ones that come with, and UV packmaster to help speed up UDIM workflow.
Highly recommend UV pack master, also. Very useful,.
spiral sigil
I couldn't find a way to have a custom paintbrush influence falloff curve in 3dcoat but it was there in blender so that's neat of blender
Specialized programs are specialized for a reason but I do like the idea of Adobe dying to Blender
Can't wait till Adobe would pull the "we just need to make enough money to pay our workers" card
spiral sigil
spiral sigil
I couldn't find a way to have a custom paintbrush influence falloff curve in 3dc...
The one great thing Blender has going for it, is a bunch of 3D artists with hyperfixations on making it better, along with the fact that you can bug the developers to fix/add things 😆
Very excited for when the new render engine is LTS also
trail python
adobes revenue for 2022 was 17 billion, 2021 was 15bil, 12bil in 2020
if they pull the "we need more money to pay our workers 🍼 " id laugh
spiral sigil
Workers > Shareholders
Nono but wait... they have so many workers though
Might as well evade US taxes while your at it
trail python
its okay guys, i wont pay you a survivable and thrivable wage, ill get you a pizza party
spiral sigil
trail python
its okay guys, i wont pay you a survivable and thrivable wage, ill get you a piz...
Lol doing everything but a raise
trail python
i love selling bloatware that requires a constant internet connection
🧑🍳 👌 mmmmmmm tasty
spiral sigil
Blender has like 31 employees
Adobe has 29k
Raw capitalism is so efficient
UV Pack master did this in 3 iterations over about 5 seconds with the RTX.

Looks like it's gonna bleed all over
Can set the exact buffer in pixels
Ahh
That is the feature I've been wanting more than anything else
Instead of the Blender margin settings, which I'm too dumb to do the math on 😆
I can see why if you have that much hair
It's all unwrapped separate with no overlap, because I mostly need it for clean normals. Wanting to do stylized shadow mapping.
First time really playing with it serious, so I'm certain I will screw it up the first time 👍
You mean just handpainting shadows
No, with shader
Oh
Like this...
Internet is super slow on the upload today...
Still working on it
Other than this slightly different style, I usually prefer doing hand painted shadows though.
Doing my best to copy the ref style...
spiral sigil
spiral sigil
Still working on it
Yeah it's all about it looking as deliberate as possible
Idk how you go about manipulating normals for that but you don't really want it to look generic if you already know how to handpaint
Yeah, still experimenting with the hair for sure, but pretty happy with the effect on the face though. I did a normal transfer from a sphere for the face, and it smoothed it out a lot. May do that with the hair too, just not quite there yet.
Guilty Gear did stuff like.this I'm pretty sure
All sorts of fancy normal manipulation for hair and muscle definition
It's not an uncommon thing I see on a lot of the models made by JP artists and on Booth.
The hair would probably look better with the shader if I was better at making it, but building Rome takes time.
Overall though, I'm much further along than I was even a few months ago I think.

As far as knowledge/skill
spiral sigil
Save those old projects so u can see what's different now
I cringe at some of the old ones now
I’m sure a year from now I’ll do the same with these
spice pewter

 spiral sigil
Yeah it's all about it looking as deliberate as possible
spiral sigil
spiral sigil
Yeah it's all about it looking as deliberate as possible
Tried with normal transfer on the hair like with the face. Think it looks much better this way.

Smooths it out a lot
spiral sigil
spice pewter
I like your stuff, it’s cute and the textures are really nice.
steady frigate
spiral sigil
Tried with normal transfer on the hair like with the face. Think it looks much b...
it looks fantastic!
misty compass
Hey I am a bit new to 3d modeling and I watched the sword tutorial but I am a little confused on one thing, when I use the mirror modifier it won't have the vertices follow it in the pic on the one side I moved the vertices and on the other it recreated that but not with the vertices following it, how would I acomplish this>

 harsh saddle
misty compass
Hey I am a bit new to 3d modeling and I watched the sword tutorial but I am a li...
harsh saddle
misty compass
Hey I am a bit new to 3d modeling and I watched the sword tutorial but I am a li...
To use the mirror modifier like this, you want the part of the model you're editing to be only 1/2 of the mesh you're trying to produce whereas it looks like your actual mesh is on both sides of the axis. If you split it down the middle and delete one side, you should be good.
steady frigate
misty compass
Hey I am a bit new to 3d modeling and I watched the sword tutorial but I am a li...
is the mirror modifier on in there? I can't see quite what's happening
misty compass
harsh saddle
To use the mirror modifier like this, you want the part of the model you're edit...
thank you that save it
misty compass
steady frigate
is the mirror modifier on in there? I can't see quite what's happening
yeah it's a close up

 harsh saddle
 frail harness
Flipped normals, probably. If you use the dropdown arrow next to the different render types (solid, material, rendered) you can select "backface culling" and go into solid mode. How does that look?
trail python
blendshape
ive seen it on booth models mostly, to hide clipping when you put on clothing. if it was flipped normals, you wouldn't see that weird line here
 frail harness
trail python
ive seen it on booth models mostly, to hide clipping when you put on clothing. i...
frail harness
trail python
ive seen it on booth models mostly, to hide clipping when you put on clothing. i...
ouf, how would i return this to normal then?
frail harness
harsh saddle
Flipped normals, probably. If you use the dropdown arrow next to the different r...
im still new to this area of modelling, would i do this in either blender or unity?
trail python
click on your body mesh in unity, expand the blendshapes section
i dont own this particular model so i couldn't say exactly but im guessing thats where the shape is at
harsh saddle
Ah, that makes sense. Never used that technique before but that would do it.
You can see the tiny little shrunk down arm highlighted there
trail python
checking your backfaces in blender is here,

blue = the side you can see the mesh/texture on
red = opposite, aka "cull"
frail harness
Alright, got it
found blend shapes
indeed you were correct
slider was maxed
im guessing because both built in toggles for the avatar had that area covered
trail python
yeah
frail harness
trail python
checking your backfaces in blender is here,
what tab can this be found under in blender? Im assuming layout?
trail python
basically all
im in the layout tab rn but if your editor type is on 3d viewpoint itll be there

top 10 microsoft paint skills but button #1 is your "editor type" button
 lyric isle
fleece
 steady frigate
blazing sandal
Hi, im doing an avatar for a friend. My first time. I’ve been modeling on and of...
steady frigate
blazing sandal
Hi, im doing an avatar for a friend. My first time. I’ve been modeling on and of...
It looks alright for a start! But I think you should show more of an angled view, it's hard to judge well when you're in orthographic mode and facing the model directly. Also, in the end I think it's better to make all those bits one single model, unless you want them to be separate, like if you're modeling a mannequin or something
 slender bobcat
I exported fbx in Blender with default settings but I have to scale 100x smaller on things like phys bone parameters etc., even merging bought clothes will cause glitches, anyone can help?
trail python
slender bobcat
I exported fbx in Blender with default settings but I have to scale 100x smaller...
im not a miracle worker but try exporting your fbx with these settings

i also uncheck "add leaf bones" under armature too
woven bramble
https://twitter.com/pixel_exe_/status/1648827107374698498?s=46&t=eJ4IUeINqr_Bgtjqmp2AJw does anyone know how to acheive this? I know about using rotation constraints but what i want to know is how to make the jacket lift up and down to follow, im modeling a poncho cape


finished making my overly complicated jacket
the sleeves even slide up and down the arm when theyre raised and lowered
Likes
235
 Twitter
·
steady frigate
woven bramble
https://twitter.com/pixel_exe_/status/1648827107374698498?s=46&t=eJ4IUeINqr_Bgtj...
Twitter
·
steady frigate
woven bramble
https://twitter.com/pixel_exe_/status/1648827107374698498?s=46&t=eJ4IUeINqr_Bgtj...
I think that's a physics thing in this case (unless you want it to actually be pre-animated)
I think #avatar-dynamics is more of a place to ask about that
misty compass
Hey I am currently working on a project where I need an arch cut out of the middle of a cube does anyone know how I've tried cutting it but it just doesn't work very well, is there a way I can put a circle on top of it and cut it out straight through or something like that?
Is there someway I can cut out this cylinder piece from the square to make an arch?
 quaint jasper
misty compass
Is there someway I can cut out this cylinder piece from the square to make an ar...
quaint jasper
misty compass
Is there someway I can cut out this cylinder piece from the square to make an ar...
That's called a Boolean, plenty of tutorials for that!
misty compass
THANKS
steady frigate
misty compass
Hey I am currently working on a project where I need an arch cut out of the midd...
What are you trying to do it for? Can you show an image for reference?
misty compass
oh, that was the Boolean I just couldn't explain it super well
steady frigate
Cool ^^
but I'm wondering if maybe there's a better way for the sort of thing you're trying to do
harsh saddle
Manually adding edgeloops and moving the edges into place will give you better topology but sometimes a boolean is good enough.
 flat wasp
They can just fix the topology after. Booleans are faster for sure. Allows for quick iteration because its non destructive until you apply it as well
steady frigate
yeah
Also, if the mesh isn't gonna be subdivided or deformed (with animation for example) I say that good topology isn't even necessary here. If anything I'd just work to keep the polycount as low as possible while still having the desired level of detail
If you check static meshes in games with professional 3D artists on board, the great majority there will have some really ugly topology and things like triangles all coming out from this one corner vertex into many unrelated vertices
spiral sigil
I am profesionazl
harsh saddle
You'll at least want to avoid ngons on curved surfaces but if the surface is completely flat then you can get away with pretty much anything.
Though I guess Unity will triangulate anyway if that's the ultimate goal
steady frigate
yeah definitely
misty compass
tbh the boolean modifier is simple enough though I need a lot so I just joined a cylinder and cube in the about shape and did the CTR + R where the cylinders vertices where and then matched them up on the cubes so the cube had vertices the shape of a half circle and just deleted the faces
steady frigate
misty compass
tbh the boolean modifier is simple enough though I need a lot so I just joined ...
Why do you need a lot of them?
misty compass
 misty compass
steady frigate
Why do you need a lot of them?
misty compass
steady frigate
Why do you need a lot of them?
a hanger
steady frigate
why not just use multiple copies of the same mesh?
dull siren
what is texture nodes?
harsh saddle
dull siren
what is texture nodes?
In what context? In the shader editor? They just let you define certain textures to plug into materials.
dull siren
harsh saddle
In what context? In the shader editor? They just let you define certain textures...
im watching a video
i just want to try to make cgi clones
harsh saddle
Maybe post the video with a time stamp of when these are mentioned but that's probably what is meant.
steady frigate
dull siren
im watching a video
what Krampus said, without that video we don't really know what you're talking about
trail python
this is the look taco is trying to go for

watch any clip of the clone wars tv show and thats the style/shading
steady frigate
I was referring to the texture nodes thing
harsh saddle
I don't have a great eye for shaders but I think something similar could be achieved using the standard shader in Unity with the right textures and maps or using the principled shader in Blender
But yeah, I assume a texture node just refers to a texture input in the shader editor unless this has to do with geometry nodes.
quaint jasper
The shading is PBR, the texturing is a bit more toony
dull siren
i was talking mire about blender
misty compass
hey does anyone know how to fix this angled move tool?

 misty compass
THANKS
hushed leaf
trail python
i also uncheck "add leaf bones" under armature too
I use FBX ALL but otherwise, that
steady frigate
dull siren
i was talking mire about blender
Oh!
In Blender the way materials are made is that every part of it is its own object, with properties that you can change. Those can be textures, operations you do on the textures, different values from various sources, fully-made shaders that you plug different parameters into, and more. You can view the whole material as a graph in the shader editor
Can you put a link to the video you were talking about though? I think that will help us help you a lot
dull siren

NEW PDF Version: https://gum.co/shadernodespdf
Instagram: https://www.instagram.com/danielkkrafft/
Discord server: https://discord.gg/wKhe3ss
In this tutorial, I'll be explaining every single Blender material node there is, while keeping it beginner friendly. In Blender 2.8, material nodes have been expanded to include a few more. Astoundingly...
steady frigate
dull siren
https://m.youtube.com/watch?v=cQ0qtcSymDI
Oh!
What's the time in the video that you were watching when you were asking about the texture nodes?
harsh saddle
That video is a good reference but I wouldn't try to use it as a means to understand the shader editor, I'd start with tutorials in how to use it in context but yeah, it's like we said, a texture node is just using some sort of texture as an input.
spiral sigil
Mmm understanding how to utilize a combination of them is key
 prisma berry
can someone help me for some reason the waight paint mode is not working
prisma berry
for some reason its not letting me paint normally and i need to select plane by plane
 glad bronze
prisma berry
for some reason its not letting me paint normally and i need to select plane by ...
glad bronze
prisma berry
for some reason its not letting me paint normally and i need to select plane by ...
make sure you have this disabled

 distant cloak
Why do these 2 parts look darker in the "Solid" viewport, but normal in the "Material Preview" viewport?


There's 0 overlapping vertices, so I don't know what else it could be
Oh, it's the back face culling. I'll just have to flip them or make it so they get rendered on both sides
thin shadow
that's the characteristic of both viewport. also it depends on shader on material preview
distant cloak
I checked with the face orientation toggle, my suspicions were correct
But now I have the issue of making stairs without adding excessive geometry
spiral sigil
distant cloak
But now I have the issue of making stairs without adding excessive geometry
Archimesh add on has a stair utility that isn’t great but with a little cleanup can help and save time.
It’s built into blender but not enabled by default
Let’s you get stair size and count right at least
distant cloak
I've tried it out, but ended up just making some cubes with the idea of getting most of the definition from texturing
But thank you for the pointer regardless
 sturdy trail
finalizing my design
 distant cloak
Any tips on making windows? Feeling stuck 😦
quaint jasper
distant cloak
Any tips on making windows? Feeling stuck 😦
What is blocking you ? A window is a rectangle with another rectangle booleaned into it
distant cloak
Good point, it's more of a mental block than a technical one. I'm trying to figure out the design, dimensions and number of windows I want is all
I'll try to trial-and-error it
spiral sigil
distant cloak
Good point, it's more of a mental block than a technical one. I'm trying to figu...
If you are playing with the design of an individual thing that is repeated throughout the model like a window. You can create it in a collection then instance that collection so changing the original changes them all.
Saves tons of time in big worlds for sure
distant cloak
spiral sigil
If you are playing with the design of an individual thing that is repeated throu...
That's a very good point! It hadn't even crossed my mind, thank you so much! ❤️
thin shadow
distant cloak
Any tips on making windows? Feeling stuck 😦
you can experiment around with https://github.com/ranjian0/building_tools addon
GitHub
Building generation addon for blender. Contribute to ranjian0/building_tools development by creating an account on GitHub.
steady frigate
distant cloak
Good point, it's more of a mental block than a technical one. I'm trying to figu...
maybe you can kind of sketch it somewhere? maybe over a render or a screenshot
 wet oyster
Am 3d modeling historically accurate armor, it's a pain to keep it as low poly as possible
 jagged bronze
how could i transfer a uv map from 1 model to another model? thats also not in the same workspace? i wanna transfer this uv map for the eyes on a model to this sphere, could someone help me out?

 steady frigate
wet oyster
Am 3d modeling historically accurate armor, it's a pain to keep it as low poly a...
steady frigate
wet oyster
Am 3d modeling historically accurate armor, it's a pain to keep it as low poly a...
Can I help?
 hearty cliff
jagged bronze
how could i transfer a uv map from 1 model to another model? thats also not in t...
hearty cliff
jagged bronze
how could i transfer a uv map from 1 model to another model? thats also not in t...
You can only truly transfer UV's from one mesh to another if they have the same geometry/vertex order
jagged bronze
yee i figured it out
hearty cliff
Since this is such a simple object, I would just let what ever modeling program you use unwrap it, then just take the iris from the other image and copy it over
glad bronze
wet oyster
Am 3d modeling historically accurate armor, it's a pain to keep it as low poly a...
Your gonna have to bake the detail into the mesh. There isn't really another way to get it any more low poly than that.
 swift jolt
wet oyster
Am 3d modeling historically accurate armor, it's a pain to keep it as low poly a...
swift jolt
wet oyster
Am 3d modeling historically accurate armor, it's a pain to keep it as low poly a...
just make it highpoly and then bake that detail onto a lowerpoly mesh
oh someone said it first
wet oyster
glad bronze
Your gonna have to bake the detail into the mesh. There isn't really another way...
which i would normally do, but now i have so many plates and stuff that it d require quire the texture cleanup anyway for baked normals etc. still ahve some clipping issues but the model and textures itself are done

and even then, i had to make the low poly version no matter what
dull siren
so im making my clone right
and i found this pic and really liked the lighting on it idk how they did it but it looks good may be some mixture of smoothness and specular and textures built in but how could i recreate this effect with blender nodes?

this is what i have so far the bag is fix by now it looks too black
 quaint jasper
Would be helpful to see your current node setup
glad bronze
dull siren
so im making my clone right
You should also try to find an hdri closer to the one they have and point the light towards the front so we could see the reflections and such. Do you want to render it out in Eevee or Cycles?
dull siren
glad bronze
You should also try to find an hdri closer to the one they have and point the li...
so im actually not home rn ill send in the morning
glad bronze
dull siren
so im actually not home rn ill send in the morning
take your time, it makes no difference to me
dull siren
i will say i have a basic principal i think with a normal with no pic and a texture map into the color and then material output
dull siren
glad bronze
take your time, it makes no difference to me
exept for the bag whichnis velvet
harsh saddle
dull siren
i will say i have a basic principal i think with a normal with no pic and a text...
You'll likely want a roughness map so you can have some variances in the smoothness of the material. Are you focused on rendering in Blender or is this for VRChat? If it's for VRChat, you probably shouldn't focus too much on making it look good in Blender as you'll need to recreate your materials in Unity anyway.
 late thunder
So is the CATS addon just completely busted for 3.x?
Because it seems to be having constant issues
Is there an alternative?
trail python
the dev version
https://github.com/absolute-quantum/cats-blender-plugin/archive/refs/heads/development.zip direct link to the dev vers
late thunder
See i was already using that.
But the atlasing is broken, and that's the main thing I needed it for
Like its only atlasing normals and making it into a color texture
Like


Have absolutely no idea what is going wrong
And any resources I try to find tell me nothing
trail python
oh
i think some use this one instead of the built in https://github.com/Grim-es/material-combiner-addon
GitHub
Blender addon for material combining, uv bounds fixing - GitHub - Grim-es/material-combiner-addon: Blender addon for material combining, uv bounds fixing
steady frigate
wet oyster
which i would normally do, but now i have so many plates and stuff that it d req...
Yeah maybe you need to make a new version of this that's more planned out or smth
steady frigate
dull siren
and i found this pic and really liked the lighting on it idk how they did it but...
Looks like a moderate to large light source from the top - likely a slightly large area light, a wide angle sunlight, or another light source with a large radius - plus maybe another light source or two filling in the shadows. Maybe a sort of three point or three point inspired setup.
This might help you out
http://lightingpixels.blogspot.com/2013/01/tutorials-does-three-point-lighting-suck.html

If you are interested in this post you may also be in the Lighting Masterclass that I am currently preparing. More information in the follo...
steady frigate
dull siren
i will say i have a basic principal i think with a normal with no pic and a text...
Can you open your shader editor and show what the material looks like?
dull siren
steady frigate
Looks like a moderate to large light source from the top - likely a slightly lar...
thank you so much!
 hardy turret
any tips to make the eyes not clip with the eyeballs?
thin shadow
hardy turret
any tips to make the eyes not clip with the eyeballs?
move the lid slightly outward, or move the eye slightly inward
wait, eyes and eyeballs?
hardy turret
not really eyeballs, more like flat white plane
thin shadow
you mean sclera?
hardy turret
yes
thin shadow
same adjustment, also might want to adjust the eye bone so that the radius is not too short

 swift jolt
Iv ran into a little issue trying to reduce the amount of bones my avatar is using…..
trying to merge vertex groups but then it breaks the avatar when i apply modifier


Any idea why? Cant find anything about it online
Wait this might be better in rigging my b
spiral sigil
smth im working on rn!
 steady frigate
spiral sigil
smth im working on rn!
steady frigate
spiral sigil
smth im working on rn!
Very lovely ^~^
spiral sigil
thanks! its strive from starlight brigade, a music video colab between ninja sex party and twrp!!
 stark radish
I'm trying to bake normals
I already have a normal map but I've changed the UVMap
And I'm getting this weirdness
I also got similar polygon looking oddities when trying to bake AO I am confused
 hardy turret
any tips how to properly model and texture the head/body?
harsh saddle
hardy turret
any tips how to properly model and texture the head/body?
What sort of look are you trying to achieve? It's going to be a bit of a different process for a simplified anime look vs if you're trying to maximize realism.
hardy turret
harsh saddle
What sort of look are you trying to achieve? It's going to be a bit of a differe...
anime look
harsh saddle
hardy turret
anime look
It would still be good if you could provide an image as to what sort of look you want to achieve as anime has many levels of complexity.
hardy turret
booth model look
harsh saddle
Booth is a site where you sell things. Booth look is like saying "I want an ebay oven"
 harsh saddle
hardy turret
https://booth.pximg.net/8a7426aa-ba62-4ef0-9e7d-2c8ea96e7c9b/i/4035411/238bd8b7-...
harsh saddle
hardy turret
https://booth.pximg.net/8a7426aa-ba62-4ef0-9e7d-2c8ea96e7c9b/i/4035411/238bd8b7-...
Okay, so the hair there is really complicated but the face is pretty simple. You could just subdivide a cube and then adjust the shape in edit mode or sculpt mode to get the profile you want. Texturing should be pretty straightforward as it's mostly a single flat color with a bit of blush for the cheeks. You'll likely want a Poiyomi shader to dial in the light and shadows. I often rely on sculpting but I also don't tend to work on anime characters and you could get away with box modeling here. https://www.youtube.com/watch?v=susLzPpjB-g
Hello there Blender maniacs well this is a timelapse video of me box modeling a cartoon character
enjoy and don't forget to like and subscribe!!
devout orchid
@hardy turret https://youtu.be/fQZ7TEdFdMU
Blender 2.9: Anime Girl Head Modeling In 30 Minutes WIP #1
You can play your favorite music and enjoy :)
Next video for eyes and ears :D
Hope you like it!
Link Discord: https://discord.gg/pe9sjYVzkM
Link Donate Paypal: https://paypal.me/nhijquang
Link Donate Momo: https://nhantien.momo.vn/0Uq2AiMUhIf
Link reference: https://www.animeoutline....
harsh saddle
The face you're going for might even be simpler than that as it doesn't seem to have a nose which is why I was asking what sort of anime look you were going for but yeah, something like that.
hardy turret
they have nose but its hard to see from front
devout orchid
i cant find the video but for nose best practice i know is just place a line of black polys on top of it+subdiv, works way better than any attempts to draw it on texture.
harsh saddle
Ah, okay. In some cases the nose will just be textured but it depends on the style.
devout orchid
same for mouth outline, i just add extra loop, separate it in uvs and move over black area of texture, getting polygon perfect outline, works for eyes too
glad bronze
hardy turret
any tips how to properly model and texture the head/body?
There aren't really a lot of good tutorials out their for 3d modeling anime stuff At least for the specific art style you are looking for. There are plenty of great anime head tutorials though. Also of course just my opinion but I am very picky with my stuff so take it with a grain of salt. You kind of have to find individual tutorials / videos that cover a specific thing you want to do and then adapt it to your target art style. For example, one tutorial for base body mesh, another for specific clothes, another for the specific texture painting techniques, etc.
I recommend watching some of Shonzo's stuff too. He doesn't have a comprehensive tutorial series or anything but he has loads of time lapses of his process. So if you are fairly new you can follow along but if not you can use it as a rough guide and for parts you are stuck on. It isn't the specific art style you showed but its close enough where you can adapt it fairly easily. There are some minor problems with Shonzo's stuff but they are mainly personal gripes and nerd topology stuff.
There are plenty of other youtubers that do time lapses and such if Shonzo isn't your speed.
This is (partially) how I learned to do this style but I had a lot of previous blender experience so it may not work for you. If you need anymore help feel free to reach out through dms.
 azure sluice
Alrighty, the base is done, Just need to texture and add all the other details

 steady frigate
stark radish
I'm trying to bake normals
_I already have a normal map but I've changed the UVM...
steady frigate
stark radish
I'm trying to bake normals
_I already have a normal map but I've changed the UVM...
Can you show what the UVs look like?
steady frigate
hardy turret
they have nose but its hard to see from front
You can change that with custom normals, so it's shaded at an angle similar to the face
hardy turret
glad bronze
There aren't really a lot of good tutorials out their for 3d modeling anime stuf...
for me the modelling part isn't that hard, but rather the texturing/shading, but the resources i found so far are very lacking ofc theres the the youtuber "shonzo" but he doesn't really make tutorials but rather timelapses
steady frigate
hardy turret
for me the modelling part isn't that hard, but rather the texturing/shading, but...
Can you show me what you have right now?
 ashen plover
hardy turret
for me the modelling part isn't that hard, but rather the texturing/shading, but...
ashen plover
hardy turret
for me the modelling part isn't that hard, but rather the texturing/shading, but...
to get the specific cel-shaded look beyond what poiyomi can do you'll probably want to look into editing normal directions, particularly in the face to manually control the end result of light/shadows in a way that consistently gives the anime look, otherwise it's just a combination of 2D texture painting in your anime style of choice/using a cel shader
hardy turret
 quaint jasper
300k 
spice pewter
 hardy turret
quaint jasper
300k <:vrcSkull:585749770442899466>
hardy turret
quaint jasper
300k <:vrcSkull:585749770442899466>
atleast it aint a 1 gigabyte vram 150mbyte+ abomination
i try to make the hair but it always ends up over 100k somehow
spice pewter
hardy turret
i try to make the hair but it always ends up over 100k somehow
then try to decimate it
steady frigate
or remesh it
steady zealot
hardy turret
i try to make the hair but it always ends up over 100k somehow
Have to design these things with optimization in mind from the start, that's the best way to make sure it's not crazy high
High to low poly normal baking can help a lot as well
(standard game dev pipeline)
stark radish
steady frigate
Can you show what the UVs look like?
Sure give me a minute
There's no overlapping UVs which I think cause this sort of thing so I'm very confused
stark radish
steady frigate
Can you show what the UVs look like?

 steady frigate
stark radish
steady frigate
stark radish
Nice! Then that's probably not the problem
Is that the only UV set though? Models can have multiple UV sets. There might be another that you forgot about
stark radish
steady frigate
Nice! Then that's probably not the problem
Is that the only UV set though? Model...
There is another UVMap being the original
 steady frigate
Ah, then unless you're using it too for something, and unless removing it causes issues, I say you should delete it
stark radish
steady frigate
Ah, then unless you're using it too for something, and unless removing it causes...
I am using it
I have a pre-existing normal map which is for that UV set
I'm trying to figure out how to bake the existing normal map to my newer UV
steady frigate
stark radish
I am using it
I have a pre-existing normal map which is for that UV set
I'm tryi...
How did you bake the normal map?
stark radish
steady frigate
How did you bake the normal map?
Figured it out, I was being lazy and using an addon to do it
Worked fine through the normal method
Change from Eevee to Cycles, CPU to GPU, adjust Extrusion and Max Ray Distance, make a new blank texture so on
Maybe what I needed to do was mess with the Extrusion more and it would work with the addon but whatever
steady frigate
you weren't lazy, the add-on probably kind of sucked
stark radish
Again seemingly the solution was making the extrusion "0.00001 m"
Which I just don't think I tried with the add-on but eh
Maybe I'll test that later for future, but for the moment I'll just keep it in mind
spiral sigil
this is the first time i actually tried rigging one of my models and i ran into an issue where one of the arms bend as intended, and the other one goes silly mode. the fur at the top also has a weird thing where when you move it the whole face moves with it
glad bronze
spiral sigil
this is the first time i actually tried rigging one of my models and i ran into ...
It would be helpful if you could show the weight of those bones on the affected area.
spiral sigil
glad bronze
It would be helpful if you could show the weight of those bones on the affected ...
you mean this?

the weight paint?
glad bronze
spiral sigil
you mean this?
yeah
spiral sigil
i never really tried editing that
glad bronze
spiral sigil
i never really tried editing that
thats exactly your problem
spiral sigil
ok
glad bronze
thats what actually tells the bones how much to move
ill link a tutorial gimme a sec
spiral sigil
so is it like the more blue it is the less it will move? since one of the arms moves perfectly
glad bronze
spiral sigil
so is it like the more blue it is the less it will move? since one of the arms m...
I personally like this guy but there are plenty of good tutorials out there and yes https://www.youtube.com/watch?v=4fICQmBEt4Y
I've been meaning to update this video for a very VERY long time. But, we're finally here. Everything you need to know in order to start painting weight layers onto your character!!! Hope it helps :)
Female Body Model Link:
https://www.youtube.com/watch?v=_XfvLpLyulI
If you enjoyed this video, please don't forget to like and subscribe!
You ca...
spiral sigil
ok
spiral sigil
glad bronze
I personally like this guy but there are plenty of good tutorials out there and ...
i couldn't find this in the video but some parts just completely ignore that i've set it to subtract mode and i can't remove the weight paint from it
glad bronze
spiral sigil
i couldn't find this in the video but some parts just completely ignore that i'v...
turn off auto-normalize
and try again
 split walrus
unity/3d modeling question why tf does changing 3 letters break my entire model
i renamed the amature from armature.001 to just armature and it makes the entire thing stiff
steady frigate
split walrus
unity/3d modeling question why tf does changing 3 letters break my entire model
where did you change it?
 waxen mist
split walrus
unity/3d modeling question why tf does changing 3 letters break my entire model
waxen mist
split walrus
unity/3d modeling question why tf does changing 3 letters break my entire model
Unity animations refer to name specific elements of the hierarchy, and yeah it gets annoying.
Blender animations and such are linked to the element itself and not just the name, so changing the name in blender doesn't affect anything, but when you change the name in unity then that thing you renamed just suddenly doesn't exist anymore to the old animations
Changing the name back will fix the issue tho
split walrus
steady frigate
where did you change it?
tried both in unity and blender
its fine tho i just renamed it back but i had to go in and change all the animations names using f2
now having issues with smth else but its not nearly as important
the animations r working while using preview but arnt working when trying gesture manager
i checked and its going to the animation while using it but just doesnt want to play
misty compass
is there a way I can make a folder in unity?
 worn glade
misty compass
is there a way I can make a folder in unity?
worn glade
misty compass
is there a way I can make a folder in unity?
Like in the assets tab or in the scene?
misty compass
assets tab
worn glade
That should just be Right Click in the assets tab > Create > Folder
misty compass
o thxs I see
 old sphinx

 trail spruce
Is there a plugin or anything that exposes the bone hierarchy in the SkinnedMeshRenderer? So I can just, re-reference bones if I accidentally deleted or something? I noticed CTRL+Z doesn't always fix it lol
harsh saddle
trail spruce
Is there a plugin or anything that exposes the bone hierarchy in the SkinnedMesh...
You can access the bones in the hierarchy and assign them in configuration, not sure what adding that to the skinned mesh renderer would do, it's for rendering meshes, not editing rigs.
trail spruce
Yeah, that wont suit my needs. Thanks though <3
digital hound
is making something double sided as simple as duplicating the mesh and inverting normals? will there be clipping issues? there's no bones or anything
harsh saddle
digital hound
is making something double sided as simple as duplicating the mesh and inverting...
Yeah. Shouldn't be any clipping unless the normals end up intersecting but that shouldn't be the case if there is no deformation occurring.
digital hound
when you atlas, can it make the normal map the same too?
harsh saddle
digital hound
when you atlas, can it make the normal map the same too?
Sure, you just have to line everything up the same way as your color textures
digital hound
I was hoping for a way for it to be automatic
though I did use a normal map generator and can just use it again after atlasing
harsh saddle
That would be nice but the only automatic atlaser I know of doesn't do normal maps last I checked. I tend to like to handle atlasing manually as it gives me more control but it would be nice to have the option.
harsh saddle
digital hound
I was hoping for a way for it to be automatic
One thought if your atlaser only does color textures is just to swap out the color with the normal maps and export that.
misty compass
Hey how would I make the box mesh match up with the ramp peice?

O wait nevermind I figured you could put multiple box colliders and make it kinda work
tranquil sierra
is there a way to lock my keyshape in blender?
 bright pelican
misty compass
Hey how would I make the box mesh match up with the ramp peice?
bright pelican
misty compass
Hey how would I make the box mesh match up with the ramp peice?
I would use a mesh collider. Probably a lot better than using multiple box colliders.
hushed leaf
digital hound
is making something double sided as simple as duplicating the mesh and inverting...
Blender has a Solidify modifier that does a decent job at this too, FYI.
 tulip condor
where in unity i can see information how much triangles chosen object has?
hushed leaf
not sure you can for a specific object
tulip condor
bummer 😦
thanks anyway
is there any way to set unity to generate quad instead of triangle meshes from unity 3D objects such as cube,sphere,cylinder etc ?
azure rain
graphics cards only speak in triangles so quad there just a modeling convenience your 3D modeling software makes up
tulip condor
@azure rain
yes but i found out that there is tris to quads conversion from the github
which im not tested yet
and i also read from unity and blender discord and youtube channels
that quads are much better then the triangles
because as they say it is better for performance and gpu loads and process mesh faster
and tbh i try this in blender and as you say it's better to do some modeling with quads instead of tris as well
but if you're interested i can give you the github link to that asset so you can test it by yourself
harsh saddle
If a model has been triangulated, it's easy to undo that by selecting the faces in blender and hitting alt + J but I don't know about retaining quads inside of Unity/VRChat. I guess there is a keep quads button in the mesh import but I have no experience with that.
Modeling is definitely easier with quads as you can more easily use things like edge loops but Unity generall converts that to triangles on import.
azure rain
tulip condor
<@216145046347448320>
yes but i found out that there is tris to quads conversion...
the graphics card literally doesn't know quads exist as I said they made up by modeling software to make things easier
harsh saddle
There appears to be some instances where feeding in quads is more efficient even though they're ultimately converted to quads but that seems to be an OpenGL thing and is deprecated. The most optimized workflow is to model in quads and then triangulate inside of Blender at the end so you can adjust how the mesh is triagulated but it's generally fine to just let Unity handle that part.
It seems like in most cases, trying to use quads just creates overhead for the CPU as it needs to process them into tris rather than having that done on import.
That's just my impression from a quick bit of research, there may be instances where using quads is preferable, it certainly seems to be fine to use them when rendering inside of Blender (though it seems like that also converts them when rendering) but there doesn't seem to be much in favor of using them inside of modern game engines.
tulip condor
@azure rain
ok but how come GPU's can see quads in blender
and thanks to that we are able to see squares
sorry maybe i dont understand how GPU's see things
but that's my tought though. 😅
azure rain
tulip condor
<@216145046347448320>
ok but how come GPU's can see quads in blender
and thanks ...
the wireframe blender gives you in the editing mode is not actually what the GPU sees like there's some hidden triangles that the software just pretends is not there for the sake of modeling
tulip condor
and for let's say 1 quad = 2 faces because two mesh faces create's quad
but if we use quad on quad mesh object it has only 1 face
and that is faster and better for cpu and gpu to process right?
azure rain
what I'm trying to say is the graphics card never actually sees a quad
like it's always two triangles anytime you have a quad in your modeling software it's just hidden triangles
tulip condor
@azure rain
really ?
this is totally new thing for me
omg thank you for this
now i have to turn another page of how i understand things for mesh things 😦
thank you
azure rain
I'm not surprised you wouldn't know as honestly kind of getting into the weeds of how like graphics cards work
like honestly using triangles in your work flow could actually save resources when dealing with low poly modeling
harsh saddle
What really taxes your hardware is the vertices and 2 triangles have the same number of vertices as 1 quad. The GPU just works in triangles because any polygonal geometry can be constructed of tris but you can't construct anything out of quads so there's no real reason to work with anything else. But you should absolutely model in quads for many reasons. You ideally want to keep a quad version for editing but if you end up having to use the triangulated version, just select all the faces and then Alt + J to convert to quads.
steady frigate
tulip condor
is there any way to set unity to generate quad instead of triangle meshes from u...
why do you want that?
tulip condor
steady frigate
why do you want that?
examine my comments about this up here
just scroll a bit and you will know
but i give up of this
because @azure rain and @harsh saddle
helps me understand it better
but thank you @steady frigate for your curiosity anyway 👍
misty compass
Hey I was trying to upload blender models into unity and some parts of it are missing, like sections are not there
steady frigate
misty compass
Hey I was trying to upload blender models into unity and some parts of it are mi...
Can you show? Can you please upload screenshots or something?


 thin shadow
misty compass
thin shadow
misty compass
have you checked the face orientation?
misty compass
nah I realized that when I saved it last time I didn't fully save it and I grabbed an earlier model
thank you tho,
dull siren
who here works with halo stuff im tryna get good modes for covenant stuff?
harsh saddle
dull siren
who here works with halo stuff im tryna get good modes for covenant stuff?
There's a bunch of vehicles on Sketchfab if you want to buy them, otherwise you'll have to go with a game asset ripping website which I'm not sure we're supposed to share.
misty compass
misty compass
so with about all of my larger models they are looking like that with pieces missing, I've tried face orientation and fixing accordingly but it still doesn't work
steady frigate
I really wonder how many other trans people are here but not in Trans Academy
misty compass
misty compass
stupidest solve to this problem since I made them to scale in blender so it was like 40 meters it lagged but I scaled it down (a different version) down to like 2 meters
spiral sigil
steady frigate
I really wonder how many other trans people are here but not in Trans Academy
3D artist community?
steady frigate
in the official VRC server
spiral sigil
What is it though
Never heard of
Thought it might be 3d modeling related since this is #3d-modeling
steady frigate
spiral sigil
What is it though
what's trans academy?
 vivid crater
hushed leaf
steady frigate
what's trans academy?
VRChat group + discord community for transgender people
solar fossil

harsh saddle
That's pretty cool. Still doesn't react 100% like a human eye would but it's a lot better than not having it and I've never been 100% clear on how anime eyes are supposed to work anyway. I think many waifus would have severe astigmatisms.
azure rain
then again at times I also wonder why folks spend so much time trying to make their avatars look completely flat with the very heavy toon shading negating the benefits of the stereoscopic vision in VR
swift jolt
steady frigate
I really wonder how many other trans people are here but not in Trans Academy
Its vrchat. Alot id assume
swift jolt
azure rain
then again at times I also wonder why folks spend so much time trying to make th...
I spot someone i recognise 👁️
 jovial seal
Why cant i see my uvs?
 steady frigate
jovial seal
Why cant i see my uvs?
steady frigate
jovial seal
Why cant i see my uvs?
can you zoom in on the left?
jovial seal
turns out projecting from view set it a million miles from the center
steady frigate
ah
steady frigate

YouTube
Learn the fundamentals of Blender while making your very own donut. You'll learn the UI, modelling, sculpting, texturing, shading, geometry nodes, lighting, ...